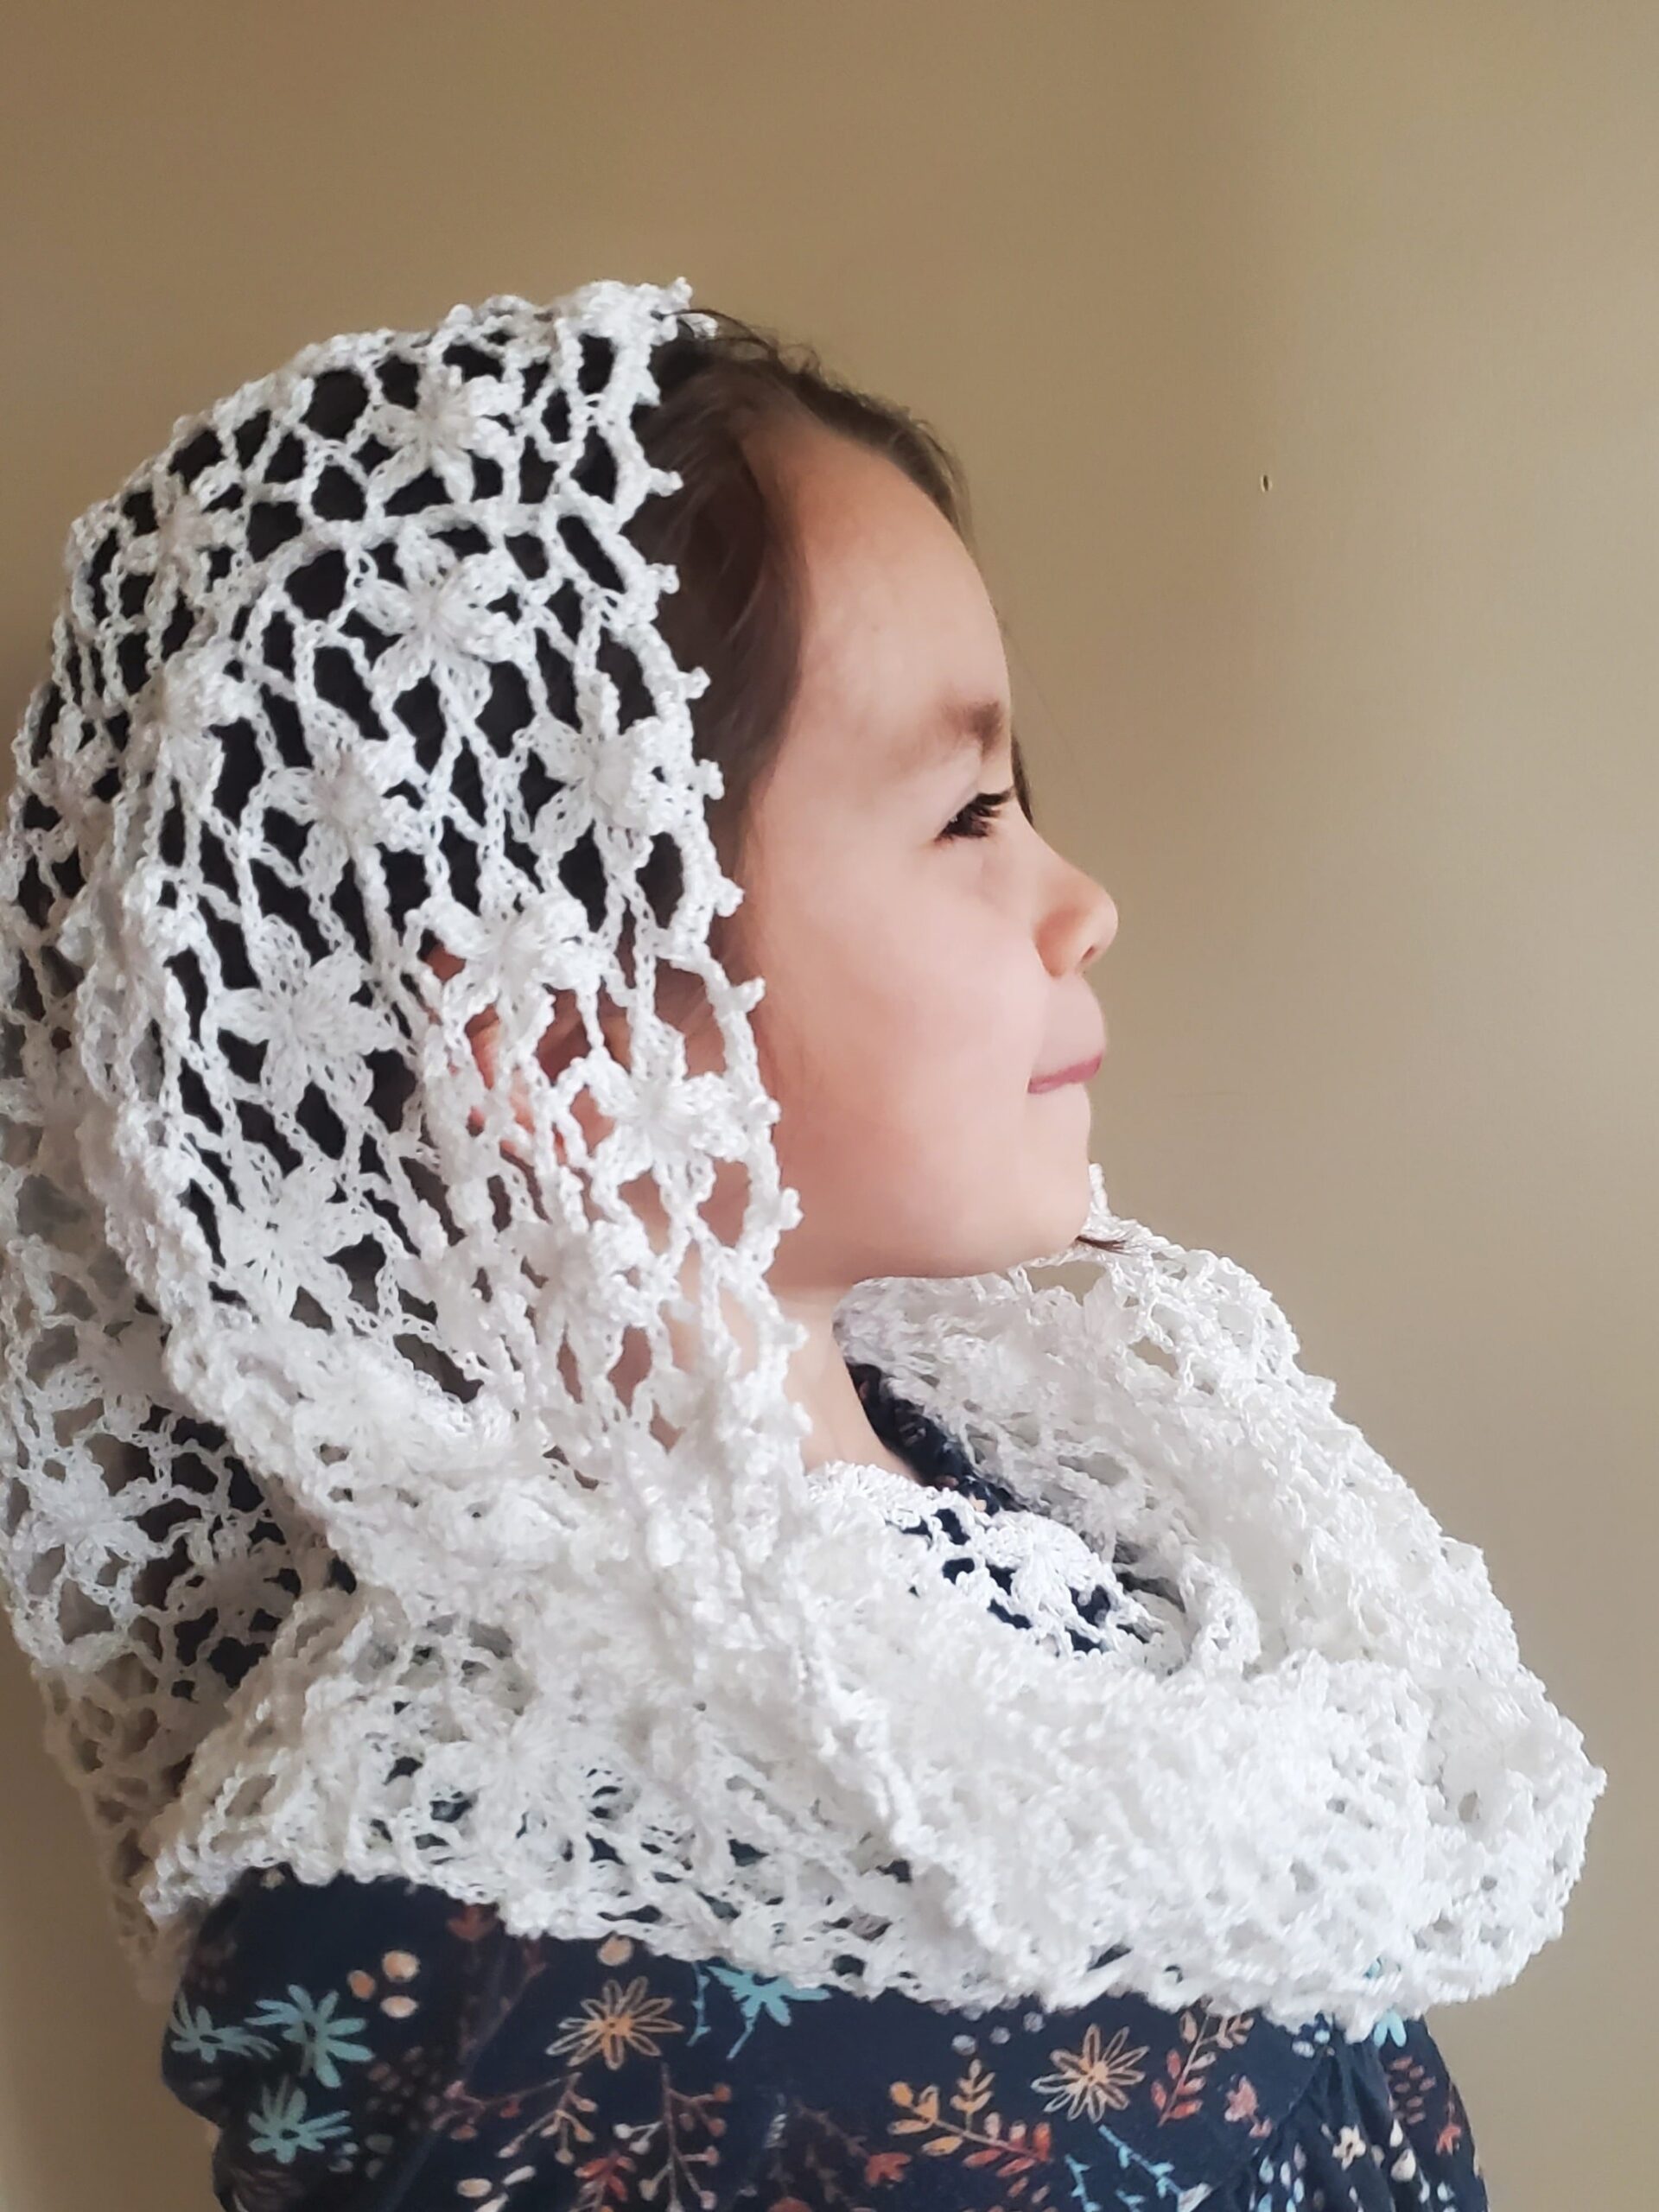
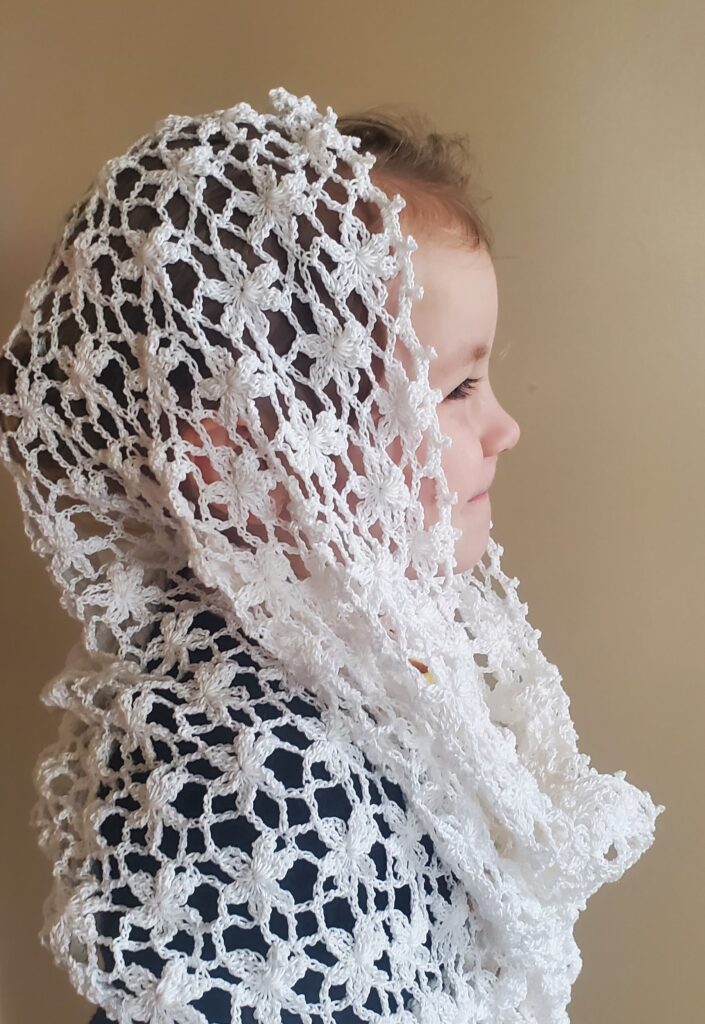
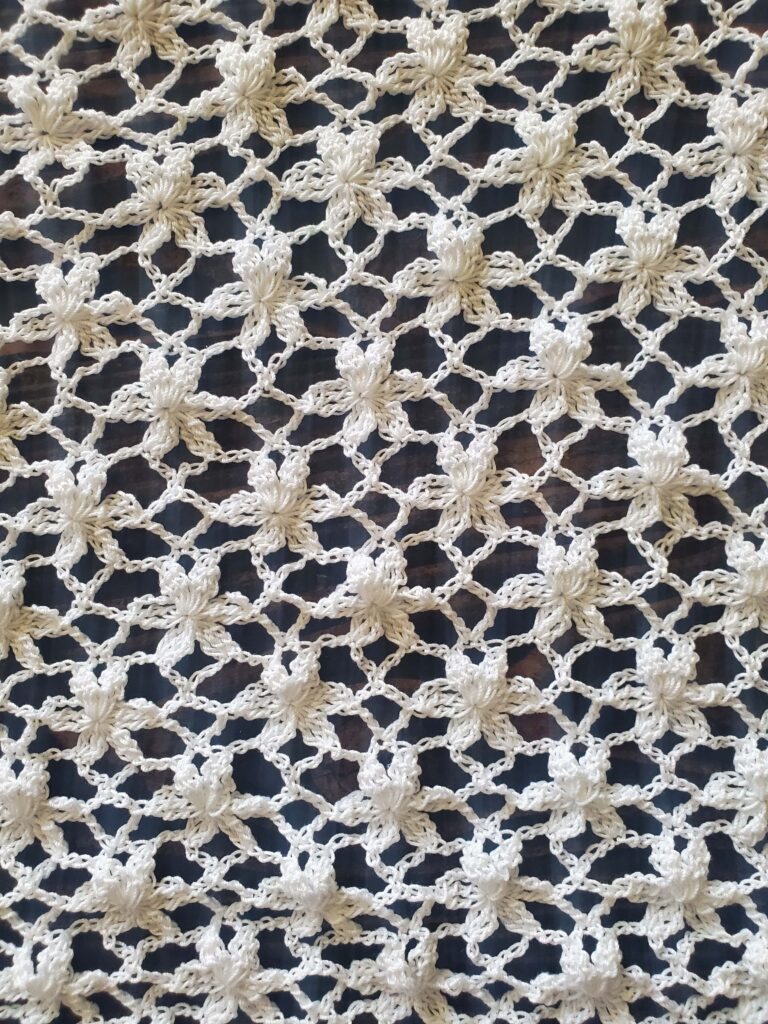
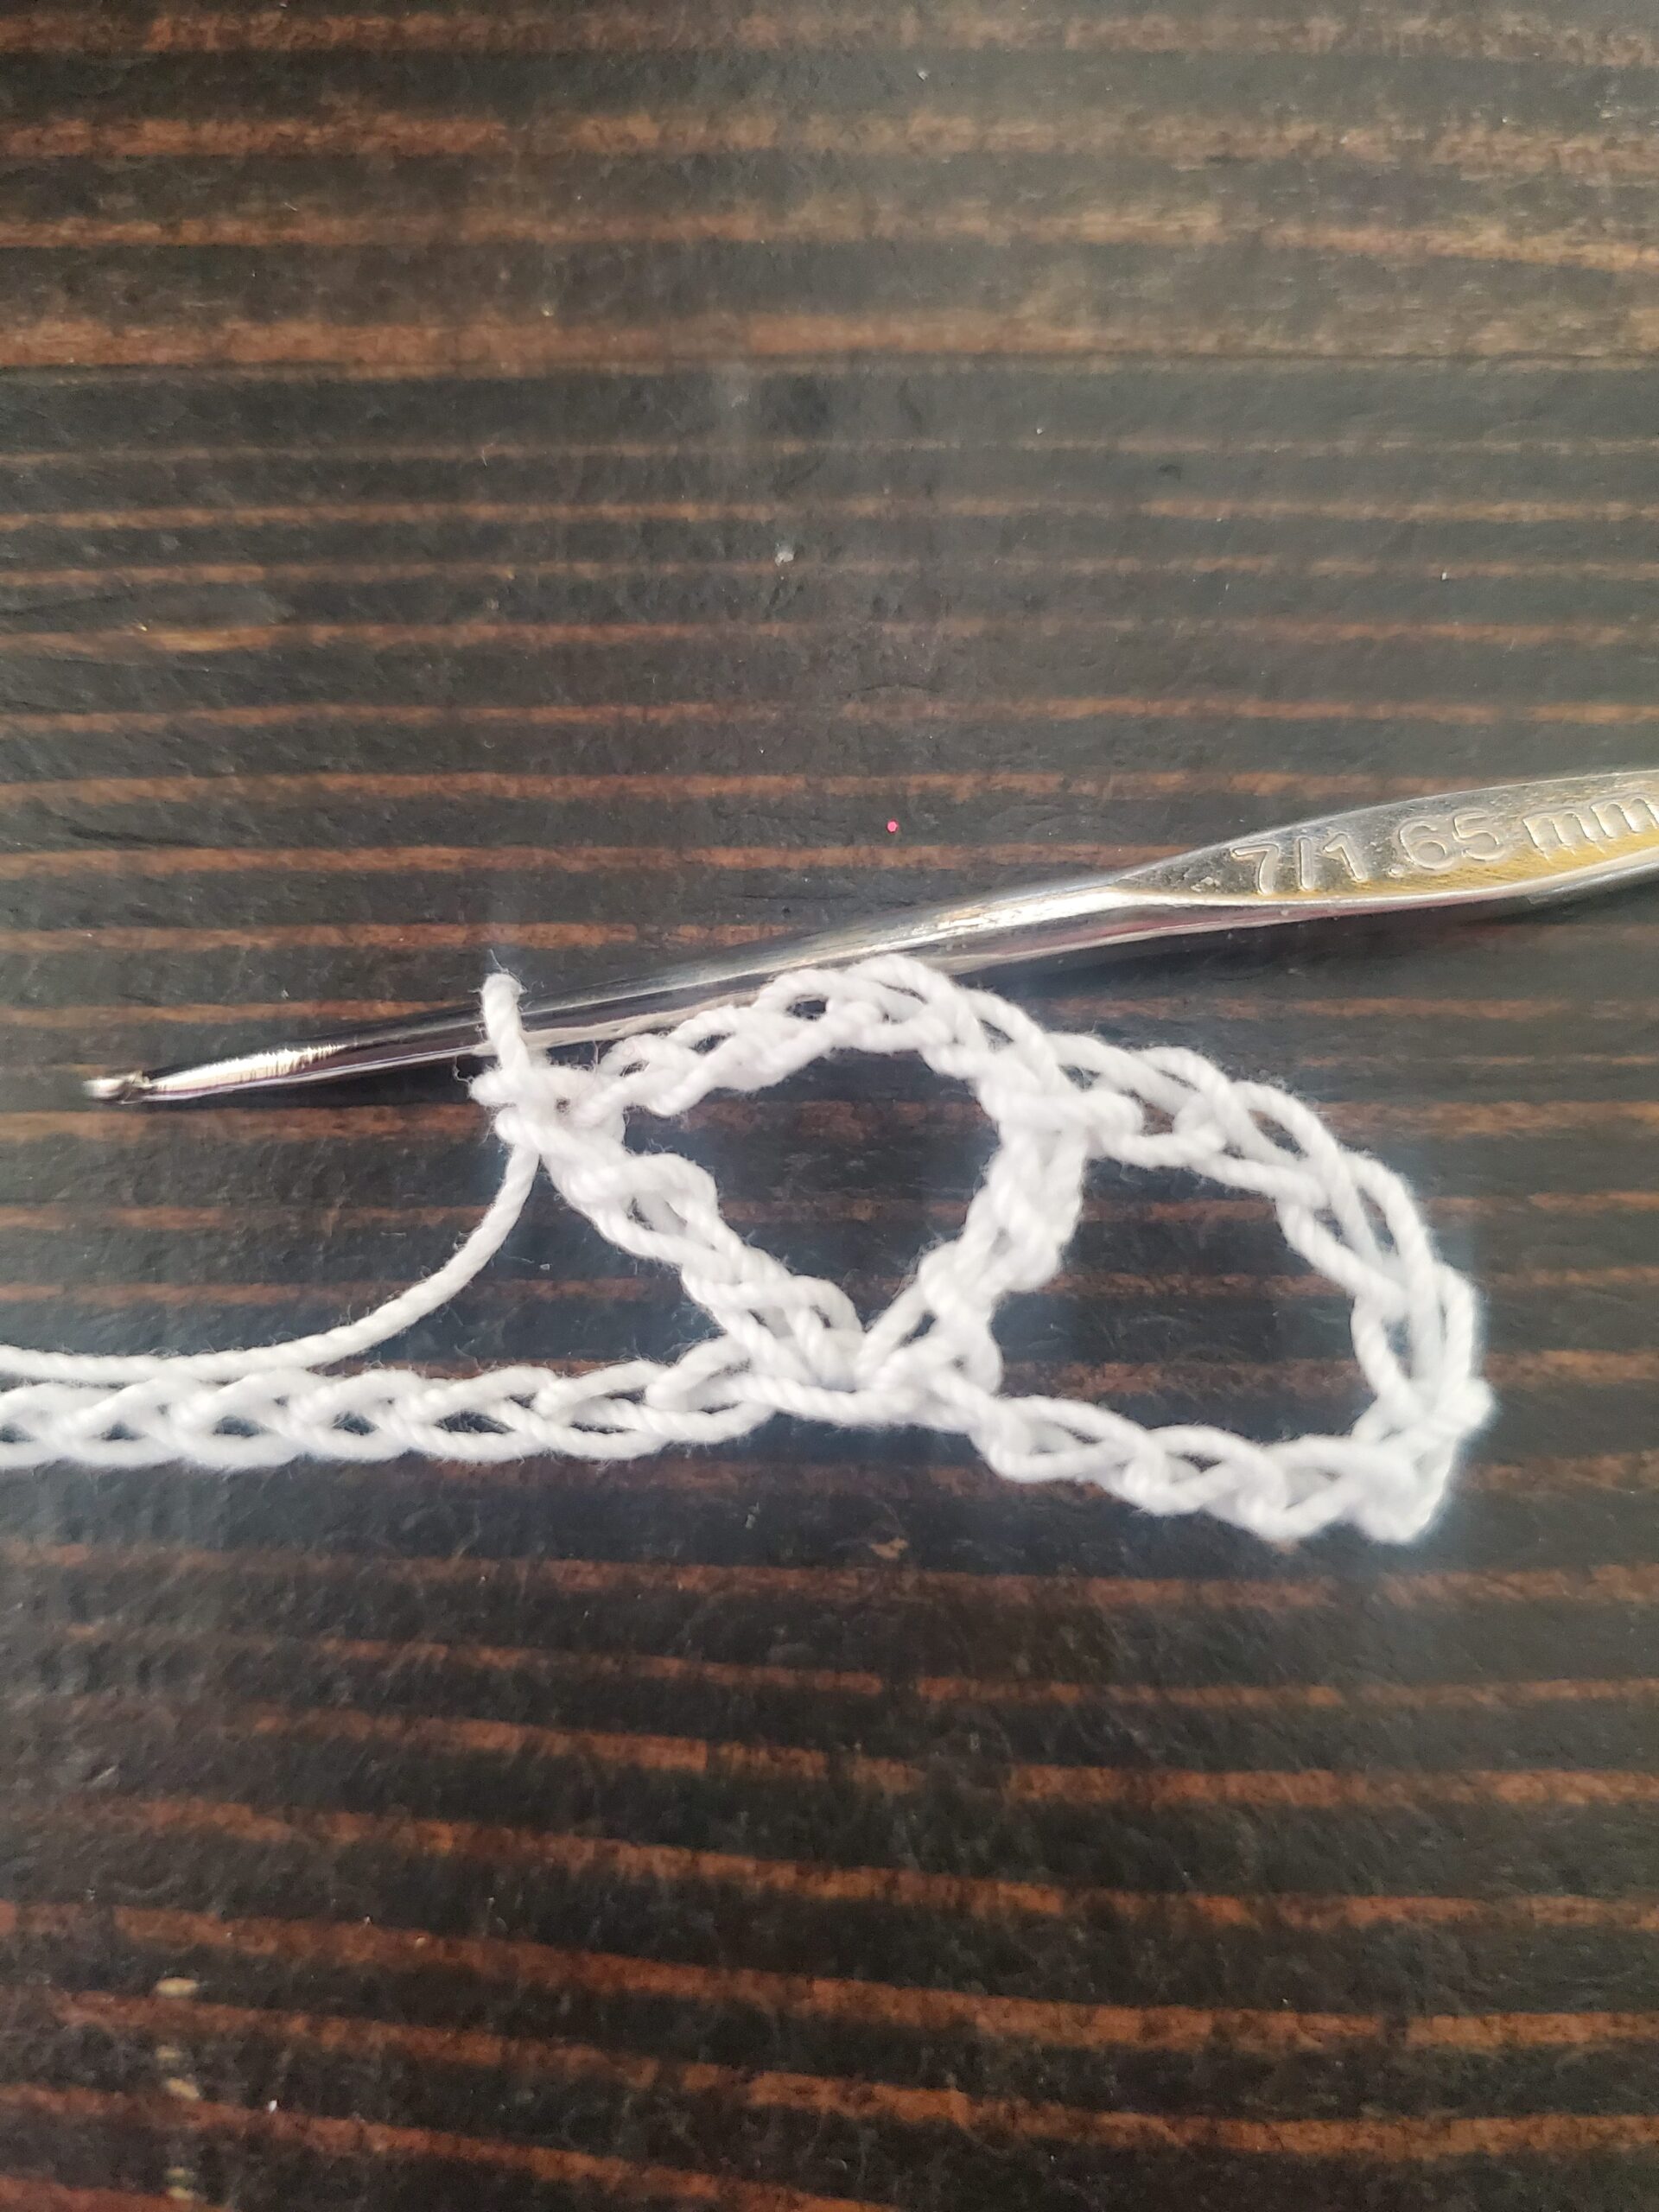
Floral Lace Infinity Veil – Free Crochet Veil Pattern

Hello everyone, today I have another beautiful crochet veil pattern that you can wear to mass for you…the Floral Lace Infinity Veil! With spring just around the corner, I wanted to create a veil that had flowers throughout it, and I think this veil turned out great!

As with some of my previous crochet veil patterns, this one will also take a little bit of time to finish, especially depending on how big you want yours. This pattern is also finished by folding your piece together and sewing to make the veil an infinity type veil. 

The Floral Lace Infinity Veil pattern is worked up in 5 rows with a repeat of rows 2-5. You’ll notice these rows are similar, with the only difference being offsetting the flowers so they look more pleasing to the eye. Here’s a close up of the flower repeats:

The veil is worked up with a repeat of 11+7. This means that you will crochet a chain with a multiple of 11 and then add 7 more chains once you’re happy with your chain length. 

The veil pictured above is a size small, so if you’re making this for an adult, make your starting chain longer. I suggest making your starting chain, draping it over your head and bring the ends together so you can get an idea of what the length will be while worn. 

I also found that in row 1, it’s easy to skip chains on accident since the crochet thread is so tiny and when you make your treble crochets, sometimes it’s hard to tell which chain you’ve crocheted into (or maybe this is just a problem for me, lol!). 

If you find that you’ve reached the end of the starting chain and you don’t have the exact number of chains left according to the pattern instructions…I would just fudge it the best you can. That’s just me, but when you’re done sewing the veil at the end, I promise that no one is going to be able to tell that you had to skip more or less chains at the end.

Alright, let’s jump into the crochet Floral Lace Infinity Veil pattern!

Similar Posts:

Floral Infinity Veil Pattern
Here's my other girly modeling the veil for me 🙂
Crochet Flower Veil Close Up
You can see how the flowers repeat themselves in this close up of the veil

Please note that some of these links are affiliate links. That means that if you click on these links and make a purchase, I may receive a commission at no extra cost to you. You can find more information about our disclosure policy here. Thank you for your support.

Materials Needed: 

Abbreviations Used:

Please note these are in US terms, not UK.

  • Ch – chain
  • St – stitch
  • Sl st – slip stitch
  • Sc – single crochet
  • Tr – treble crochet

Special Stitches:

This crochet veil pattern uses treble cluster stitches. When you make a cluster stitch, you will make 2 or 3 treble crochets, but hold back the last pull through until all 2 or 3 treble crochets are made, and then pull through all loops to finish. Here are more detailed instructions: 

2 Tr Cluster:

  • Yarn over twice, insert hook into next stitch, draw up a loop, yarn over, pull through two loops, yarn over, pull through two loops (you should have two loops on your hook)
  • Yarn over twice, insert hook into same stitch, draw up a loop, yarn over, pull through two loops, yarn over, pull through two loops, yarn over, pull through all three loops.

3 Tr Cluster: 

  • Yarn over twice, insert hook into next stitch, draw up a loop, yarn over, pull through two loops, yarn over, pull through two loops (you should have two loops on your hook)
  • Yarn over twice, insert hook into same stitch, draw up a loop, yarn over, pull through two loops, yarn over, pull through two loops (you should have three loops on your hook)
  • Yarn over twice, insert hook into same stitch, draw up a loop, yarn over, pull through two loops, yarn over, pull through two loops, yarn over and pull through all four loops.

Crochet Flower Lace Infinity Veil

Repeat is 11+7 

Loosely Ch 205 or until desired length using the repeat formula above. (Protip: use stitch markers to mark every 50 stitches or so if you find yourself getting distracted or losing count) 

  • Row 1: Tr in 10th ch from hook, *ch 5, tr in same ch as first tr
  • ch 5, 2 tr cluster in front two loops of last tr (hold back the last pull through, you should have 3 loops on your hook)
  • skip 2 chs, 3 tr cluster in next ch (hold back the last pull through, 6 loops on your hook)
  • skip 4 chs, 3 tr cluster in next ch (pull through all 9 loops on your hook)
  • sl st into any loop of the last tr cluster leg to “secure” the center of your flower petal (this prevents a big hole from forming later in the center)
  • Ch 5, 2 tr cluster in the “center” of your flower petal. You should have a 4 petaled flower made up of 3 tr clusters at this point.
  • Skip 2 chs, tr in next ch.* Repeat from *to* until end, you should have 3 chs left, but if you don’t I would just work the last bit the best you can (it’s easy to miss chains with how small the thread is). Ch 5, tr in same ch as previous tr, ch 1, tr in last ch.
  • Row 2: Ch 10, turn, sc in the 3rd ch in previous row’s ch 5 space
  • *ch 7, 3 tr cluster in center of next flower, ch 3, 3 tr cluster again in center of same flower, ch 7, sc in 3rd ch of next ch 5 space from previous row.* Repeat from *to* until last ch 5 space sc into, ch 5, tr in 2nd ch away from last tr of previous row.
  • Row 3 (this row is similar to row 1, but we are offsetting the flowers): Ch 10, turn, 2 tr cluster in 5th ch from hook (hold back last pull through, 3 loops on hook), looking at the sc in the top of row 1’s ch 5, 3 tr cluster in 3rd ch from the right of the next sc (hold back last pull through, 6 loops on hook), *3 tr cluster in the 4th ch from the left of the same sc (pull through all 9 loops)
  • Sl st into any loop of the last tr cluster leg, ch 5, 2 tr cluster in center of flower. Tr in the middle ch of the next ch 3 from row 2, ch 5, tr in same ch as previous tr made
  • Ch 5, 2 tr cluster in front two loops of last tr (hold back last pull through, 3 loops on hook), 3 tr cluster in 4th ch from the right of the next sc (hold back last pull through, 6 loops on hook).* Repeat from *to* until last sc from previous row, 3 tr cluster in 3rd ch from the left of the last sc, pull through all 9 loops, sl st into any thread of last tr cluster leg, ch 5, 2 tr cluster in center of flower, skip 2 chs, tr in 3rd ch of previous rows turning ch.
  • Row 4 (this row is similar to row 2, but offset again): Ch 6, turn, *3 tr cluster in center of next flower, ch 3, 3 tr cluster in center of the same flower, ch 7, sc in 3rd ch of previous row’s ch 5, ch 7.* Repeat from *to* until last flower, 3 tr cluster in center of last flower, ch 3, 3 tr cluster in center of same flower, ch 1, tr in next ch.

Row 5 (similar to row 1): Ch 6, turn, *tr in middle of ch 3 from previous row, ch 5, tr in same ch, ch 5, 2 tr cluster in two front loops of last tr (hold back last pull through, 3 loops on hook), 3 tr cluster in 4th ch from the right of the next sc (hold back last pull through, 6 loops on hook), 3 tr cluster in 4th ch from the left of the same sc, pull through all 9 loops, sl st into any loop of last tr cluster leg, ch 5, 2 tr cluster in center of flower.* Repeat from *to* until last flower completed, tr in middle of next ch 3, ch 5, tr in same ch as previous tr made, ch 1, skip 1 ch, tr in next ch.

Repeat Rows 2-5 until you’ve reached your desired length. End on a repeat of row 2 for the edging.         

Edging: Ch 1, turn, 3 sc in ch 5 space, ch 3 picot, 3 sc in same ch 5 space, sc in next sc, *3 sc in next ch 7 space, ch 3 picot, 3 sc in same ch 7 space,  sc in top of 3 treble cluster, sc in ch 3 space, ch 3 picot, sc in same ch 3 space, sc in top of next 3 treble cluster, 3 sc in next ch 7 space, ch 3 picot, 3 sc in same ch 7 space, sc in next sc,* repeat from *to* until you’ve sc in last sc of row, 3 sc in last ch space, ch 3 picot, 3 sc in same ch space.

DO NOT CUT THREAD

Assembly:  Fold your veil in half, line up the edges as evenly as possible, and sl st into both sides of the veil all the way down. This will “sew” the sides together.

Leave a long enough piece of thread for sewing, cut with scissors, and pull through. Sew the end in with tapestry needle and any other ends.

Thank you for viewing the Floral Lace Infinity Veil pattern! If you find a mistake, or need help, please don’t hesitate to leave a comment or question below. 

Until next time!

Other Posts You May Like:

 
Please follow and like us:

You May Also Like