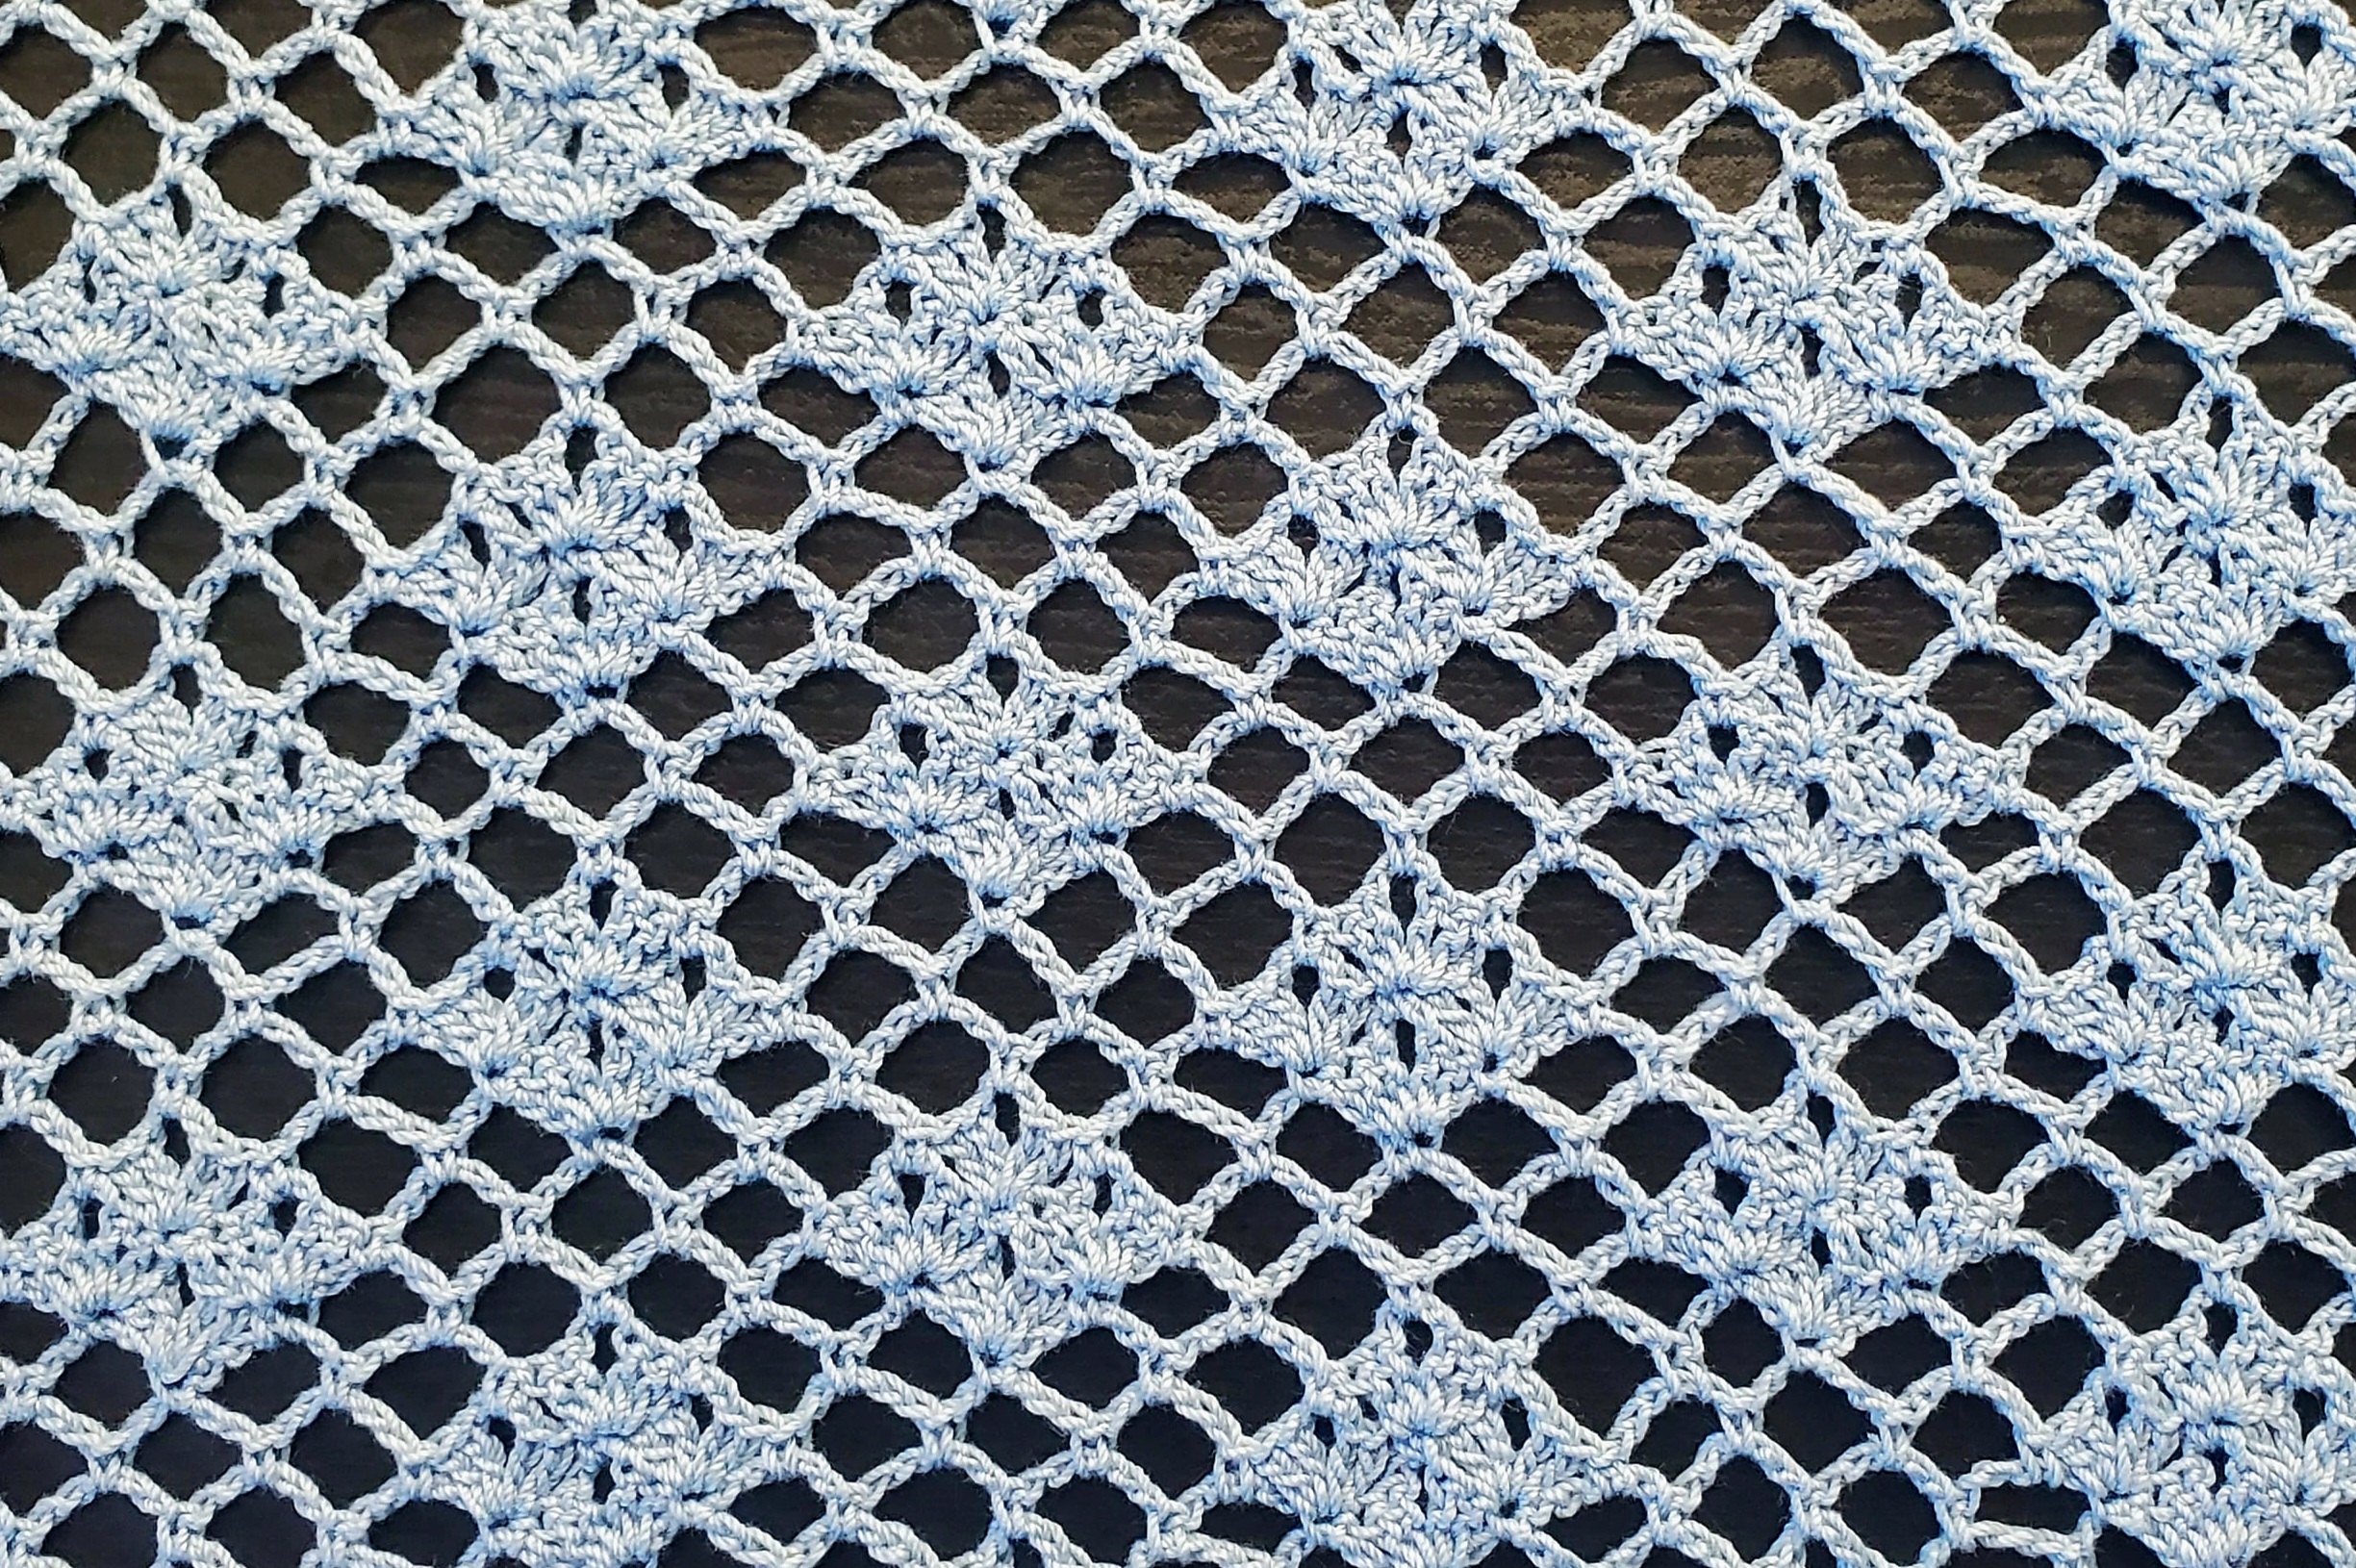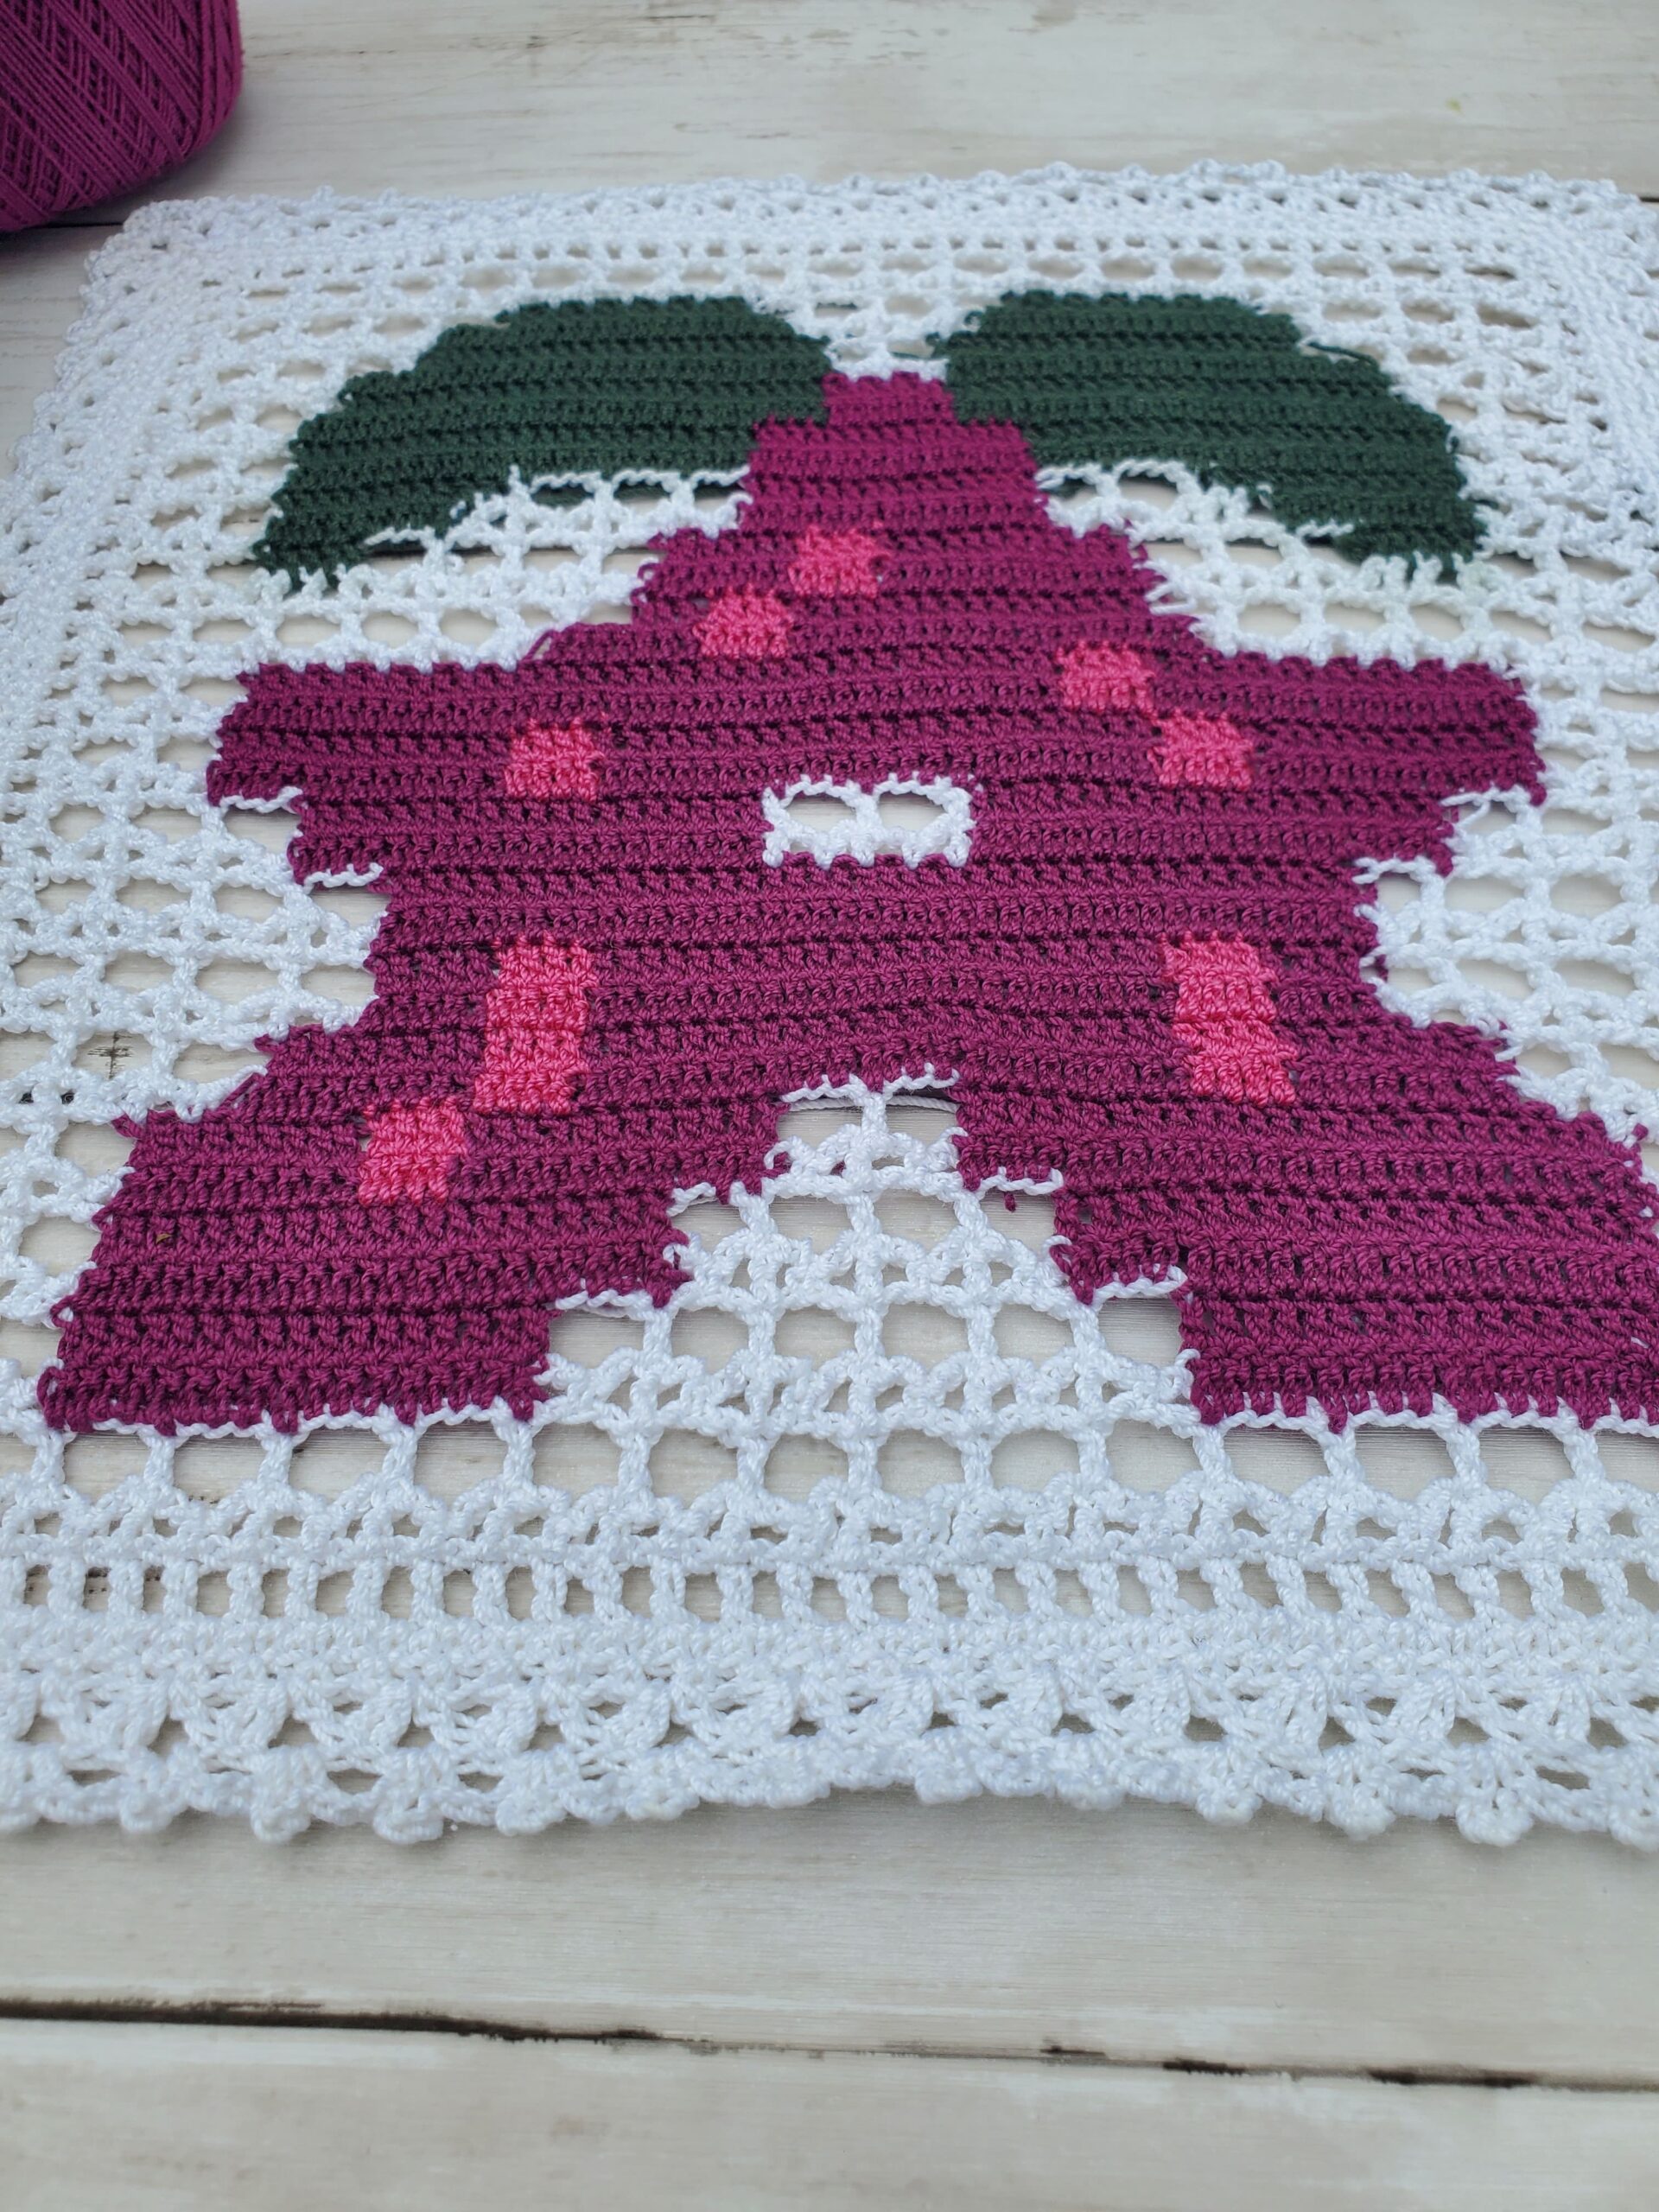
Crochet Lace Stitch Pattern – Crosswind Lace Stitch
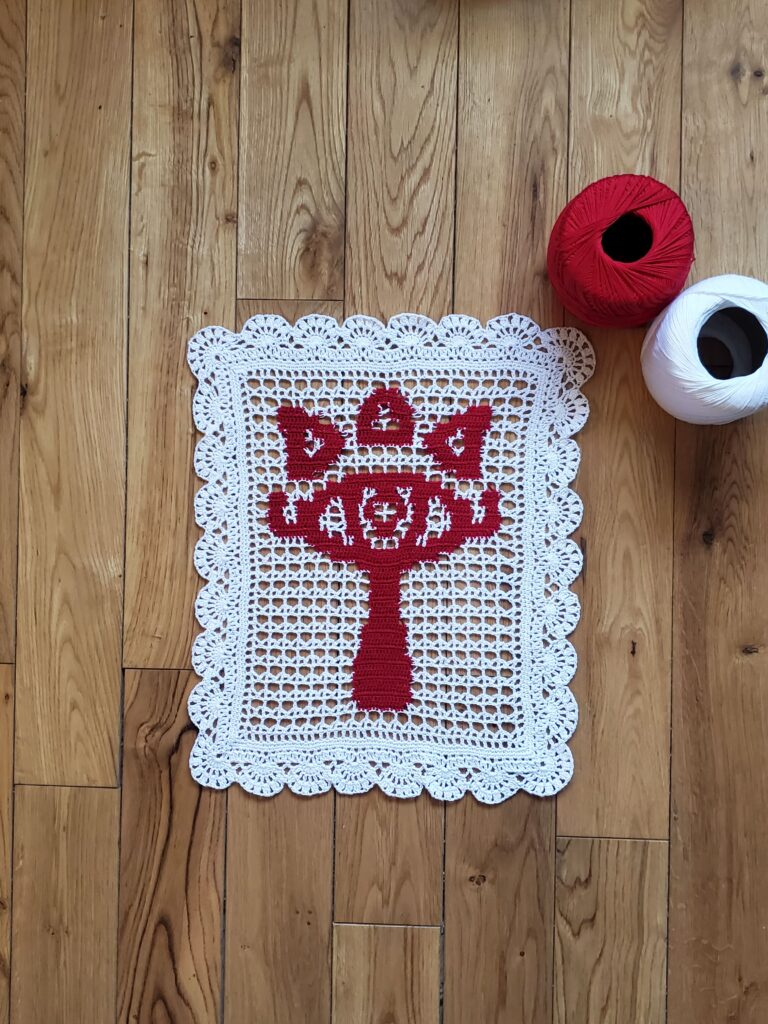
Hello everyone! Today I have an amazing crochet lace stitch pattern to share with you! I’m calling this the Crosswind Lace Stitch.
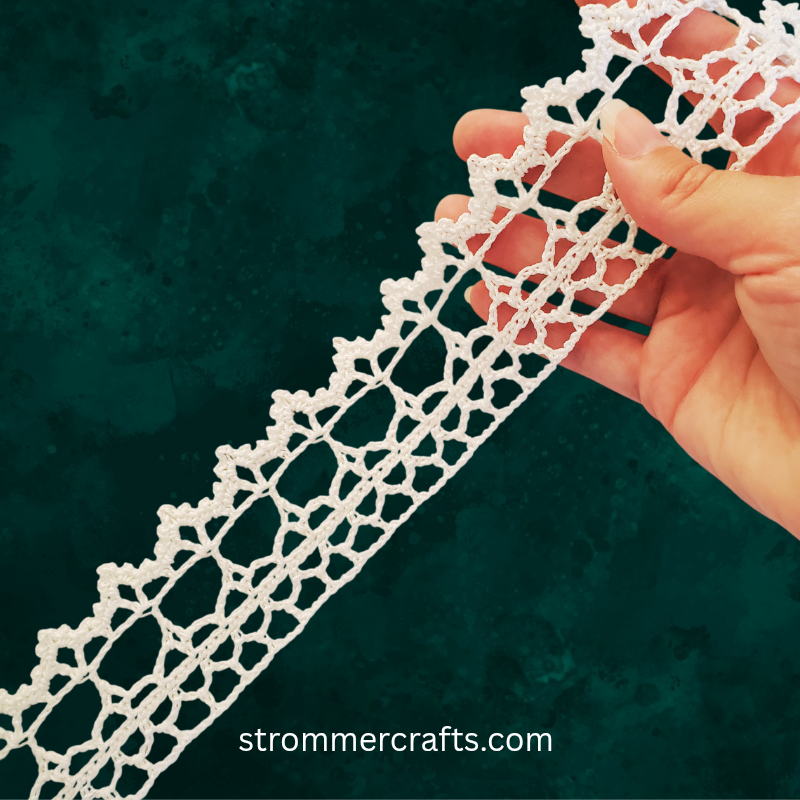
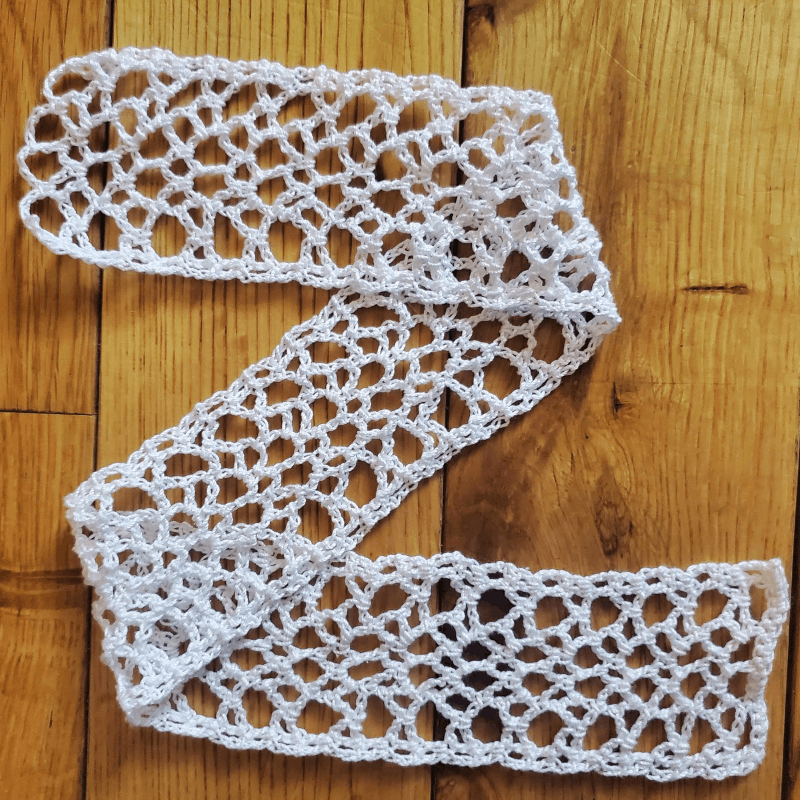
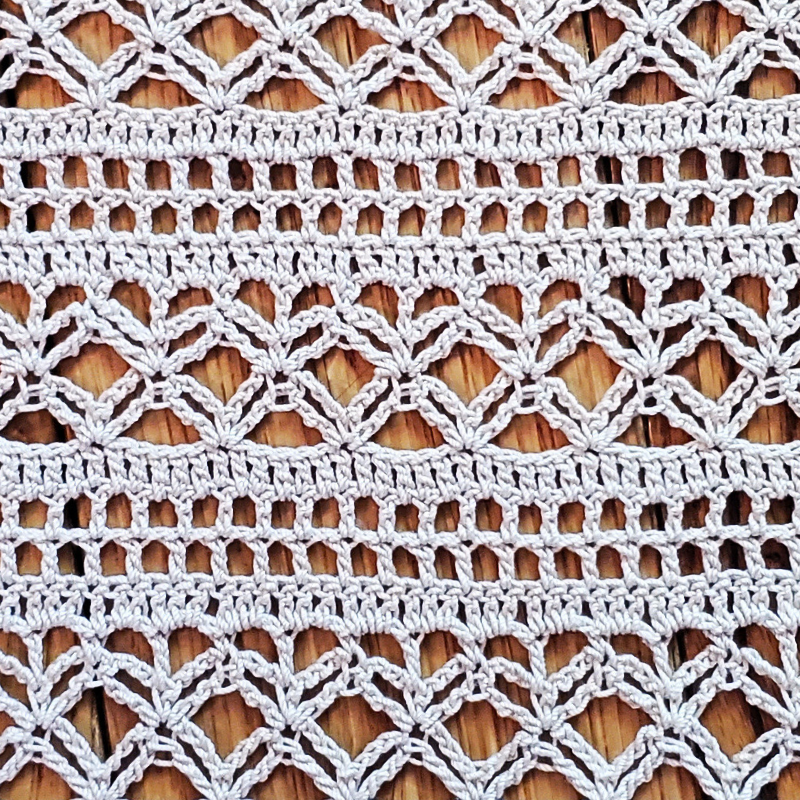
The name popped into my head since the main motif in this pattern looks like a criss cross or an X (or maybe it’s a butterfly!? I don’t really know lol!). Plus when it’s worked up a few rows, it makes your fabric very light and airy…like the wind!
Anyways I think this pattern would provide an excellent visual break as a trim for blankets, shawls, scarves or tablecloths. You could also just make the whole project as this pattern, the possibilities are endless!
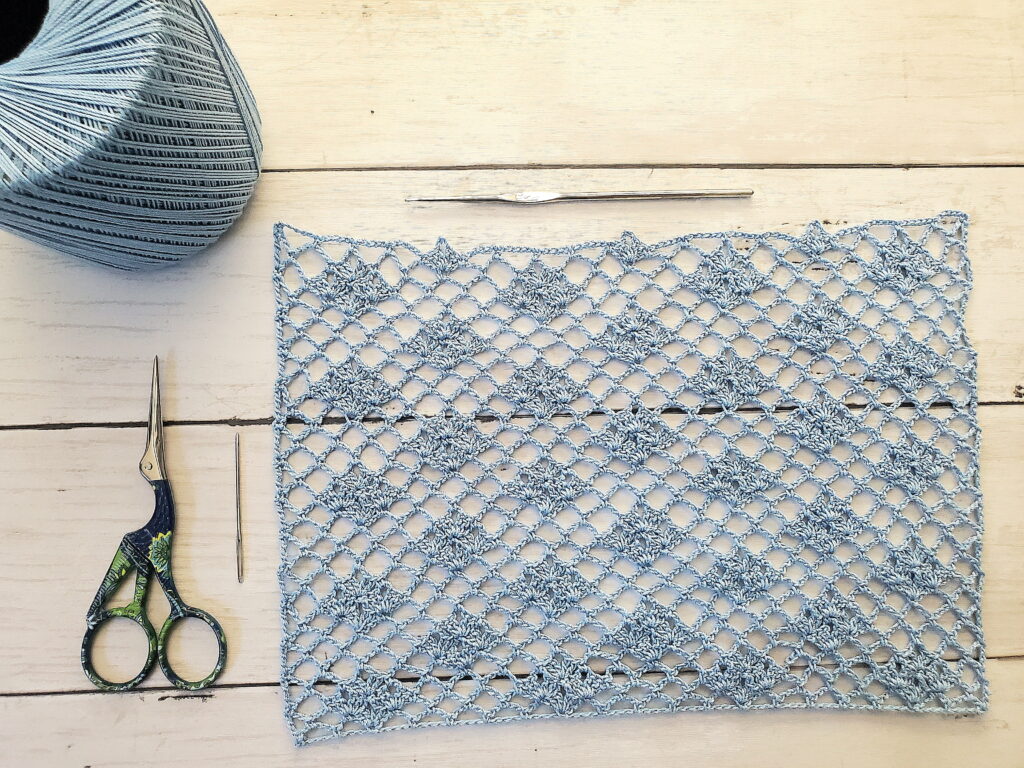
As always, you may use whatever size yarn and hook your heart desires for this pattern, but I am using size 10 crochet thread and a 1.65mm crochet hook.
Related Posts:
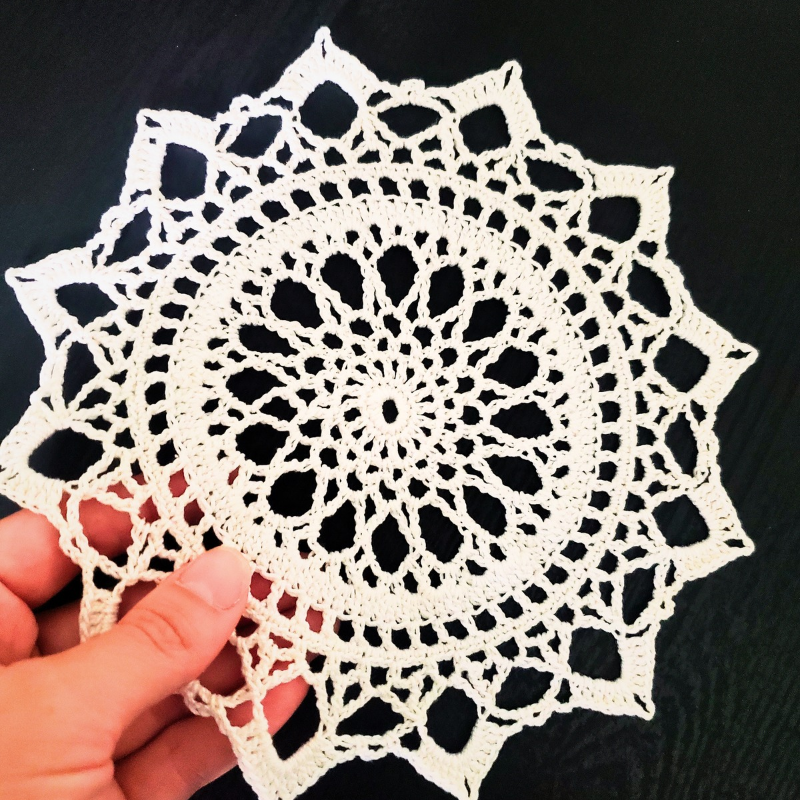
- 21 Stunning Crochet Lace Stitches
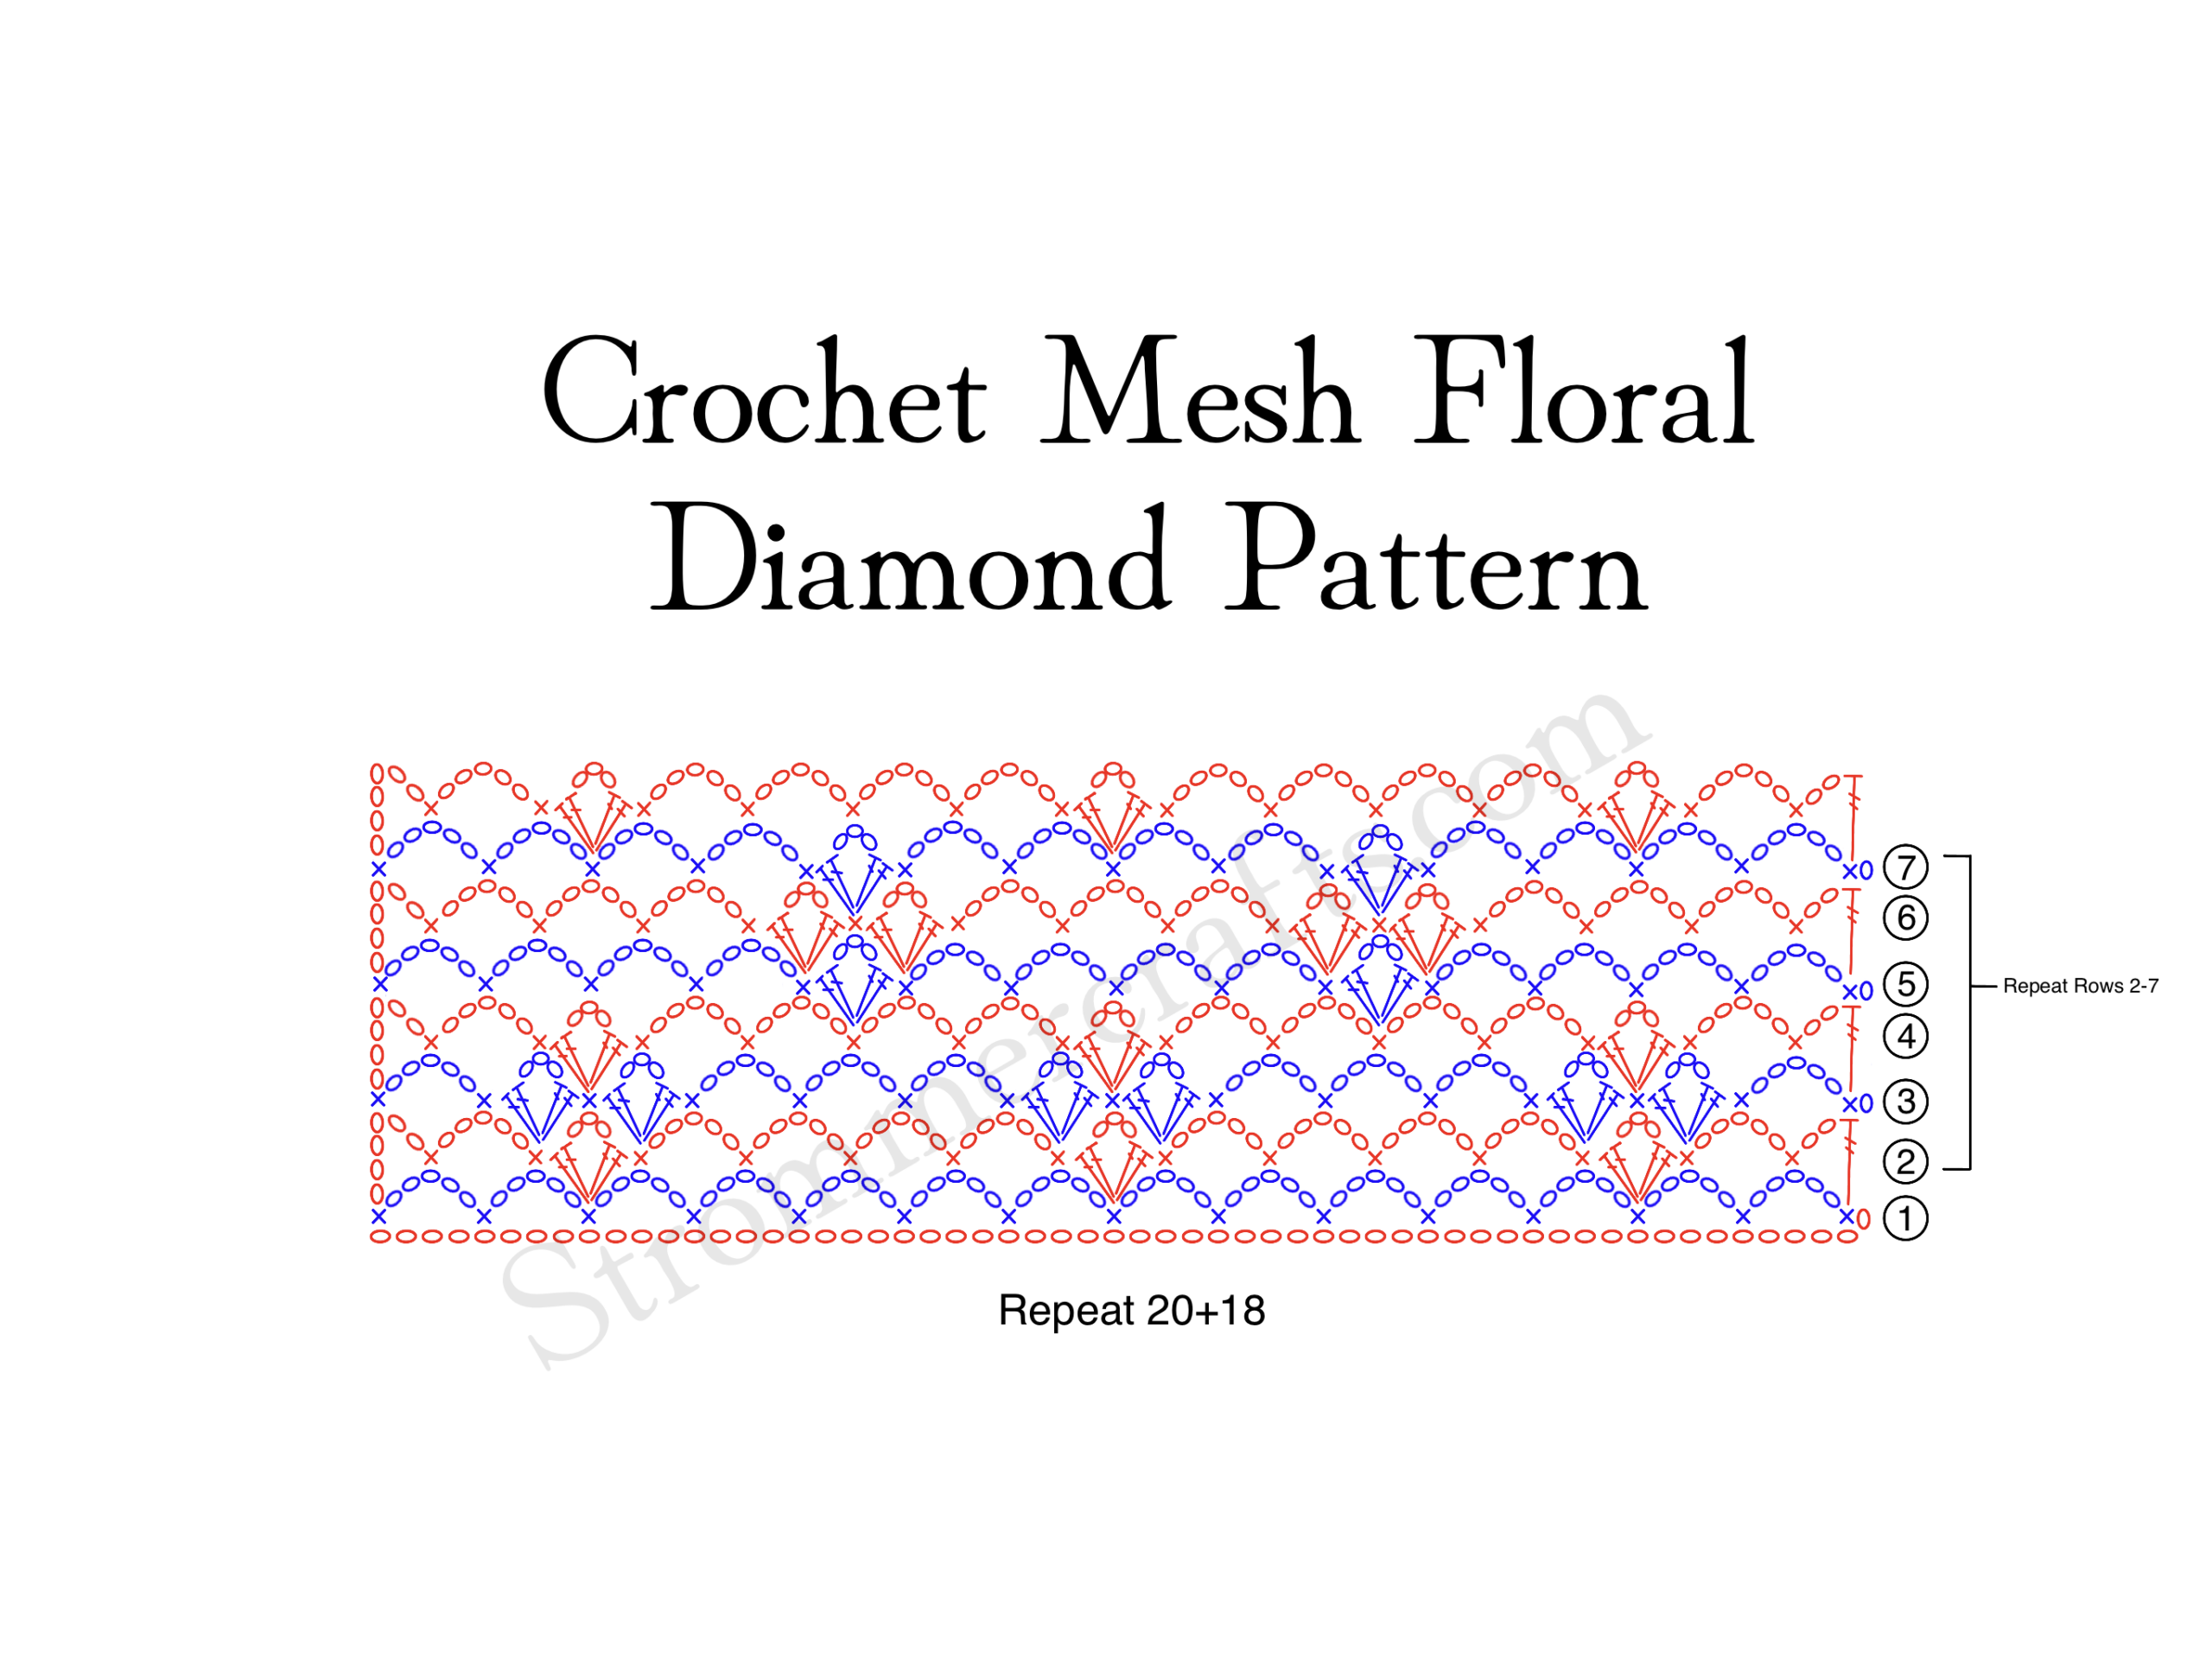
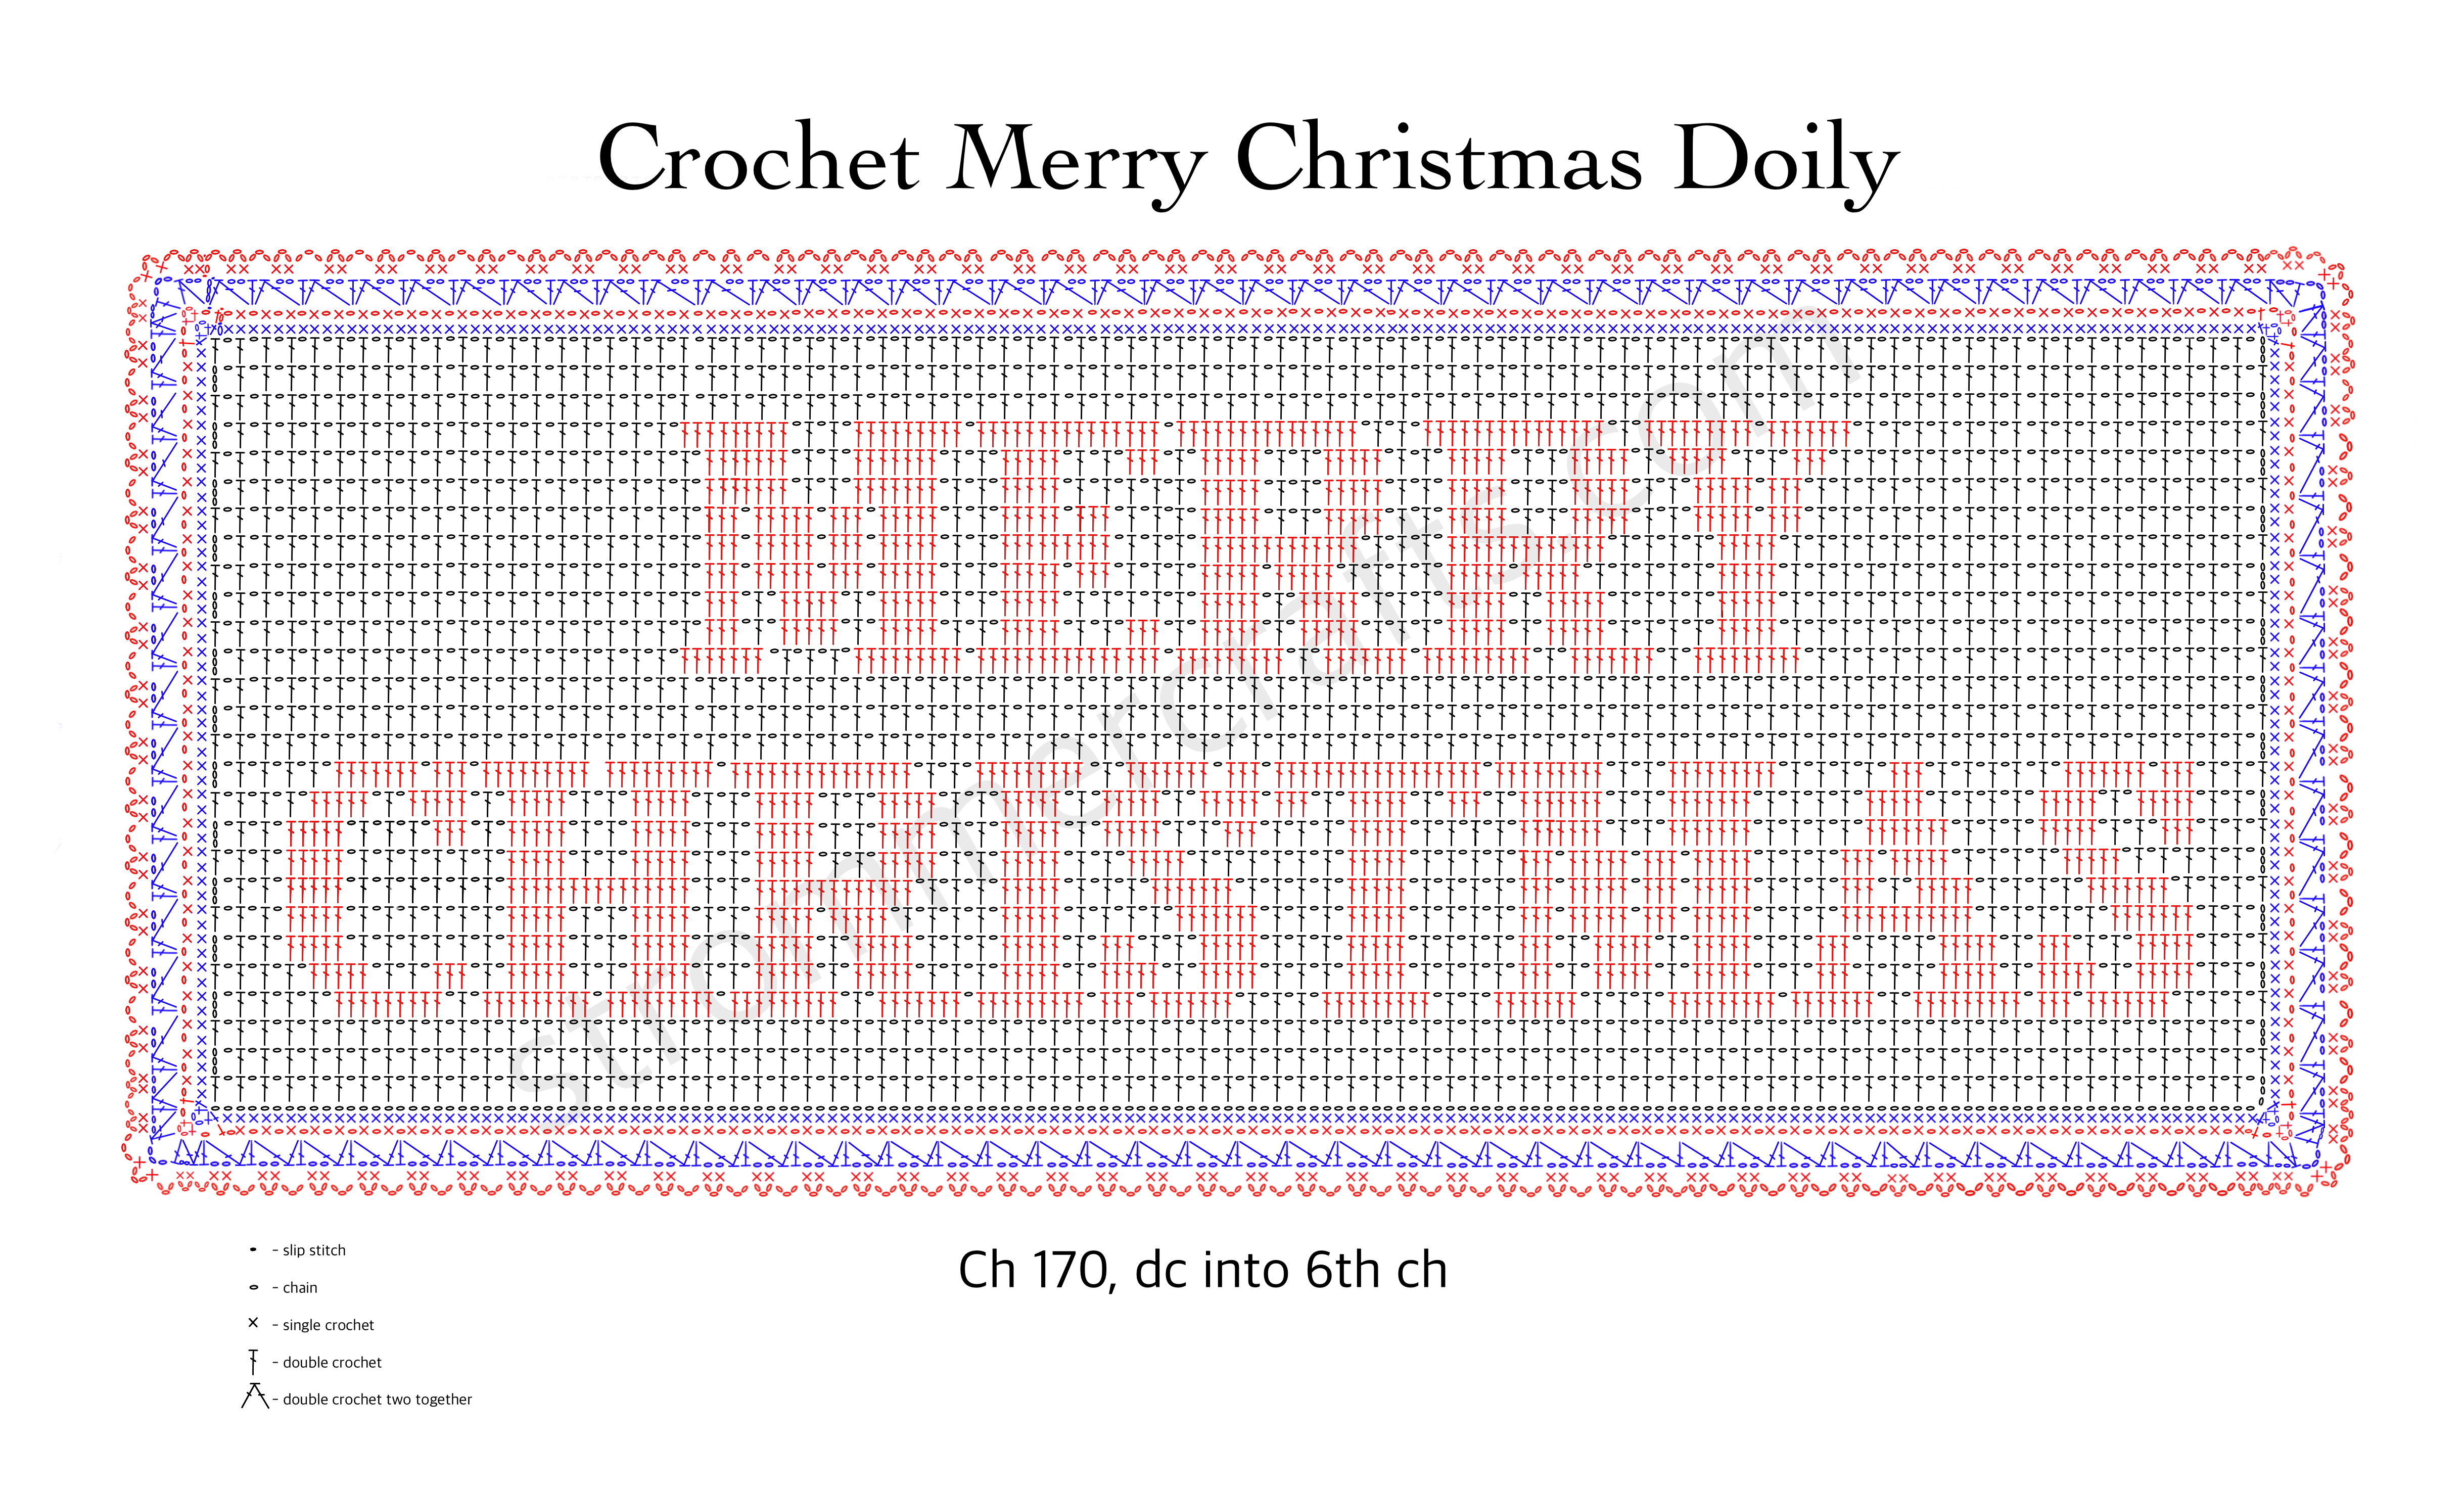
- Crochet Mesh Stitch with Floral Diamonds
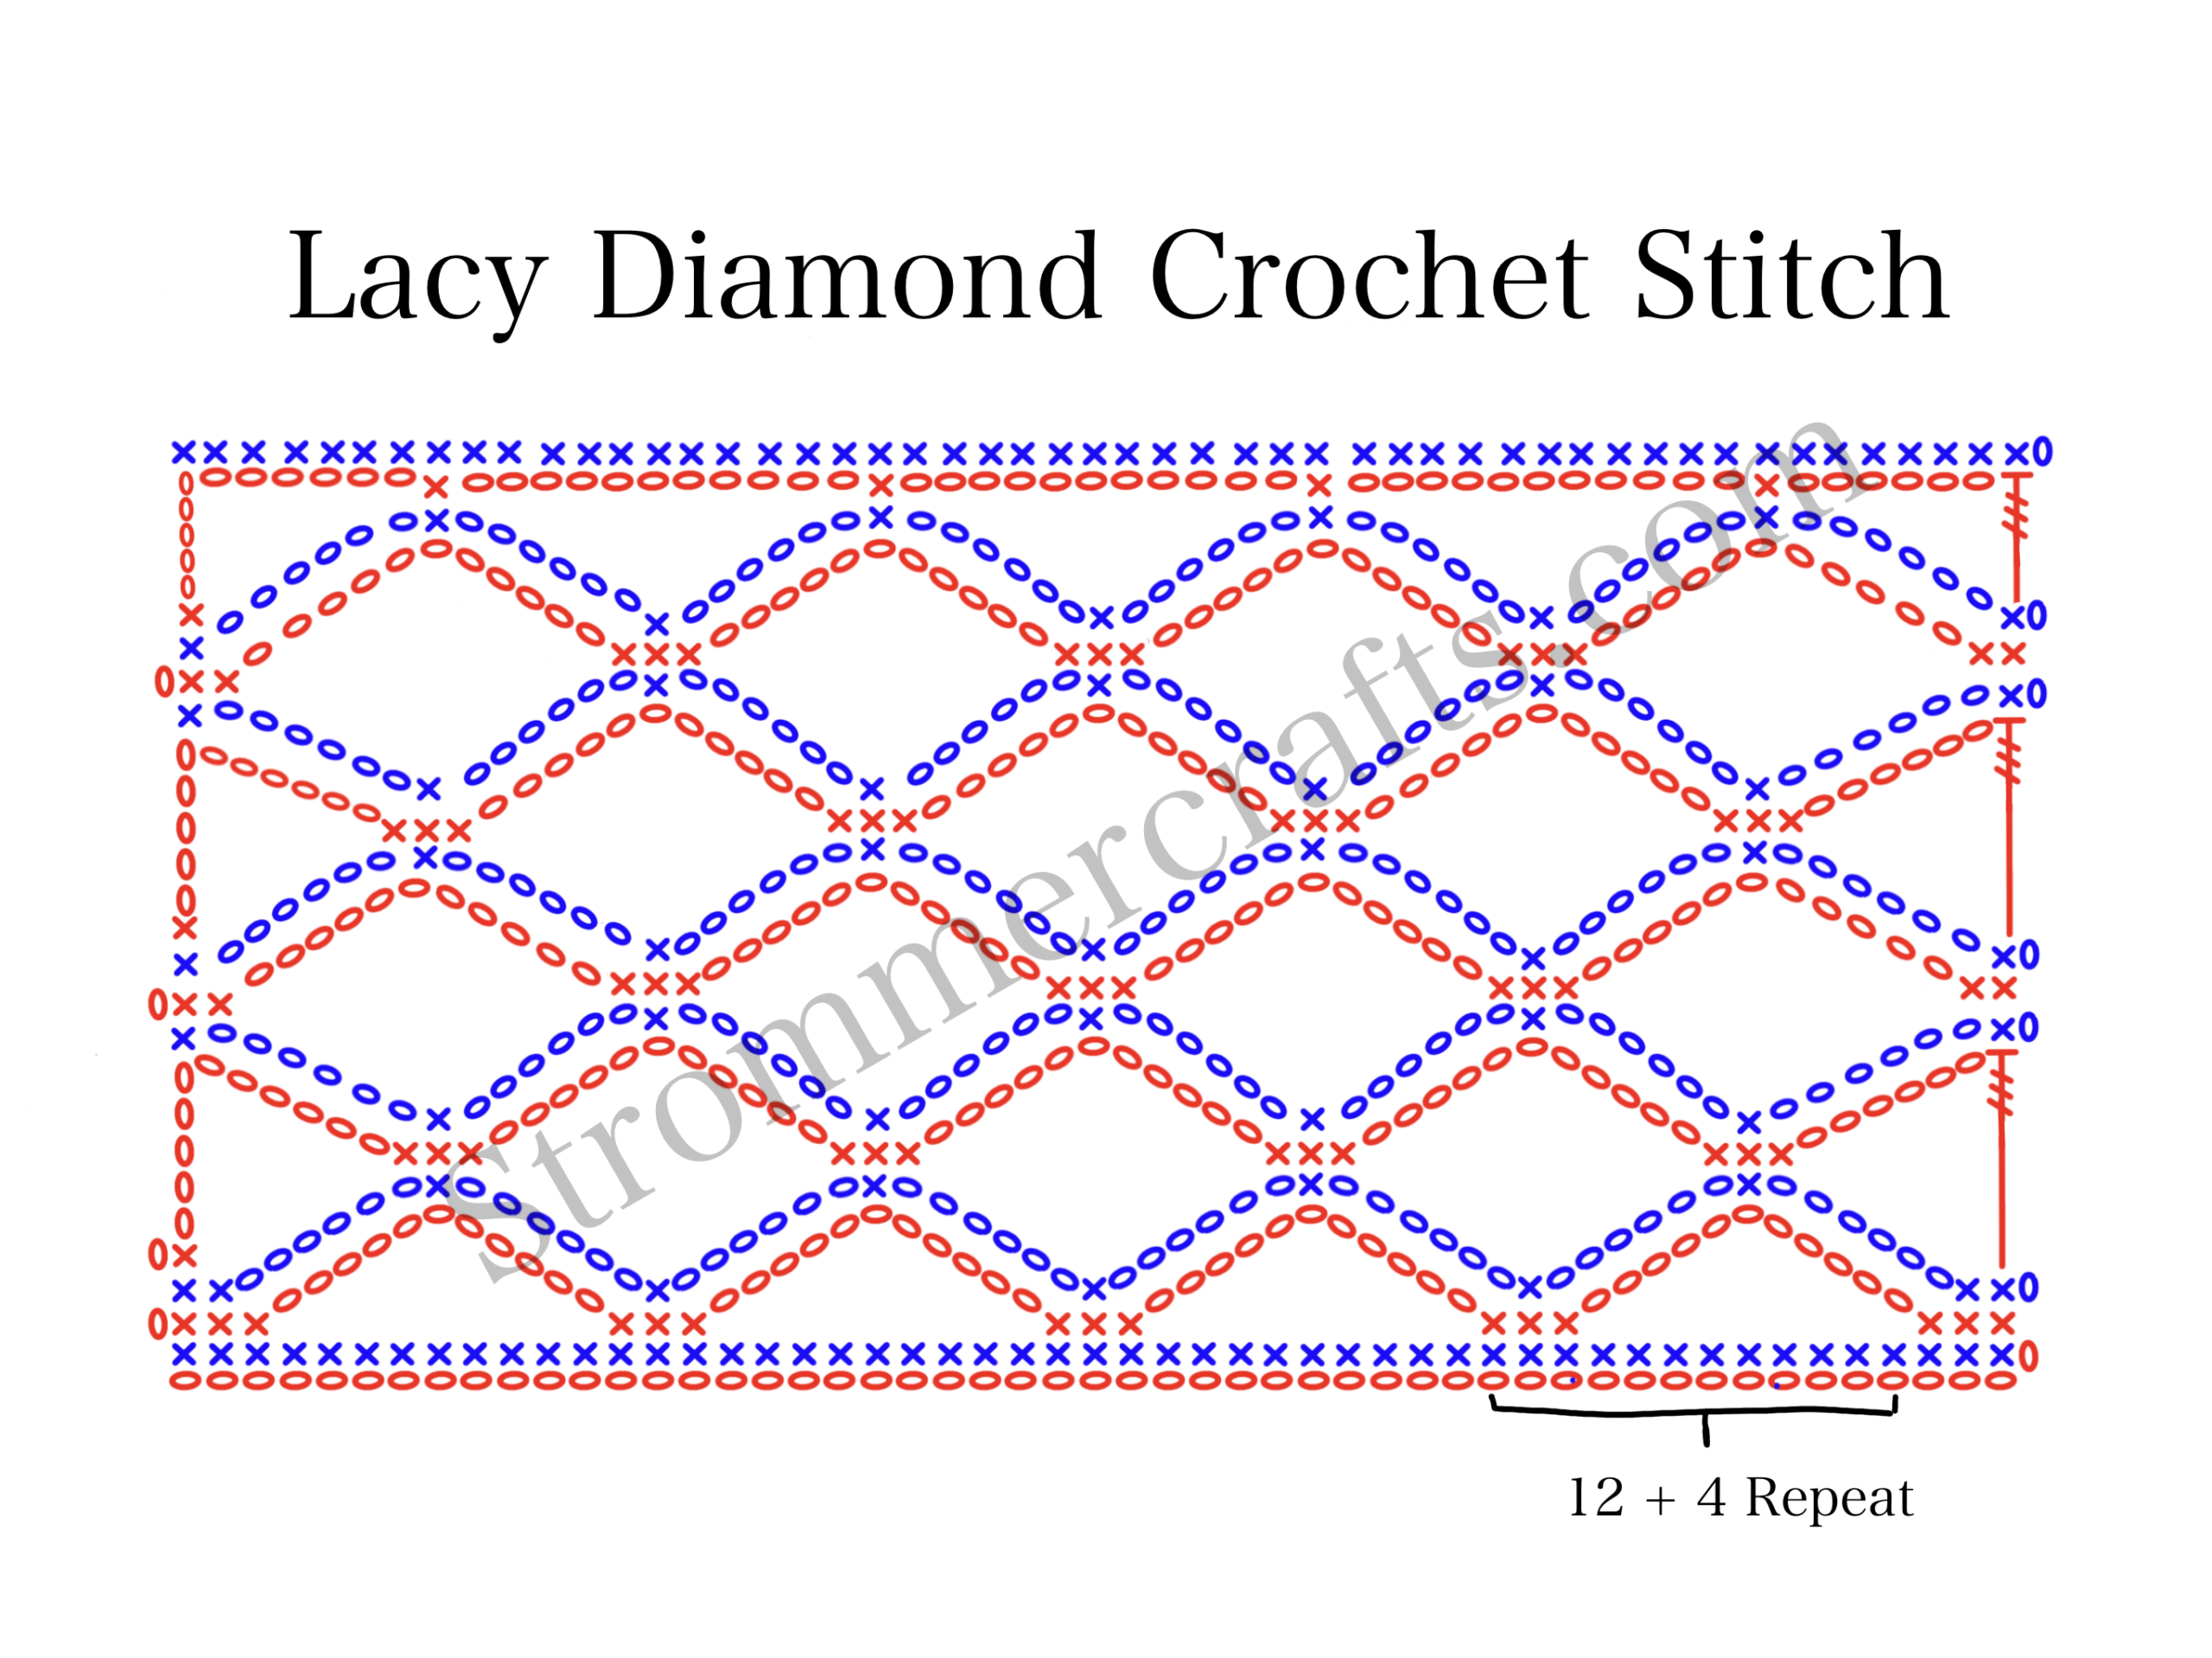
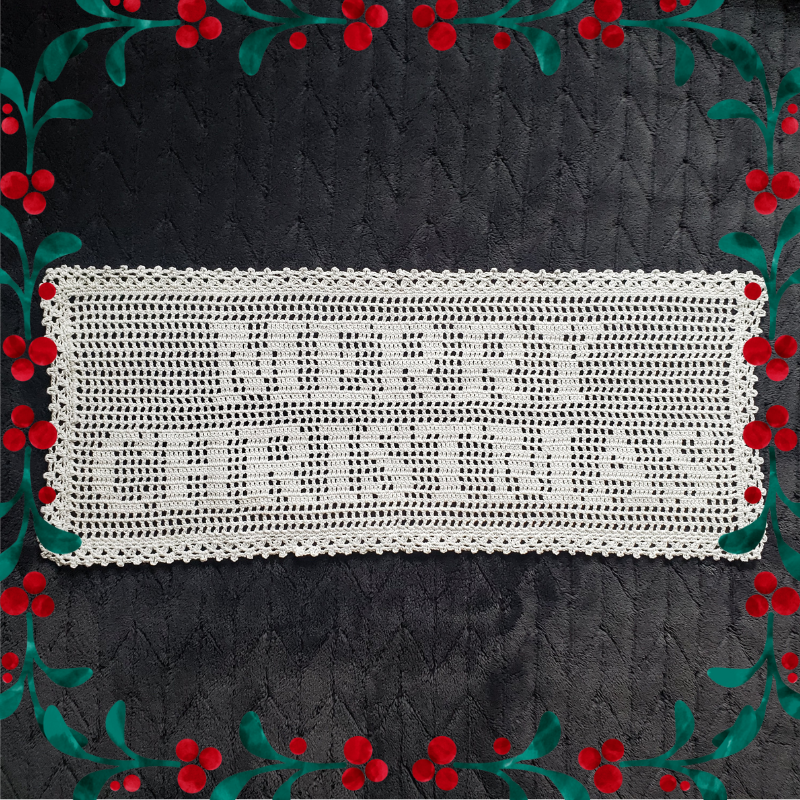
- Lacy Diamond Crochet Stitch
Please note that some of these links may be affiliate links. That means that if you click on these links and make a purchase, I may receive a commission at no extra cost to you. You can find more information about our disclosure policy here. Thank you for your support.
Materials Used:
- Size 10 Crochet Thread by Red Heart Classic in Off-White
- 1.65mm Crochet Hook
- Scissors
- Tapestry Needle
Abbreviations Used:
- Ch – chain
- St – stitch
- Sl st – slip stitch
- Sc – single crochet
- Dc- double crochet
- Tr – treble crochet
- 2trtog – 2 treble crochets together
Steps for 2Trtog:
- Yarn over 2 times, insert hook into designated st and pull up a loop (4 loops on hook)
- Yarn over and pull through 2 loops (3 loops on hook)
- Yarn over and pull through 2 loops again (2 loops on hook) This is the first “leg” of the 2trtog
- Yarn over 2 times, insert hook into next designated st and pull up a loop (5 loops on hook)
- Yarn over and pull through 2 loops (4 loops on hook)
- Yarn over again and pull through 2 loops (3 loops on hook)
- Yarn over one last time and pull through all 3 loops. This is the second “leg” of the 2trtog
YOUTUBE VIDEO NOT LOADING? CLICK FOR THE CROSSWIND LACE STITCH HERE.
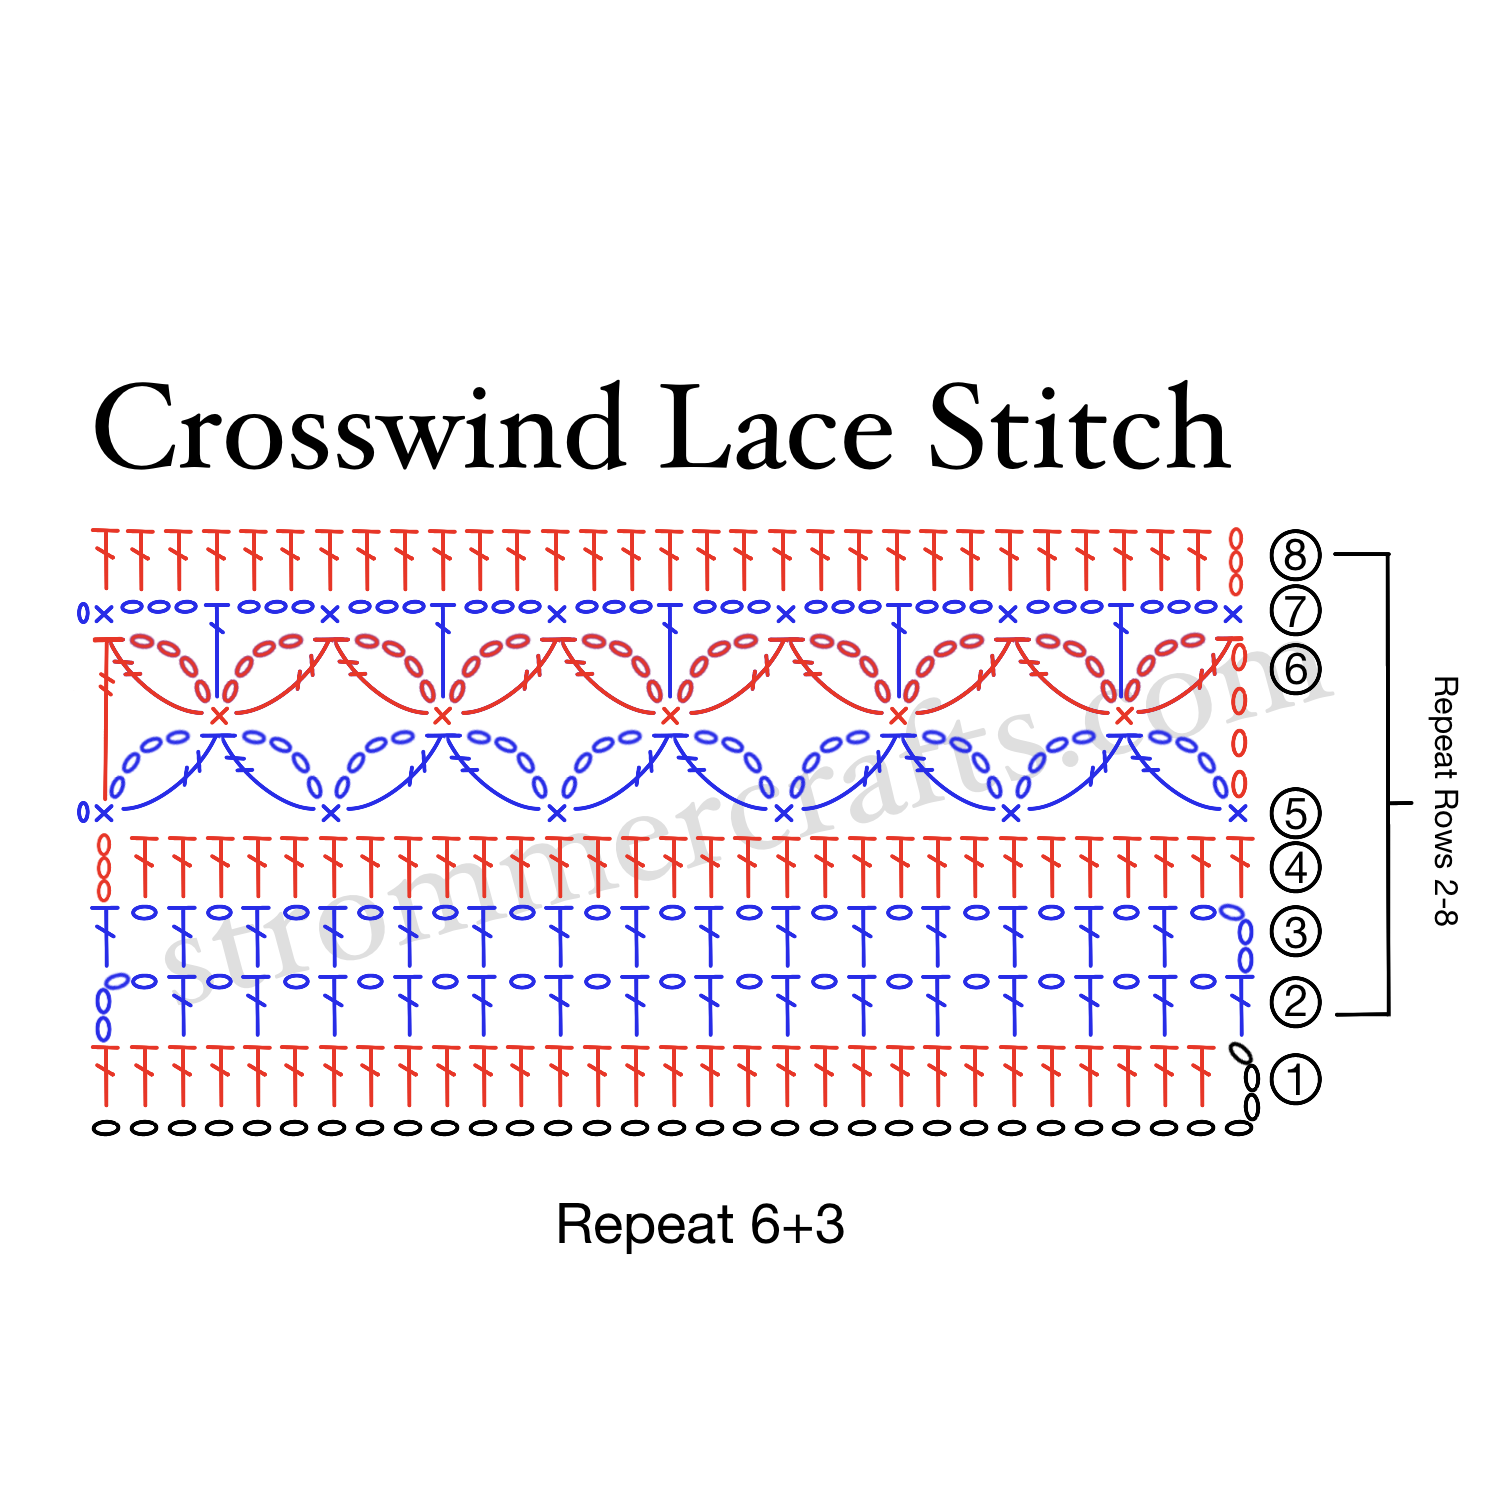
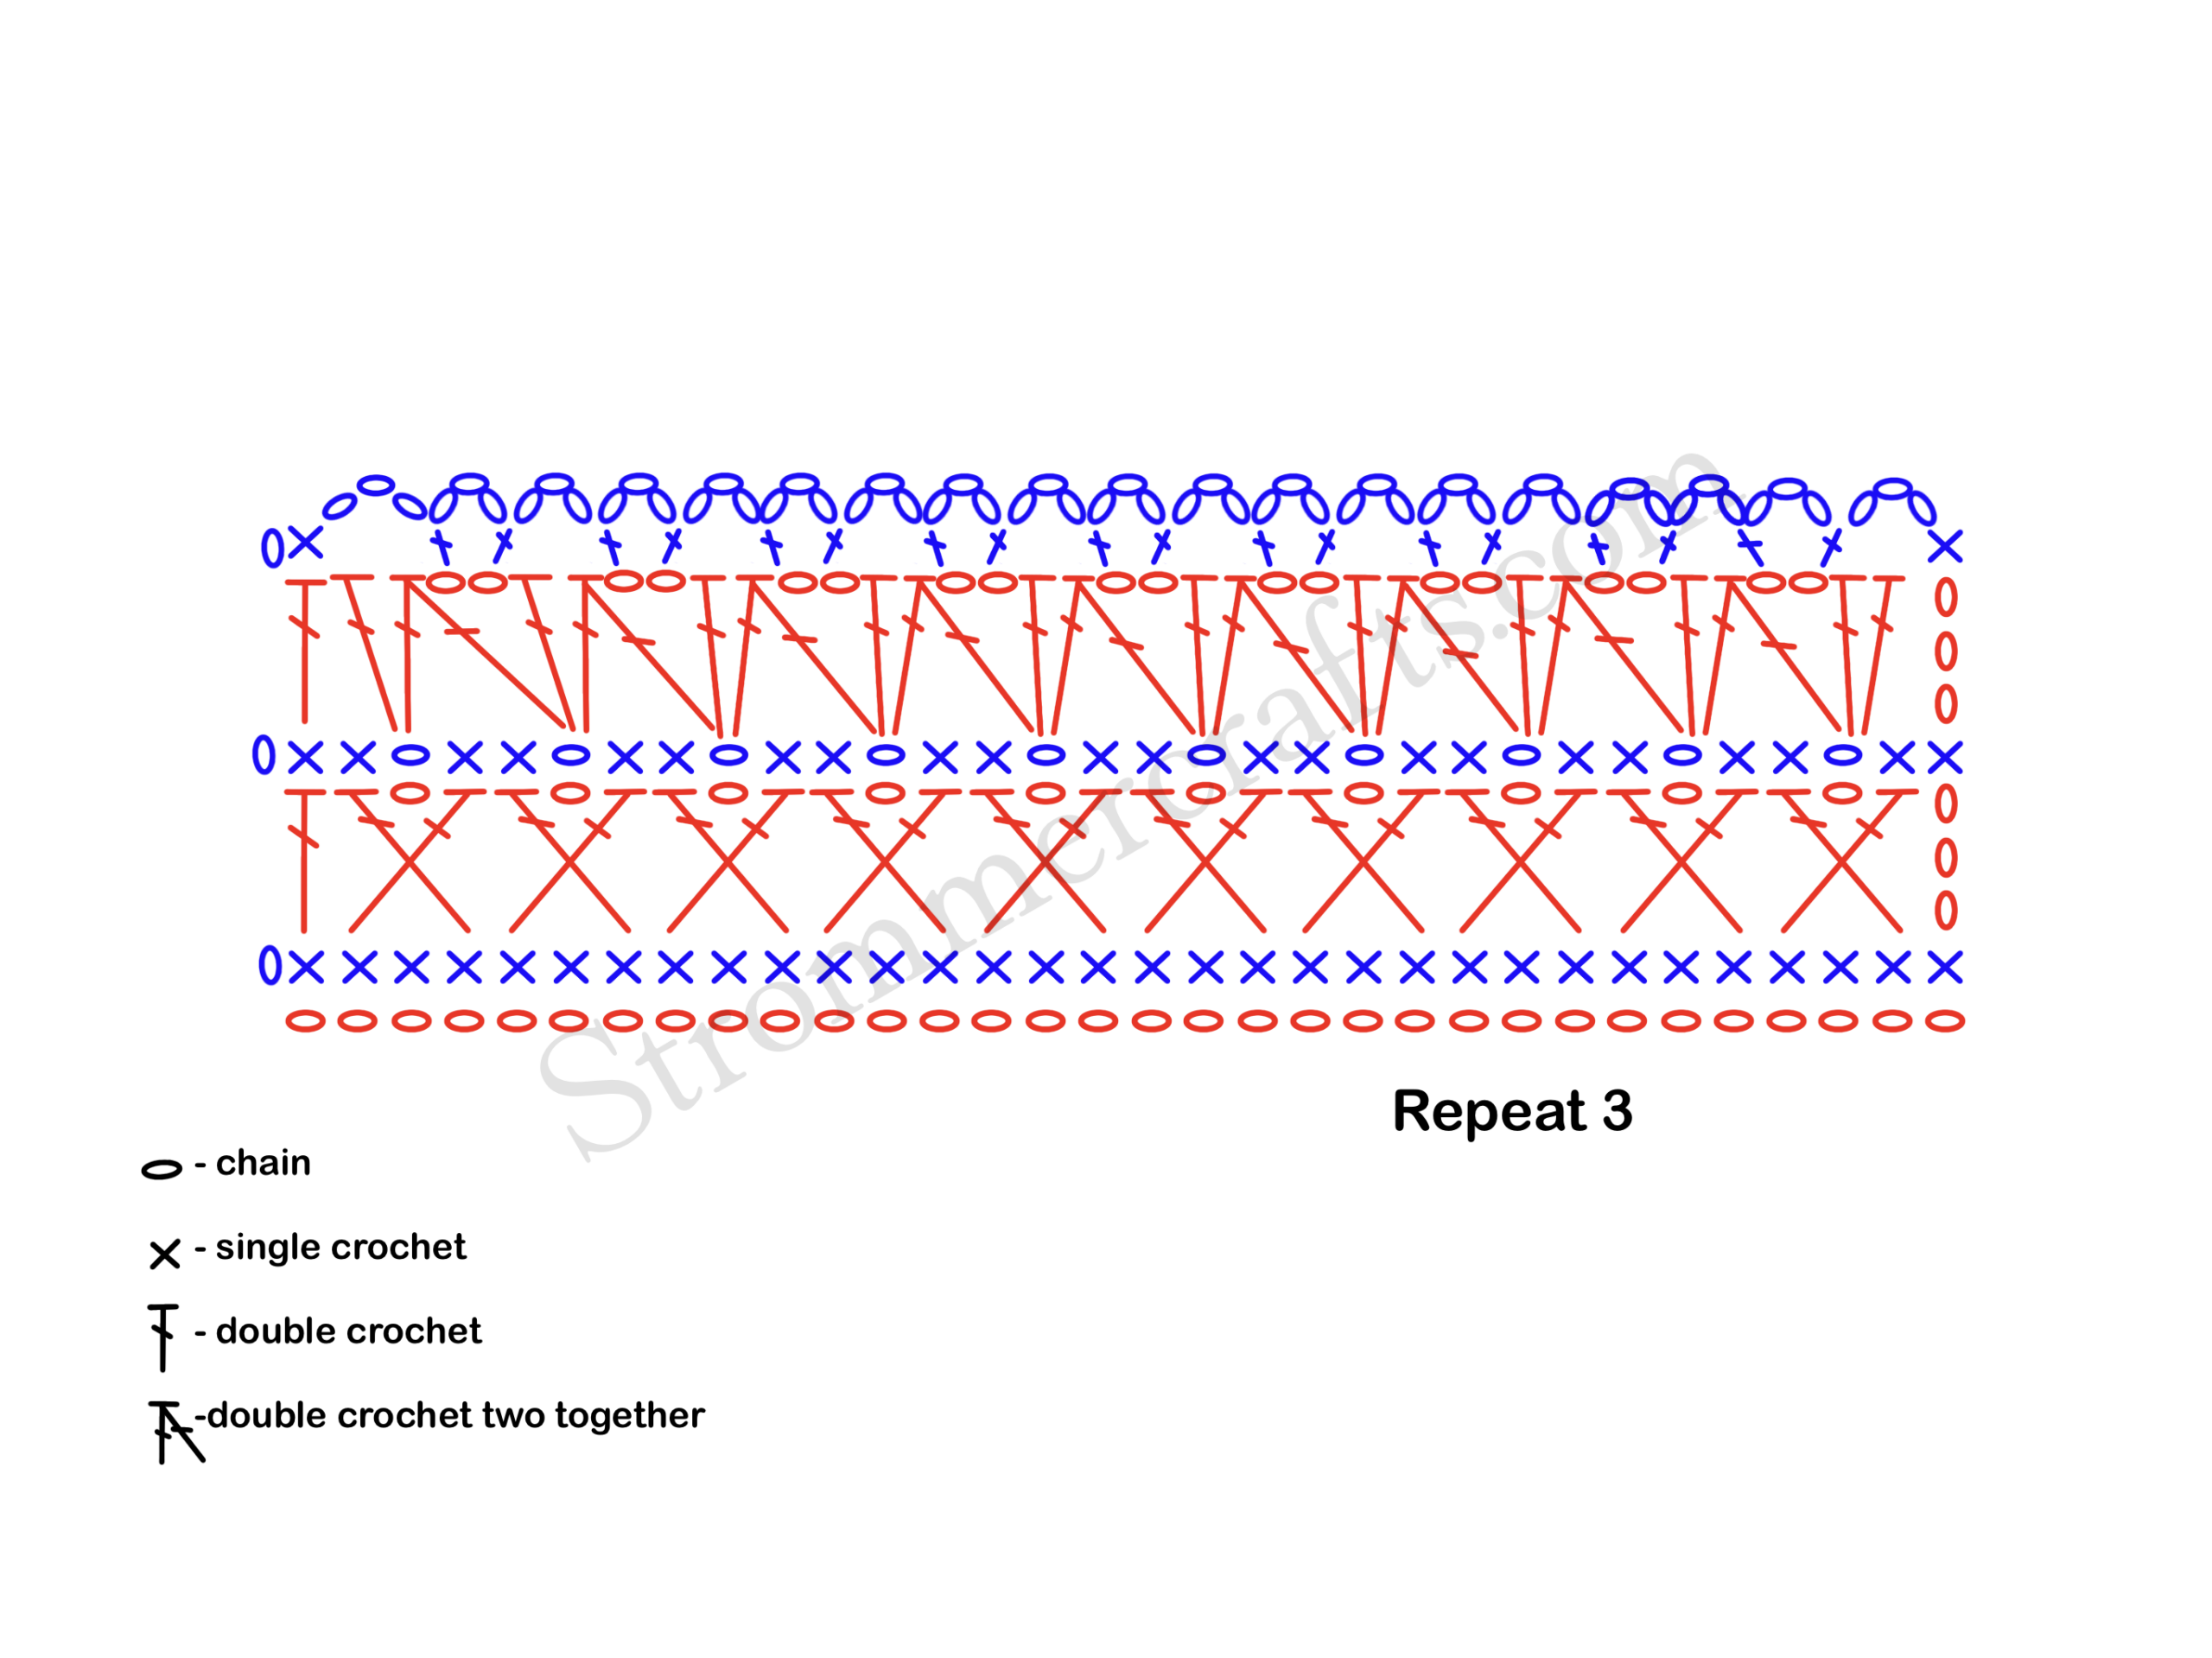
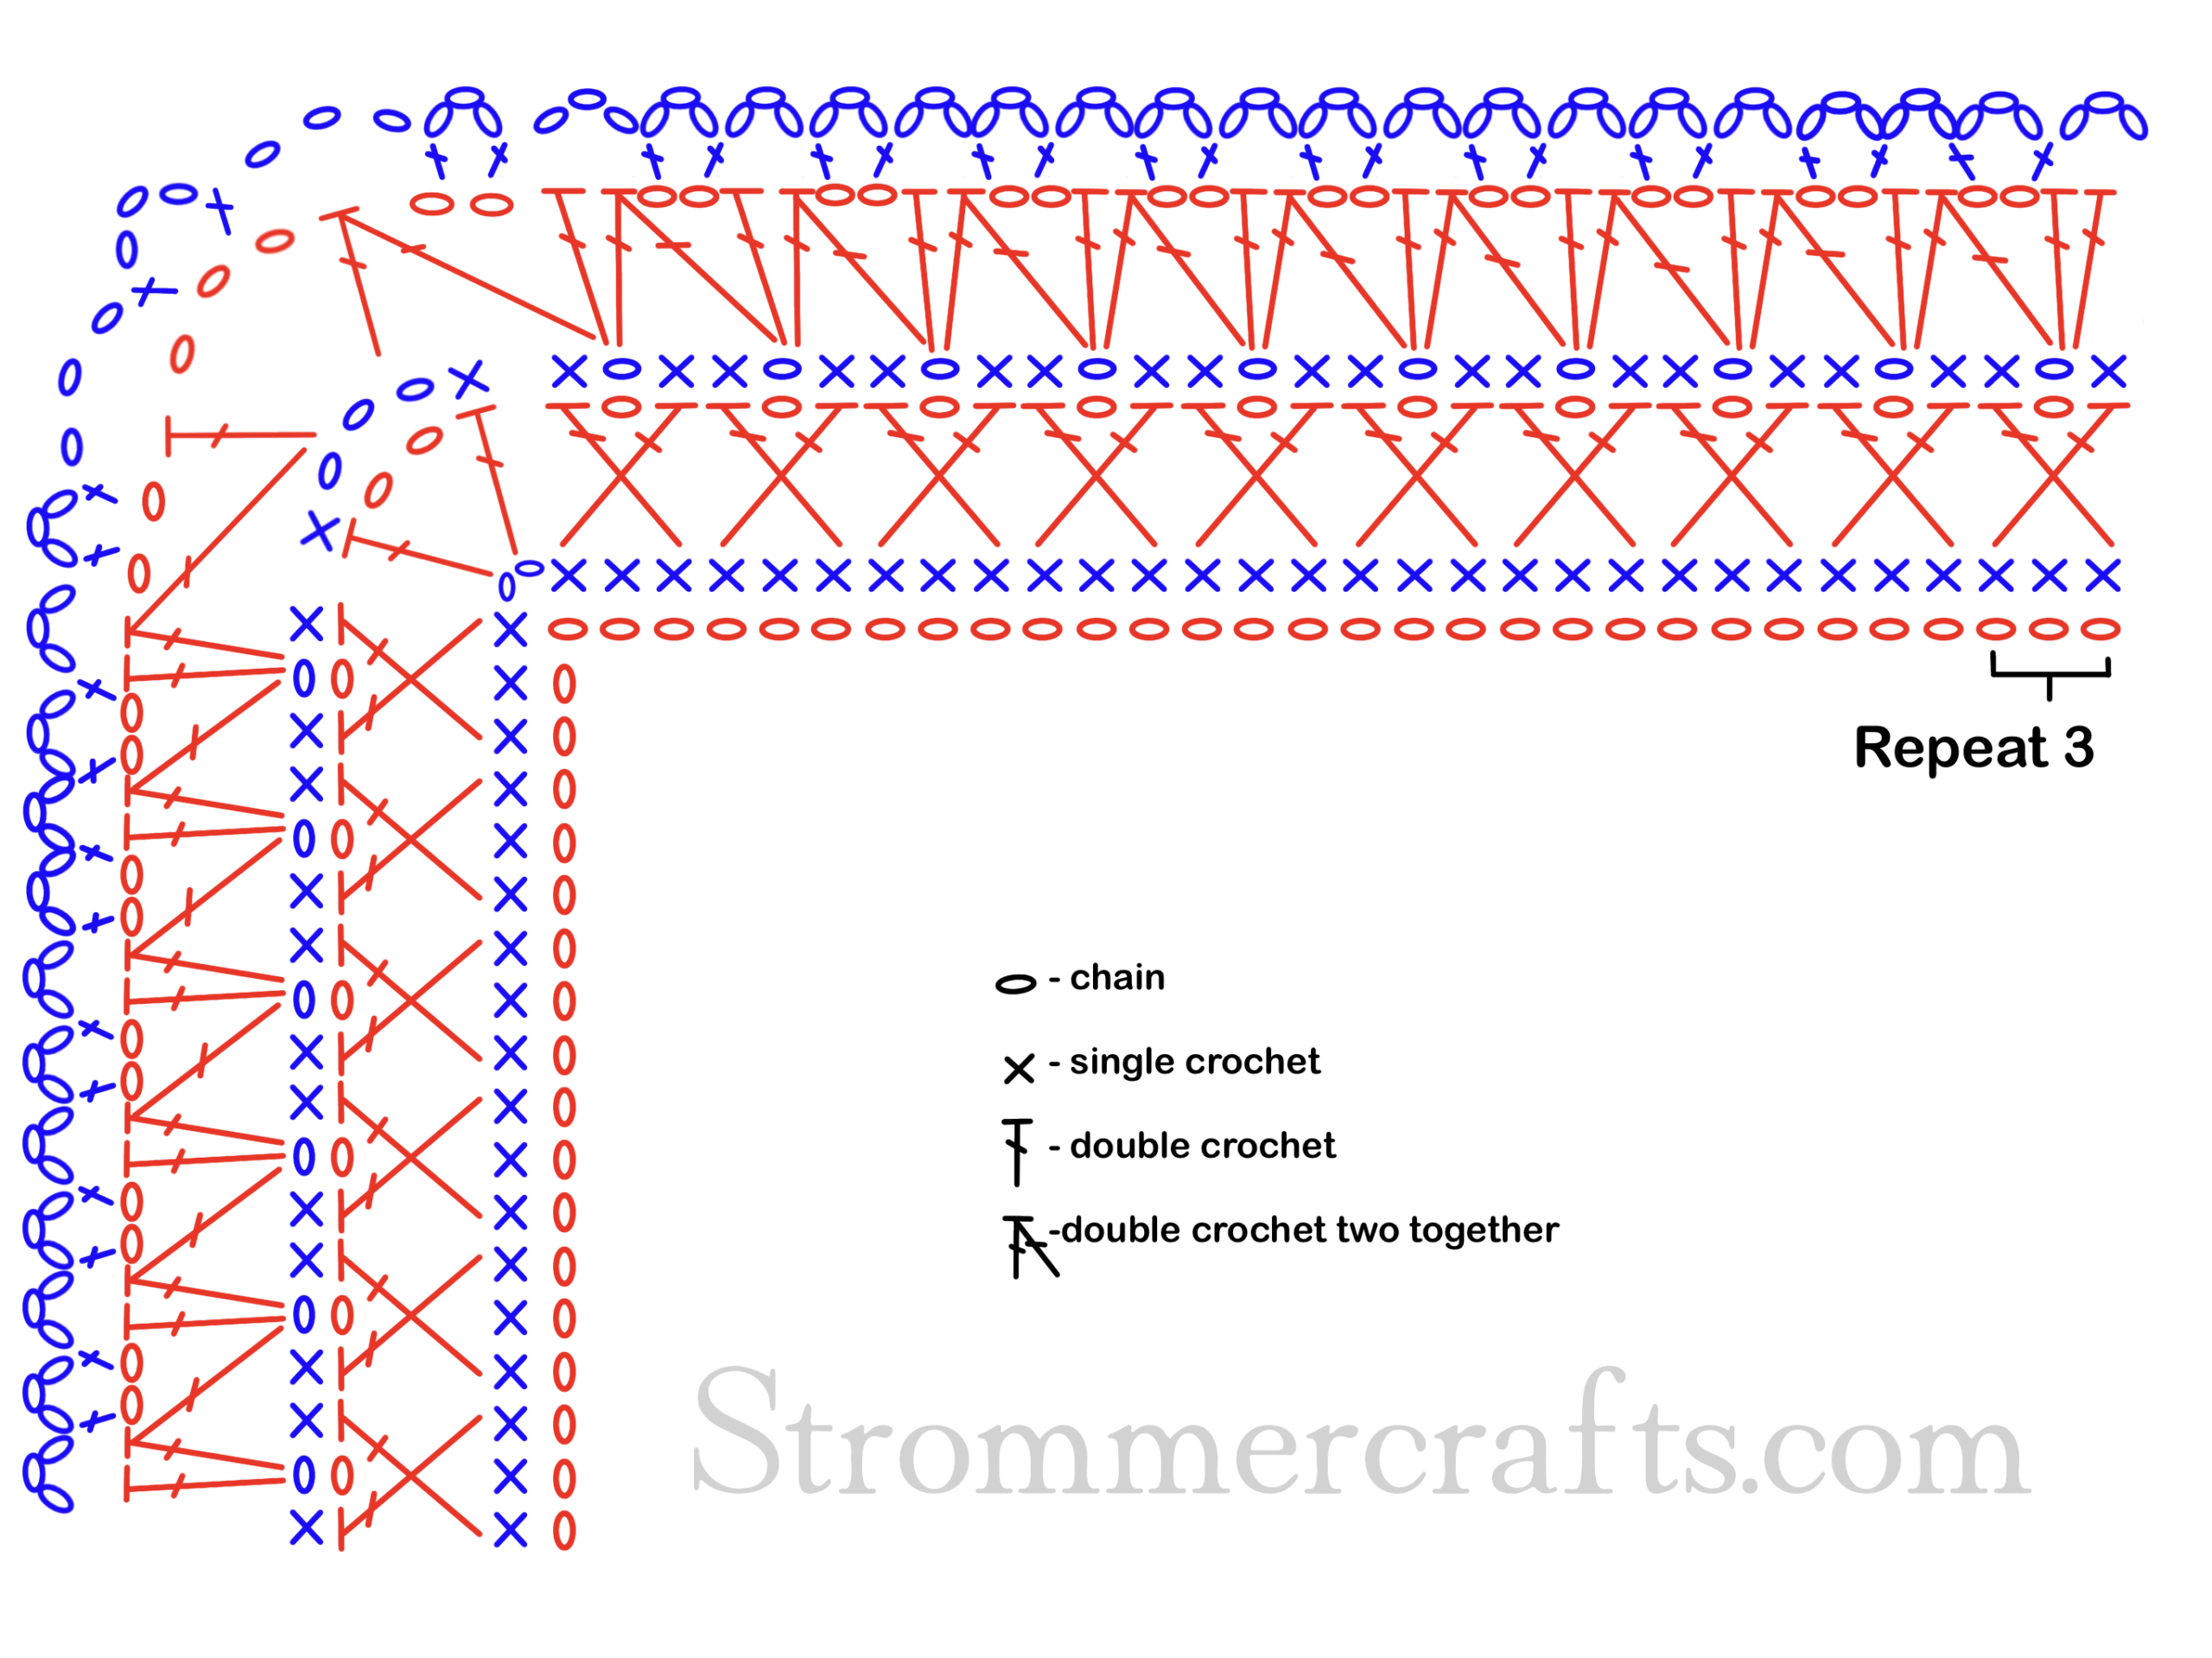
Crosswind Lace Stitch Pattern
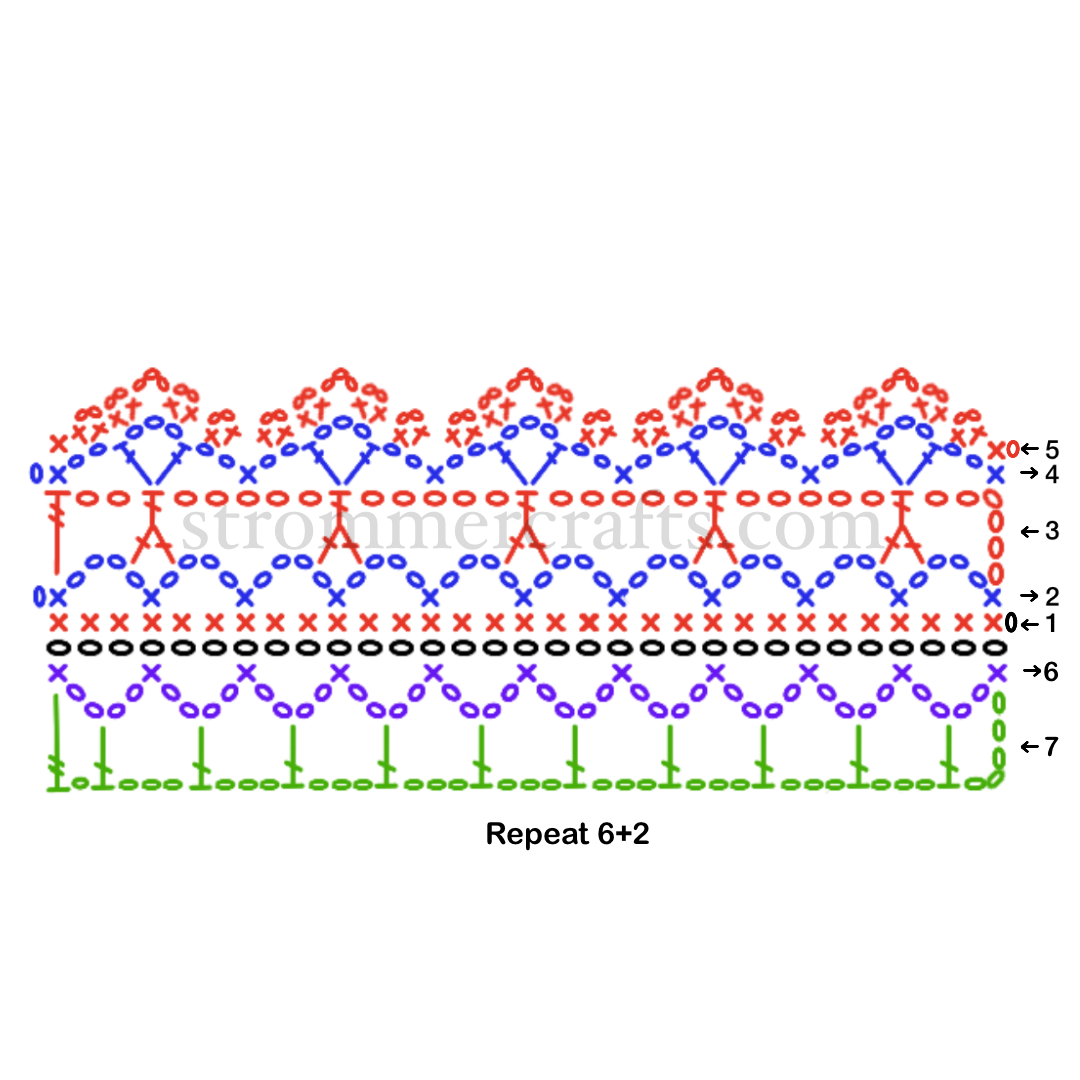
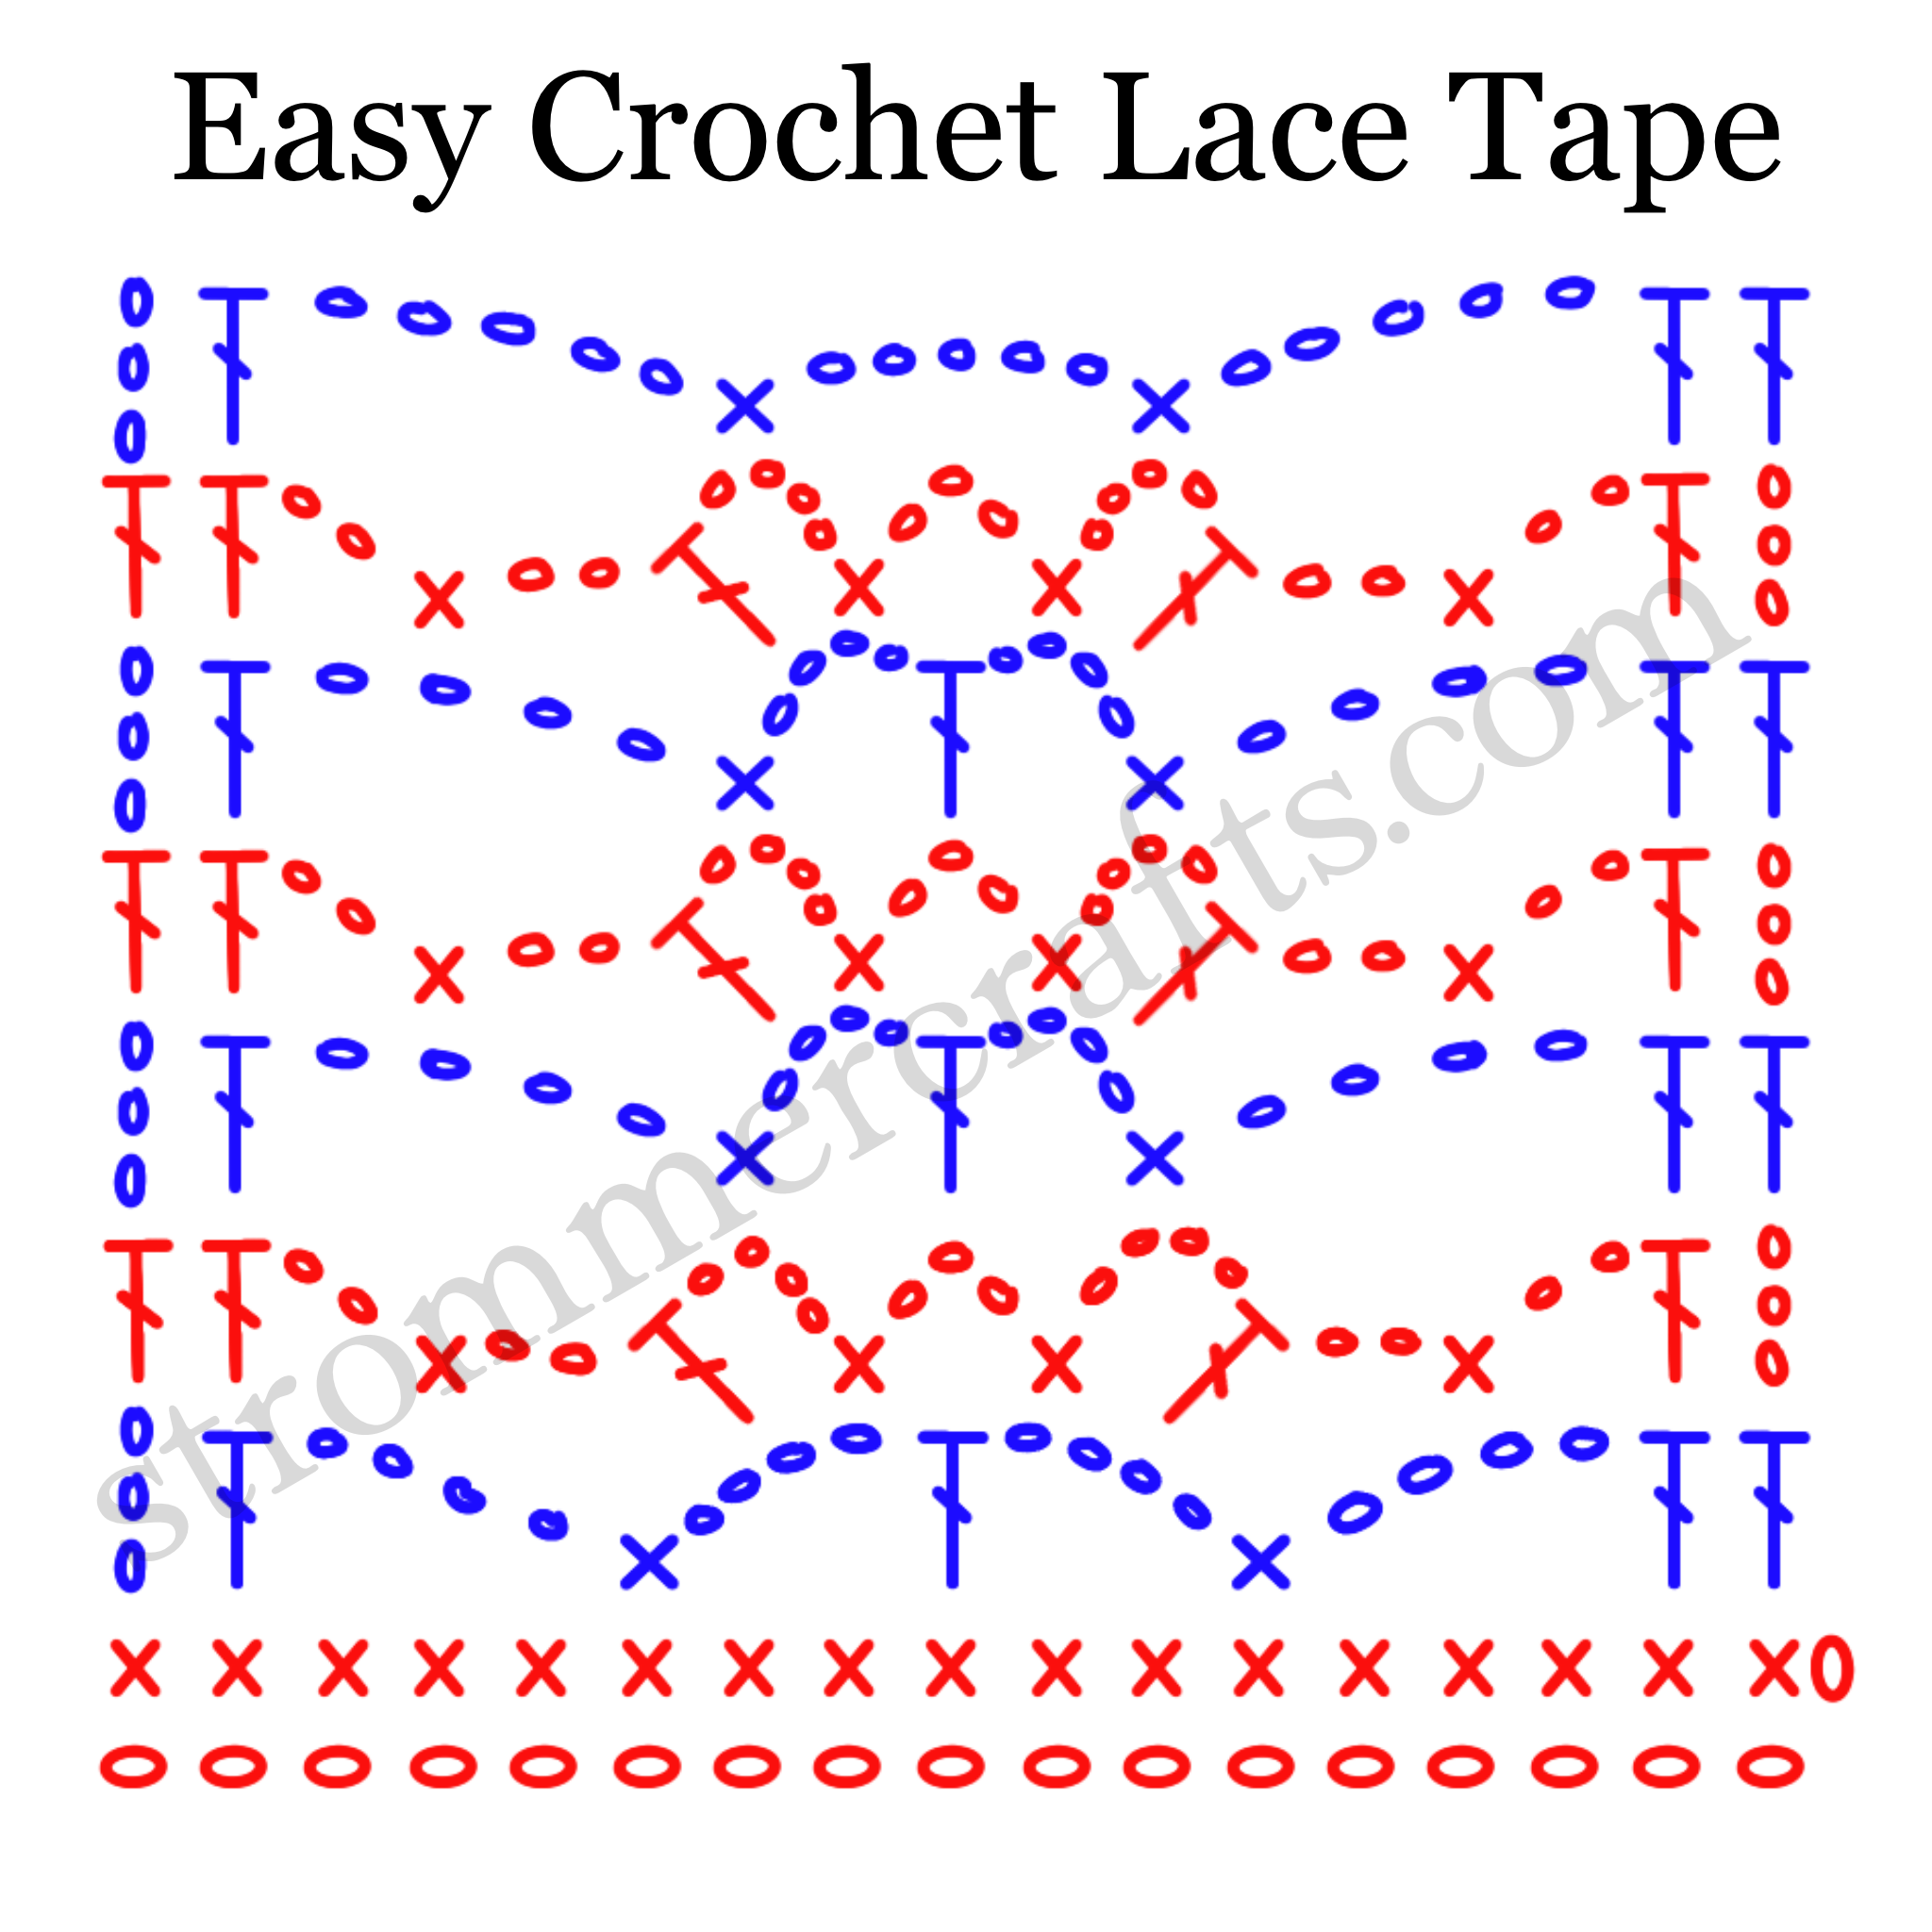
Ch a repeat of 6+3
All that means is to chain 6 over and over until you’re happy with the length, then add 3 more chains to the end of that.
Row 1: Dc into 4th ch from hook, dc into each ch across
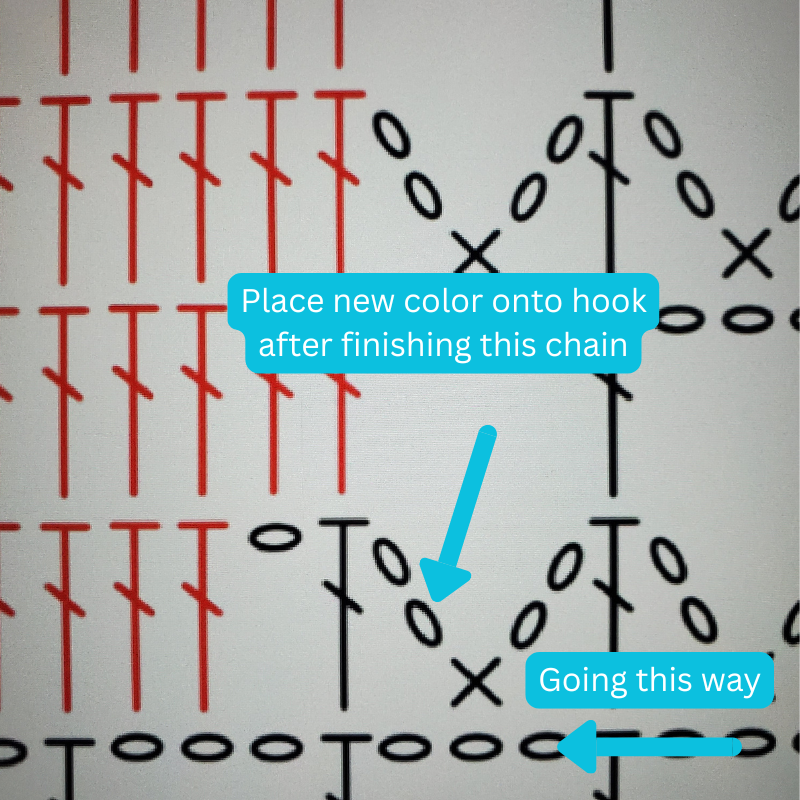
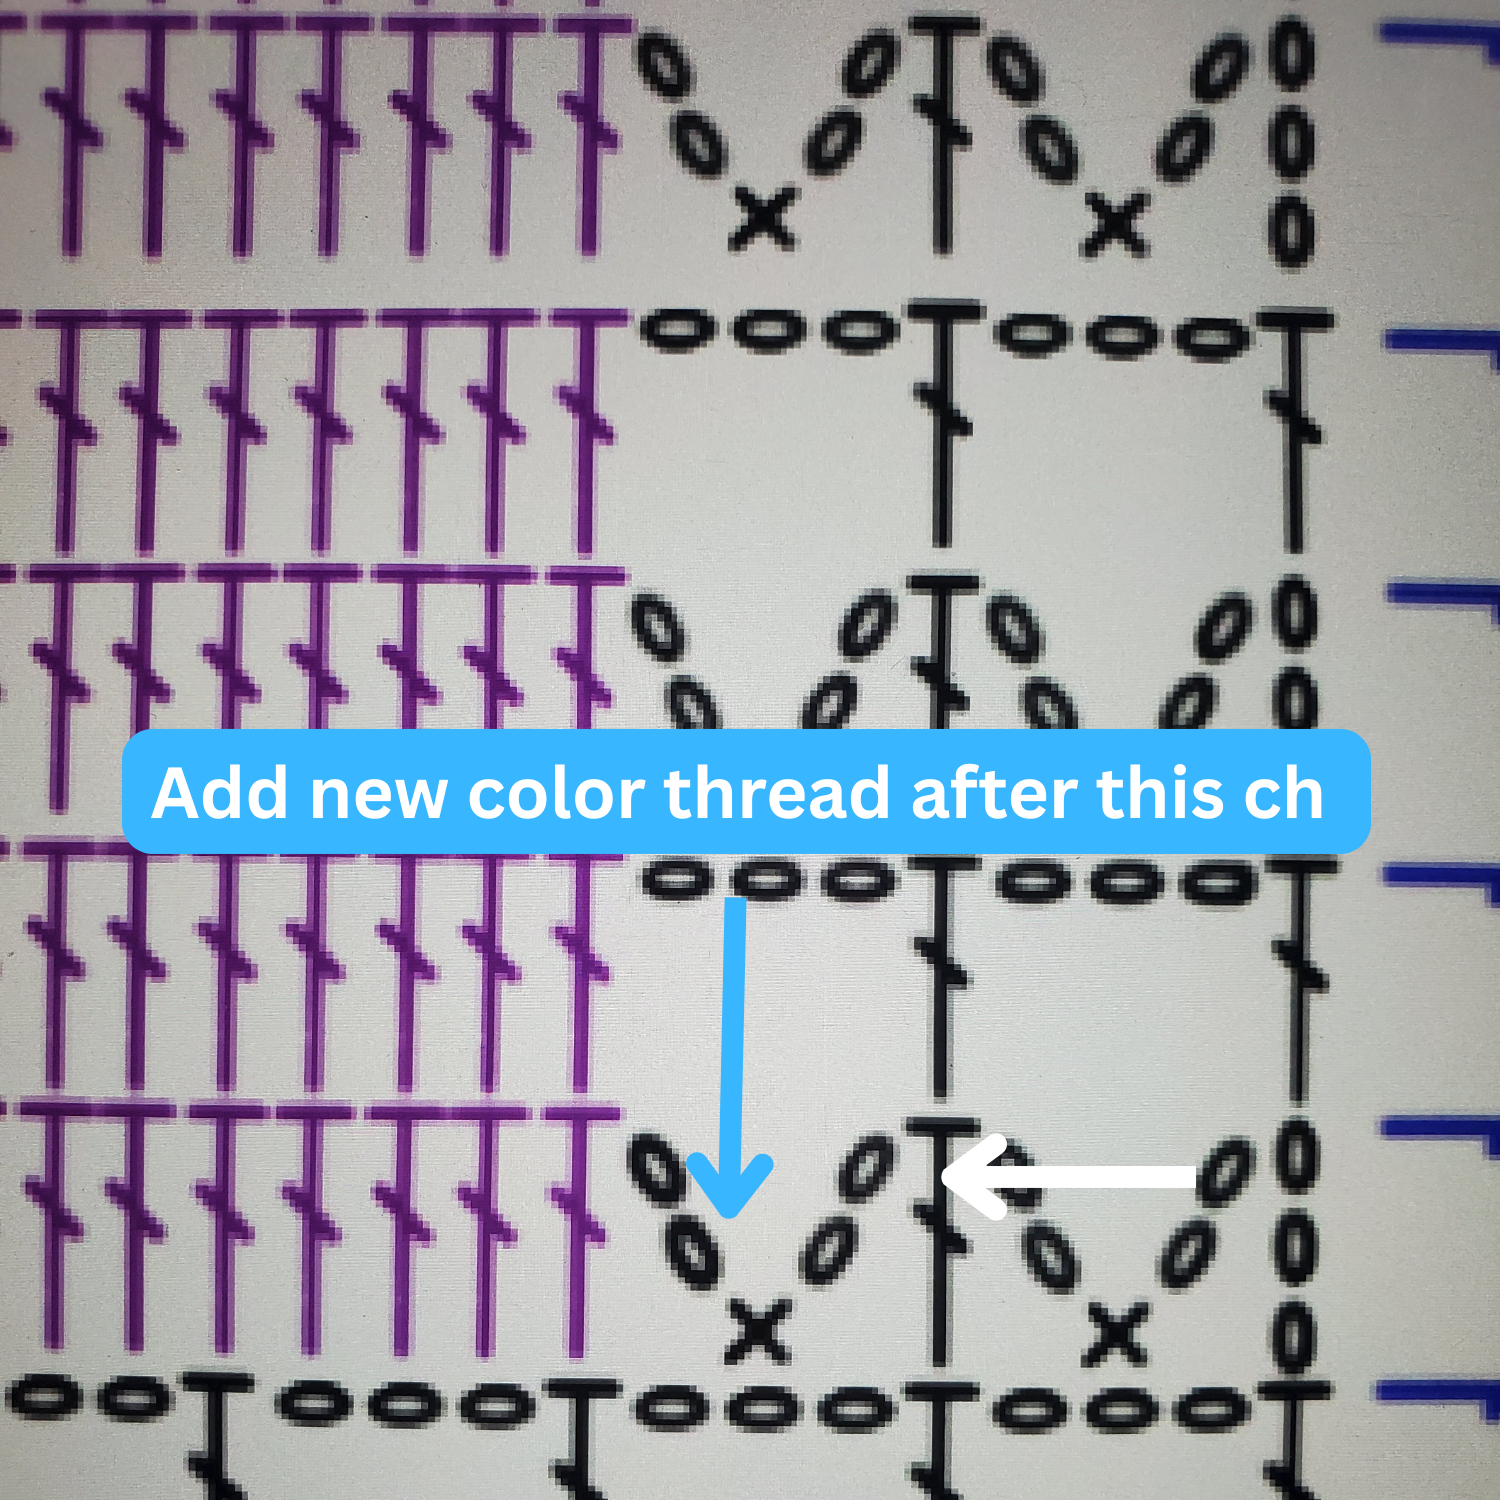
Row 2: Ch 4 (counts as dc and ch 1), turn, skip a st, *dc into next st, ch 1, skip a st dc into next st.* Repeat from *to,* placing the last dc into the top ch of from foundation row.
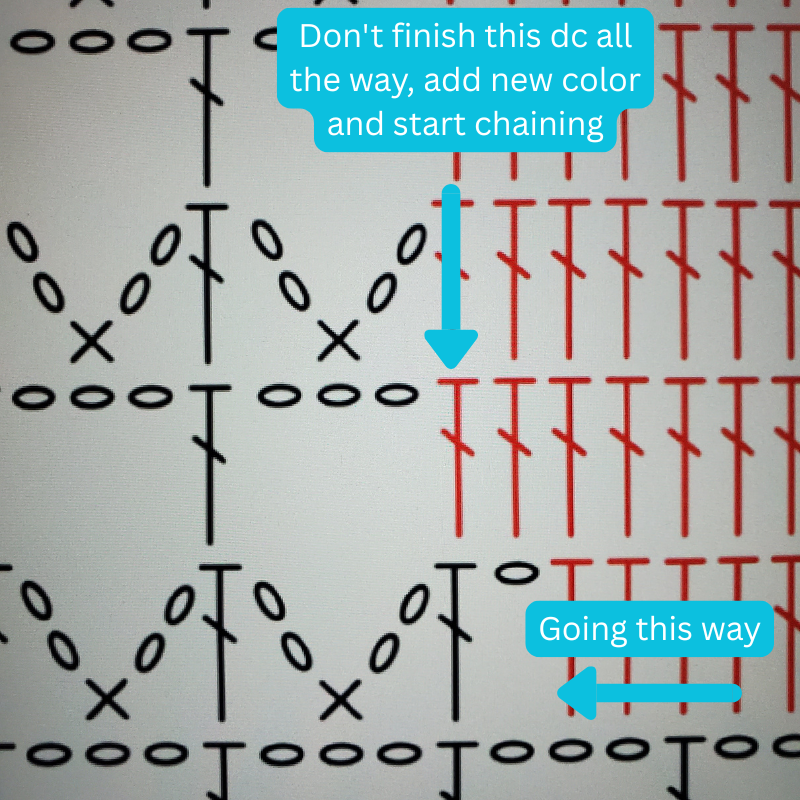
Row 3: Ch 4 (counts as dc and ch 1), turn, skip over ch 1 space, dc into next dc, *ch 1, skip over ch 1 space, dc into next dc.* Repeat from *to,* place the last dc into the 3rd ch of Row 2’s starting ch 3
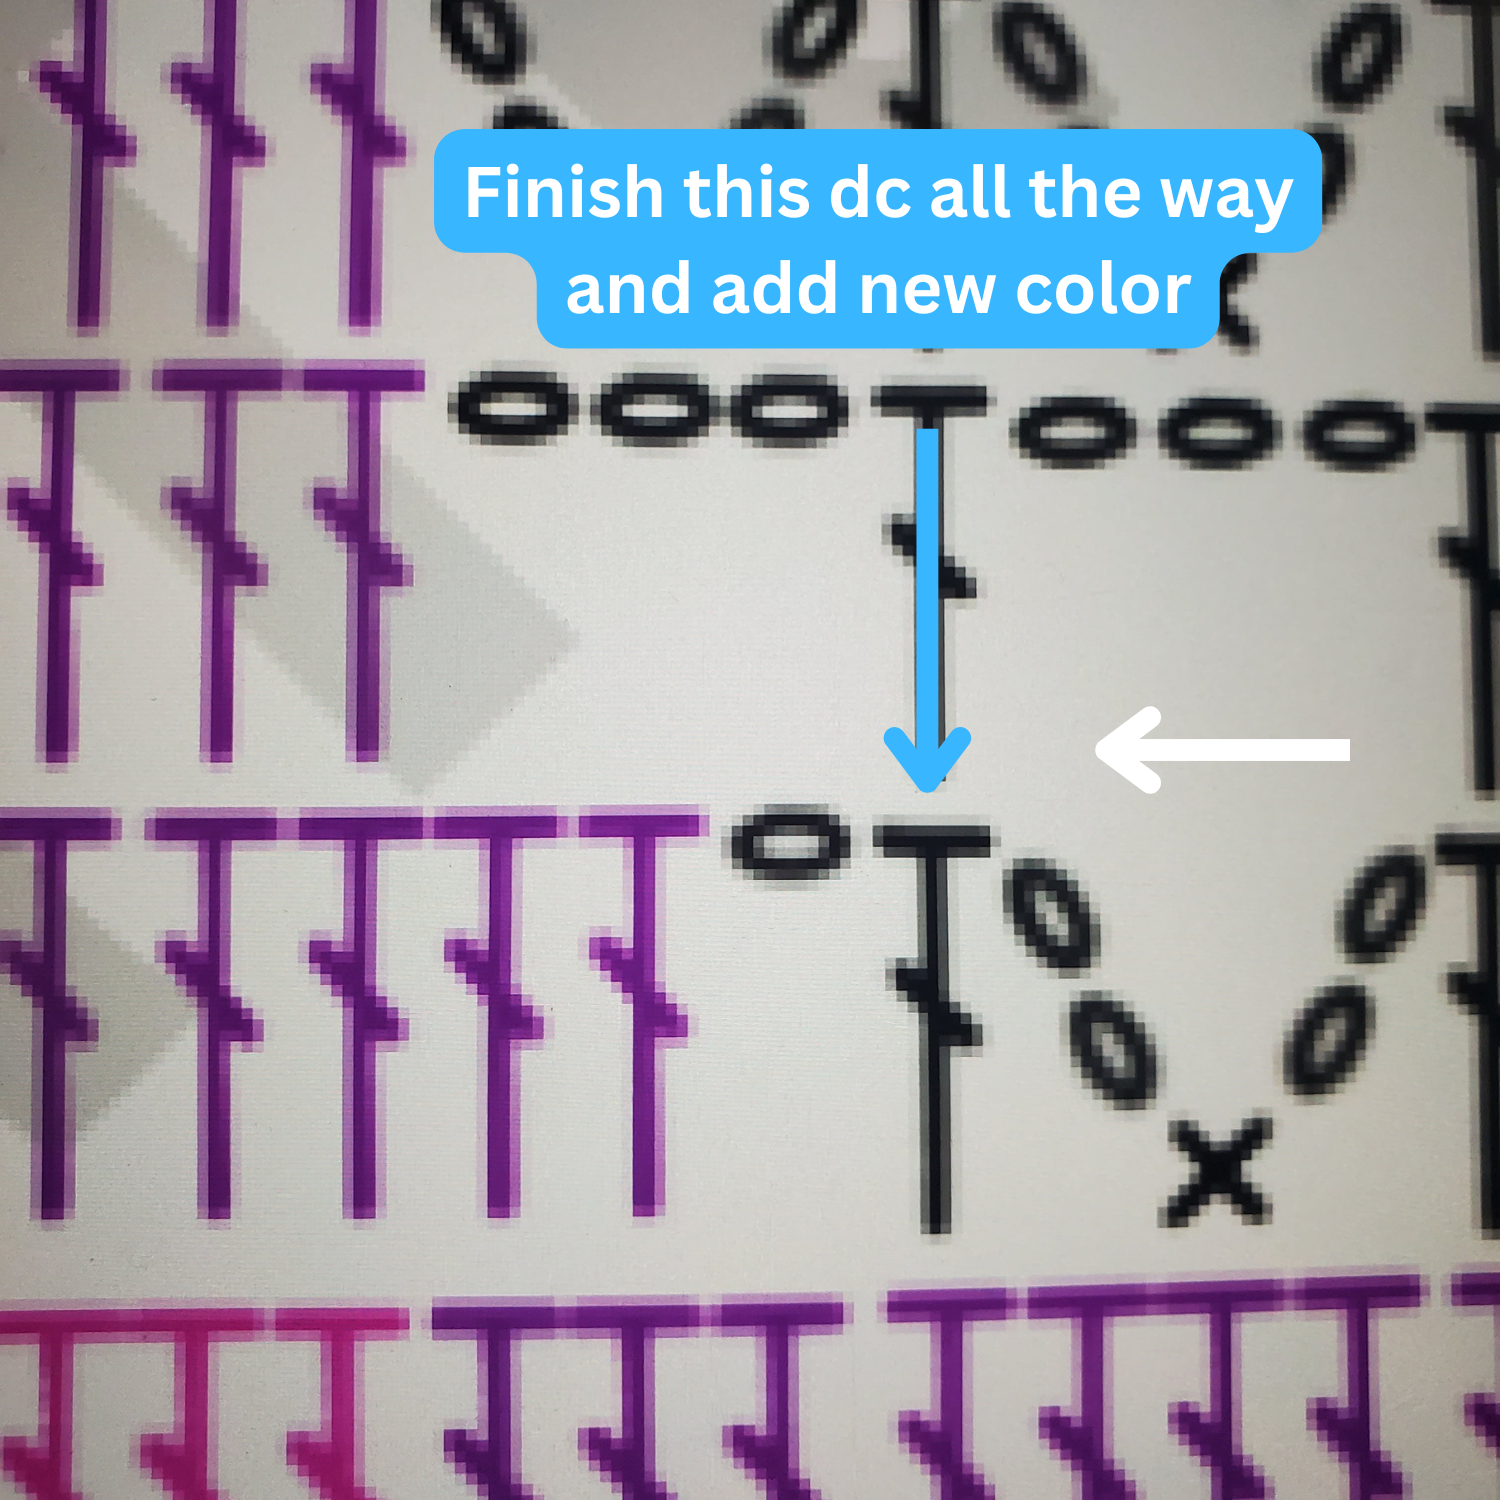
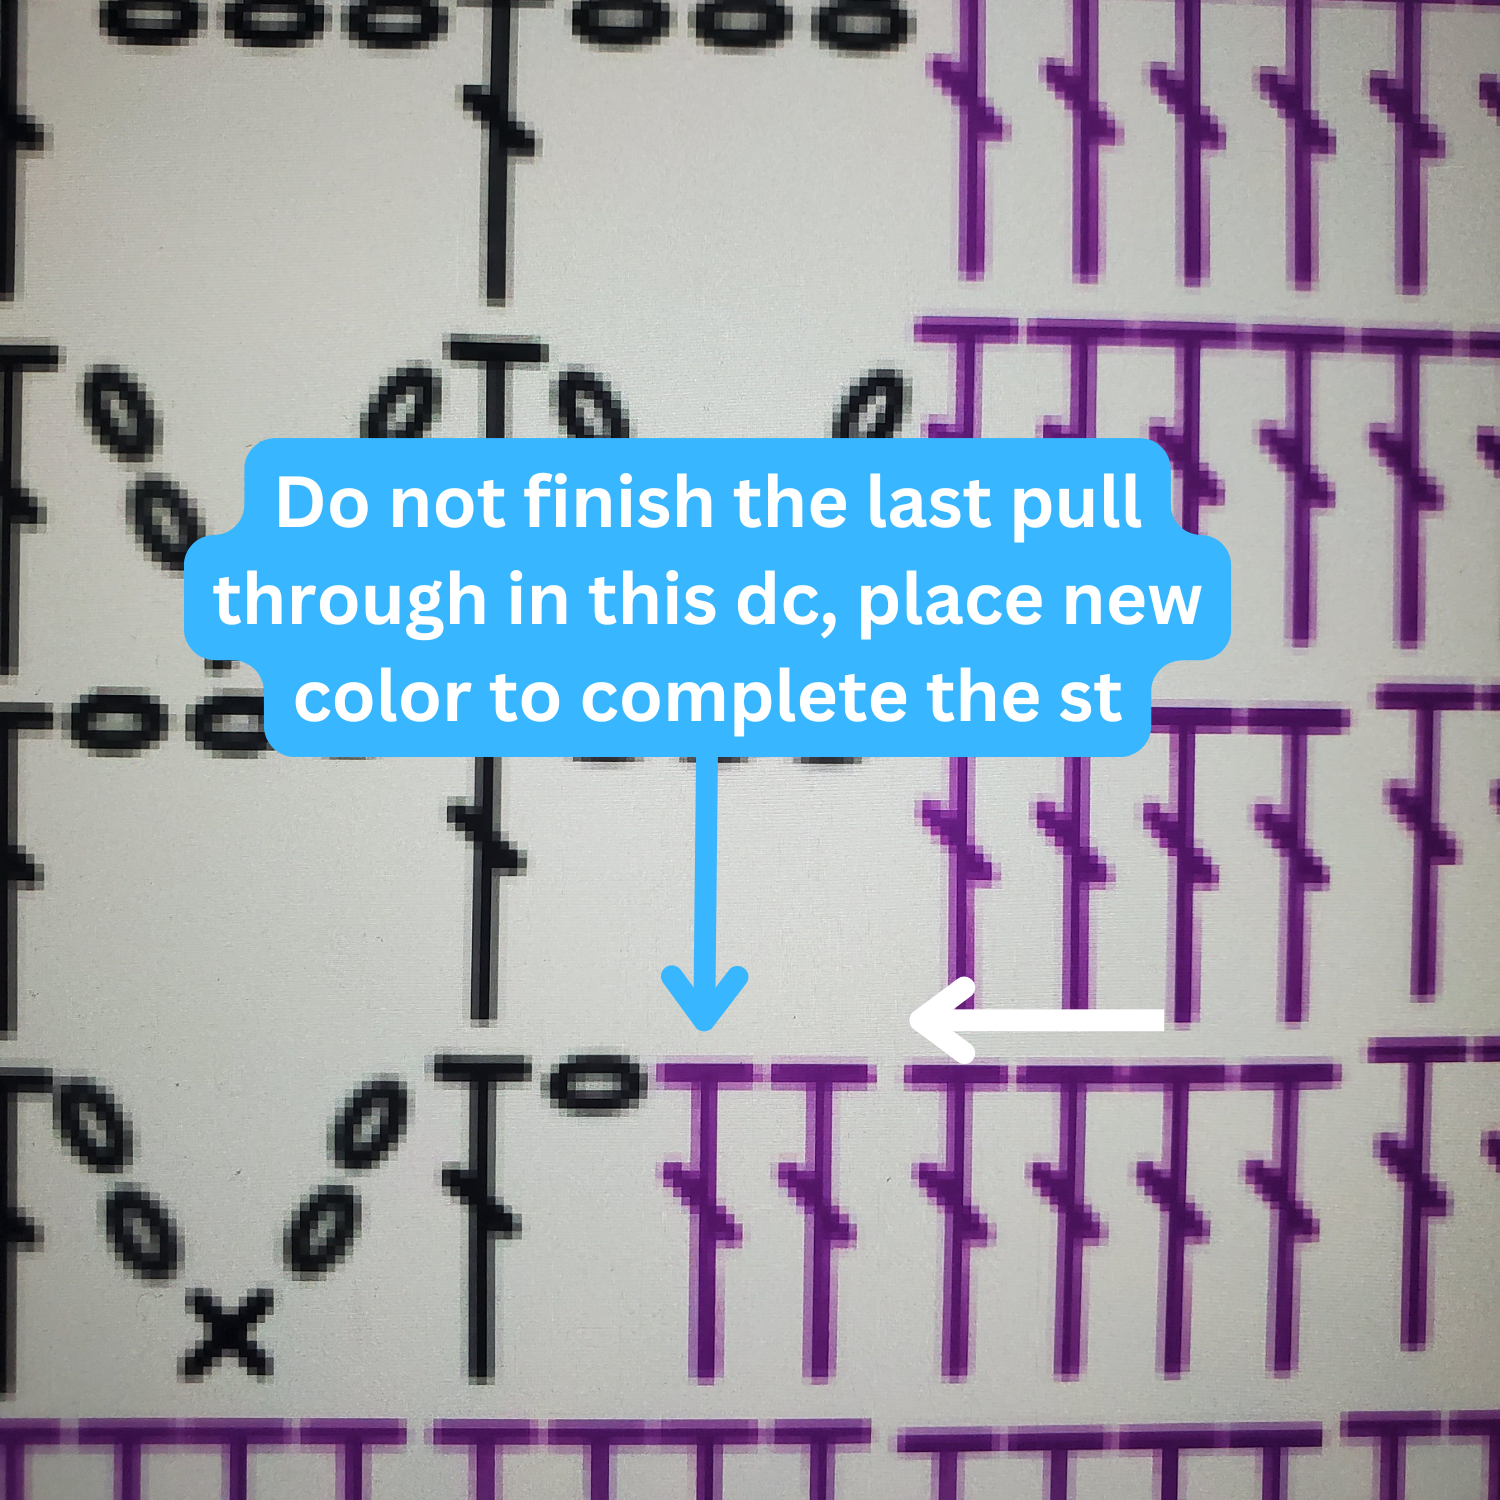
Row 4: Ch 3 (counts as dc), turn, dc into next ch 1 space, *dc into next dc, dc into next ch 1 space.* Repeat from *to,* place last dc into 3rd ch of starting ch 4.
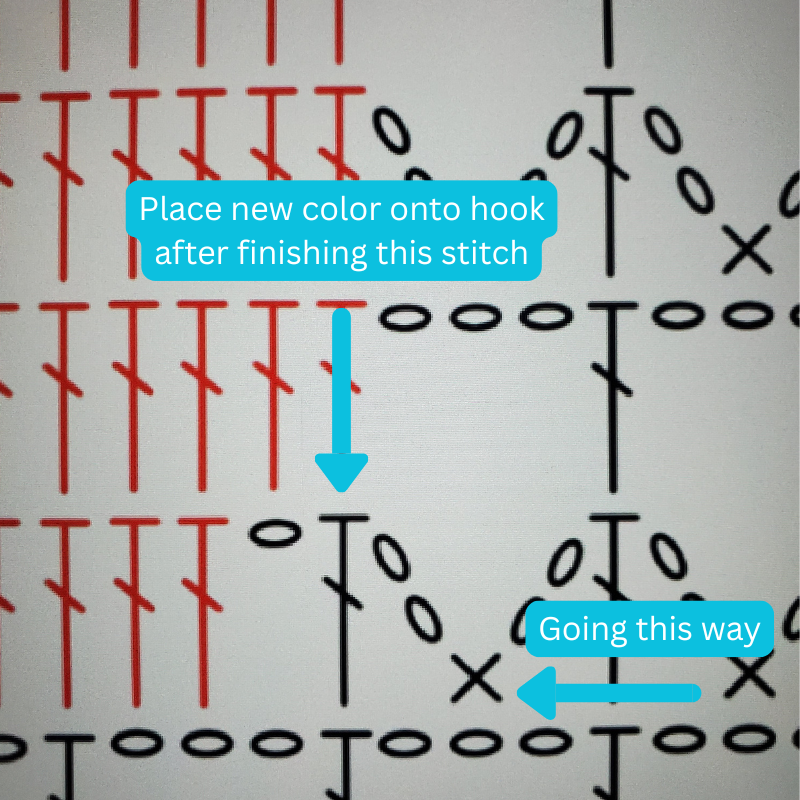
Row 5: Ch 1, turn, sc in same st. *Ch 4, make a 2trtog, placing the 1st leg in the same st as sc just made, skipping 5 sts and placing the 2nd leg into the next st. Ch 4, sc into the same st as the 2nd leg of 2trtog.* Repeat from *to * place last sc into top of starting ch 3.
Row 6: Ch 4 (counts as tr), turn, tr into next 2trtog from Row 5, *ch 4, sc into same st. Ch 4, 2trtog by placing the 1st leg in the same st as sc just made, then skipping over to the next 2trtog
and placing the 2nd leg.* Repeat from *to,* at the very last 2trtog, place the 2nd leg into the starting sc from Row 5 to
Row 7: Ch 1, turn, sc in same st, *ch 3, dc into next sc, ch 3, sc into next 2trtog.* Repeat from *to* and place the last sc into the top of the starting ch 4 from Row 6.
Row 8: Ch 3 (counts as a dc), turn, *2 dc in next ch 3 space, dc into next dc, 2 dc in next ch 3 space, dc into next sc.* Repeat from *to* across.
Repeat Rows 2-8
Cut yarn with scissors and weave in any loose ends with a tapestry needle.
I hope you enjoyed this crochet lace stitch pattern! Until next time!