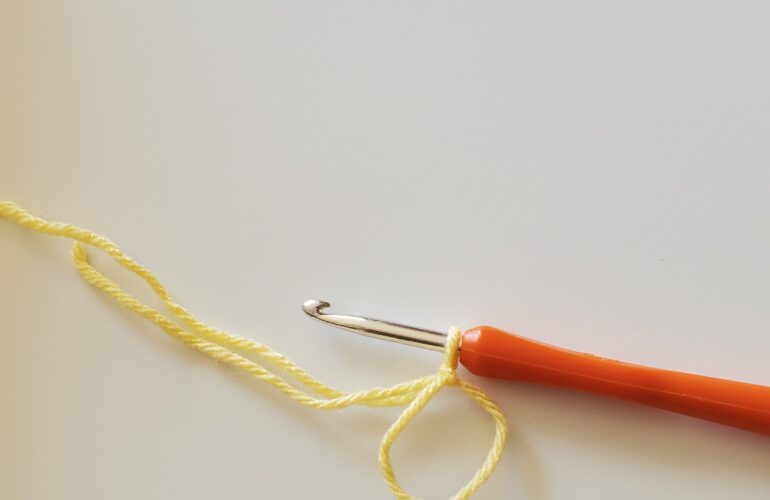
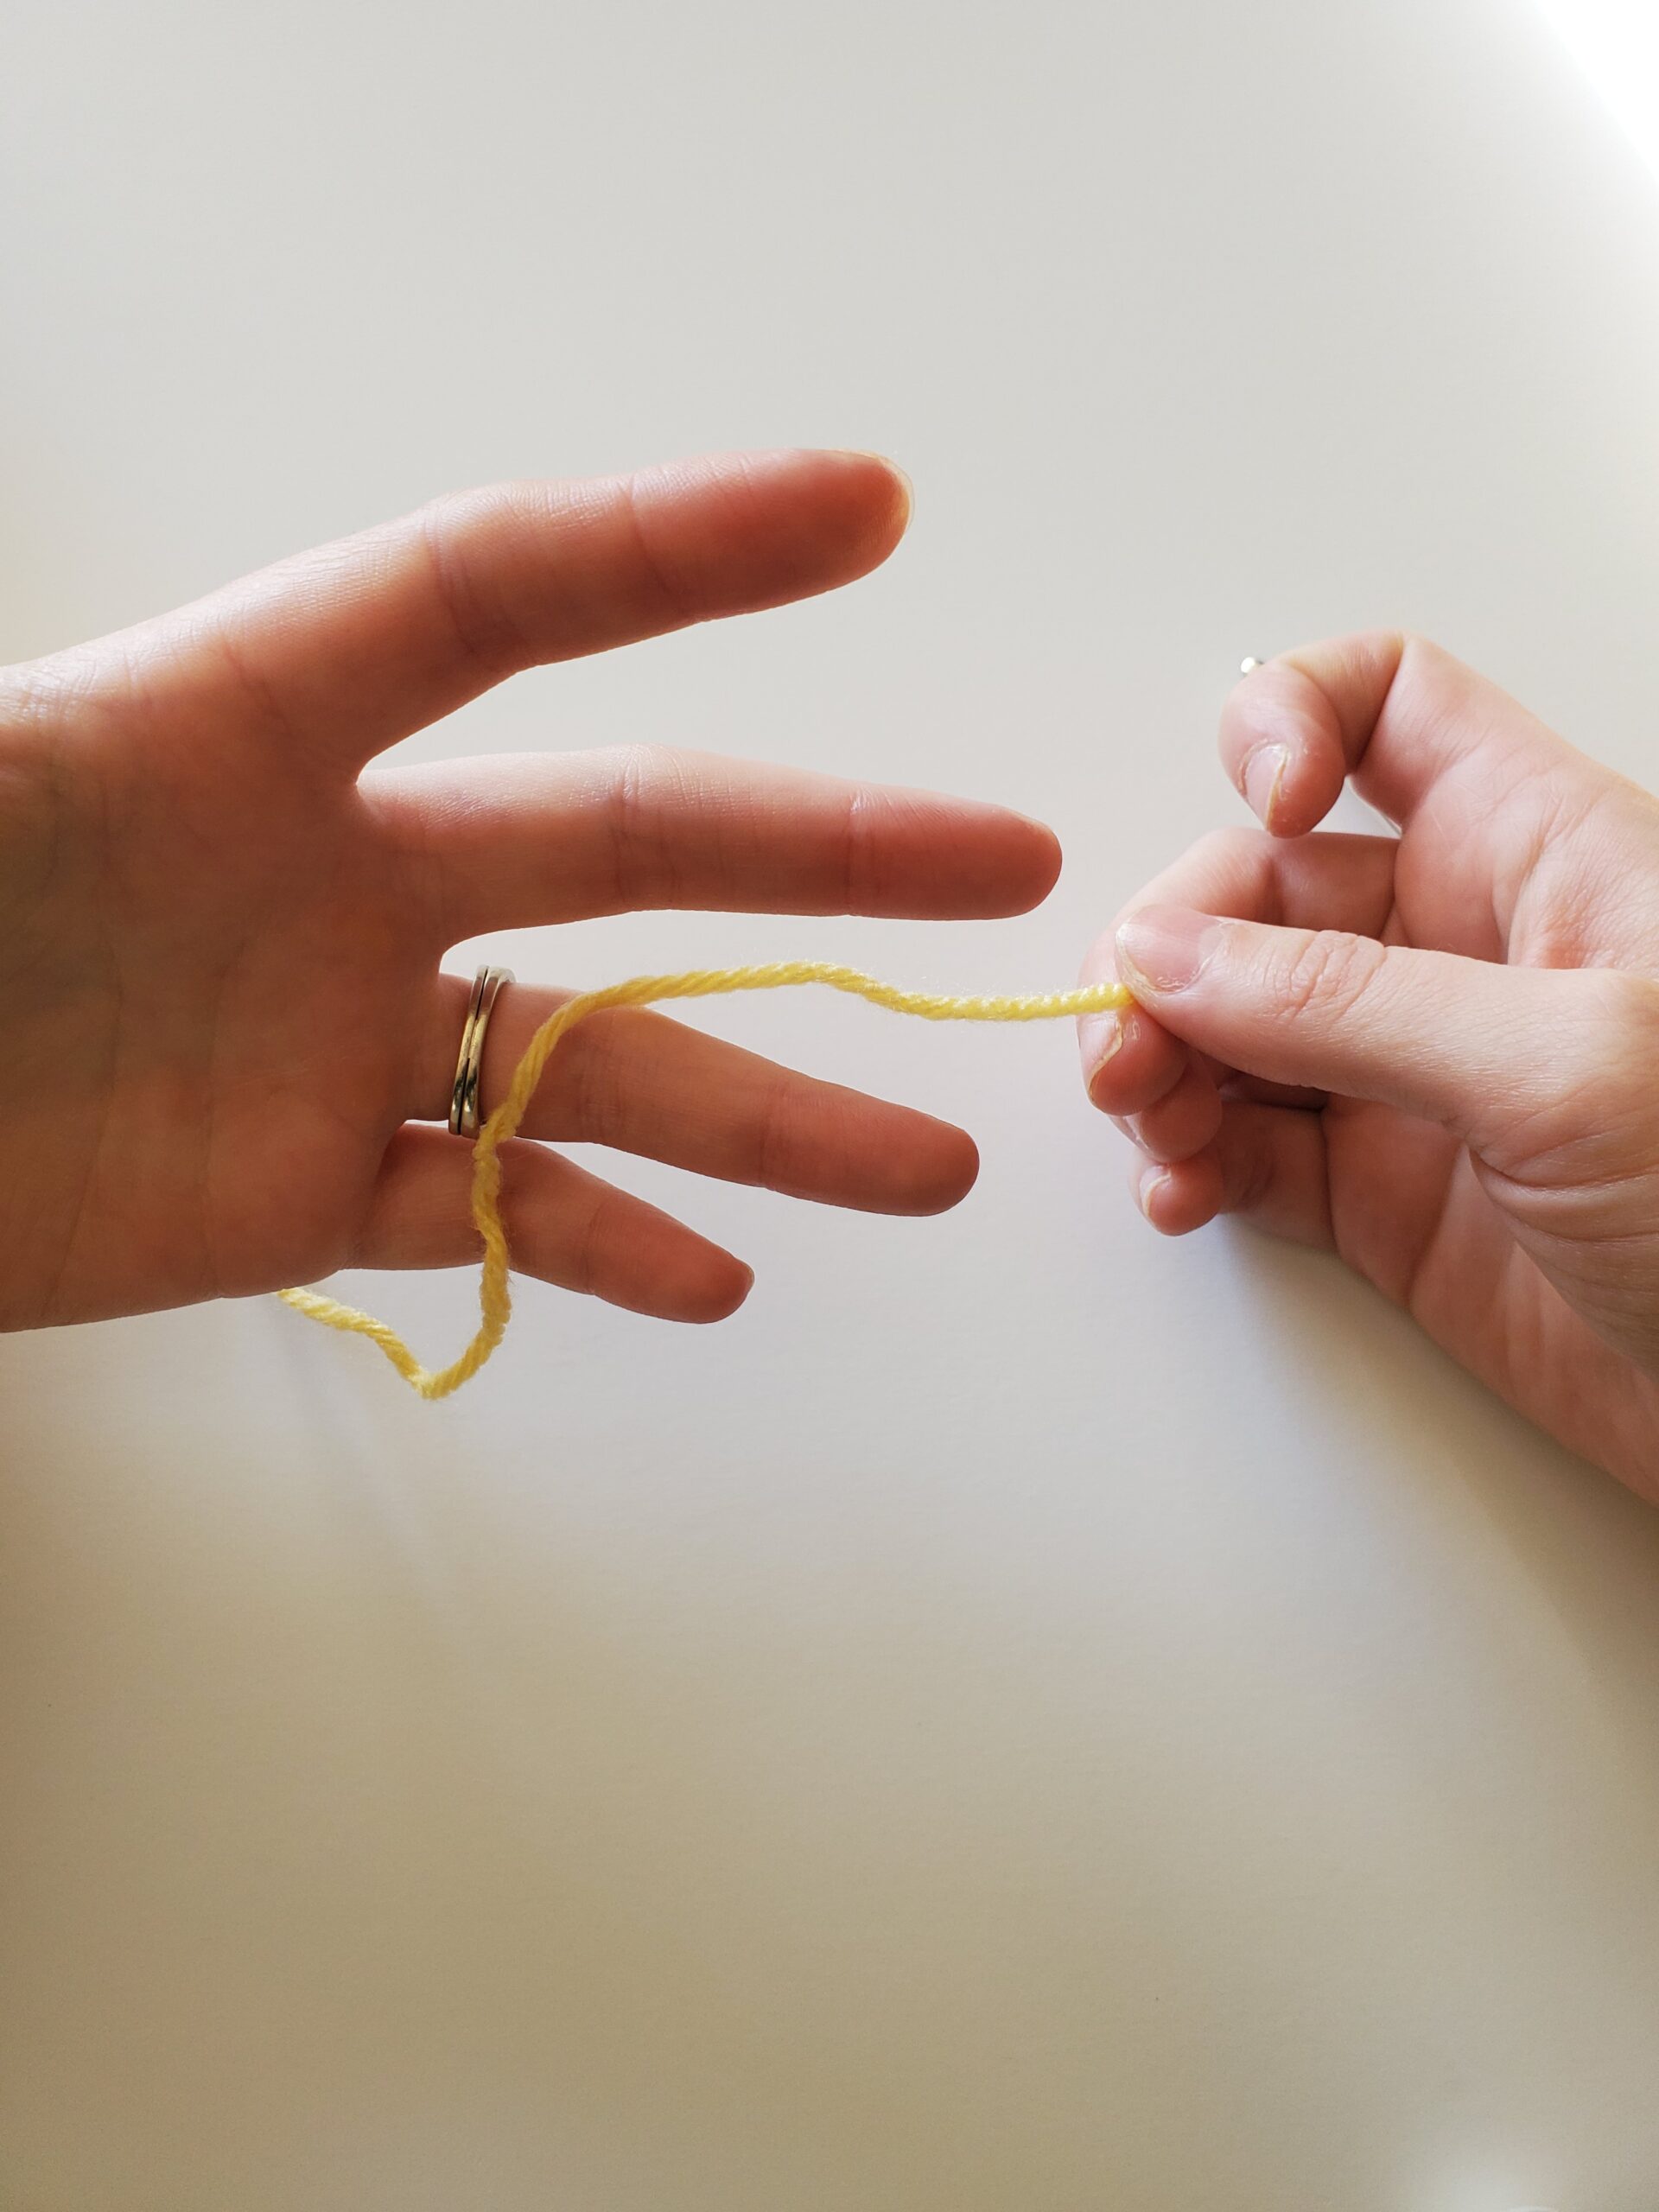
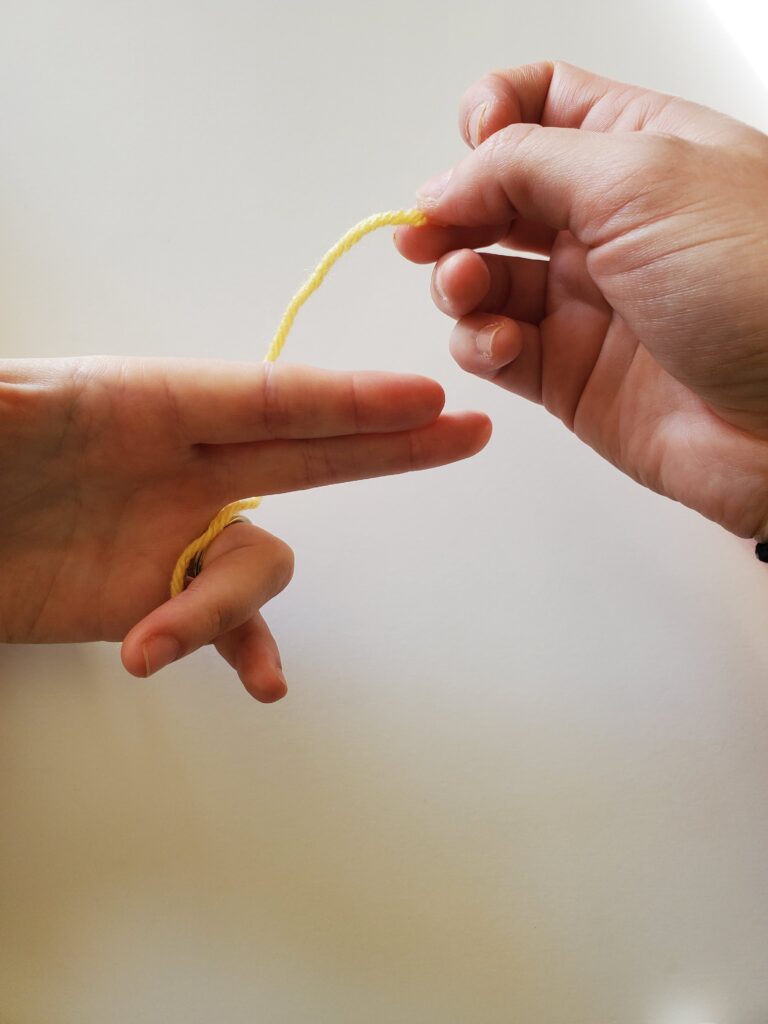
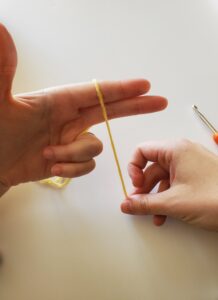
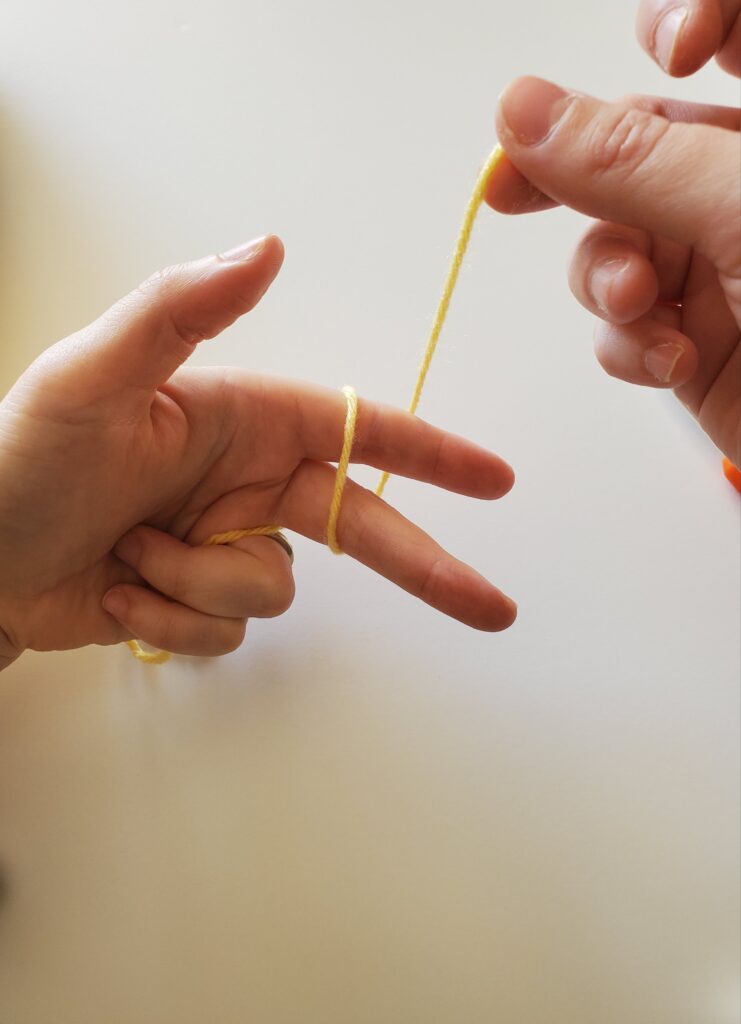
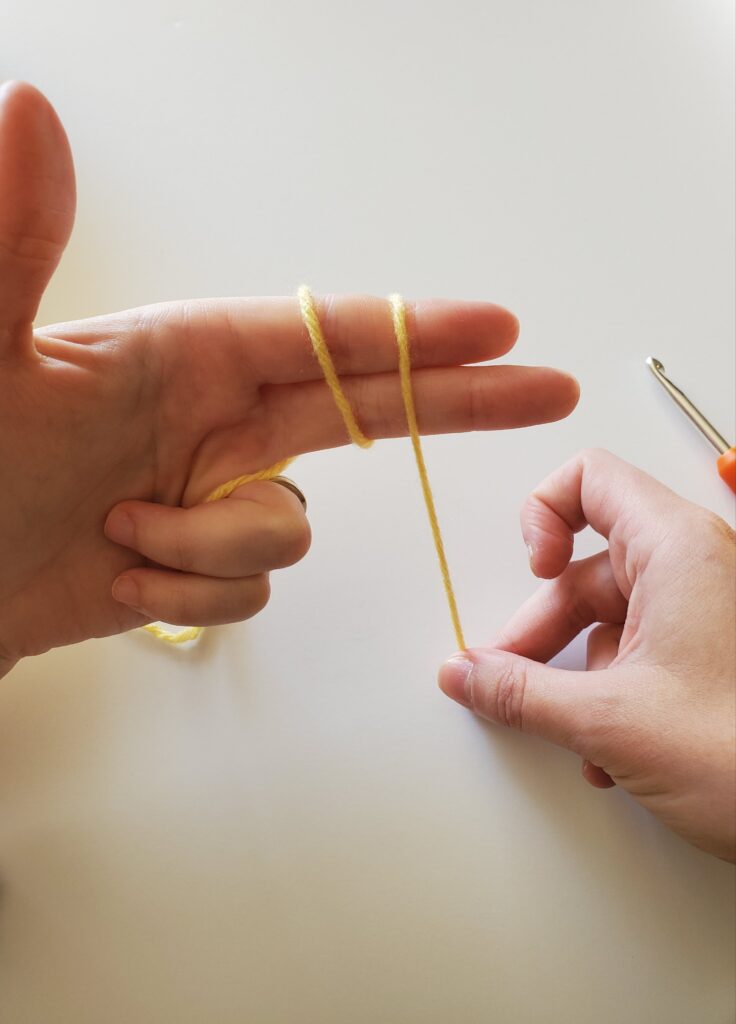
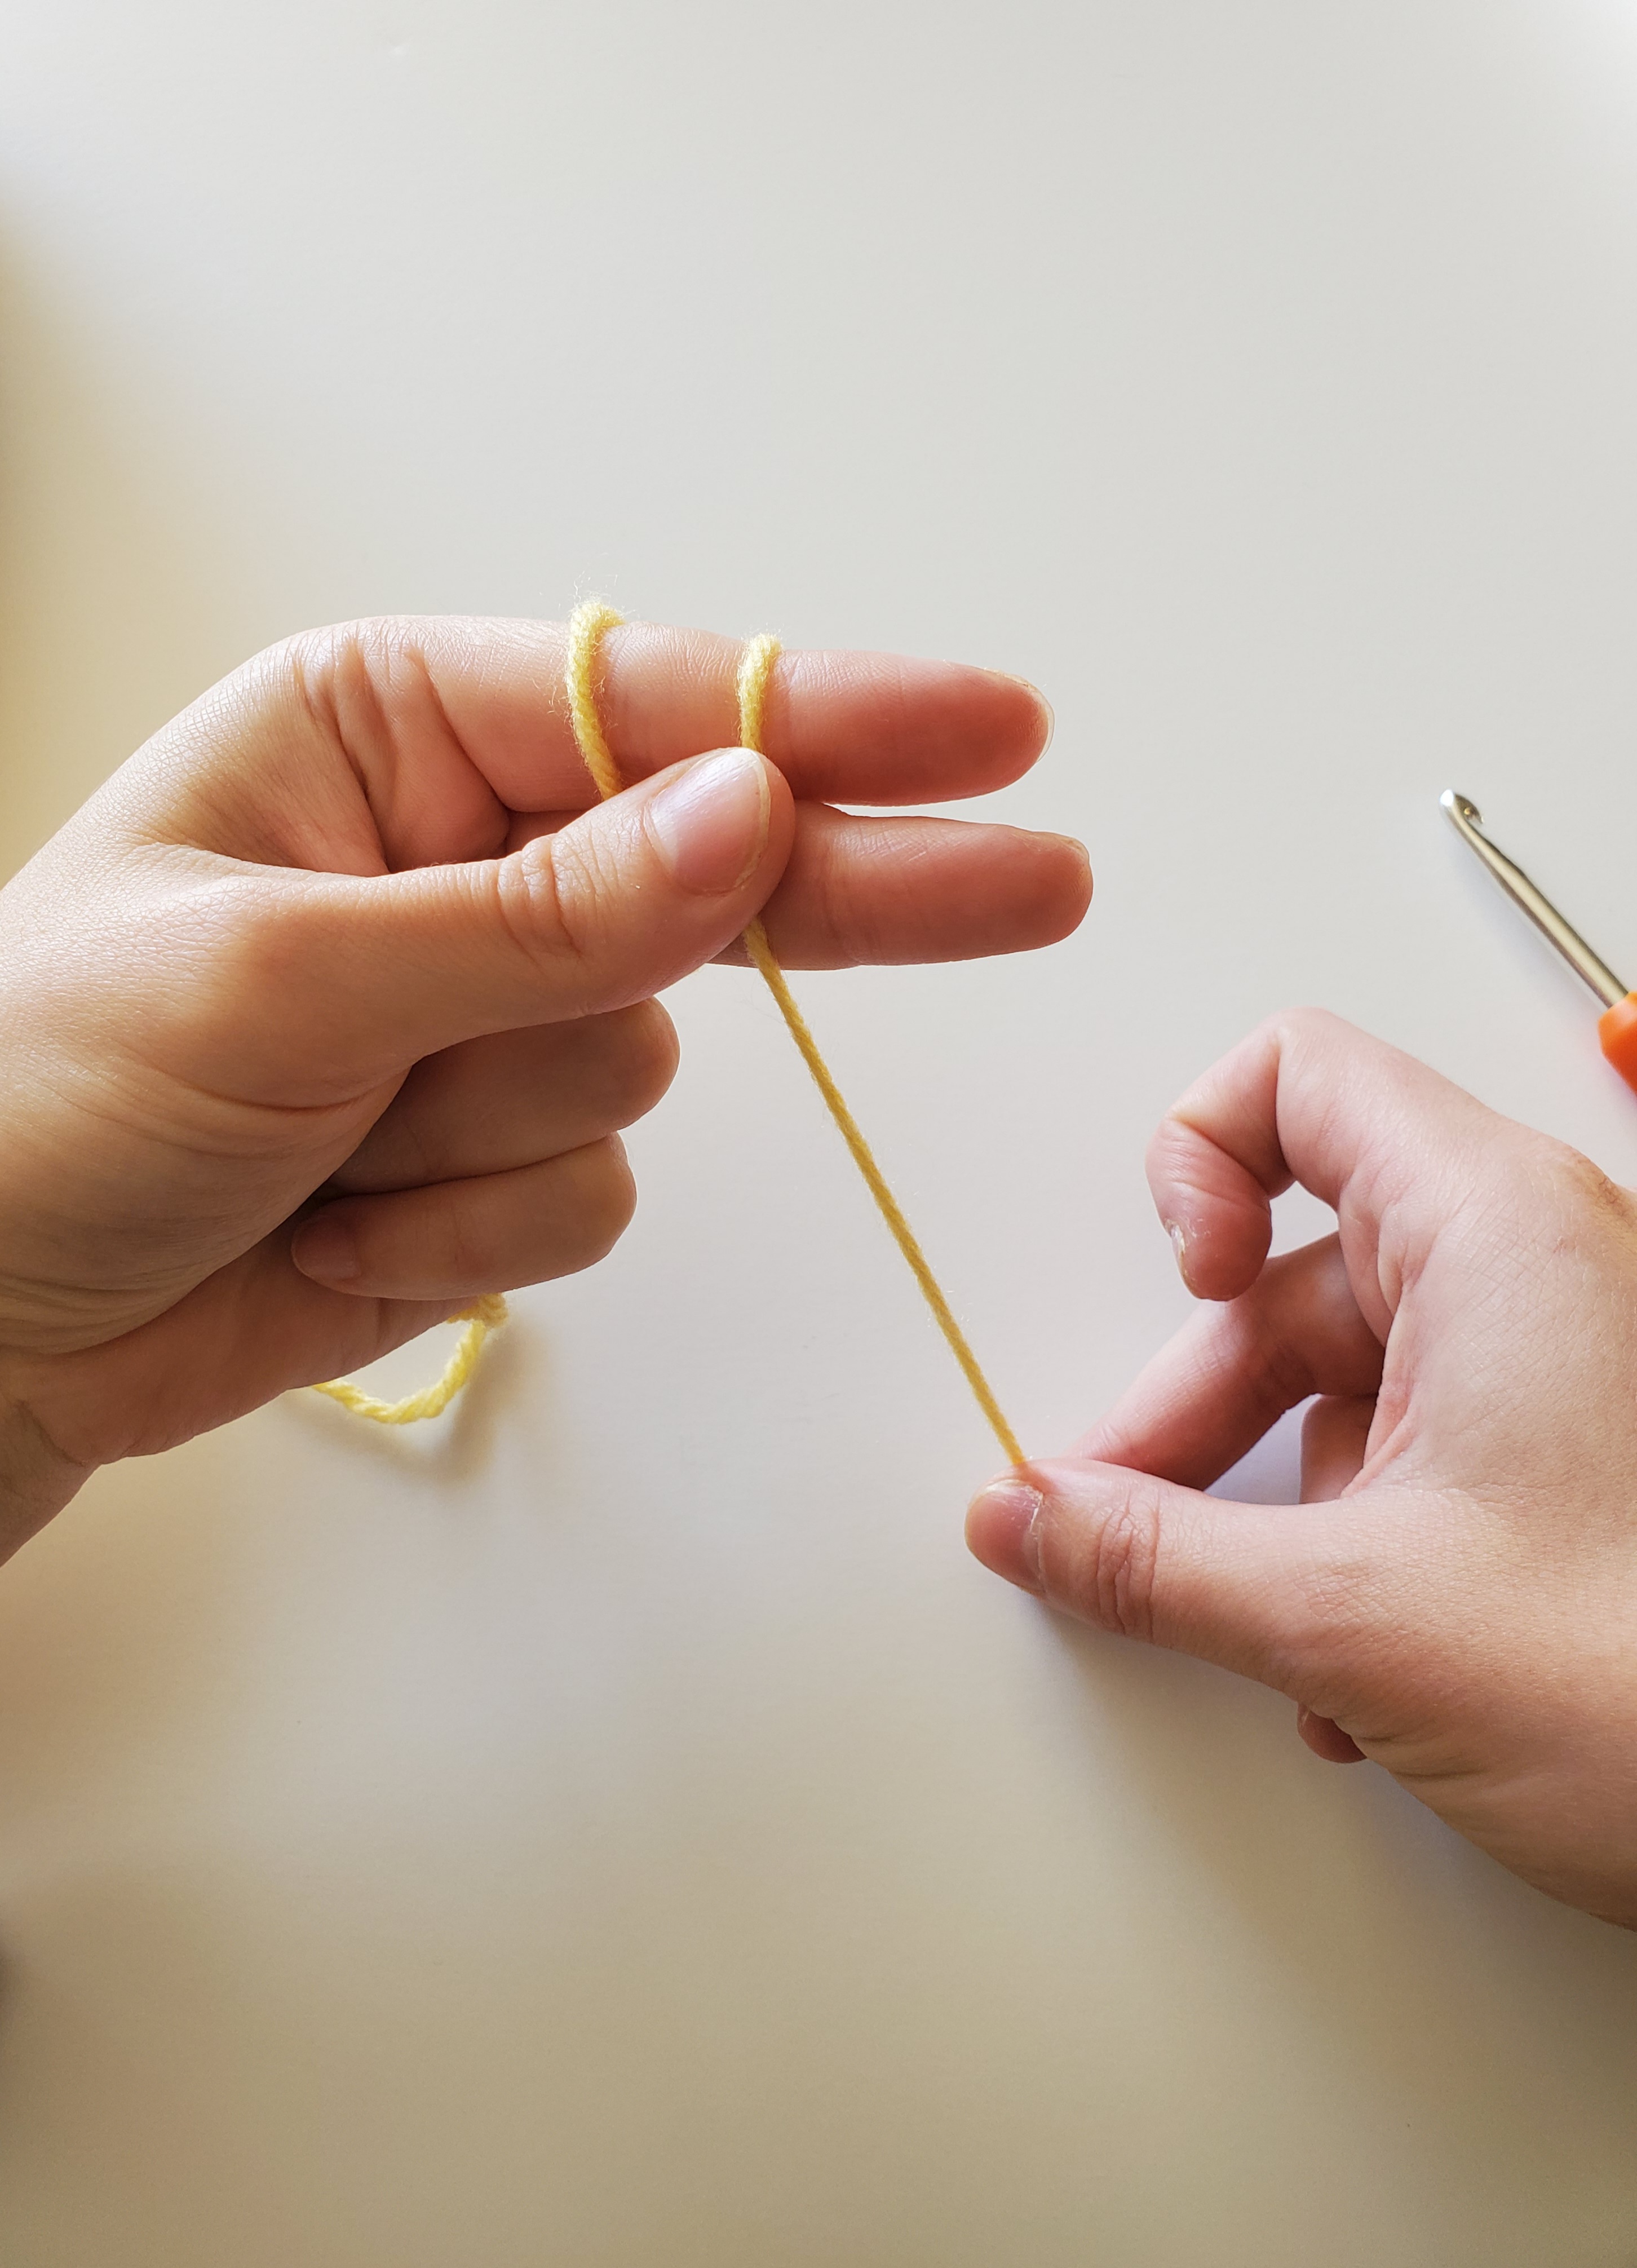
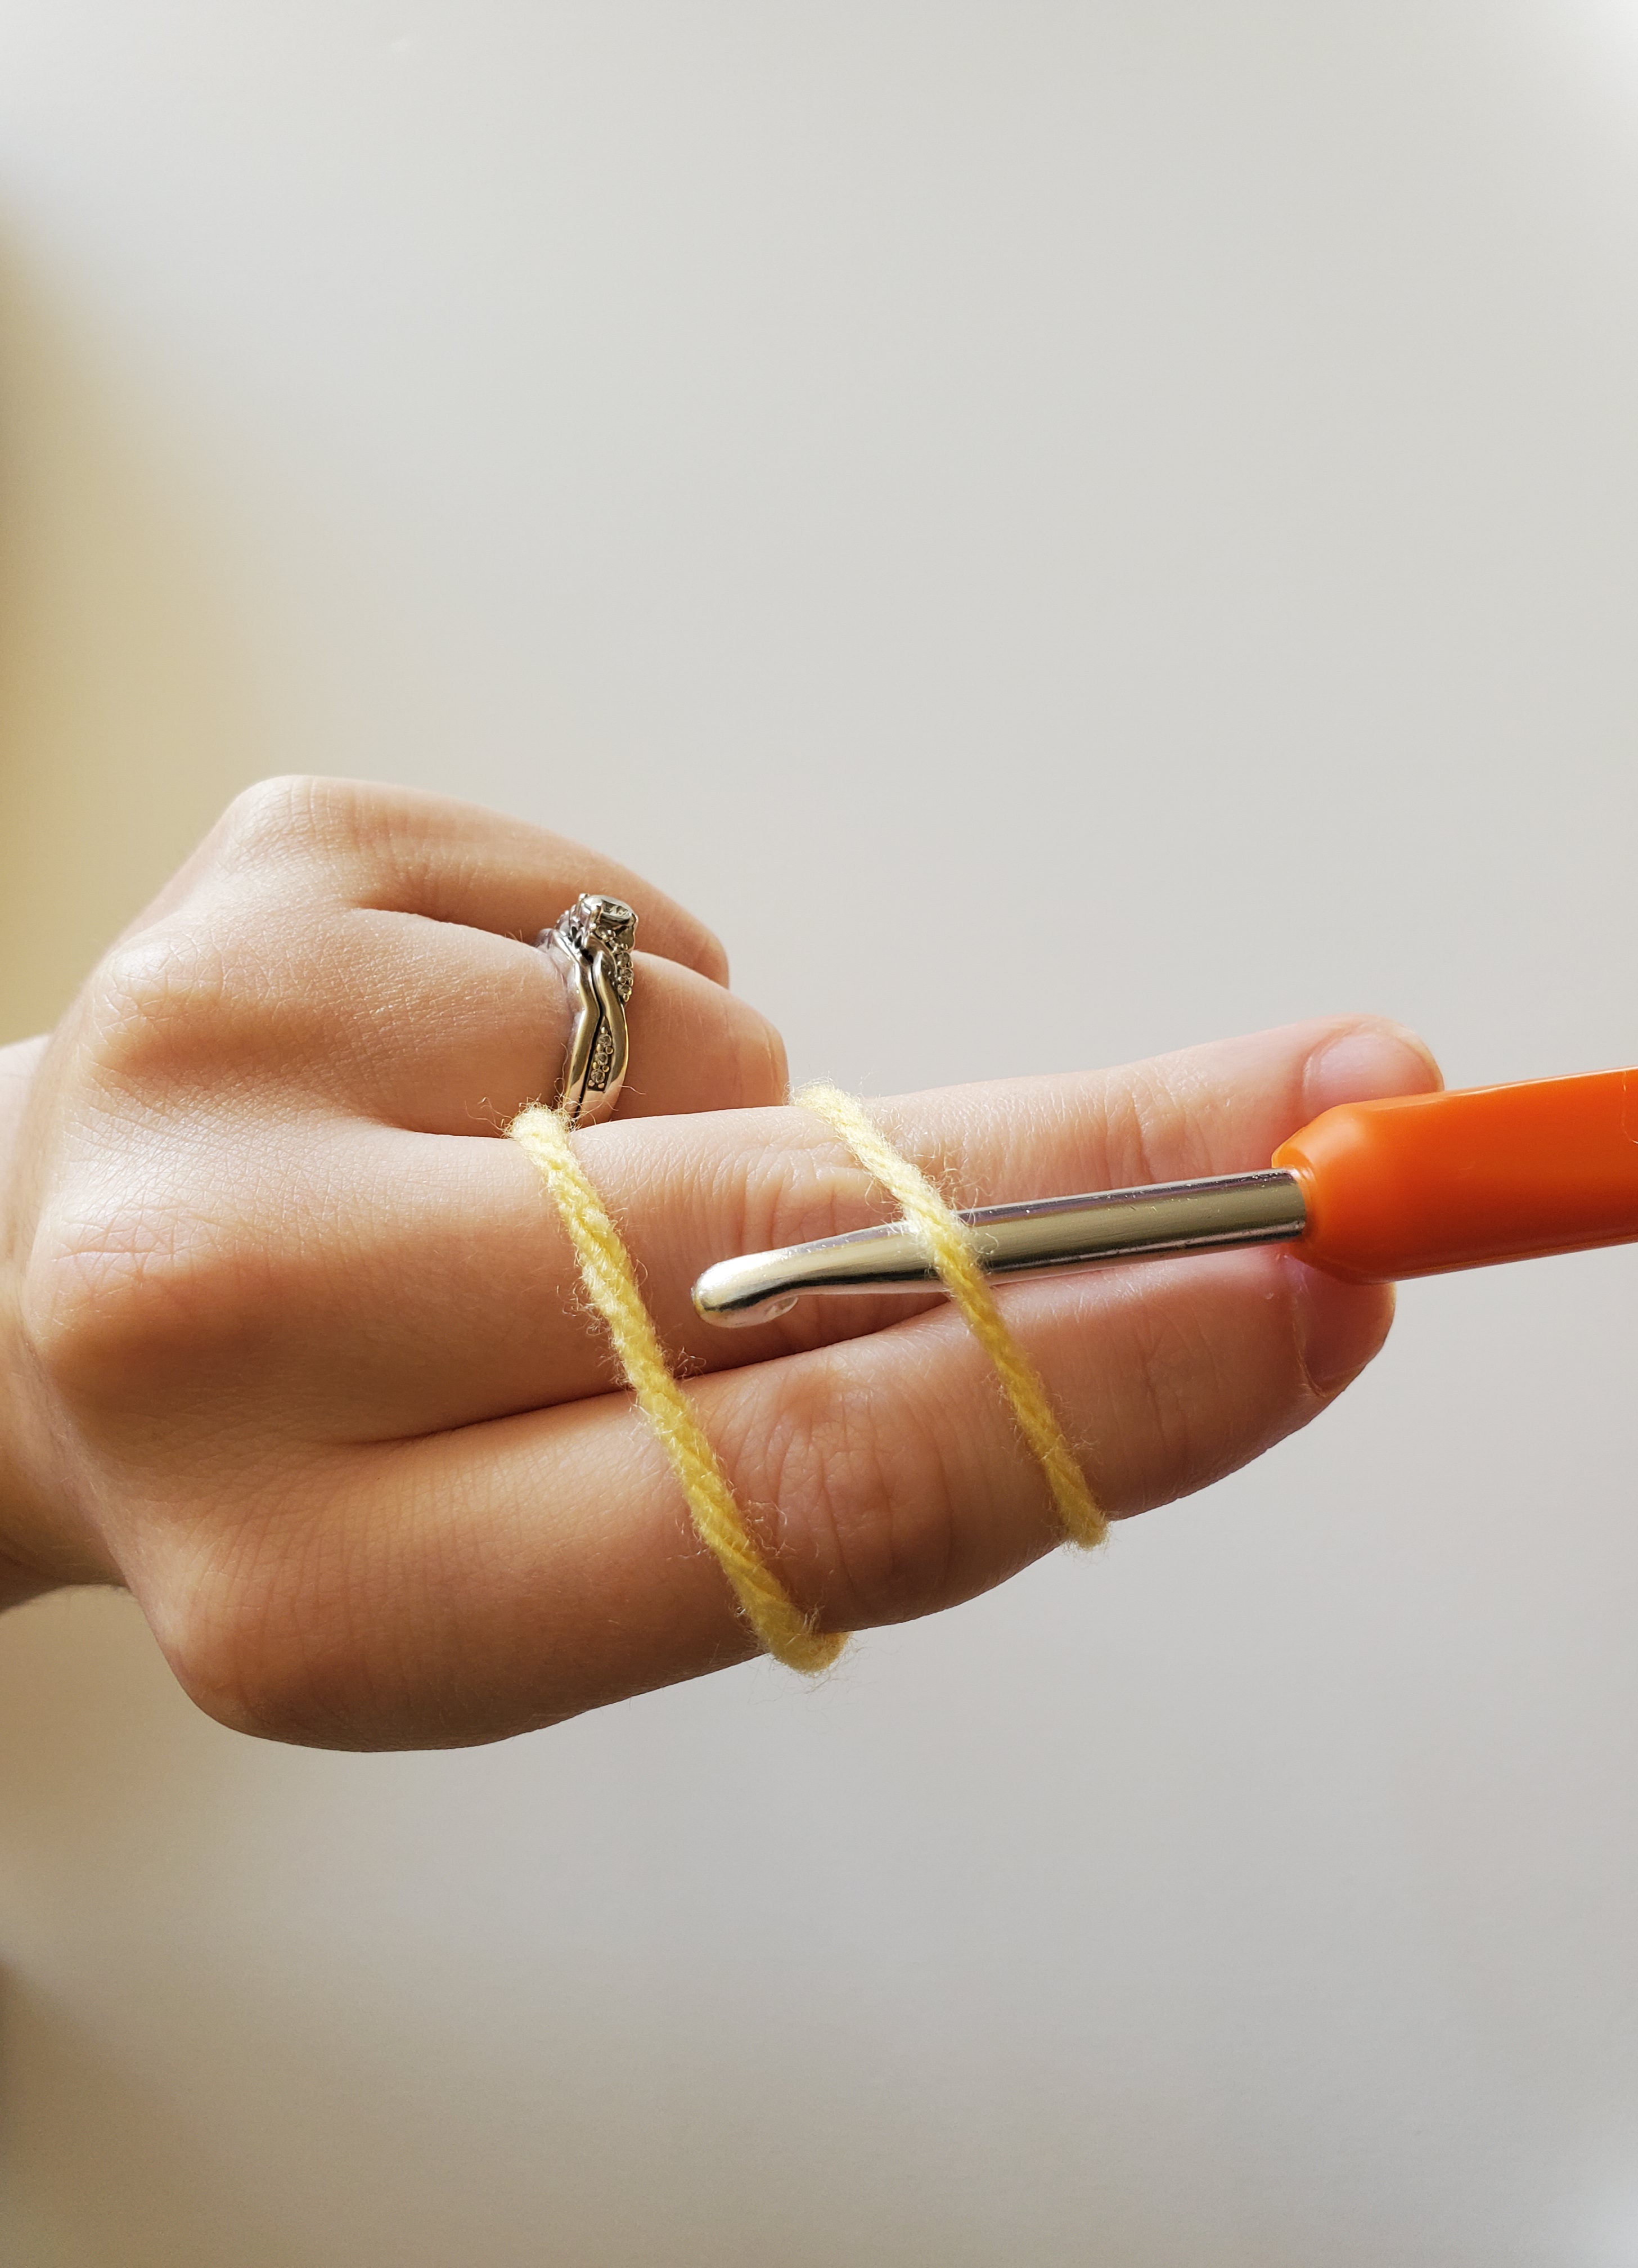
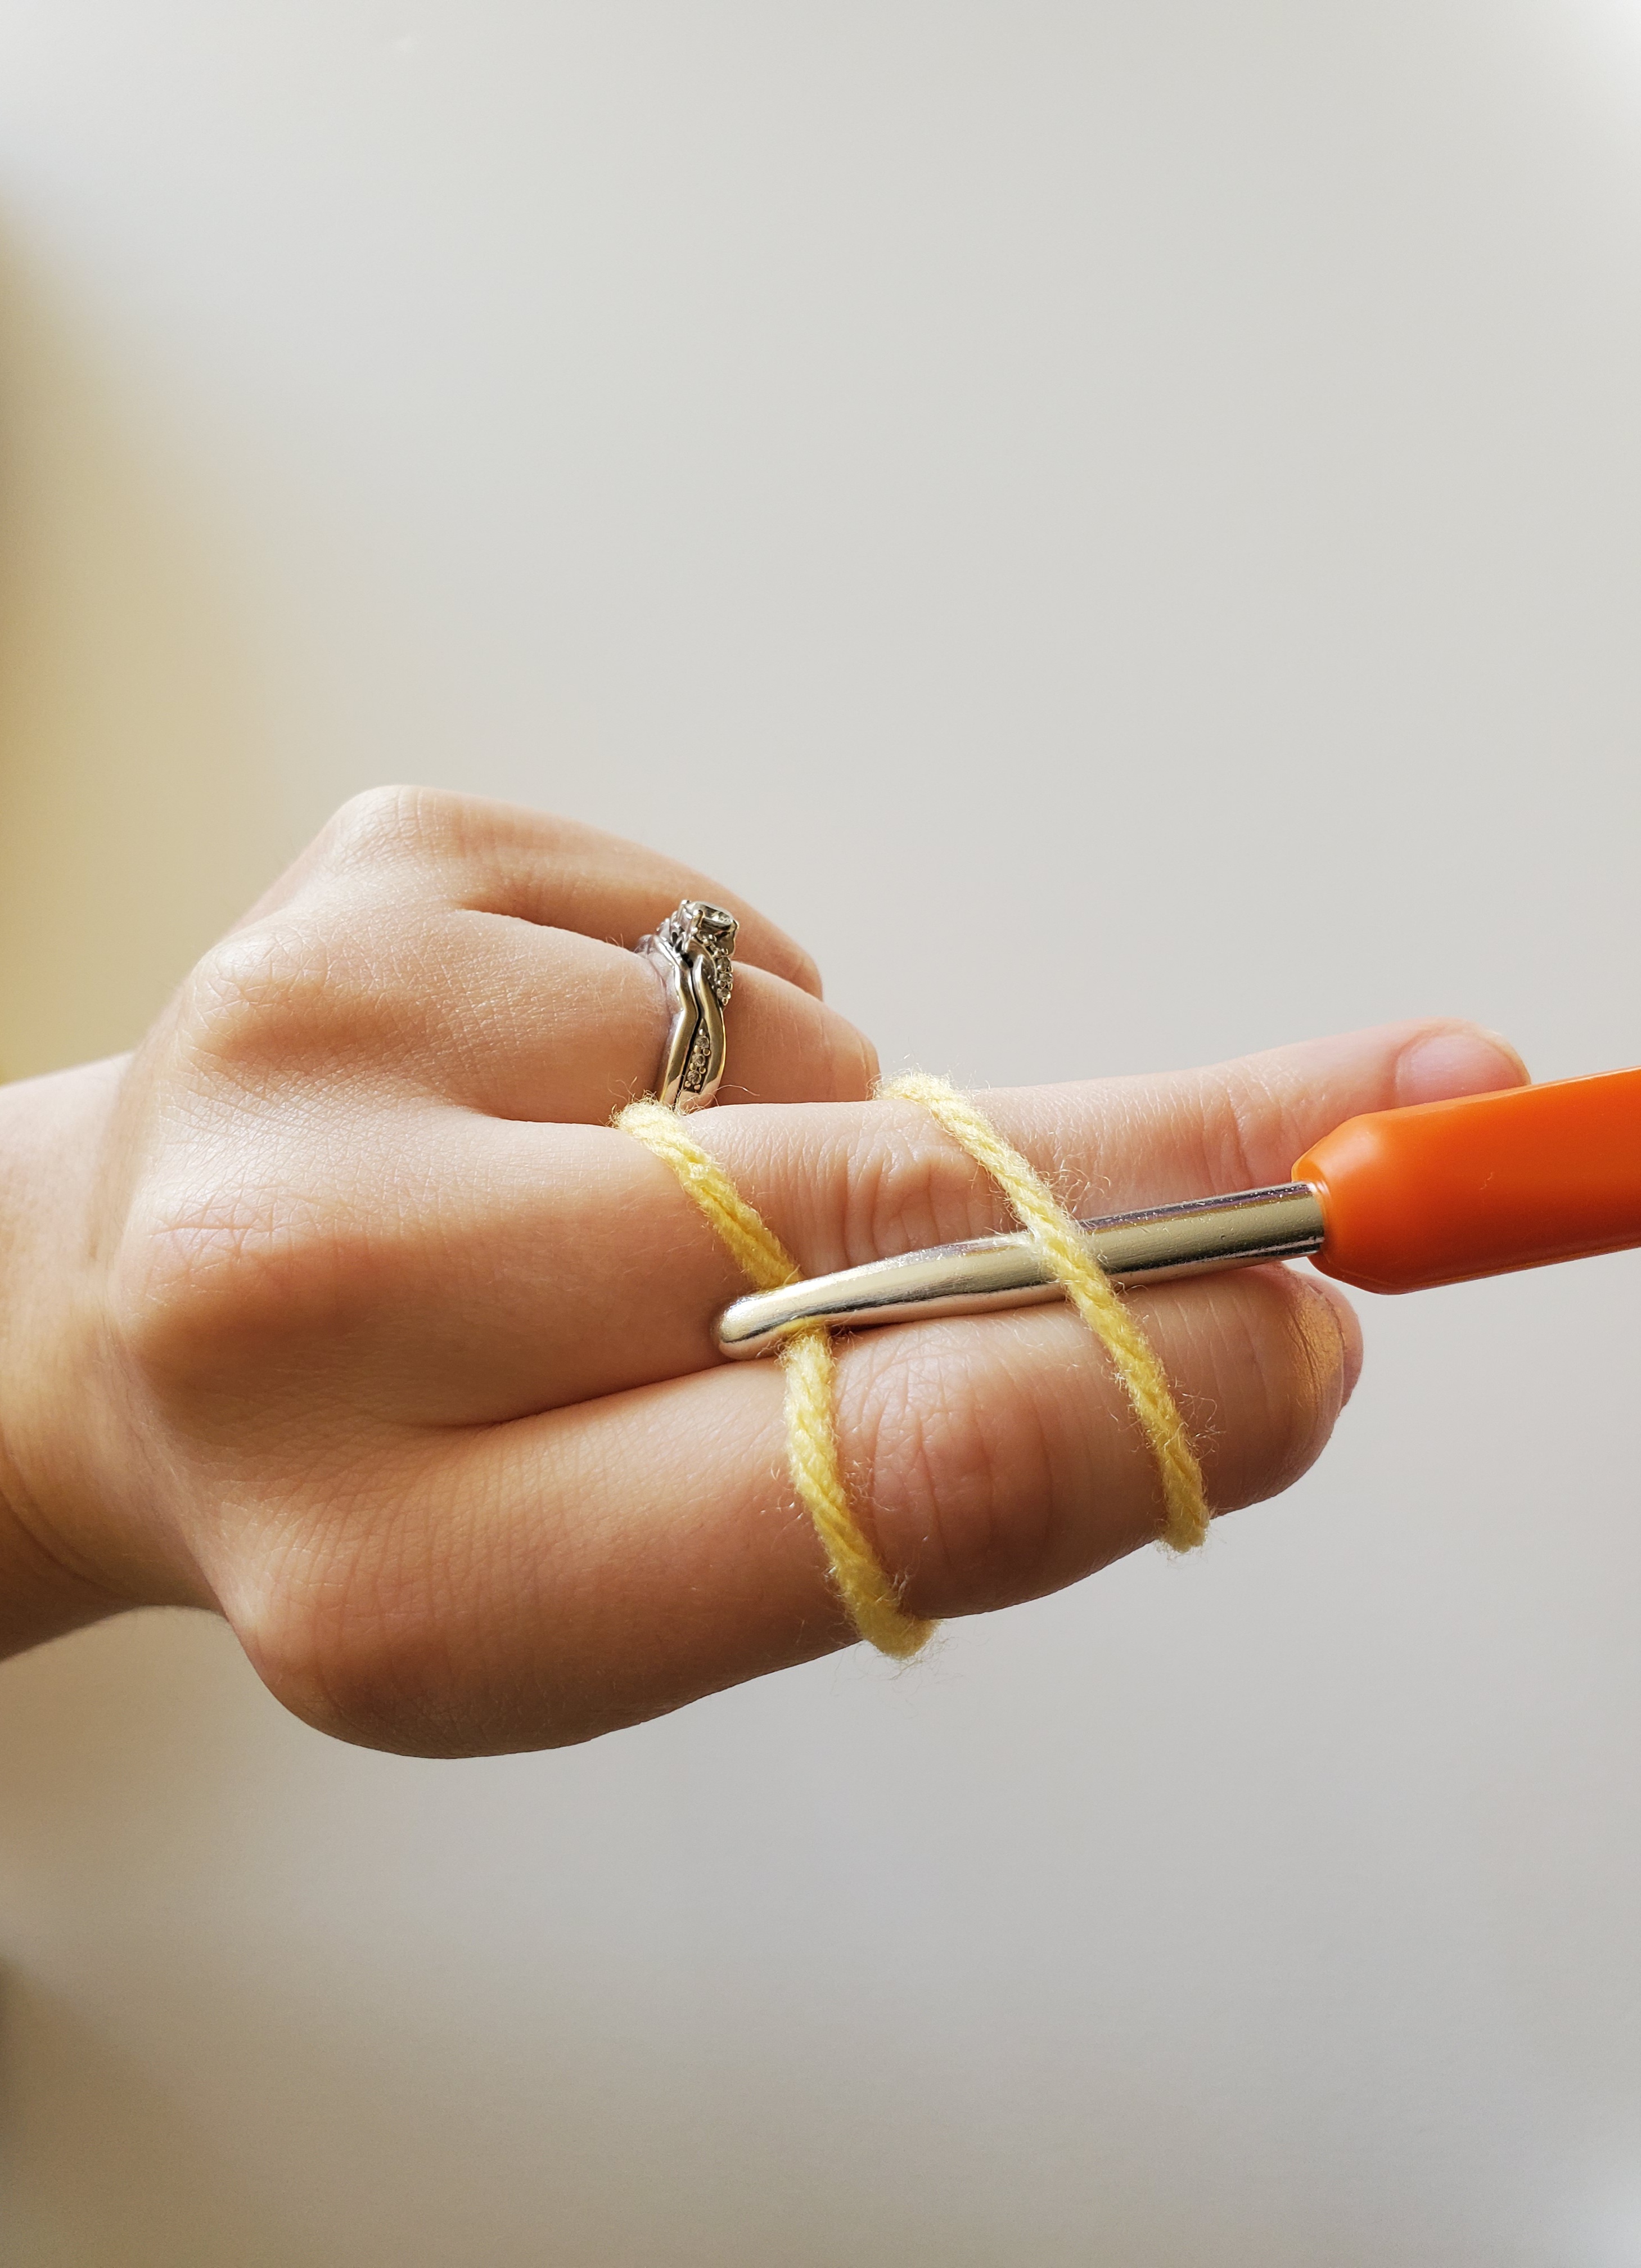
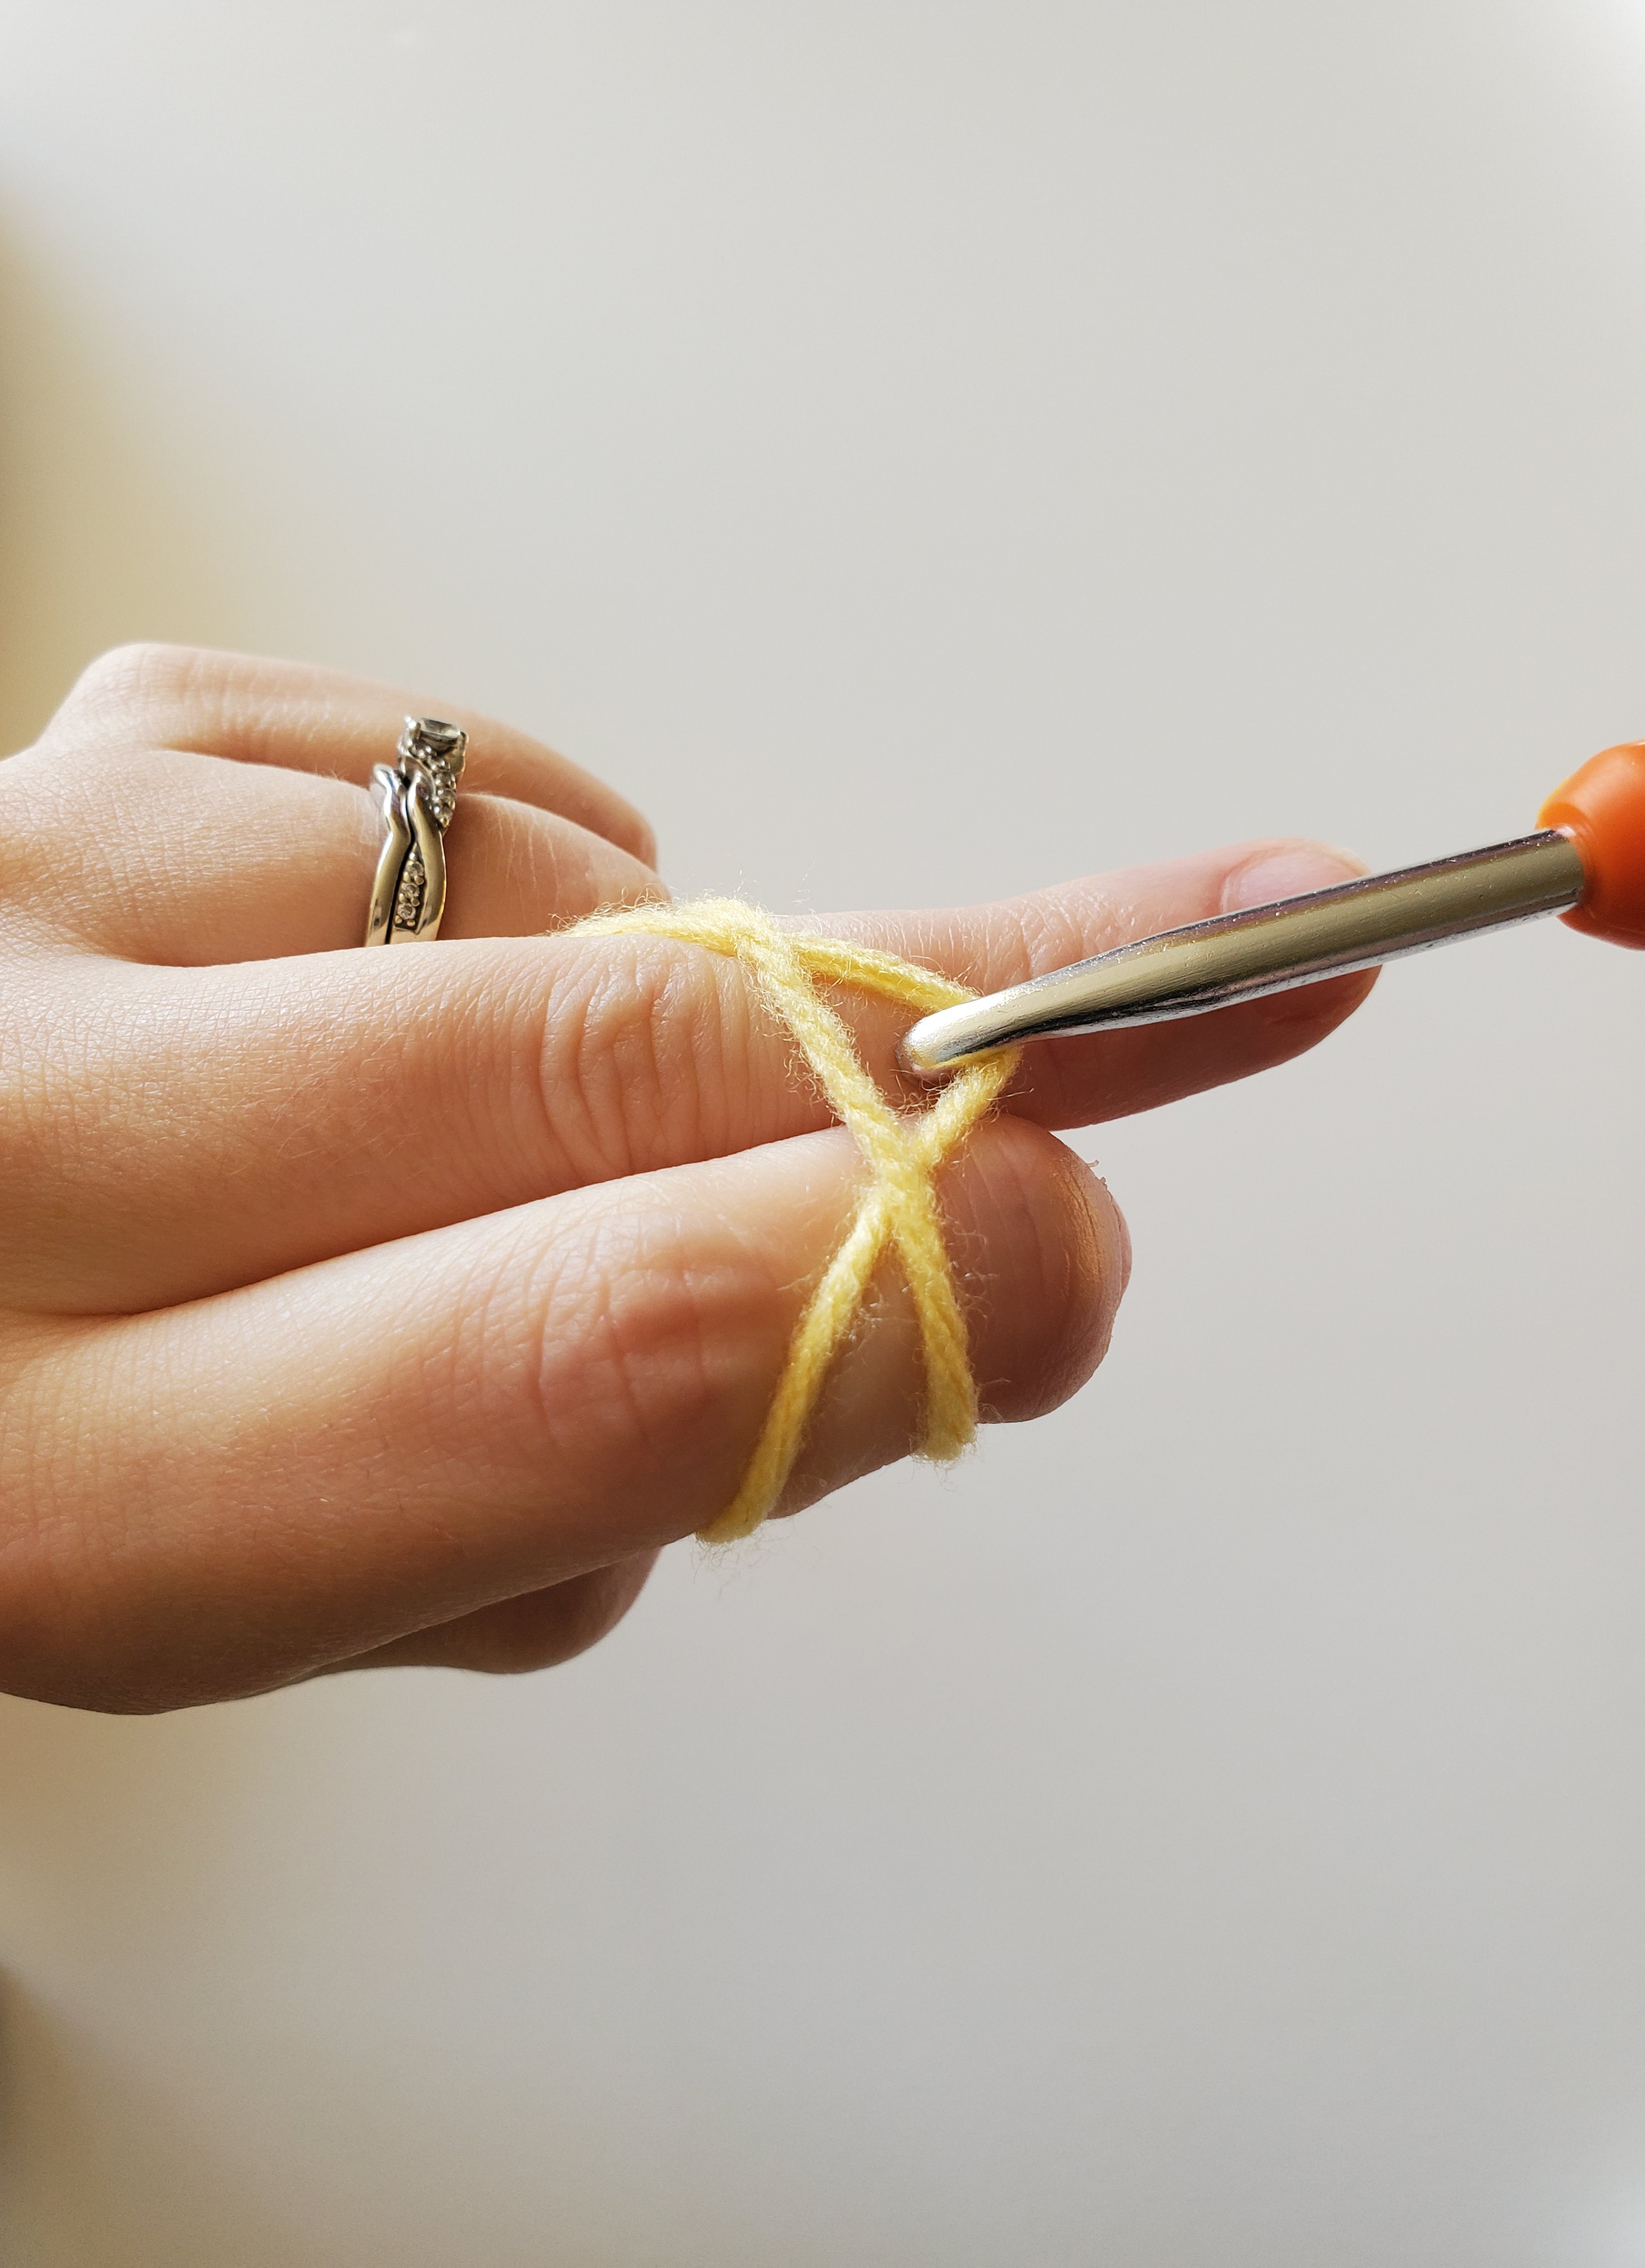
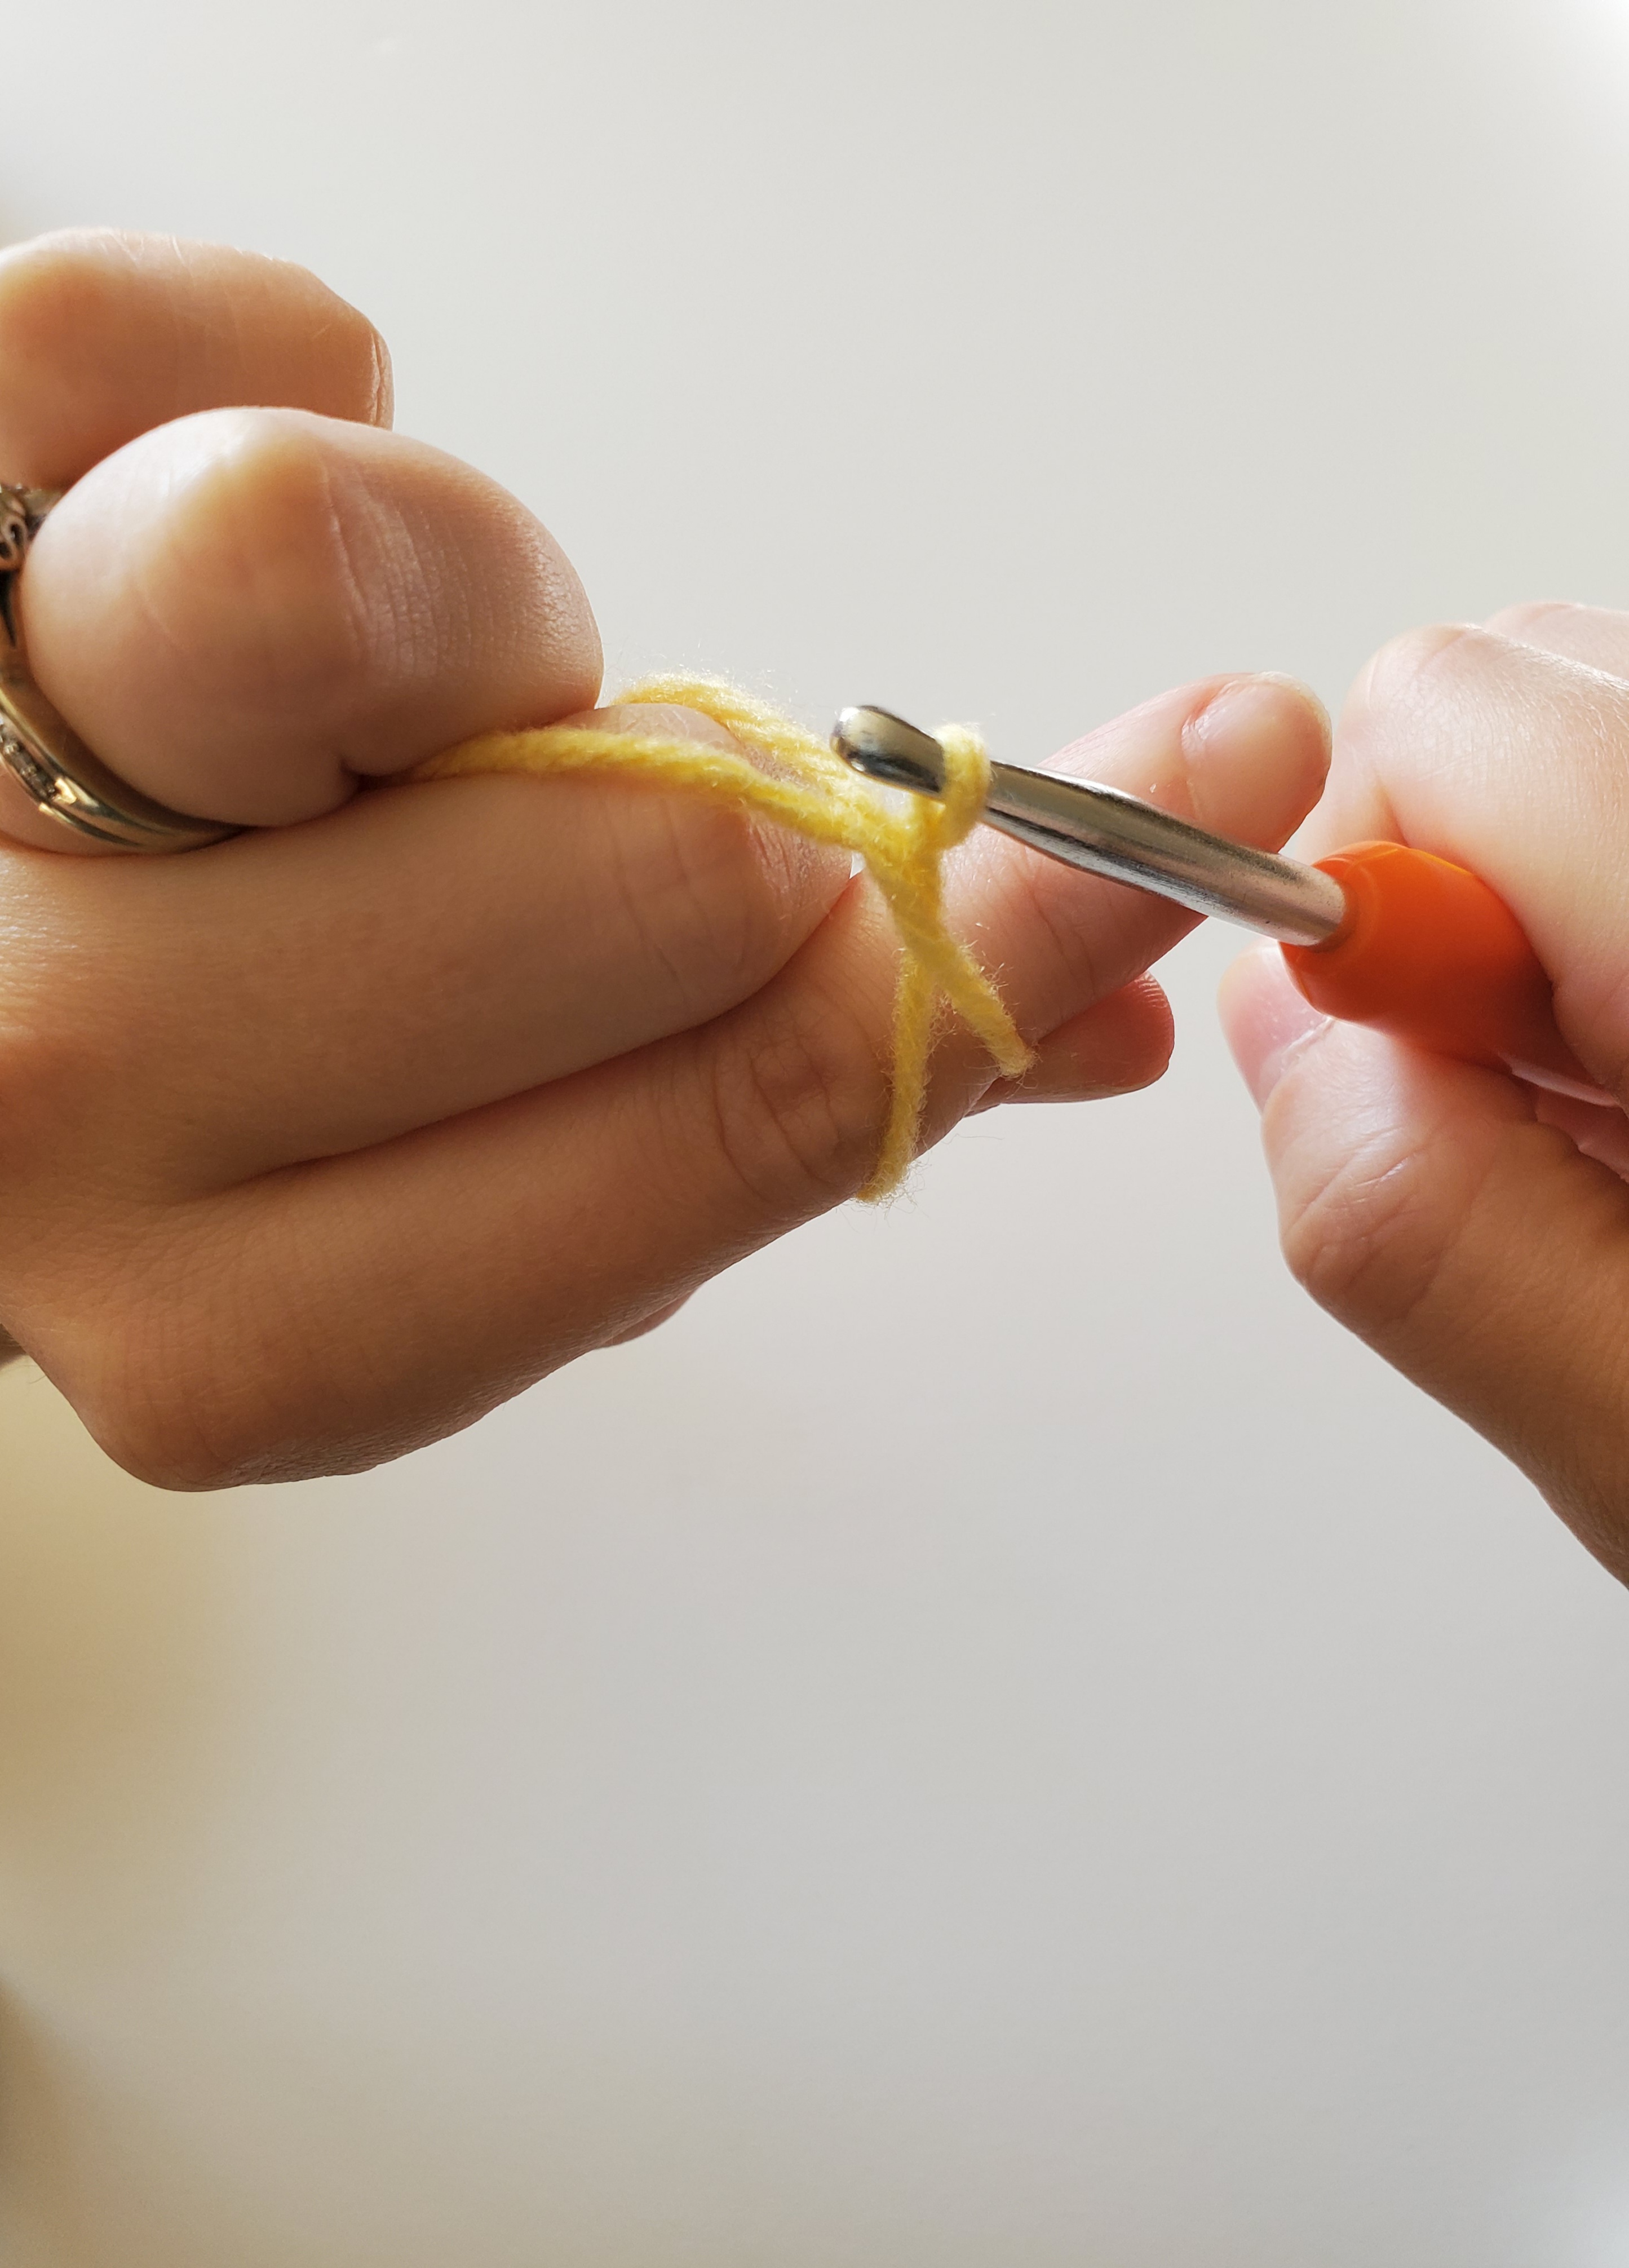
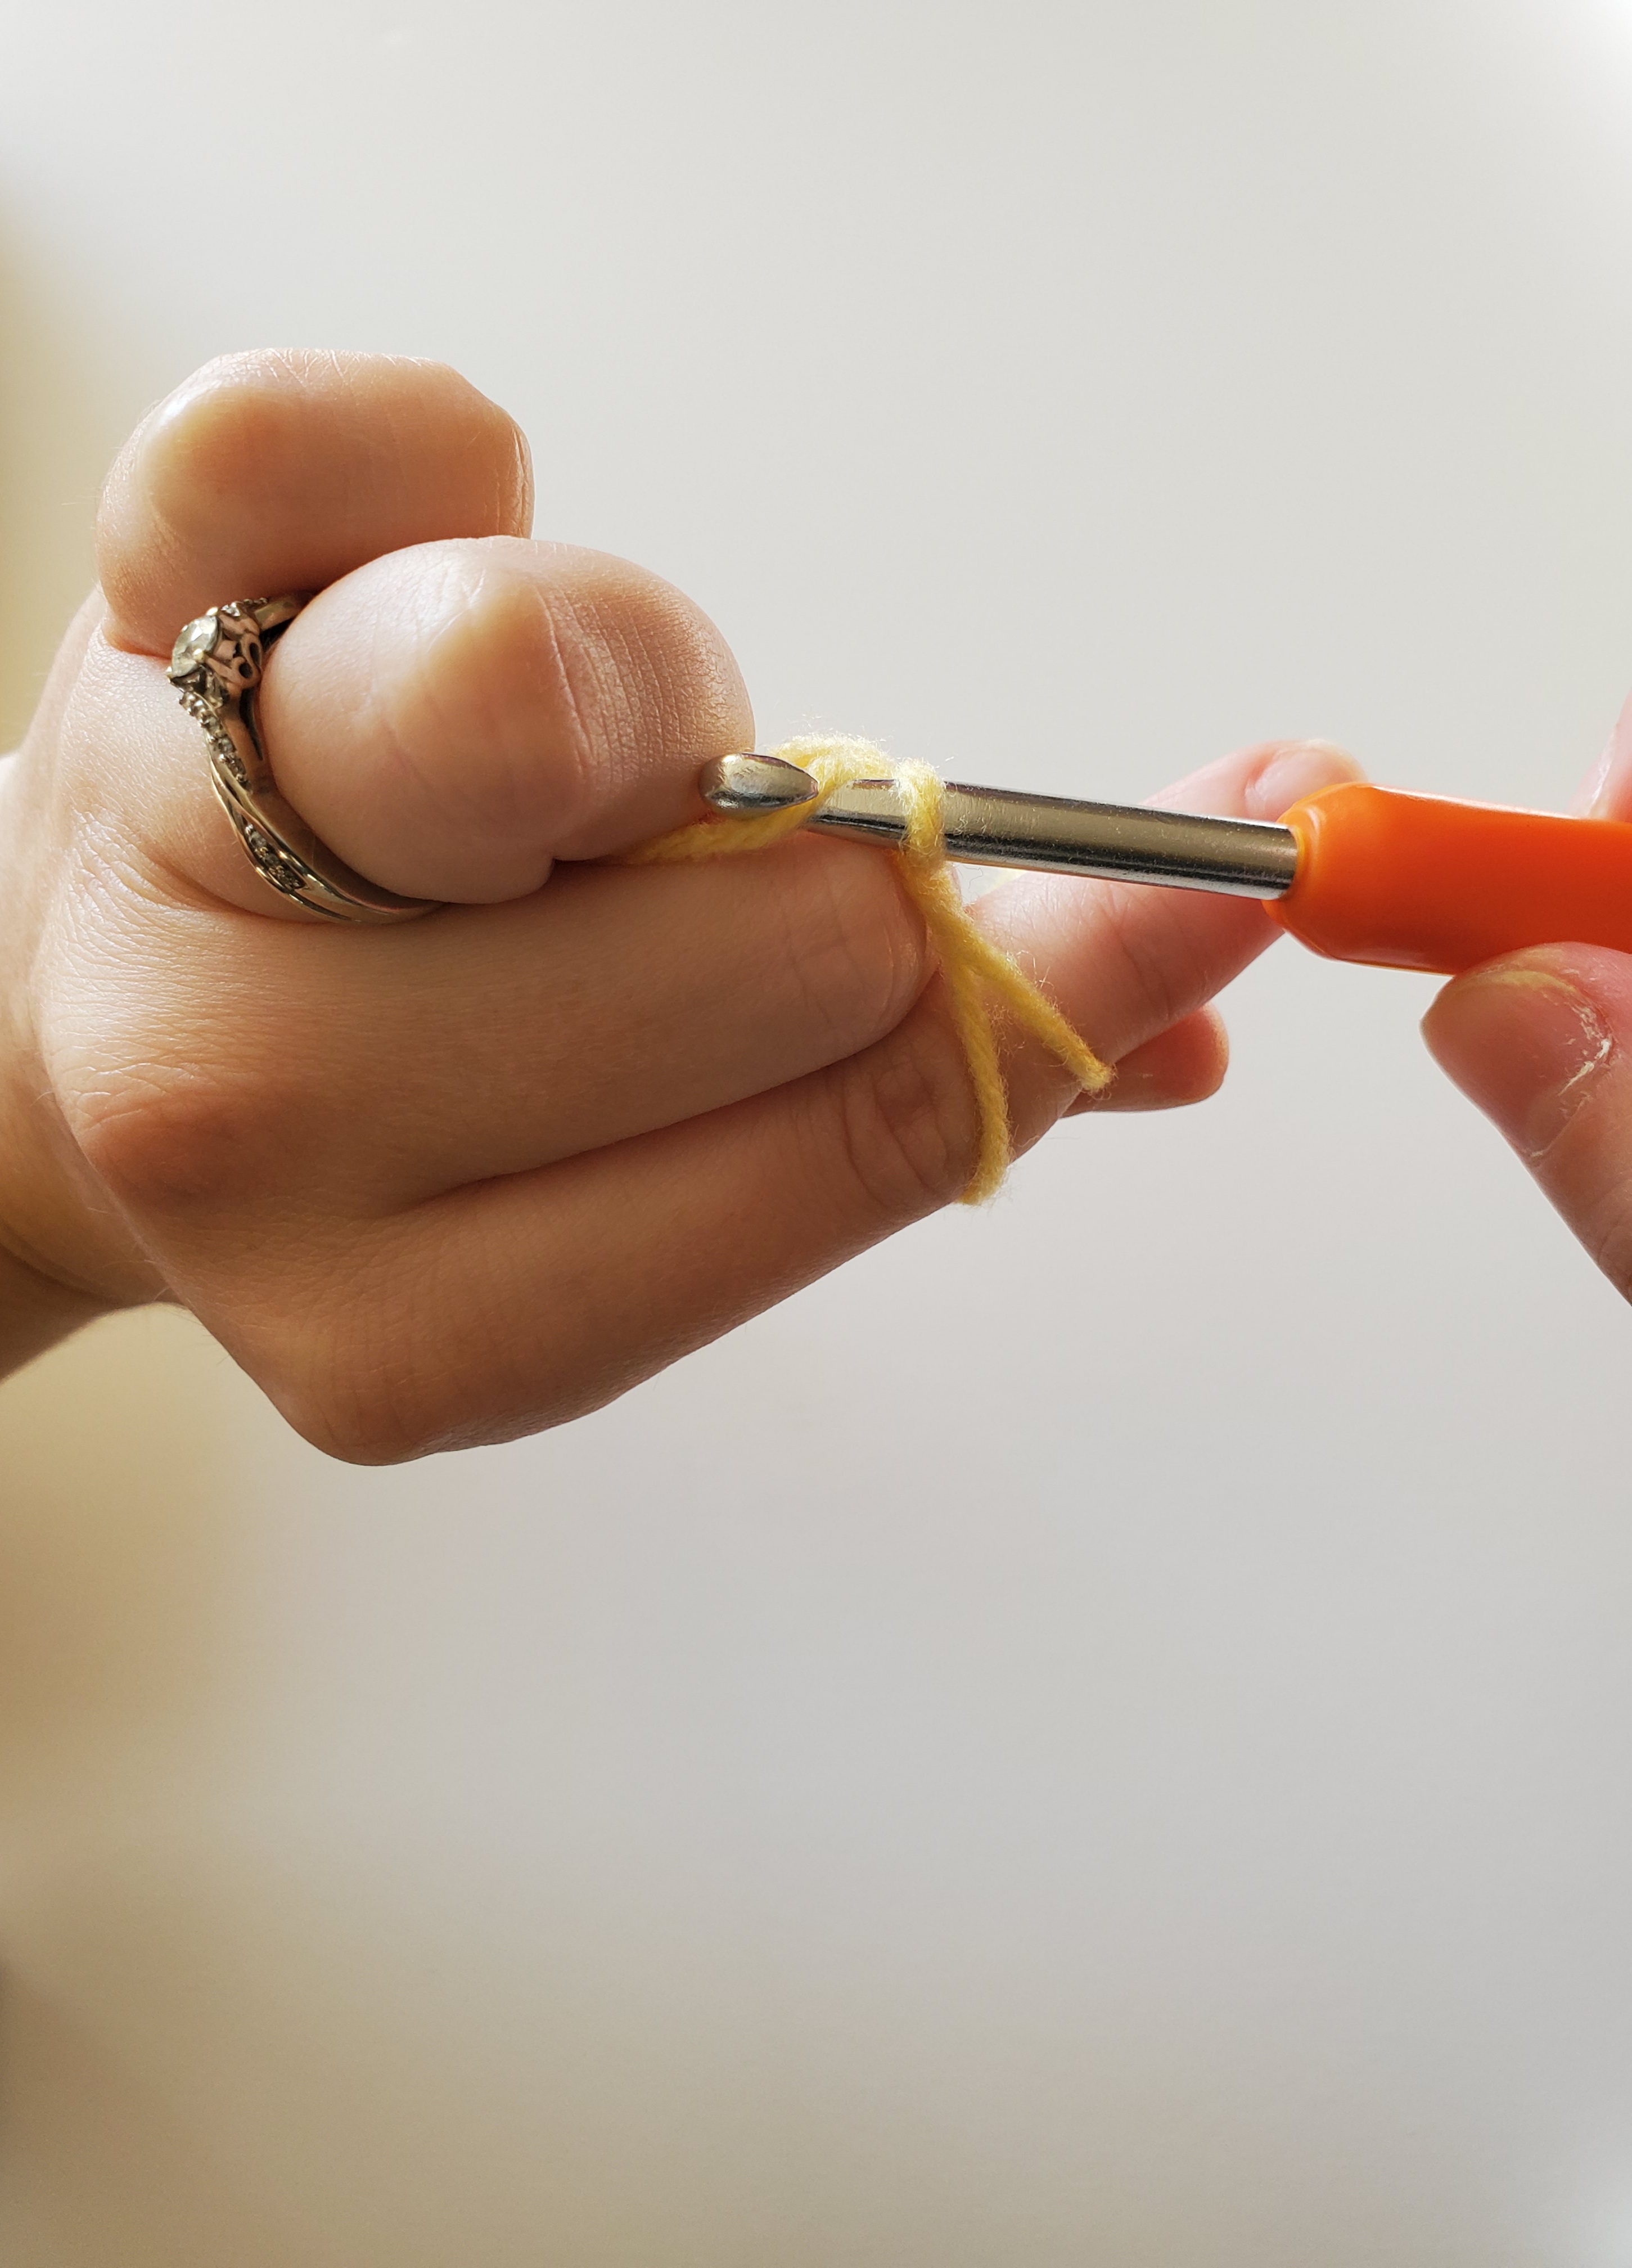
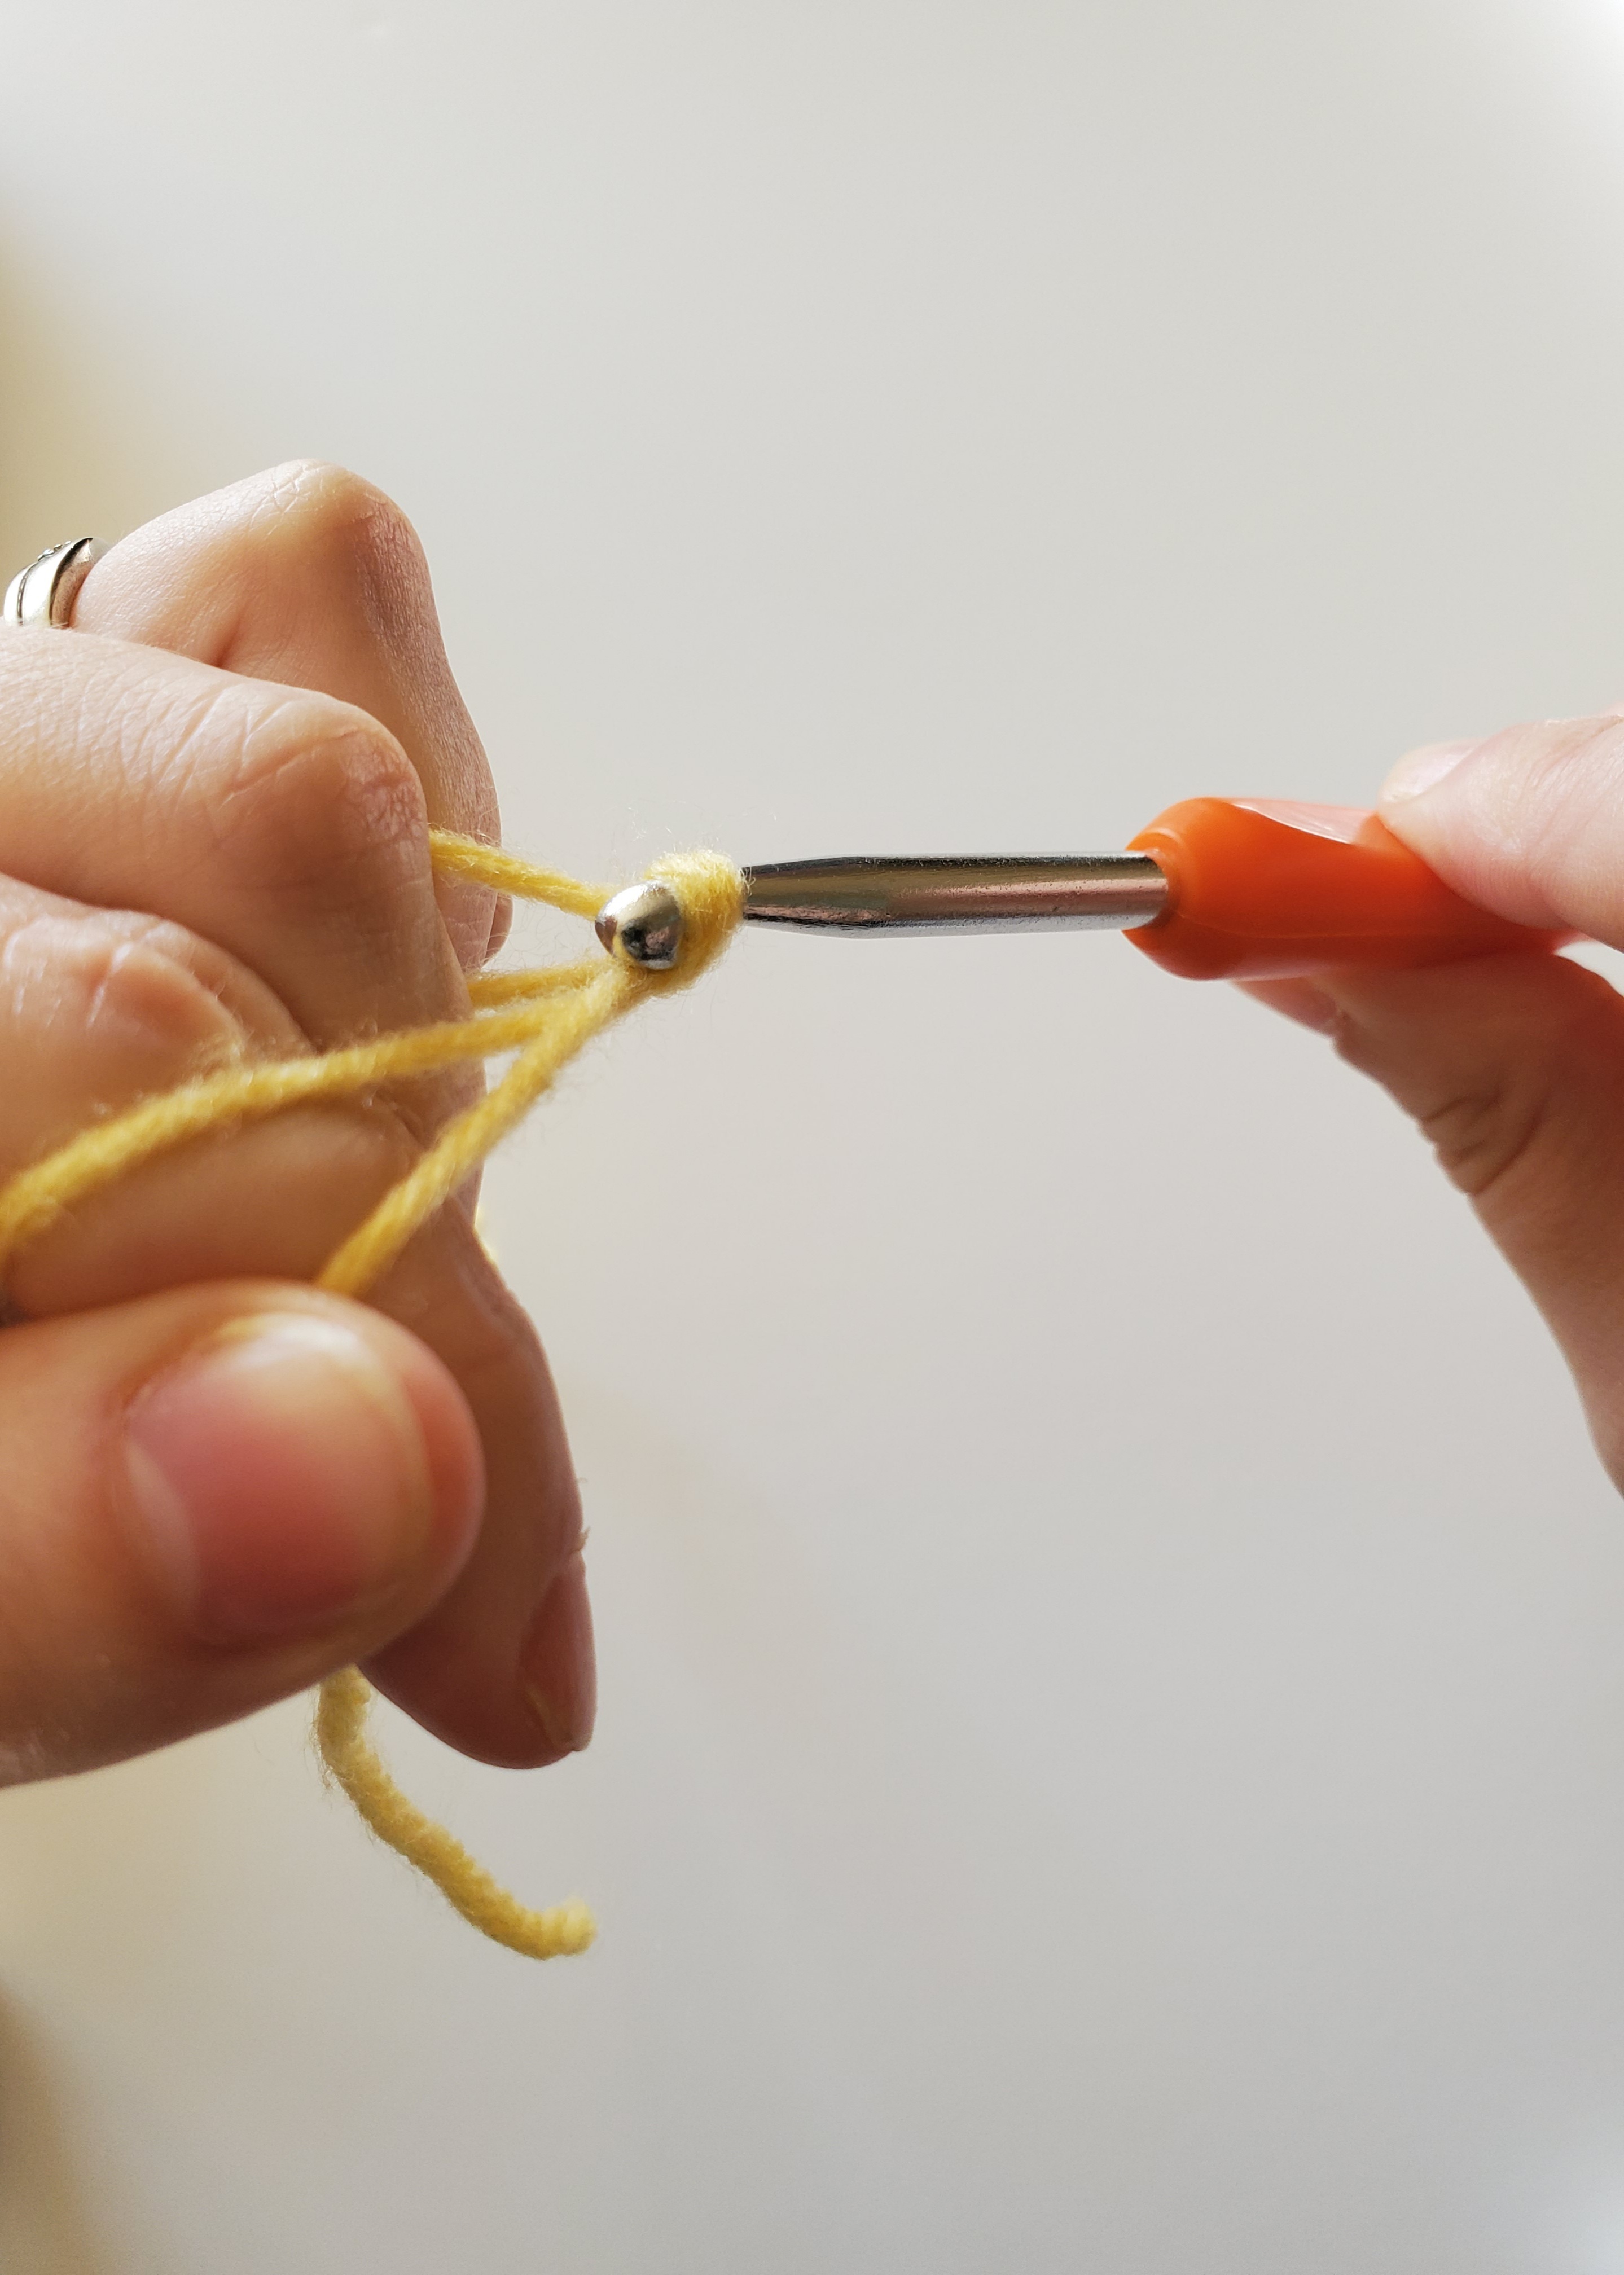
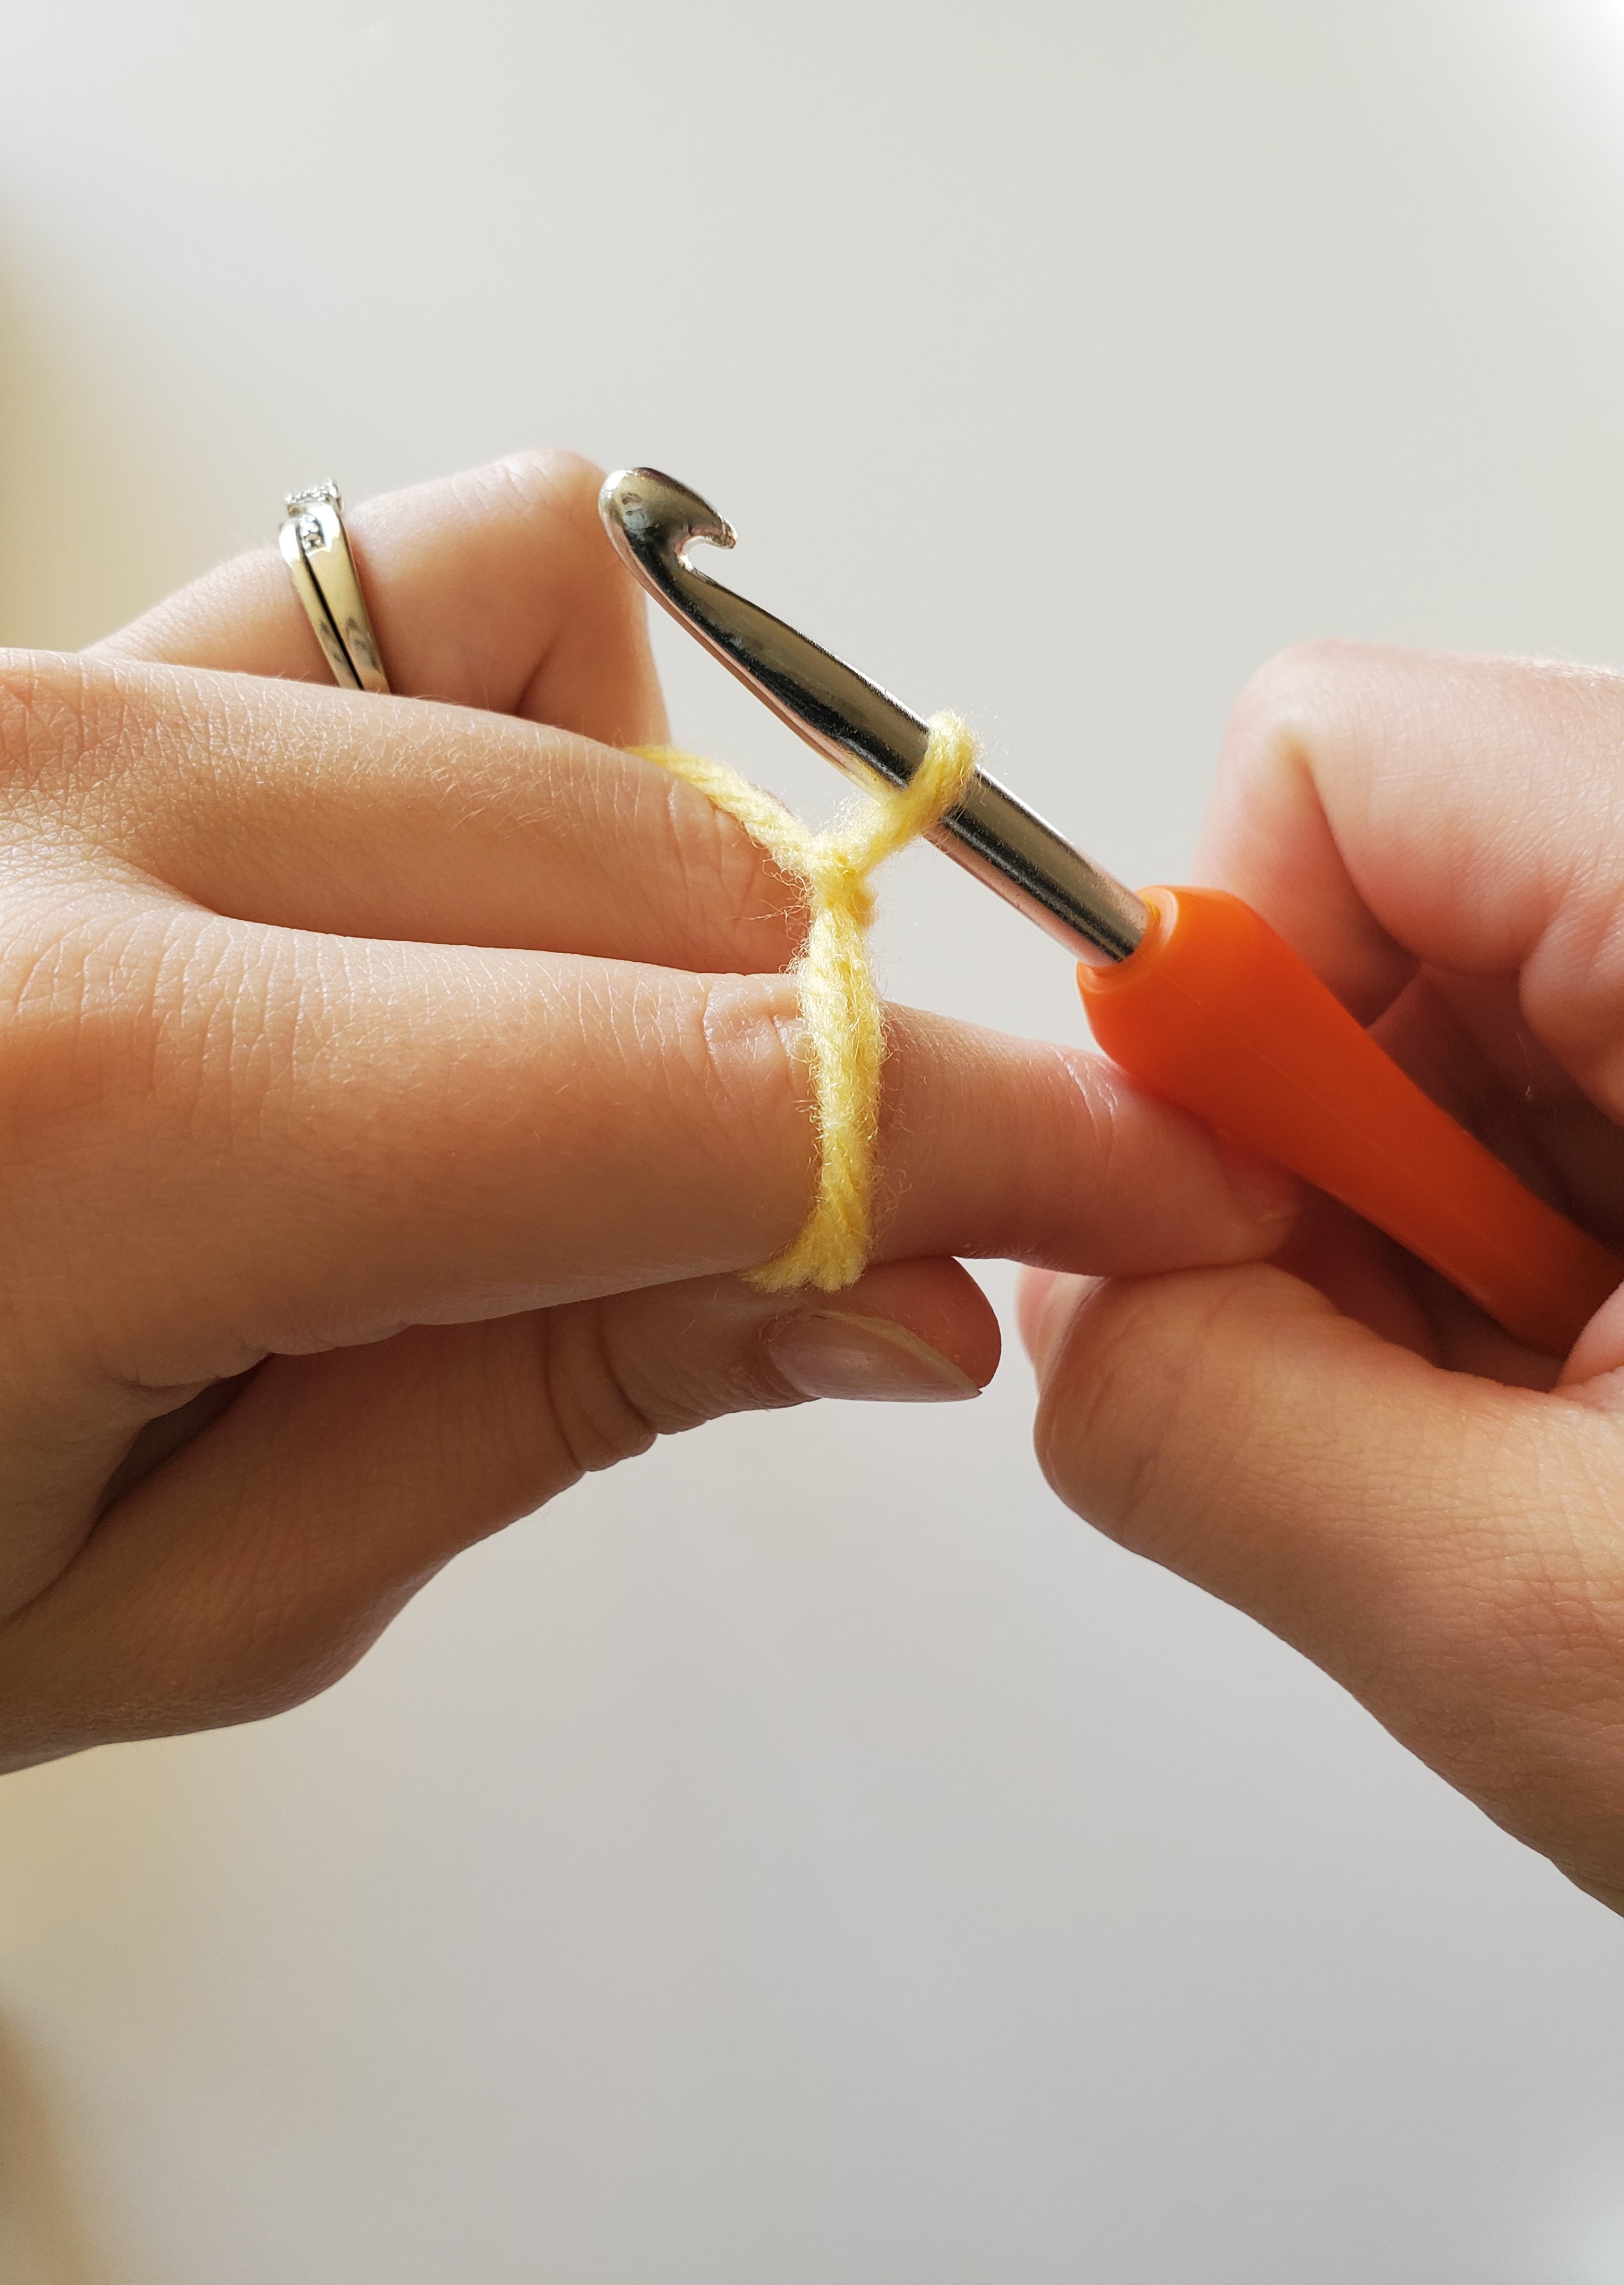
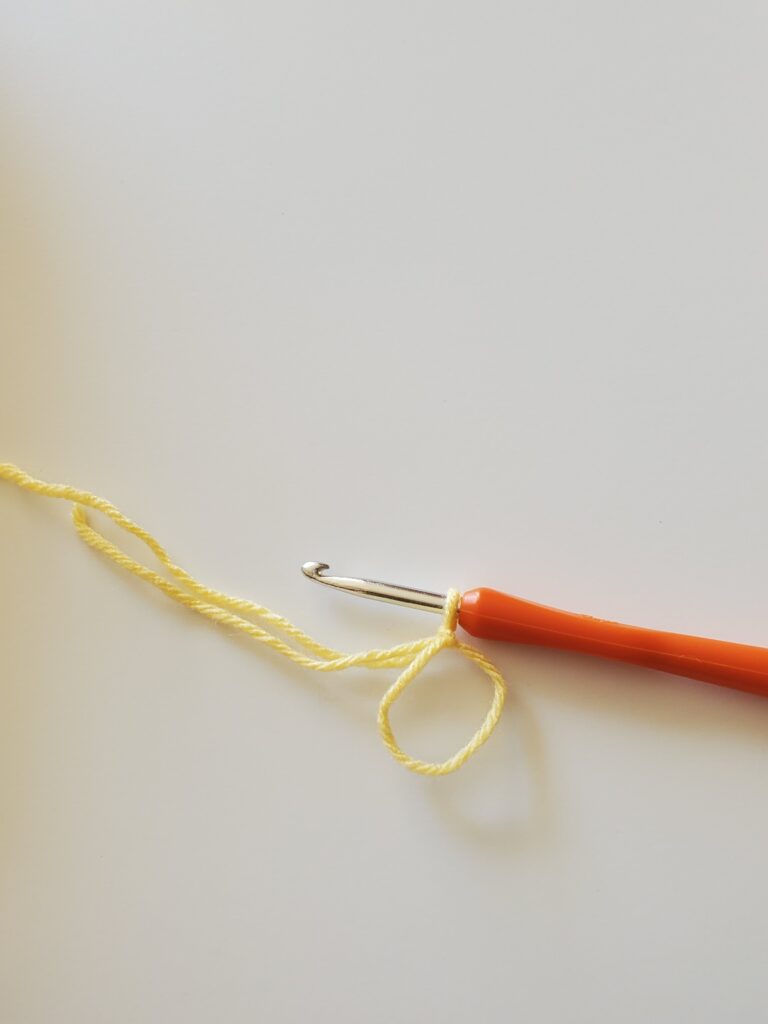
Make a Magic Circle for Crochet (Magic Ring)

Finished magic circle on crochet hook

In this post I will show you in 11 steps with pictures, how to make a magic circle for crochet.

Making a magic circle, or interchangeably, magic ring, is one of the best ways to set yourself up for success if you want to crochet amigurumi or any projects that require you to crochet in a round.

You may have seen some patterns say something along the lines of like x number of sc in a mc. The “mc” stands for magic circle. 

So what makes this magic circle so magical? The magic circle, when pulled tightly, makes a less noticeable hole than if you were to make a slip knot, chain 2 and crochet in the first stitch. Magic circles are also a lot less likely than the previous method, to unravel from the beginning.11

First step of magic circle
Picture 1
Pulling yarn behind two fingers
Picture 2
Pulling yarn up and over two fingers
Picture 3

Step 1)

With the tail end of your yarn, pull it through between your middle and ring finger (see picture 1).

Step 2)

Pretend to make “gun” fingers with your left hand. Grip your yarn with your ring and pinky finger (to keep tension), while you move the tail end behind your pointer and middle finger (see picture 2).

Step 3) 

Take the tail and and go up and over your pointer and middle finger (see picture 3).

Pulling yarn around two fingers again
Picture 4
Finished step of pulling yarn around two fingers twice
Picture 5
Showing where to grab yarn to hold in place for magic circle
Picture 6

Step 4)

Repeat step 3 by going behind your pointer/middle fingers with the tail end and go up and over (see pictures 4 and 5).

Step 5)

Pinch your yarn with your thumb to hold in place (picture 6) and turn your hand knuckle-side up (picture 7).

Top view of turned hand while holding yarn in place
Picture 7
Inserting crochet hook under and over strands of yarn
Picture 8
Grabbing the second yarn strand with crochet hook
Picture 9

Step 6)

Grab your crochet hook with your right hand. Go underneath the first yarn and grab the second yarn with your hook (see pictures 8 and 9).

Step 7)

With that yarn still hooked, pull your second yarn underneath the first yarn (picture 10).

Step 8)

Carefully turn your hook up, while continuing to keep that yarn in place (picture 11). 

Pulling the second strand of yarn underneath the first strand
Picture 10
Picture of crochet hook turned upwards while yarn is still hooked
Picture 11
Depiction of yarning over to complete magic circle
Picture 12

Step 9)

Now, this is where it can get tricky. Essentially, “yarn over” to grab the same, second strand of yarn you grabbed before. If that makes sense (see picture 12) and pull it through (see picture 13). 

*Protip! Try not to keep your yarn super tight during step 9. When you attempt to pull it through, it’ll be very, very difficult to do. So try to keep it a tad loose.

Step 10)

???

Step 11)

Profit (see pictures 14a. and 14b.).

Picture of pulling the yarned over strand through
Picture 13
Loose magic circle
Picture 14a.
Magic circle complete with crochet hook
Picture 14b.

Don’t worry too much if you mess up. I had a difficult time trying to keep my yarn and hands coordinated the first couple of tries when I first started. It just takes practice! 

Congratulations and happy crocheting! 

Please follow and like us:

You May Also Like

  1. How to Crochet Star Ornaments for your Christmas Tree - Strommer Crafts

    […] You’ll need to know how to make a magic circle in order to start this pattern. If you’ve never made a magic circle, or need help, you can go to my step-by-step guide here.  […]