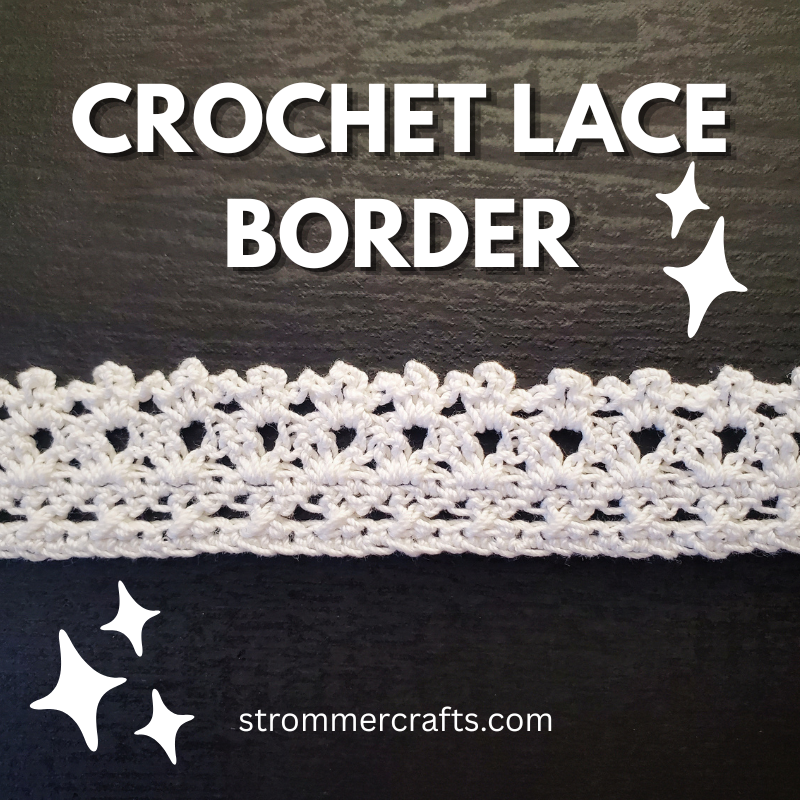
Very Elegant Crochet Lace Border (Pattern Tutorial)
Hey everyone, today I have a Very Elegant Crochet Lace Border Pattern for you!
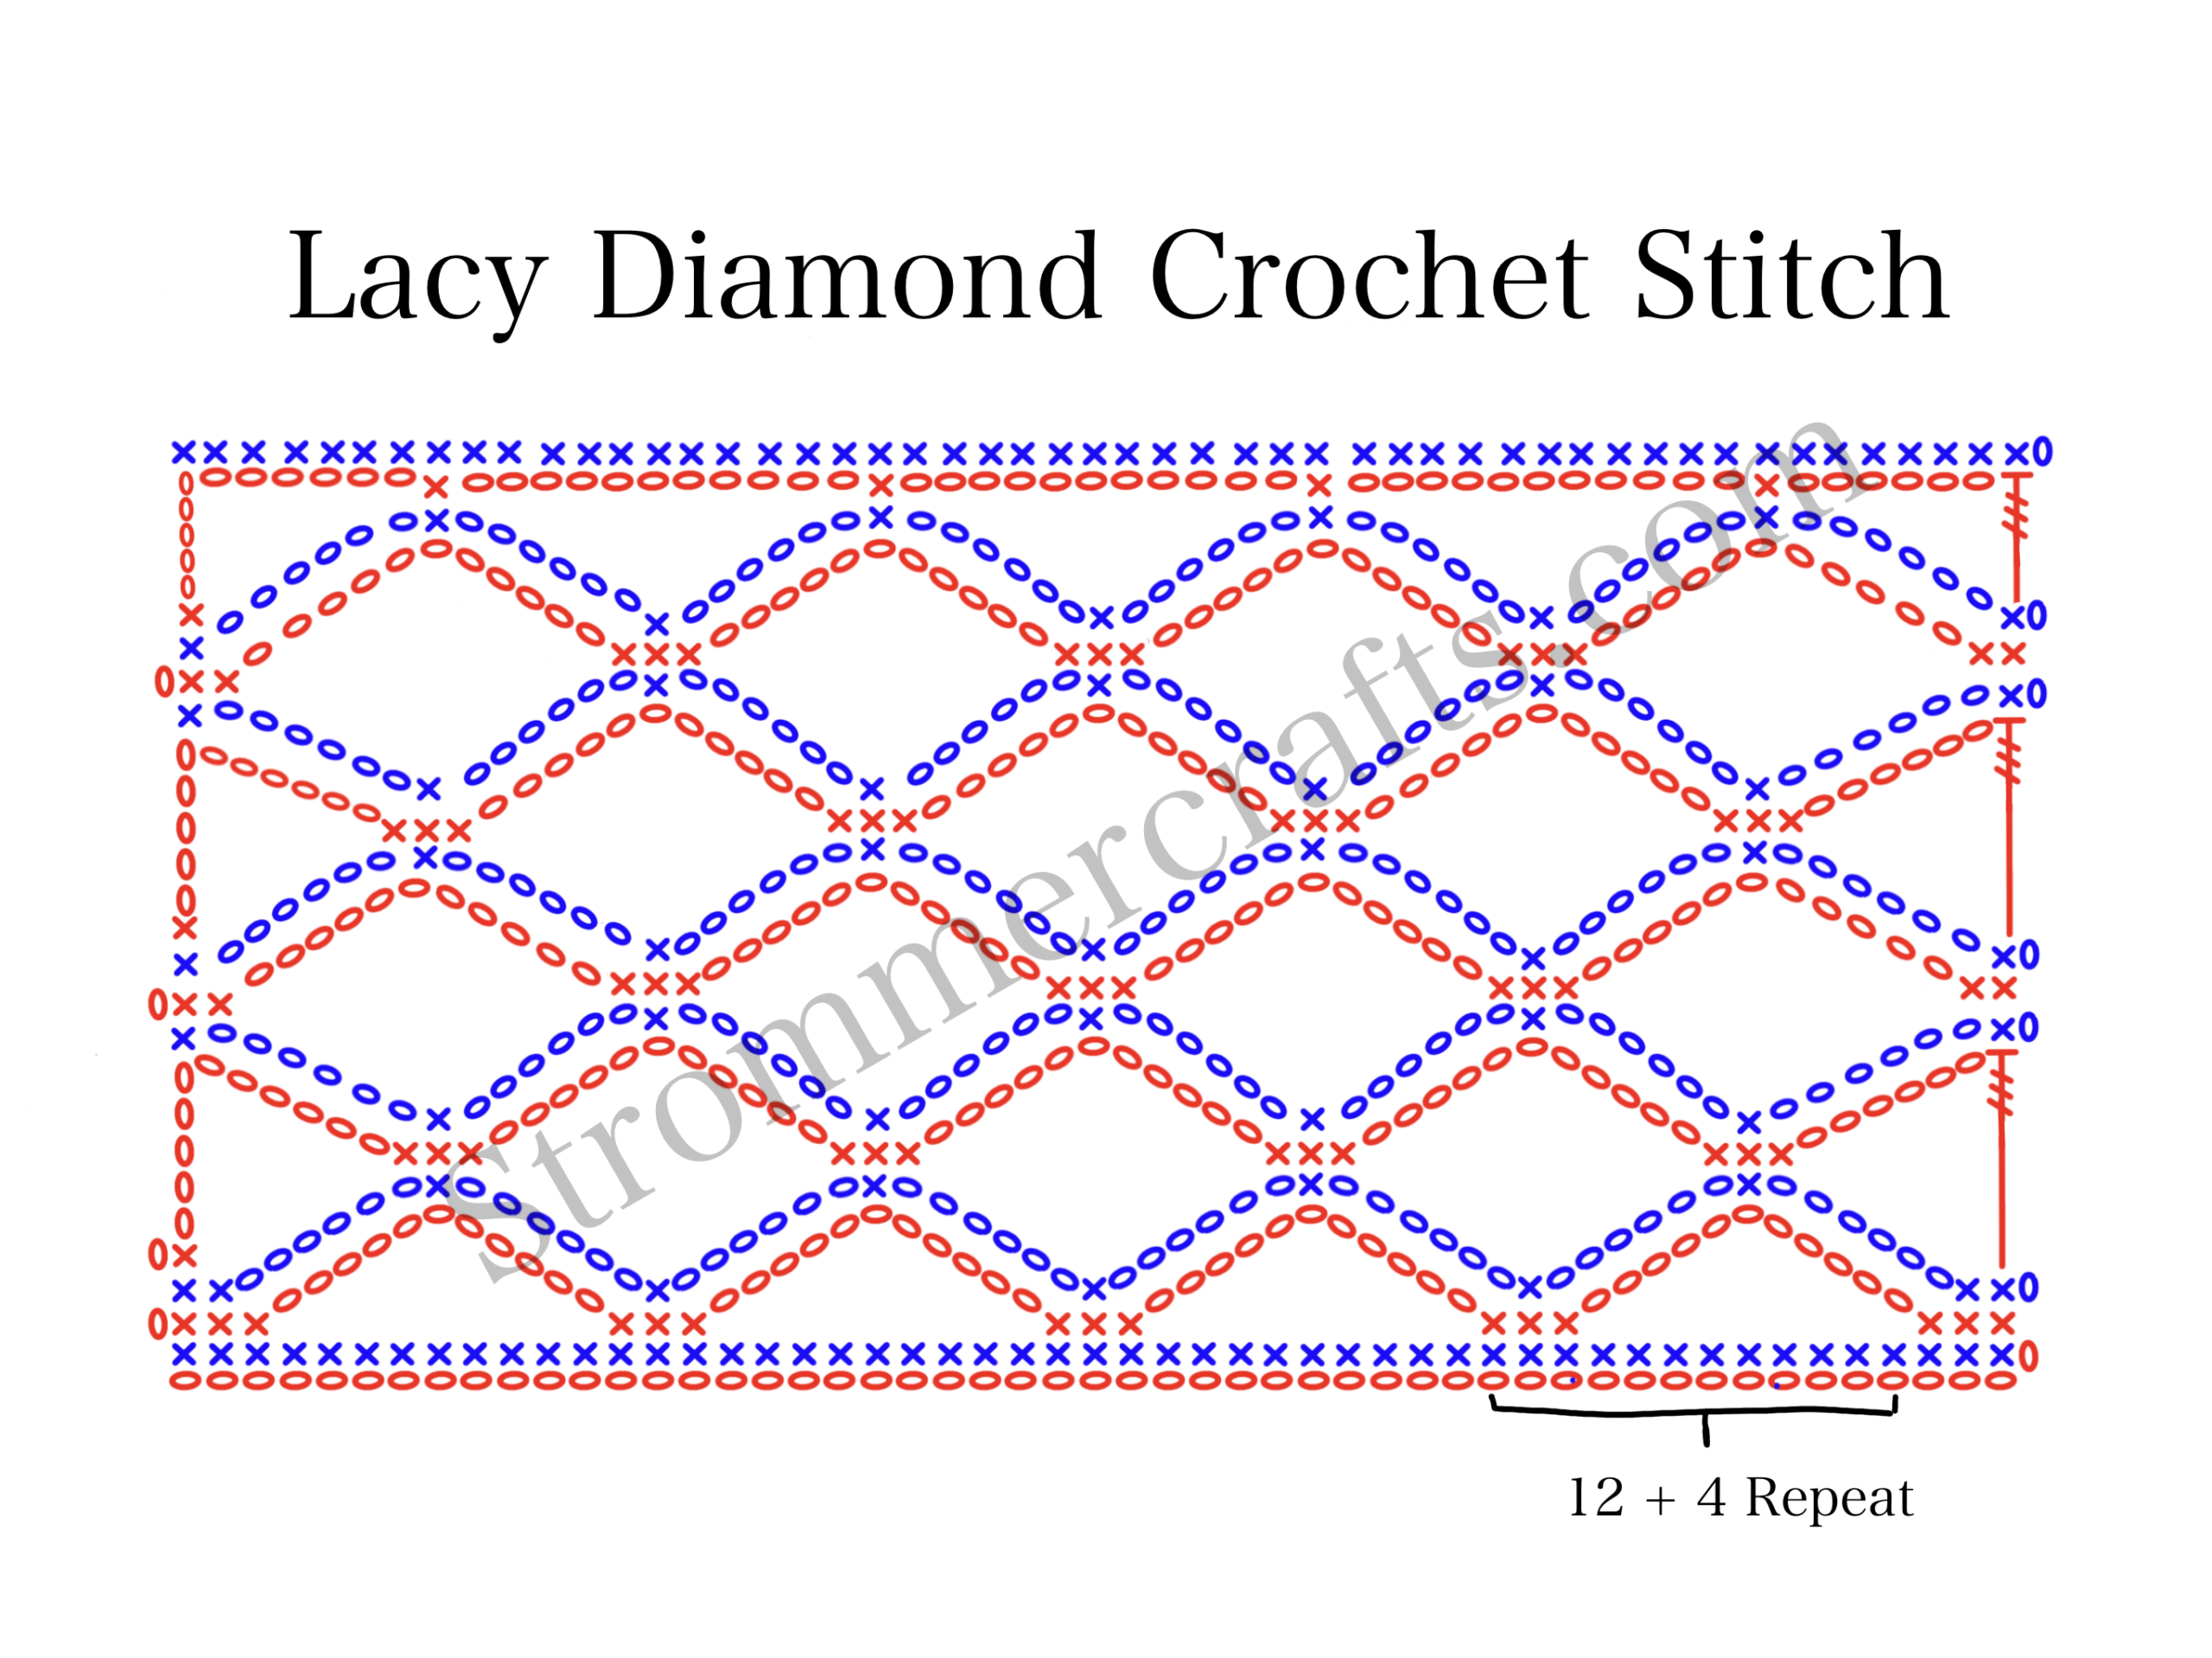
This lacy crochet border has a series of beautiful crochet stitches that give it a subtle, but elegant look.
I am also providing a diagram for if you need to use this border for a square or rectangular object, sometimes figuring out the corners can be a pain on your own!
To do this border, you will need to be able to 2 intermediate stitches, X stitches and 2 double crochets together.
But I will walk you through those, it will be easy peasy!
I have used a very similar lace border for my Filet Crochet Heart Doily and my Merry Christmas Doily if you’d like to check those out too!
Related Posts:
- Absolutely Lovingly Crochet Lace Edging
- 31 Crochet Lace Edgings to Try for Your Next Project
- 27 Amazing Crochet V Stitch Patterns
Today I am using plain ol’ size 10 crochet thread in white from Red Heart, but you can use whatever color you like!
I am also using a size 1.65mm crochet hook as well. Just note that if you use a different size thread or hook, your finished project will be a different size than mine!
Please note that some links in this post may be affiliate links. That means if you click on these and make a purchase, I may receive a small commission at no cost to you. Thanks for your support!
Materials Used:
- Size 10 Crochet Thread in White
- 1.65mm Crochet Hook
- Scissors
- Tapestry Needle
Abbreviations Used:
- Ch – chain
- St – stitch
- Sl st – slip stitch
- Sc – single crochet
- Dc – double crochet
- Dc2tog – double crochet 2 stitches together
- X stitch – a double crochet placed 3 stitches ahead of current stitch, ch 1, and another double crochet placed in the 2nd stitch behind the first double crochet.
Youtube video not loading? Click for the video tutorial of this pattern here!
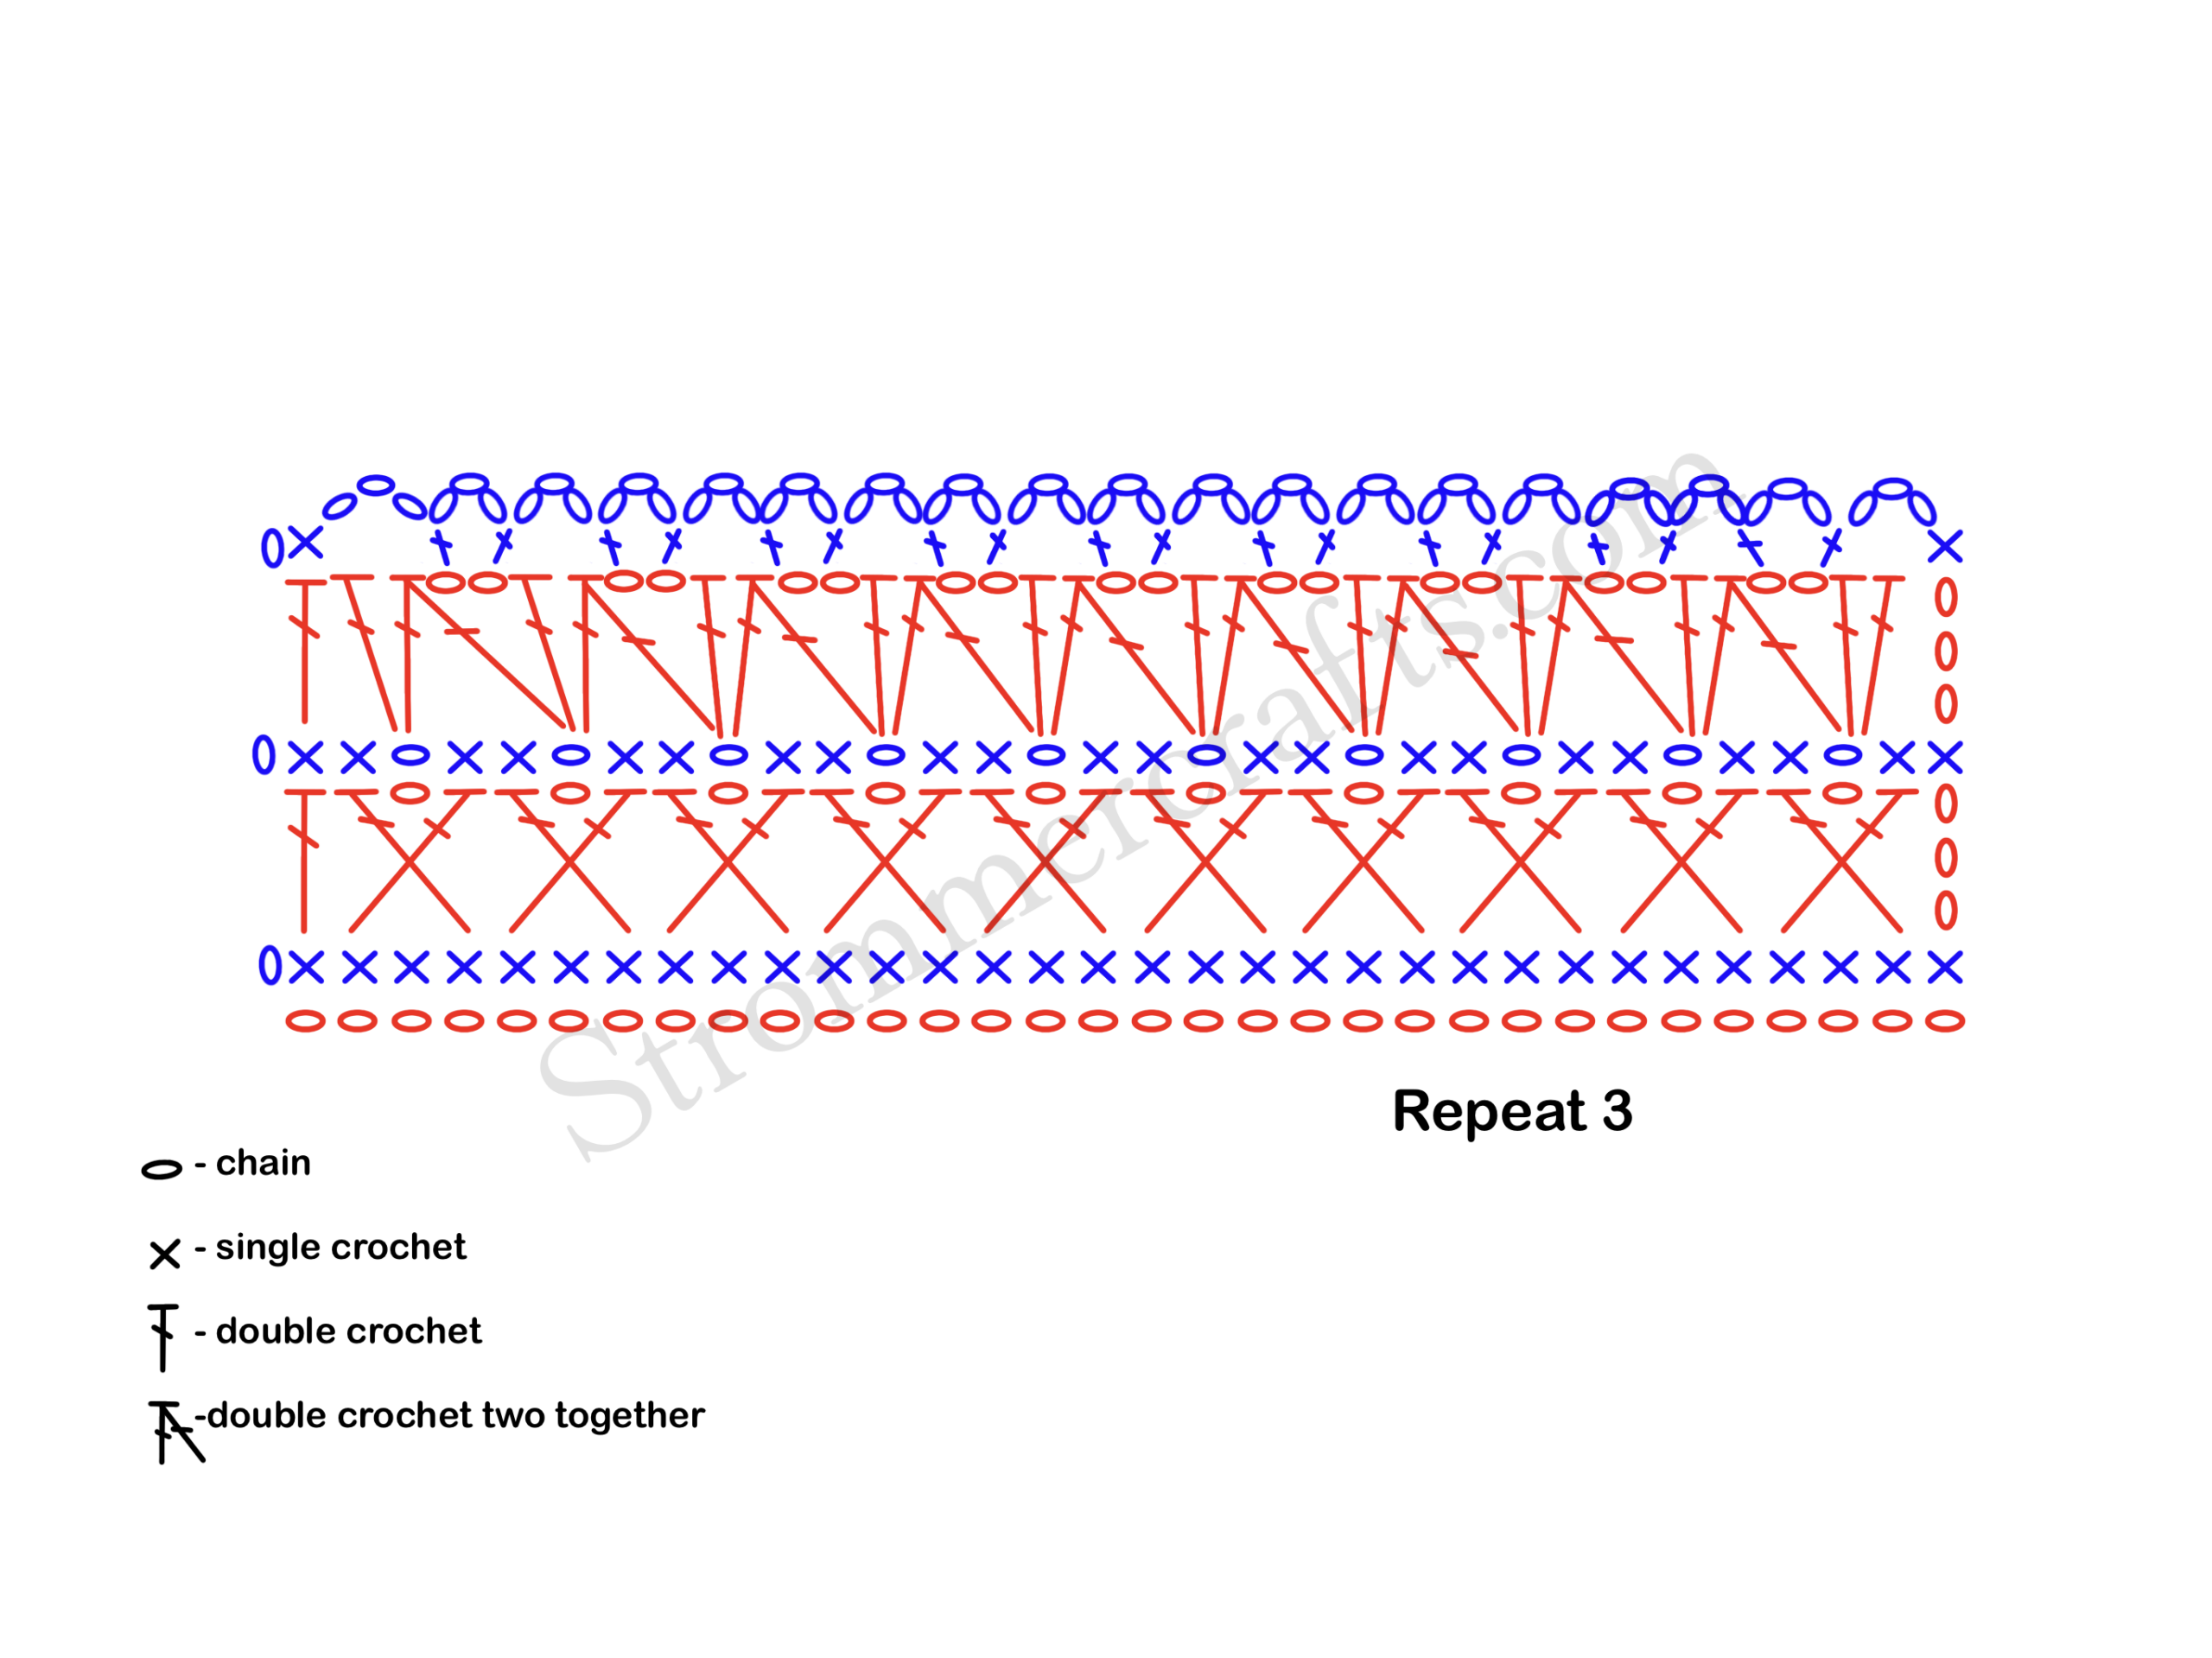
Very Elegant Crochet Lace Border Pattern
(This is for the straight edge only, scroll down for written instructions on the corners)
Ch a repeat of 3 until your happy with the length.
Row 1: sc into 2nd ch from hook, and sc into each ch across.
Row 2: ch 3 (counts as dc), turn, *skip 2 sts, dc into next st, ch 1, and going behind the dc just made, skip a st and dc into the next st.* This should make your dcs cross each other like an X. *Repeat from *to* across. You will have 1 st left at the end! Dc into last st
Row 3: ch 1 (does not count as st), sc into same st, sc into next st, *ch 1, skip ch 1 space from row 2, sc into next 2 sts.* Repeat from *to* the last sc will be placed in the top ch of starting ch 3.
Row 4: ch 3 (counts as a dc), in next ch 1 space (2dc, ch 2, dc2tog with the first leg in the same ch 1 space and the second leg in the next ch 1 space), *dc into same ch 1 space as the second leg of dc2tog, ch 2, dc2tog with the first leg in the same ch 1 space and the second leg in the next ch 1 space.* Repeat from *to* across, in the last ch 1 space, you should have the second leg of a dc2tog…place 1 more dc in same ch 1 space, skip a st and dc into very last st.
Row 5: ch 1 (does not count as a st), *ch 3, (sc, ch 3, sc) into next ch 2 space.* Repeat from *to* finish with a ch 3, skip 2 sts and sc into top of starting ch 3.
Cut thread with scissors, weave in any ends.
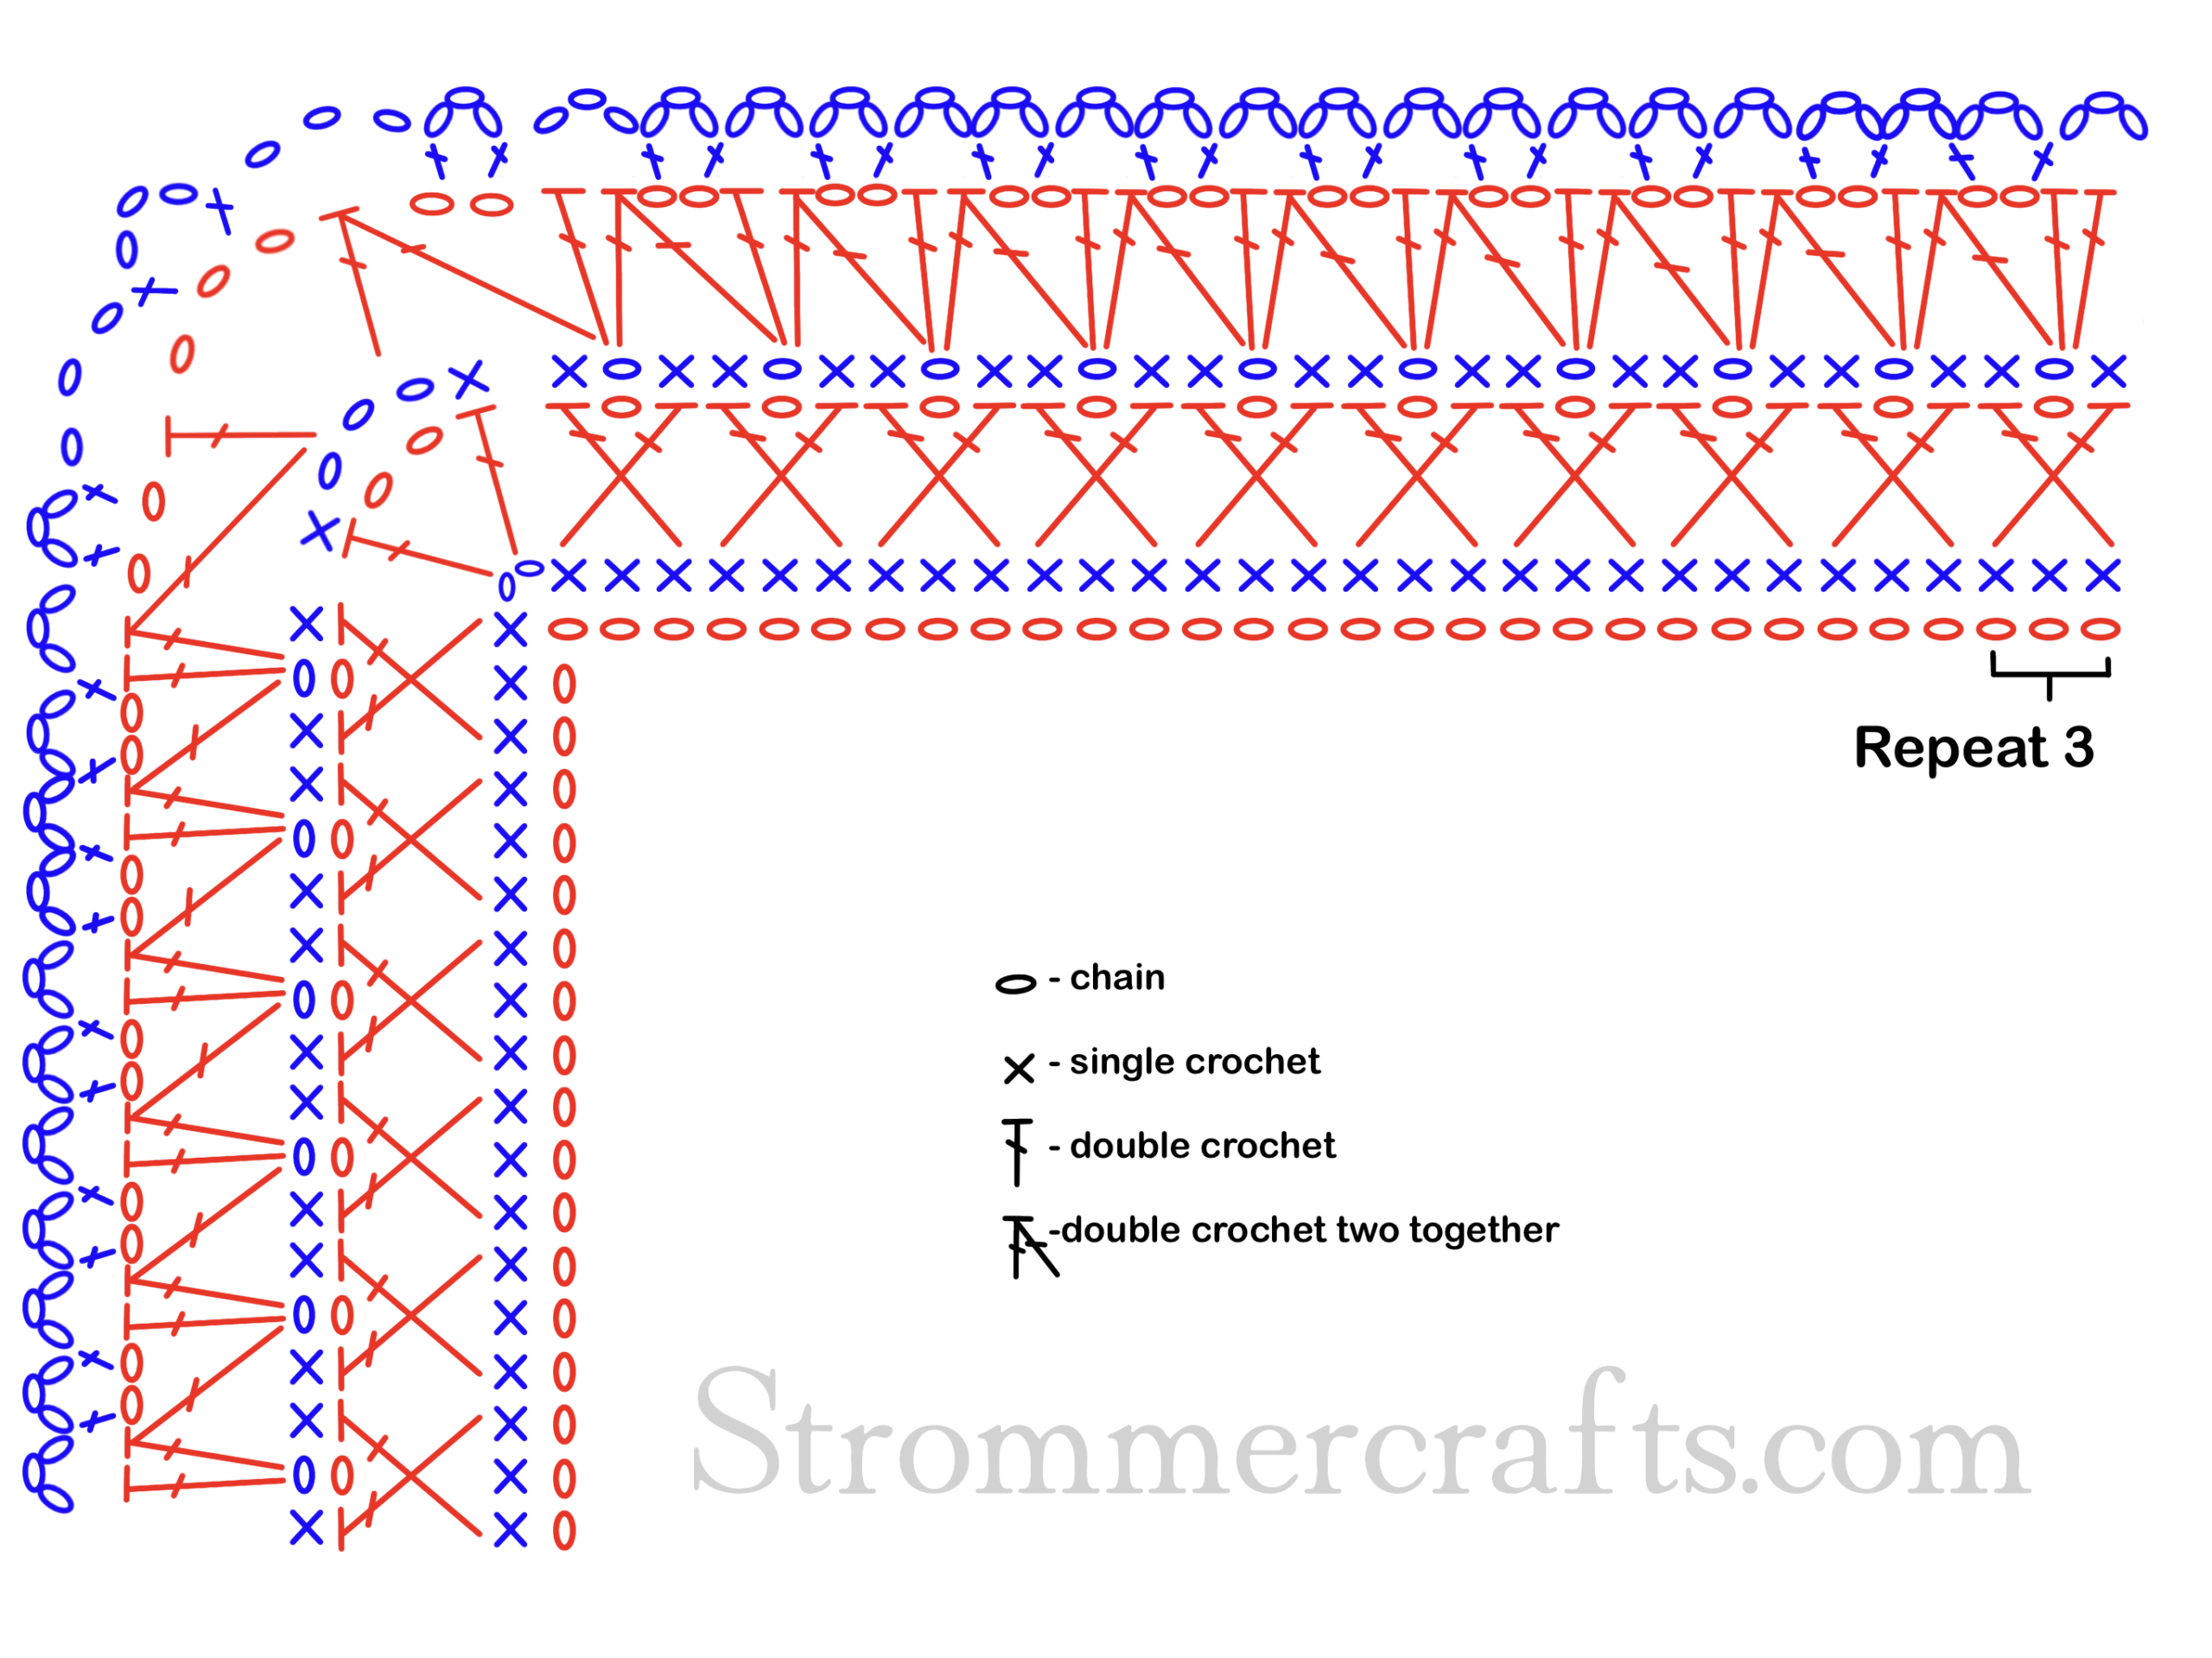
(Corners)
This is purely for the corners, the straight edges should be the exact same as the pattern above, except without the 1 dc on the end of either side.
You need to have a repeat of 3 for this border pattern to fit correctly.
Round 1: simply place sc in a series of 3, in the corner spaces place a ch 2 (so the 3rd sc in your repeat will be the first sc in the corner, ch 2, and then the 1st sc of your next series of 3 repeats will be the second sc in the same corner st)
Please look at the diagram for clarification. The 2 sc separated by the ch 2 share the same ch.
Round 2: in your corner ch 2 space, place (dc, ch 2, dc)
Round 3: in the corner, place a sc into first dc, ch 3 and sc into next dc
Round 4: in the ch 1 space before the ch 3 corner space, place a dc if you have not already, ch 2, 2dctog with first leg in same ch 1 space, and the second leg in the ch 3 corner space. Ch 3, dc into same ch 3 corner space, turning down the next side ch 2, 2dctog with the first leg in the same ch 3 corner space and the second leg in the next ch 1 space, and continue down straight edge
Round 5: (sc, ch 3, sc) in ch 3 corner space
Join with a sl st to first sc
Cut thread with scissors. Weave in any ends with tapestry needle.
Thank you for checking out my Very Elegant Crochet Lace Border!