Make a Stuffed Crochet Frog in an Afternoon!

Hello everyone! Today we are going to learn how to make a stuffed crochet frog toy! This pattern is so easy and quick, you can crochet this little guy in an afternoon!

***Please note that this post may contain affiliate links. This means that I may receive a commission if you purchase something through these links (at no cost to you!). Thank you for your support!***

Okay, so I was inspired to make my little frog friend to go along with my Frog Bucket Hat I made a few months ago. I use the same green yarn for both patterns so they match! Here they are side by side:

Crochet Stuffed Frog and Crochet Frog Bucket Hat

I think they’re so cute together! 

When I was creating this little crochet frog friend, I couldn’t decide if I wanted to give him arms or not. I decided to add arms, but did this using an amigurumi technique by working in a magic circle. The belly is also made with this technique.

If you like how your frog looks without the arms, you can leave them off.

I used medium 4 worsted weight, acrylic yarn. You can use any kind of yarn you would like as long as it’s the correct weight. I just really like the yarn from Red Heart for fun projects like this. Especially since it’s reasonably priced and comes in so many colors.

When finished, he is about 5″ x 5.5″ (give or take, all depends on your tension!)  

Ready to learn how to make your cute, little, crochet frog stuffy? Let’s get started!

Materials Needed:

Abbreviations Used:

  • Ch – chain
  • St(s) – stitch(es)
  • Sl st – slip stitch
  • Sc – single crochet
  • Sc2tog – single crochet two stitches together
  • Mc – magic circle

Special Considerations:

  • When making the body of the frog, the chain 1 does not count as a stitch.
  • When working in the magic circle, do not join to the first st with a slip stitch, just continue single crocheting around (a stitch marker is helpful to keep track of your rounds).
  • The number in parenthesis at the end of the row/round, indicates how many stitches you should have.
  • When finished with the 2nd body panel (do not cut yarn, leave your hook on there if you want to sl st them together)

Body of Frog (make 2):

With 5 mm crochet hook and lime green yarn:

  • Ch 11
  • Row 1: From second ch from hook, sc in each ch across (10 sts)
  • Row 2: Turn, ch 1, make 2 sc in first st, sc in each st across until last st, make 2 sc in last st (12 sts)
  • Row 3: Turn, ch 1, make 2 sc in first st, sc in each st across until last st, make 2 sc in last st (14 sts)
  • Row 4: Turn, ch 1, make 2 sc in first st, sc in each st across until last st, make 2 sc in last st (16 sts)
  • Row 5-8: Turn, ch 1, sc in each st across (16 sts)
  • Row 9: Turn, ch 1, sc2tog, sc in each st across until the last two sts, sc2tog (14 sts)
  • Row 10-11:  Turn, ch 1, sc in each st across (14 sts)
  • Row 12: Turn, ch 1, make 3 sc in first st, sc in each st across until last st, make 3 sc in last st (18 sts)
  • Row 13: Turn, ch 1, make 2 sc in first st, sc in each st across until last st, make 2 sc in last st (20 sts)
  • Row 14: Turn, ch 1, sc2tog, sc in each st across until last two sts, sc2tog (18 sts)
  • Row 15: Turn, ch 1, sc2tog, 1 sc in next st, sl st into next 4 sts loosely, 1 sc in next 4 sts, sl st into next 4 sts loosely, 1 sc in next st, sc2tog (16 sts)
  • Row 16: Turn, ch 1, 2 sc in first st, sc2tog, sl st into next 3 sts loosely, 1 sc in next 4 sts, sl st into next 3 sts, sc2tog, 2 sc in last st (16 sts)
  • Sl st into same st, cut a reasonable length off and pull through for the FIRST PANEL.
  • If you don’t cut your yarn for the second panel, it can be easy to sew them together by sl sting later. If you want to make the arms, I would suggest sewing the panels together first and then making the arms (unless you would rather sew with your needle, totally up to you).
How body of crochet frog stuffy should look
Completed Body

Eyes (make 2):

With 5 mm hook and black yarn:

  • Ch 3
  • Row 1: From second ch from hook, 1 sc in next 2 chs (2 sts)
  • Cut a reasonable length of yarn for sewing and pull through.

Belly:

With 5 mm hook and soft white yarn:

  • Make 6 sc in mc (6 sts)
  • Round 1: Make 2 scs in each st around (12 sts) [You can use a stitch marker to mark the begining/end of your round so you can count your stitches]
  • Round 2: Make 2 scs in next st, 1 sc in next st. Repeat around (18 sts)
  • Round 3: Make 2 scs in next st, 1 sc in next 2 sts. Repeat around (24 sts)
  • Cut a long piece of yarn off for sewing later, and pull through.

Arms (optional, make 2)

With 5 mm hook and lime green yarn:

  • Make 6 sc in mc (6 sts)
  • Round 1-3: Sc in each st around (6 sts)
  • Cut a long piece of yarn off for sewing later and pull through.
Finished frog arm

Assembly:

  • Step 1: Start by sewing facial features onto one of the body panels (see pic below). Tie excess yarn securely in the back.
  • Step 2: Sew the mouth on with a piece of long black yarn. Insert needle into row even with the bottom of the eyes. Go 5 sts across. Insert needle 3 rows below your “line” and catch it to create a V smile (see pic below). Tie excess yarn securely in the back.
  • Step 3: Sew the belly on by lining the bottom of the belly up with the bottom of the body. Tie excess yarn securely in the back.
  • The tied off portions will be hidden inside the frog. Don’t worry about how messy your yarn looks for now!
  • Step 4: With the second body panel, line it up with the first. Use your crochet hook to sew them together by slip stitching around. Leave one side open.
  • Step 5: Stuff with poly-fil to your liking. Continue to sew across by slip stitching until the last st. Cut yarn and pull through. Sew tail with tapestry needle.  
Finished crochet frog with arms
Step 1
How to sew on mouth
Step 2
Line up body panels of the frog
Step 4
Stuffing the body
Step 5

You’re all done! What a fun crochet project this was, and I really think it pairs well the Frog Bucket Hat. Make them both as a baby shower gift or just for fun for the kids!

Does the crochet frog stuffy look great with or without the arms? Which one do you think looks better? Let me know in the comments below!

How to Change Color in Crochet the Right Way

In this post you will learn: How to change color the right way in crochet and how to change color with single, half double, double, and triple crochet stitches.

Hello everyone! Today we are going to learn how to change colors in crochet the right way! In one of my works in progress (WIP), I am needing to change between two different colors frequently, and I thought this would be a great learning opportunity for beginners.

Have you ever worked on a project that required you to attach a new colored yarn to complete it? Did you attach your new color, but notice as you crocheted along that your new color tended to look a little…off?

I am here to help! This technique of changing colors will keep your colored stitches straighter and much more uniform!

Why is this technique the right way?

This color change technique is better because it prevents your last color from “wandering” into your new one. 

Many crocheters will attempt a color change by inserting their hook into the next stitch, THEN attaching the new yarn and finishing the stitch.

There is nothing wrong with doing that, it just makes the top of the stitch have the previous colored yarn and the bottom of the stitch with the new.

This is what happens if you attach a new color the INCORRECT way:

Incorrect way to change colors
Incorrect!

Do you see how the stitch that needs the new color is half the cream colored yarn and half the brown colored yarn? We want to avoid this!

Below I will show you how to change colors with single, half double, double, and triple crochet stitches.

Color Change with Single Crochet:

(Please note these are US crochet terms used, not UK)

Step 1 of Color change technique
Step 1
Step 2 of Color Change
Step 2
Step 3 of color change technique crochet
Step 3

I have already made a starting chain and single crocheted back into those chains prior to step 1.

Step 1 – Stop yourself two stitches BEFORE the needed color change. The arrow indicates the stitch that needs the new color. 

Step 2 – Single crochet as per usual into the next stitch, but DO NOT finish all the way. Keep those two loops on your hook.

Step 3 – Loop your new color onto your hook and pull it through both of the loops. I found that this was a little tricky when I was a beginner crocheter. Just try to keep tension on the new color and your previous color the best you can so it’s not super loose.

Step 4 of color change technique
Step 4
Step 5 of color change
Step 5

Step 4 – Single crochet into the next stitch with your new color.

Step 5 – Finished row of color change.

You can also use this technique if you are needing to start a whole new row with a color. 

In the LAST stitch of the row (before turning and chaining) do Steps 2-4 and chain however many chains you need for your stitch height with your new color, continue with the next row with your new color. 

Color Change with Half Double Crochet:

Step 1 of half double color change
Step 1
Step 2 of half double color change
Step 2
Step 3 of half double color change
Step 3

Step 1 – In the stitch before the needed color change, start your half double crochet stitch, but don’t finish it (yarn over, insert hook into next stitch). You should have 3 loops on your hook.

Step 2 – Loop your new colored yarn onto your hook and pull through all 3 loops. Do your best to keep your tension!

Step 3 – Continue half double crocheting with your new color!

Color Change with Double Crochet:

Step 1 of double crochet color change
Step 1
Step 2 of double crochet color change
Step 2

Step 1 – In the stitch before the needed color change, make a double crochet but don’t finish it! You will have 2 loops on your hook.

Step 2 – Attach your new colored yarn and pull through both loops. Continue double crocheting across.

How to Color Change with Triple Crochet:

Start your triple crochet
Step 1
Pull through 2 loops
Step 2
Attach yarn at top of triple crochet stitch
Step 3

Steps 1-2 – In the stitch before the needed color change, make your triple crochet. Yarn over twice (step 1), insert hook into next stitch, yarn over (4 loops on your hooks), pull through 2 loops (step 2/ 3 loops on your hook), yarn over pull through 2 loops again (2 loops on your hook).

Step 3 – Attach new colored yarn by looping it onto your hook

pull yarn through triple crochet
Step 4
Triple Crochet color change
Step 5

Step 4 – Pull new yarn through both loops

Step 5 – Continue triple crocheting across.


What if I want to start a whole row with a new color, not just in the middle?

There are actually a few ways you can do this! You can either, A) Cut your yarn at the end of your row, attach a new yarn to your hook via a slip knot and make a standing stitch. Or B) Follow the steps above in the last stitch of your row to attach your new colored yarn. Chain one (or however many you need for your stitch height) with your new color and continue crocheting.

Whichever one you choose will be up to you and I think depends on what your project is. If your project uses many different colors, option A) might be better. If you’re only using two colors option B) would be ideal.

So to recap: You want to color change with this technique if you want your colors to be nice and straight. Essentially, you will make whatever stitch you are using, and before the last pull through of that stitch, attach your new color, THEN pull through to finish it.

Thank you for reading, and as always…happy crocheting!

Add a Little Texture to Your Life! 2 Beautiful Crochet Dishcloths in Peaches and Creme Yarn

***This post may contain affiliate links. This means if you click on a link and make a purchase, I may make a commission at no extra cost to you***

In this post you’ll find: the crochet pattern for both dishcloths and materials used.

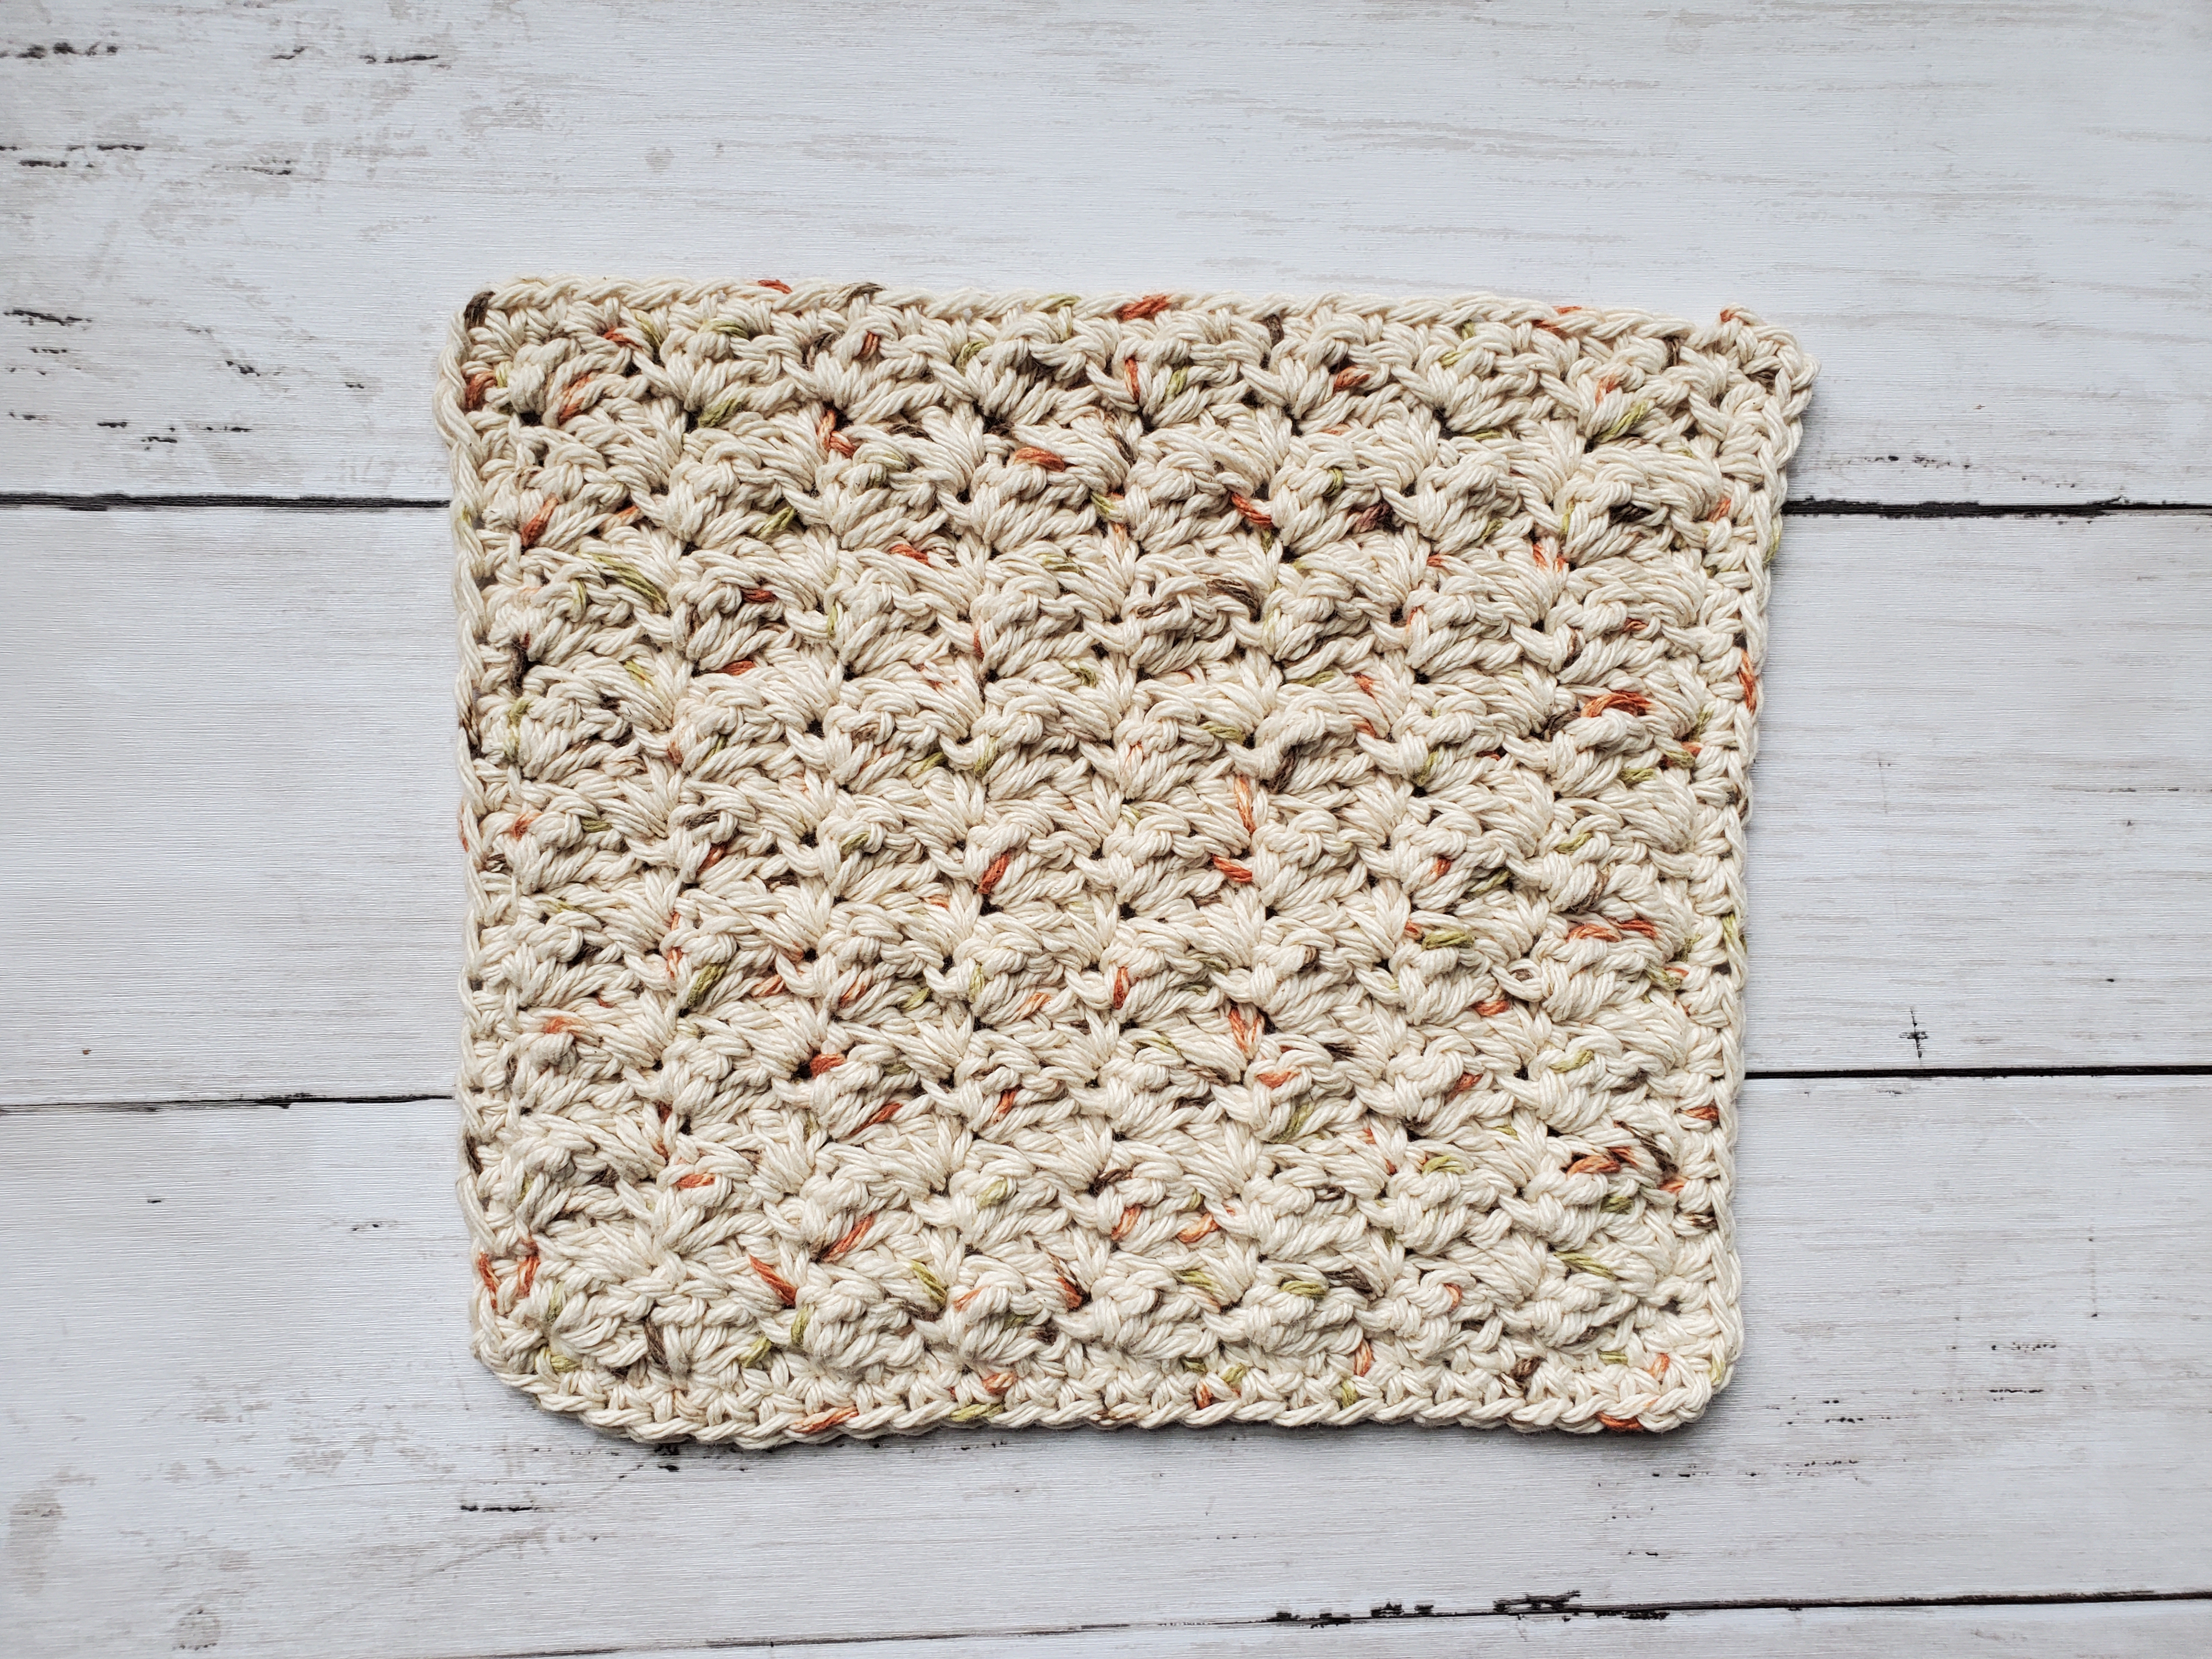
Hello everyone! Today I bring you not just one, but TWO dishcloth patterns with gorgeous texture! I am using the Peaches and Creme yarn in Linen to make these.

I am so in love with the Peaches and Creme yarn line. The yarn literally looks like peaches and creme! Not only is it beautiful, but the cotton yarn feels so nice to touch. It’s soft, but durable!

If you enjoy these crochet textures and this yarn, check out my previous post on another Peaches and Creme dishcloth here!

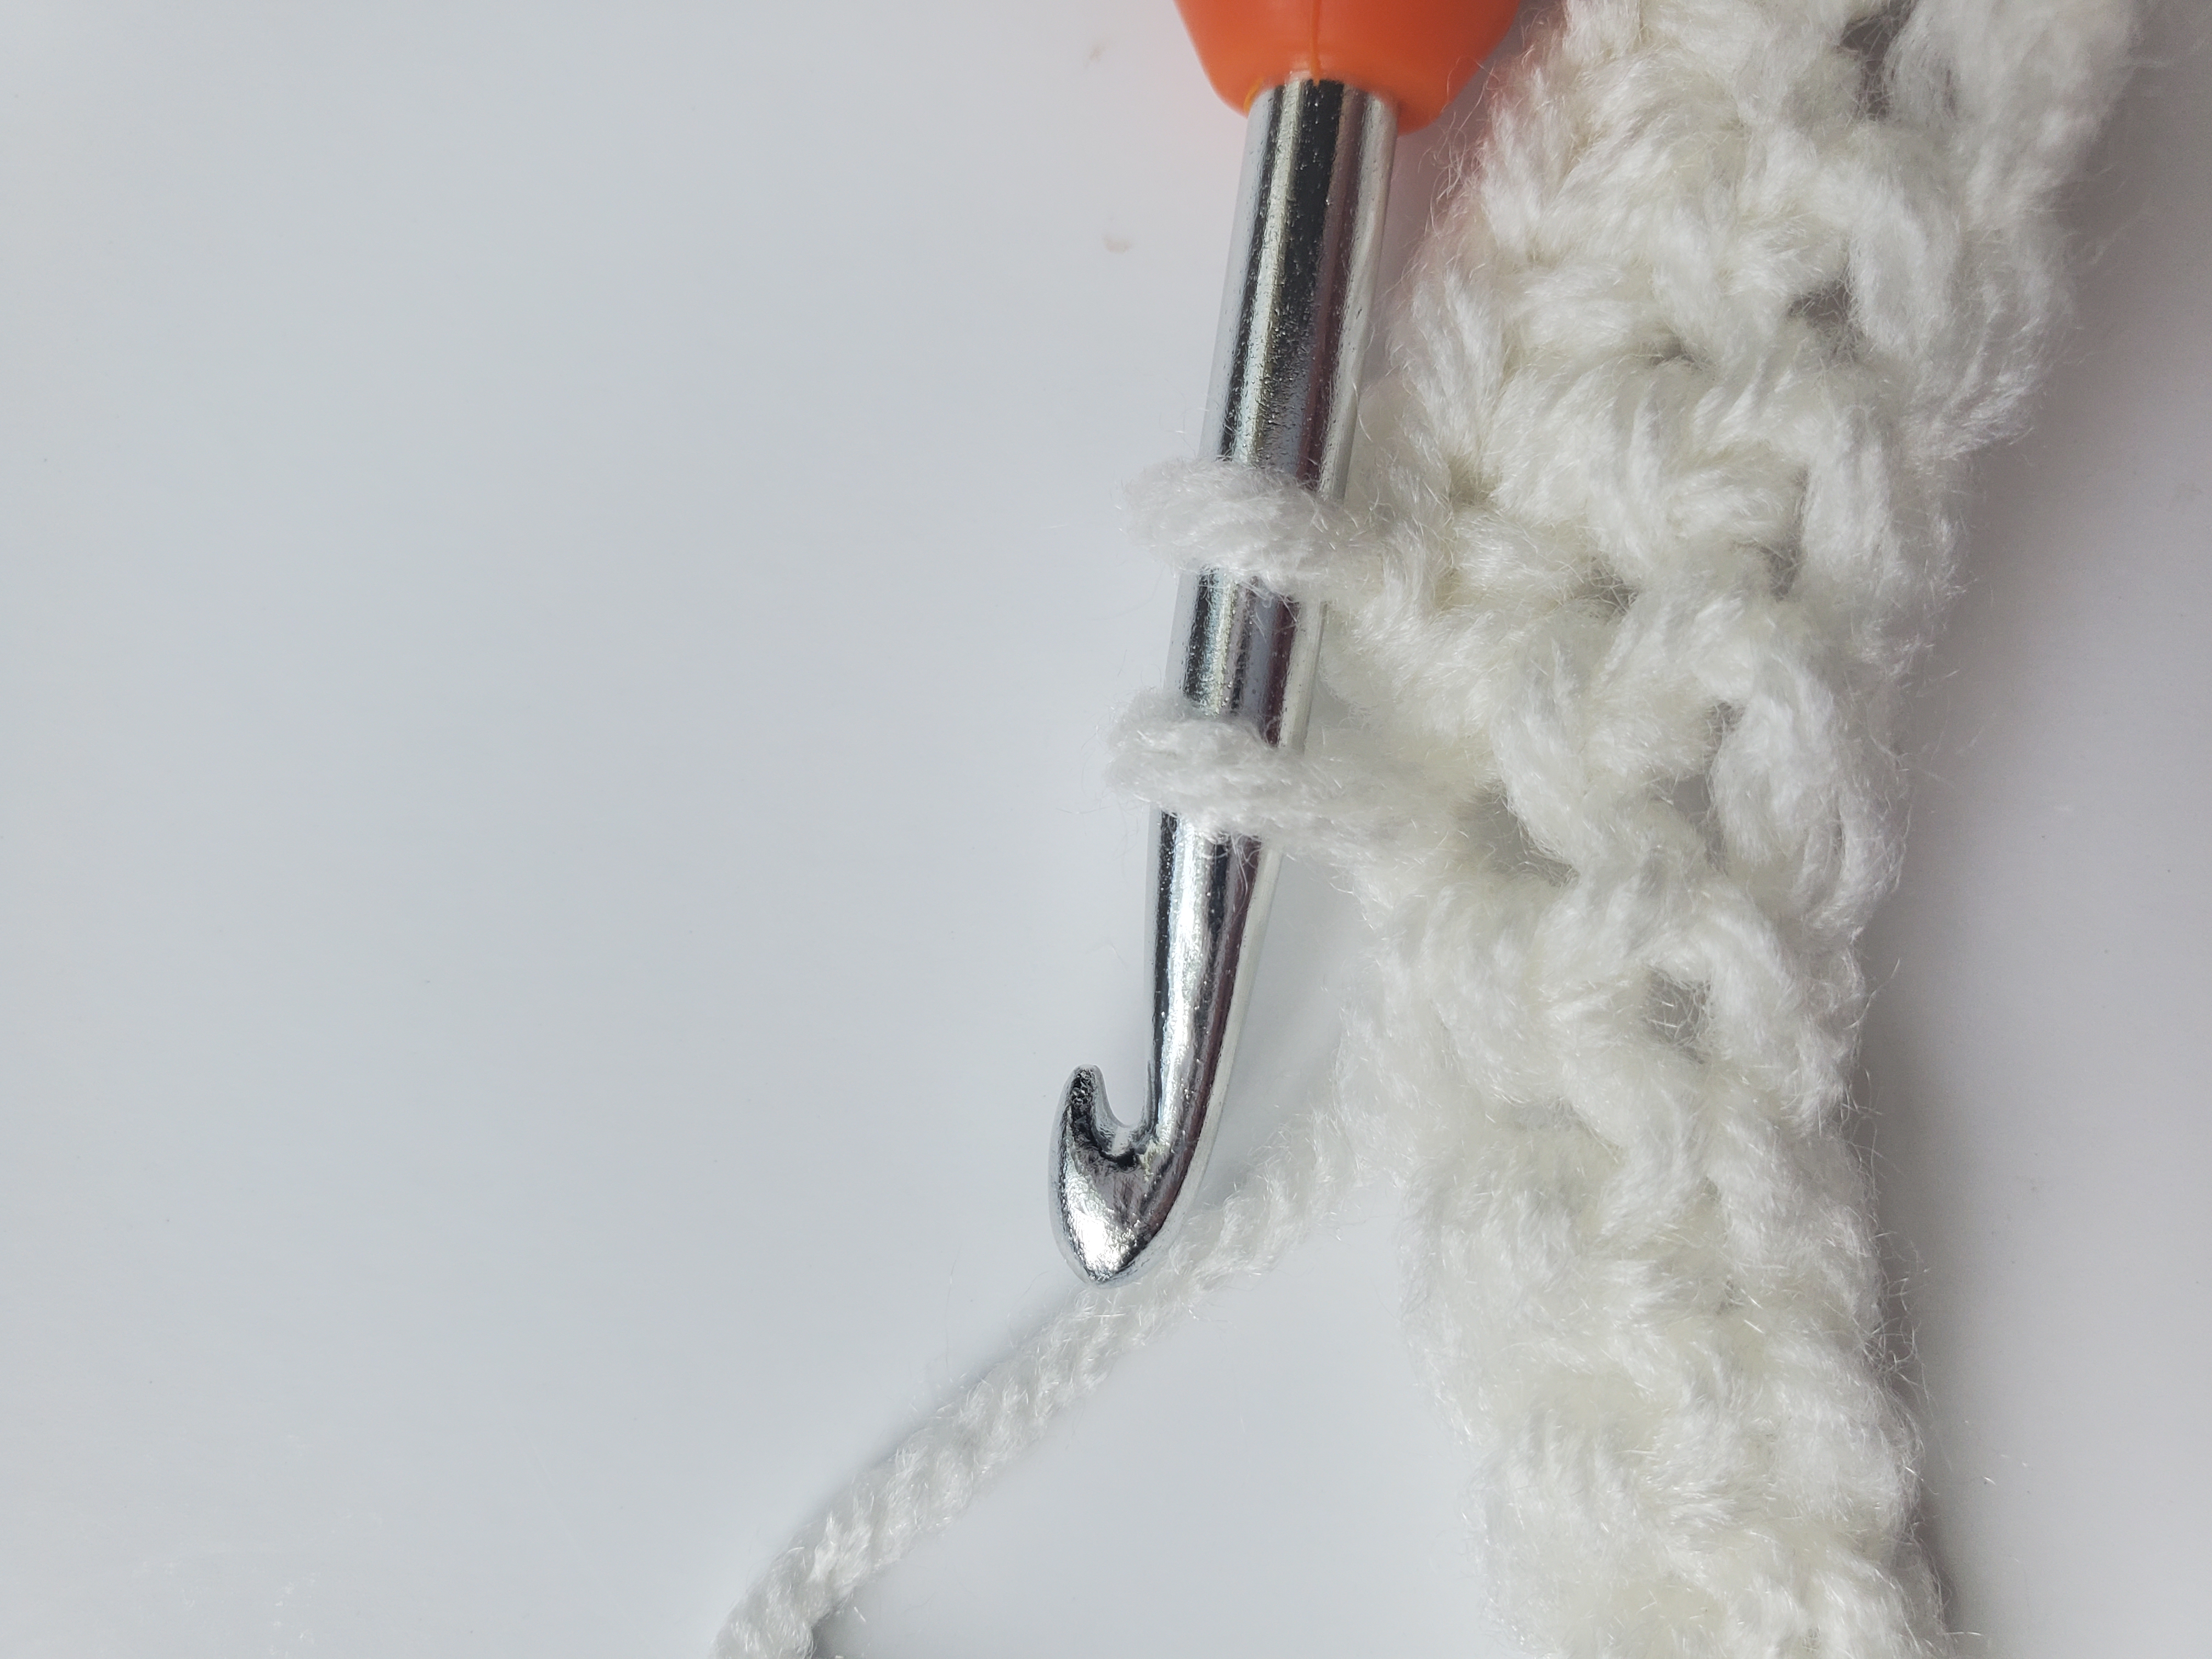
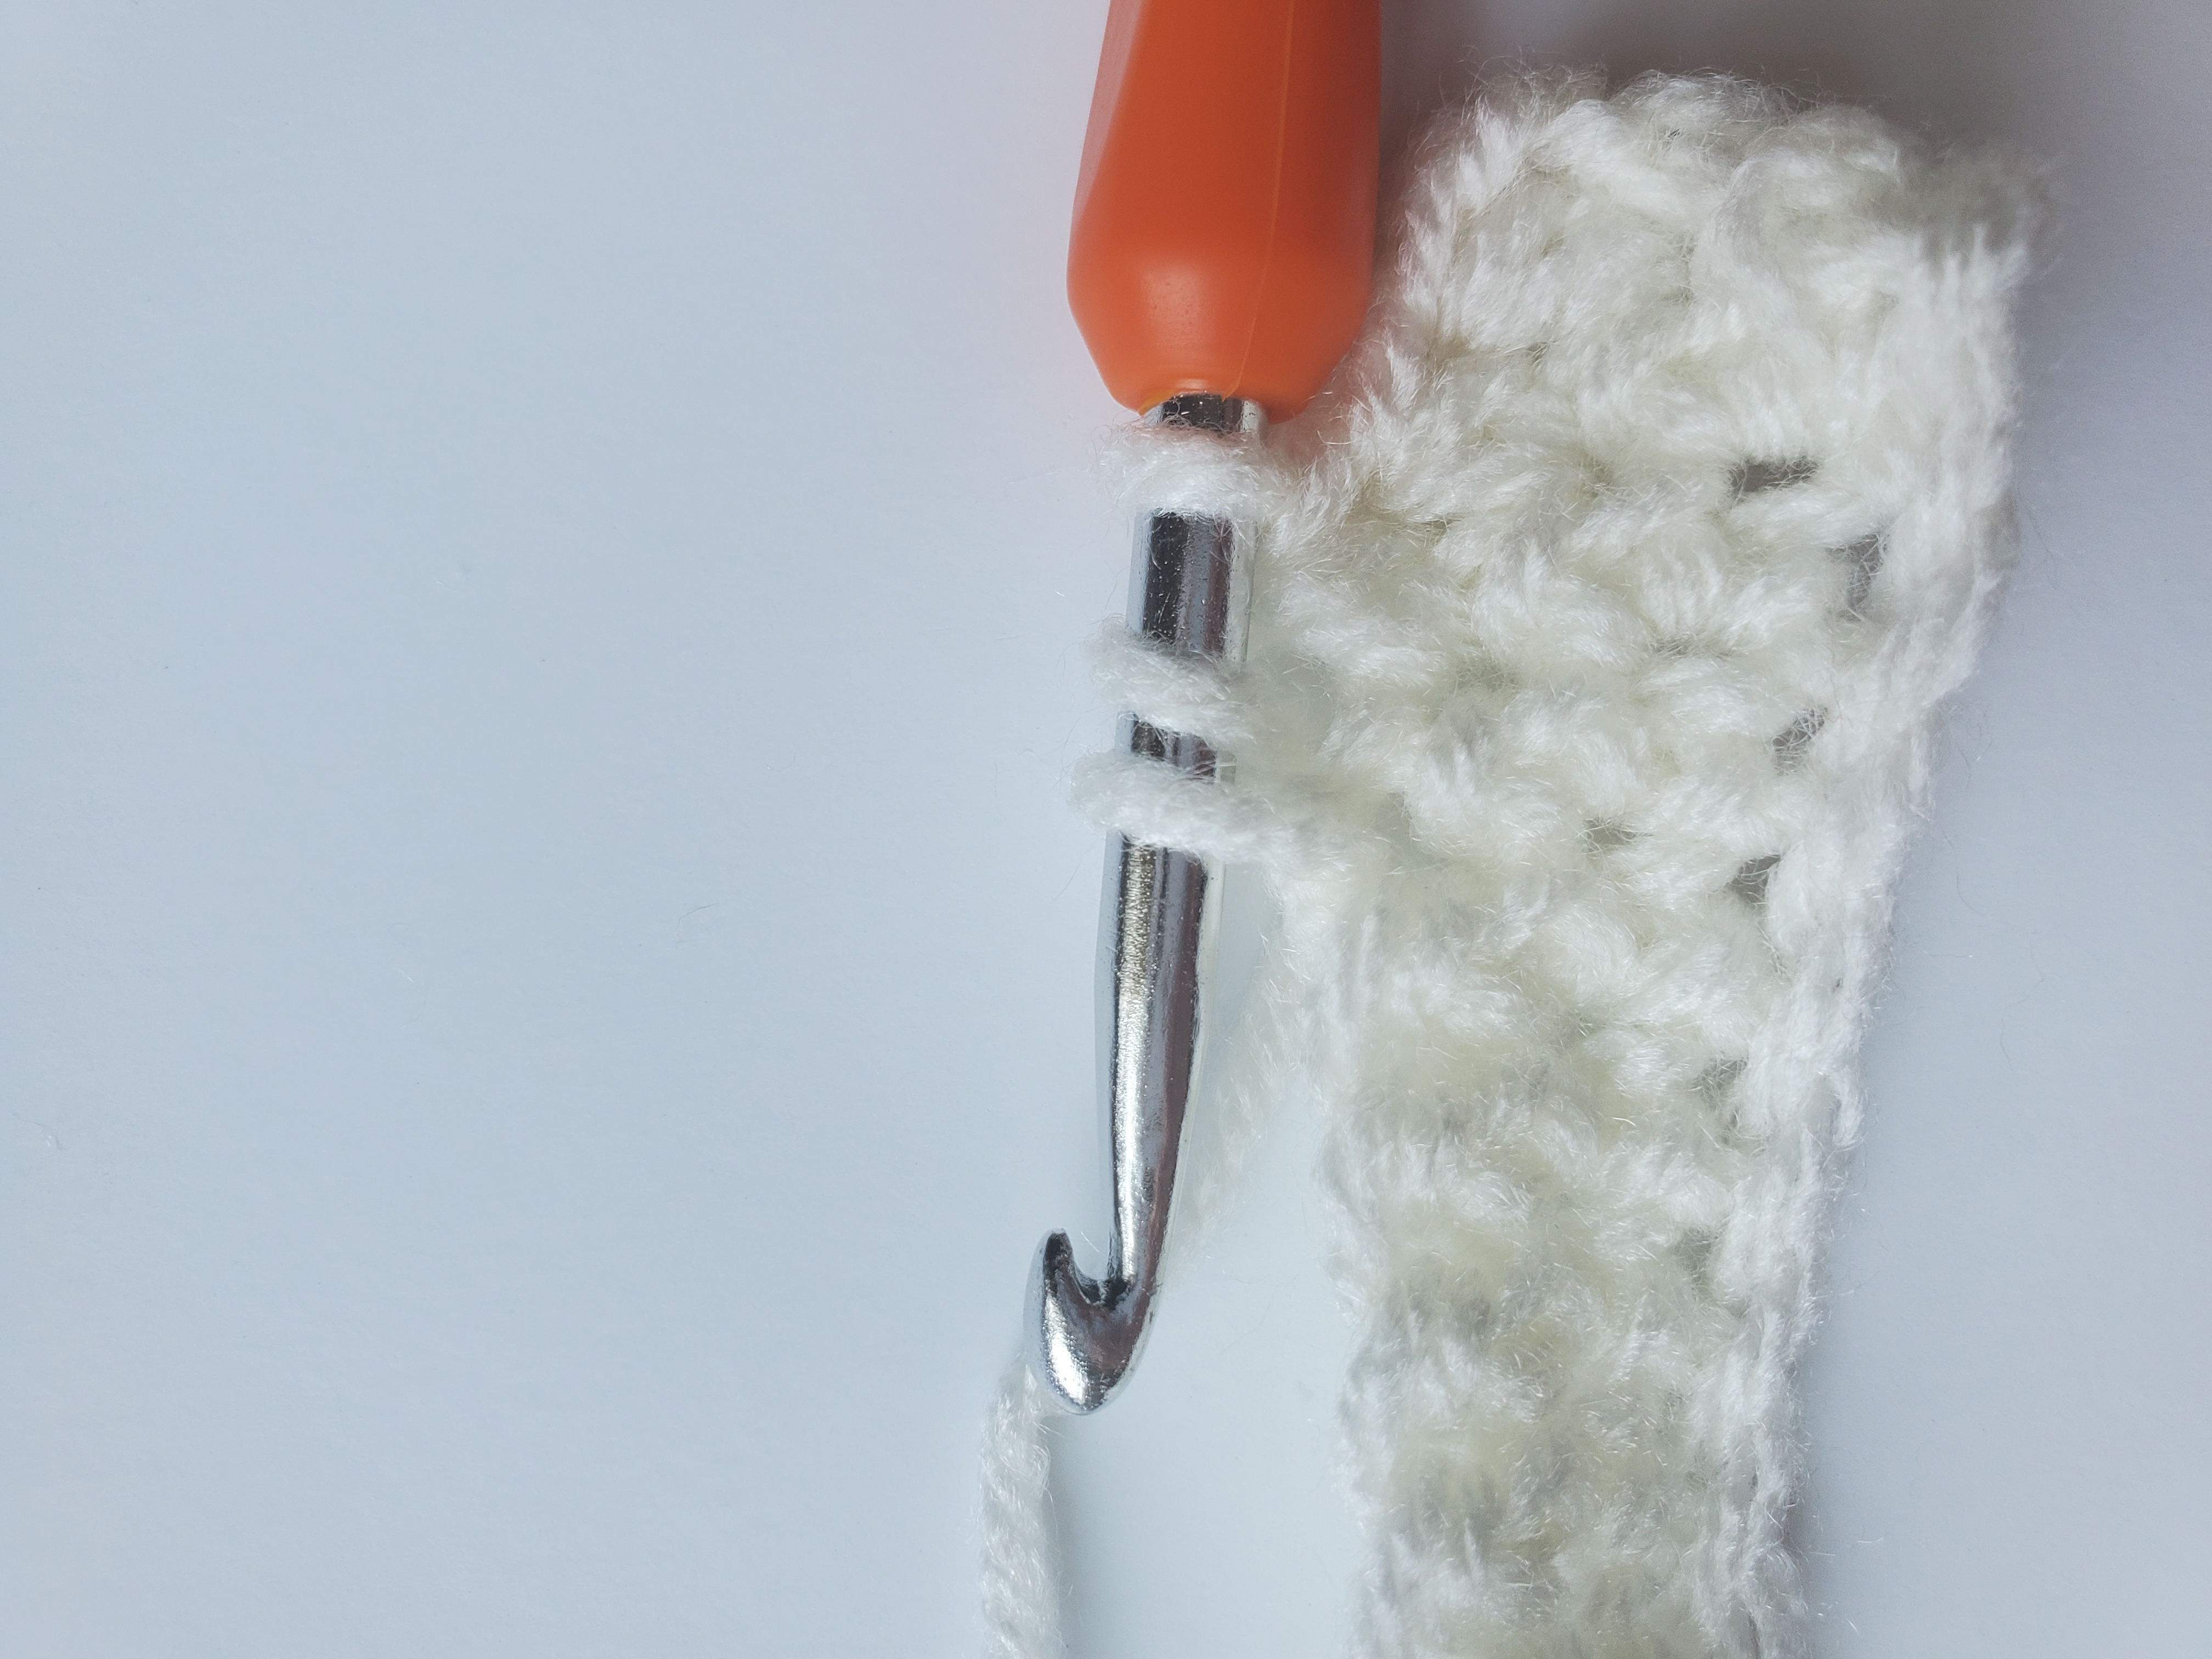
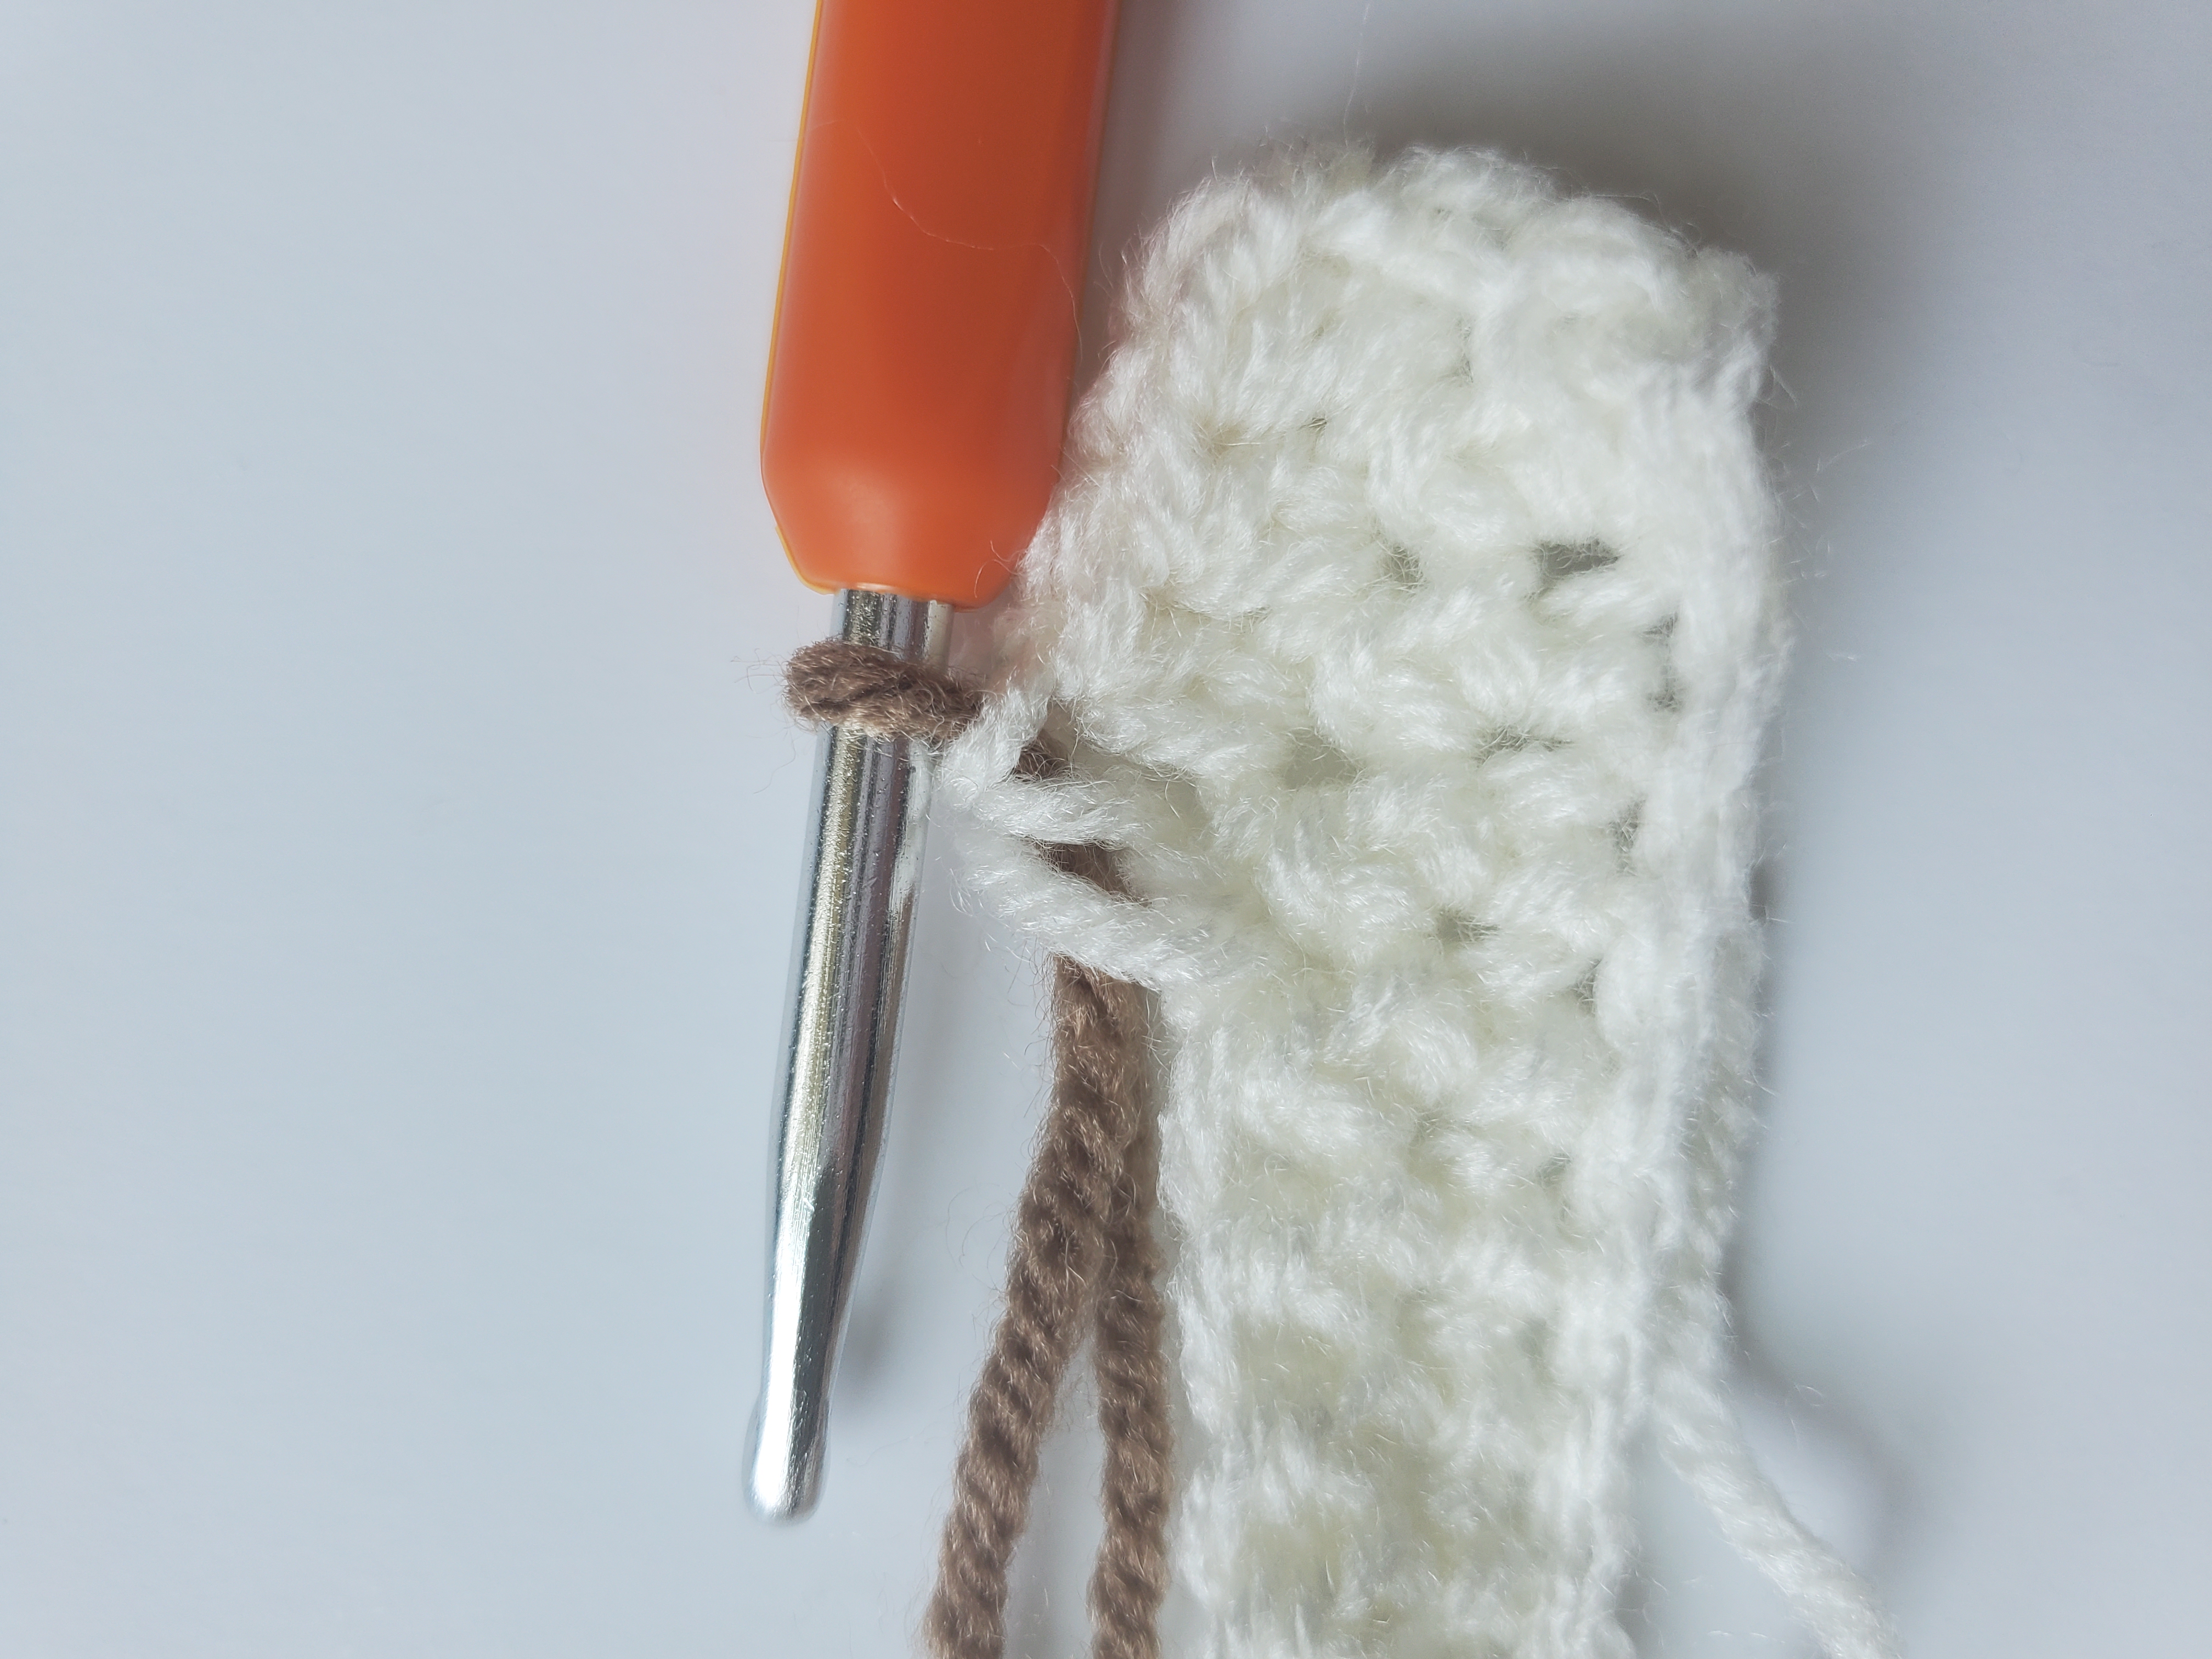
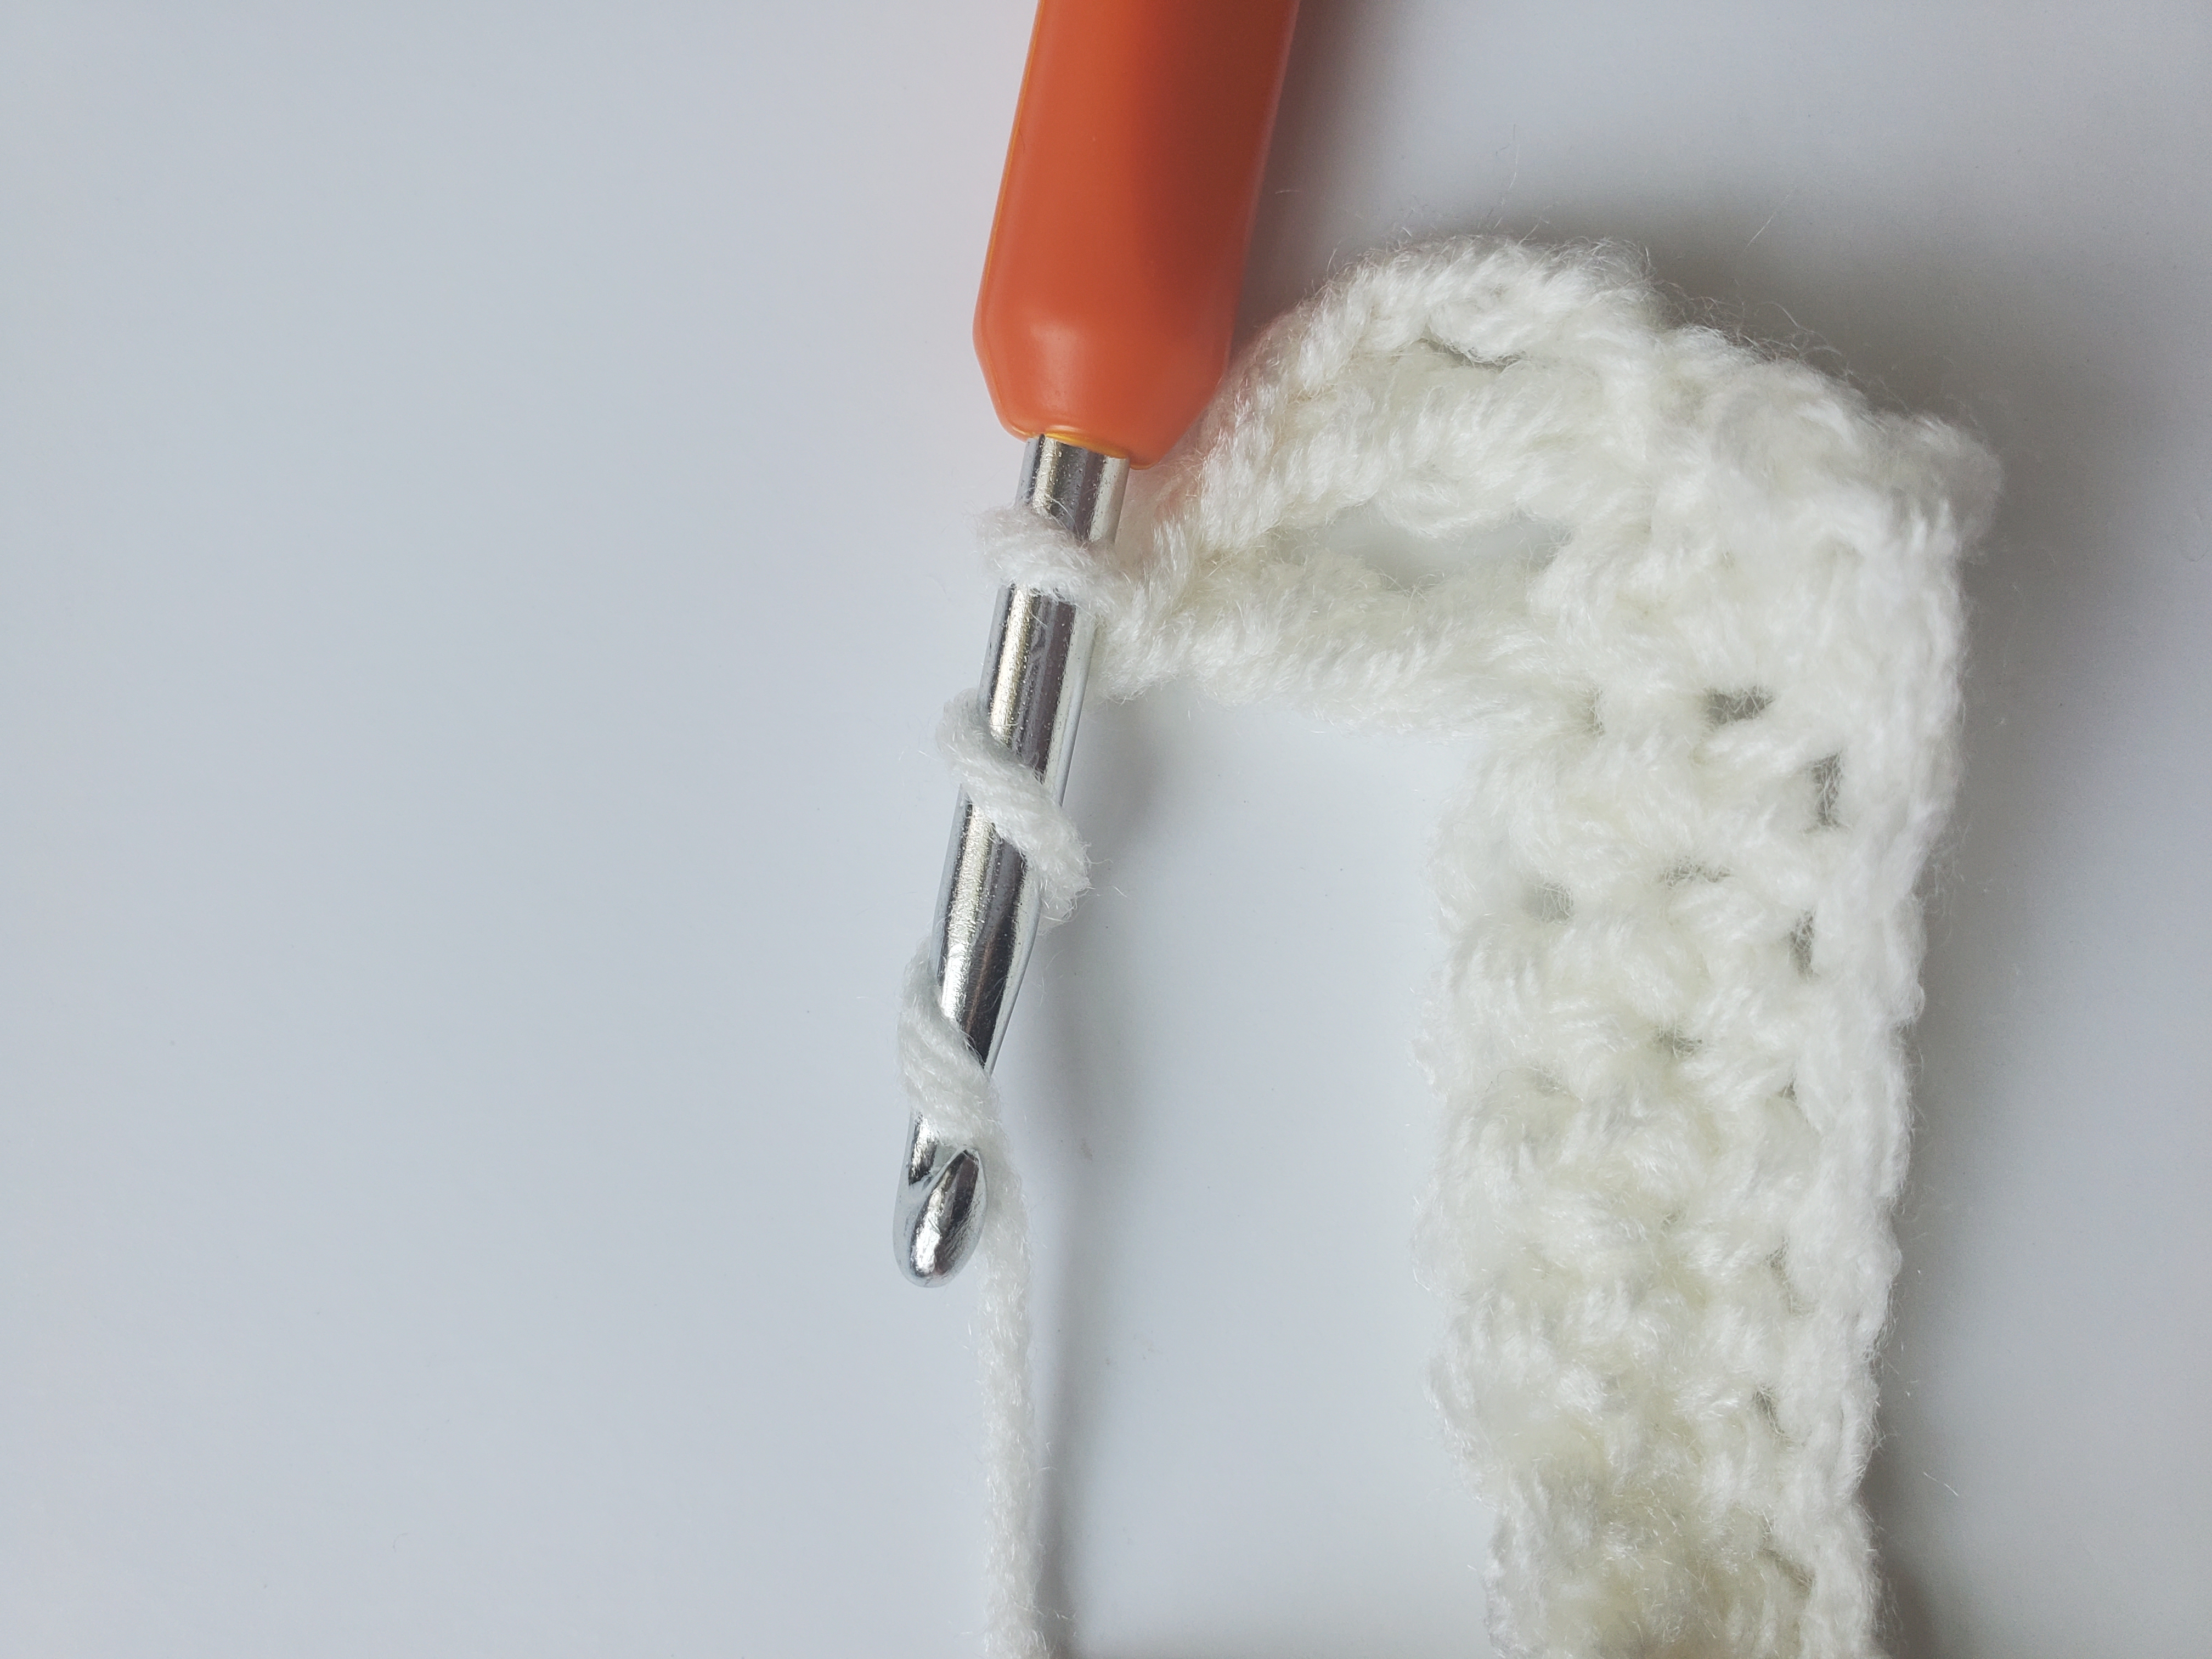
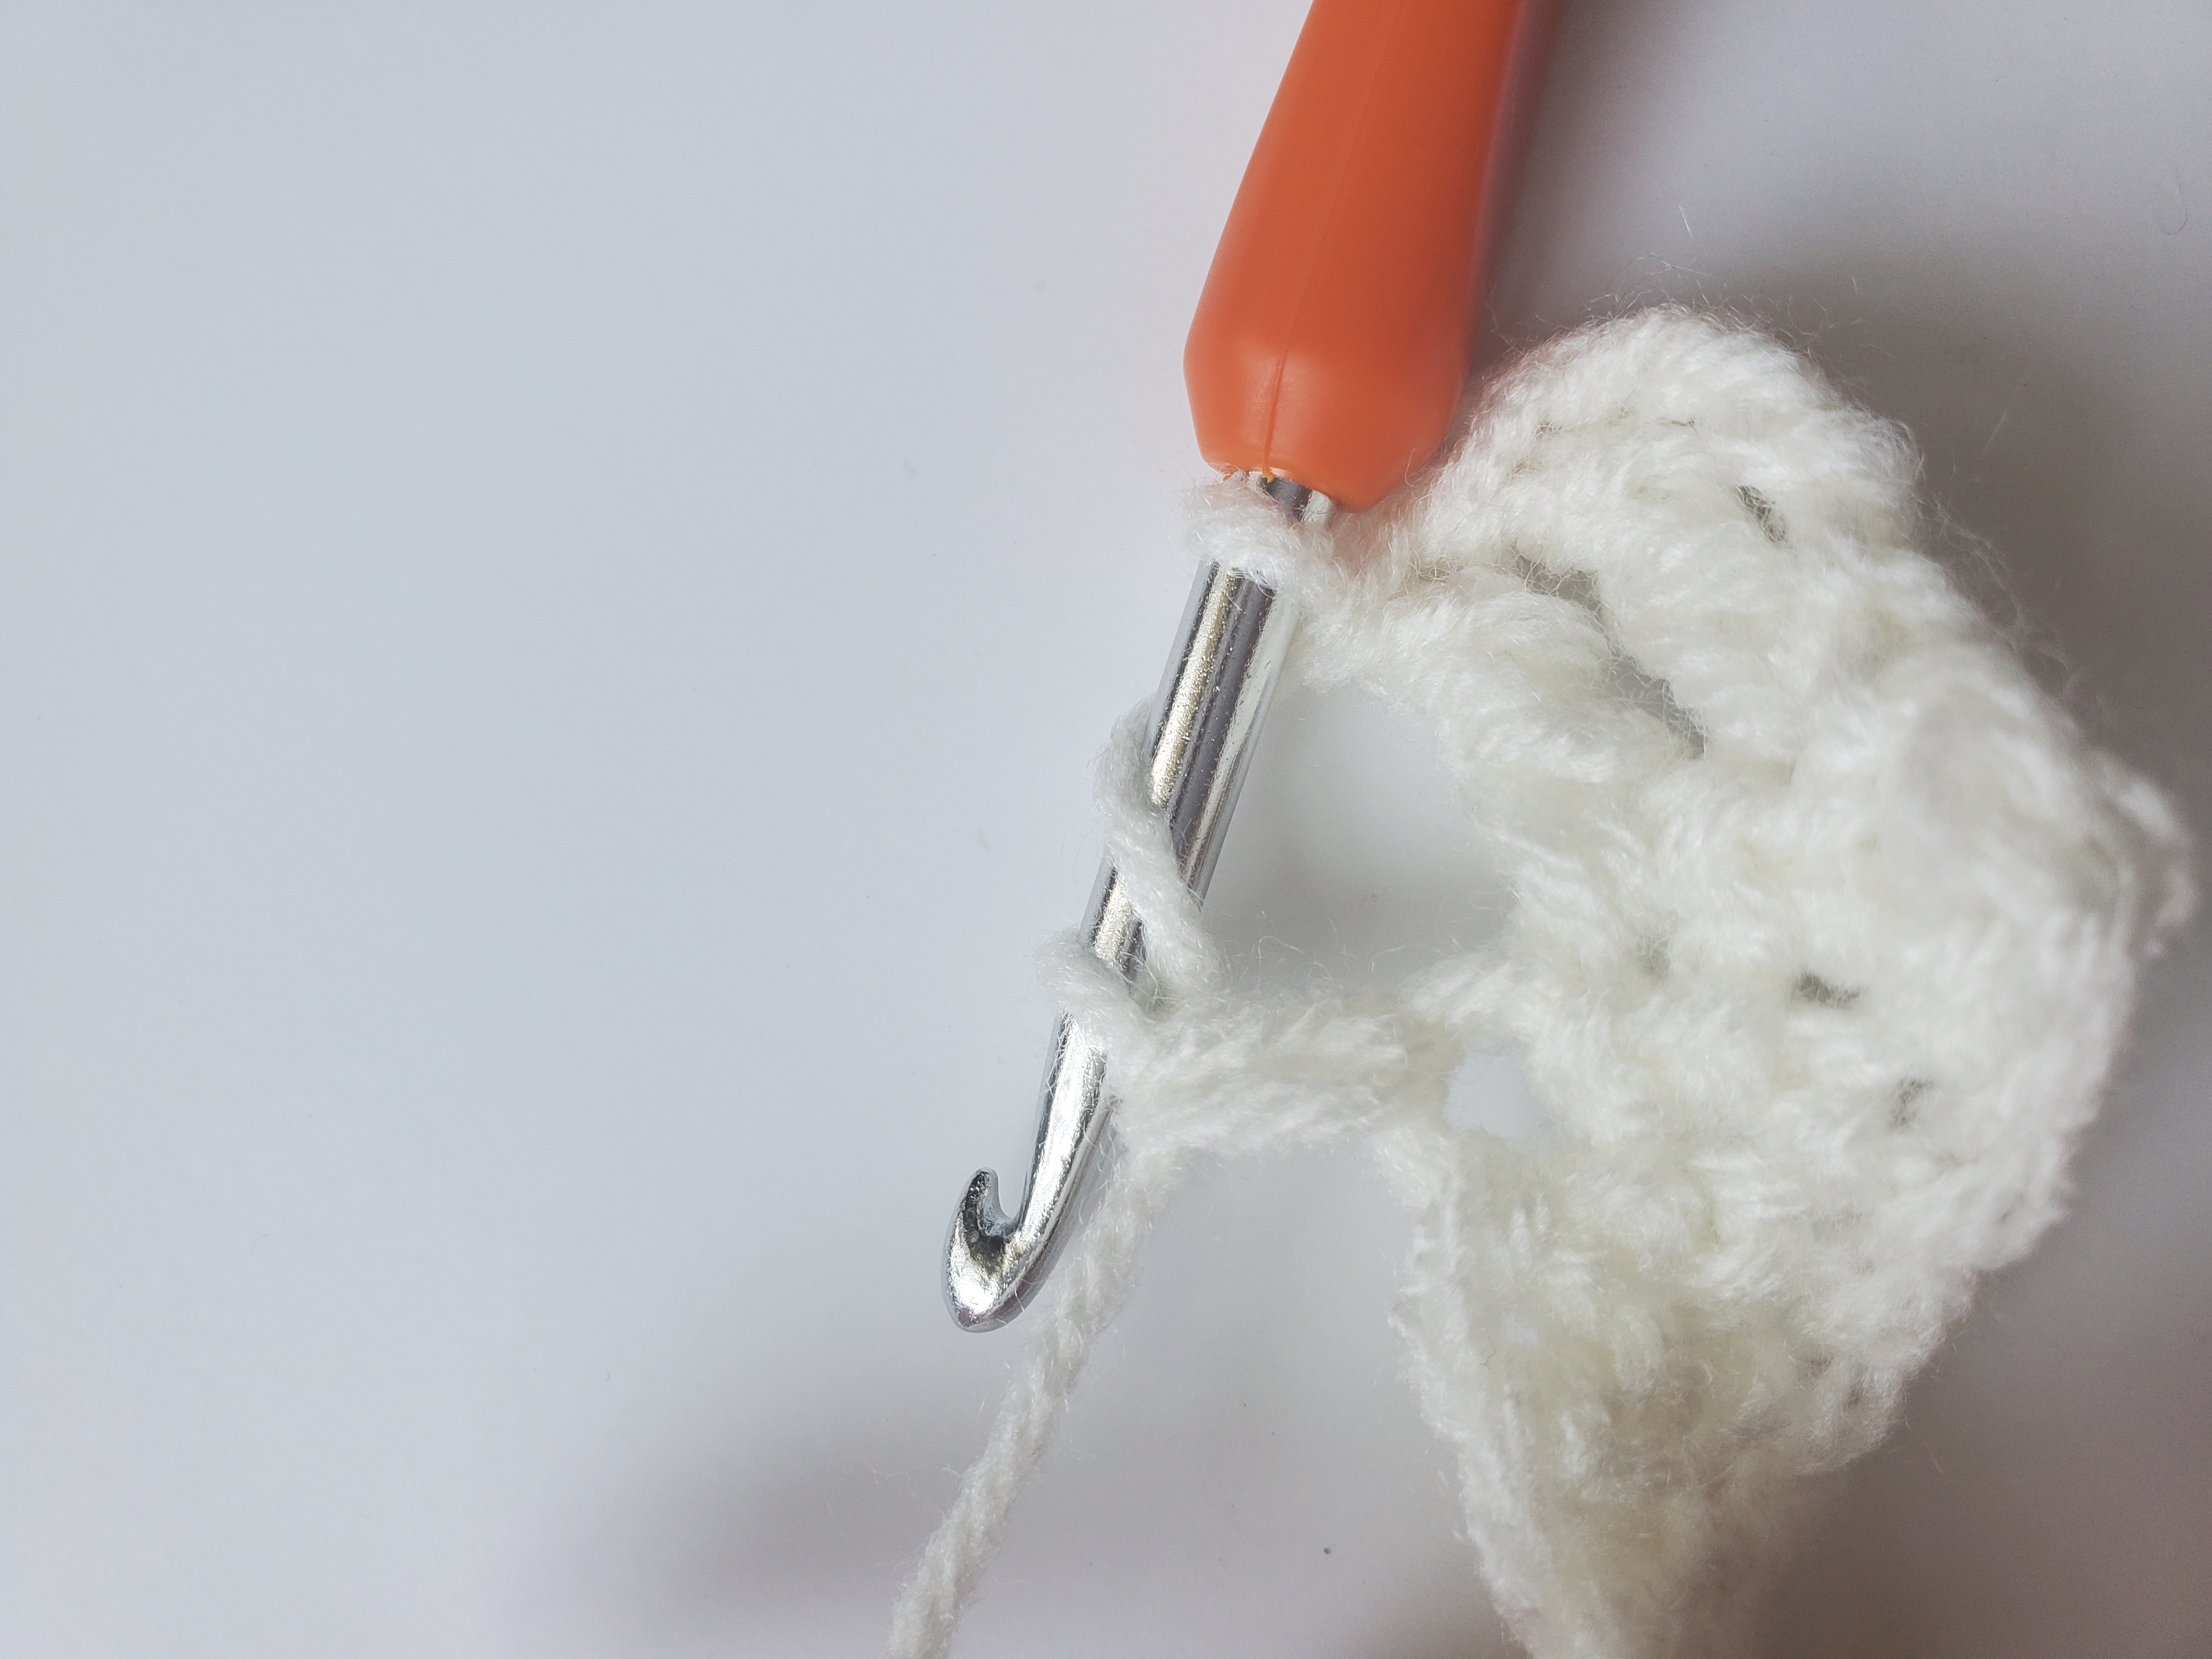
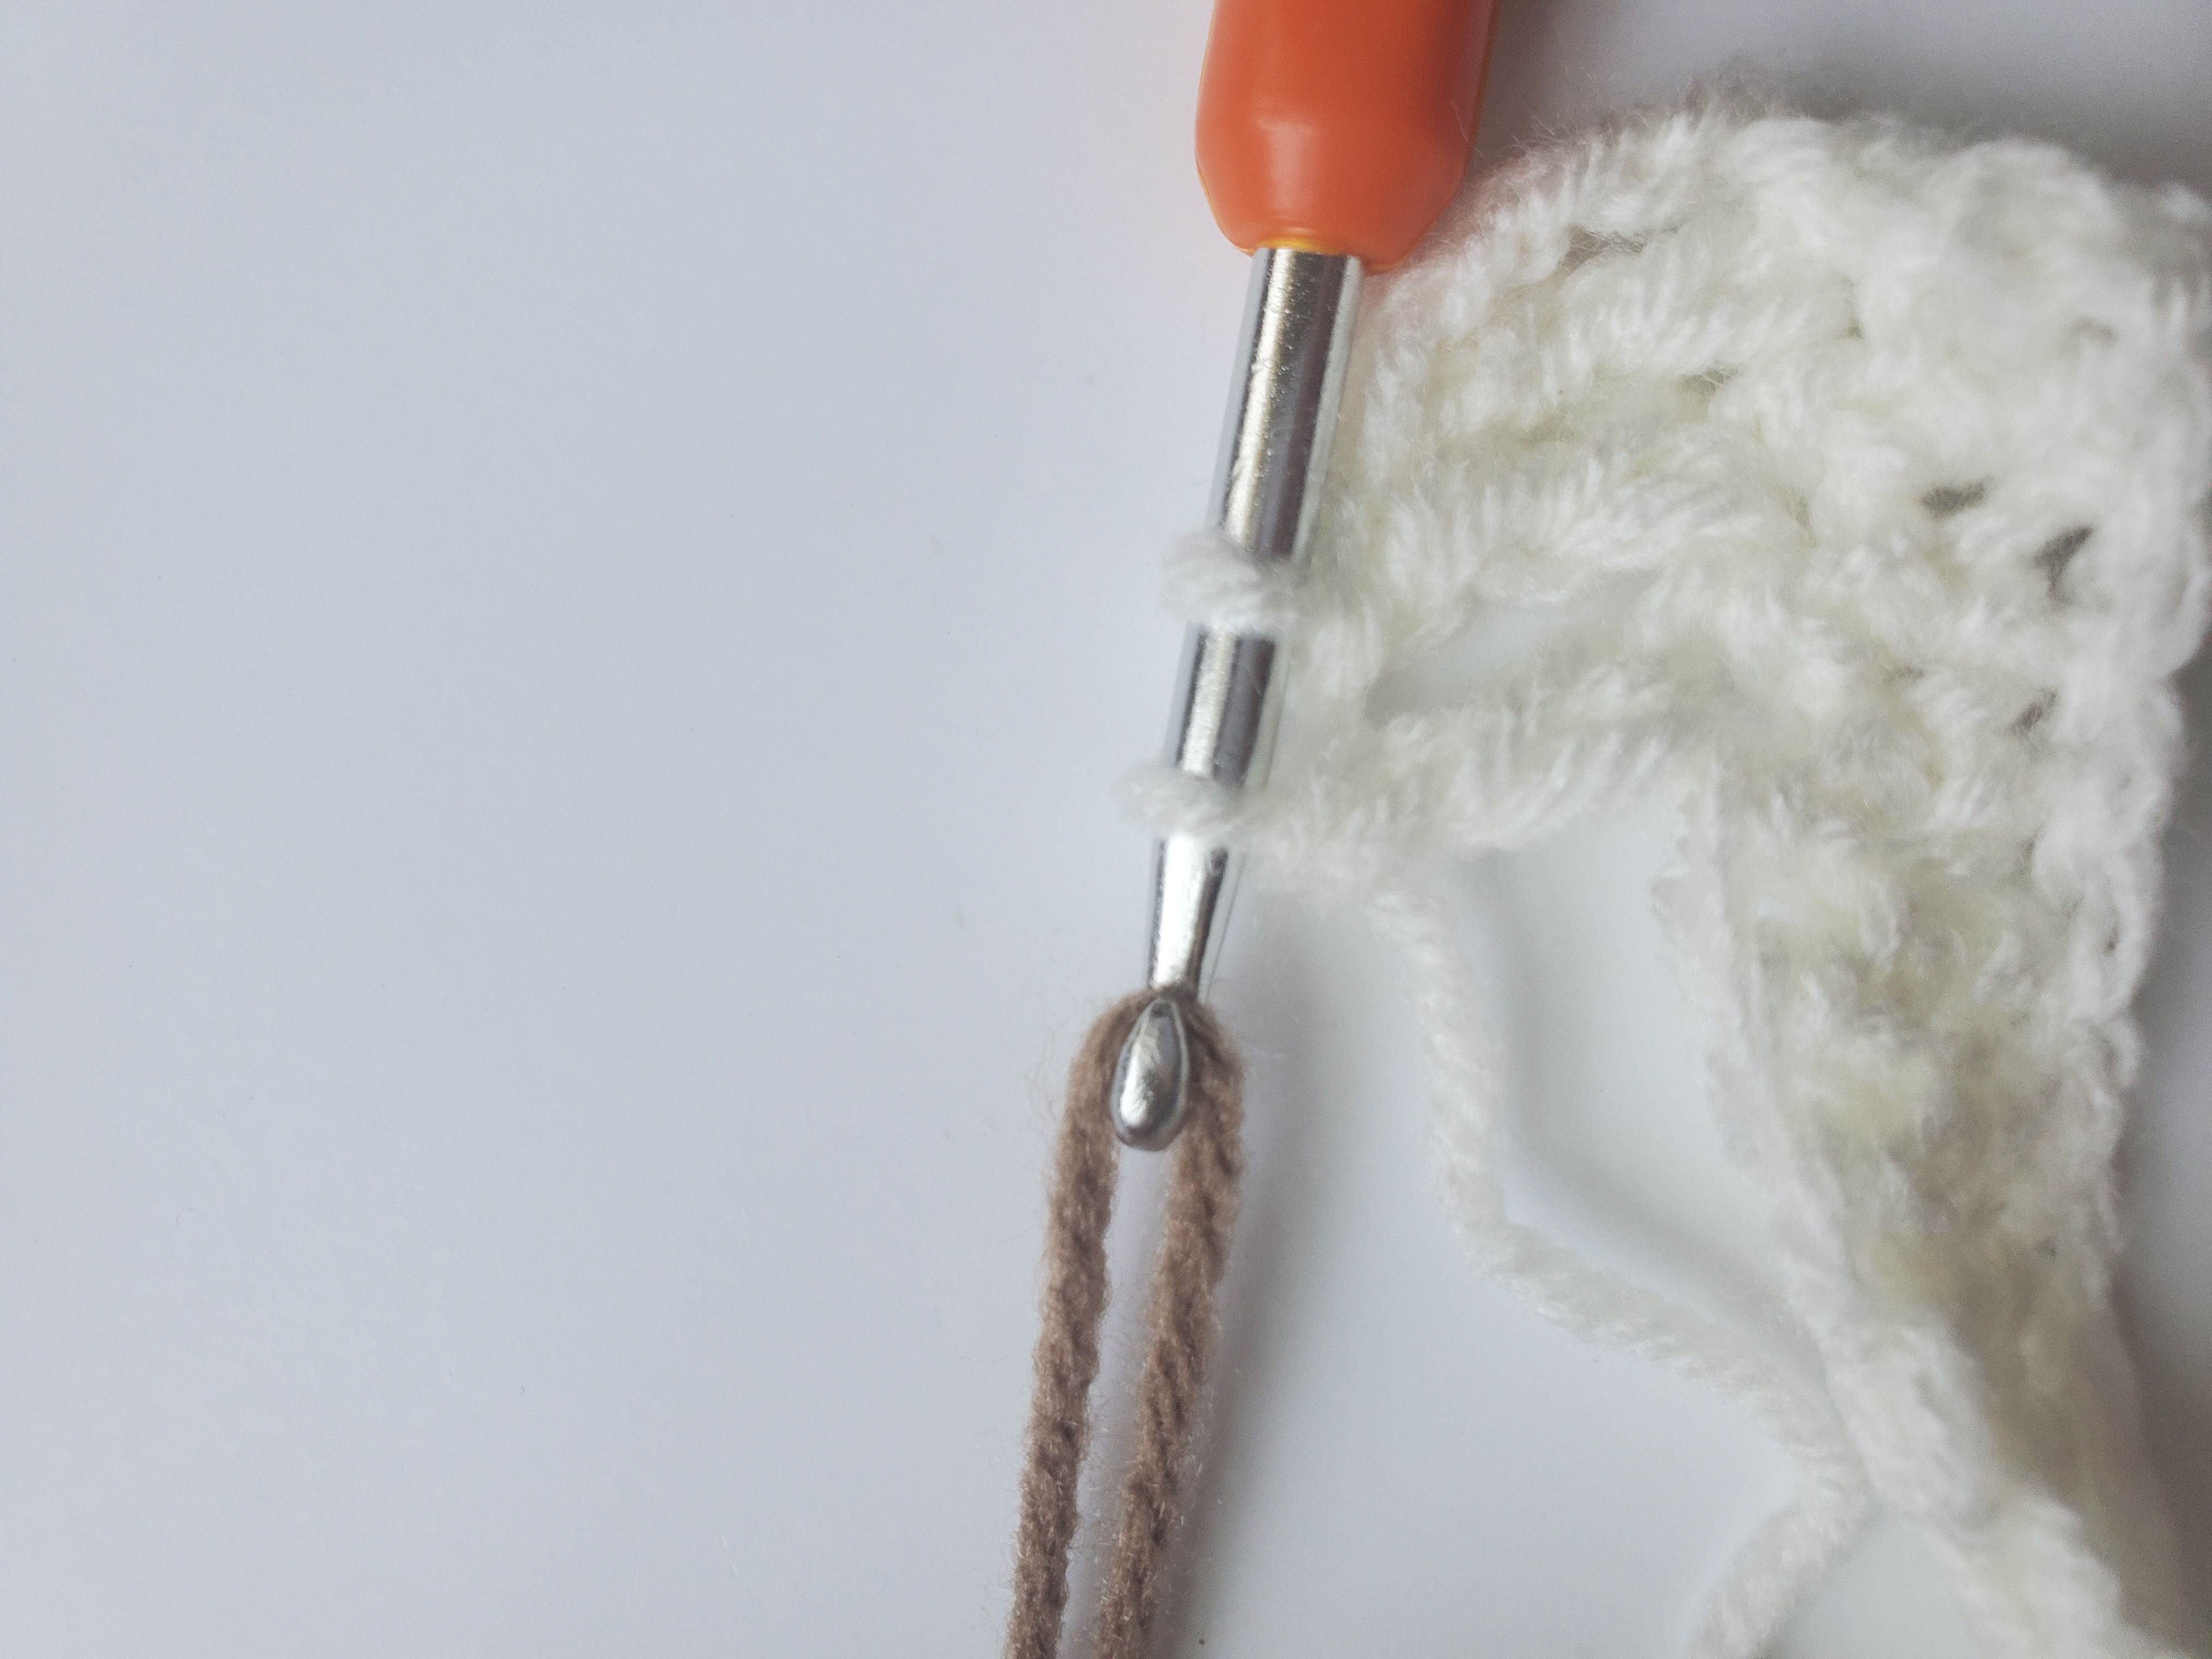
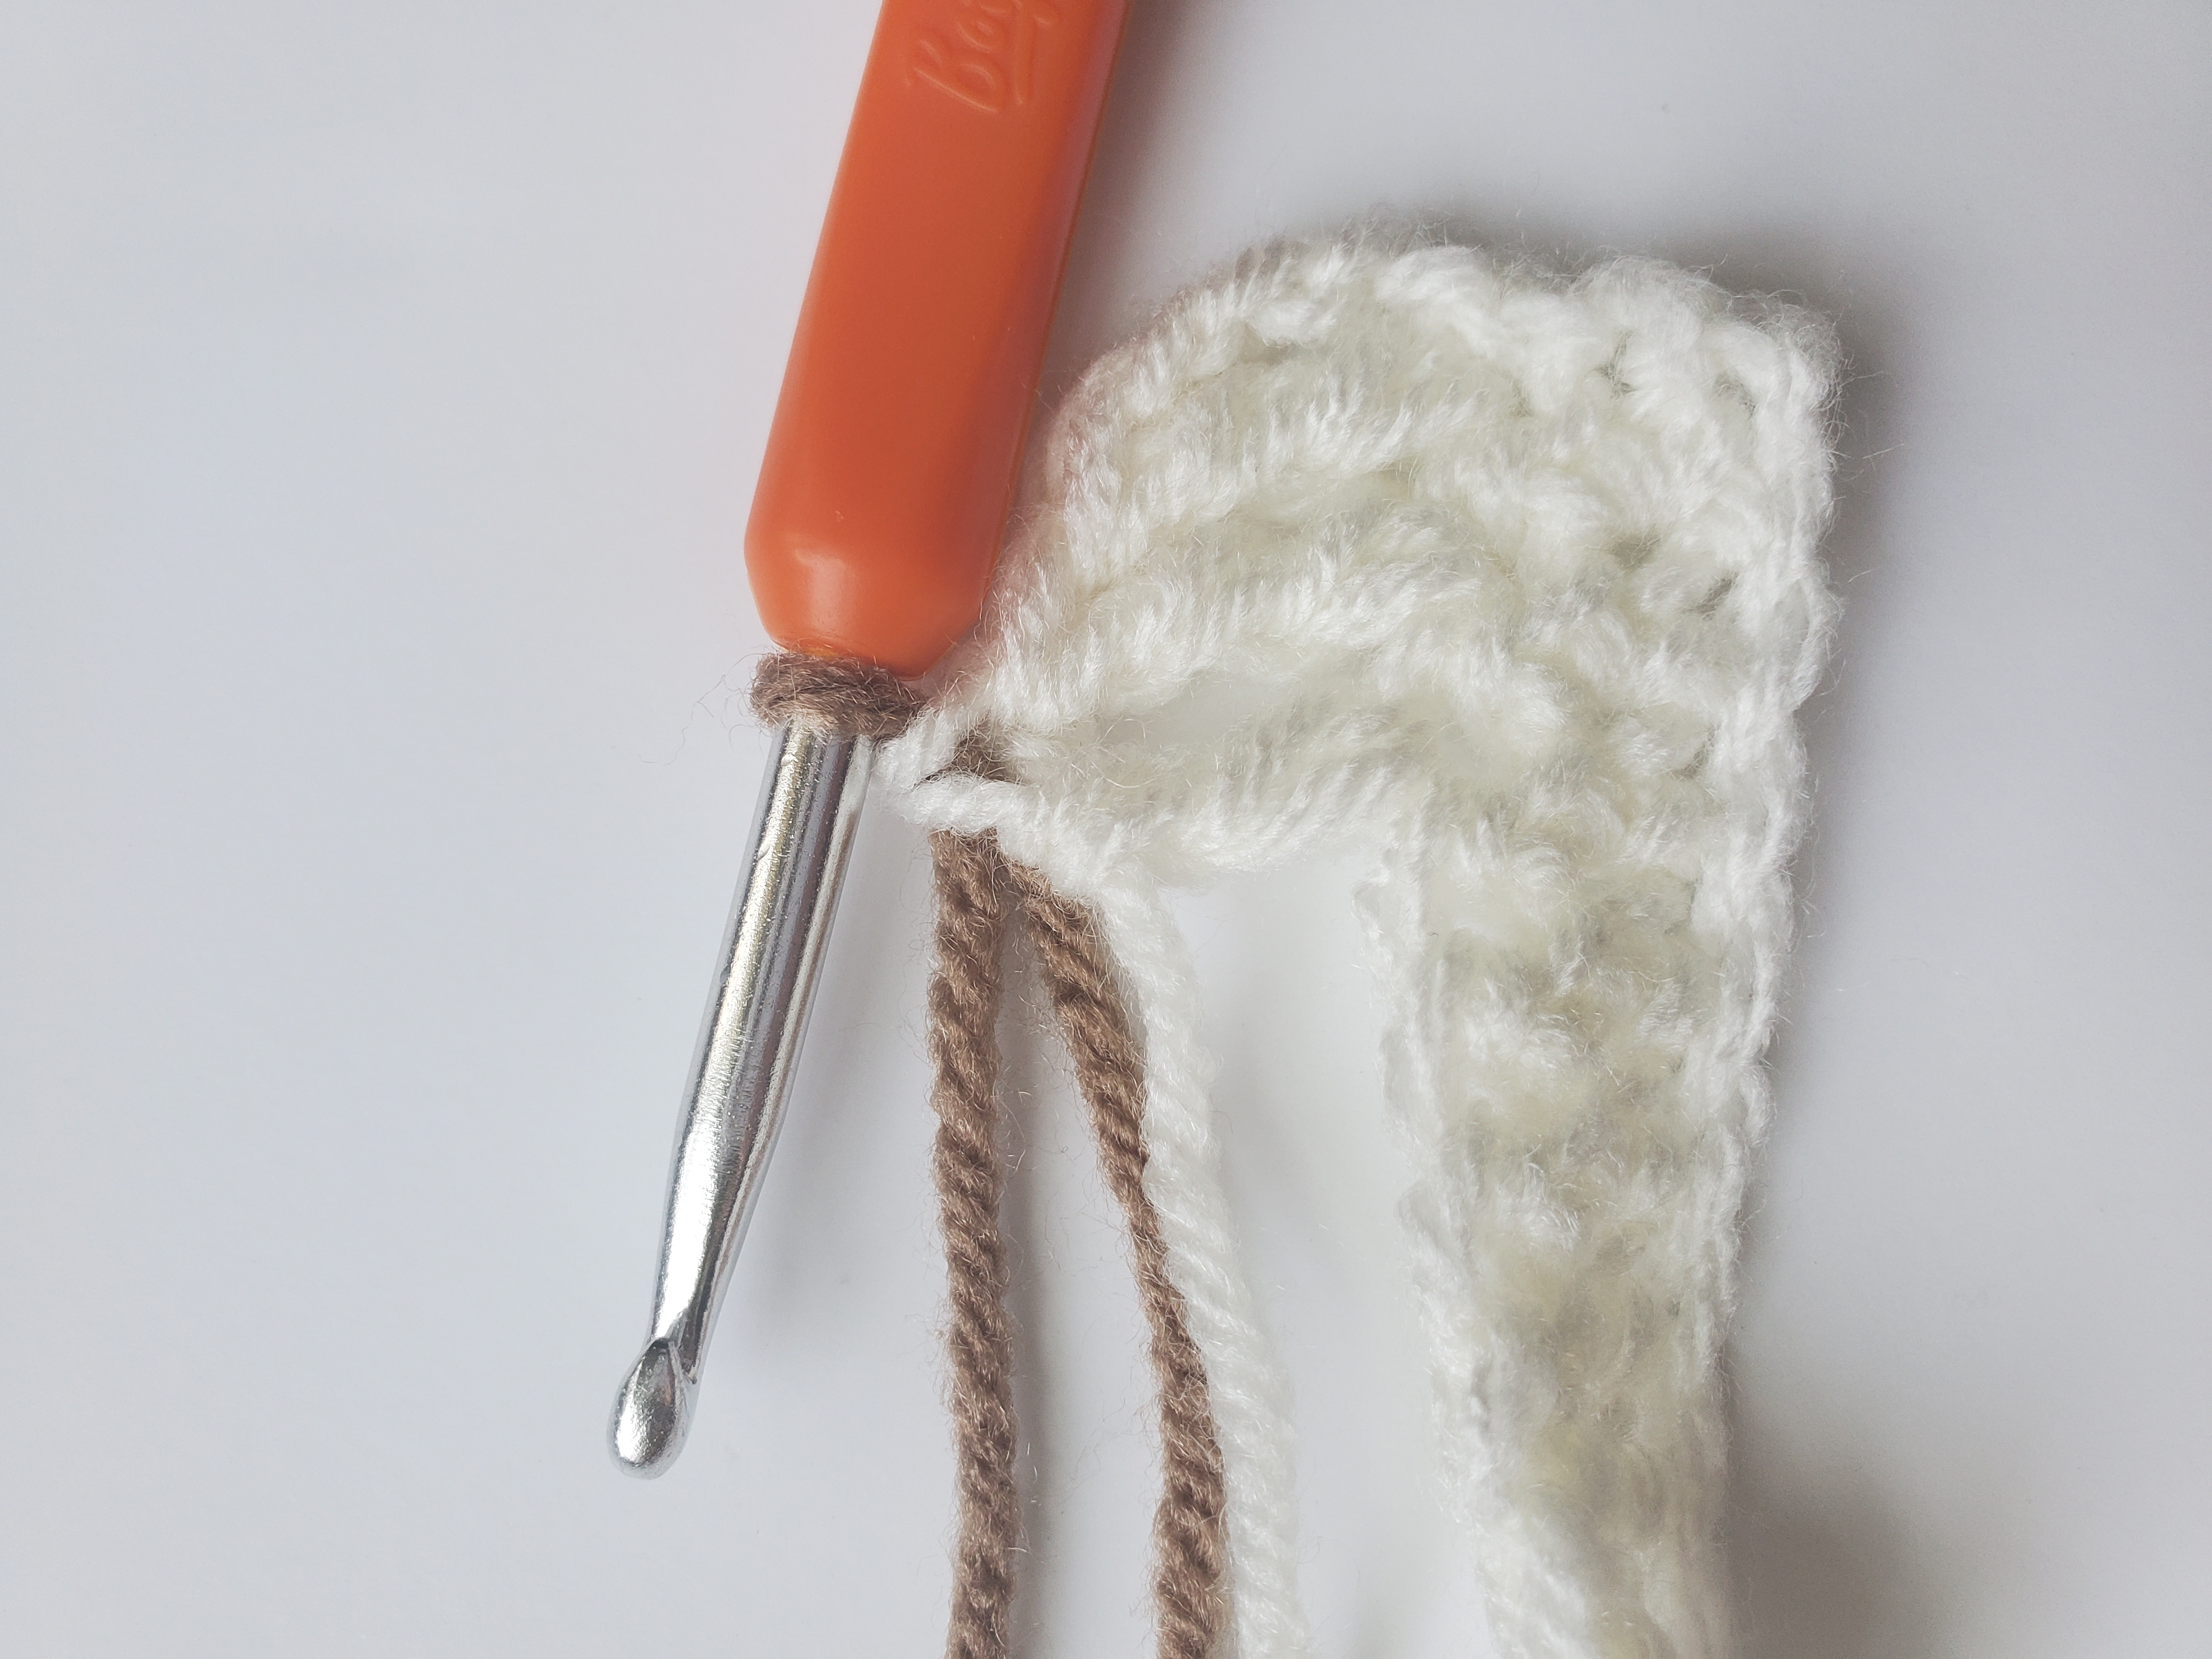
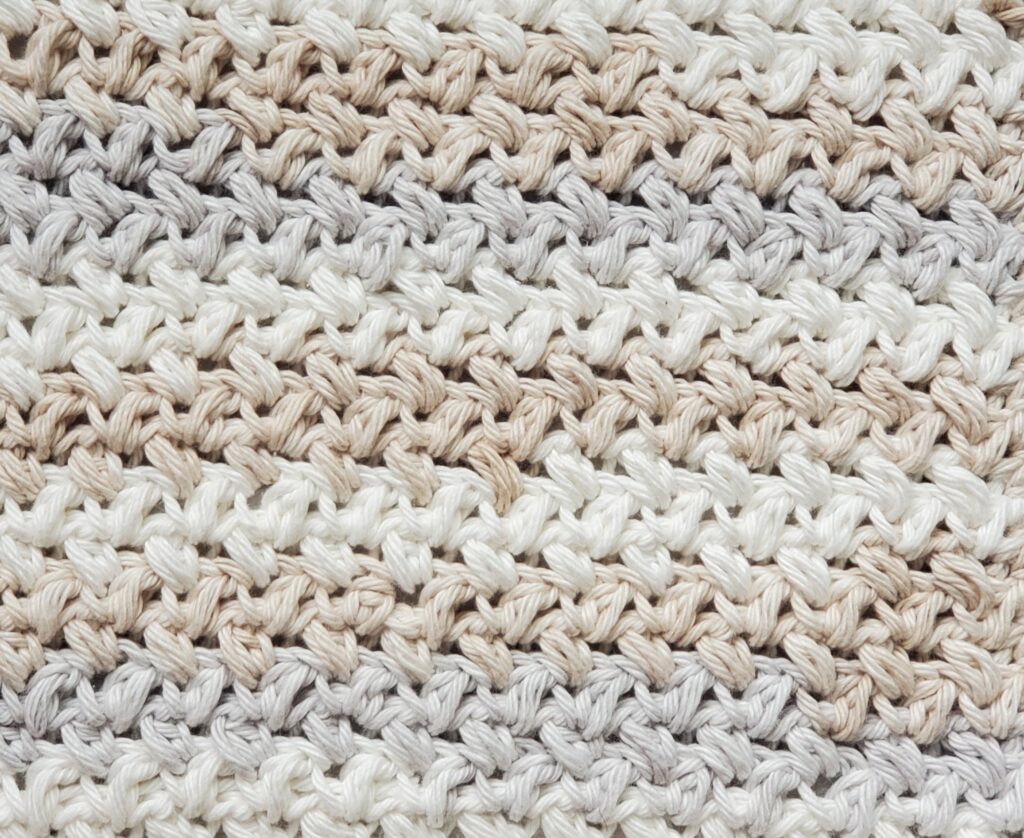
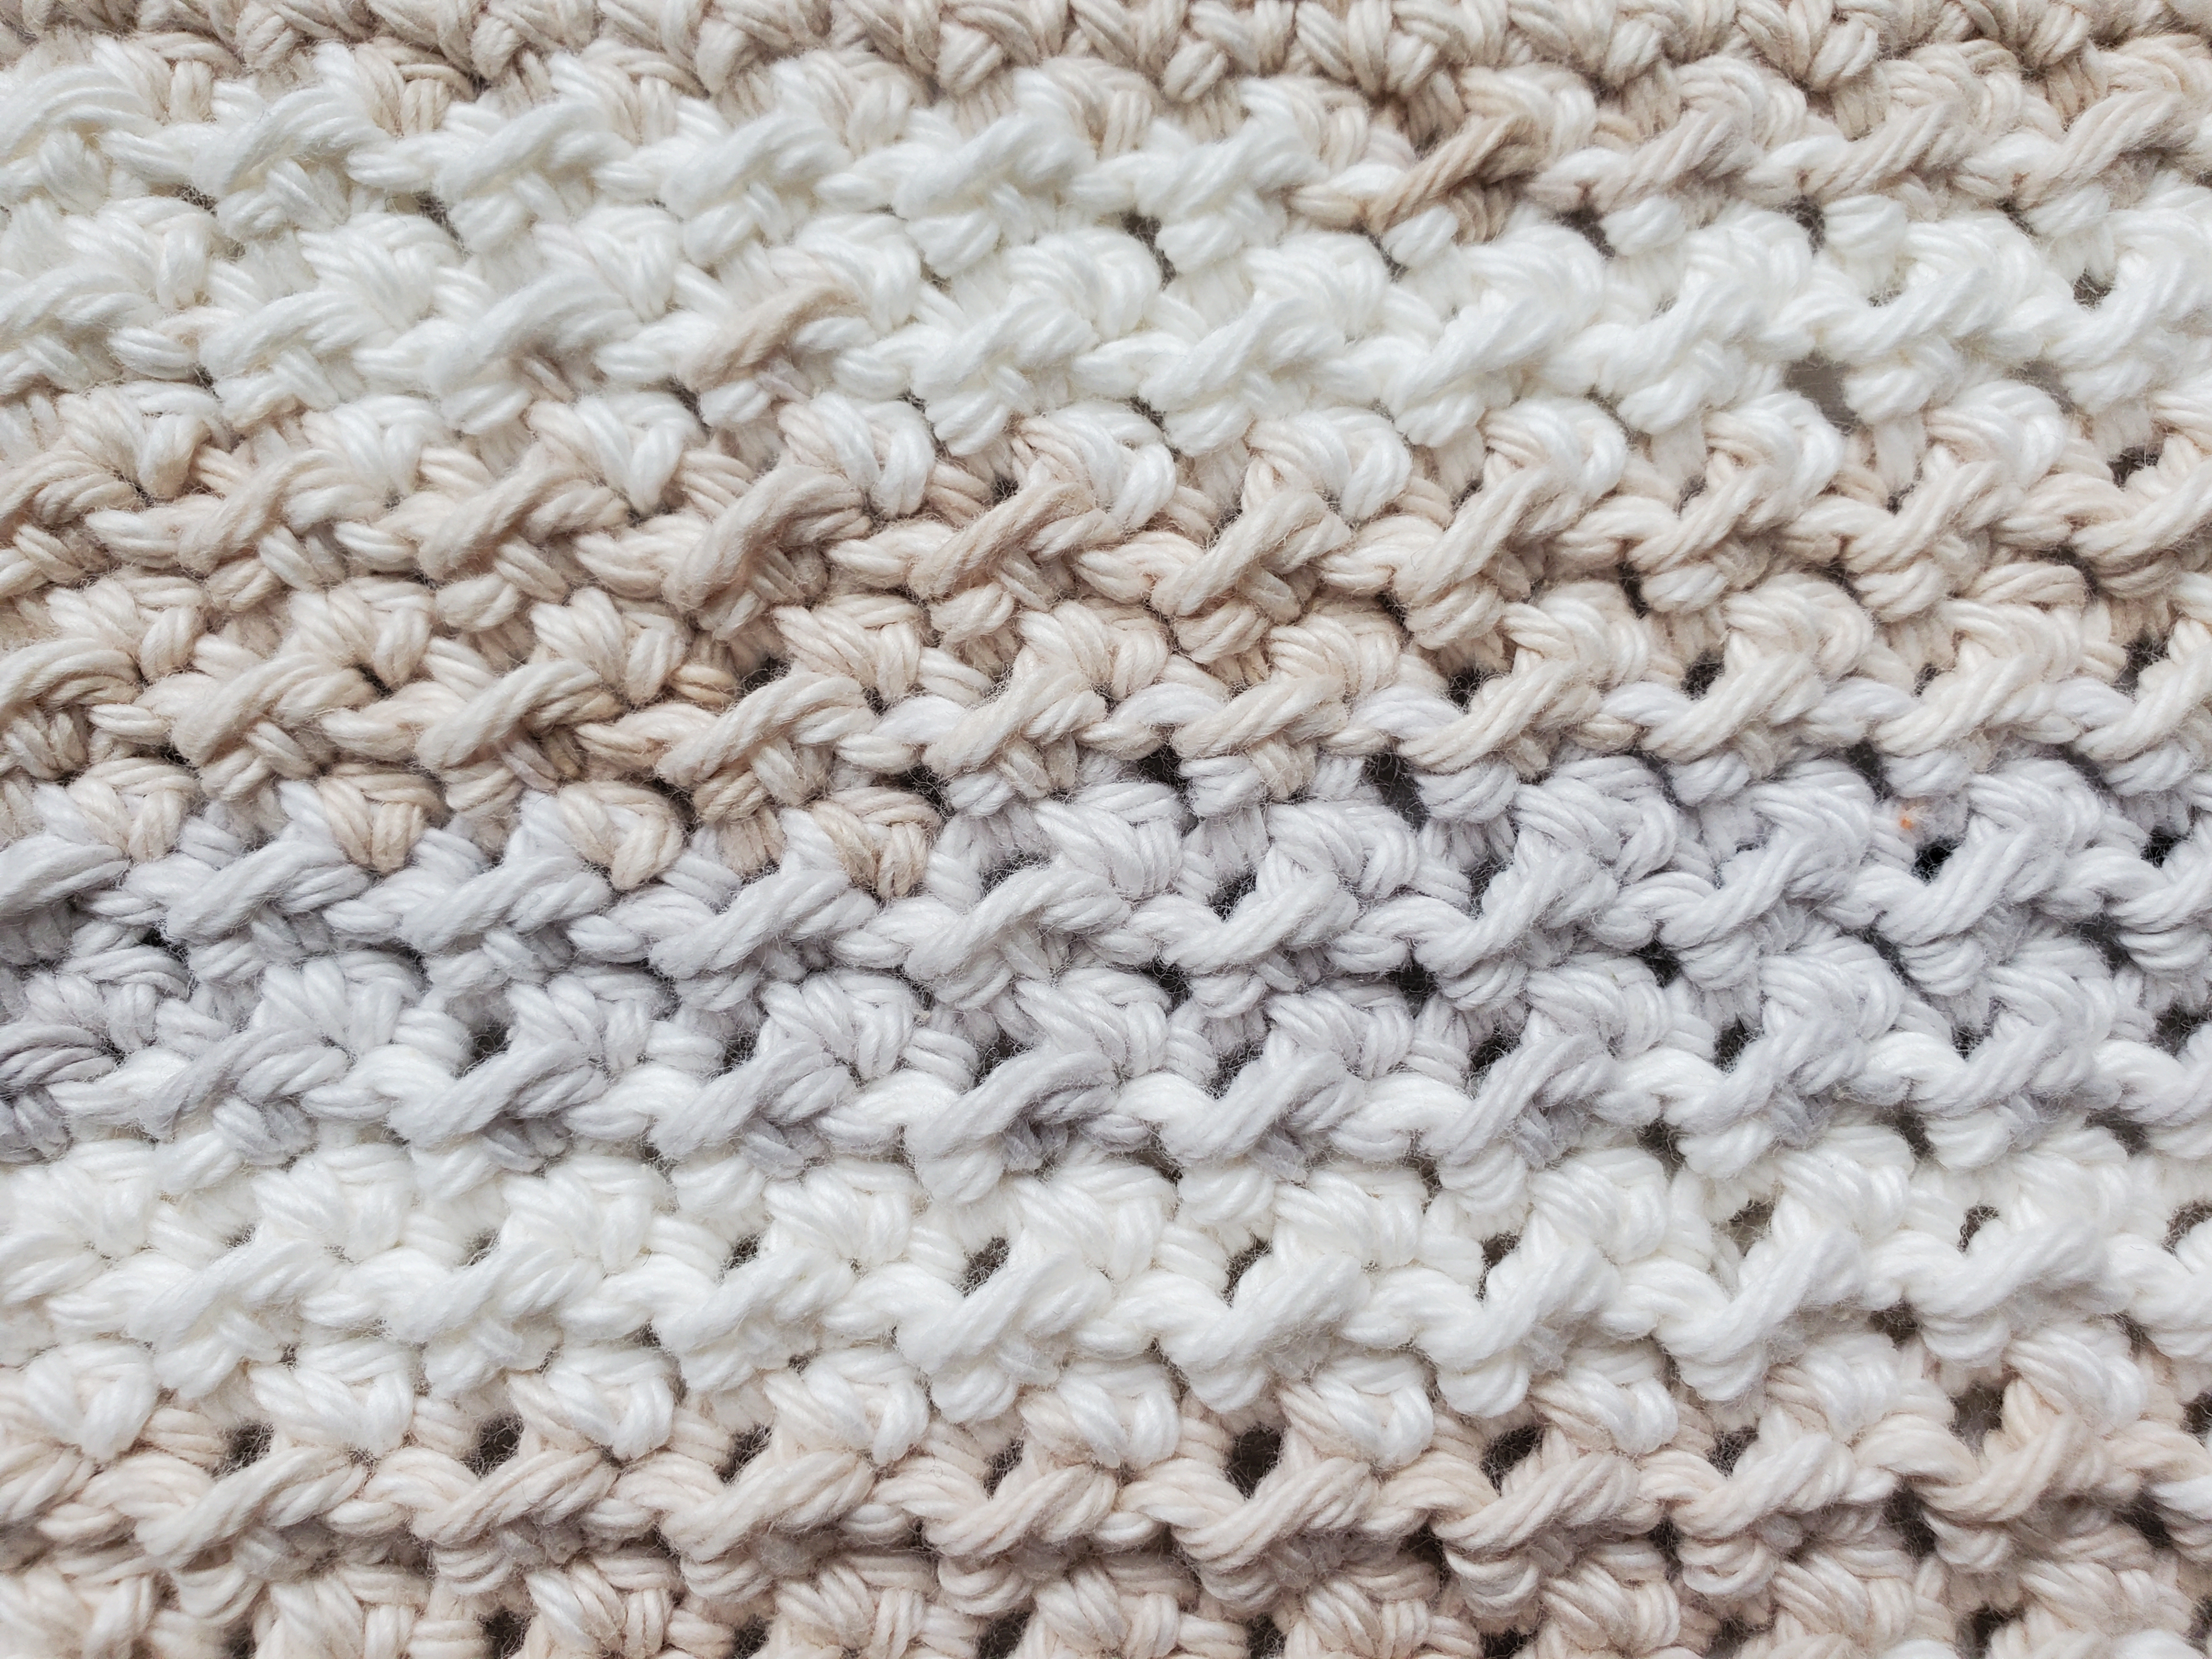
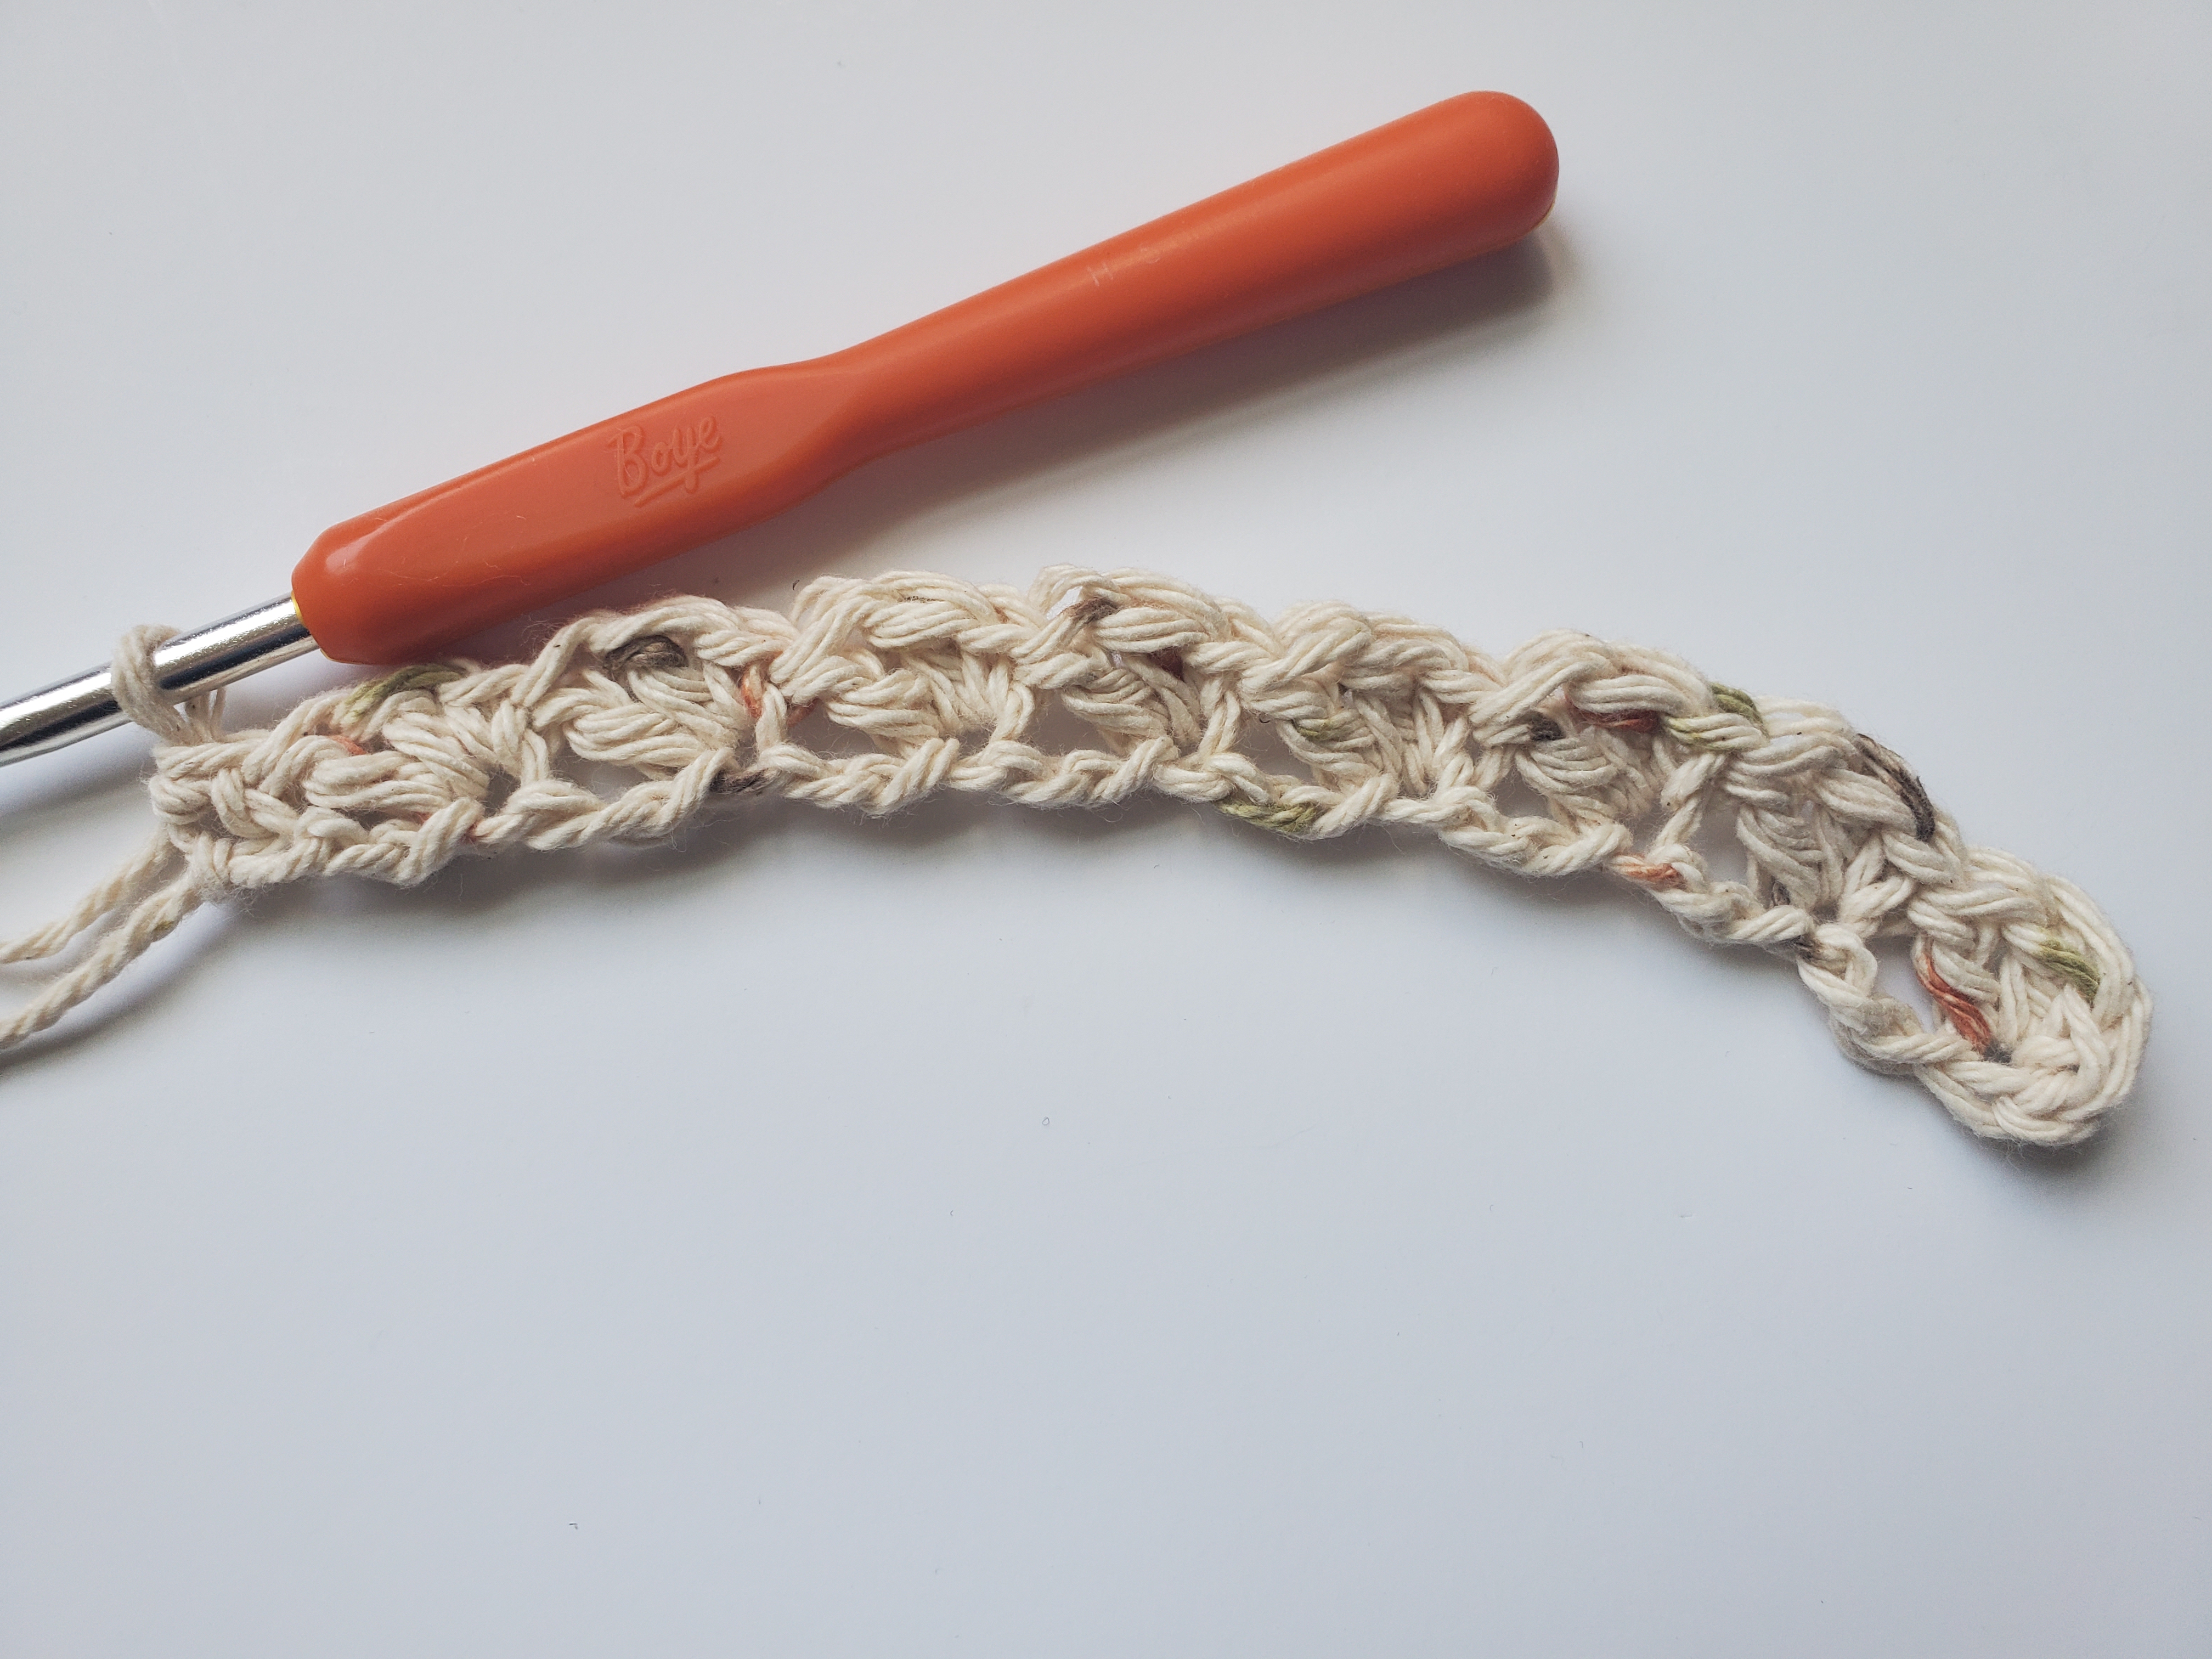
Starting left to right, the patterns are: the Bean Stitch Dishcloth and the Crunchy Stitch Dishcloth

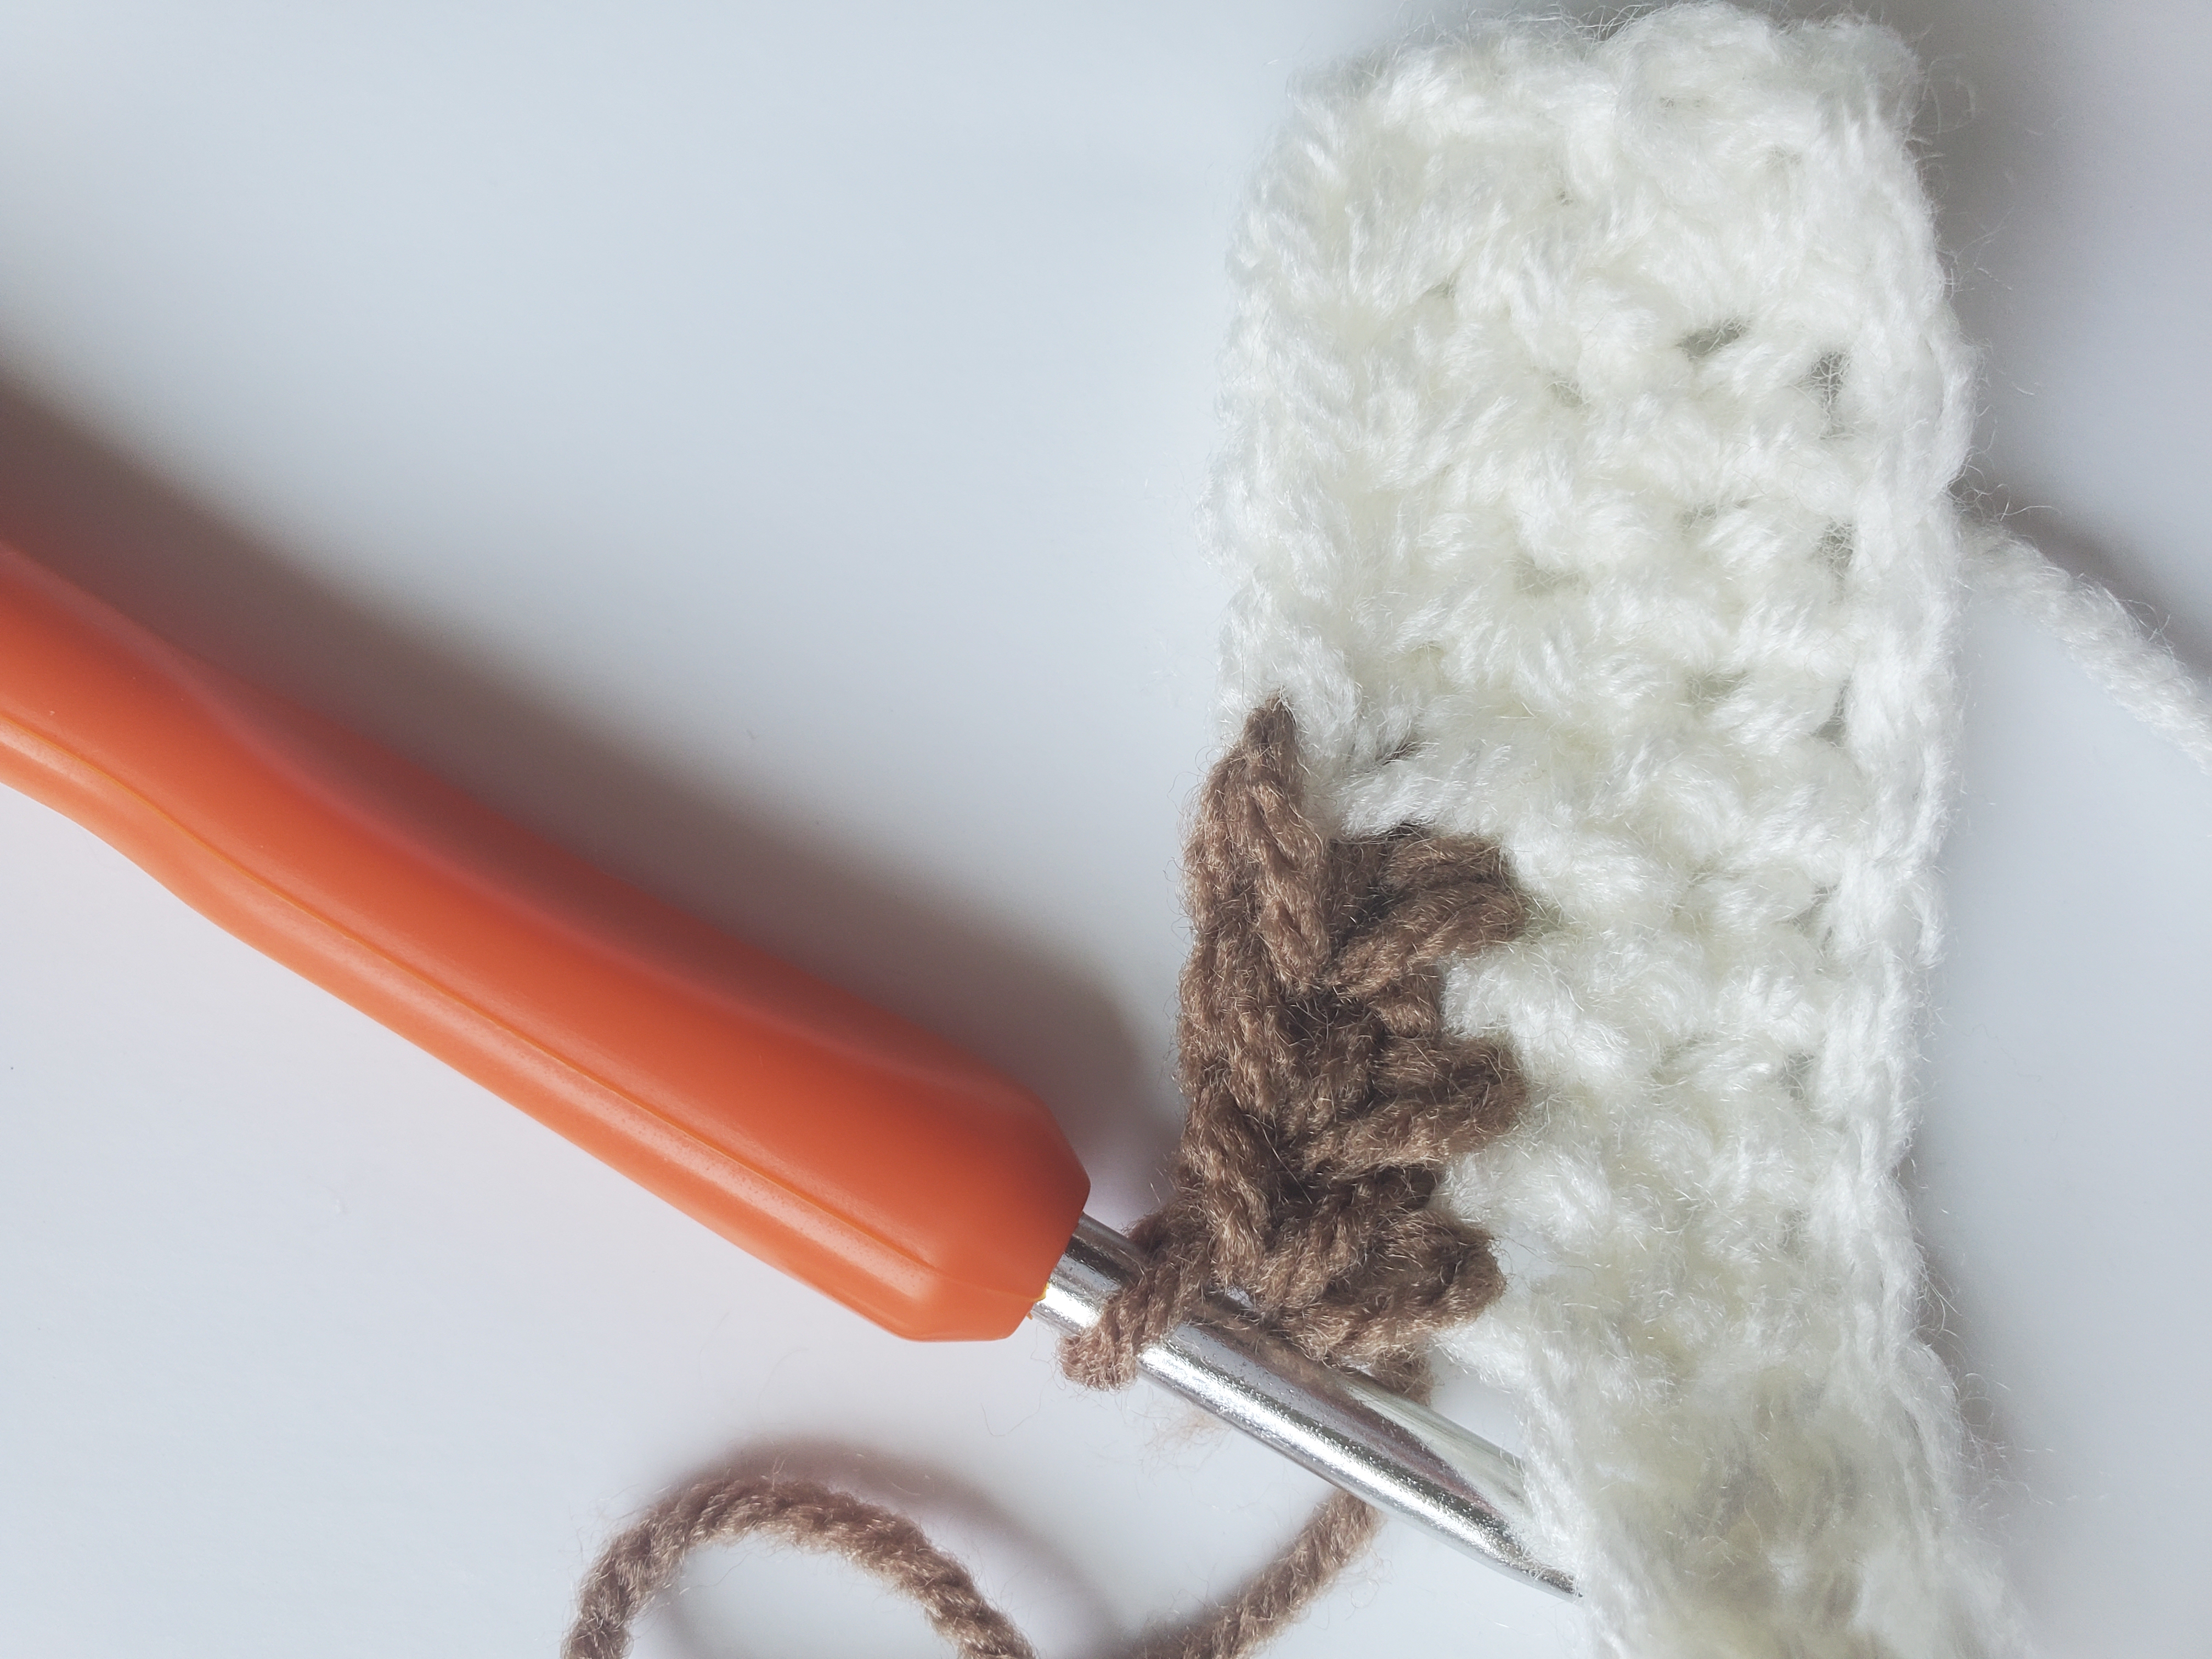
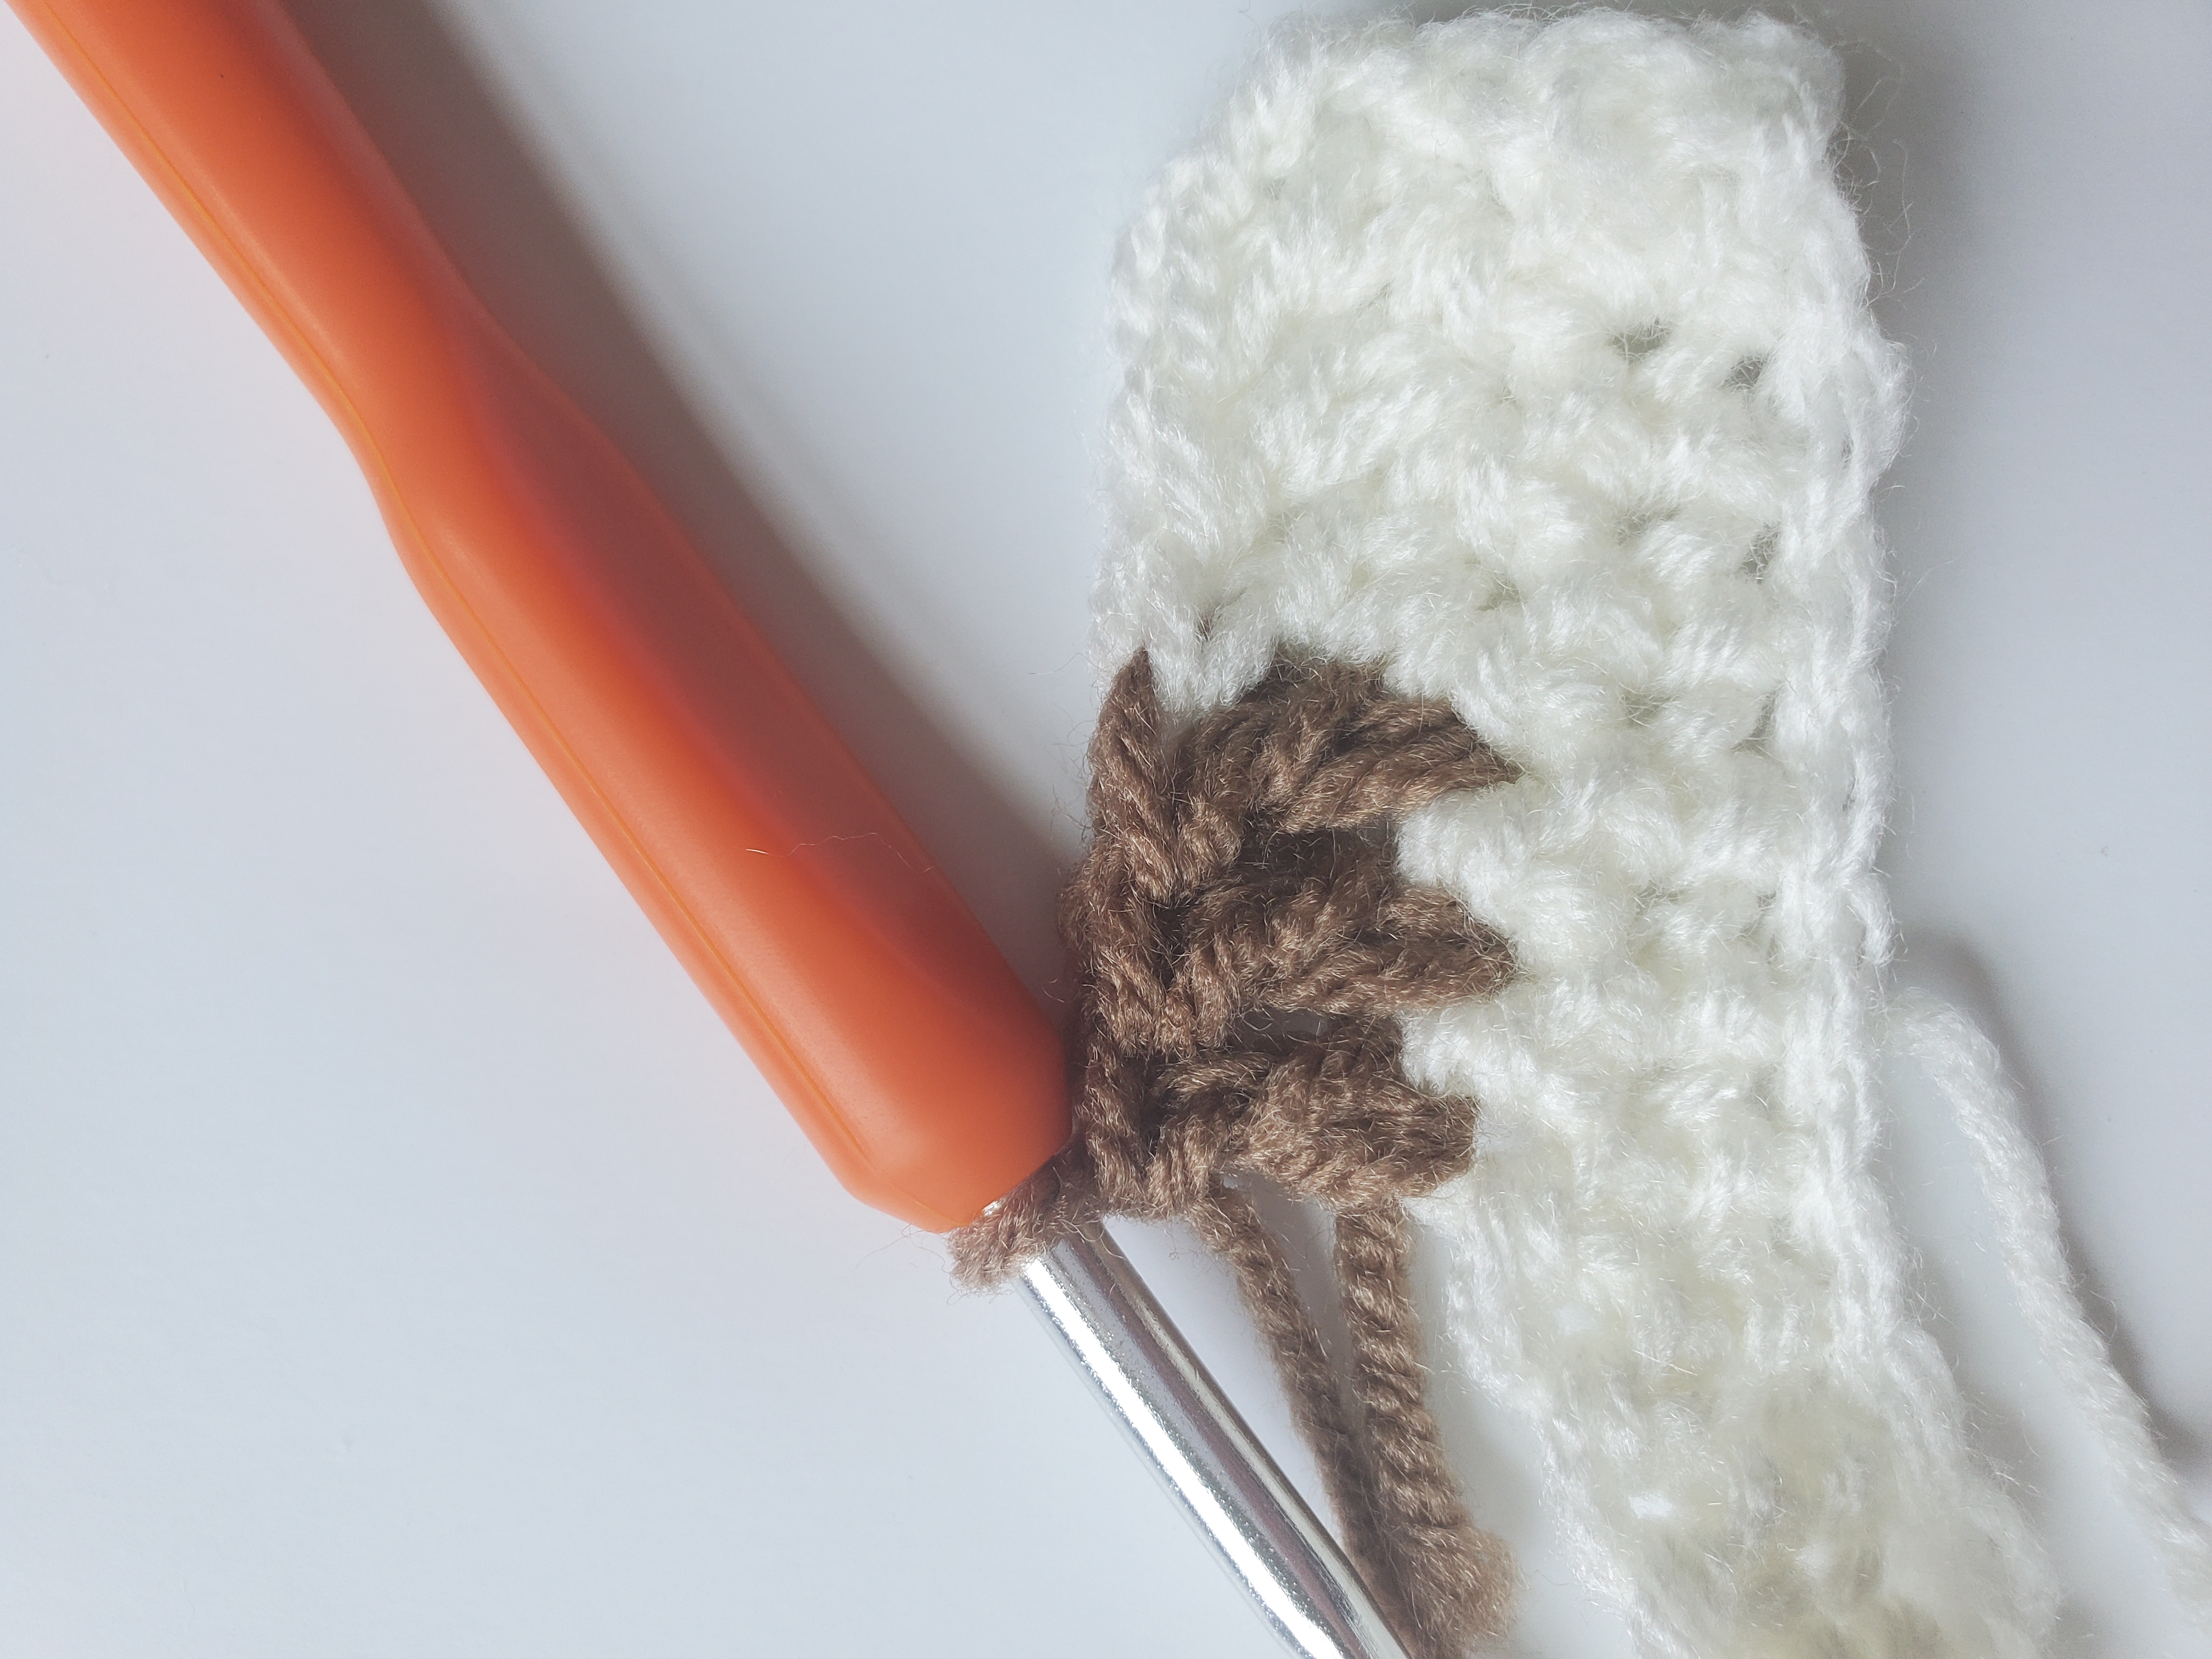
Both are very simple stitches that even a beginner crocheter can do. The bean stitch is a combination of single crochets, puffs, and chains. The crunchy stitch is a combination of slip stitches and half double crochets. They both give off a texture that looks somewhat complex, but they are SO easy.

Here’s a close up of that beautiful texture from the Bean Stitch Dishcloth:

Close up of bean stitch dishcloth with peaches and creme stripey linen
Bean Stitch

And here’s a close up of the Crunchy Stitch Dishcloth:

Close up of crunchy stitch dishcloth with peaches and creme stripey linen
Crunchy Stitch

Aren’t they just pretty?

These crochet dishcloths measure around 7″ x 7″ (depending on your tension) when completed.

The bean stitch and crunchy stitch patterns can be made not just for dishcloths, but blankets, hats, scarves, and others! The patterns provided have instructions on how to increase the size if needed.

Materials Needed for Both Patterns:

Abbreviations Used:

  • ch(s) – chain(s)
  • st – stitch
  • sl st – slip stitch
  • sc – single crochet
  • hdc – half double crochet

Special Instructions:

  • Instructions are made in US crochet terms, not UK.
  • Repeat pattern between *and* when indicated.
  • For the bean stitch dishcloth pattern, the turning chain does NOT count as a stitch.
  • The bean stitch is comprised of puff stitches, this is how you need to make the puff for this pattern:
    • Step 1: insert hook into the st, yarn over, draw up a loop [2 loops on hook]
    • Step 2: insert into the same st, yarn over, draw up a loop [4 loops on hook]
    • Step 3: insert hook into the same st again, yarn over, draw up a loop [6 loops on hook]
    • Step 4: yarn over and pull through all 6 loops

Bean Stitch Dishcloth Pattern:

  • Ch 26 (or any even number of chs), turn
  • Row 1: Sc in each ch, turn
  • Row 2: Ch 1, sc in next st, skip the next st, make 1 puff st in the next st (see special instructions), *ch 1, skip next st, make 1 puff st in the next st* repeat from *to* until the last st, make 1 sc in last st, turn
  • Row 3-21 (or until desired height): Repeat instructions for Row 2
  • Border (optional): turn, ch 1, sc in each st across until the corner, make a (sc, ch 1, sc), and continue making sc down the sides of the dishcloth. Sl st into the last st. 
  • Cut yarn, pull through and weave in end with tapestry needle.

Crunchy Stitch Dishcloth:

  • Ch 26 (or any even number of chs)
  • Row 1: Sl st in the 2nd ch from your hook, *1 hdc in next ch, sl st into next ch,* repeat from *to,* turn
  • Row 2: Ch 2 (counts as first hdc), *Sl st into next hdc, 1 hdc into the next sl st,* repeat from *to,* turn
  • Row 3: *Sl st into next hdc, 1 hdc in next sl st,* repeat from *to*, sl st into turning ch
  • Row 4-25: Repeat rows 2 and 3
  • Border (optional): turn, ch 1, sc in each st across until the corner, make a (sc, ch 1, sc), and continue making sc down the sides of the dishcloth. Sl st into the last st. 
  • Cut yarn, pull through and weave in end with tapestry needle. 

As always, thank you for checking out these patterns and I hope you enjoy! I always love a good texture, and the Peaches and Creme yarn makes for wonderful dishcloths.

Happy crocheting!

Peaches and Creme Yarn: Beautiful Crochet Dishcloth Pattern (Free)

***This post may contain affiliate links. This means if you click on a link and make a purchase, I may make a commission at no extra cost to you***

Hello everyone! Today I thought I would share my next crochet project with you; dishcloths! But it’s not just any dishcloth, it’s a dishcloth that has a beautiful texture with beautiful yarn! The yarn that I’ve used for this pattern is called Peaches and Creme Ombre – Oasis. 

This is a cotton yarn which is great for practical crochet projects like dishcloths. It’s softer and much more durable than acrylic. Plus it just feels so much nicer to hold and feel.

I really am quite happy with the way that the yarn looks in this pattern too. Sometimes with the speckled or striped yarns, it’s difficult to tell how it’ll look with your project. The little chocolate and brownish-red flecks break up that main beige color in such a way that’s pleasing to the eye.

The texture created is really simple too. It’s a combination of a single crochet and two double crochets in the same stitch, then skipping two stitches. The stitches lay in such a way that it makes a subtle “bulge” in the project, creating a beautiful, squishy texture.

When finished, the dishcloth measures about 7″ x 7″ (give or take depending on your gauge). 

Here’s a close up of the texture with the Peaches and Creme Oasis yarn:

Close up of textured dishcloth in peaches and creme oasis cotton yarn

Pretty isn’t it? 

As always, you can use any type of yarn you like for this project, and it doesn’t have to be a dishcloth. You can make a blanket or a scarf or a burp cloth for example. Just make sure your yarn is a medium 4 weight yarn or else it might come out too big or small!

If you like this pattern, you might also want to check out my Easy Textured Burp Cloth pattern (which has another beautiful, squishy texture to it).

Materials Used:

  • 5 mm crochet hook
  • 1 little skein (2oz) of Peaches and Creme Cotton Yarn – Oasis 
  • Scissors
  • Tapestry Needle

Abbreviations Used:

Please note that I am using US crochet terms and not UK crochet terms for this pattern.

  • ch(s) – chain(s)
  • sc – single crochet
  • dc – double crochet
  • st(s) – stitch(es)
  • sl st – slip stitch

Special Considerations:

  • If you need to adjust the size of your project, chain a multiple of 13 + 1.
  • The turning chain does not count as a stitch.

Textured Crochet Dishcloth Pattern:

  • Ch 26
  • Row 1: From second ch from hook, make *(1 sc, 2 dc) in the same ch, skip 2 chs.* Repeat from *to* until you reach the last 3 chs. Make 1 sc in last ch. Turn (25 sts)
  • Row 2: Ch 1, (turning ch does not count as a st) make *(1 sc, 2 dc) in the next st, skip next 2 sts.* Repeat from *to* until you reach the last 3 sts, 1 sc in last st. Turn (25 sts)
  • Row: 3-18 (or until desired height): Repeat Row 2
Ch 26 for Peaches and Creme Dishcloth
Ch 26
Beginning of Row 2 for Textured Dishcloth
Beginning of Row 2
End of Row 2 for textured dishcloth pattern
End of Row 2
Textured Dishcloth using Peaches and Creme Oasis Cotton Yarn
Completed Peaches and Creme Dishcloth with border!

You can sc a border around the dishcloth if you’d like, but it is totally optional. Otherwise cut your yarn, pull through, and weave in end with tapestry needle.

Border: sc in each st across until the last st, (sc, ch 1, sc) in the corner st. Crocheting down the side of a project can be challenging, since we are making a square, try to make the side as even as the top/bottom (so 25 sts). Continue making (sc, ch 1, sc) in the corner sts and sc across until the last st. Sl st to last stitch, Cut yarn and pull through. Weave in end with tapestry needle. 

As always, thank you for reading this post and happy crocheting! Until next time!