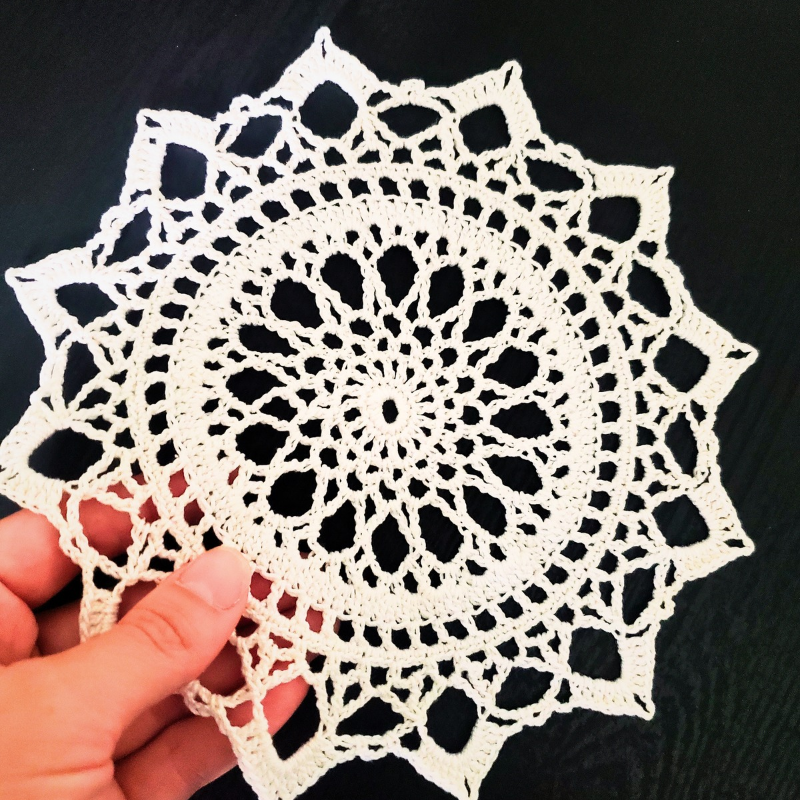
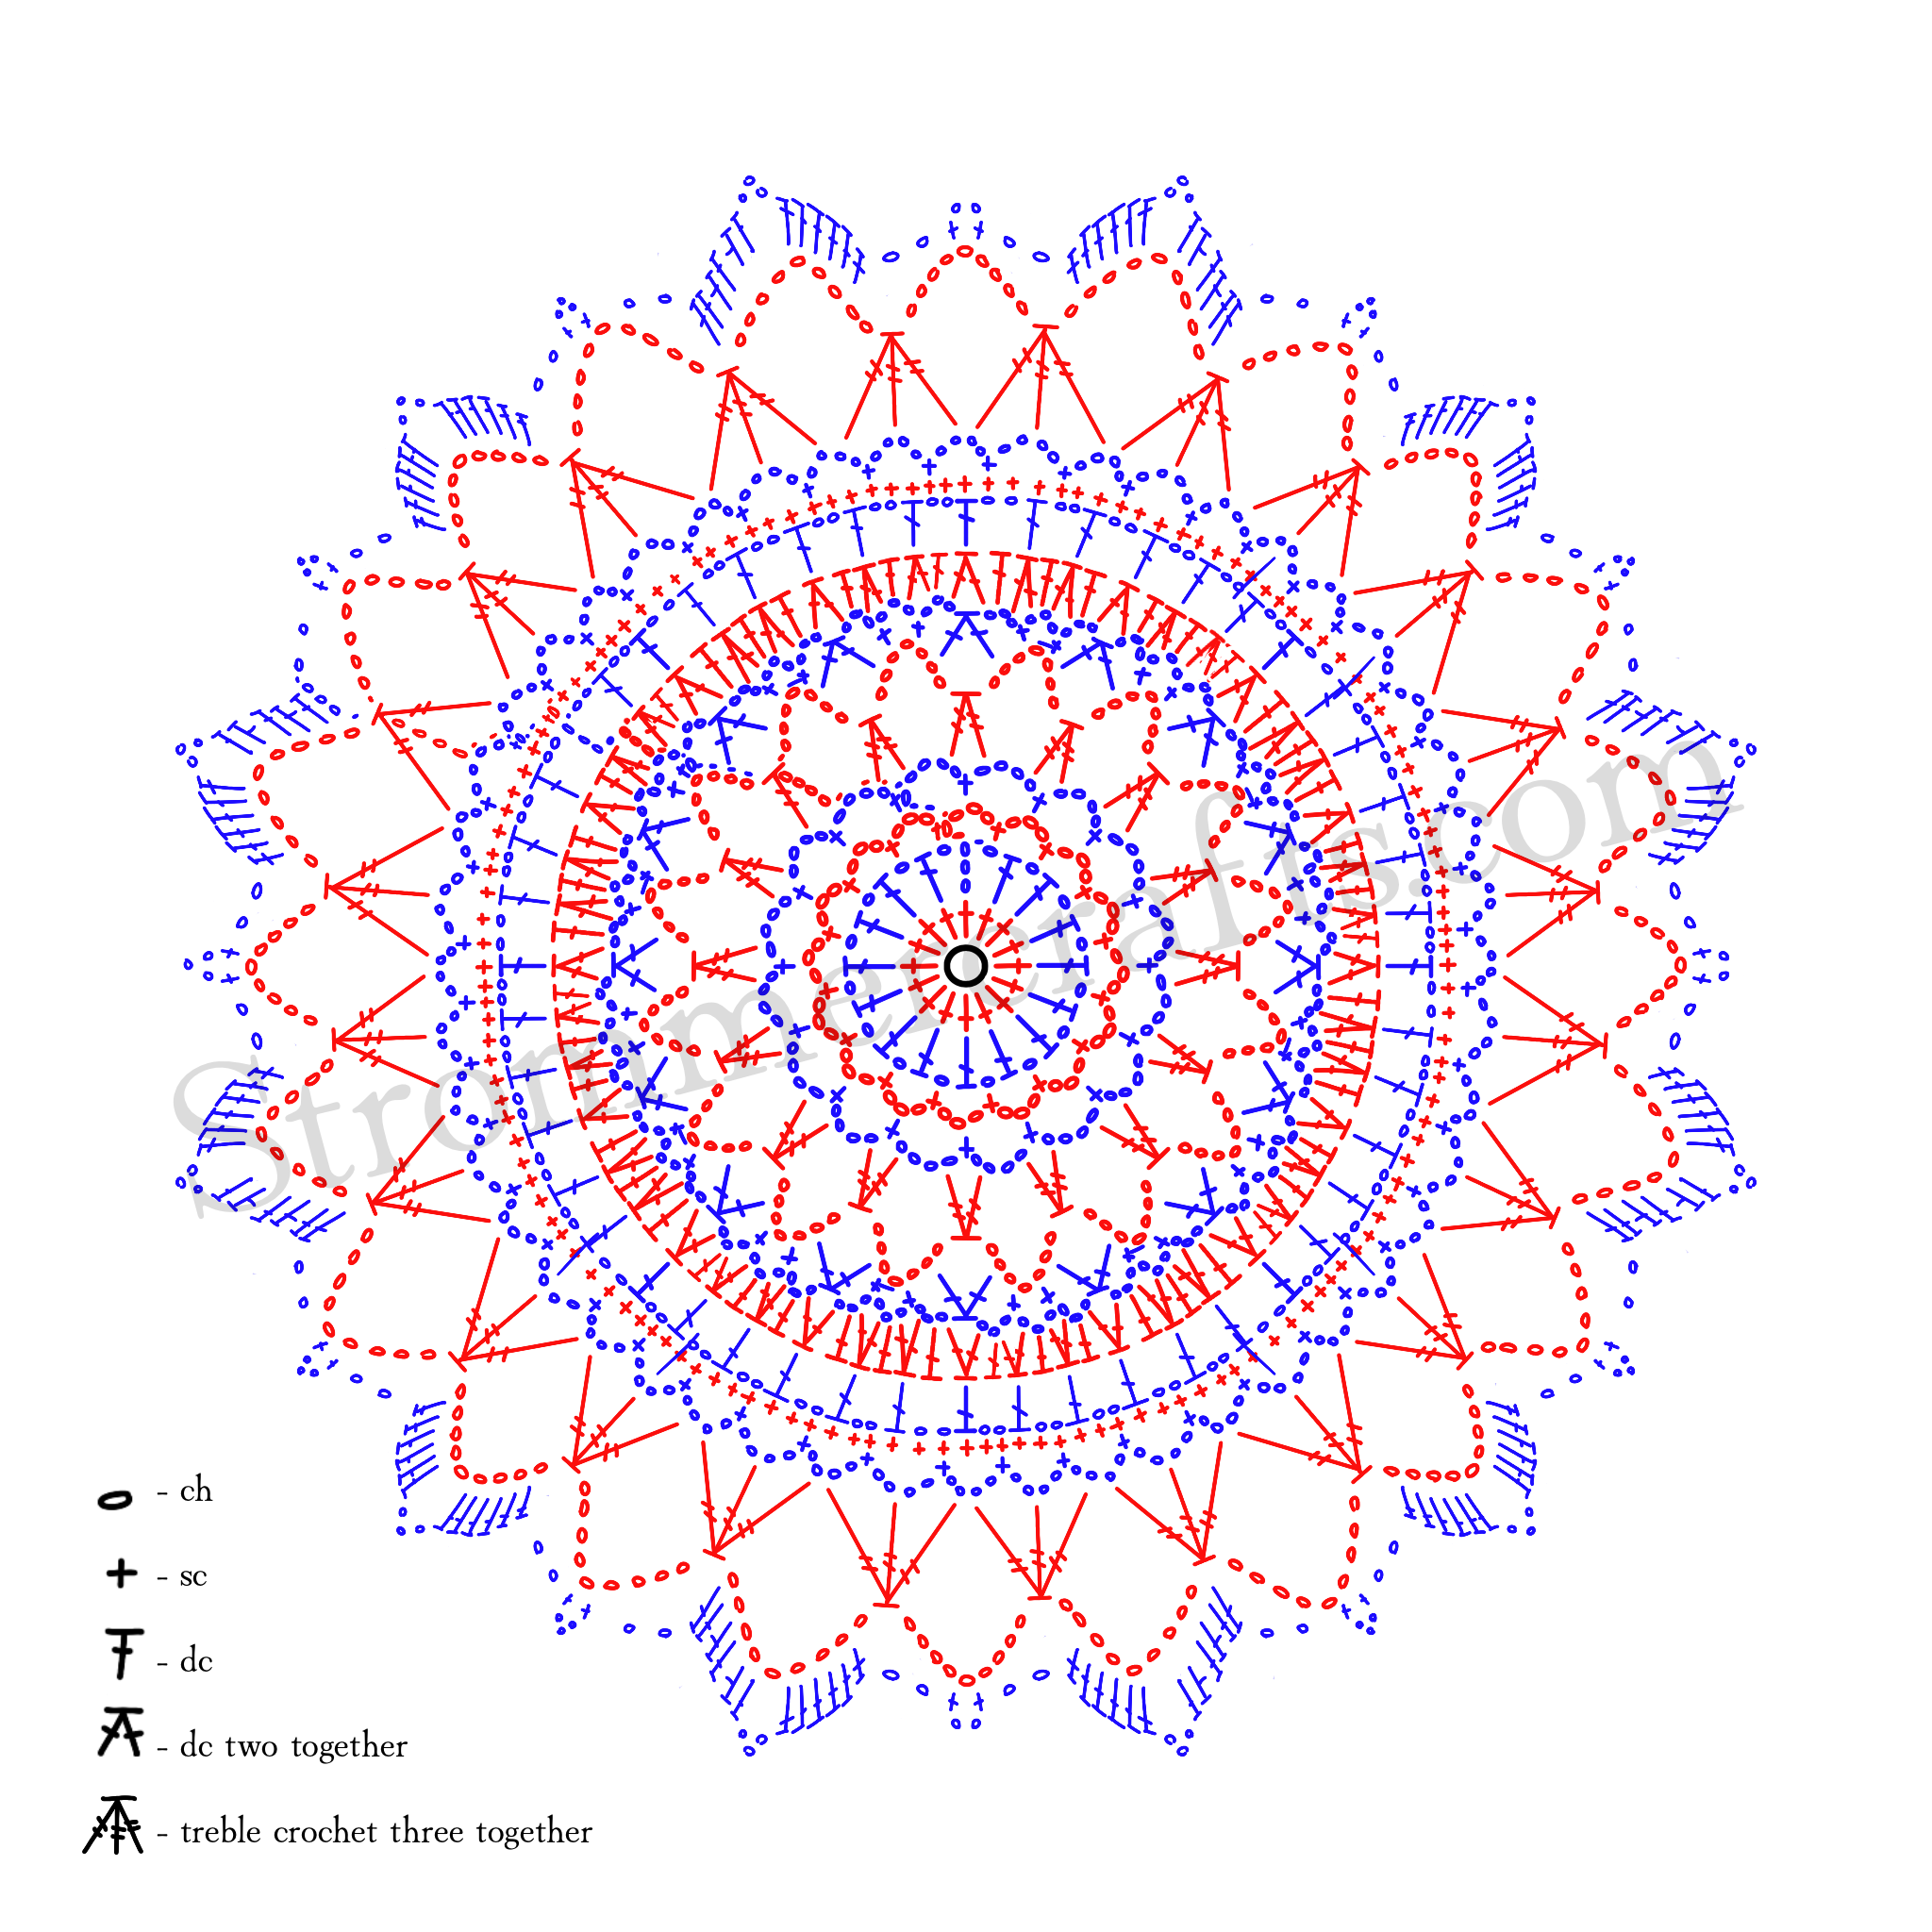
Small Crochet Doily Pattern – The Sacred Window Doily
Make a magic circle or chain 6 and sl st to beginning ch.
Round 1: ch 1 (doesn’t count as a st), place 16 sc into magic circle or chain 5, sl st to first st
Round 2: ch 4 (counts as dc and ch 1), *dc into next sc, ch 1.* Repeat from *to* around. Sl st to 3rd ch of starting ch 4. (16 dc and 16 ch 1s)
Round 3: sl st into ch 1 space, ch 1, sc into same ch 1 space, ch 3, *skip dc and sc into next ch 1 space, ch 3.* Repeat from *to* sl st to first sc.
Round 4: sl st into next 2 chs, ch 1, sc into same ch 3 space, ch 4, *skip next sc, sc into next ch 4 space, ch 4* Repeat from *to* sl st to first sc
Round 5: sl st into next 3 chs, ch 4, skip next sc, tr into next ch 4, *ch 7, in the same ch 4 space make the first leg of tr2tog, place second leg into the next ch 4 space.* Repeat from *to* around, ch 7, sl st into first sc.
Round 6: sl st into next 4 chs, ch 1, *sc into same ch 7 space, ch 3, sc again in same ch 7 space. Ch 3, place first leg of dc2tog in same ch 7 space, place second leg in next ch 7 space, ch 3.* Repeat from *to* around, sl st into first sc
Round 7: sl st into next ch 3 space, ch 3 (counts as dc), place first leg of dc2tog in same ch 3 space, place second leg in next ch 3 space, *dc in same ch 3 space, place first leg of dc2tog in same ch 3 space, place second leg in next ch 3 space.* Repeat from *to* around, sl st to top of
Round 8: ch 5 (counts as dc and ch 2), *skip 2 sts, dc into next, ch 2.* Repeat from *to* around. Sl st to 3rd ch of starting ch 5.
Round 9: ch 1 (doesn’t count as a st), sc into same ch, 2 sc into ch 2 space, *sc into next dc, 2 sc into next ch 2 space.* Repeat from *to* around, sl st to starting sc.
Round 10: sl st into next 2 sc, ch 1, sc into same st, ch 4, *skip 2 sts, sc into next st, ch 4.* Repeat from *to* around, sl st into starting sc.
Round 11: sl st into next 2 sts, ch 4 (counts as middle leg of tr3tog, tr into next ch 4 space, ch 9, *place first leg of tr3tog in same ch 4 space, place the middle leg of tr3tog in the next ch 4 space, place the last leg of tr3tog in the next ch 4 space, ch 9.* Repeat from *to* around, tr in last ch 4 space, sl st to top of starting ch 4
Round 12: sl st into next ch 9 space, ch 3 (counts as dc), place 5 more dc in same ch 9 space, ch 3, place 6 dc into same ch 9 space. Ch 2, skip tr3tog, sc into next ch 9 space ch 3, sc again in same ch 9 space, ch 2, skip next tr3tog, *(6 dc, ch 3, 6 dc) in next ch 9 space. Ch 2, skip tr3tog, sc into next ch 9 space ch 3, sc again in same ch 9 space, ch 2.* Repeat from *to* around, sl st to top of starting ch 3.
Cut thread with scissors, weave in ends with tapestry needle.
Block doily by soaking in water and patting dry with a towel. Place on a piece of cardboard or blocking board and use pins to gently stretch the doily. Wait 24-48 hours or until completely dry.
I hope you enjoy this small crochet doily pattern! Until next time!
Other Posts You May Like: