Crochet Veil Pattern – Little Leaf Trellis

Hello everyone, I hope you have had a lovely spring so far. Today I have another beautiful crochet veil pattern for you, the Little Leaf Trellis Veil! 

This lacy crochet veil is created with chains and little “leaves.” After a few rows worked, it really does look like a pretty trellis.

Here’s a close up of the pattern:

As always, these crochet veil projects tend to take a while to finish (at least if you’re like me and devote an hour or two a day). This one took me about a month to finish, but this depends on your length and size.

Check Out These Other Crochet Veil Patterns:

The Little Leaf Trellis crochet veil is sewed into an infinity style veil. I usually just take both ends of the veil, line them up as straight as possible, and slip stitch my way down to sew it in place. You can easily adjust to the length you need in the foundation row. The formula is a series of 12 chains, no need to add turning chains for this one.

Need help sizing your veil? 

Take your foundation row and drape it loosely over your head. Bring the ends together and add more or less chains. I like to have my crochet infinity veils down to my chest so it doesn’t feel too restrictive.

When and why do you wear a veil?

These veils are typically worn during Catholic Masses. Veiling during mass was the norm prior to the Vatican II counsel and was officially dropped from the new Code of Canon Law in 1983. Despite veiling no longer being required, many women still choose to implement the practice as a sign of modesty and respect at Mass.

I always try my best to make pattern instructions clear and easy to follow, if you find a mistake or need help, please make a comment below.

Okay, let’s jump into the pattern! 🙂    

Please note that some of these links are affiliate links. That means that if you click on these links and make a purchase, I may receive a commission at no extra cost to you. You can find more information about our disclosure policy here. Thank you for your support.

Materials Needed:

Abbreviations Used:

Please note these are in US, not UK terms.

  • Ch(s) – chain(s)
  • Sc – single crochet
  • Tr – treble crochet
  • Dtr – double treble crochet

Special Stitches:

  • Ch 3 Picot – chain 3, insert hook into previous sc made, and make a slip stitch. 
  • Leaf – Step 1) after chaining the specified number of chains, take your hook out and leave a loop at the top big enough to grab later, insert hook into the 6th ch away from the top. Step 2) Grab the loop you left and pull through. Step 3) Ch 6. Step 4) Make a sc into the 6th ch away from hook. 
Leaf step 1
Step 1
Leaf step 2
Step 2
Leaf step 3
Step 3
Leaf Step 4
Step 4

Little Leaf Trellis Crochet Veil Pattern:

Make a series of 12 chains until desired length is reached.

Row 1: Insert hook into 12th ch from hook and make a sc, *ch 15, skip 8 chs, make a sc in next ch, ch 5, skip 2 chs, sc into next ch.* Repeat from *to* until end.

Little Leaf Trellis Veil Row 1
Row 1

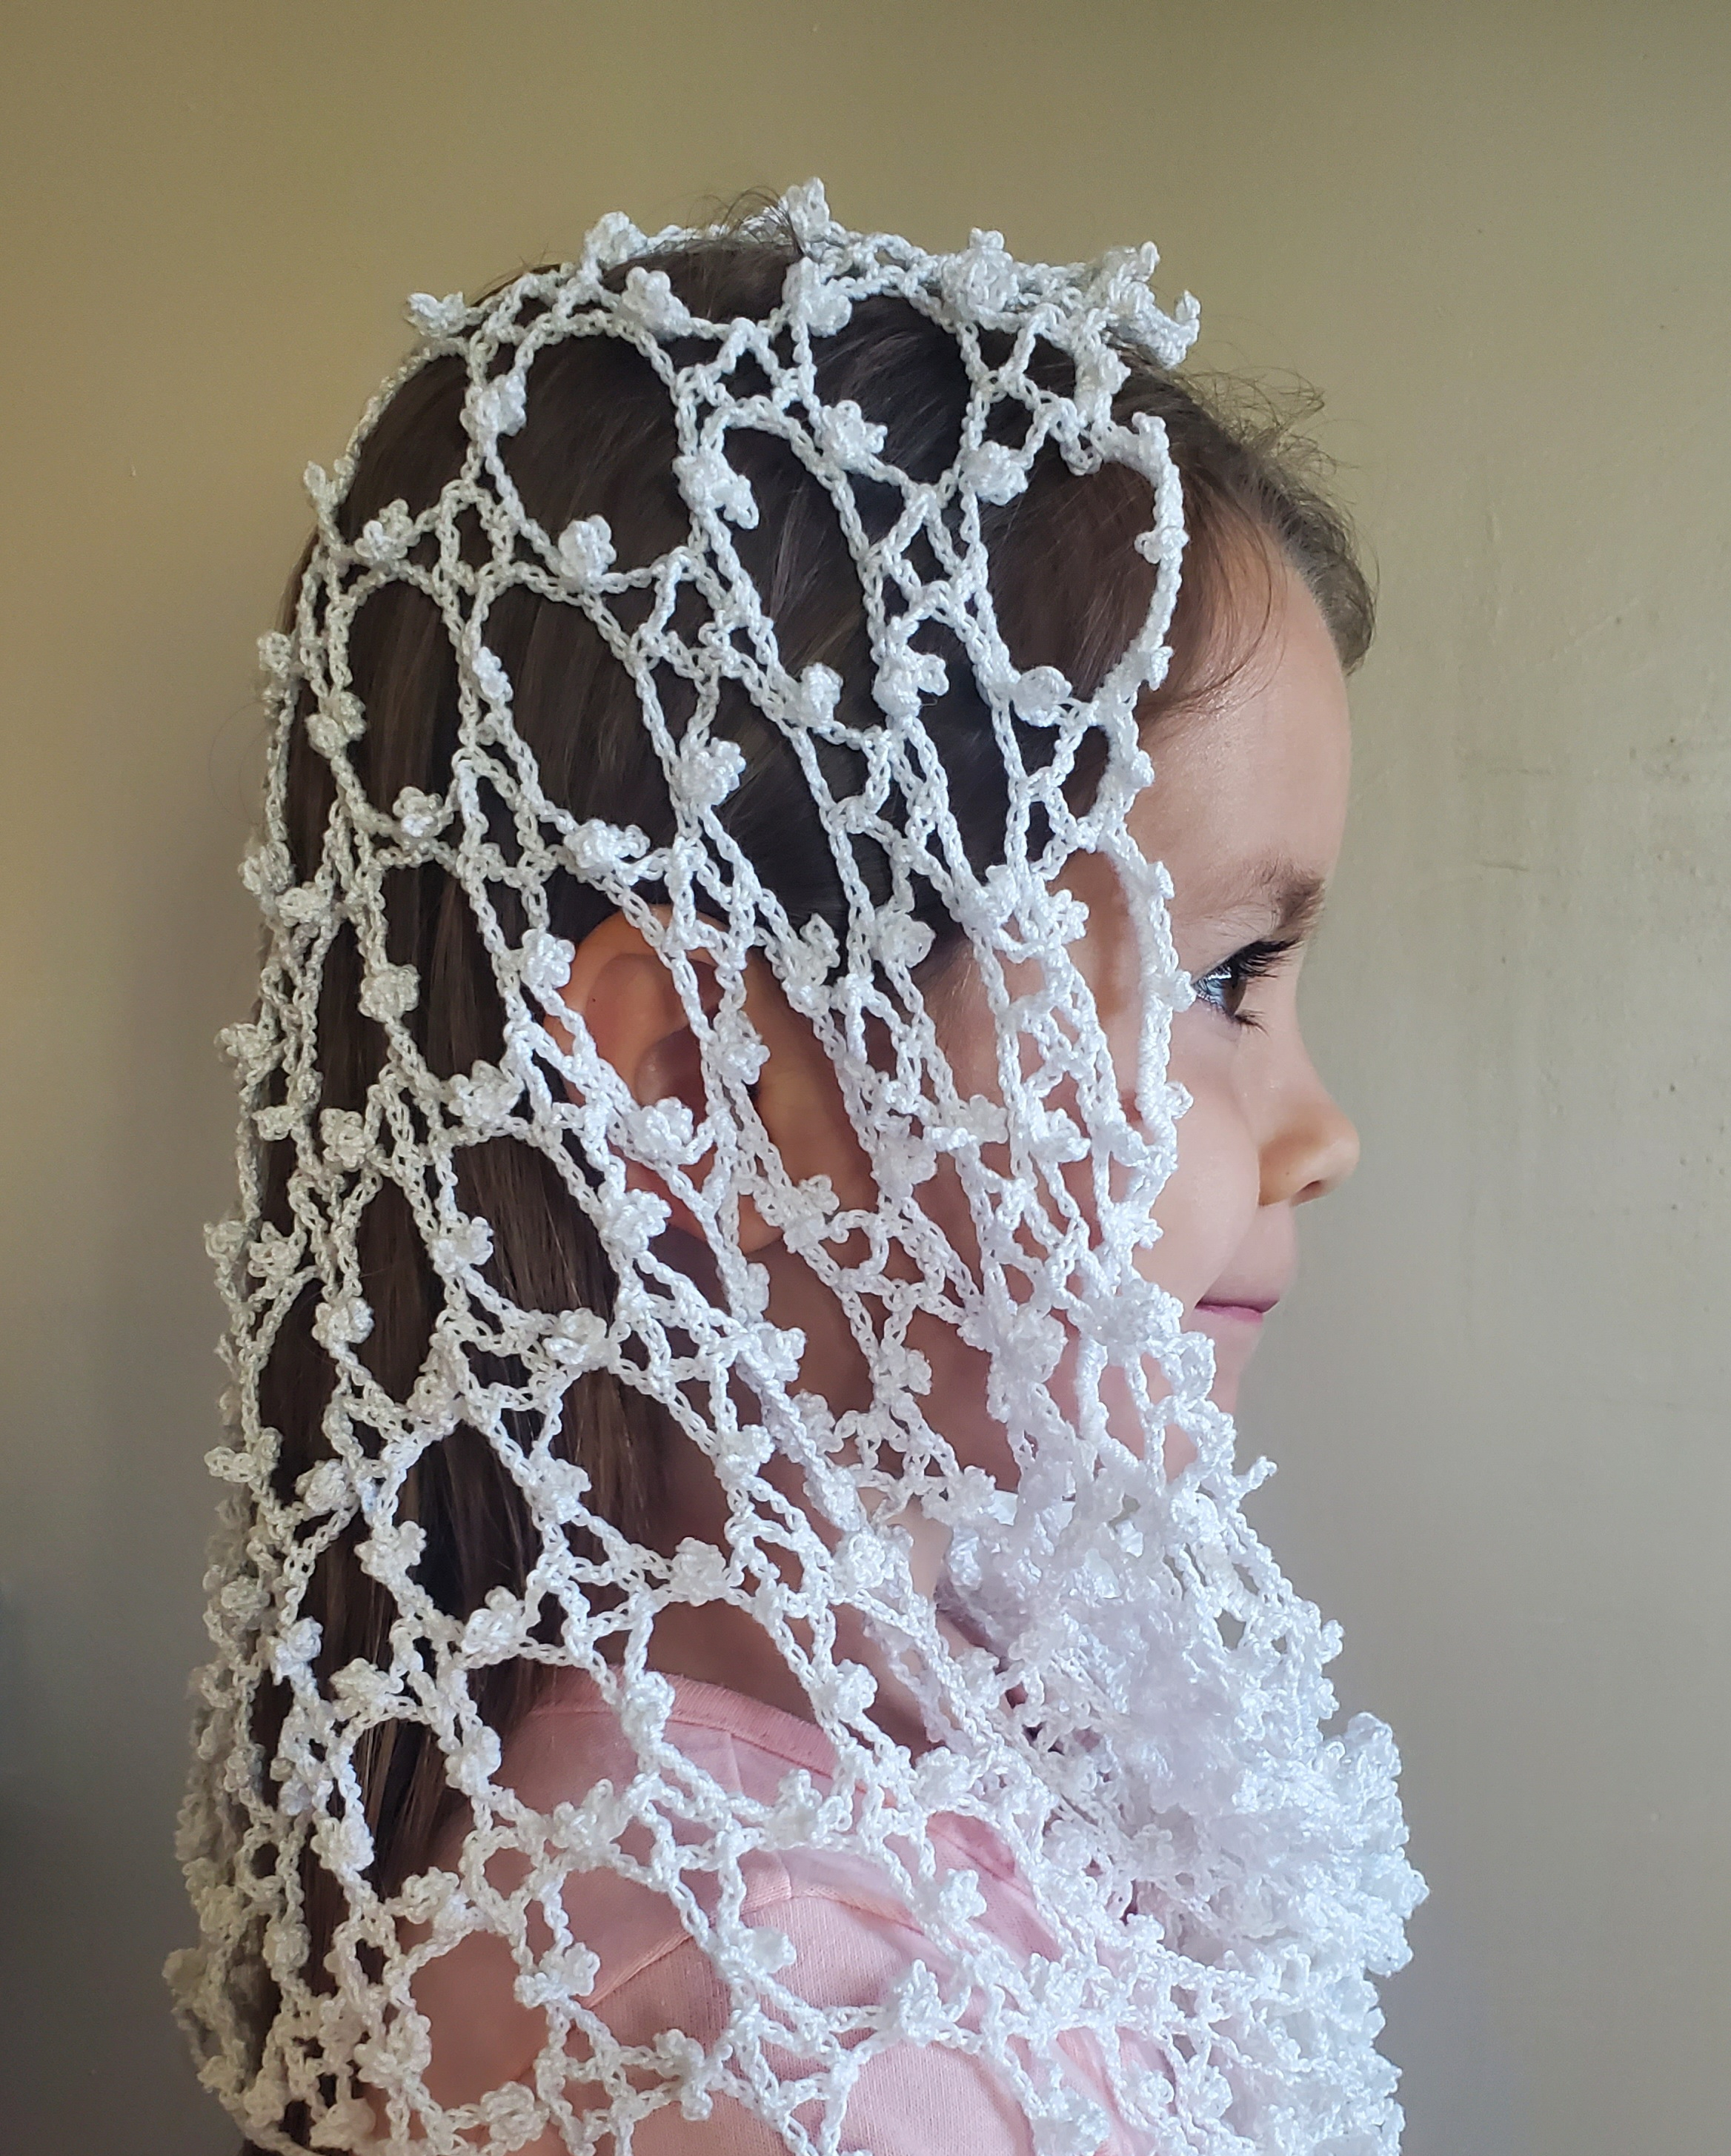
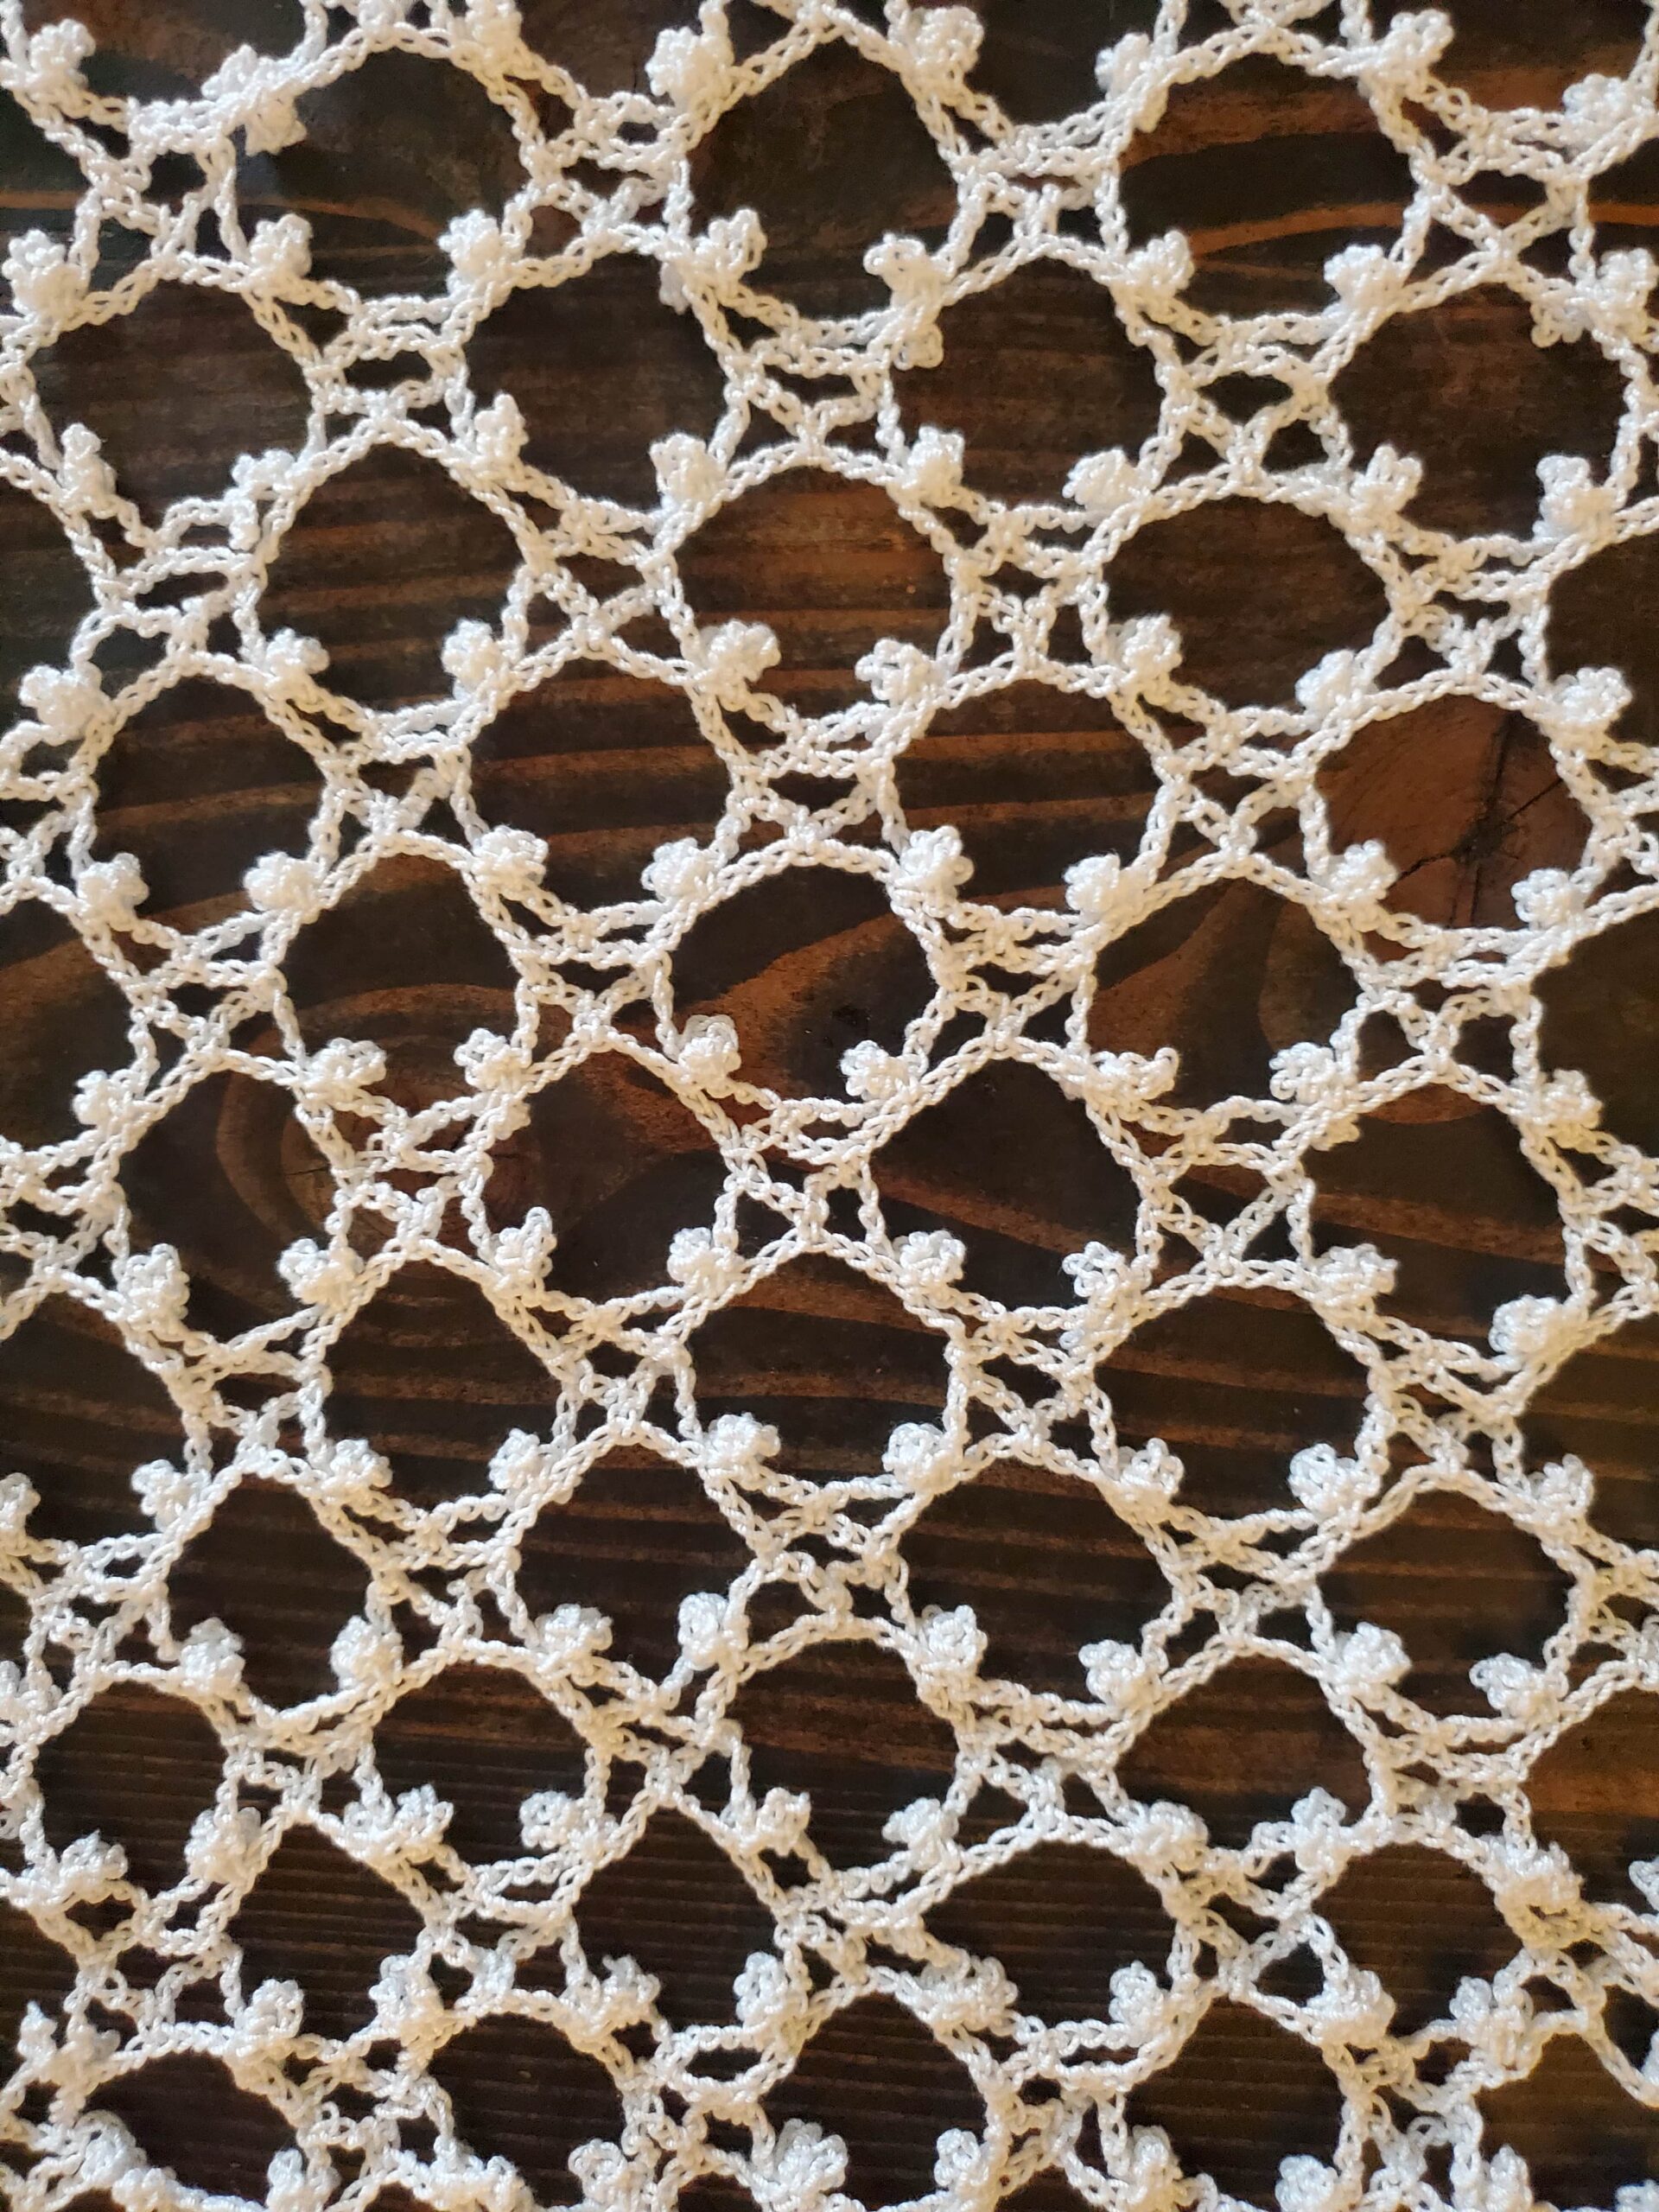
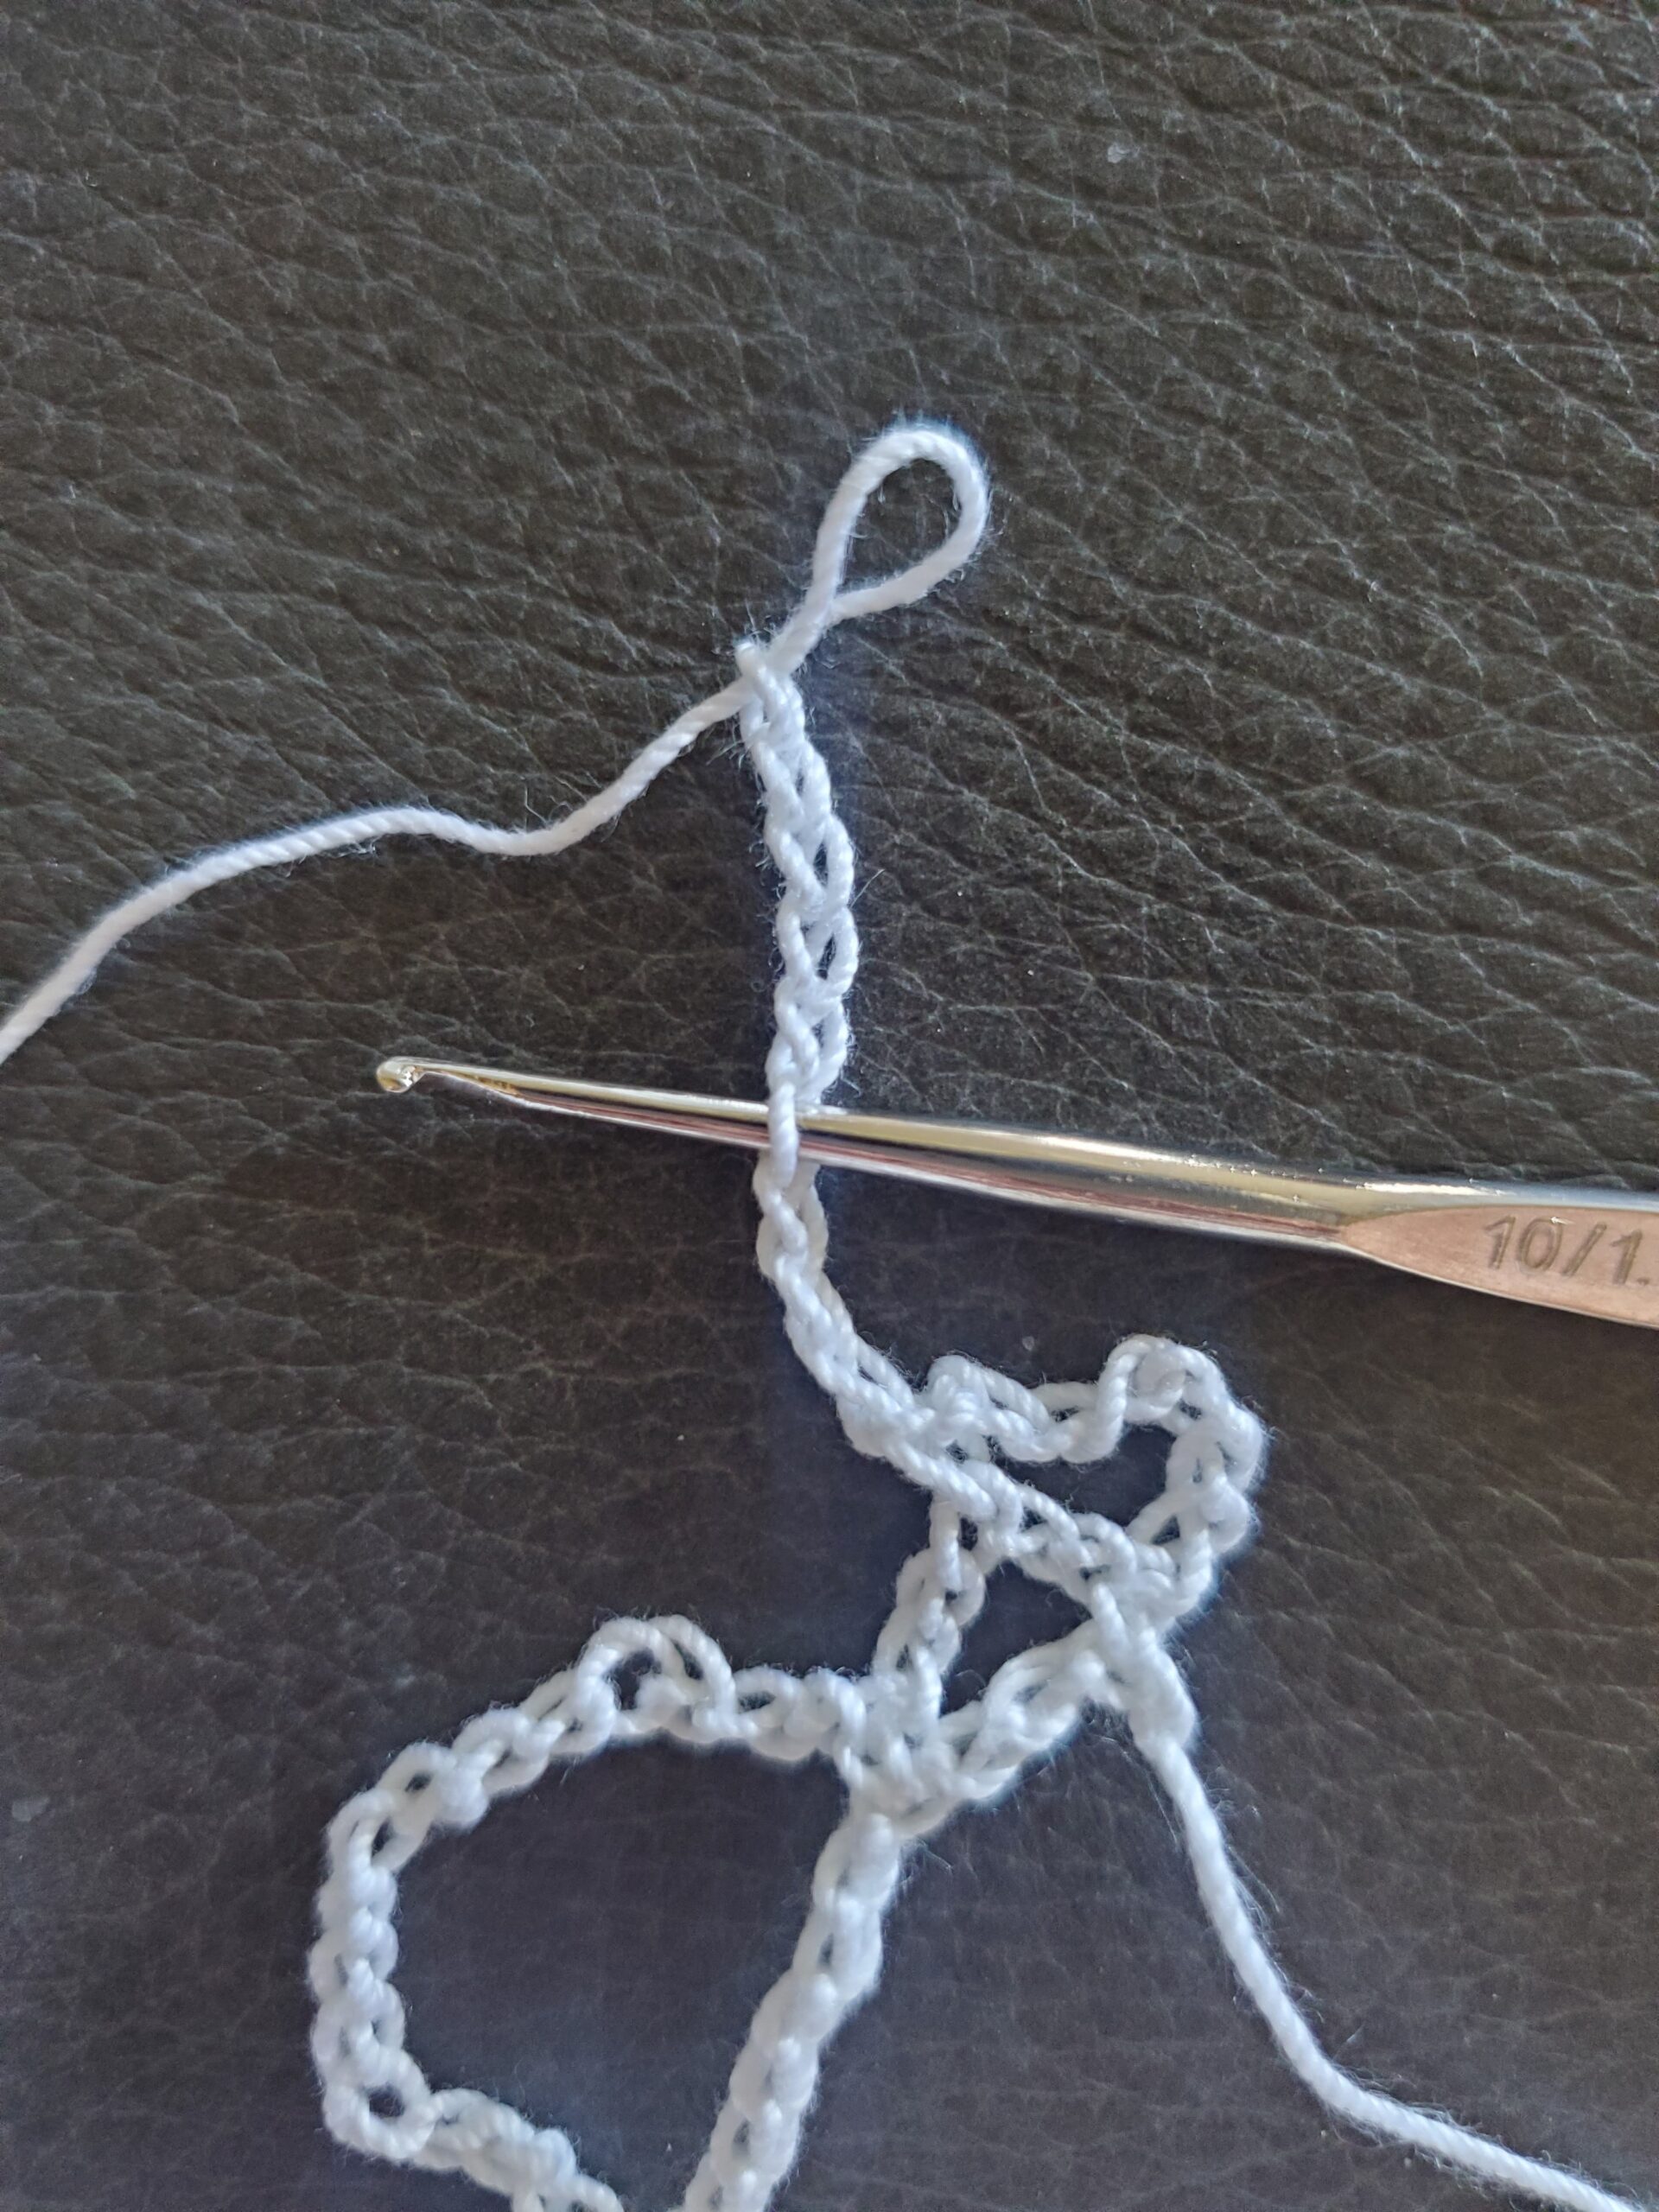
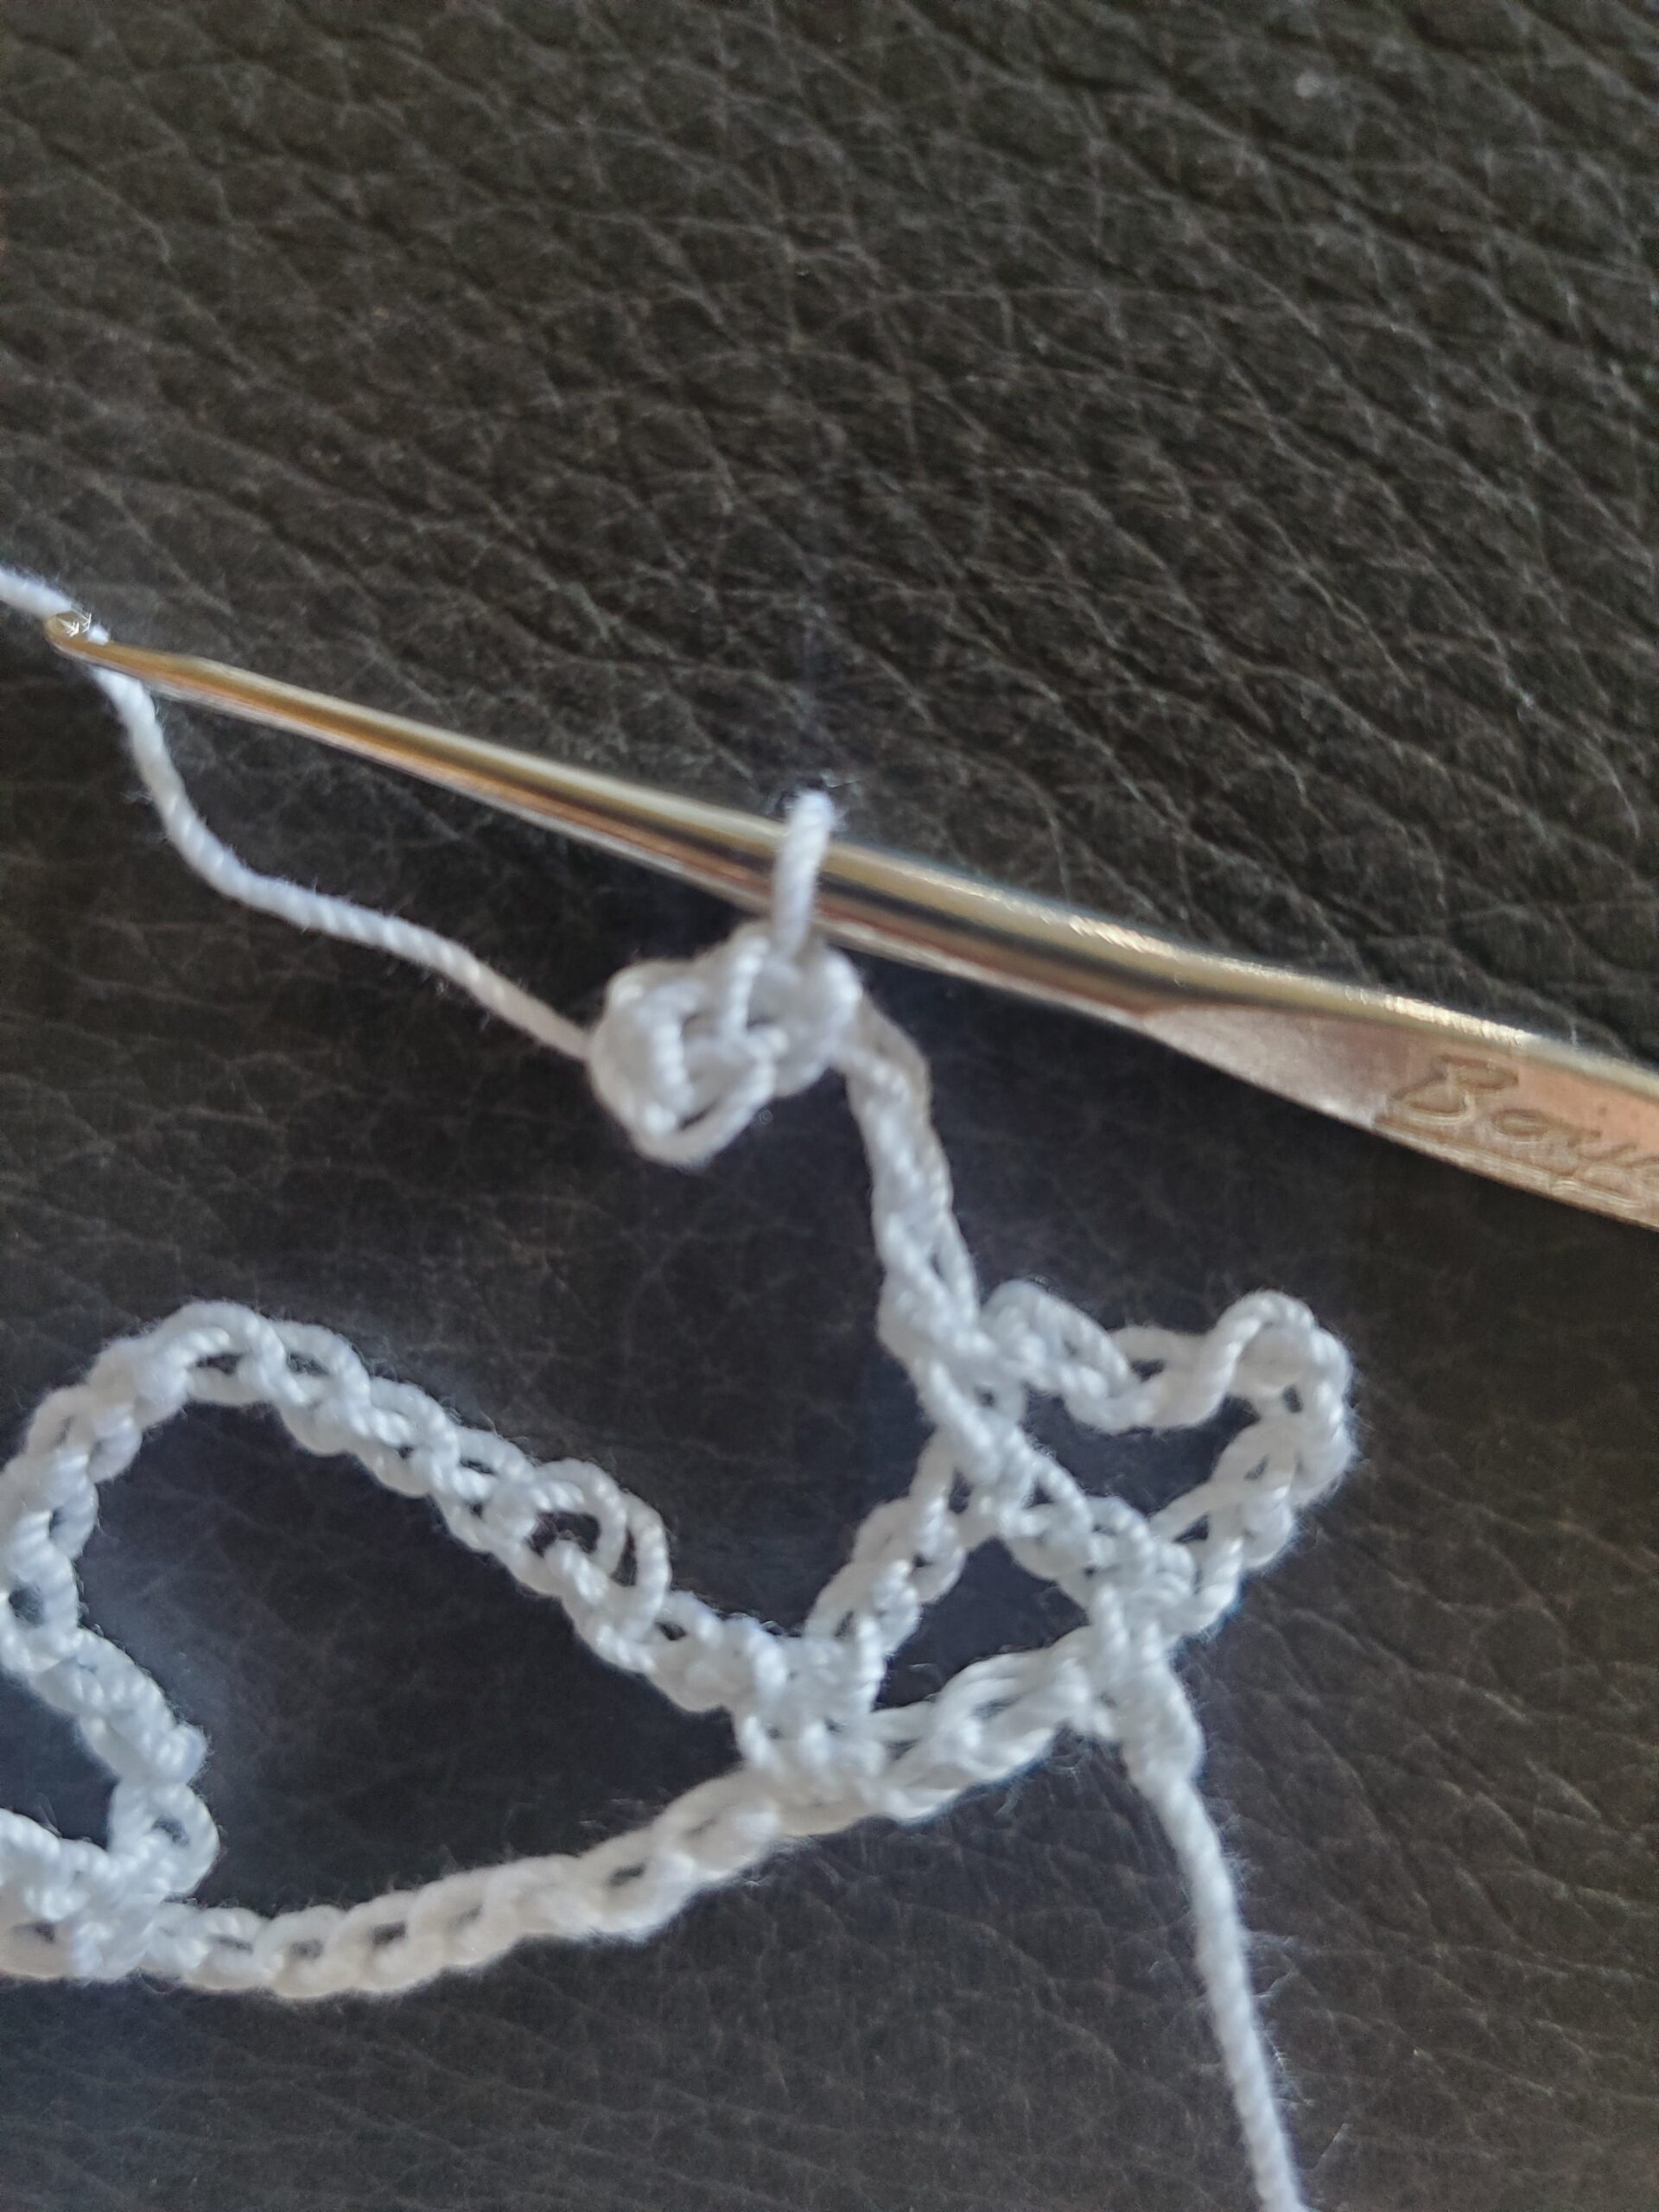
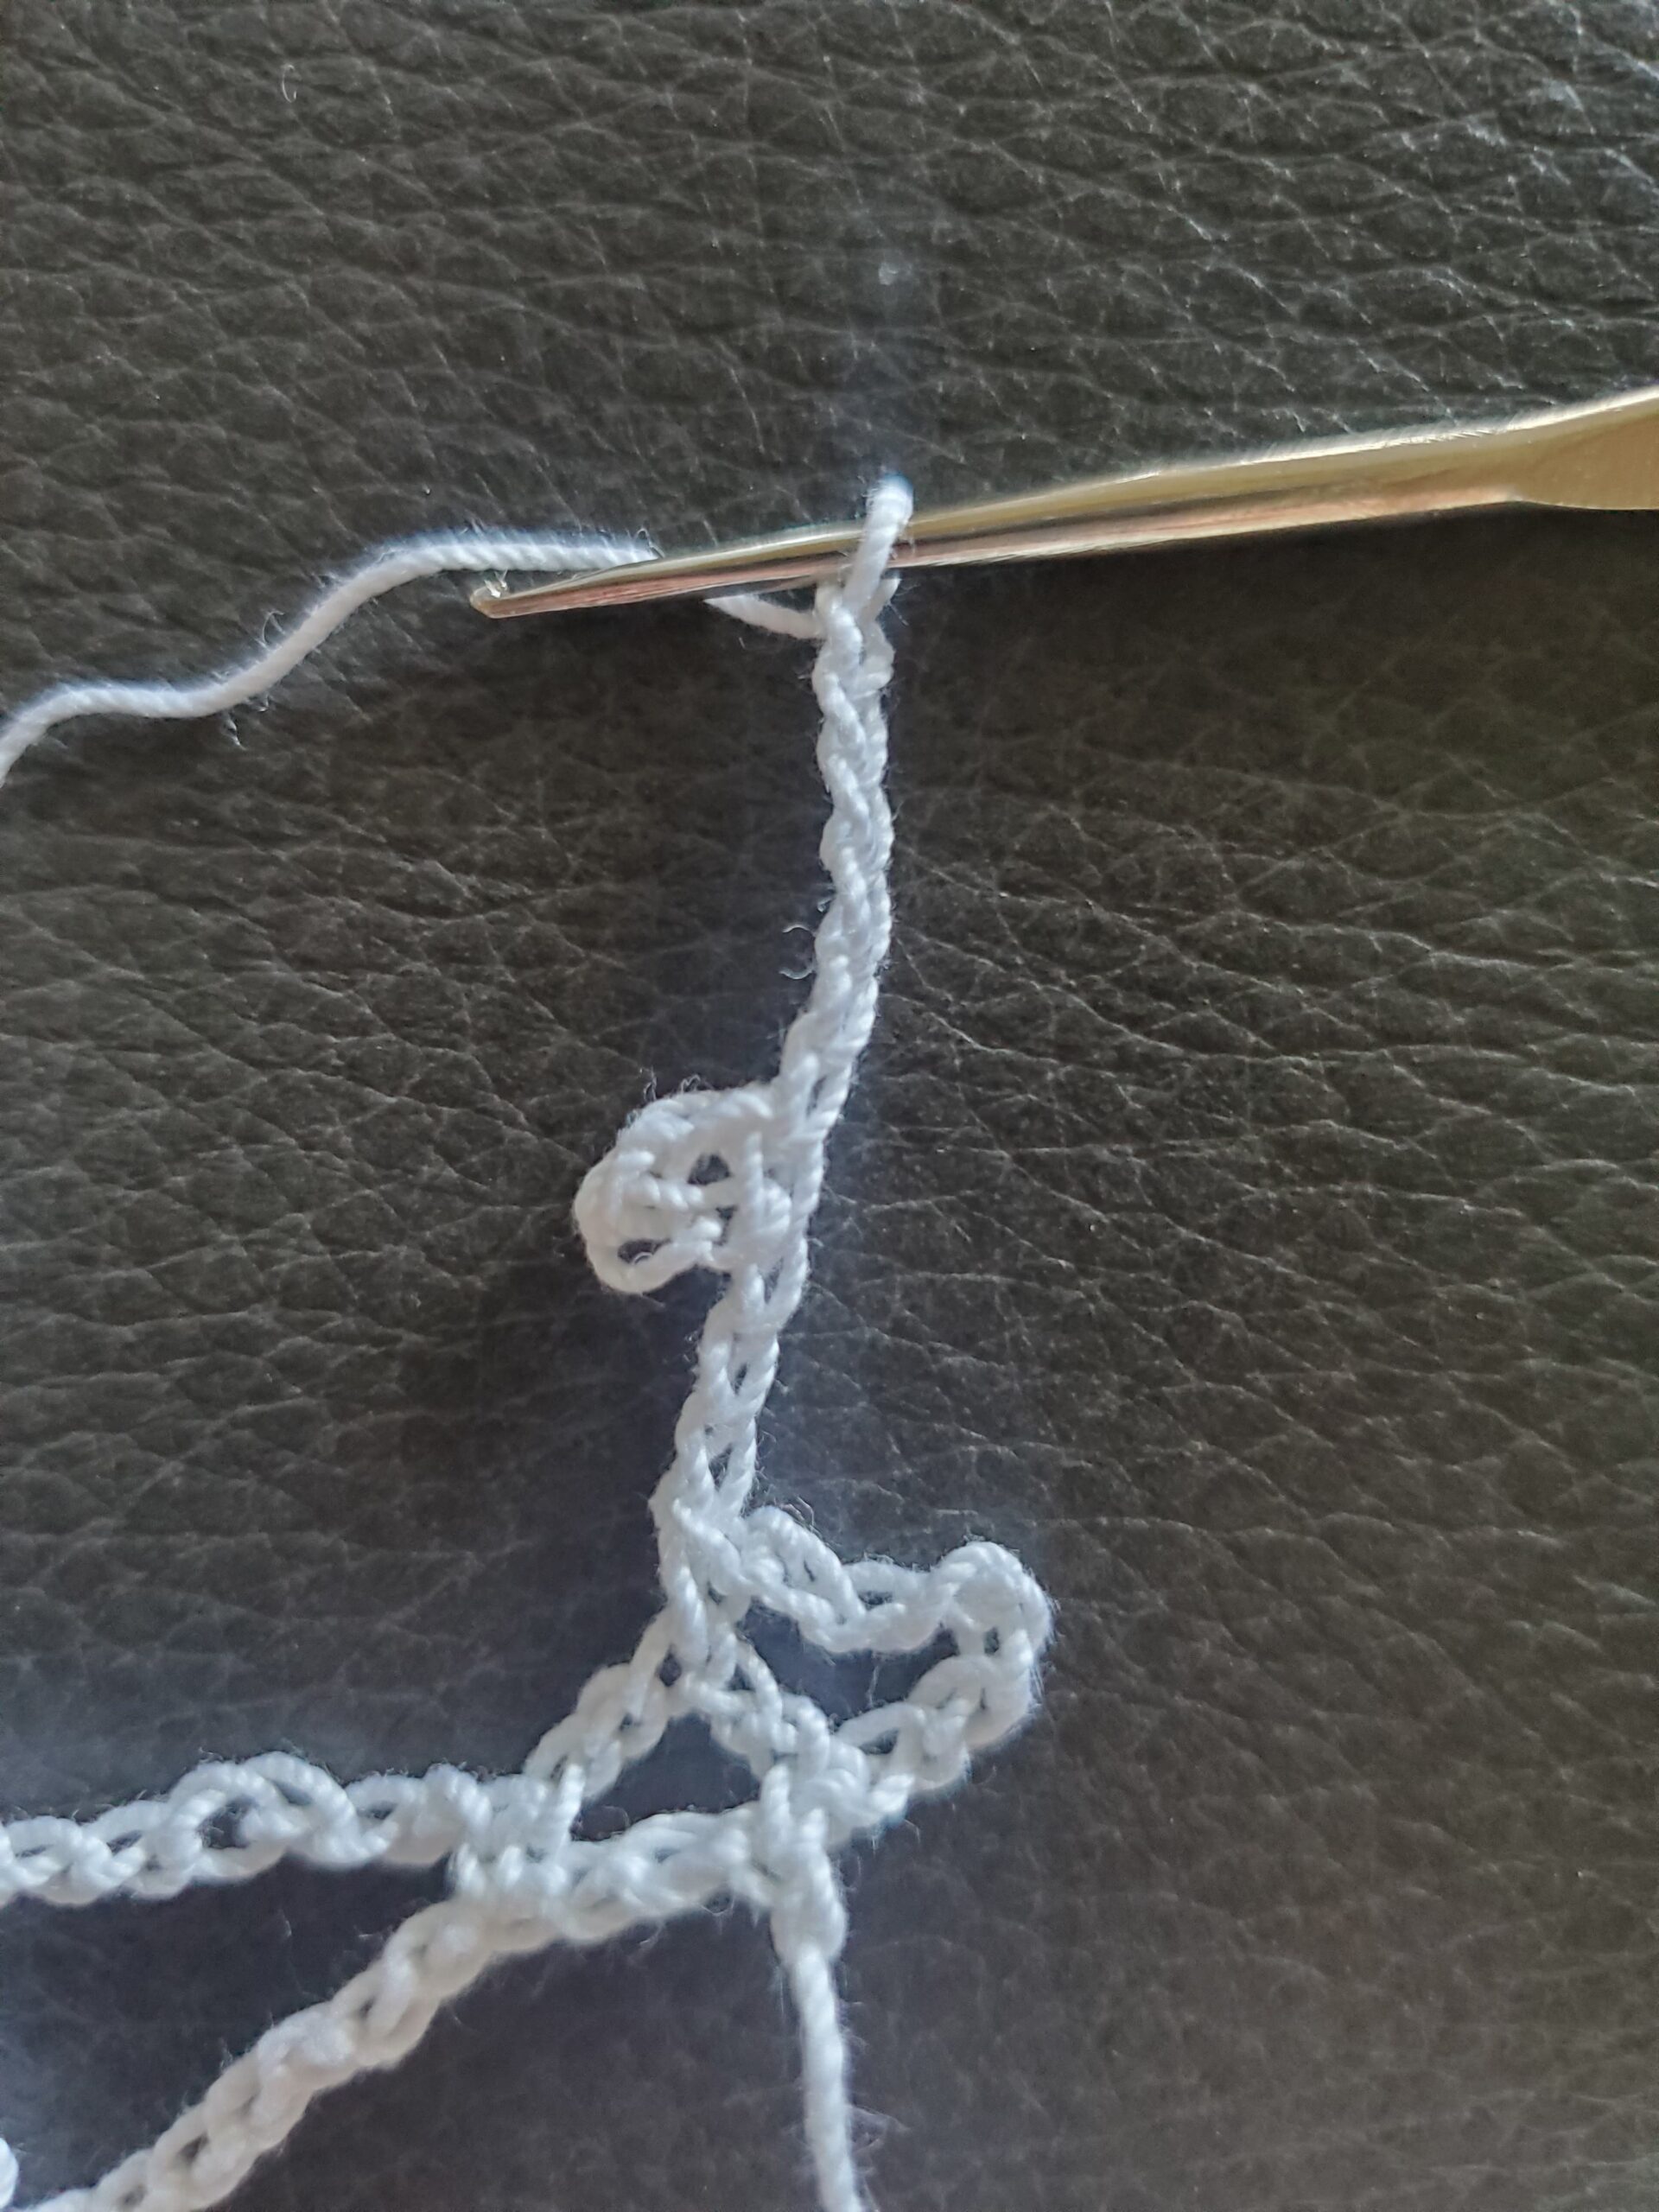
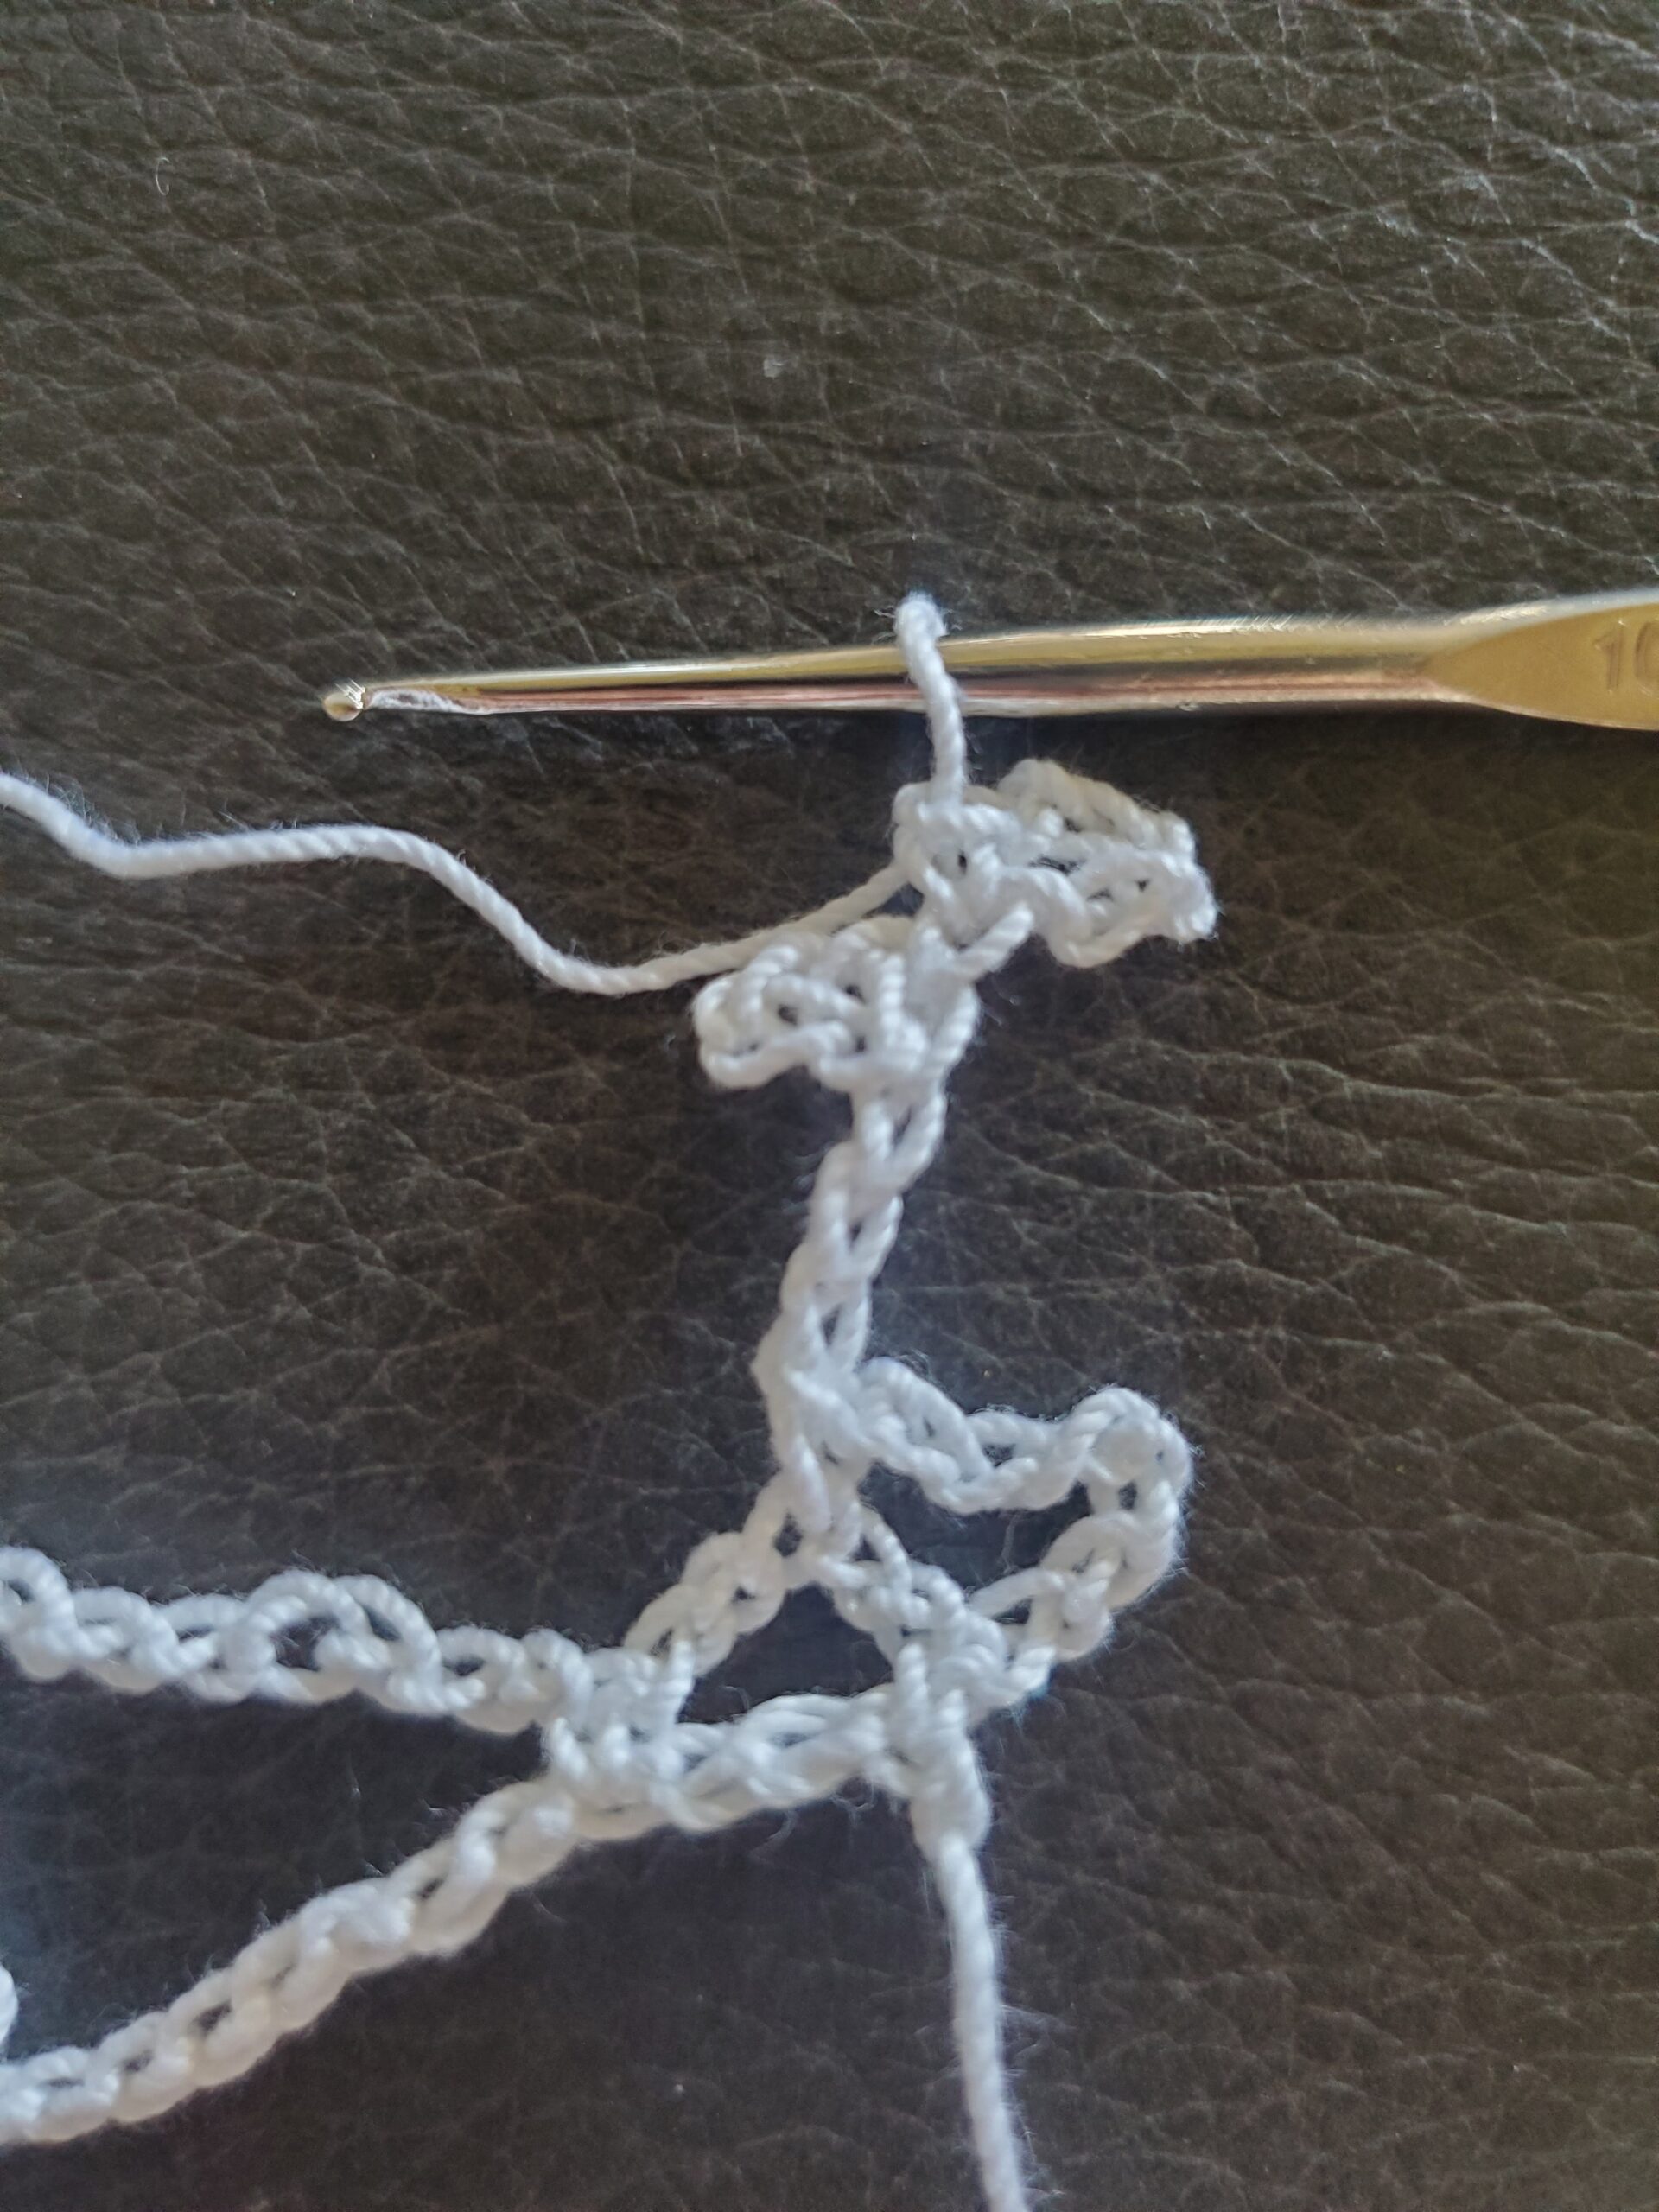
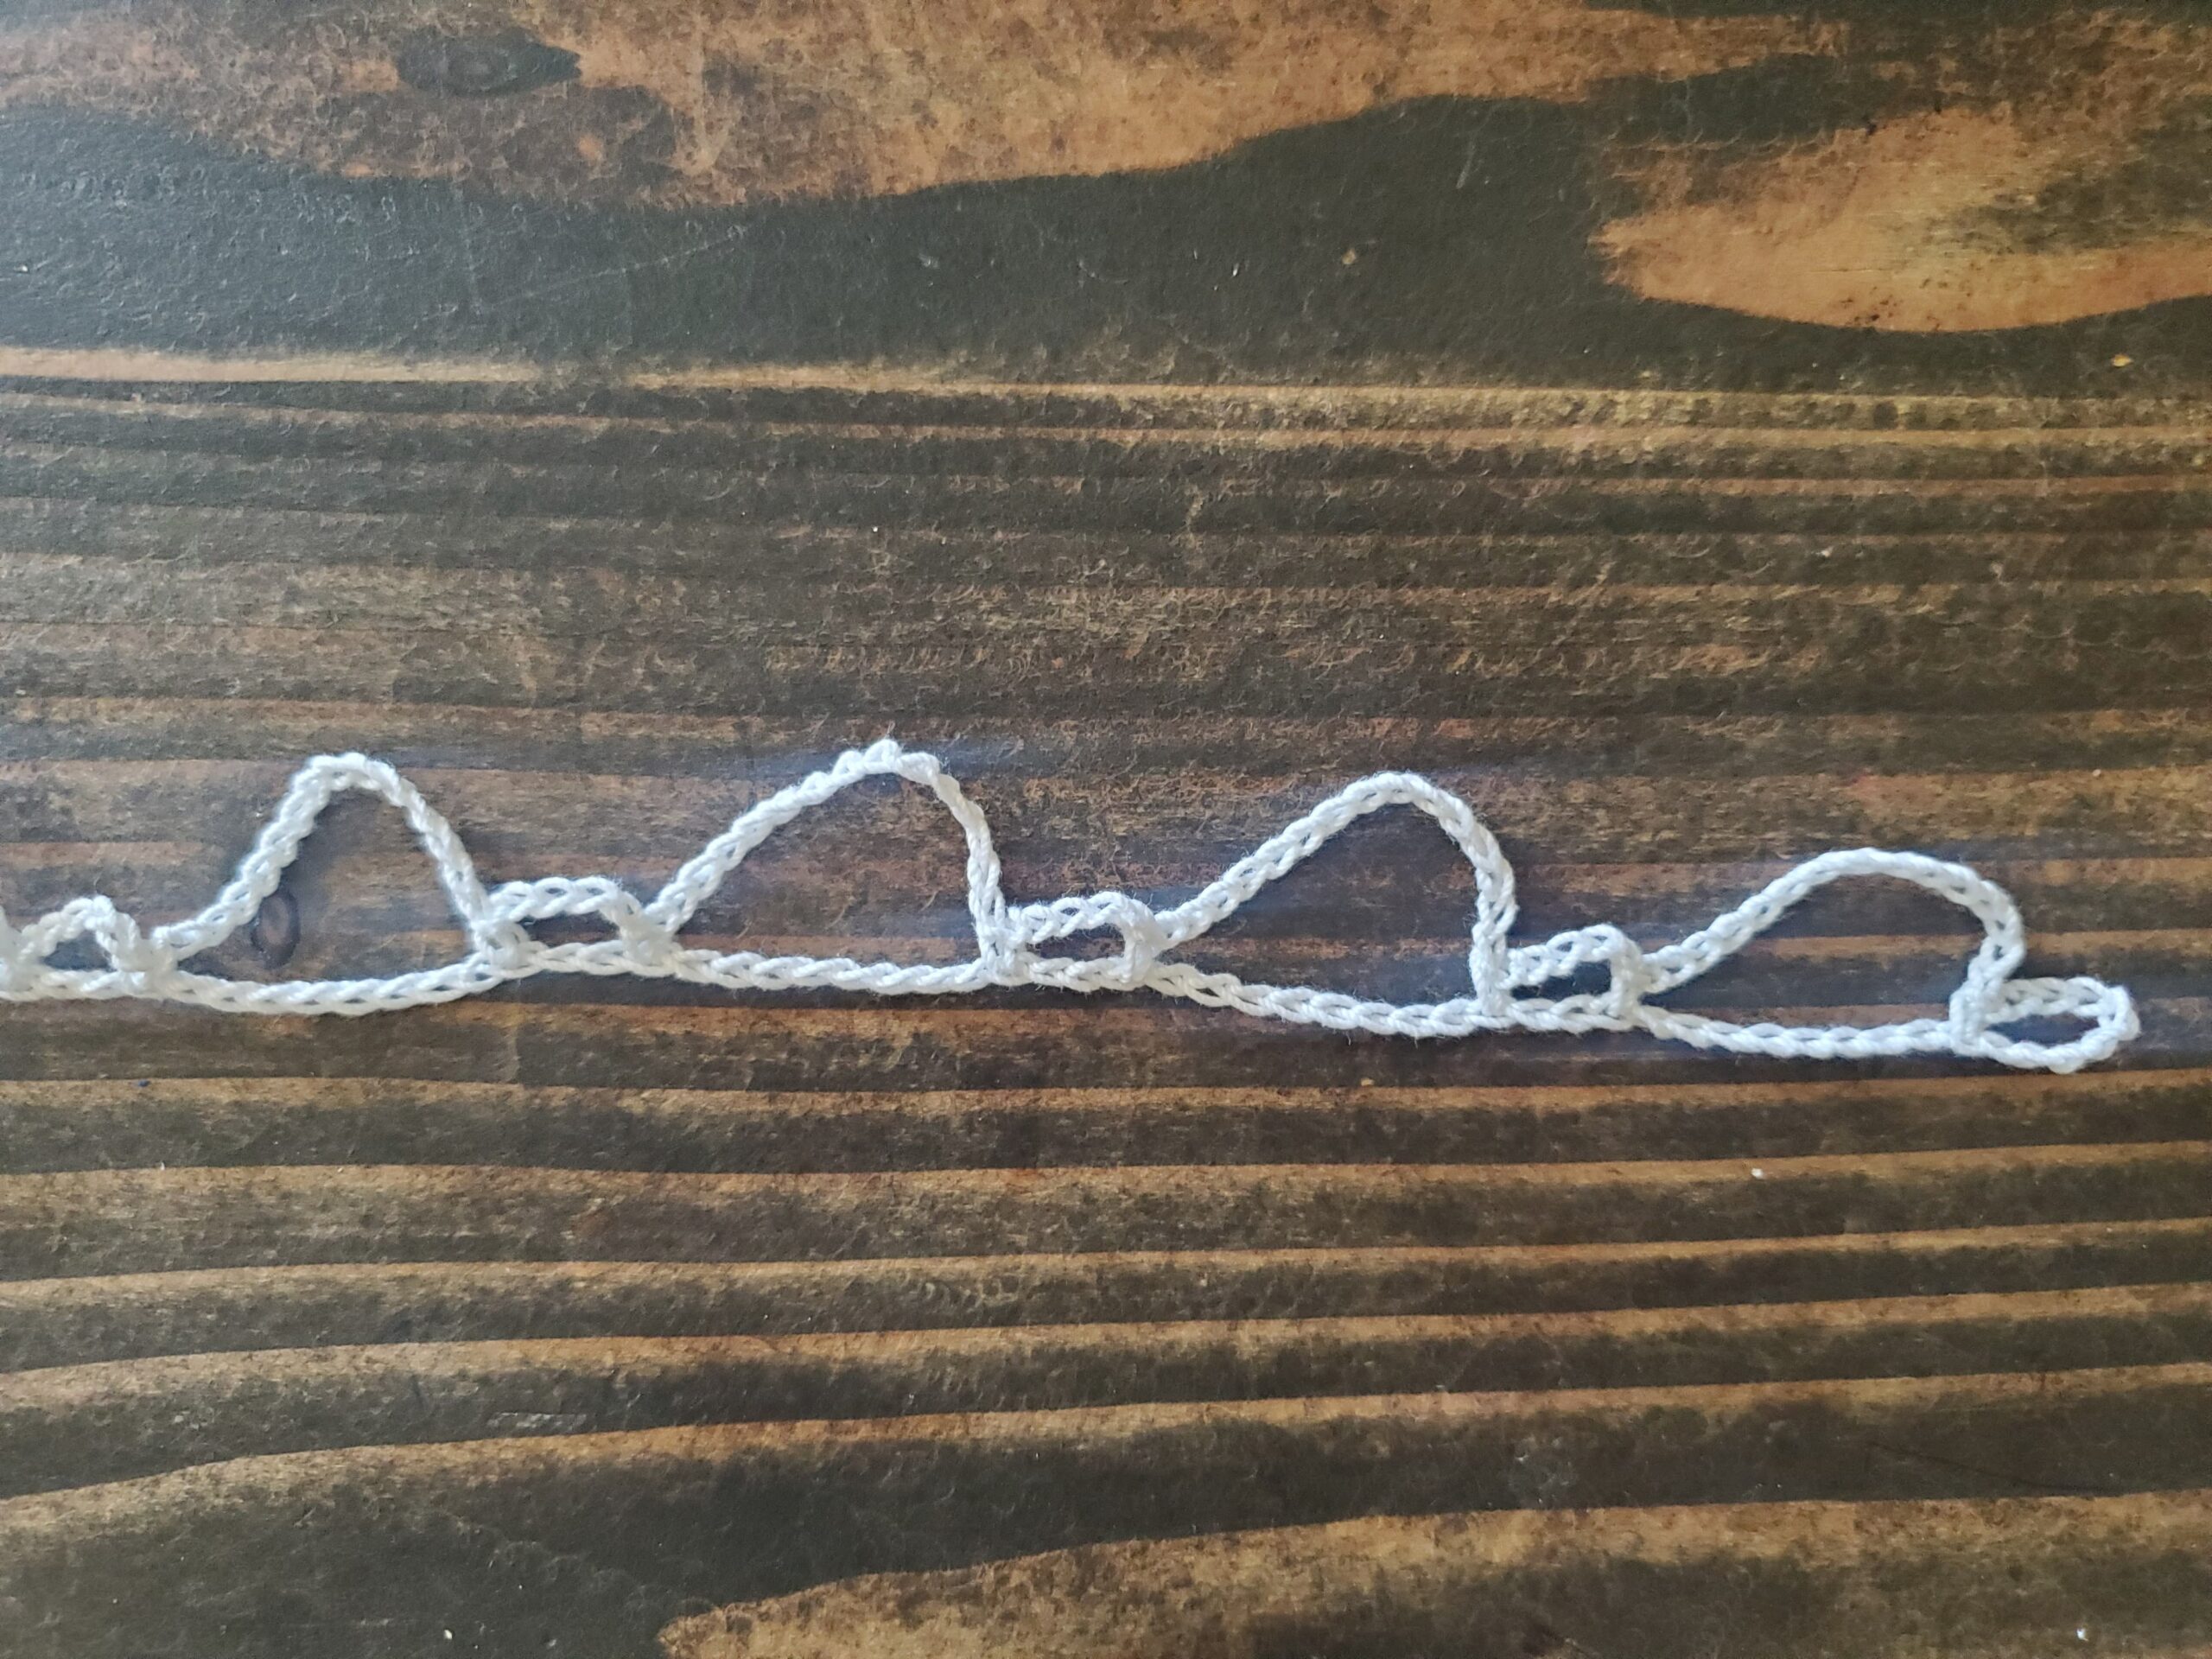
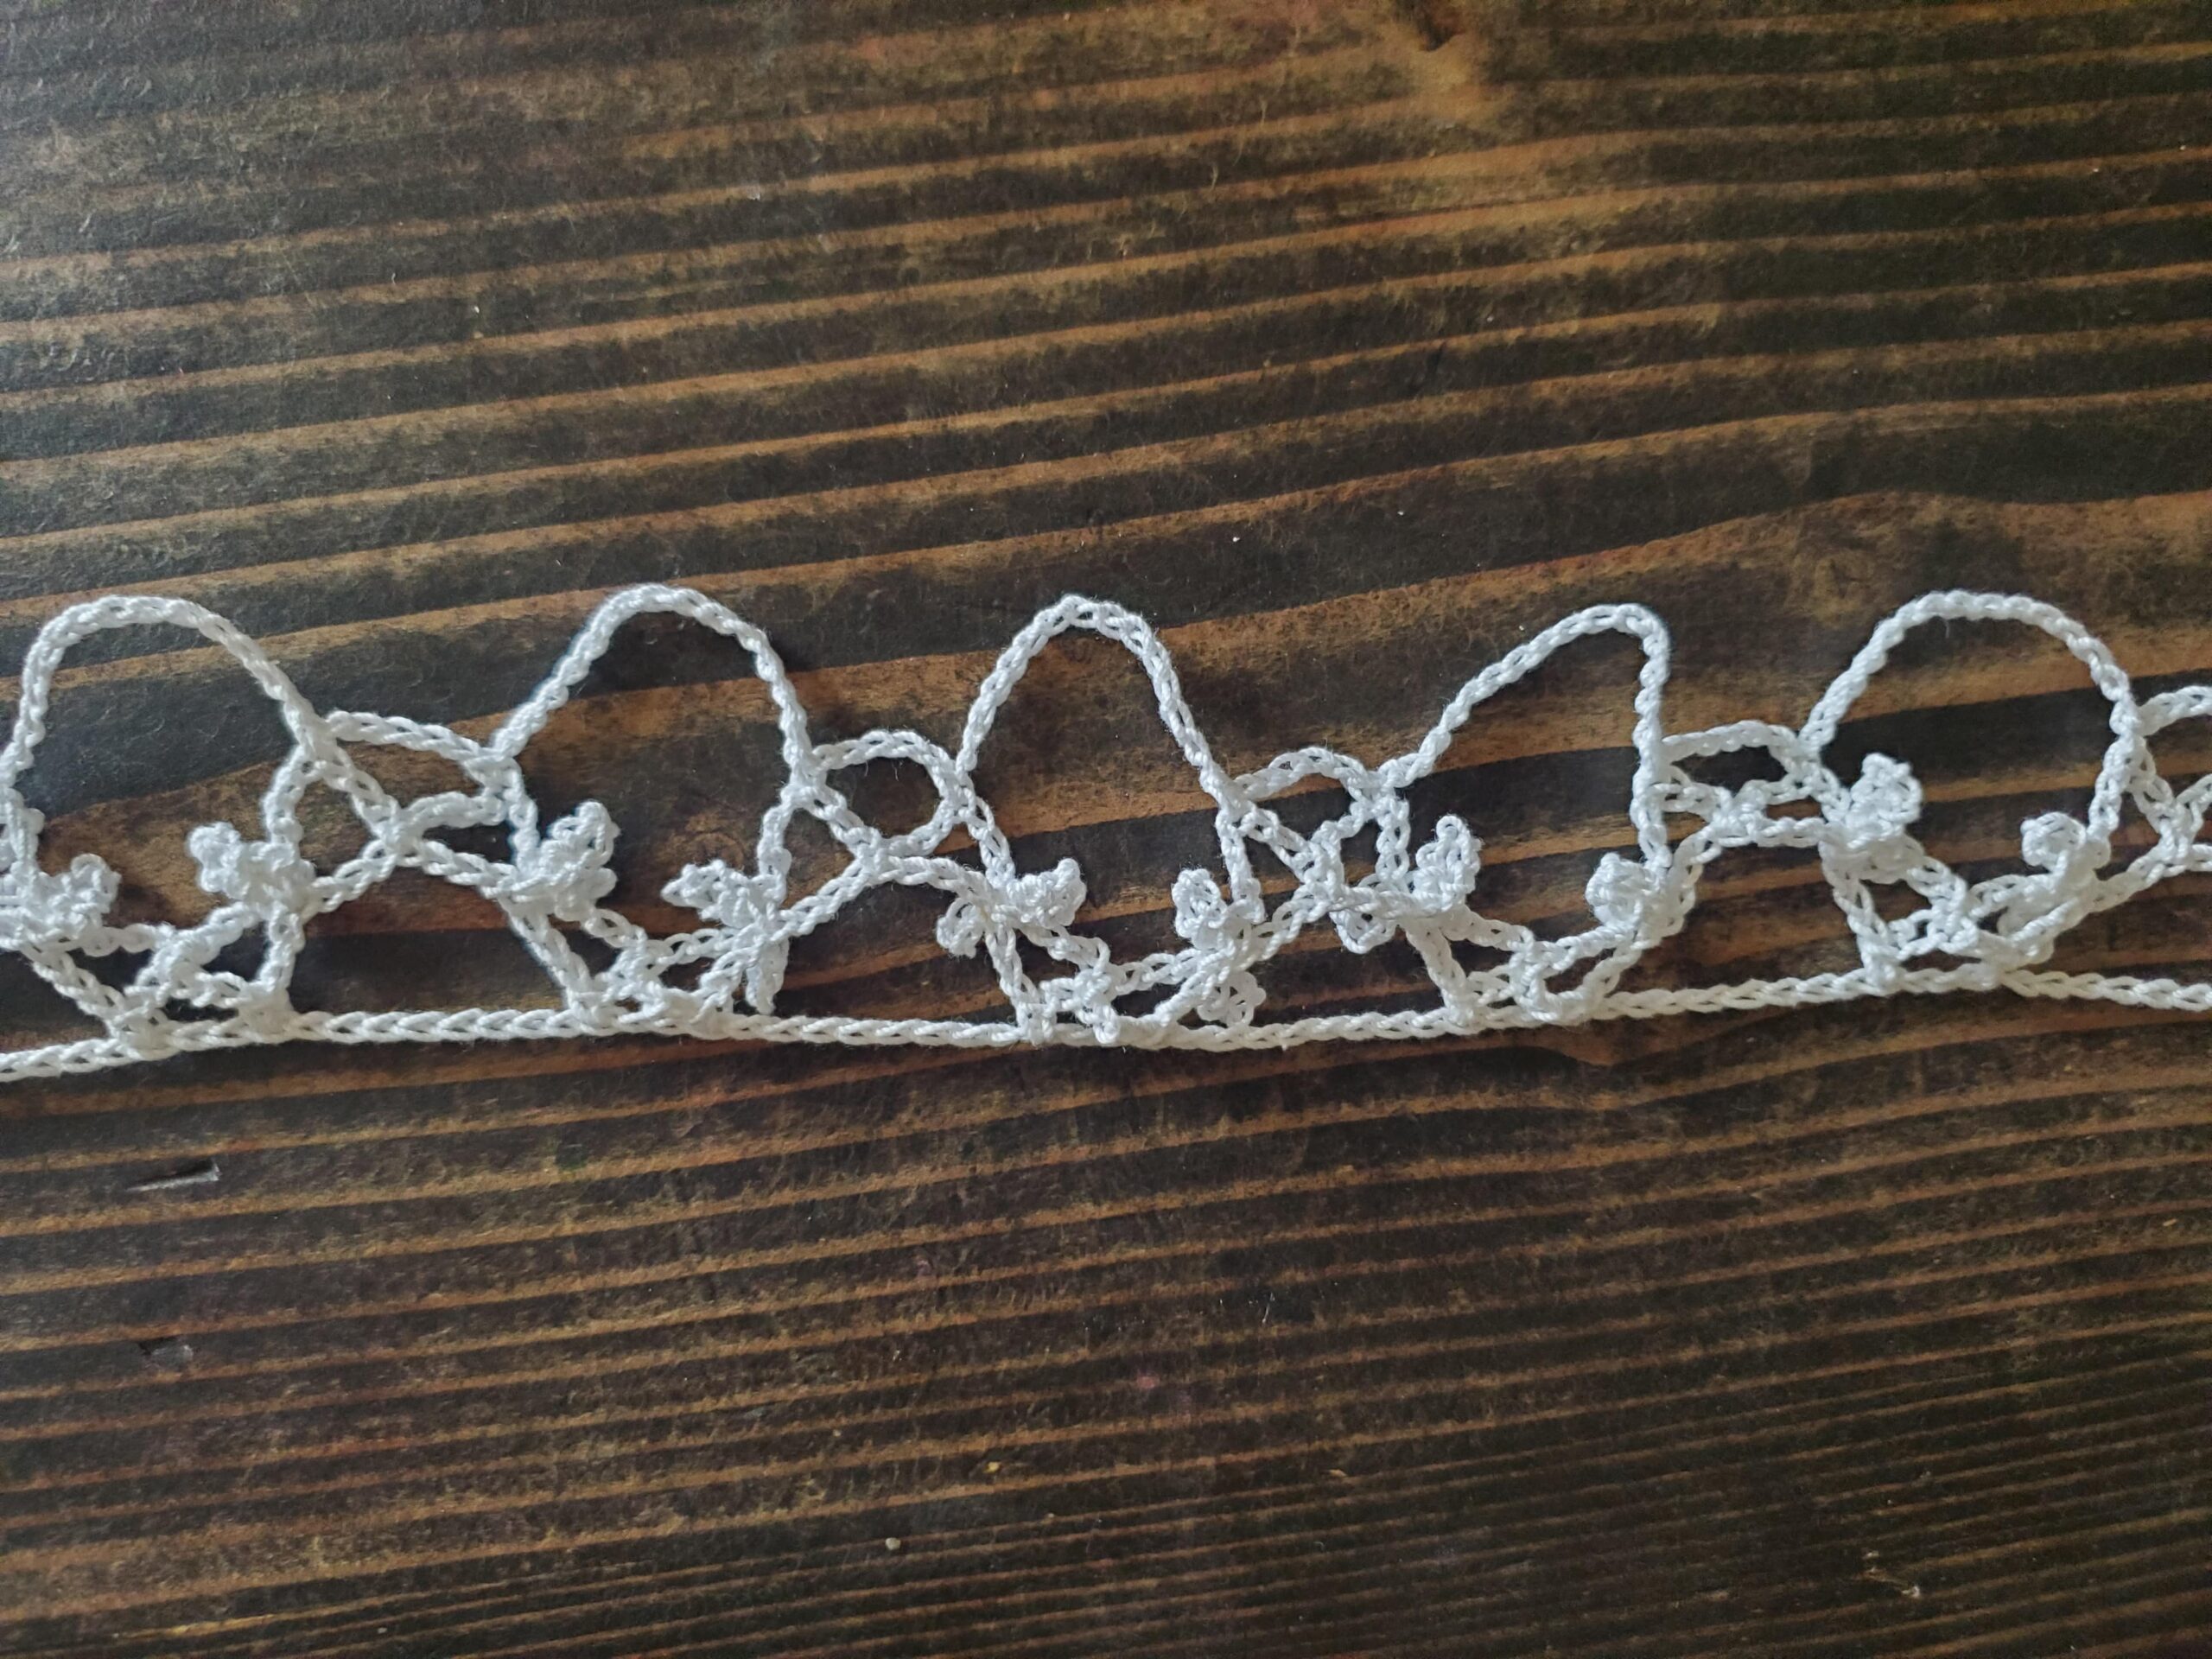
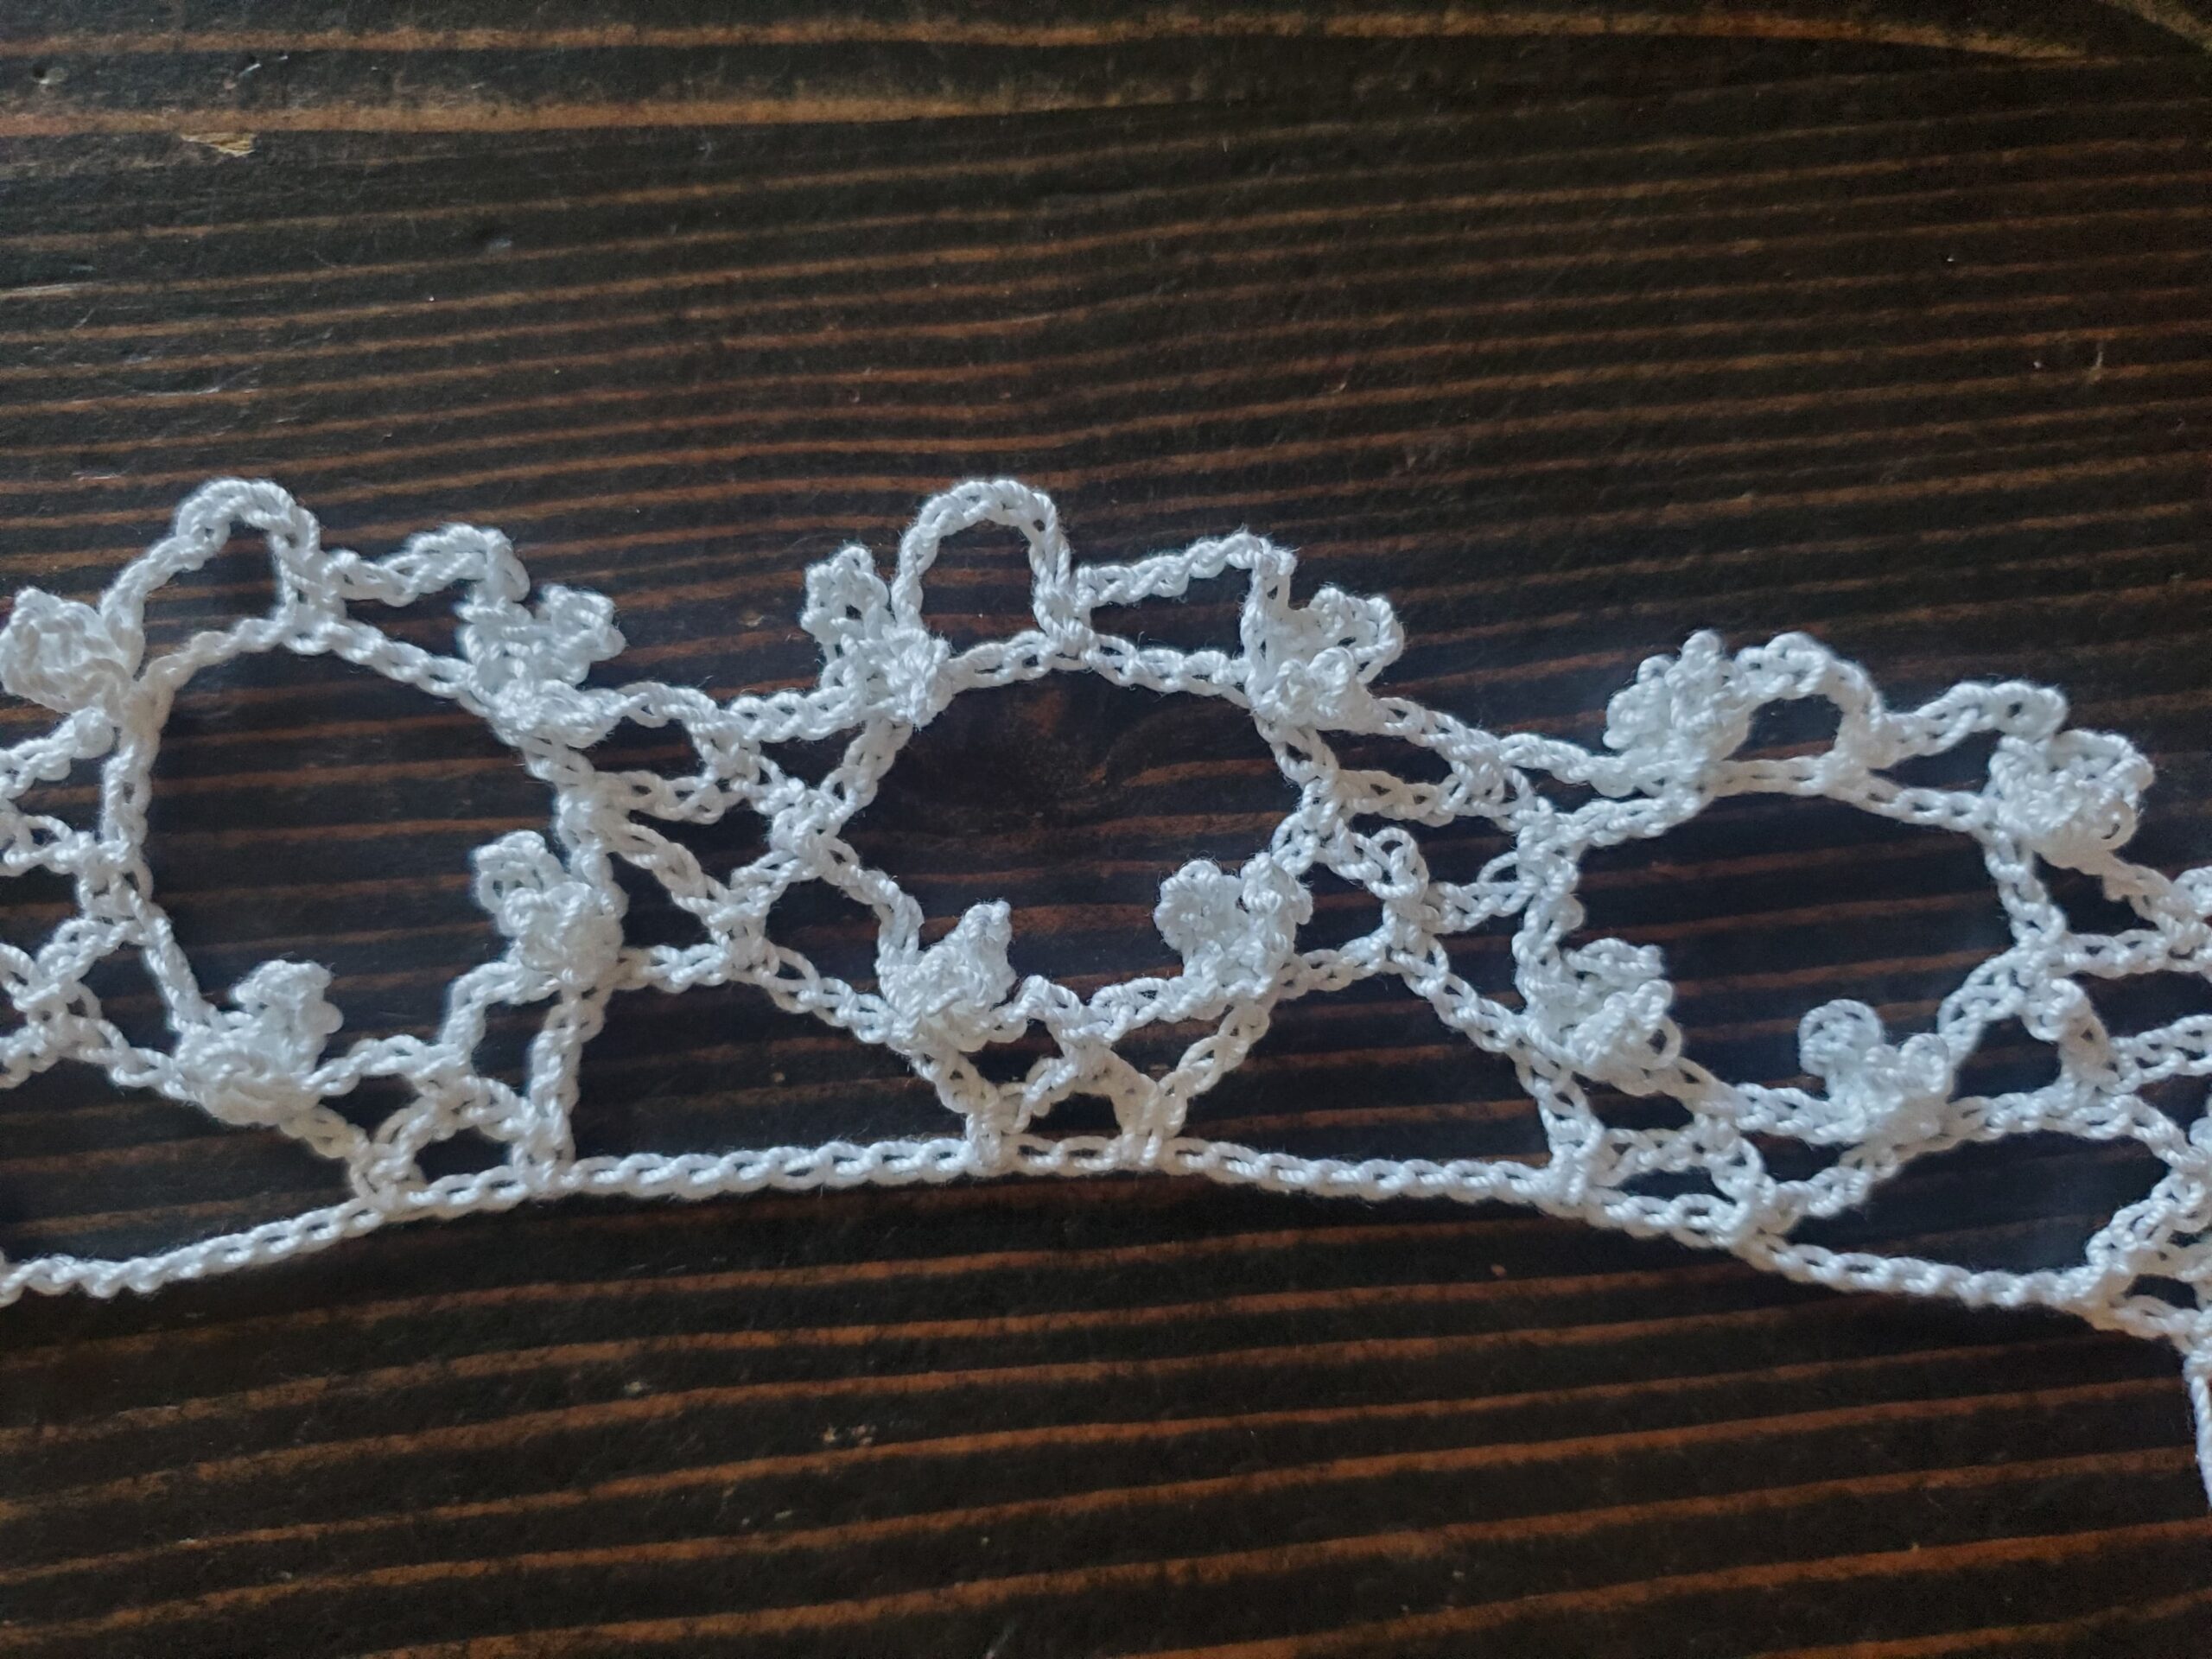
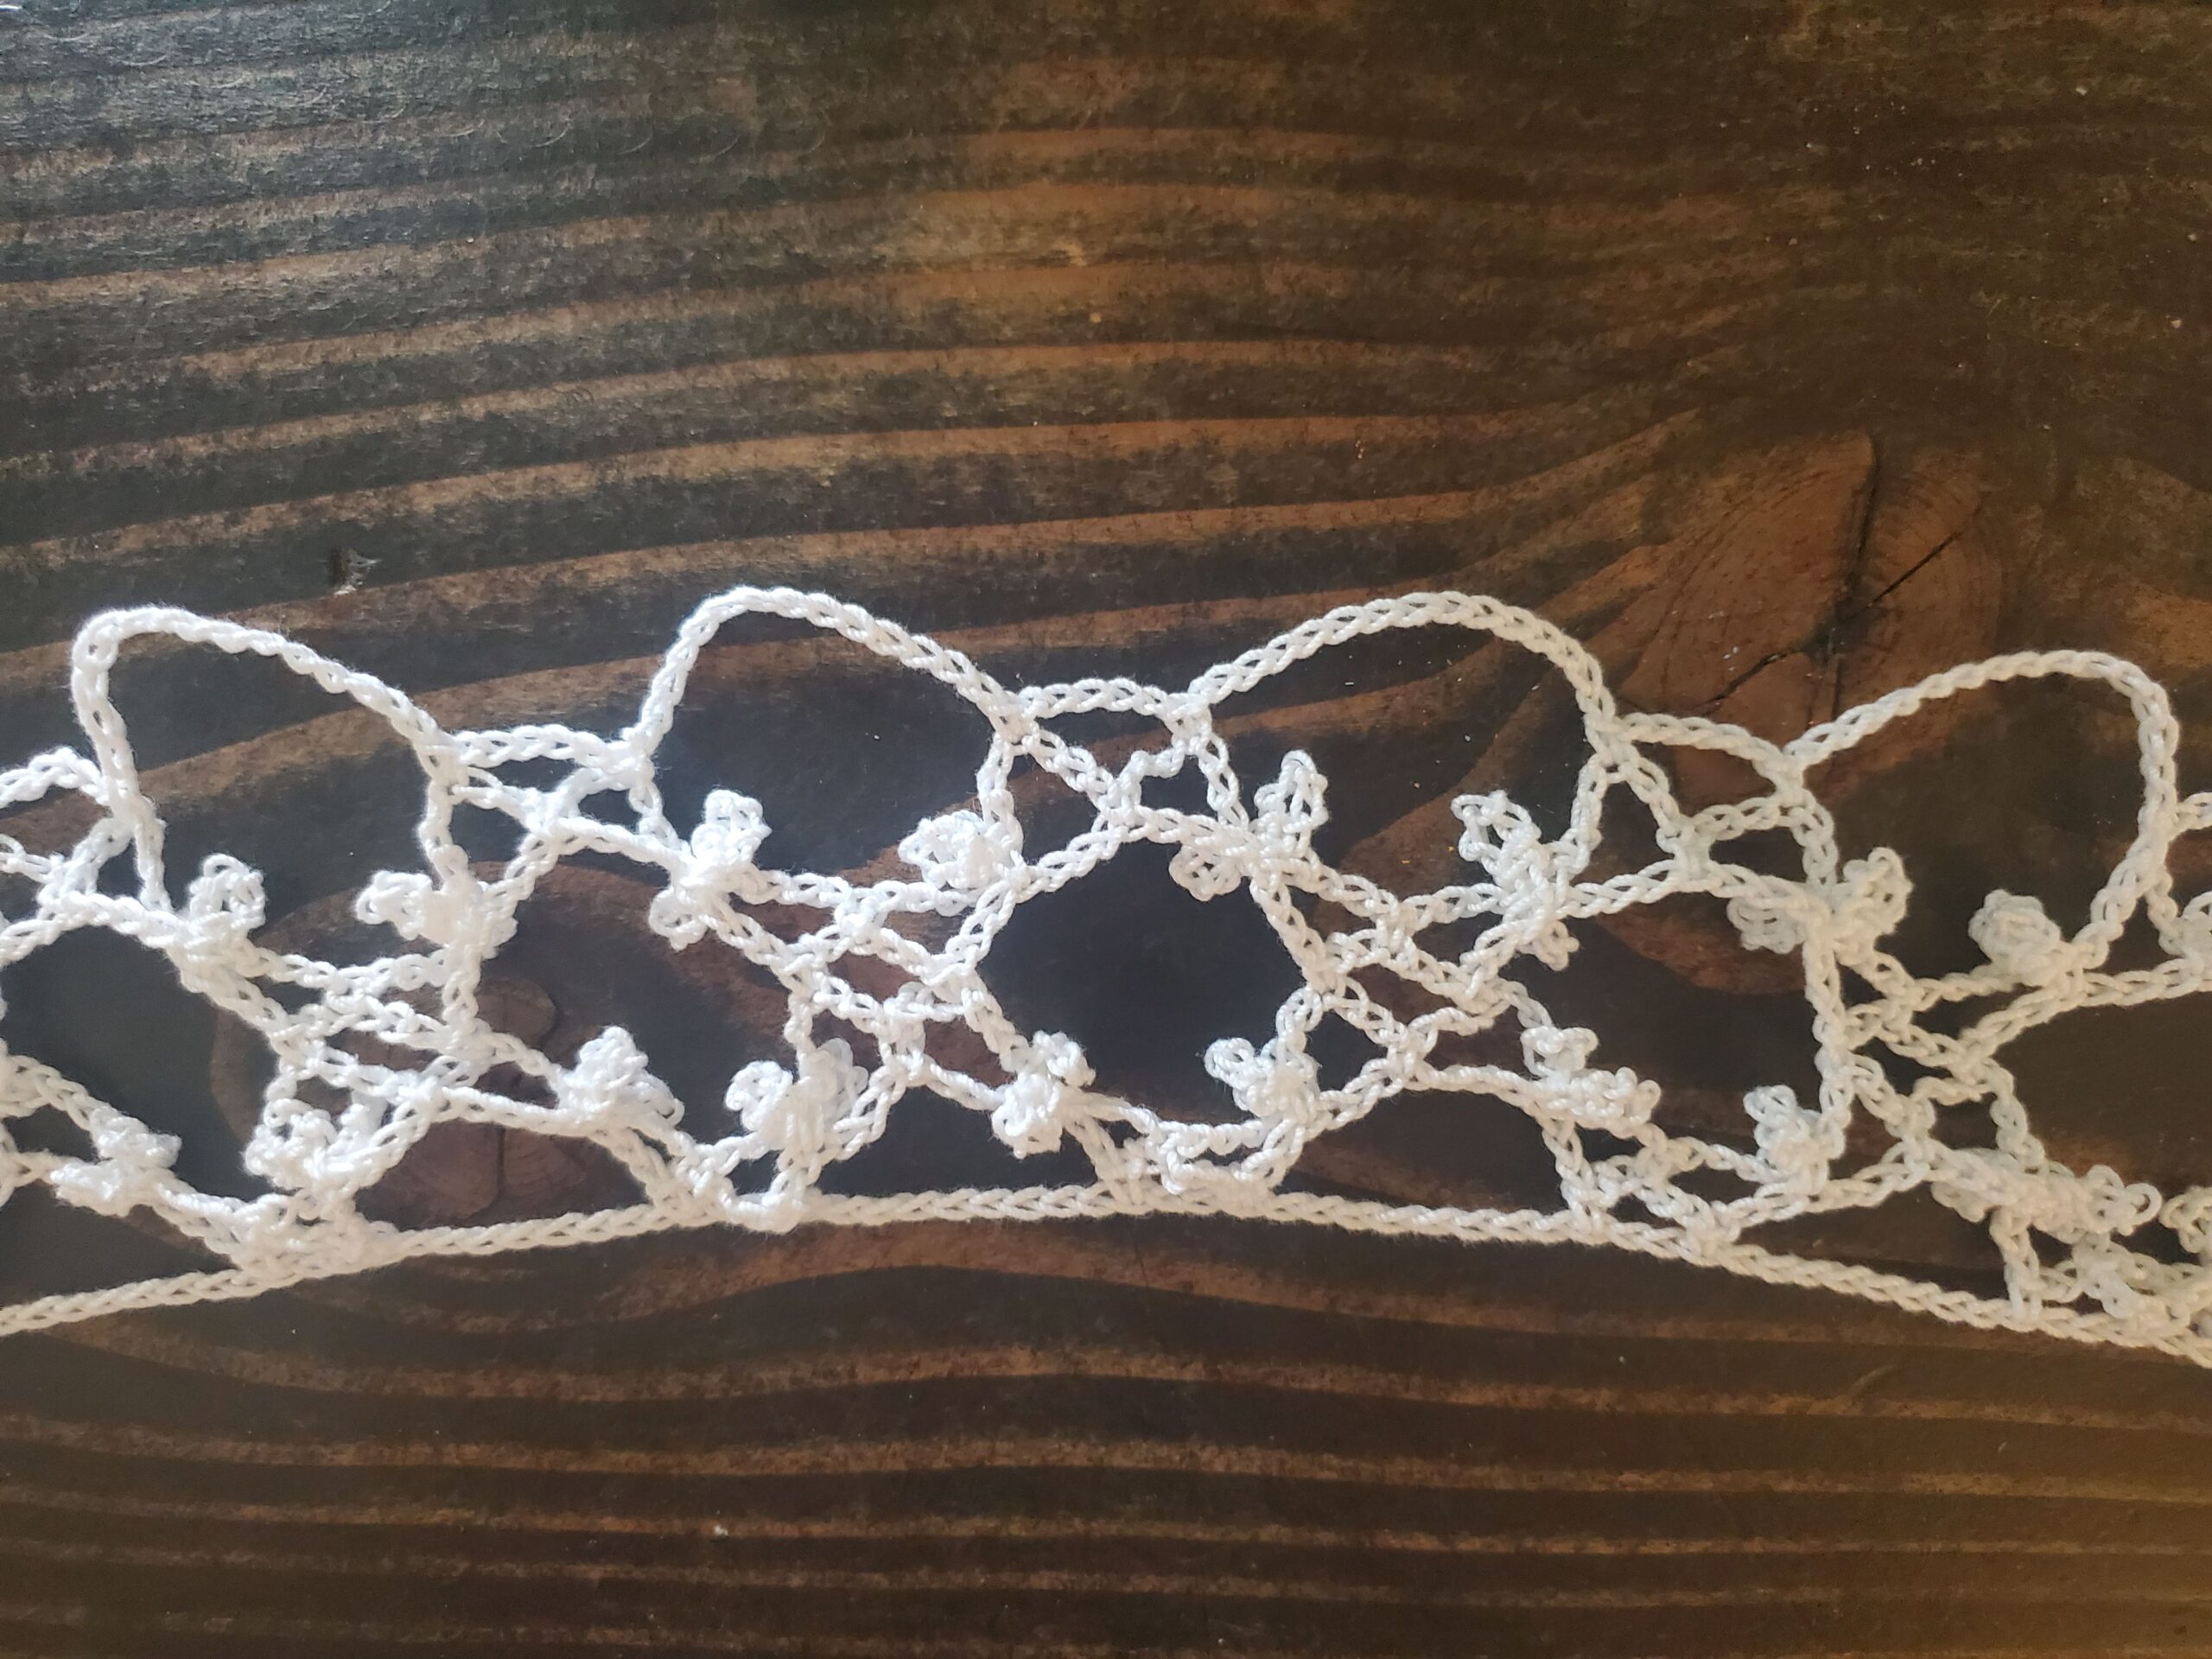
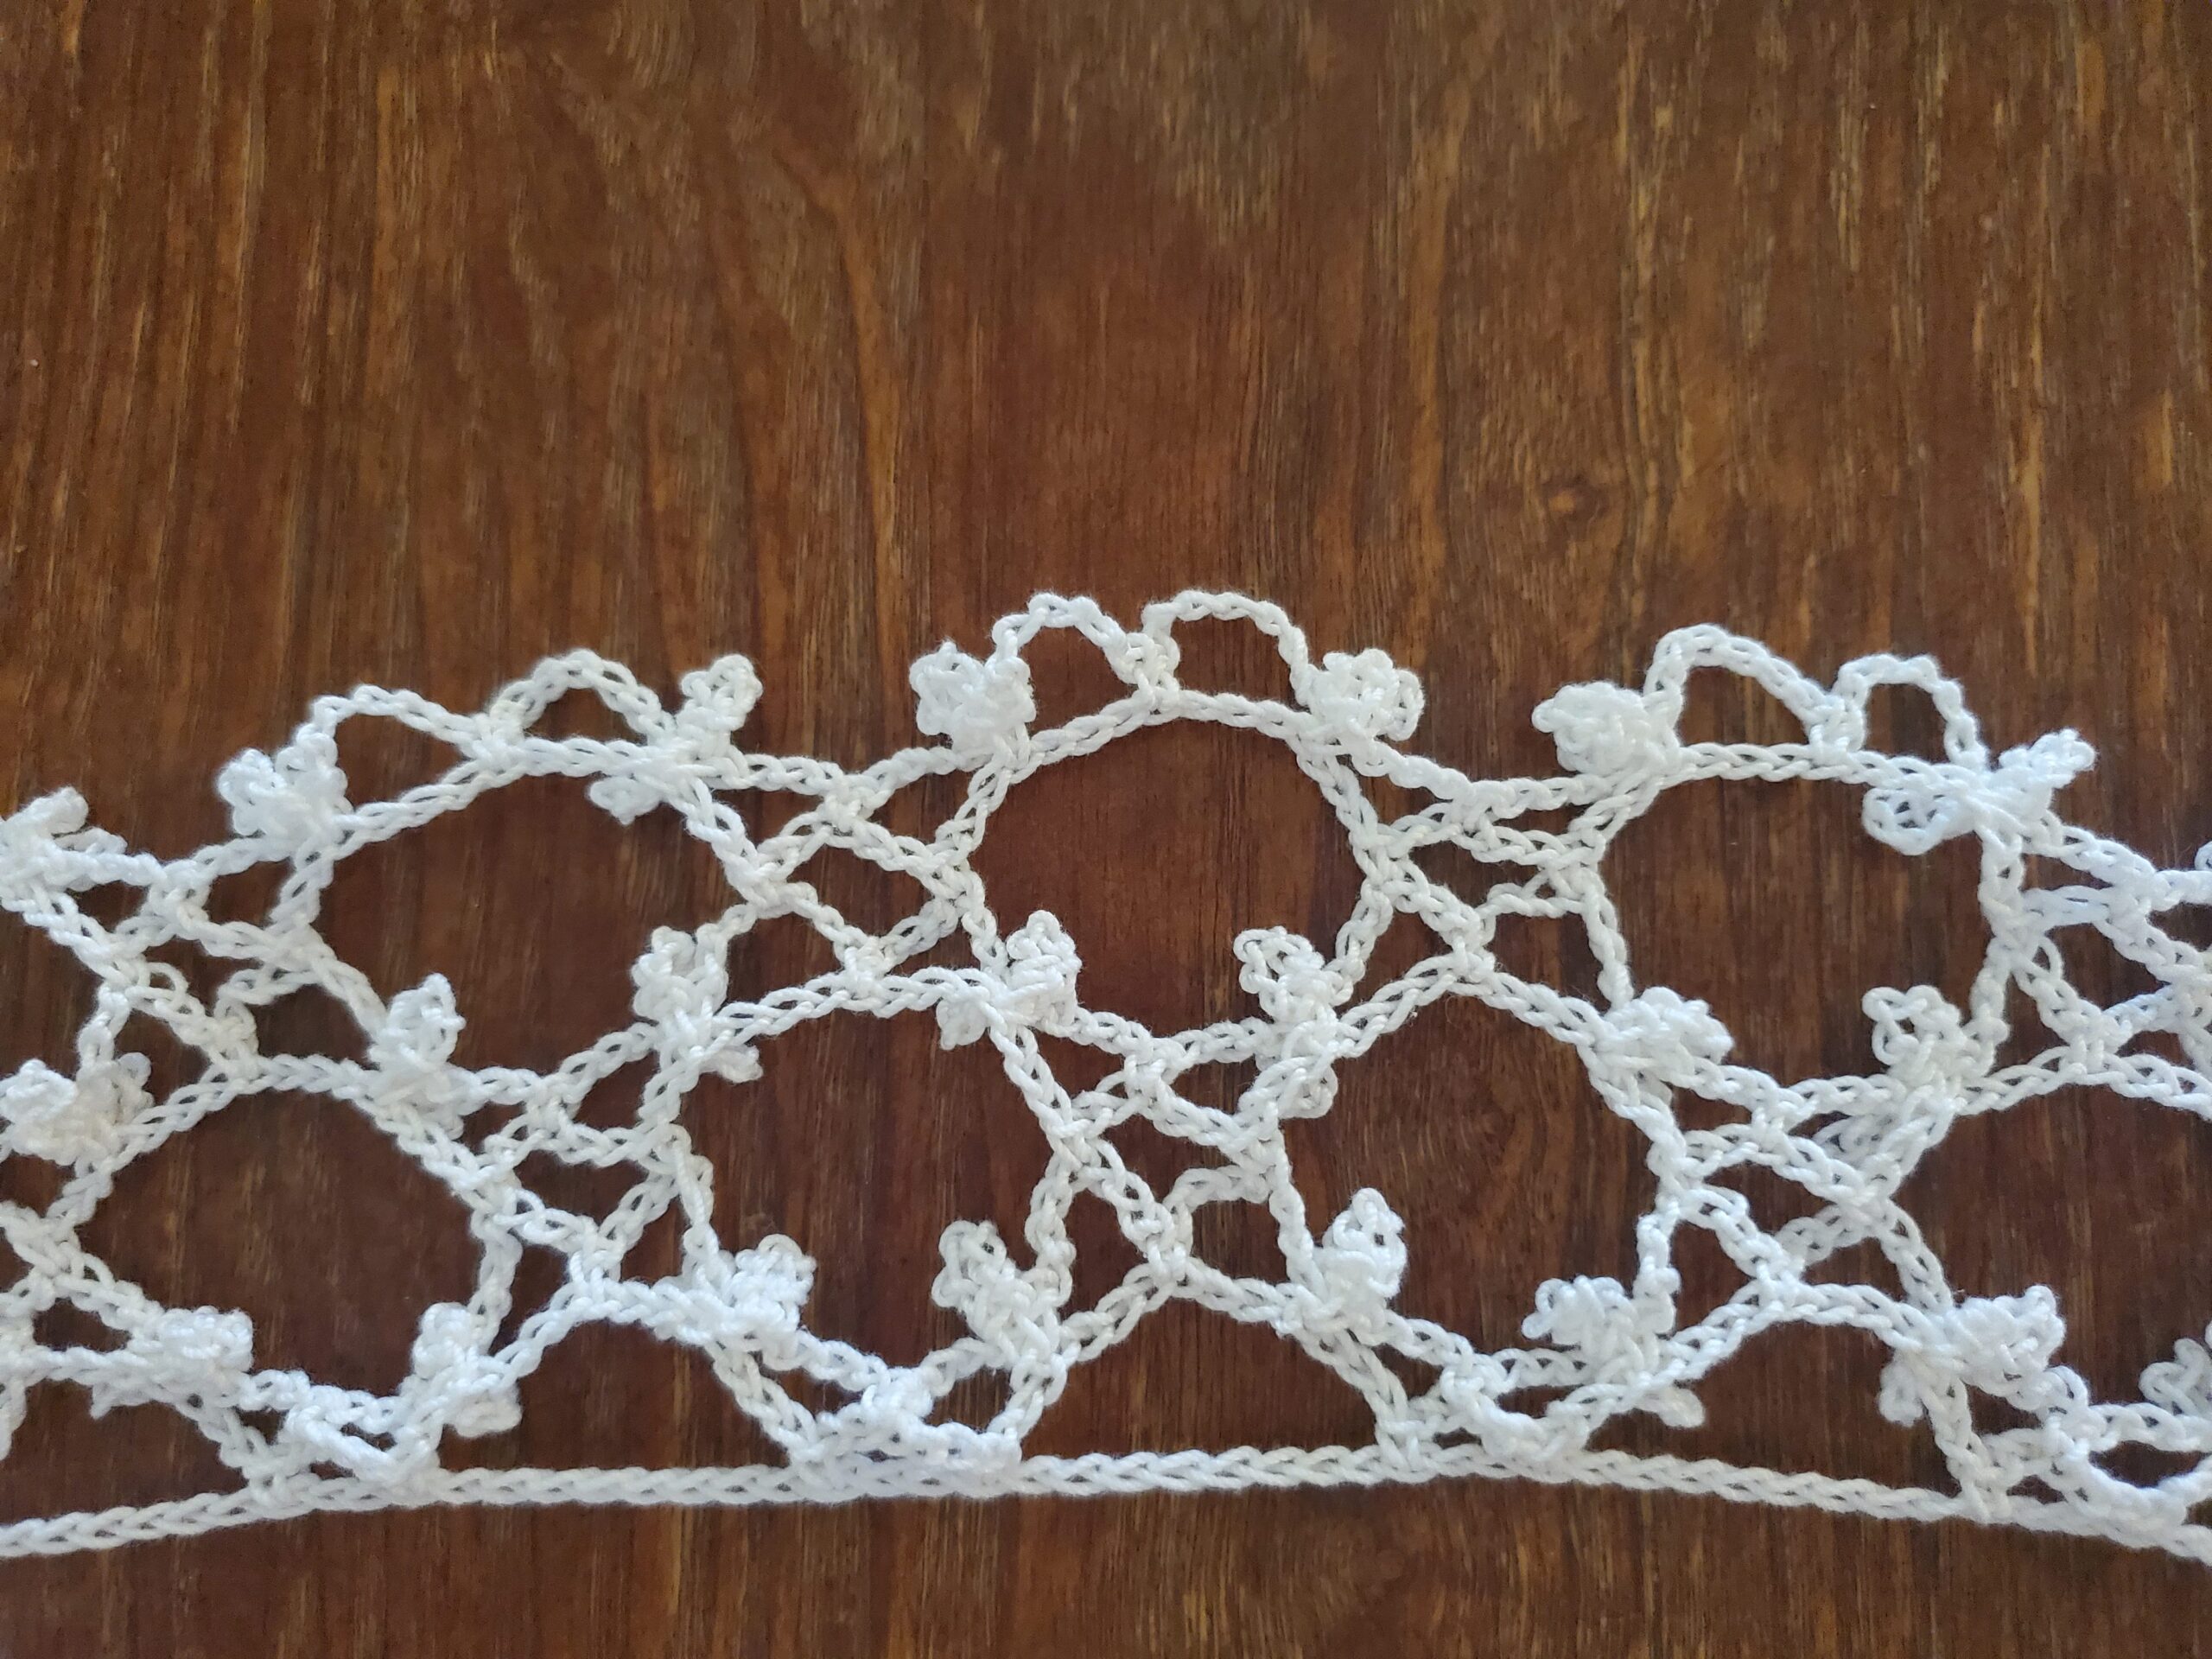
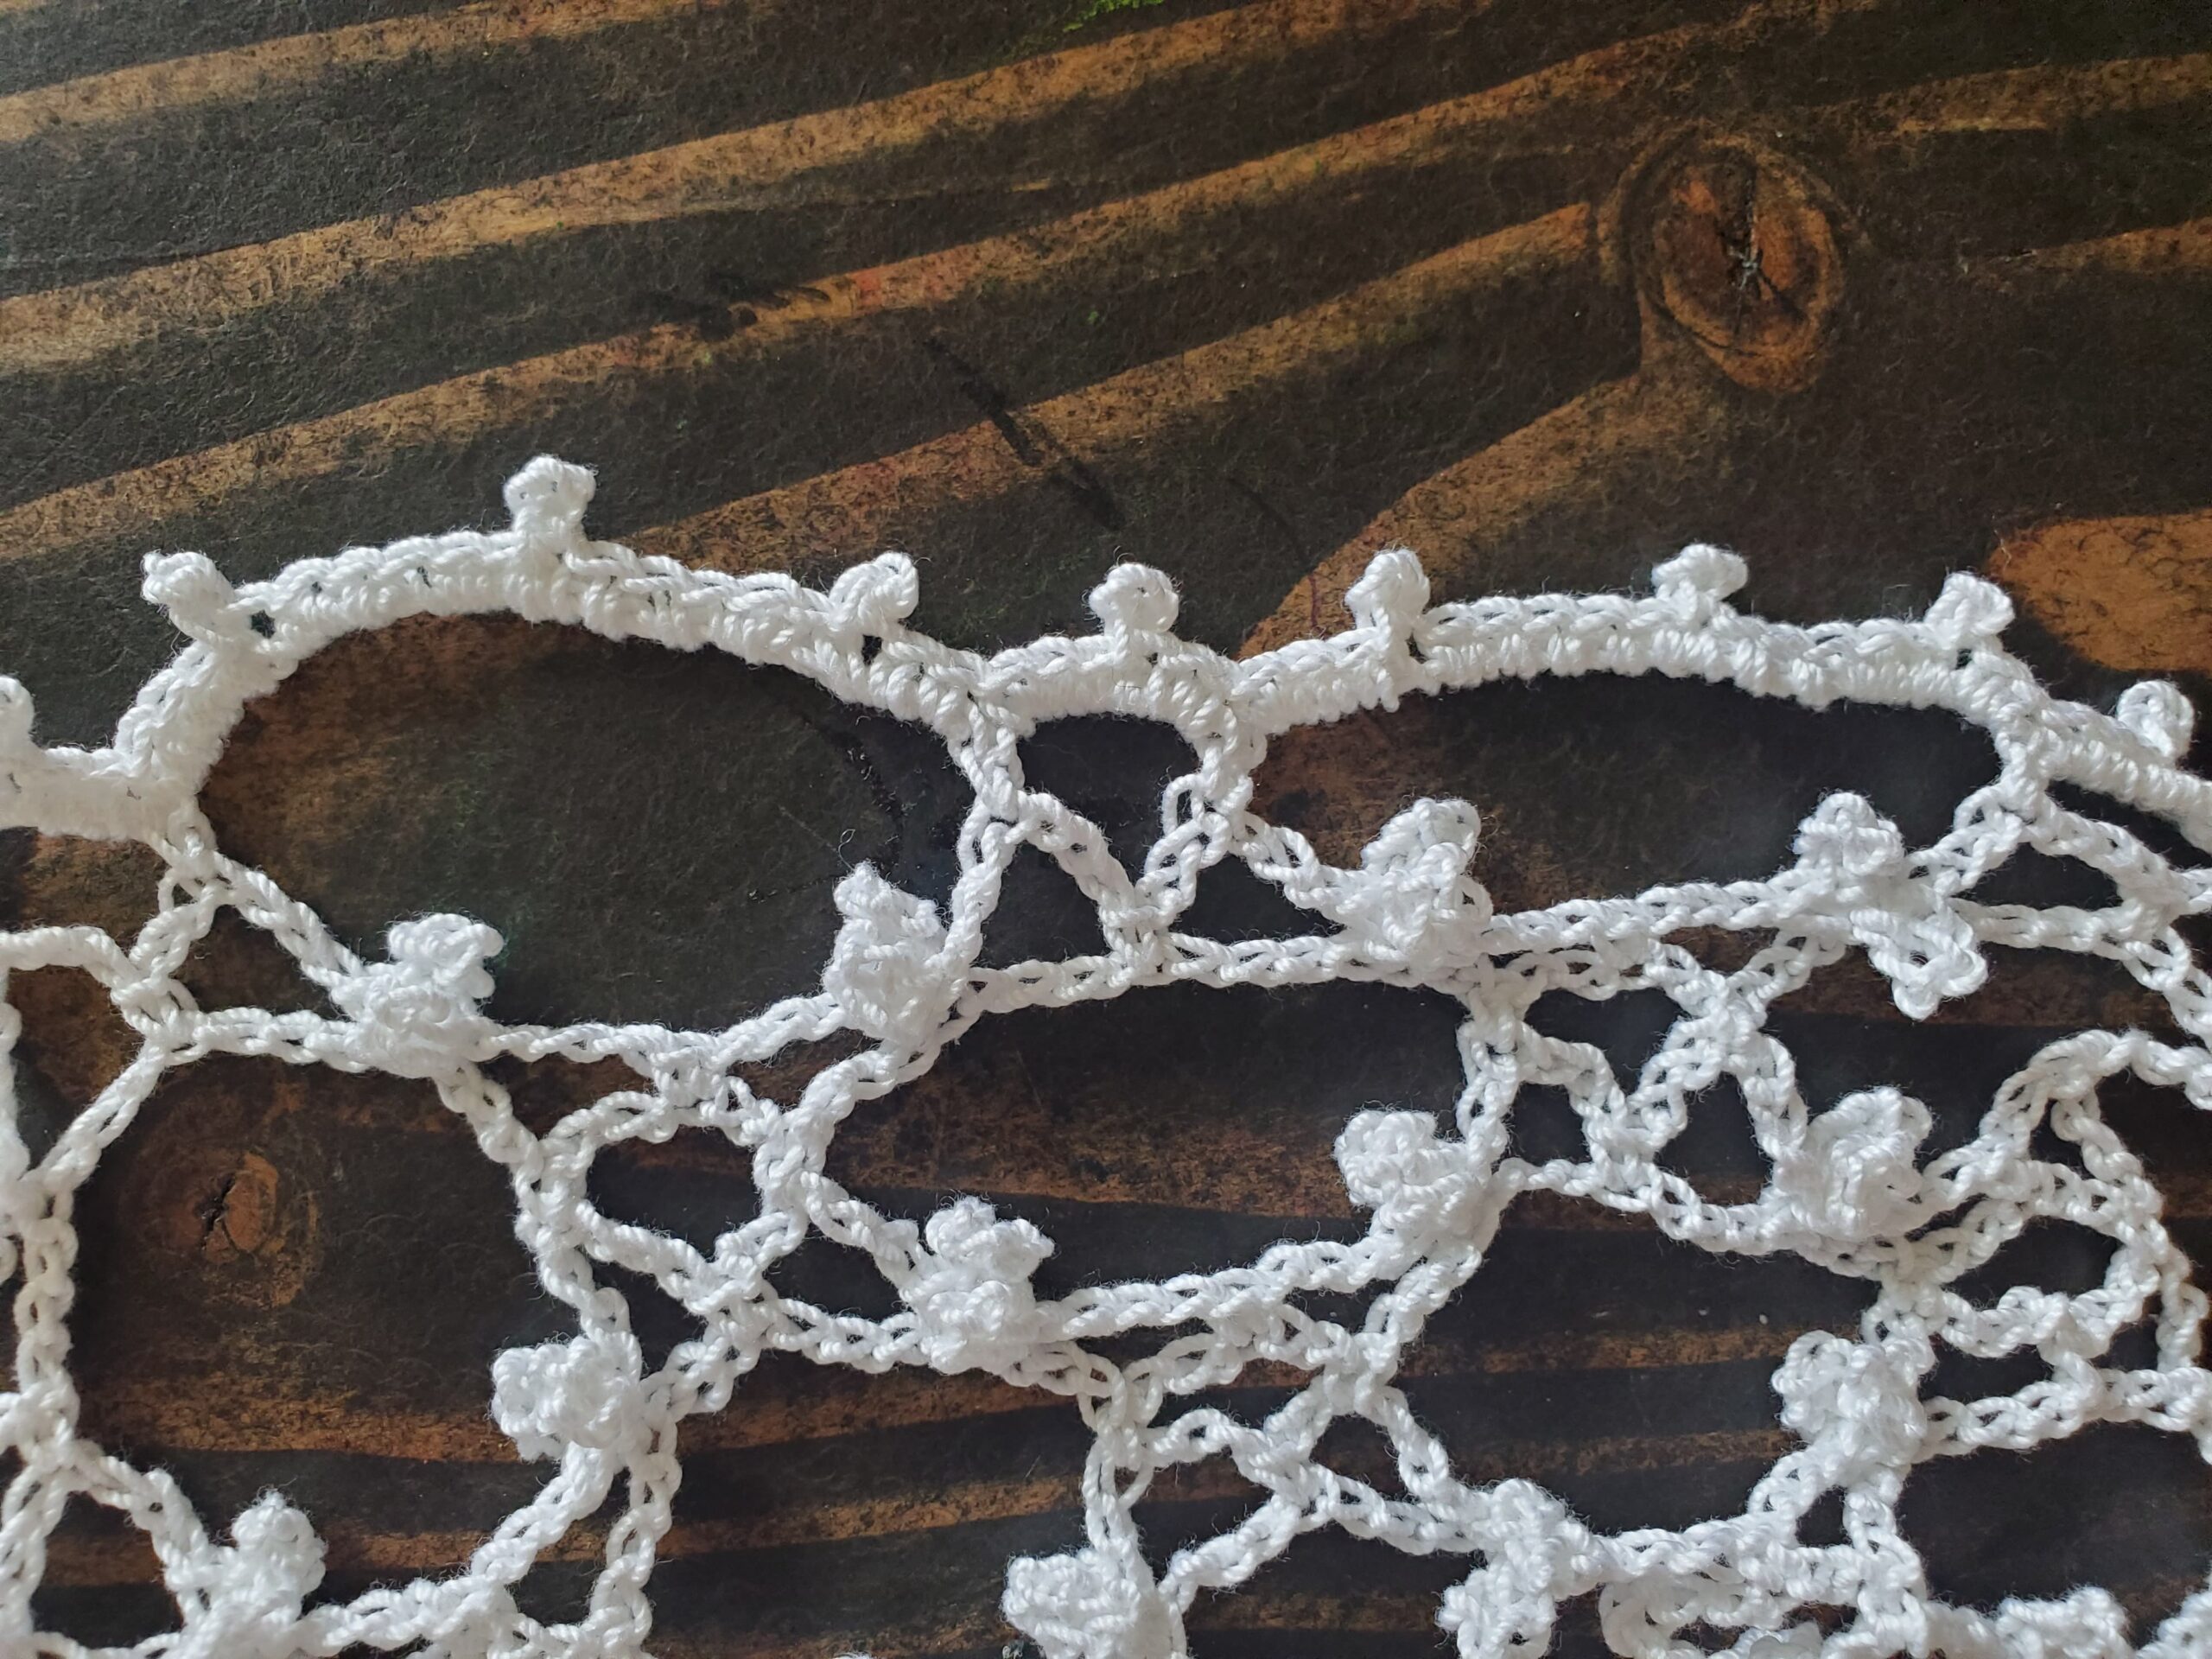
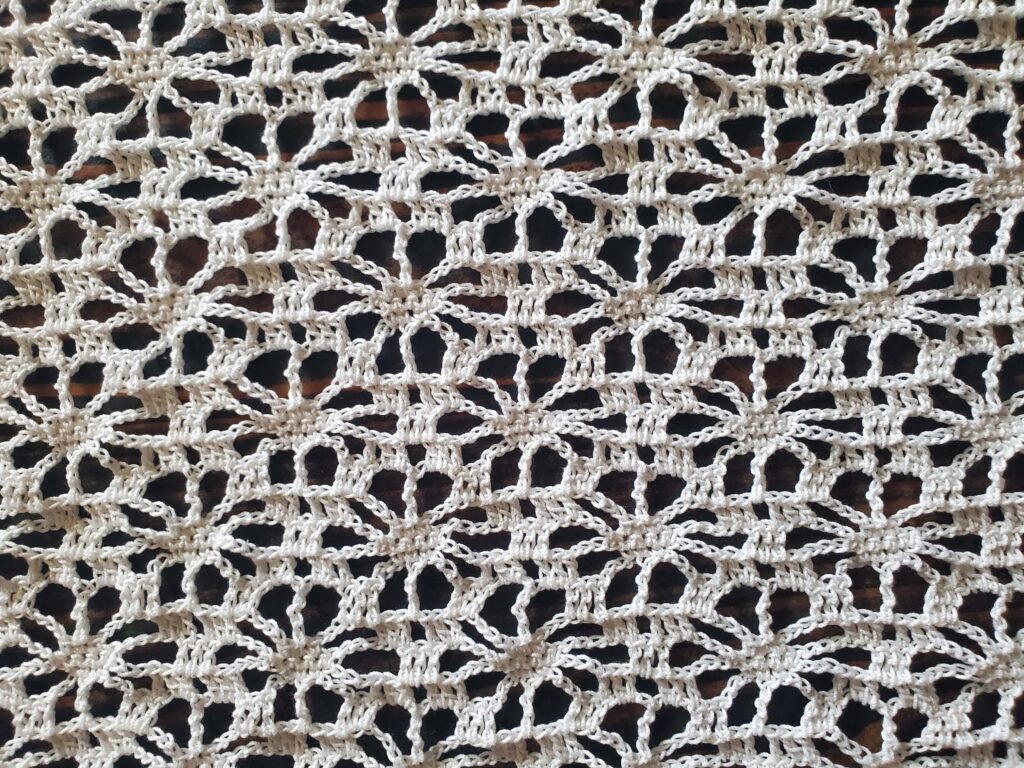
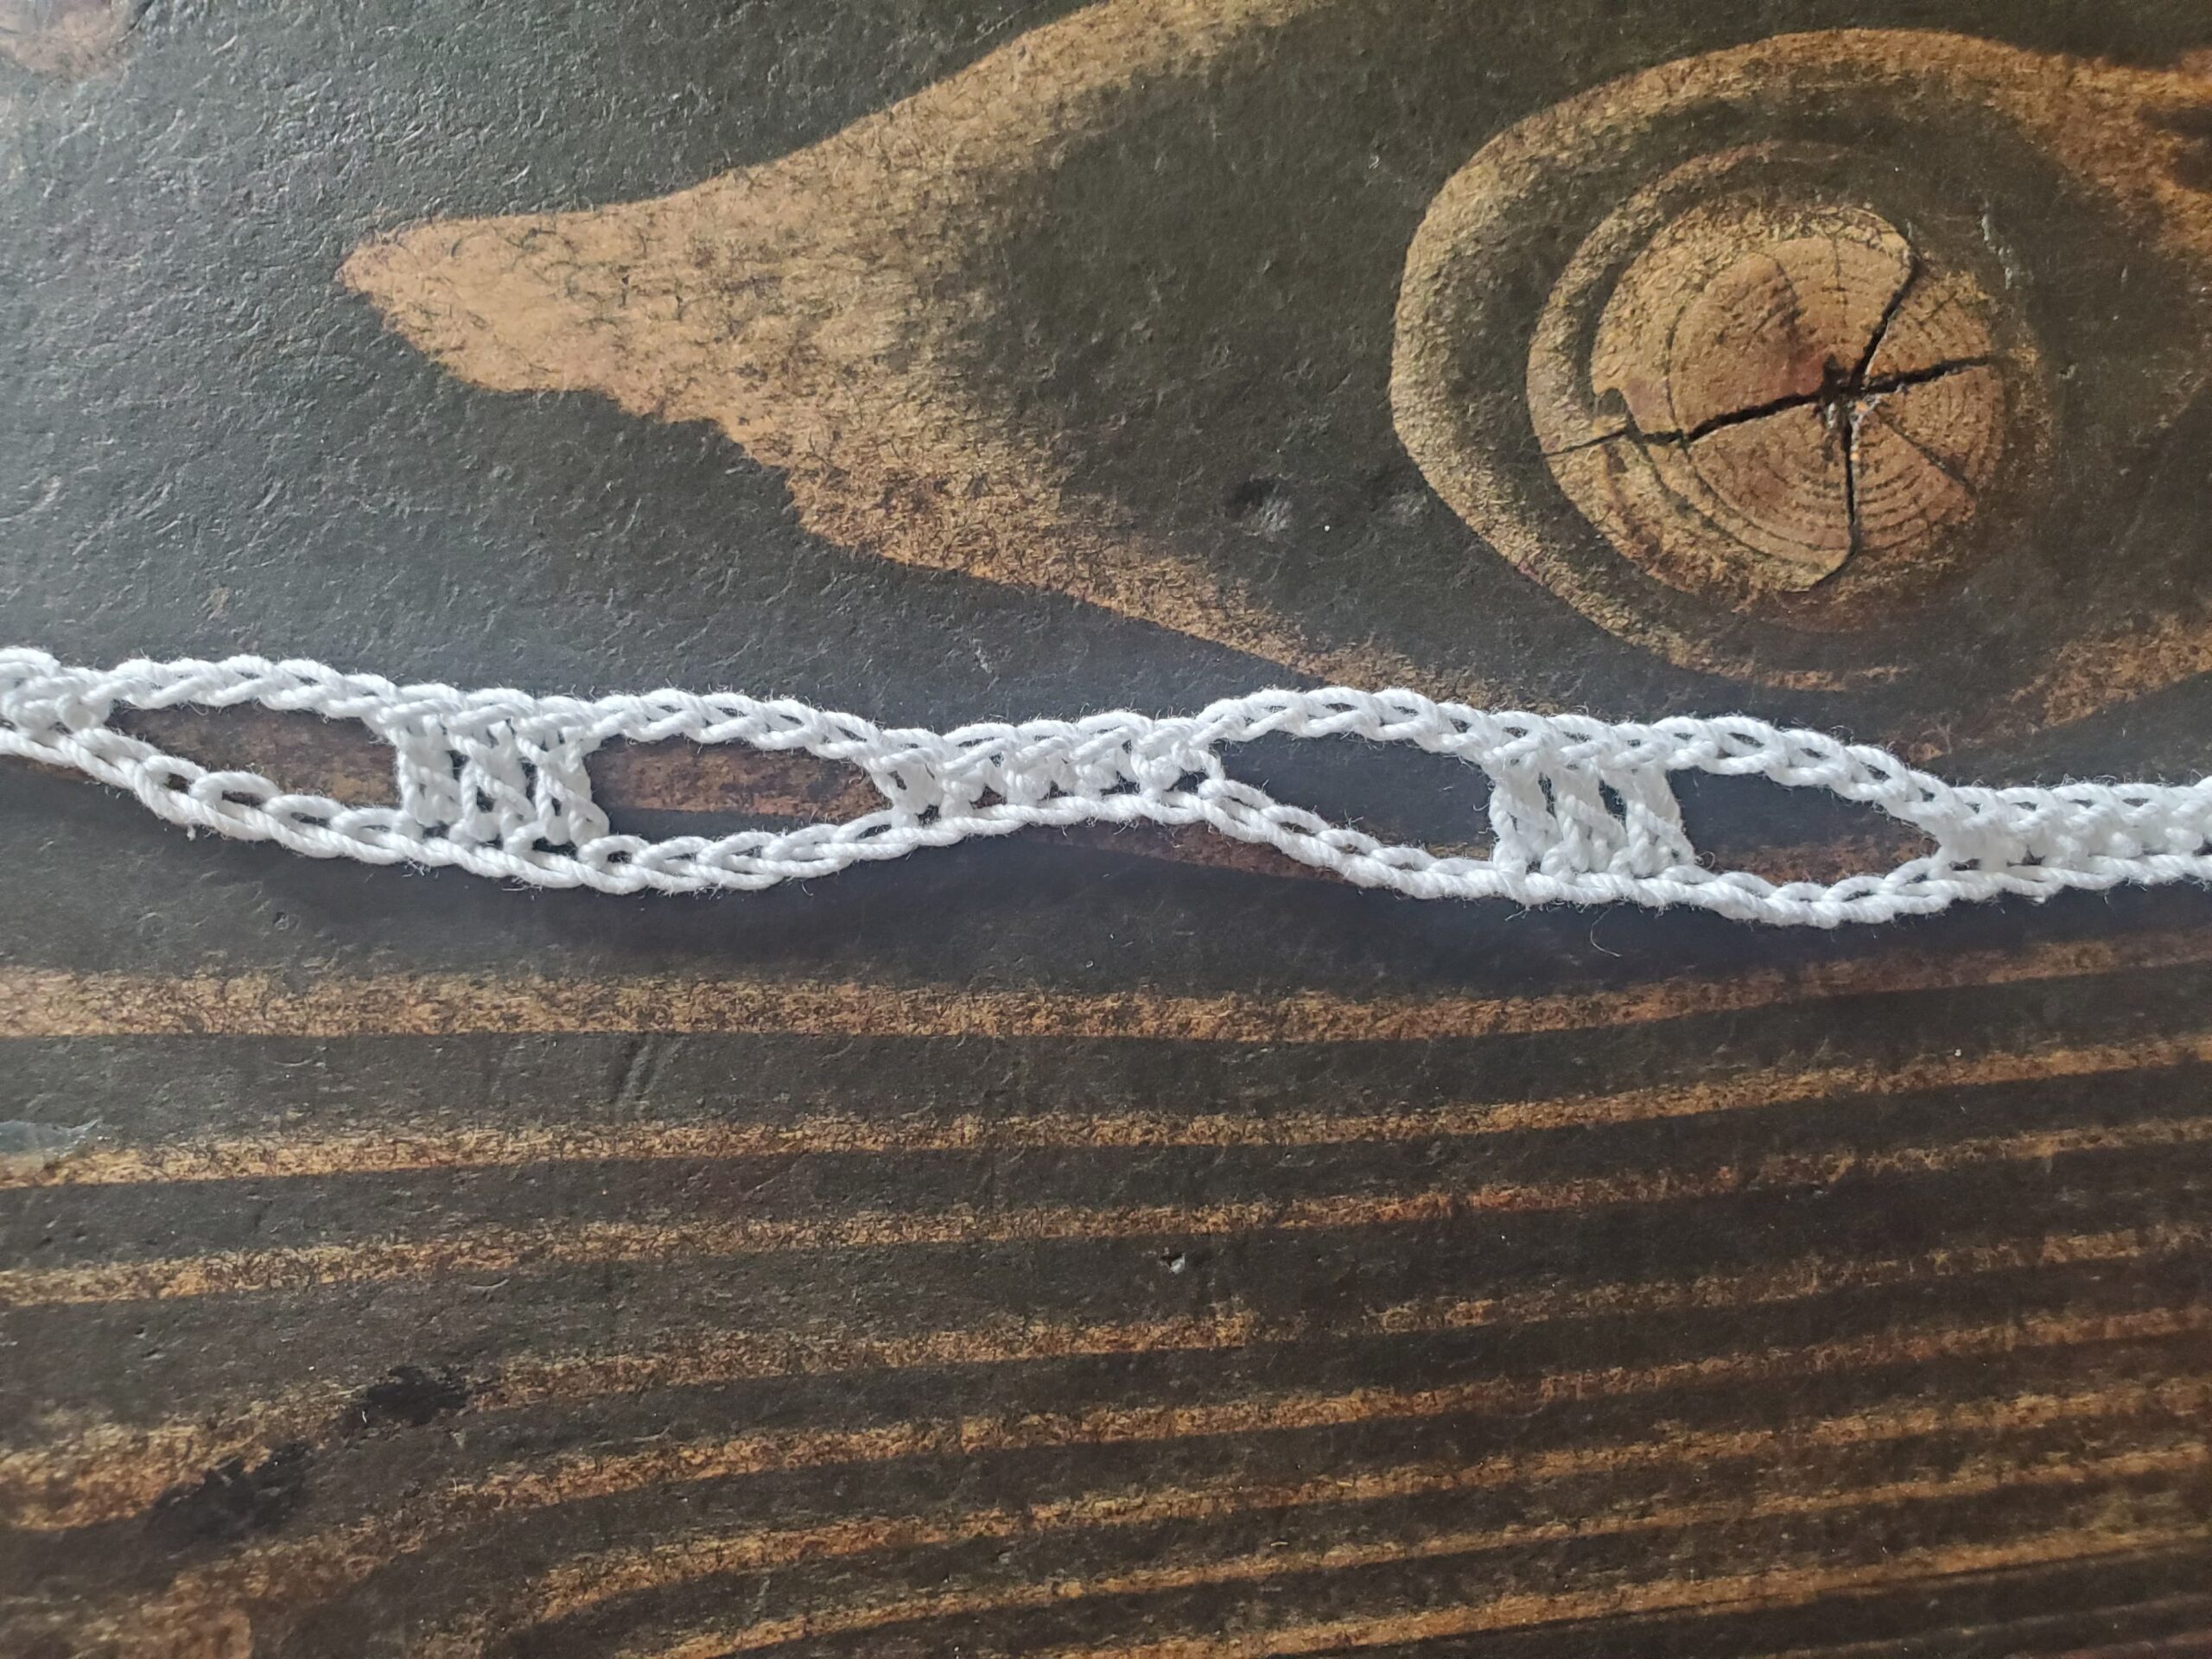
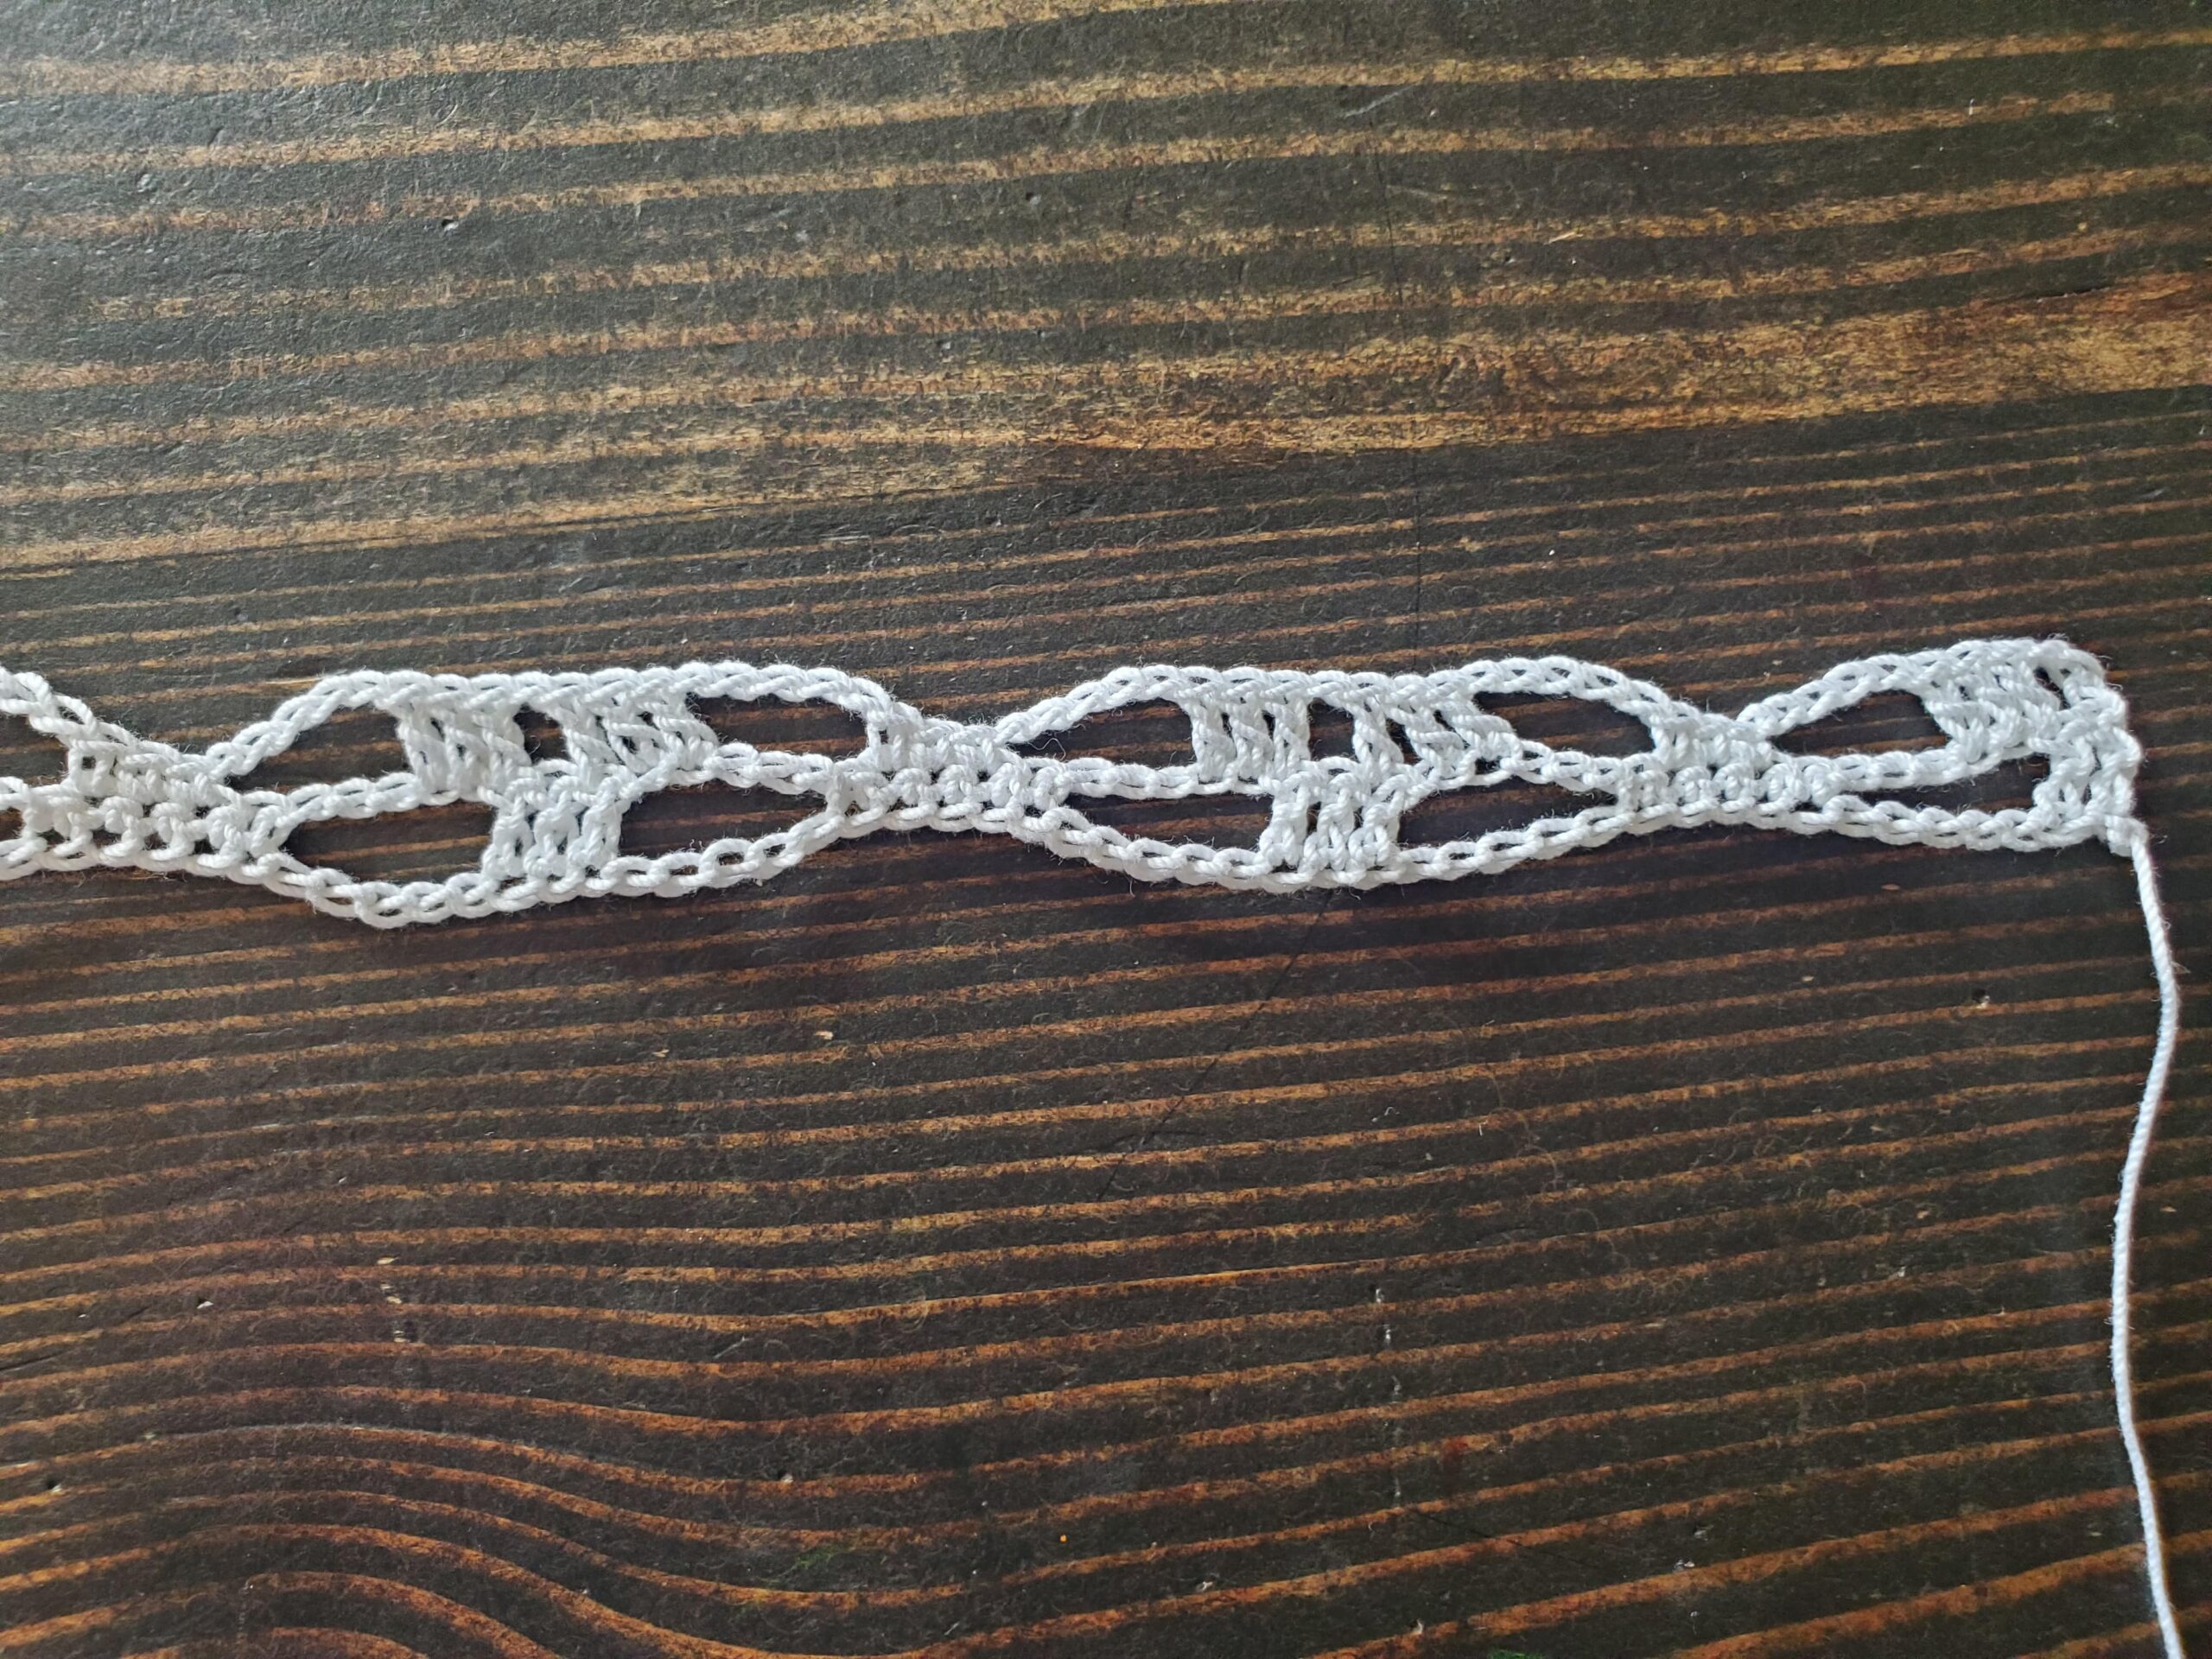
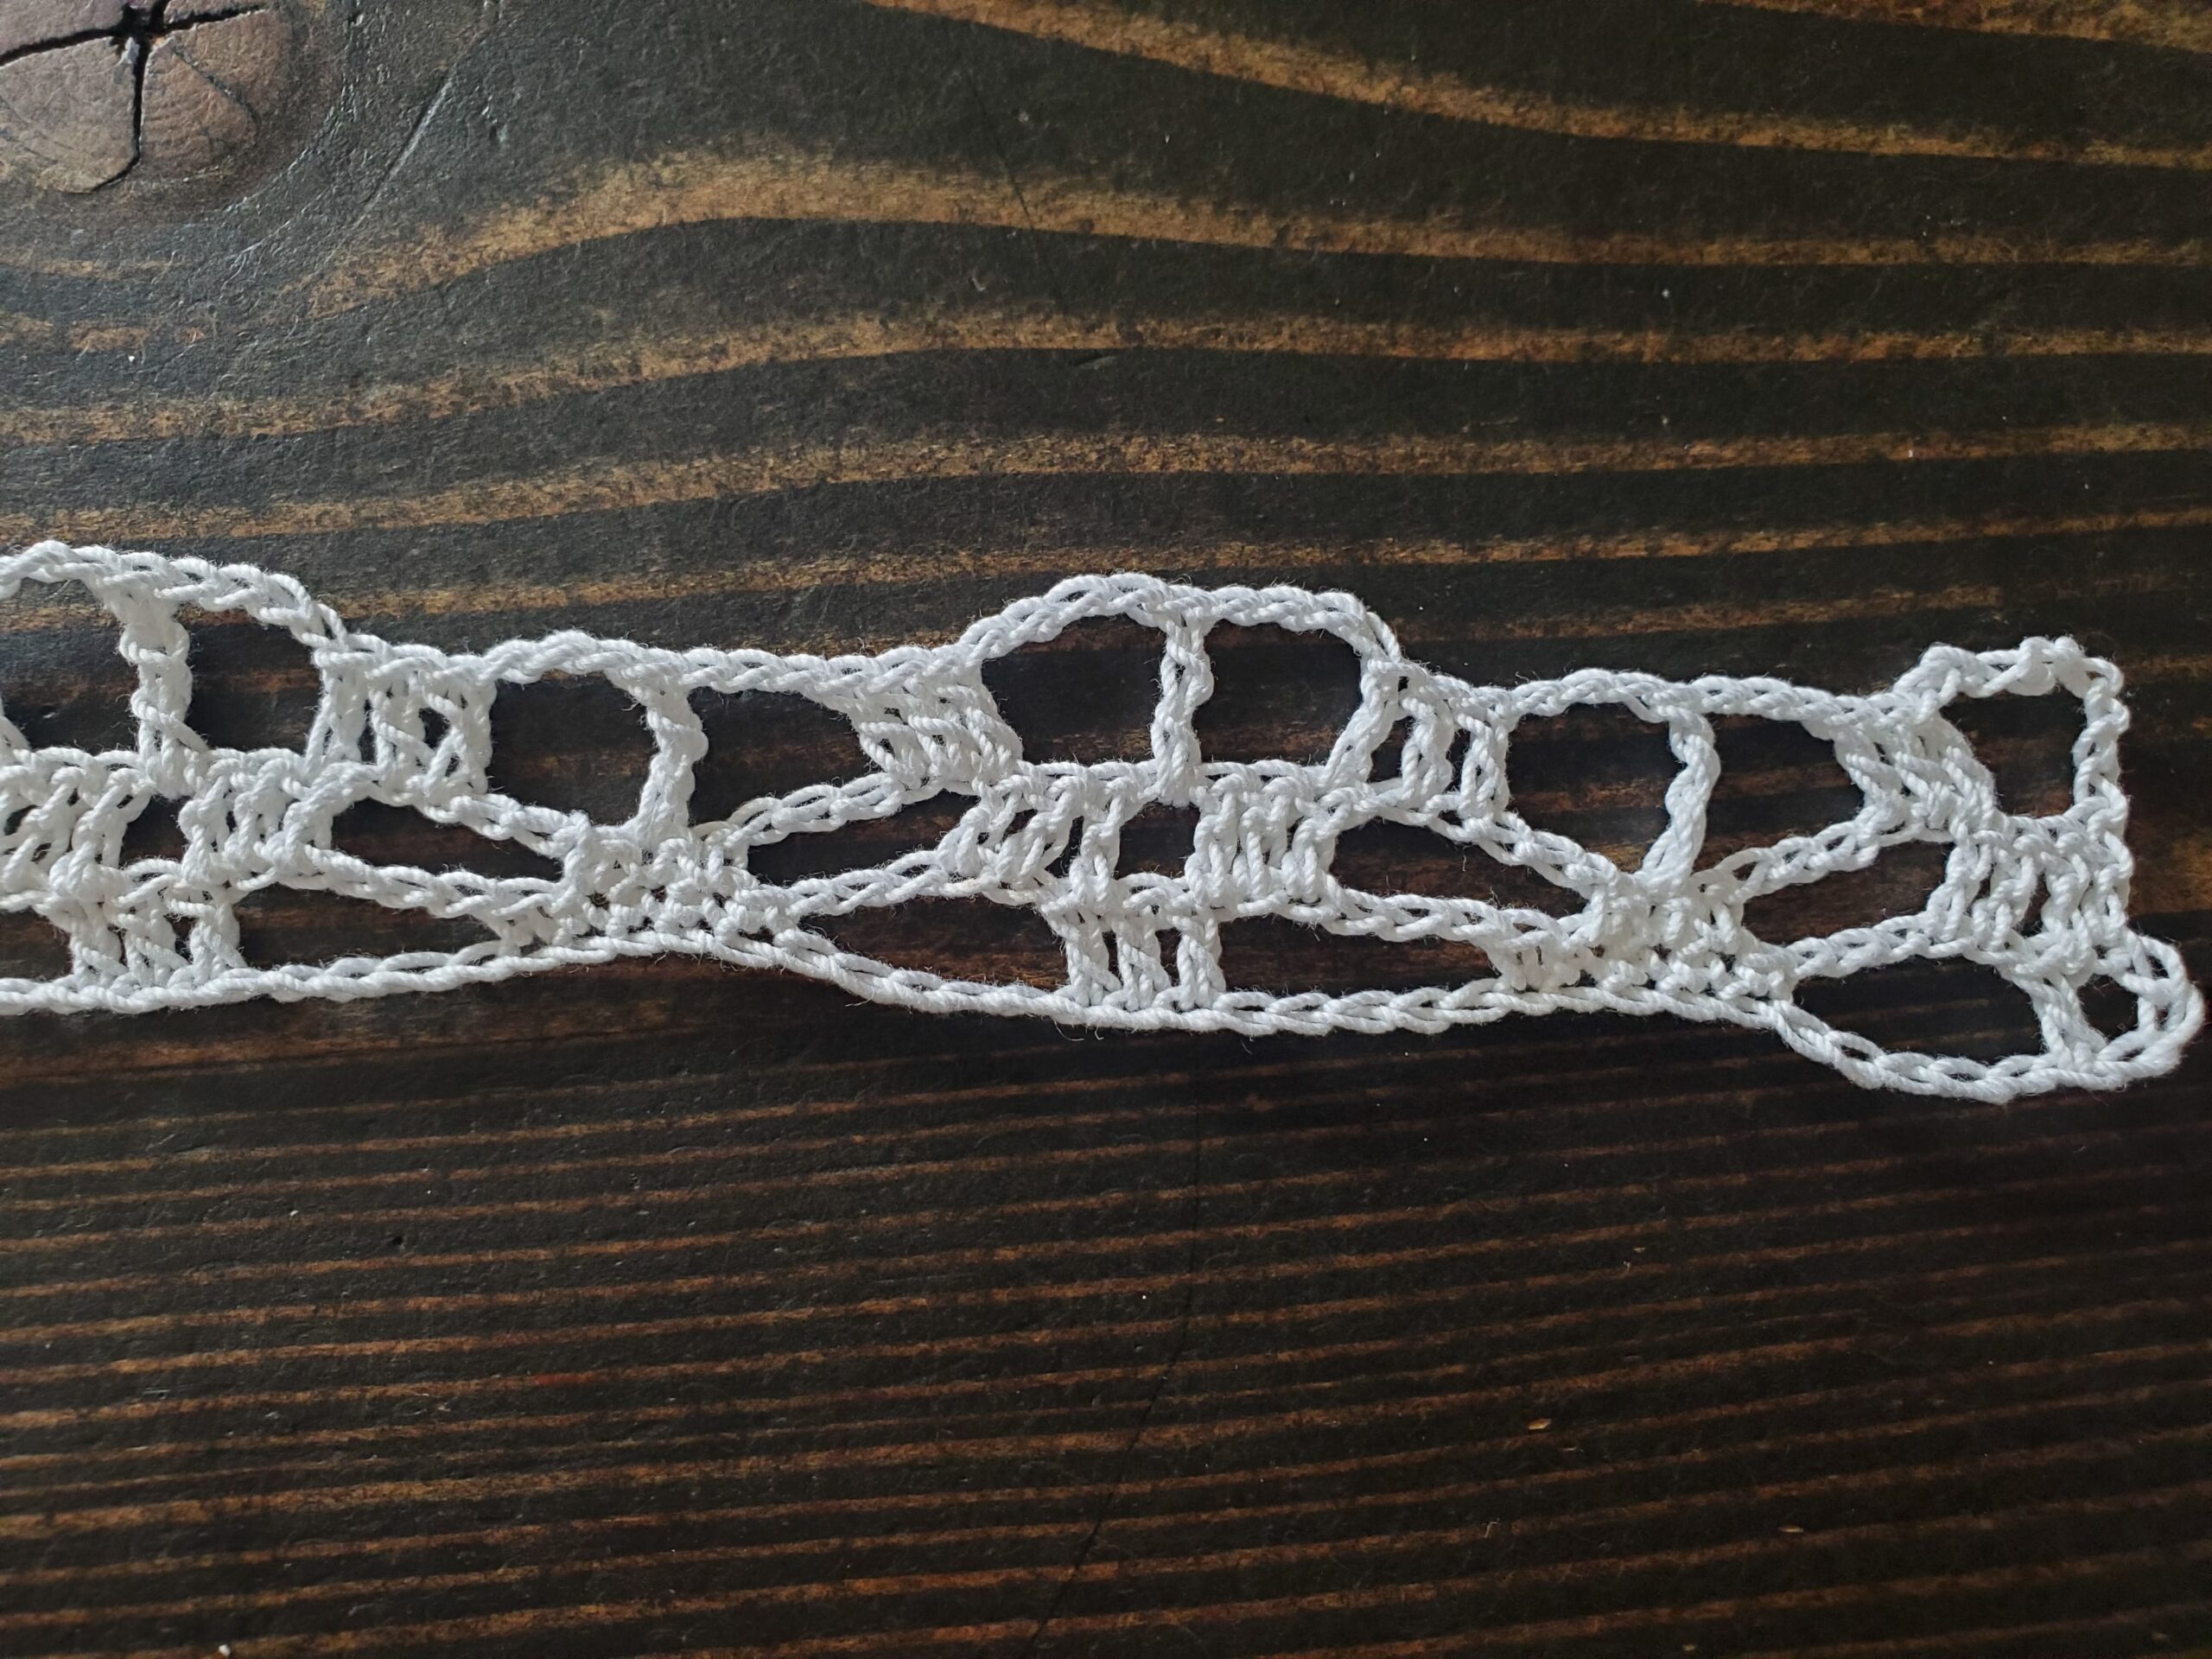
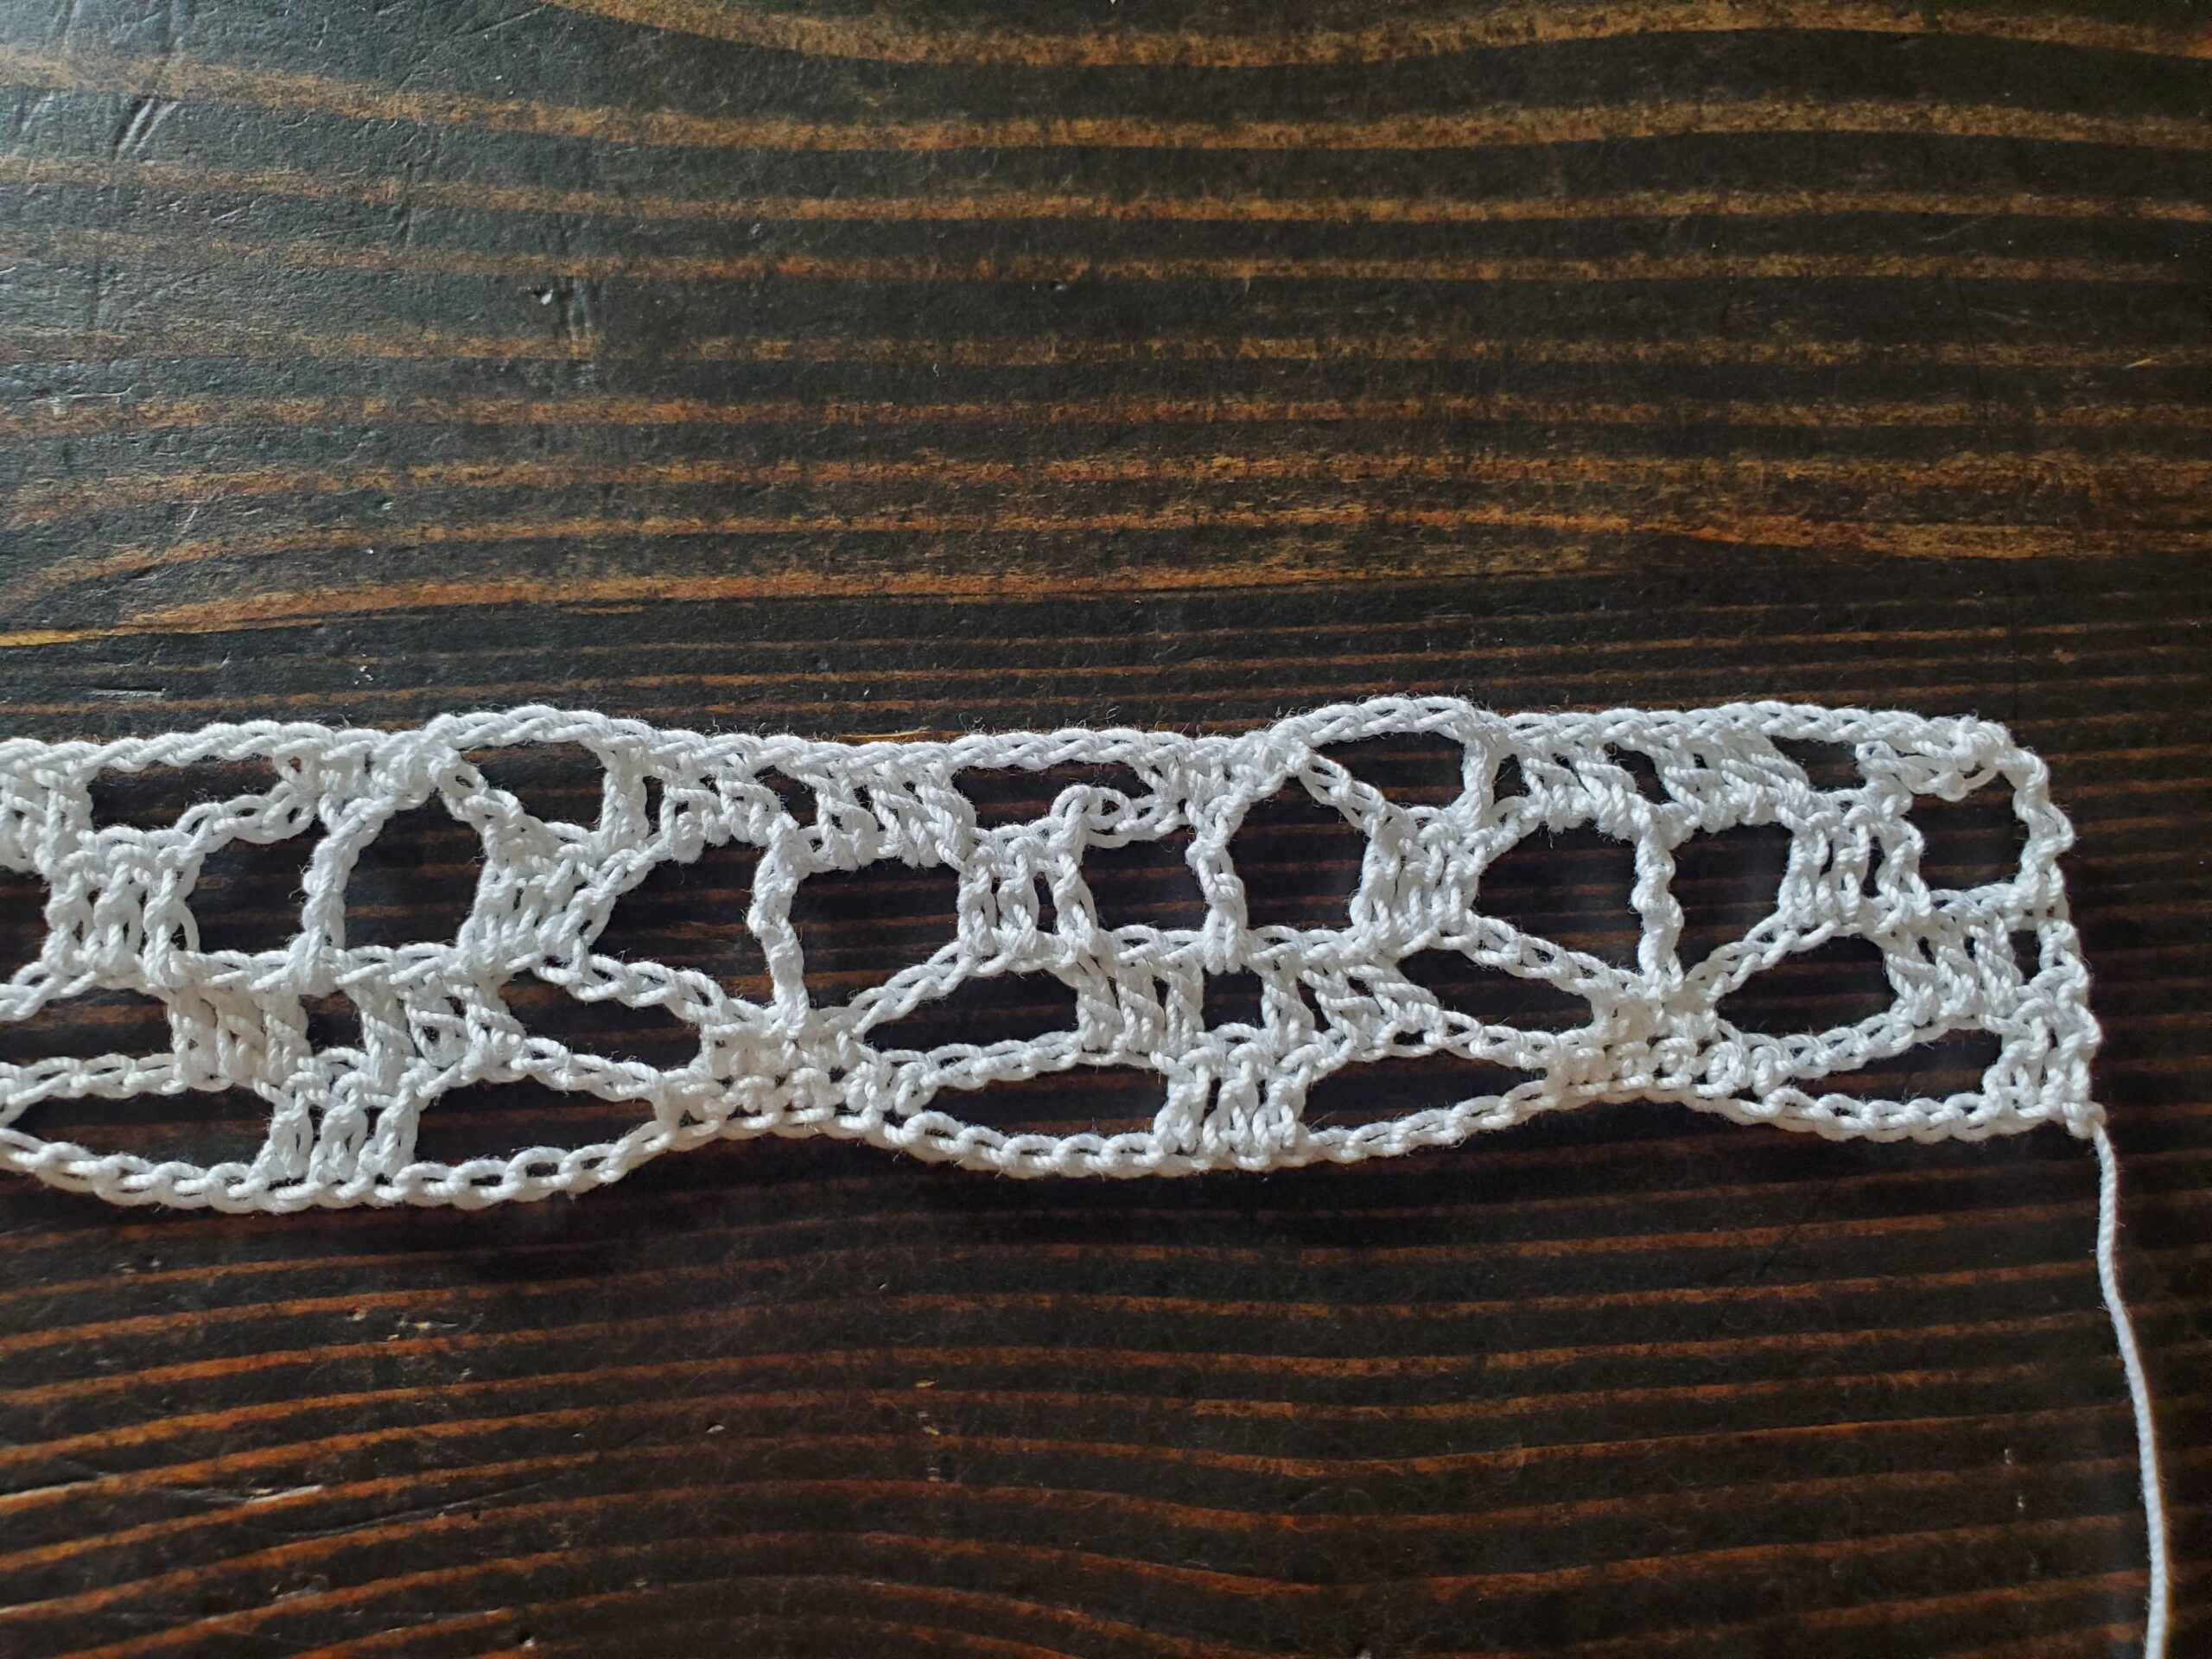
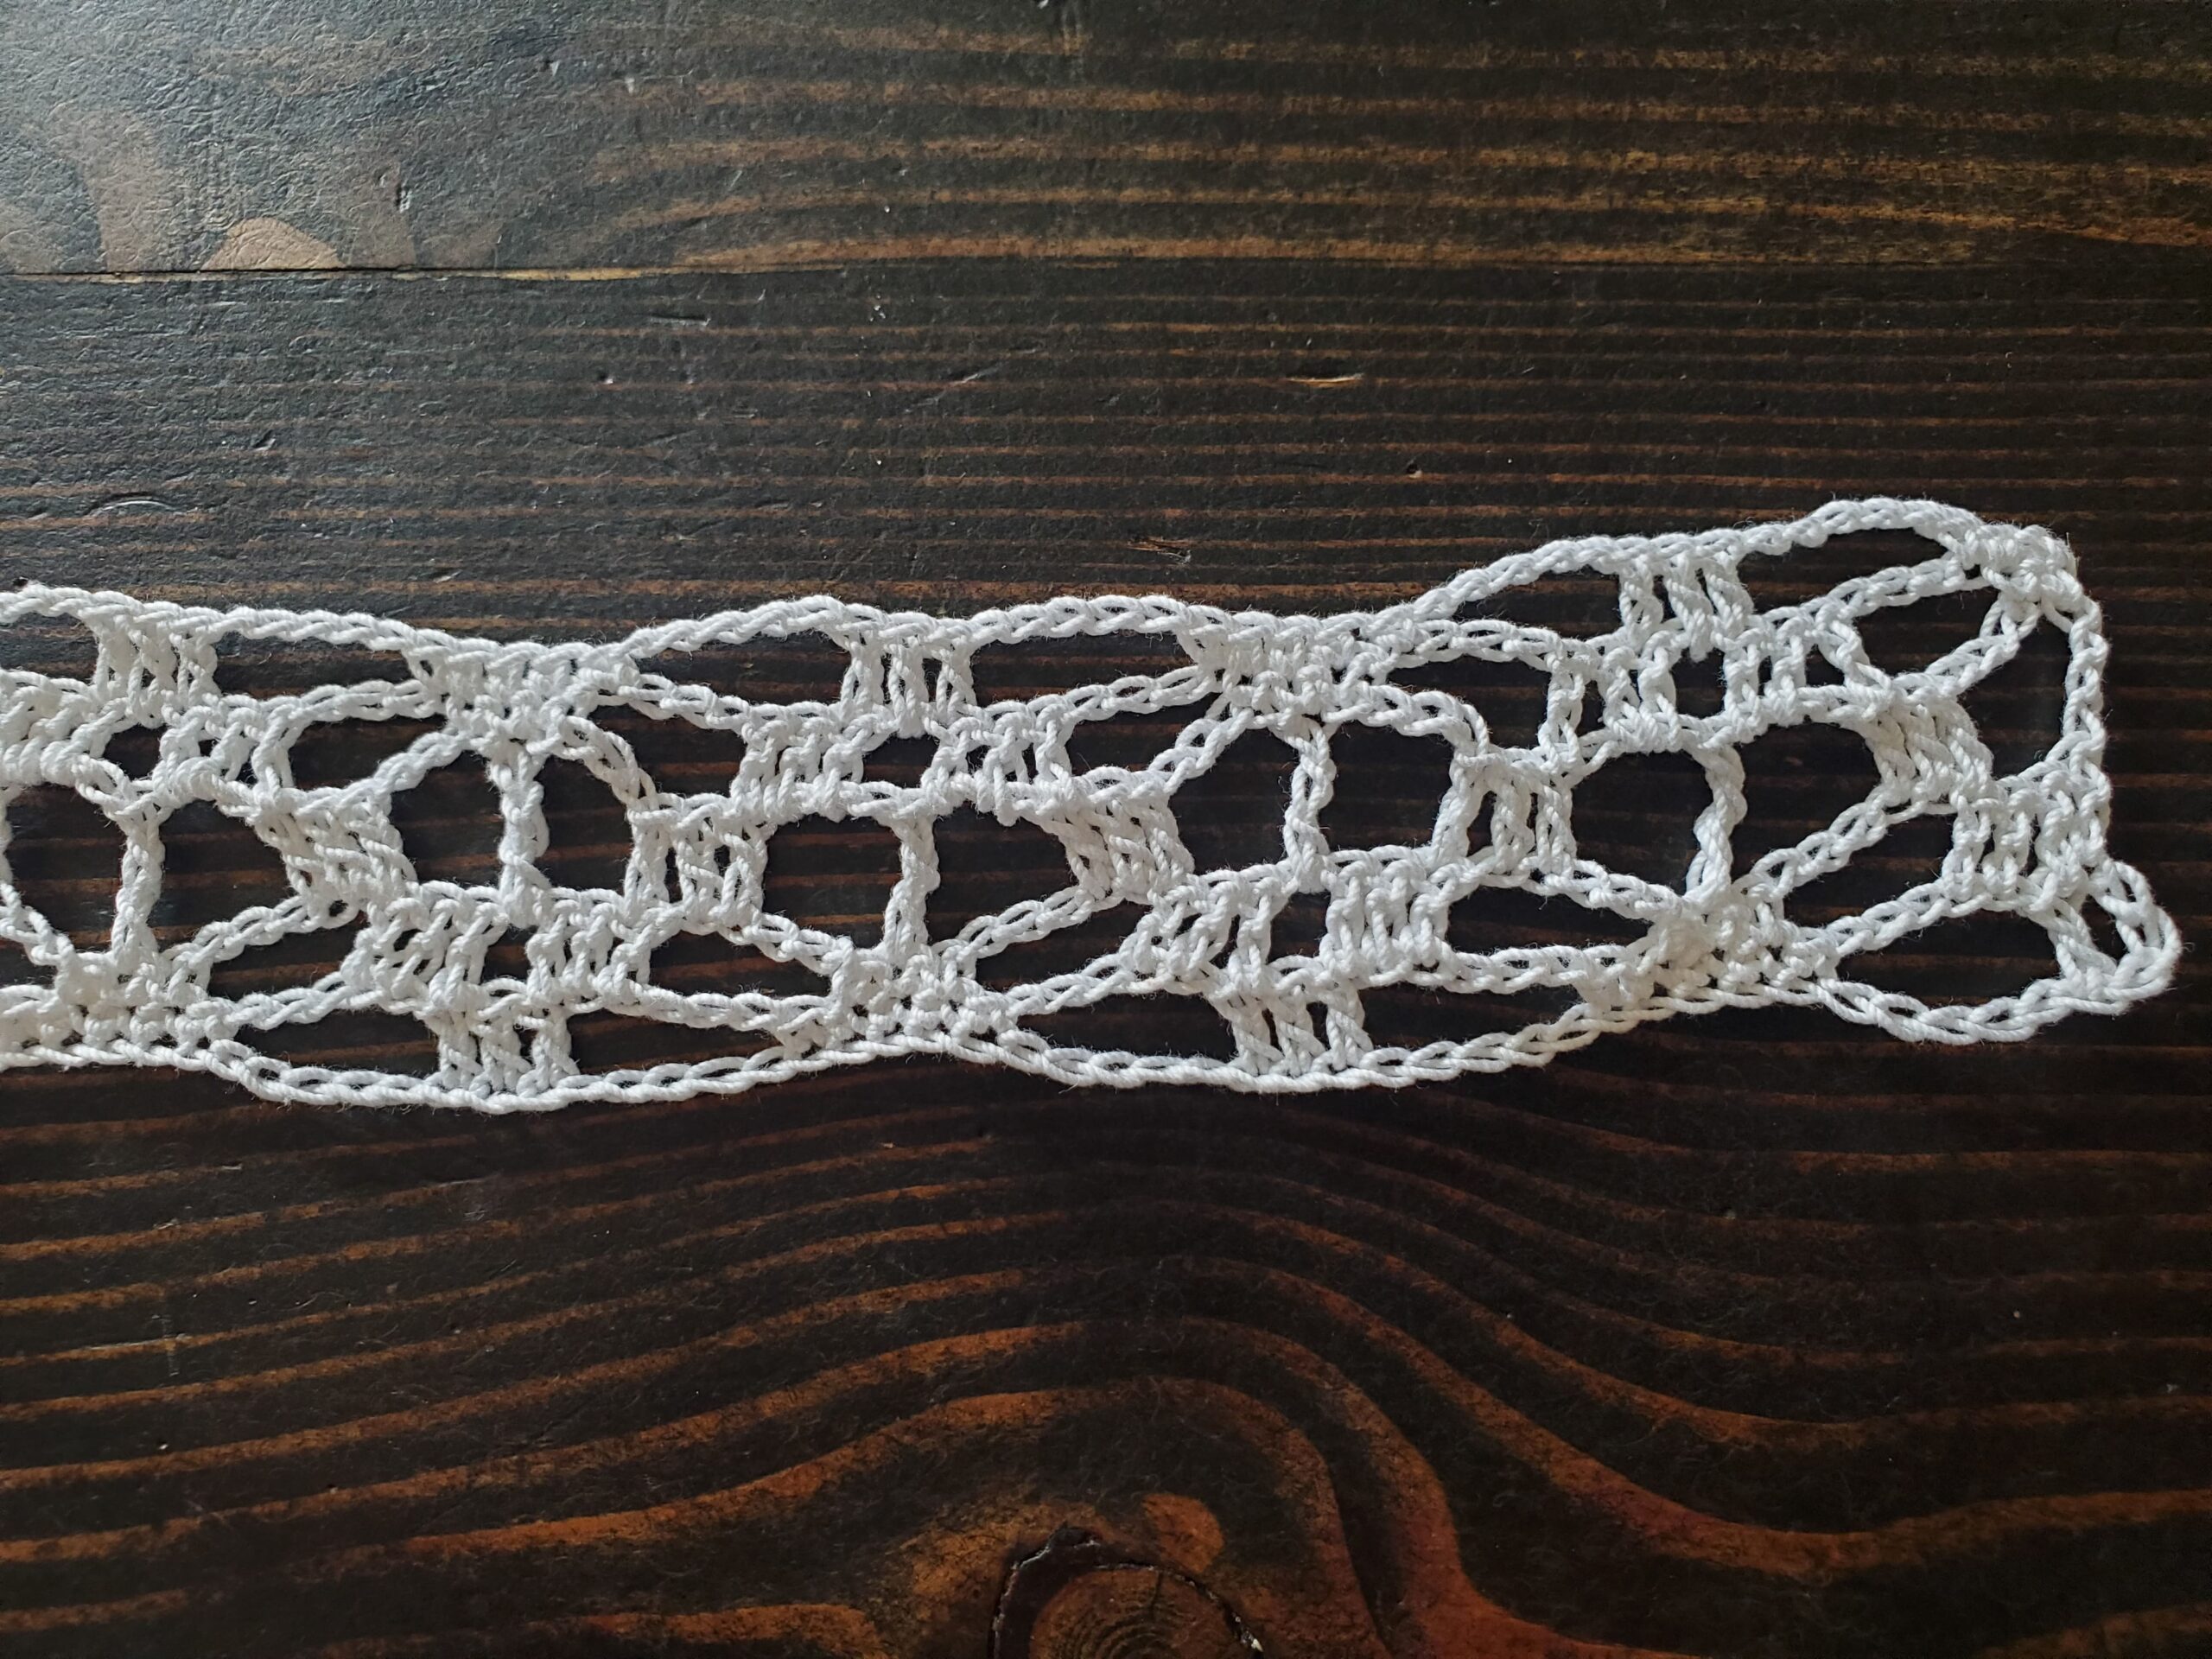
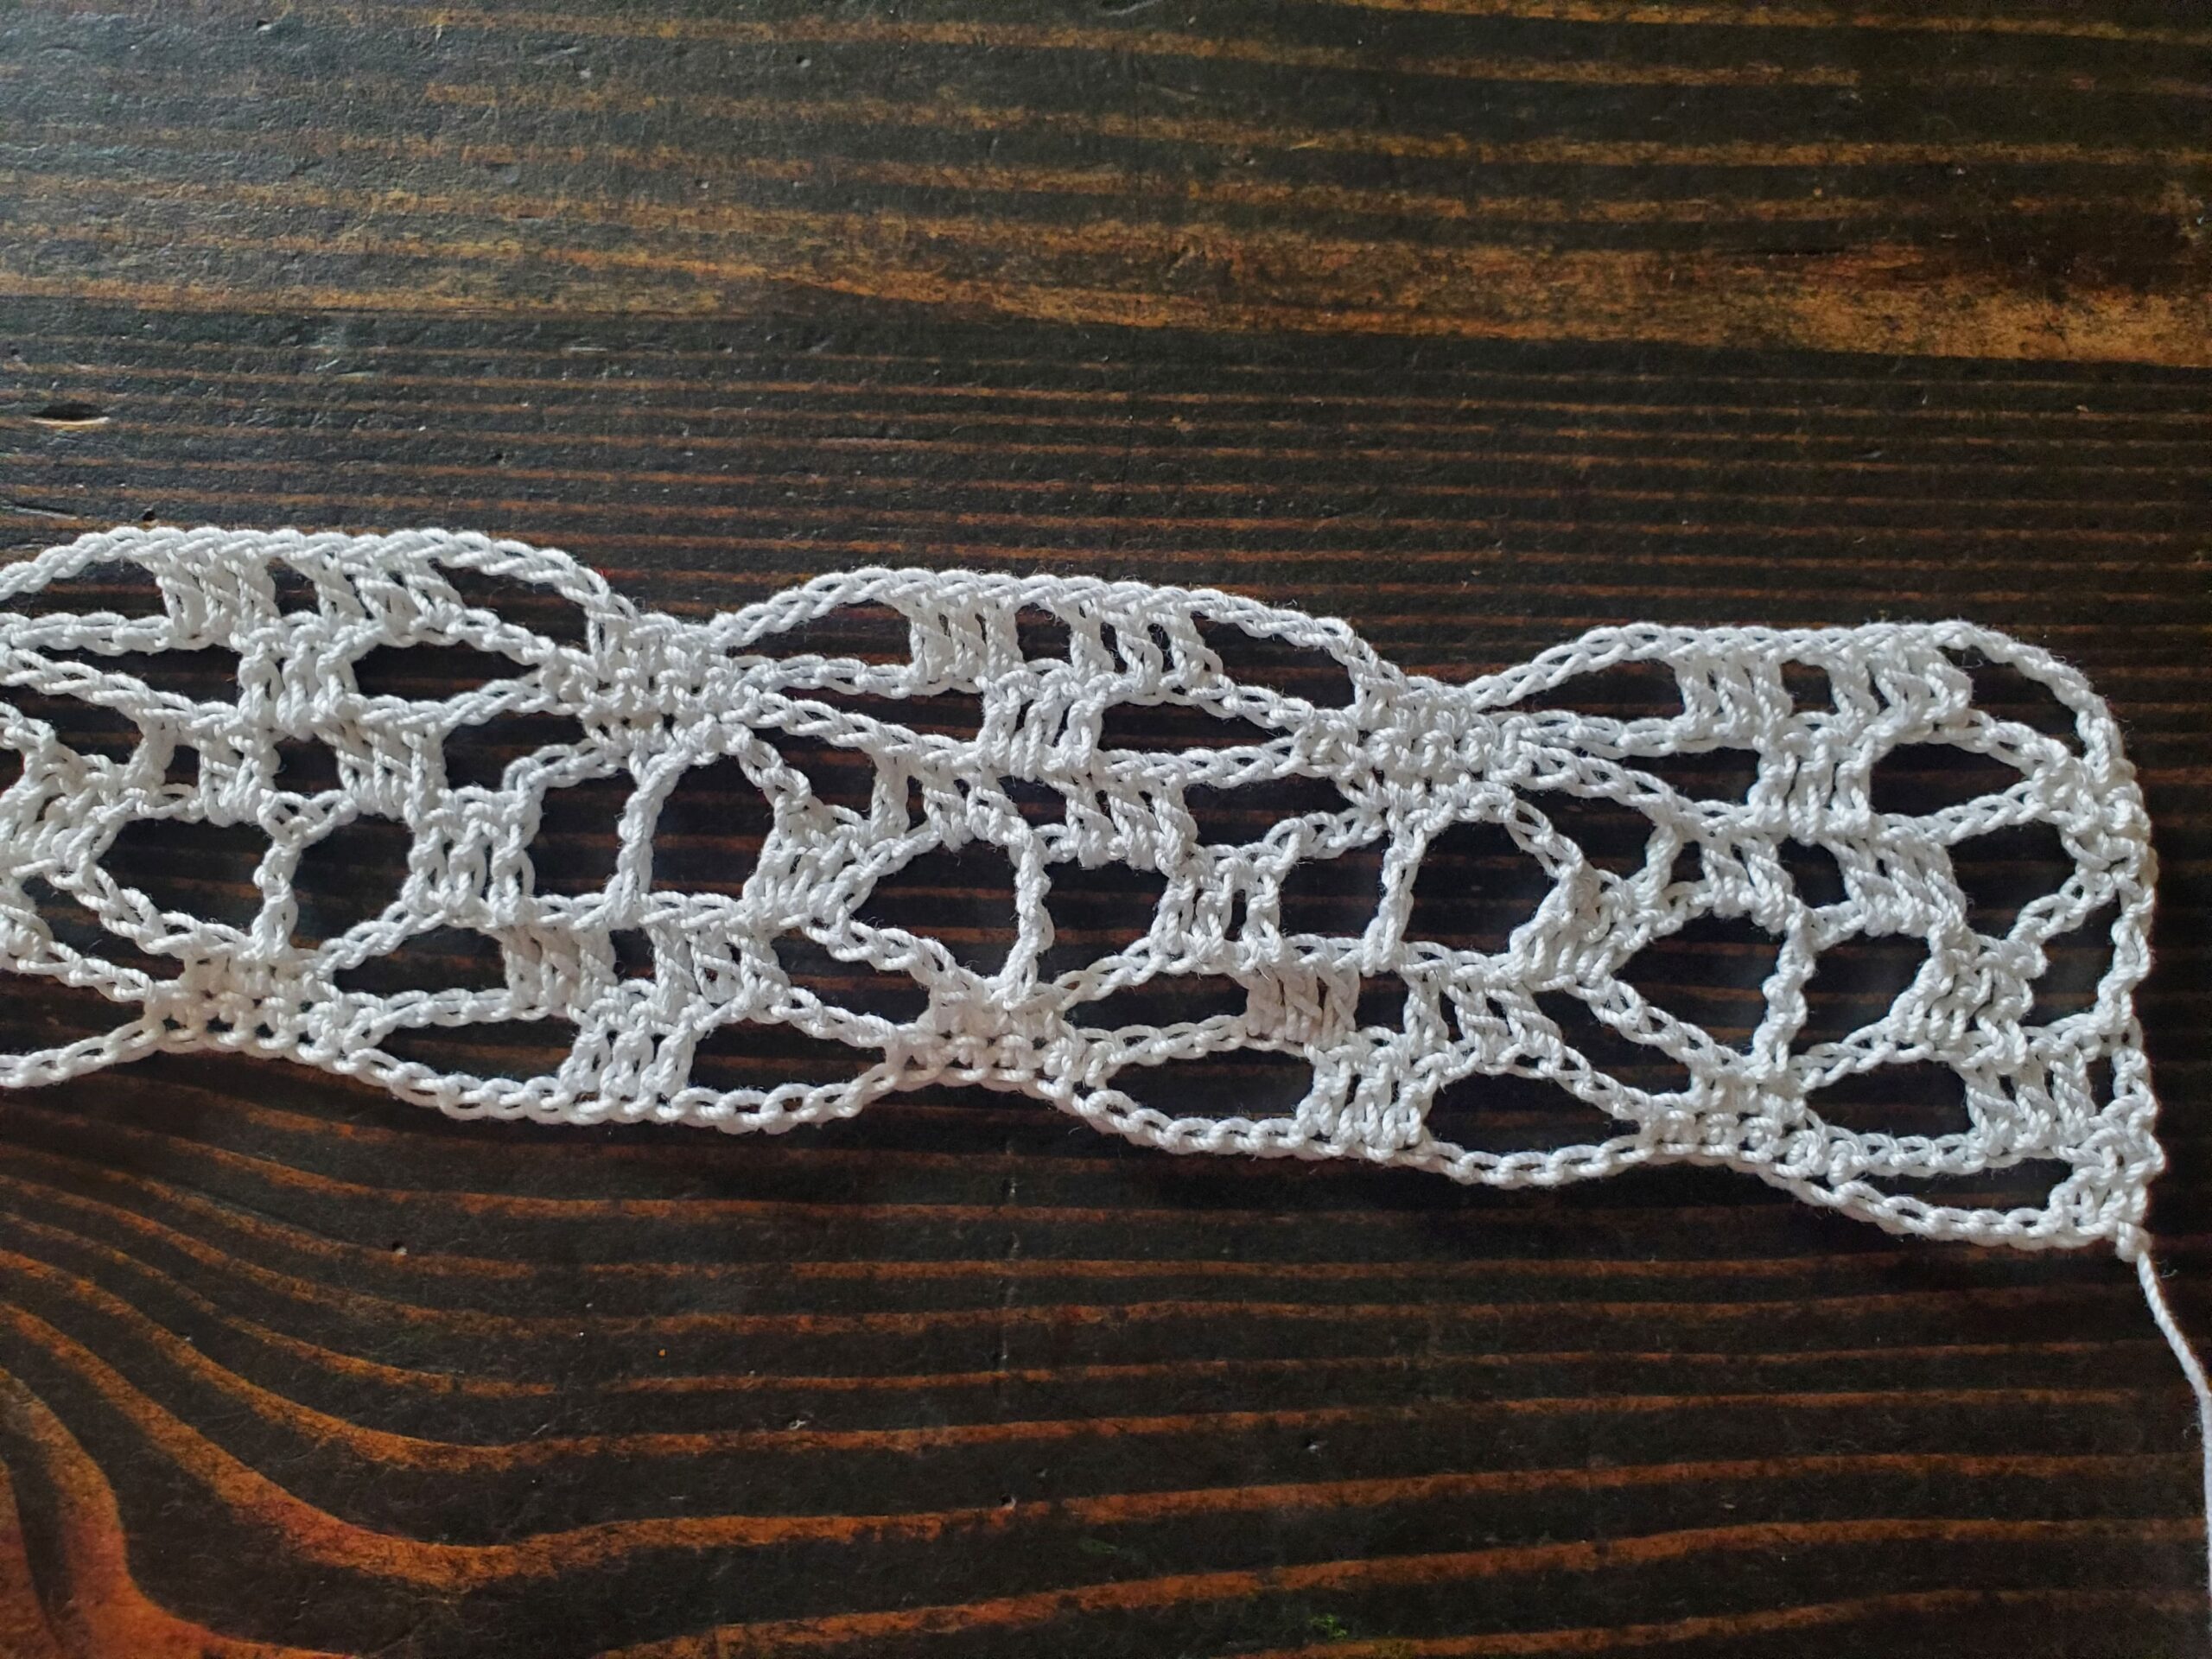
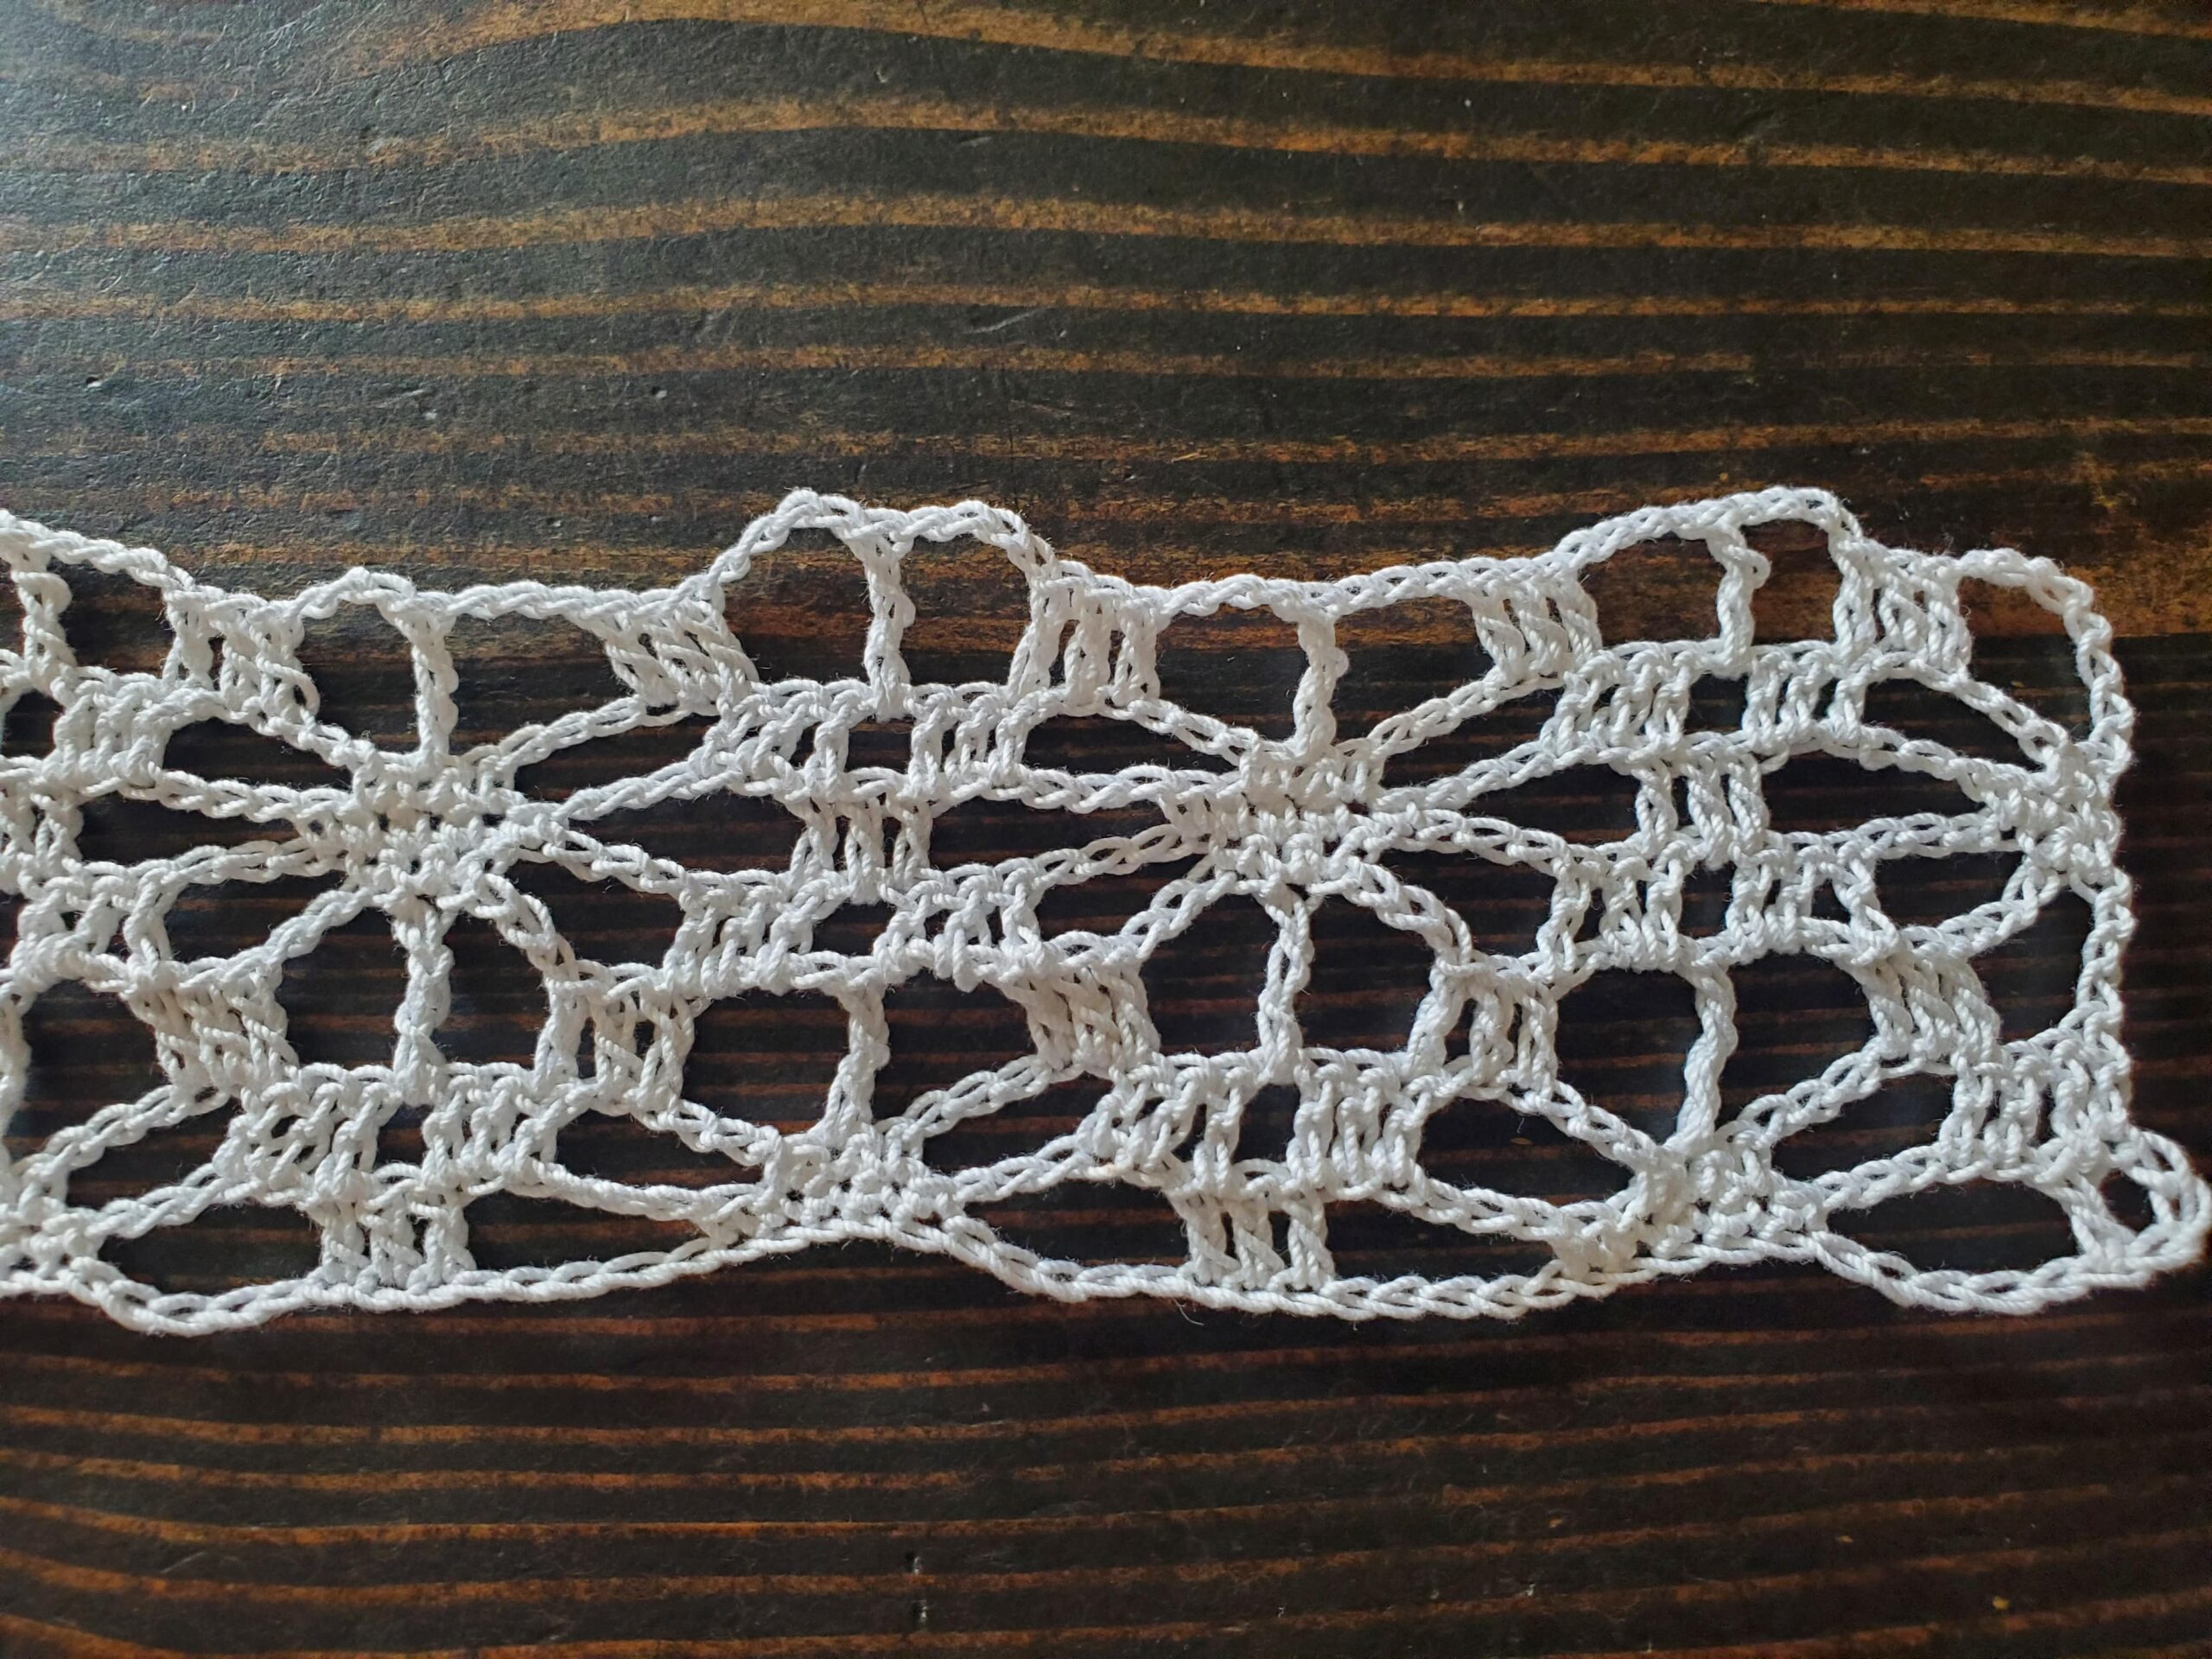
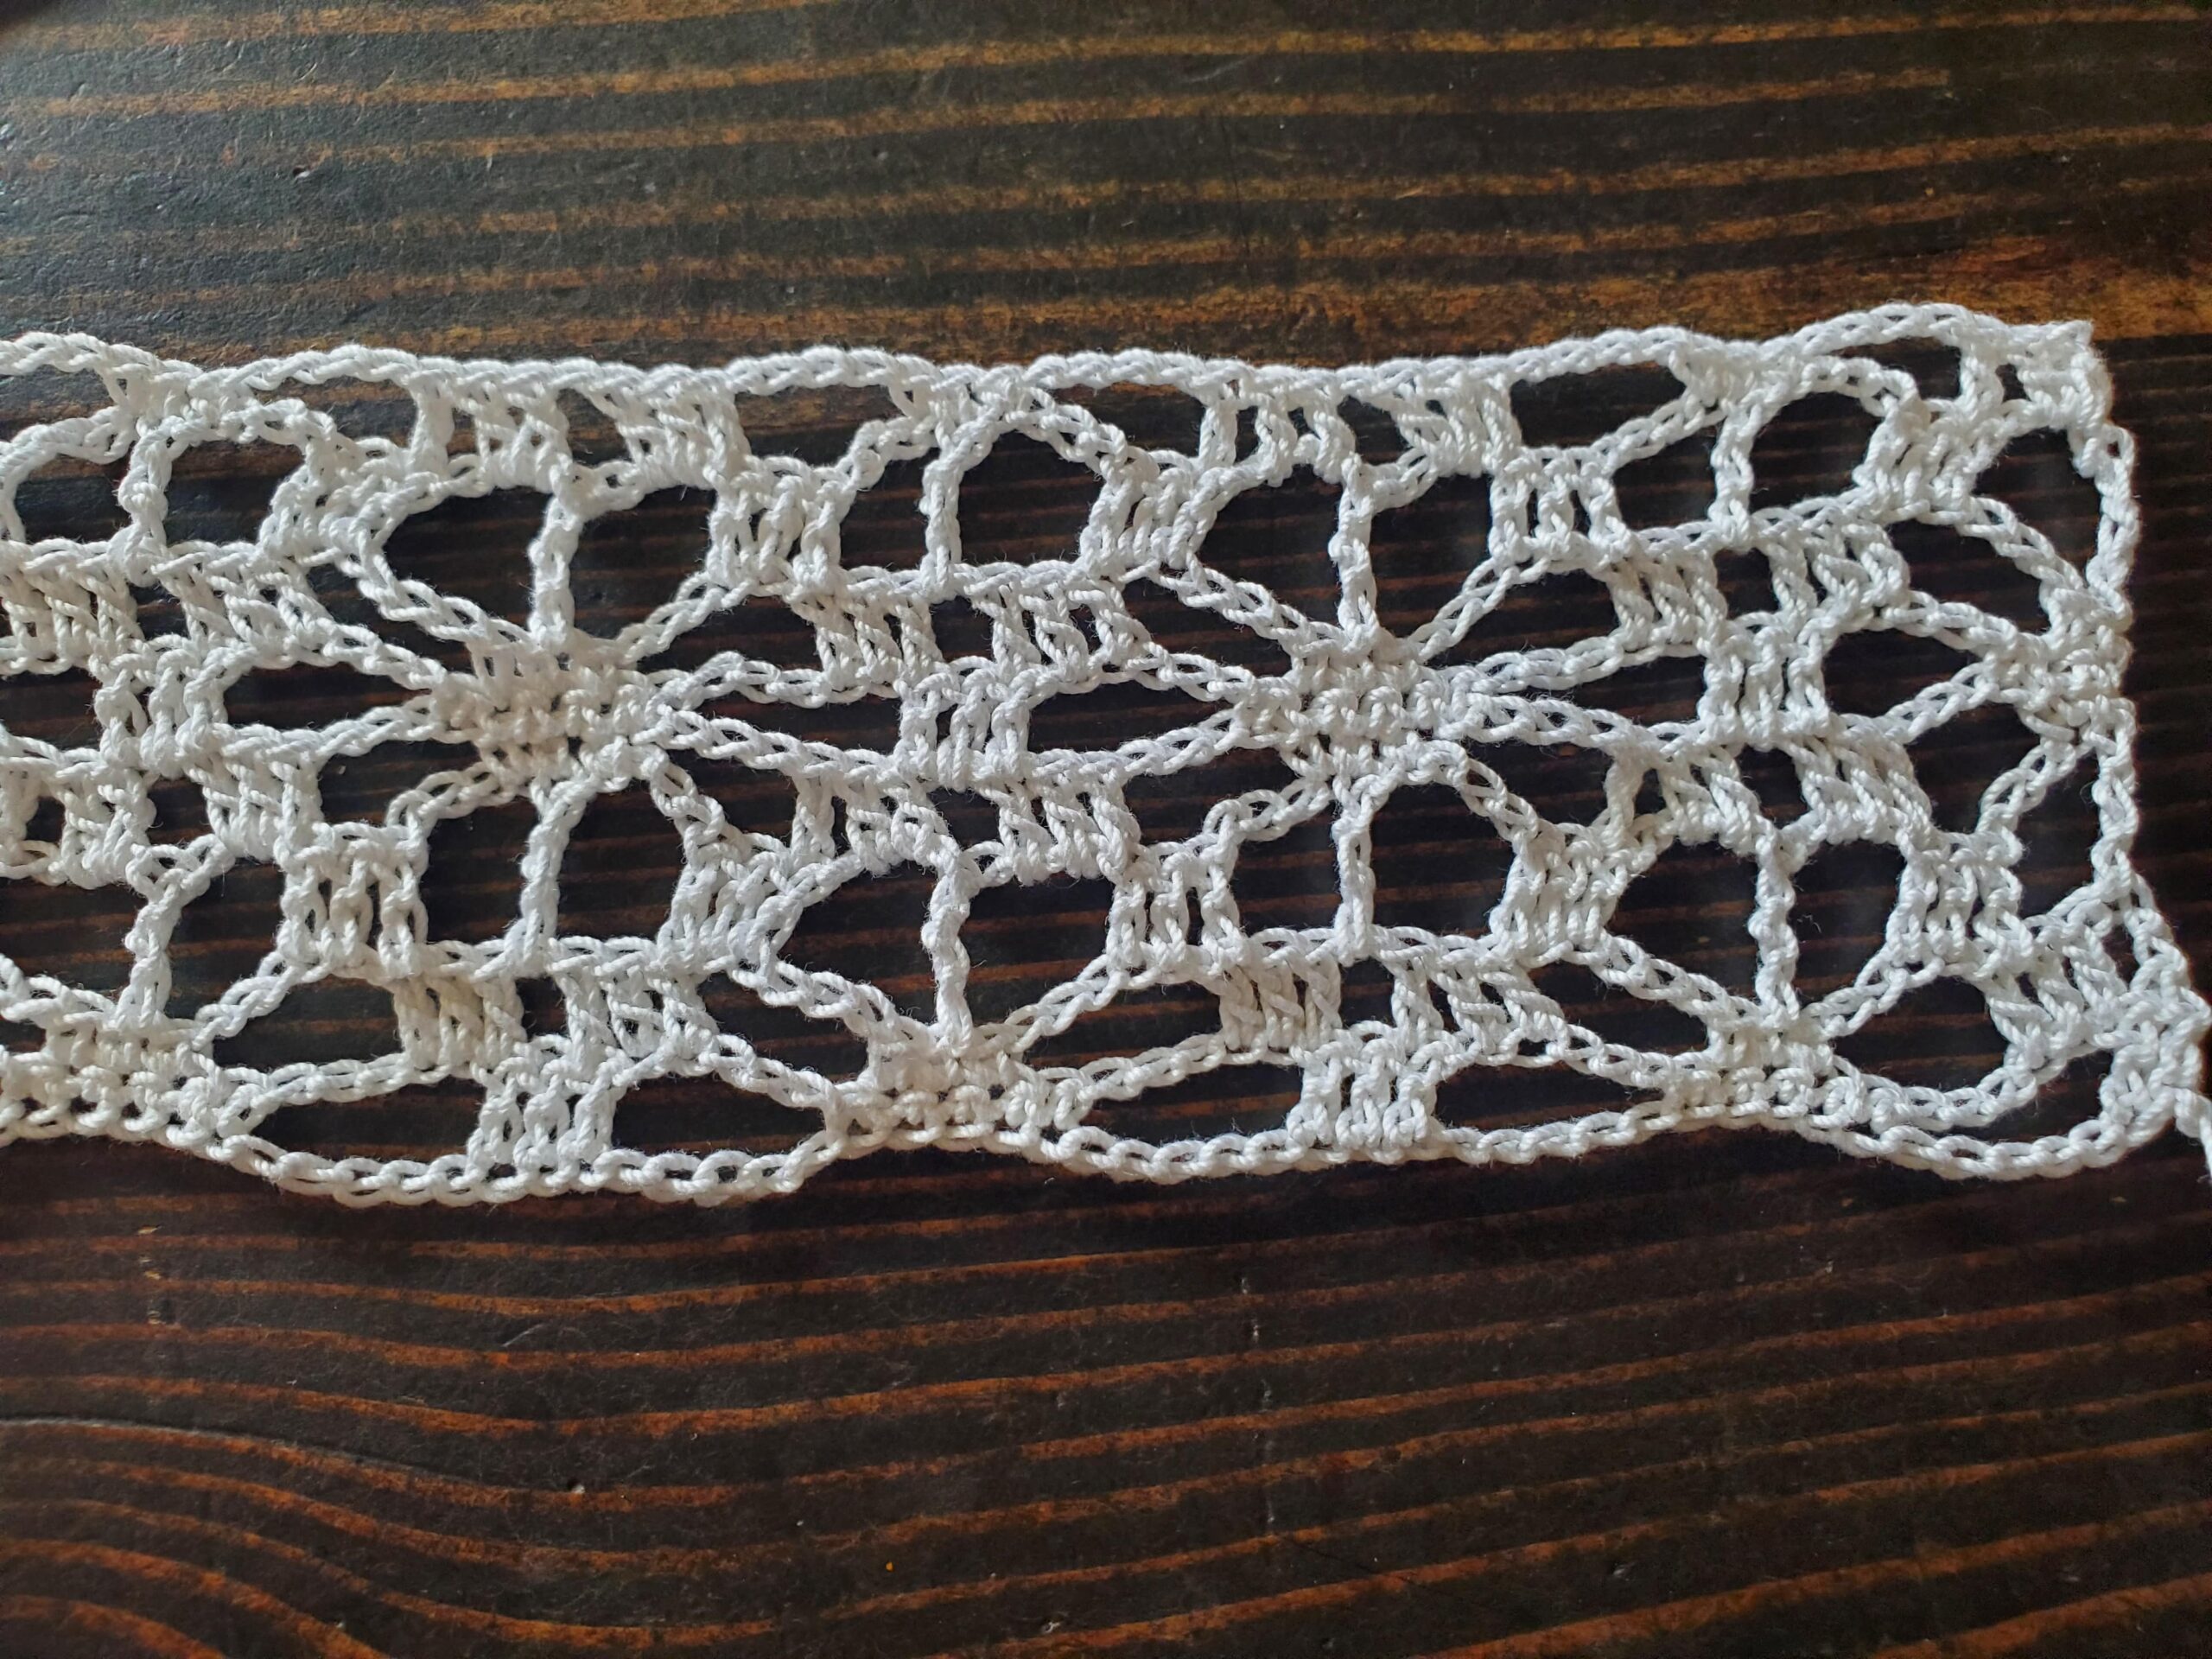
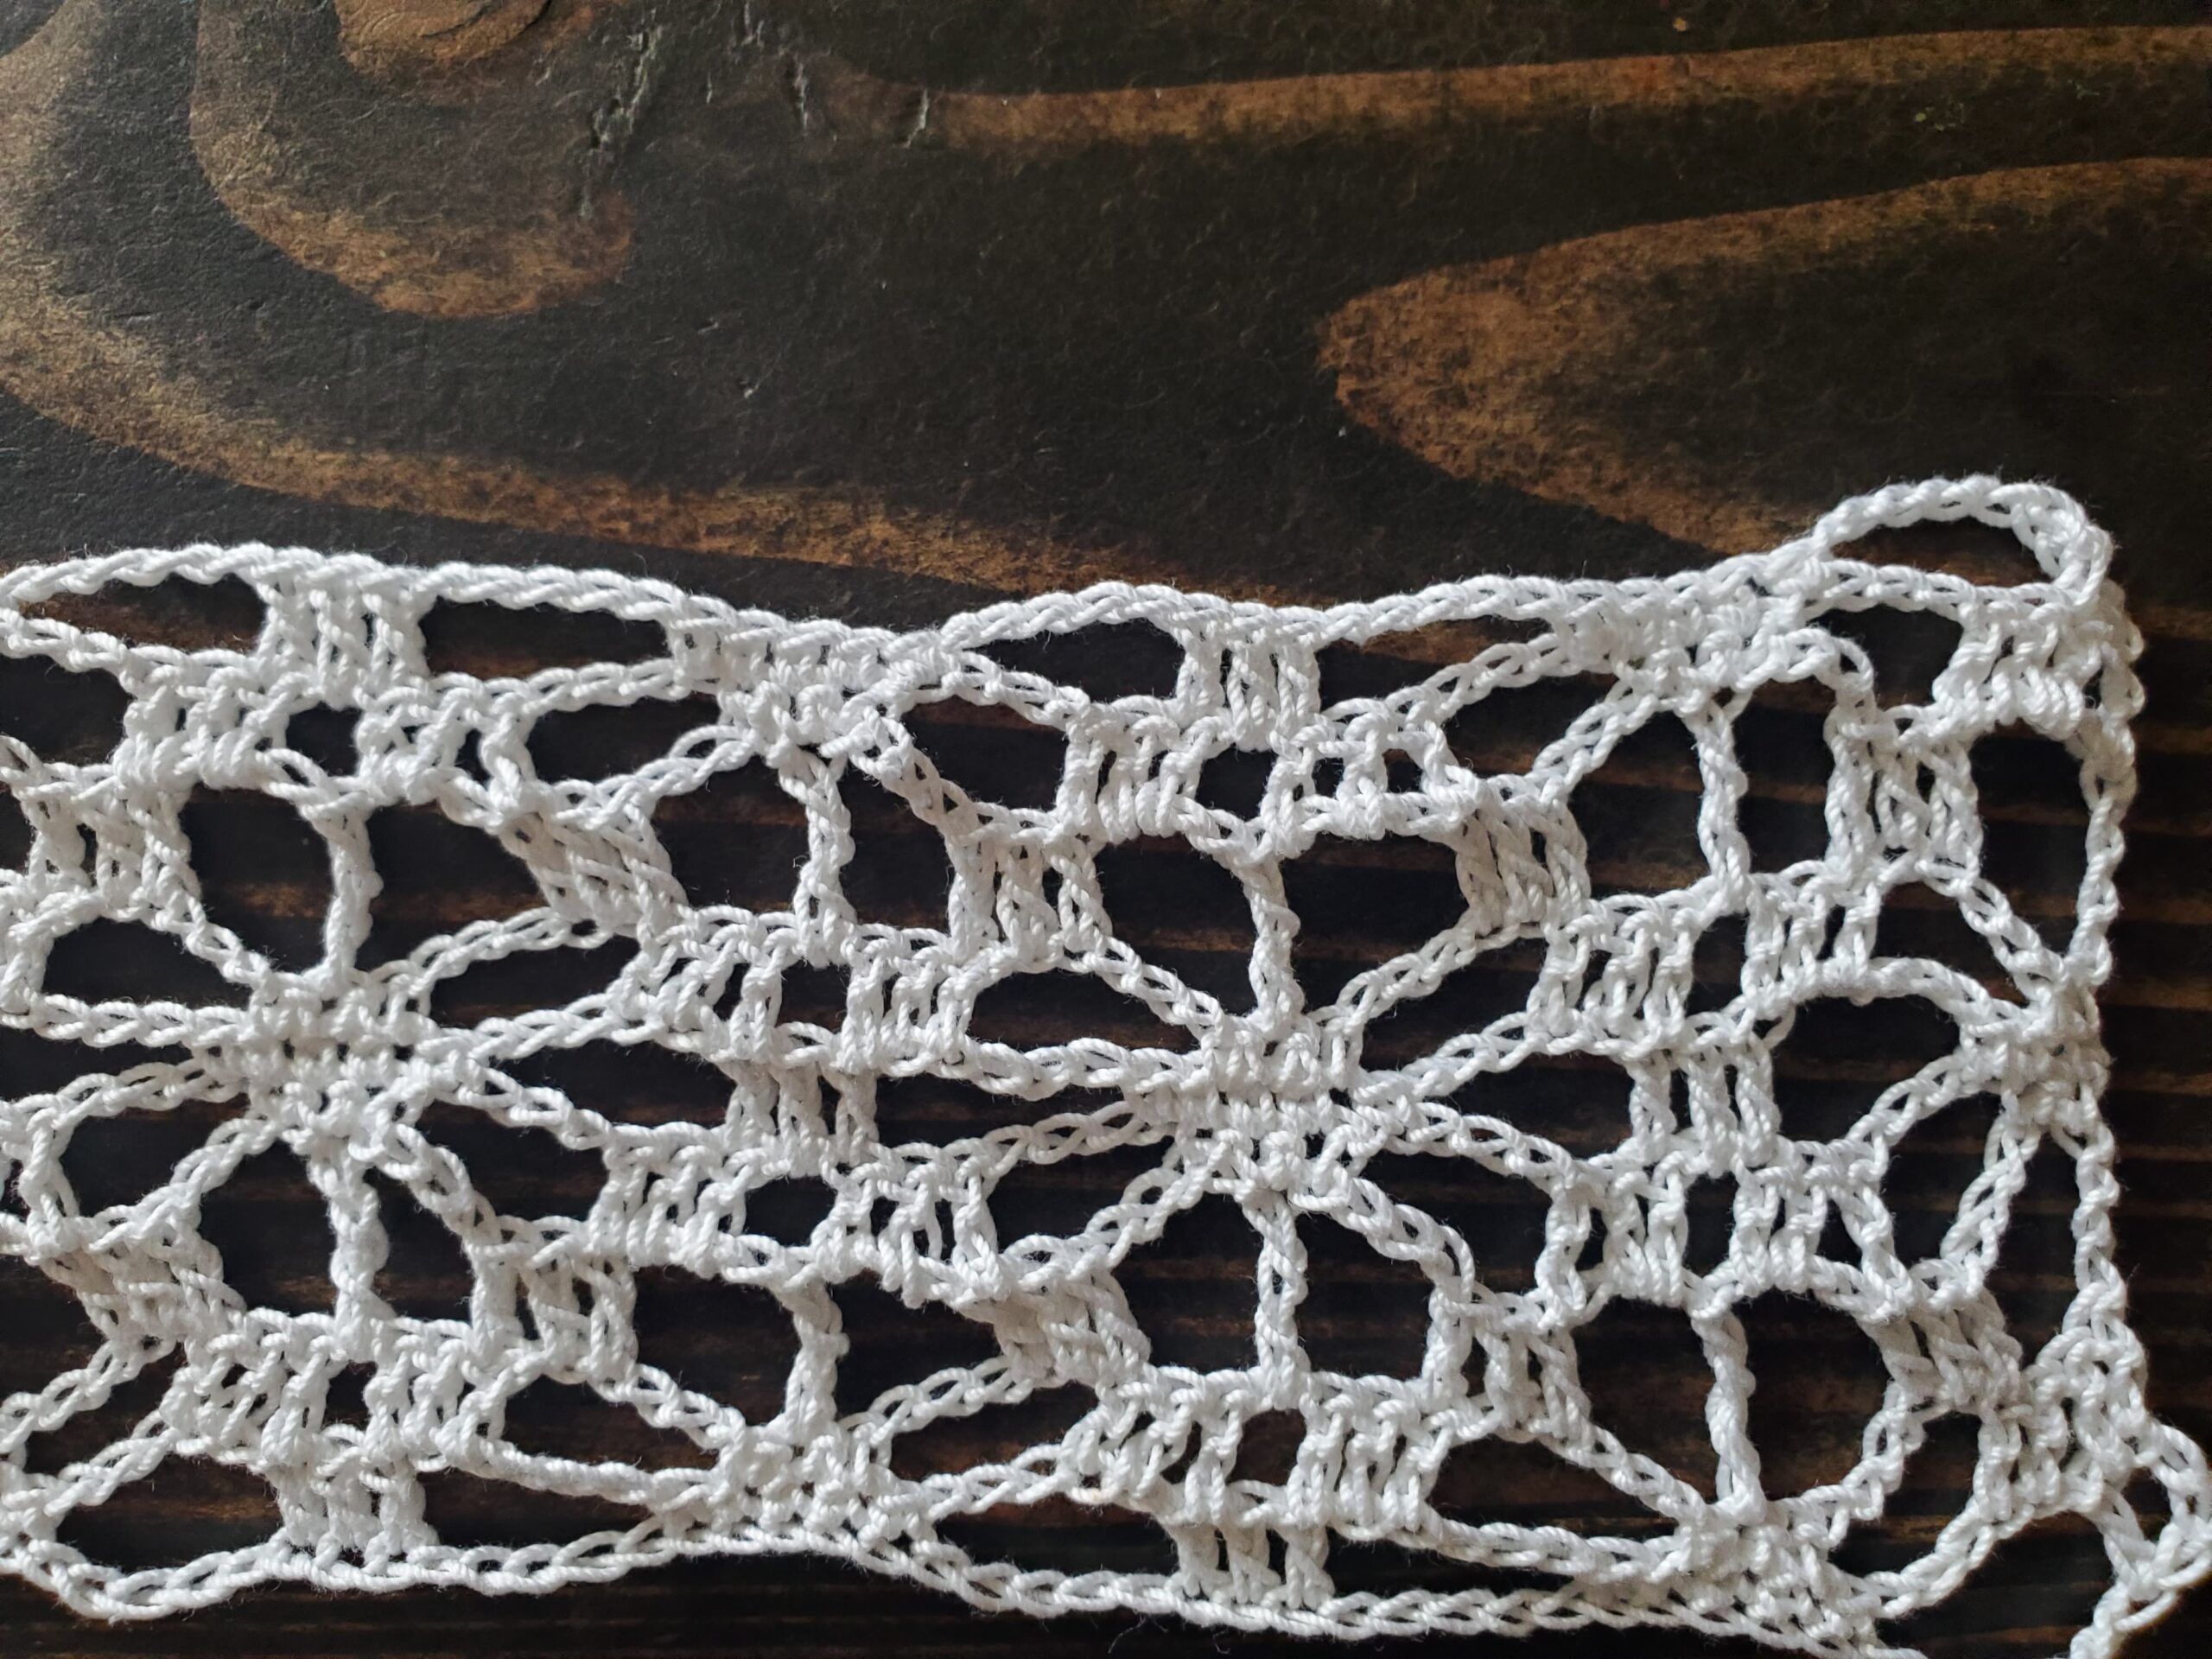
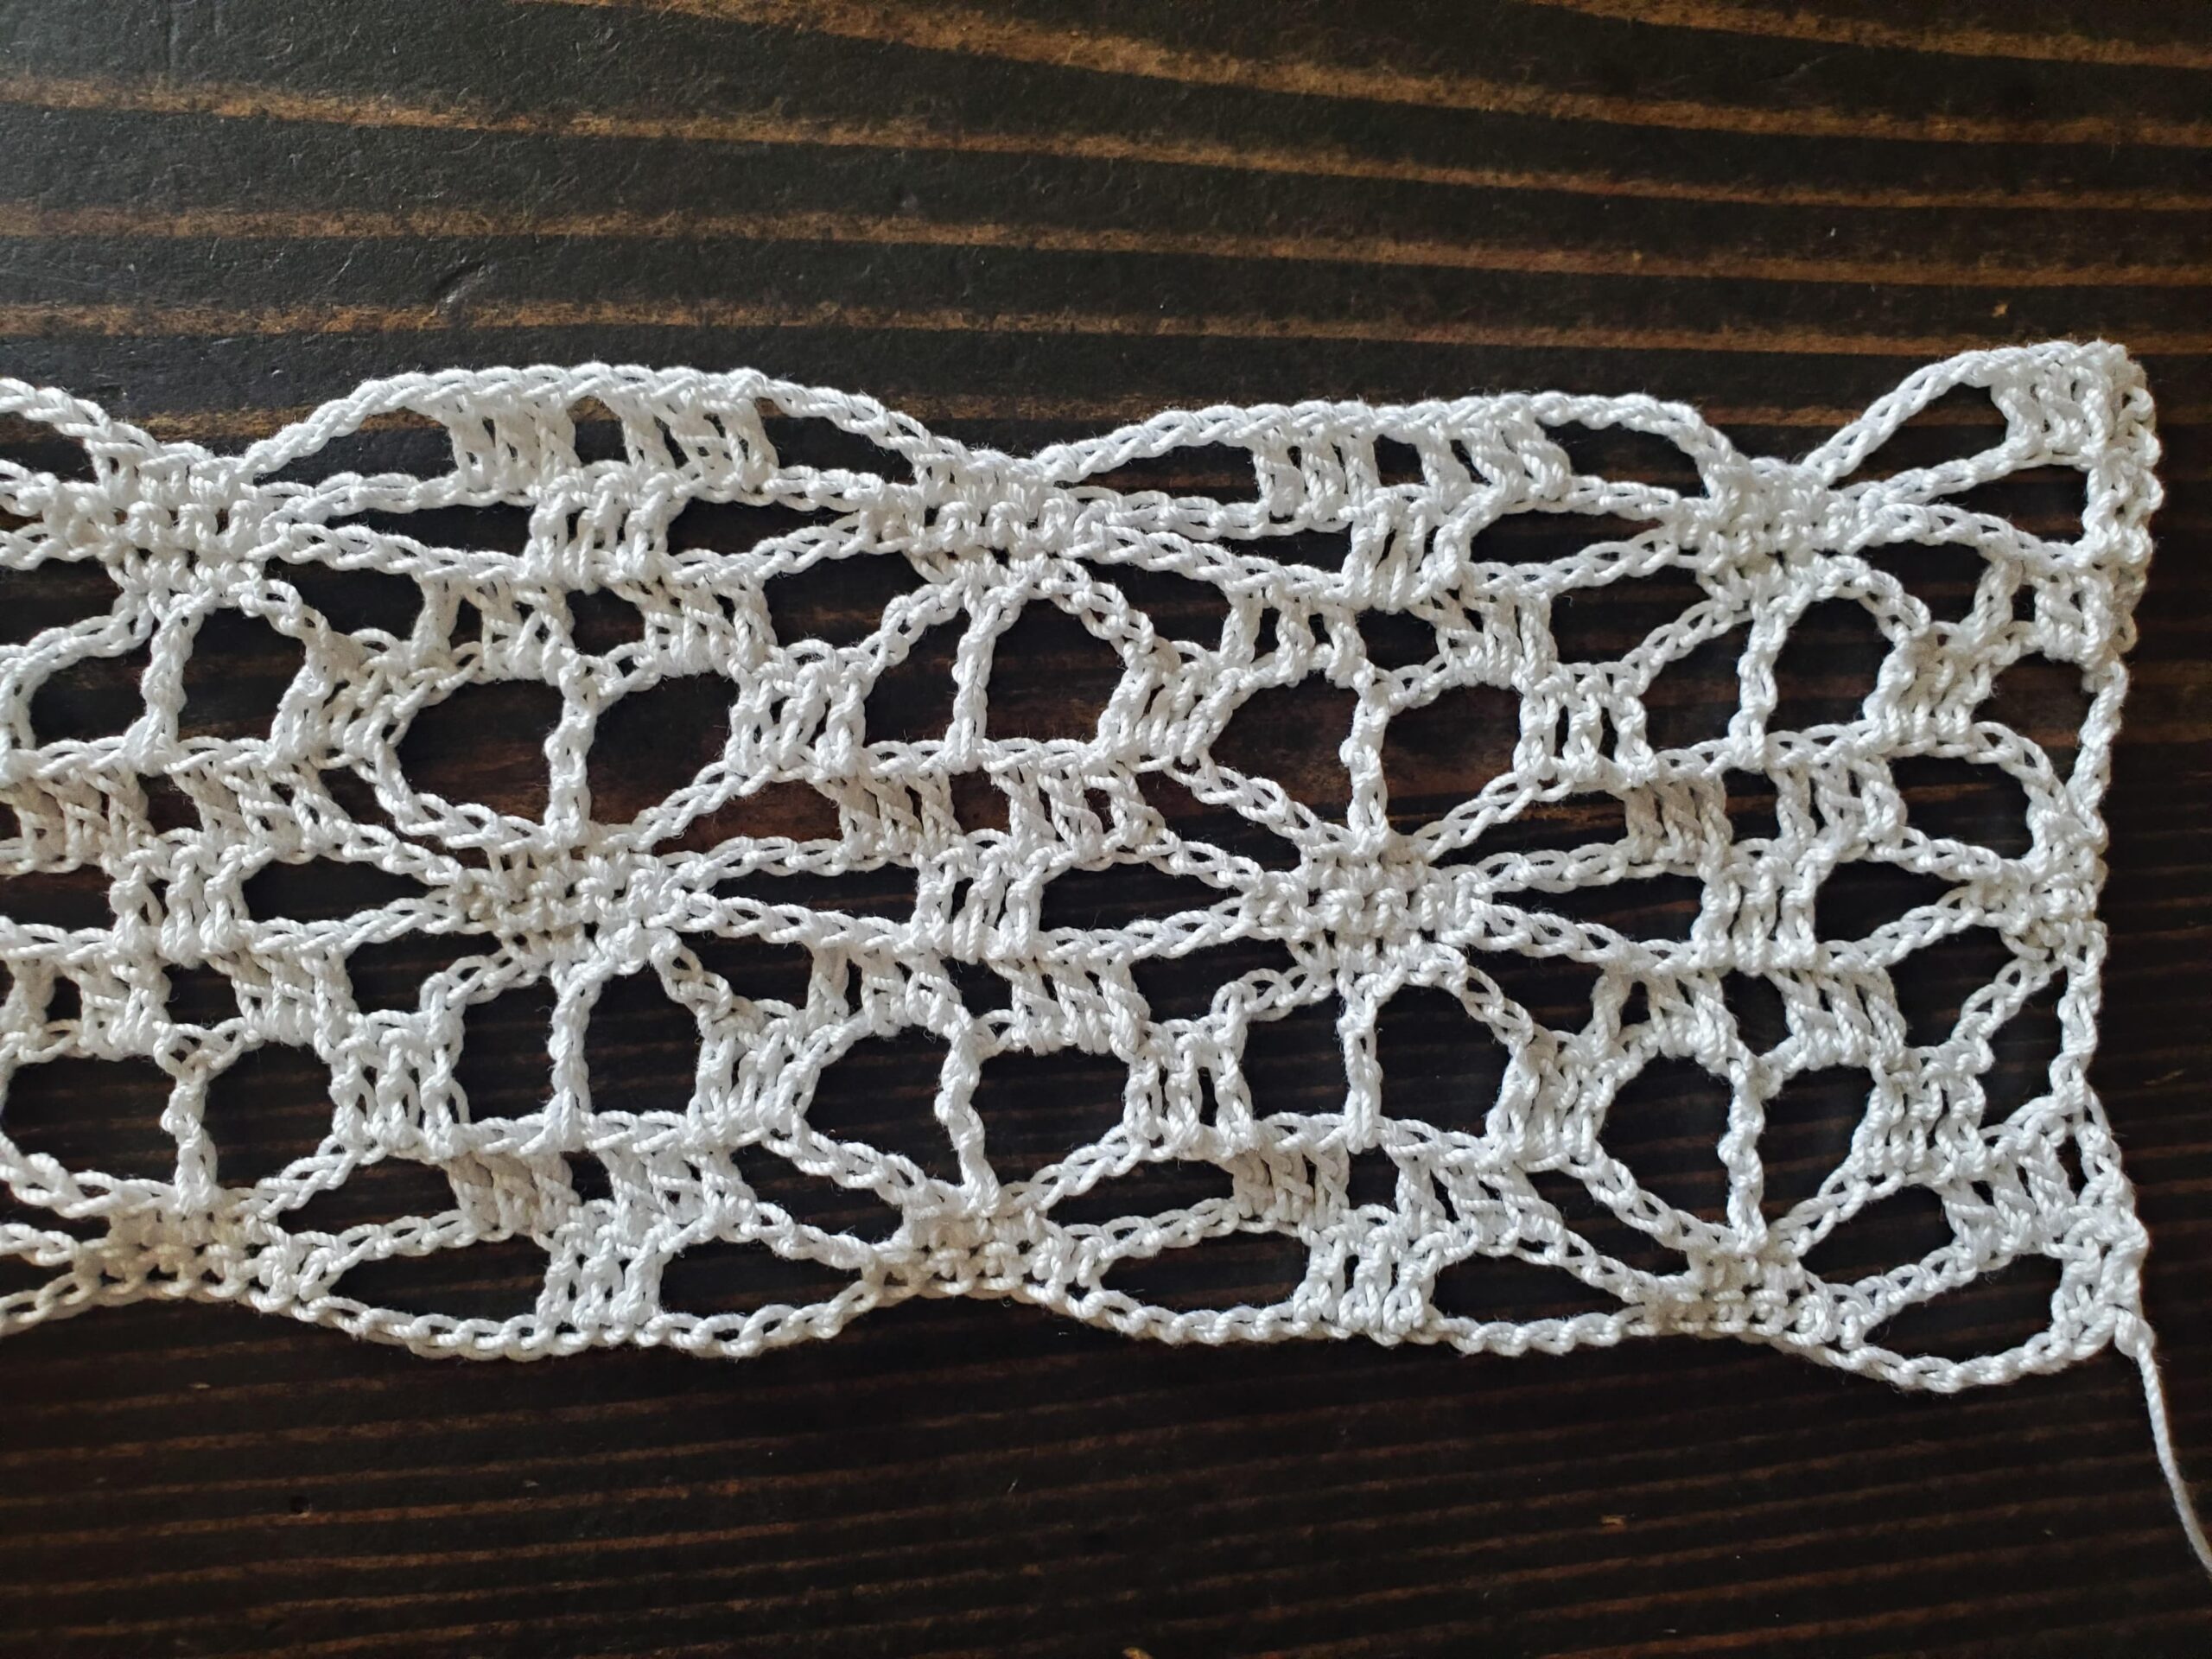
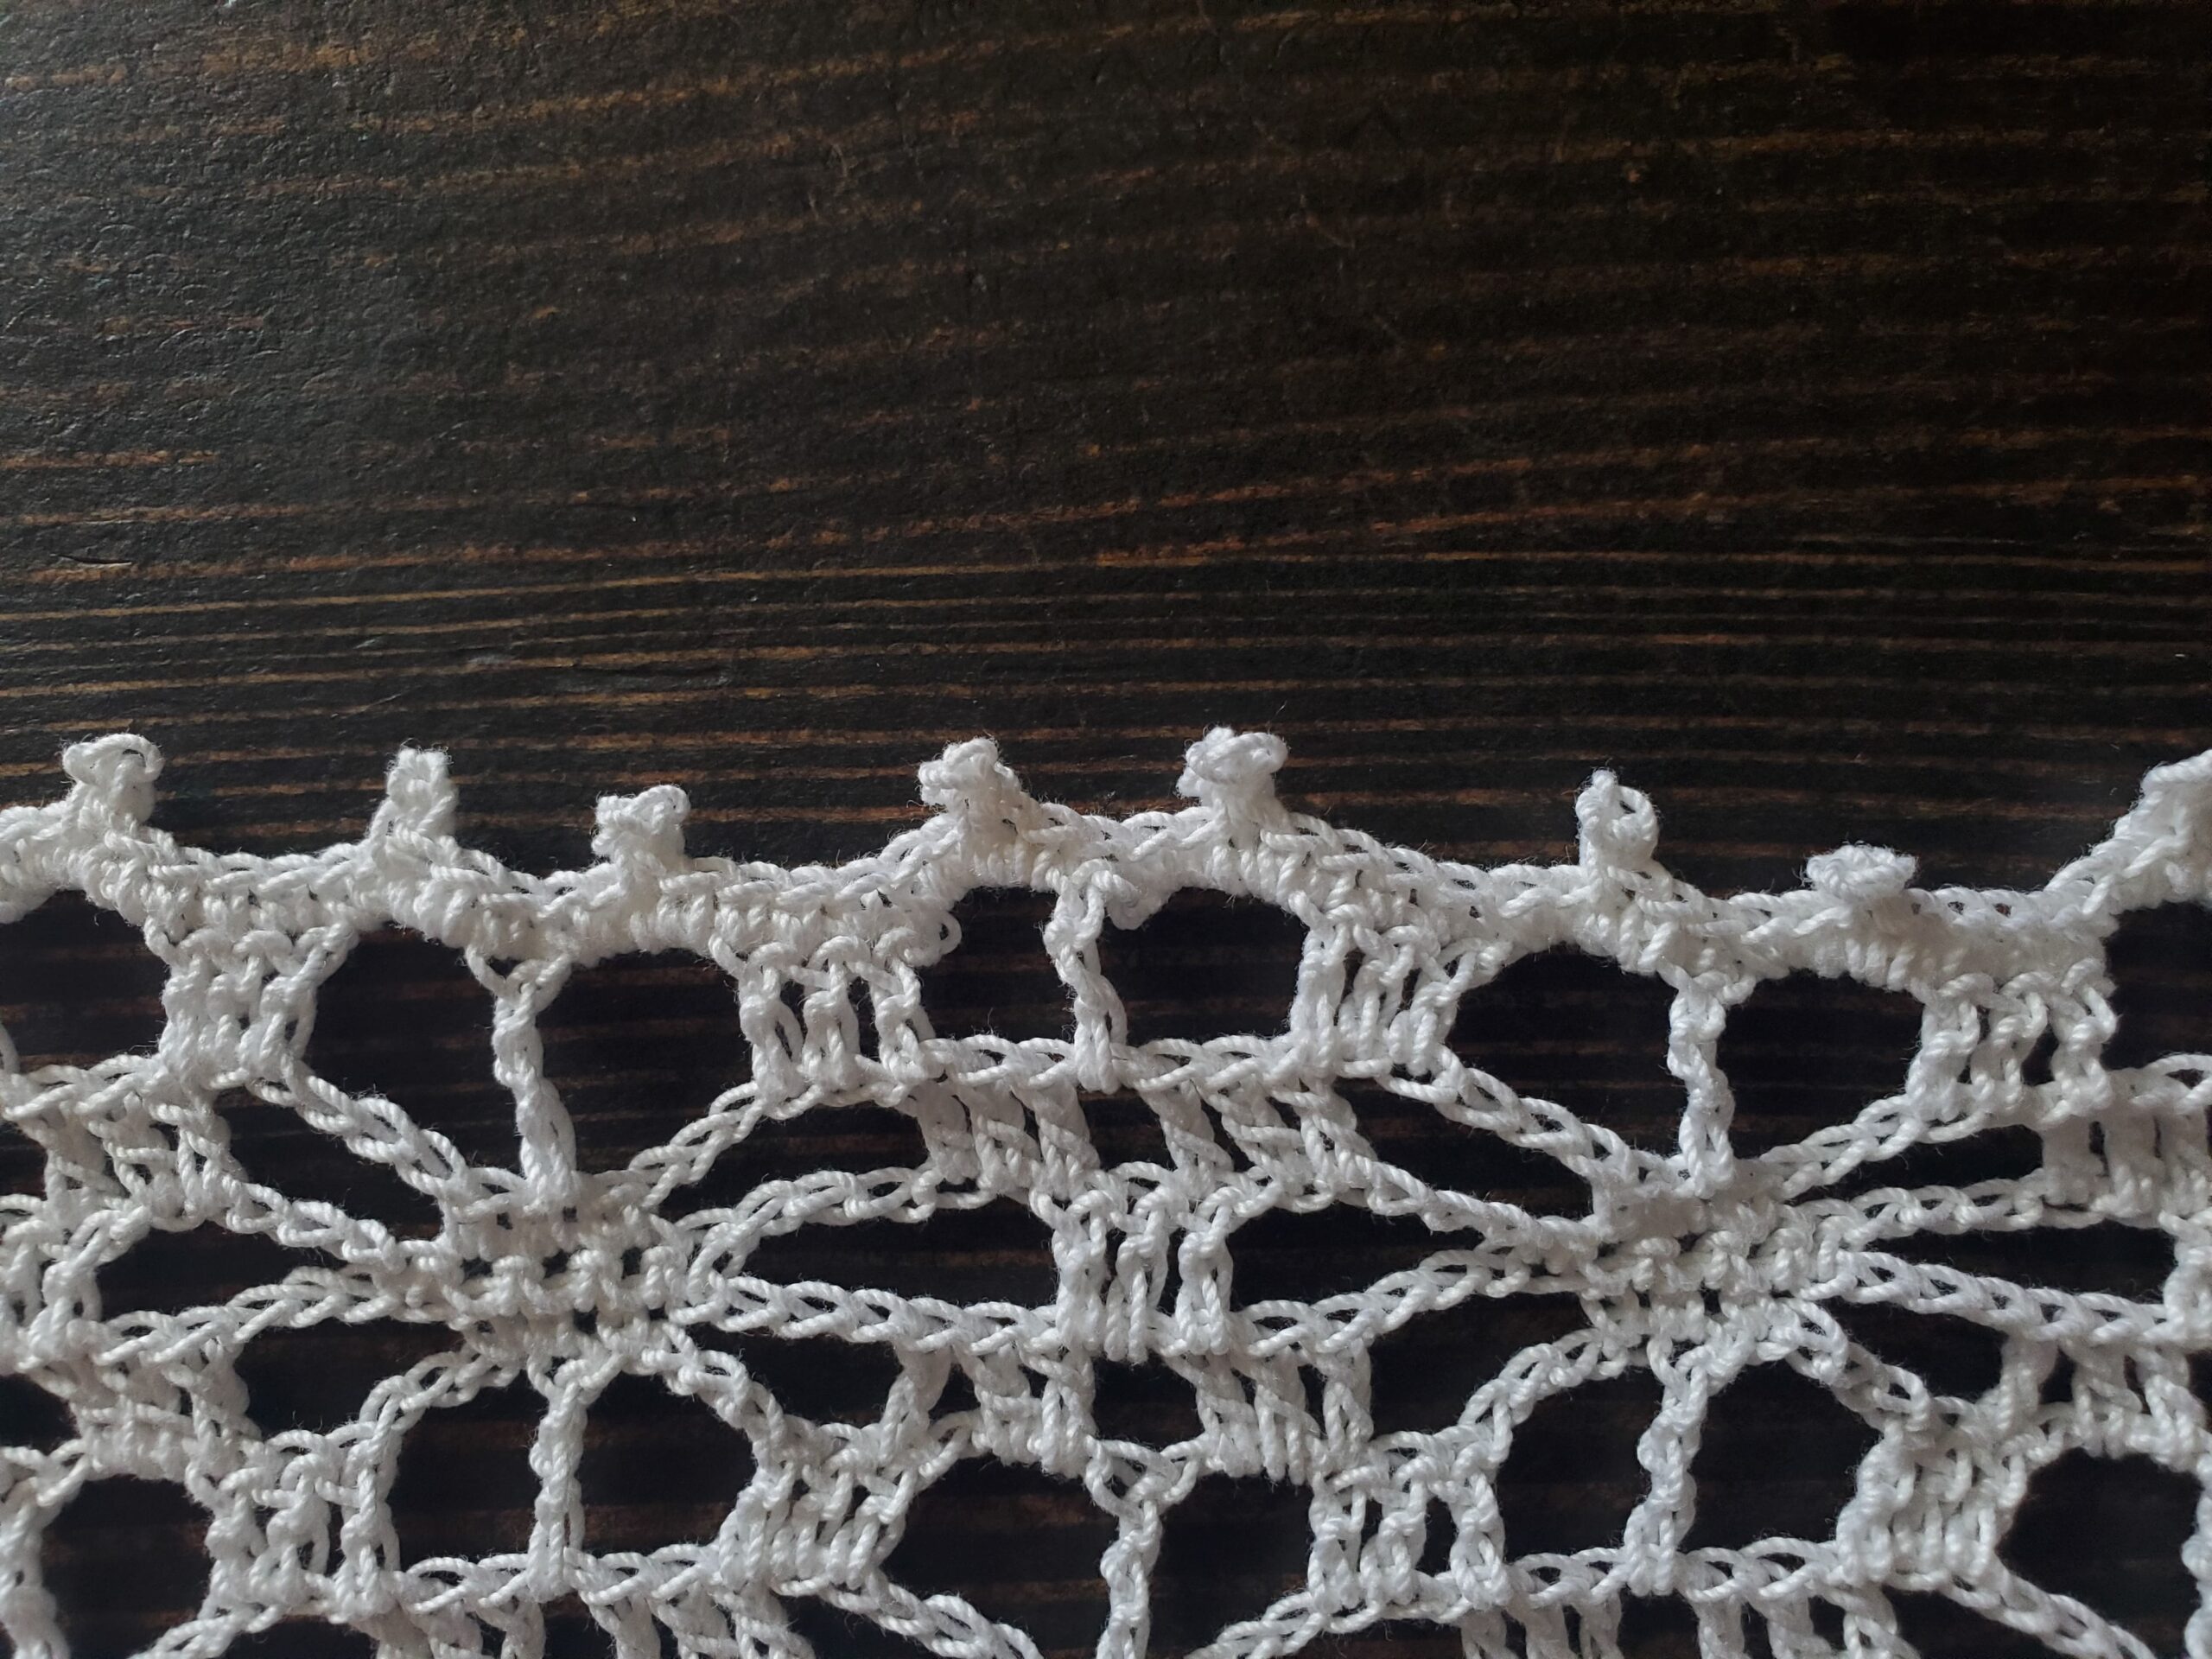
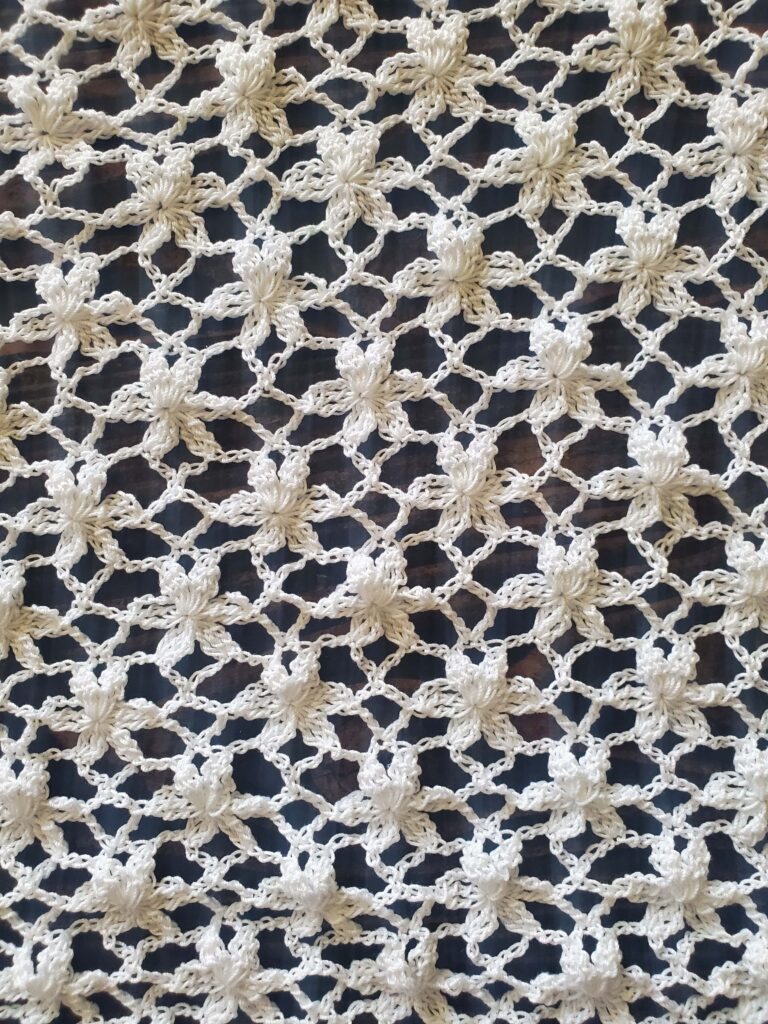
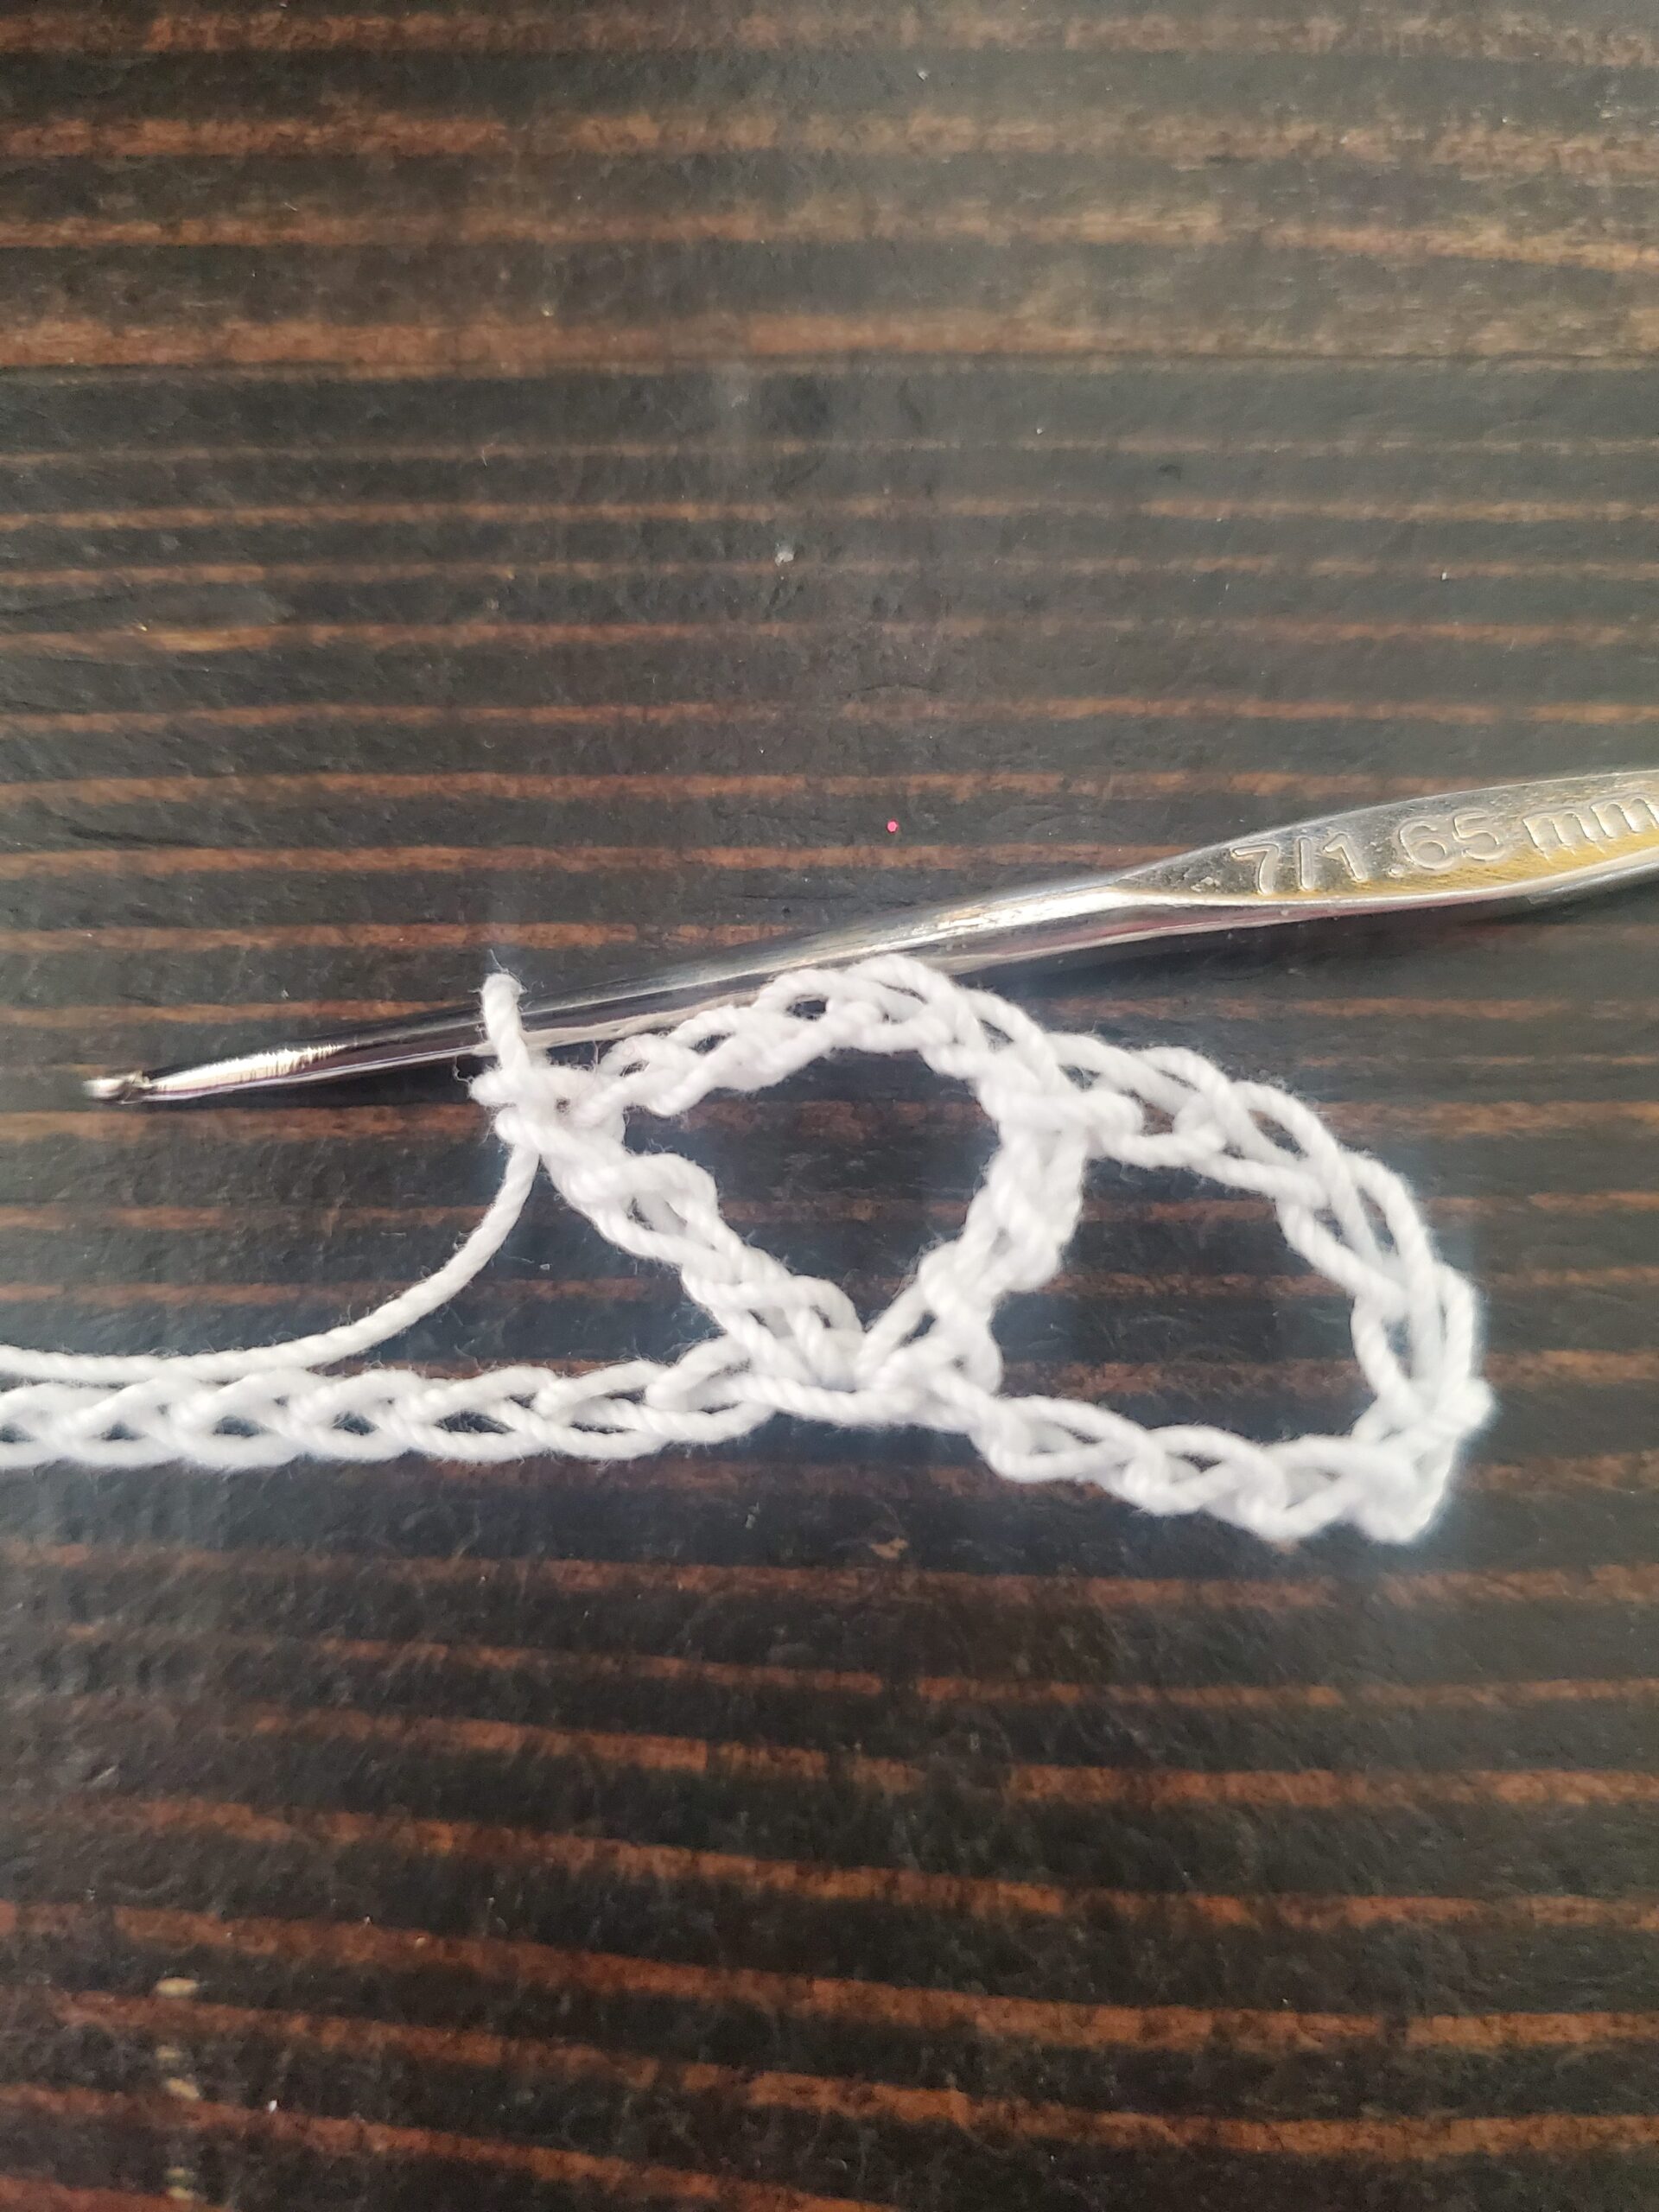
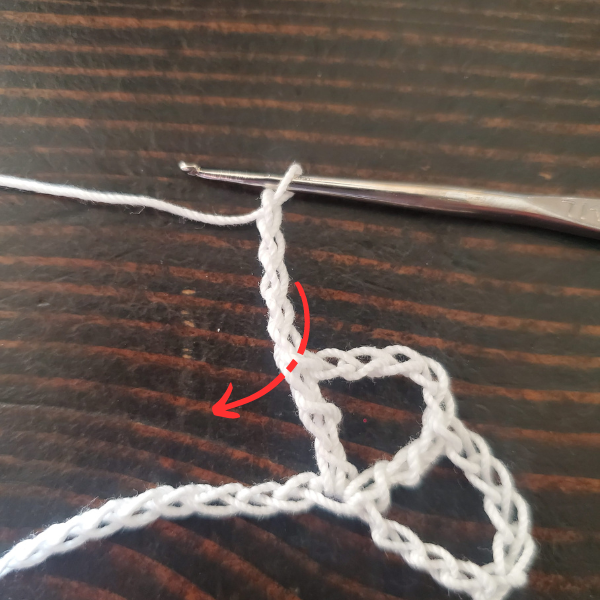
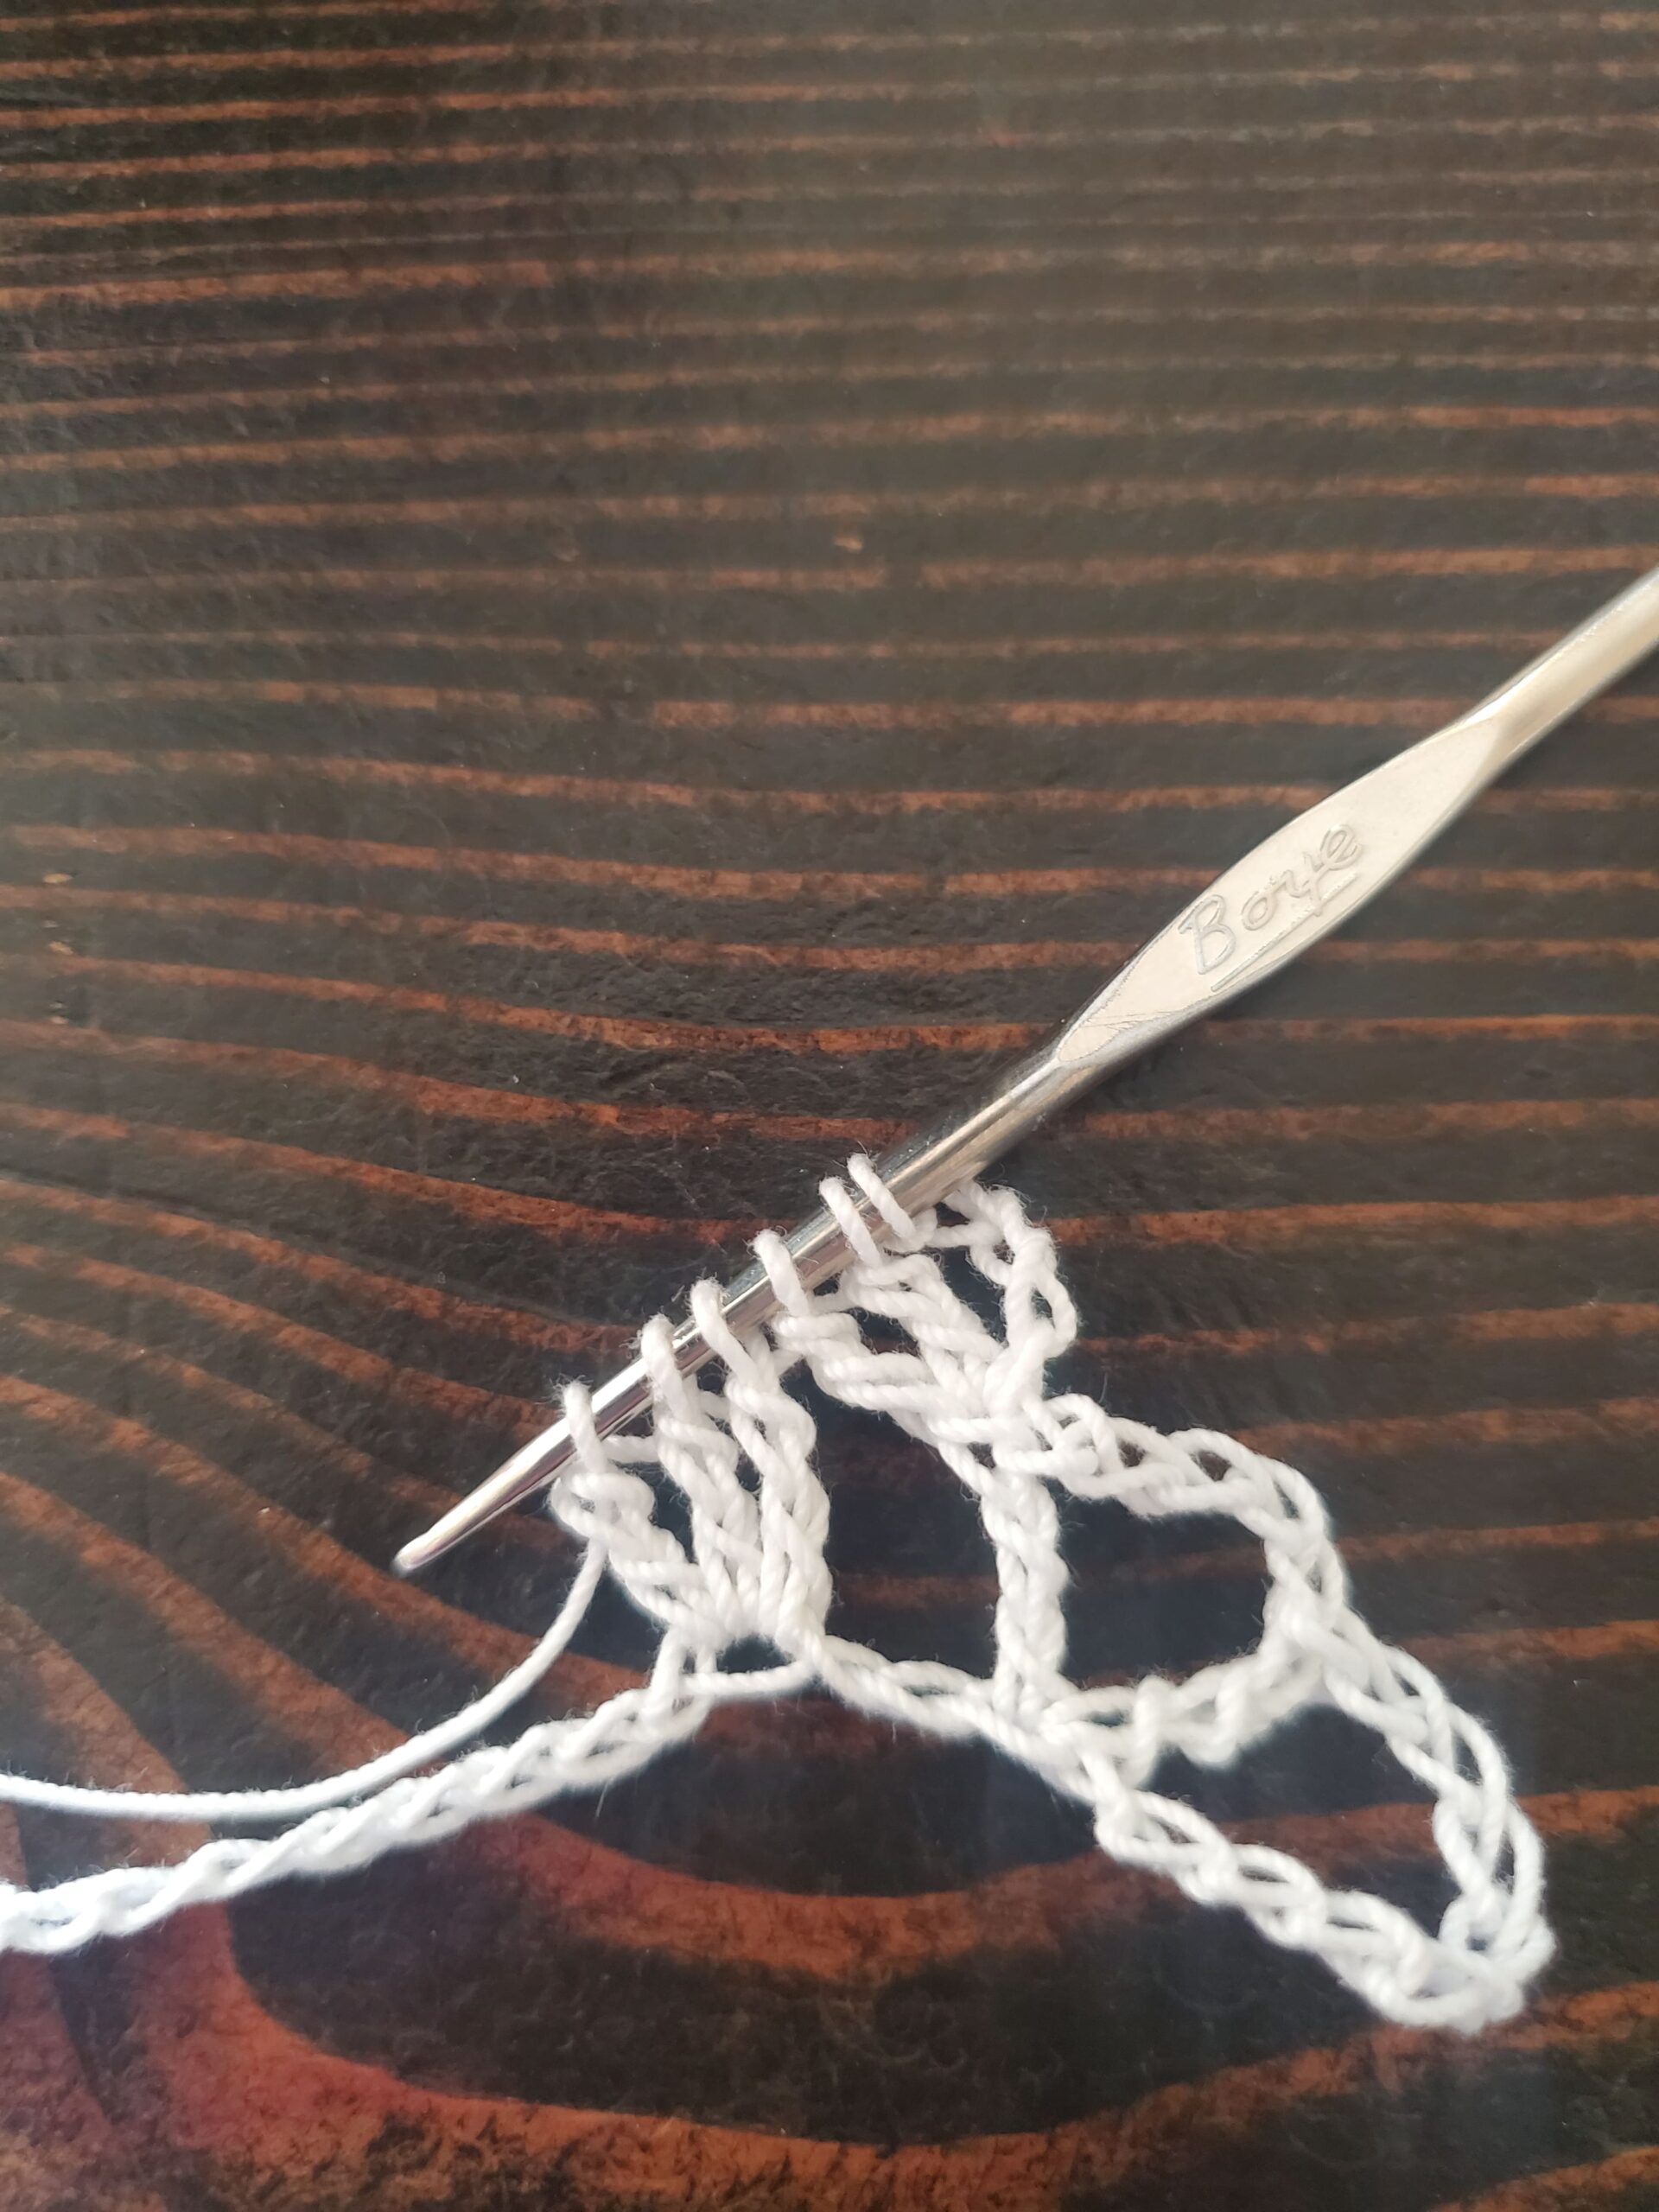
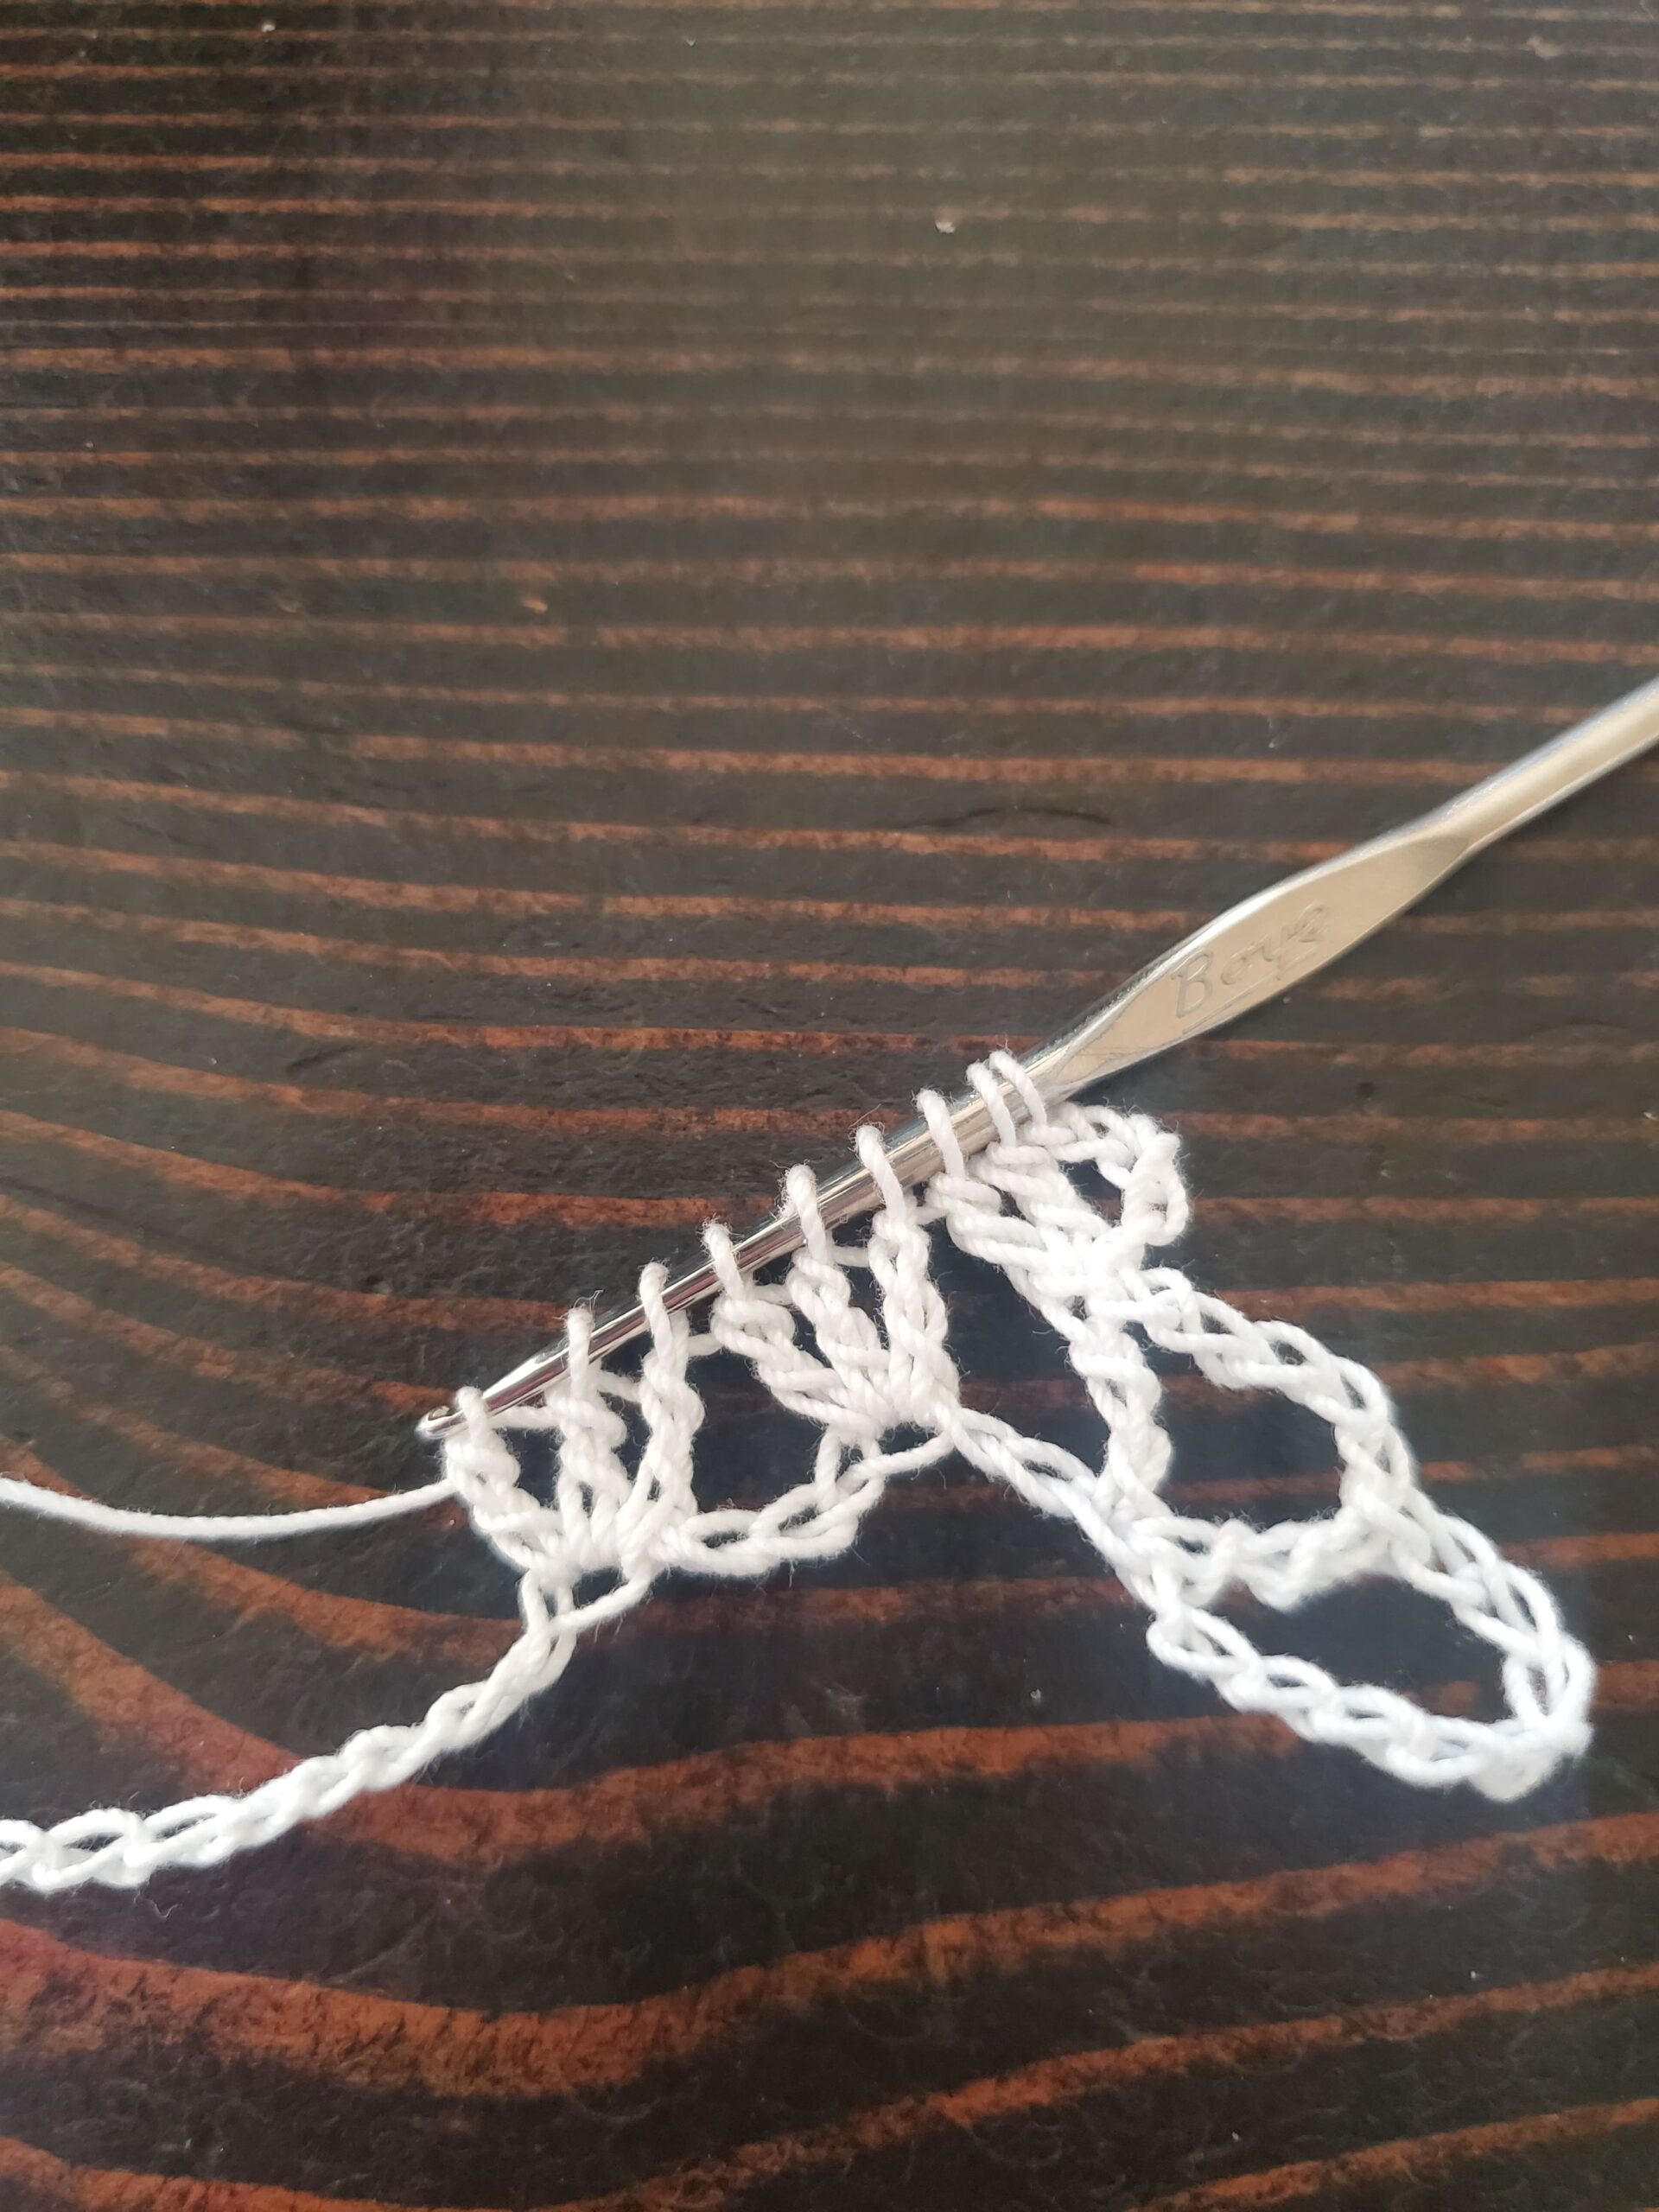
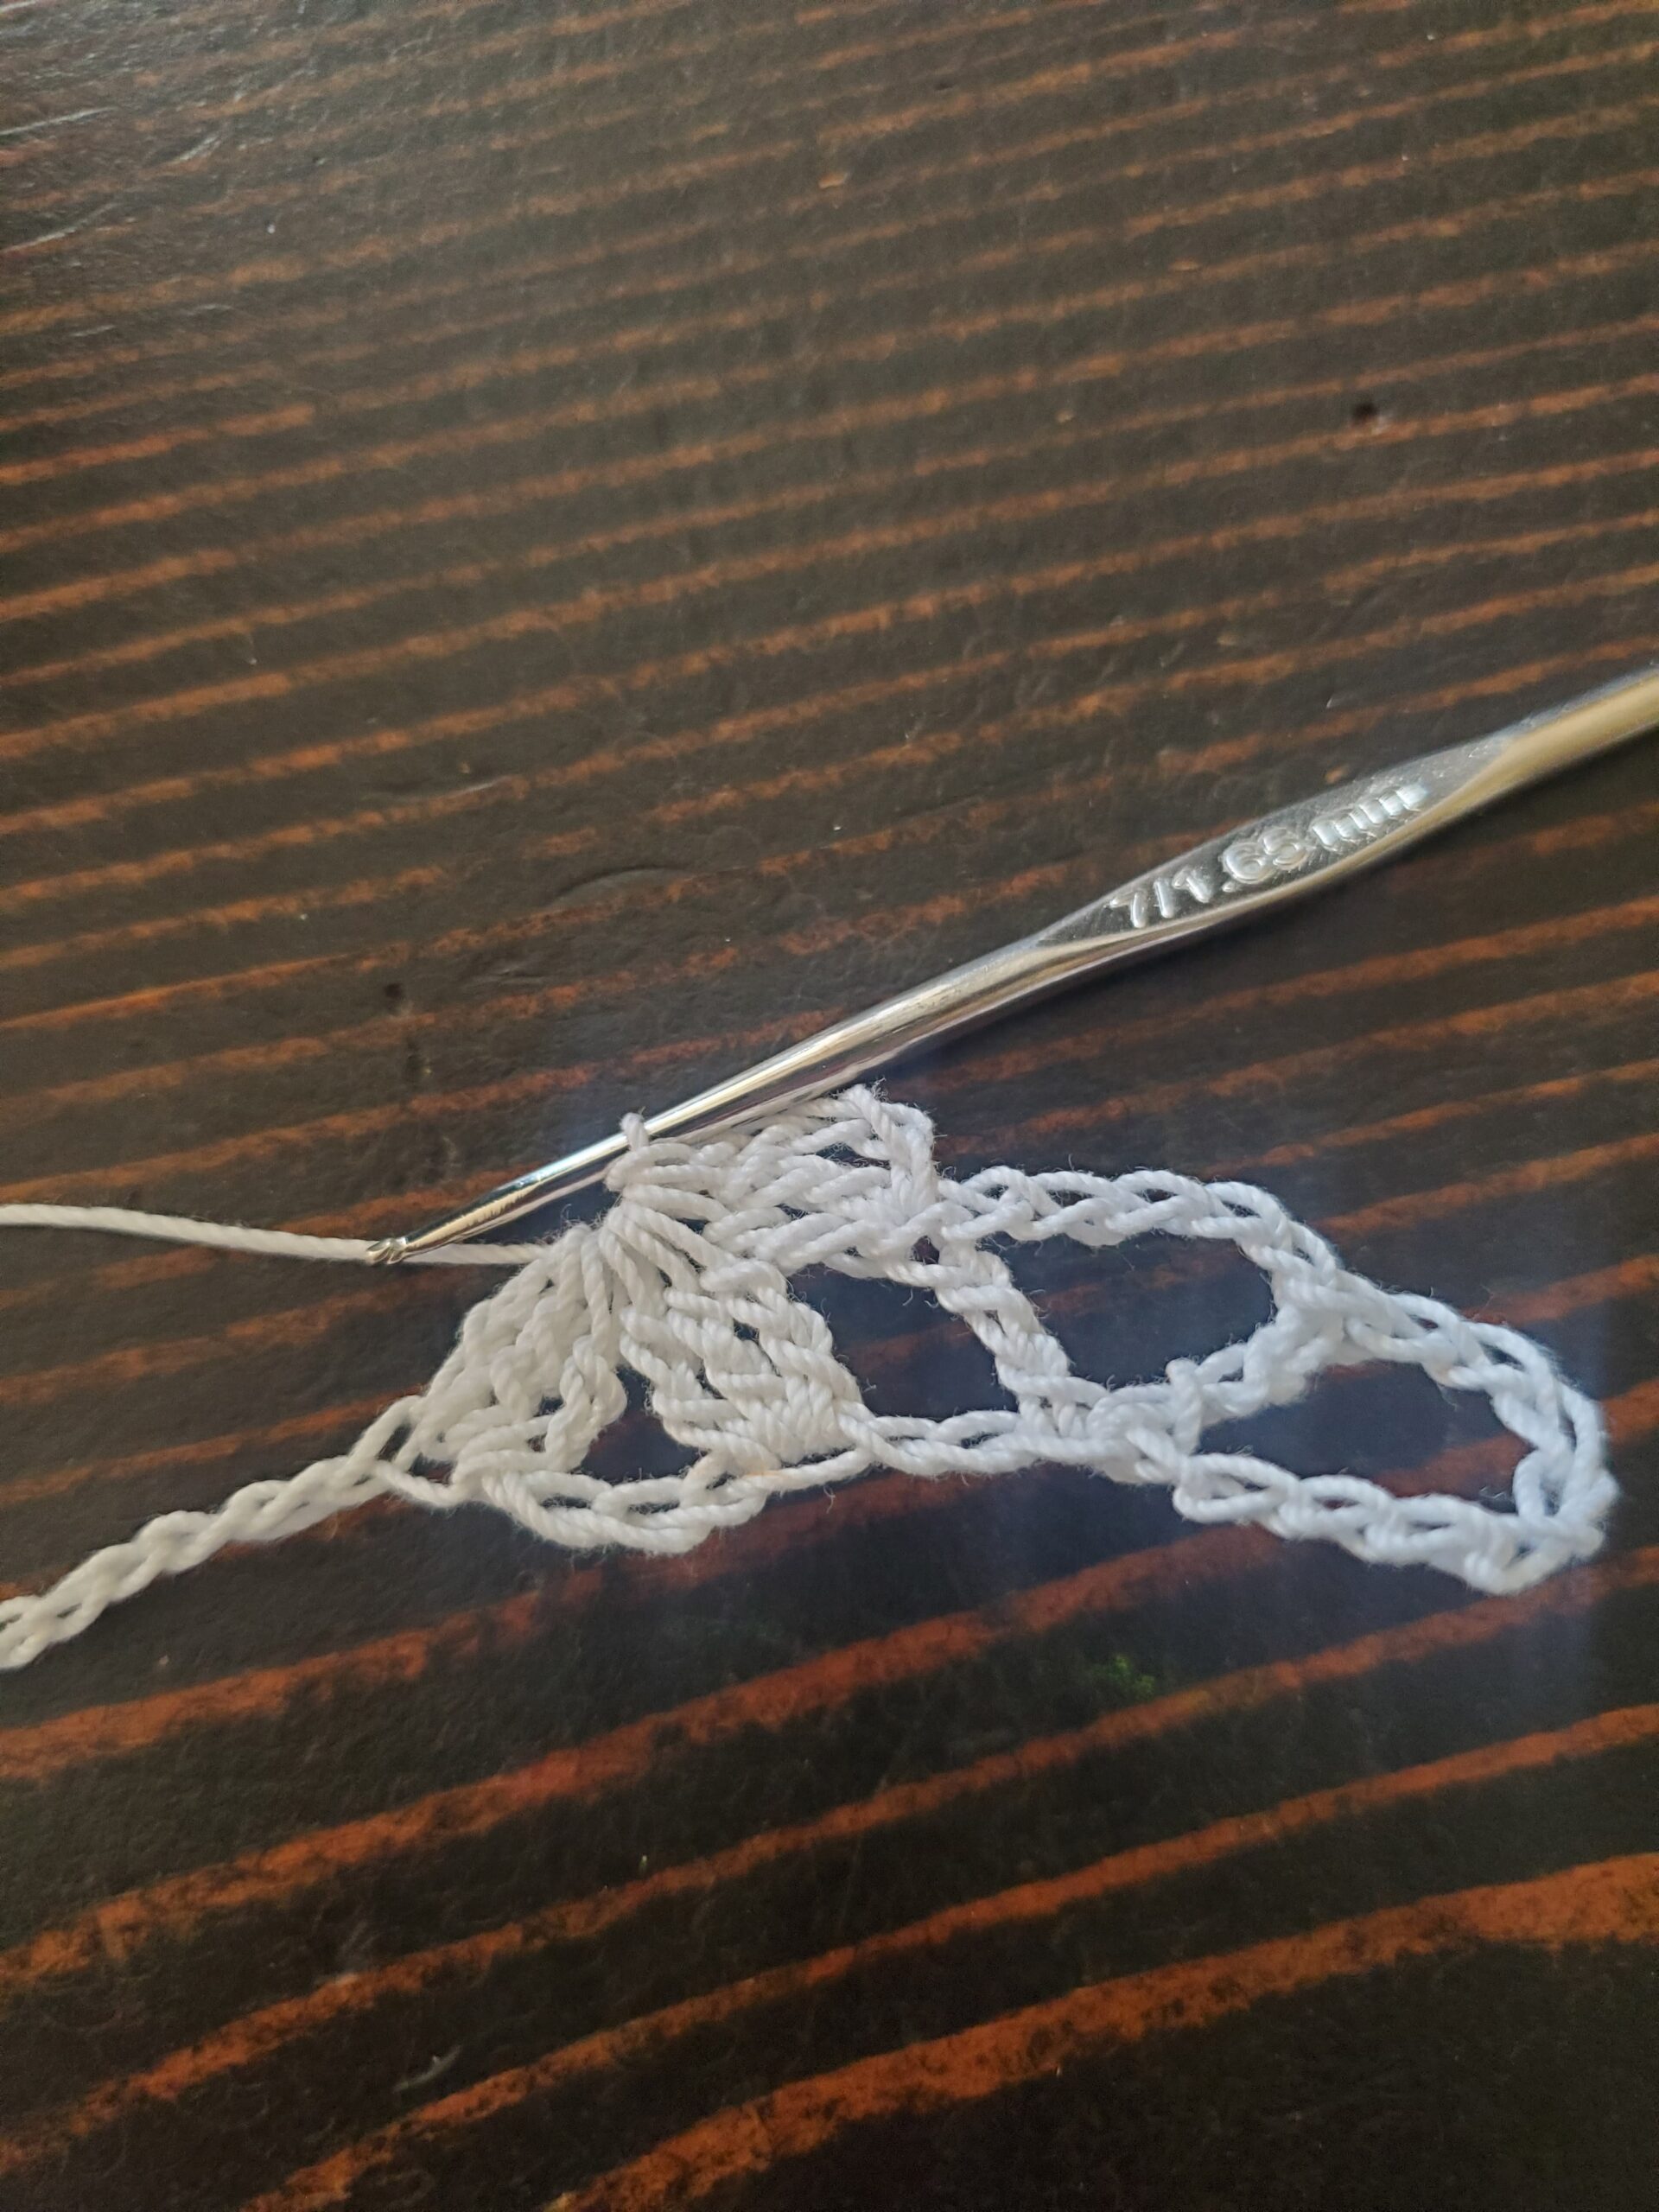
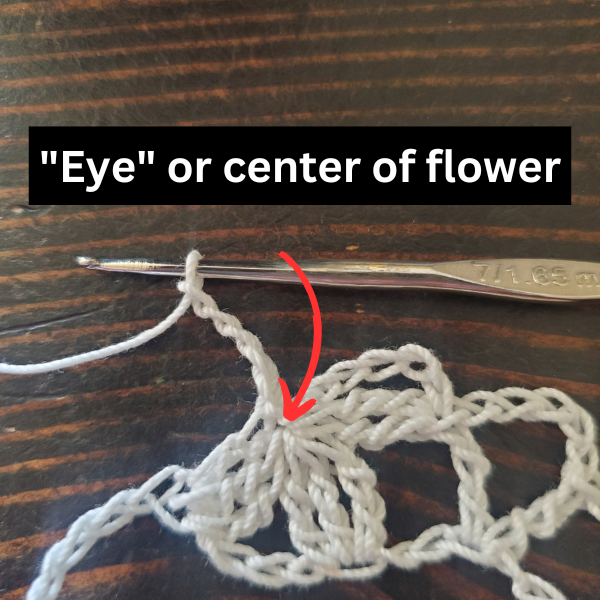
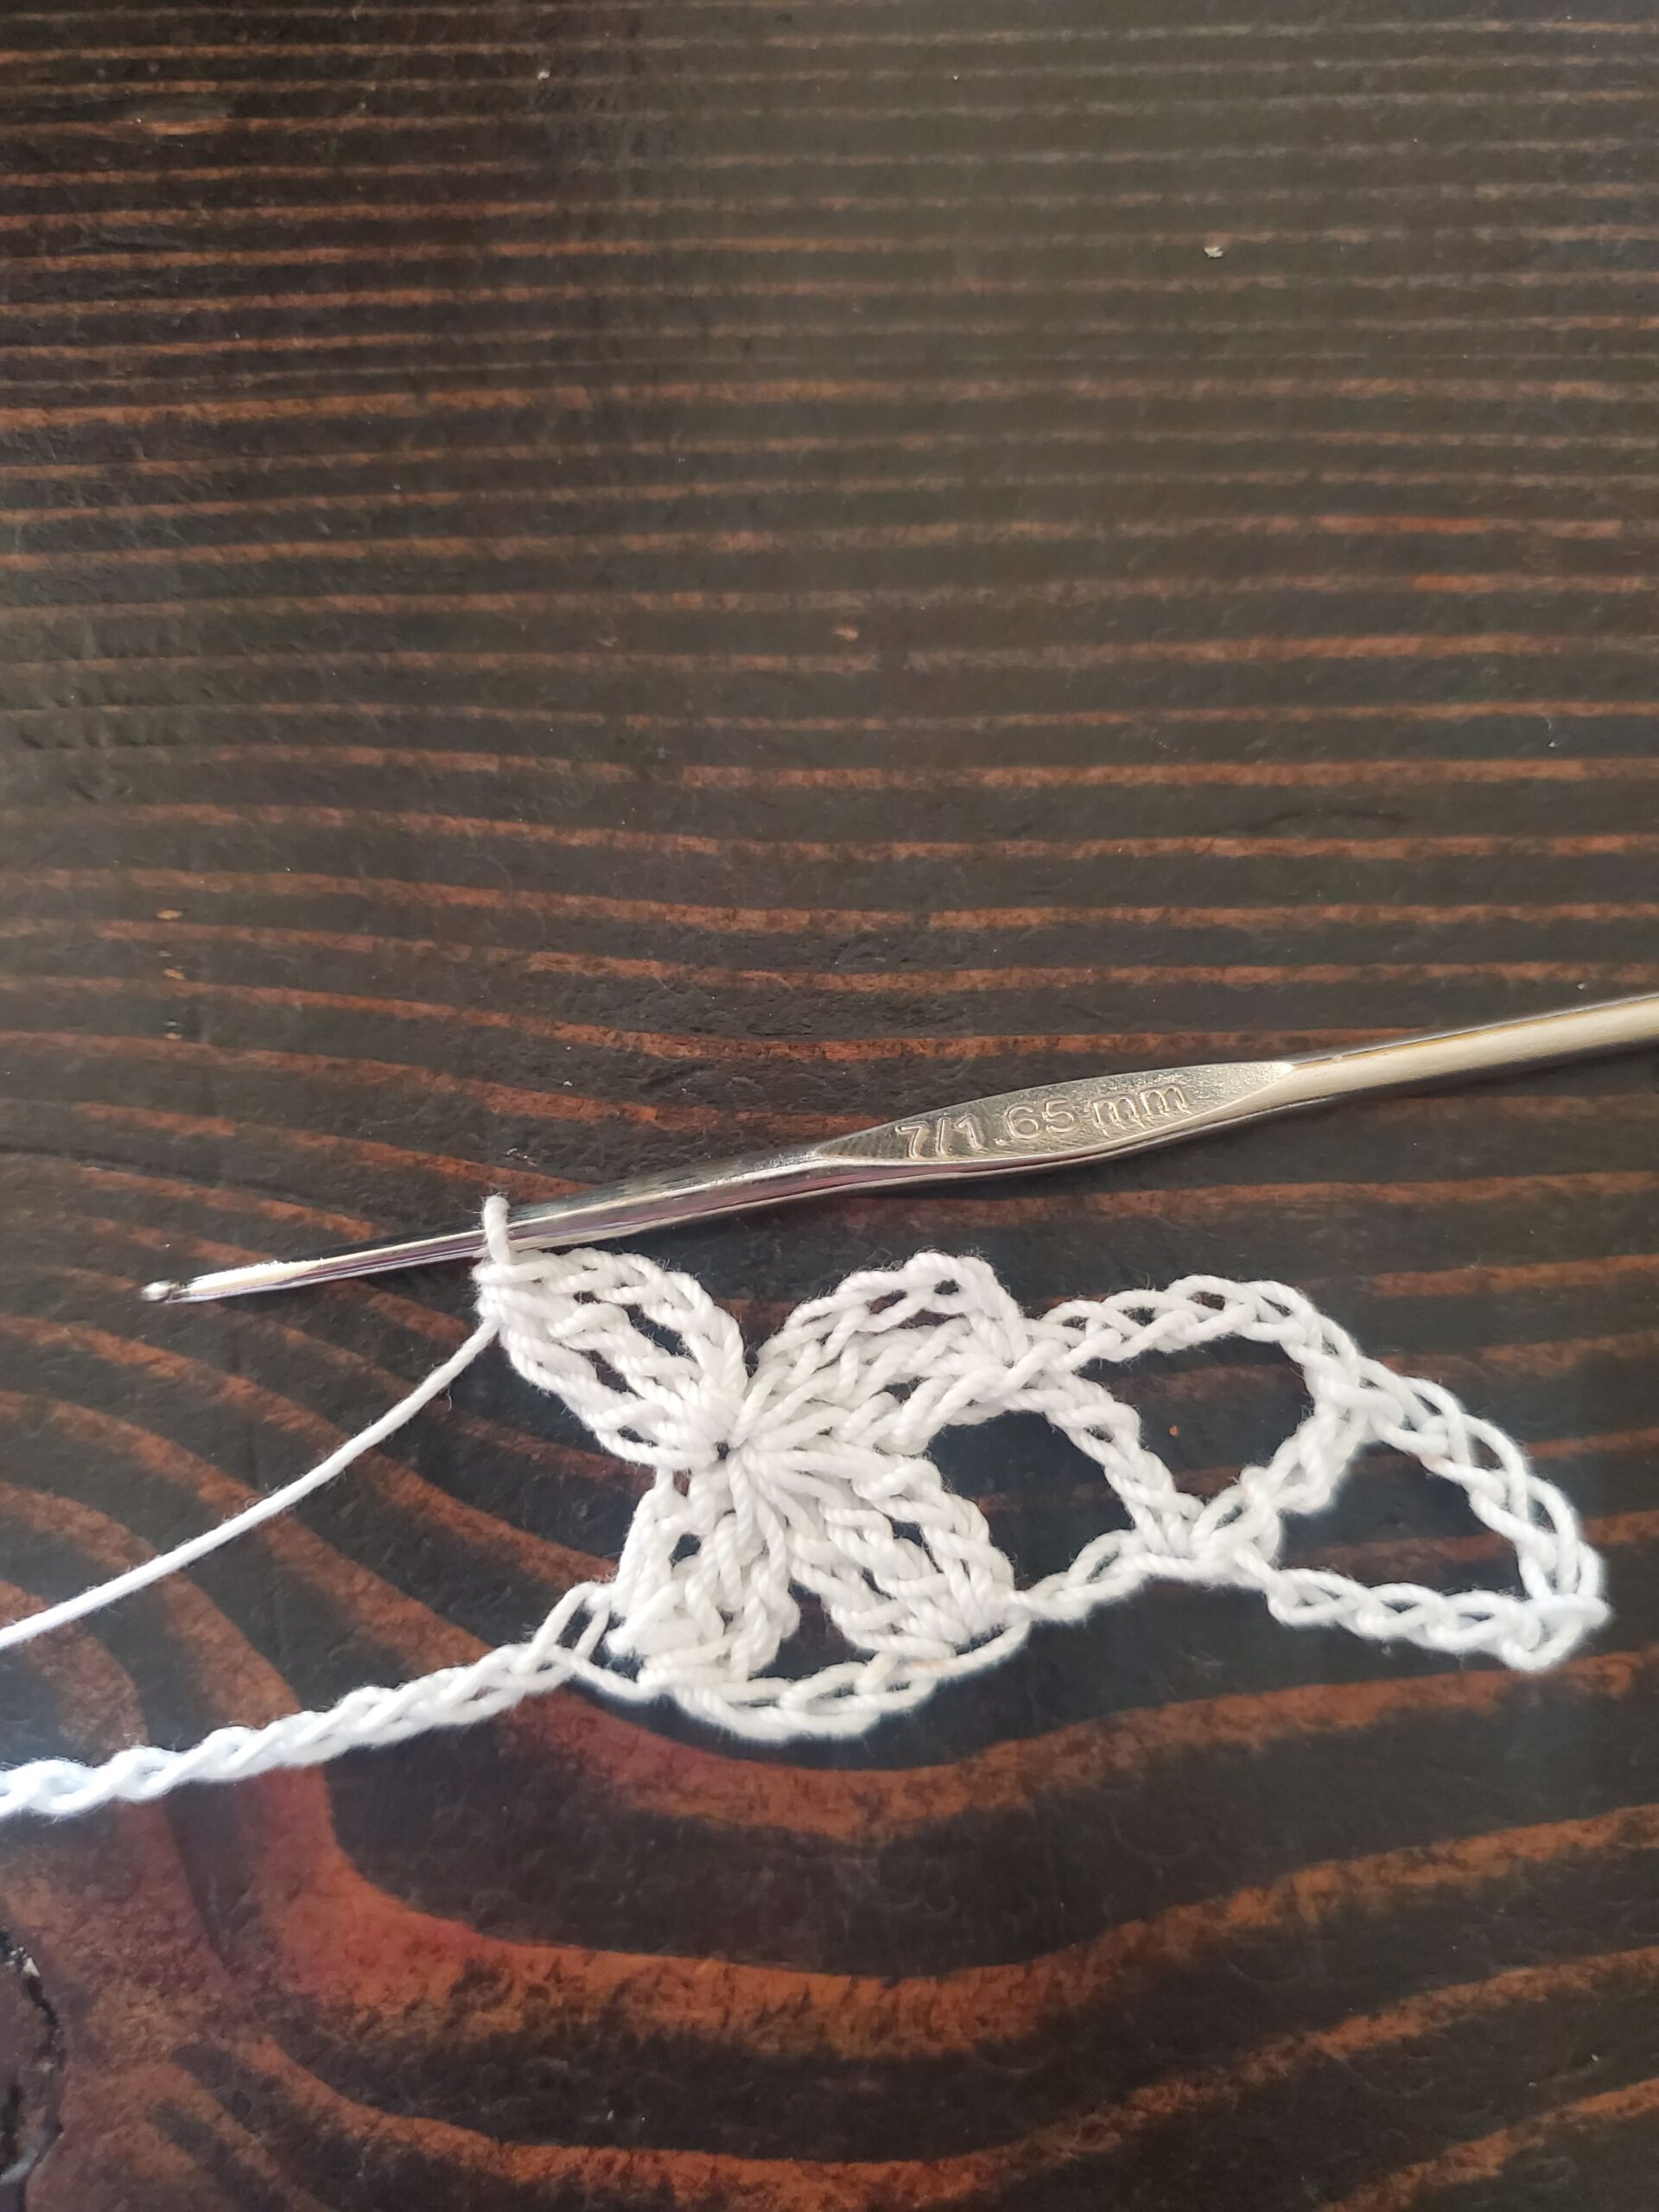
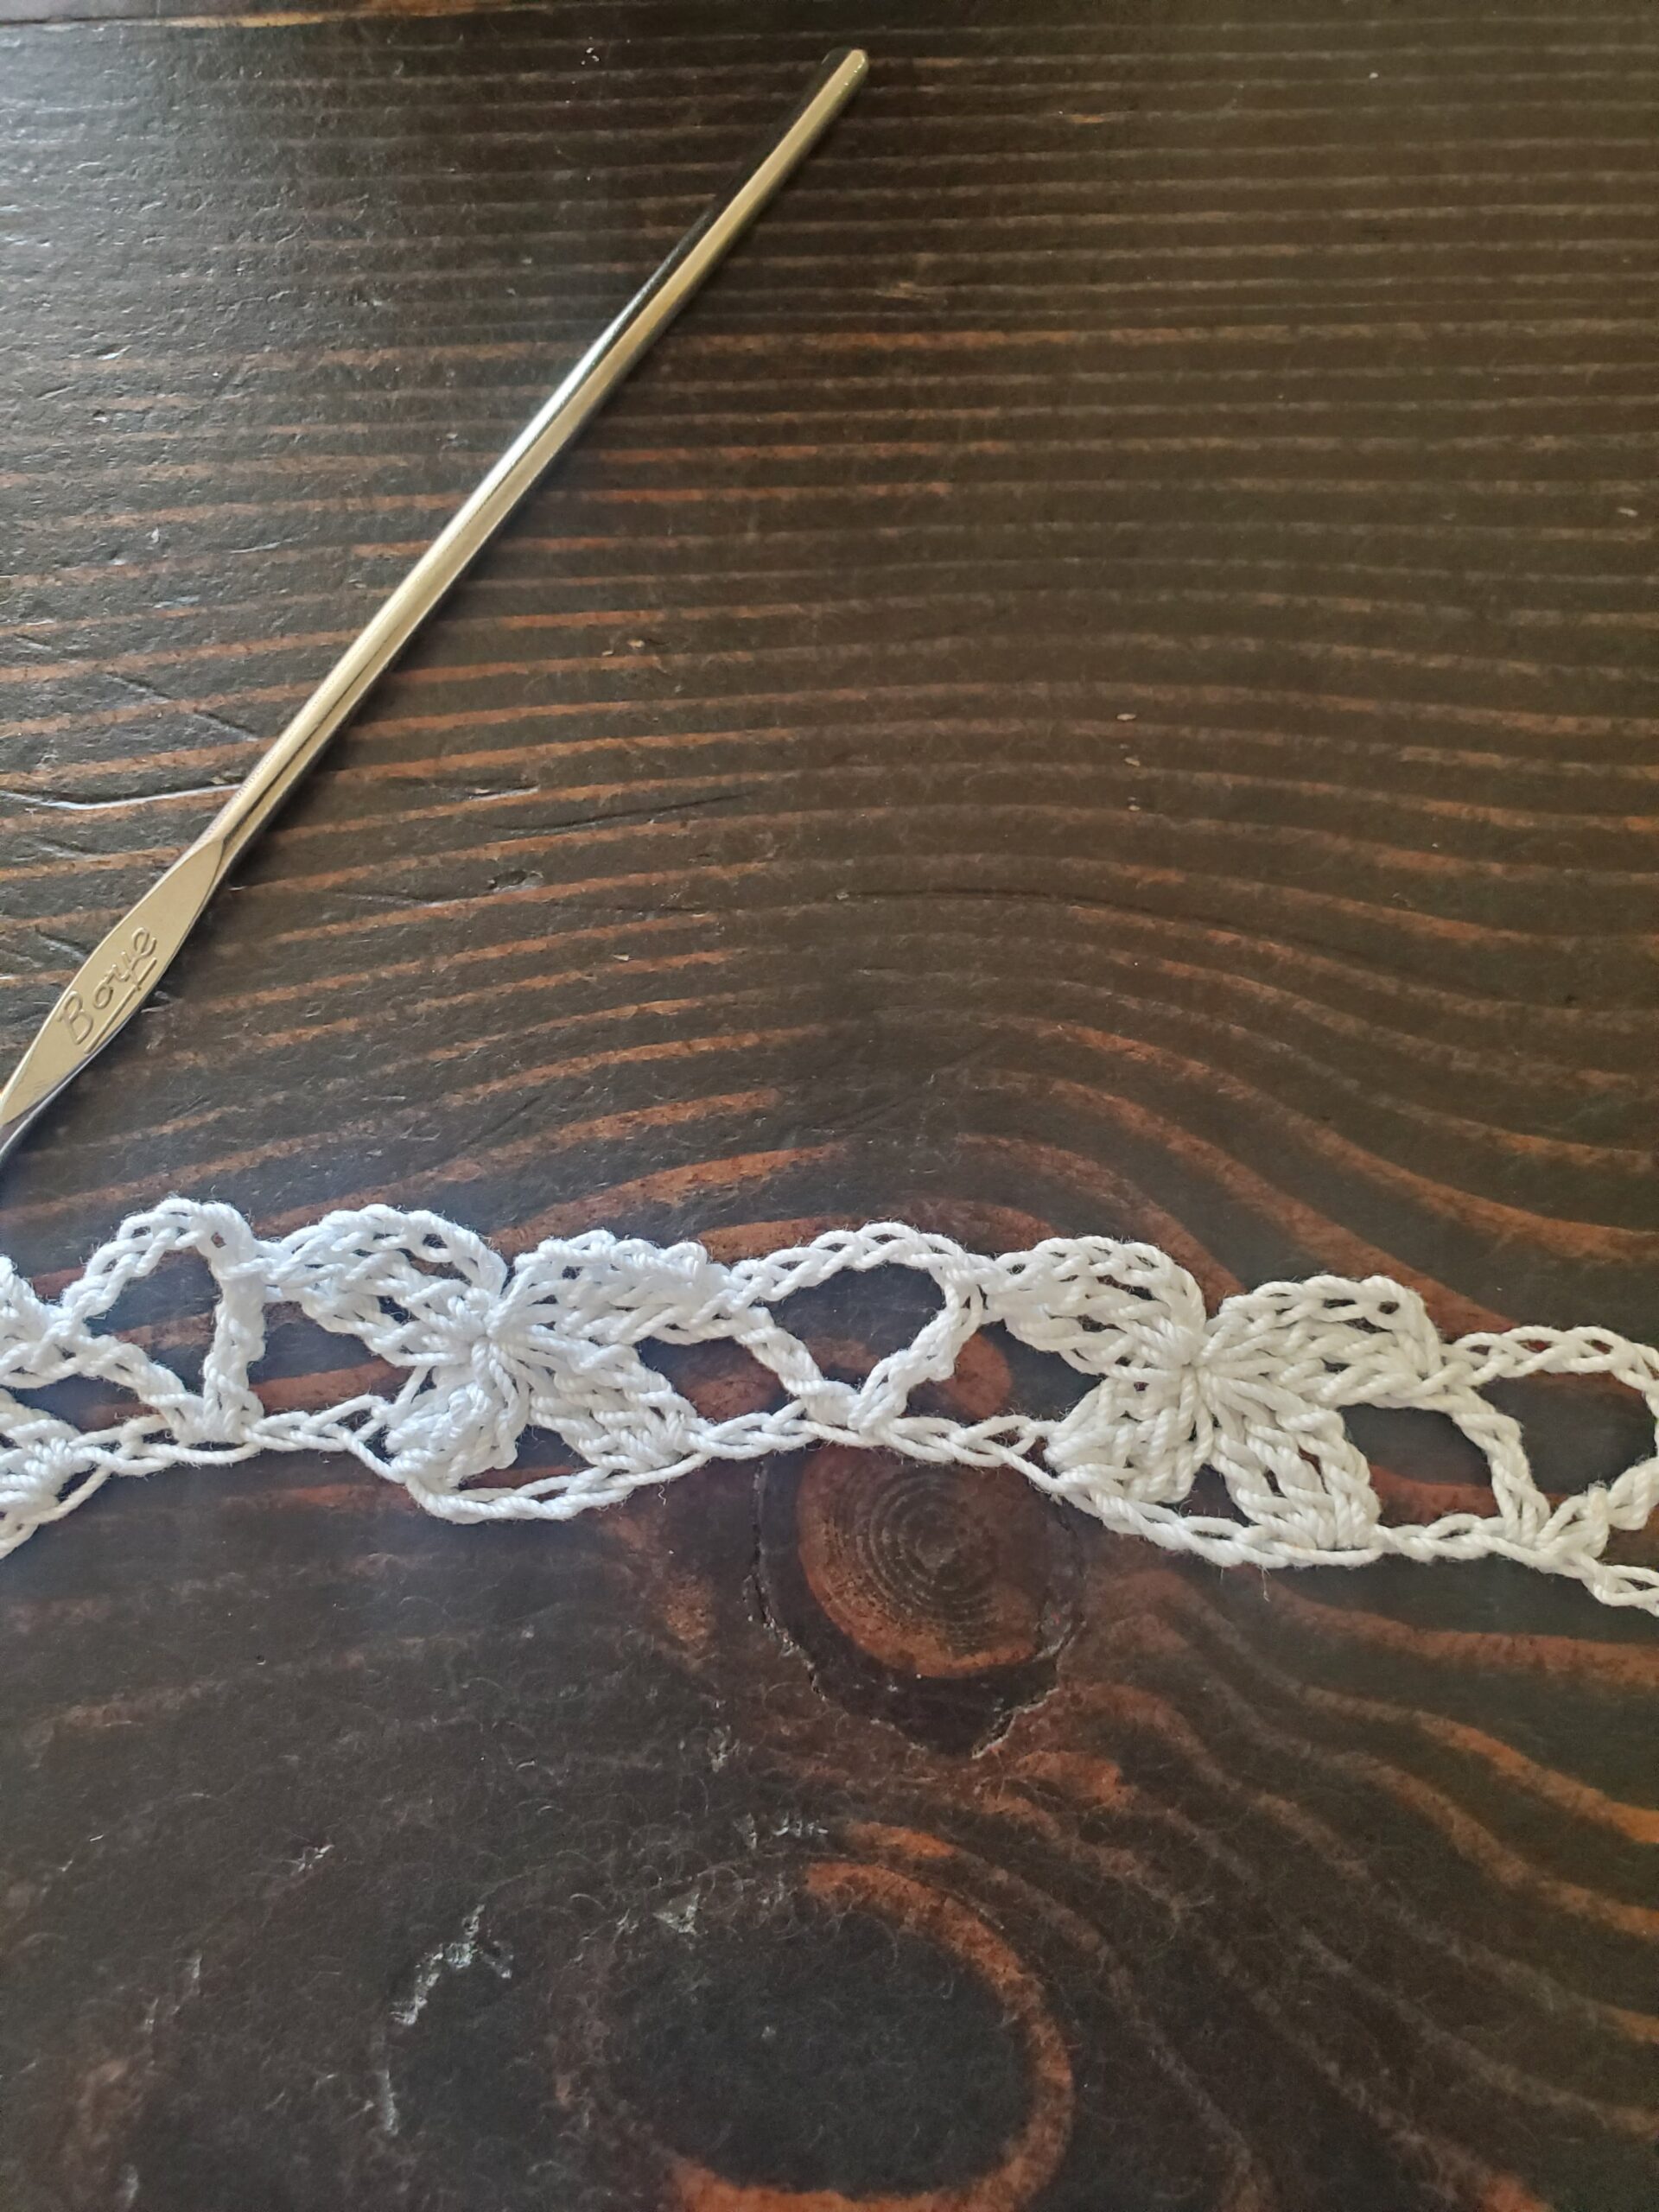
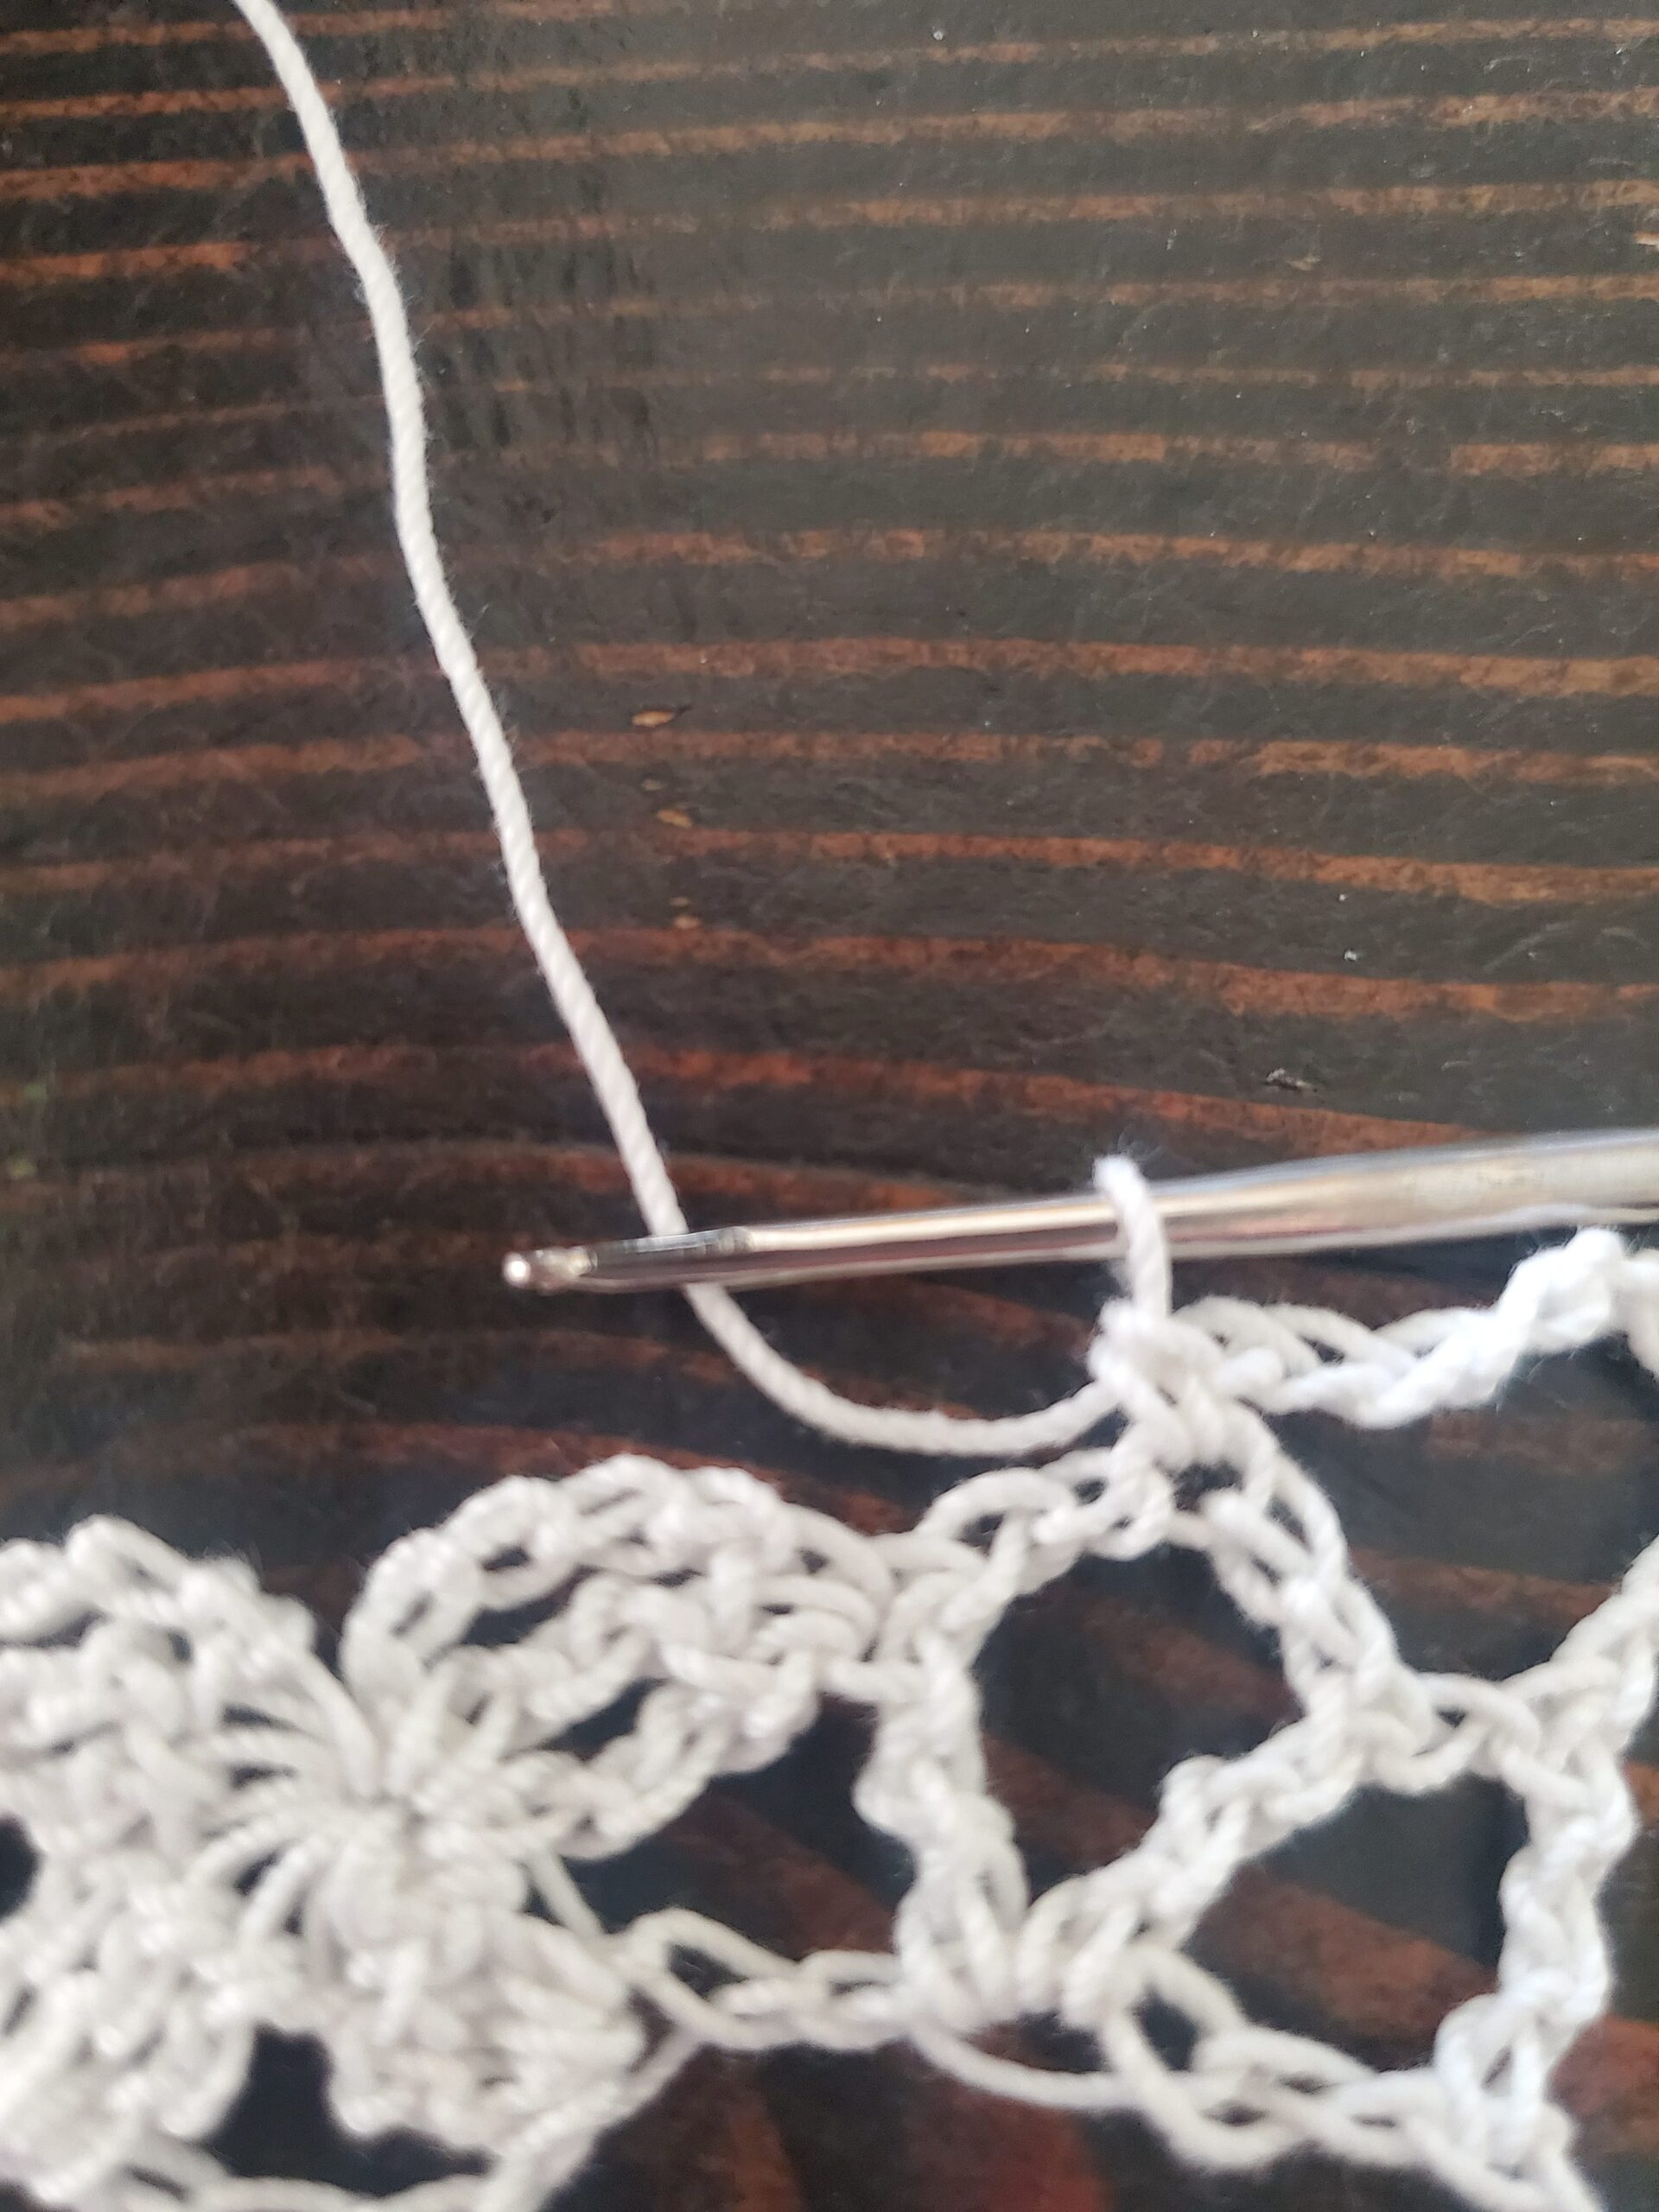
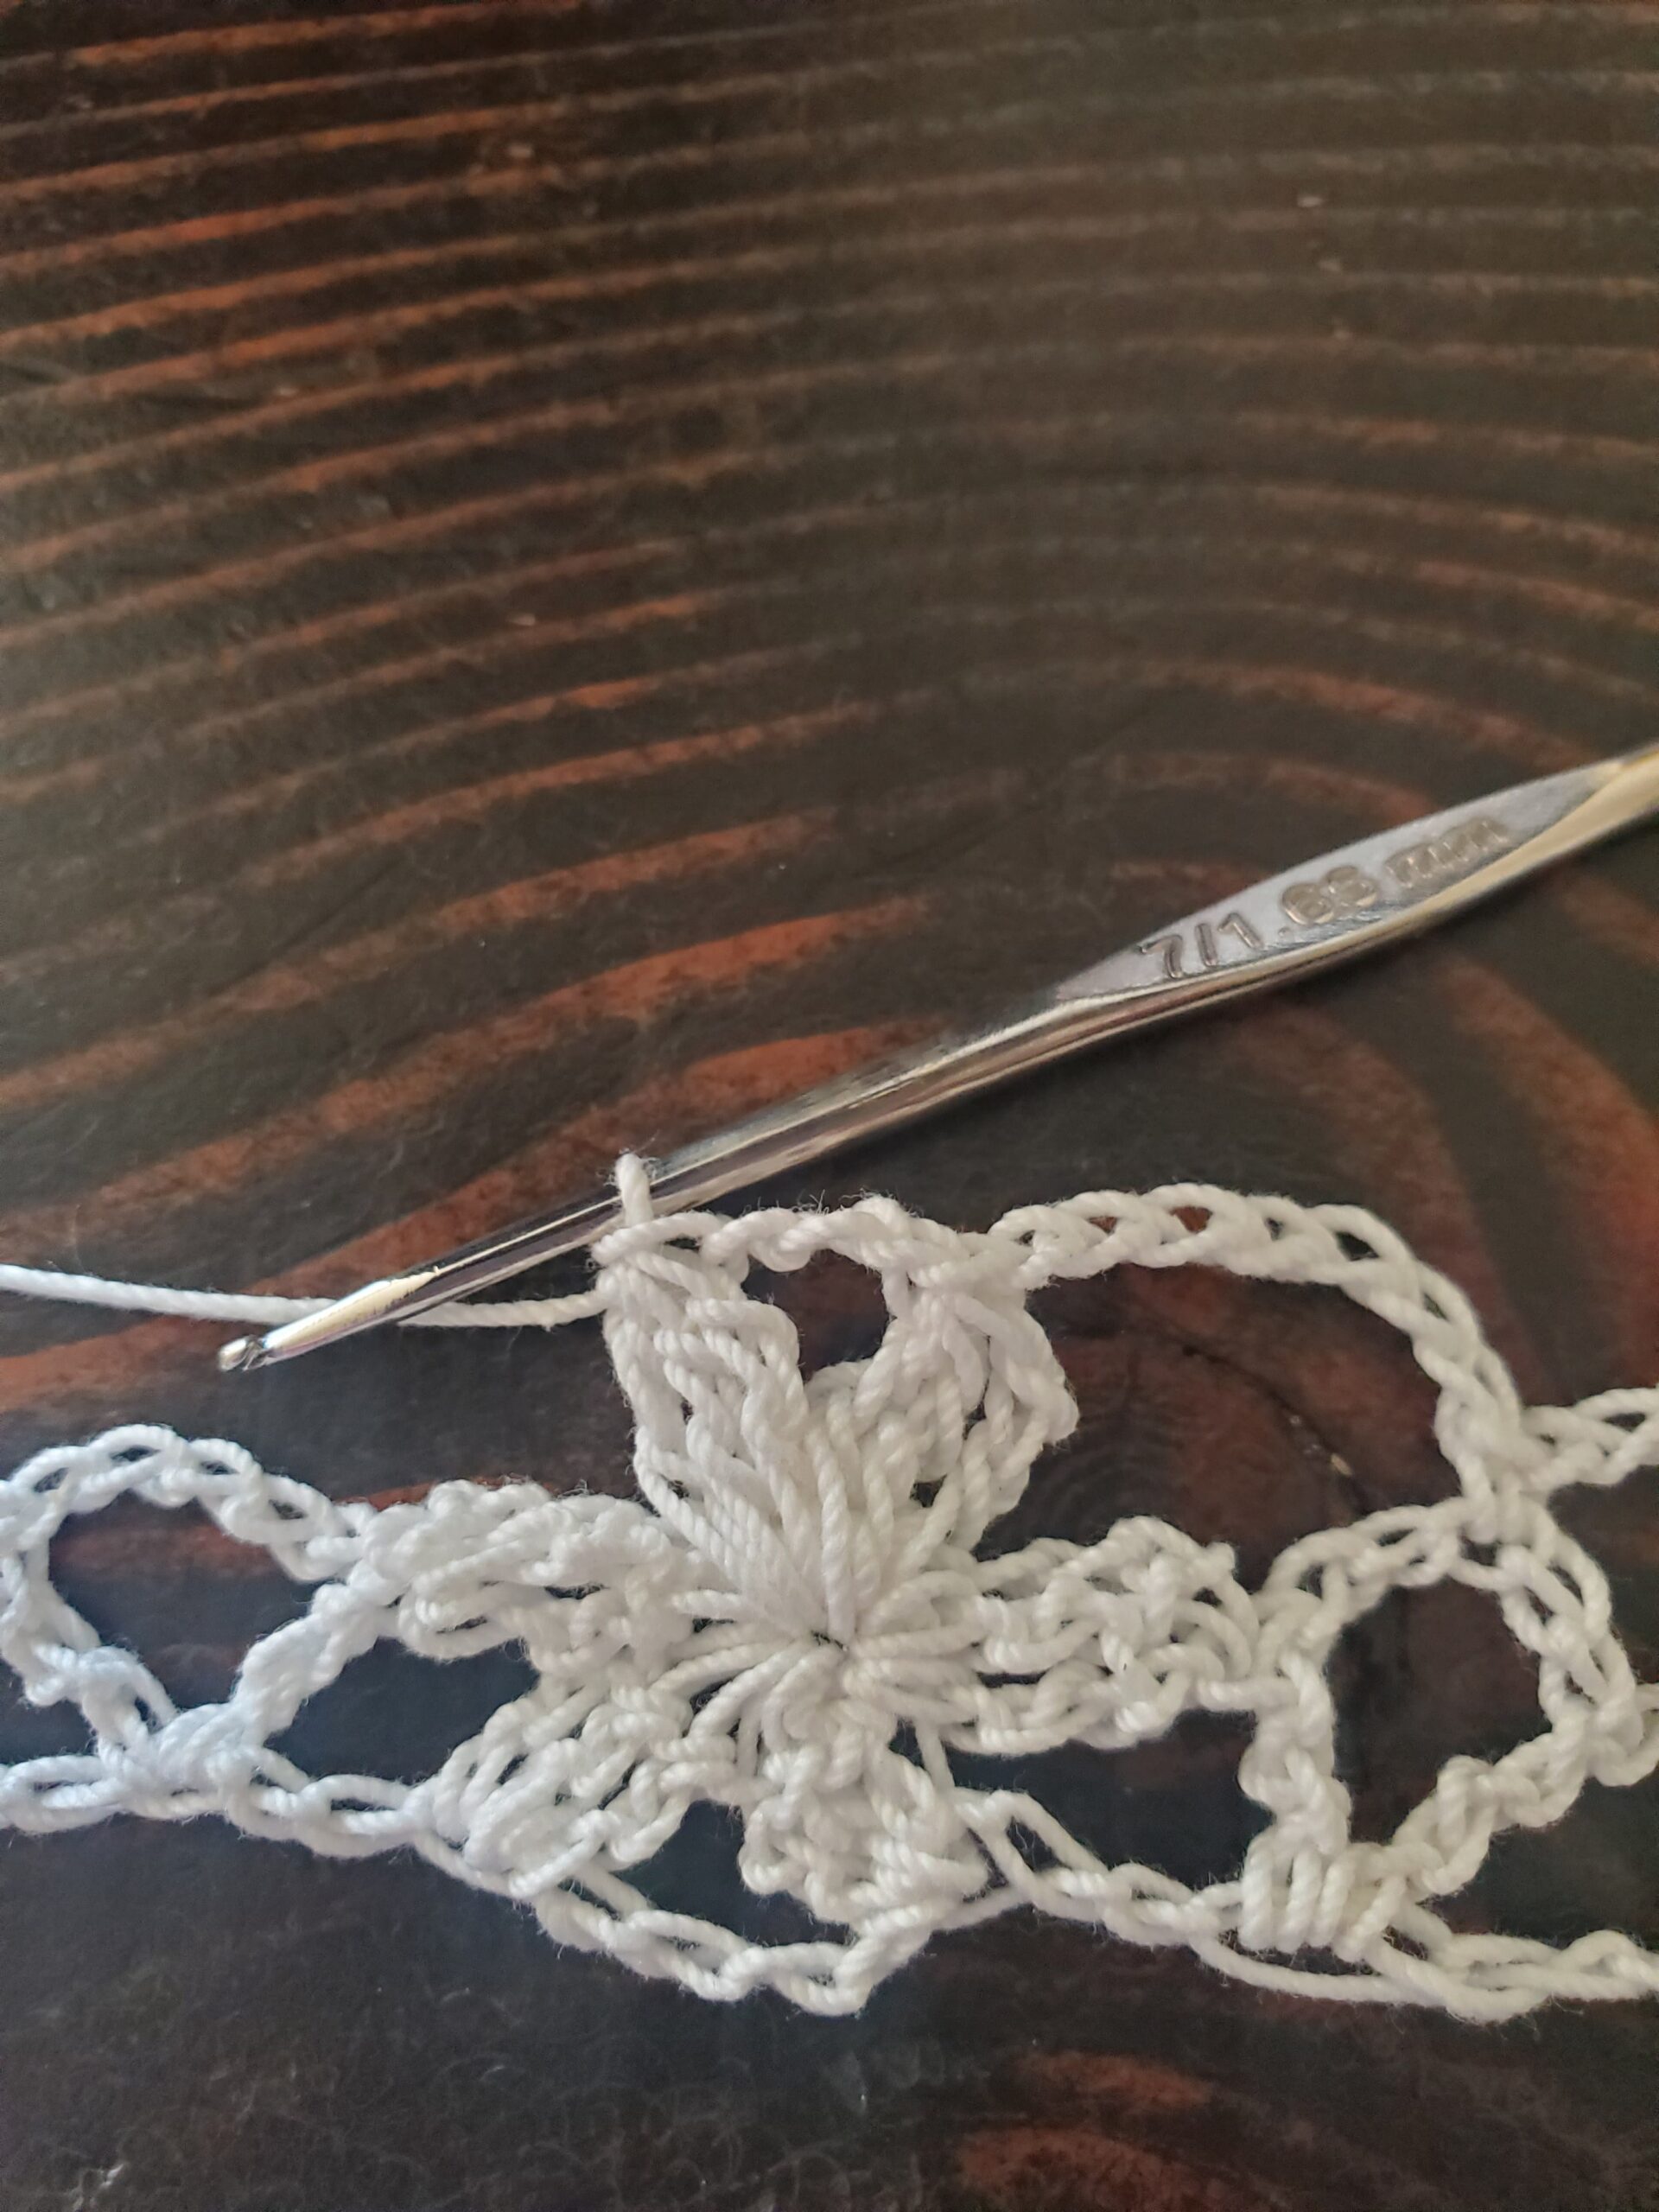
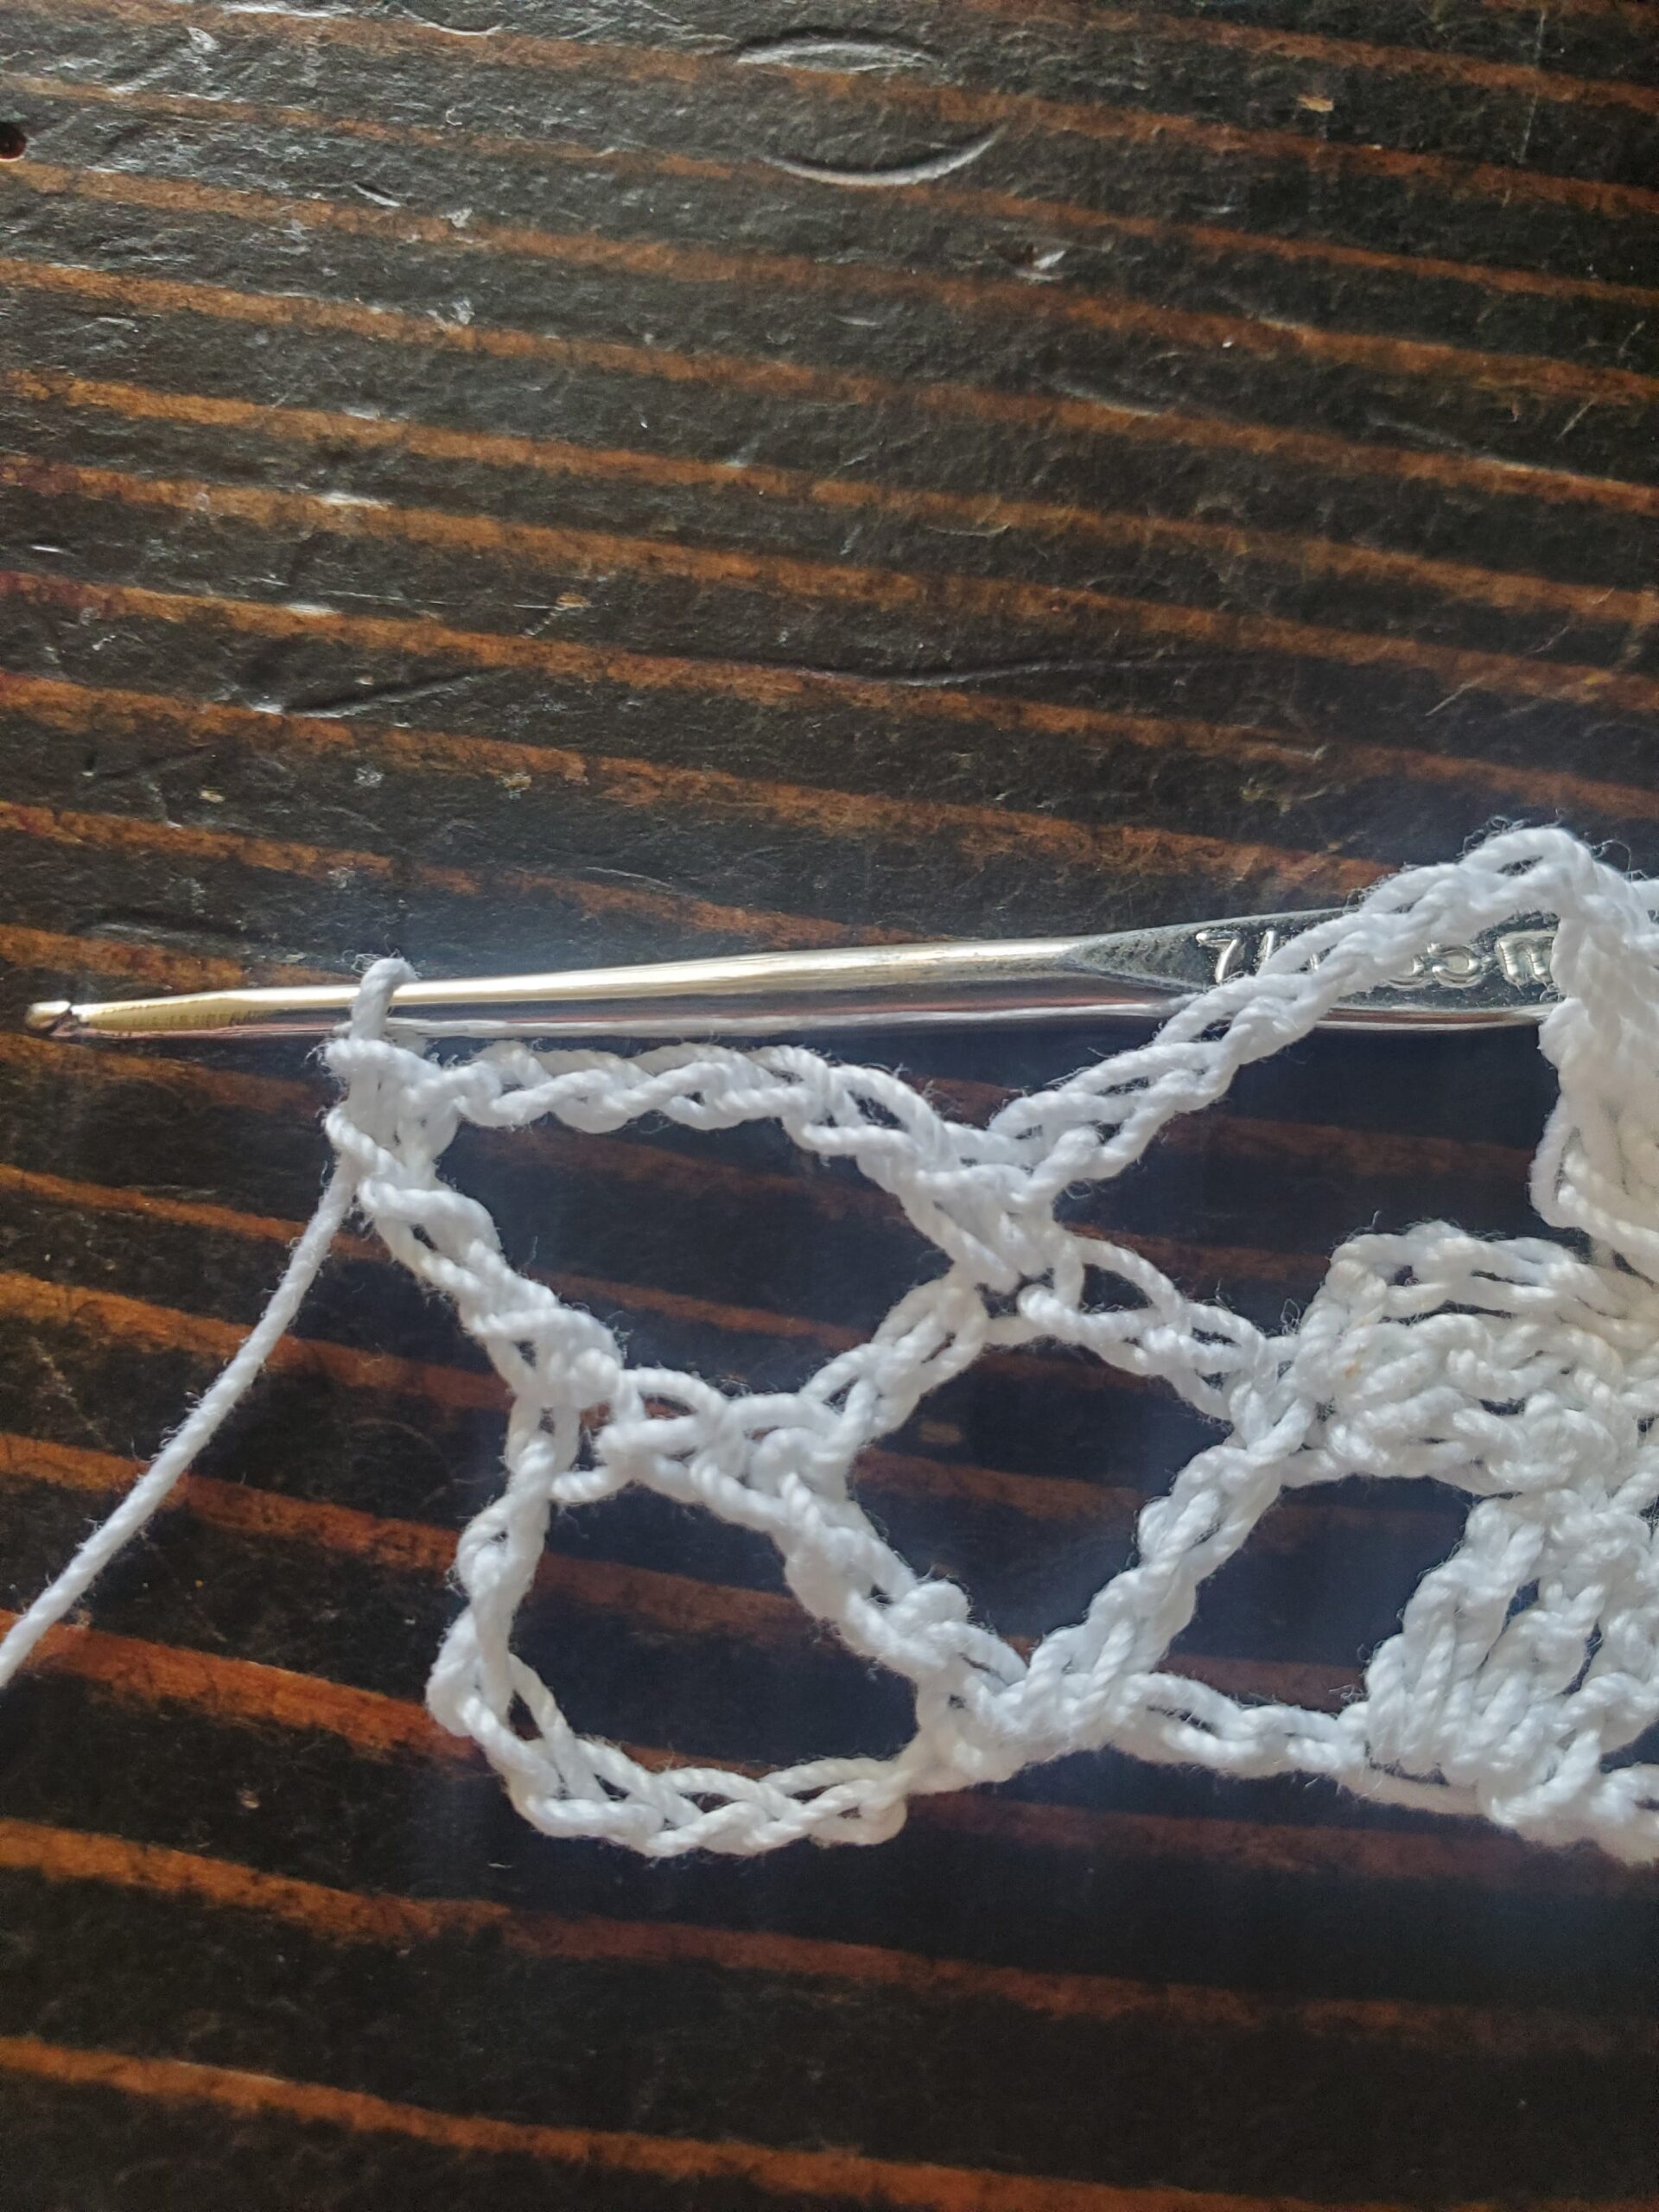
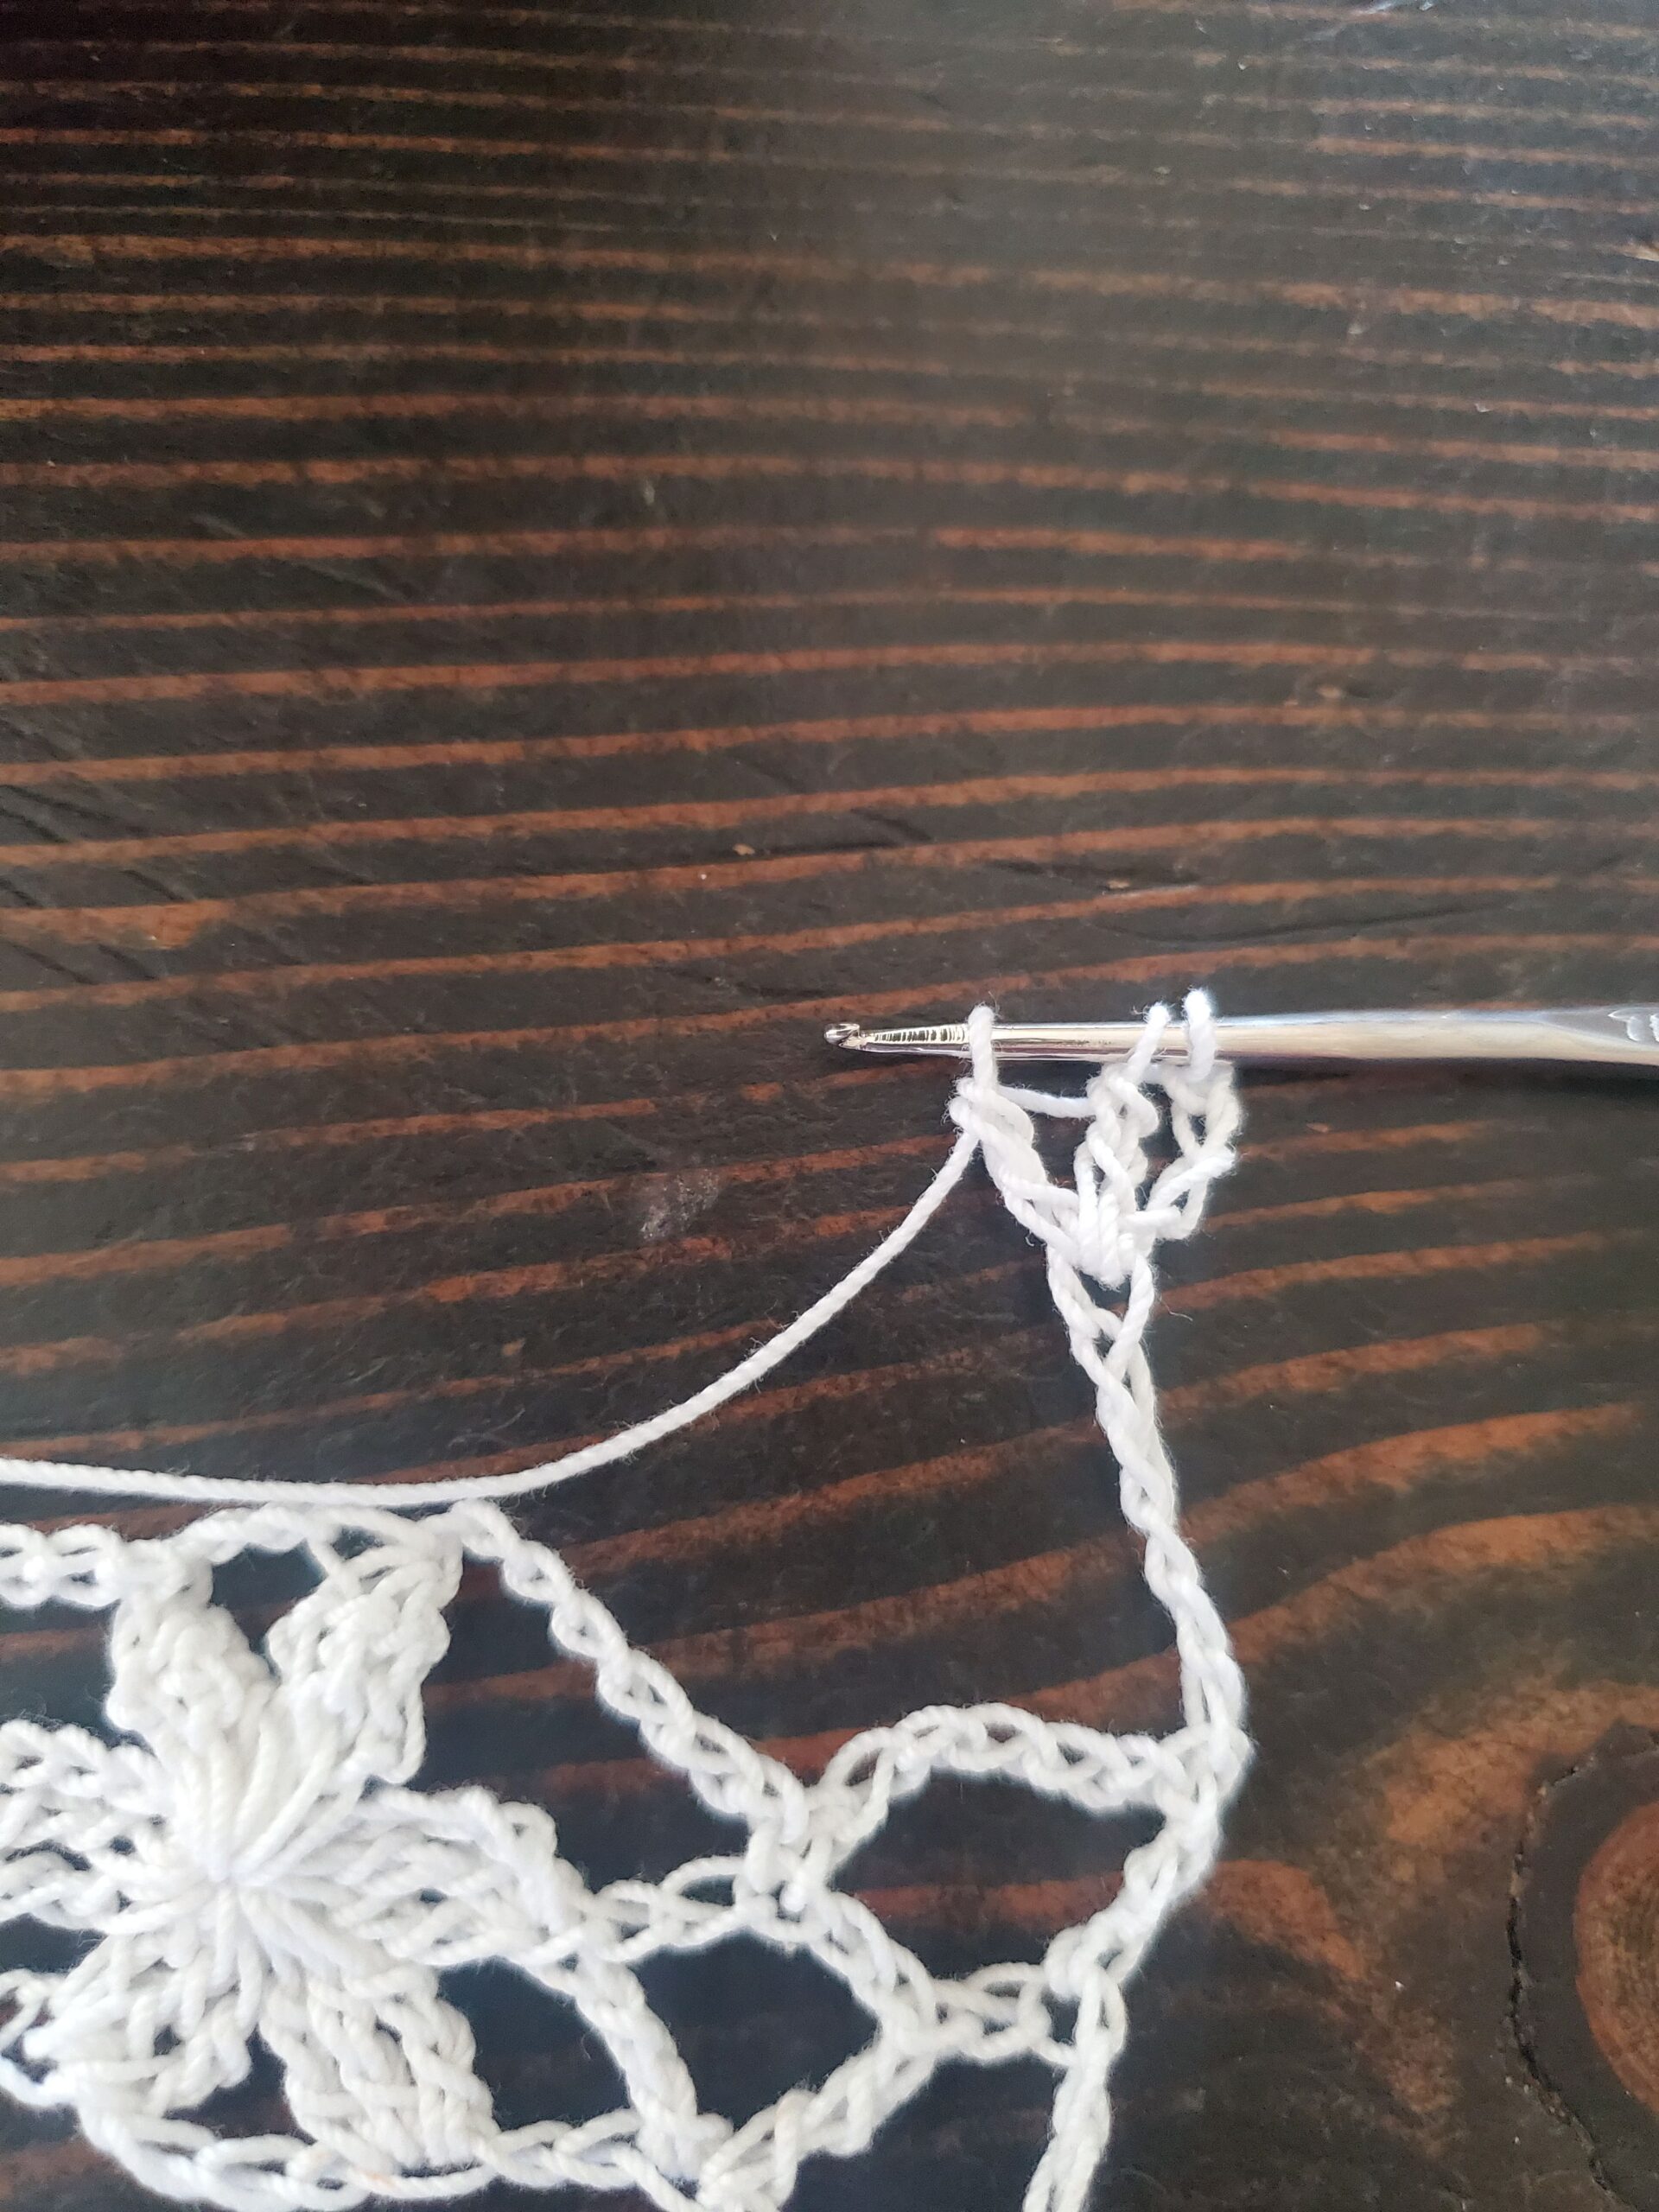
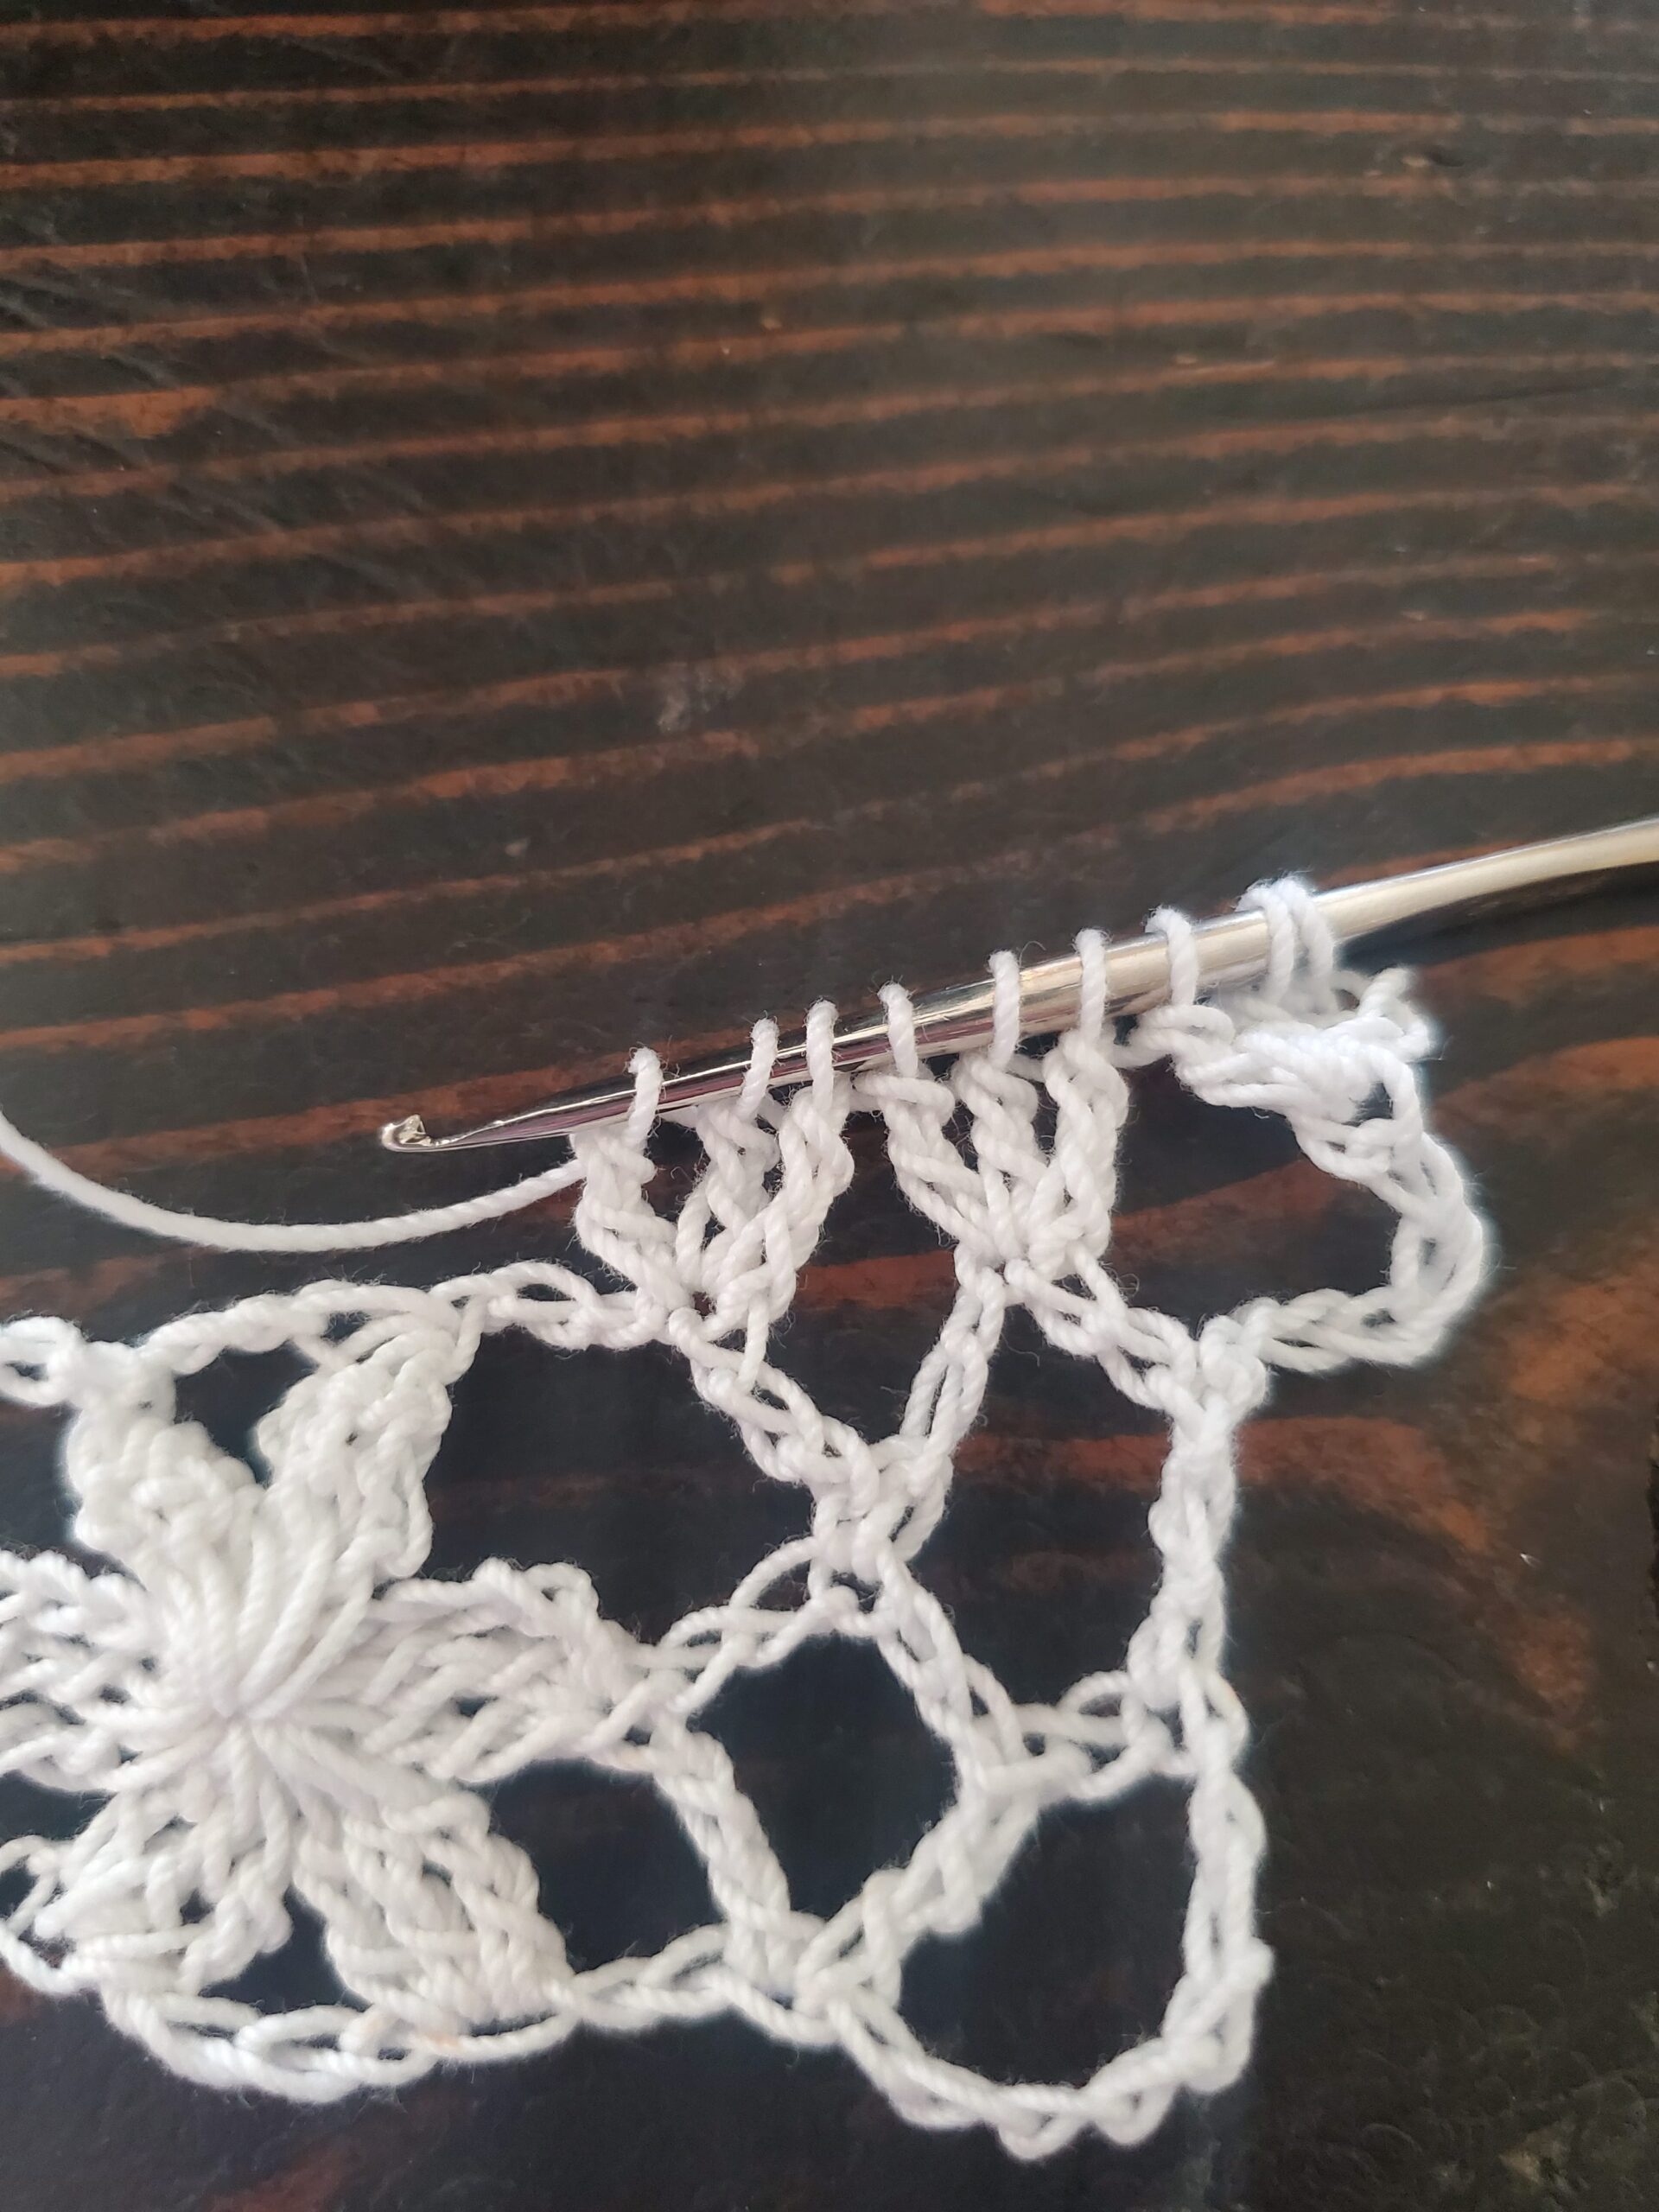
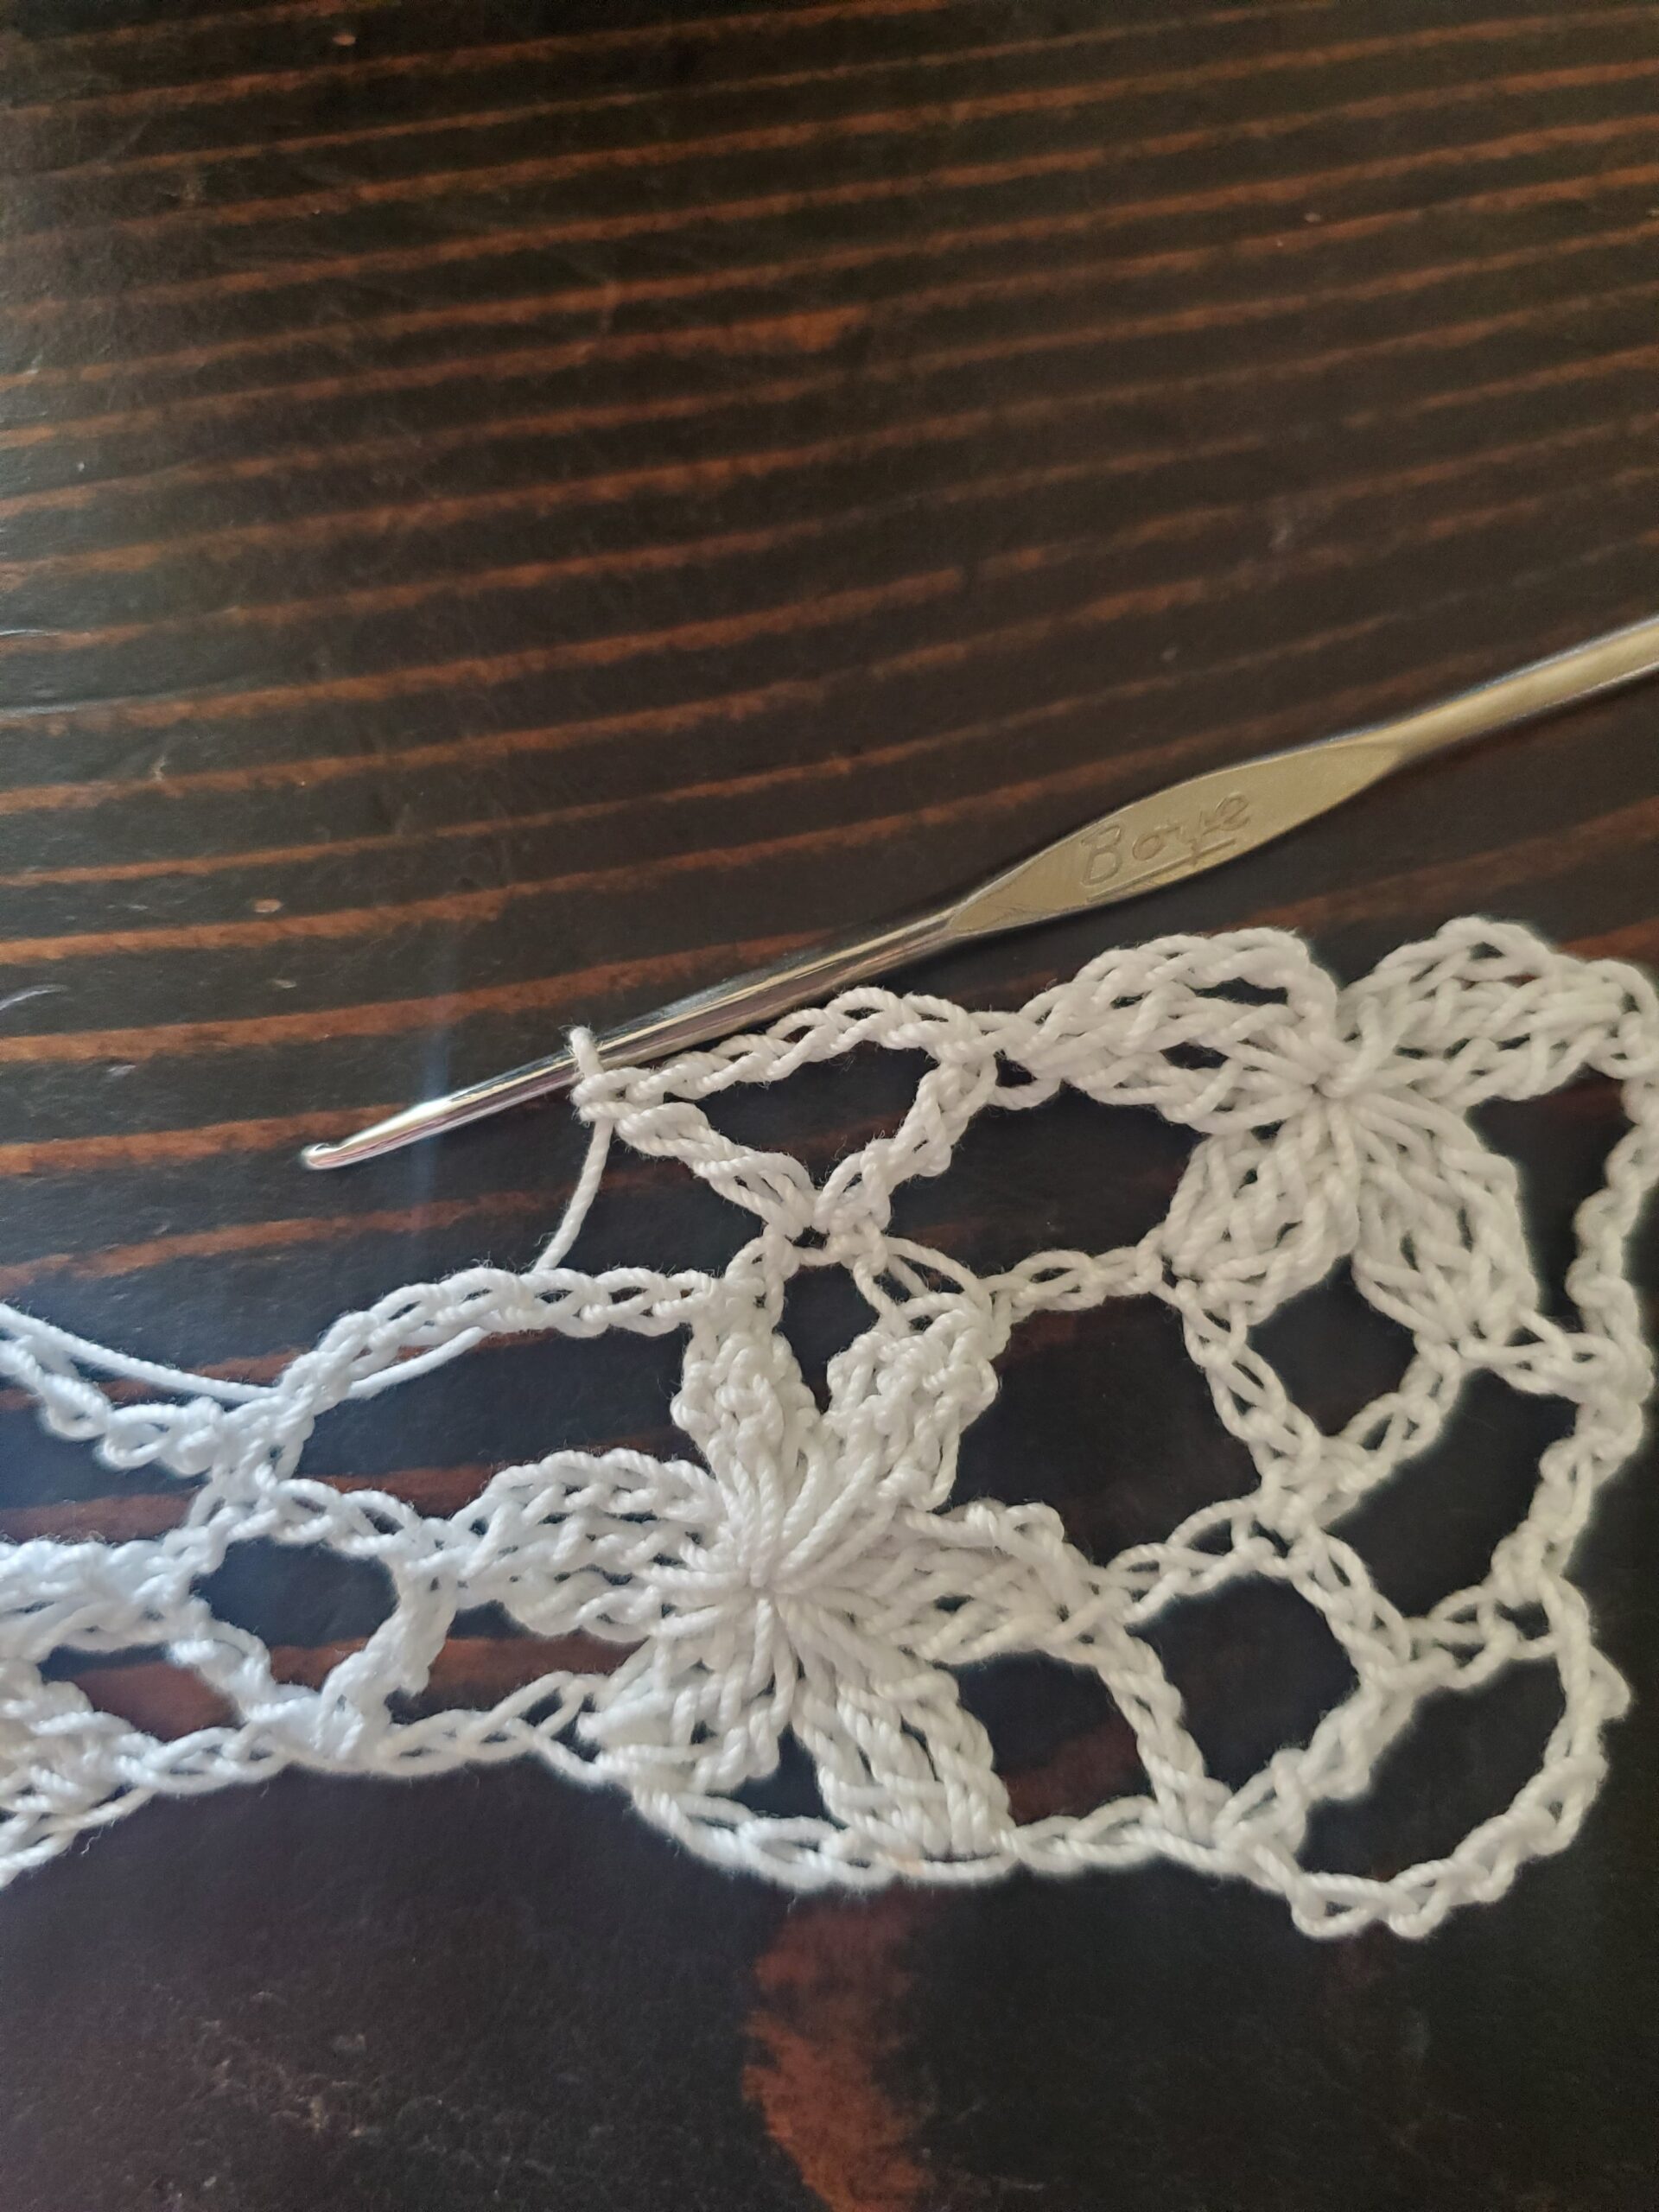
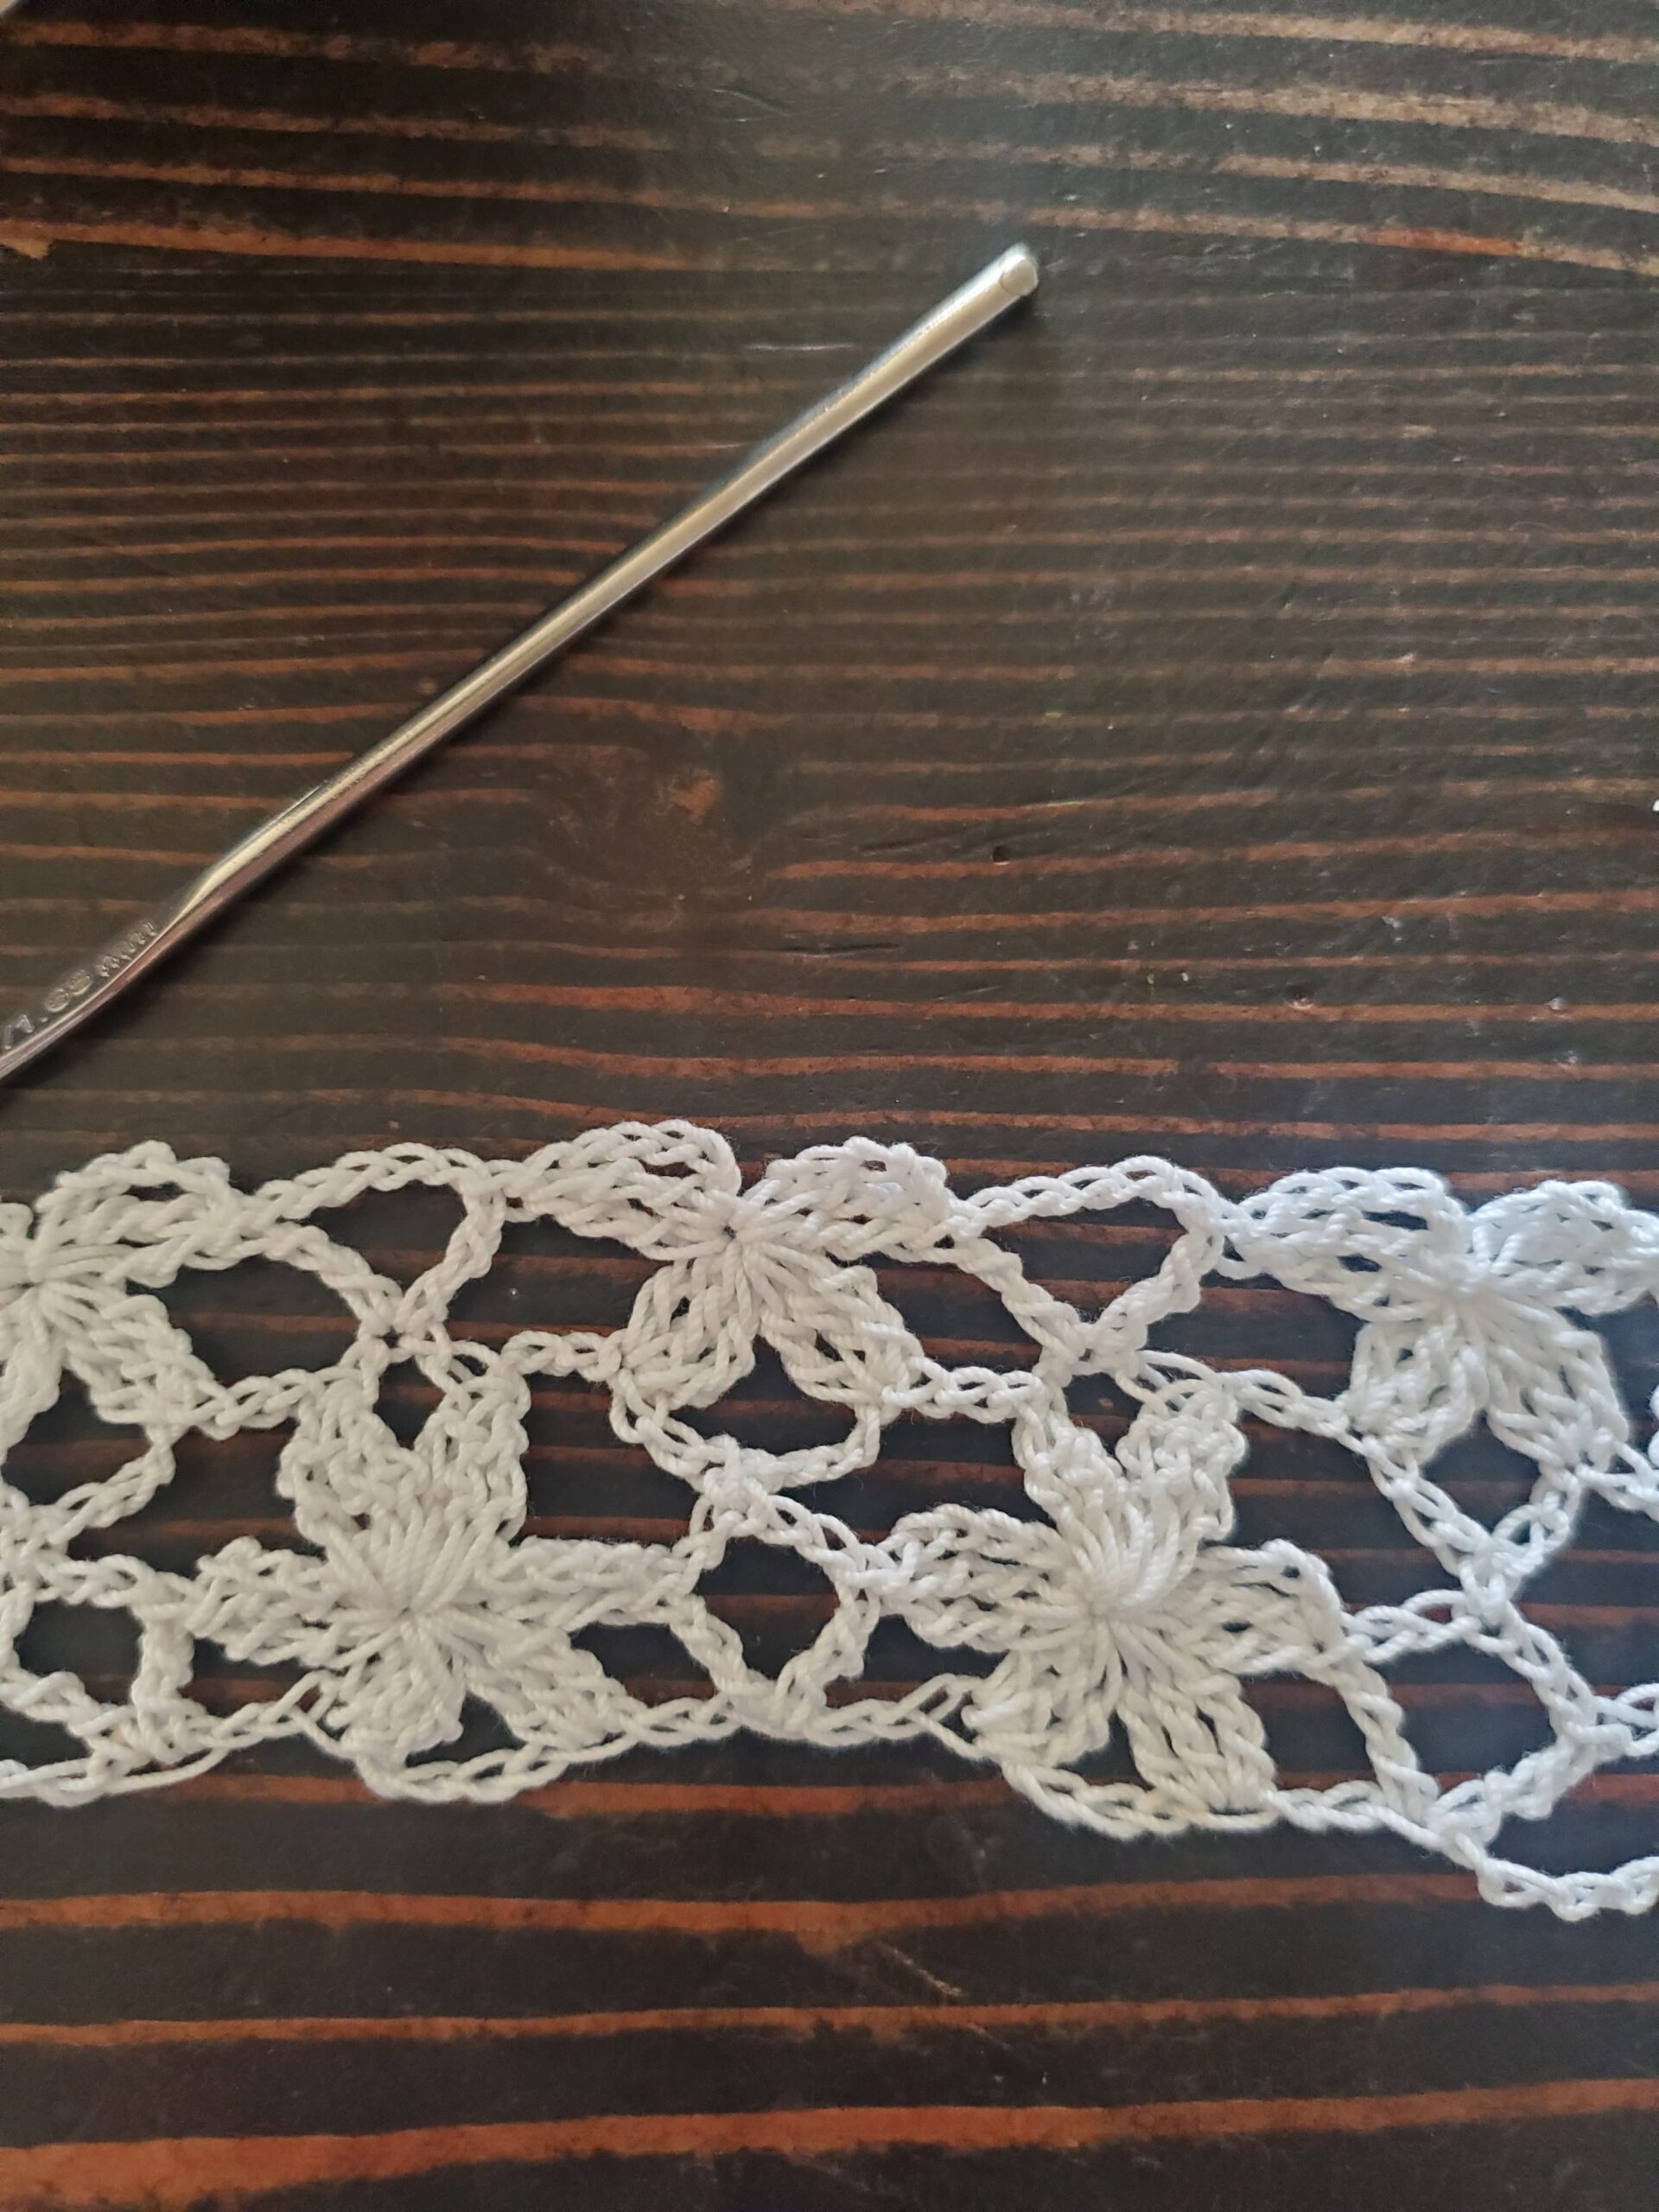
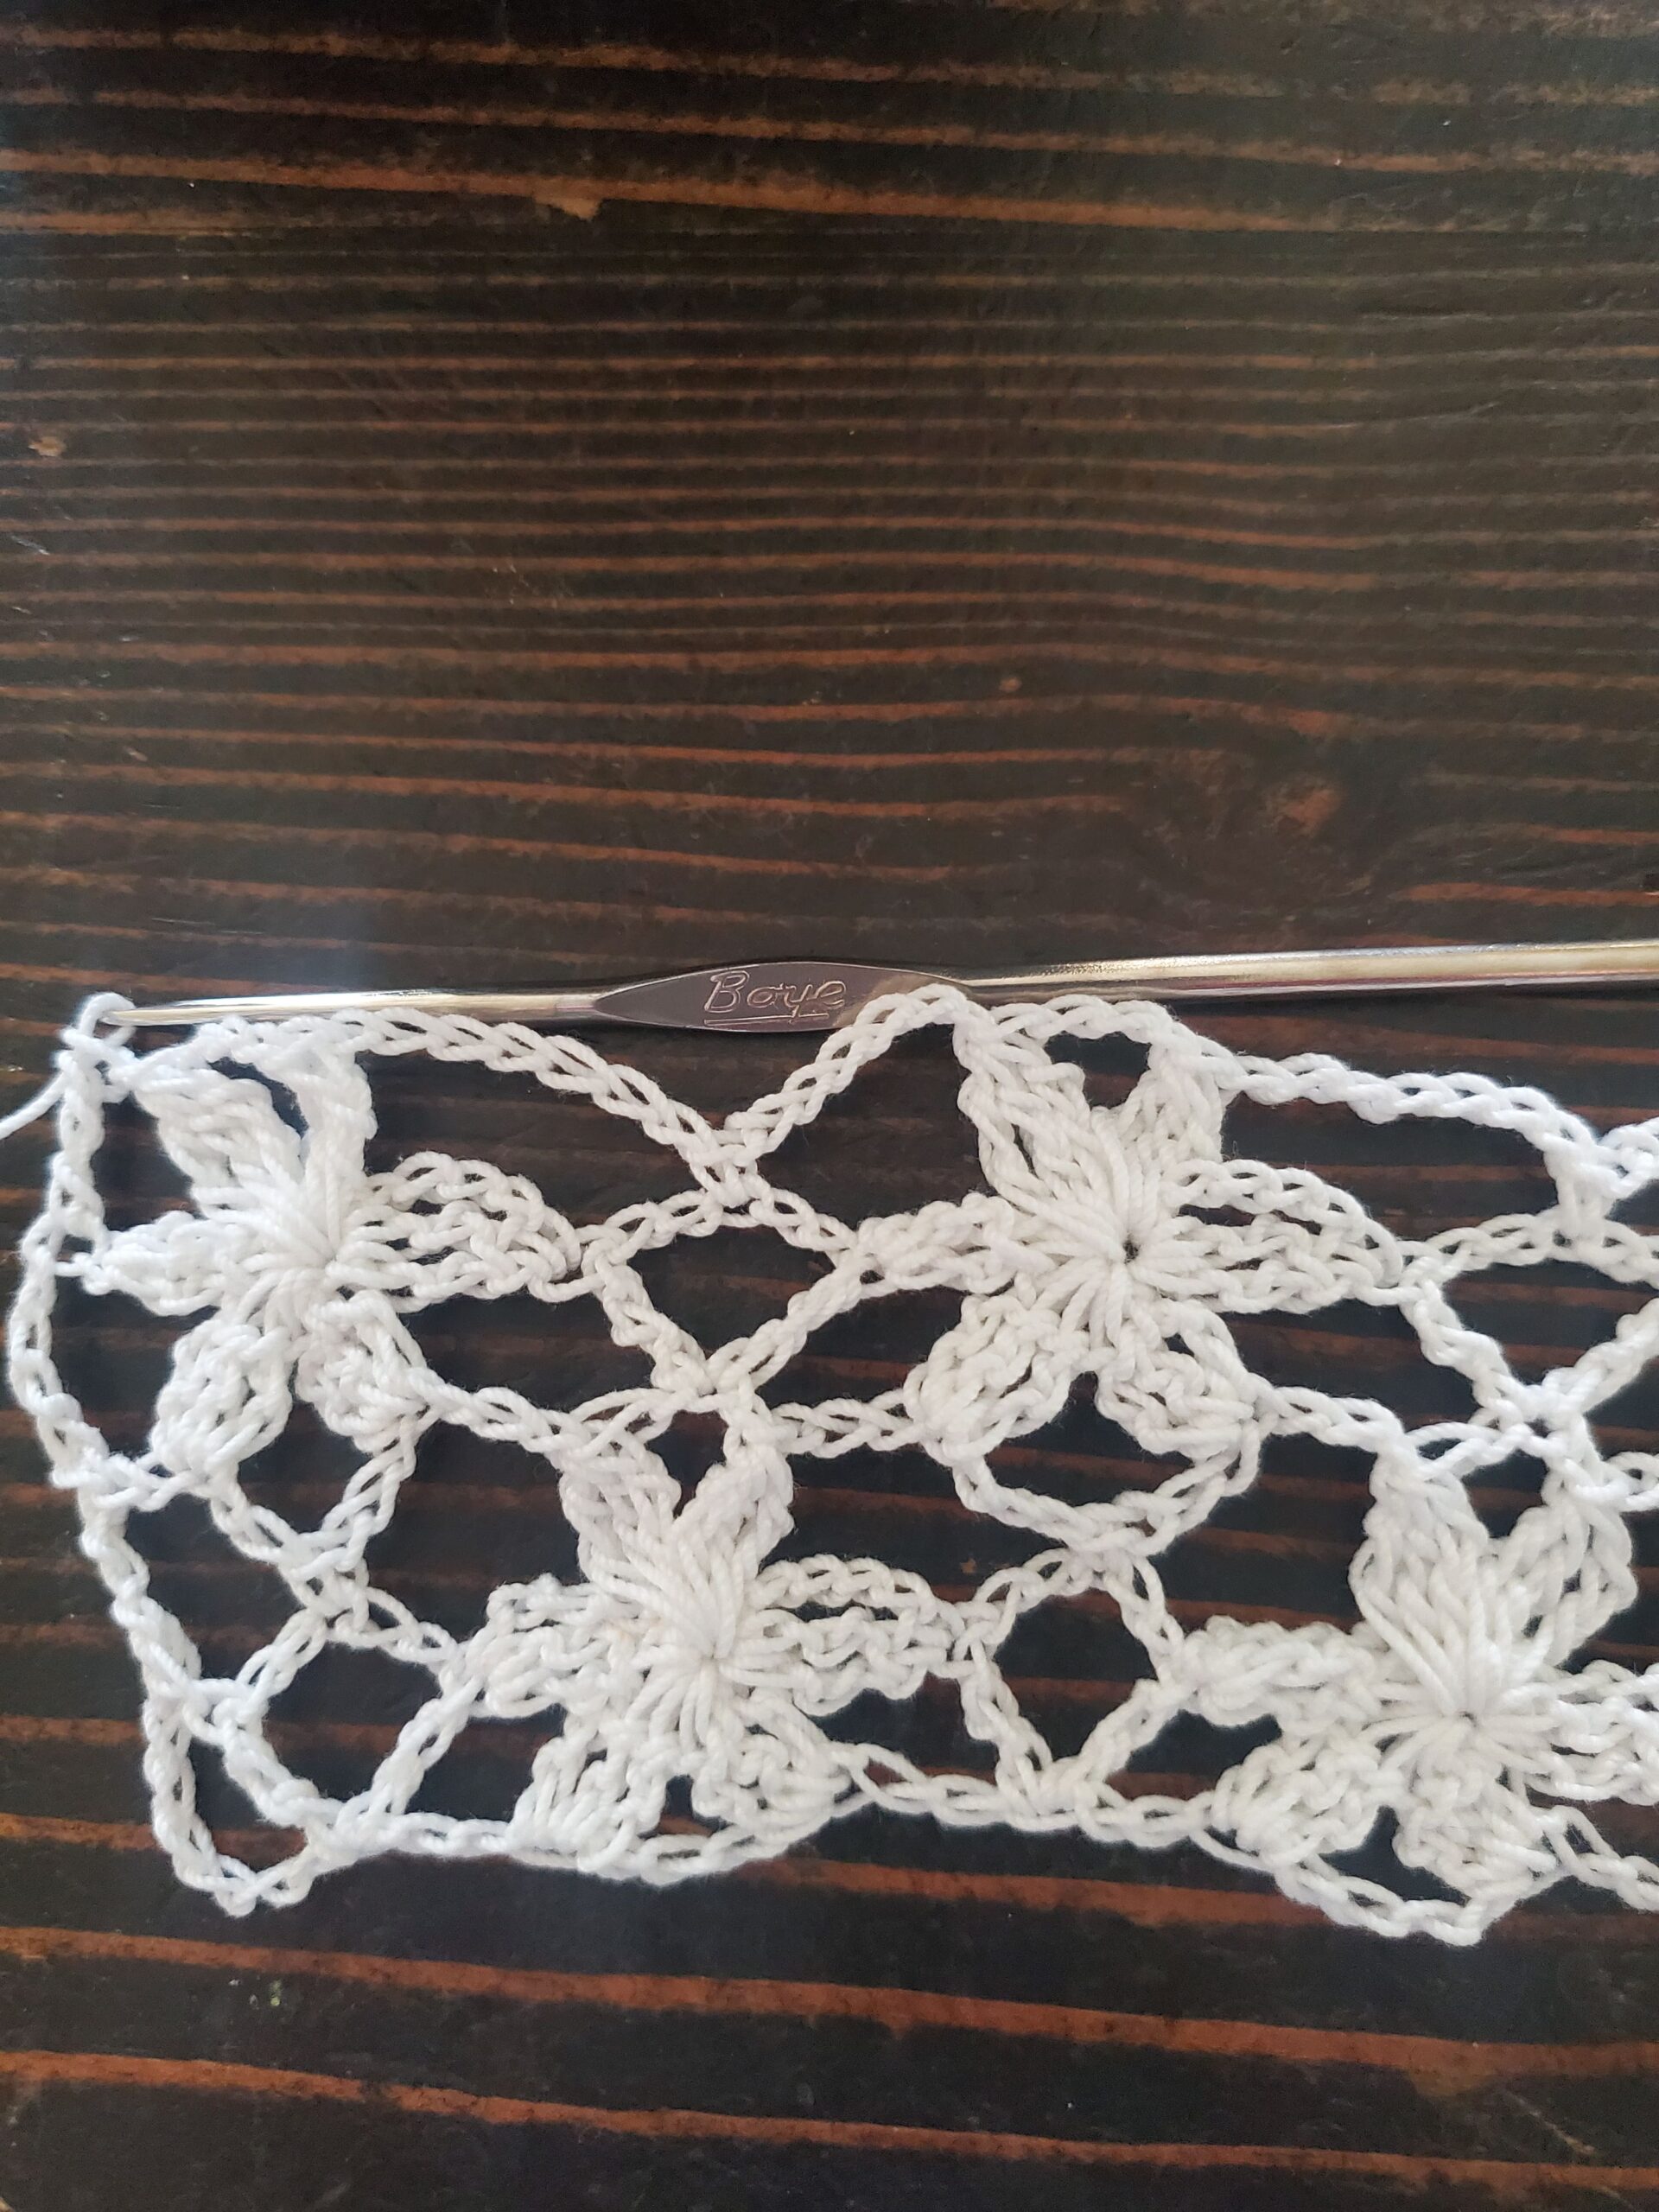
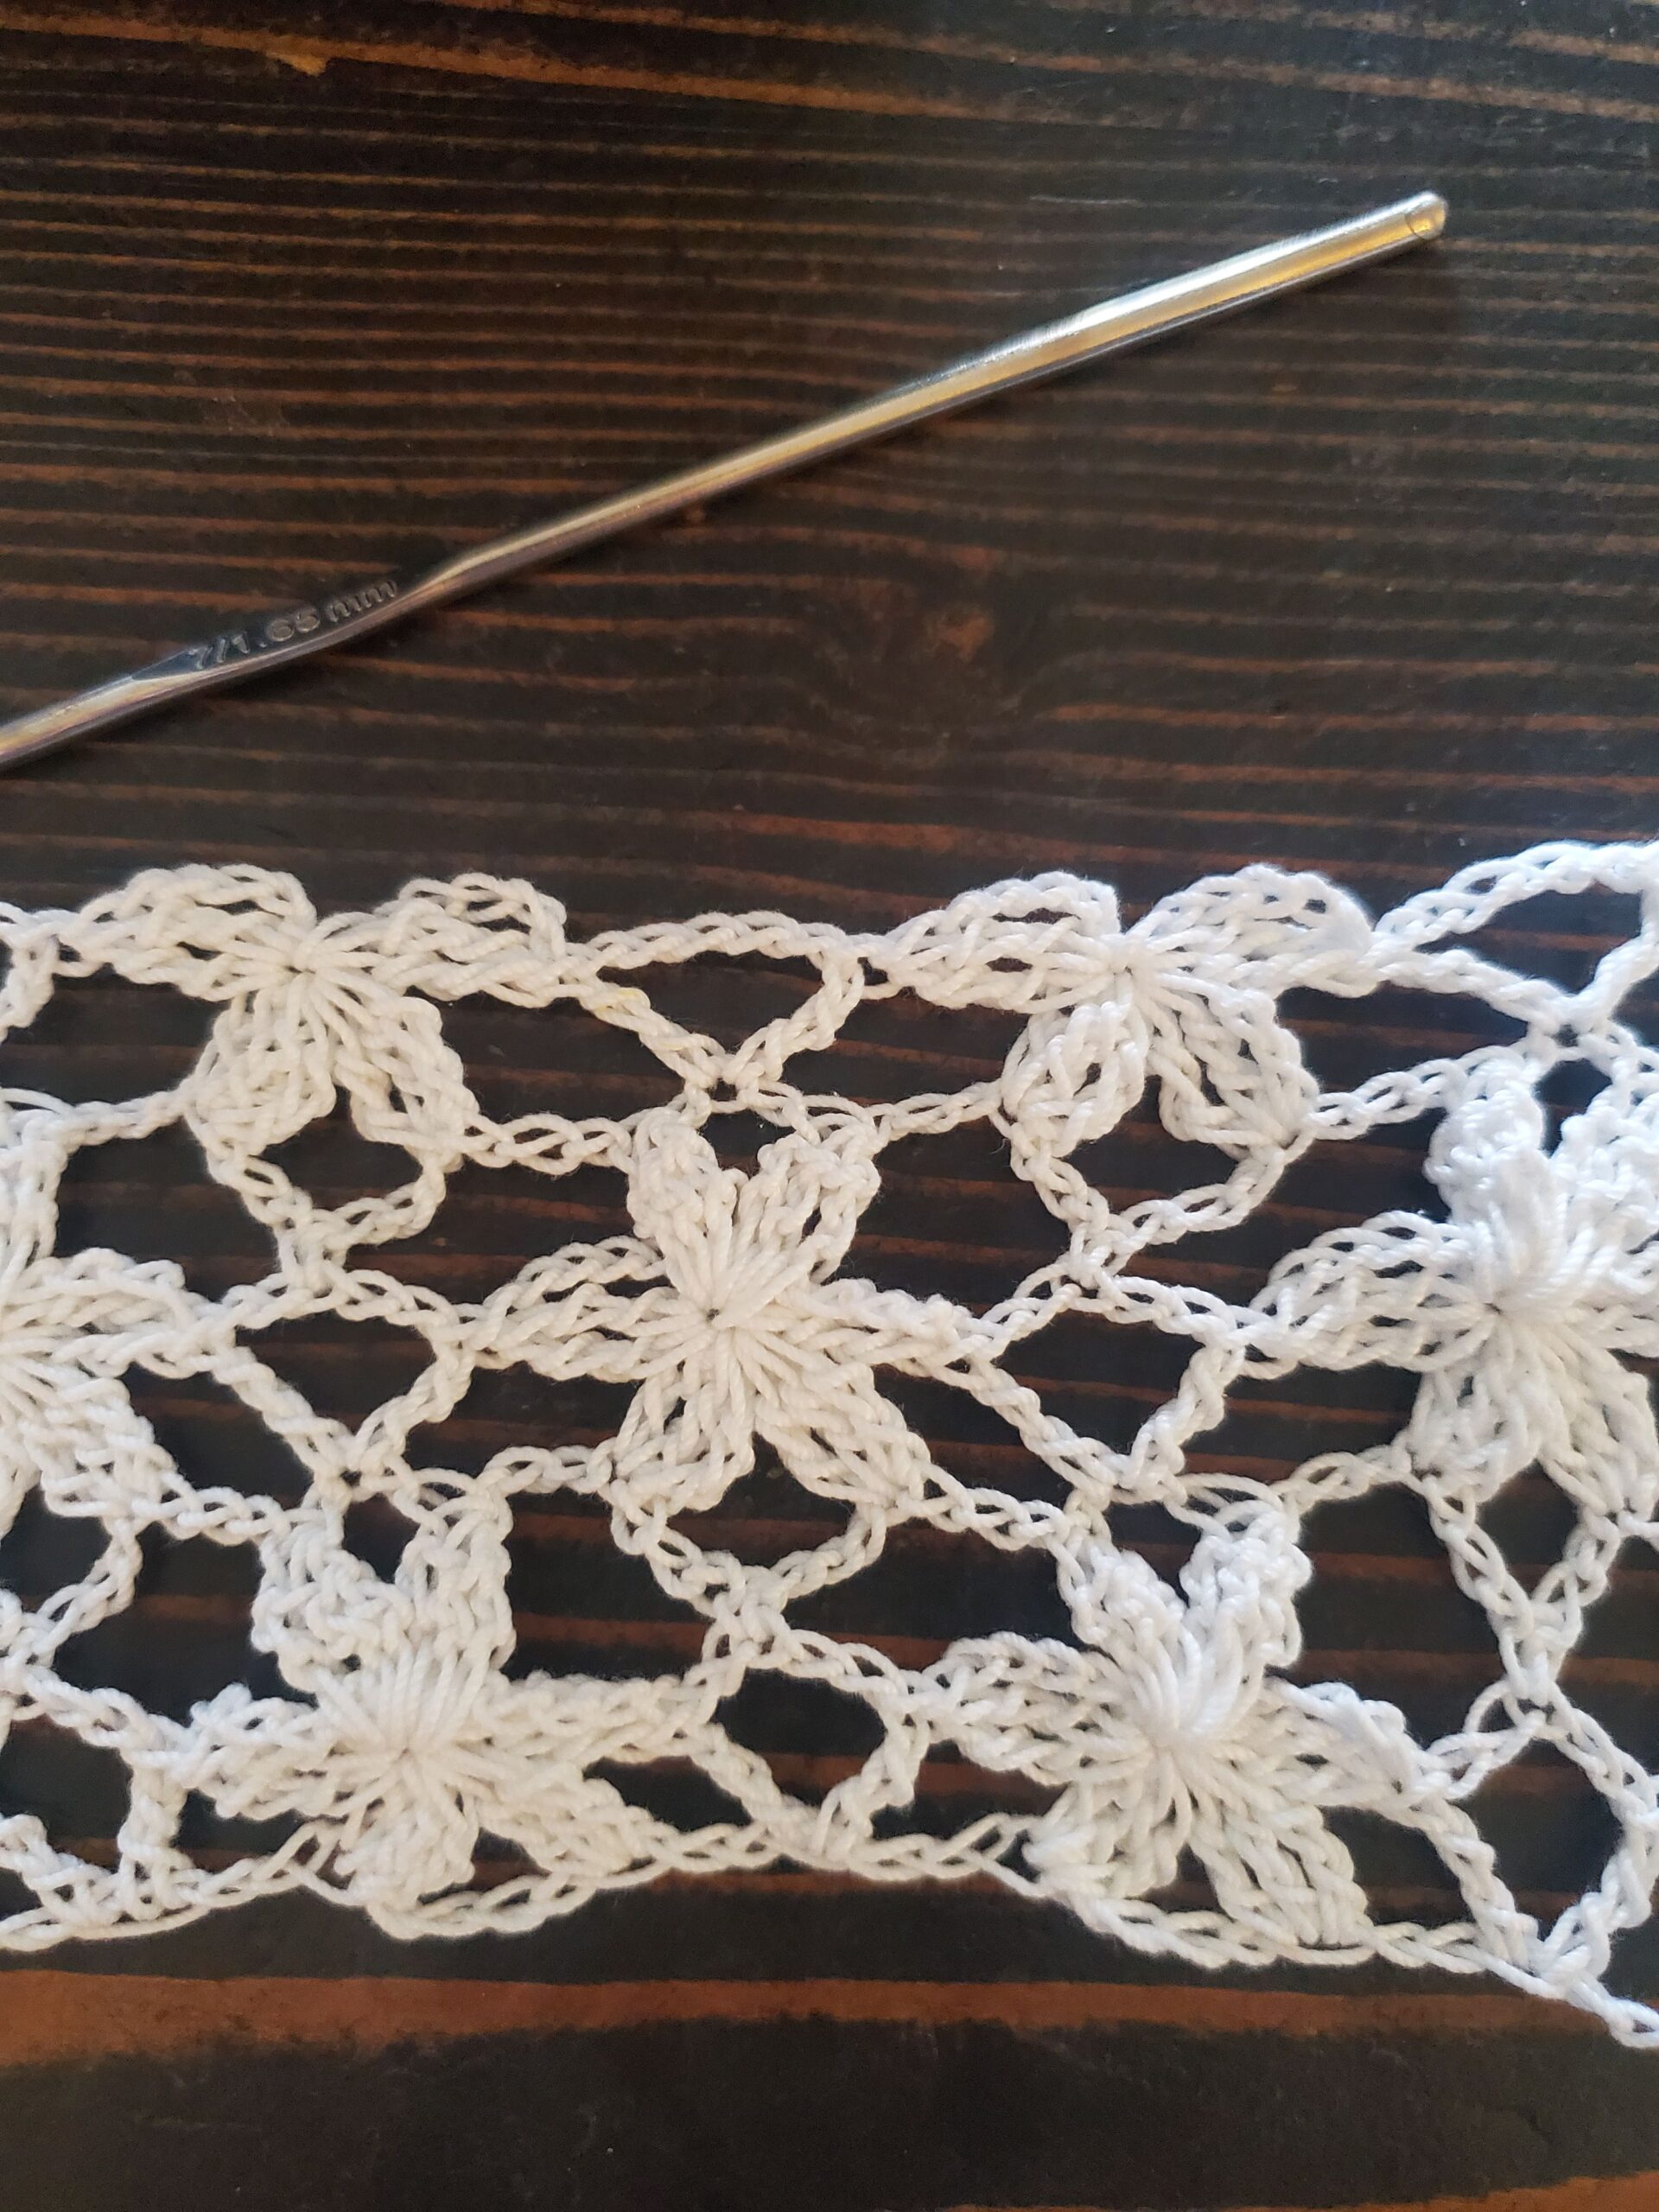
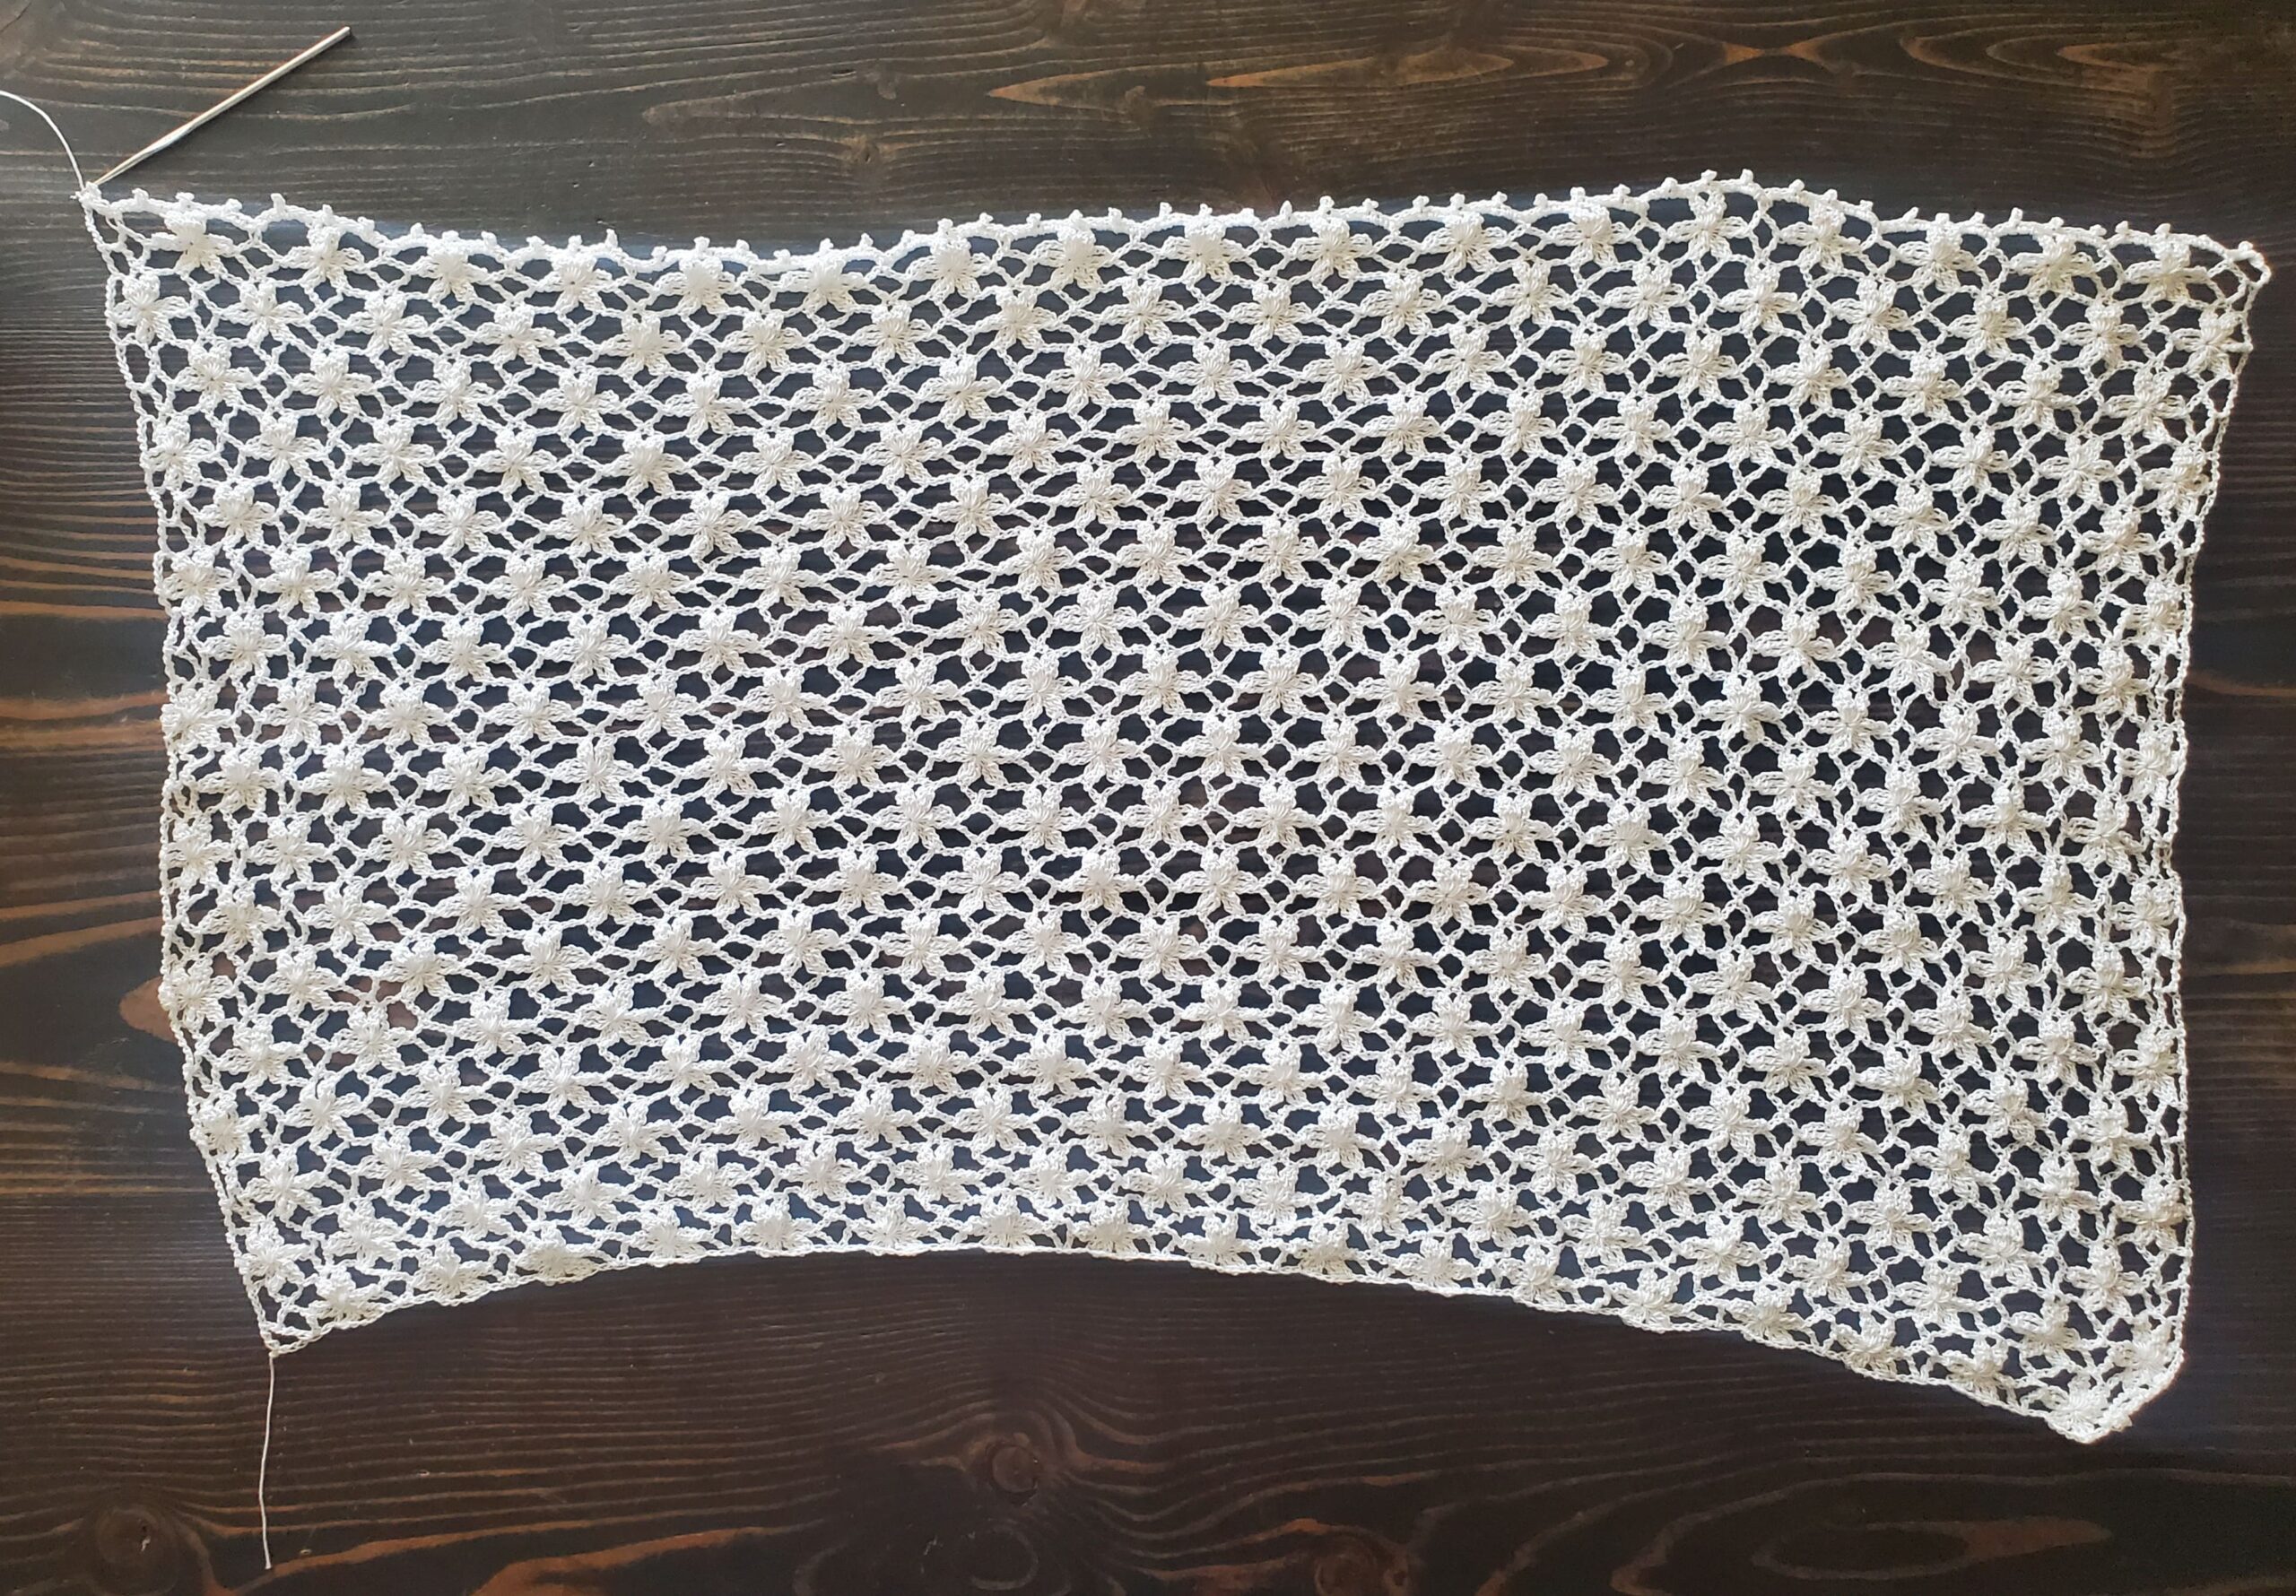
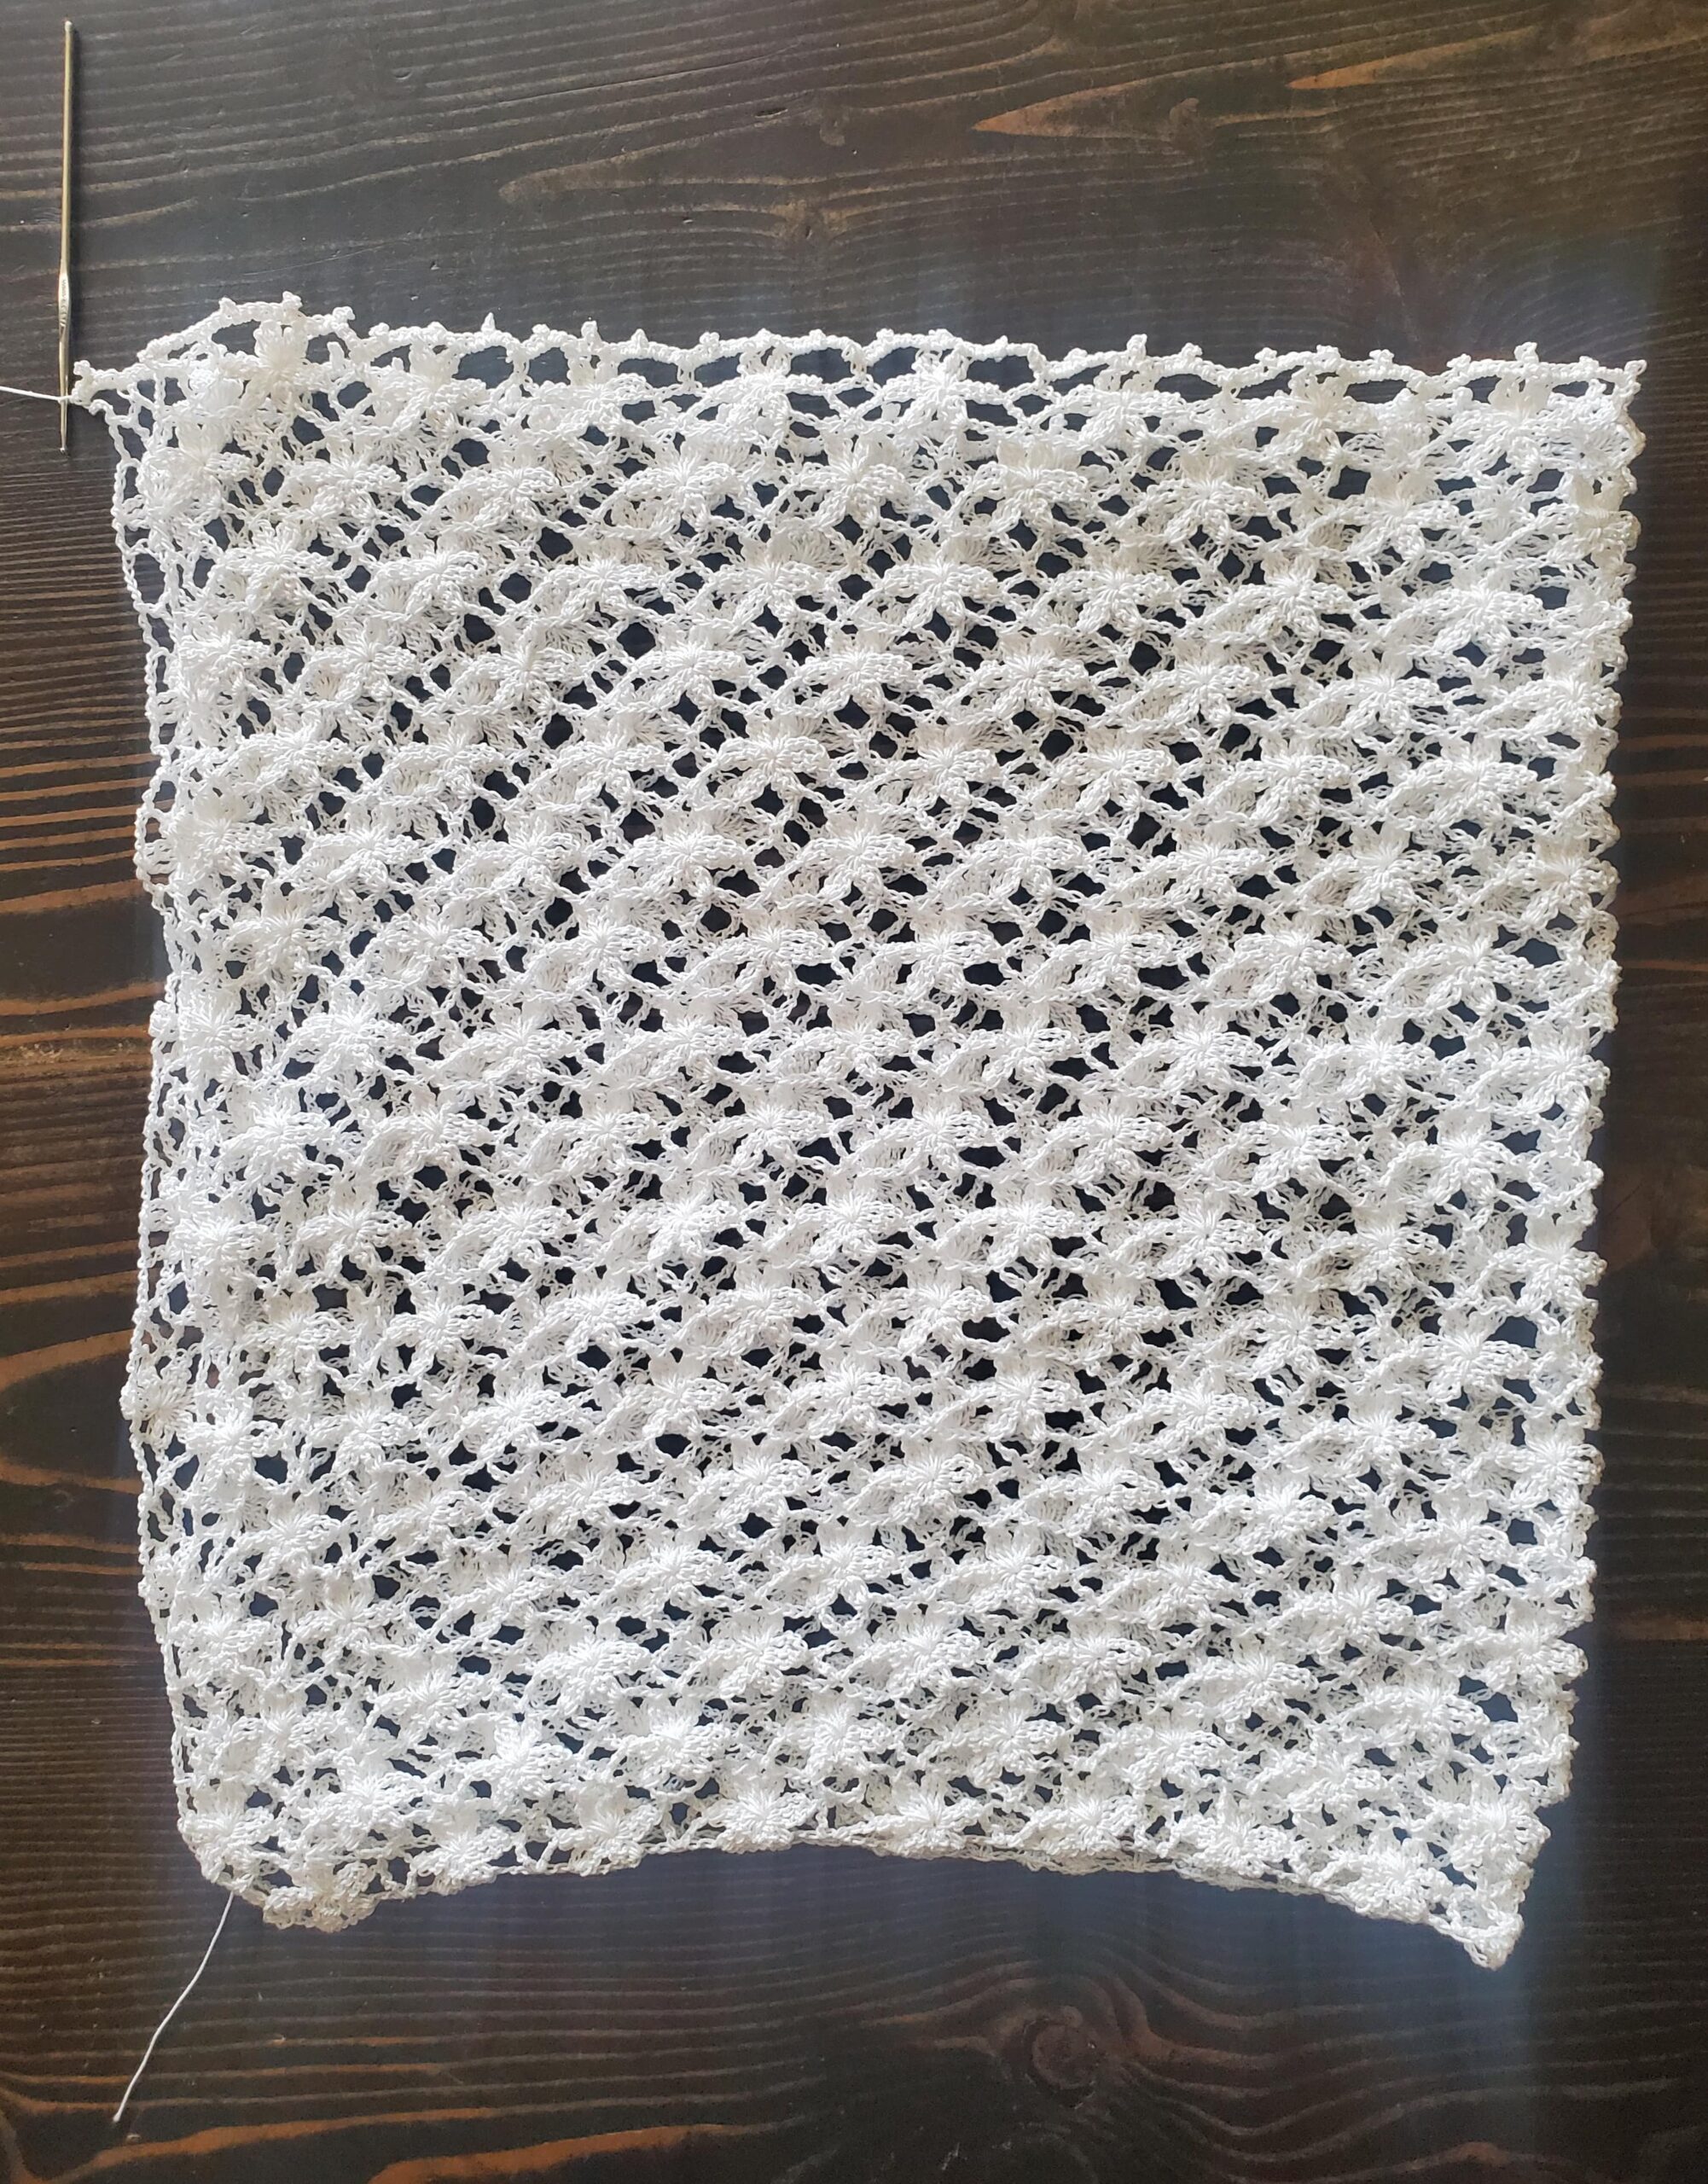
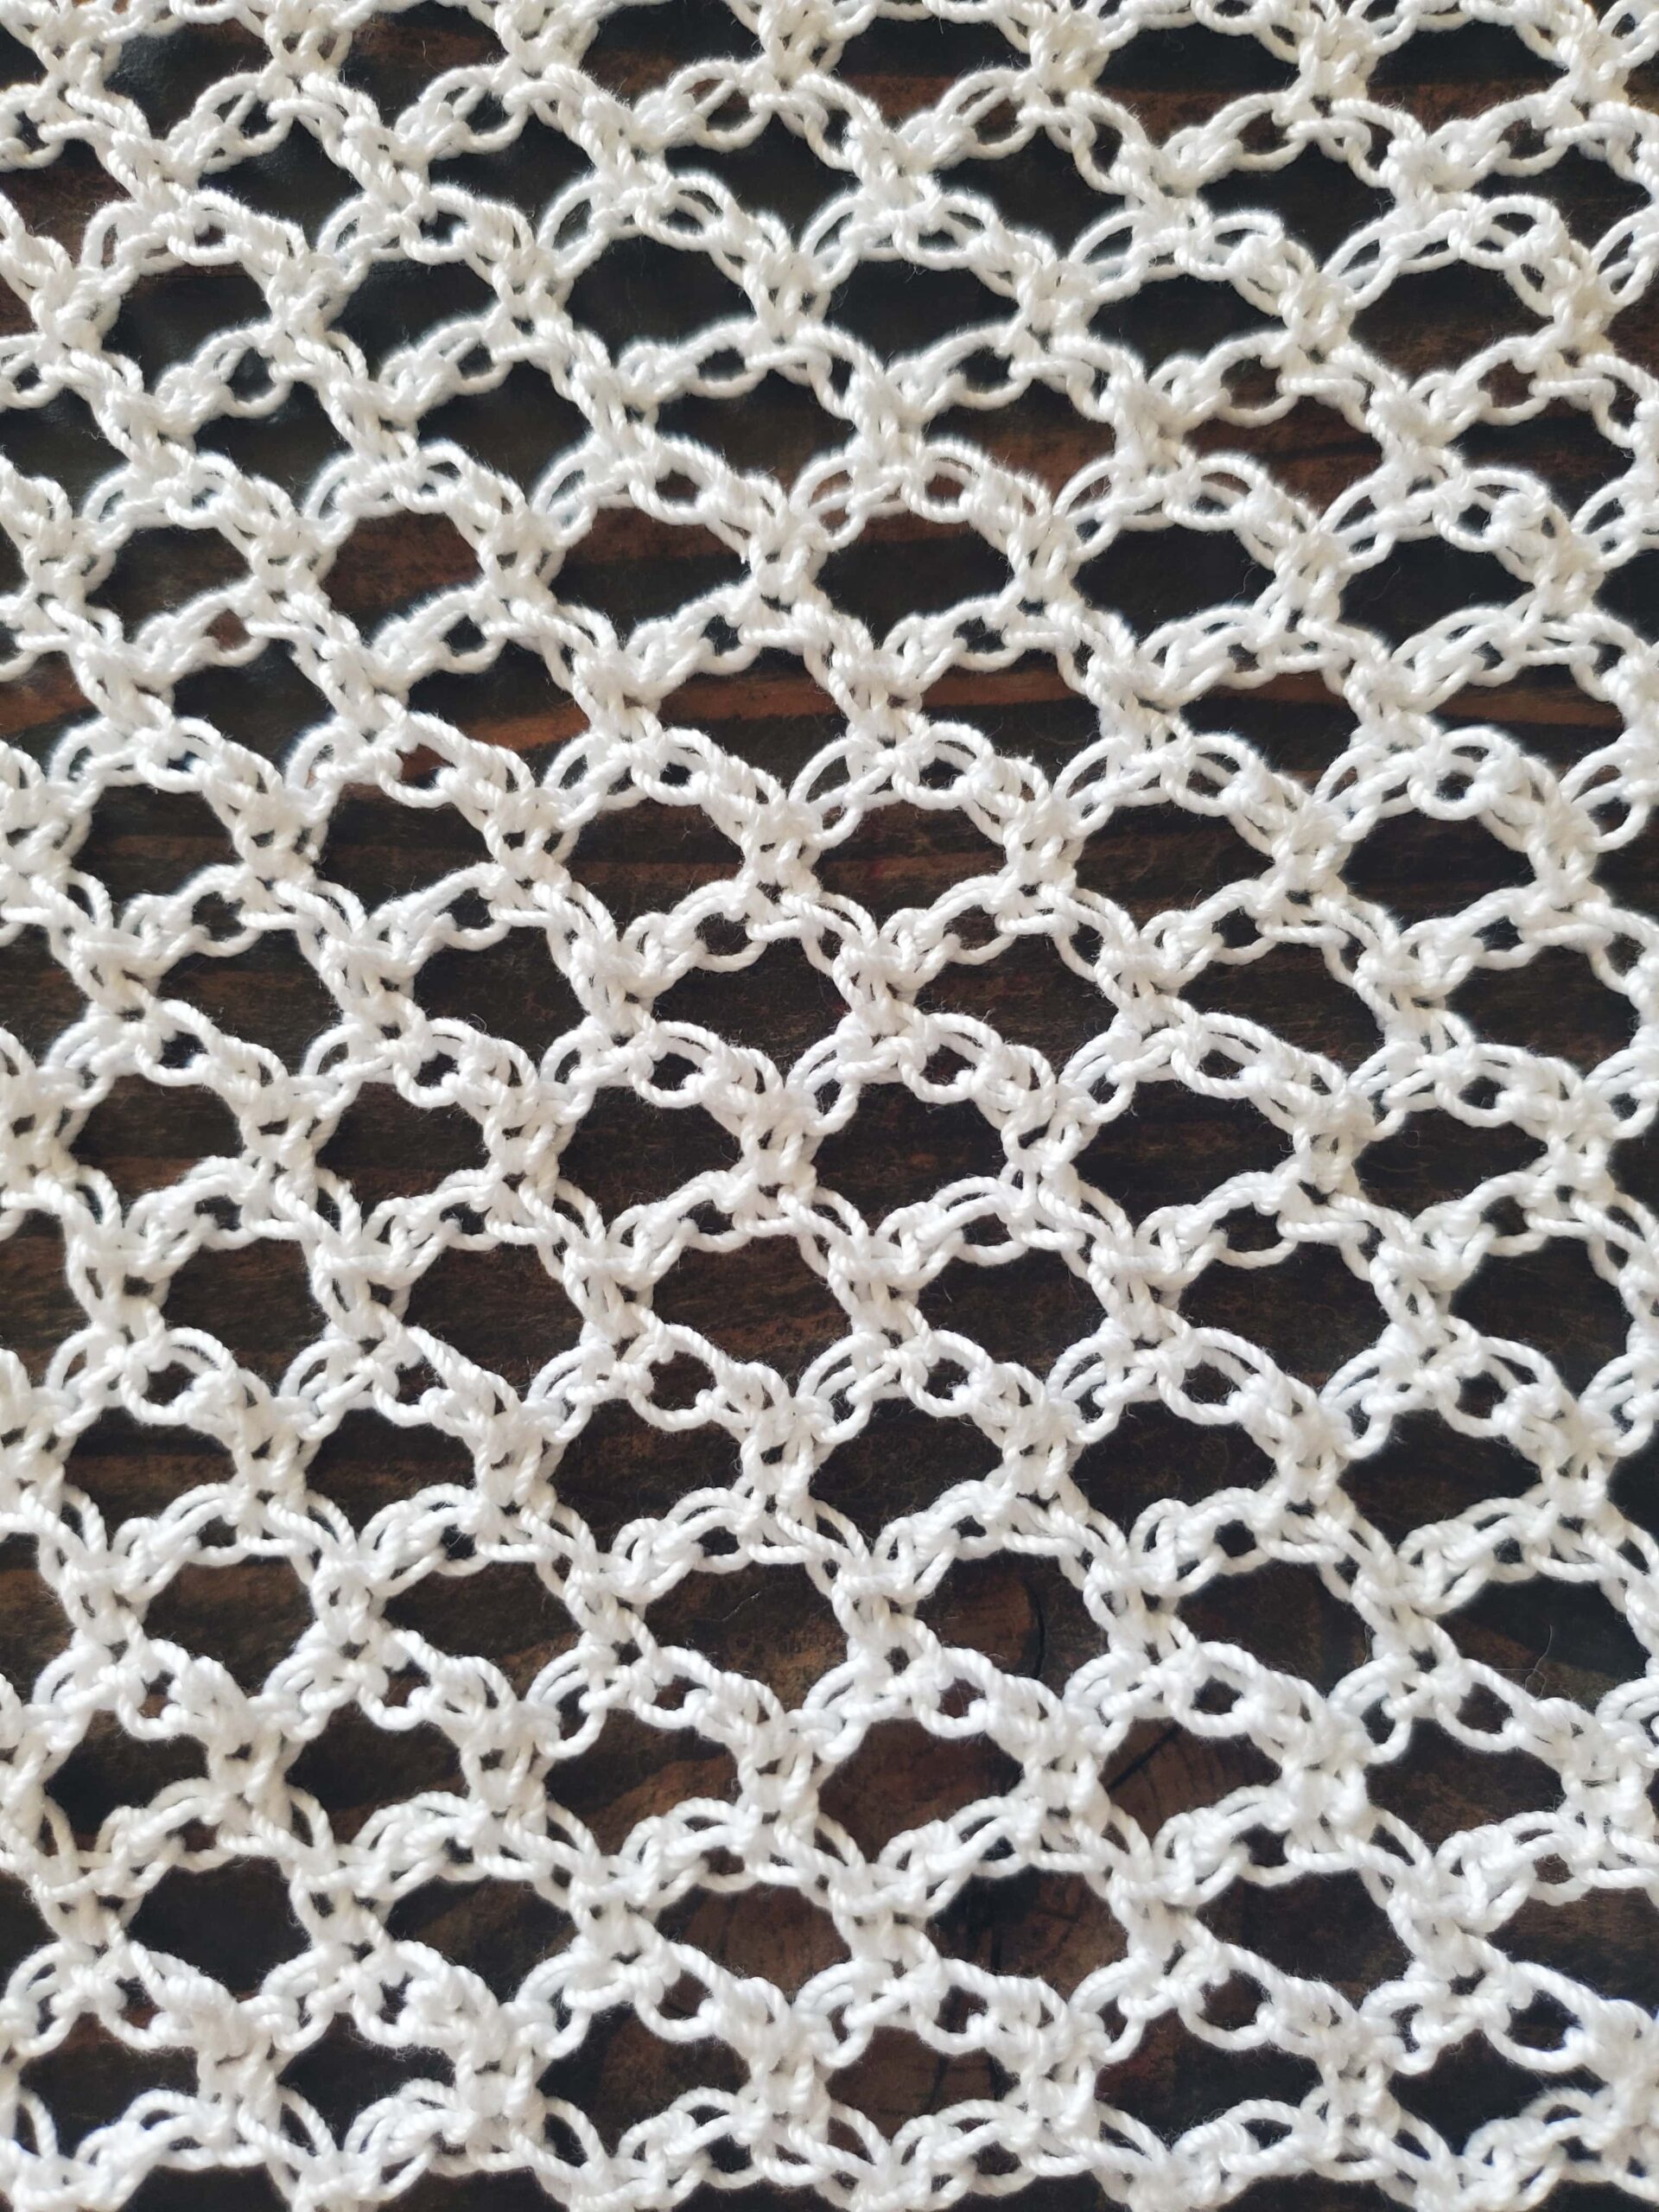
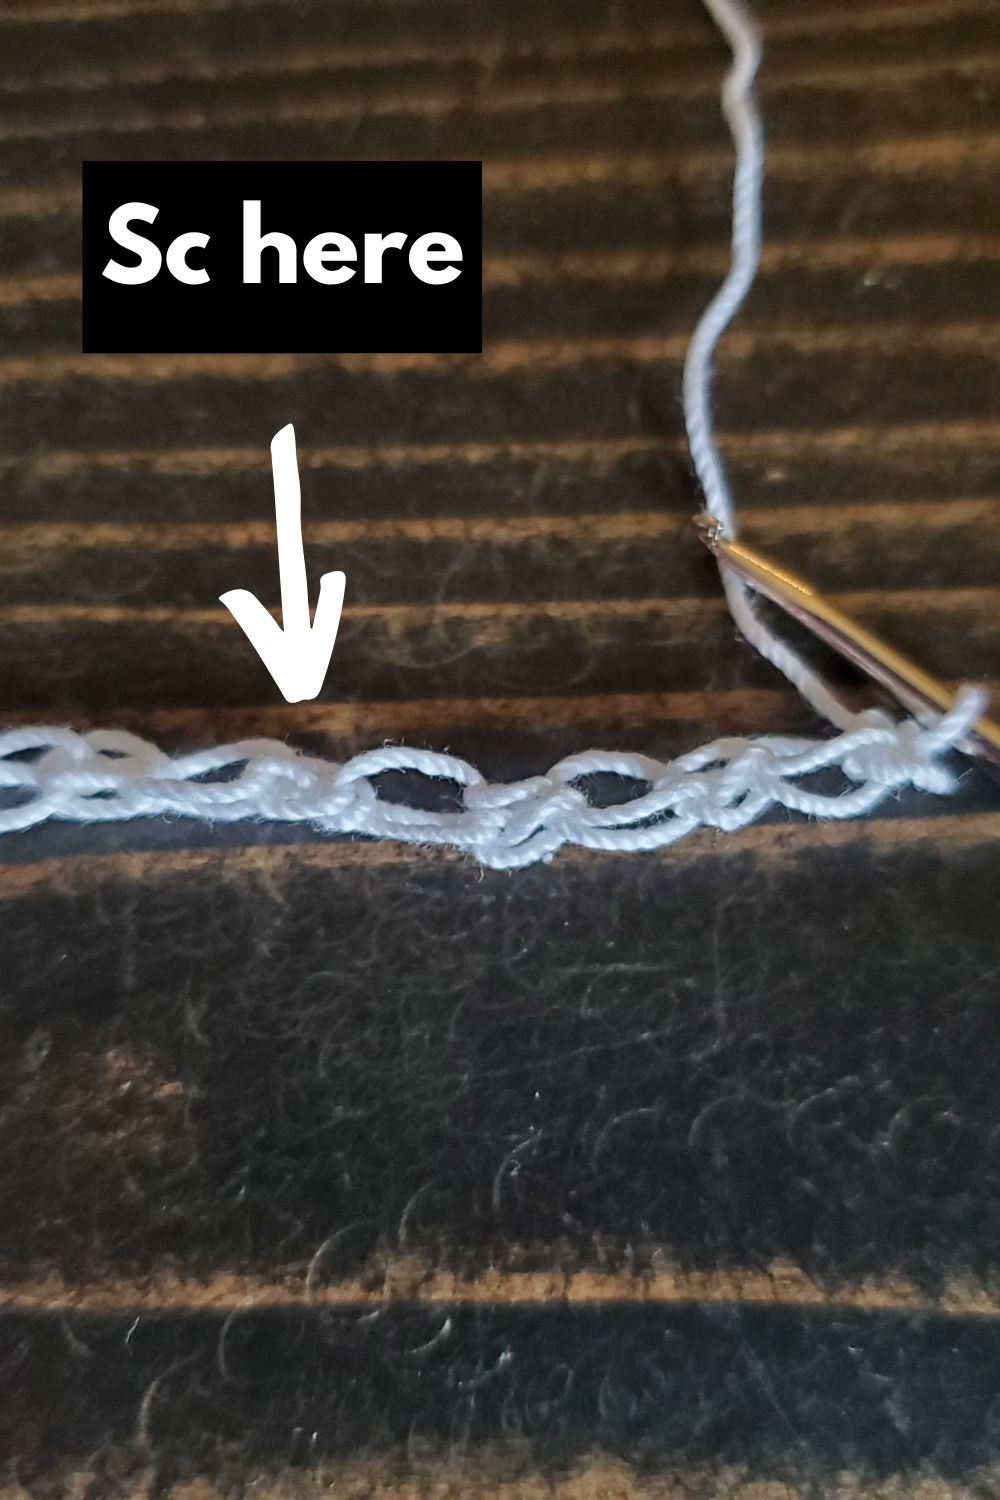
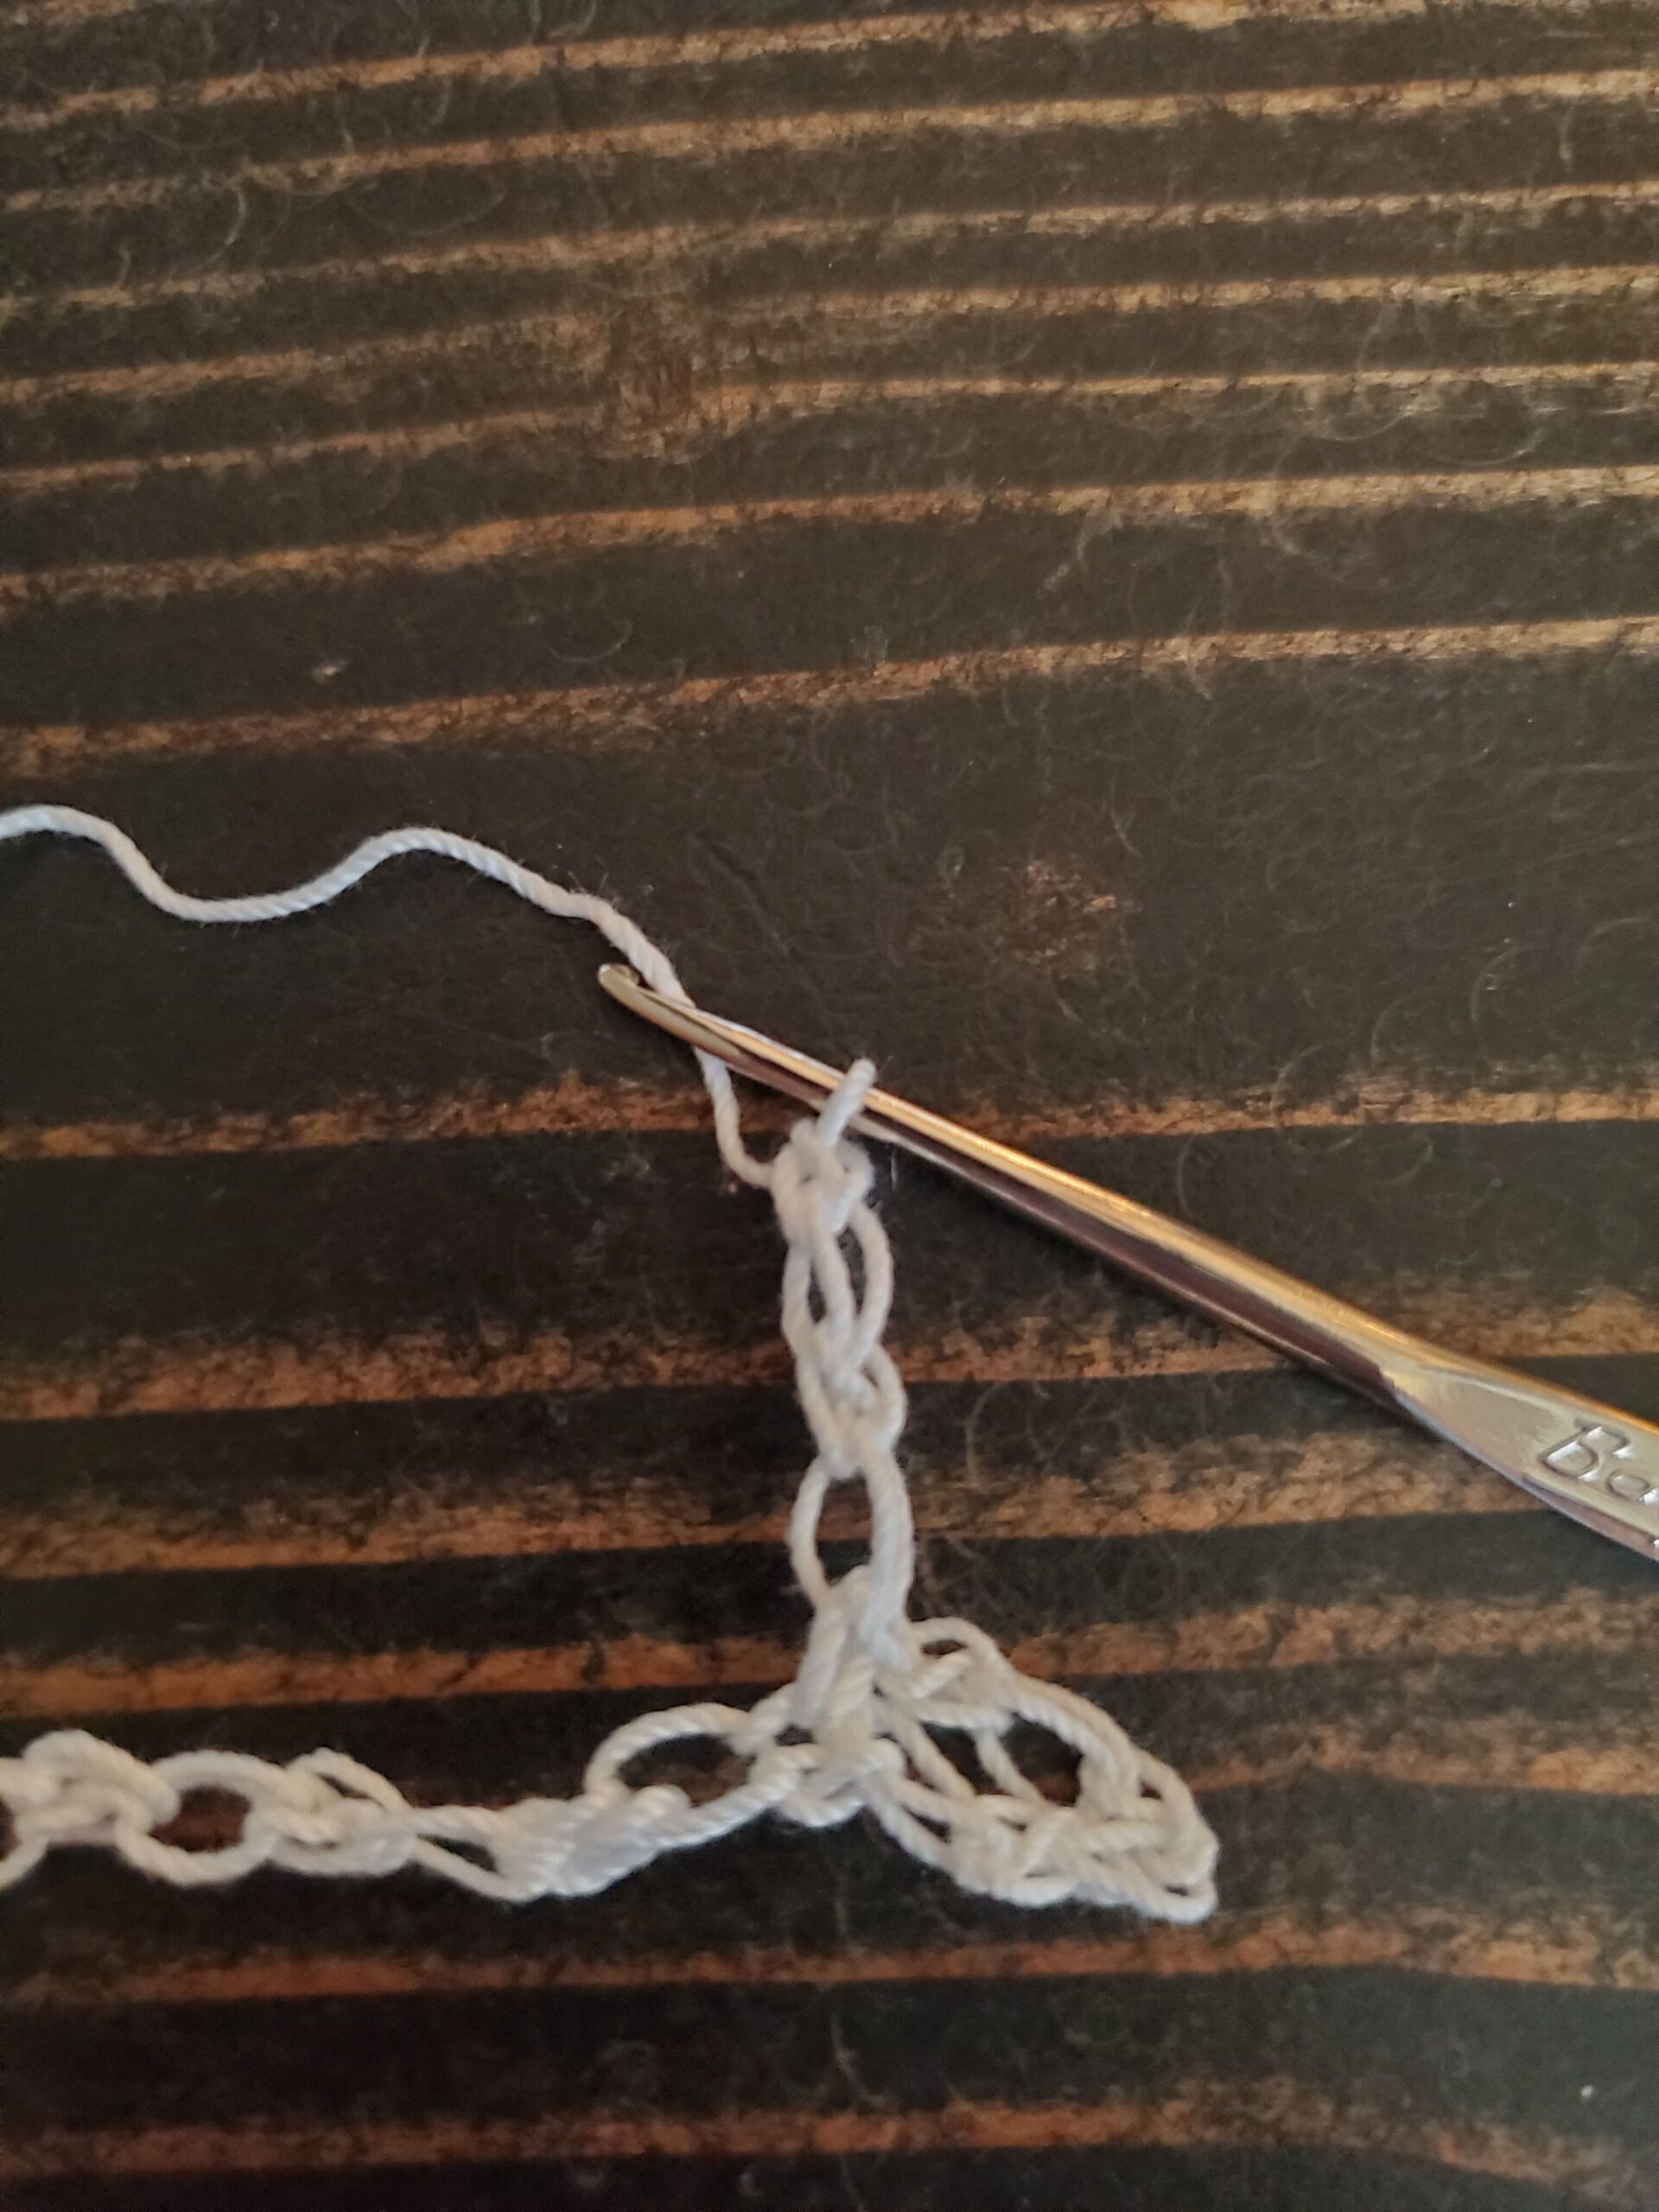
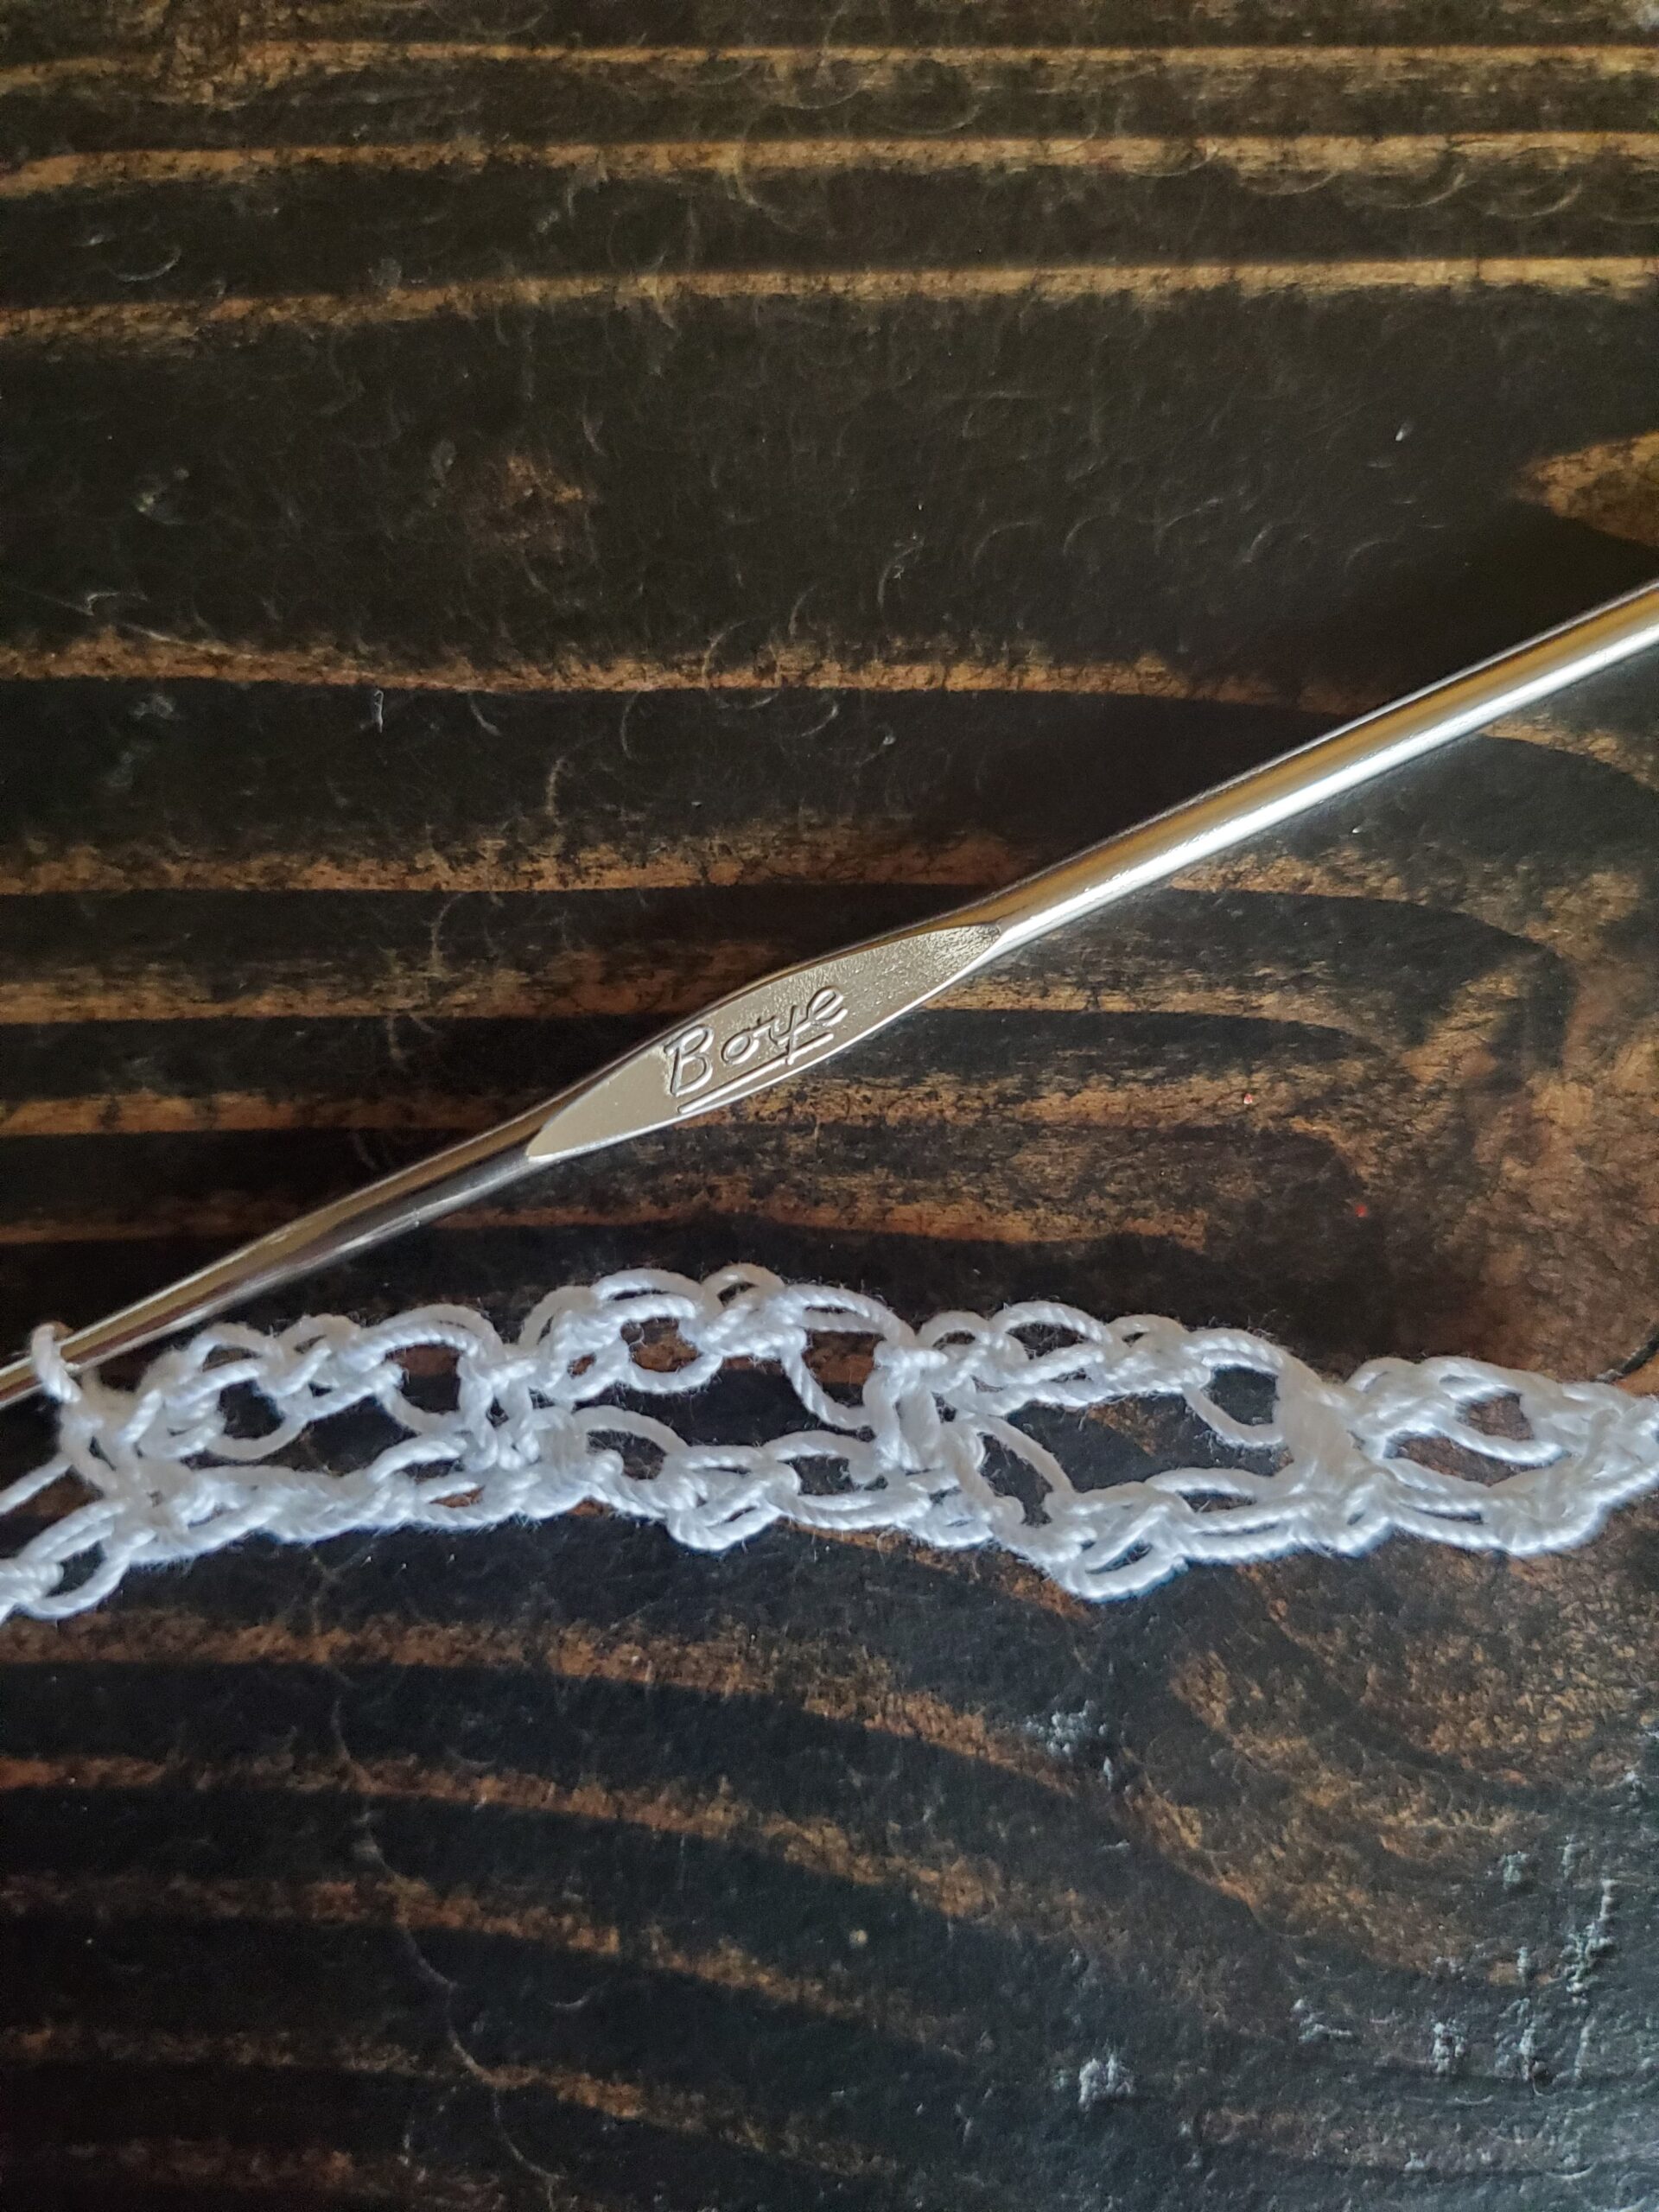
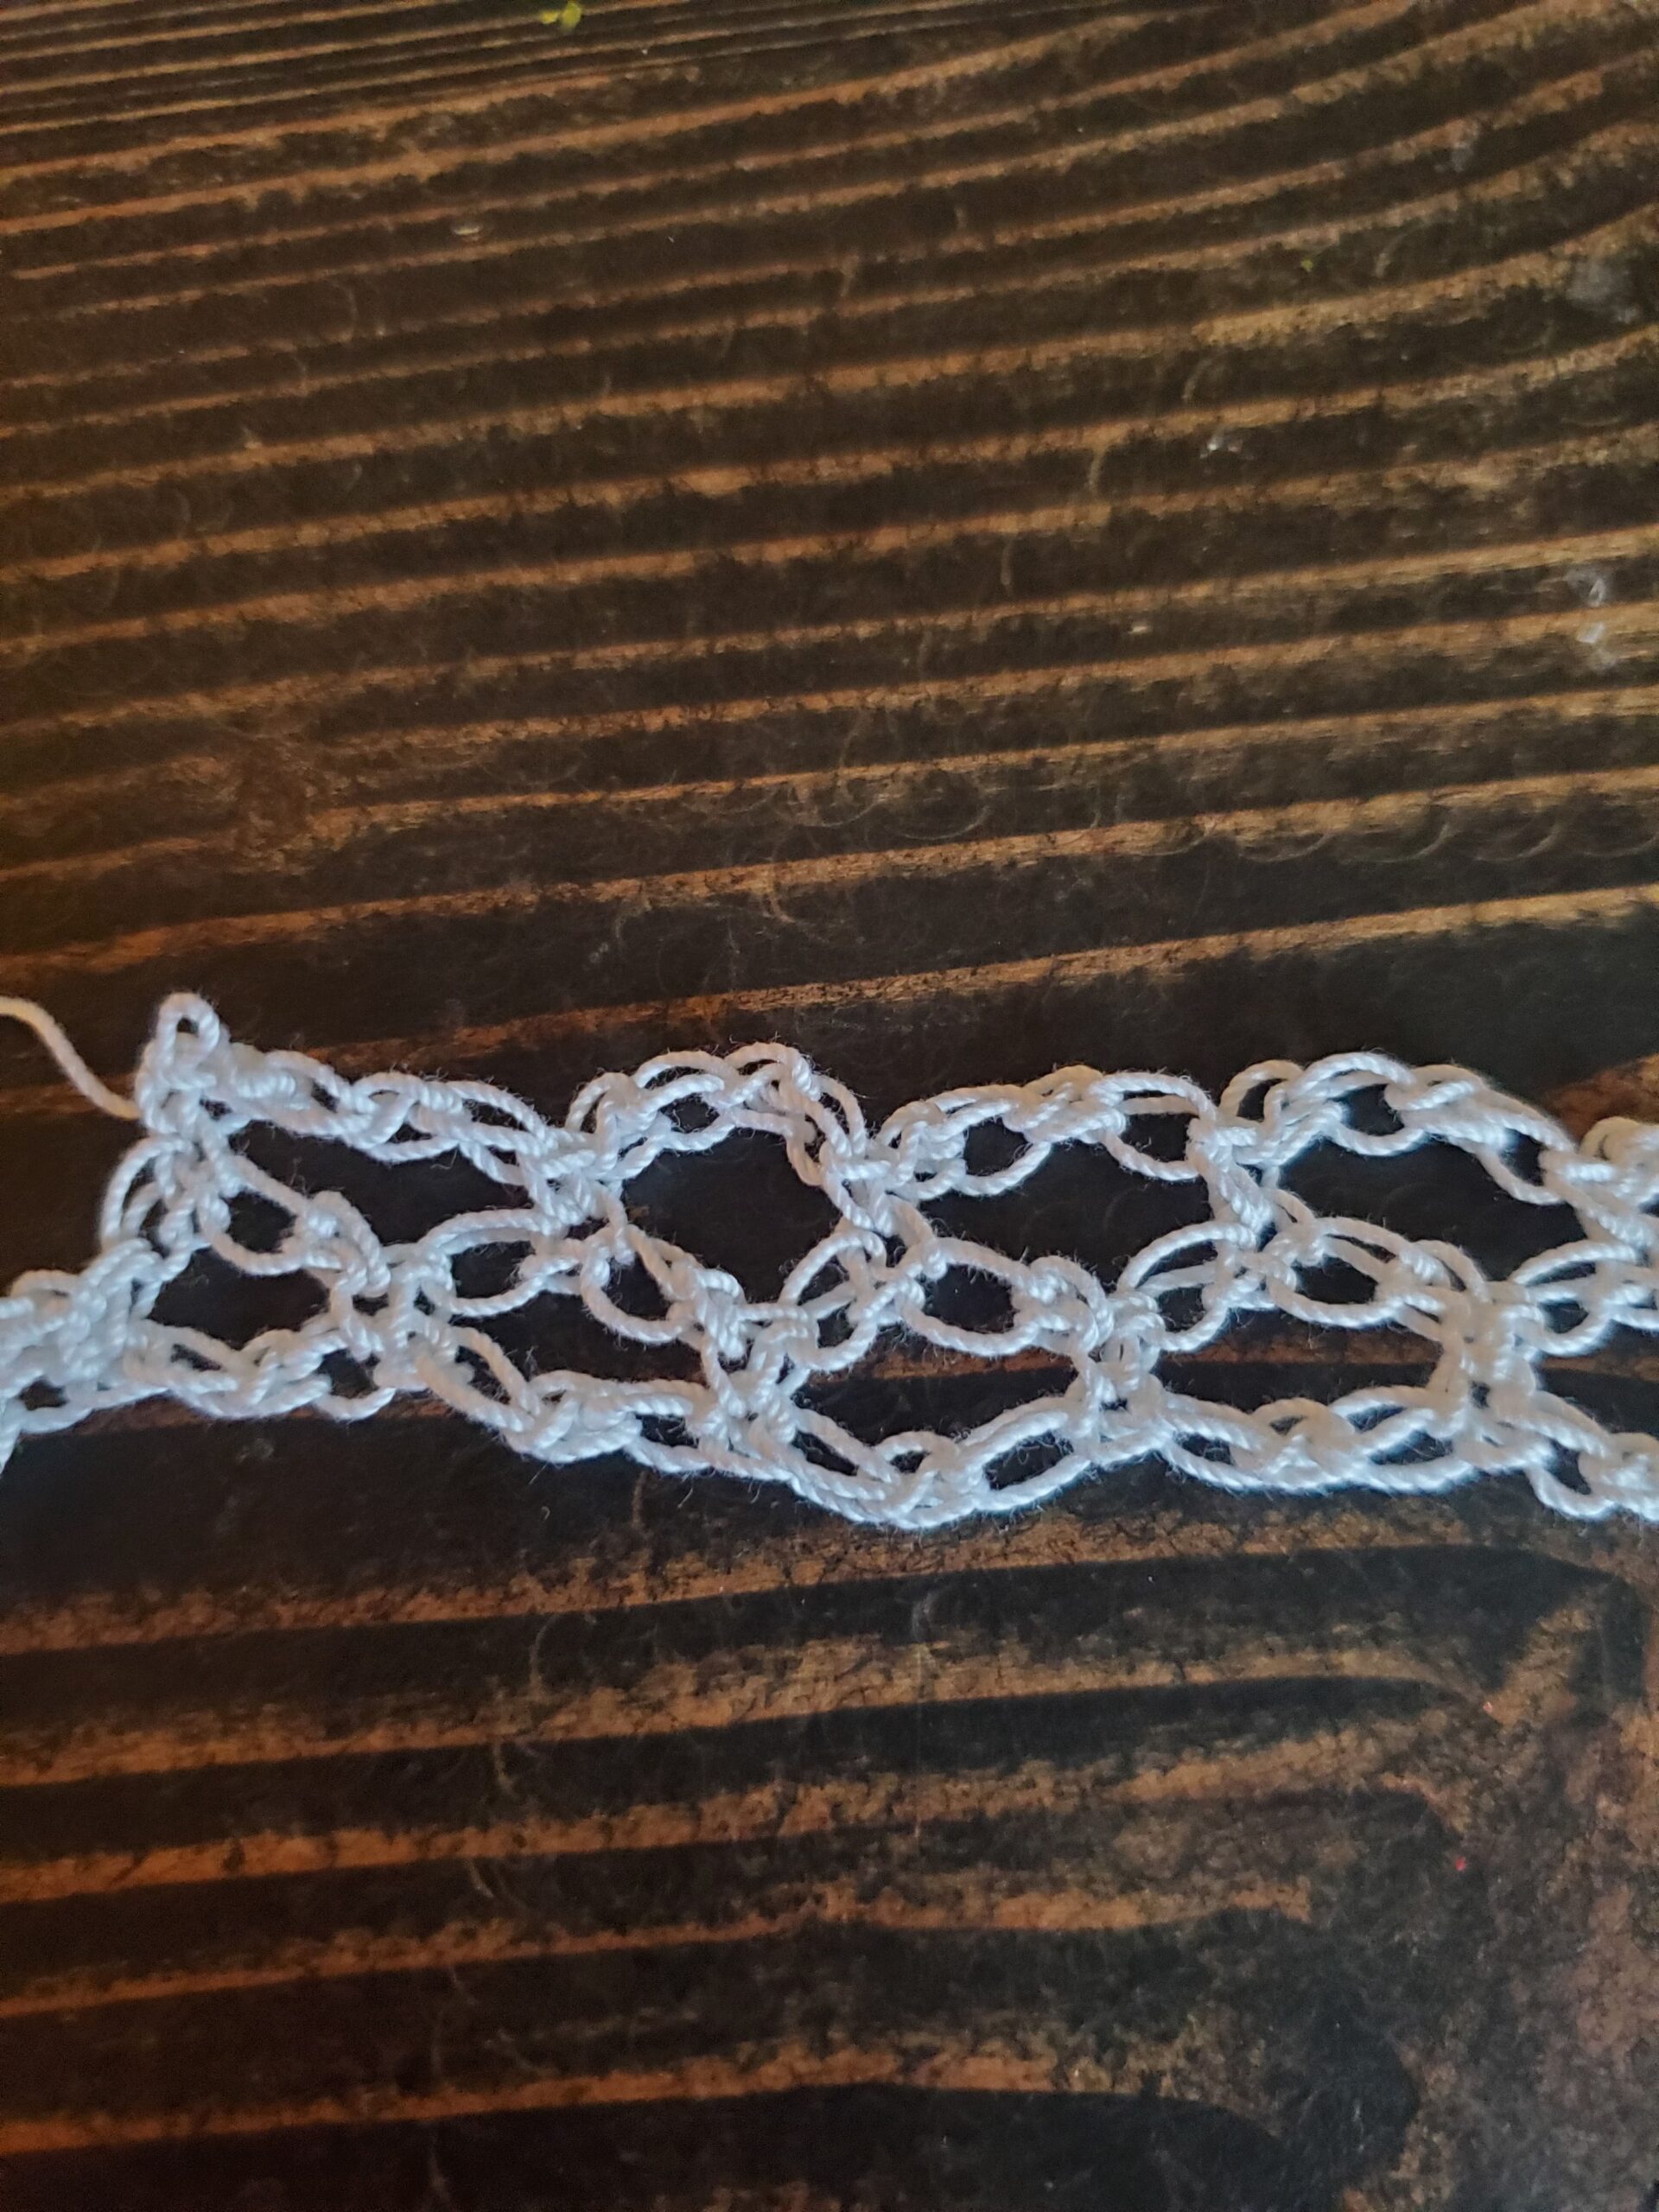
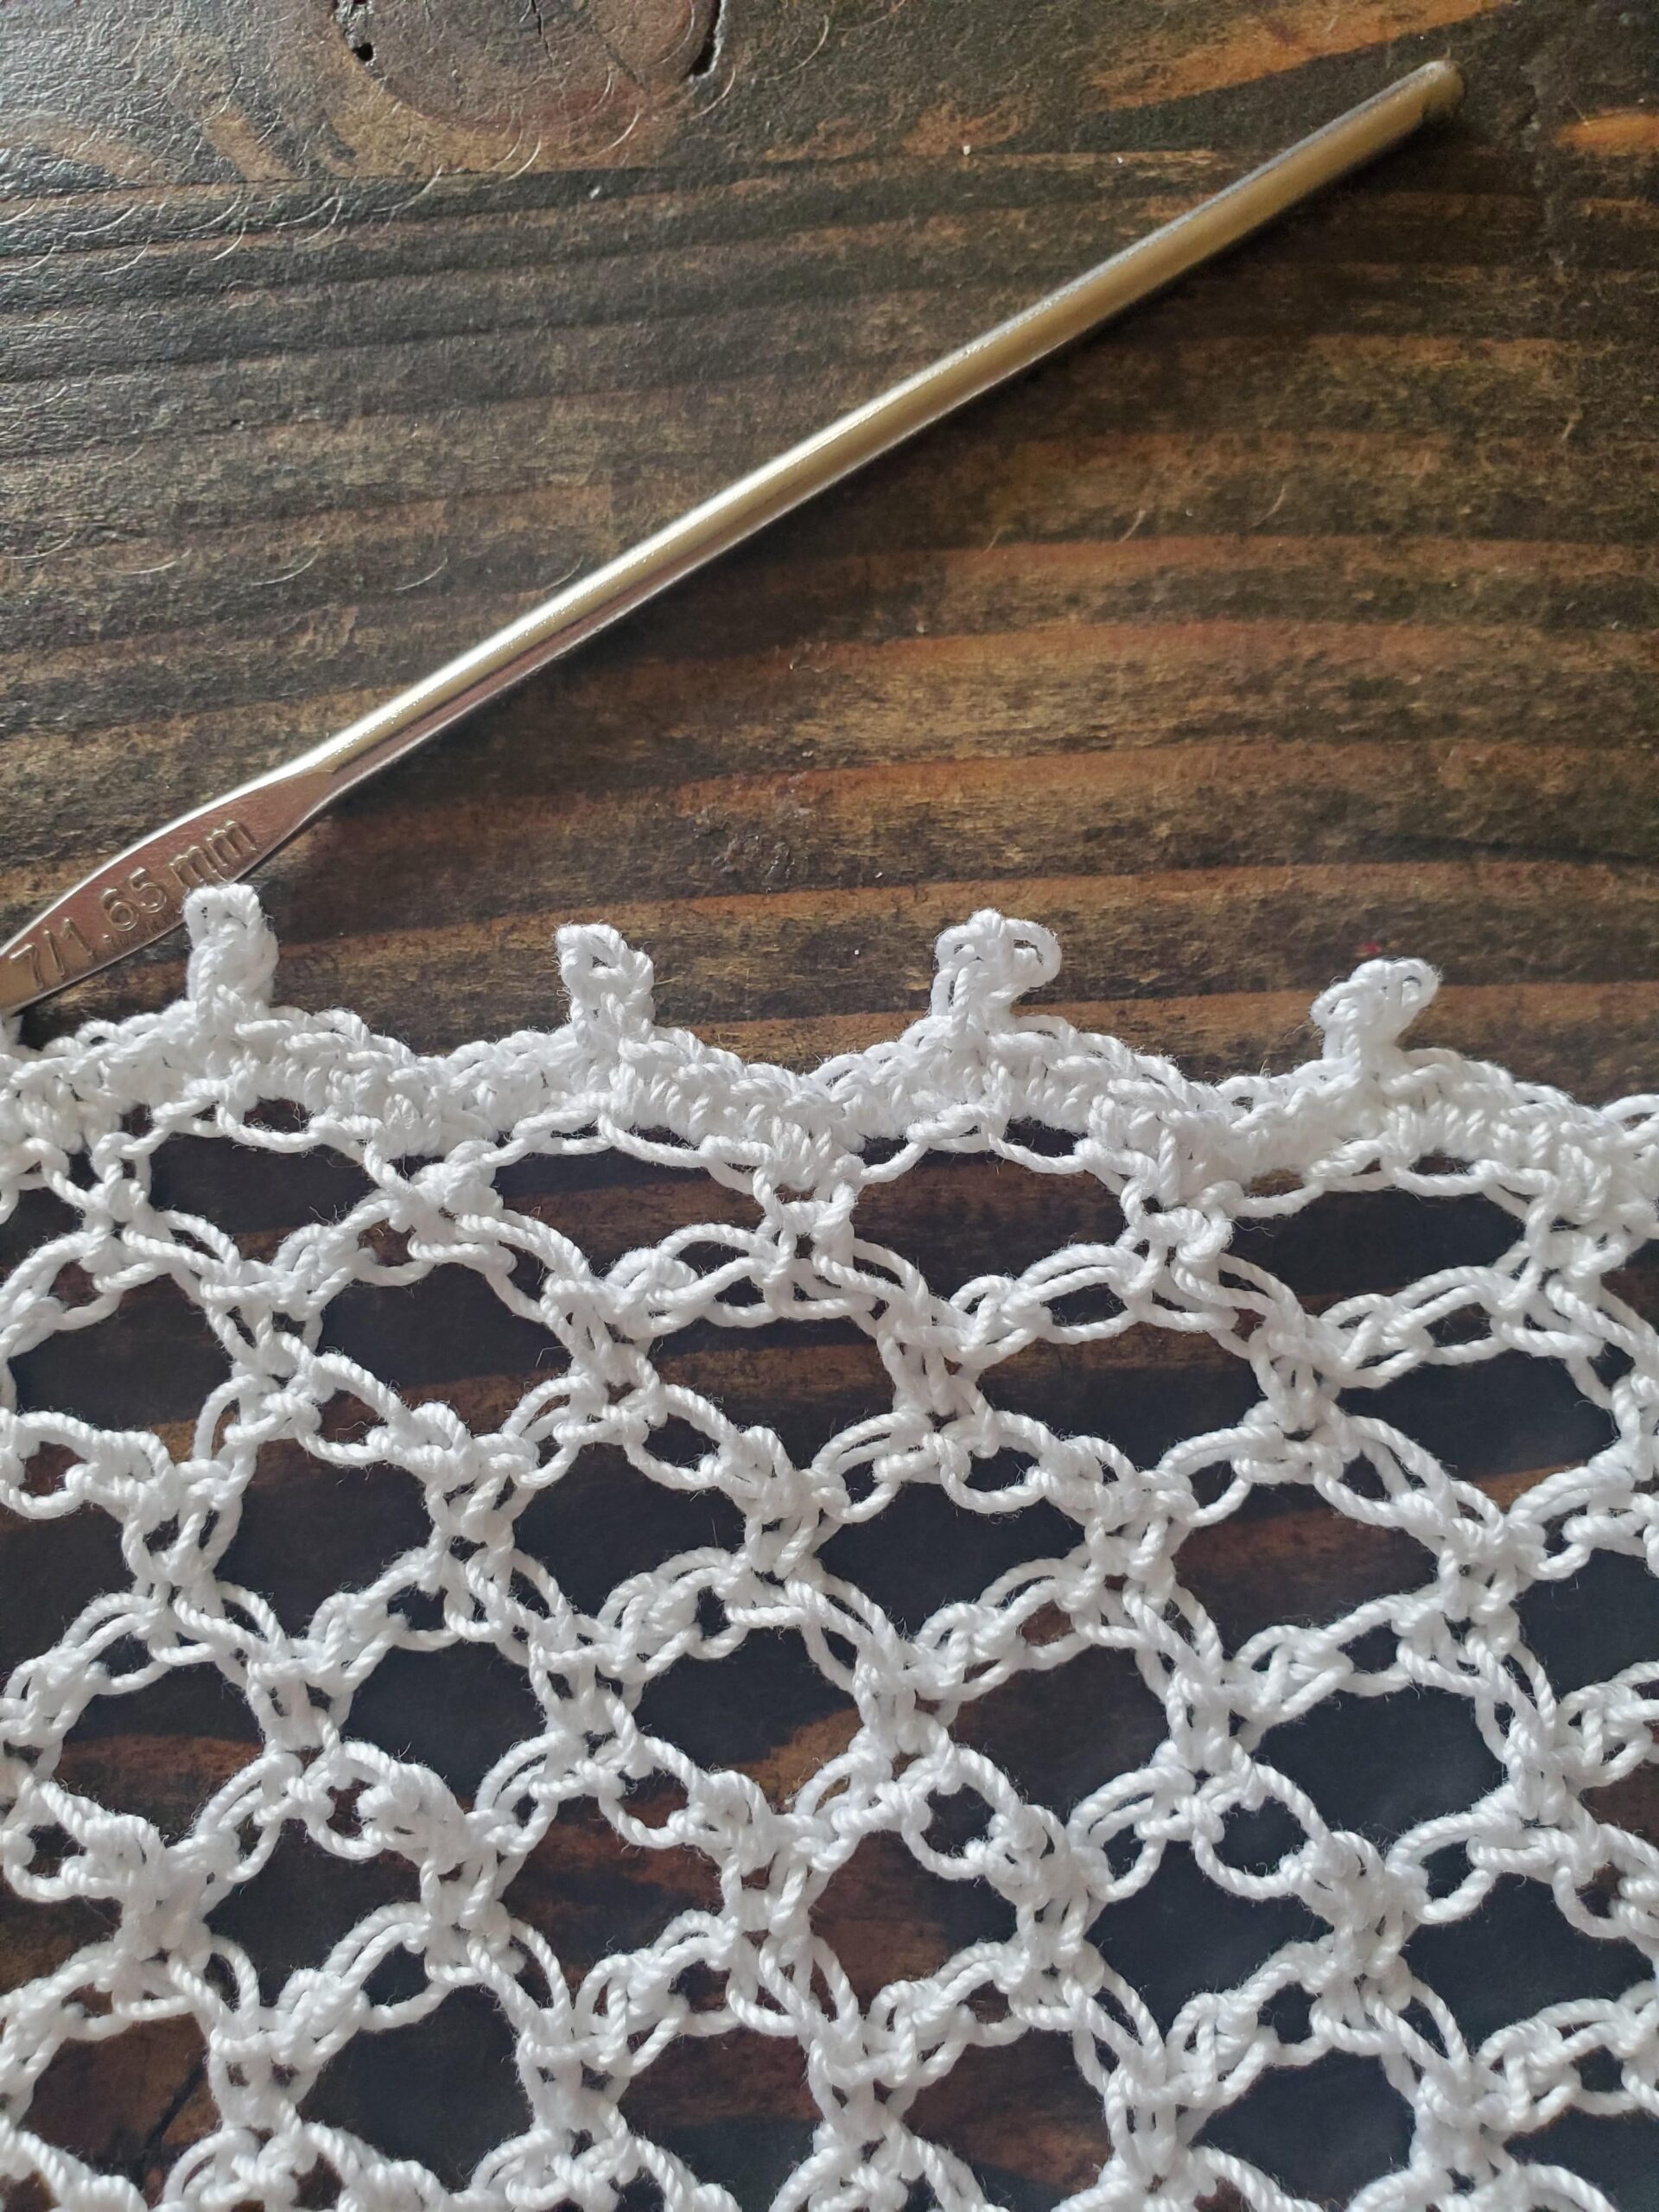
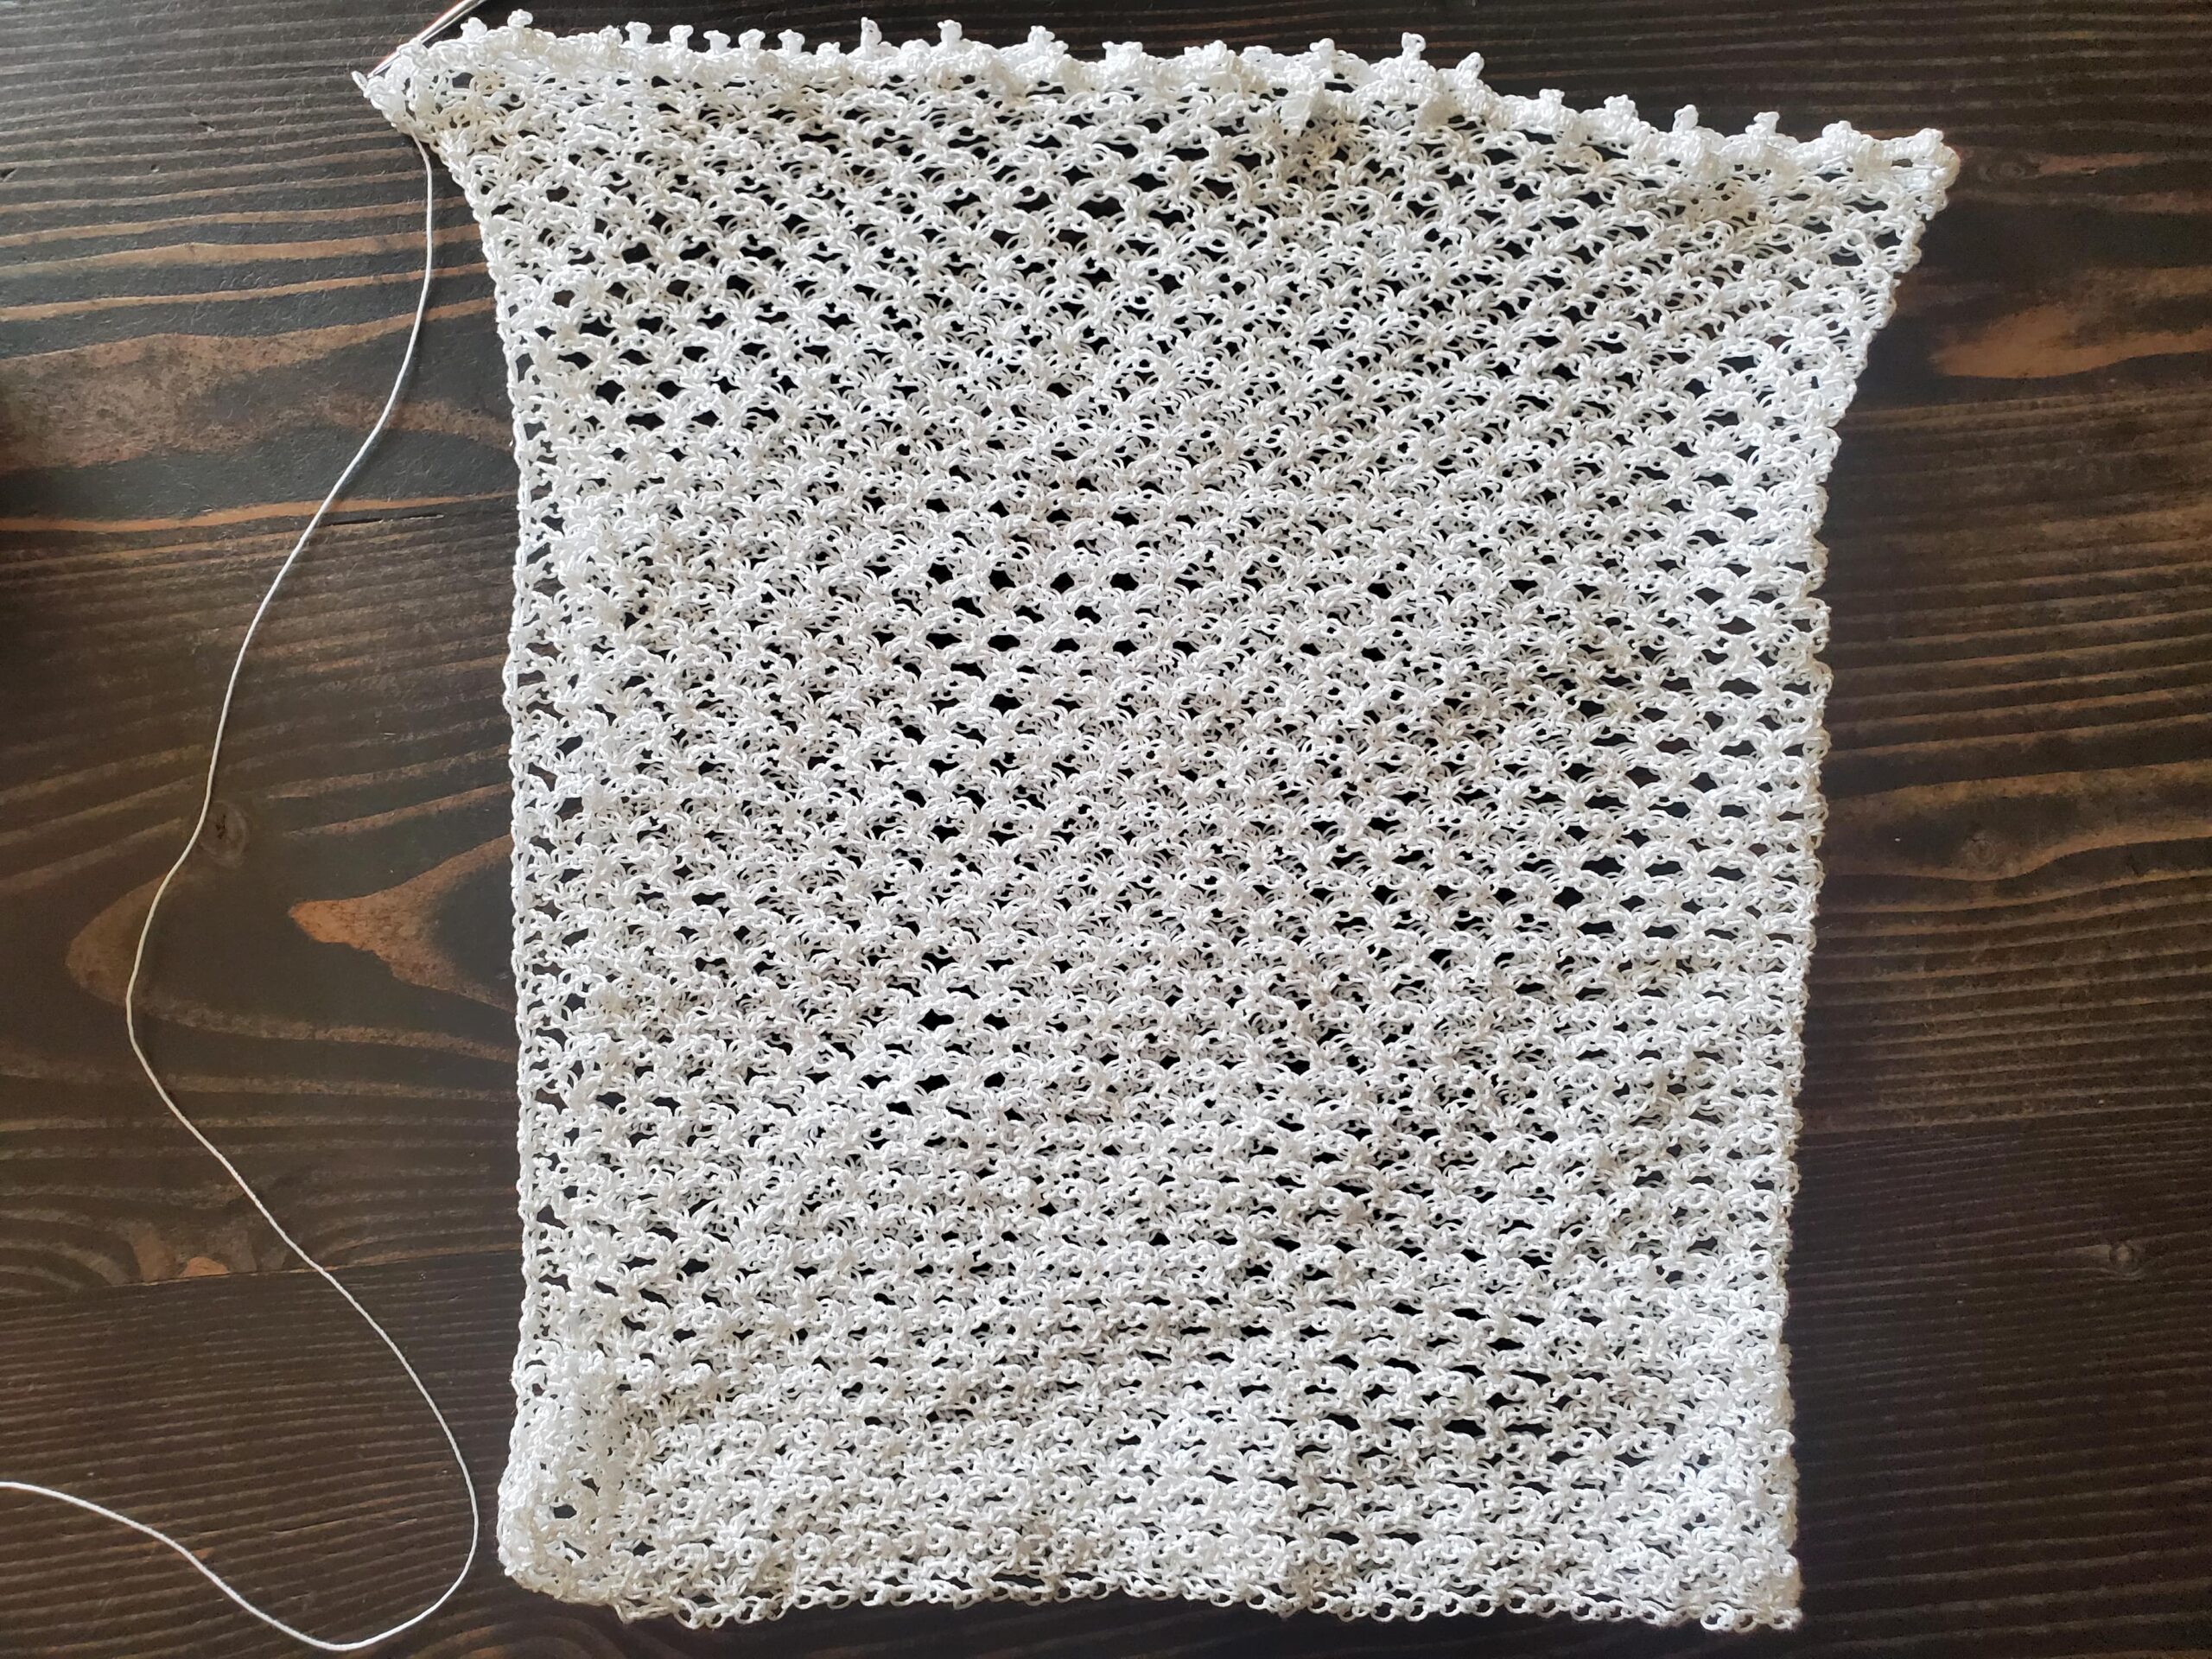
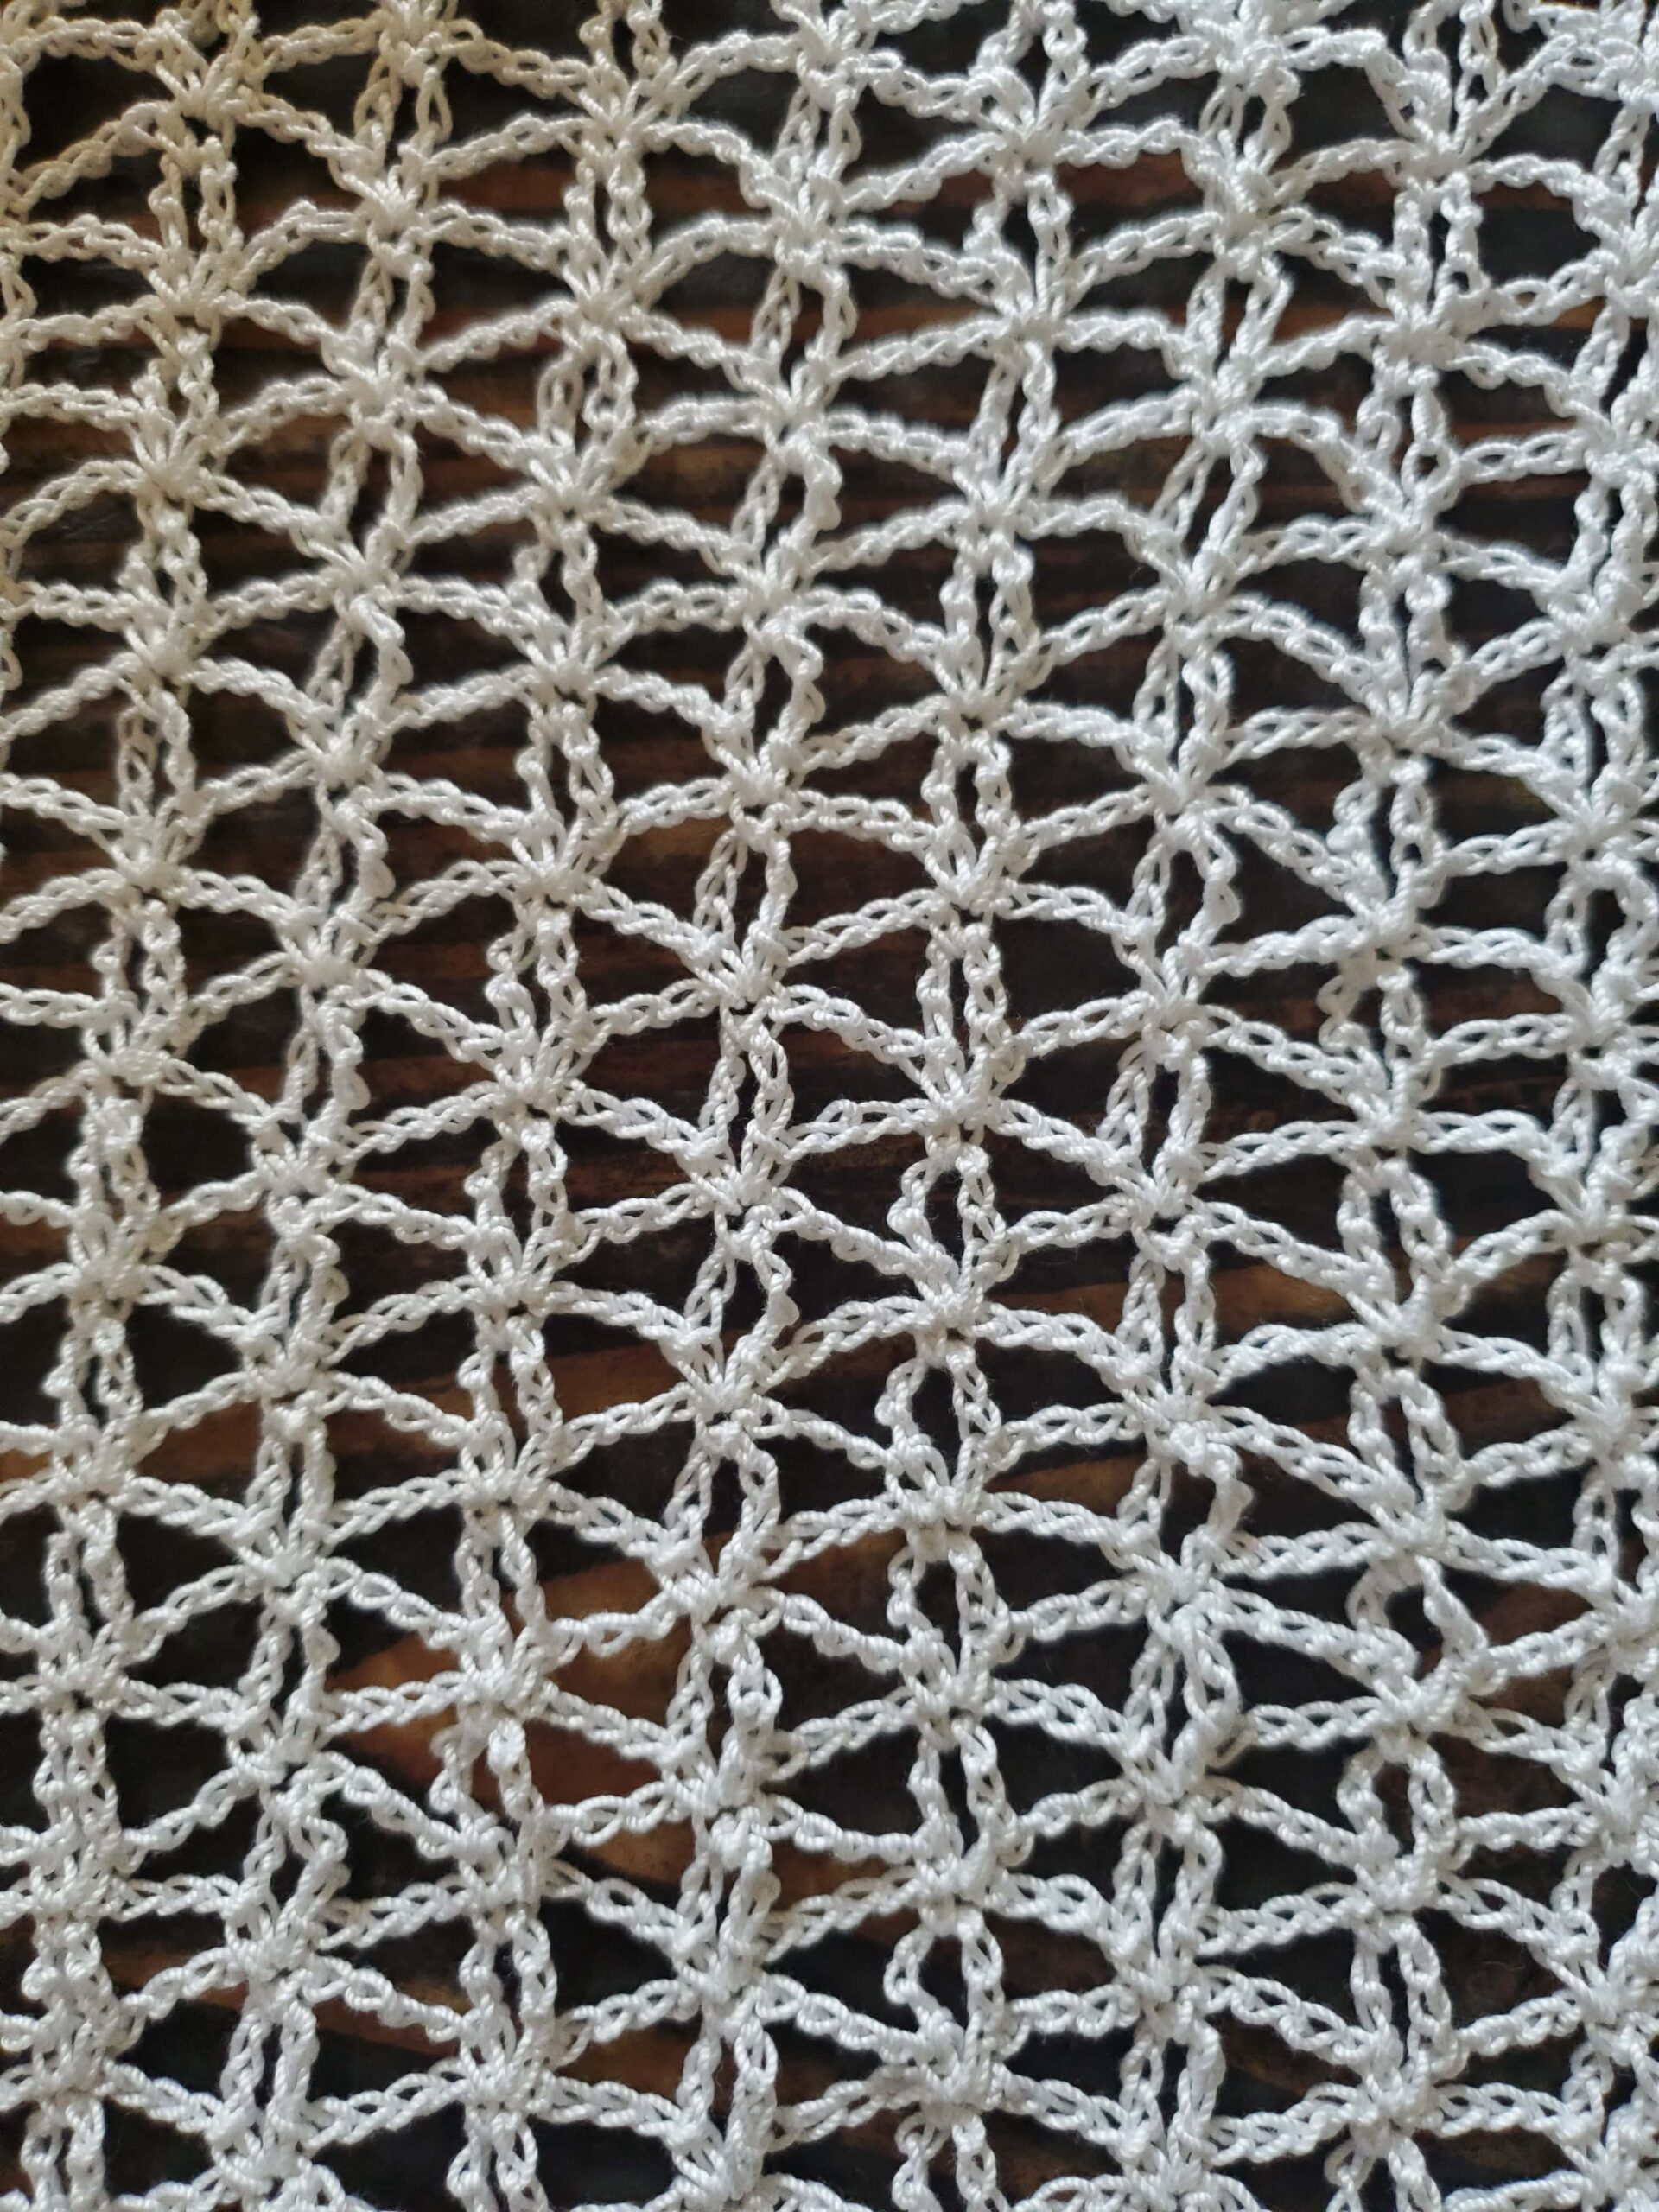
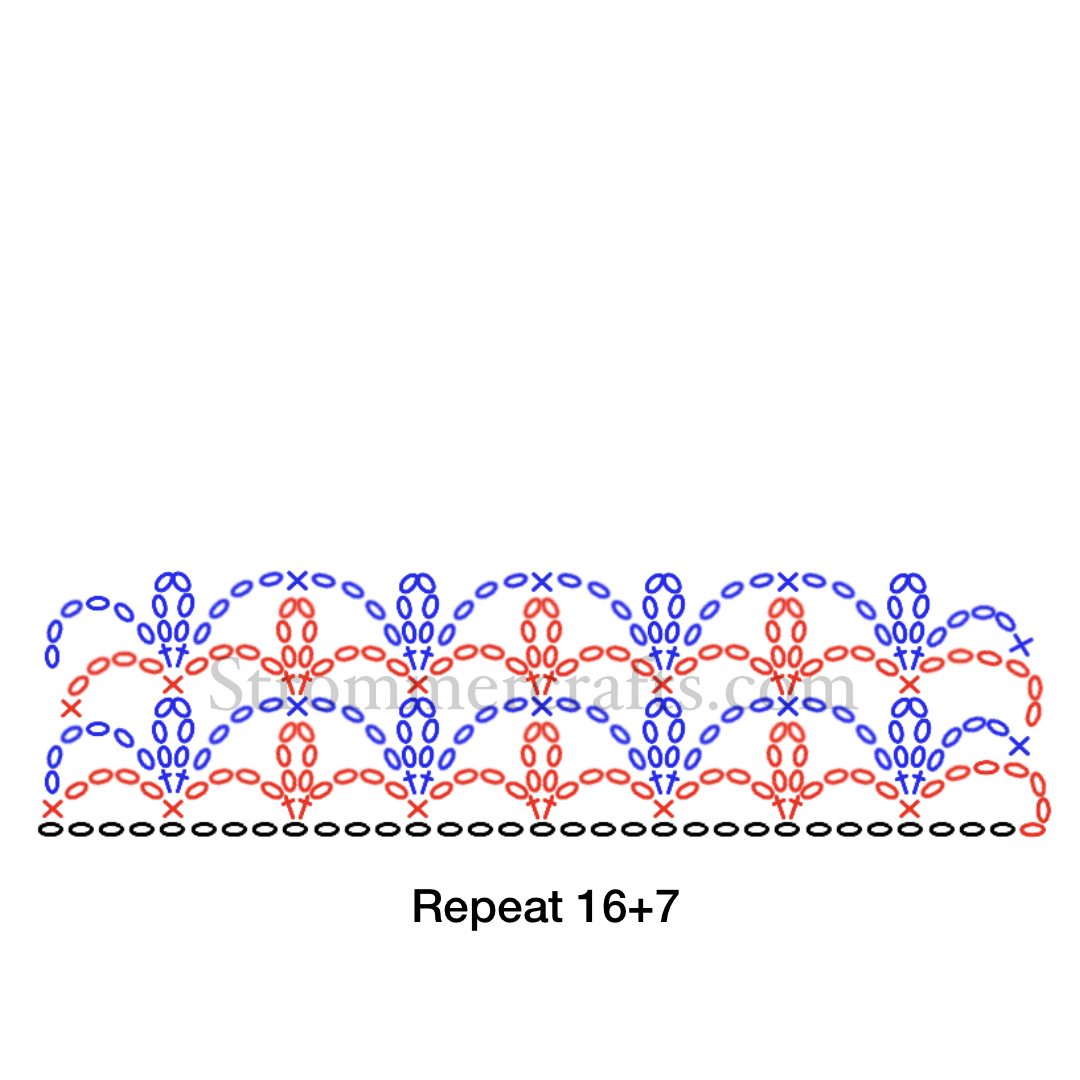
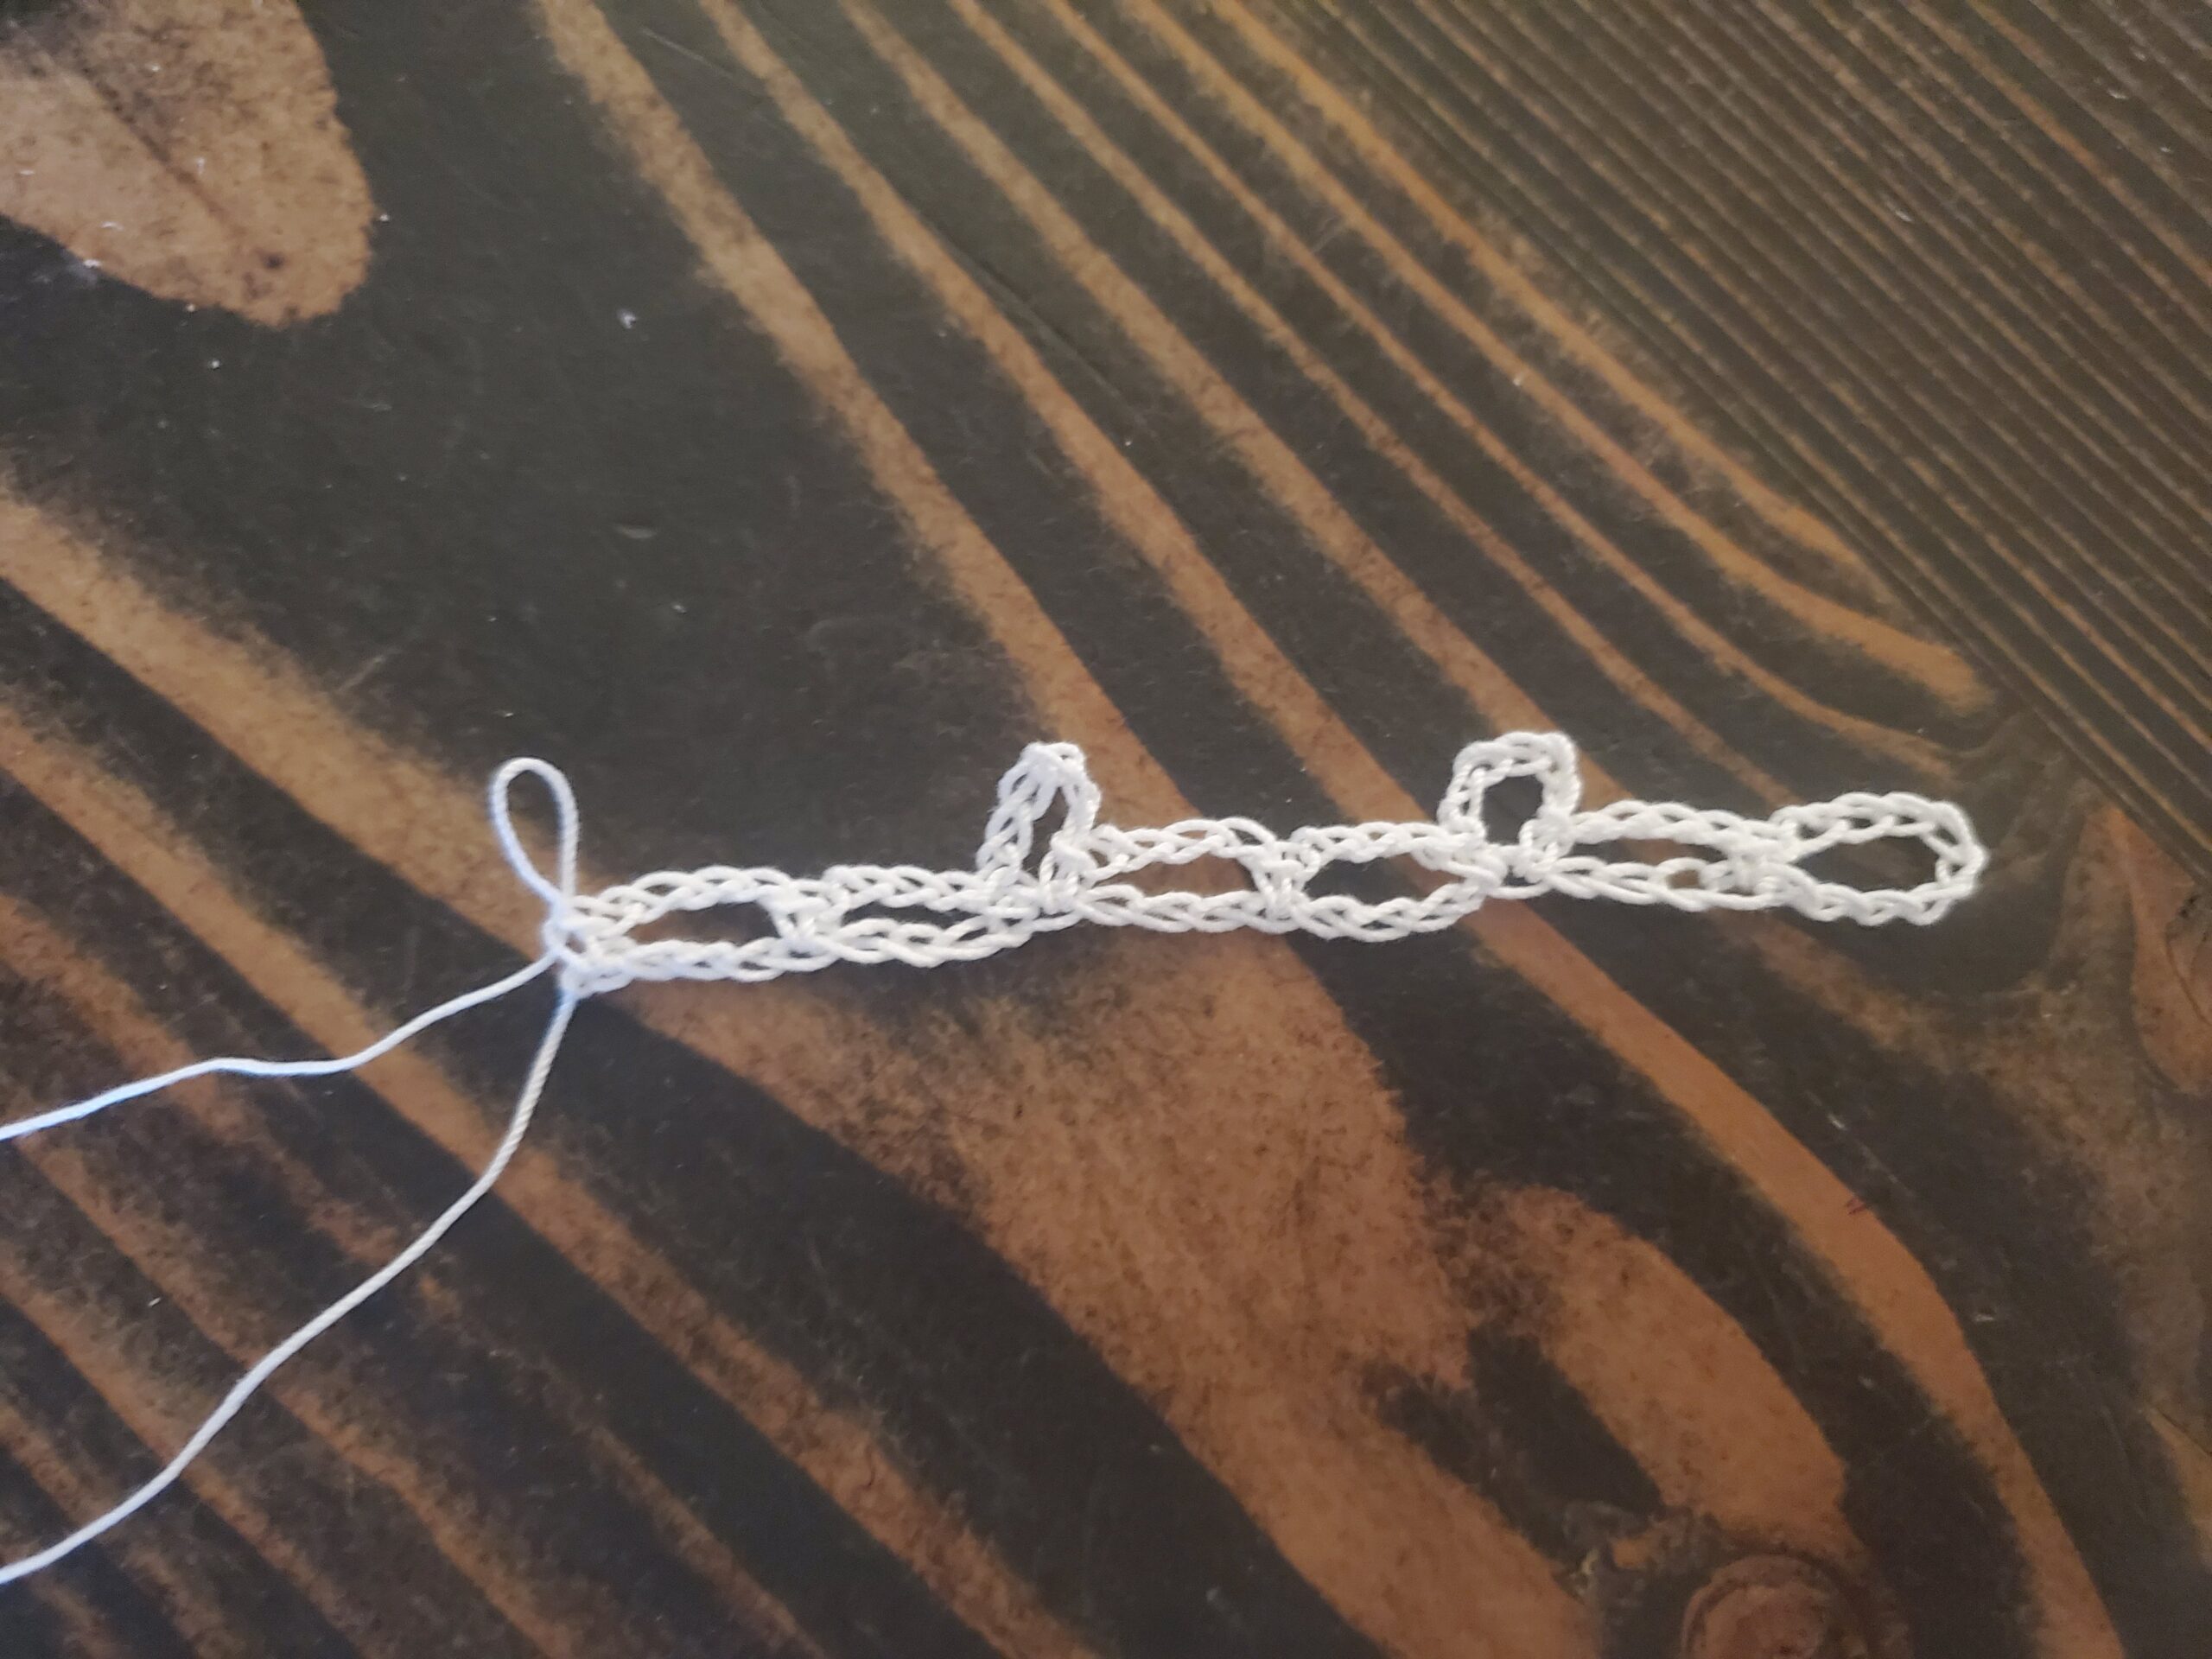
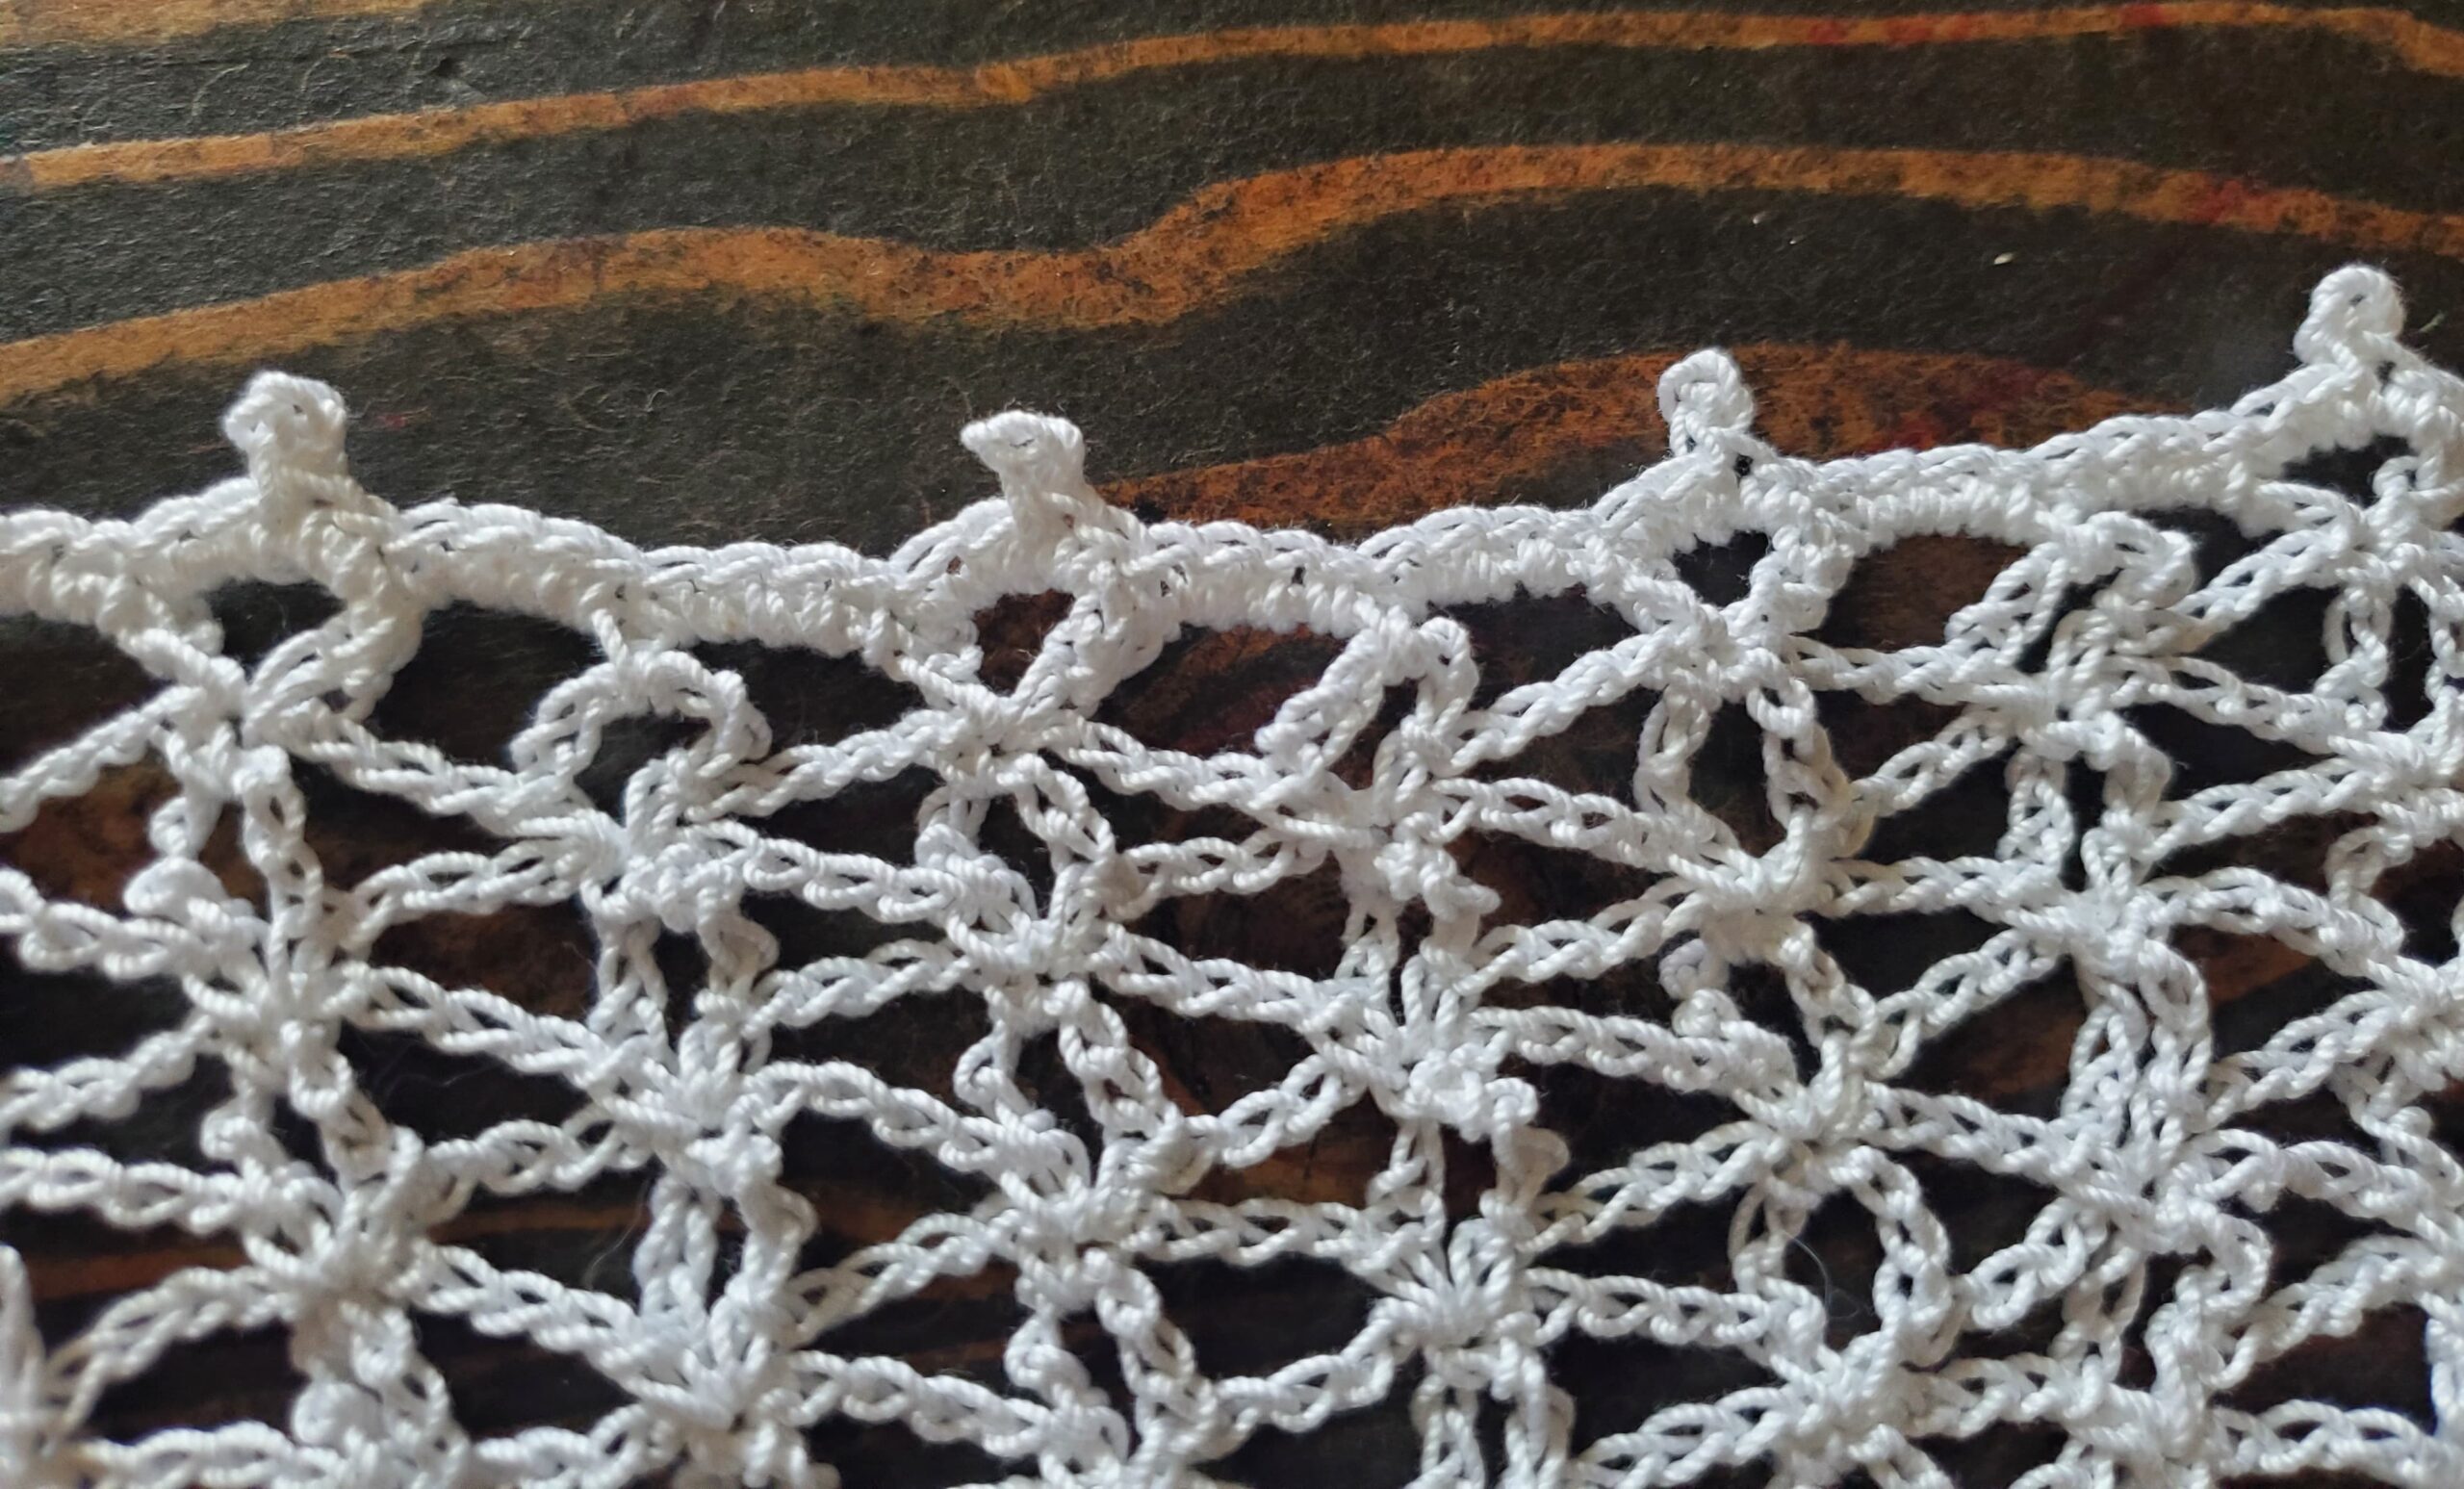
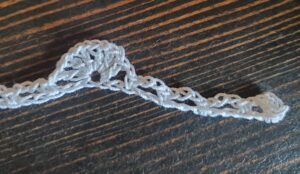
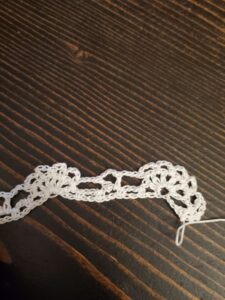
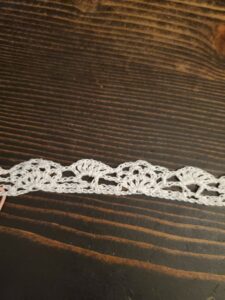
Row 2: Turn, ch 7, skip 2 chs, sc into next ch, ch 9, take hook out and insert into 6th ch away from where your hook was, grab loop at top and pull through, ch 6, insert hook into 6th ch away from hook, make a sc, insert hook into “middle of leaves” just made, and insert hook into 4th ch in the ch 15 space from previous row, make a sc, *ch 7, skip 3 chs, sc in next ch, ch 13, take hook out, insert into 6th ch away from hook, grab loop, pull through and ch 6, insert hook into 6th ch away from hook, make a sc, insert hook into “middle of leaves” just made, skip 3 chs, sc into next ch, ch 3, make a sc in 3rd ch of next ch 5 from previous row, ch 9, take hook out, insert into 6th ch away from where hook was, grab loop and pull through, ch 6, insert hook into 6th ch away from hook, make a sc, insert hook into middle of leaves, make a sc into 4th ch of next ch 15.*

Repeat from *to* until last repeat, ch 7, skip 3 chs, sc in next ch, ch 13, take hook out, insert into 6th ch away from hook, grab loop, pull through and ch 6, insert hook into 6th ch away from hook, make a sc, insert hook into “middle of leaves” just made, skip 3 chs, sc into next ch, ch 3, make a sc in 3rd ch of next ch 5 from previous row, end with ch 3, and tr into 3rd ch away. 

Little Leaf Trellis Veil Row 2
Row 2

Row 3: Turn, ch 15, skip over first set of “leaves” and sc into 4th ch of next ch 7 space, ch 5, sc into 4th ch of next ch 7 space, *ch 15, skip over next two “leaves,” sc into 4th ch of next ch 7 space, ch 5, sc into 4th ch of next ch 7 space* Repeat from *to,* end with ch 12, tr into 4th ch of last ch 7 space.

Little Leaf Trellis Veil Row 3
Row 3

Row 4: Turn, *ch 7, skip 3 chs, sc in next ch, ch 13, make a leaf (see special stitches above), skip 3 chs, sc in next ch, ch 3, sc in 3rd ch of ch 5, ch 9, make a leaf, sc into 4th ch of next ch 15 space,* Repeat from *to* until last repeat, ch 7, skip 3 chs, sc into next ch, end with ch 4, tr into 4th ch.

Crochet llt veil row 4
Row 4

Row 5: Turn, *ch 5, skip next ch 7, sc into 4th ch of next ch 7 space, ch 15, skip over next 2 leaves, sc into 4th ch in next ch 7 space.* Repeat from *to,* end with ch 5, sc into 4th ch of last ch 7 space. 

Little Leaf Trellis Veil Row 5
Row 5

Row 6: Turn, ch 7, sc into 3rd ch of next ch 5 from previous row, *ch 9 and make a leaf, sc into 4th ch of next ch 15, ch 7, skip 3 chs, sc into next ch, ch 13, make a leaf, skip 3 chs and sc into next ch, ch 3, sc into 3rd ch of next ch 5.* Repeat from *to* until end. Ch 4, dtr into top of tr from previous row.

Row 6 llt veil
Row 6

Repeat rows 3-6  

End on a Row 6 repeat

Edging:

Turn, ch 1, *3 sc into ch 5 space, ch 3 picot, 3 sc into same ch 5 space, (3 sc into next ch 15 space, ch 3 picot, 6 sc in same ch space, ch 3 picot, 6 sc in ch space, ch 3 picot, 3 sc in ch space)* Repeat from *to.*

DO NOT CUT THREAD.

Assembly:

Take both edges of the veil and line them up as evenly as possible. Insert hook into both sides and slip stitch your way down to sew into an infinity style veil. Alternatively, you can cut a long enough piece of thread and sew with your tapestry needle. Cut thread with scissors and weave in any ends with tapestry needle.

Thank you for checking out the Little Leaf Trellis Crochet Veil pattern! Until next time.

Other Posts You Might Like:  

Flower Diamond Crochet Veil Pattern

Hello everyone, today I have another free crochet veil pattern for you all…the Crochet Flower Diamond Veil! This crochet veil has a 10 petaled flower worked in a diamond shape and sewn into the infinity style. I hope you like it!

This veil pattern is created for use at Catholic mass, or at least, that’s what I use it for! Some women wear a veil during mass as an outward way to humble themselves before God. According to Fr. Anthony Dorsa from Catholic Answers, “…women are to be veiled in the presence of that which is holy, because they themselves are, in a sense, sacred.” 

As with some of my previous crochet veil patterns, this is a project that will take a little bit of time to complete. Using the tiny crochet thread makes the veil look dainty, and because of that, it’s a labor of love. I believe this veil took me about 3 weeks to finish. Of those 3 weeks, I worked on it for about 1-2 hours a day, your time may vary of course.

The Flower Diamond Crochet Veil is worked up in 10 rows and then repeated from rows 3-10 until you’ve reached your desired length. 

The veil can be adjusted in length, the repeat formula is 36+4. This means to make a series of 36 chains until you’re happy with the length and then add 4 more chains for the turning chain.

I suggest making your starting chain and then draping it over your head, while bringing the ends together to get an idea of what size you need. I like to give my veils enough room around my neck and chest area, otherwise I feel constricted.

Okay, let’s get into this beautiful crochet veil pattern!

Related Posts:

Please note that some of these links are affiliate links. That means that if you click on these links and make a purchase, I may receive a commission at no extra cost to you. You can find more information about our disclosure policy here. Thank you for your support.

Materials Needed:

Abbreviations Used:

Please note these are in US terms, not UK.

  • Ch(s) – chain(s)
  • Sc – single crochet
  • Dc – double crochet
  • Tr – treble crochet
  • Ch 3 picot – ch 3, insert hook into top of last stitch, make a slip stitch
Flower Diamond Veil Close Up

Flower Diamond Crochet Veil Pattern

Ch a repeat of 36+4 until desired length.

  • Row 1: Dc in 5th ch from hook, ch 5, skip 5 chs, 1 sc in next 5 chs, *ch 5, skip 5 chs, 1 dc in next 3 chs, ch 5, skip 5 chs, 1 sc in next 5 chs.* Repeat from *to* until 7 chs are left. Ch 5, skip 5 chs, 1 dc in last 2 chs.
Row 1
  • Row 2: Ch 3, turn, skip first dc, *dc in next dc, 1 dc in 1st and 2nd chs of next ch 5, ch 5, skip next sc, 1 sc in next 3 sc, ch 5, skip 3 chs of next ch 5, 1 dc in 4th and 5th chs, dc in next dc, ch 1, skip next dc.* Repeat from *to* until last repeat completed. Dc in next dc, 1 dc in 1st and 2nd chs of next ch 5, ch 5, skip next sc, 1 sc in next 3 sc, ch 5, 1 dc in 4th and 5th chs of next ch 5, 1 dc in next dc, 1 dc in top of turning ch from previous row.
Row 2
  • Row 3: Ch 8, turn, skip next 3 dc, *1 dc in next dc, 1 dc in 1st and 2nd chs of next ch 5, ch 3, skip next sc, tr in next sc, ch 3, skip 3 chs of next ch 5, 1 dc in 4th and 5th chs, 1 dc in next dc, ch 4, tr in next ch 1 space, ch 4, skip next 2 dc.* Repeat from *to* until last repeat completed. 1 dc in next dc, 1 dc in 1st and 2nd chs of next ch 5, ch 3, skip next sc, tr in next sc, ch 3, skip 3 chs of next ch 5, 1 dc in 4th and 5th chs, 1 dc in next dc, ch 4, tr in top of ch 3 turning ch from previous row.
Row 3
  • Row 4: Ch 1, turn, skip tr, sc in 1st ch of next ch 4, *ch 4, skip next 2 dc, 1 dc in next dc, 2 dc in next ch 3 space, ch 1, skip tr, 2 dc in next ch 3 space, 1 dc in next dc, ch 4, skip next 2 dc and 3 chs in next ch 4 space, sc in 4th ch, sc in tr, sc in 1st ch in next ch 4 space.* Repeat from *to* until last repeat completed. Ch 4, skip next 2 dc, 1 dc in next dc, 2 dc in next ch 3 space, ch 1, skip tr, 2 dc in next ch 3 space, 1 dc in next dc, ch 4, skip next 2 dc, skip 3 chs of previous rows turning ch, 1 sc in next 2 chs.
Row 4
  • Row 5: Ch 1, turn, skip 1st sc, sc in next sc, sc in 1st ch of next ch 4 space, *ch 5, skip next 2 dc, dc in next dc, dc in ch 1 space, dc in next dc, ch 5, skip next 2 dc, skip 3 chs of next ch 4 space, sc in next ch, 1 sc in next 3 sc, 1 sc in 1st ch of next ch 4 space.* Repeat from *to* until until last repeat completed. Ch 5, skip next 2 dc, dc in next dc, dc in ch 1 space, dc in next dc, ch 5, skip next 2 dc, skip next 3 chs of next ch 4 space, sc in next ch, sc in next sc, sc in ch 1 turning ch from previous row.
Row 5
  • Row 6: Ch 1, turn, skip 1st sc, sc in next sc, skip next sc, *ch 5, skip 3 chs of next ch 5 space, dc in 4th and 5th chs, dc in next dc, ch 1, skip dc, dc in next dc, dc in 1st and 2nd chs of next ch 5 space, ch 5, skip next sc, 1 sc in next 3 sc, skip next sc.* Repeat from *to* until last repeat completed, ch 5, skip 3 chs of next ch 5 space, dc in 4th and 5th chs, dc in next dc, ch 1, skip dc, dc in next dc, dc in 1st and 2nd chs of next ch 5 space, ch 5, skip next sc, sc in next sc, sc in ch 1 turning ch from previous row.
Row 6
  • Row 7: Ch 7, turn, skip next 2 sc and 3 chs of next ch 5 space, dc in 4th and 5th chs, *dc in next dc, ch 4, skip next 2 dc, tr in ch 1 space, ch 4, skip next 2 dc, dc in next dc, dc in 1st and 2nd chs of next ch 5 space, ch 3, skip next sc, tr in next sc, ch 3, skip next sc, skip 3 chs of next ch 5 space, dc in 4th and 5th chs.* Repeat from *to* until last repeat completed, dc in next dc, ch 4, skip next 2 dc, tr in ch 1 space, ch 4, skip next 2 dc, dc in next dc, dc in 1st and 2nd chs of next ch 5 space, ch 3, skip next sc, tr in ch 1 turning ch of previous row
Row 7
  • Row 8: Ch 3, turn, 2 dc in ch 3 space, dc in next dc, *ch 4, skip next 2 dc and 3 chs of next ch 4 space, sc in 4th ch, sc in tr, sc in 1st ch of next ch 4 space, ch 4, skip next 2 dc, dc in next dc, 2 dc in next ch 3 space, ch 1, skip tr, 2 dc in next ch 3 space, dc in next dc.* Repeat from *to* until last repeat completed, ch 4, skip next 2 dc and 3 chs of next ch 4 space, sc in 4th ch, sc in tr, sc in 1st ch of next ch 4 space, ch 4, skip next 2 dc, dc in next dc, 3 dc in ch 7 turning ch from previous row.
Row 8
  • Row 9: Ch 3, turn, skip 1st dc, dc in next dc, *ch 5, skip 3 chs of next ch 4 space, sc in 4th ch, sc in next 3 sc, sc in 1st ch of next ch 4 space, ch 5, skip next 2 dc, dc in next dc, dc in ch 1 space, dc in next dc, skip next 2 dc.* Repeat from *to* until last repeat completed, ch 5, skip 3 chs of next ch 4 space, sc in 4th ch, sc in next 3 sc, sc in 1st ch of next ch 4 space, ch 5, skip next 2 dc, dc in next dc, dc in top of ch 3 turning ch from previous row.
Row 9
  • Row 10: Ch 3, turn, skip 1st dc, *dc in next dc, dc in 1st and 2nd ch of next ch 5 space, ch 5, skip next sc, sc in next 3 sc, ch 5, skip next sc and 3 chs of next ch 5 space, dc in 4th and 5th chs, dc in next dc, ch 1, skip next dc.* Repeat from *to* until last repeat completed, dc in next dc, dc in 1st and 2nd ch of next ch 5 space, ch 5, skip next sc, sc in next 3 sc, ch 5, skip next sc and 3 chs of next ch 5 space, dc in 4th and 5th chs, dc in next dc, dc in top of ch 3 turning ch from previous row.

Repeat rows 3-10 until desired length. End after a row 3 repeat. 

Row 10
  • Edging: Ch 1, turn, *sc in tr, 2 sc in next ch space, ch 3 picot, 2 sc in same ch space, sc in next 3 dc, 2 sc in next ch space, ch 3 picot, 2 sc in same ch space.* Repeat from *to* until end. 

DO NOT CUT THREAD

Edging
  • Assembly: Fold the veil in half, sew the edges together by slip stitching into both sides as evenly as possible. Cut thread, sew in ends with tapestry needle. 

Thank you for trying out the Flower Diamond Crochet Veil pattern. I try my best to make pattern instructions as clear as possible, but if you have questions or notice a mistake, please let me know in the comments below.

Until next time!

Other Posts You May Like:

Floral Lace Infinity Veil – Free Crochet Veil Pattern

Hello everyone, today I have another beautiful crochet veil pattern that you can wear to mass for you…the Floral Lace Infinity Veil! With spring just around the corner, I wanted to create a veil that had flowers throughout it, and I think this veil turned out great!

As with some of my previous crochet veil patterns, this one will also take a little bit of time to finish, especially depending on how big you want yours. This pattern is also finished by folding your piece together and sewing to make the veil an infinity type veil. 

The Floral Lace Infinity Veil pattern is worked up in 5 rows with a repeat of rows 2-5. You’ll notice these rows are similar, with the only difference being offsetting the flowers so they look more pleasing to the eye. Here’s a close up of the flower repeats:

The veil is worked up with a repeat of 11+7. This means that you will crochet a chain with a multiple of 11 and then add 7 more chains once you’re happy with your chain length. 

The veil pictured above is a size small, so if you’re making this for an adult, make your starting chain longer. I suggest making your starting chain, draping it over your head and bring the ends together so you can get an idea of what the length will be while worn. 

I also found that in row 1, it’s easy to skip chains on accident since the crochet thread is so tiny and when you make your treble crochets, sometimes it’s hard to tell which chain you’ve crocheted into (or maybe this is just a problem for me, lol!). 

If you find that you’ve reached the end of the starting chain and you don’t have the exact number of chains left according to the pattern instructions…I would just fudge it the best you can. That’s just me, but when you’re done sewing the veil at the end, I promise that no one is going to be able to tell that you had to skip more or less chains at the end.

Alright, let’s jump into the crochet Floral Lace Infinity Veil pattern!

Similar Posts:

Floral Infinity Veil Pattern
Here's my other girly modeling the veil for me 🙂
Crochet Flower Veil Close Up
You can see how the flowers repeat themselves in this close up of the veil

Please note that some of these links are affiliate links. That means that if you click on these links and make a purchase, I may receive a commission at no extra cost to you. You can find more information about our disclosure policy here. Thank you for your support.

Materials Needed: 

Abbreviations Used:

Please note these are in US terms, not UK.

  • Ch – chain
  • St – stitch
  • Sl st – slip stitch
  • Sc – single crochet
  • Tr – treble crochet

Special Stitches:

This crochet veil pattern uses treble cluster stitches. When you make a cluster stitch, you will make 2 or 3 treble crochets, but hold back the last pull through until all 2 or 3 treble crochets are made, and then pull through all loops to finish. Here are more detailed instructions: 

2 Tr Cluster:

  • Yarn over twice, insert hook into next stitch, draw up a loop, yarn over, pull through two loops, yarn over, pull through two loops (you should have two loops on your hook)
  • Yarn over twice, insert hook into same stitch, draw up a loop, yarn over, pull through two loops, yarn over, pull through two loops, yarn over, pull through all three loops.

3 Tr Cluster: 

  • Yarn over twice, insert hook into next stitch, draw up a loop, yarn over, pull through two loops, yarn over, pull through two loops (you should have two loops on your hook)
  • Yarn over twice, insert hook into same stitch, draw up a loop, yarn over, pull through two loops, yarn over, pull through two loops (you should have three loops on your hook)
  • Yarn over twice, insert hook into same stitch, draw up a loop, yarn over, pull through two loops, yarn over, pull through two loops, yarn over and pull through all four loops.

Crochet Flower Lace Infinity Veil

Repeat is 11+7 

Loosely Ch 205 or until desired length using the repeat formula above. (Protip: use stitch markers to mark every 50 stitches or so if you find yourself getting distracted or losing count) 

  • Row 1: Tr in 10th ch from hook, *ch 5, tr in same ch as first tr
  • ch 5, 2 tr cluster in front two loops of last tr (hold back the last pull through, you should have 3 loops on your hook)
  • skip 2 chs, 3 tr cluster in next ch (hold back the last pull through, 6 loops on your hook)
  • skip 4 chs, 3 tr cluster in next ch (pull through all 9 loops on your hook)
  • sl st into any loop of the last tr cluster leg to “secure” the center of your flower petal (this prevents a big hole from forming later in the center)
  • Ch 5, 2 tr cluster in the “center” of your flower petal. You should have a 4 petaled flower made up of 3 tr clusters at this point.
  • Skip 2 chs, tr in next ch.* Repeat from *to* until end, you should have 3 chs left, but if you don’t I would just work the last bit the best you can (it’s easy to miss chains with how small the thread is). Ch 5, tr in same ch as previous tr, ch 1, tr in last ch.
  • Row 2: Ch 10, turn, sc in the 3rd ch in previous row’s ch 5 space
  • *ch 7, 3 tr cluster in center of next flower, ch 3, 3 tr cluster again in center of same flower, ch 7, sc in 3rd ch of next ch 5 space from previous row.* Repeat from *to* until last ch 5 space sc into, ch 5, tr in 2nd ch away from last tr of previous row.
  • Row 3 (this row is similar to row 1, but we are offsetting the flowers): Ch 10, turn, 2 tr cluster in 5th ch from hook (hold back last pull through, 3 loops on hook), looking at the sc in the top of row 1’s ch 5, 3 tr cluster in 3rd ch from the right of the next sc (hold back last pull through, 6 loops on hook), *3 tr cluster in the 4th ch from the left of the same sc (pull through all 9 loops)
  • Sl st into any loop of the last tr cluster leg, ch 5, 2 tr cluster in center of flower. Tr in the middle ch of the next ch 3 from row 2, ch 5, tr in same ch as previous tr made
  • Ch 5, 2 tr cluster in front two loops of last tr (hold back last pull through, 3 loops on hook), 3 tr cluster in 4th ch from the right of the next sc (hold back last pull through, 6 loops on hook).* Repeat from *to* until last sc from previous row, 3 tr cluster in 3rd ch from the left of the last sc, pull through all 9 loops, sl st into any thread of last tr cluster leg, ch 5, 2 tr cluster in center of flower, skip 2 chs, tr in 3rd ch of previous rows turning ch.
  • Row 4 (this row is similar to row 2, but offset again): Ch 6, turn, *3 tr cluster in center of next flower, ch 3, 3 tr cluster in center of the same flower, ch 7, sc in 3rd ch of previous row’s ch 5, ch 7.* Repeat from *to* until last flower, 3 tr cluster in center of last flower, ch 3, 3 tr cluster in center of same flower, ch 1, tr in next ch.

Row 5 (similar to row 1): Ch 6, turn, *tr in middle of ch 3 from previous row, ch 5, tr in same ch, ch 5, 2 tr cluster in two front loops of last tr (hold back last pull through, 3 loops on hook), 3 tr cluster in 4th ch from the right of the next sc (hold back last pull through, 6 loops on hook), 3 tr cluster in 4th ch from the left of the same sc, pull through all 9 loops, sl st into any loop of last tr cluster leg, ch 5, 2 tr cluster in center of flower.* Repeat from *to* until last flower completed, tr in middle of next ch 3, ch 5, tr in same ch as previous tr made, ch 1, skip 1 ch, tr in next ch.

Repeat Rows 2-5 until you’ve reached your desired length. End on a repeat of row 2 for the edging.         

Edging: Ch 1, turn, 3 sc in ch 5 space, ch 3 picot, 3 sc in same ch 5 space, sc in next sc, *3 sc in next ch 7 space, ch 3 picot, 3 sc in same ch 7 space,  sc in top of 3 treble cluster, sc in ch 3 space, ch 3 picot, sc in same ch 3 space, sc in top of next 3 treble cluster, 3 sc in next ch 7 space, ch 3 picot, 3 sc in same ch 7 space, sc in next sc,* repeat from *to* until you’ve sc in last sc of row, 3 sc in last ch space, ch 3 picot, 3 sc in same ch space.

DO NOT CUT THREAD

Assembly:  Fold your veil in half, line up the edges as evenly as possible, and sl st into both sides of the veil all the way down. This will “sew” the sides together.

Leave a long enough piece of thread for sewing, cut with scissors, and pull through. Sew the end in with tapestry needle and any other ends.

Thank you for viewing the Floral Lace Infinity Veil pattern! If you find a mistake, or need help, please don’t hesitate to leave a comment or question below. 

Until next time!

Other Posts You May Like:


Solomon’s Knot Crochet Veil Pattern

Hey there everyone, today I have another crochet veil pattern for you, the Solomon’s Knot Crochet Veil! 

I’ve been having a lot of fun making these lacey veils lately. It’s very therapeutic, and I can somewhat turn my brain off when making them (bonus!).

These crochet veils are typically worn during a Catholic Mass. Wearing a veil to mass is not a requirement, but some women continue the tradition of wearing one as a way to humble oneself before God.

With that said, if you like wearing a veil to mass, you may have noticed that these veils can be a little pricey. I wanted to make one that would fit my 4 year old, but didn’t want to spend 20-30 dollars on one that she’d grow out of eventually. 

Luckily, crochet thread is still super cheap, so all you need is the time to make the actual veil. Making this child size one took me about 4 days of crocheting off and on.  

The Solomon’s Knot Crochet Veil is made up entirely of a special stitch called…you guessed it; the solomon’s knot. The solomon’s knot stitch is made simply by pulling up “longer” loops than normal and single crochets. This creates a lacey, diamond-like shape in your work. 

I’ve made a child size crochet veil for this project today, but you can easily adjust the length of your veil by using a repeat of 2+4. 

Related Posts:

Please note that some of these links are affiliate links. That means that if you click on these links and make a purchase, I may receive a commission at no extra cost to you. You can find more information about our disclosure policy here. Thank you for your support.

Solomon's Knot Crochet Stitch
Close up of Solomon's Knot Crochet Veil

Materials Needed:

Abbreviations Used:

Please note these are in US terms, not UK.

  • Ch – chain
  • Sl st – slip stitch
  • Sc – single crochet
  • SK – solomon’s knot (see Row 1)

Solomon’s Knot Crochet Veil Pattern:

To make your foundation chain, make a repeat of 2+4

This means to make a multiple of 2 SK stitches plus 4 SK stitches at the end for your turning ch.

For this child size veil, make 90 SK stitches.

Row 1: Ch 2, sc in first ch. Pull up a loop about ¾” tall (or to your desired height) with your crochet hook. Yarn over, and pull through your big loop. Insert your hook into the single, back “bump” of your work, make a sc in that bump. This is a solomon’s knot (SK) stitch. Continue making SK stitches until you reach your desired length (remember, it needs to be able to drape over your head comfortably).

Pull up a 3/4" loop and yarn over
Insert hook into the single back bump of your work
Make a sc

Row 2: Turn, sc in the 4th sc from your hook, *make 2 SK stitches, skip a sc, sc in next sc*. Repeat from *to* until end of row. You should end with a sc in the last sc.

Sc here
Make 2 SK stitches
Row 2

Row 3: Make 3 SK stitches, turn, sc in the “middle” sc of previous rows 2 SK stitches, *make 2 SK stitches, skip a sc, sc in next sc.* Repeat from *to.*

Row 3

Repeat Row 3 until you’ve reached the desired length for your veil. 

Edge:

To make a ch 3 picot: ch 3, insert your hook into the previous sc made and make a sl st in that sc.

Row 1: Ch 1, *sc in next sc, 2 sc in first loop, (sc, ch 3 picot, sc) in middle sc, 2 sc in next loop, sc in next sc.* Repeat from *to*

Assembly:

Fold the crochet veil in half, line up the sides and sew together by slip stitching into both sides all the way down. Try to sl st as evenly as possible on both sides.

Fold in half and sl st to sew down the edge.
Crochet Veil Child Size
Here is my oldest wearing the veil!

Thank you for checking out my Solomon’s Knot Crochet Veil! If you have any questions, please leave a comment down below.

Until next time!

Other Posts You May Like:


Crochet Veil Pattern – Infinity Snowflakes

Hello everyone! Today I am presenting another beautiful crochet veil pattern that you can wear to mass. 

I still don’t see too many crochet veil patterns for free available, so I thought I would make another one for you.

This crochet veil is made in a lacey fashion with a simple 2 row repeat. The lacey stitches gives the veil the appearance of having stars or snowflakes, which I think is wonderful, especially this time of year!

My last crochet veil has a floral appearance, which you should check out if you enjoy this pattern.

This veil is also made in an infinity veil style. 

Like with my previous crochet veil pattern, this one does take a little bit of time to complete, but it looks so beautiful when finished. 

I believe this took me about 2-3 weeks of irregular crocheting (anywhere from 0-3 hours a day) to get done. Once you get the hang of the repeat rows, it’s a nice pattern to do while you listen to a podcast or watch your favorite show (or take to the park while your kids run around!). 

You can easily adjust the size of the crochet veil if you wish. The starting chain is a repeat of 16 + 7. This means that you will be chaining a series of 16 chains until you reach your desired length and then add 7 chains to the end of that. 

I suggest using stitch markers or writing down the number of chains you have for your starting chain so you don’t get lost, especially if you’re like me and easily distracted or need to help a kiddo or two in the meantime!

Also, don’t get too discouraged if your starting chain doesn’t end exactly as it should on the first row.

I found that it’s fairly easy to miss or skip extra chains on accident, especially after you single crochet twice into the same chain…it makes the next chain easy to miss when counting.

If you don’t end up with exactly 4 remaining chains at the end of the first row, it’ll be ok. Nobody is going to know or tell that you’re missing a chain or two, everything will work out :).

Crochet Veil Free Pattern
Close up of the lacey, snowflake-like stitches.

Please note that some of these links are affiliate links. That means that if you click on these links and make a purchase, I may receive a commission at no extra cost to you. You can find more information about our disclosure policy here. Thank you for your support.

Related Posts:

Materials

Abbreviations

Please note these are in US terms, not UK.

  • St – stitch
  • Sl st – slip stitch
  • Ch – chain
  • Sc – single crochet

Special Stitches

  • Ch 3 Picot – ch 3, sl st into sc previously made

Crochet Veil Pattern – Infinity Snowflakes

Ch 279 or a repeat of 16 + 7.

  • Row 1: Insert into 11th ch from hook and make a sc, *ch 4, skip 3 chs and (sc in the next ch, ch 6, sc in the same ch), ch 4, skip 3 chs, sc in next ch* repeat from *to* until you have 4 chs left before the last ch, ch 4, sc in last ch.
  • Row 2: Ch 6, turn, *ch 4, skip ch 4, (sc in next sc, ch 6, sc in same sc), ch 4, skip ch 4, sc in ch 6 space,* repeat from *to* until the end (you should end with a (sc, ch 6, sc)), ch 4, skip 3 chs and sc in next ch.
  • Row 3: Ch 6, turn, *sc in ch 6 space, ch 4, skip ch 4, (sc in next sc, ch 6, sc in same sc), ch 4,* repeat from *to* until end of row, ch 4, skip 3 chs, sc in next ch.

Repeat rows 2-3 until desired length is reached, ending on a row 3 repeat.

  • Trim: Ch 1, turn, *4 sc in ch 4 space, skip next sc, 4 sc in next ch 4 space, 2 sc in ch 6 space/loop, ch 3 picot, 2 sc in same ch 6 space/loop,* repeat from *to* until end of row, 4 sc in ch 4 space, skip next sc, 4 sc in last ch 4 space. 

Do not cut your yarn.

  • Sewing: Fold your veil in half (short side to short side), with your yarn still on your hook, sl st into the first sc from the trim row, sl st into both sides of the veil into every ch until the bottom. It’s important to line up the chs on both sides as evenly as possible to create a straight seam. 

Cut yarn with scissors, pull through, weave in any ends with your tapestry needle. 

Crochet Veil for Mass

Thank you for trying out this crochet veil pattern, I hope you enjoyed making it! Have a Merry Christmas everyone!   

Other Posts You May Like:

Crochet Infinity Veil for Mass – Free Pattern

Hello everyone, I hope summer has been treating you all well! Today I have a crochet infinity veil pattern for you.

The girls have been playing with my veil at mass and it got me inspired to make their own! I didn’t want to spend the money on getting veils for them when they’re this little, so I thought it would be fun to try making them myself.

I tried looking up a crochet pattern for a veil, but I couldn’t find much. It was mostly people trying to sell their finished crochet veils on Etsy (which I’m cheap so didn’t want to buy a pattern lol!). Or it was tutorials on how to sew your own veil together with different materials.

I did find this post helpful from Crocheting with Joy. I liked her idea of taking a shawl pattern and turning it into a veil. However, I personally wear an infinity veil and I wanted to recreate that style instead of a V shape. 

This pattern does require a teeny tiny hook (1.65 mm to be exact) and size 10 crochet thread. The delicacy of the tiny thread gives it a lovely, lacy look.

This was very much a labor of love, it did take a long time to get the crochet infinity veil to the length that I wanted it. With that said, once you get the pattern down, it’s easy to tackle while you’re watching your favorite show or listening to a podcast.

Why wear a veil to mass?

Although wearing a veil to mass is no longer a requirement, some women may want to continue the tradition of wearing one to mass.

One of the main reasons why women veil at mass is to humble herself before God during the mass where Christ is present in the Eucharist.

It is also seen as being modest and respectful.

Check out some of my other patterns here!

Materials Needed:

  • Red Heart Classic Crochet Thread in White, size 10
  • 1.65 mm crochet hook
  • Tapestry Needle
  • Scissors
  • Stitch markers (option)

Abbreviations Used:

Please note that these abbreviations are in US terms

  • Ch – chain
  • St(s) – stitch(es)
  • Sl st – slip stitch
  • Sc – single crochet
  • Dc – double crochet
  • Shell – 6 dc separated by ch 1s in same st. Or in simpler terms…dc, ch 1, dc, ch 1, dc ch 1, dc, ch 1, dc, ch 1, dc.

Crochet Infinity Veil for Mass Pattern:

You can make your own veil shorter or longer by chaining a series of 14 + 4 + 4. The 14 is the base repeat, the first +4 is to account for the 2 double crochets bordering on both sides, and the second +4 is to account for the turning chain. Please keep in mind that you will fold the crochet veil in half at the end to create the “infinity” part.

Ch 260

Protip: Use your stitch markers every 50 chs or a count of your choice. This helps if needing to recount.

Row 1: Dc in next ch, ch 1, skip 1 ch, (sc in next ch, ch 3, skip 2 chs, sc in next ch, x3 times), *ch 1, skip 2 chs, shell into next ch (dc, ch1, dc x6 times in same ch), ch 1, skip 2 chs, (sc in next ch, ch 3, skip 2 chs x3 times)* repeat from *to* until last 4 chs (should be finished with the shell at this point), ch 1, skip 2 chs, dc in last 2 chs

Start of row 1 for crochet veil
Beginning of Row 1

Row 2: Turn, ch 3 (counts as a dc), dc in next dc, ch 1, skip ch 1 and next dc, sc into the first space between the dc, ch 1, dc in the last shell made. *(Ch 3, sc into next open space into shell x 3 times). You should have 4 “petals” on top of the shell from the previous row. Ch 3, skip the next (sc, ch3 space, sc), and dc between the next (sc, ch3 space, sc). Ch 3 and dc in the same space. Ch 3, skip the last (sc, ch3, sc) and sc between the (dc, ch1, dc) in the next shell*. Repeat from *to* until the very last (dc, ch3, dc). Ch3, skip all sts and dc in next dc, dc in top ch of ch 3 from previous row.

crochet veil row 2
Beginning of Row 2

Row 3: Turn, ch 3 (counts as a dc), dc in next dc, *ch 1, skip ch 3 and shell into the (dc, ch3, dc) space. Ch 1, skip ch 3, sc into the first (sc, ch3, sc) space, (ch 3, sc into next space x2 times). You should have 3 “petals.”* Repeat from *to* until the last (sc, ch3, sc), ch 1, dc in next dc, dc in top ch of ch 3 from previous row.

Crochet Veil Row 3
Beginning of Row 3

Row 4: Turn, ch 3 (counts as a dc), dc in next dc, *ch 3, place a (dc, ch3, dc) in the middle (sc, ch3, sc) petal, ch 3, sc into the first space between the dc, ch 1, dc in the last shell made. (Ch 3, sc into next open space into shell x 3 times). You should have 4 “petals” on top of the shell from the previous row.* Repeat from *to* until last petal made, ch 1, dc in next dc, dc in top ch of ch 3 from previous row.

Repeat rows 1-4 until desired length. 

End on row 3.

Row 5: Turn, ch 1, 1 sc in next 2 dc, *1 sc in ch 1 space, 1 sc in next sc, (2 sc in next ch 3 space, 1 sc in next sc x3 times), (sc in next ch 1 space, 1 sc in next dc x6 times)* repeat from *to* until end of row, 1 sc in next 2 dc. Do not cut thread yet.

Sewing Together:

Fold in the crochet veil in half. Line the edges up and insert your hook through both sides. Slip stitch down the edge to sew together. Try your best to line up the stitches as evenly as possible for a clean look. 

Cut thread with scissors and weave in ends with tapestry needle. 

Crochet Infinity Veil worn by cute little girl

Here’s my oldest girl modeling the crochet veil. She was doing a great job being very serious for me lol!

Thank you as always. If you liked this pattern and want to share your crochet veil on Instagram, tag me @strommercrafts. I love to see everyone’s work!

Until next time.