Floral Lace Infinity Veil – Free Crochet Veil Pattern

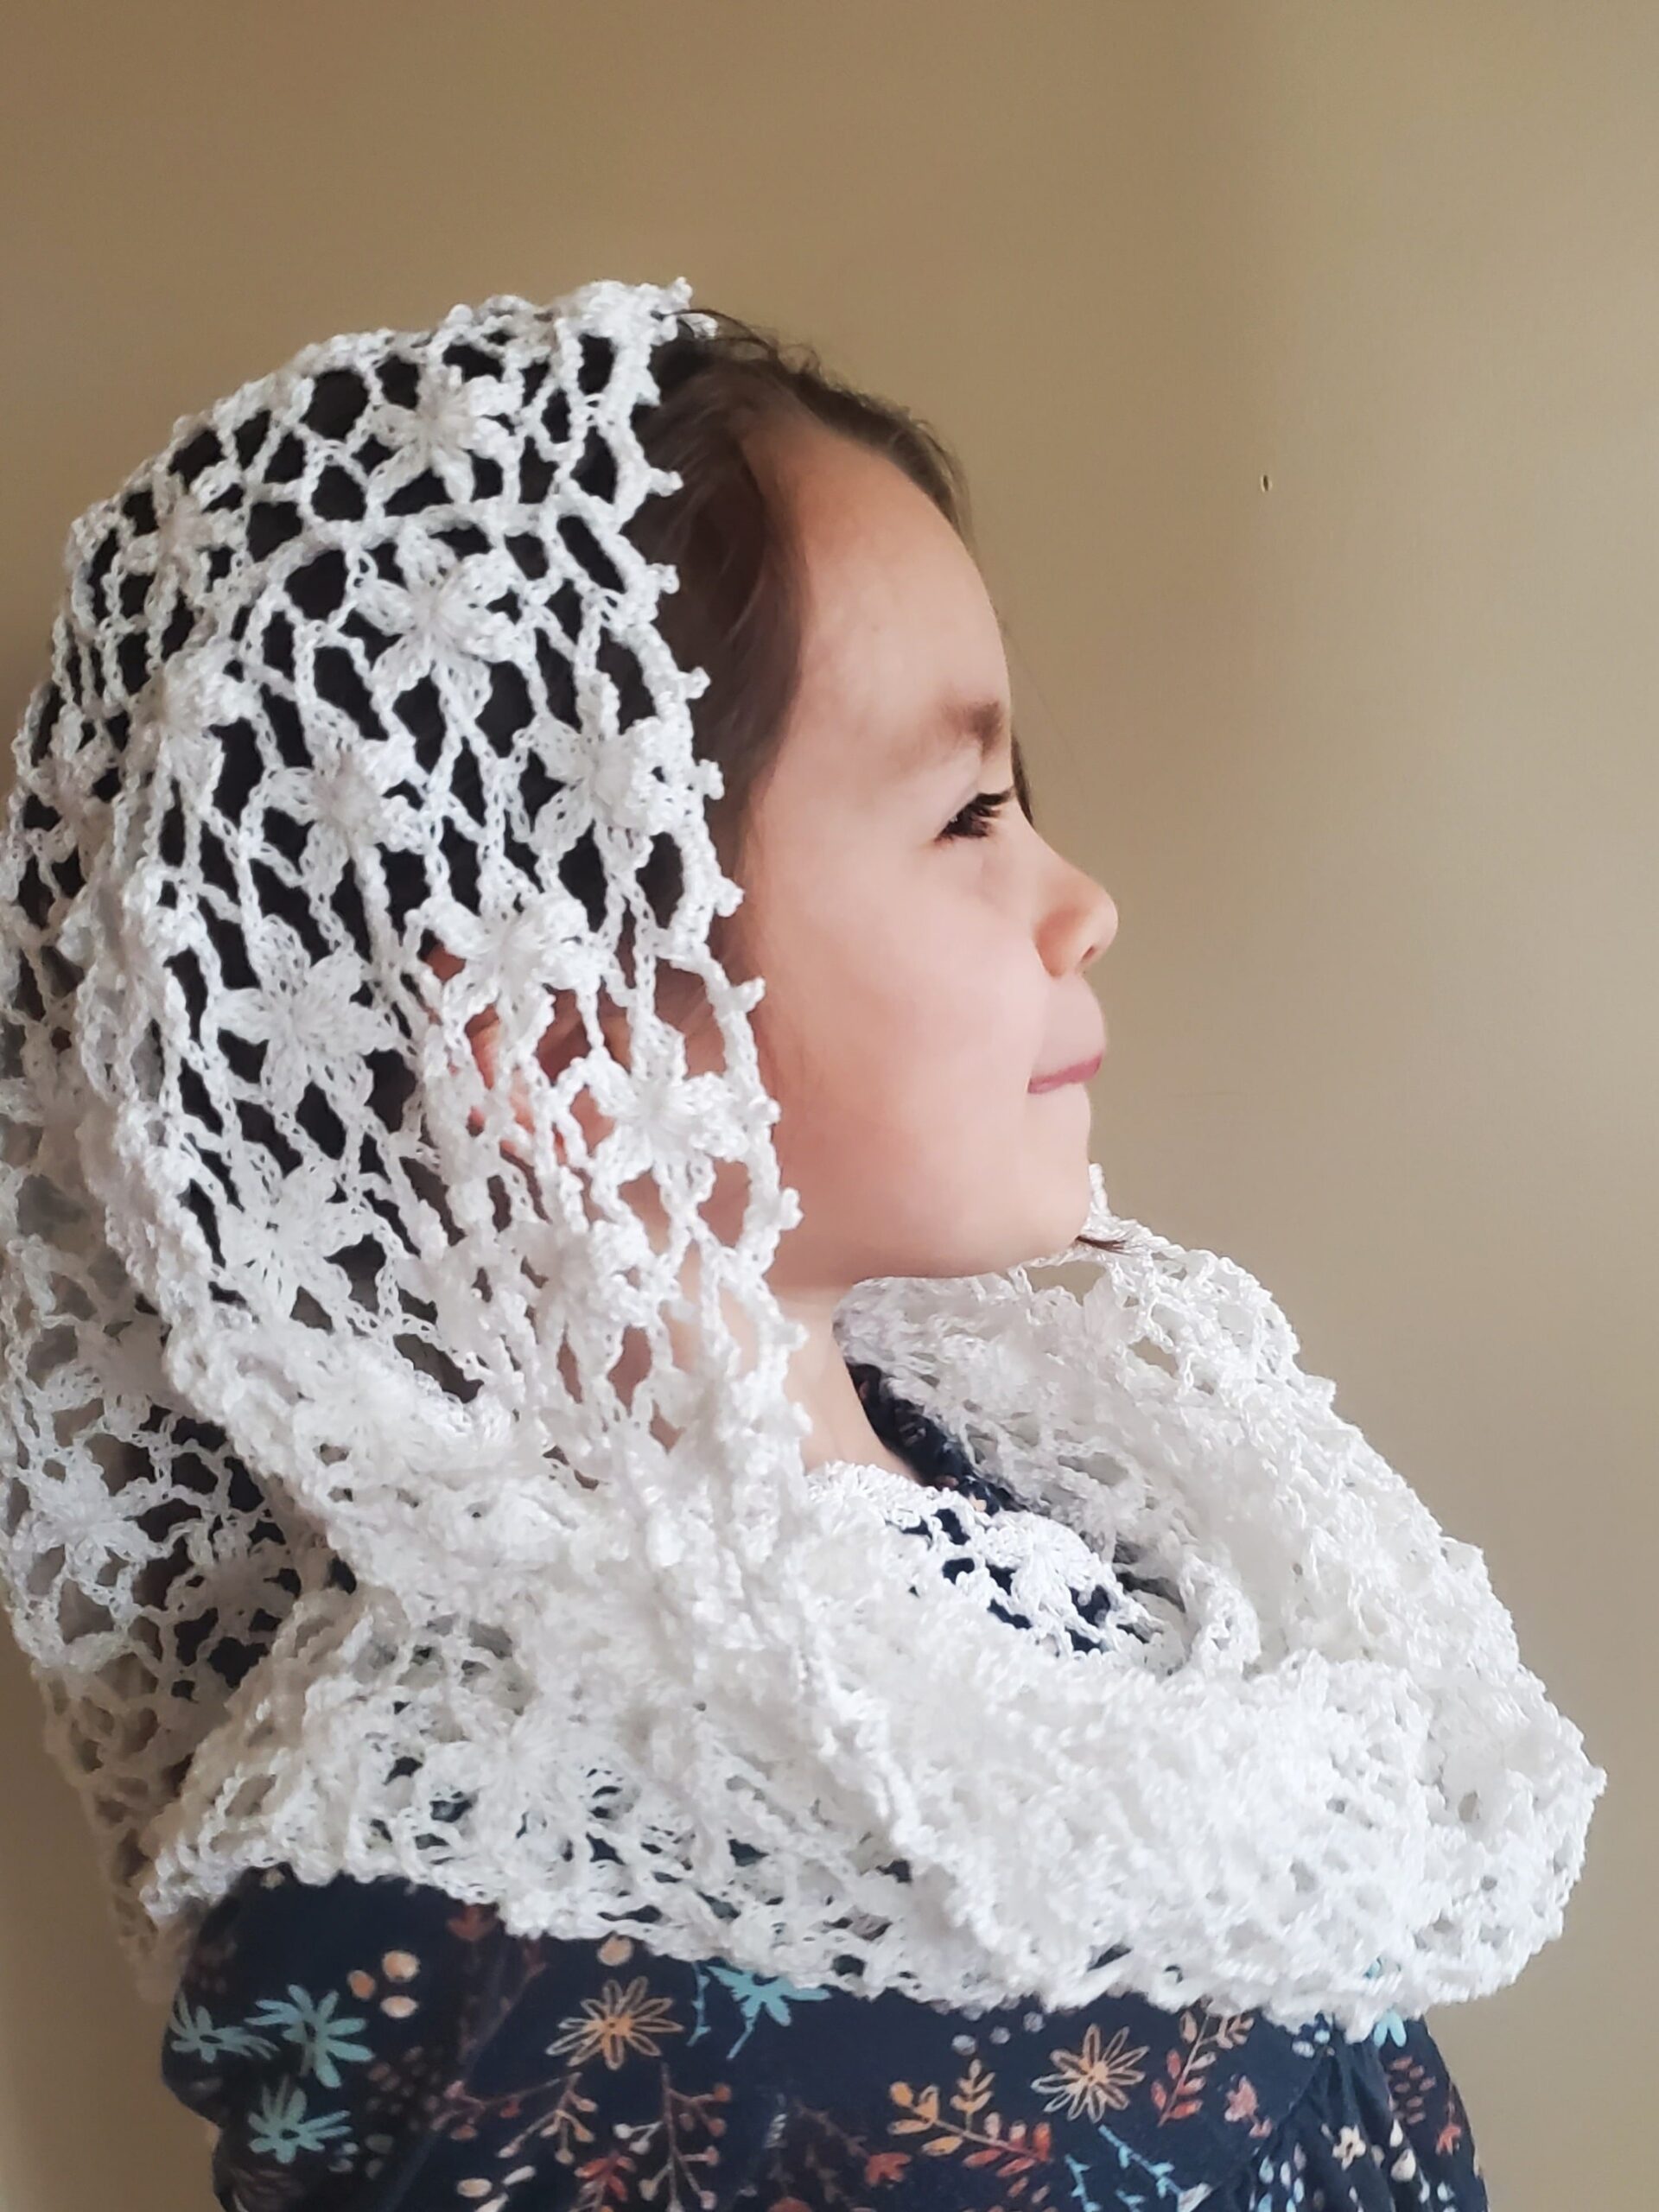
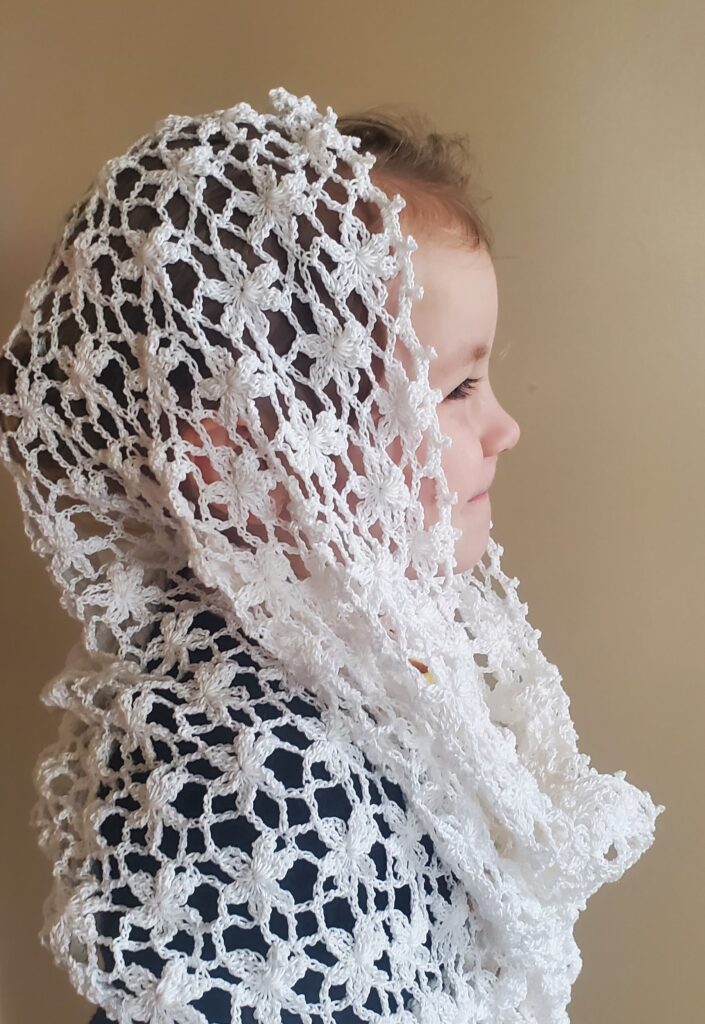
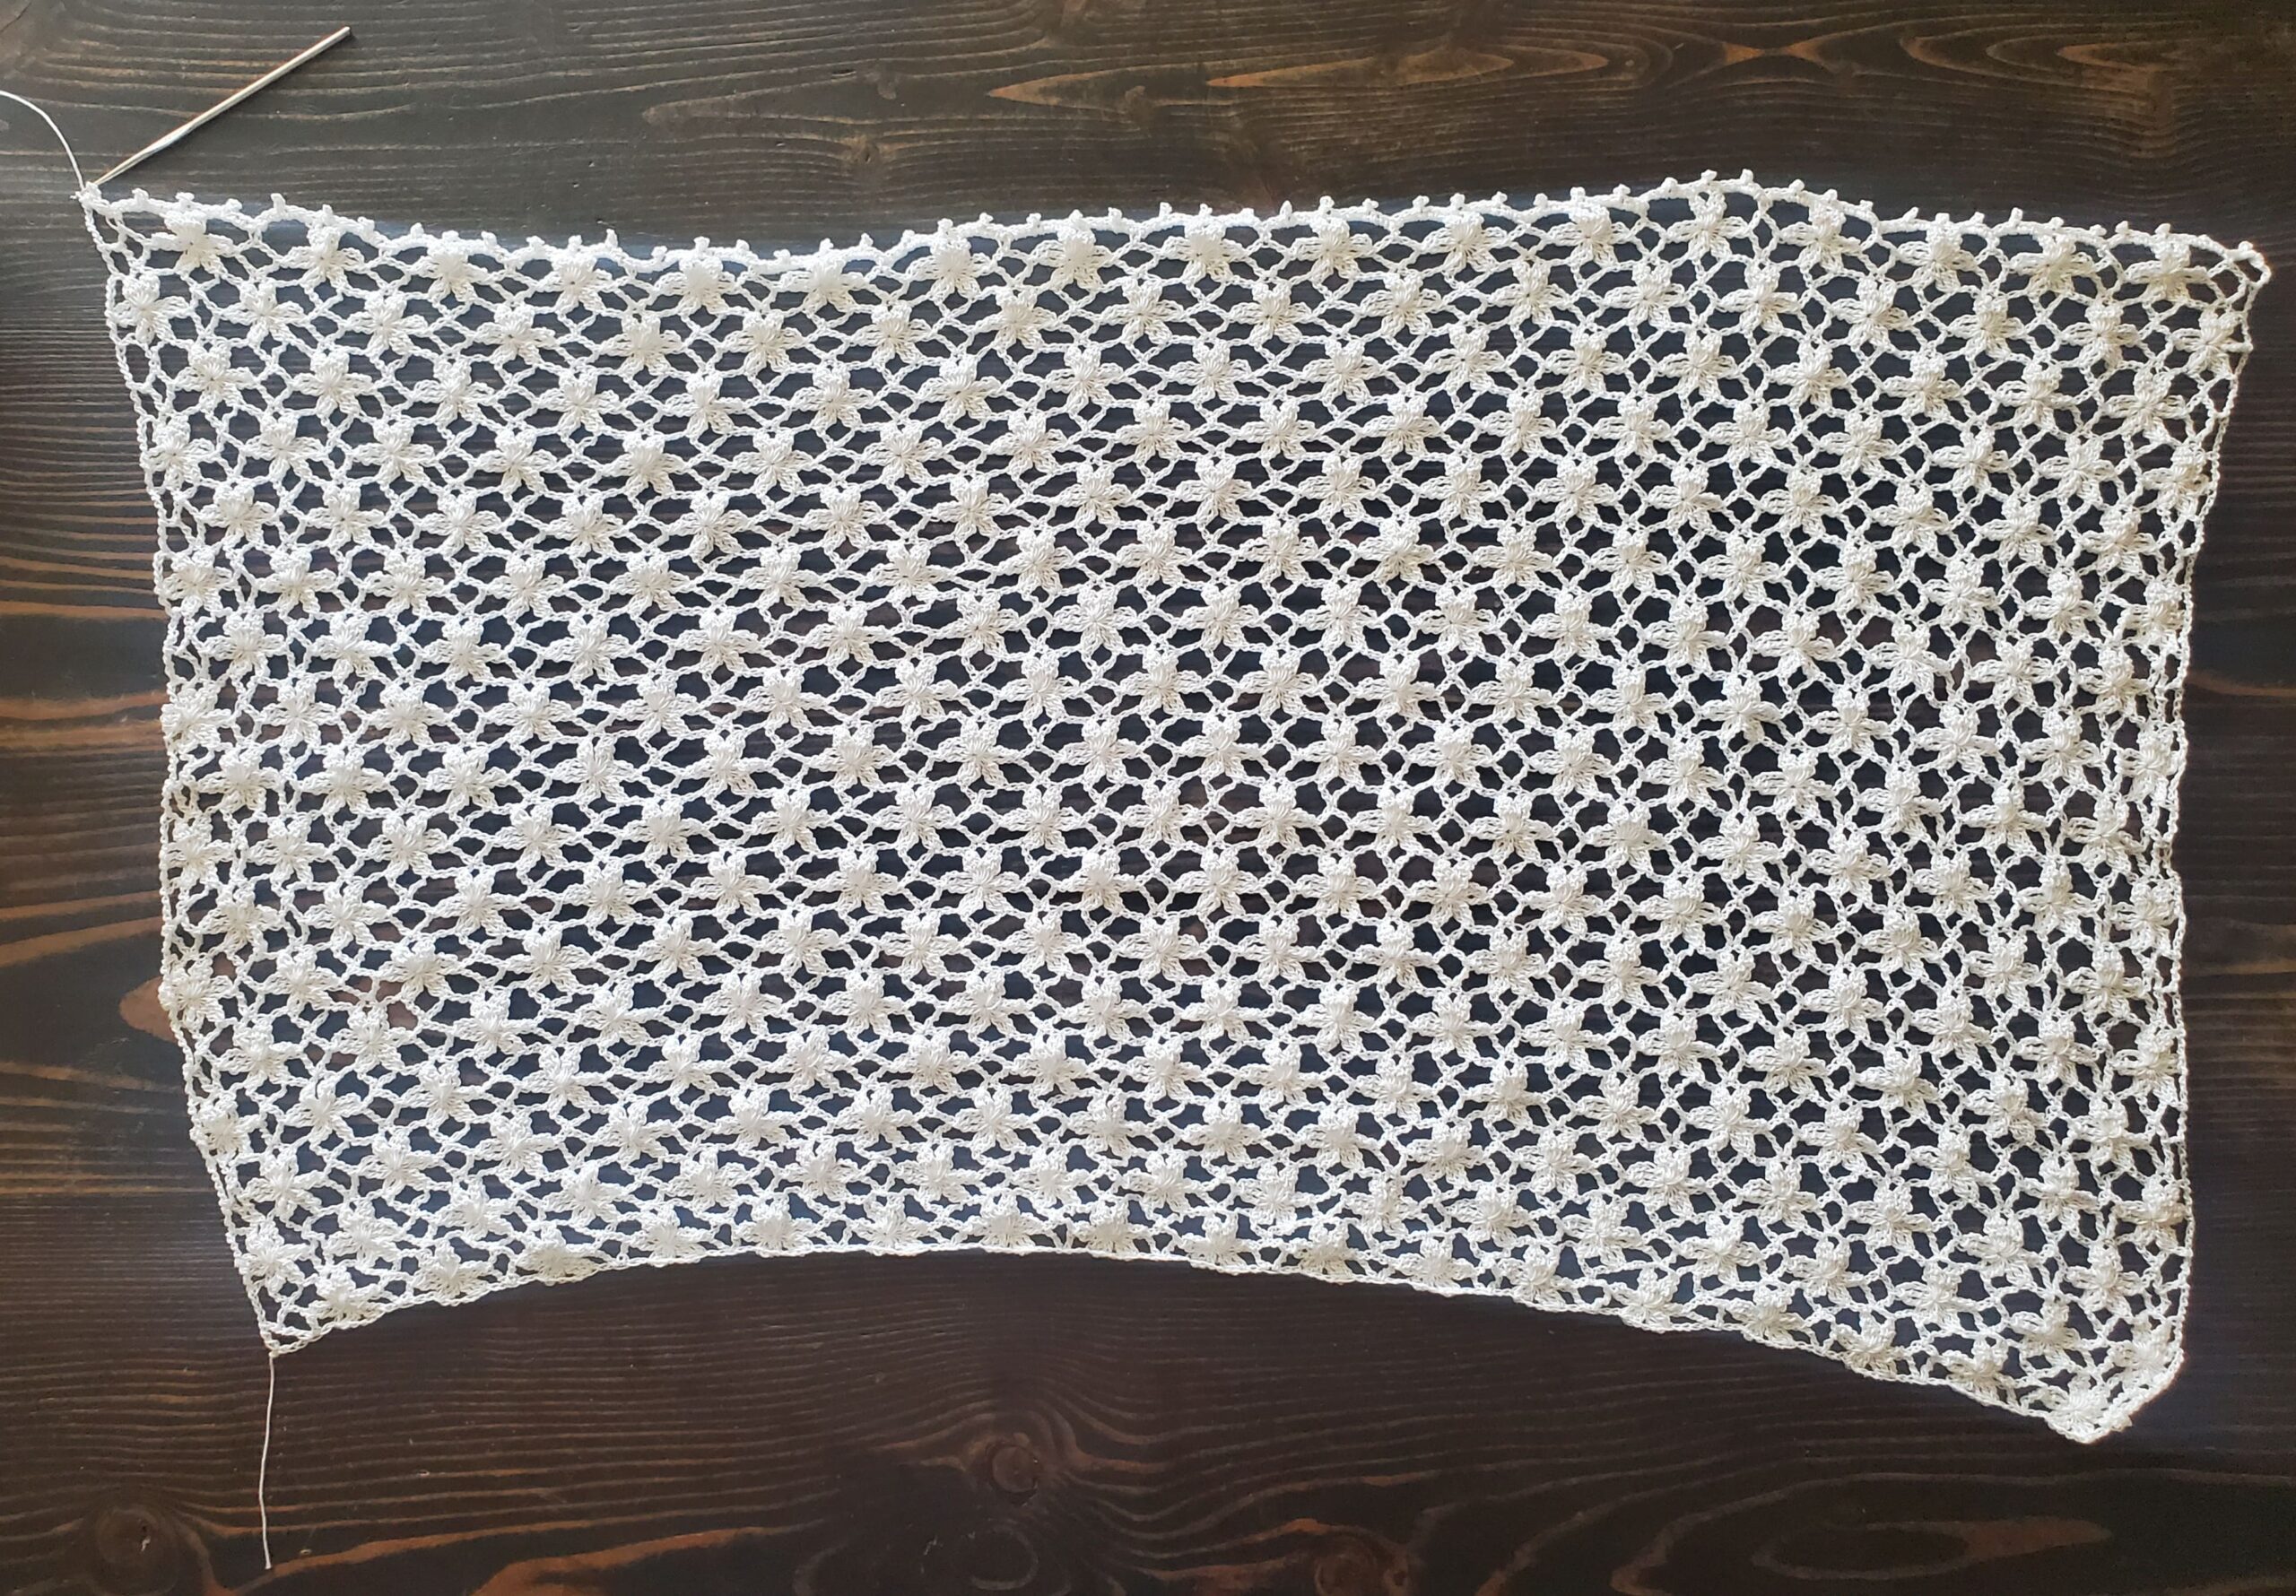
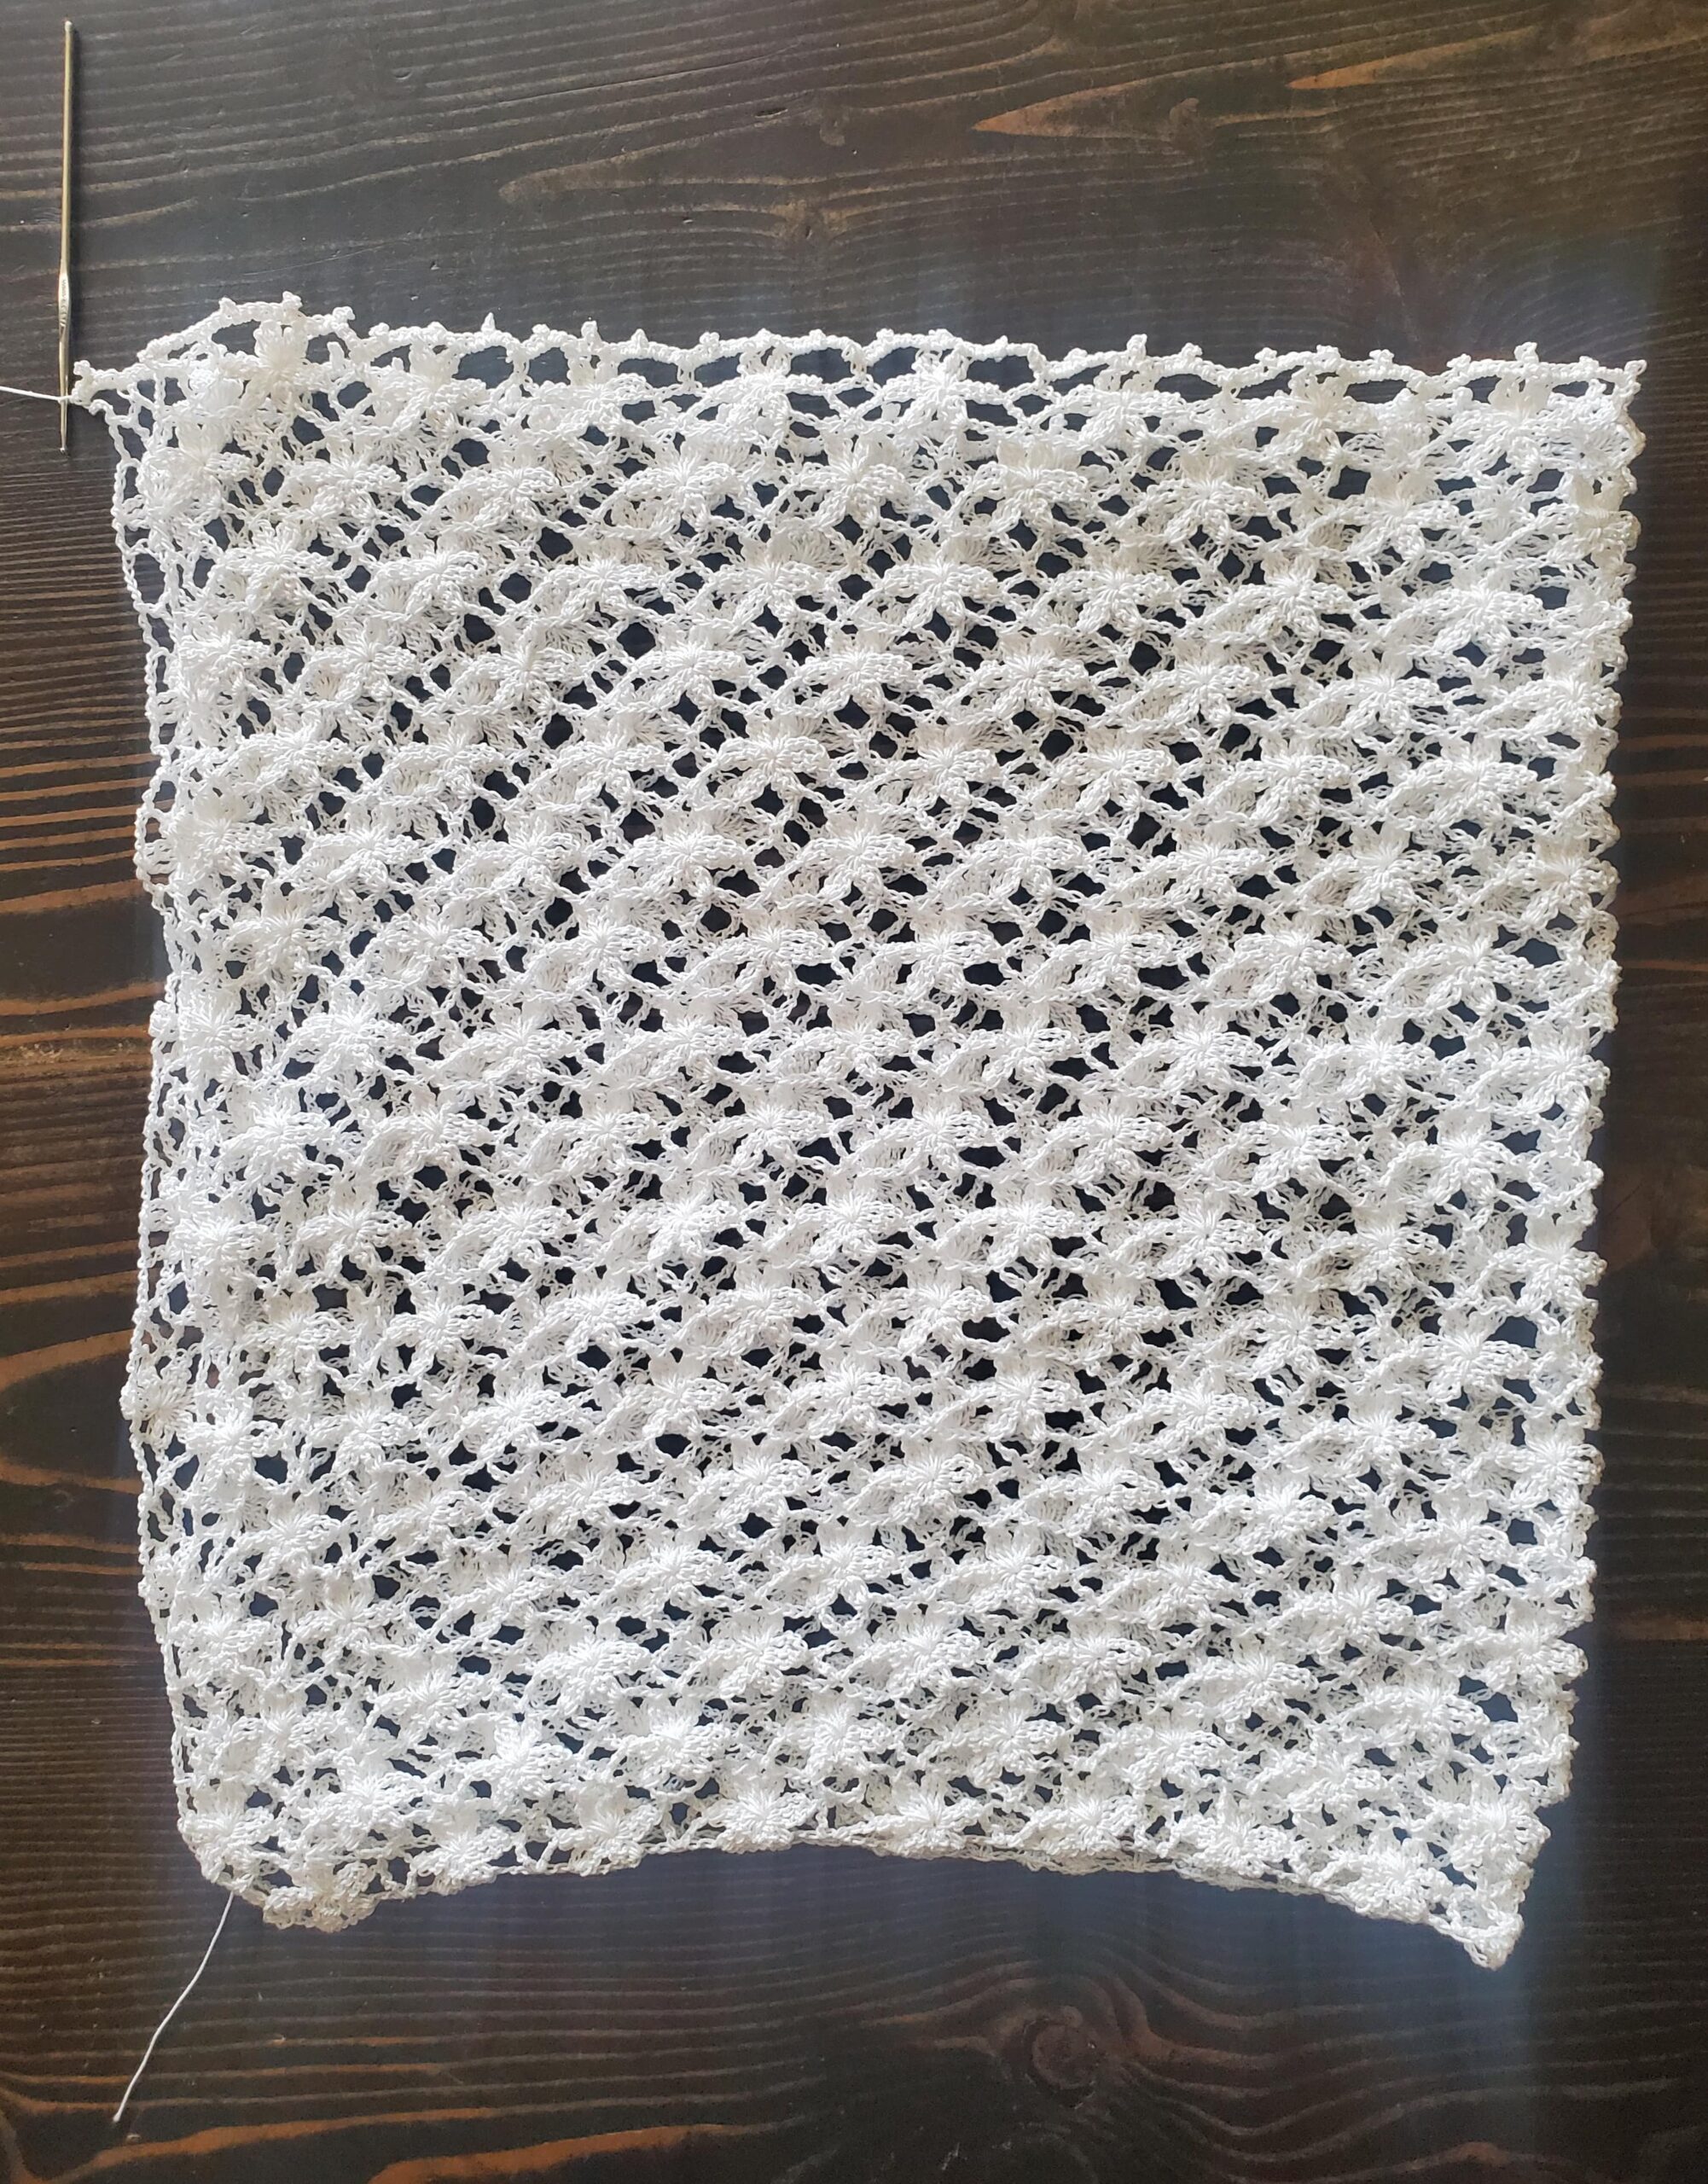
Hello everyone, today I have another beautiful crochet veil pattern that you can wear to mass for you…the Floral Lace Infinity Veil! With spring just around the corner, I wanted to create a veil that had flowers throughout it, and I think this veil turned out great!

As with some of my previous crochet veil patterns, this one will also take a little bit of time to finish, especially depending on how big you want yours. This pattern is also finished by folding your piece together and sewing to make the veil an infinity type veil. 

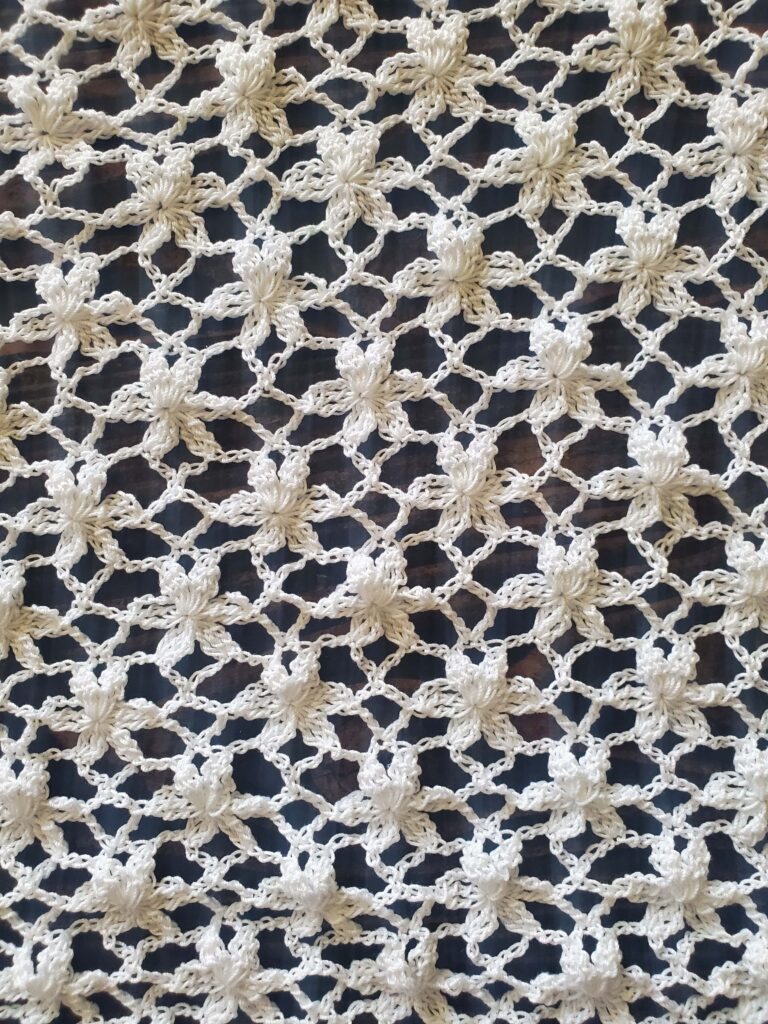
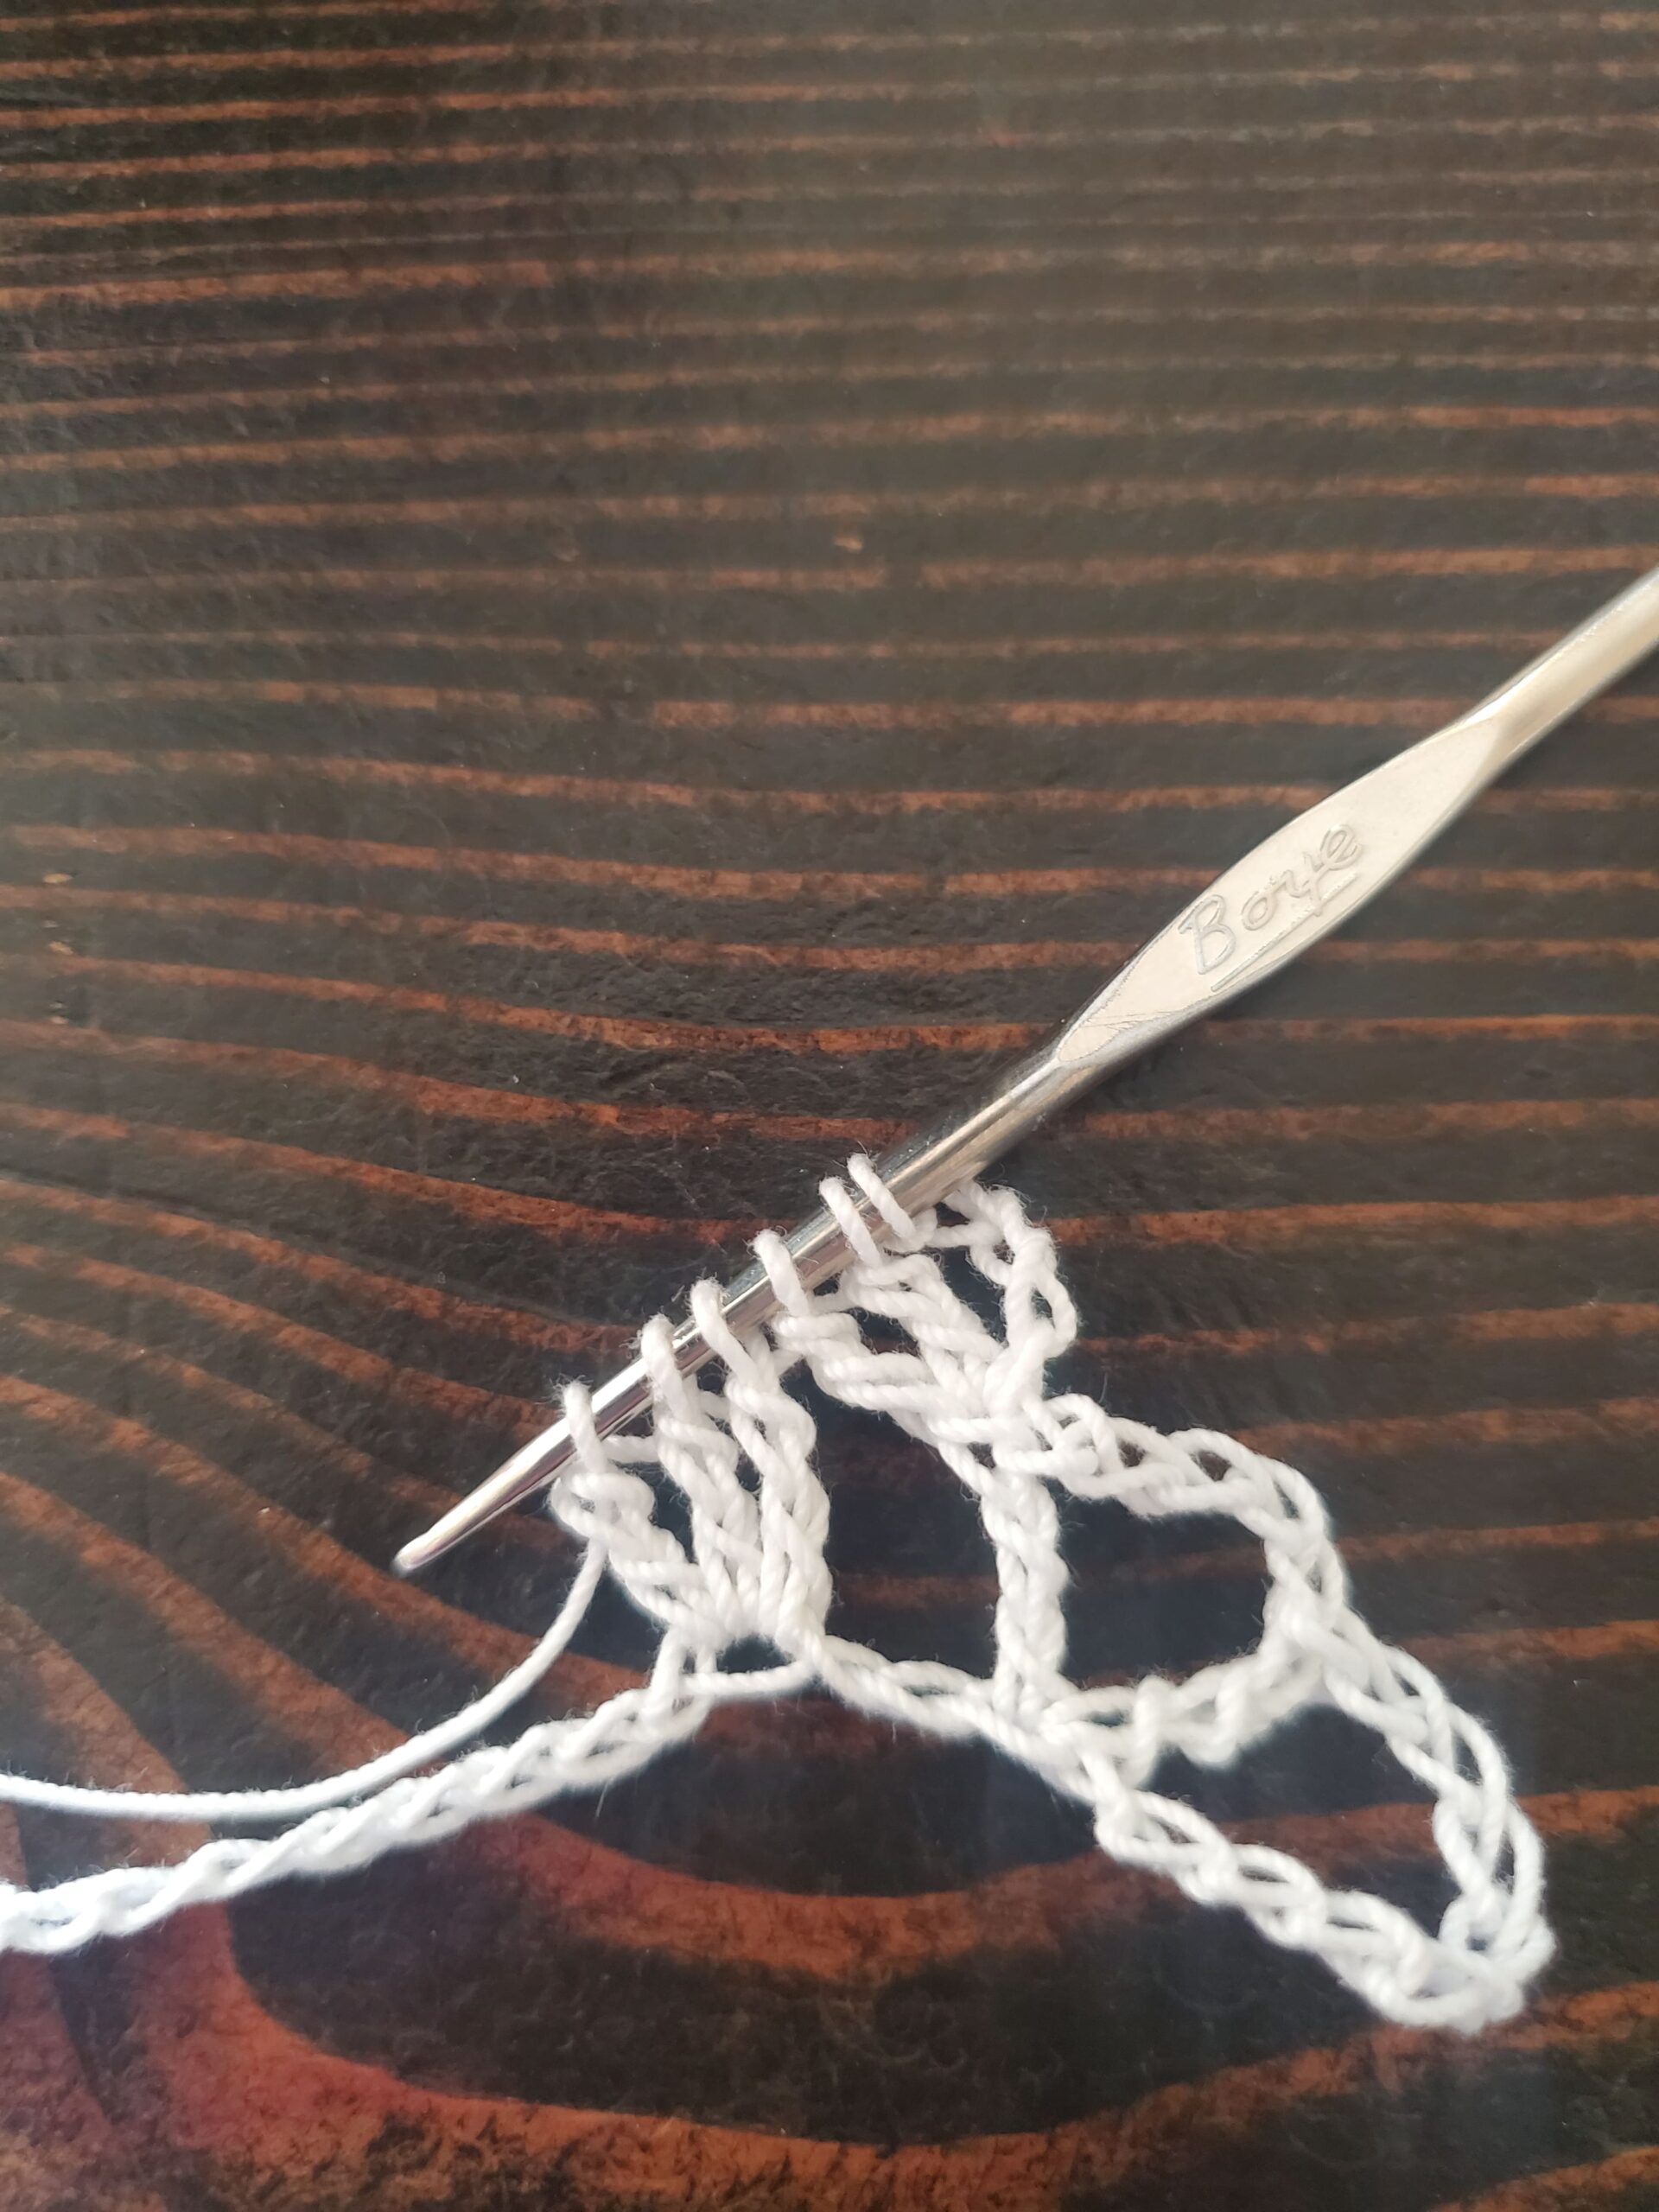
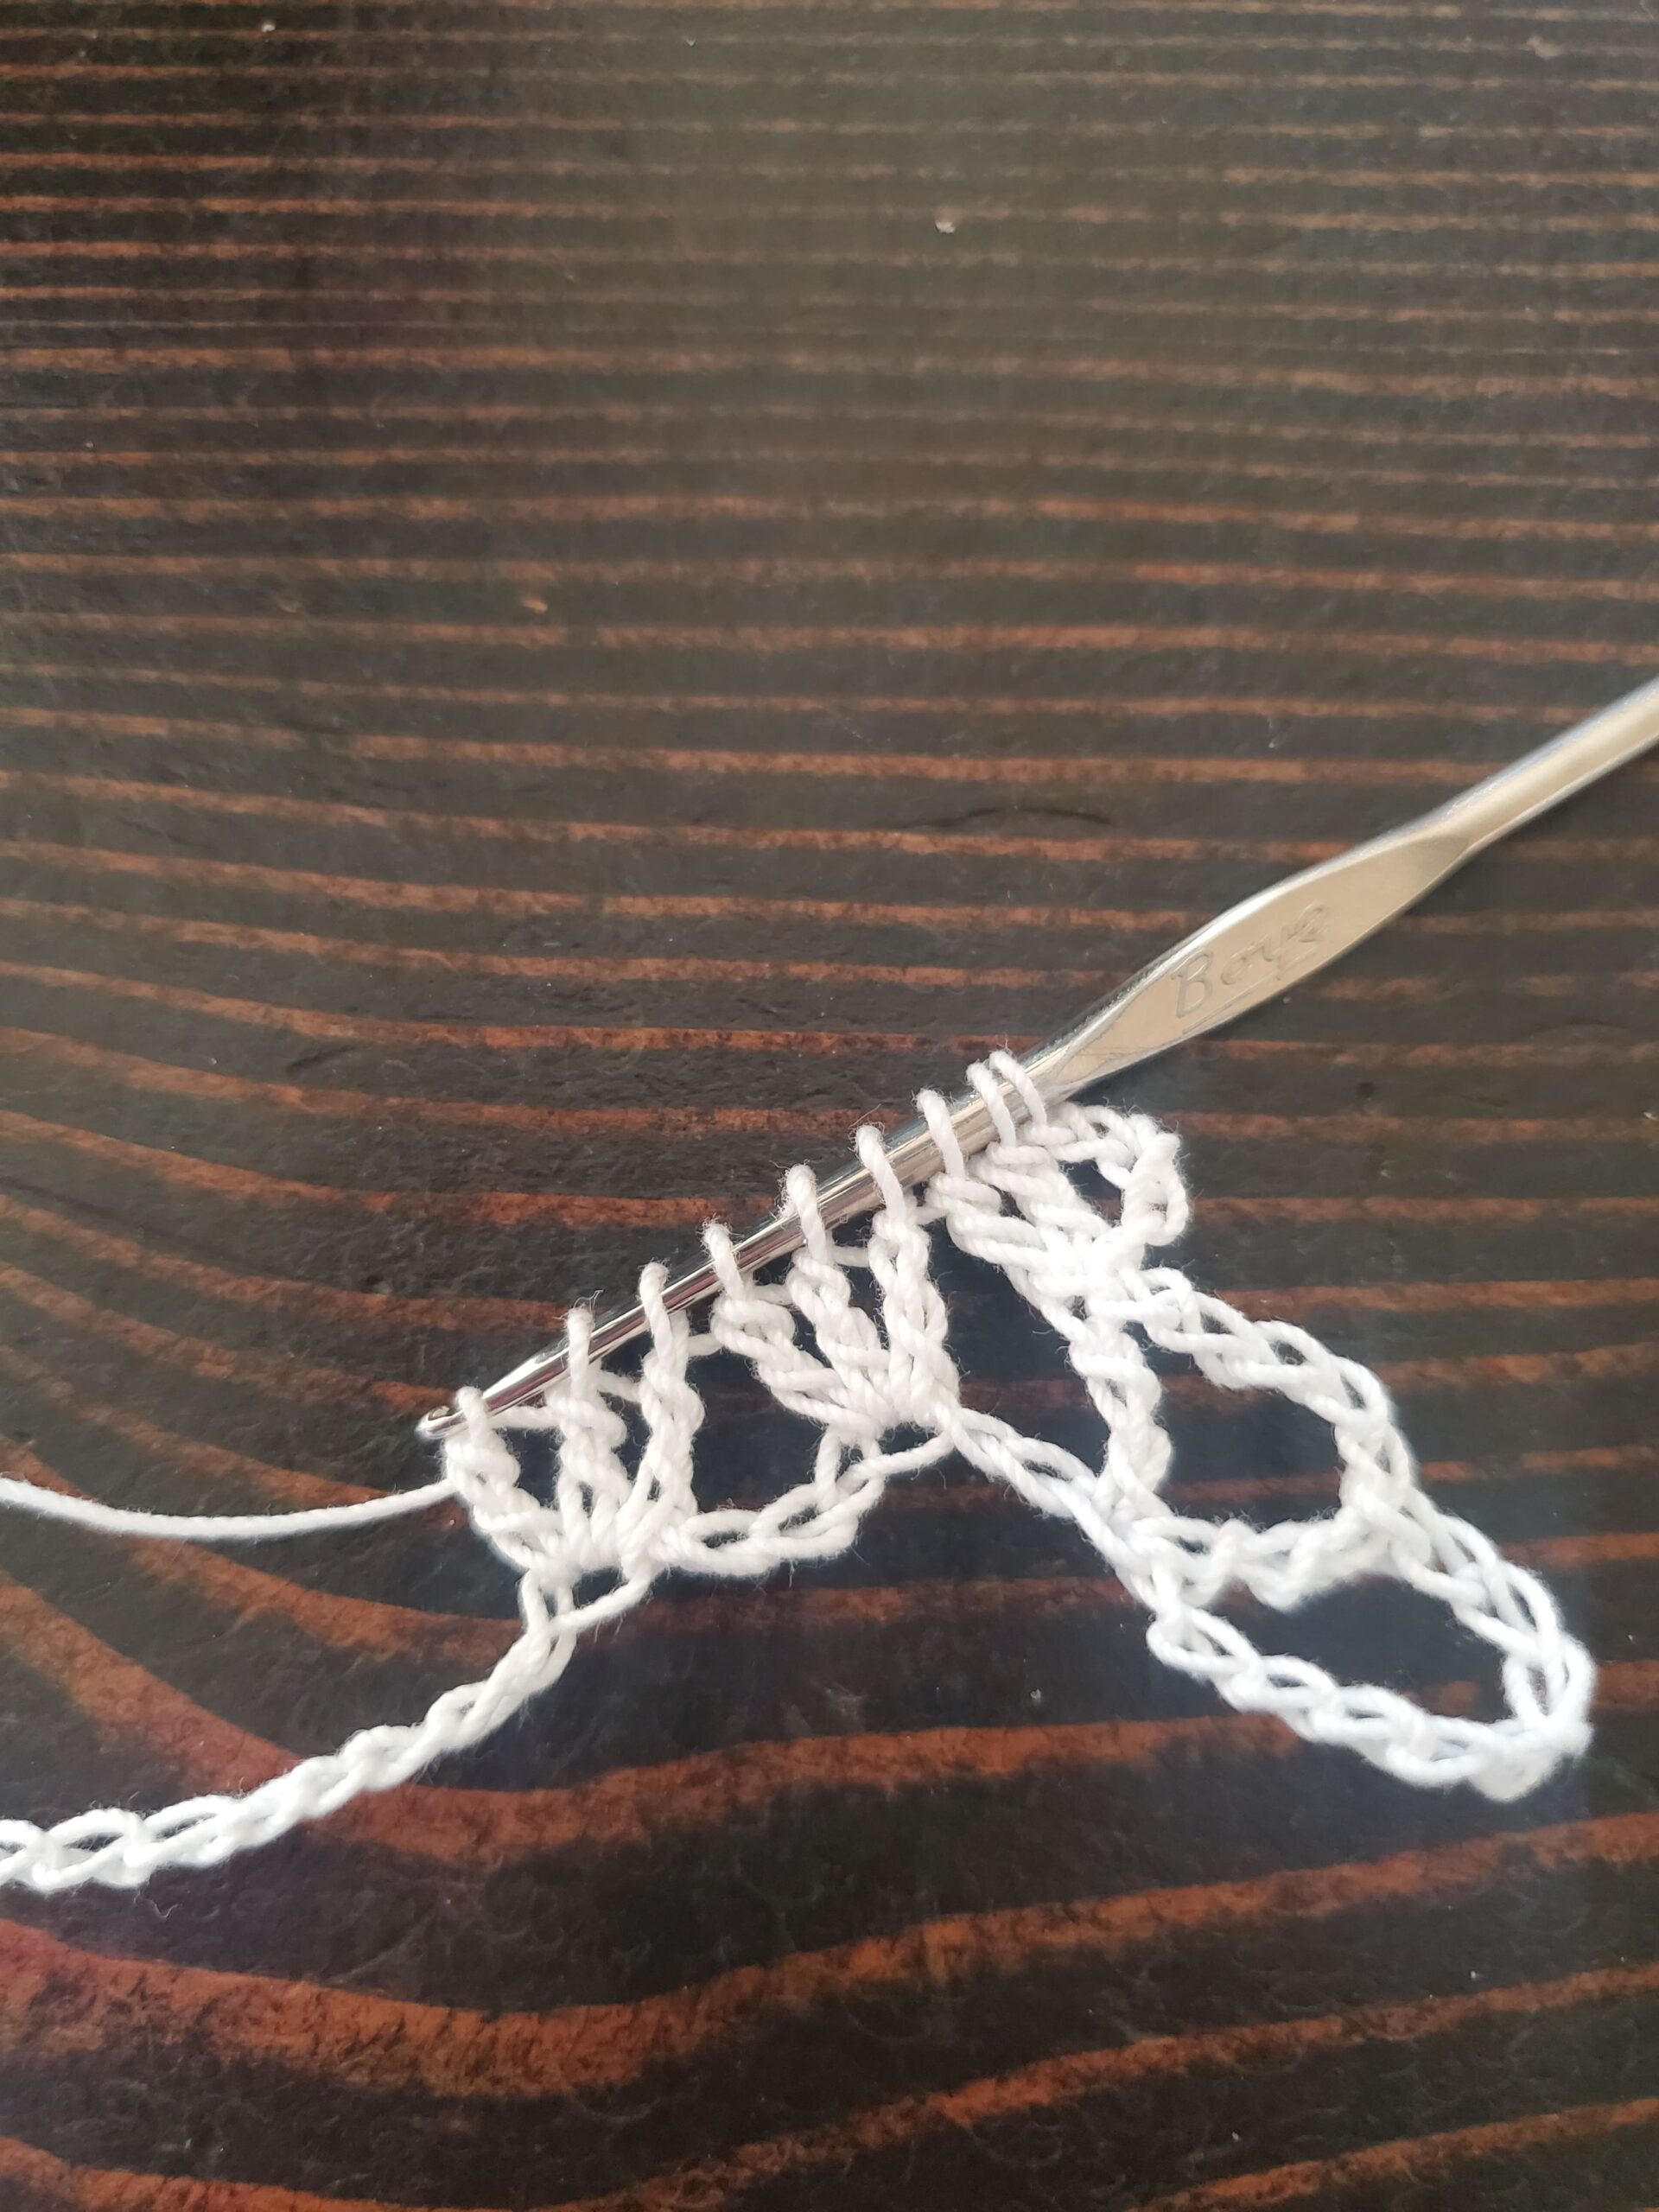
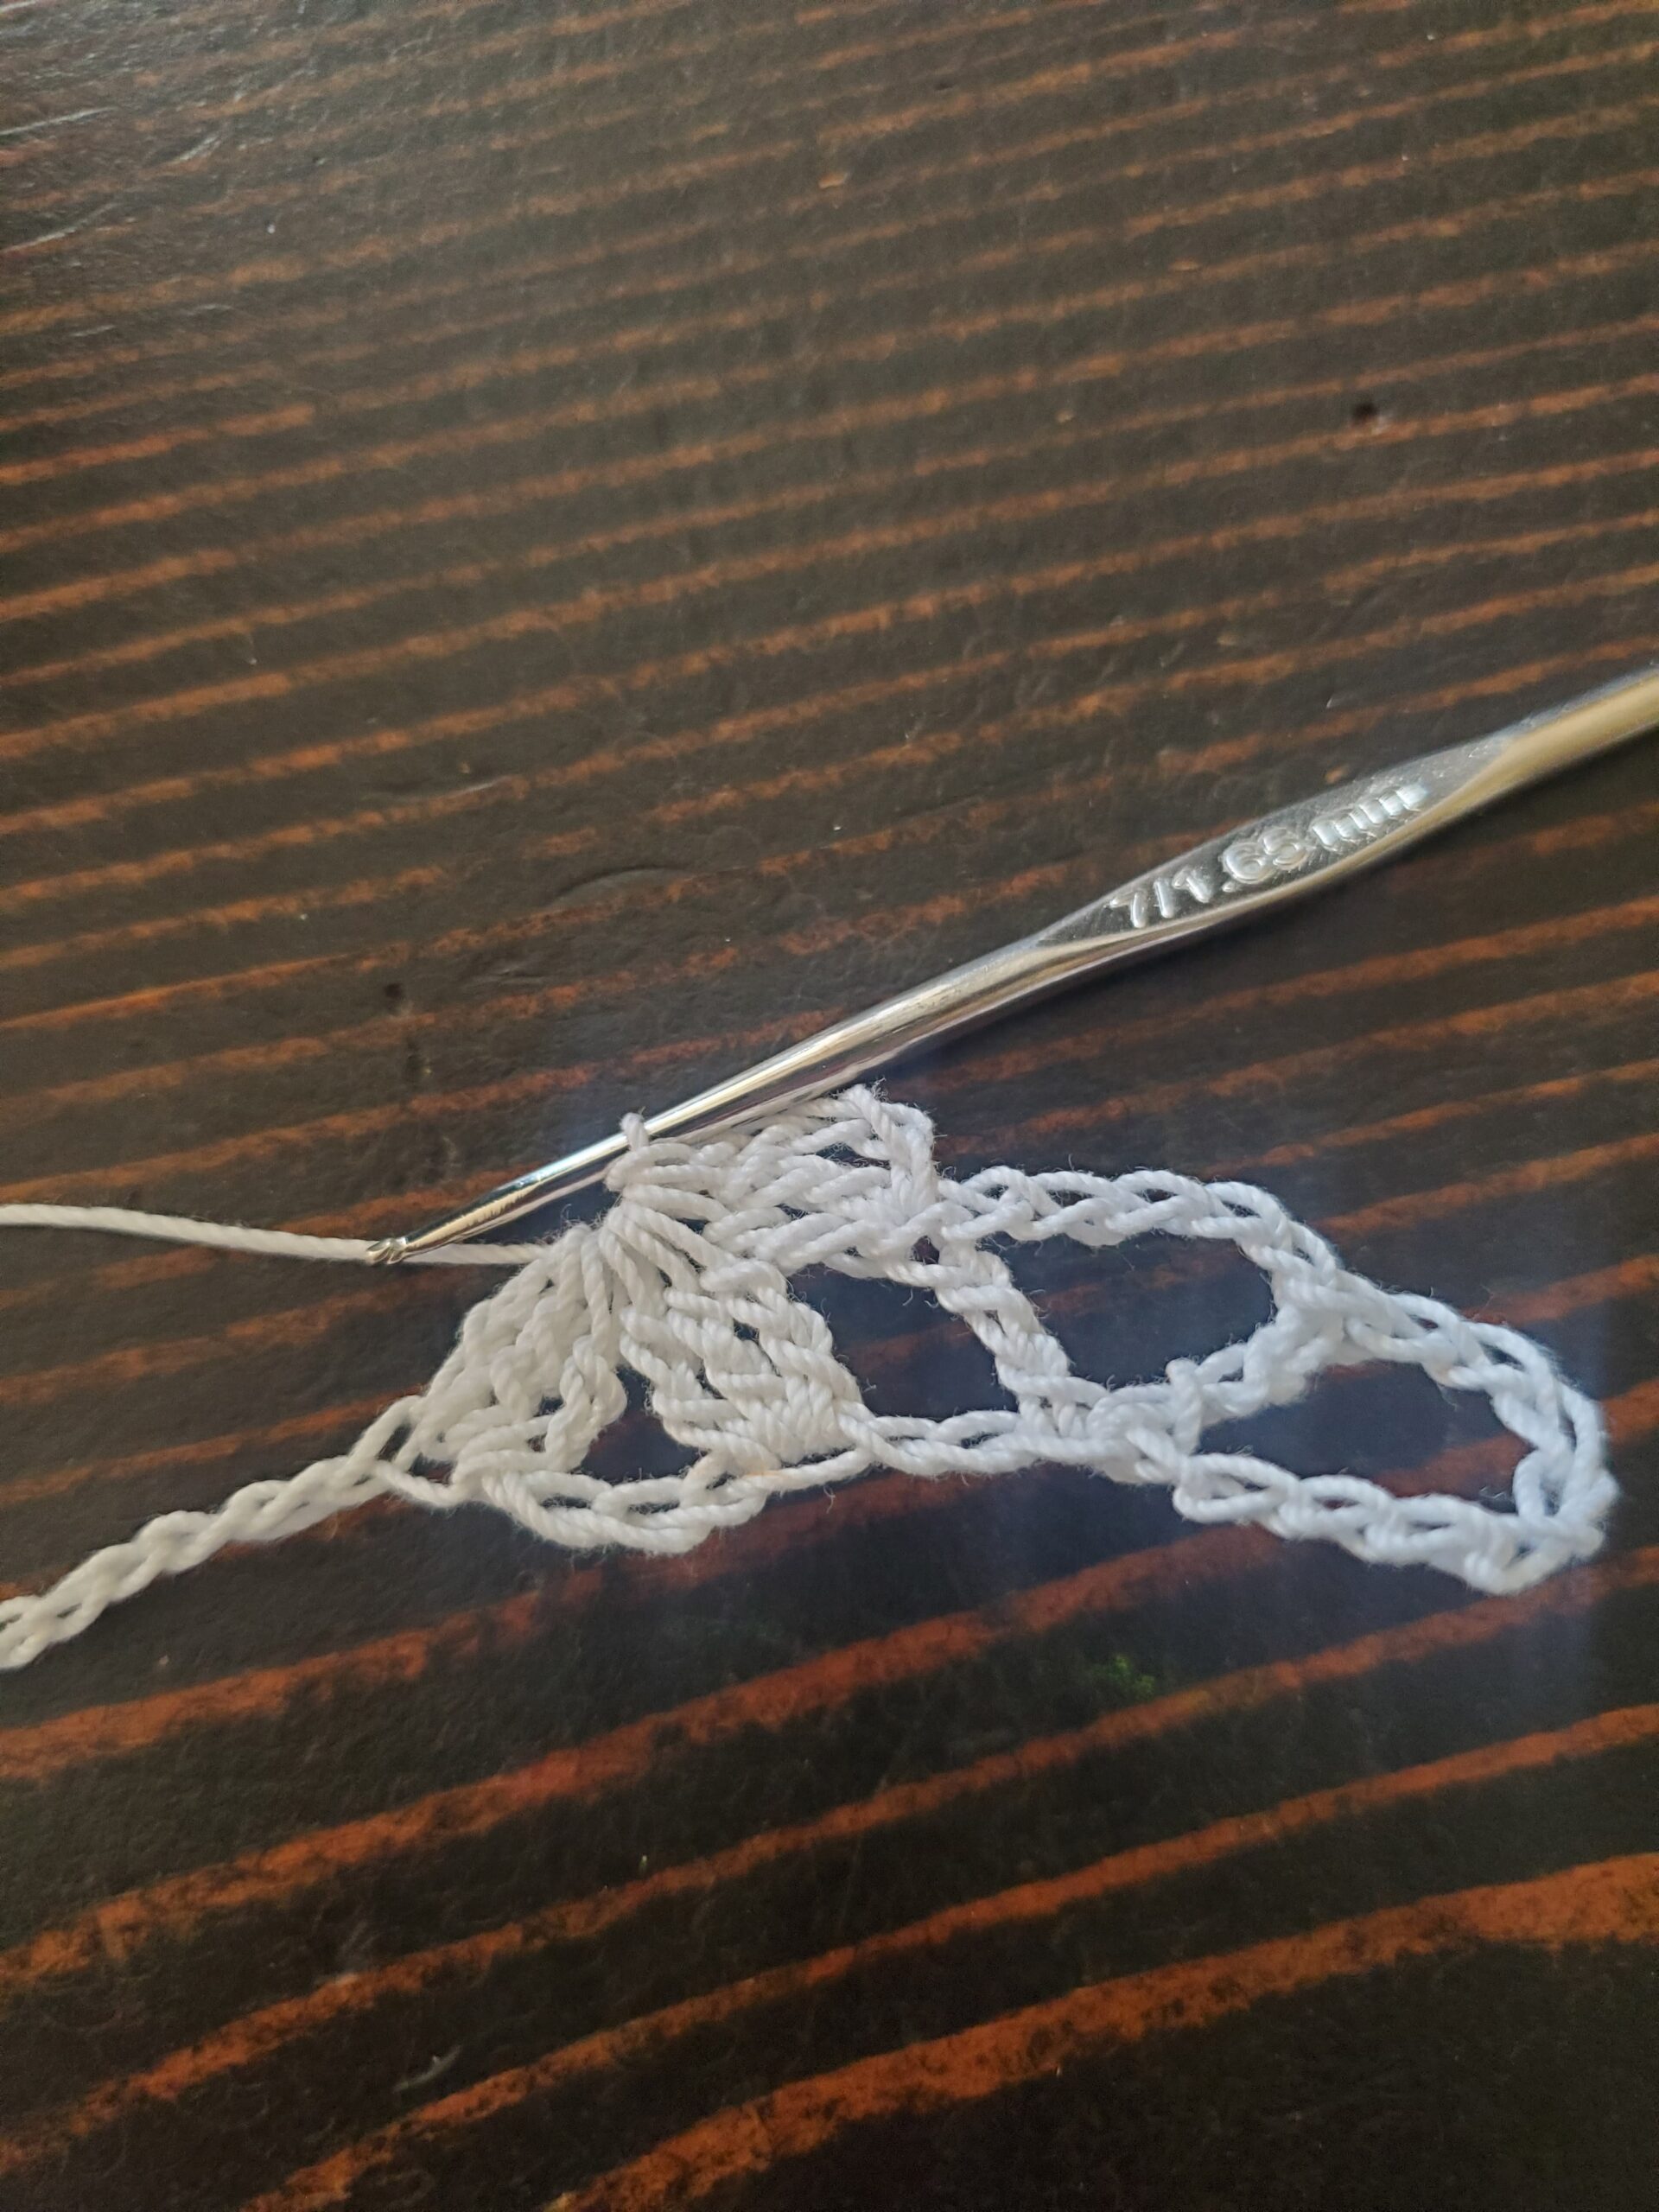
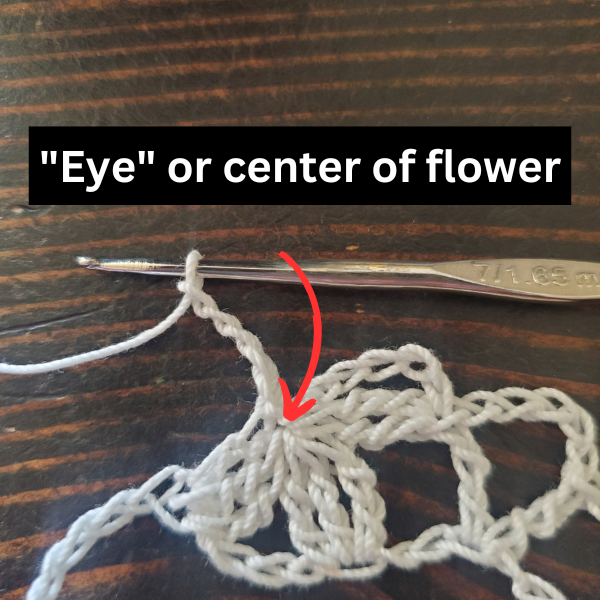
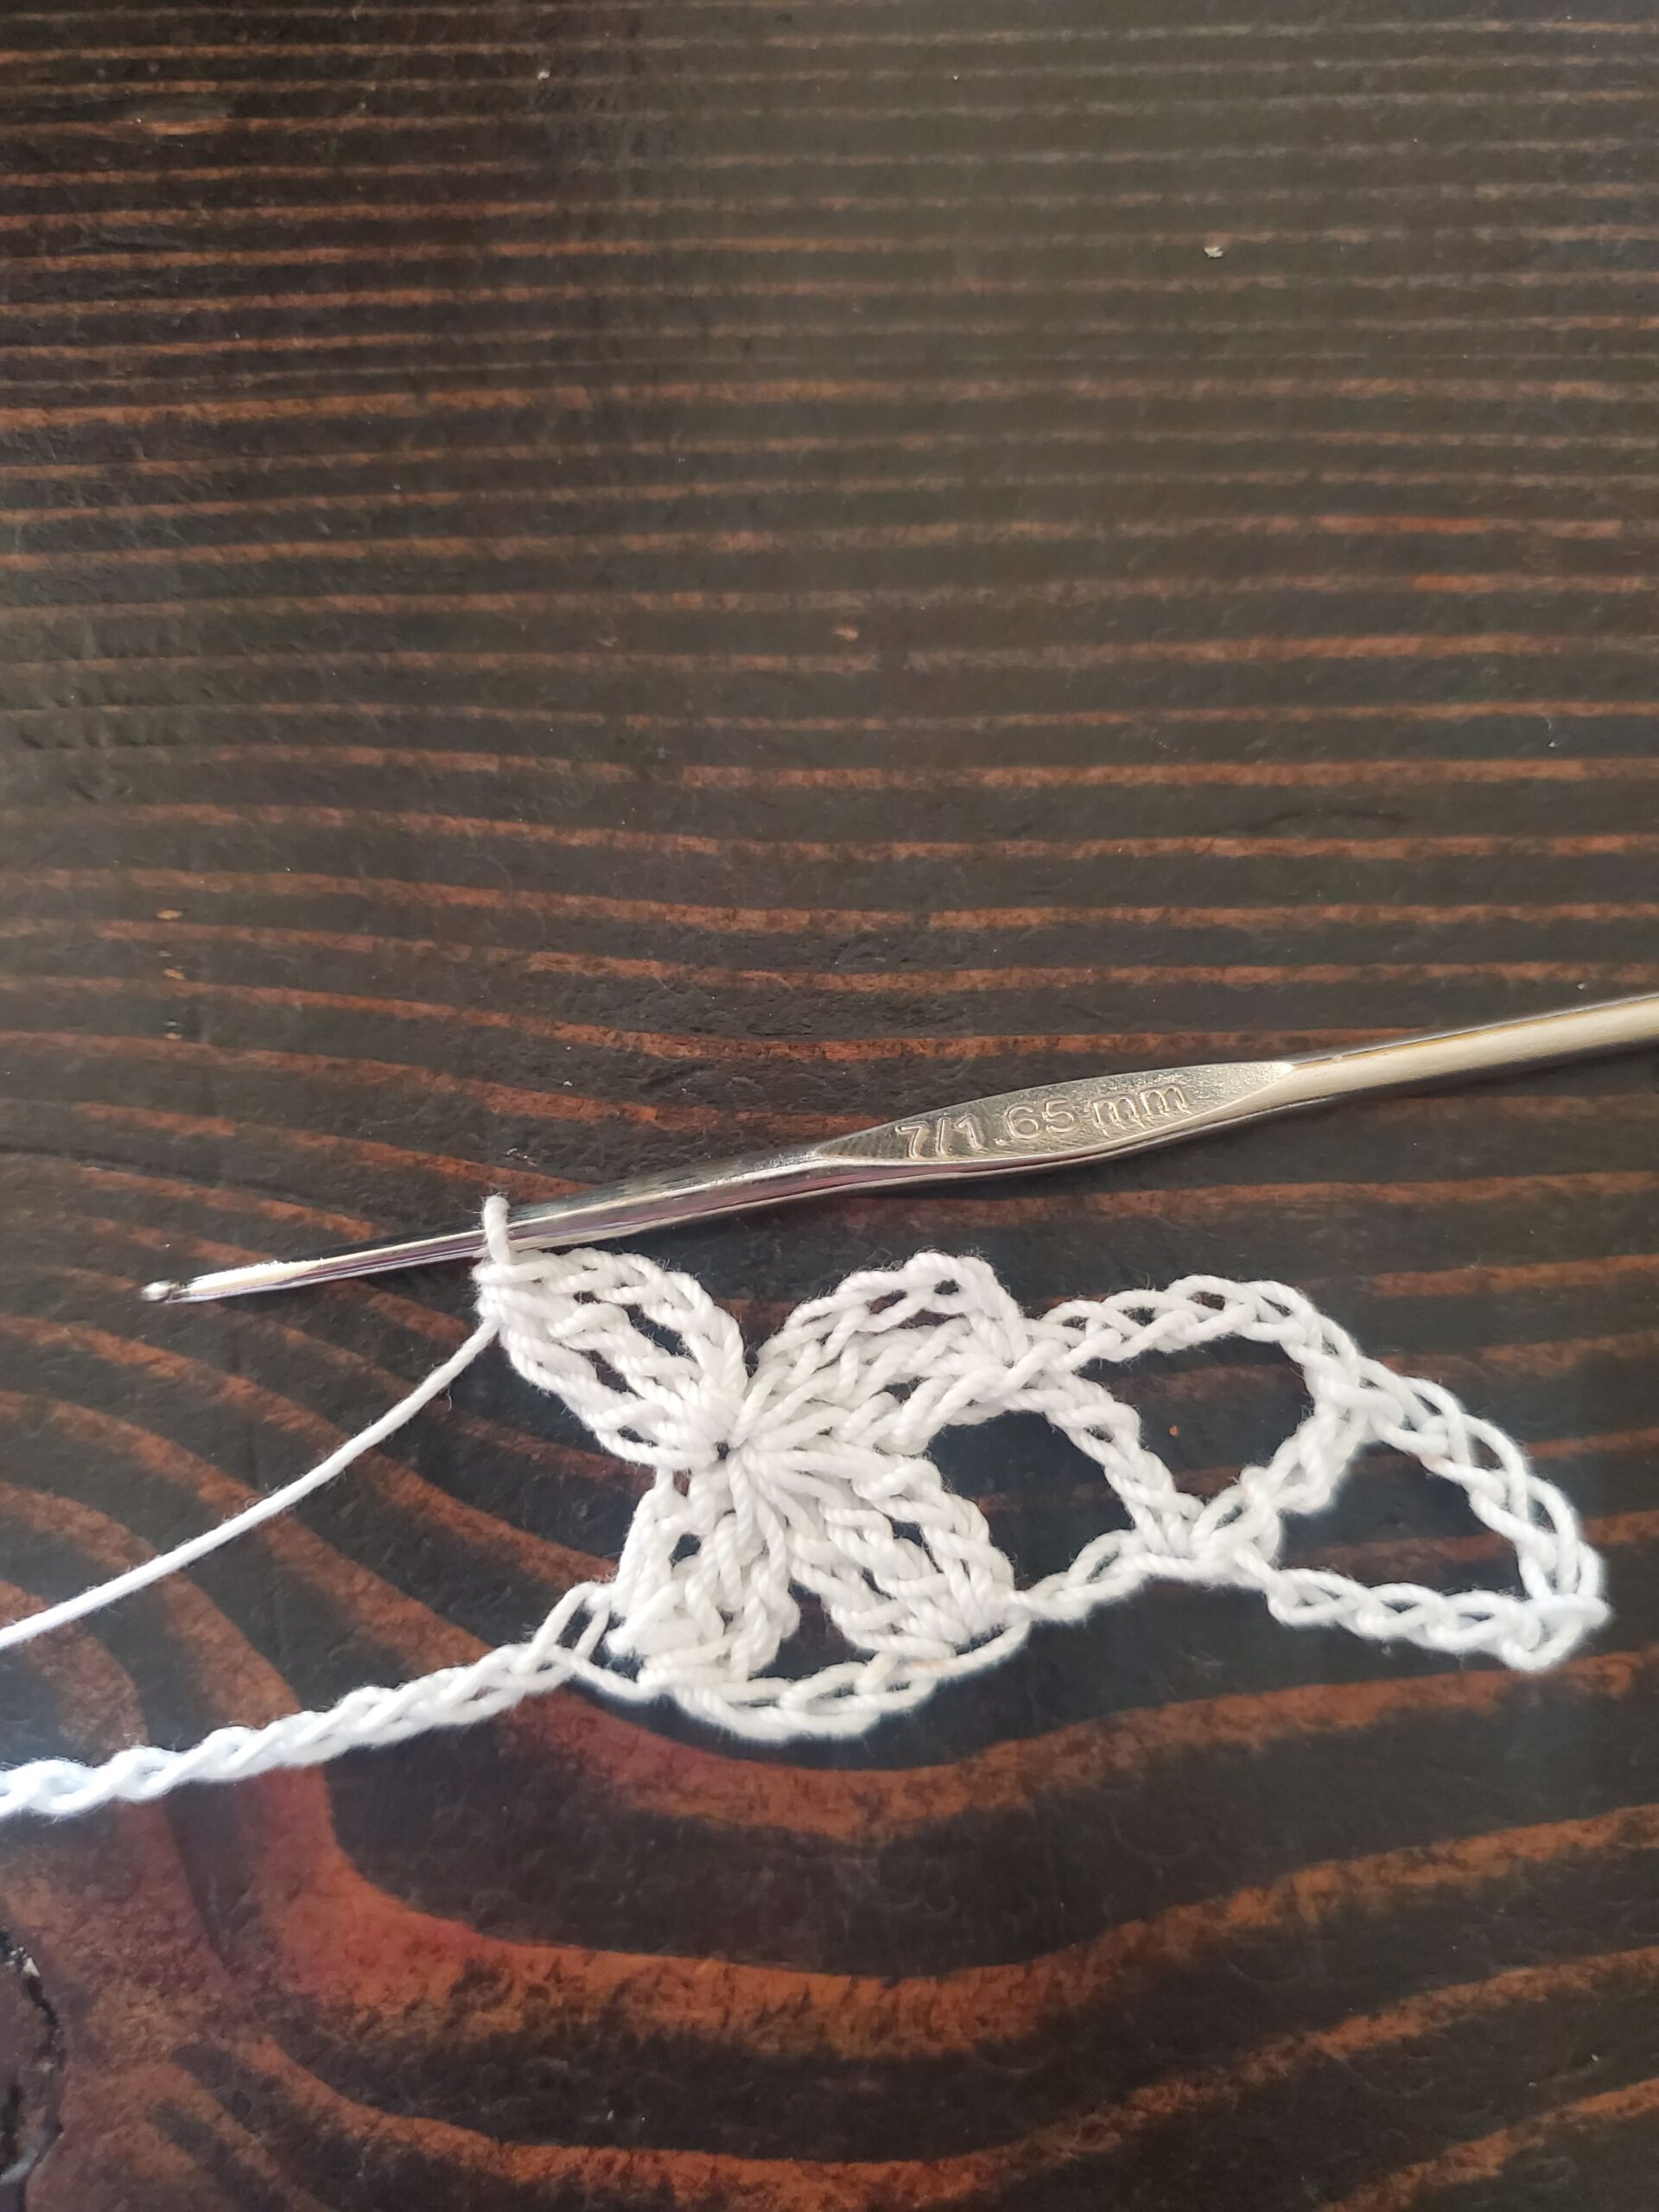
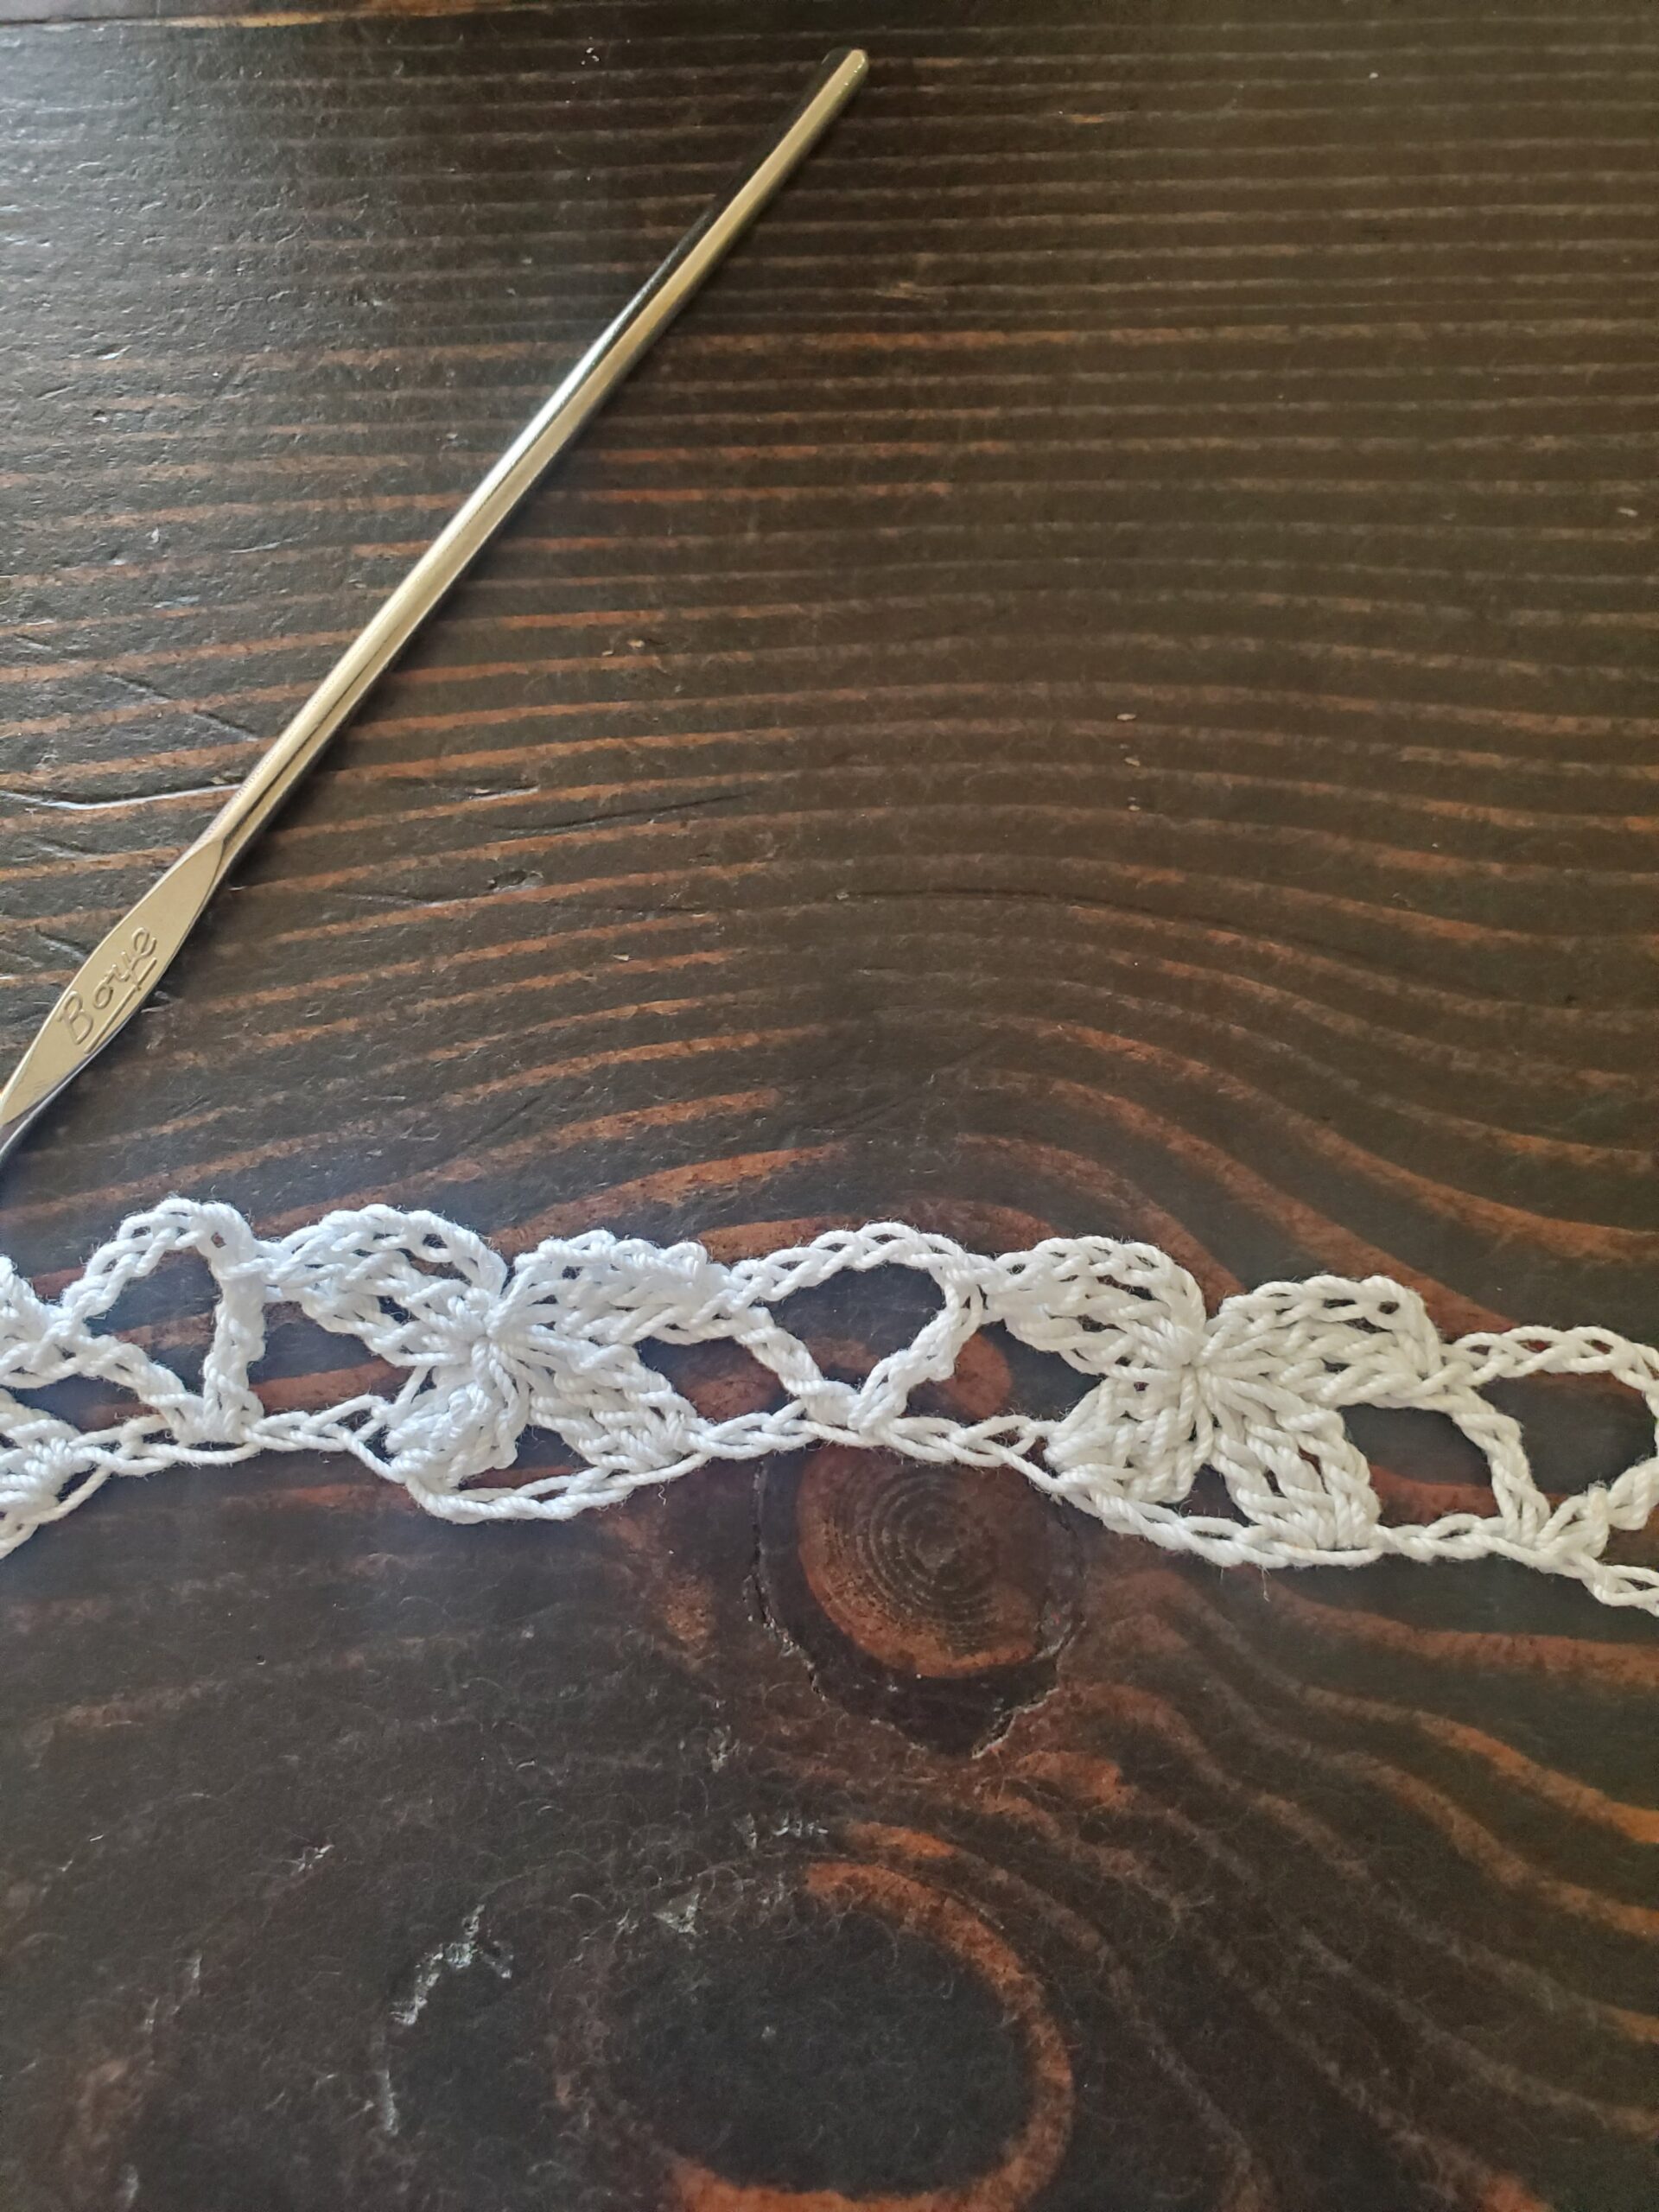
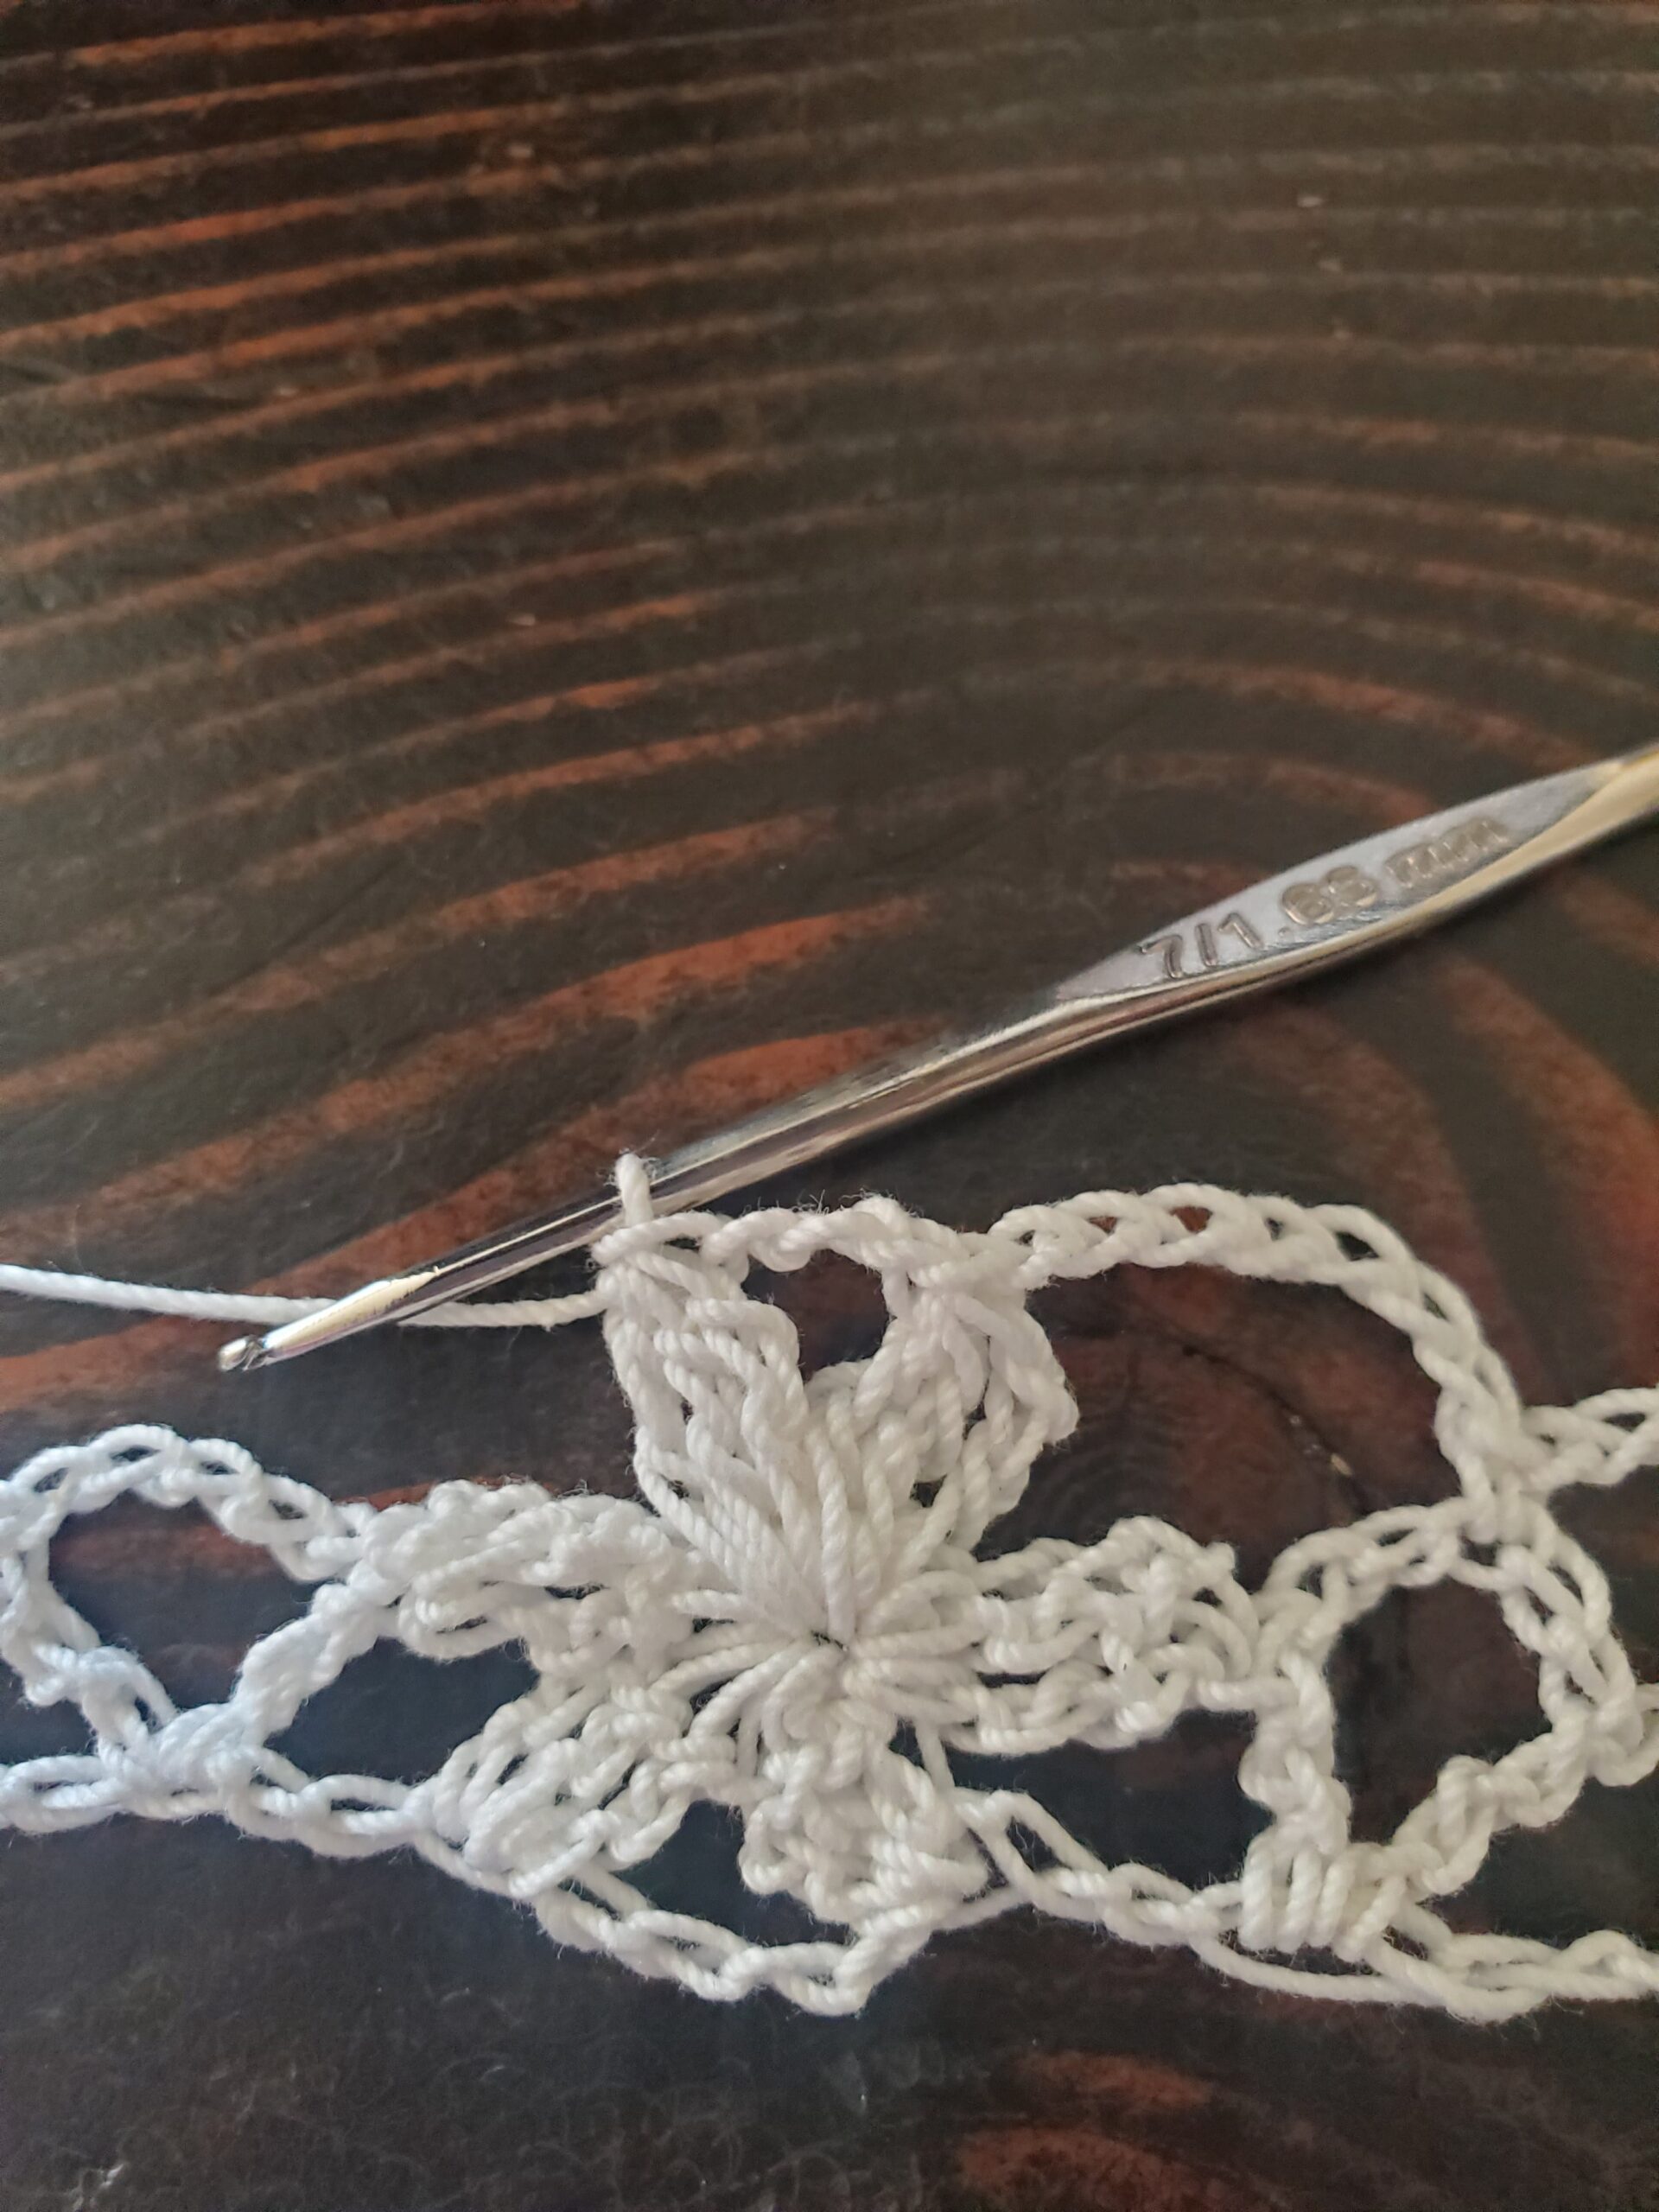
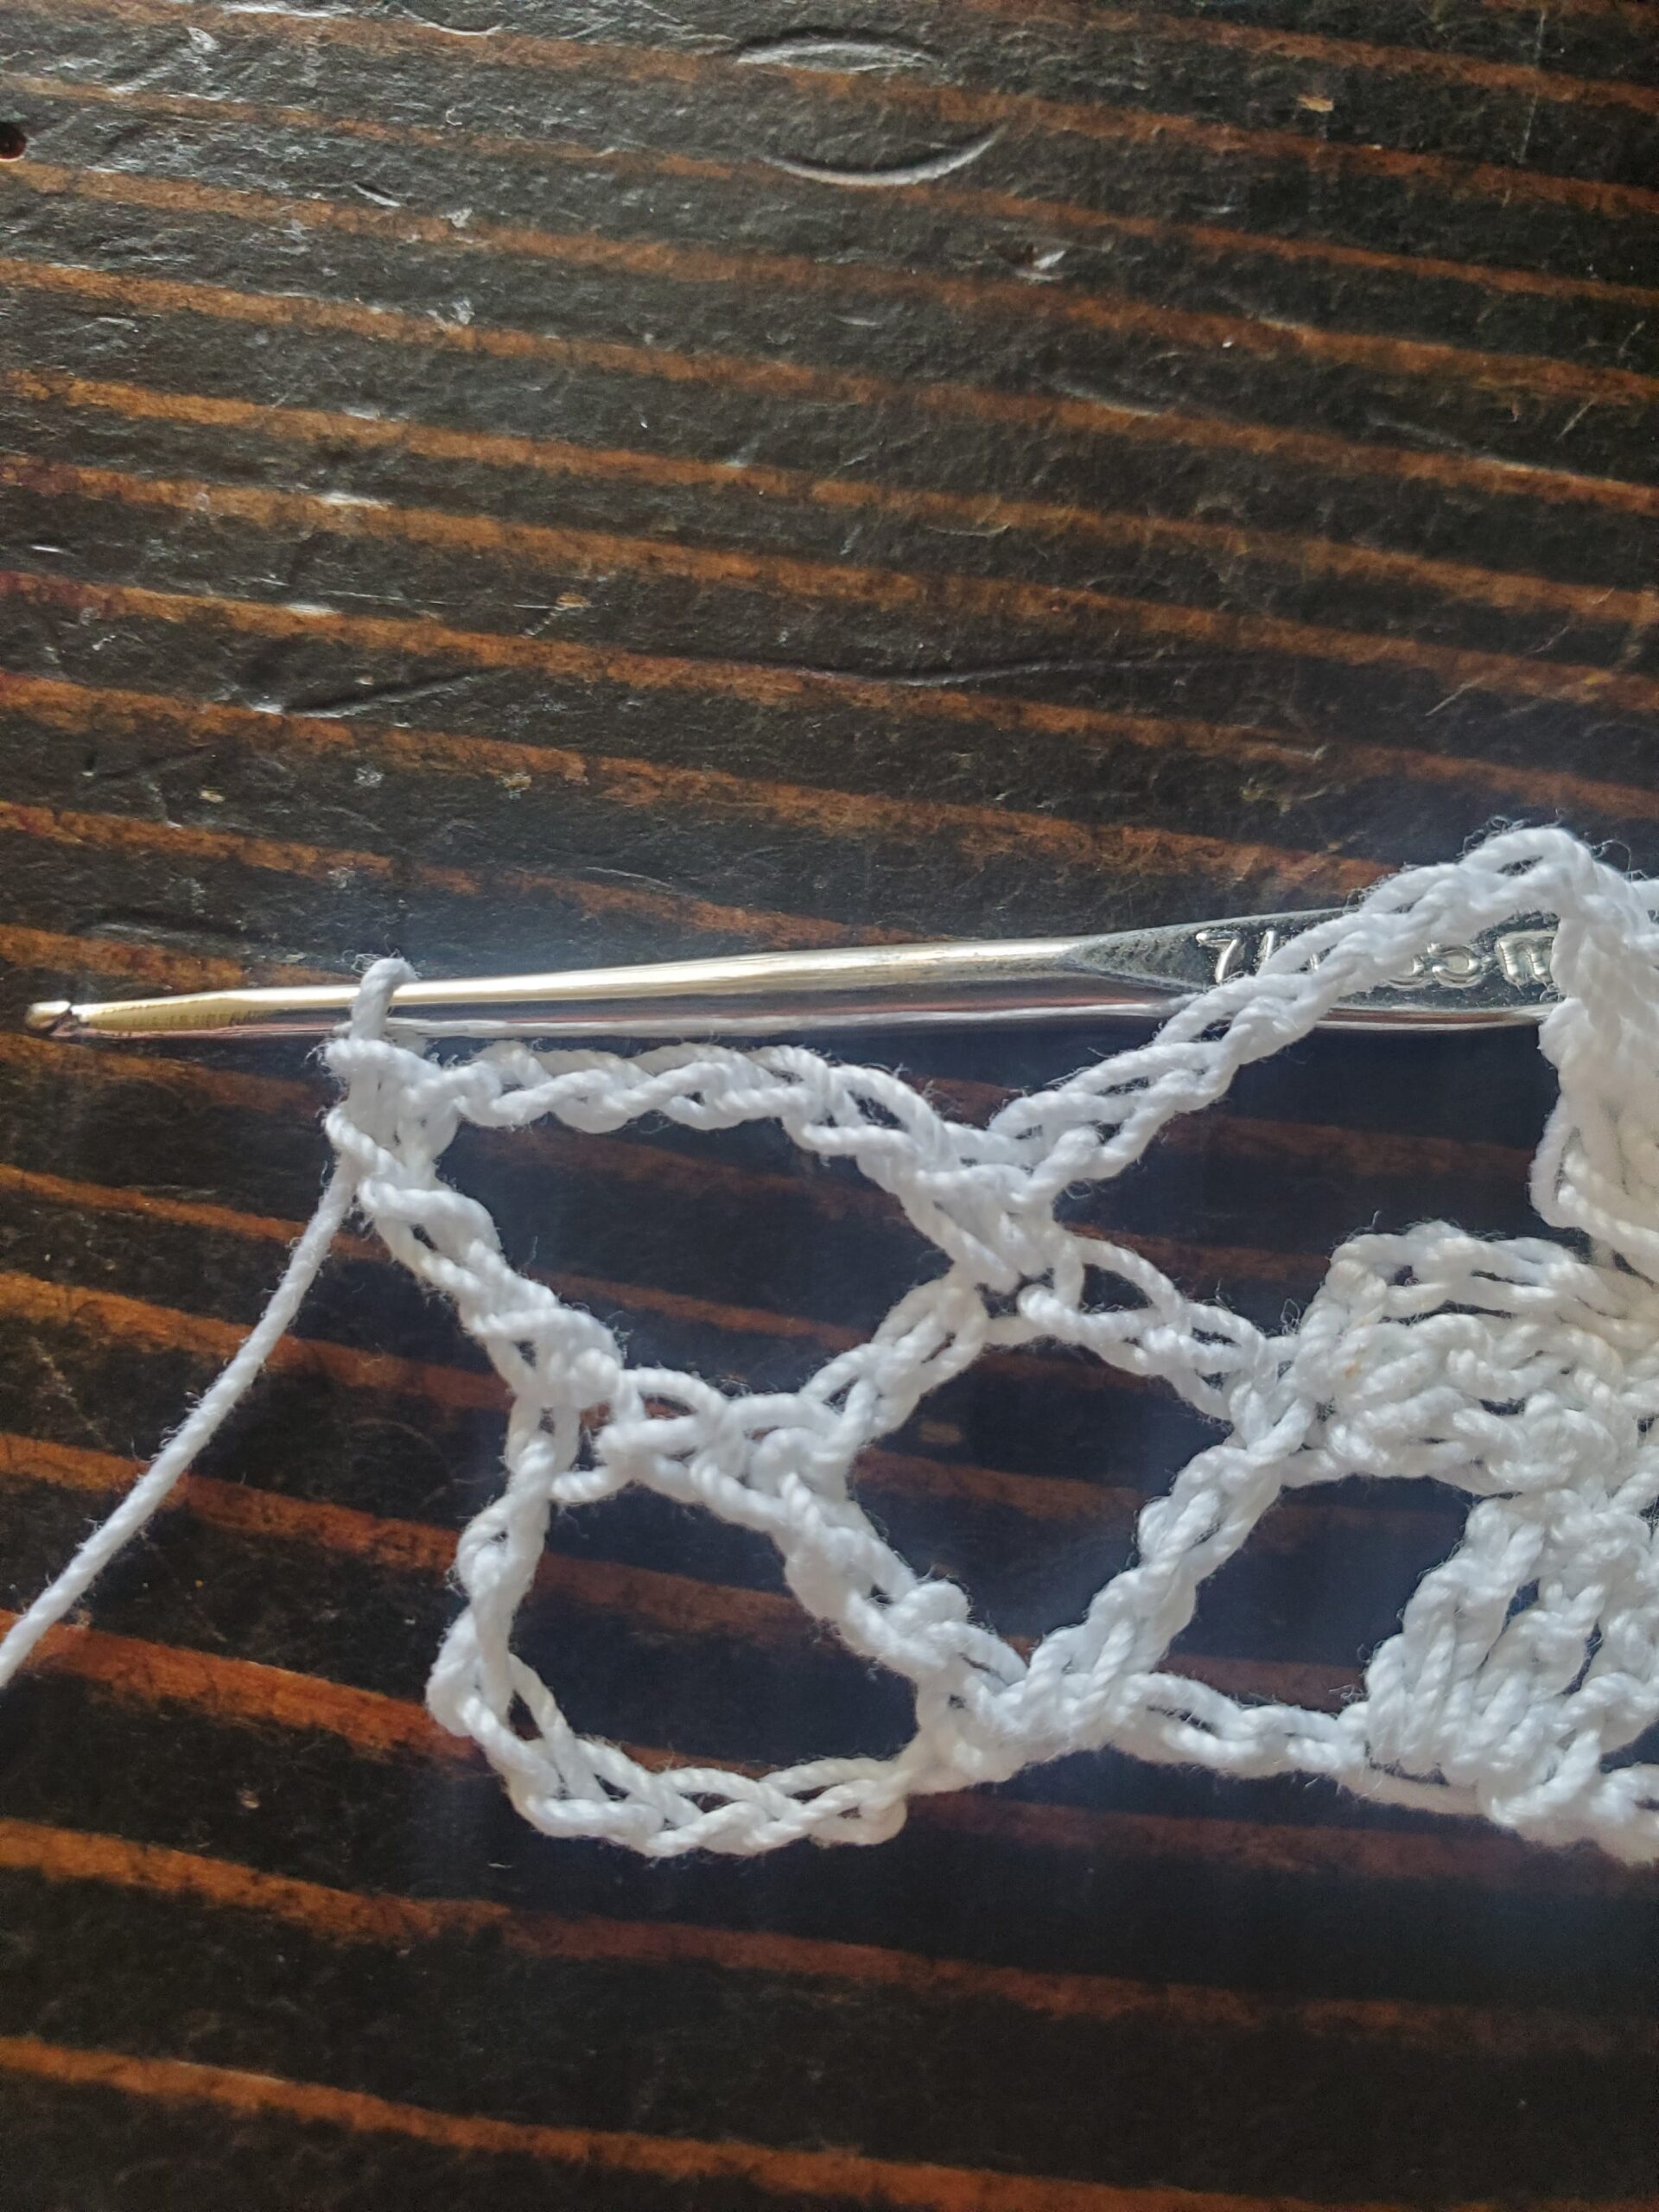
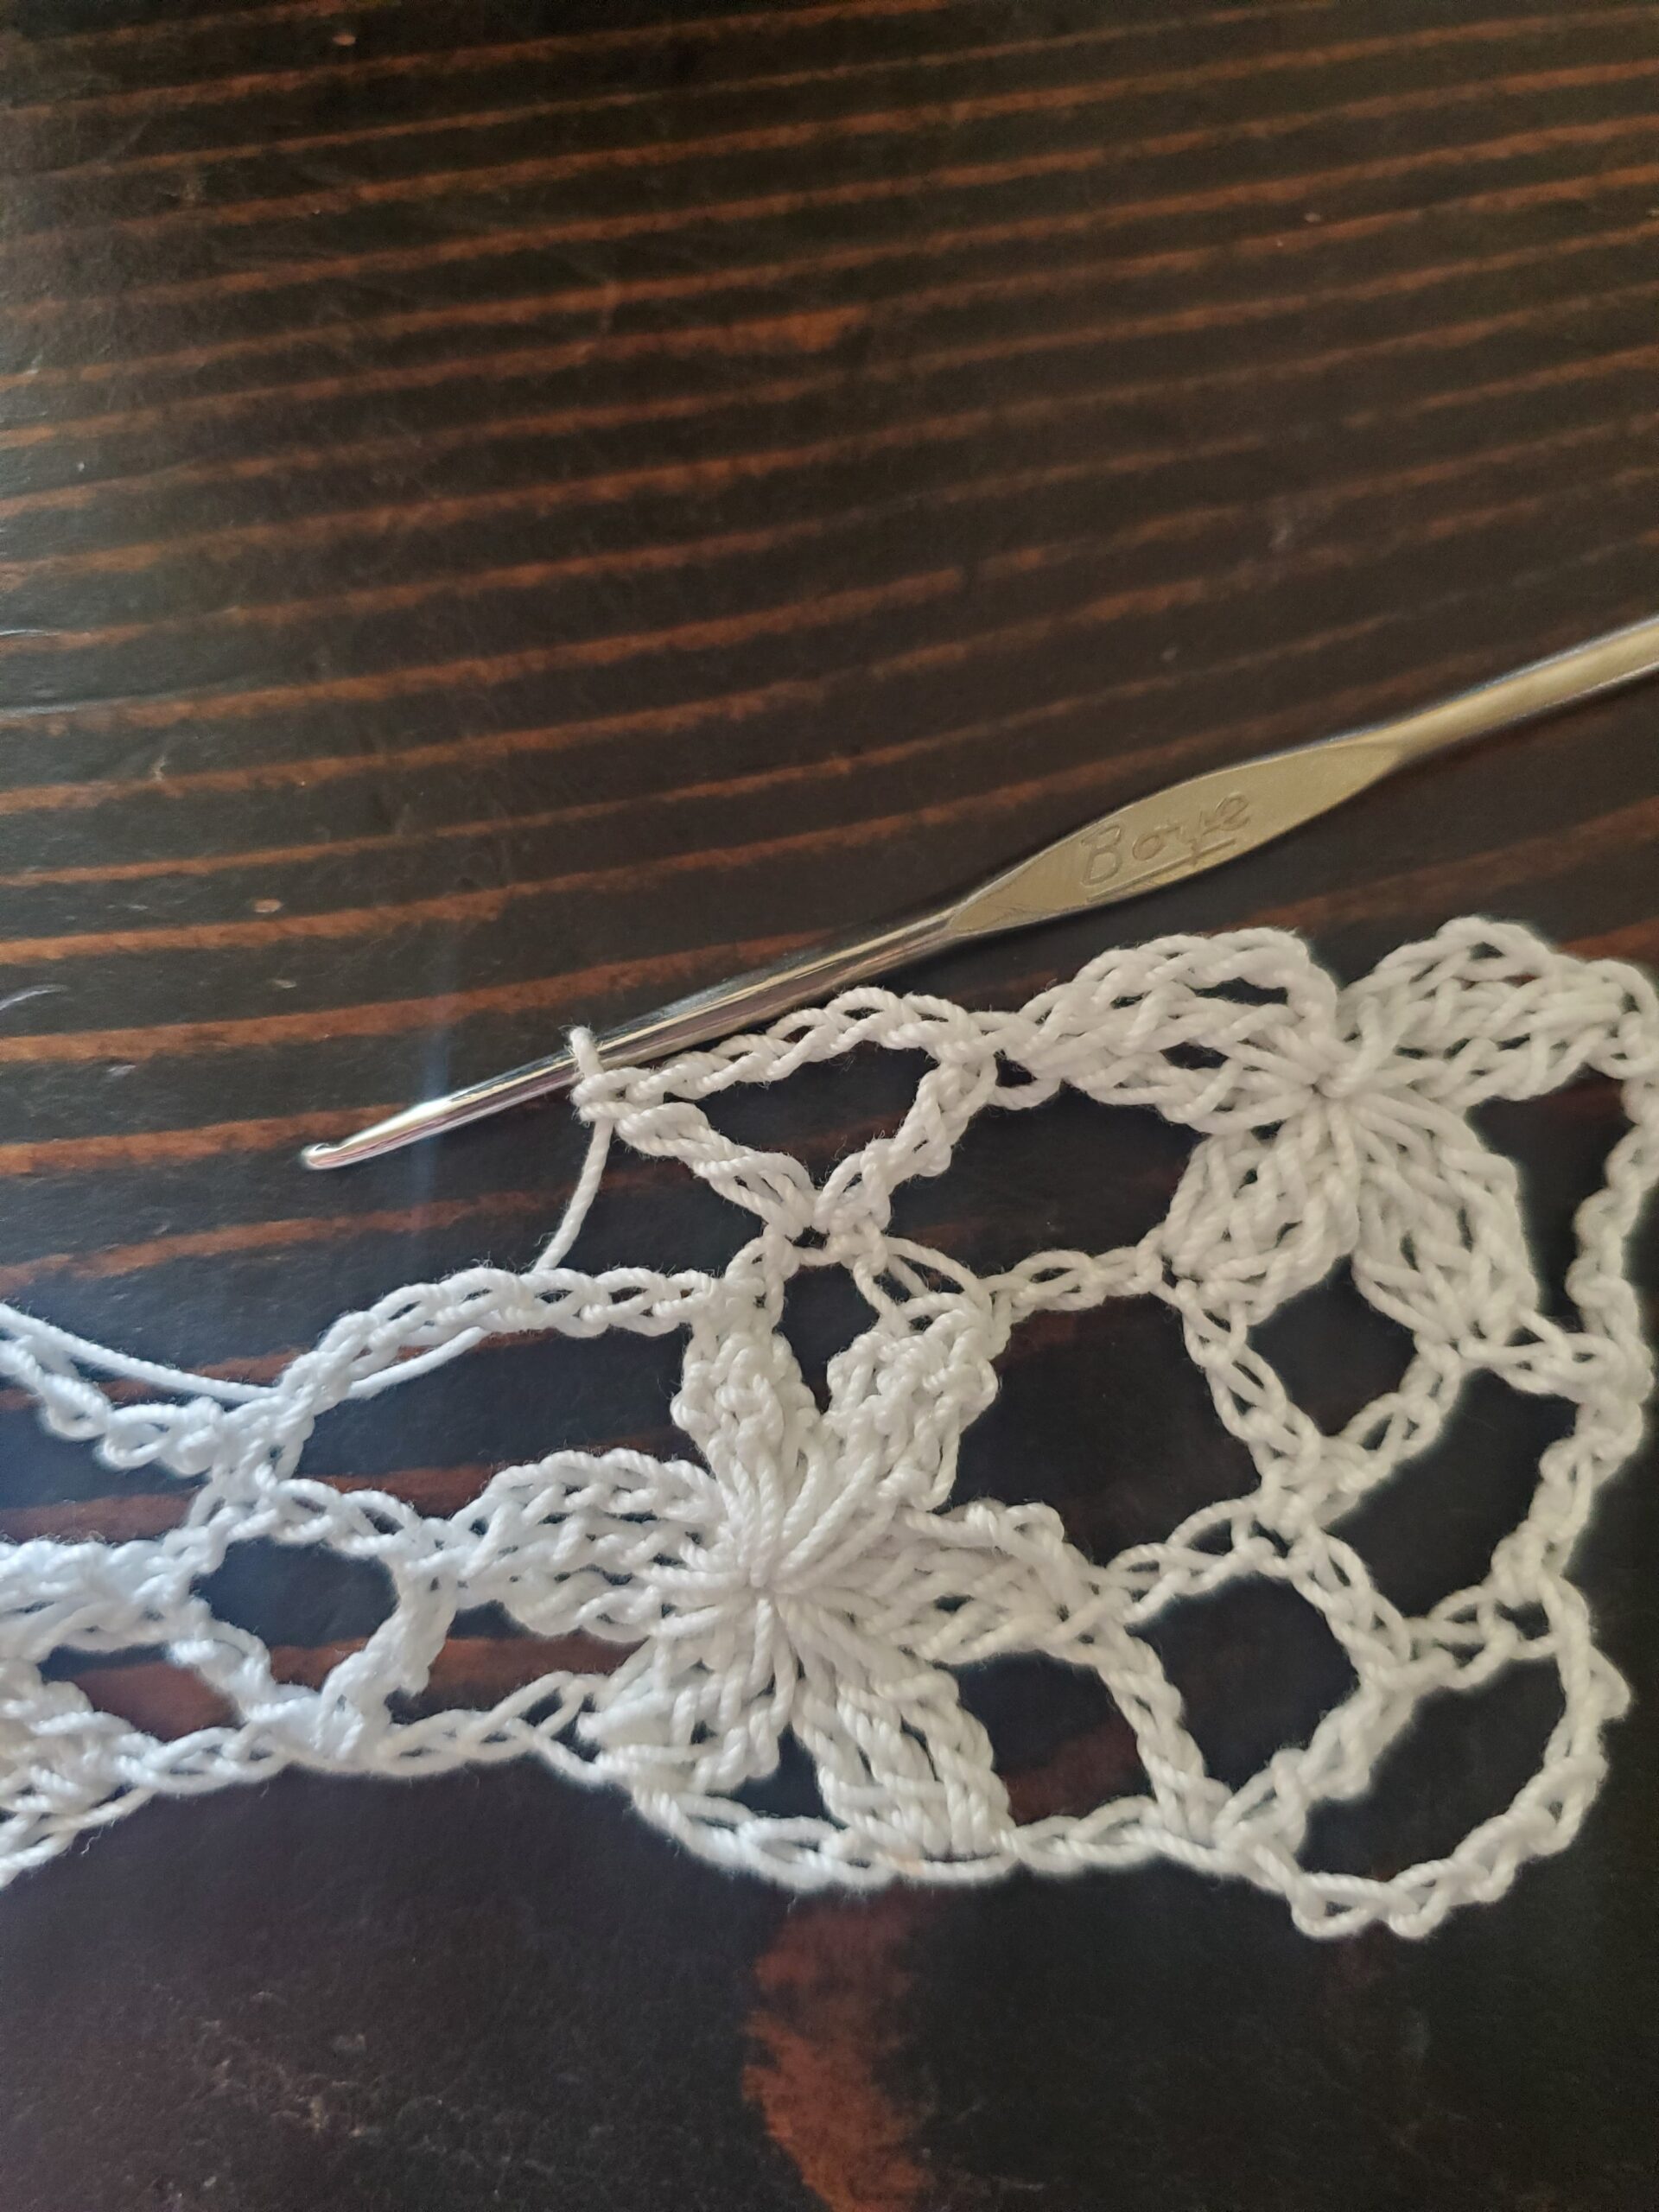
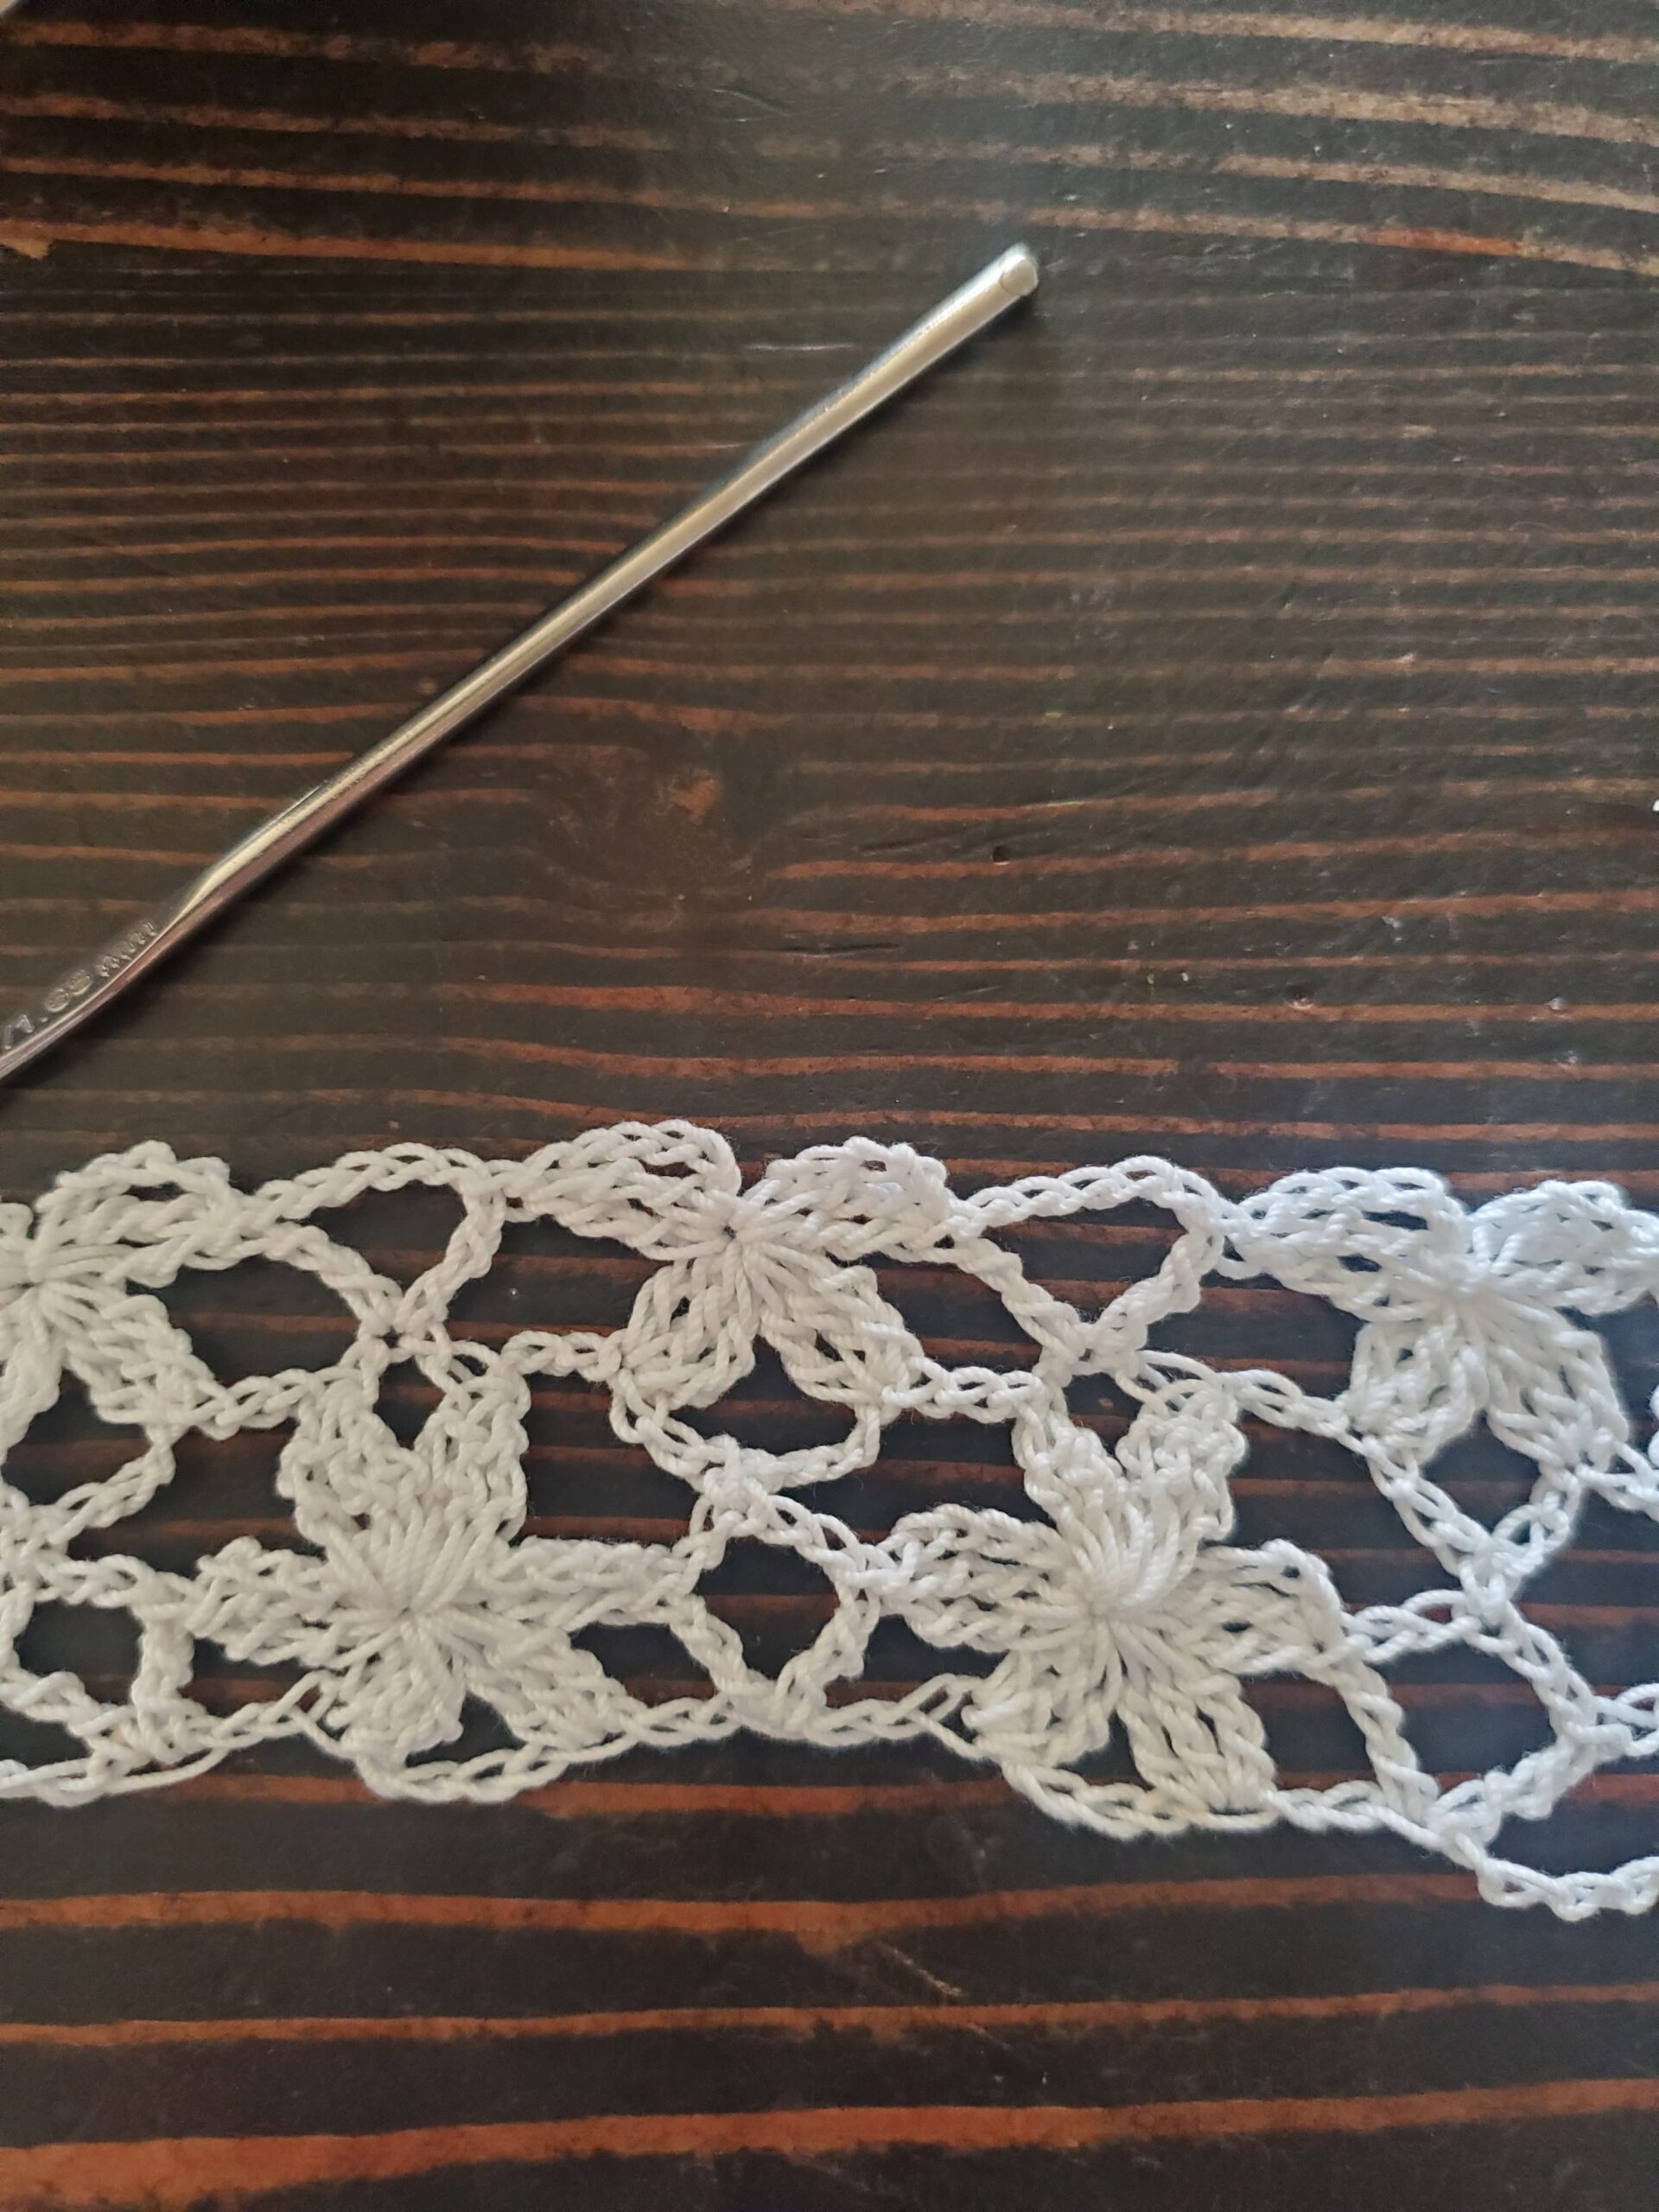
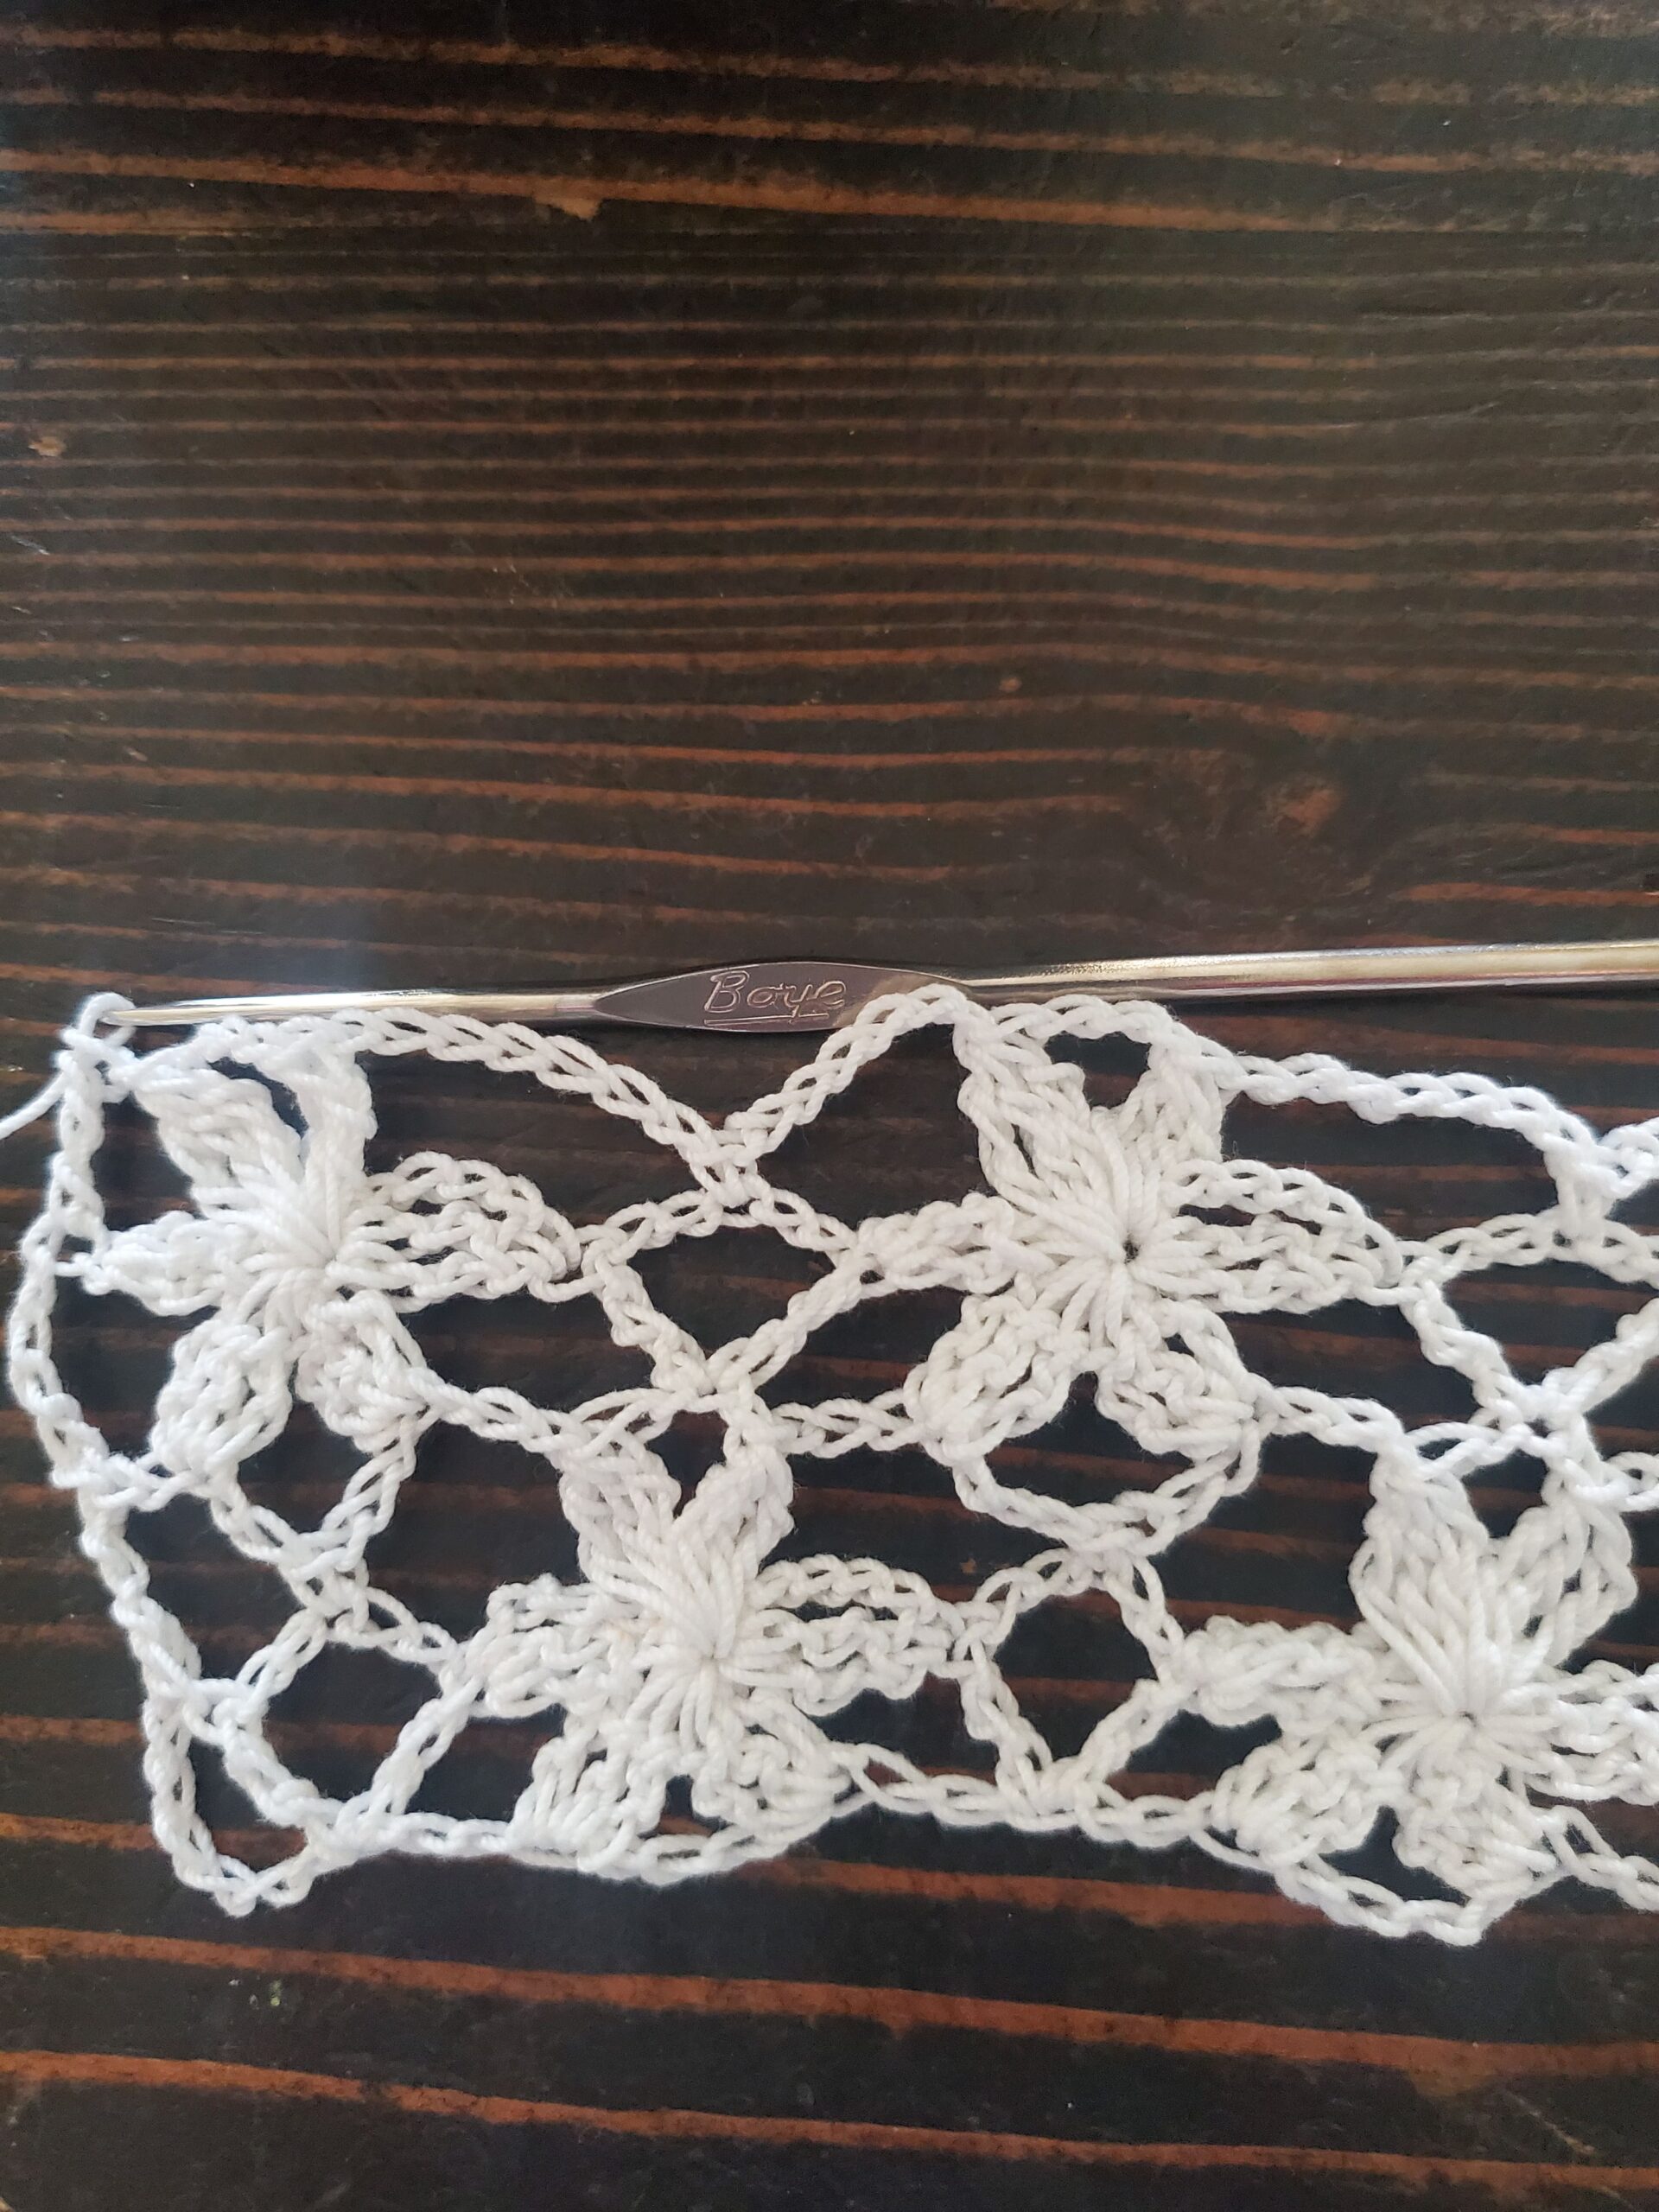
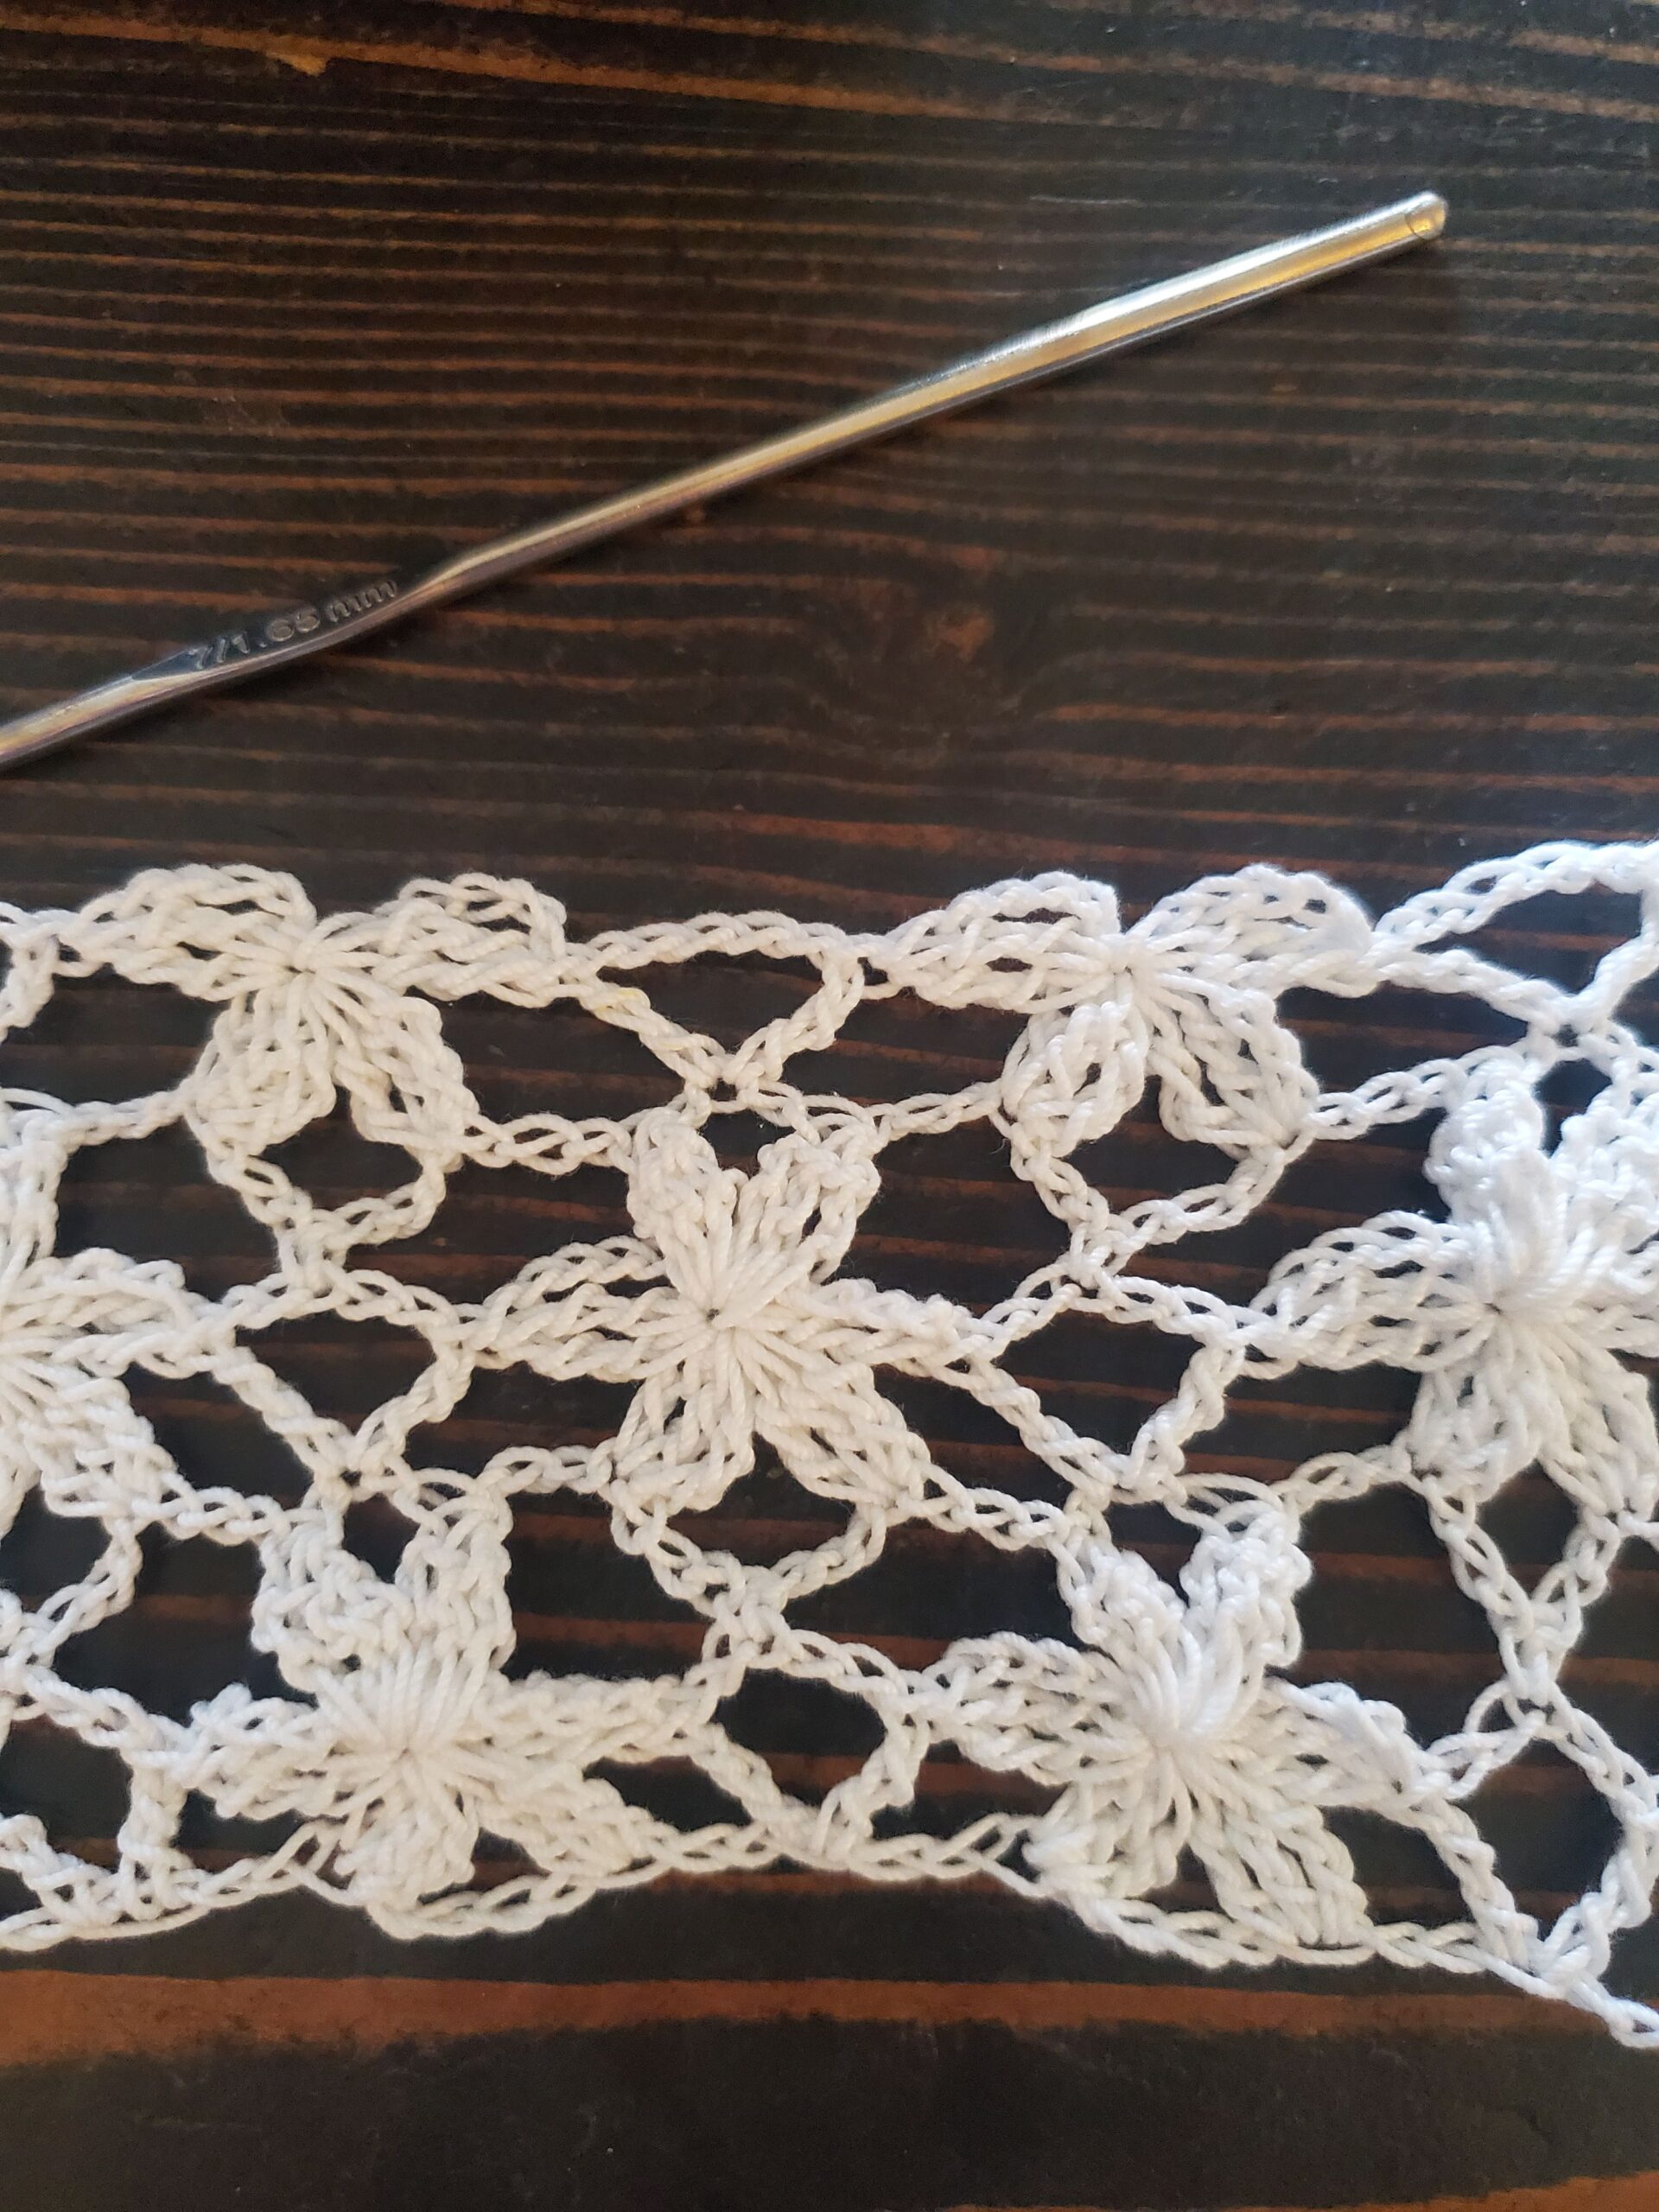
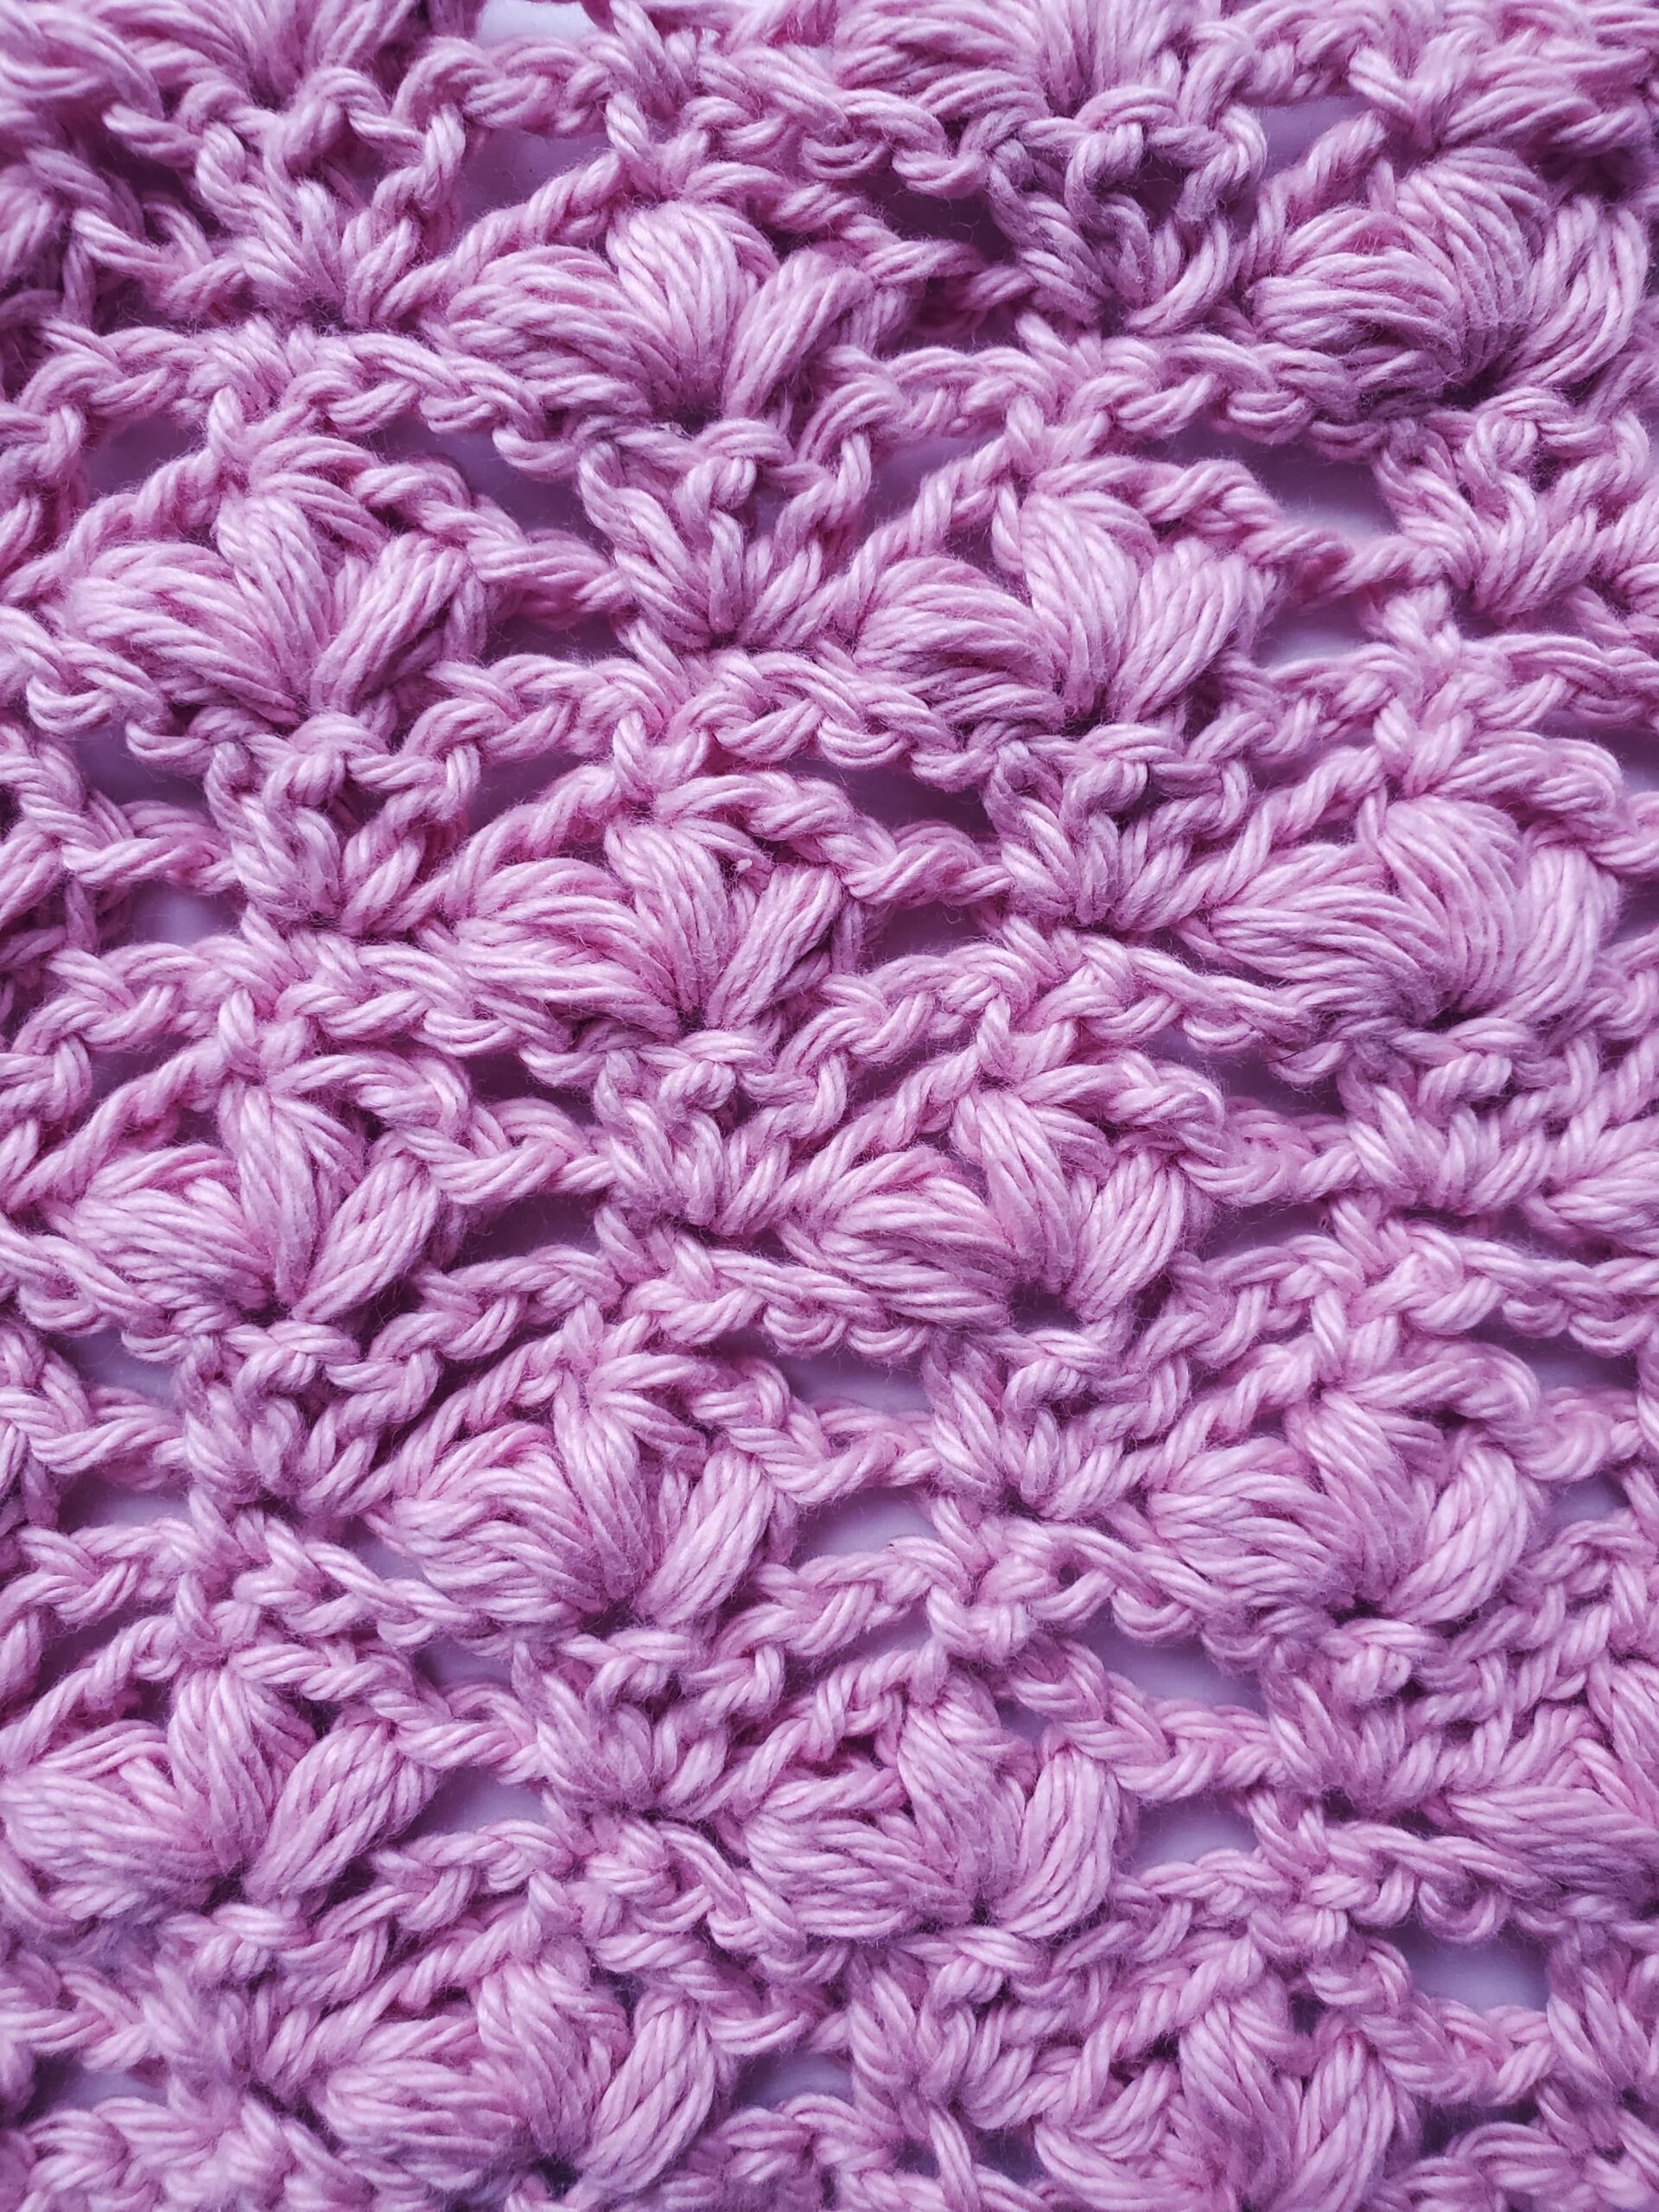
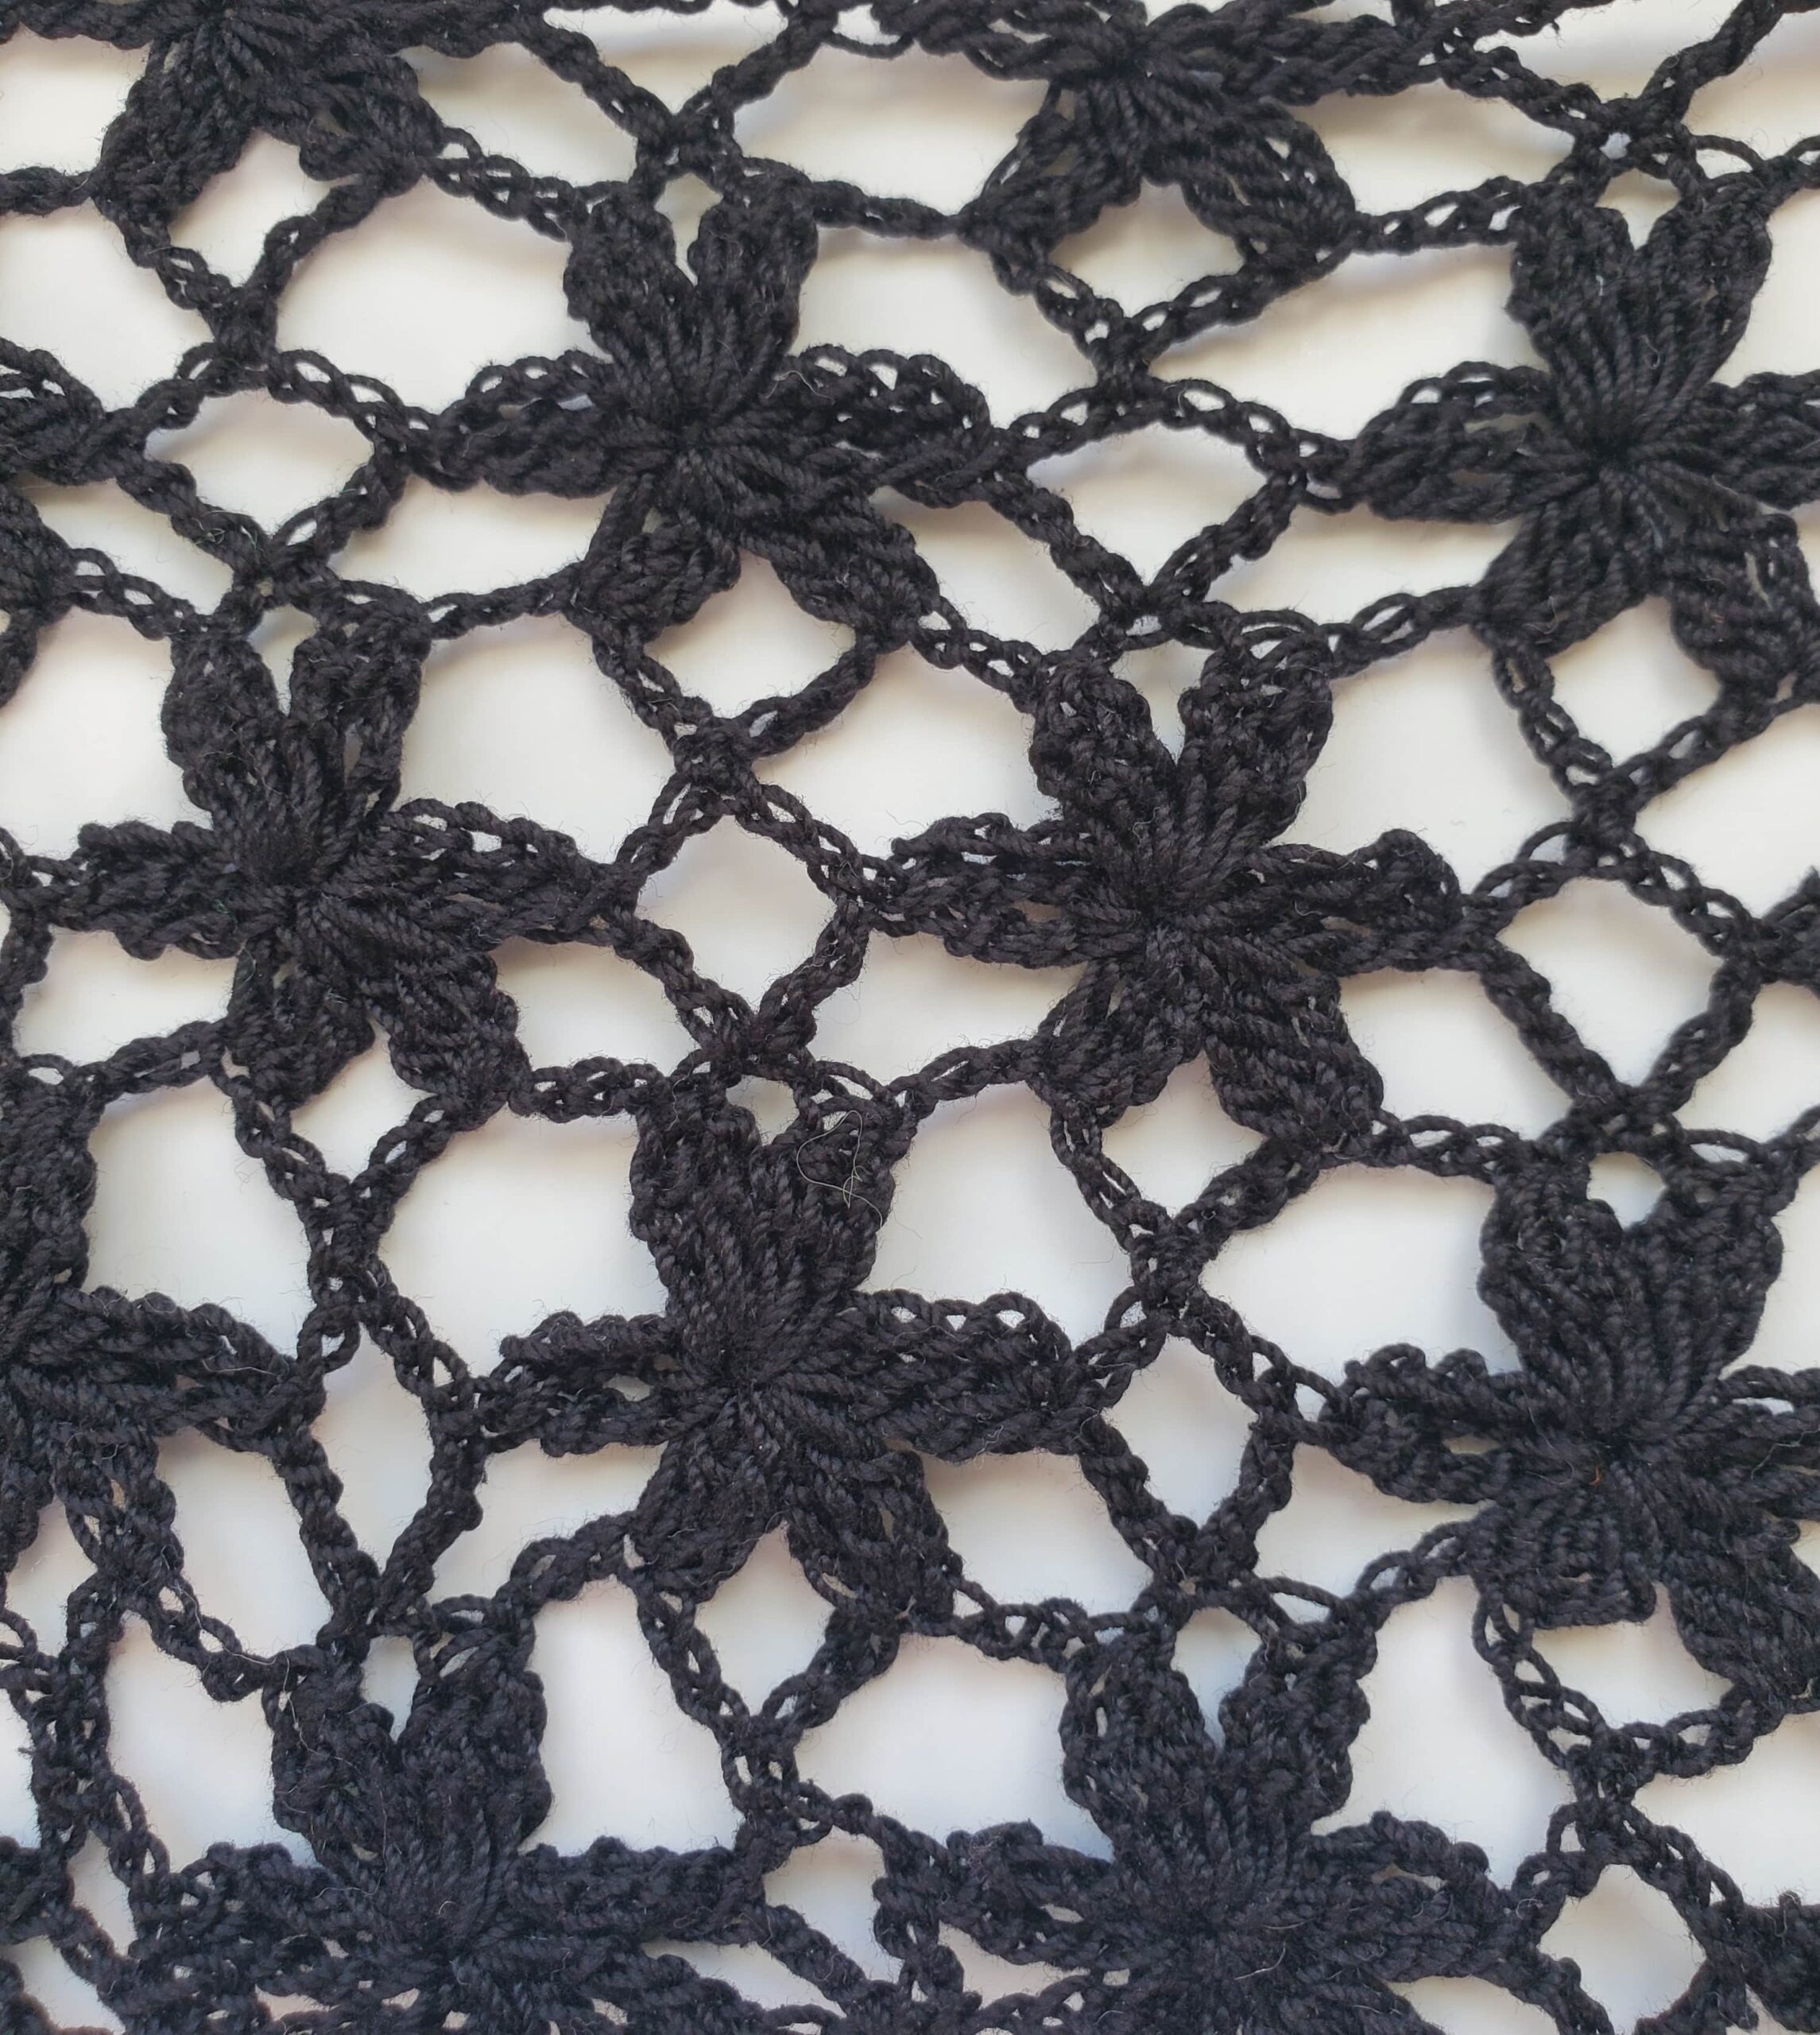
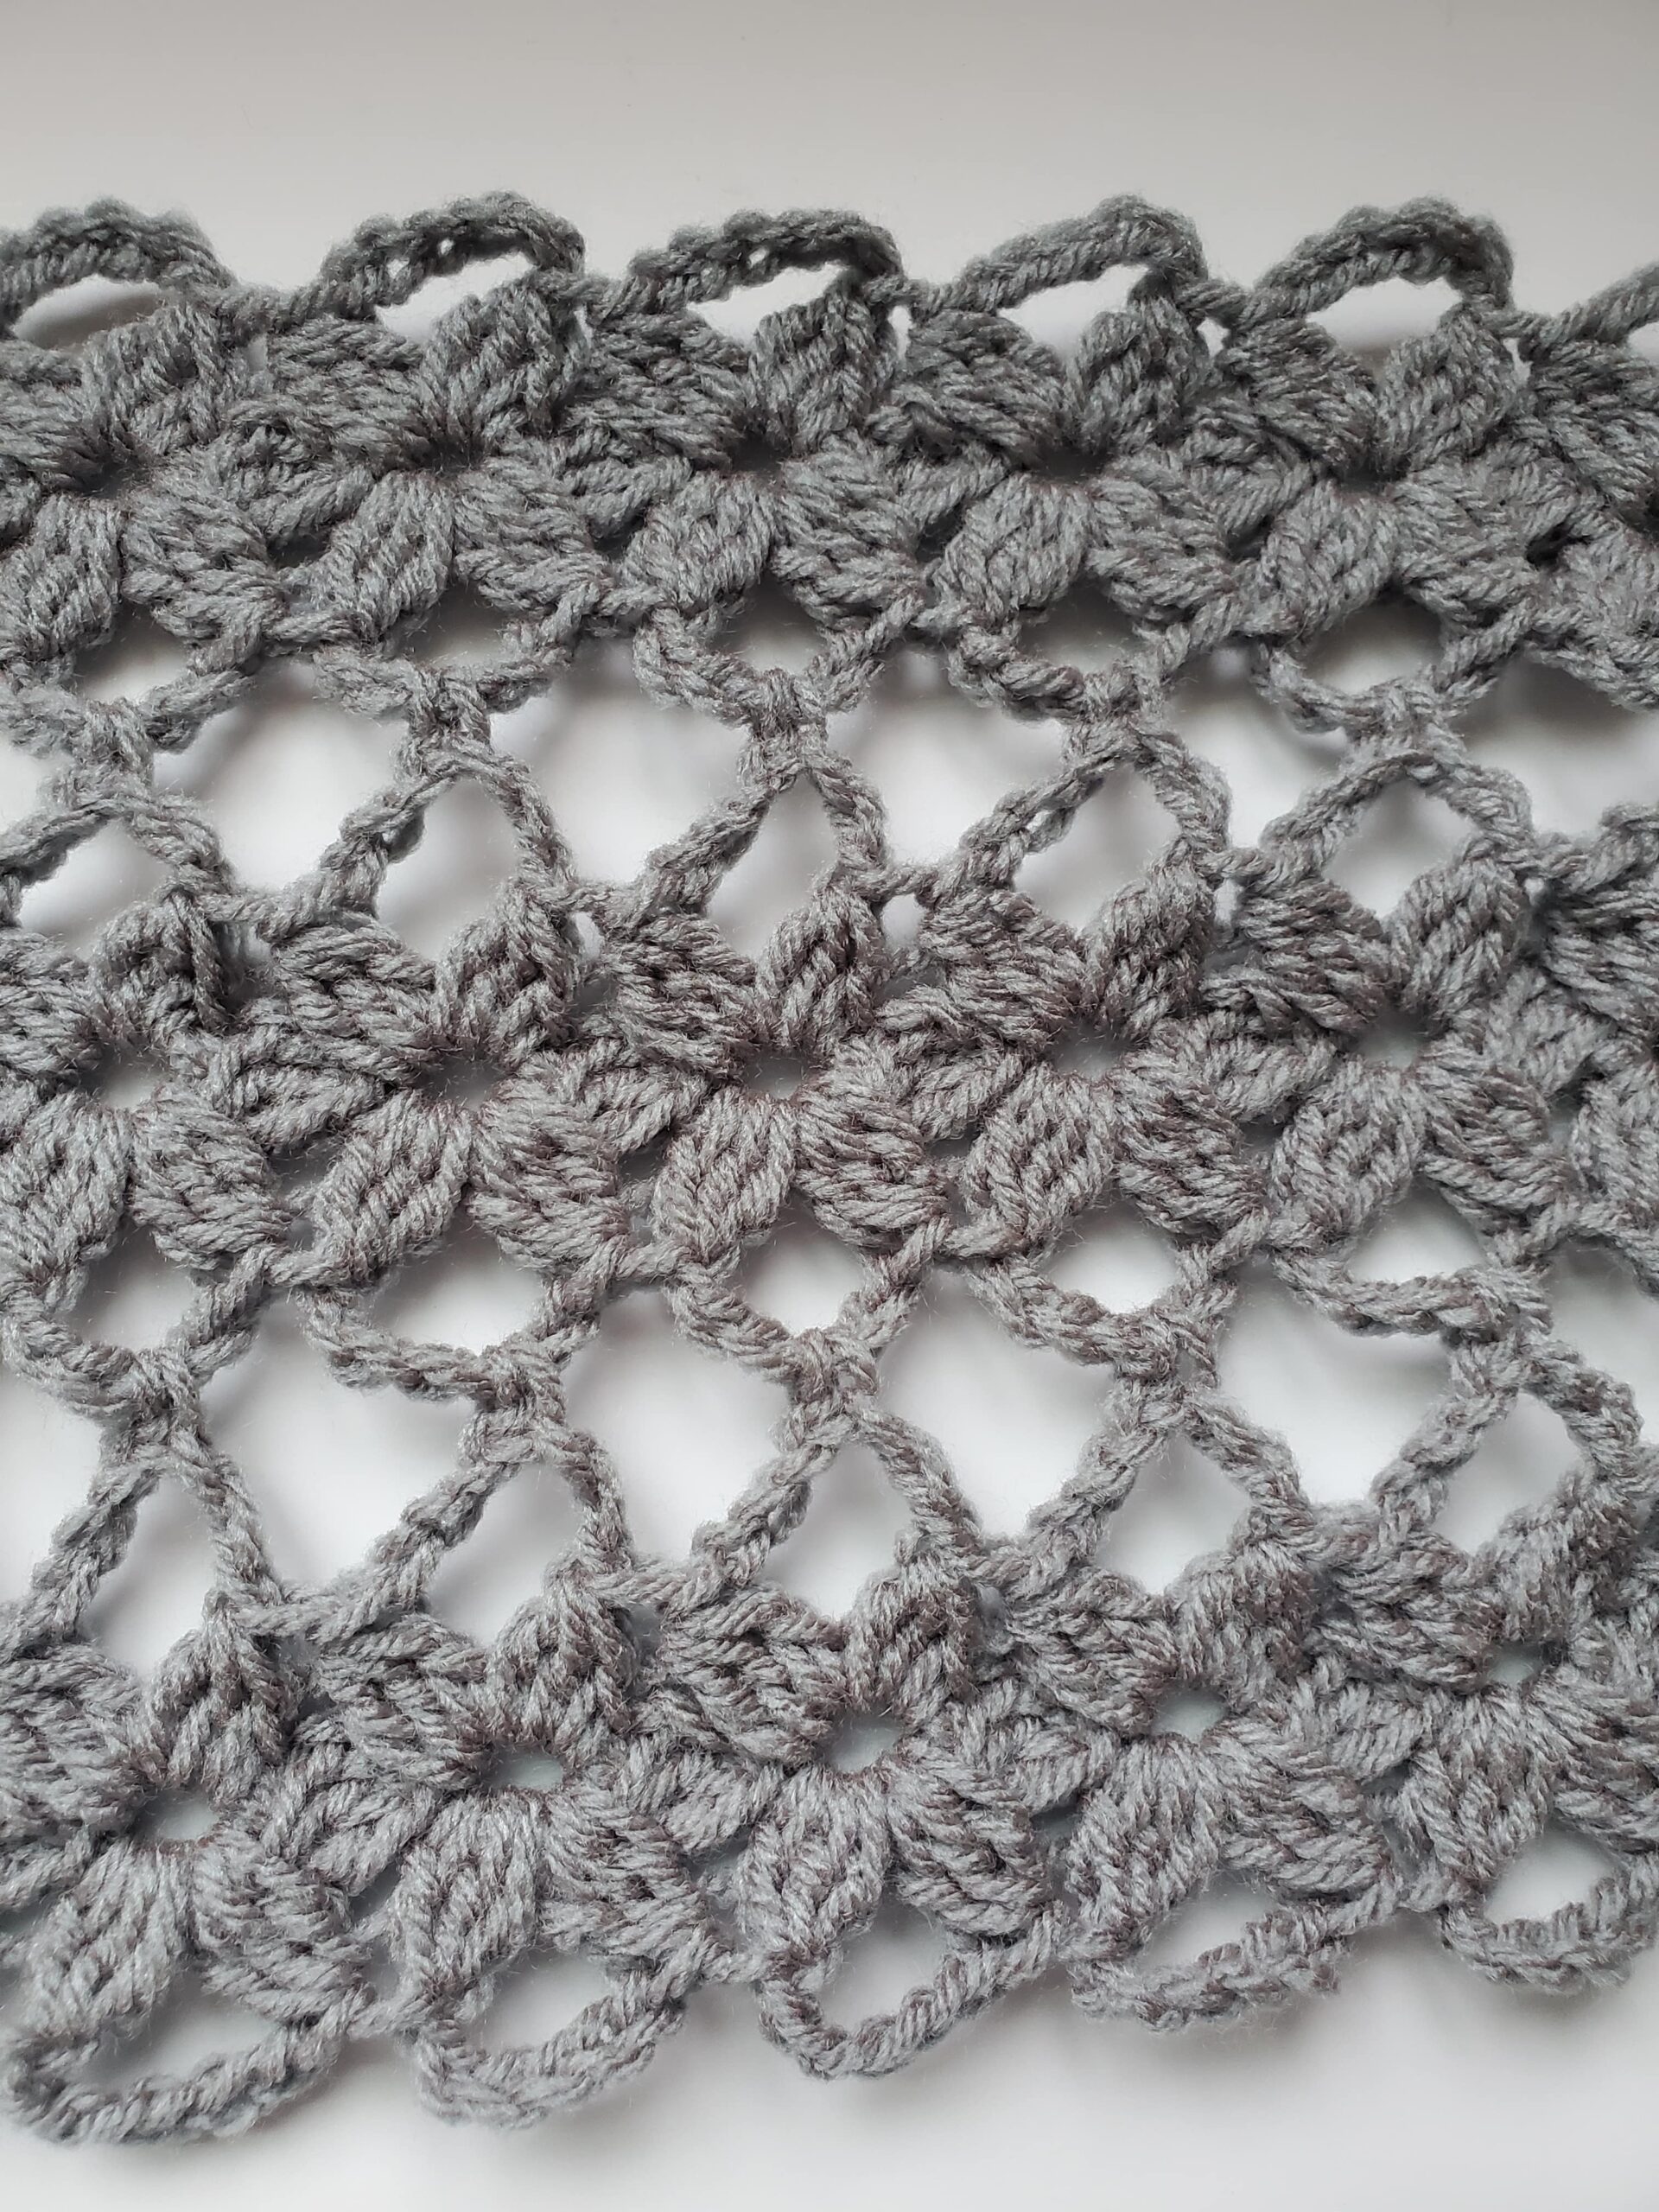
The Floral Lace Infinity Veil pattern is worked up in 5 rows with a repeat of rows 2-5. You’ll notice these rows are similar, with the only difference being offsetting the flowers so they look more pleasing to the eye. Here’s a close up of the flower repeats:

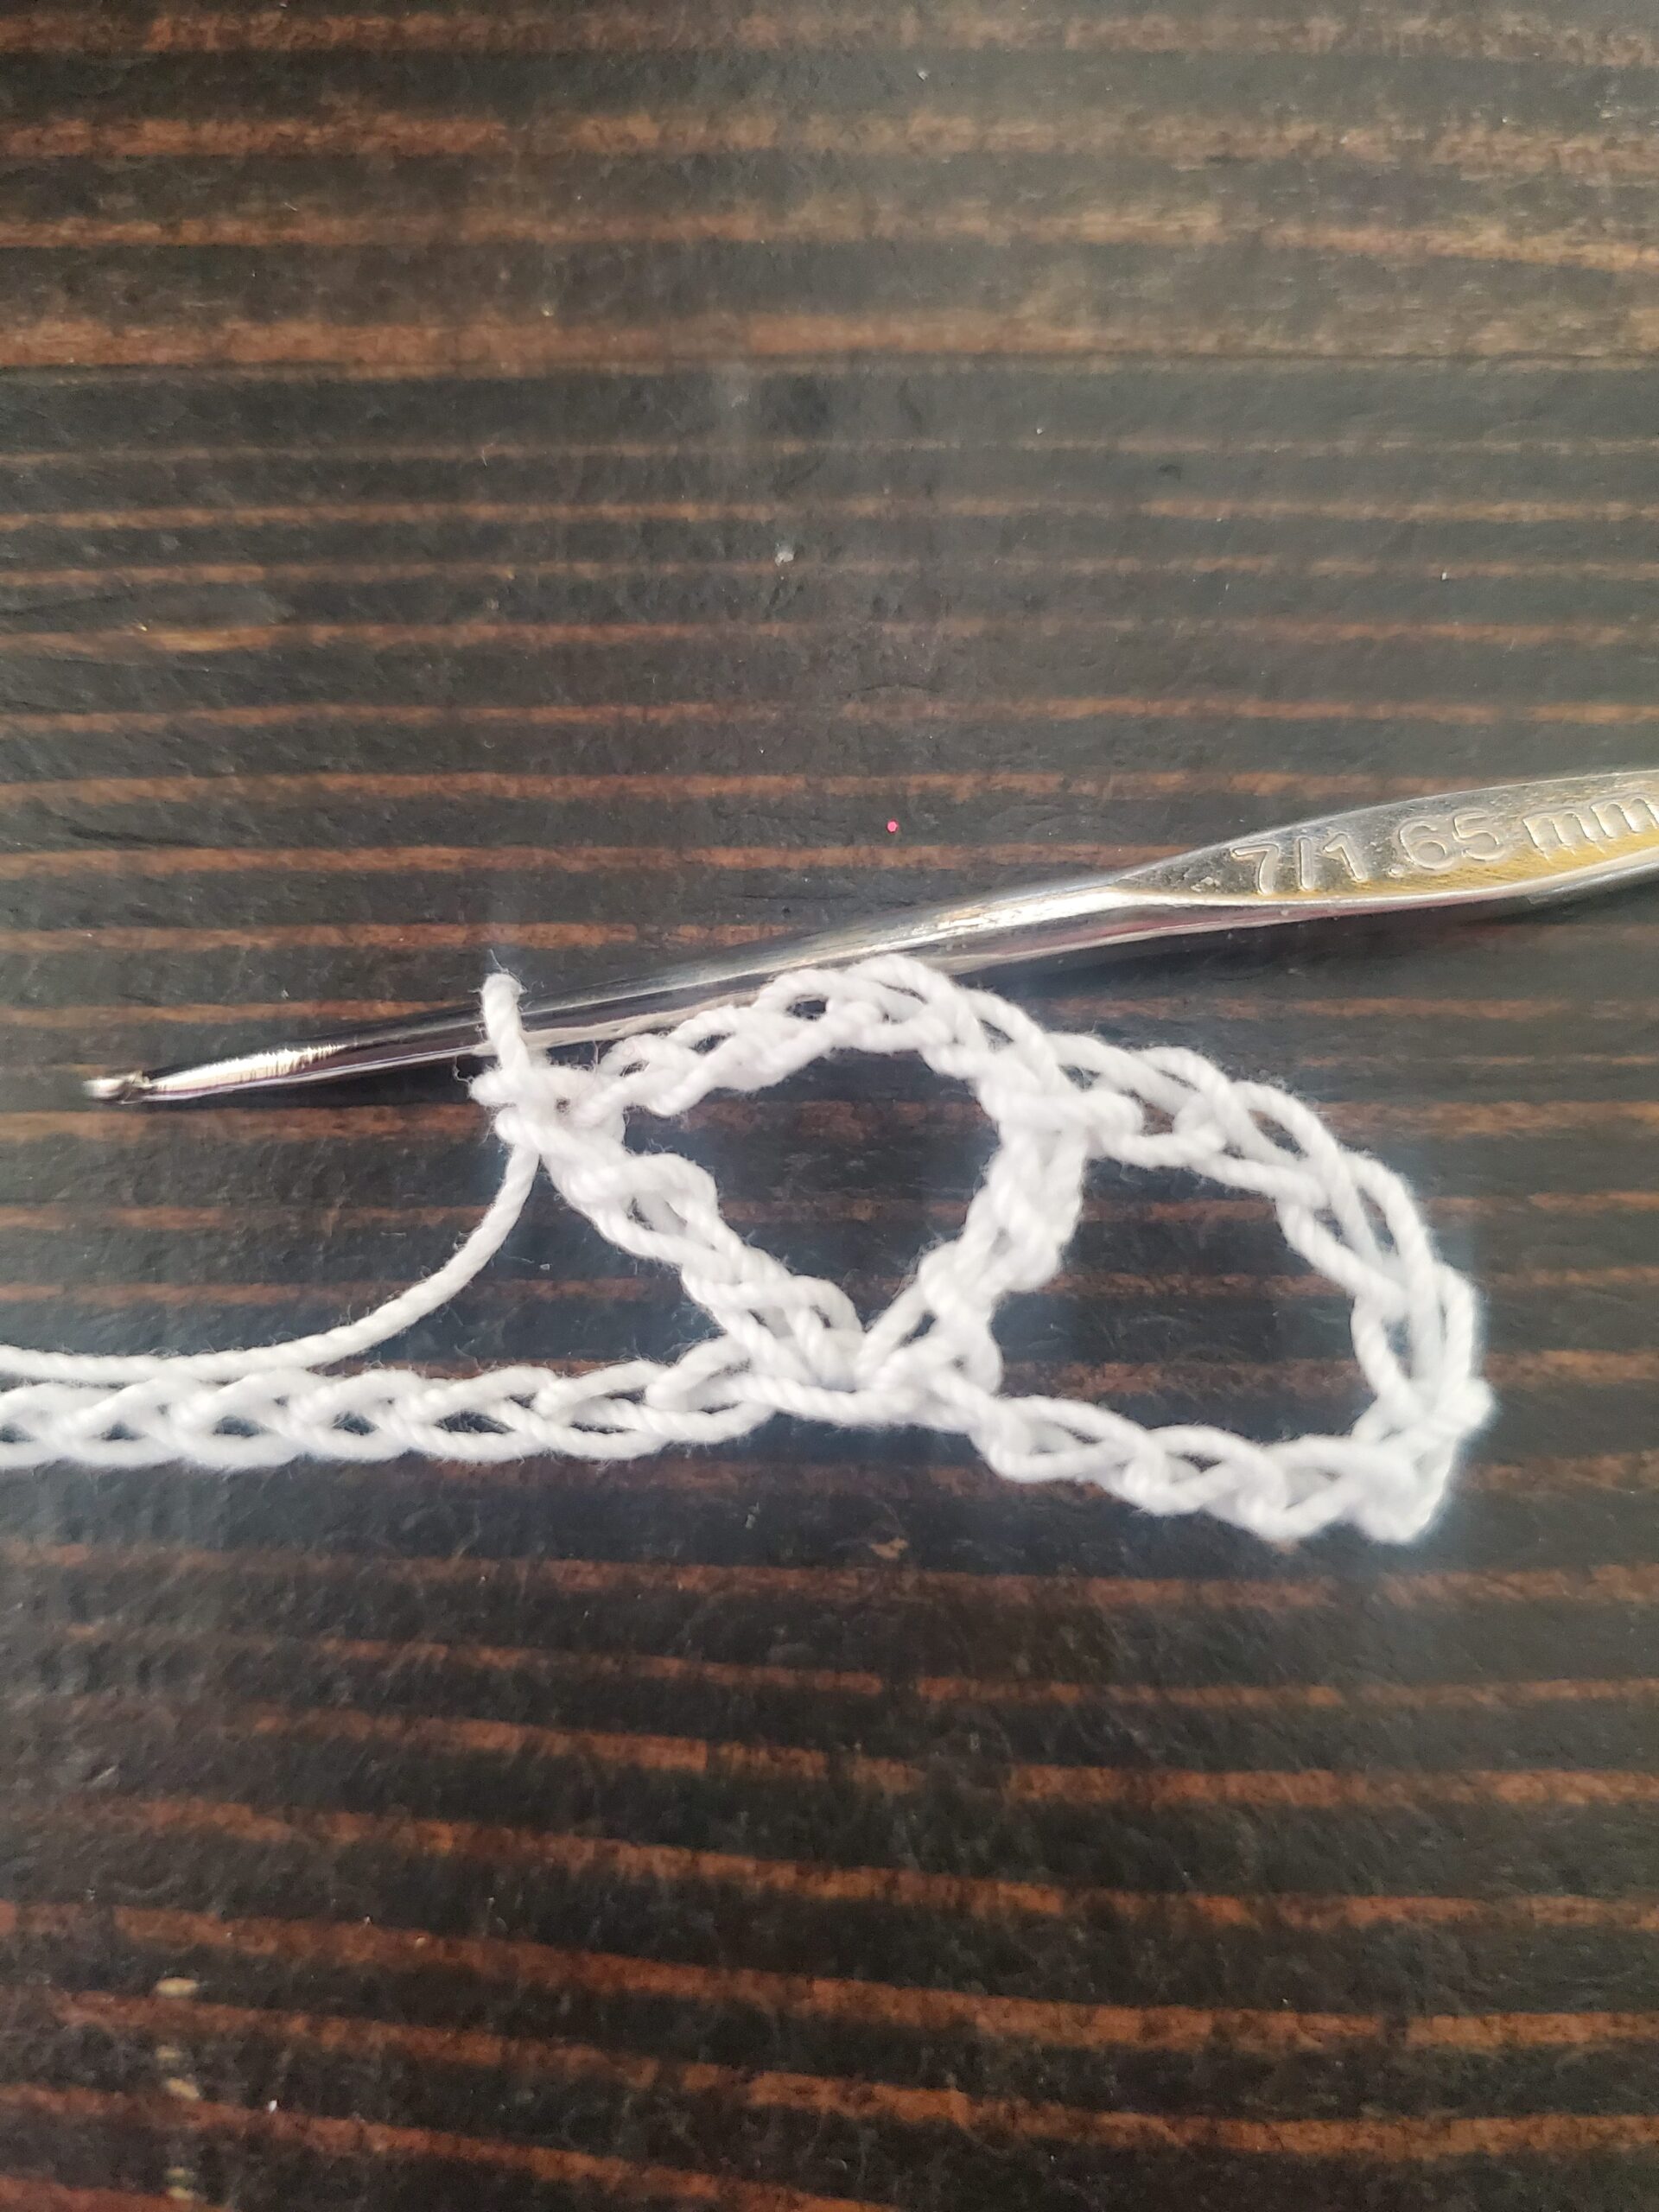
The veil is worked up with a repeat of 11+7. This means that you will crochet a chain with a multiple of 11 and then add 7 more chains once you’re happy with your chain length. 

The veil pictured above is a size small, so if you’re making this for an adult, make your starting chain longer. I suggest making your starting chain, draping it over your head and bring the ends together so you can get an idea of what the length will be while worn. 

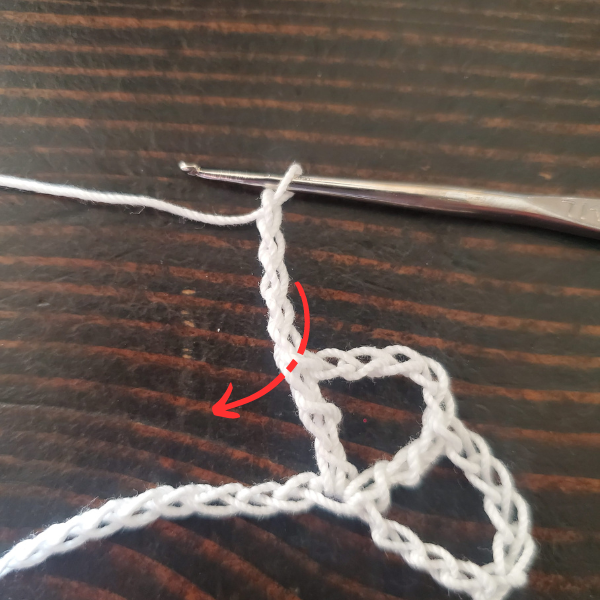
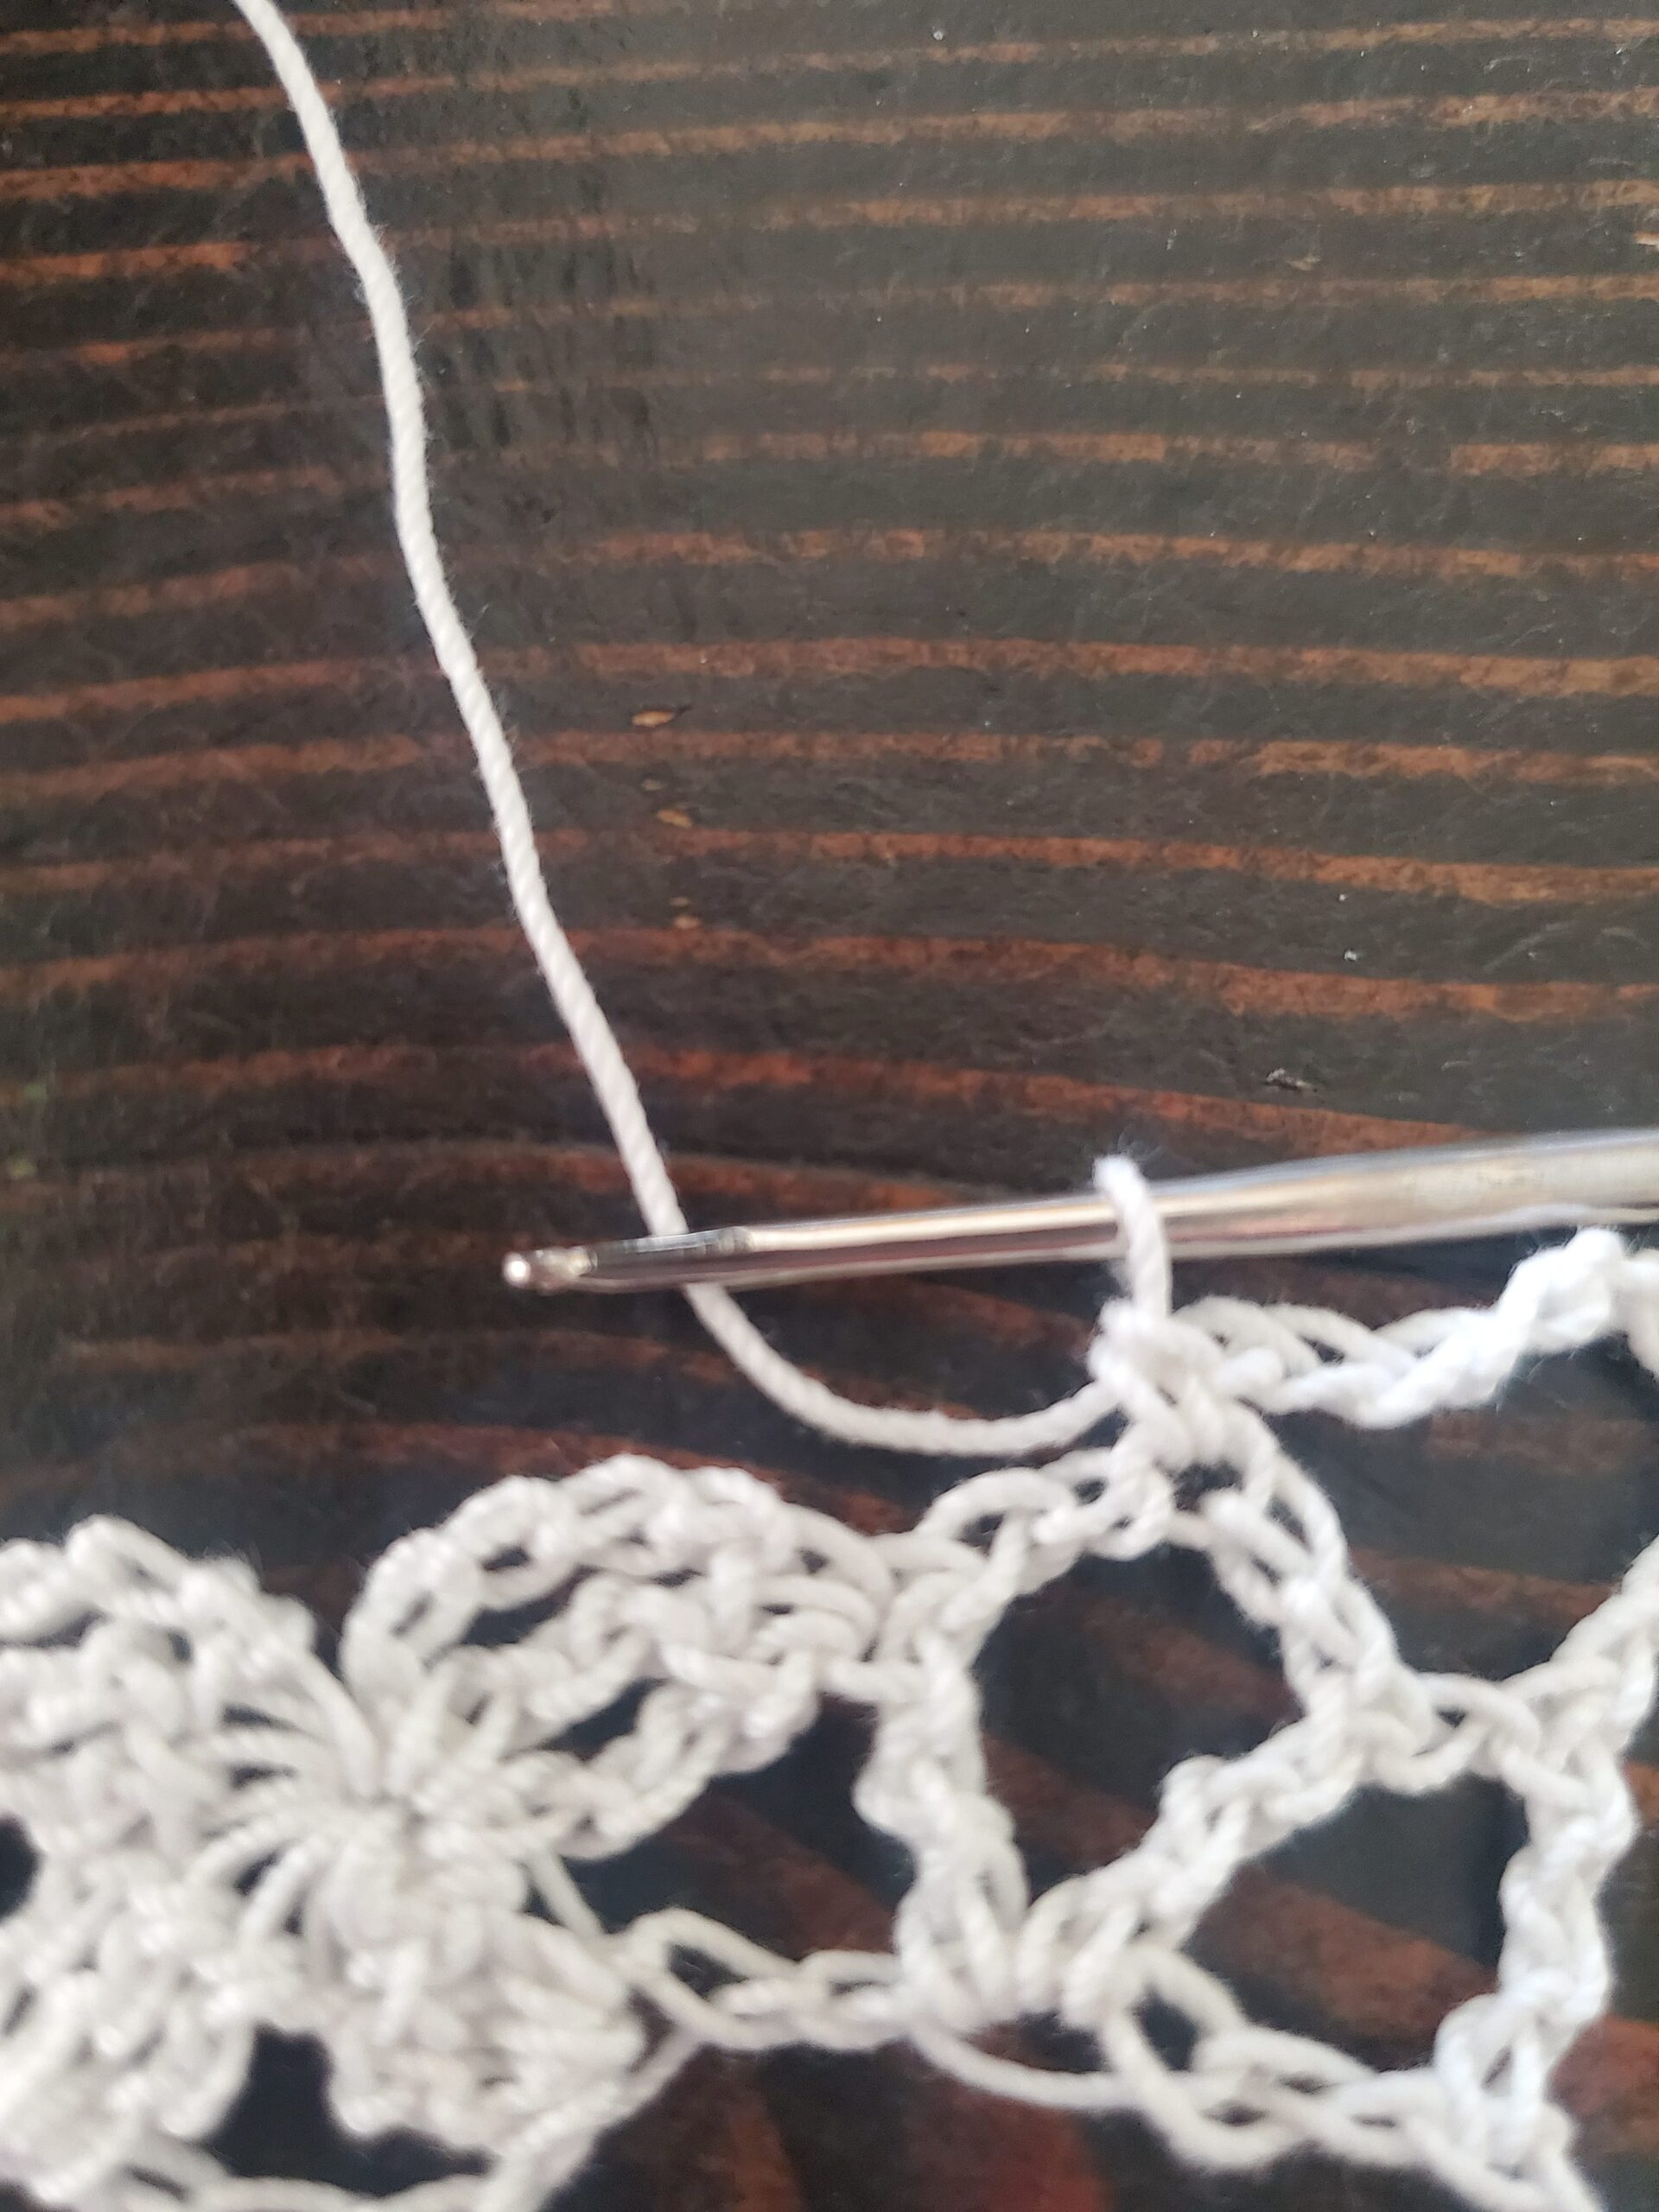
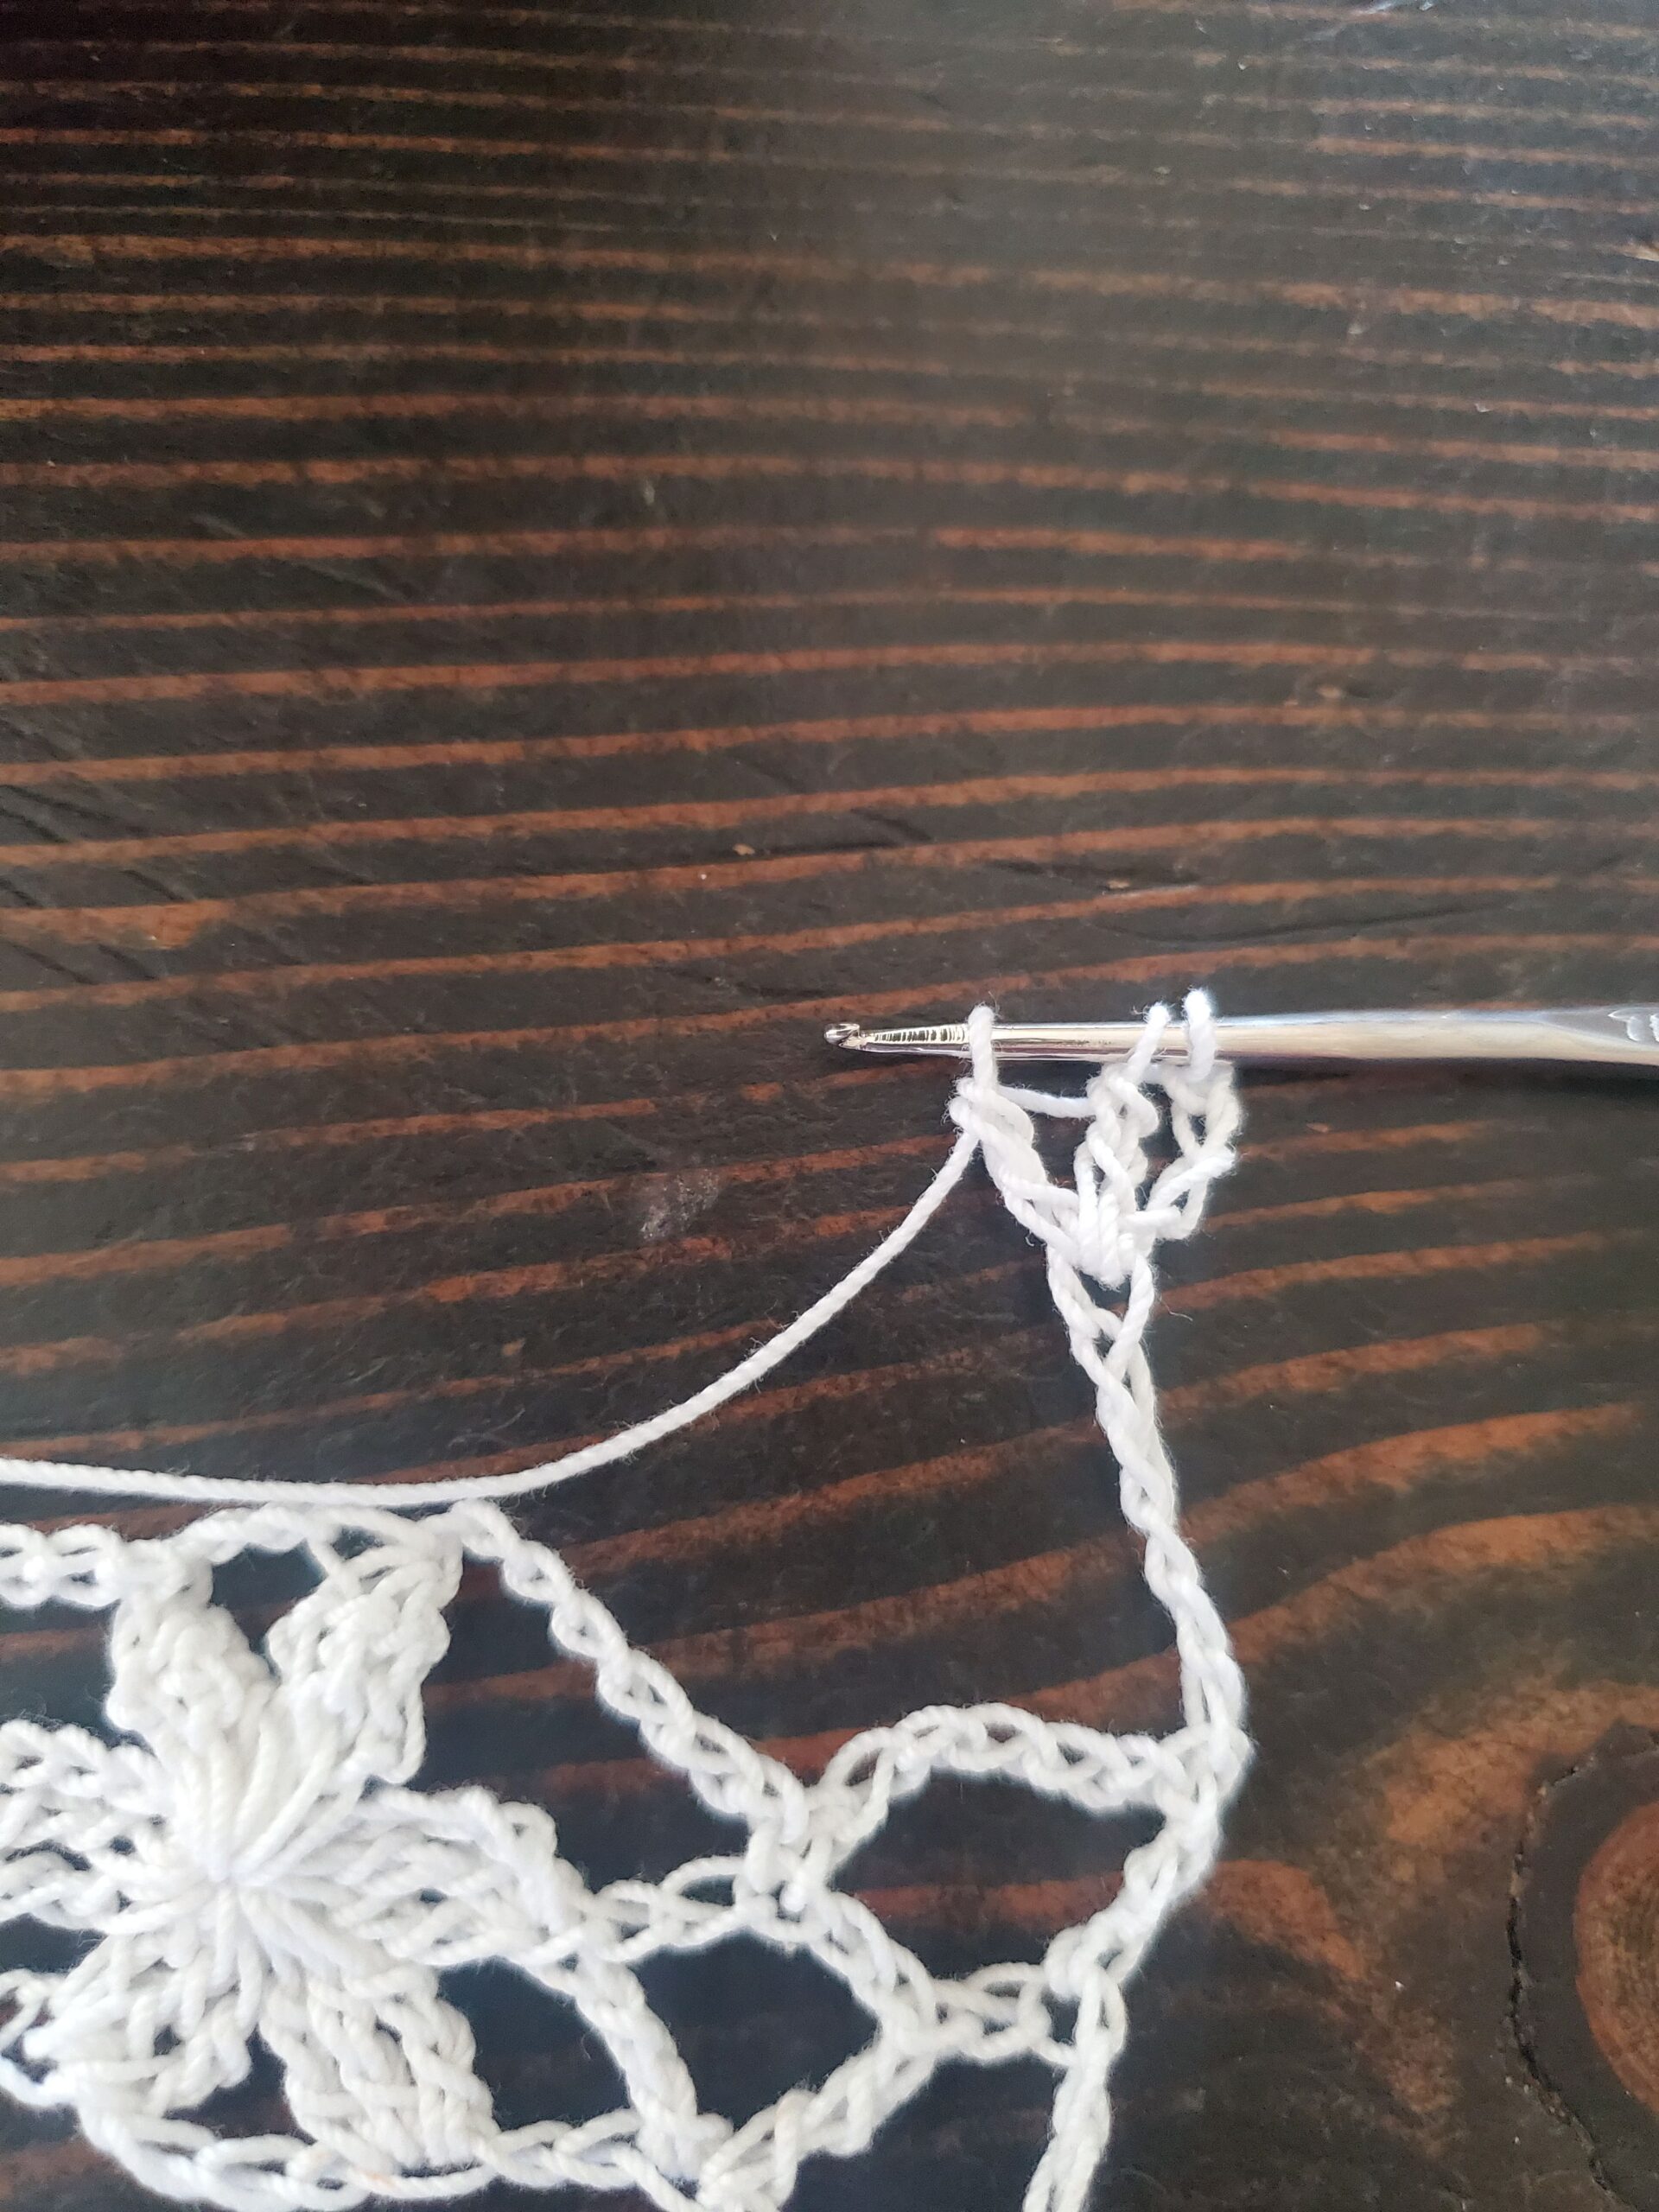
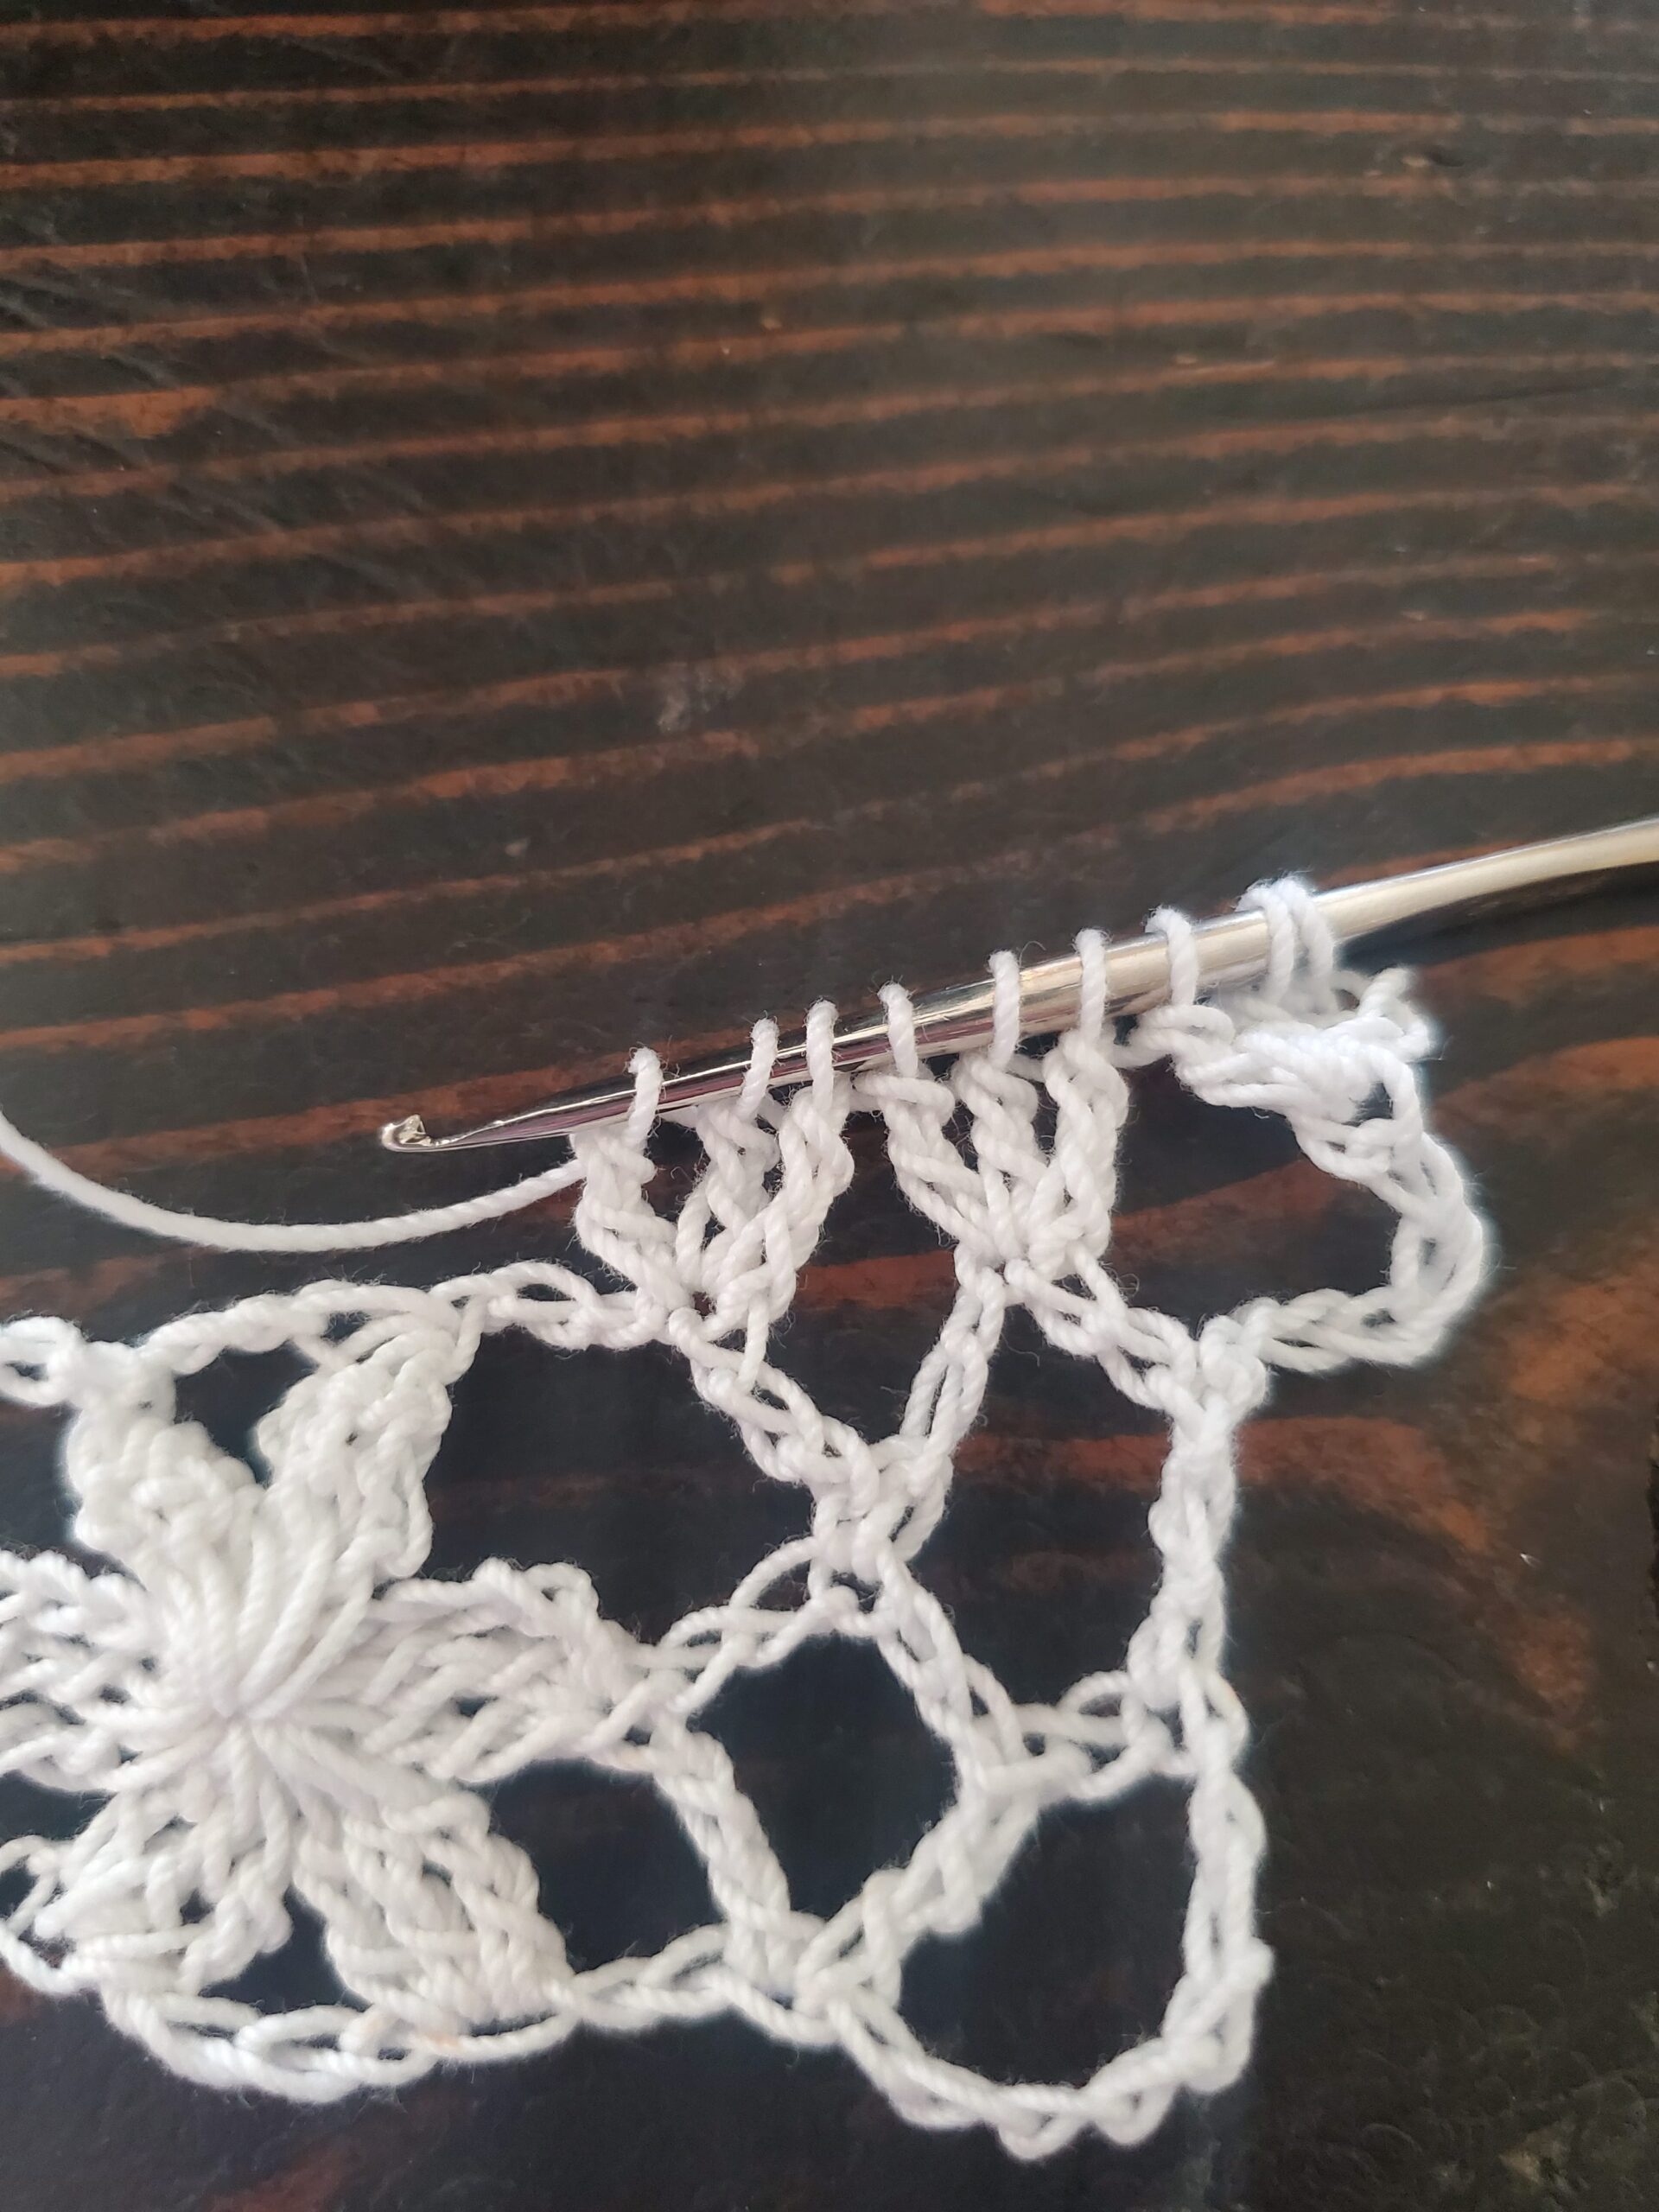
I also found that in row 1, it’s easy to skip chains on accident since the crochet thread is so tiny and when you make your treble crochets, sometimes it’s hard to tell which chain you’ve crocheted into (or maybe this is just a problem for me, lol!). 

If you find that you’ve reached the end of the starting chain and you don’t have the exact number of chains left according to the pattern instructions…I would just fudge it the best you can. That’s just me, but when you’re done sewing the veil at the end, I promise that no one is going to be able to tell that you had to skip more or less chains at the end.

Alright, let’s jump into the crochet Floral Lace Infinity Veil pattern!

Similar Posts:

Floral Infinity Veil Pattern
Here's my other girly modeling the veil for me 🙂
Crochet Flower Veil Close Up
You can see how the flowers repeat themselves in this close up of the veil

Please note that some of these links are affiliate links. That means that if you click on these links and make a purchase, I may receive a commission at no extra cost to you. You can find more information about our disclosure policy here. Thank you for your support.

Materials Needed: 

Abbreviations Used:

Please note these are in US terms, not UK.

  • Ch – chain
  • St – stitch
  • Sl st – slip stitch
  • Sc – single crochet
  • Tr – treble crochet

Special Stitches:

This crochet veil pattern uses treble cluster stitches. When you make a cluster stitch, you will make 2 or 3 treble crochets, but hold back the last pull through until all 2 or 3 treble crochets are made, and then pull through all loops to finish. Here are more detailed instructions: 

2 Tr Cluster:

  • Yarn over twice, insert hook into next stitch, draw up a loop, yarn over, pull through two loops, yarn over, pull through two loops (you should have two loops on your hook)
  • Yarn over twice, insert hook into same stitch, draw up a loop, yarn over, pull through two loops, yarn over, pull through two loops, yarn over, pull through all three loops.

3 Tr Cluster: 

  • Yarn over twice, insert hook into next stitch, draw up a loop, yarn over, pull through two loops, yarn over, pull through two loops (you should have two loops on your hook)
  • Yarn over twice, insert hook into same stitch, draw up a loop, yarn over, pull through two loops, yarn over, pull through two loops (you should have three loops on your hook)
  • Yarn over twice, insert hook into same stitch, draw up a loop, yarn over, pull through two loops, yarn over, pull through two loops, yarn over and pull through all four loops.

Crochet Flower Lace Infinity Veil

Repeat is 11+7 

Loosely Ch 205 or until desired length using the repeat formula above. (Protip: use stitch markers to mark every 50 stitches or so if you find yourself getting distracted or losing count) 

  • Row 1: Tr in 10th ch from hook, *ch 5, tr in same ch as first tr
  • ch 5, 2 tr cluster in front two loops of last tr (hold back the last pull through, you should have 3 loops on your hook)
  • skip 2 chs, 3 tr cluster in next ch (hold back the last pull through, 6 loops on your hook)
  • skip 4 chs, 3 tr cluster in next ch (pull through all 9 loops on your hook)
  • sl st into any loop of the last tr cluster leg to “secure” the center of your flower petal (this prevents a big hole from forming later in the center)
  • Ch 5, 2 tr cluster in the “center” of your flower petal. You should have a 4 petaled flower made up of 3 tr clusters at this point.
  • Skip 2 chs, tr in next ch.* Repeat from *to* until end, you should have 3 chs left, but if you don’t I would just work the last bit the best you can (it’s easy to miss chains with how small the thread is). Ch 5, tr in same ch as previous tr, ch 1, tr in last ch.
  • Row 2: Ch 10, turn, sc in the 3rd ch in previous row’s ch 5 space
  • *ch 7, 3 tr cluster in center of next flower, ch 3, 3 tr cluster again in center of same flower, ch 7, sc in 3rd ch of next ch 5 space from previous row.* Repeat from *to* until last ch 5 space sc into, ch 5, tr in 2nd ch away from last tr of previous row.
  • Row 3 (this row is similar to row 1, but we are offsetting the flowers): Ch 10, turn, 2 tr cluster in 5th ch from hook (hold back last pull through, 3 loops on hook), looking at the sc in the top of row 1’s ch 5, 3 tr cluster in 3rd ch from the right of the next sc (hold back last pull through, 6 loops on hook), *3 tr cluster in the 4th ch from the left of the same sc (pull through all 9 loops)
  • Sl st into any loop of the last tr cluster leg, ch 5, 2 tr cluster in center of flower. Tr in the middle ch of the next ch 3 from row 2, ch 5, tr in same ch as previous tr made
  • Ch 5, 2 tr cluster in front two loops of last tr (hold back last pull through, 3 loops on hook), 3 tr cluster in 4th ch from the right of the next sc (hold back last pull through, 6 loops on hook).* Repeat from *to* until last sc from previous row, 3 tr cluster in 3rd ch from the left of the last sc, pull through all 9 loops, sl st into any thread of last tr cluster leg, ch 5, 2 tr cluster in center of flower, skip 2 chs, tr in 3rd ch of previous rows turning ch.
  • Row 4 (this row is similar to row 2, but offset again): Ch 6, turn, *3 tr cluster in center of next flower, ch 3, 3 tr cluster in center of the same flower, ch 7, sc in 3rd ch of previous row’s ch 5, ch 7.* Repeat from *to* until last flower, 3 tr cluster in center of last flower, ch 3, 3 tr cluster in center of same flower, ch 1, tr in next ch.

Row 5 (similar to row 1): Ch 6, turn, *tr in middle of ch 3 from previous row, ch 5, tr in same ch, ch 5, 2 tr cluster in two front loops of last tr (hold back last pull through, 3 loops on hook), 3 tr cluster in 4th ch from the right of the next sc (hold back last pull through, 6 loops on hook), 3 tr cluster in 4th ch from the left of the same sc, pull through all 9 loops, sl st into any loop of last tr cluster leg, ch 5, 2 tr cluster in center of flower.* Repeat from *to* until last flower completed, tr in middle of next ch 3, ch 5, tr in same ch as previous tr made, ch 1, skip 1 ch, tr in next ch.

Repeat Rows 2-5 until you’ve reached your desired length. End on a repeat of row 2 for the edging.         

Edging: Ch 1, turn, 3 sc in ch 5 space, ch 3 picot, 3 sc in same ch 5 space, sc in next sc, *3 sc in next ch 7 space, ch 3 picot, 3 sc in same ch 7 space,  sc in top of 3 treble cluster, sc in ch 3 space, ch 3 picot, sc in same ch 3 space, sc in top of next 3 treble cluster, 3 sc in next ch 7 space, ch 3 picot, 3 sc in same ch 7 space, sc in next sc,* repeat from *to* until you’ve sc in last sc of row, 3 sc in last ch space, ch 3 picot, 3 sc in same ch space.

DO NOT CUT THREAD

Assembly:  Fold your veil in half, line up the edges as evenly as possible, and sl st into both sides of the veil all the way down. This will “sew” the sides together.

Leave a long enough piece of thread for sewing, cut with scissors, and pull through. Sew the end in with tapestry needle and any other ends.

Thank you for viewing the Floral Lace Infinity Veil pattern! If you find a mistake, or need help, please don’t hesitate to leave a comment or question below. 

Until next time!

Other Posts You May Like:


17 Crochet Stitches that Look Like Flowers

Are you looking for crochet stitches that look like flowers to incorporate into your next project? Here are 17 different stitches/patterns that you can use to get some floral inspiration…for free! 

Click the headings to take you to the tutorials.

1: The Jasmine Stitch

The Jasmine Stitch is a gorgeous stitch that creates the look of flower blossoms using a series of puff stitches. It’s one of the prettiest crochet stitches, but it can be a little difficult to master at first. The Jasmine Stitch is a thick stitch, which means that it uses up a lot of yarn quickly, so make sure you purchase enough yarn to complete your project. This is a great stitch to use for headbands, hats, or scarves.

2: Lace Flower Stitch 

This is a delicate looking, lacy flower stitch that’s perfect for adding a decorative floral pattern to your crochet projects. Try using this stitch for a lacy shawl or scarf, or even a beautiful table runner. A series of three puff stitches separated by chains, creates the flowery look of this stitch.

3: Flower Stitch

This is a cute little crochet flower stitch that resembles a row of tulips or rose buds. The Flower Stitch tutorial has three color changes, so keep that in mind. Try using this stitch for blankets, scarves, or shawls. The “ground” is made up of 2 rows of single crochets, the “stems” are made of V stitches, and the flower is made up of a 3 double crochet puff stitch.

4: Crochet Flower Stitch 

The Crochet Flower Stitch is a dainty, openwork stitch that creates a four petaled flower. This would be a great stitch for any lace work, like a doily or a table runner. The Crochet Flower stitch tutorial includes step-by-step pictures and is made up of 5 different rows to create the floral look.

5: Wattle Stitch

The Wattle Stitch adds a stunning texture to many crochet projects. The series of double crochets, chains, and single crochets, makes it look like tiny little flowers throughout your work. It’s beginner friendly and great for a variety of crochet projects. The Wattle Stitch is great for baby blankets, hats, scarves, or dishcloths. 

Here are some patterns I’ve made using the wattle stitch: 

6: Crochet Garden Flower Stitch 

The Crochet Garden Flower Stitch is similar to the #4 Crochet Flower Stitch, however, this flower has 6 petals instead of 4, and is actually a little easier to work up. This is another lacy stitch that would be great for projects that need a floral border like a dress or a doily. The video tutorial in the link is in Spanish, so keep that in mind if you don’t speak the language, however there is a diagram that is available in the tutorial.

7: Lace Crochet Flowers

The Lace Crochet Flowers pattern creates a 5 petal flower using chains, double crochets, and single crochets. It’s a repeat of 8 rows, but it’s easy to get a hang of after some practice. The Lace Crochet Flower pattern uses the gaps made from the chains to create the petals in the flower. This particular pattern would be great for blankets, scarves, or borders. 

8: Crochet Puff Flower Blanket 

The Crochet Puff Flower stitch is a series of flowers made up of puff stitches. This is another tutorial that is in Spanish, so again, if you don’t speak or understand Spanish, turn on closed captioning and change the language setting to your preferred language. 

These flowers are then connected to one another by crocheting into the top of the petals. This is different from most other types of flower stitches, as each flower is crocheted, connected and then cut with scissors. However, don’t let that discourage you, the way the flowers are connected keeps them secure and almost impossible to unravel. Not only is this great for a beautiful blanket, but a pillow would also be a good project for this stitch.

9: Flower Trellis Stitch

The Flower Trellis Stitch is an elegant crochet flower stitch that looks like flowers or roses peaking out behind a trellis. The bobble stitches and front post stitches create an interesting 3D effect in your work. You will also need 3 different colors of yarn to complete this pattern. The Flower Trellis Stitch would be great to use for blankets, crochet wraps, or any crochet garments. 

10: Lace Flower Scarf

The Lace Flower Scarf stitch is another gorgeous crochet flower stitch that can be used for more than just scarves. It’s a lacy floral pattern that is crocheted in strips and then crocheted together. This is a great stitch to use for scarves, table runners, lacy curtains, summer tops or shawls.

11: Edging with Puff Stitch Flowers 

The Edging with Puff Stitch Flowers is a cute way to add flowers to any crochet project that has a straight border. The flowers are made of puff stitches, somewhat similar to the Jasmine stitch, but chains and double crochets are incorporated in the pattern. This is a great stitch to add to a crochet baby blanket for a girl.

12: Vela Flower Square

The Vela Flower Square is a beautiful granny square made up of tiny, four petaled flowers. The way the flowers pop out of the square gives it an interesting texture. The Velma Flower Square pattern is easy to follow, and you only crochet with single crochets, double crochets, chains and slip stitches. This would be a good stitch to use for blankets, washcloths, or wraps.

13: Bobble Drops Flower Granny Square

The Bobble Drops Flower Granny Square is a pleasing, modern-looking crochet flower design. The pattern is created with 4 simple rows, so it works up quickly. The front post bobbles in the pattern creates this pretty flower square. This crochet stitch would be great for blankets, bags, cushions, or garments. Using thicker yarn or a bigger crochet hook may be helpful to cover more area quickly with this pattern.

14: Crochet Velvet Flowers Throw 

The Crochet Velvet Flowers Throw is another cute way to incorporate flowers for a blanket or throw. Flowers are made throughout the blanket by crocheting bobbles in groups. The bobbles can be pushed out to make the flowers “pop.” This would be a great pattern for blankets, garments, or scarves.

15: Sunburst Granny Square 

The Sunburst Granny Square is a wonderful way to get the look of sunflowers in your projects. There’s 4 color changes and a variety of different ways to arrange the colors to get the sunflower look you want. The sunflower is created by crocheting puff stitches and bobbles for the petals. The Sunburst Granny Square is great for blankets, bags, pillows, and garments.

16: African Flower Crochet Pattern 

The African Flower Crochet Pattern is a floral, hexagonal “granny square.” This is another pattern with 4 different color changes. Figuring out which color changes look the best is part of the fun with these types of flower crochet patterns. The African Flower is created with mostly double crochets and chains. This is a great pattern for crochet blankets, pillows, and even animals made from motifs.

17: Simple Daisy Stitch

The Simple Daisy Stitch is a textured stitch that looks like little crochet daisy flowers or stars. The stitch is created with chains and pulling through loops. The Simple Daisy Stitch is great to incorporate into a variety of projects including scarves, blankets, bags, washcloths, or wraps.

I hope these 17 crochet stitches that look like flowers have inspired you! 

Until next time.

Other Posts You May Like: