
Beautiful Crochet Doily Pattern – Crosswind Lace Doily

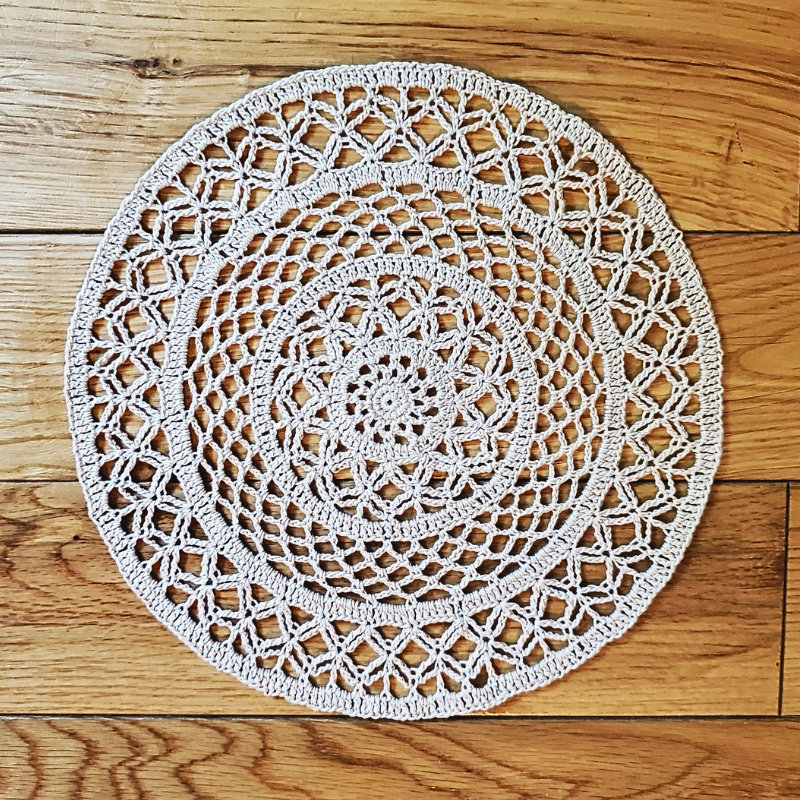
Hello everyone, today I have a new, beautiful crochet doily pattern for you to try; The Crosswind Lace Doily!
This doily is based off of the Crosswind Lace Pattern a made a little while ago. I loved the lacy stitch pattern so much I want to try making a doily version of it.
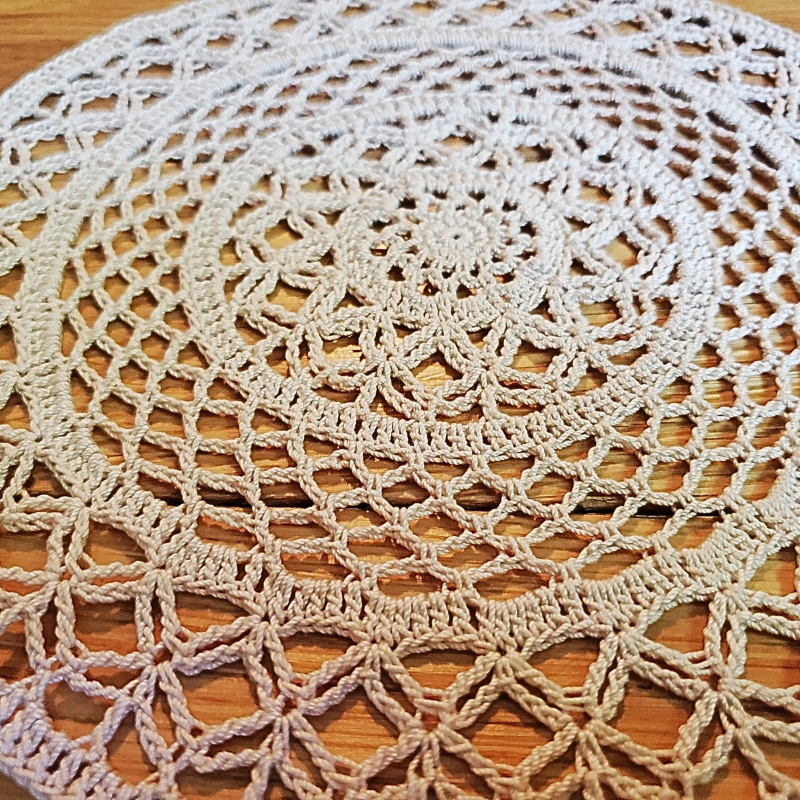
This doily has a really pretty center, then opens up with an airy, lacy middle, and finishes with a simple round edge. The X stitches in the center and outer edge give the doily its name, plus they look really neat!
With only 19 Rounds to complete this doily, I hope you all enjoy!
Related Posts:
Please note that some of these links may be affiliate links. That means that if you click on these links and make a purchase, I may receive a commission at no extra cost to you. You can find more information about our disclosure policy here. Thank you for your support.
Materials Used:
- Red Heart Classic Crochet Thread Size 10 in Off White
- 1.65mm Crochet Hook
- Scissors
- Tapestry Needle
- Blocking Board or Cardboard
- Pins
Abbreviations Used:
- Ch – chain
- St – stitch
- Sl st – slip stitch
- Sc – single crochet
- Dc- double crochet
- Tr – treble crochet
- 2trtog – 2 treble crochets together
Steps for 2Trtog:
- Yarn over 2 times, insert hook into designated st and pull up a loop (4 loops on hook)
- Yarn over and pull through 2 loops (3 loops on hook)
- Yarn over and pull through 2 loops again (2 loops on hook) This is the first “leg” of the 2trtog
- Yarn over 2 times, insert hook into next designated st and pull up a loop (5 loops on hook)
- Yarn over and pull through 2 loops (4 loops on hook)
- Yarn over again and pull through 2 loops (3 loops on hook)
- Yarn over one last time and pull through all 3 loops. This is the second “leg” of the 2trtog
YOUTUBE VIDEO NOT LOADING? CLICK TO SEE THE VIDEO TUTORIAL ON THE CROSSWIND LACE DOILY HERE.
Crosswind Lace Doily Pattern
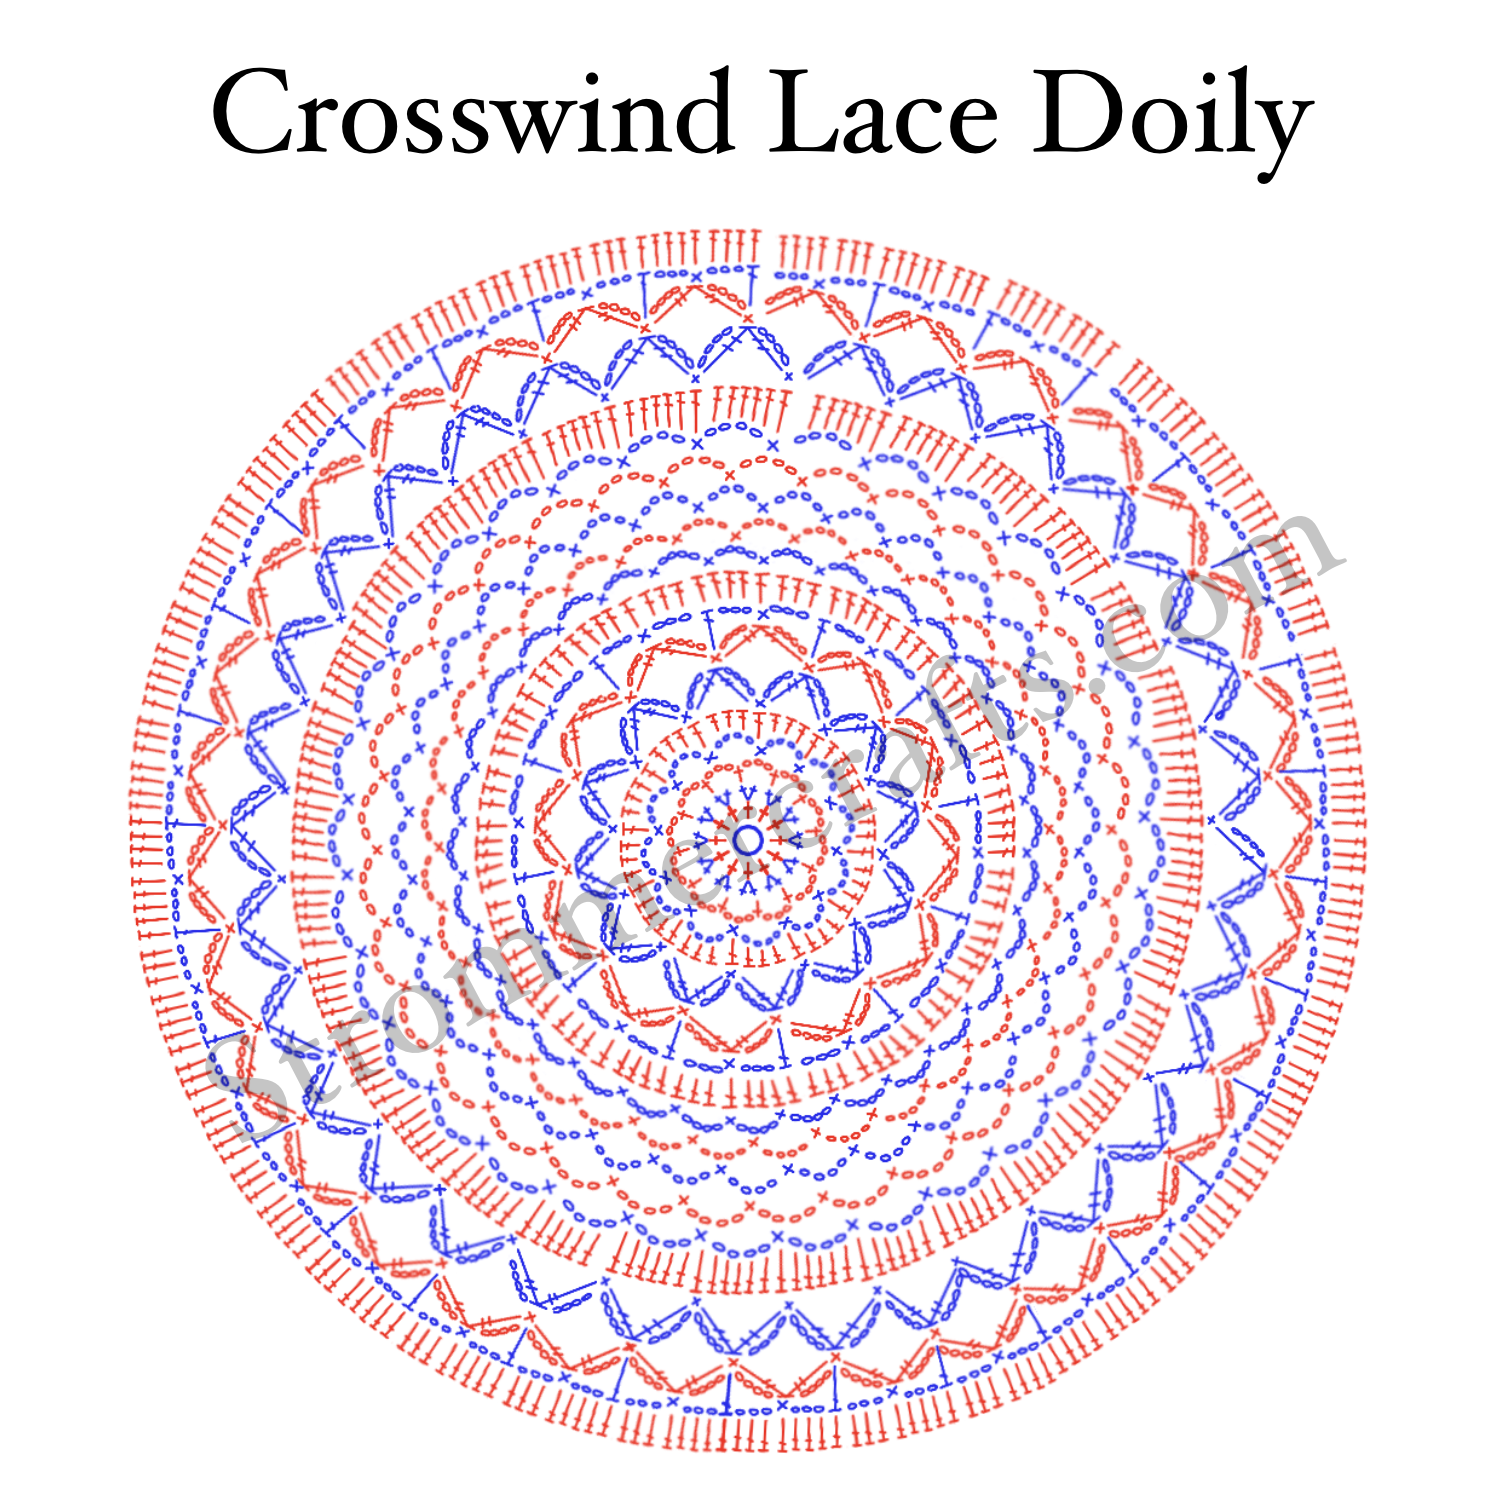
Round 1: Place 12 sc into magic ring (or ch 6, sl st to make a ring, ch 1 and place 12 sc into center), sl st to first sc (12 sts)
Round 2: ch 1, 2 sc into each st around (24 sts)
Round 3: ch 1, sc into same st, *ch 3, skip a st, sc into next st.* Repeat from *to* for 11 ch 3 spaces, for that last ch 3 space, instead of a ch 3, ch 1 and make a hdc into the first sc to join (12 ch 3 spaces)
Round 4: ch 1, sc into same ch 3 space, *ch 4, sc into next ch 3 space.* Repeat from *to* around, sl st to first sc. ( 12 ch 4 spaces)
Round 5: Ch 3 (counts as dc), 3 dc into next ch 4 space, *dc into next sc, 3 dc into next ch 4 space.* Repeat from *to* around. Sl st to top of starting ch 3. (48 dc)
Round 6: Ch 1, sc into same st. We will now be making the bottom half of these X stitches.
*Ch 4, 2trtog (see steps above) by placing the first leg in the same st as the sc just made, skip 3 sts, make the second leg into the next st, ch 4, sc into same st as second leg of 2trtog.* Repeat from *to* around. Finish the last half of the X stitch with a ch 4, 2trtog with the first leg in the same st as previous sc and place the second leg into the same st as the first sc of this round (not the sc but top of the ch 3 from Round 5). Ch 4 and sl st to first sc of this round. (12 “bottom” halves of X stitch)
Round 7: sl st up the ch 4 until you get to the first 2trtog from Round 6. Now we will make the top half of the X stitch.
Ch 1, sc into same st. *Ch 4, 2trtog, place the first leg in the same st, and place the second leg into the next 2trtog. Ch 4, sc into same st as the second leg of the 2trtog just made.* Repeat from *to* around.
Finish with with a ch 4, 2trtog, the first leg in the same st and then the second leg will go into the same st as the starting sc. Ch 4, sl st to first sc of this round.
Round 8: Ch 6 (counts as dc and ch 3), *sc into next 2trtog, ch 3, dc into next sc, ch 3* Repeat from *to* around, sl st to the 3rd ch of starting ch 6.
Round 9: Ch 3 (counts as dc), *3 dc in next ch 3 space, dc into next sc, 3 dc into next ch 3 space, dc in next dc.* Repeat from *to* around. Sl st to top of starting ch 3. (84 dc)
Round 10: Ch 1, sc, *ch 4, skip 2 sts, sc into next st.* Repeat from *to* around, for the last ch 4, instead of doing a ch 4, ch 1 and dc into the starting sc. (32 ch 4 spaces)
Round 11-13: Ch 1, sc into same ch 4 space, *ch 4, sc into next ch 4 space.* Repeat from *to* around, for the last ch 4 space, make a ch 1 and dc into starting sc.
Round 14: Ch 1, sc into same ch 4 space, *ch 4, sc into next ch 4 space.* Repeat from *to* around. Sl st to first sc.
Round 15: Ch 3 (counts as dc), *5 dc into next ch 4 space, dc into next sc.* Repeat from *to* around. Sl st to top of starting ch 3. (172 dc)
Round 16: Ch 1, sc into same st. We will now be making the bottom half of the X stitches.
*Ch 4, 2trtog (see steps above) by placing the first leg in the same st as the sc just made, skip 5 sts, make the second leg into the next st, ch 4, sc into same st as second leg of 2trtog.* Repeat from *to* around.
Finish the last half of the X stitch with a ch 4, 2trtog with the first leg in the same st as previous sc and place the second leg into the same st as the first sc of this round (not the sc but top of the ch 3 from Round 16).
Round 17: sl st up the ch 4 until you get to the first 2trtog from Round 16. Now we will make the top half of the X stitch.
Ch 1, sc into same st. *Ch 4, 2trtog, place the first leg in the same st, and place the second leg into the next 2trtog. Ch 4, sc into same st as the second leg of the 2trtog just made.* Repeat from *to* around.
Finish with with a ch 4, 2trtog, the first leg in the same st and then the second leg will go into the same st as the starting sc. Ch 4, sl st to first sc of this round.
Round 18: Ch 6, (counts as dc and ch 3), *sc into next 2trtog, ch 3, dc into next sc, ch 3* Repeat from *to* around, sl st to the 3rd ch of starting ch 6.
Round 19: Ch 3 (counts as dc), *3 dc in next ch 3 space, dc into next sc, 3 dc into next ch 3 space, dc in next dc.* Repeat from *to* around. Sl st to top of starting ch 3.
Cut thread and pull through. Weave in any loose ends with your tapestry needle.
Blocking The Crosswind Lace Doily:
I suggest blocking this doily once you are finished.
To block your doily:
- Get a bowl and fill it with water
- Soak your doily in the water (you might have to pushed the doily down as it tends to want to float)
- After a minute or two, place your doily on a dry towel and gently pat it to get out excess water
- Using a blocking board or cardboard (you may need to get a mixing bowl and trace around it with a pen as a guide), pin your doily by gently stretching it into the desired shape.
- Allow to air dry for 24-48 hours or until dry.
I hope you all enjoyed the Crosswind Lace Doily Pattern! Until next time.
Other Posts You May Like:



Leave a Reply
You must be logged in to post a comment.