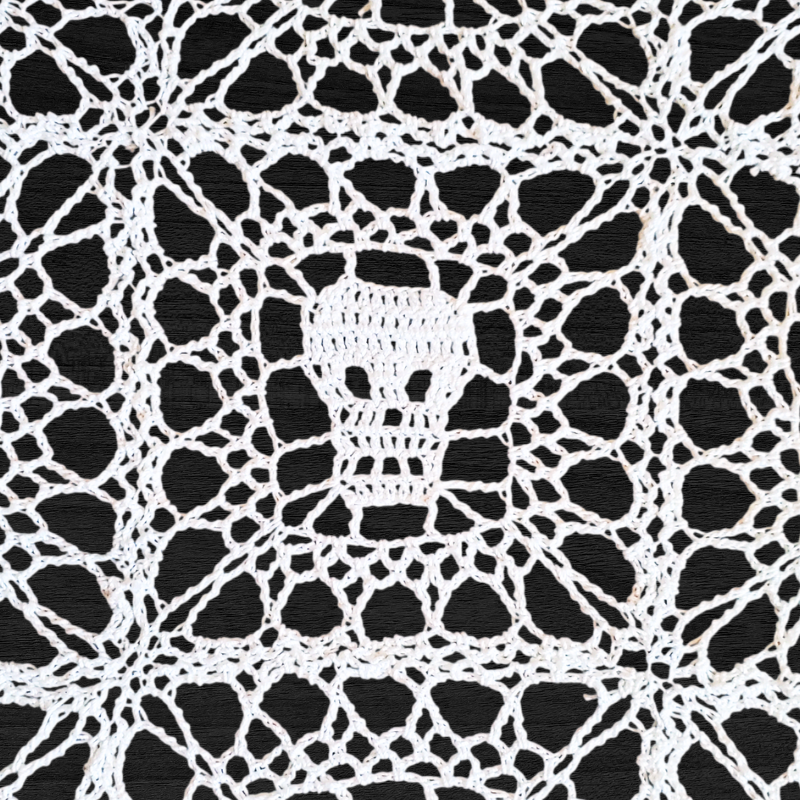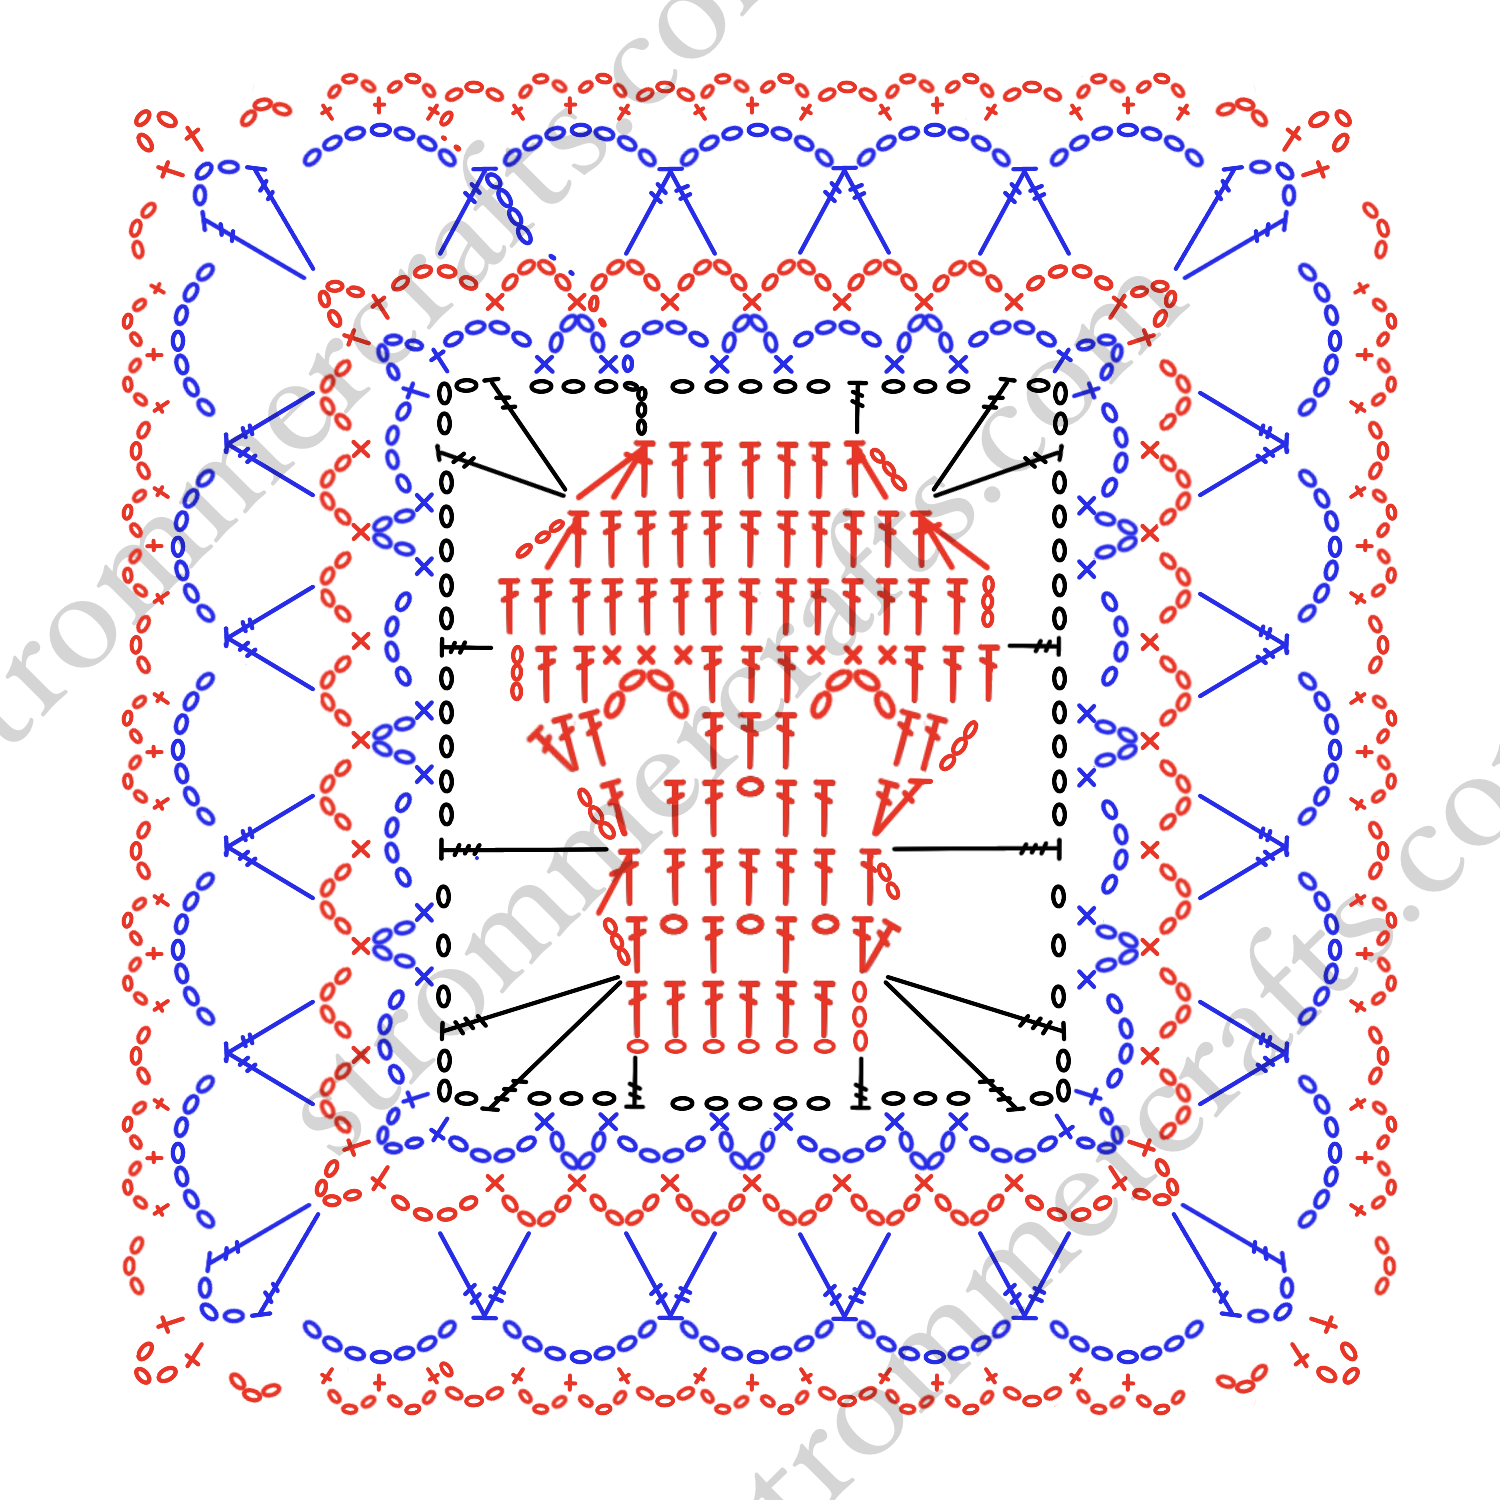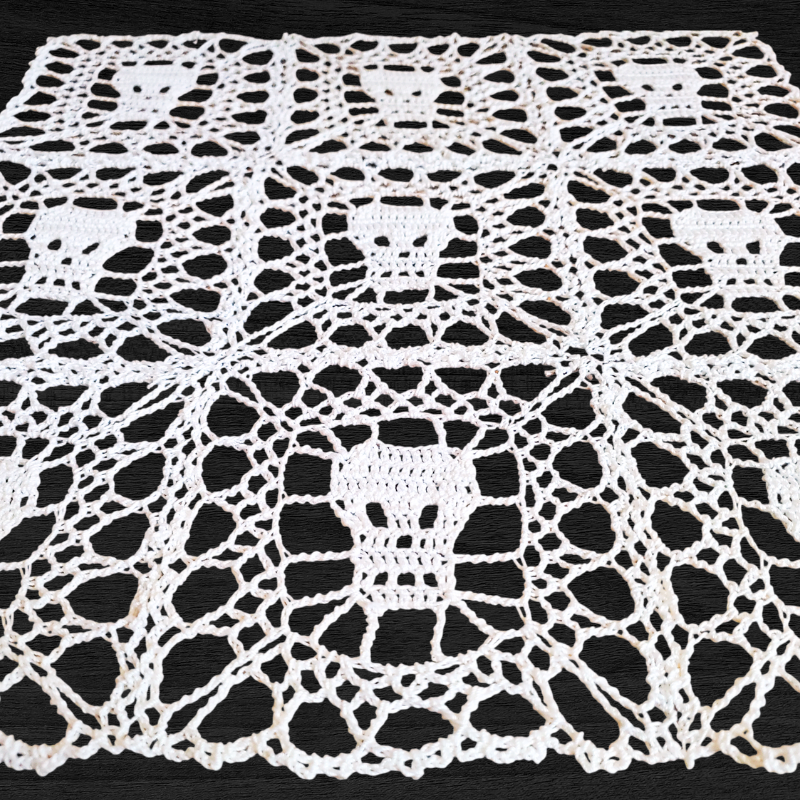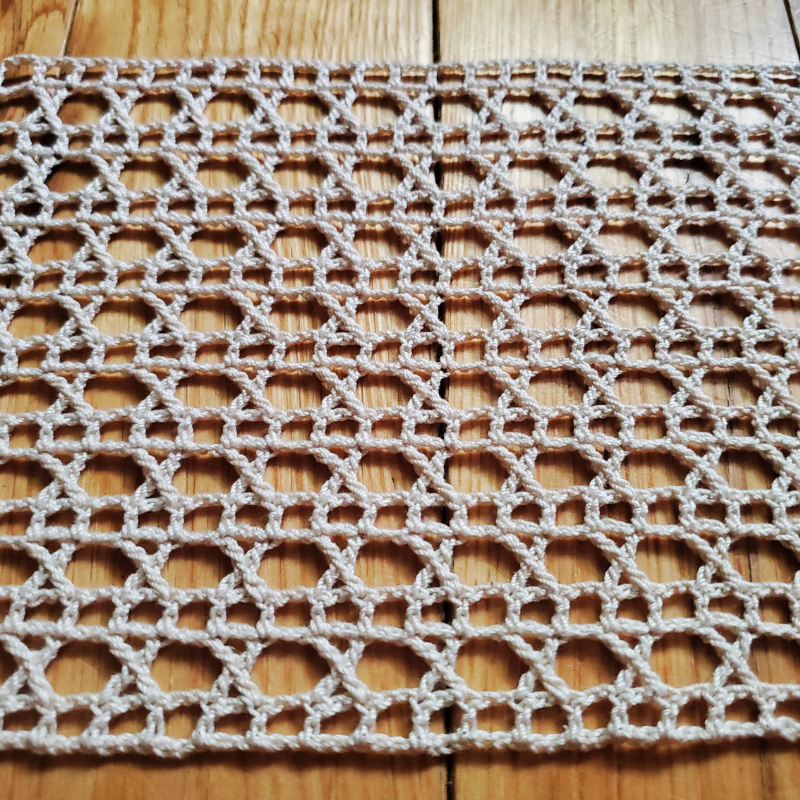
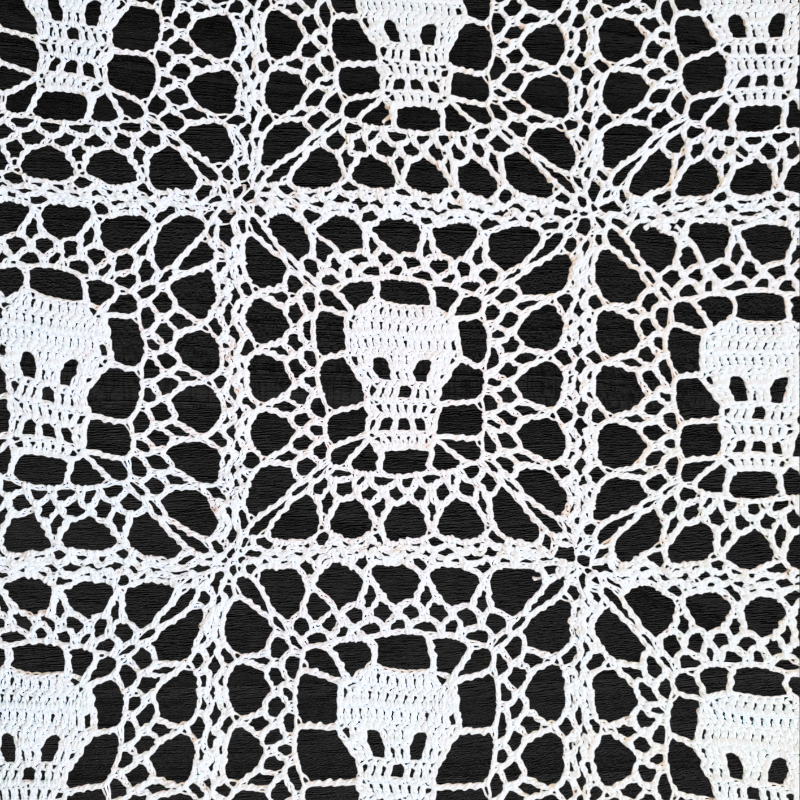
Crochet Lace Stitch Pattern – Floral Shell Lace

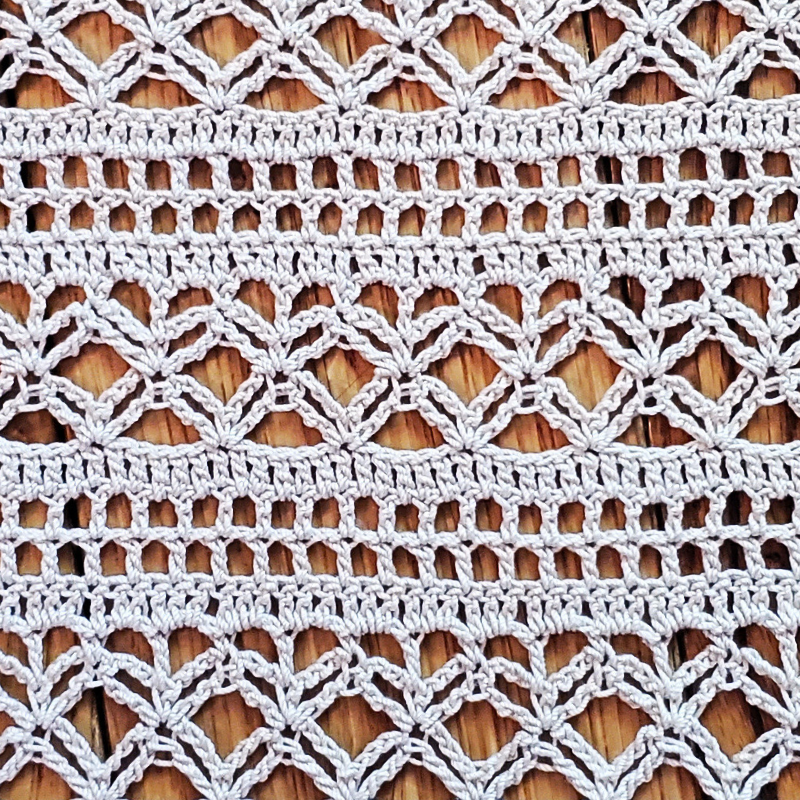
Hello everyone, today I have another crochet lace stitch pattern for you to try; The Floral Shell Lace Stitch!

I’ve actually used a variation of this pattern to make a crochet infinity veil, so that’s one project idea that you could do with this stitch!

This one is slightly different from my veil, as the way you begin and end each row has changed. However the “meat” of the pattern is the same!

I love this lace stitch, it’s fun to make the little petals on top of the shells, plus it provides the perfect amount of airflow and coverage for your fabric.

Related Posts:

Materials Used:

Abbreviations Used:

  • Ch – chain
  • St – stitch
  • Sl st – slip stitch
  • Sc – single crochet
  • Hdc – half double crochet
  • Dc – double crochet
  • Shell – in this pattern, the shell is essentially 6 double crochets with chain 1s separating each one in the same stitch or space. In simpler terms you will: dc, ch 1, dc, ch 1, dc, ch 1, dc, ch 1, dc, ch 1, dc all in the same stitch.
YOUTUBE VIDEO NOT LOADING? CLICK TO SEE THE VIDEO TUTORIAL ON THE FLORAL SHELL LACE STITCH HERE.

Crochet Lace Stitch Pattern – Floral Shell Lace

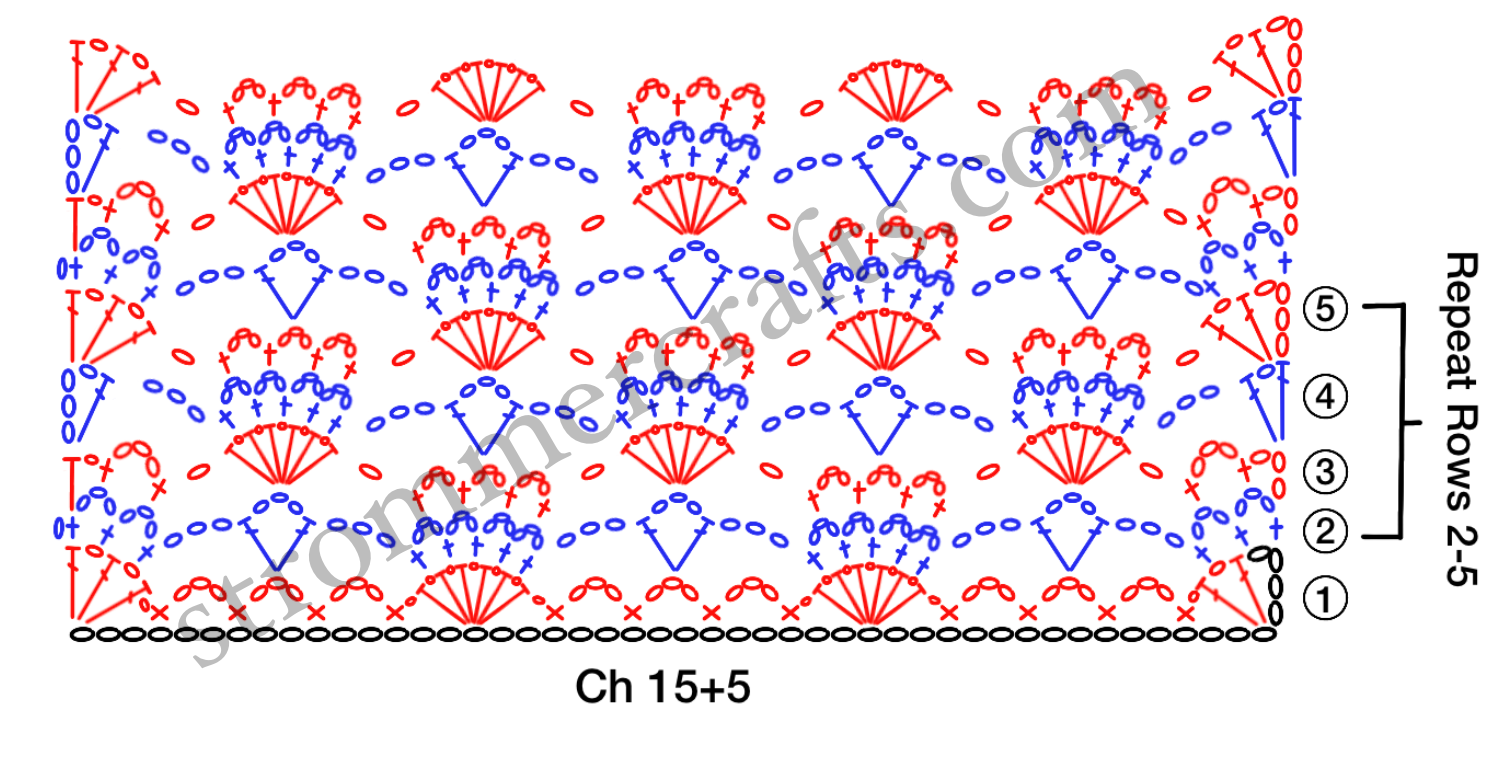
Ch 15+5

All that means is to chain 15 over and over until you’re happy with the length and then add 5 more chains to the end of that.

Row 1: Dc into the 5th ch away from your hook, ch 1, dc into same ch. Ch 1, skip 2 chs, sc into next ch, [ch 3, skip 2 chs, sc into next ch x3 times]

*Ch 1, skip 2 chs in the next ch make a shell, so (dc, ch 1 x5 times, dc one more time). The shell will be 6 dc separated by ch 1s.

Ch 1, skip 2 chs, sc into next ch, [ch 3, skip 2 chs, sc into next ch x3 times].*

Repeat from *to* 

To finish, after your last sc, you will have 3 chs left, ch 1, (dc, ch 1, dc, ch 1, dc) in very last ch.

Row 2: Ch 1, sc into same st, ch 3, sc into next ch 1 space, ch 3, sc into next ch 1 space. 

Ch 3, skip next ch 3 space, in the next ch 3 space (the middle ch 3 space), place a (dc, ch 3, dc).

*Ch 3, skip over to the next shell, place a sc in the first ch 1 space of shell (in between the 1st and 2nd dc), (ch 3, sc in next ch 1 space x4 times).

Ch 3, skip next ch 3 space, in the next ch 3 space (the middle ch 3 space), place a (dc, ch 3, dc).*

Repeat from *to*

To finish, ch 3, sc in the ch 1 space between next 2 dc, ch 3, sc into next ch 1 space, sc into the top of the 3rd ch.

Row 3: Ch 3 (counts as a hdc, and a ch 1), sc into next ch 3 space, ch 3, sc into next ch 1 space. Ch 1, skip next ch 3 space, shell into next ch 3 space.

*Ch 1, skip next ch 3 space, in the next ch 3 space place a sc, (ch 3, sc into next ch 3 space x3 times), 

Ch 1, skip next ch 3 space, shell into next ch 3 space.*

Repeat from *to*

To finish, ch 1, skip next ch 3 space, sc in next ch 3 space, ch 3, sc into next ch 3 space, ch 1, hdc into the last sc.

Row 4: Ch 4 (counts as dc and ch 1), dc into same st, ch 3, in the first ch 1 space in the next shell make a sc (ch 3, sc in next ch 1 space x4 times).

*Ch 3, skip next ch 3 space, in the next ch 3 space make (dc, ch 3, dc).

Ch 3, in the first ch 1 space in the next shell make a sc (ch 3, sc in next ch 1 space x4 times).*

Repeat from *to*

To finish, ch 3 skip next ch 3 space, in the 2nd ch of starting ch 3 from previous row, (dc, ch 1, dc).

Row 5: Ch 4 (counts as dc and ch 1), (dc, ch 1, dc) in next ch 1 space. Ch 1 skip next ch 3 space, in the next ch 3 space place a sc, (ch 3, sc into next ch 3 space x3 times).

*Ch 1, skip next ch 3 space, shell into next ch 3 space. 

Ch 1 skip next ch 3 space, in the next ch 3 space place a sc, (ch 3, sc into next ch 3 space x3 times).*

Repeat from *to*

To finish, ch 1, in the starting ch 4 space from previous row, place (dc, ch 1, dc), dc into 3rd ch of ch 4.

Repeat Rows 2-5 until desired length.

Cut thread with scissors. Weave in any ends with tapestry needle.

I hope you all enjoyed this tutorial on the Crochet Floral Shell Lace Stitch. Until next time!

Beautiful Crochet Doily Pattern – Crosswind Lace Doily

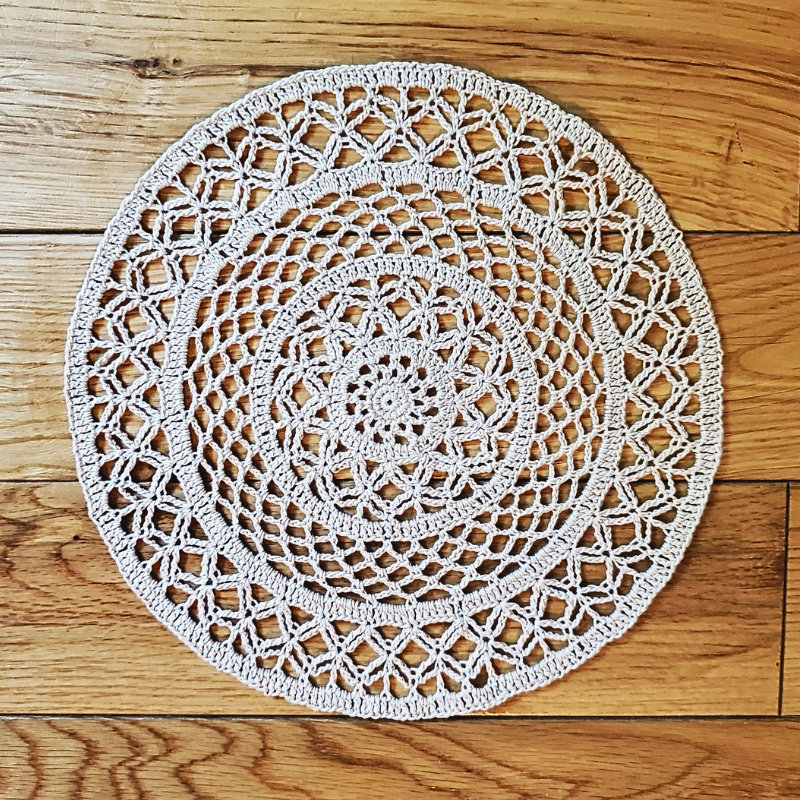
Hello everyone, today I have a new, beautiful crochet doily pattern for you to try; The Crosswind Lace Doily!

This doily is based off of the Crosswind Lace Pattern a made a little while ago. I loved the lacy stitch pattern so much I want to try making a doily version of it.

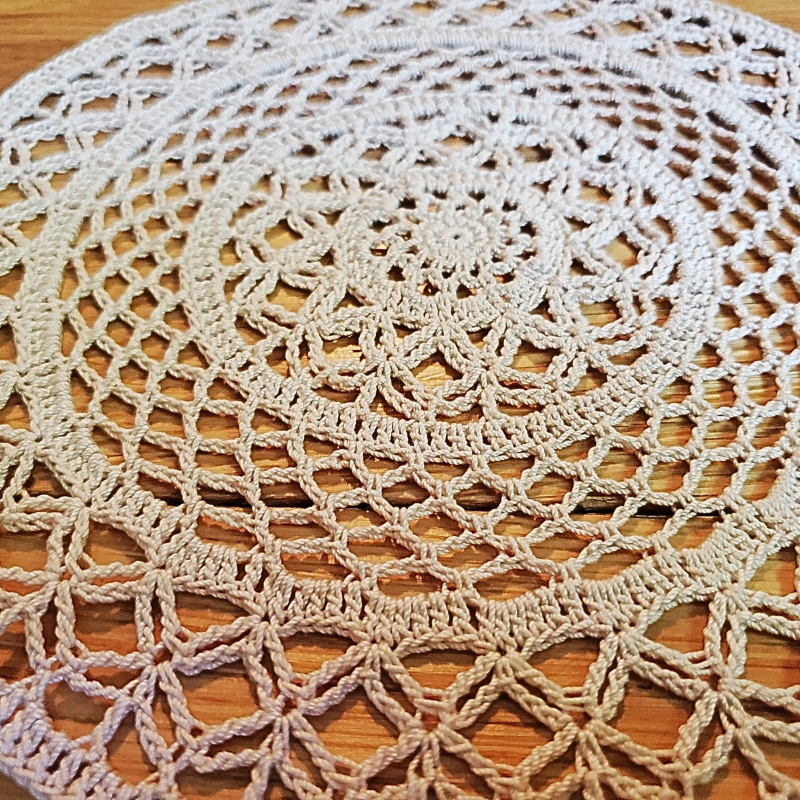
This doily has a really pretty center, then opens up with an airy, lacy middle, and finishes with a simple round edge. The X stitches in the center and outer edge give the doily its name, plus they look really neat!

With only 19 Rounds to complete this doily, I hope you all enjoy!

Related Posts:

Please note that some of these links may be affiliate links. That means that if you click on these links and make a purchase, I may receive a commission at no extra cost to you. You can find more information about our disclosure policy here. Thank you for your support.

Materials Used:

Abbreviations Used:

  • Ch – chain
  • St – stitch 
  • Sl st – slip stitch 
  • Sc – single crochet
  • Dc- double crochet
  • Tr – treble crochet
  • 2trtog – 2 treble crochets together
Steps for 2Trtog: 
  • Yarn over 2 times, insert hook into designated st and pull up a loop (4 loops on hook)
  • Yarn over and pull through 2 loops (3 loops on hook)
  • Yarn over and pull through 2 loops again (2 loops on hook) This is the first “leg” of the 2trtog
  • Yarn over 2 times, insert hook into next designated st and pull up a loop (5 loops on hook)
  • Yarn over and pull through 2 loops (4 loops on hook)
  • Yarn over again and pull through 2 loops (3 loops on hook)
  • Yarn over one last time and pull through all 3 loops. This is the second “leg” of the 2trtog
YOUTUBE VIDEO NOT LOADING? CLICK TO SEE THE VIDEO TUTORIAL ON THE CROSSWIND LACE DOILY HERE.

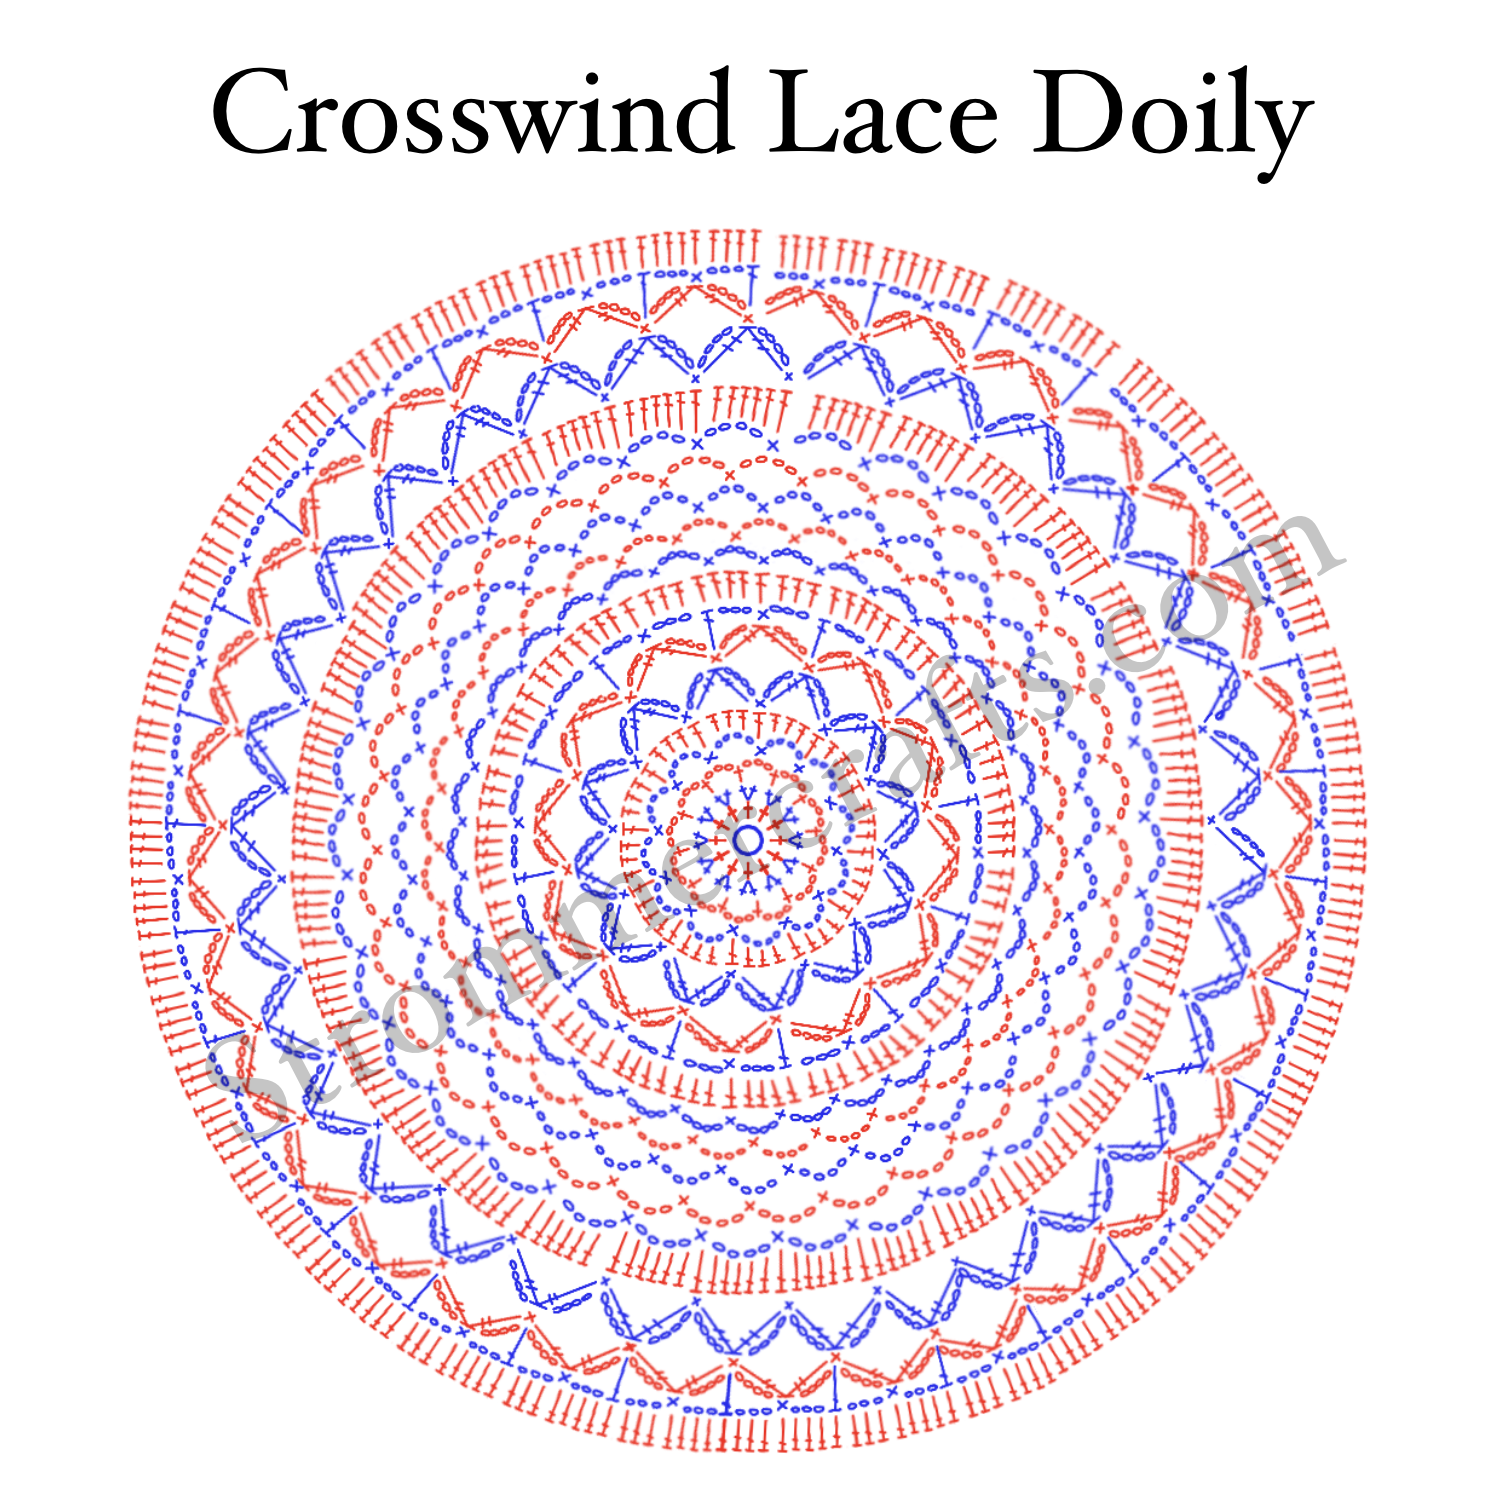
Crosswind Lace Doily Pattern

Round 1: Place 12 sc into magic ring (or ch 6, sl st to make a ring, ch 1 and place 12 sc into center), sl st to first sc (12 sts)

Round 2: ch 1, 2 sc into each st around (24 sts)

Round 3: ch 1, sc into same st, *ch 3, skip a st, sc into next st.* Repeat from *to* for 11 ch 3 spaces, for that last ch 3 space, instead of a ch 3, ch 1 and make a hdc into the first sc to join (12 ch 3 spaces)

Round 4: ch 1, sc into same ch 3 space, *ch 4, sc into next ch 3 space.* Repeat from *to* around, sl st to first sc. ( 12 ch 4 spaces)

Round 5: Ch 3 (counts as dc), 3 dc into next ch 4 space, *dc into next sc, 3 dc into next ch 4 space.* Repeat from *to* around. Sl st to top of starting ch 3. (48 dc)

Round 6: Ch 1, sc into same st. We will now be making the bottom half of these X stitches. 

*Ch 4, 2trtog (see steps above) by placing the first leg in the same st as the sc just made, skip 3 sts, make the second leg into the next st, ch 4, sc into same st as second leg of 2trtog.* Repeat from *to* around. Finish the last half of the X stitch with a ch 4, 2trtog with the first leg in the same st as previous sc and place the second leg into the same st as the first sc of this round (not the sc but top of the ch 3 from Round 5). Ch 4 and sl st to first sc of this round. (12 “bottom” halves of X stitch)

Round 7: sl st up the ch 4 until you get to the first 2trtog from Round 6. Now we will make the top half of the X stitch.

Ch 1, sc into same st. *Ch 4, 2trtog, place the first leg in the same st, and place the second leg into the next 2trtog. Ch 4, sc into same st as the second leg of the 2trtog just made.* Repeat from *to* around. 

Finish with with a ch 4, 2trtog, the first leg in the same st and then the second leg will go into the same st as the starting sc. Ch 4, sl st to first sc of this round. 

Round 8: Ch 6 (counts as dc and ch 3), *sc into next 2trtog, ch 3, dc into next sc, ch 3* Repeat from *to* around, sl st to the 3rd ch of starting ch 6.

Round 9: Ch 3 (counts as dc), *3 dc in next ch 3 space, dc into next sc, 3 dc into next ch 3 space, dc in next dc.* Repeat from *to* around. Sl st to top of starting ch 3. (84 dc)

Round 10: Ch 1, sc, *ch 4, skip 2 sts, sc into next st.* Repeat from *to* around, for the last ch 4, instead of doing a ch 4, ch 1 and dc into the starting sc. (32 ch 4 spaces)

Round 11-13: Ch 1, sc into same ch 4 space, *ch 4, sc into next ch 4 space.* Repeat from *to* around, for the last ch 4 space, make a ch 1 and dc into starting sc.

Round 14: Ch 1, sc into same ch 4 space, *ch 4, sc into next ch 4 space.* Repeat from *to* around. Sl st to first sc.

Round 15: Ch 3 (counts as dc), *5 dc into next ch 4 space, dc into next sc.* Repeat from *to* around. Sl st to top of starting ch 3. (172 dc)

Round 16: Ch 1, sc into same st. We will now be making the bottom half of the X stitches. 

*Ch 4, 2trtog (see steps above) by placing the first leg in the same st as the sc just made, skip 5 sts, make the second leg into the next st, ch 4, sc into same st as second leg of 2trtog.* Repeat from *to* around.

Finish the last half of the X stitch with a ch 4, 2trtog with the first leg in the same st as previous sc and place the second leg into the same st as the first sc of this round (not the sc but top of the ch 3 from Round 16).

Round 17: sl st up the ch 4 until you get to the first 2trtog from Round 16. Now we will make the top half of the X stitch.

Ch 1, sc into same st. *Ch 4, 2trtog, place the first leg in the same st, and place the second leg into the next 2trtog. Ch 4, sc into same st as the second leg of the 2trtog just made.* Repeat from *to* around. 

Finish with with a ch 4, 2trtog, the first leg in the same st and then the second leg will go into the same st as the starting sc. Ch 4, sl st to first sc of this round. 

Round 18: Ch 6, (counts as dc and ch 3), *sc into next 2trtog, ch 3, dc into next sc, ch 3* Repeat from *to* around, sl st to the 3rd ch of starting ch 6.

Round 19: Ch 3 (counts as dc), *3 dc in next ch 3 space, dc into next sc, 3 dc into next ch 3 space, dc in next dc.* Repeat from *to* around. Sl st to top of starting ch 3.

Cut thread and pull through. Weave in any loose ends with your tapestry needle.

Blocking The Crosswind Lace Doily:

I suggest blocking this doily once you are finished. 

To block your doily:

  • Get a bowl and fill it with water
  • Soak your doily in the water (you might have to pushed the doily down as it tends to want to float)
  • After a minute or two, place your doily on a dry towel and gently pat it to get out excess water
  • Using a blocking board or cardboard (you may need to get a mixing bowl and trace around it with a pen as a guide), pin your doily by gently stretching it into the desired shape.
  • Allow to air dry for 24-48 hours or until dry.

I hope you all enjoyed the Crosswind Lace Doily Pattern! Until next time.

Other Posts You May Like:
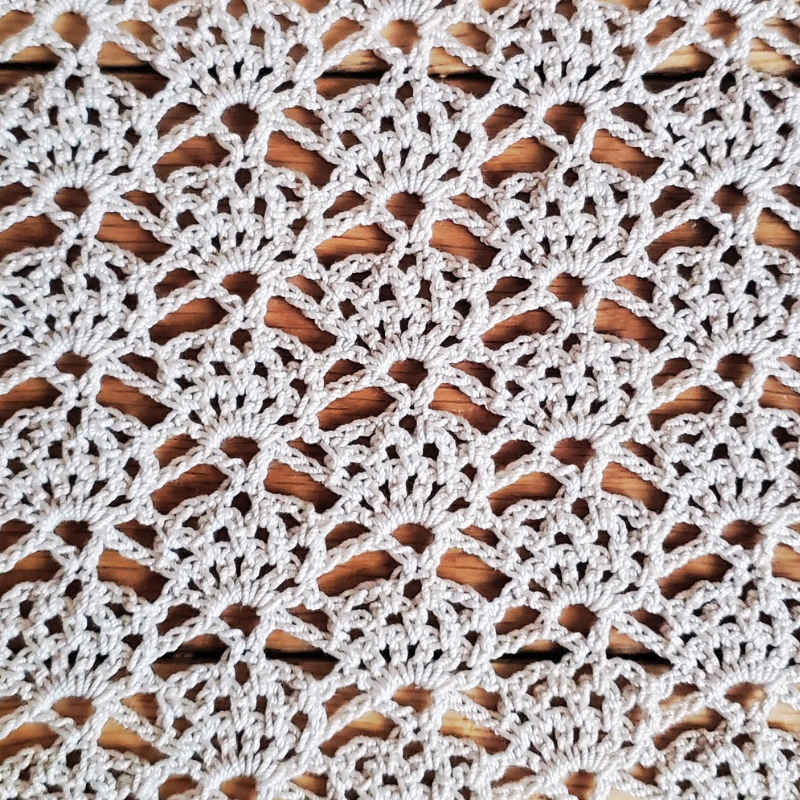
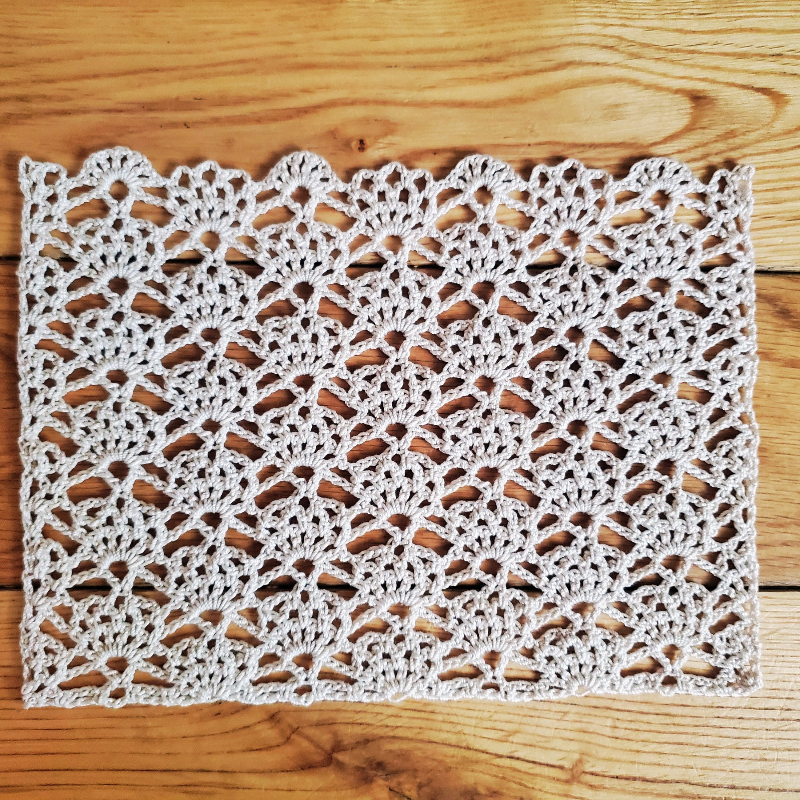
Crochet Lace Stitch Pattern – Crosswind Lace Stitch

Hello everyone! Today I have an amazing crochet lace stitch pattern to share with you! I’m calling this the Crosswind Lace Stitch.

The name popped into my head since the main motif in this pattern looks like a criss cross or an X (or maybe it’s a butterfly!? I don’t really know lol!). Plus when it’s worked up a few rows, it makes your fabric very light and airy…like the wind!

Anyways I think this pattern would provide an excellent visual break as a trim for blankets, shawls, scarves or tablecloths. You could also just make the whole project as this pattern, the possibilities are endless!

As always, you may use whatever size yarn and hook your heart desires for this pattern, but I am using size 10 crochet thread and a 1.65mm crochet hook.

Related Posts:

Please note that some of these links may be affiliate links. That means that if you click on these links and make a purchase, I may receive a commission at no extra cost to you. You can find more information about our disclosure policy here. Thank you for your support.

Materials Used:

Abbreviations Used:

  • Ch – chain
  • St – stitch 
  • Sl st – slip stitch 
  • Sc – single crochet
  • Dc- double crochet
  • Tr – treble crochet
  • 2trtog – 2 treble crochets together
Steps for 2Trtog: 
  • Yarn over 2 times, insert hook into designated st and pull up a loop (4 loops on hook)
  • Yarn over and pull through 2 loops (3 loops on hook)
  • Yarn over and pull through 2 loops again (2 loops on hook) This is the first “leg” of the 2trtog
  • Yarn over 2 times, insert hook into next designated st and pull up a loop (5 loops on hook)
  • Yarn over and pull through 2 loops (4 loops on hook)
  • Yarn over again and pull through 2 loops (3 loops on hook)
  • Yarn over one last time and pull through all 3 loops. This is the second “leg” of the 2trtog
YOUTUBE VIDEO NOT LOADING? CLICK FOR THE CROSSWIND LACE STITCH HERE.

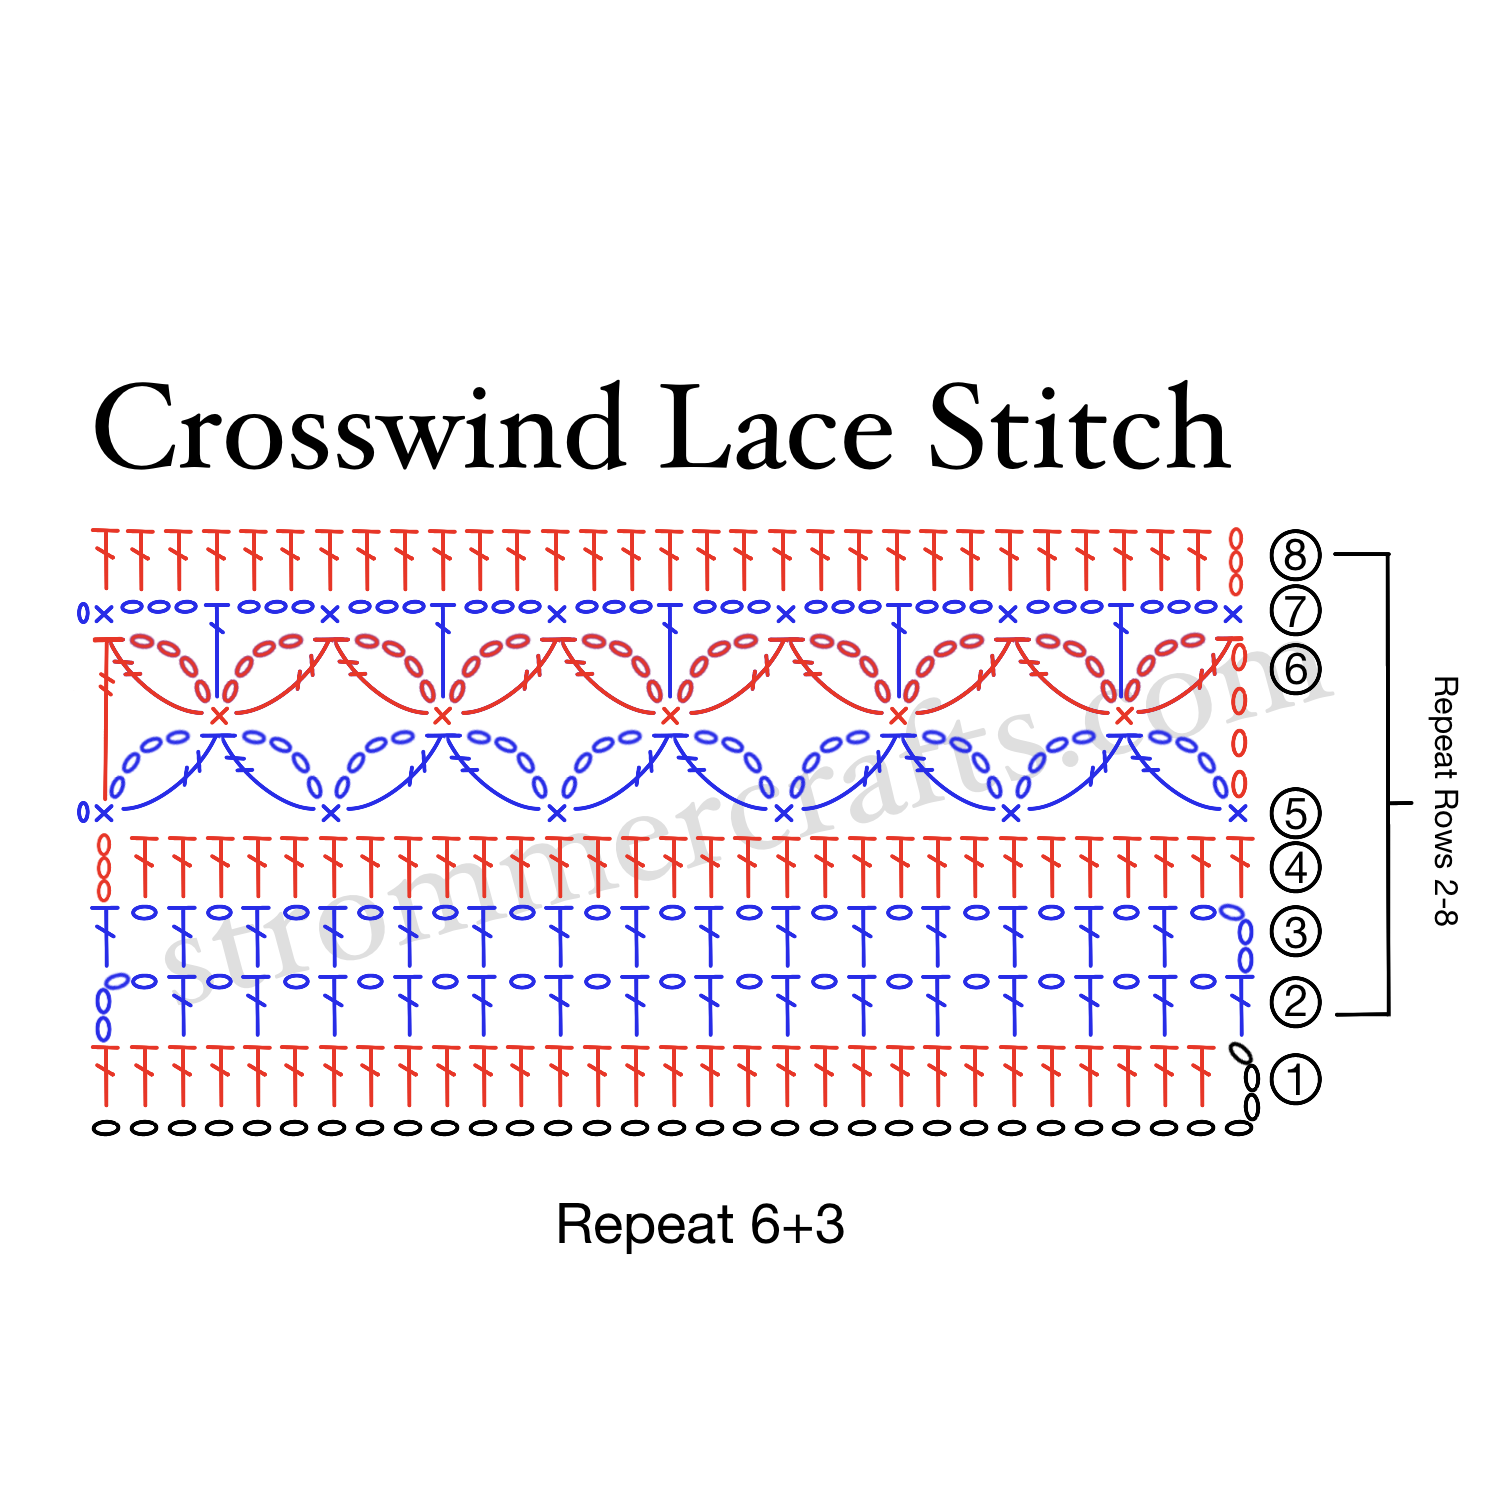
Crosswind Lace Stitch Pattern

Ch a repeat of 6+3

All that means is to chain 6 over and over until you’re happy with the length, then add 3 more chains to the end of that.

Row 1: Dc into 4th ch from hook, dc into each ch across

Row 2: Ch 4 (counts as dc and ch 1), turn, skip a st, *dc into next st, ch 1, skip a st dc into next st.* Repeat from *to,* placing the last dc into the top ch of from foundation row.

Row 3: Ch 4 (counts as dc and ch 1), turn, skip over ch 1 space, dc into next dc, *ch 1, skip over ch 1 space, dc into next dc.* Repeat from *to,* place the last dc into the 3rd ch of Row 2’s starting ch 3

Row 4: Ch 3 (counts as dc), turn, dc into next ch 1 space, *dc into next dc, dc into next ch 1 space.* Repeat from *to,* place last dc into 3rd ch of starting ch 4.

Row 5: Ch 1, turn, sc in same st. *Ch 4, make a 2trtog, placing the 1st leg in the same st as sc just made, skipping 5 sts and placing the 2nd leg into the next st. Ch 4, sc into the same st as the 2nd leg of 2trtog.* Repeat from *to * place last sc into top of starting ch 3.

Row 6: Ch 4 (counts as tr), turn, tr into next 2trtog from Row 5, *ch 4, sc into same st. Ch 4, 2trtog by placing the 1st leg in the same st as sc just made, then skipping over to the next 2trtog

and placing the 2nd leg.* Repeat from *to,* at the very last 2trtog, place the 2nd leg into the starting sc from Row 5 to 

Row 7: Ch 1, turn, sc in same st, *ch 3, dc into next sc, ch 3, sc into next 2trtog.* Repeat from *to* and place the last sc into the top of the starting ch 4 from Row 6.

Row 8: Ch 3 (counts as a dc), turn, *2 dc in next ch 3 space, dc into next dc, 2 dc in next ch 3 space, dc into next sc.* Repeat from *to* across.

Repeat Rows 2-8

Cut yarn with scissors and weave in any loose ends with a tapestry needle.

I hope you enjoyed this crochet lace stitch pattern! Until next time!

Other Posts You May Like:
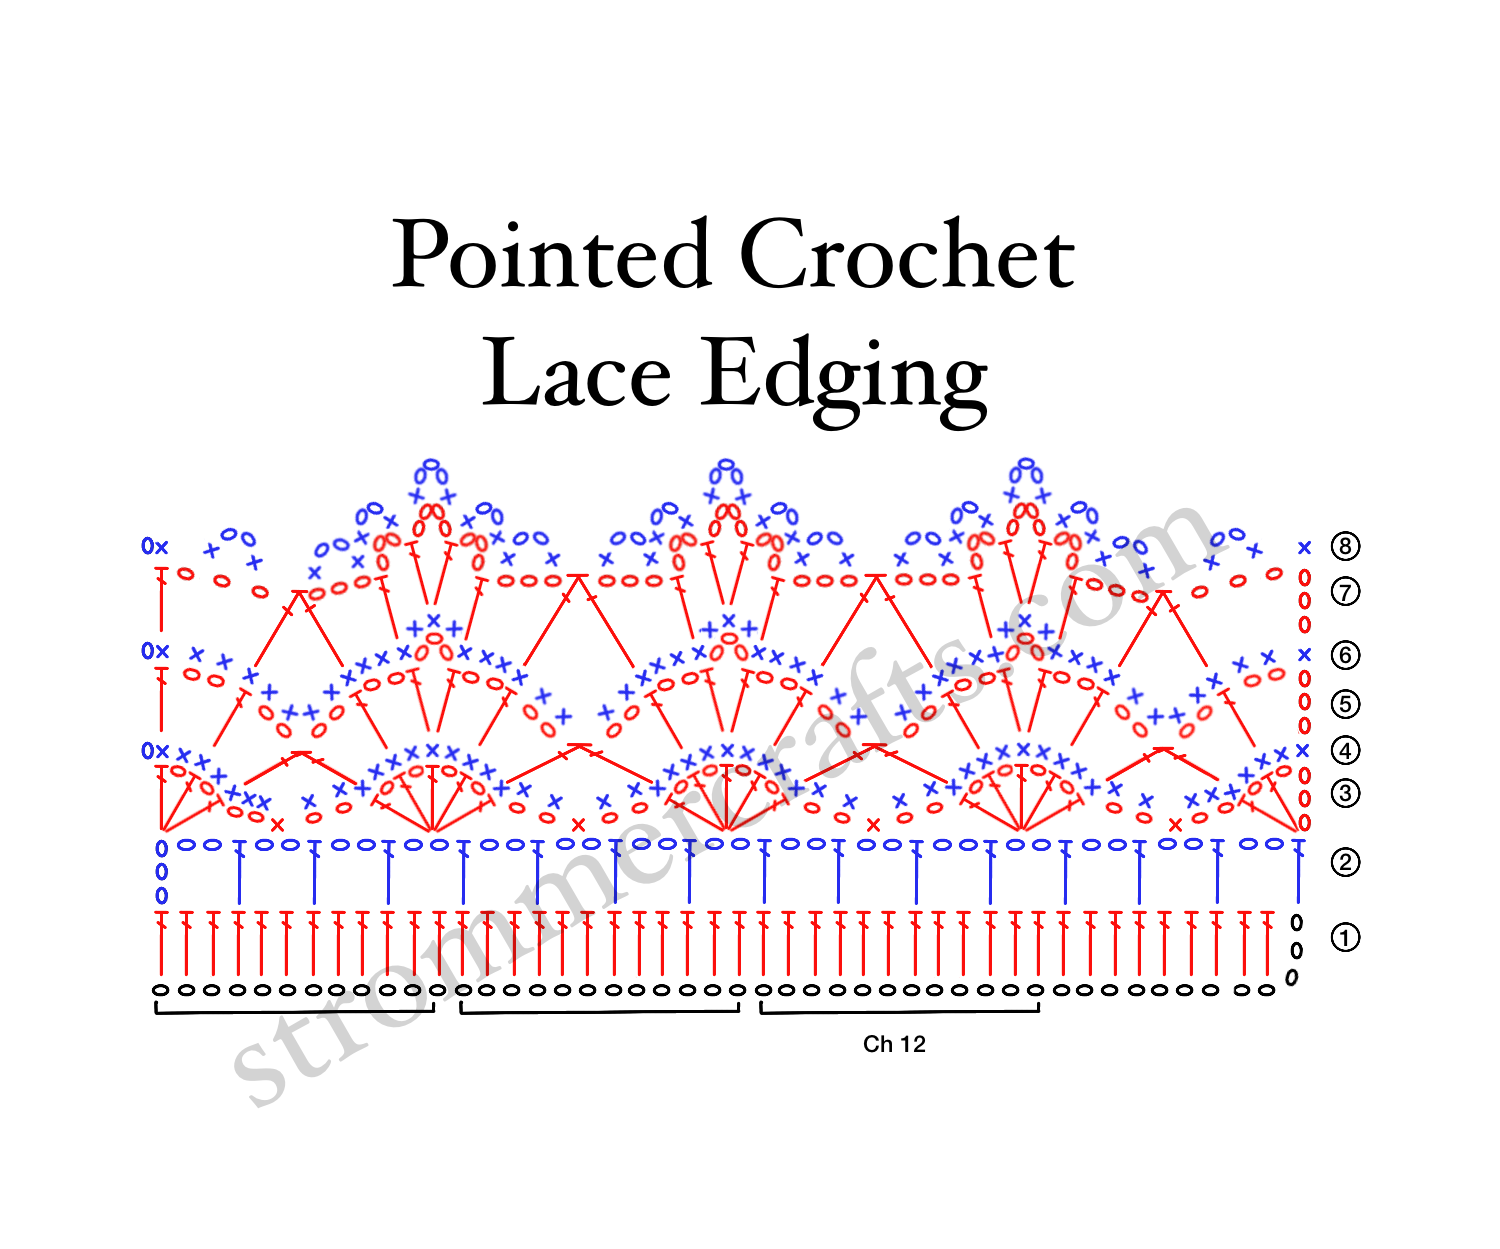
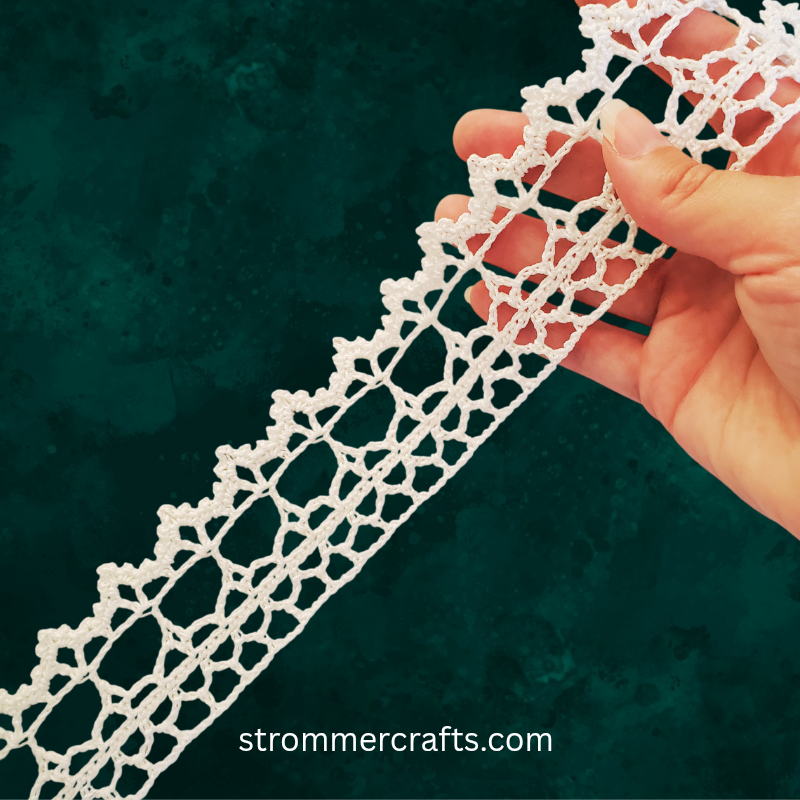
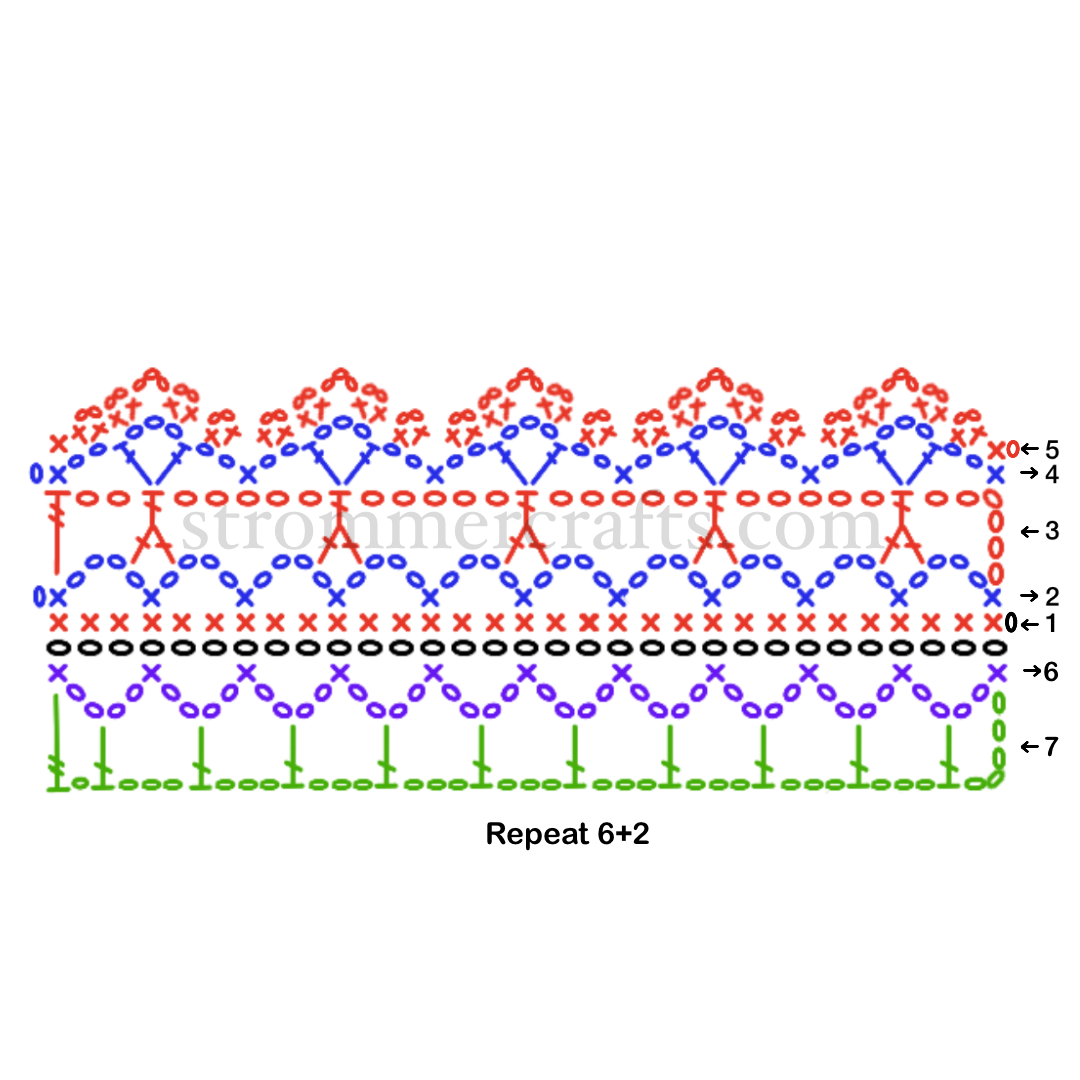
Gorgeous Crochet Lace Edging Pattern

Hi everyone, today I have an amazingly Gorgeous Crochet Lace Edging Pattern to share with you!

After making the foundation chain, the first row is literally just single crochets.

Then we will make a row of ch 4 mesh stitches for row two.

Next, for the third row, it gets a little bit more complicated, the stitch is essentially like a treble crochet, but your putting two legs in two different ch 4 spaces, and then making the neck of the stitch kind of tall, you’ll see what I mean!

For the fourth row, it’s just a series of V stitches separated by ch 2s and single crochets.

Row five includes single crochets and chains to give the edging a little bit of frill.

After all of that, we will be working on the underside of the pattern. You can do this by either slip stitching down the edge or you can simply cut your thread and attach it to the underside of the first single crochet from row one.

The 6th row will be continued on that underside and is the exact same as row 2. 

Finally, row 7 is a simple repeat of double crochets and chain 3s!

Related Posts:

What do you do with crochet edgings?

I love making crochet edgings and borders, but you may be wondering what you should do with it when you’ve finished!

Here are some ideas I’ve come up with that you can try:

  • Sew it to the edge of a fabric like a tablecloth, dress, or curtains
  • Use it as a pretty ribbon for presents
  • Line a wicker basket on the outside for am extra pretty embellishment
  • Line a jewelry box or memory box
  • Frame it as art with a dark background
  • Use it as Christmas tree garland
  • Decorate with it for a wedding
  • Wrap around Mason jars
  • Line a flower pot
  • Use it to decorate a fabric book cover

I’m sure there are way more uses for these crochet lace edgings, but these are a few of ideas that I could think of!

I’d also like to mention that blocking this edging is highly recommended! You can do this by soaking it in water, patting dry with a towel and then stretching and pinning it to a blocking board or a cardboard box. 

Blocking makes your finished crochet lace look so much cleaner and straight!

Please note that some links in the post may be affiliate links. That means if you click on a link and decide to make a purchase, I may receive a small commission at no cost to you. This helps to keep this blog going. Thanks for your support!

Materials Used:

Abbreviations Used:

  • St – stitch
  • Sl st – slip stitch
  • Ch – chain
  • Sc – single crochet
  • Dc – double crochet
  • Tr – treble 
  • TTr2tog – Tall 2 treble crochet together 

How to do a TTr2tog : 

  1. Yarn over 2 times like you’re going to do a tr. 
  2. Insert hook into the next ch 4 space, pull up a loop, you have 4 loops on your hook. 
  3. Pull through 2 loops like you would a dc. Stop, you should have 3 loops on your hook. 
  4. Yarn over, insert hook into the next ch 4 space, pull up a loop, you should have 5 loops on your hook. 
  5. Yarn over and pull through 2 loops. 4 loops on your hook.
  6. Yarn over and pull through 2 loops. 3 loops on your hook.
  7. Yarn over and pull through 2 loops. 2 loops on your hook.
  8. Yarn over and pull through the last 2 loops.
YOUTUBE VIDEO NOT LOADING? CLICK FOR THE GORGEOUS CROCHET LACE EDGING PATTERN HERE.

Gorgeous Crochet Lace Edging Pattern 

Ch a repeat of 6+2

That just means to ch 6 over and over again until you’re happy with the length and then ch 2 more.

Row 1: sc into 2nd ch from your hook. Sc into each ch across.

Row 2: ch 1, turn, sc in same st. *Ch 4, skip 2 sts, sc into next st.* Repeat from *to* across. You should have a sc in the very last st.

Row 3: ch 6, (counts as a tr and ch 2), turn TTr2tog  with the first leg in the first ch 4 space and the second leg in the next ch 4 space. *Ch 5, TTr2tog in the next ch 4 space (making sure the first leg is not in the same ch 4 space as the second leg from the previous TTr2tog).* Repeat from *to* until you’ve placed second leg of TTr2tog in last ch 4 space, ch 2 and tr into last sc.

Row 4: ch 1, turn, sc in same tr. Ch 2, (dc, ch 3, dc), into next TTr2tog, *ch 2, sc into 3rd ch of next ch 5, ch 2 (dc, ch 3, dc) into next TTr2tog.* Repeat from *to* until you’ve made the last (dc, ch 3, dc), ch 2 and sc into the 4th ch of Row 3’s starting ch 6.

Row 5: ch 1, turn, sc into same sc. (Sc, ch 2, sc) in next ch 2 space. *(Sc, ch 2, sc, ch 3, sc, ch 2, sc) in next ch 3 space. (Sc, ch 2, sc) in next ch 2 space, skip the sc and (sc, ch 2, sc) in next ch 2 space.* Repeat from *to,*

at the end of the row simply place a sc into the last sc

At this point you may cut your thread and start on the underside of the foundation chain or you can slip stitch down the side. 

Either way, begin in the underside of the first ch from the foundation row. 

Row 6: ch 1, sc in same ch, *ch 4, skip 2 chs, sc into next ch.* Repeat from *to.*

The ch 4s and scs in this row should mirror the ones in Row 1.

Row 7: ch 5 (counts as tr and ch 1), turn, dc into next ch 4 space, *ch 3, dc into next ch 4 space.* Repeat from *to* After last dc in last ch 4 space, ch 1 and tr in last sc.

Cut thread with scissors. Weave in any loose ends with a tapestry needle.

Block your work by soaking in water and pinning it to a blocking board or cardboard until dry. 

Thank you for checking out this Gorgeous Crochet Lace Edging Pattern. I hope this tutorial was helpful for you. Until next time!

Other Posts You May Like:
Easy Crochet Lace Tape Pattern

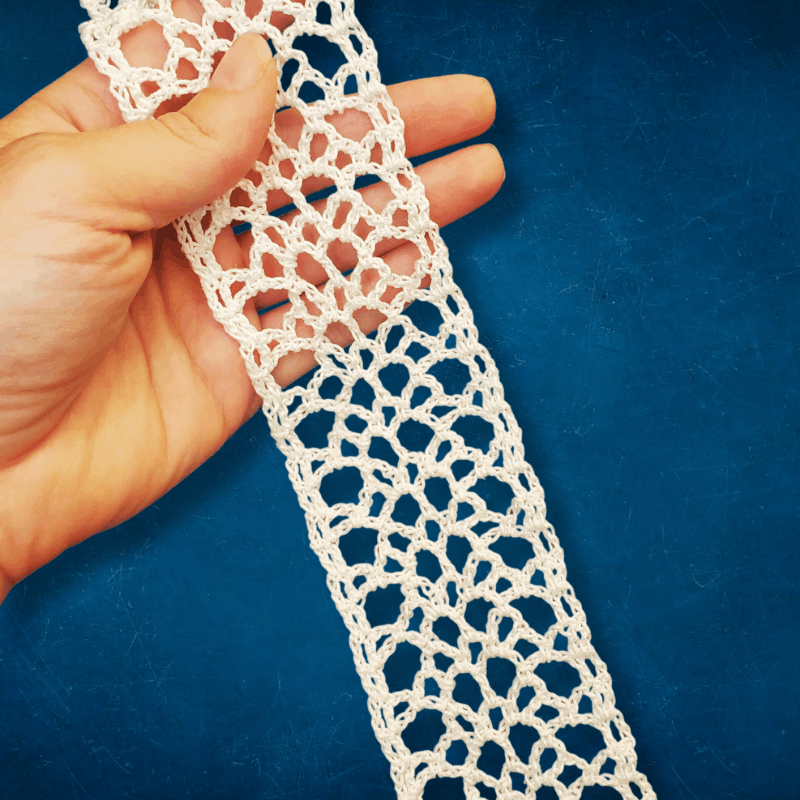
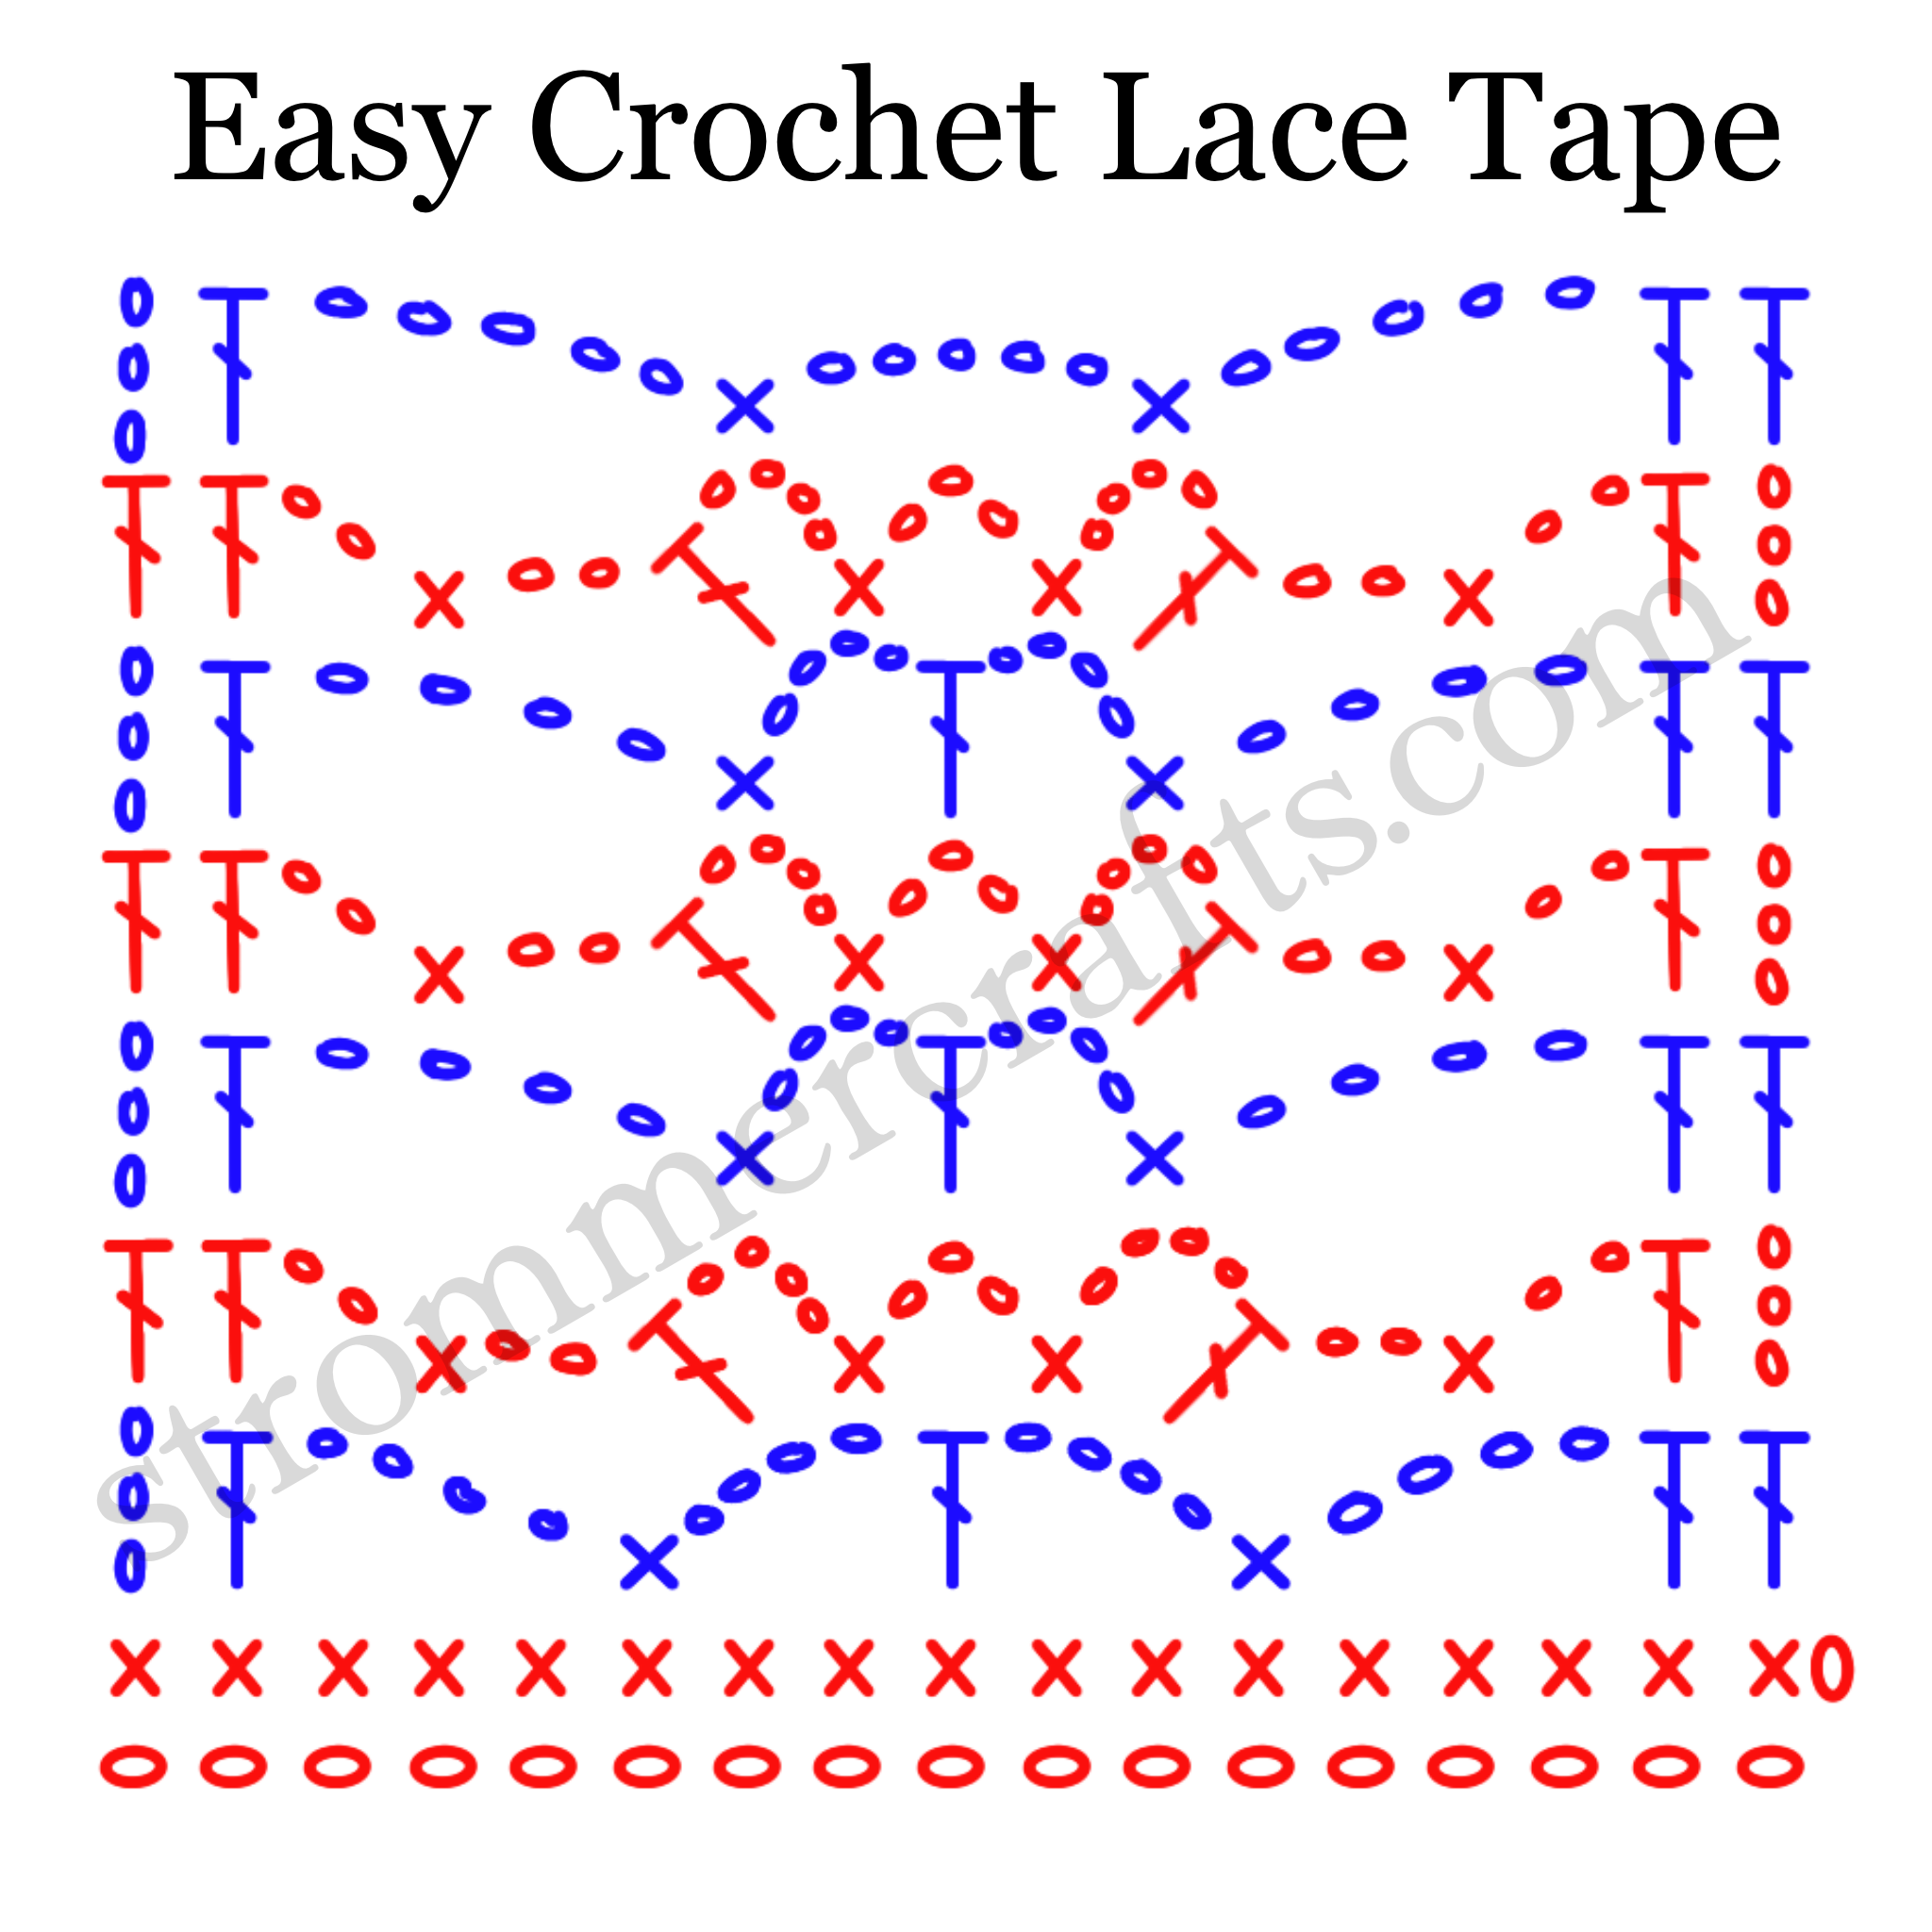
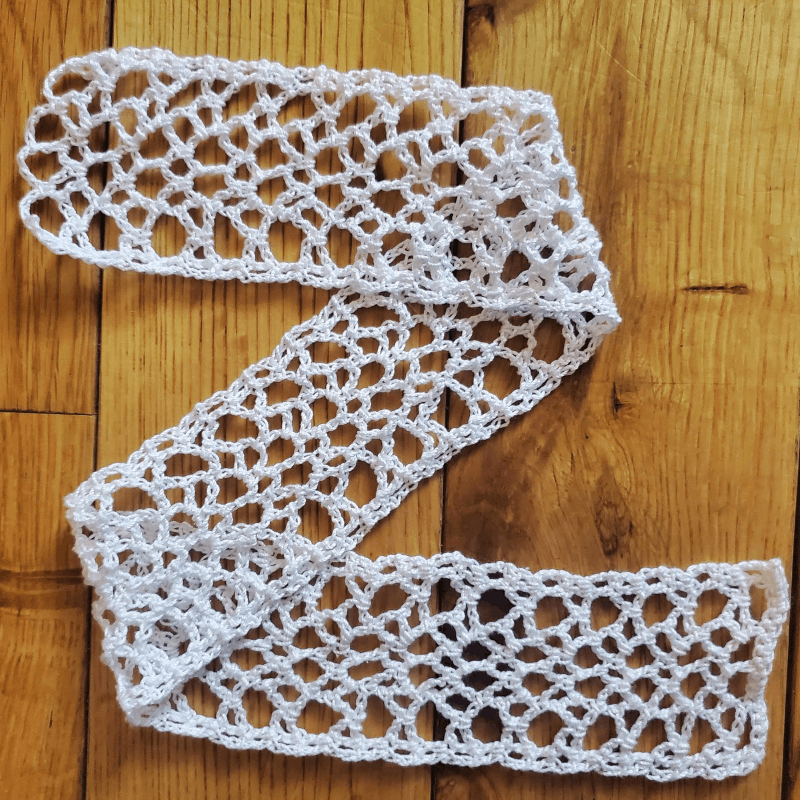
Hey everyone, today I am showing you how to make a very Easy Crochet Lace Tape!

After the first row, it’s just a 2 row repeat until it’s as long as you want it to be! 

This crochet tape has straight edges, which may be preferred by some instead of frills or shells.

What do you do with crochet tape?

So you’ve crocheted a length of this pretty lace tape, but now you might be wondering…what the heck do I even do with this?

Here are some ideas that I came up with that you can do with this particular crochet tape:

  • Use it as a trim for any fabric or clothing item (think like tablecloths, towels, dresses or curtains
  • Use it as a headband
  • Crochet a few rows and make it a bookmark
  • Frame it as part of an art collection of lace tapes
  • Line the edge of a pretty basket or box

Related Posts:

Please note some links in this post are affiliate links. That means if you click on one of these links and decide to make a purchase, I may receive a small commission at no cost to you. This helps offset the cost of running this blog. Thank you for your support!

Materials Used:

Abbreviations Used (US terms)

  • St(s) – stitch(es)
  • Ch(s) – chain(s)
  • Sl st – slip stitch 
  • Sc – single crochet 
  • Dc – double crochet
YouTube video not loading? Click for the video tutorial on the Easy Crochet Lace Tape Pattern here.

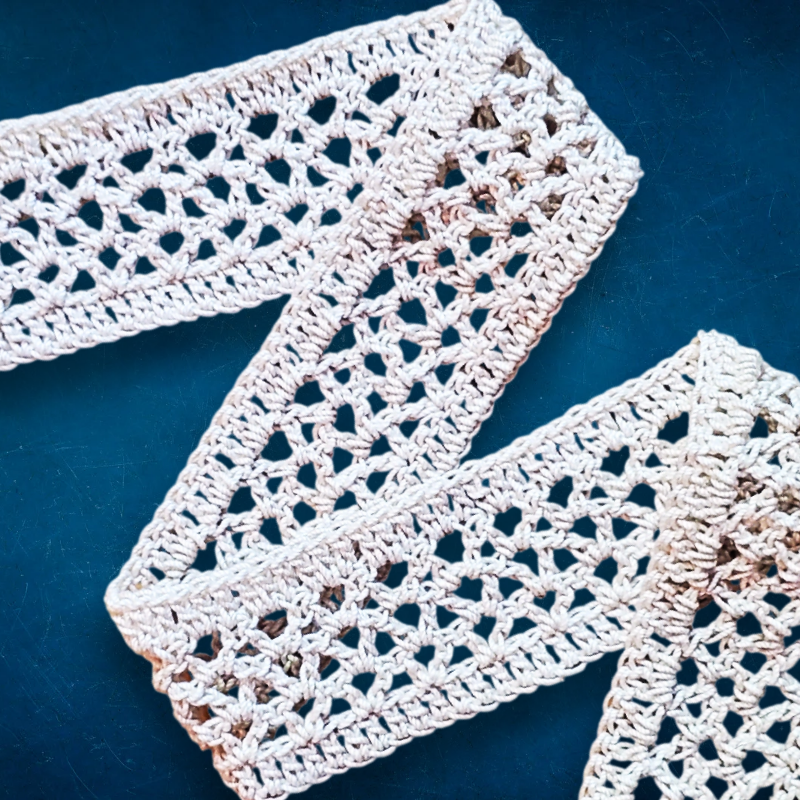
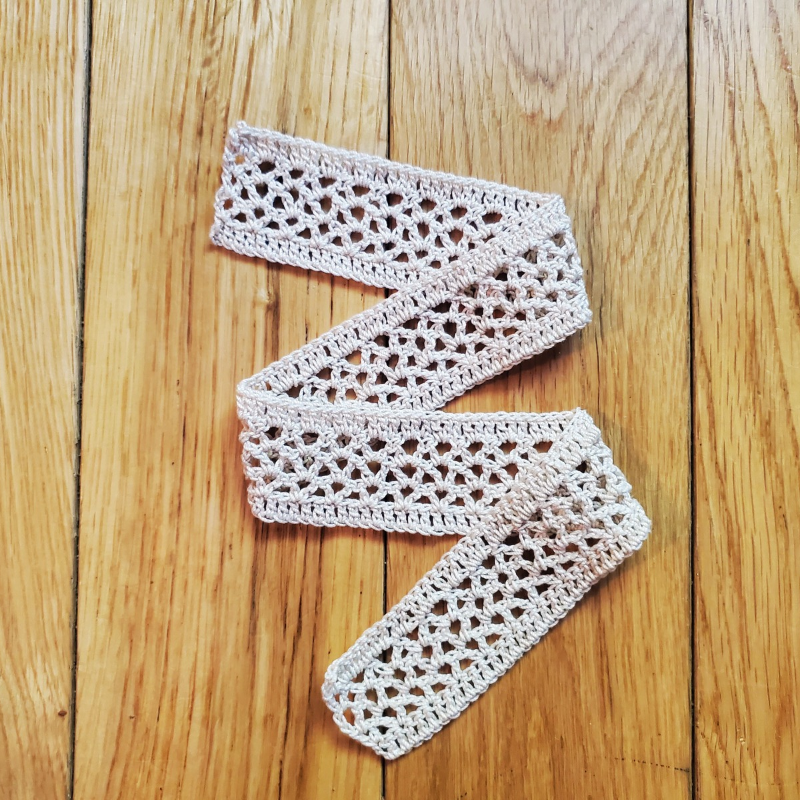
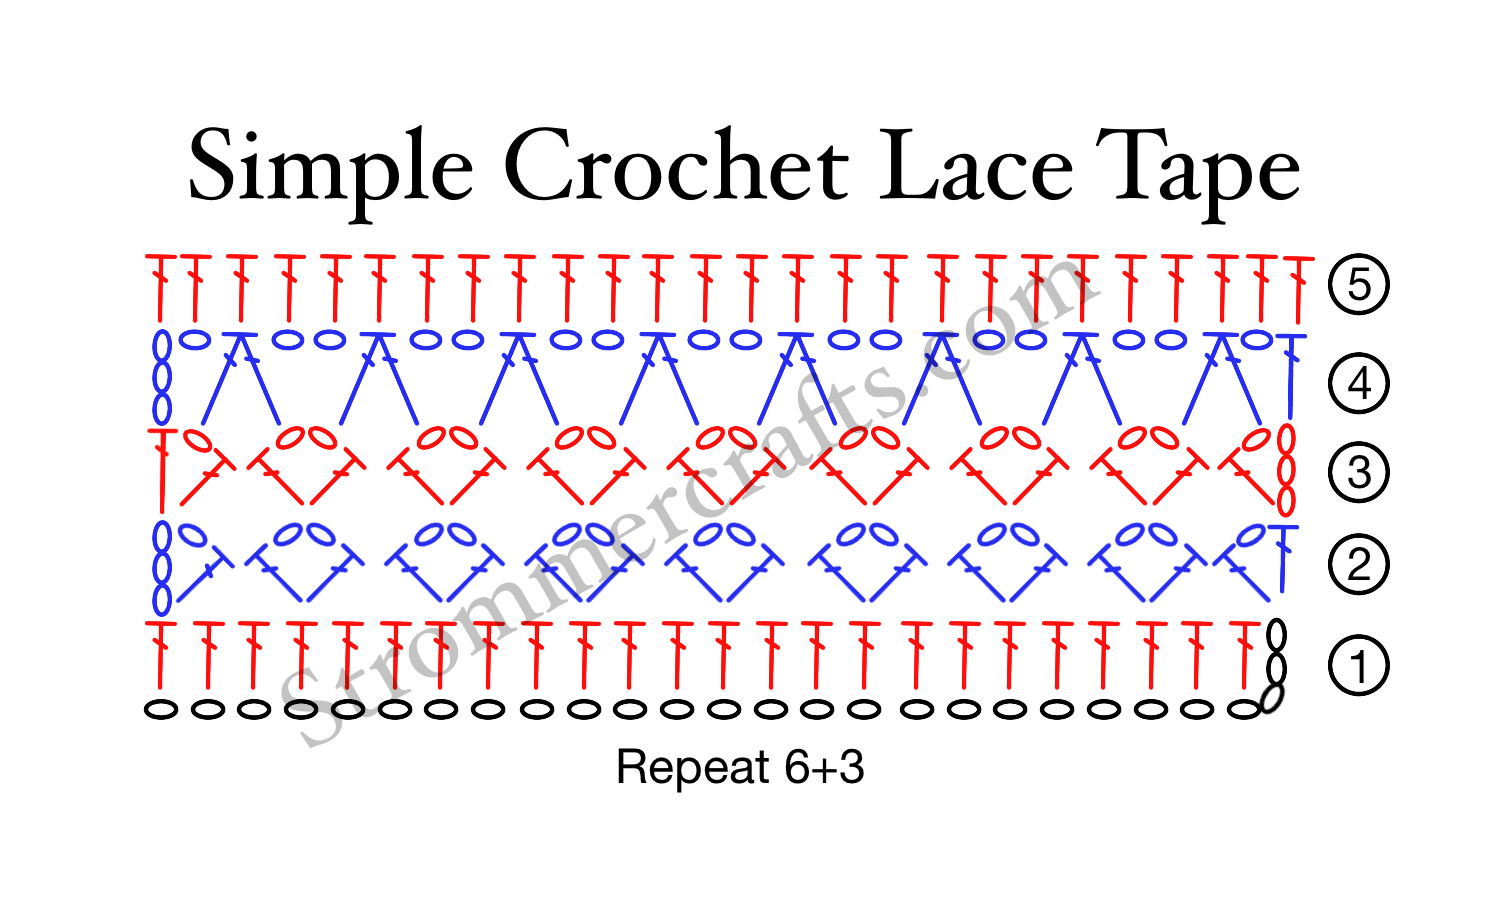
Crochet Lace Tape Pattern

Ch 18

Row 1: sc in second ch from hook, sc in each ch across.

Row 2: ch 3 (counts as dc), turn, dc in next st, ch 4, skip 3 sts, sc in next st. Ch 4, skip 2 sts, dc in next st, ch 4, skip 2 sts, sc in next st. Ch 4, skip 3 sts, dc in last 2 sts.

Row 3: ch 3 (counts as dc), turn, dc in next st, ch 2, sc in next ch 4 space. Ch 2, (dc, ch 4, sc) in next ch 4 space. Ch 3, (sc, ch 4, dc) in next ch 4 space. Ch 2, sc in next ch 4 space, ch 2, dc in last 2 sts.

Row 4: ch 3 (counts as dc), turn, ch 4, sc in next ch 4 space. Ch 4, dc in ch 3 space. Ch 4  sc in next ch 4 space. Ch 4, dc in last 2 sts.

Repeat Rows 3-4 until desired length 

I hope you enjoyed this pattern on a gorgeous looking crochet lace tape! Have a good one 👍. 

Other Posts You May Like:
Crochet Mesh Stitch with Floral Diamonds

Hi everyone, today I have a GORGEOUS crochet lace stitch pattern for you to try! The Crochet Mesh Stitch with Floral Diamonds Pattern!

This is a lacy crochet pattern that is embedded with cute diamond shapes made up of 4 “shells.” The shells give the pattern a floral look.

I think this pattern is extremely airy, and light and PERFECT for summer clothing crochet projects, veils, curtains or anything that your heart desires.

I am using size 10 crochet thread and a 1.65mm crochet hook since I love crocheting with lace, HOWEVER, you don’t actually need to use what I’m using.

Feel free to use whatever yarn and hook that corresponds to your yarn that you like.

Crochet Lace Stitch with Diamonds

Related Posts: 

Please note that some of these links in this post may be affiliate links. That means if you click on one of these links and decide to make a purchase, I may receive a small commission at no cost to you. Thanks for your support!

Materials Needed:

Abbreviations Used:

  • Ch – chain
  • St – stitch
  • Sl st – slip stitch 
  • Sc – single crochet 
  • Dc – double crochet
  • Tr – treble crochet

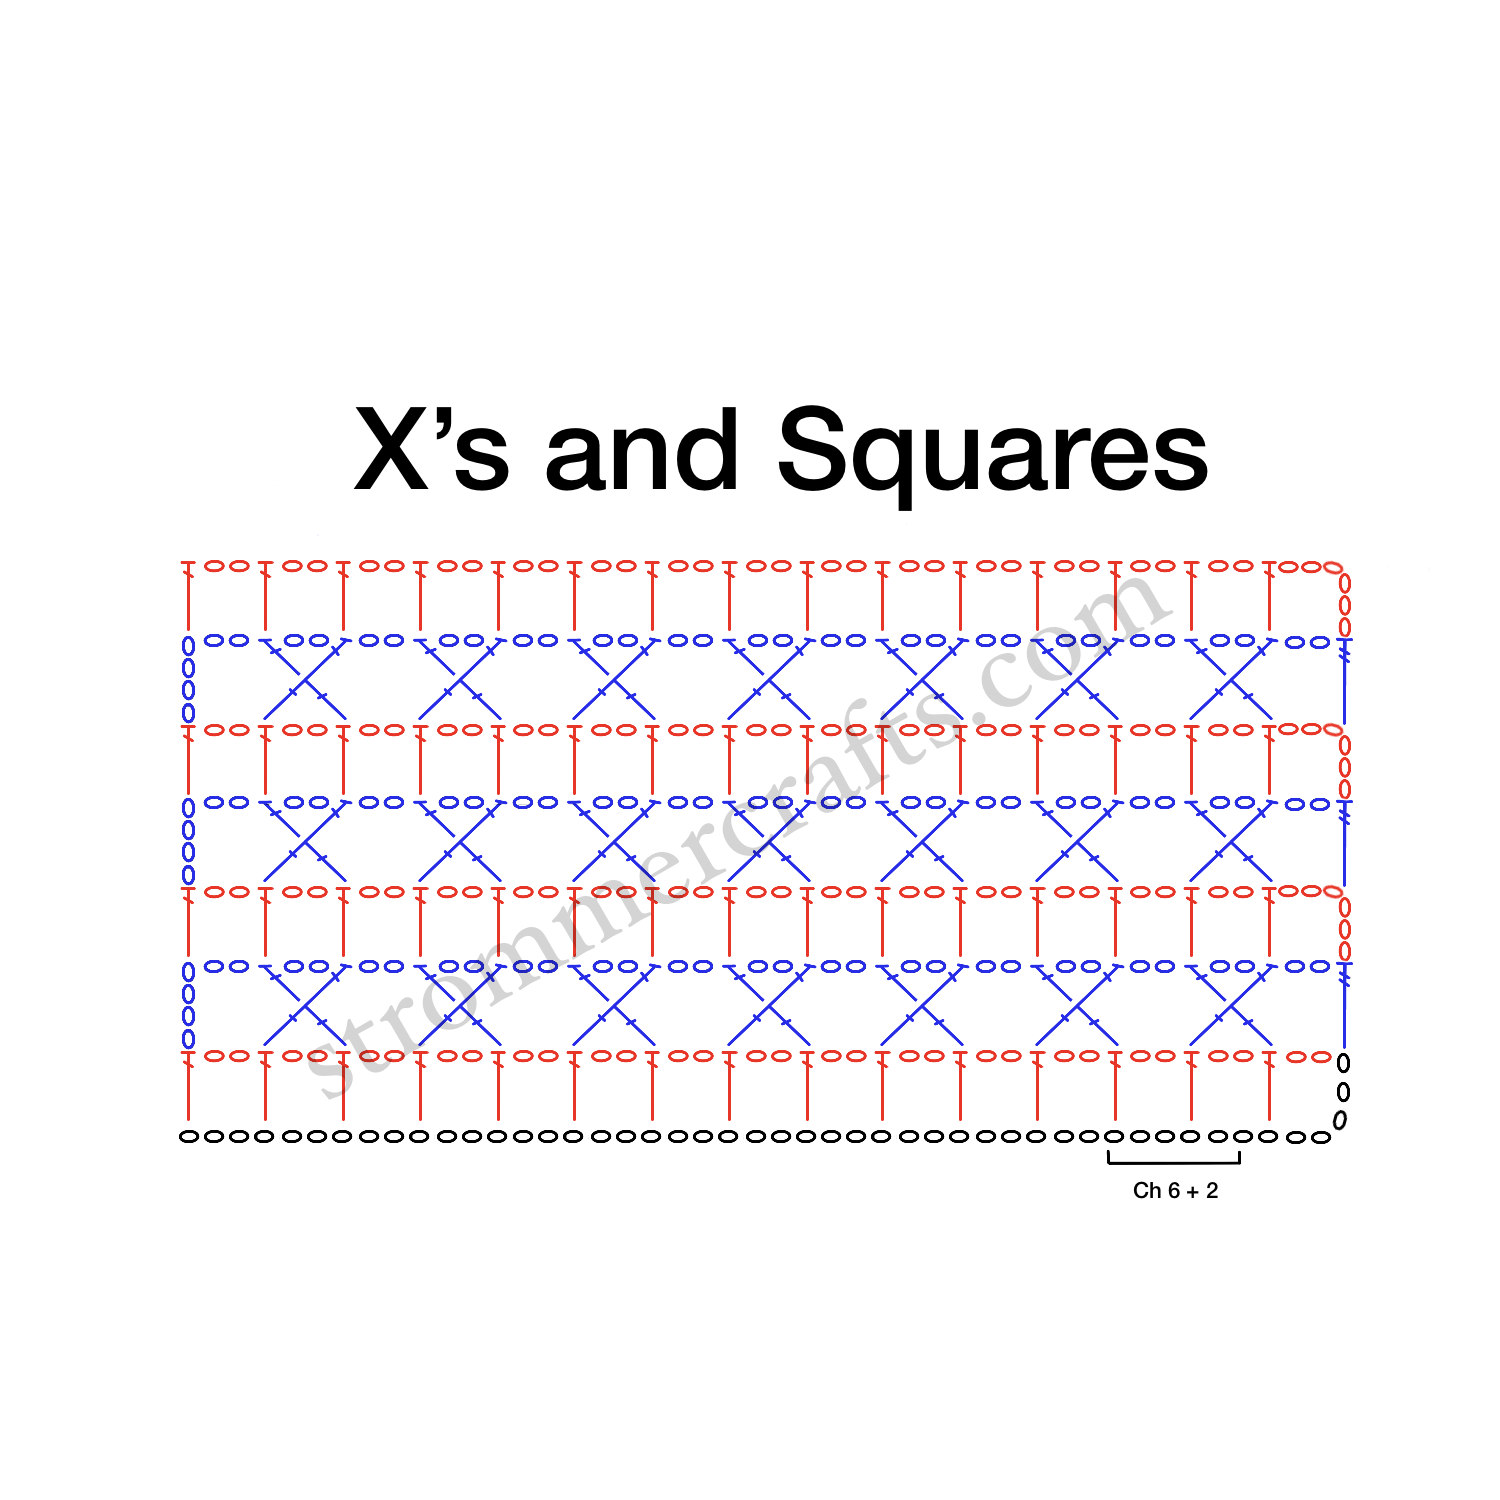
I have the chart for this pattern above if your interested. Just click to enlarge the pic.☝

Youtube video not loading? Click here for video tutorial on this stitch pattern

Crochet Mesh Stitch with Floral Diamonds Pattern

Ch a repeat of 20+18 until desired length.

Row 1: sc into 2nd ch from hook, *ch 5, skip 3 chs and sc into next ch.* Repeat from *to.* You should have a sc in the very last ch.

Row 2: ch 6 (counts as a tr and ch 2), sc into next ch 5 space, ch 5, sc into next ch 5 space, *(2 dc, ch 3, 2 dc) in next sc, sc into next ch 5 space, (ch 5, sc into next ch 5 space x4 times)* The very last (2 dc, ch 3, 2 dc) should be in the 3rd sc from the end with 2 ch 5’s left. Ch 5, sc in next ch 5 space, ch 2, tr into very last sc.

Row 3: ch 1, sc in same st, ch 5, sc into next ch 5 space, *(2 dc, ch 3, 2 dc) into next sc, sc into ch 3 space, (2 dc, ch 3, 2 dc) into next sc, (ch 5, sc into next ch 5 space x3 times)* Repeat from *to* until the last (2 dc, ch 3, 2 dc), sc into next ch 5 space, ch 5, sc into 4th ch of starting ch 6 from Row 2.

Row 4: ch 6 (counts as tr and ch 2), sc into next ch 5 space, ch 5, sc into next ch 3 space, *(2 dc, ch 3, 2 dc) into next sc, sc in next ch 3 space, (ch 5, sc into next ch 5 space x4 times)* Repeat from *to* until last (2 dc, ch 3, 2 dc), sc into next ch 3 space, ch 5, sc into next ch 5 space, ch 2, tr into last sc

Row 5: ch 1, sc into same st, *(ch 5, sc into next ch 5 space x4 times), (2 dc, ch 3, 2 dc) in next sc, sc into next ch 5 space.* Repeat from *to* until sc in last ch 5 space, ch 5 and sc into4th ch of starting ch 6.

Row 6: ch 6 (counts as tr and ch 2), sc into next ch 5 space, *(ch 5, sc into next ch 5 space x3 times), (2 dc, ch 3, 2 dc) in next sc, sc into next ch 3 space, (2 dc, ch 3, 2 dc) in next sc.* Repeat from *to* until sc in last ch 5 space, ch 2, tr in last sc.

Row 7: ch 1, sc in same st, *(ch 5, sc into next ch 5 space x4 times), (2 dc, ch 3, 2 dc) in next sc), sc into next ch 3 space.* Repeat from *to* until last (2 dc, ch 3, 2 dc), sc into ch 3 space, (ch 5, sc into next ch 5 space x3 times), ch 5, sc into 4th ch of starting ch 6.

Repeat Rows 2-7 until desired height. 

Cut with scissors, weave in any ends with tapestry needle.

Thank you for checking out this Crochet Mesh Floral Diamond Pattern! 

Until next time.

Other Posts You May Like:
Very Elegant Crochet Lace Border (Pattern Tutorial)

Hey everyone, today I have a Very Elegant Crochet Lace Border Pattern for you!

This lacy crochet border has a series of beautiful crochet stitches that give it a subtle, but elegant look.

I am also providing a diagram for if you need to use this border for a square or rectangular object, sometimes figuring out the corners can be a pain on your own!

To do this border, you will need to be able to 2 intermediate stitches, X stitches and 2 double crochets together.

But I will walk you through those, it will be easy peasy!

I have used a very similar lace border for my Filet Crochet Heart Doily and my Merry Christmas Doily if you’d like to check those out too!

Related Posts:

Today I am using plain ol’ size 10 crochet thread in white from Red Heart, but you can use whatever color you like! 

I am also using a size 1.65mm crochet hook as well. Just note that if you use a different size thread or hook, your finished project will be a different size than mine!

Please note that some links in this post may be affiliate links. That means if you click on these and make a purchase, I may receive a small commission at no cost to you. Thanks for your support!

Materials Used:

Abbreviations Used:

  • Ch – chain
  • St – stitch
  • Sl st – slip stitch
  • Sc – single crochet
  • Dc – double crochet
  • Dc2tog – double crochet 2 stitches together
  • X stitch – a double crochet placed 3 stitches ahead of current stitch, ch 1, and another double crochet placed in the 2nd stitch behind the first double crochet.

Youtube video not loading? Click for the video tutorial of this pattern here!

Very Elegant Crochet Lace Border Pattern

(This is for the straight edge only, scroll down for written instructions on the corners)

Ch a repeat of 3 until your happy with the length.

Row 1: sc into 2nd ch from hook, and sc into each ch across.

Row 2: ch 3 (counts as dc), turn, *skip 2 sts, dc into next st, ch 1, and going behind the dc just made, skip a st and dc into the next st.* This should make your dcs cross each other like an X. *Repeat from *to* across. You will have 1 st left at the end! Dc into last st

Row 3: ch 1 (does not count as st), sc into same st, sc into next st, *ch 1, skip ch 1 space from row 2, sc into next 2 sts.* Repeat from *to* the last sc will be placed in the top ch of starting ch 3.

Row 4: ch 3 (counts as a dc), in next ch 1 space (2dc, ch 2, dc2tog with the first leg in the same ch 1 space and the second leg in the next ch 1 space), *dc into same ch 1 space as the second leg of dc2tog, ch 2, dc2tog with the first leg in the same ch 1 space and the second leg in the next ch 1 space.* Repeat from *to* across, in the last ch 1 space, you should have the second leg of a dc2tog…place 1 more dc in same ch 1 space, skip a st and dc into very last st.

Row 5: ch 1 (does not count as a st), *ch 3, (sc, ch 3, sc) into next ch 2 space.* Repeat from *to* finish with a ch 3, skip 2 sts and sc into top of starting ch 3.

Cut thread with scissors, weave in any ends.

(Corners)

This is purely for the corners, the straight edges should be the exact same as the pattern above, except without the 1 dc on the end of either side.

You need to have a repeat of 3 for this border pattern to fit correctly.

Round 1: simply place sc in a series of 3, in the corner spaces place a ch 2 (so the 3rd sc in your repeat will be the first sc in the corner, ch 2, and then the 1st sc of your next series of 3 repeats will be the second sc in the same corner st) 

Please look at the diagram for clarification. The 2 sc separated by the ch 2 share the same ch.

Round 2: in your corner ch 2 space, place (dc, ch 2, dc)

Round 3: in the corner, place a sc into first dc, ch 3 and sc into next dc

Round 4: in the ch 1 space before the ch 3 corner space, place a dc if you have not already, ch 2, 2dctog with first leg in same ch 1 space, and the second leg in the ch 3 corner space. Ch 3, dc into same ch 3 corner space, turning down the next side ch 2, 2dctog with the first leg in the same ch 3 corner space and the second leg in the next ch 1 space, and continue down straight edge

Round 5: (sc, ch 3, sc) in ch 3 corner space 

Join with a sl st to first sc

Cut thread with scissors. Weave in any ends with tapestry needle.

Thank you for checking out my Very Elegant Crochet Lace Border!

Other Posts You May Like:
Lacy Diamond Crochet Stitch [Pattern Tutorial]

Hi everyone! Today I have the Lacy Diamond Crochet Stitch pattern to share with you!

This is a VERY open and airy crochet stitch with big holes. And once you’ve completed a few rows, you can see the diamond shapes form!

But first, what the heck do you even do with a crochet stitch like this? 

Here are a few ideas: a lace crochet curtain, a delicate table runner, a cover up for the pool, or maybe you need an open stitch to break up a solid crochet blanket. 

Whatever the reason, this is going to be your next FAVORITE crochet stitch. 

This is also one of those crochet patterns where the middle part is 1 of 2 series of stitches, but you’ll need to pay attention to the edges. You’ll see what I mean.

Today I’m using size 10 crochet thread in Gold Dust from Artiste Cotton Crochet Thread and a 1.65mm crochet hook, but you can use whatever size yarn and a matching hook.

Related Posts:

Before we start, do you like Instagram? Follow me @strommer.crafts for more crochet content!

Materials Needed:

  • Crochet thread size 10
  • 1.65mm crochet hook
  • Scissors 
  • Tapestry needle 

Abbreviations Used (US terms):

  • St – stitch 
  • Sl st – slip stitch 
  • Ch – chain
  • Sc – single crochet
  • Dtr – double treble crochet (yarn over 3 times)
CLICK HERE FOR THE VIDEO TUTORIAL OF THE LACY DIAMOND STITCH.

Lacy Crochet Diamond Stitch Pattern

Ch a repeat of 12 + 4. 

That just means to ch 12 over and over until you’re happy with the length and then add 4 more to the end of that.

FYI the beginning ch 1s do not count as a stitch.

Row 1: sc into the 2nd ch from your hook and sc into each and every ch across

Row 2: ch 1, turn, sc into the next 3 sc, *ch 11, skip 9 sc, and sc into the next 3 sc.* Repeat from *to*

Row 3: ch 1, turn, sc into next 2 sc, *ch 6, skip 5 chs and sc into the 6th ch from the ch 11 in row 2, ch 6, skip the next sc and sc into the middle sc of the 3 sc from row 2.* Repeat from *to* until you’ve placed the last sc in the 6th ch in the ch 11.

To finish, ch 6 and, skip the next sc, sc into next 2 sc.

Row 4: ch 1, turn, sc into first sc, ch 11, *sc into the 6th ch (the ch before the sc), sc into the sc, sc into the next ch, ch 11, skip the ch 6, skip the sc, and skip the next ch 6.* Repeat from *to* skip a sc and dtr into the last sc.

Row 5: ch 1, turn, sc into dtr, *ch 6, skip the next sc, sc into next sc (middle sc of the 3), ch 6, sc into 6th ch of the ch 11.* Repeat from *to* 

Row 6: ch 1, turn, sc into first sc, sc into first ch, *ch 11, sc into the 6th ch, sc into the next sc, sc into the next ch.* Repeat from *to* until last ch 11, place sc into 6th ch away, sc into last sc

Row 7: ch 1, turn, sc into first sc, *ch 6, sc into 6th ch in ch 11, ch 6, skip next sc, sc into next sc (the middle sc).*

Repeat Rows 4-7 until desired height

Row 8: ch 11, turn, skip ch 6, sc into next sc, *ch 11, skip ch 6, skip sc, skip the next ch 6, sc into the next sc* Repeat from *to* end the row with a ch 6 and dtr into the last sc.

Row 8: ch 1, turn, sc into first sc, 6 sc in ch 6 space, sc in next sc, *11 sc in ch 11 space, sc into next sc.* Repeat from *to.* 6 sc in last ch 11 space, place last sc in 6th ch.

Cut thread with scissors. Weave in any ends with tapestry needle.

And that’s it! What did you think about the Lacy Diamond Crochet Stitch? 

I hope you enjoyed this tutorial, until next time!

Other Posts You May Like:
Absolutely Lovely Crochet Lace Edging

Hello everyone, today I have an Absolutely Lovely Crochet Lace Edging pattern to share with you.

This pattern is very similar to the border I used for my Crochet Animal Crossing Doily, but I’ve tweaked it just a little to make it slightly better I think. 

I was inspired to create my very own crochet lace edging after hours of searching for the perfect pattern for my own project. I think this pattern works up amazingly, it’s got a nice scalloped edge with pretty, little picots. 

You can use this crochet lace pattern as a way to decorate or adorn things like dresses, skirts, tablecloths, blankets, or scarves. I’ve even seen people use these to line woven baskets or jars. Really anything you can think of that you want to make look pretty!

Related Posts:

Feel free to use any crochet yarn and hook you’d like, however if you want to make crochet lace, I suggest using crochet thread and a corresponding hook. I’m using size 10 crochet thread and a 1.65 mm crochet hook to make this beautiful pattern.

I’ve made a diagram for this pattern as well. I think the diagrams are super helpful to use as a reference. I’m still trying to get used to making them and they aren’t always perfect but I think you’ll get the idea!

I also highly suggest blocking this pattern and really anything that you crochet as lace. You can get the edging wet and then stretch and pin it onto a blocking board or a piece of cardboard.

Please note that some of these links may be affiliate links. That means that if you click on these links and make a purchase, I may receive a commission at no extra cost to you. You can find more information about our disclosure policy here. Thank you for your support.

Here are some different colors of thread I used for my edging. I like to use the classic white thread, but black can make any piece look instantly more beautiful and gothic-like. The other colors are a lot of fun too.

Alright let’s go ahead and check out the pattern below!

Materials Used:

Abbreviations Used:

  • St – stitch
  • Ch – chain
  • Sc – single crochet
  • Dc – double crochet

Special Stitches:

  • X Stitch – skip 2 sts, dc into next, ch 1, going backwards/behind the dc just made, skip a st and dc into the next. This makes the two double crochet cross each other.
  • 3dc Cluster – make a double crochet in the designated st, but don’t finish it, make 2 more double crochet without finishing them. You should have 4 loops on your hook at this point, pull through all 4 loops.
  • 3ch Picot – ch 3, slip stitch into the top of the previously made st (in this pattern it will be the top of the 3dc cluster)

Crochet Lace Edging Pattern

Ch a repeat of 12+3

Row 1: Sc into 2nd ch from hook, sc into each ch across.

Row 2: Ch 3 (counts as a dc), turn, we will be making an X st now. *Skip next 2 sts, dc into the next st. Ch 1, going behind the ch 1 and dc just made, skip a st and dc into the next st. Now we go back forward.* Repeat from *to* until the end, you should have 1 st left, make a dc in the last st.

Row 3: Ch 5 (counts as a dc and ch 2), turn, skip dc, sc into ch 1 space in the X st, *ch 3, skip next 2 dcs, sc into ch 1 space in the X st.* Repeat from *to.* Ch 2, dc into top of ch 3 from Row 2.

Row 4: Ch 1 (does not count as st), turn, sc into same st, *ch 3, sc into next ch 3 space, 7 dc into next ch 3 space (this is a shell), sc into next ch 3 space, ch 3, sc into next ch 3 space* Repeat from *to.* After sc into last ch 3 space, ch 3 and sc into top of ch 3 from Row 3. You should have 2 ch 3 spaces before and after each 7 dc shell, except for the beginning and end of the row, which will have 1 ch 3 space.

Row 5: Ch 5 (counts as a dc and ch 2), turn, sc into next ch 3 space, *in the next 7 dc shell, dc into each dc with a ch 1 between each dc (7 dc with 6 ch 1s) . Sc into next ch 3 space, ch 3, sc into next ch 3 space.* Repeat from *to* After you’ve sc into the last ch 3 space, ch 2, dc into last sc from Row 4.

Row 6: Ch 1 (does not count as a st), turn, sc into same st. *In the ch 1 space of the next shell, 3 dc cluster. (Ch 3 picot, ch 2, 3 dc cluster in next ch 1 space of shell x 5 more times, so 6 3dc clusters with picots on top total in the shell), sc into next ch 3 space.* Repeat from *to.* Place last sc into the 3rd ch of Row 5s starting ch 5.

Cut thread with scissors, weave in any ends with tapestry needle.

Blocking:

At this point I would try to find time to block your edging. It will make your piece look very clean and crisp.

Grab a blocking board (or cardboard), pins, a bowl of water, and a towel.

Soak your crochet lace edging in the bowl of water for a minute or two. Gently pat dry on the towel.

Place on your blocking board and pin in a straight line. Place somewhere safe to dry, take the pins out after 1-2 days or until totally dry.

That’s all for this crochet lace edging! What do you think? I hope yours turns out to be lovely! 

Until next time!

Other Posts You May Like:
37 Crochet Lace Square Patterns

Hello everyone, today I have a list of 37 Crochet Lace Square Patterns that I think you’ll enjoy!

These patterns are the best crochet lace square ideas I could find from Pinterest.

Almost all of these are crochet diagrams/charts, if you don’t know how to read charts, there are many tutorials online for how to do so. A quick Google search will help you get started!

I find that a lot of these pretty doily patterns are just diagrams, which in my opinion is almost easier to read than written step by step instructions. 

You can use these crochet square doilies as framed artwork, table centerpieces, some are smaller squares so you could use multiple ones to create blankets or curtains. The possibilities are really endless!

For the following patterns, you’re going to want to use small crochet thread and a corresponding hook. I’m using size 10 crochet thread and a 1.65mm crochet hook, but feel free to use whatever you like. If you use a bigger size yarn and hook, your finished square will be bigger and vice versa, so just keep that in mind!

You’ll also want to block your crochet lace squares when you’re finished. It will look so much neater and less curly if you do this step. I like to soak mine in water and then pin it to a blocking board, but you can use a cardboard or pizza box in a pinch!

Alright let’s go ahead and get started on this list of 37 Crochet Lace Square Patterns!

Please note that some of the links in this post may be affiliate links. That means that if you click on these links and make a purchase, I may receive a commission at no extra cost to you. You can find more information about our disclosure policy here. Thank you for your support.

Related Posts:

Materials Needed:

#1 Gemstone Lace Blanket 

Click to learn the Gemstone Lace Blanket here.

The Gemstone Lace Blanket by The Lavender Chair, is a gorgeous lace square that can be made any size. To start, you’ll be working in the round, and then create a solid, circular center. Once that is complete, you’ll make a few lacy rounds and then crochet shells into the corner spaces. You’ll repeat the last 3 rows in order to keep growing your lace square.

#2 Sylvanweave Square 

Click to learn the Sylvanweave Square here.

The Sylvanweave Square, created by Draiguna, is a beautiful lace square pattern. This square takes a little bit of time to complete as it has 20 rounds, but it is so worth it! Draiguna also has two different borders you can choose to finish the square. I decided to go with the last border with the picot shells. 

#3 Floral Crochet Lace Square

Click to learn the Floral Crochet Lace Square here.

This is a very pretty crochet lace square diagram that will have you crocheting a series of leaves in each corner. This pattern will require you to double crochet 4 stitches together (to create the tips of the leaves) and you’ll need to be comfortable making 3 double crochet clusters for the second to last round.

#4 Pineapples and Leaves Crochet Square

Click to learn the Pineapples and Leaves Crochet Square here.

You’ll be crocheting a series of Pineapples and Leaves in this lace square diagram. There’s a label in the top right corner which hides some of the pattern (annoying I know), but if you look on the bottom you can tell what the pattern is asking you to do. This is a stunning crochet square and would be great to use as a little place mat or table decoration.

#5 Celtic Square Doily

Click to learn the Celtic Square Doily here.

The Celtic Square Doily pattern is brought to you by Handmade by Raine. This is a very unique piece, as you’ll be crocheting the middle part first, cutting your thread and then restarting on a different point. You’ll do that a few times in this project, even if you’re using one color like I did here. This is a very large square doily, and would be a wonderful centerpiece for a table.

#6 Crochet X Lace Square

Click to learn the Crochet X Lace Square here.

This crochet lace square has a giant X in the middle of it, surrounded by a shell stitch border. Start with a ch 8 and close it with a slip stitch. You’ll notice that you grow the middle of the X out and then start to taper as you get closer to the end.

#7 Lacy Square Diamonds

Click to learn the Lacy Square Diamonds here.

The Lacy Square Diamonds pattern is unique in this list. Instead of starting from the center, you’ll chain 43, turn and make mesh stitches across. At the end of the part in black, you’ll turn and crochet down and across all the sides to finish the border. The Lacy Square Diamonds pattern looks very pretty and rustic.  

#8 Pretty Crochet Square Pattern

Click to learn the Pretty Crochet Square Pattern here.

The Pretty Crochet Square Pattern is a short and simple 10 round doily. Use this pattern to make multiple squares and stitch them together to create tablecloths, lacy sweaters, or curtains.

#9 Square Lace Doily

Click to learn the Square Lace Doily here.

This square doily is simple, yet elegant. After round 5, you could easily adjust the size to suit your needs. Each of the opposite two sides mirror each other, so keep that in mind. I did find that if you’re not paying attention, it’s easy to repeat sides instead of switching. Half of the square is a mesh stitch and the other half is chains and picots.

#10 Delicate Lace Crochet Square

Click to learn the Delicate Lace Crochet Square here.

The Delicate Lace Crochet Square is probably one of the more “solid” of the lace squares in this list. It starts off as a circle and then transforms itself into a square shape. There’s also a diagram for how to connect multiple squares of this pattern together in order to get a seamless look.

#11 Small Crochet Lace Square Pattern

Click to learn the Small Crochet Lace Square Pattern here.

In this pattern, you’ll be creating many crochet clusters, giving your work a floral/feminine feel. You can work until round 12, join other squares together, and then create the border. Or you can simply do what I did and create one square (I just continued after round 12 without cutting). The little triangle shapes in the diagram indicate a 3 chain picot.

#12 Japanese Crochet Square 

Click to learn the Japanese Crochet Square here.

In this square doily diagram, you will start by making a circular shape and then adding the four corners with double treble crochets (that’s a yarn over three times!). The small square is then framed with a double crochet mesh stitch pattern, followed by a floral looking lace stitch, with the final frame of the crochet square being 4 rounds of a ch4 mesh stitch. 

This was a fun one to make, I sort of enjoy longer crochet doily patterns, as this one is a total of 20 rounds. 

#13 Flowers and Leaves Square Pattern

Click to learn the Flowers and Leaves Square Pattern here.

The Flowers and Leaves Square Pattern is another floral doily. I do love the doilies that have mesh borders, I think the lace effect is beautiful. This pattern reminds me of two different flowers, one looked like tulips and the other in the corners looks like a dandelion to me. Very cool!

#14 Big X Square Doily

Click to learn the Big X Square Doily here.

The Big X Square Doily is a large pattern that shows off the shape of an X in the middle. Make sure to pay close attention to the beginning center, as I got thrown off by the corners in rounds 2 and 3, but after that it works up beautifully and it looks so intricate and gorgeous. 

#15 Crochet Square with Flowers Motif 1

Click to learn the Crochet Square with Flowers Motif 1 here.

This motif is a lace square with cute, six petaled flowers throughout. Unfortunately this pattern does not indicate a starting point or where to join. I found it easiest to start my starting chain near a corner. You’ll definitely need to block this square when you’re finished.

#16 Alternating Leaves Square

Click to learn the Alternating Leaves Square here.

This is a neat square where you will be crocheting alternating leaves throughout. What’s cool about this pattern is that you could technically make it as big as you want. 

#17 Crochet Clusters Square

Click to learn the Crochet Clusters Square here.

You’ll crochet 5 double crochet clusters in a heart shaped pattern or maybe it’s a four leaf clover, I guess it could be seen either way! You’ll start with 8 single crochets separated by ch 1s inside a magic ring.

#18 Simple Crochet Flower Square Pattern

Click to learn the Simple Crochet Flower Square here.

This simple crochet flower square shows off an eight petaled flower with leaves in each corner. There are 16 single crochets in a magic ring. Unfortunately this diagram doesn’t show starting chains or joins. I would just chain 1 for single crochets and do a chain 3 if I needed to start with a double crochet. All of the chain mesh stitches surrounding the flower should all be mostly ch 7s.

#19 Easy Lace Square

Click to learn the Easy Lace Square here.

This easy lace square is short, sweet and simple. The chain 3s and single crochets break up the double crochets to form a cute diamond shape. This would be a great square pattern to use in order to sew many of them together to create a larger piece.

#20 Sunshine Square

Click to learn the Sunshine Square here.

I’m calling this one the Sunshine Square as the circular center reminds me of the sun’s rays! You’ll create the center of the sun by creating 3 double crochet clusters, followed by a few rows of chains, fans, and 5 treble crochets made together. The rest is a series of clusters, fans, and chains. I suggest blocking this piece after finishing as well.

#21 JP Crochet Square Doily 

Click to learn the JP Crochet Square Doily here.

This free crochet doily is brought to you by JPCrochet. This square will have you crocheting 3 double crochets together, sprinkled throughout with most of the chains being a series of chain 5s. Make sure you pay attention to the number of chains you have as it’s easy to skip a chain or accidentally add an extra.

#22 Pineapple Flower Square

Click to learn the Pineapple Flower Square here.

The Pineapple Flower Square displays a beautiful 8 petaled flower motif using a pineapple effect. This is a fairly large square, maxing out at 22 rounds. 

#23 Daisy Lace Square

Click to learn the Daisy Lace Square here.

The Daisy Lace Square is a whopping 28 rounds long. This pattern shows off a total of 8 flowers in the corners of the square, with a mesh border. You’ll need to be able to crochet clusters as well as decreasing up to 6 stitches at a time for the tips of the petals. It’s a little hard to see the beginning center, but start with a chain 8, join to form a circle and then there are a total of 16 single crochets inside the circle for round 2. After that, it’s easier to see what is happening.

#24 Sun’s Rays Crochet Square

Click to learn the Sun’s Rays Crochet Square here.

This is a very unique way to crochet a lacy square. You’ll have to cut your thread twice, but the diagonal mesh stitches remind me of the sun’s rays. You’ll definitely want to block with square when you’re done. 

#25 Lunar Blossom Square Lace Motif

Click to learn the Lunar Blossom Square Lace Motif here.

Another unique crochet square, the Lunar Blossom Square Lace Motif is a pattern by Ellej.org. It’s a tiny square that displays a flower in the bottom corner and then grows outward. She has a few examples of how you can use multiple squares for crochet clothing.

#26 Crochet Four Square Pineapples 

Click to learn the Crochet Four Square Pineapples here. 

Okay so this was a tricky pattern, not going to lie. You start from the middle and work your way out, and then after you finish the 7th round, you’ll cut your thread and work on each corner individually, this creates a pineapple effect with a 4 double crochet border surrounding each square.

#27 Circular Lace Square

Click to learn the Circular Lace Square here.

This square has a lacy circle motif right in the center, surrounded by V stitches, and finished with a V stitch and picot combo border.

#28 Artistic Crochet Square 

Click to learn the Artistic Crochet Square here.

I thought the two lacy corners in this square gave it a very artsy look. It works up quickly and you can make multiple squares to create fabric for anything you’d like!

#29 Cross Square 

Click to learn the Cross Square here.

This pattern has another cross motif in it. Start with a magic ring, ch 3, and make 15 double crochet. Place 2 double crochet in each stitch to grow the center and then the chart is clear from there. You’ll need to be able to double crochet 2 and 3 together, as this helps create the tips of the cross. 

#30 Diamond Pineapple Square

Click to learn the Diamond Pineapple Square here.

This was a great pineapple doily to make. The pineapples are surrounded by a double crochet border, and that border creates a diamond effect. You’ll need to make a magic ring to start this pattern. 

#31 Pinwheel Lace Square

Click to learn the Pinwheel Lace Square here.

The Pinwheel Lace Square is a whimsical little doily. It’s only 13 rounds long and the pinwheel effect is really cool! I definitely recommend blocking this doily once it’s finished.

#32 Stained Glass Square

Click to learn the Stained Glass Square here.

This is a large crochet square doily at 33 rounds long. The center design reminds me a lot of how a stained glass window in a church looks. Ch 7, join to form a ring, make 12 single crochets in the ring and then you can go from there.

#33 Pretty Shell Corners Square

Click to learn the Pretty Shell Corners Square here.

The Pretty Shell Corners Square is a simple, yet elegant doily pattern. In the corners of the square, you’ll be making a sort of shell or fan effect with a mesh on the sides. The border is also an intricate shell pattern built around a triangular mesh. 

Ch 6. Sl st to form a circle, ch 3 and place 2 more double crochet. Make 3 more groups of 3 double crochets separated by ch 2s and then join. 

Sometimes it’s hard to see the center of the crochet diagrams! Hopefully that helps.

#34 Simple Filet Crochet Square

Click to learn the Simple Filet Crochet Square here.

I really liked this square doily because you’re using Filet crochet to make the center until round 6. At that round you’ll start going around the square instead of back and forth, this might be tricky for some, but the diagram does a really good job showing where to place your stitches. 

It’s also a sort of mindless piece until you get to the border (which is great for me!). The border is a fan composed of 3 double crochet clusters and chains.

#35 Lacy Hearts Square Doily

Click to learn the Lacy Hearts Square Doily here.

The Lacy Hearts Square Doily shows off 4 heart shapes in the center and then a variety of different stitch combinations with a cute picot border to finish. I noticed that on round 7 the joins don’t seem to line up, so you can either cut your yarn and place it where the diagram is showing to start or you can be like me and wing it and continue from the original joins. 

#36 Wheat Square Motif

Click to learn the Wheat Square Motif here.

This square doily is pretty neat. You start in the corner and go back and forth instead of around. You’ll start to see a design that reminds me of Wheat growing. Starting at round 13, you’ll need to slip stitch to get to the starting point or you can simply cut your yarn and move. 

To start, you’ll ch 4 and place a double crochet into the first ch made, ch 3, and place 2 more double crochet into the same space.

This is a smaller square, so making multiples of these and sewing them together would make a lovely table cloth or even a curtain.

#37 Little Crowns Square

Click to learn the Little Crowns Square here.

This crochet square doily is embedded with little crown shapes throughout. The Crowns are made by single crocheting into a space, ch 3, 4 treble crochets, ch 3 and then placing another single crochet, all in the same space.

And that’s it for this list of 37 Crochet Lace Square Patterns! I hope you were able to find a pattern that is beautiful and you enjoyed making. I enjoyed crocheting all of these myself and I hope you do too!

Until next time!

Other Posts You May Like: