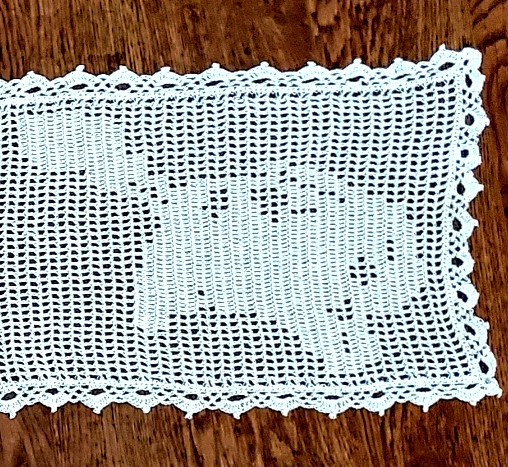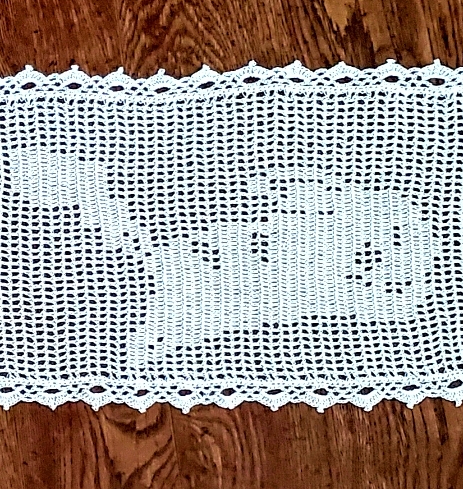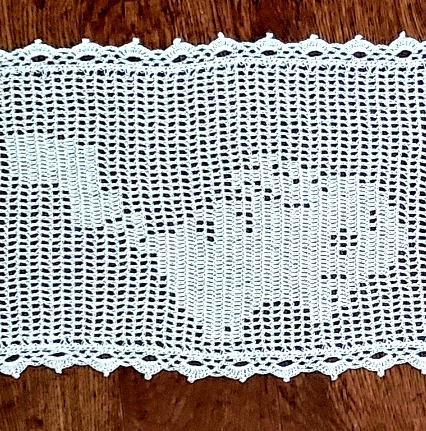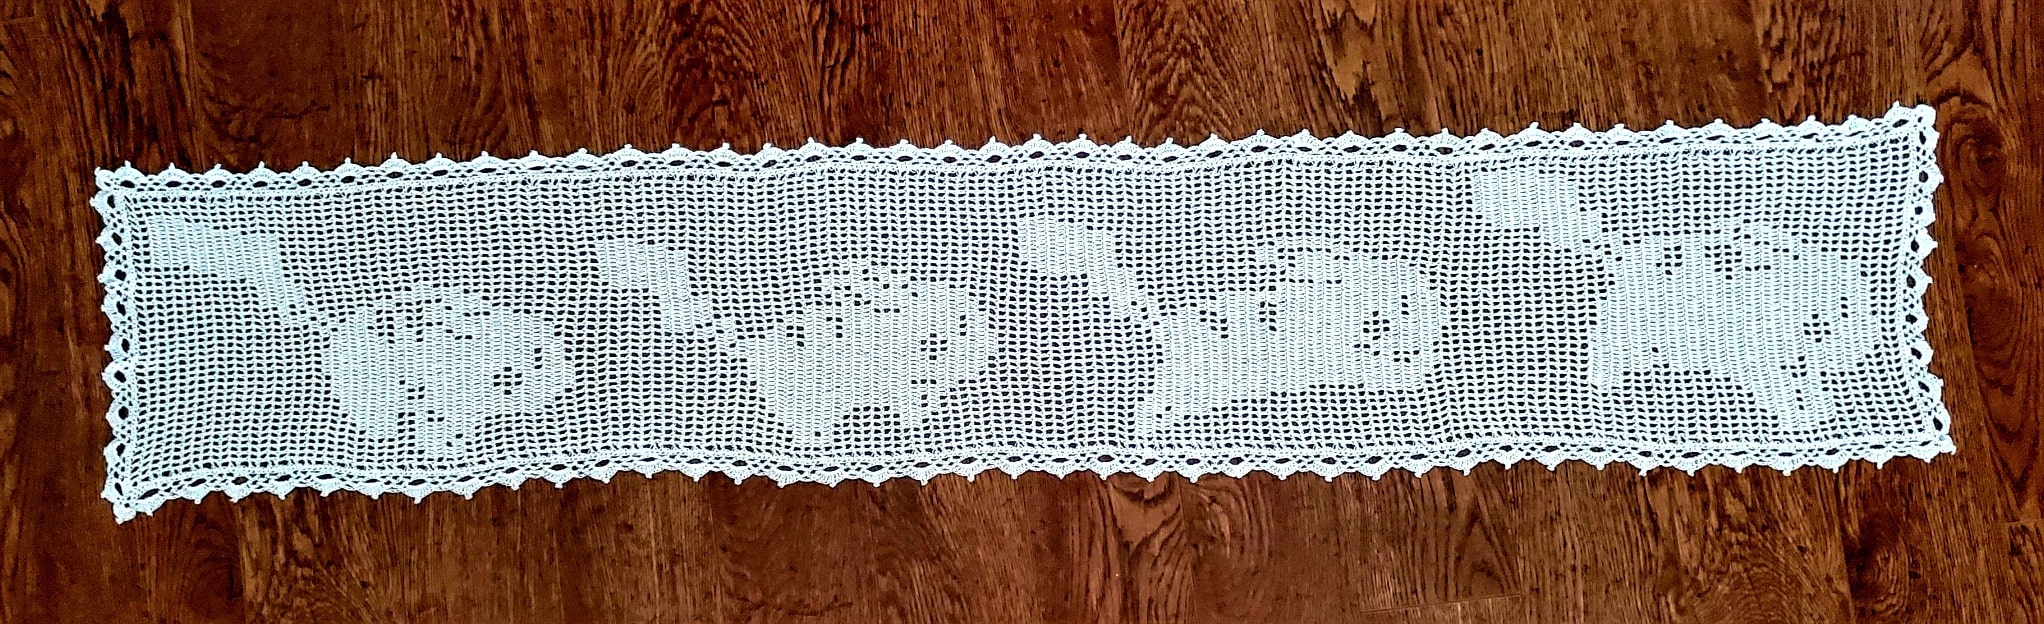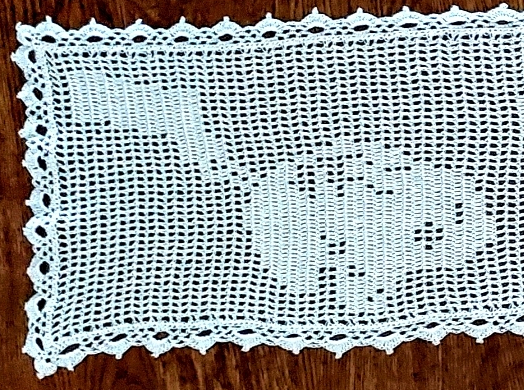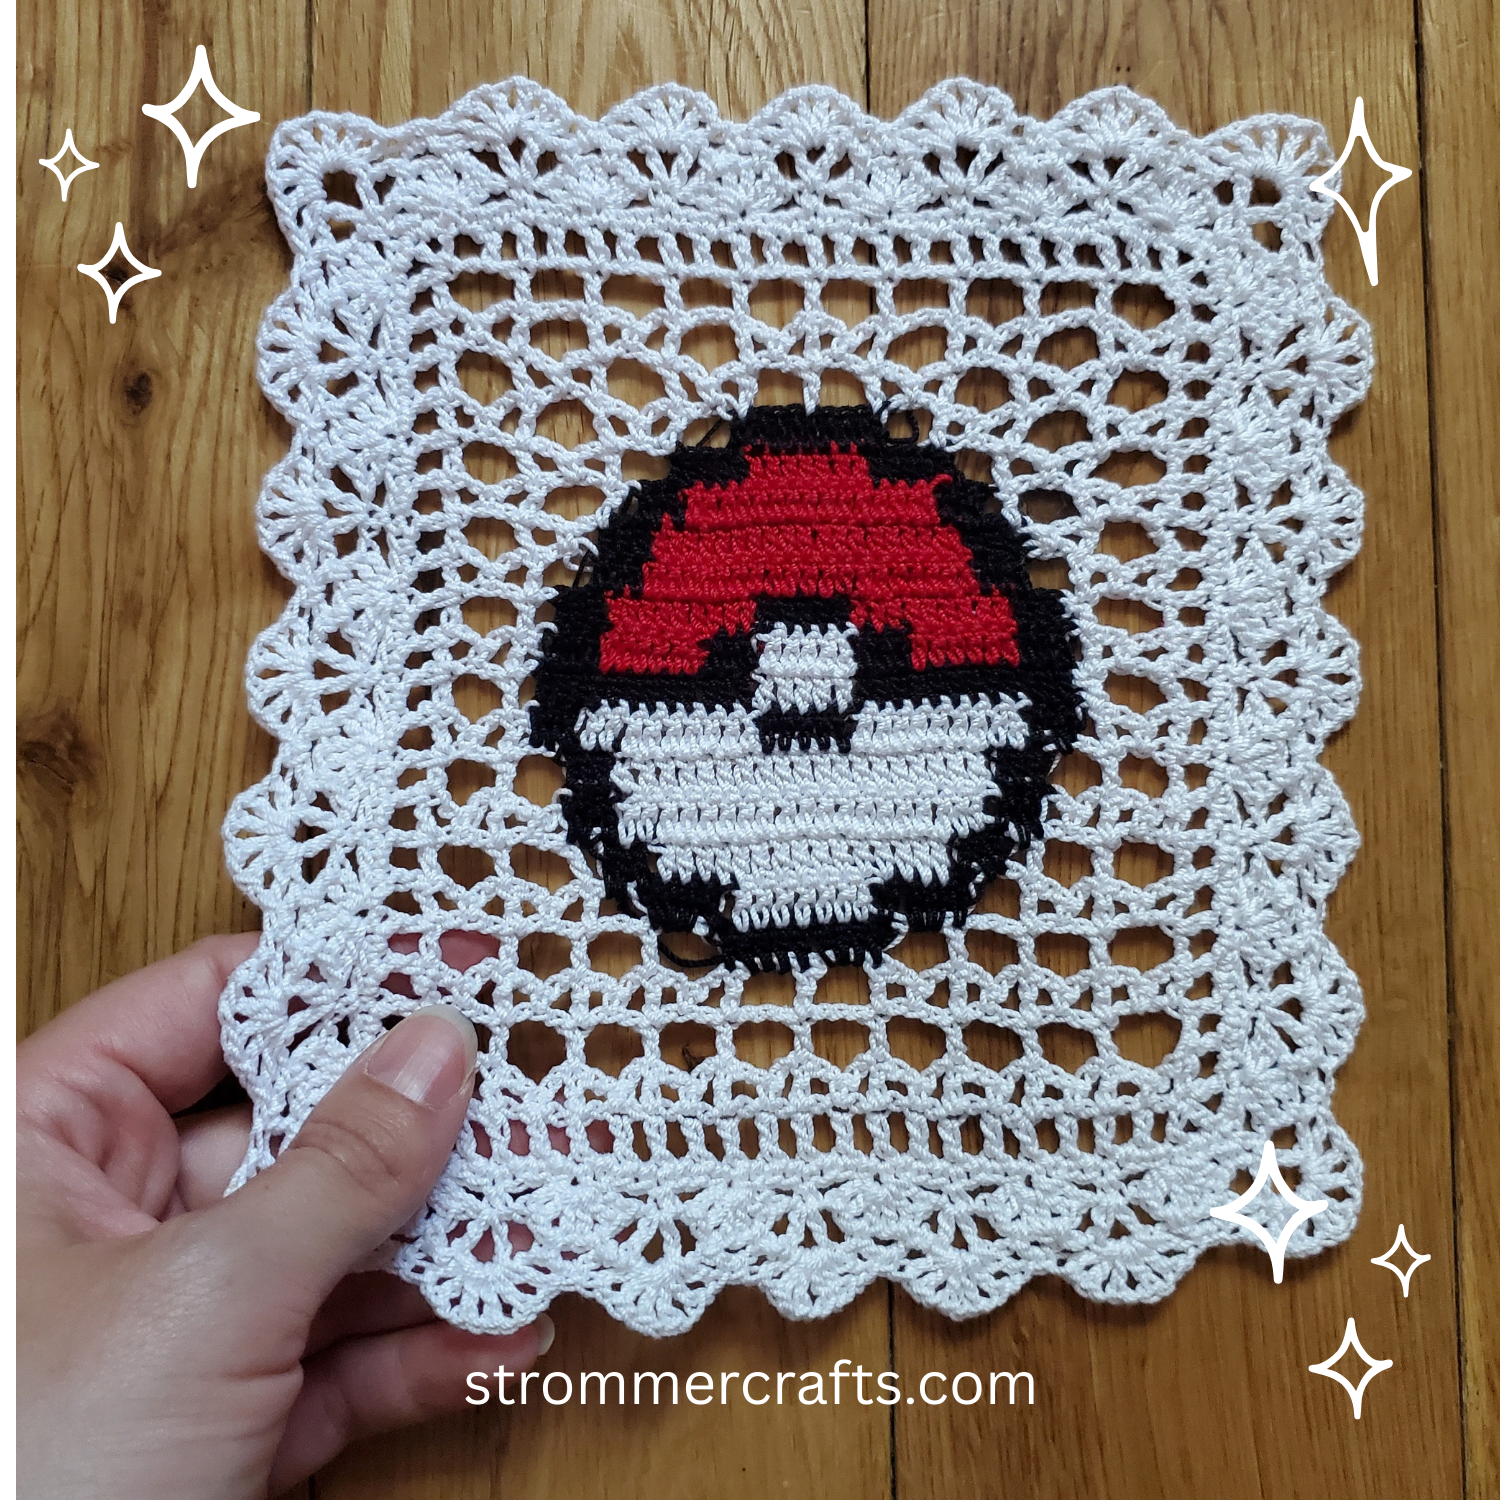
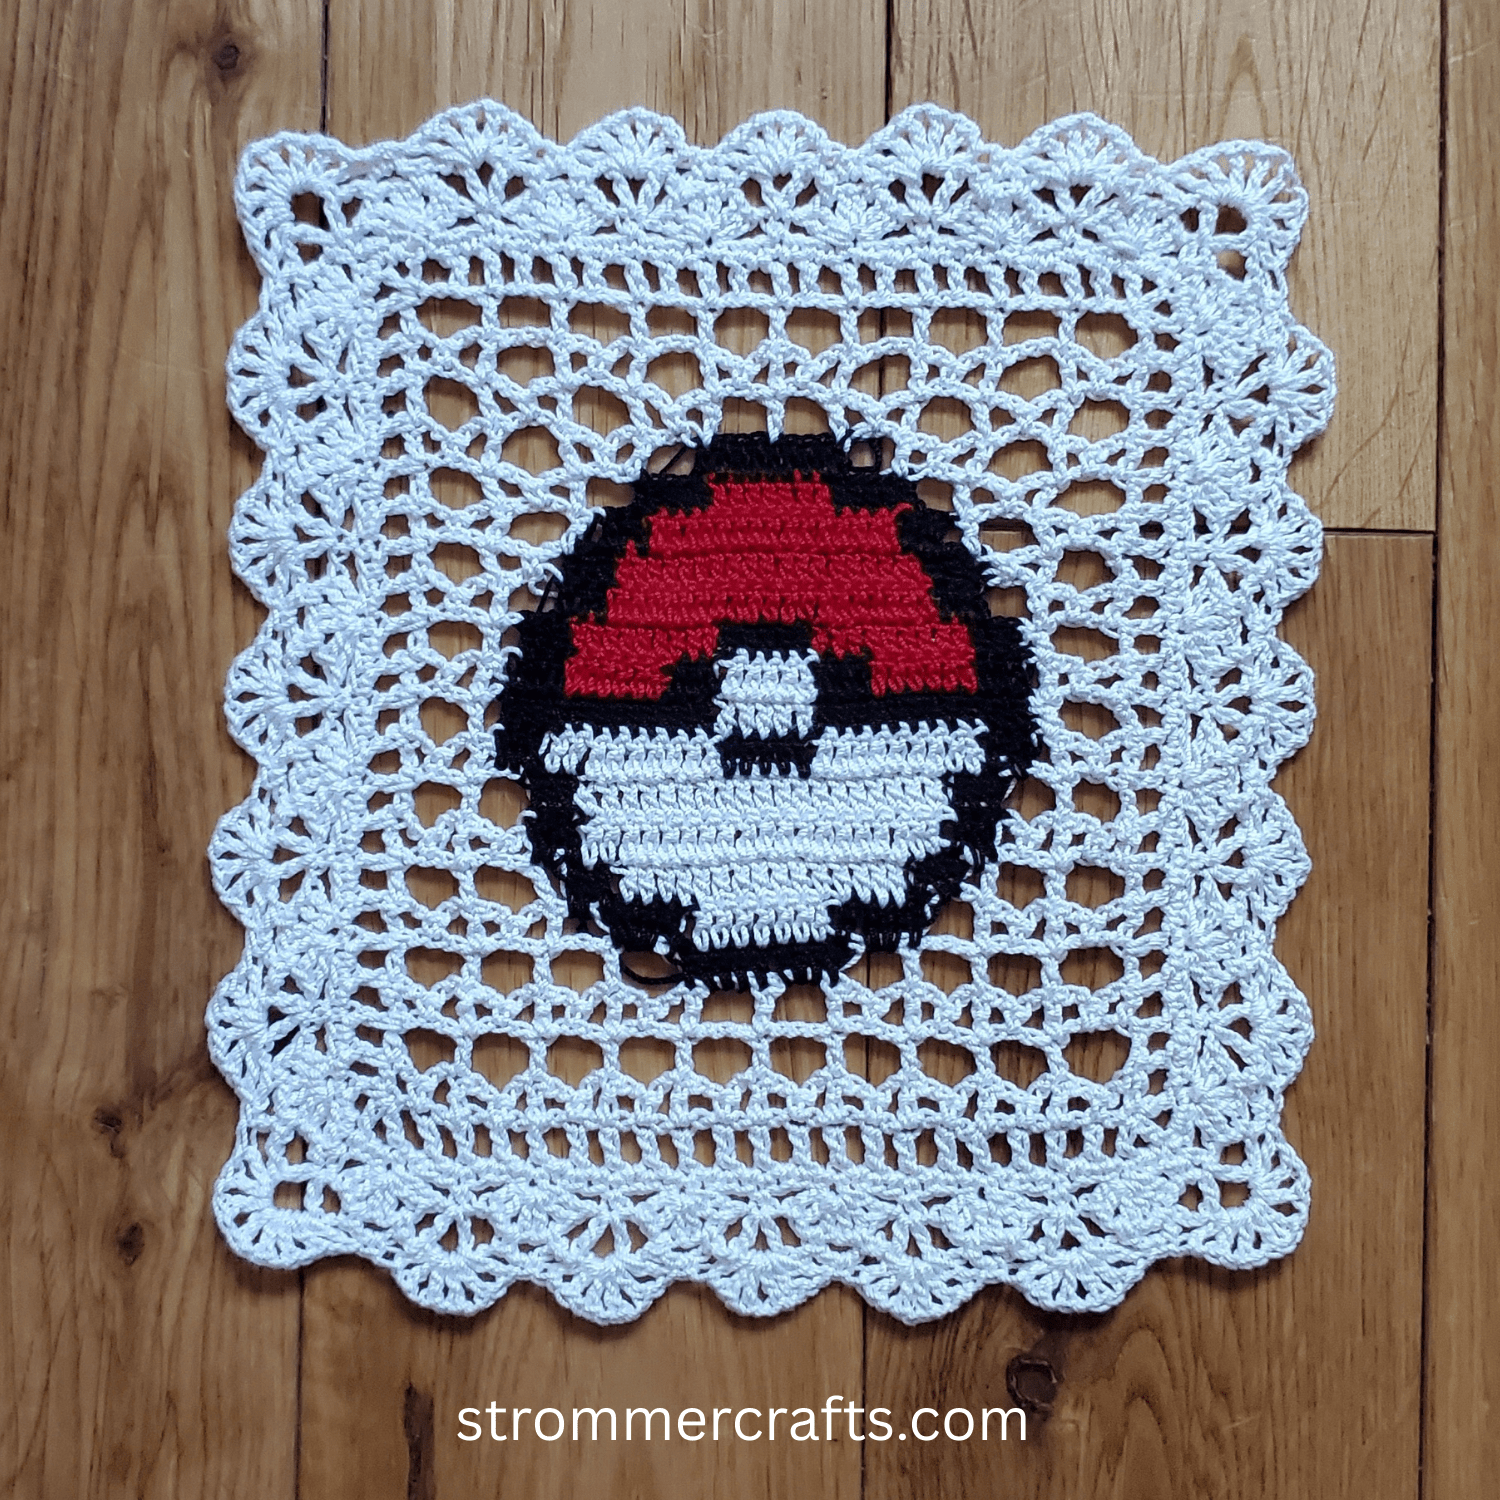
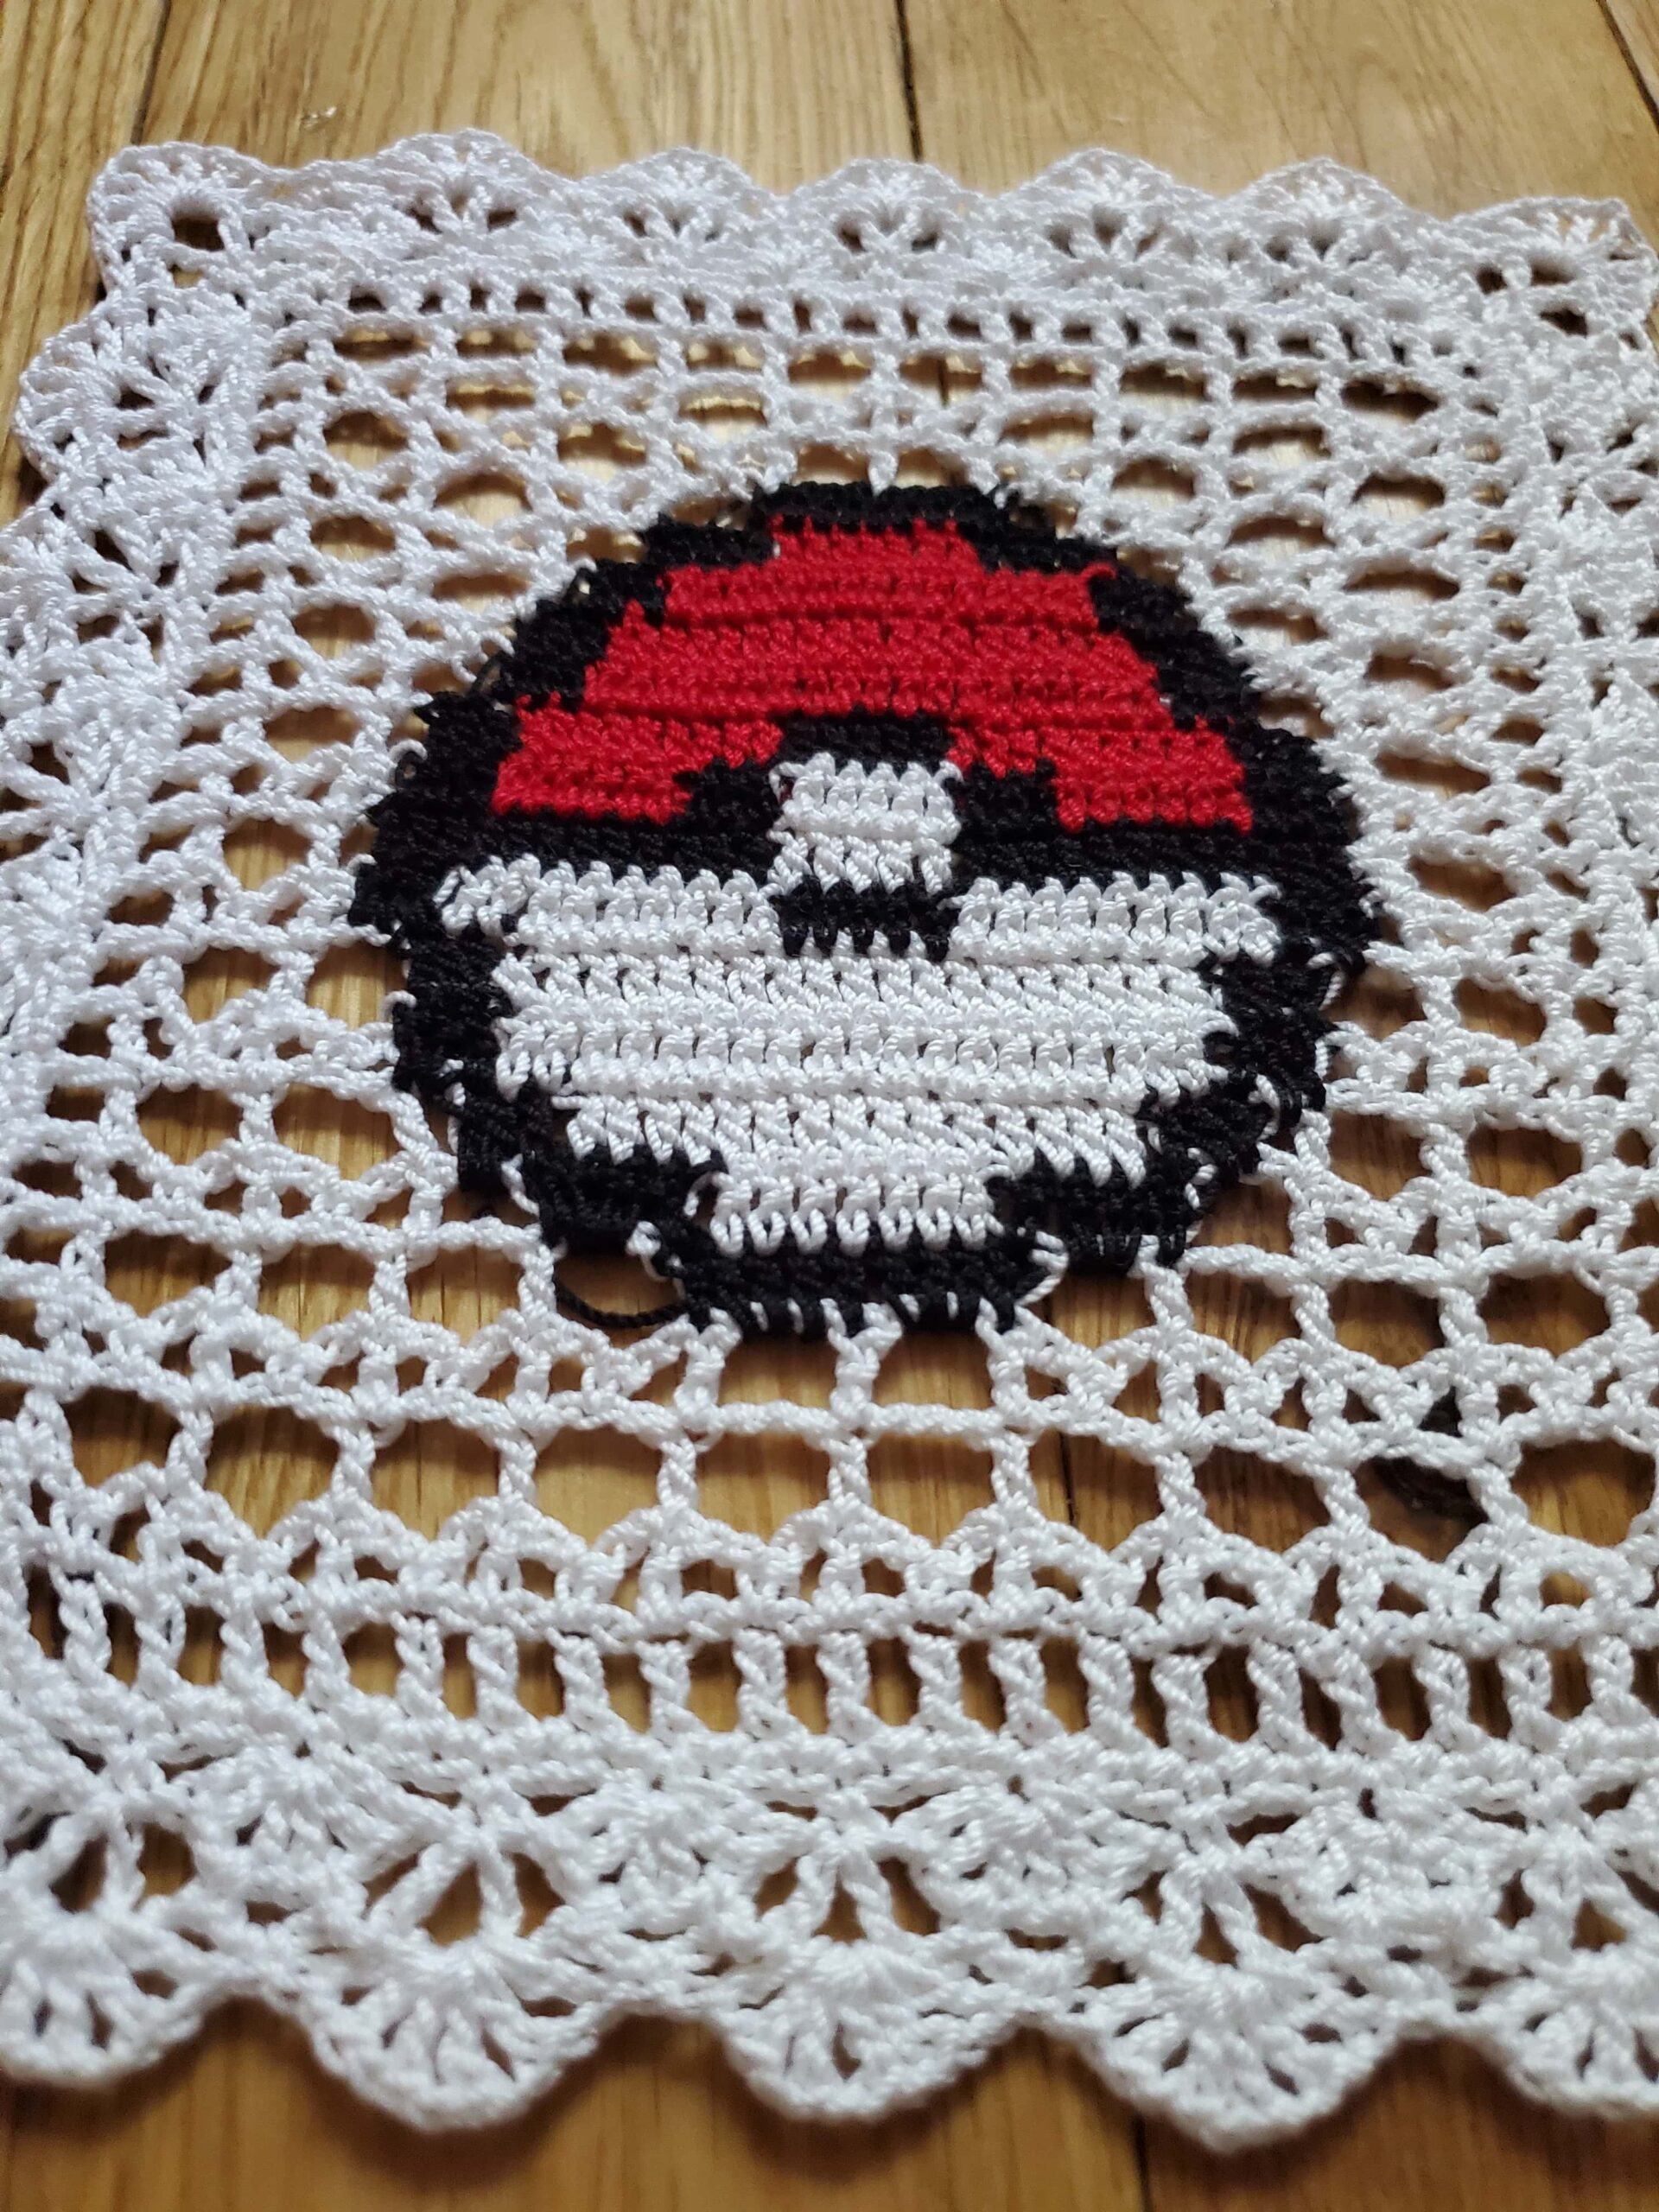
Breathtakingly Nostalgic Crochet Pokeball Doily
Hello everyone! Today I have made a Breathtakingly Nostalgic Crochet Pokeball Doily to share with you.
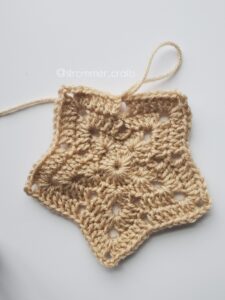
I’ve been inspired to make doilies based off of some of my favorite video games growing up. This includes my Crochet Legend of Zelda Triforce Doily and my Crochet Animal Crossing Doily!
I still remember the very first Pokemon game I played was Pokemon Ruby. I picked Mudkip as my starter and named him Bubbles. I loved that little game…but surprisingly with how many hours I put in, I never caught a dang shiny Pokemon :(.
Anyways…
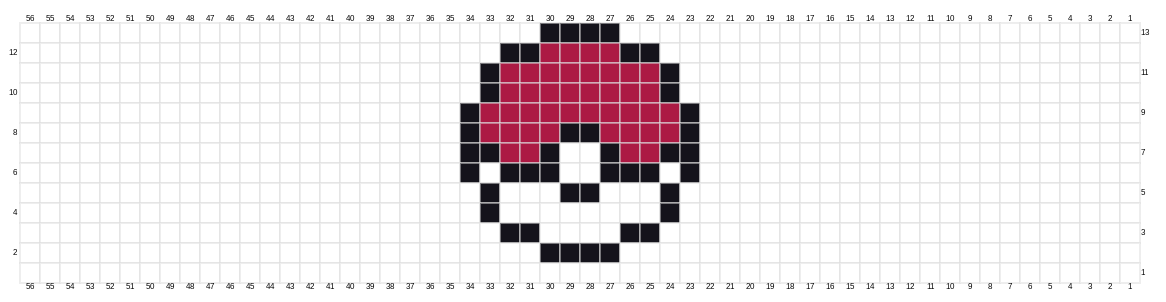
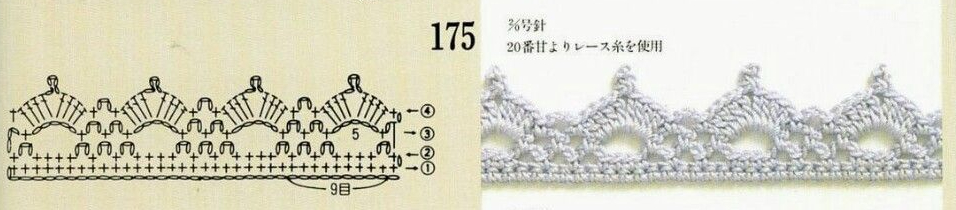
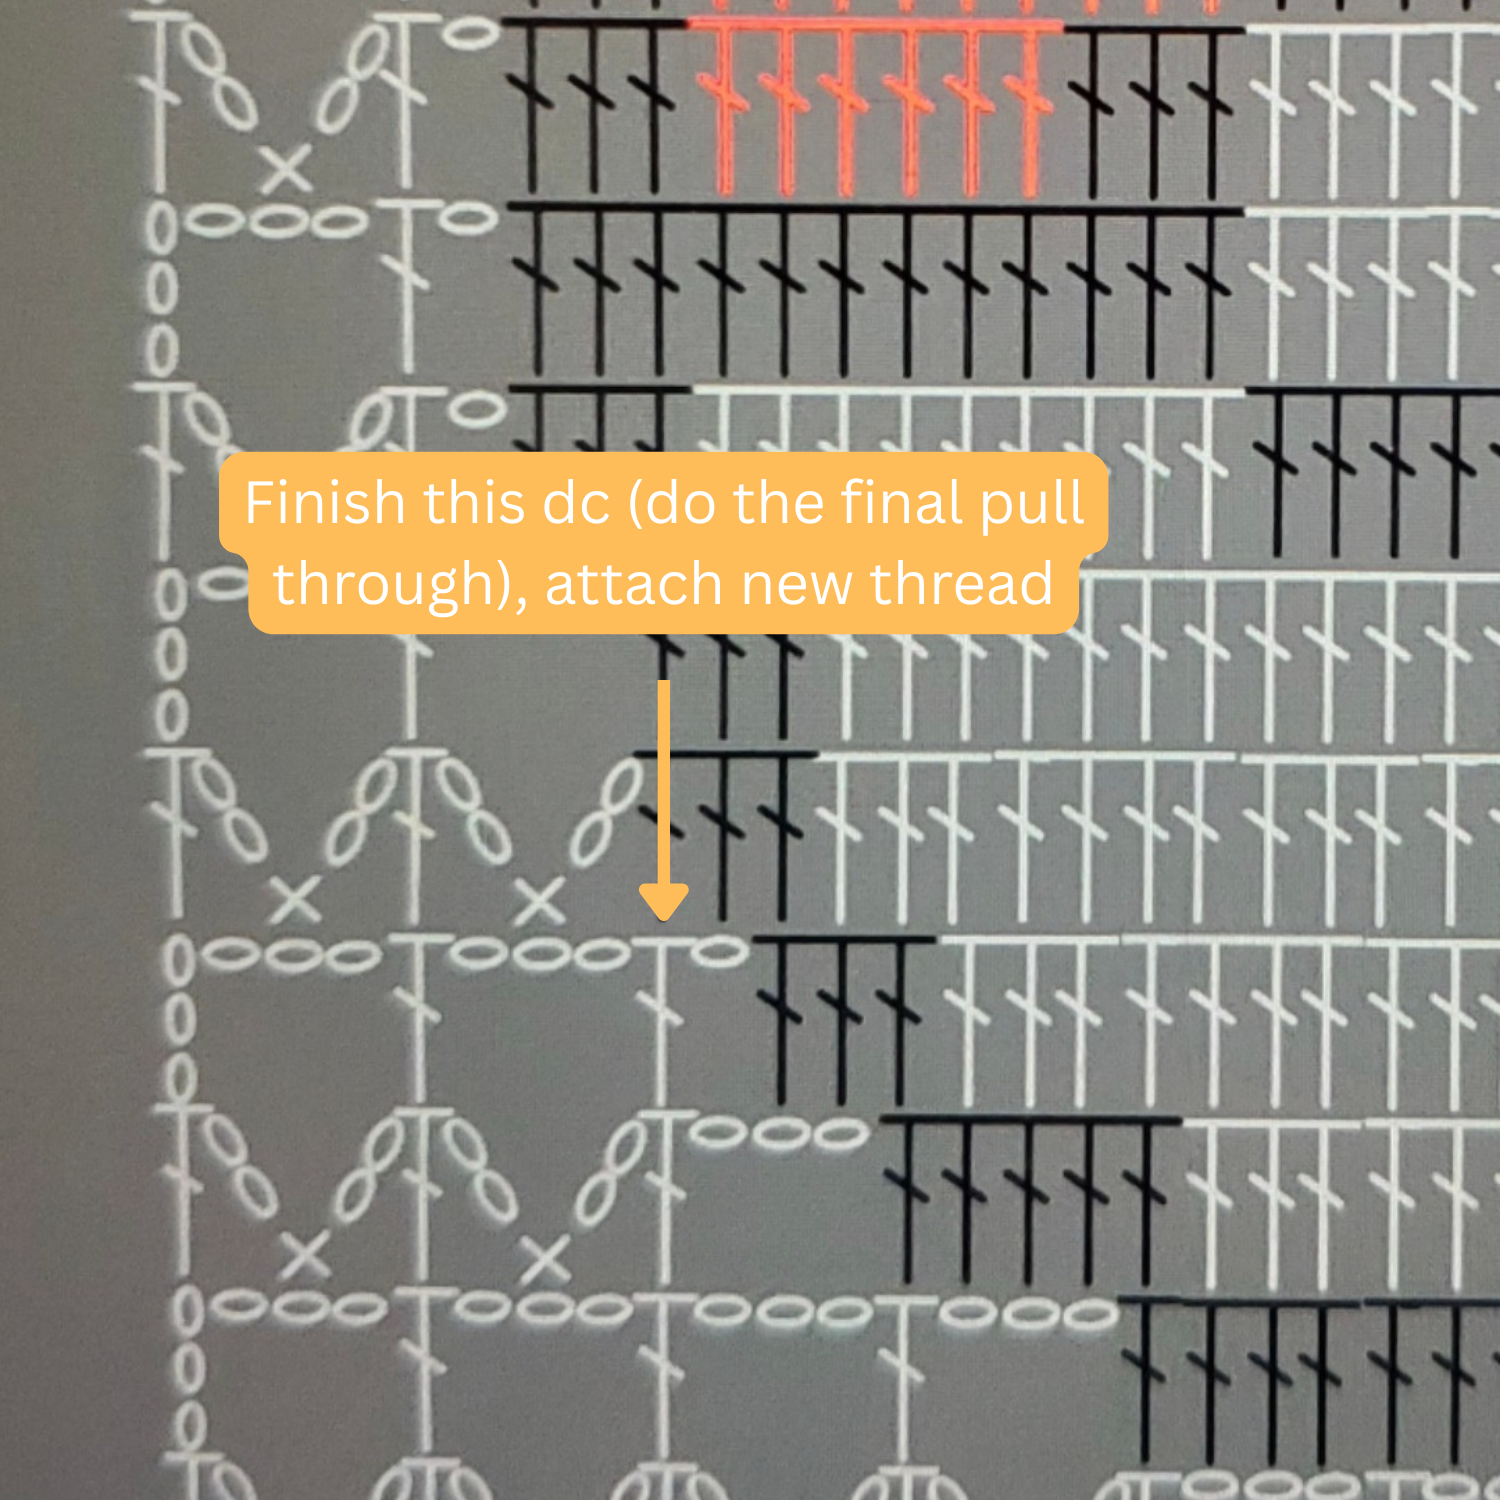
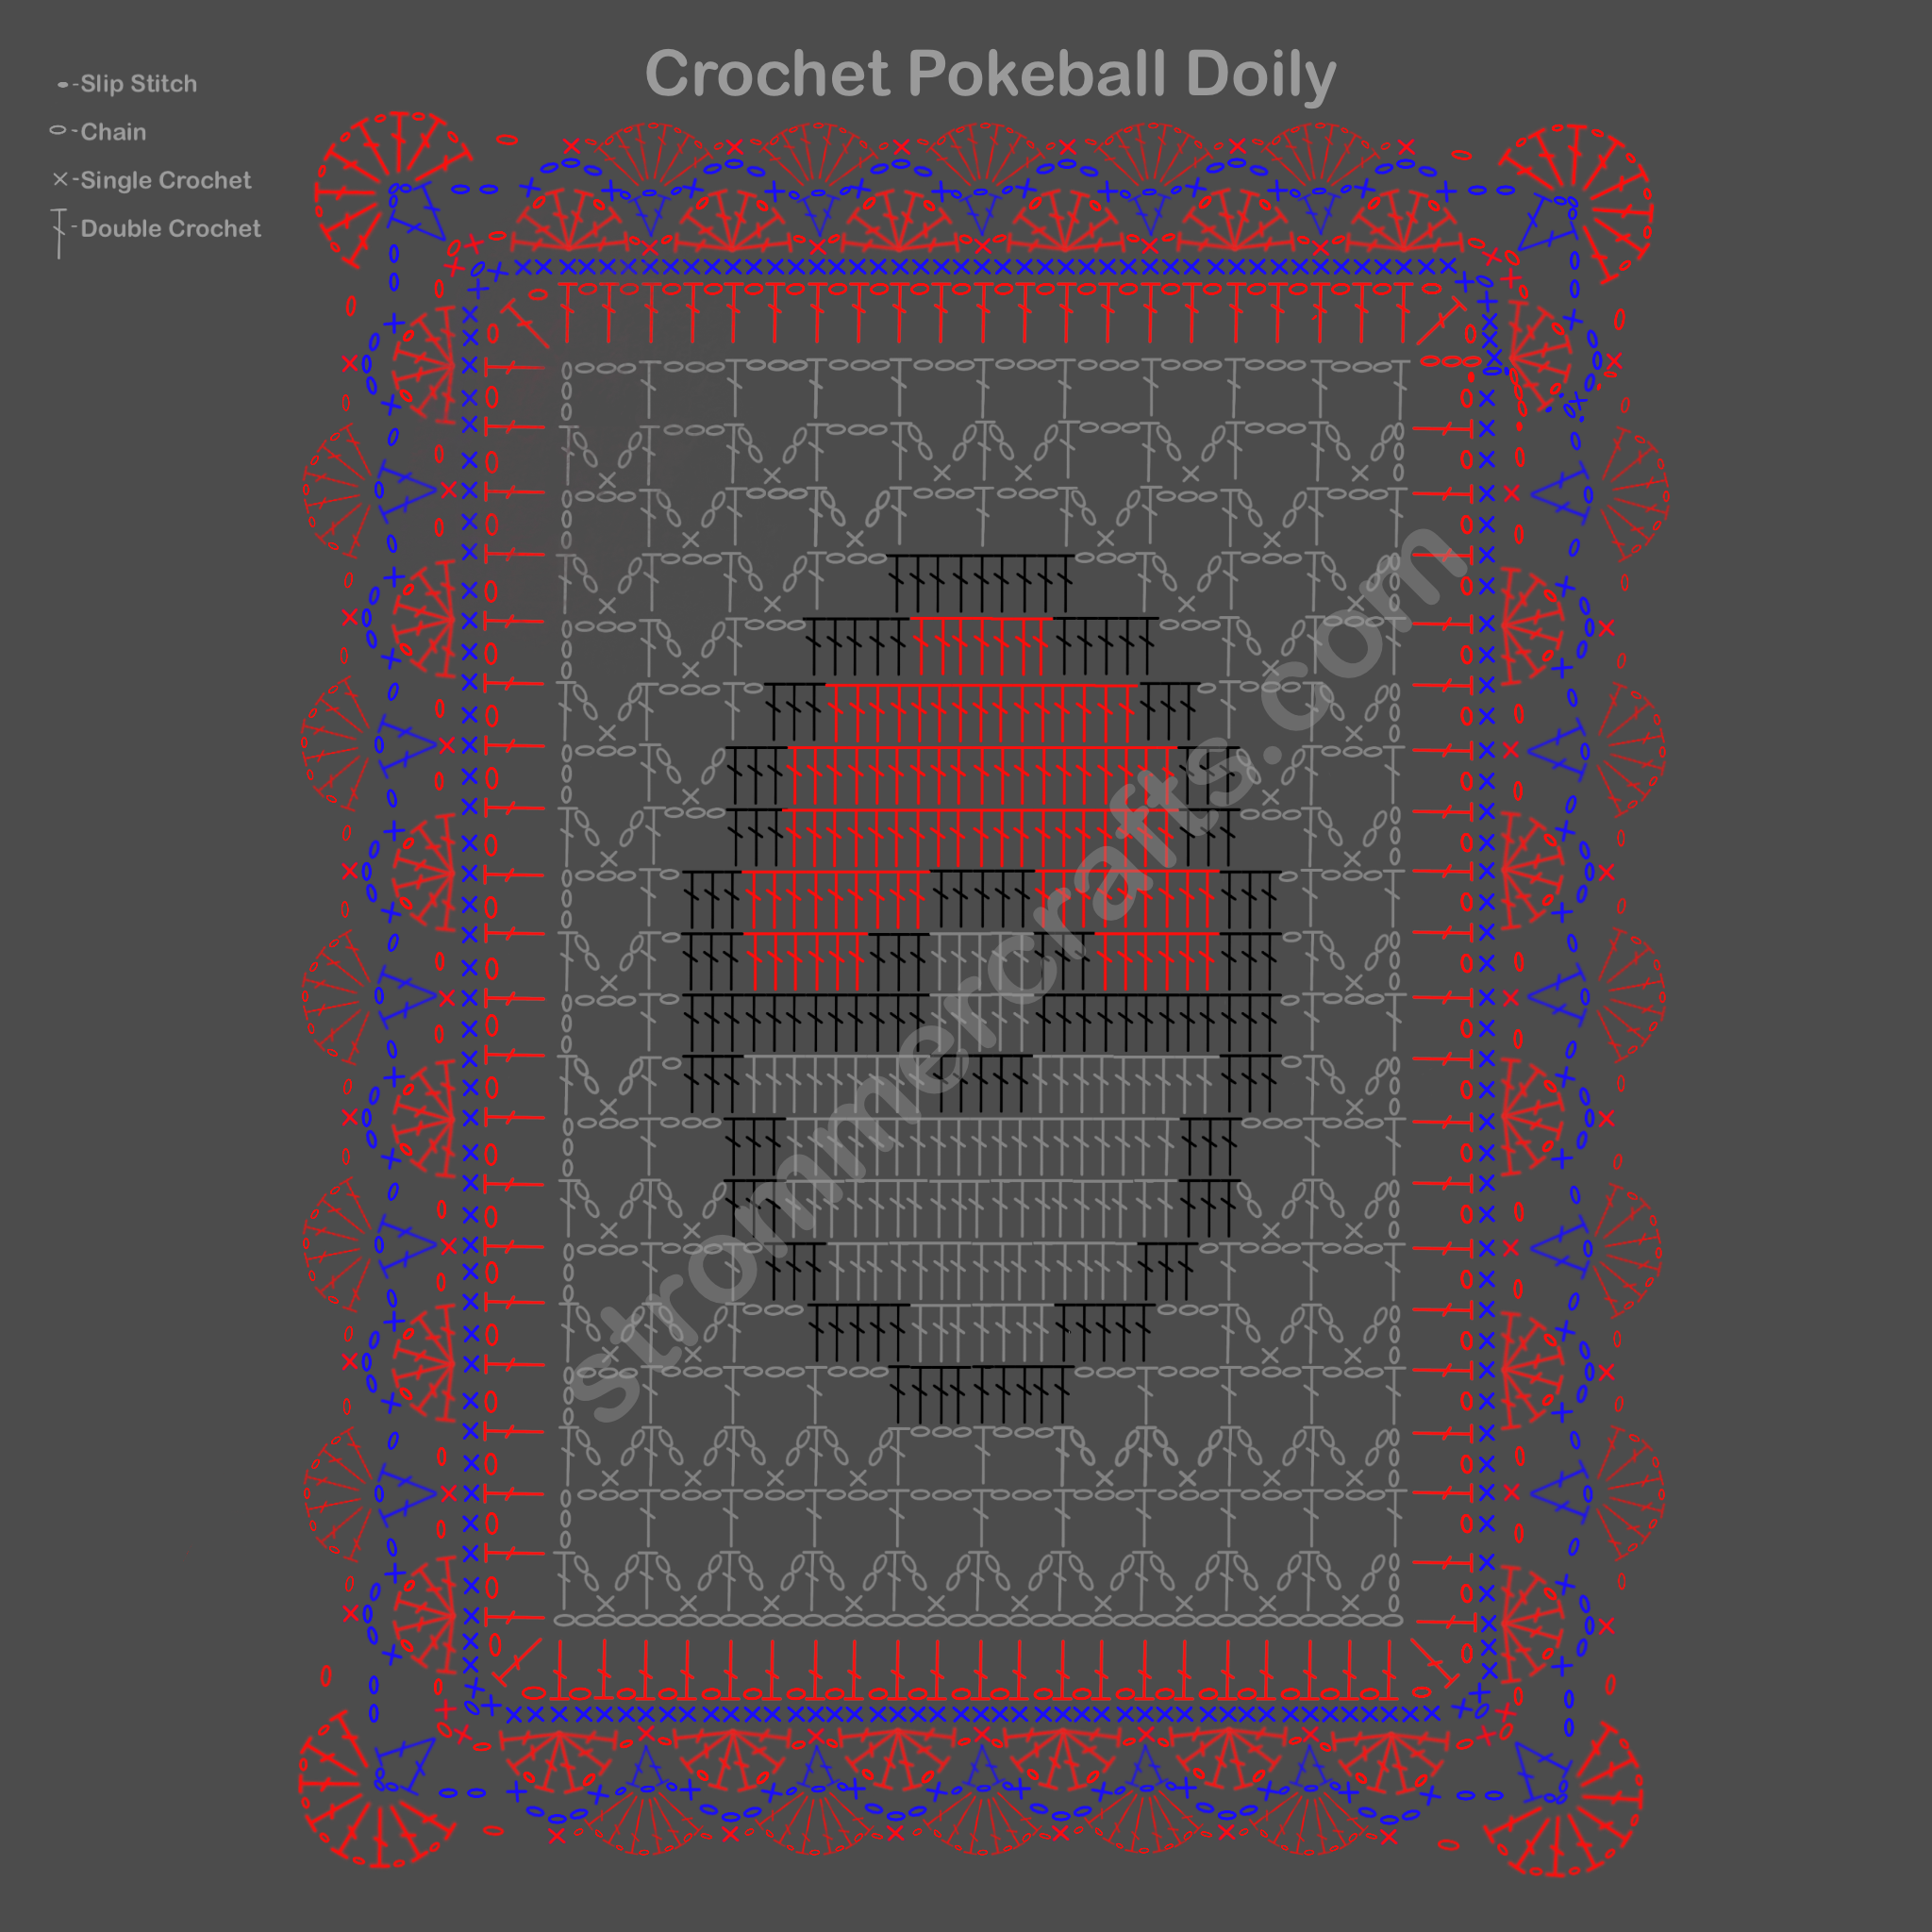
This is one of my more complex designs, so I drew up a diagram to help you visualize the pattern better.
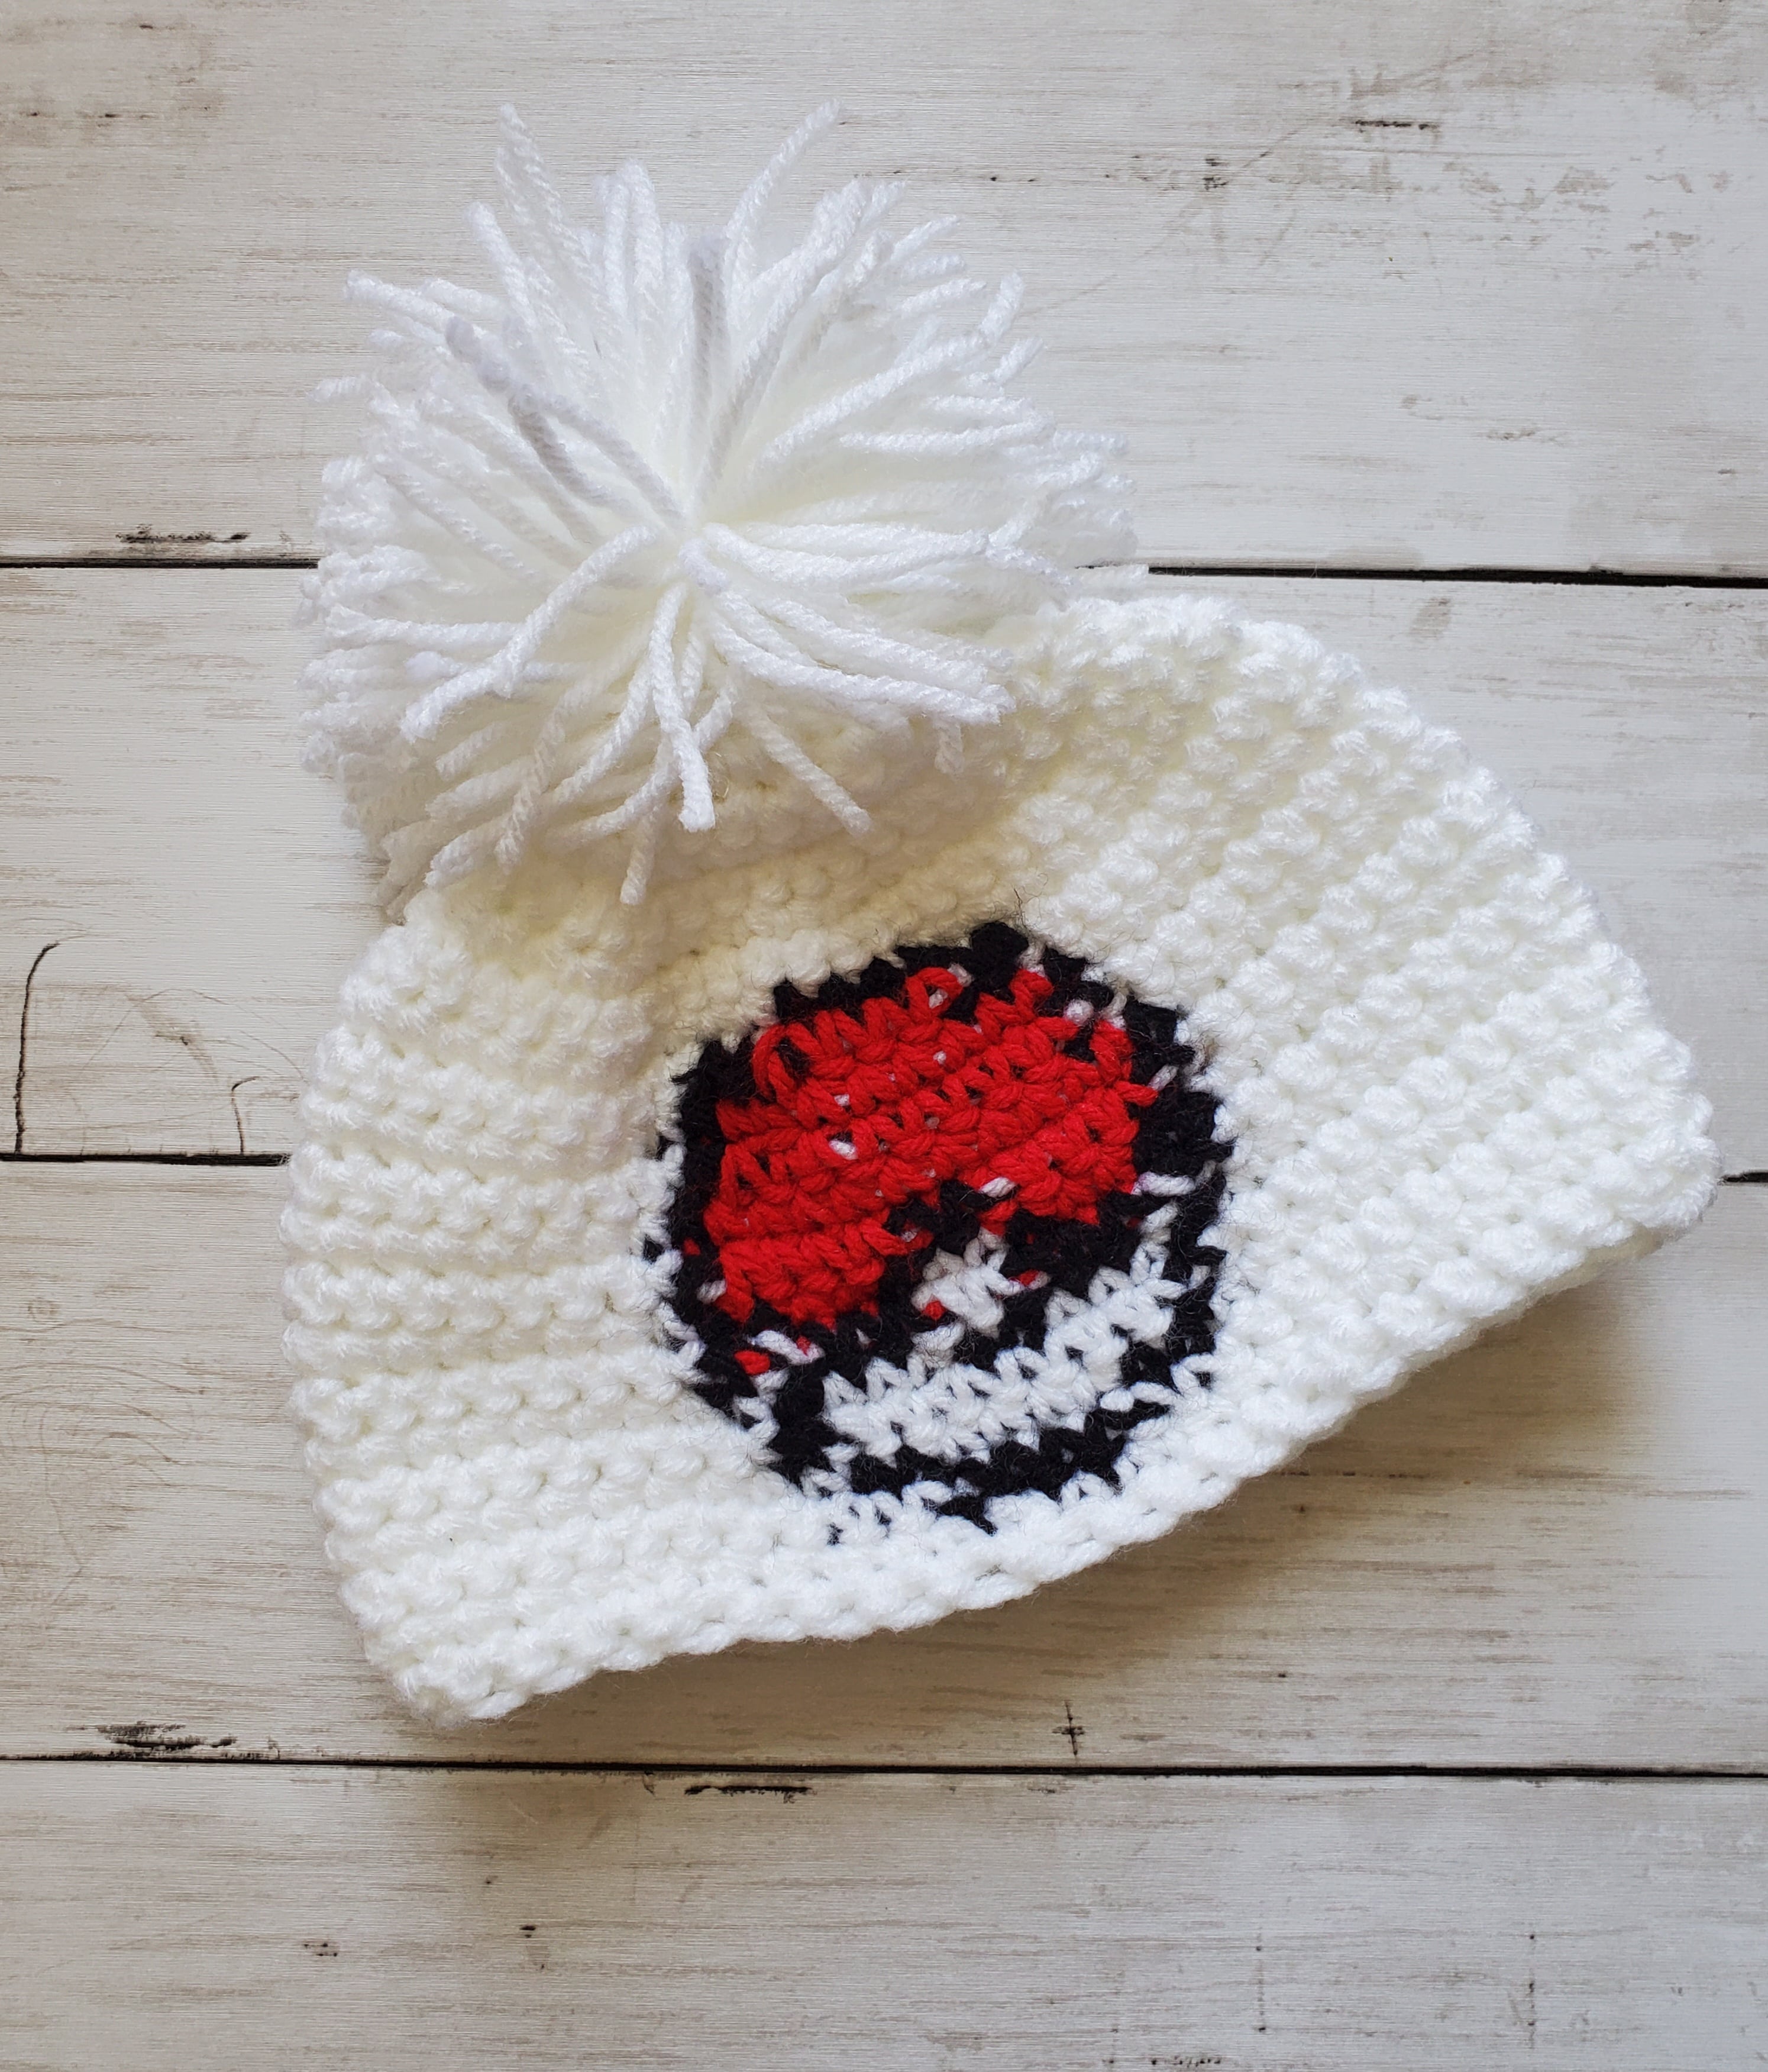
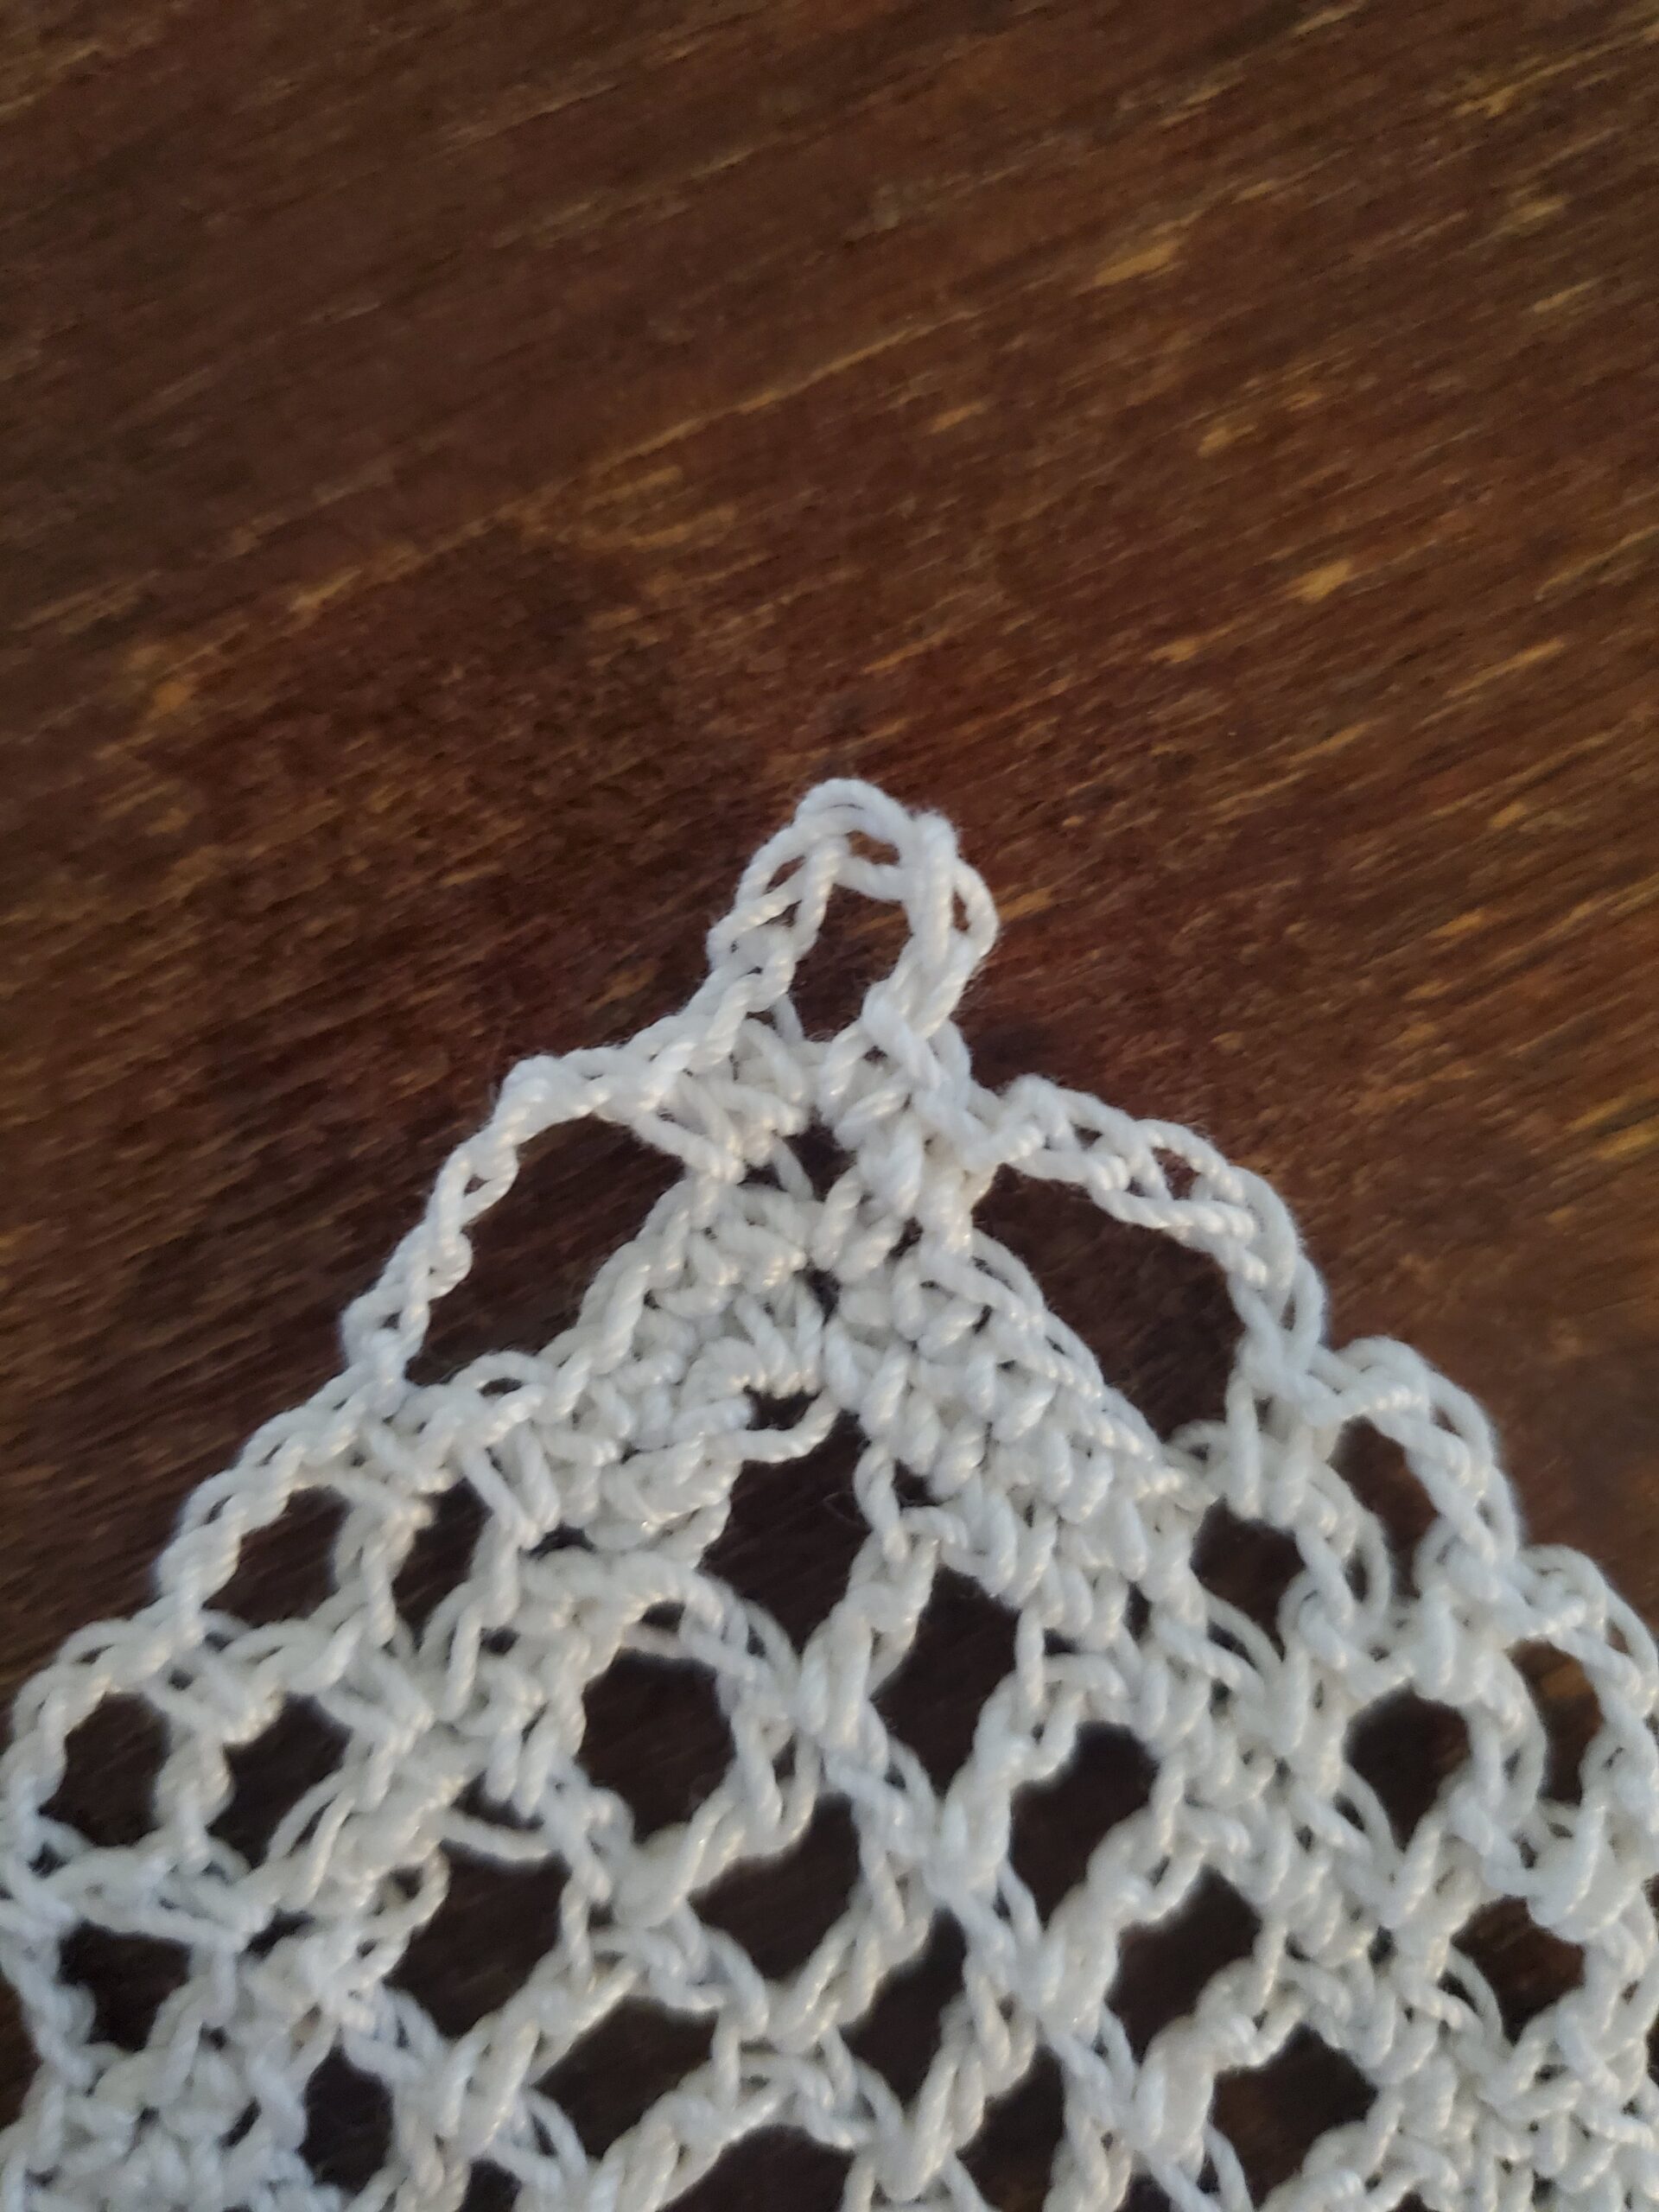
I am using a new filet crochet technique in this pattern, to make it appear a little more delicate and lacy. I think it also helps the Pokeball “pop” out more so you can see it better.
We will be coloring changing threads in this Crochet Pokeball Doily pattern. I highly suggest that you feel comfortable doing color changes with bigger yarn sizes before trying it with thread. But I understand if you want to just go for it and see what happens!
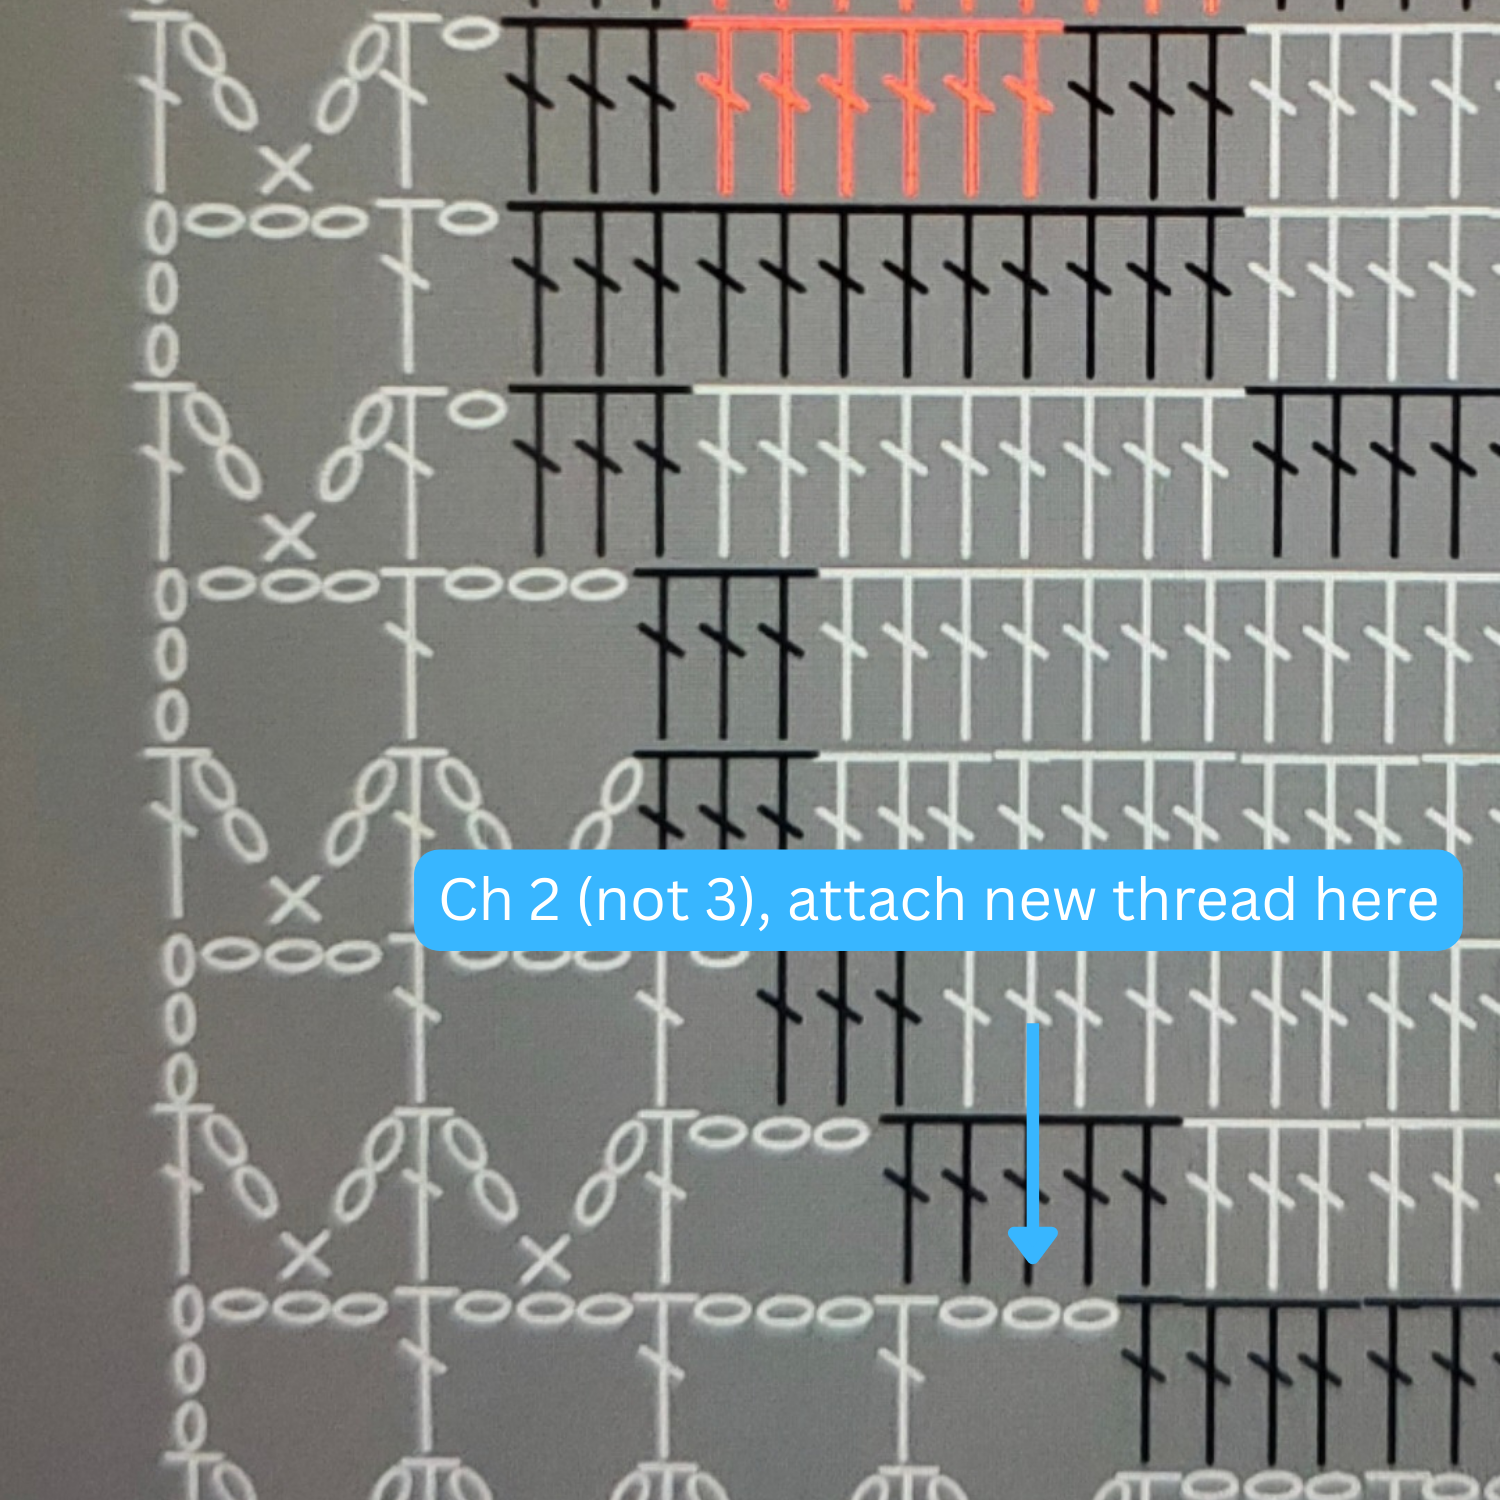
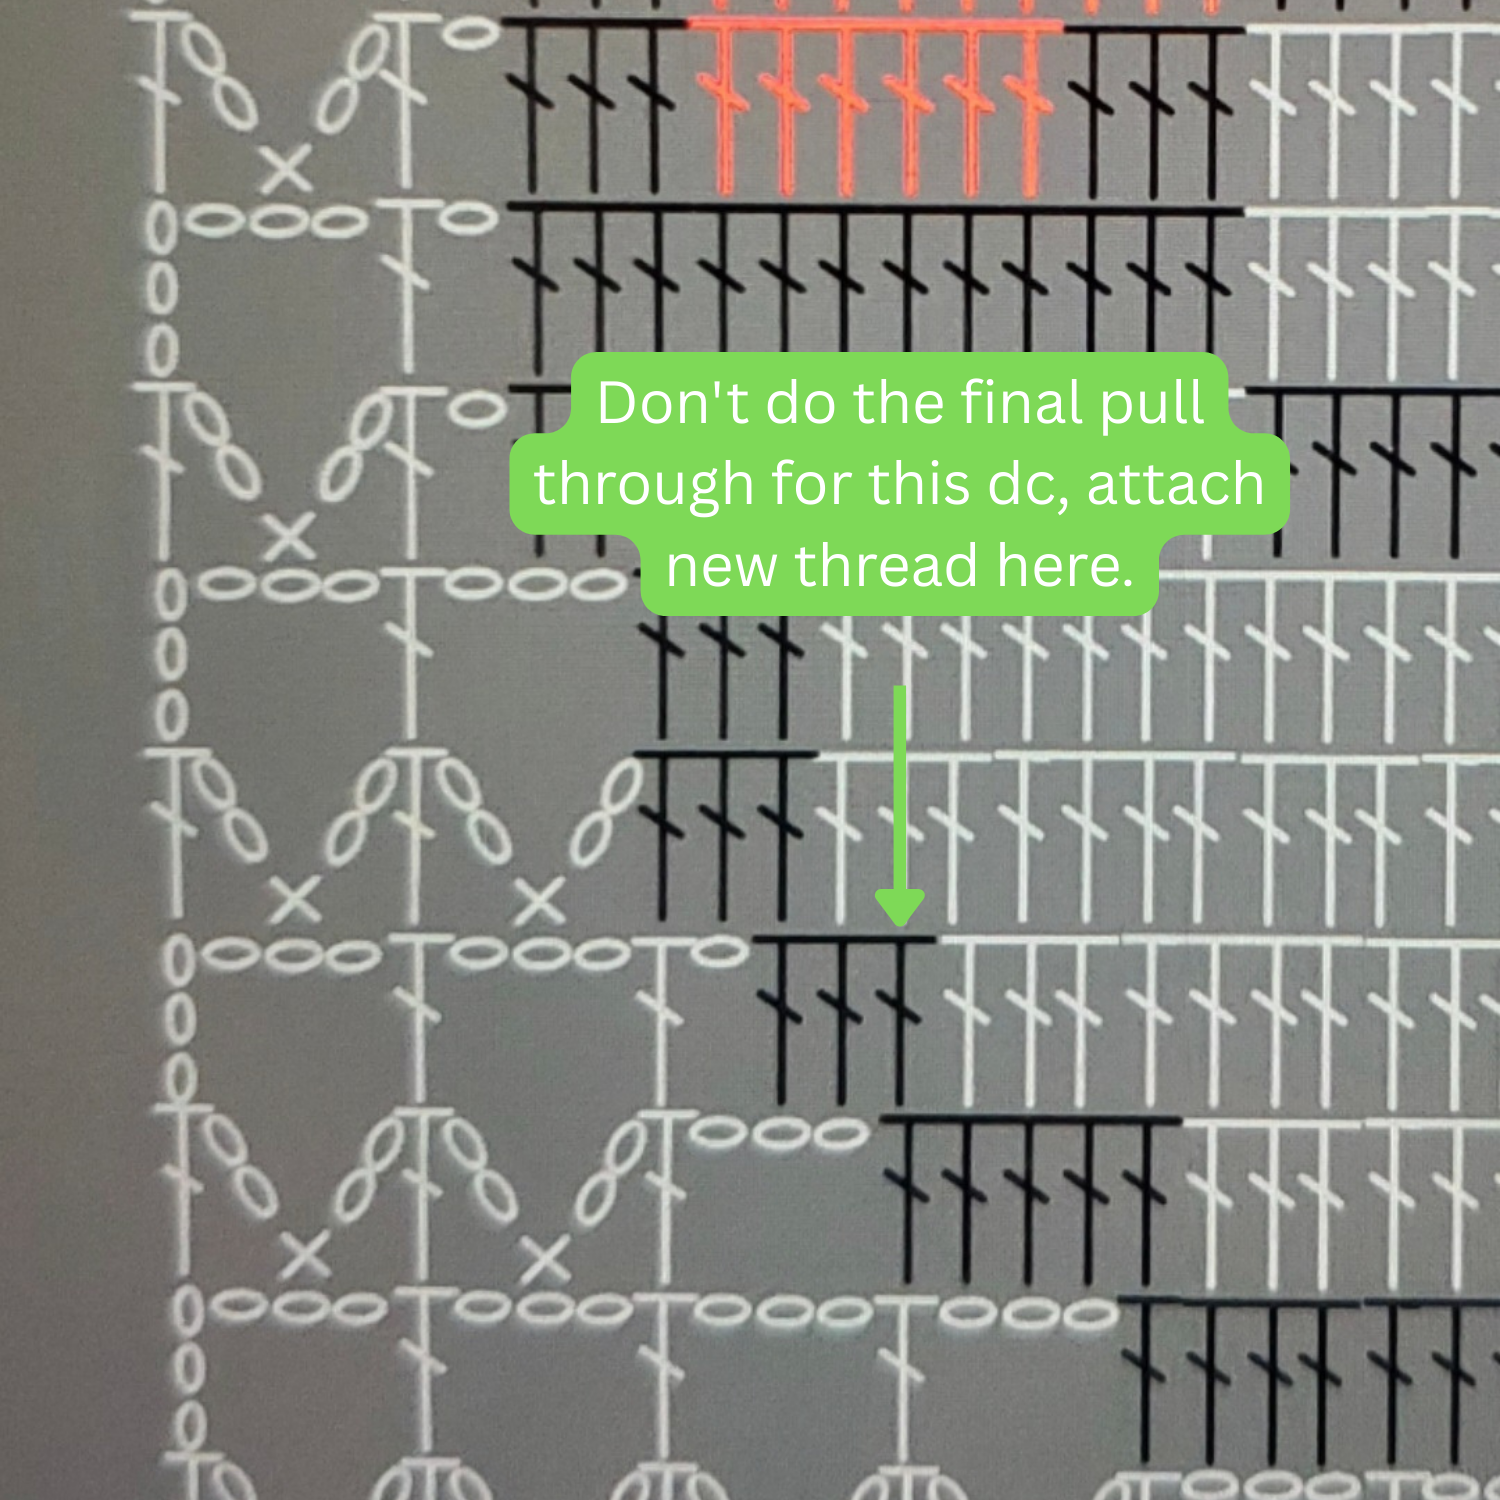
Color changing in crochet is kind of weird and I’ll explain a little better below…I hope. Essentially, you have to think ahead and attach your new color before the stitch that needs the new color.
It’s kind of like tapestry crochet, but we’re using double crochets instead of single crochets.
I also recommend blocking this doily and basically anything that you crochet with thread. It looks so much cleaner and less scrunched up. I use water to block mine, but I know other people like to use a starch solution to make it stiff.
Okay enough rambling, let’s start making your Crochet Pokeball Doily!
Please note that some of these links may be affiliate links. That means that if you click on these links and make a purchase, I may receive a commission at no extra cost to you. You can find more information about our disclosure policy here. Thank you for your support.
Related Posts:
- Crochet Legend of Zelda Pattern – Hearts
- Crochet Legend of Zelda Triforce Dishcloth
- 15 Small Crochet Doily Patterns
Materials Used:
- Red Heart Classic Crochet Thread in White Size 10
- Red Heart Classic Crochet Thread in Black Size 10 (the image displays the wrong size of thread, but this is the correct listing for size 10 thread…it’s confusing I know)
- Red Heart Classic Crochet Thread Size in Red 10
- 1.65mm Crochet Hook
- Scissors
- Tapestry needle
- Optional – blocking board (or cardboard), pins, bowl of water and a towel
Abbreviations
- St – stitch
- Sl st – slip st
- Ch – chain
- Sc – single crochet
- Dc – double crochet
- S2W – switch to white
- S2B – switch to black
- S2R – switch to red
About Color Changes in This Pattern
- Color changes can be a little weird in crochet. You must look ahead to color change and attach your new color before you finish the current you’re on.
- Sometimes you will finish a dc and sometimes you will not! It depends on whether the next st is a ch or another dc.
- I don’t recommend “carrying” your last color thread with you. Since we are using dc and contrasting colors, they stick out through the fabric.
- I recommend cutting your thread when starting a new color OR dropping the yarn and picking it up when you need it again and giving yourself enough line (but one side of your doily will be ugly)
- See pics below for info on when to attach the new colored thread.
I’ve also made a crochet chart to go with this pattern below.
I’m still learning how to make these charts, but I think you can see the pattern much better if you don’t like written instructions.
I made the border in a red and blue color in this chart so you can see each round more clearly.
Crochet Pokeball Doily Pattern:
Ch 46
Row 1: sc into 8th ch away from hook (counts as dc and ch 2), ch 2, skip a ch, dc into next ch, *ch 2, skip a ch, sc into next ch, ch 2, skip a ch, dc into next ch.* Repeat from *to* (10 sc, 11 dc, 20 ch 2s)
Row 2: ch 6 (counts as dc and ch 3), turn, skip ch 2, skip sc, and skip next ch 2, dc into next dc, *ch 3, skip ch 2, skip dc, and skip next ch 2, dc into next dc.* Repeat from *to* (11 dc, 10 ch 3s)
Row 3: ch 5 (counts as dc and ch 2), turn sc into middle ch of previous row’s ch 3, ch 2, dc into next dc, *ch 2, sc into middle ch of previous row’s ch 3, ch 2, dc into next dc* Repeat from *to* twice more. Ch 3, skip ch 3 space, dc into next dc, ch 3, skip ch 3 space, dc into next dc (these two open squares should be aligned right in the middle of the fabric). Repeat from *to* 4 more times. (11 dc, 8 sc, 16 ch 2s, 2 ch 3s)
Row 4: ch 6 (counts as dc and ch 3), turn, skip ch 2, skip sc, skip ch 2, dc into next dc, *ch 3, skip ch 2, skip sc, skip ch 2, dc into next dc.* Repeat from *to* once more. Ch 2, S2B, dc into next dc (if done correctly, the white thread will have the appearance of a ch 3 not a ch 2). 3 dc into ch 3 space, dc in dc, 3 dc into ch 3 space, dc into next dc (don’t finish the final pull through, S2W). Repeat from *to* 4 more times (17 dc, 8 ch 3s)
Row 5: ch 5 (counts as dc and ch 2), turn, sc into middle ch of ch 3 space, *ch 2, dc into next dc, ch 2, dc into middle ch of ch 3 space, ch 2, dc into next dc,* ch 2, S2B dc in next dc, 3 dc in ch 3 space, dc in next dc (don’t finish last pull through and S2W), dc in next 7 dc S2B, dc in next dc, 3 dc in ch 3 space, dc in next dc S2W ch 3, dc in next dc. Repeat from *to* twice more. (23 dc, 4 sc, 8 ch 2s, 2 ch 3s)
Row 6: ch 6 (counts as dc and ch 3), turn, skip and dc into next dc, ch 3, skip and dc into next dc, (finish this last dc all the way and S2B, skip a ch, dc in 2nd and 3rd ch of ch 3 space, dc into next dc S2W, dc into next 15 dc, S2B, dc into next dc, dc into next ch and middle ch of ch 3 space (don’t finish dc all the way and S2W, ch 1, dc into next dc, ch 3, skip and dc into next dc, ch 3, skip and dc into next dc (27 dc, 4 ch 3s, 2 ch 1s)
Row 7: ch 5 (counts as dc and ch 2), turn, sc into middle ch of ch 3, ch 2, dc into next dc, ch 2, sc into middle ch, ch 1, S2B, dc into next dc, dc into ch 1 space, dc into next dc S2W dc into next 19 dc, S2B dc in next dc, dc in ch 1 space, dc into next dc S2W, ch 2, sc into middle ch of ch 3, ch 2, dc into next dc, ch 2, sc in middle ch of ch 3, ch 2, dc into next dc (29 dc, 4 sc, 8 ch 2s)
Row 8: ch 6 (counts as dc and ch 3), turn, skip and dc into next dc, ch 2 S2B, skip and dc into next 3 dc, S2W, dc in next 19 dc, S2B dc in next 3 dc, S2W, ch 3, skip and dc into next dc, ch 3, skip and dc into next dc (29 dc, 4 ch 3s)
Row 9: ch 5 (counts as dc and ch 2), turn, sc in middle ch, ch 2, dc in next dc S2B, dc in middle and last ch of ch 3, dc in next dc, S2W, dc in next 9 dc, S2B, dc in next 5 dc, S2W, dc in next 9 dc, S2B, dc in next dc, dc in first ch of ch 3, dc in middle ch of ch 3, S2W, ch 1, dc in next dc, ch 2, sc in middle ch of ch 3, ch 2, dc in next dc (29 dc, 2 sc, 4 ch 2s, 2 ch 1s)
Row 10: ch 6 (counts as dc and ch 3), turn, dc into next dc S2B, dc in next 12 dc, S2W, dc in next 5 dc, S2B, dc in next 12 dc, S2W, ch 1, dc in next dc, ch 3 dc in next dc (33 dc, 2 ch 3s, w ch 1s)
Row 11: ch 5 (counts as dc and ch 2), turn, sc in middle ch of ch 3, ch 2, dc in next dc, S2B, dc in next 3 dc, S2R, dc in next 6 dc, S2B, dc in next 3 dc, S2W, dc in next 5 dc, S2B, dc in next 3 dc, S2R, dc in next 5 dc, S2B, dc in next 3 dc, S2W, ch 1, dc in next dc, ch 2, sc in middle ch of ch 3, ch 2, dc in next dc (28 dc, 2 sc, 4 ch 2s, 2 ch 1s)
Row 12: ch 6 (counts as dc and ch 3), dc in next dc, S2B, dc in next 3 dc, S2R, dc in next 9 dc, S2B dc in next 5 dc, S2R, dc in next 9 dc, S2B, dc in next 3 dc, S2W, ch 1, dc in next dc, ch 3, dc in next dc (28 dc, 2 sc, 2 ch 1s)
Row 13: ch 5 (counts as dc and ch 2), turn, sc in middle ch of ch 3, ch 2, dc in next dc, ch 2 S2B, skip 2 dc, dc in next 3 dc, S2R, dc in next 19 dc, S2B, dc in next 3 dc, S2W, ch 3, skip 2 dc, skip ch 1, dc in next dc, ch 2, sc in middle ch of ch 3, ch 2, dc in next dc (29 dc, 2 sc, 4 ch 2s, 2 ch 3s)
Row 14: ch 6 (counts as dc and ch 3), turn, dc in next dc, ch 2, sc in middle ch of ch 3, ch 1 S2B, dc in next 3 dc, S2R, dc in next 19 dc, S2B, dc in next 3 dc, S2W, ch 2, sc in middle ch of ch 3, dc in next dc, ch 3, dc in next dc (29 dc, 2 sc, 4 ch 2s, 2 ch 3s)
Row 15: ch 5, (counts as dc and ch 2), turn, sc in middle ch of ch 3, ch 2, dc in next dc, ch 3 dc in next dc, ch 1 S2B, skip a dc, dc in next 3 dc, S2R, dc in next 15 dc, S2B, dc in next 3 dc, S2W ch 1, skip a dc, dc in next dc, ch 3 dc in next dc, ch 2, sc in middle ch of ch 3, ch 2, dc in next dc (27 dc, 2 sc, 4 ch 2s, 2 ch 3s, 2 ch 1s)
Row 16: ch 6, (counts as dc and ch 3), turn, dc in next dc, ch 2, sc in middle ch of ch 3, ch 2, dc in next dc, ch 3, S2B, skip 2 dc, dc in next 5 dc, S2R, dc in next 7 dc, S2B, dc in next 5 dc, S2W, ch 3, skip 2 dc, skip ch 1, dc in next dc, ch 2, sc in middle ch of ch 3, ch 2, dc in next dc, ch 3, dc in next dc (23 dc, 2 sc, 4 ch 2s, 4 ch 3s)
Row 17: ch 5 (counts as dc and ch 2), turn, sc in middle ch of ch 3, ch 2, dc in next dc, ch 3, dc in next dc, ch 2, sc in middle ch of ch 3, ch 2, dc in next dc, ch 3, S2B, skip 3 dc, dc in next 9 dc, S2W, ch 3, skip 3 dc, dc in next dc, ch 2, sc in middle ch of ch 3, ch 2, dc in next dc, ch 3, dc in next dc, ch 2, sc in middle ch of ch 3, ch 2, dc in next dc (17 dc, 4 sc, 8 ch 2s, 4 ch 3s)
Row 18: ch 6 (counts as dc and ch), turn, dc in next dc, ch 2, sc in middle ch of ch 3, ch 2, dc in next dc, ch 3, dc in next dc, ch 2, sc in middle ch of ch 3, ch 2, dc in next dc, ch 3, skip 3 dc, dc in next dc, ch 3, skip 3 dc, dc in next dc, ch 2, sc in middle ch of ch 3, ch 2, sc in middle ch of ch 3, dc in next dc, ch 3, dc in next dc, ch 2, sc in middle ch of ch 3, dc in next dc, ch 3, dc in next dc (11 dc, 4 sc, 8 ch 2s, 6 ch 3s)
Row 19: ch 5 (counts as dc and ch 2), turn, sc in middle ch of ch 3, ch 2, dc in next dc, ch 3, dc in next dc, ch 2, sc in middle ch of ch 3, ch 2, dc in next dc, ch 3, dc in next dc, ch 2, sc in middle ch of ch 3, ch 2, dc in next dc, ch 2, sc in next ch of ch 3, ch 2, dc in next dc, ch 3, dc in next dc, ch 2, sc in middle ch of ch 3, ch 2, dc in next dc, ch 3, dc in next dc, ch 2, sc in middle ch of ch 3, dc in next dc (11 dc, 6 sc, 12 ch 2s, 4 ch 3s)
Row 20 ch 6 (counts as dc and ch 3), turn, dc in next dc, *ch 3, dc in next dc.* Repeat from *to* (11 dc, 10 ch 3s)
Border
Instead of going back and forth like we have with the main body of the crochet Pokeball doily, now we will crochet around our square.
Round 1: ch 4 (counts as dc and ch 1) dc into the same st as the starting ch 4, ch 1, dc into same st again. This is our first corner made.
Ch 1, dc into middle ch of ch 3, *ch 1, dc into next dc.* Repeat from *to* until we reach the next corner. Your last dc should be placed in the 3rd ch of the previous row’s starting ch 6. From here, ch 1, dc into same ch, ch 1, dc into same ch again.
As you can see, our corners will be a combination of (dc, ch 1, dc, ch 1, dc) all in the same corner st.
Turning down the first side of our doily, ch 1, skip the rest of the ch 3 you just made your corner in and dc into the top of row 19’s dc. Ch 1, skip the length of the rest of that dc and dc into the 3rd ch of row 18. Repeat dc and ch 1s down the side, see the chart as a reference. Sl st to 3rd ch of starting ch 4.
(22 “squares” on each side)
Round 2:
**Note: the ch 1 spaces before and after the middle corner dc from round 1 will have 2 sc in them, not 1. See diagram for details.
ch 1 (does not count as a st), sc into same st, 2 sc in next ch 1 space, (sc, ch 1, sc) into the next dc (this should be the middle dc of round 1s corner). If you need to, place st marker in the corner ch 1 space for later. 2 sc in next ch 1 space, sc into each dc and ch 1 space across until you get to the first dc of the next corner from round 1. Place a sc in this dc, 2 dc into next ch 1 space, (sc, ch 1, sc) into next dc, 2 sc into next ch 1 space.
Turn down the next side and sc into each dc and ch 1 space, make corners. Sl st to first sc.
(47 sc on each side, 4 ch 1 corner spaces)
Round 3: ch 3 (counts as a dc), (dc, ch 1, 2 dc, ch 1, 2 dc) in the same st as ch 3. Ch 1, skip 3 sc, (sc, ch 1, sc) in ch 1 corner space. *Ch 1, skip 3 sc, (2 dc, ch 1, 2 dc, ch 1, dc) in next sc, ch 1, skip 3 sc, sc in next sc* Repeat from *to* until next corner.
You should have 3 sc left before the next ch 1 corner space after the last (2 dc, ch 1, 2 dc, ch 1, 2 dc) shell. Ch 1, (sc, ch 1, sc) in ch 1 corner space. Repeat from *to* until next corner again. Corner spaces will be (sc, ch 1, sc). Sl st to top if starting ch 3
(6 shells on each side)
Round 4: sl st into next dc, sl st into ch 1 space. Ch 1 (does not count as a st), sc in same ch 1 space, ch 3, skip 2 dc and sc into next ch 1 space, ch , skip 2 dc, skip next ch 1 space, skip next sc, (dc, ch 3, dc) in ch 1 corner space.
Ch 2, sc into first ch 1 space of next shell, ch 3, skip 2 dc, sc into next ch 1 space of shell, ch 1, (dc, ch 1, dc) in the sc between the shells, *ch 1, sc into first ch 1 space of next shell, ch 3, skip 2 dc, sc into next ch 1 space of shell, ch 1, (dc, ch 1, dc) in sc between shells* Repeat from *to* until next corner, finish last shell with sc into first ch 1 space, ch 3, skip 2 dc, and sc in next ch 1 space of shell.
Ch 2, (dc, ch 3, dc) into ch 1 corner space. Repeat on sides and corners in this fashion. Sl st to starting sc
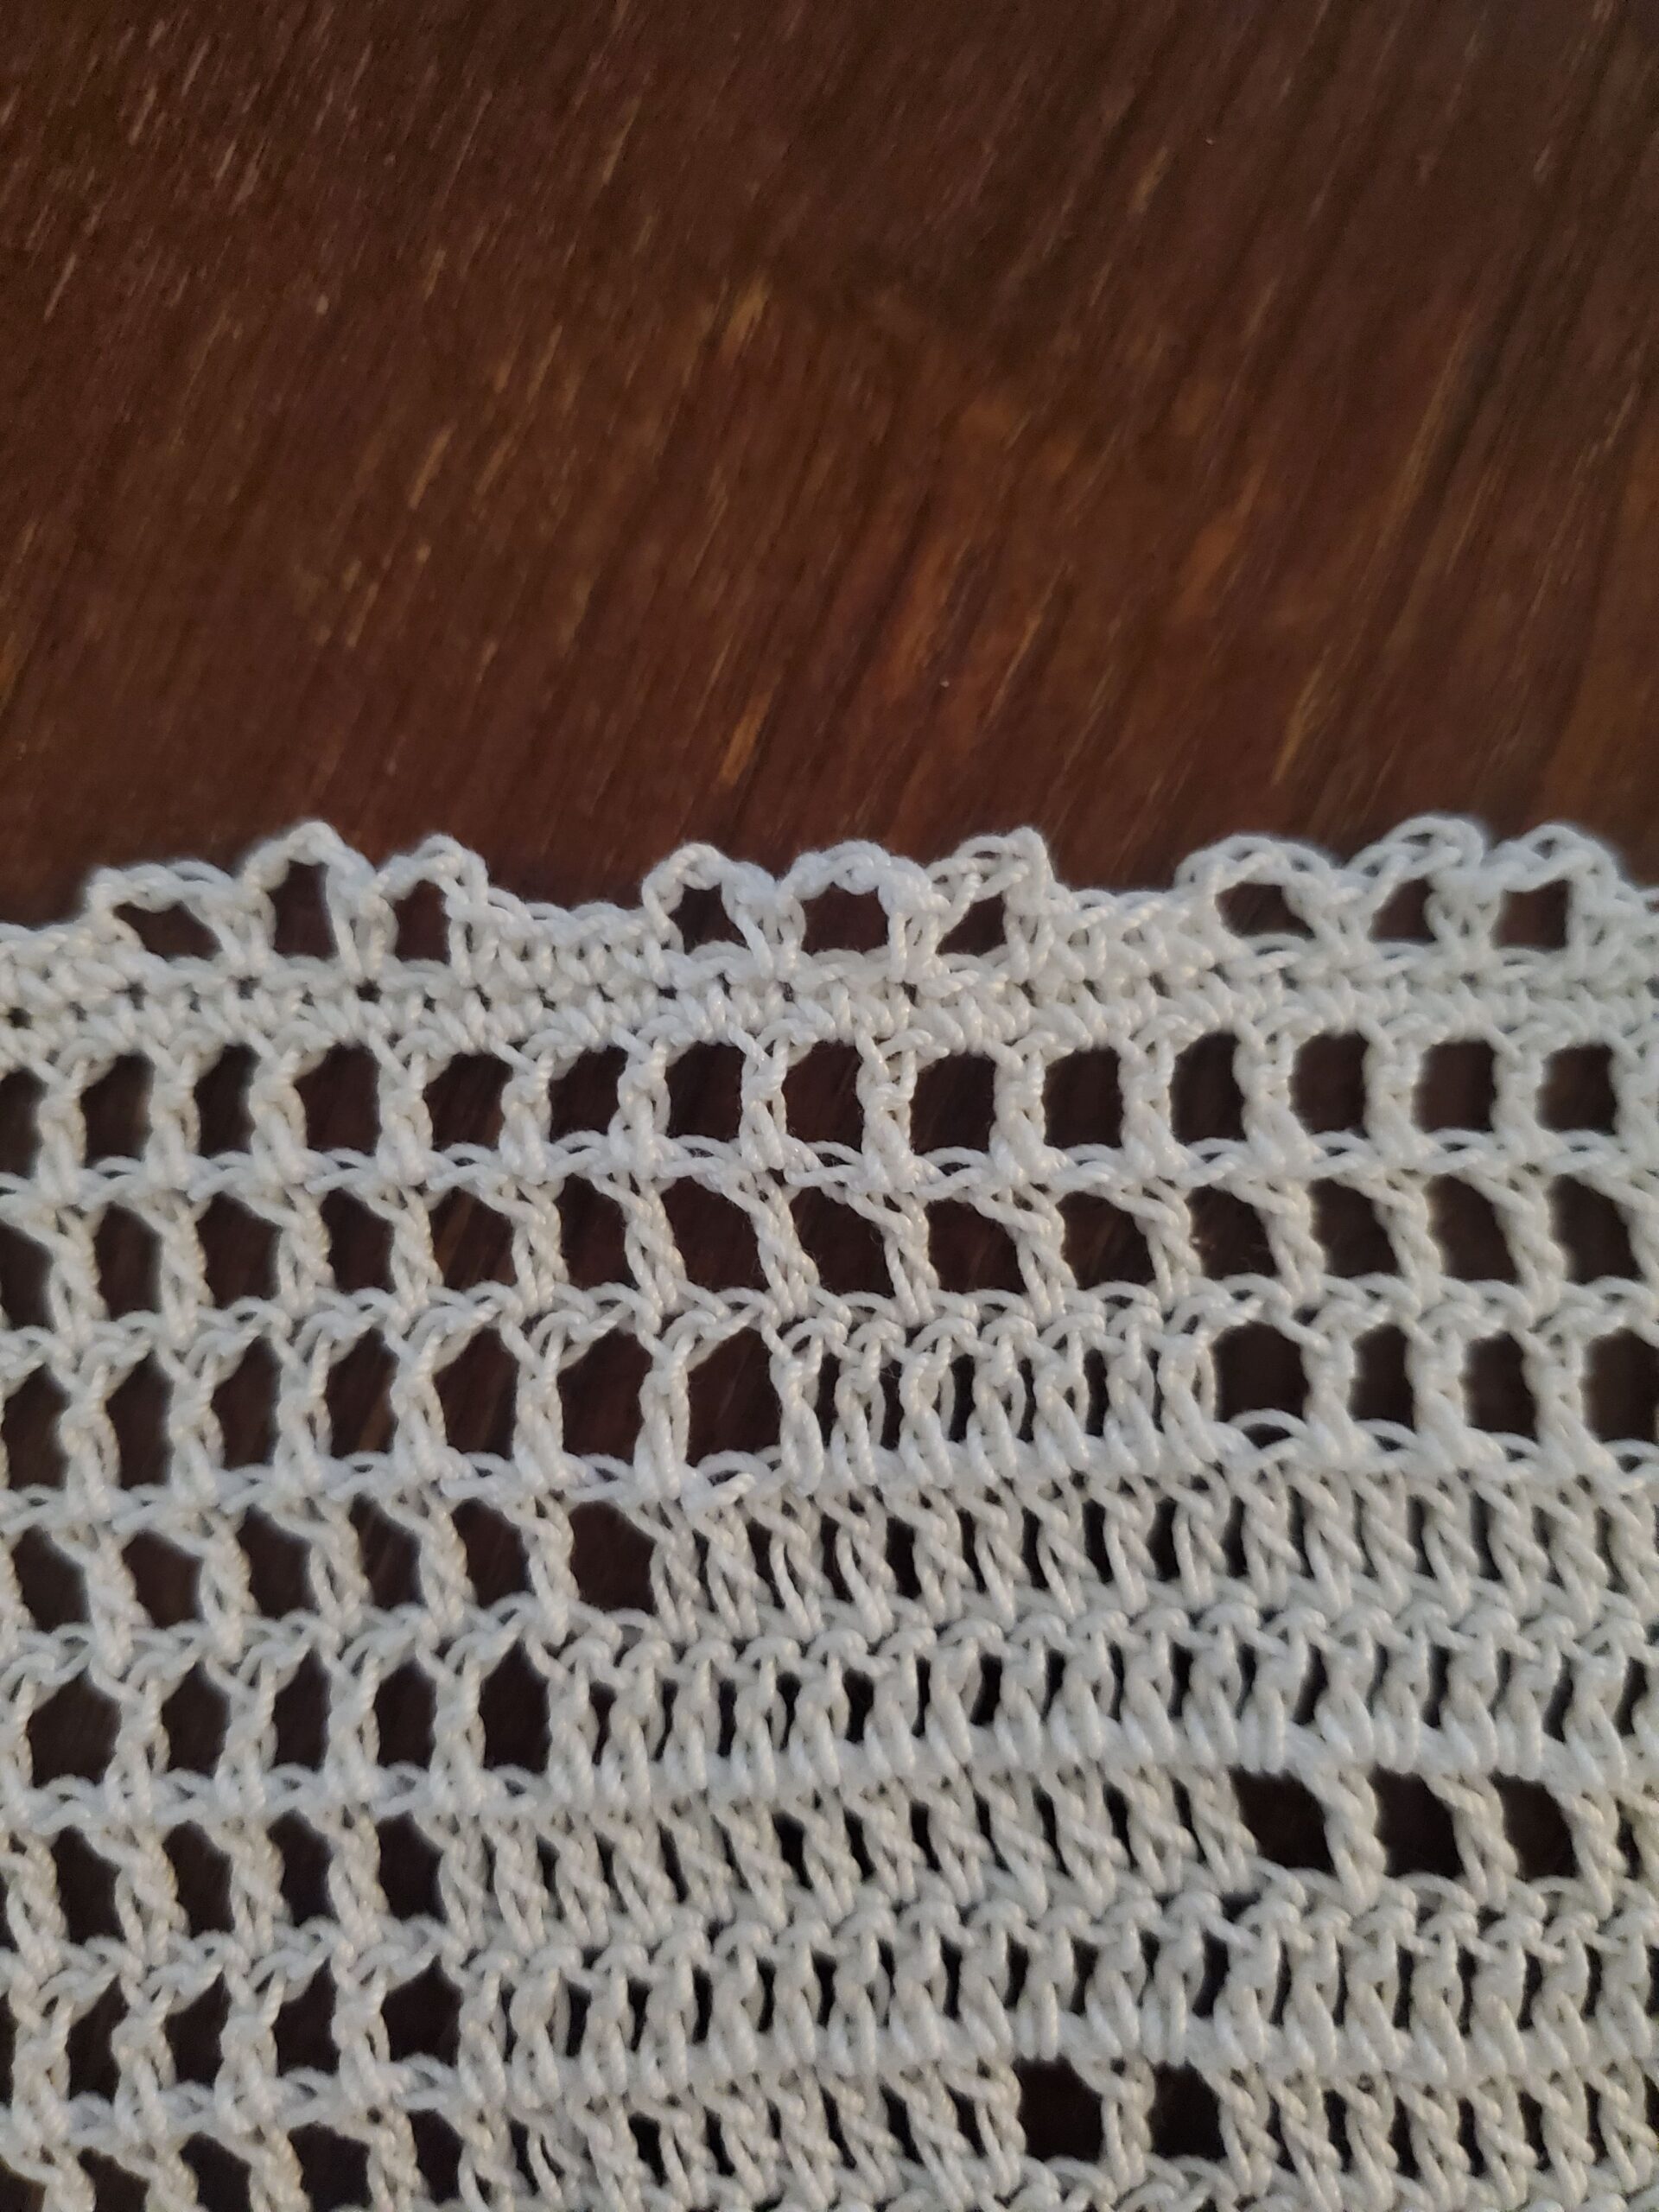
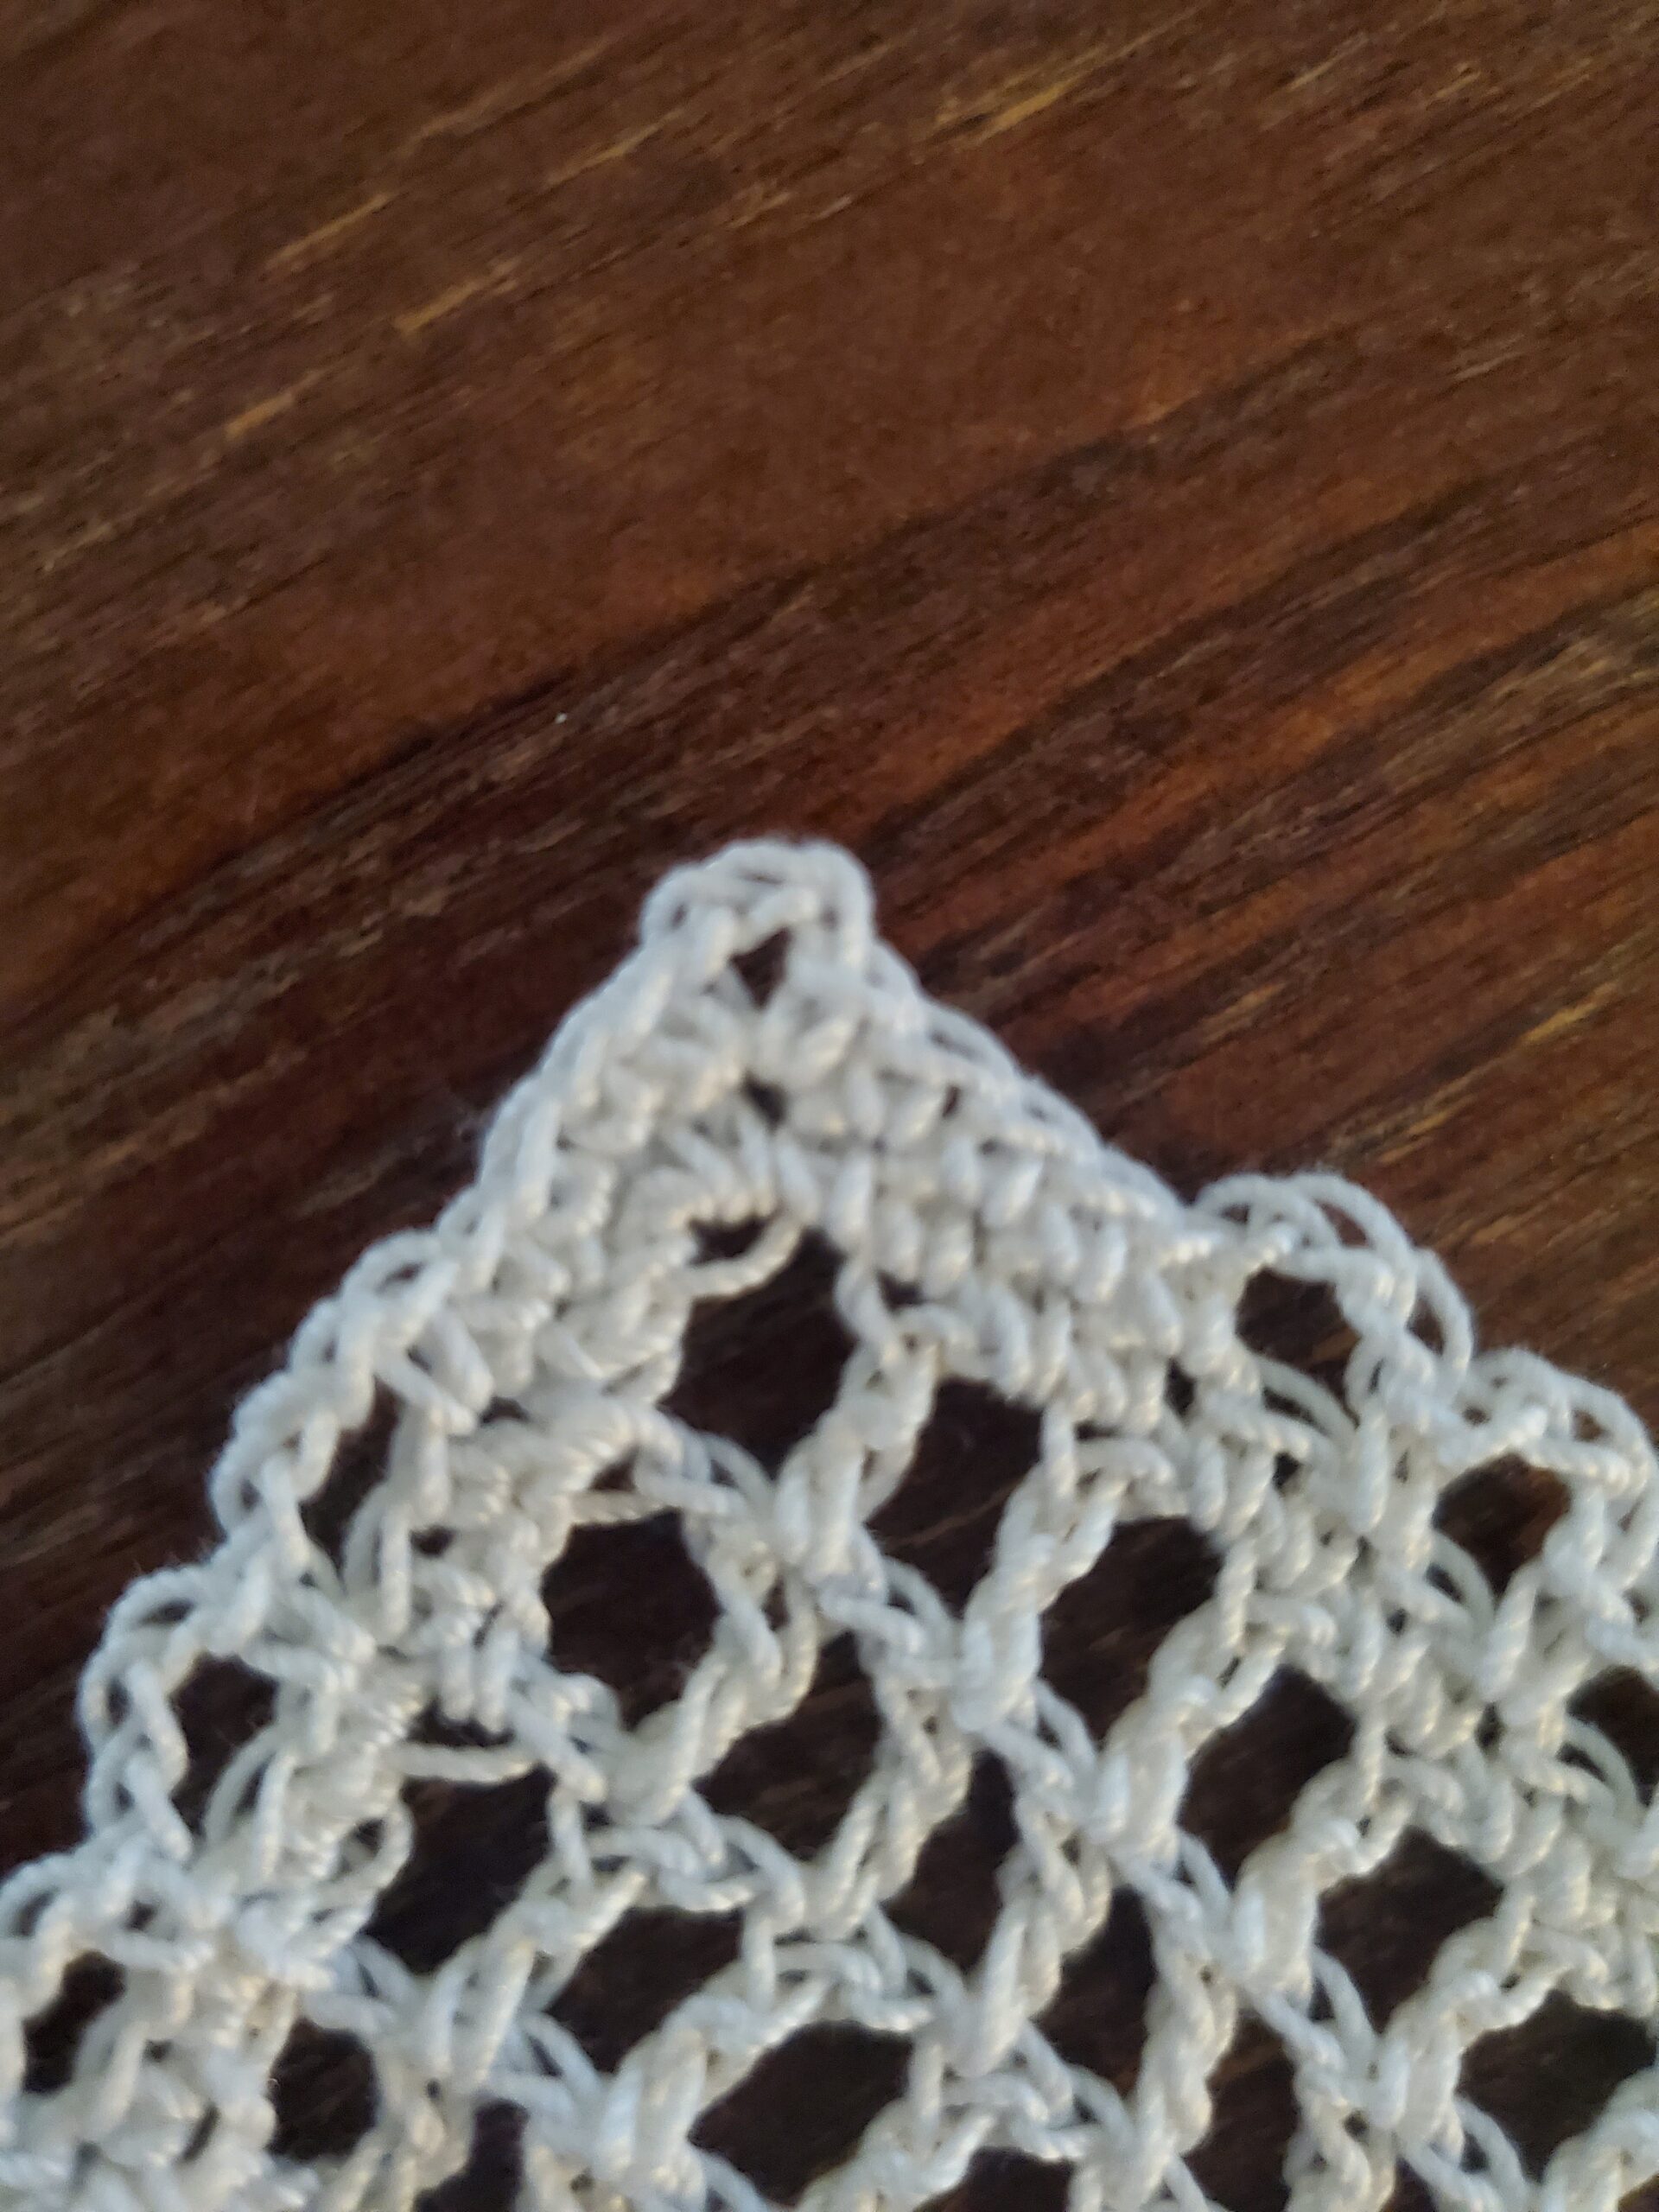
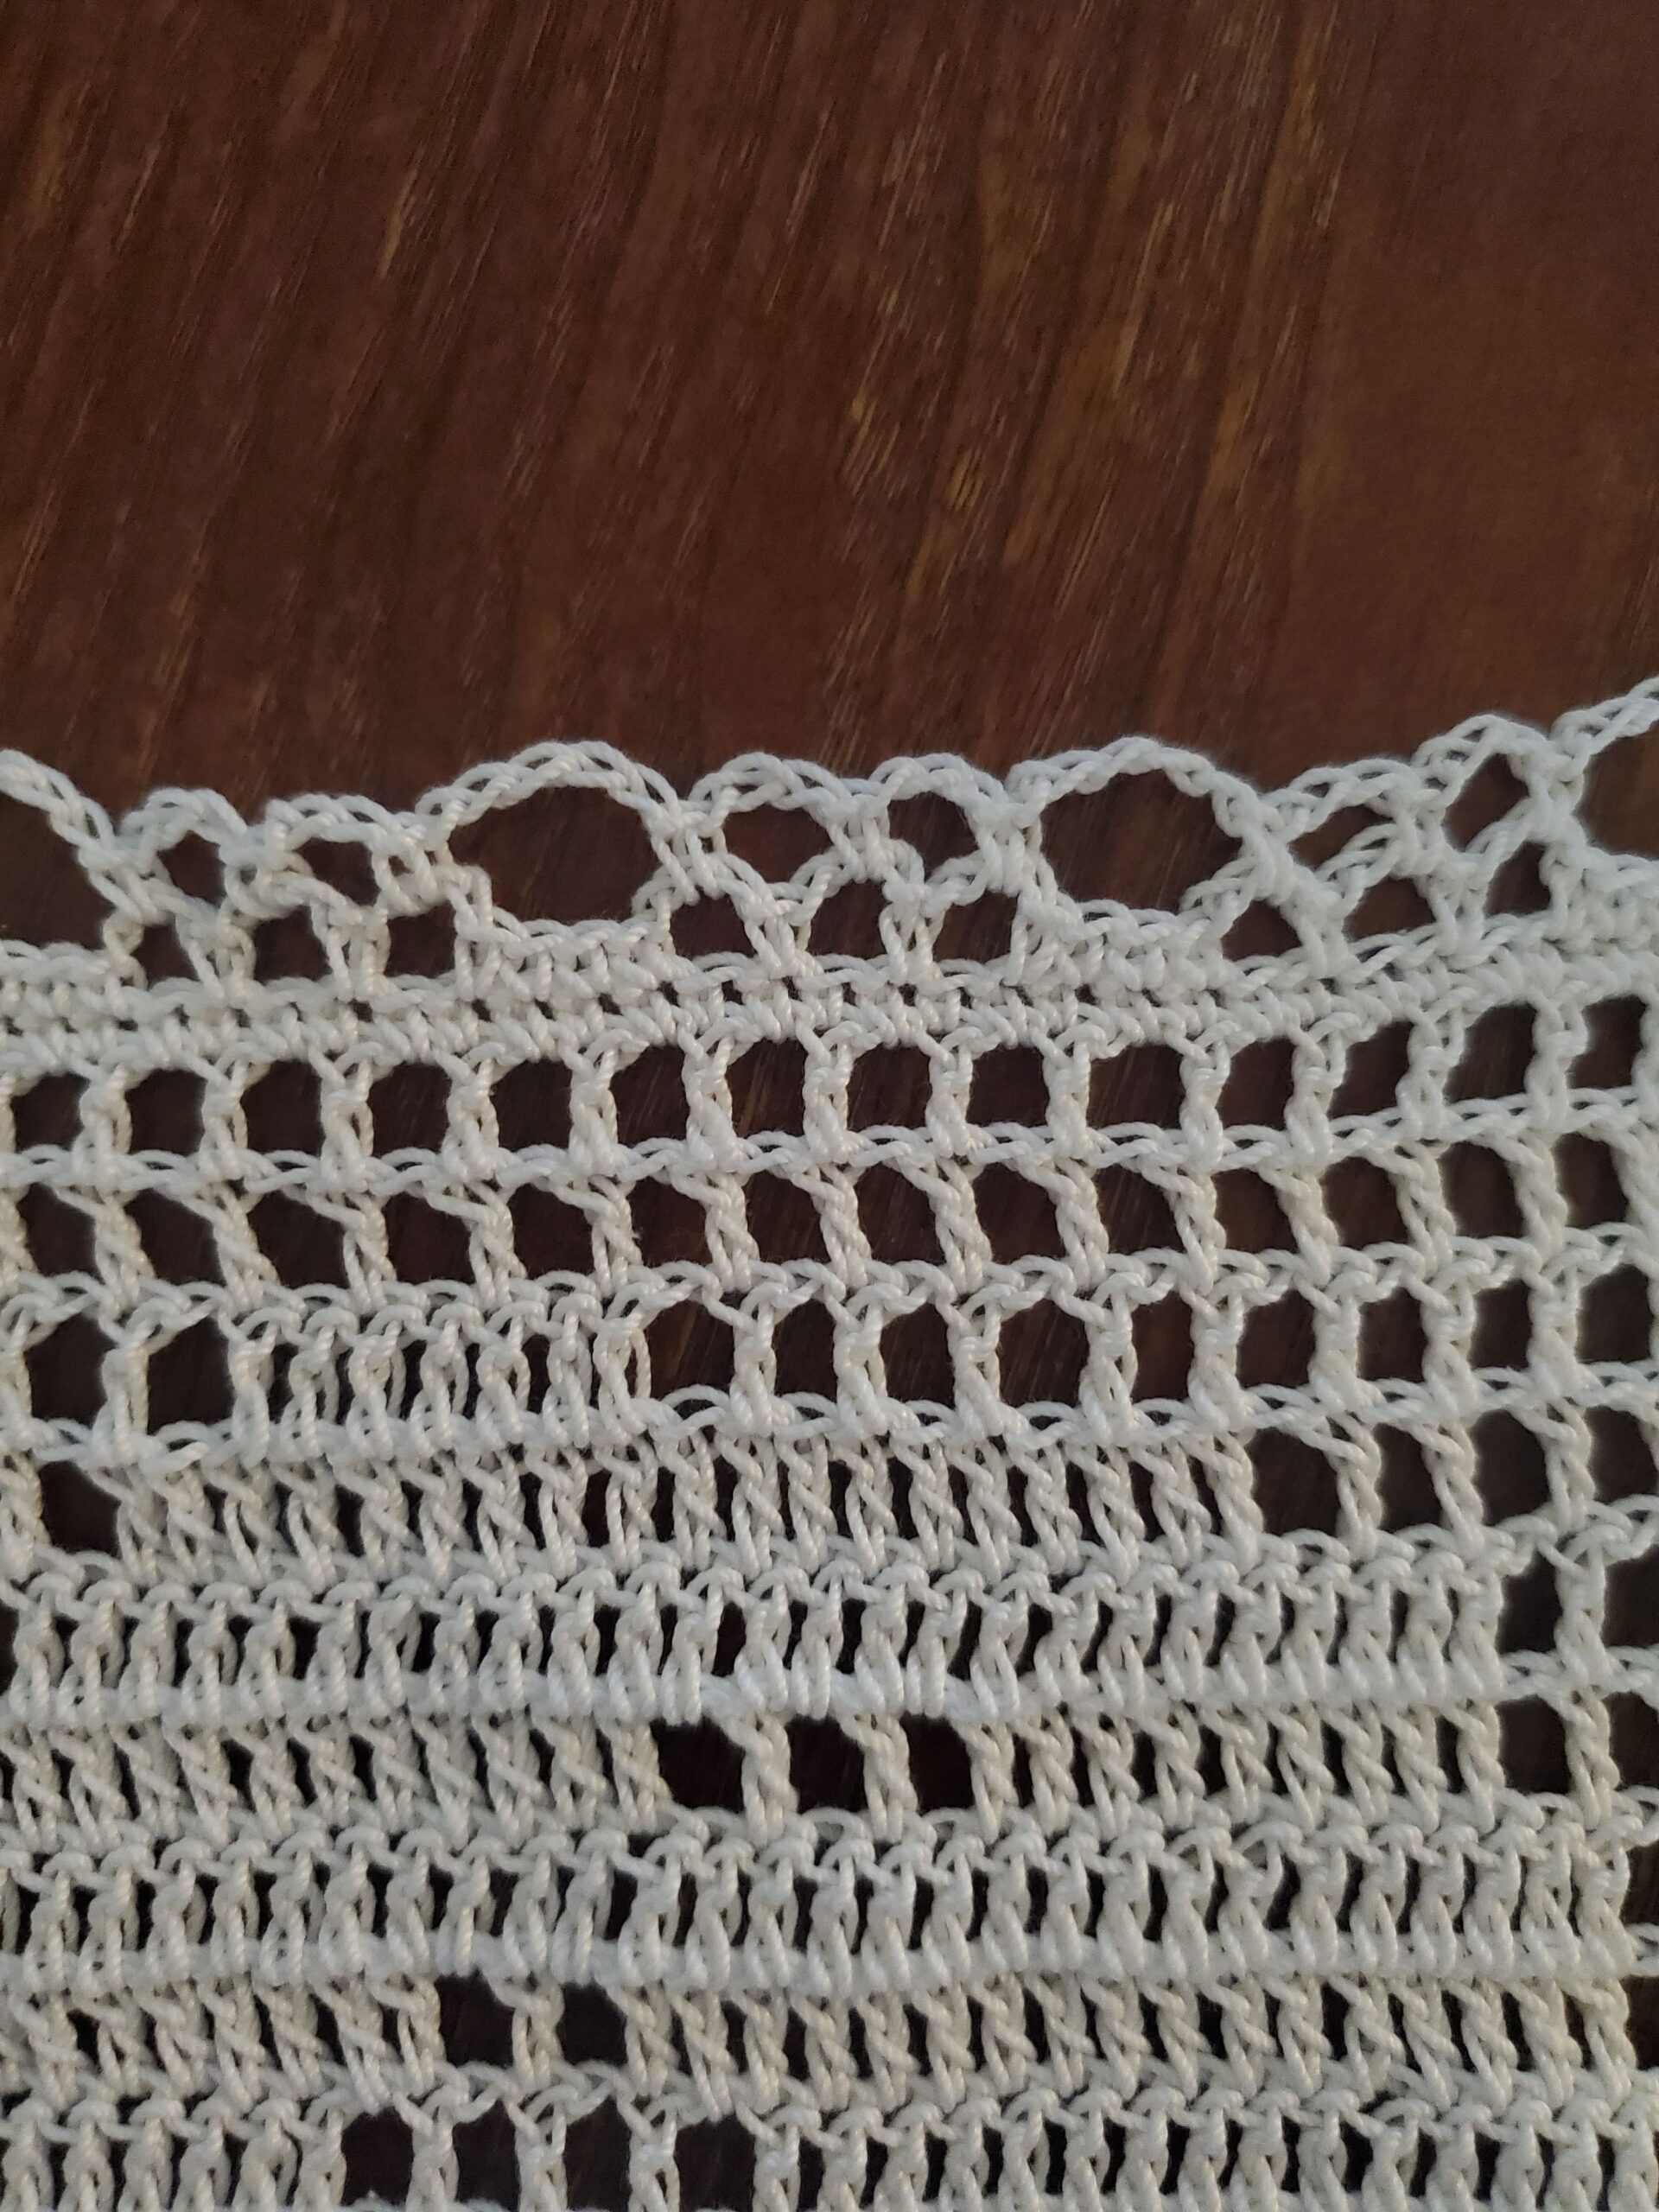
Round 5: sl st into next 2 chs, ch 1 (does not count as a st) sc into ch 3 space. Ch 1, ([dc, ch 1 x7 times], dc) in ch 3 corner space. (This corner shell should have 8 dc separated by ch 1s)
*Ch 1, sc into next ch 3 space on top of next shell, ch 1, skip next sc, skip ch 1 space, skip dc, ([dc, ch 1 x5 times], dc) into ch 1 space between the 2 dc.* Repeat from *to* until next corner, ch 1, sc into ch 3 space in last shell, ch 1, ([dc, ch 1 x7 times], dc) in next ch 3 corner space. Repeat from *to* on sides.
Sl st to starting sc. (5 smaller shells on sides, 1 larger shell in each corner).
Cut thread with scissors and pull through.
Weave in any ends with tapestry needle.
Blocking:
Soak doily in cool water for a minute, gently pat dry on a towel. Using a blocking board (or piece of cardboard large enough), pin edges straight with pins. Allow to dry for about 24-48 hours.
That’s it for this Crochet Pokeball Doily Pattern! If you made it this far, thank you, I hope you enjoyed this pattern.
Until next time.