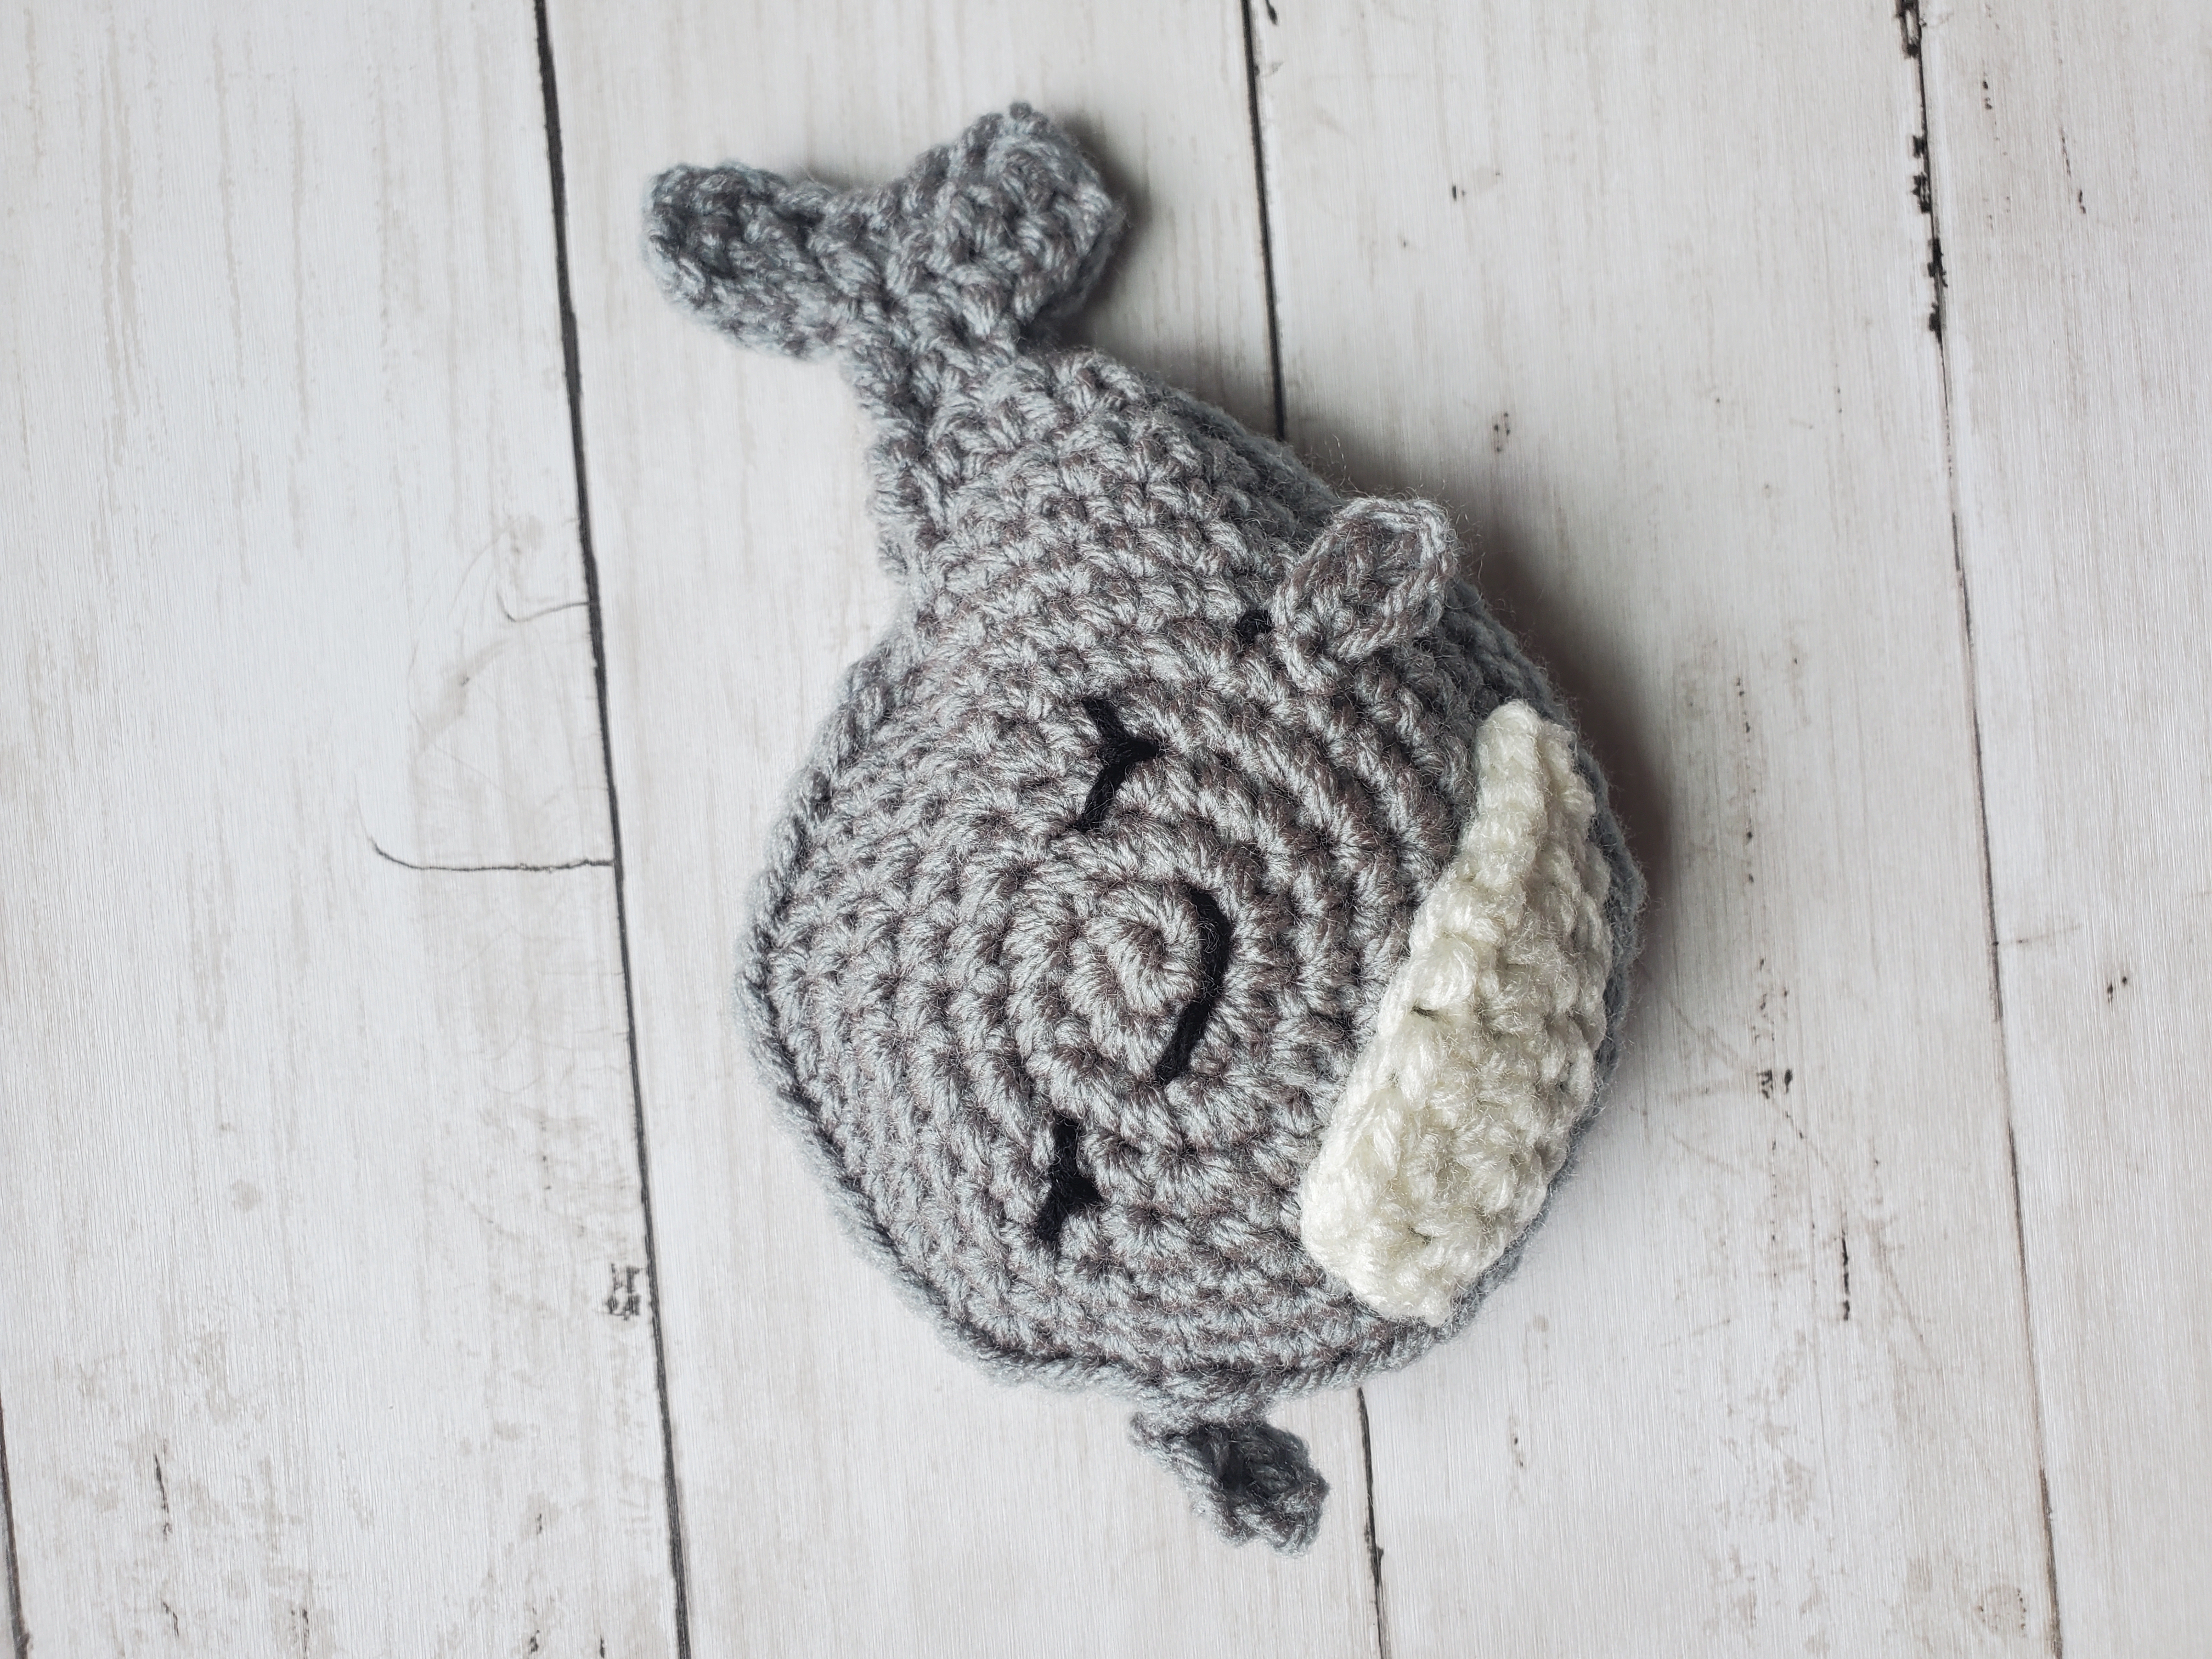
Learn to crochet this free whale pattern in a day! This post contains: materials needed, the free whale pattern, and pictures to help guide you.
***Please note that this post may contain affiliate links. This means that I may receive a commission if you purchase something through these links (at no cost to you!). Thank you for your support!***
Summer is finally here! Can you believe it? I feel like this year has flown by so quickly and it’s more than halfway over!
Why not celebrate by crocheting this cute little whale? I had a lot of fun coming up with another crochet stuffed animal, and having it be nautical themed just seemed appropriate for the season.
This crochet whale toy is made very similarly to my frog toy. I will admit, that I’ve been in the groove for making these flatter stuffed animals. They are kind of like amigurimi, but you have to sew two sides of the project together.
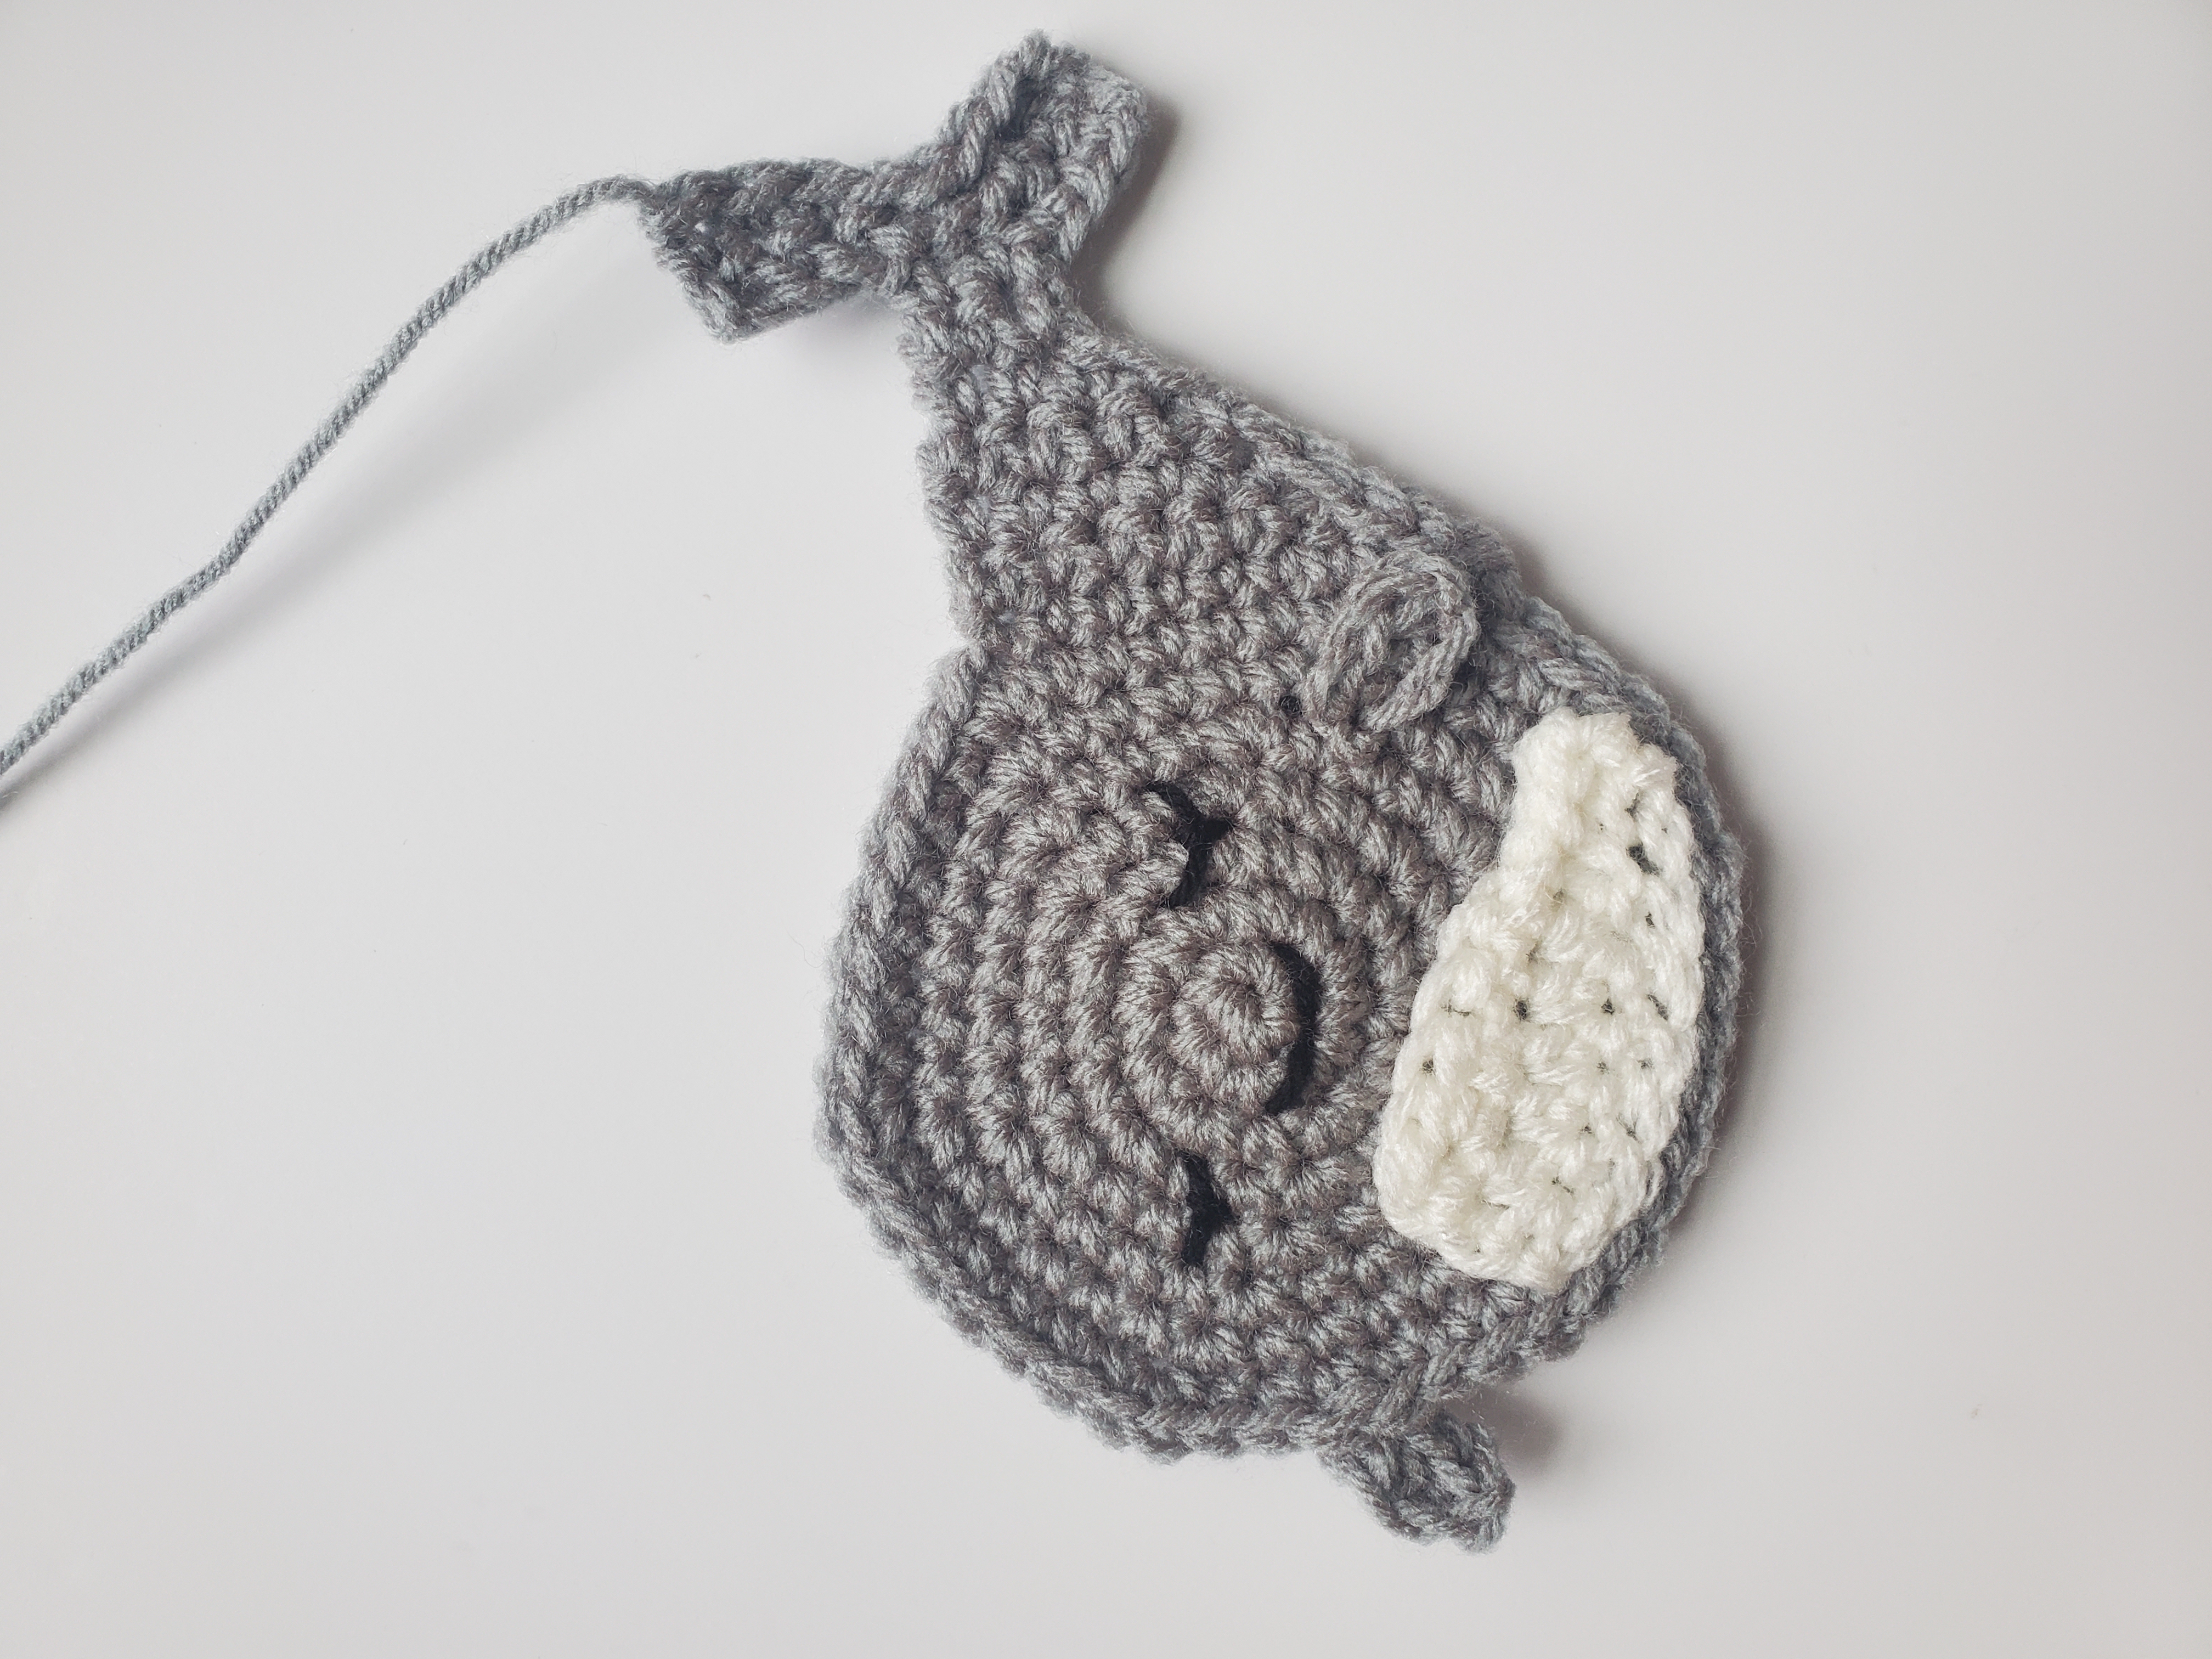
When completed, the whale is about 7″ x 5,” but depends on your tension.
I use Red Heart Super Saver, medium 4 worsted weight yarn for this project. You can use a different type of yarn if you prefer. If it’s not medium 4 worsted weight, then it might come out bigger or smaller than expected!
This project took me less than a day to complete, so it’s a super quick crochet pattern. Perfect for a last minute crochet gift!
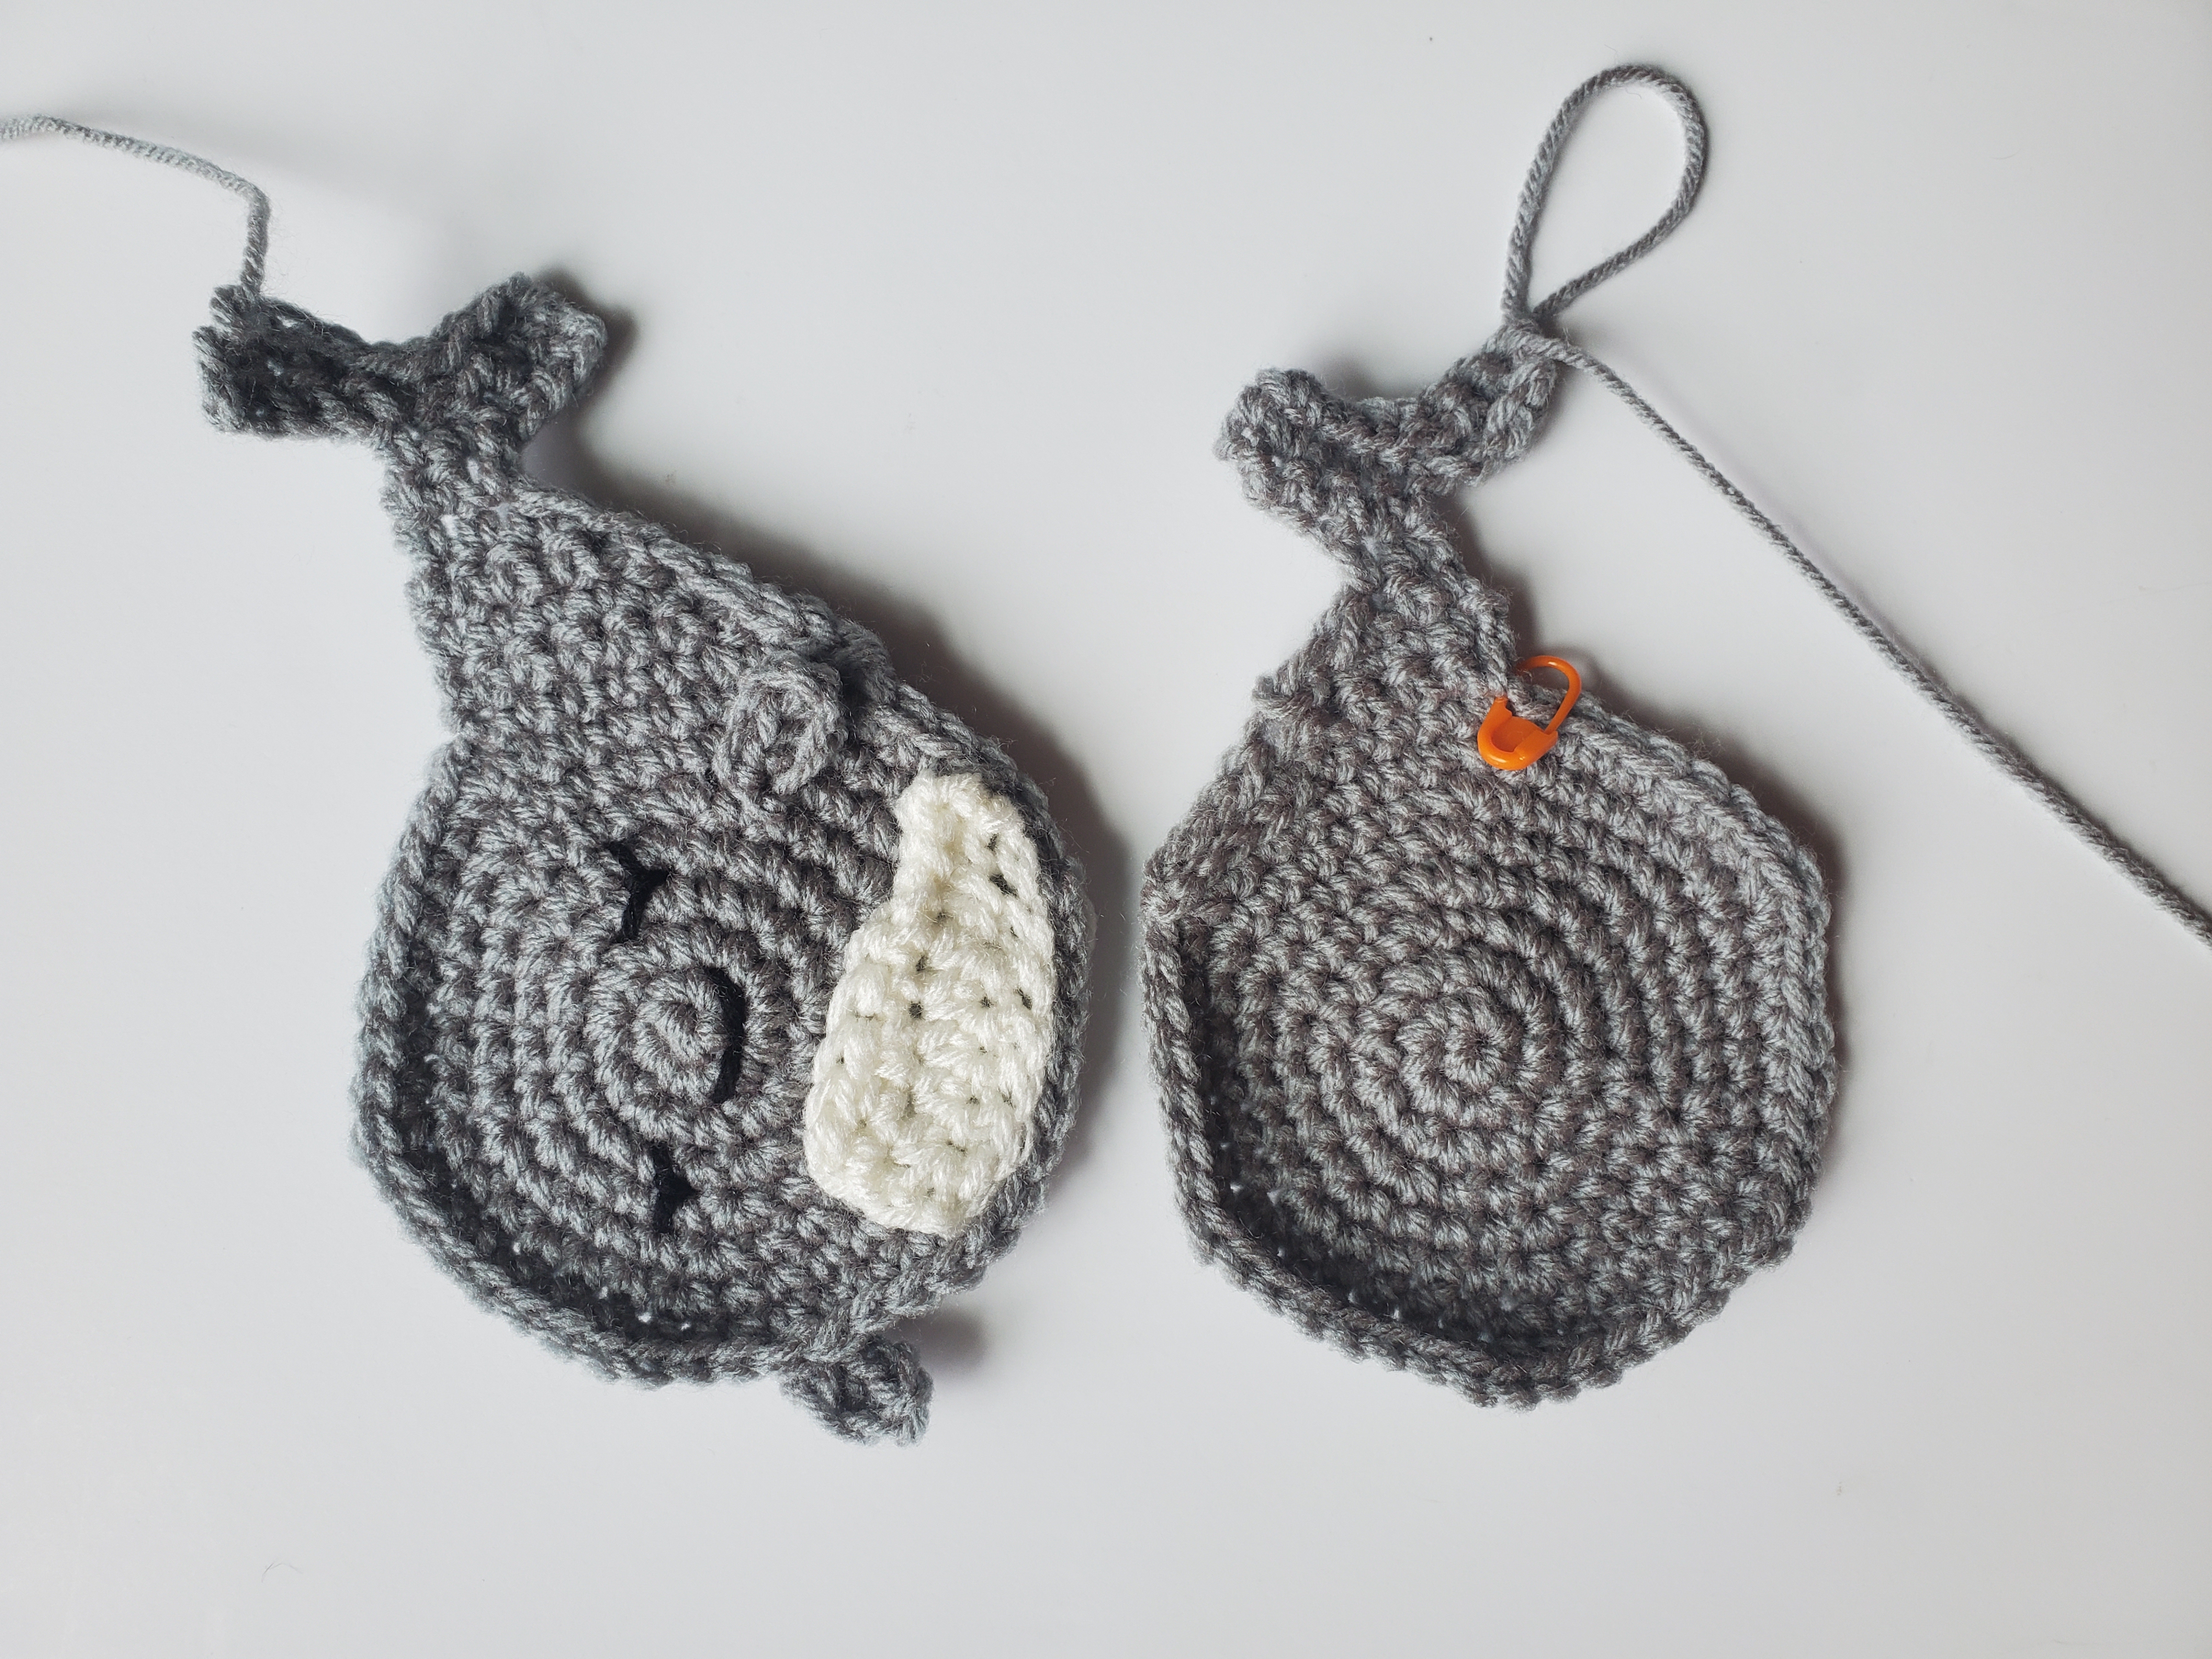
When working on the body of the crochet whale, do not join to your first stitch with a slip stitch. Continue to single crochet around. Your stitch marker will come in handy to mark the beginning of your rounds. That way, you won’t get lost.
When working the tail of the whale (haha), you will notice that some of the rows do not require chain 1’s. This is intentional.
I sew both the whale panels together using slip stitches with the crochet hook. Instead of cutting my yarn and pulling through for the second side of the whale, I keep my hook on so I can do this. This step is up to you, you can sew with the tapestry needle instead if you would like.
Sew the facial features onto the front panel before joining the two panels together. This is so you can tie your strands of yarn securely inside of the whale.
The rounds end with a (x), where x represents the number of stitches you should have.
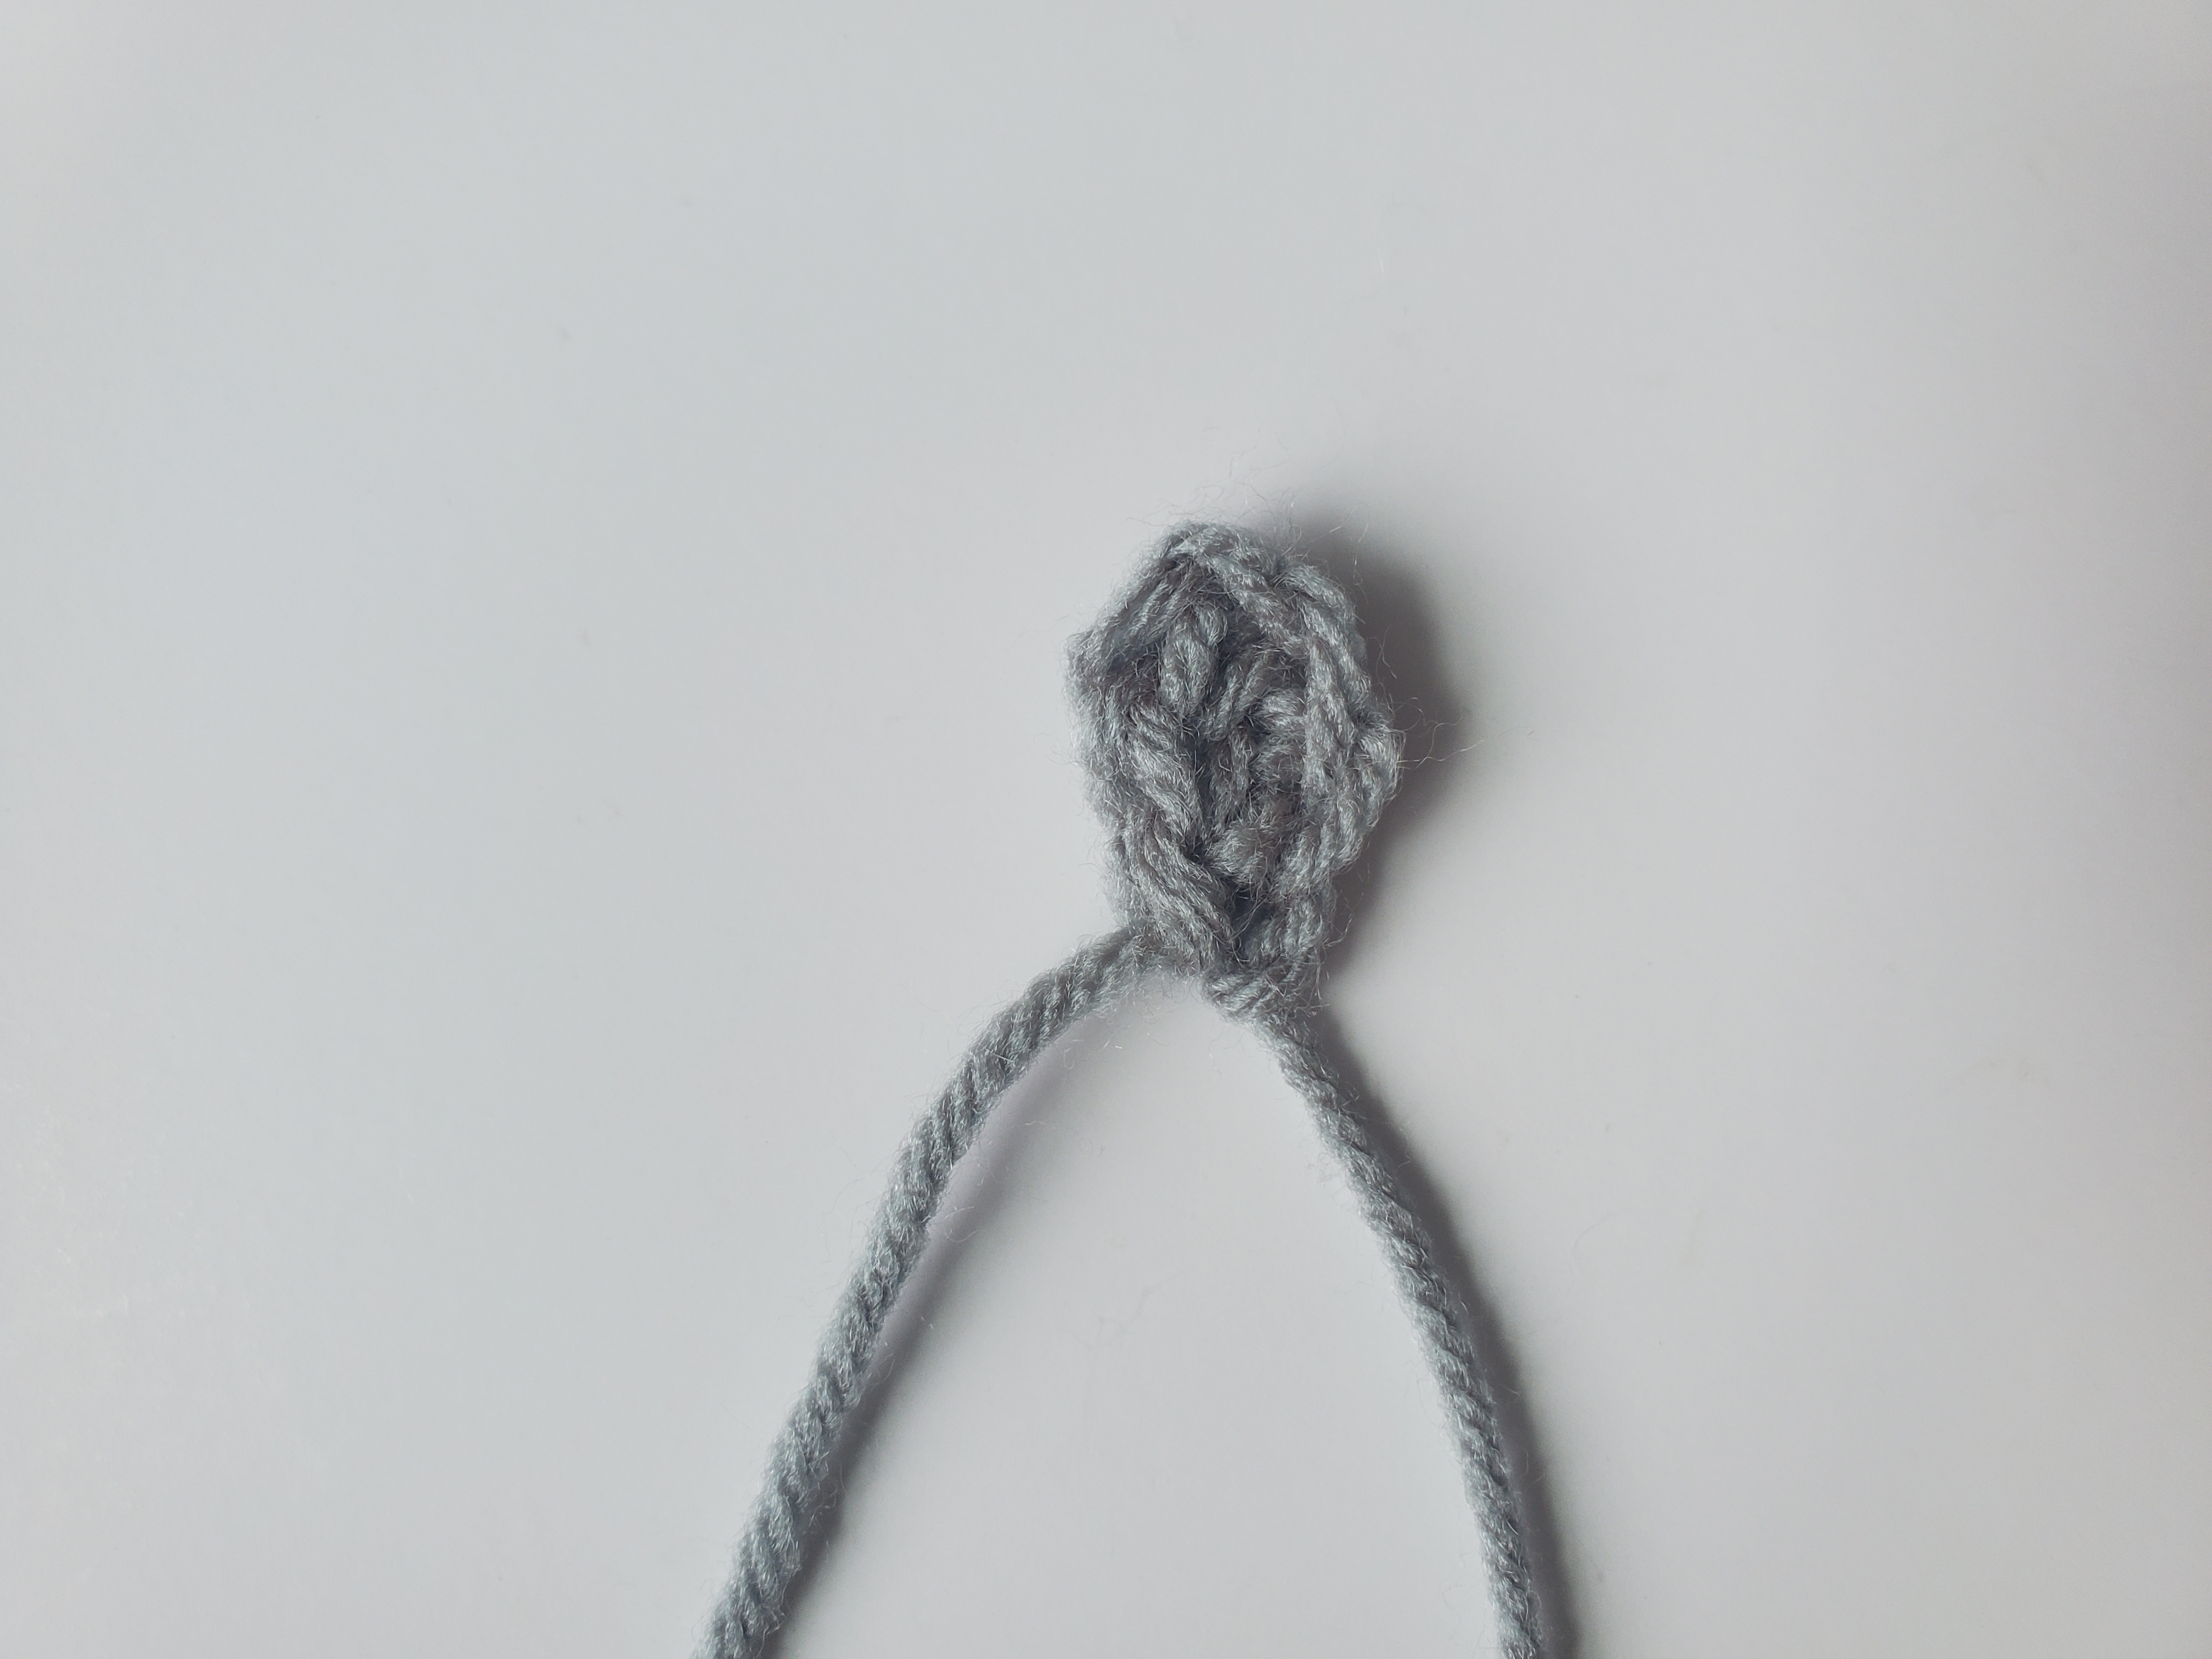
6 sc in mc (if you don’t like the mc, you can ch 2 and start in the second from the hook, but the center “hole” tends to be a little bigger)
Round 1: 2 sc in each st around (12 sts)
Round 2: 2 sc in first st, 1 sc in next st. Repeat around (18 sts)
Round 3: 2 sc in first st, 1 sc in next 2 sts. Repeat around (24 sts)
Round 4: 2 sc in first st, 1 sc in next 3 sts. Repeat around (30 sts)
Round 5: 2 sc in first st, 1 sc in next 4 sts. Repeat around (36 sts)
Round 6: 2 sc in first st, 1 sc in next 5 sts. Repeat around (42 sts)
Round 7: 2 sc in first st, 1 sc in next 6 sts. Repeat around, sl st into the first st (48 sts)
Tail:
Round 8: Ch 1, turn, 1 sc in next 5 sts, sl st into next 5 sts (10 sts)
Round 9: Turn, sl st into next 3 sts (do not sl st into the first st after you turn…sl st into the next, you’ll lose a st here), 1 hdc into next 2 sts, 1 sc in next 4 sts (9 sts)
Round 10: Ch 1, turn, 1 sc into next 3 sts, sl st into next 2 sts (5 sts)
Round 11: Turn, sl st into next st (again, not the first st, but the next). 1 hdc in next st, 1 sc in next 2 sts (4 sts)
Round 12: Ch 1, turn, 1 sc in next sts (2 sts)
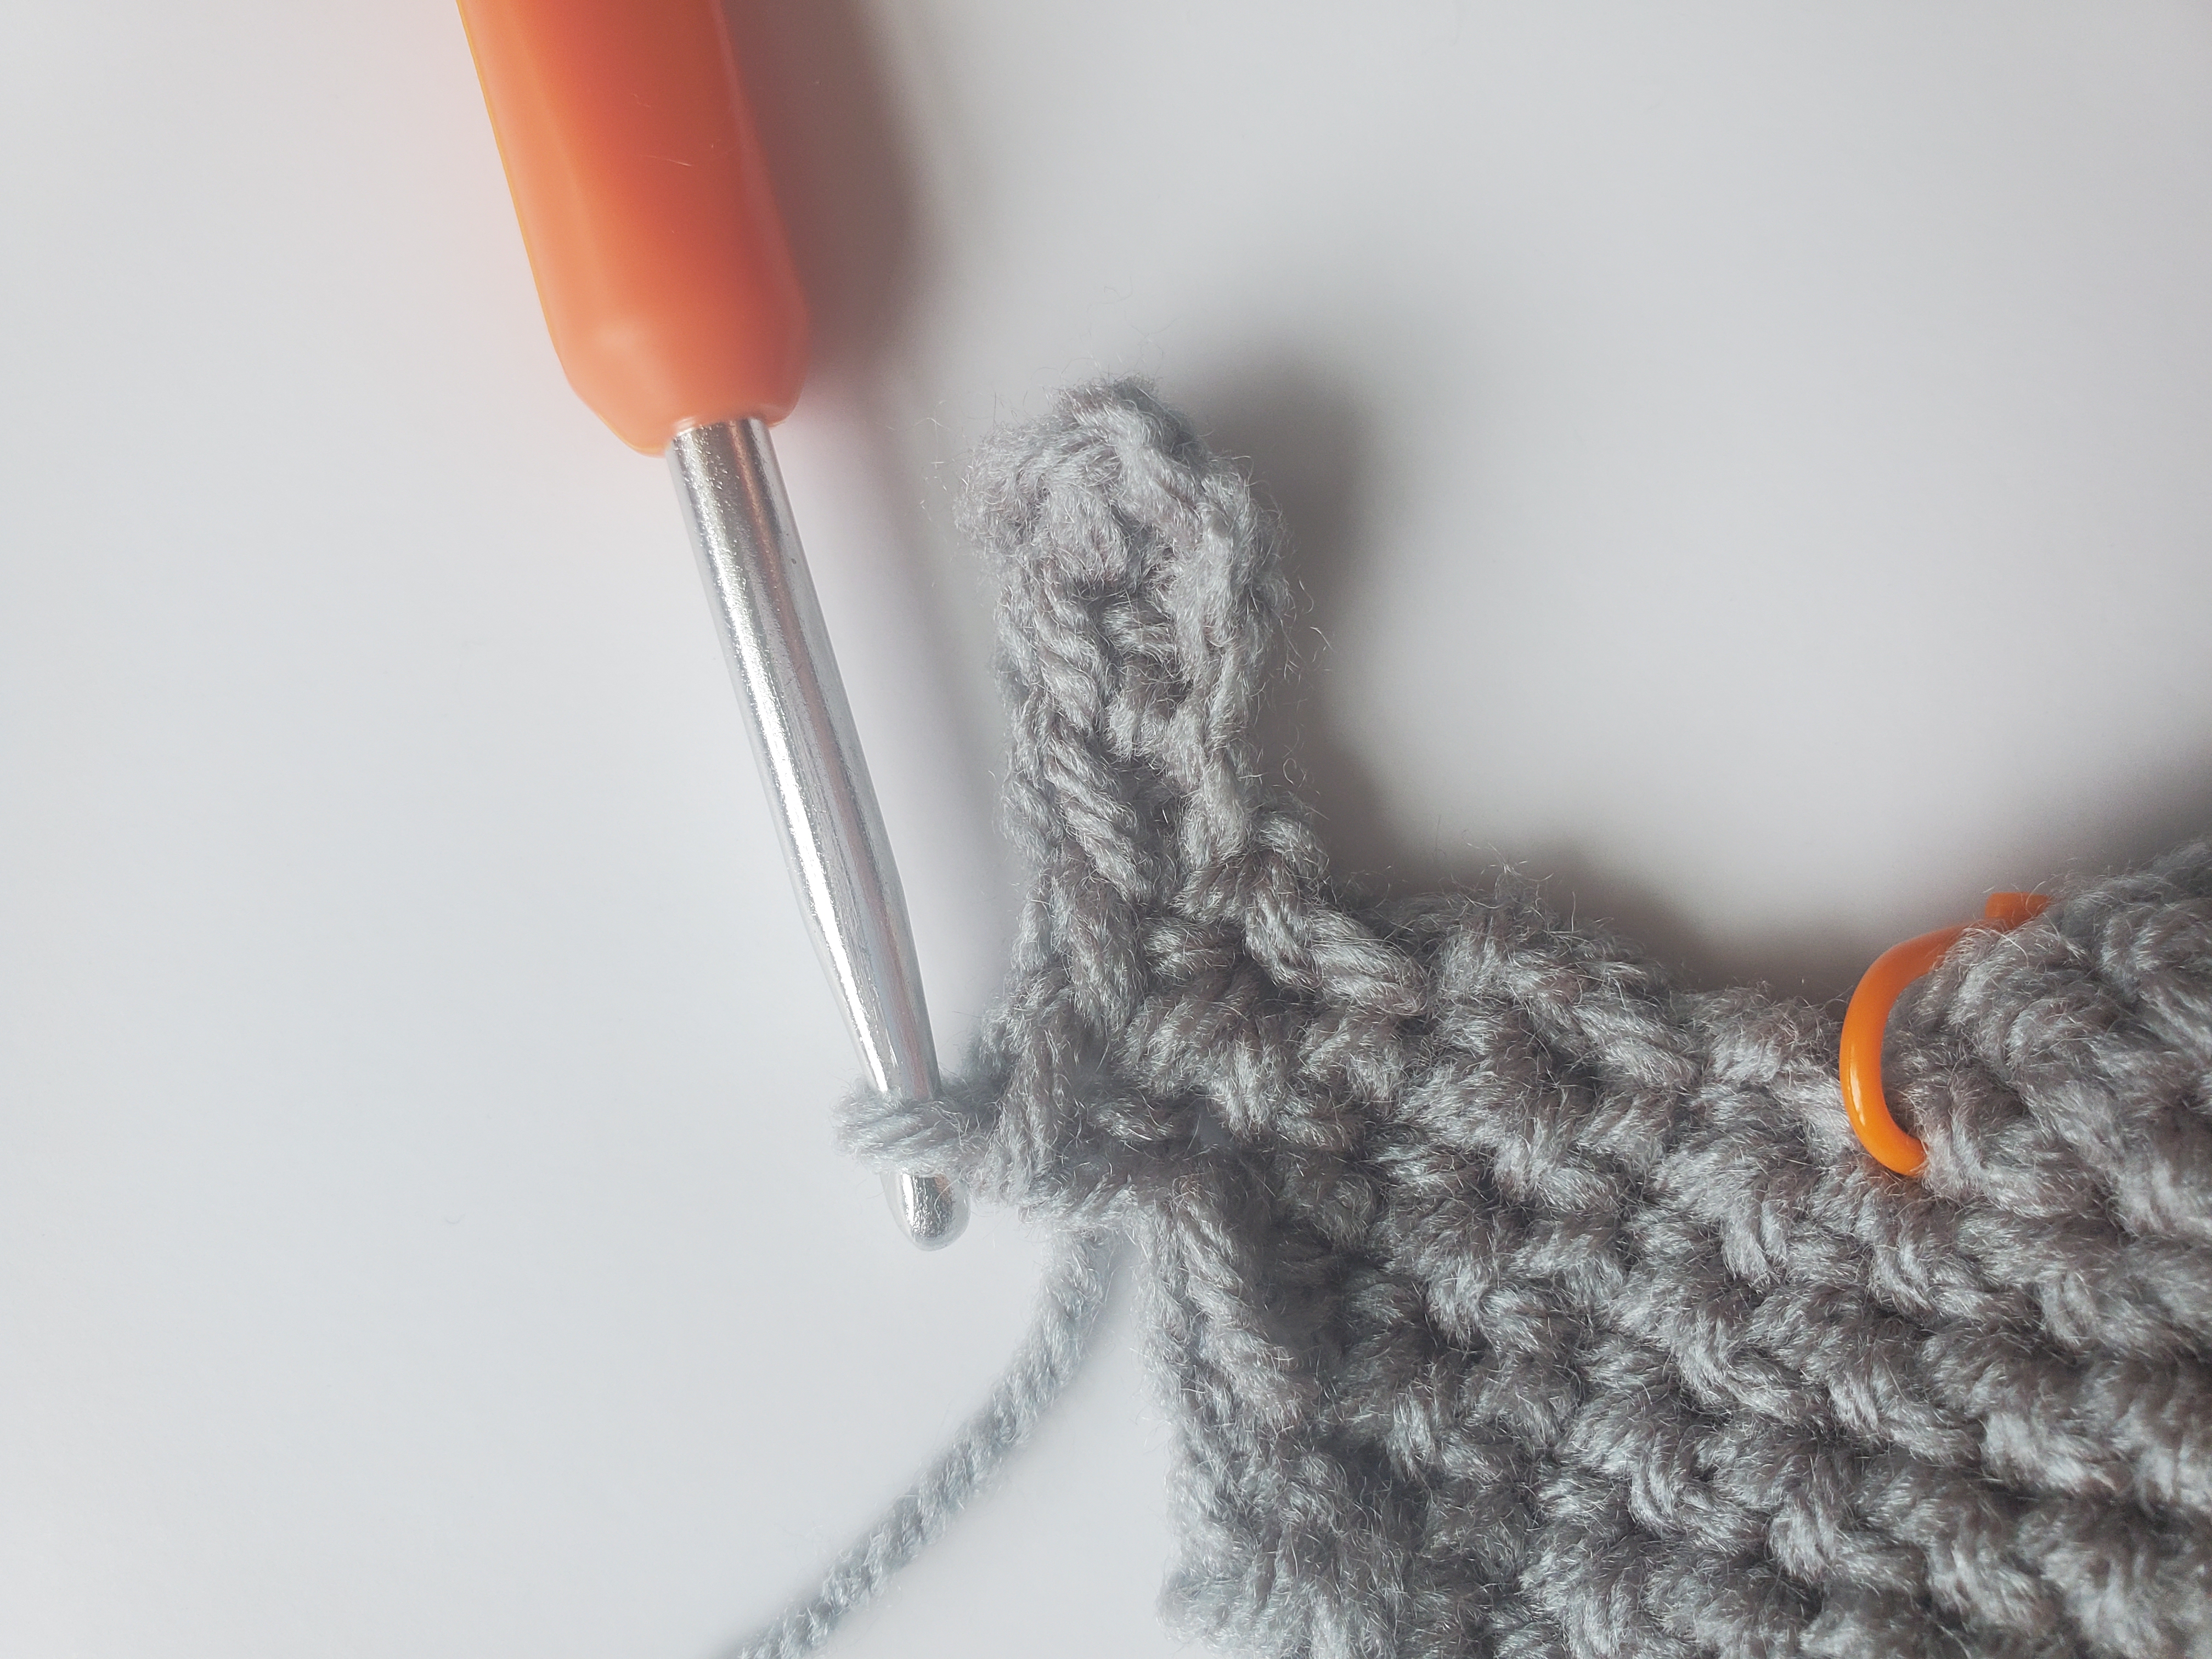
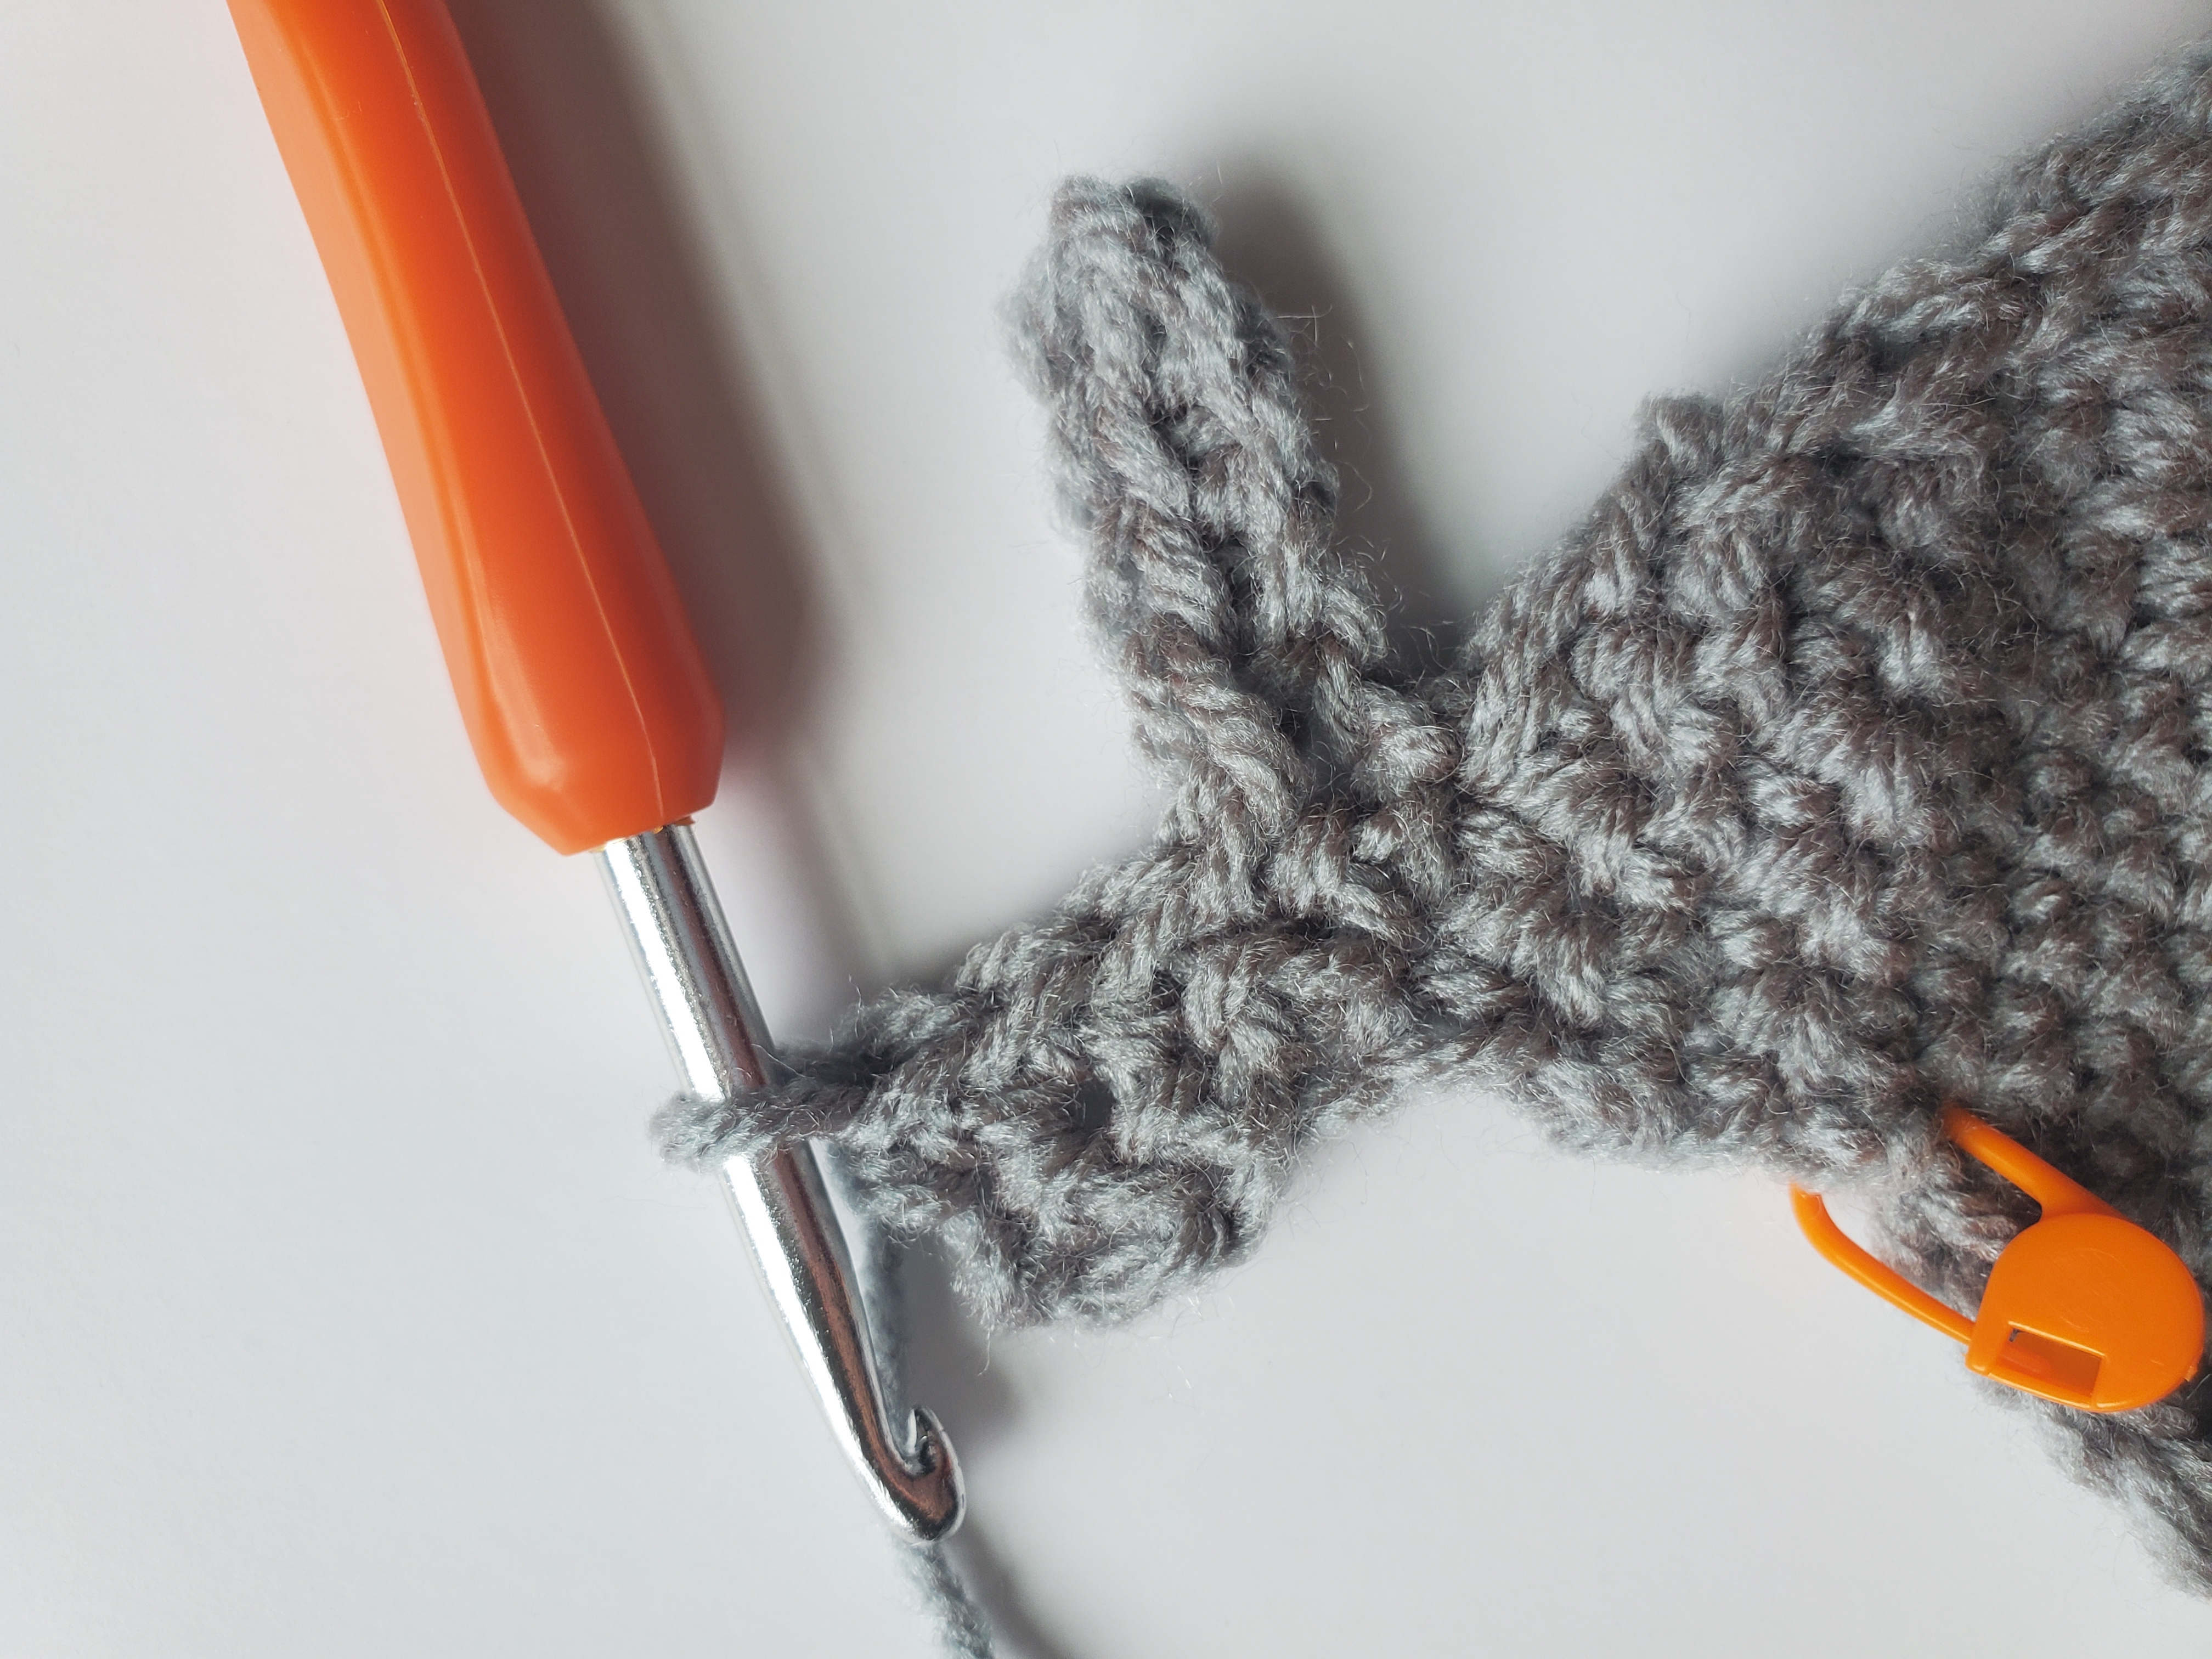
Round 13: Ch 4, turn, (from second ch from hook), 1 sc into next 5 sts (see pic below) (5 sts)
Round 14: Ch 4, turn, (from second ch from hook), 1 sc into next 3 sts, sl st into next 2 sts, 1 sc into next 3 sts (8 sts)
Round 15: Turn, sl st into next 4 sts, 1 sc in last 3 sts (7 sts)
Round 7: 2 sc in first st, 1 sc in next 6 sts, Repeat around (48 sts)
Tail (Back Panel):
Round 8: 1 sc in next 5 sts (5 sts)
Round 9: Ch 1, turn, 1 sc in next 5 sts, sl st into next 5 sts (10 sts)
Round 10: Turn, sl st into next 3 sts (do not sl st into the first st after you turn…sl st into the next, you’ll lose a st here), 1 hdc into next 2 sts, 1 sc in next 4 sts (9 sts)
Round 11: Ch 1, turn, 1 sc into next 3 sts, sl st into next 2 sts (5 sts)
Round 12: Turn, sl st into next st (again, not the first st, but the next). 1 hdc in next st, 1 sc in next 2 sts (4 sts)
Round 13: Ch 1, turn, 1 sc in next sts (2 sts)
Round 14: Ch 4, turn, (from second ch from hook), 1 sc into next 5 sts (see pic below) (5 sts)
Round 15: Ch 4, turn, (from second ch from hook), 1 sc into next 3 sts, sl st into next 2 sts, 1 sc into next 3 sts (8 sts)
Round 16: Turn, sl st into next 4 sts, 1 sc in last 3 sts (7 sts)
Row 1: From second ch from hook, 1 sc into the next 6 chs across, sl st into last 3 chs (9 sts)
Row 2: Ch 1, turn, sl st into the next 3 sts, make 1 hdc in next 6 sts (9 sts)
Row 3: Ch 1, turn, 1 hdc in next 3 sts, 1 sc in next 2 sts, sl st into the next 4 sts (9 sts)
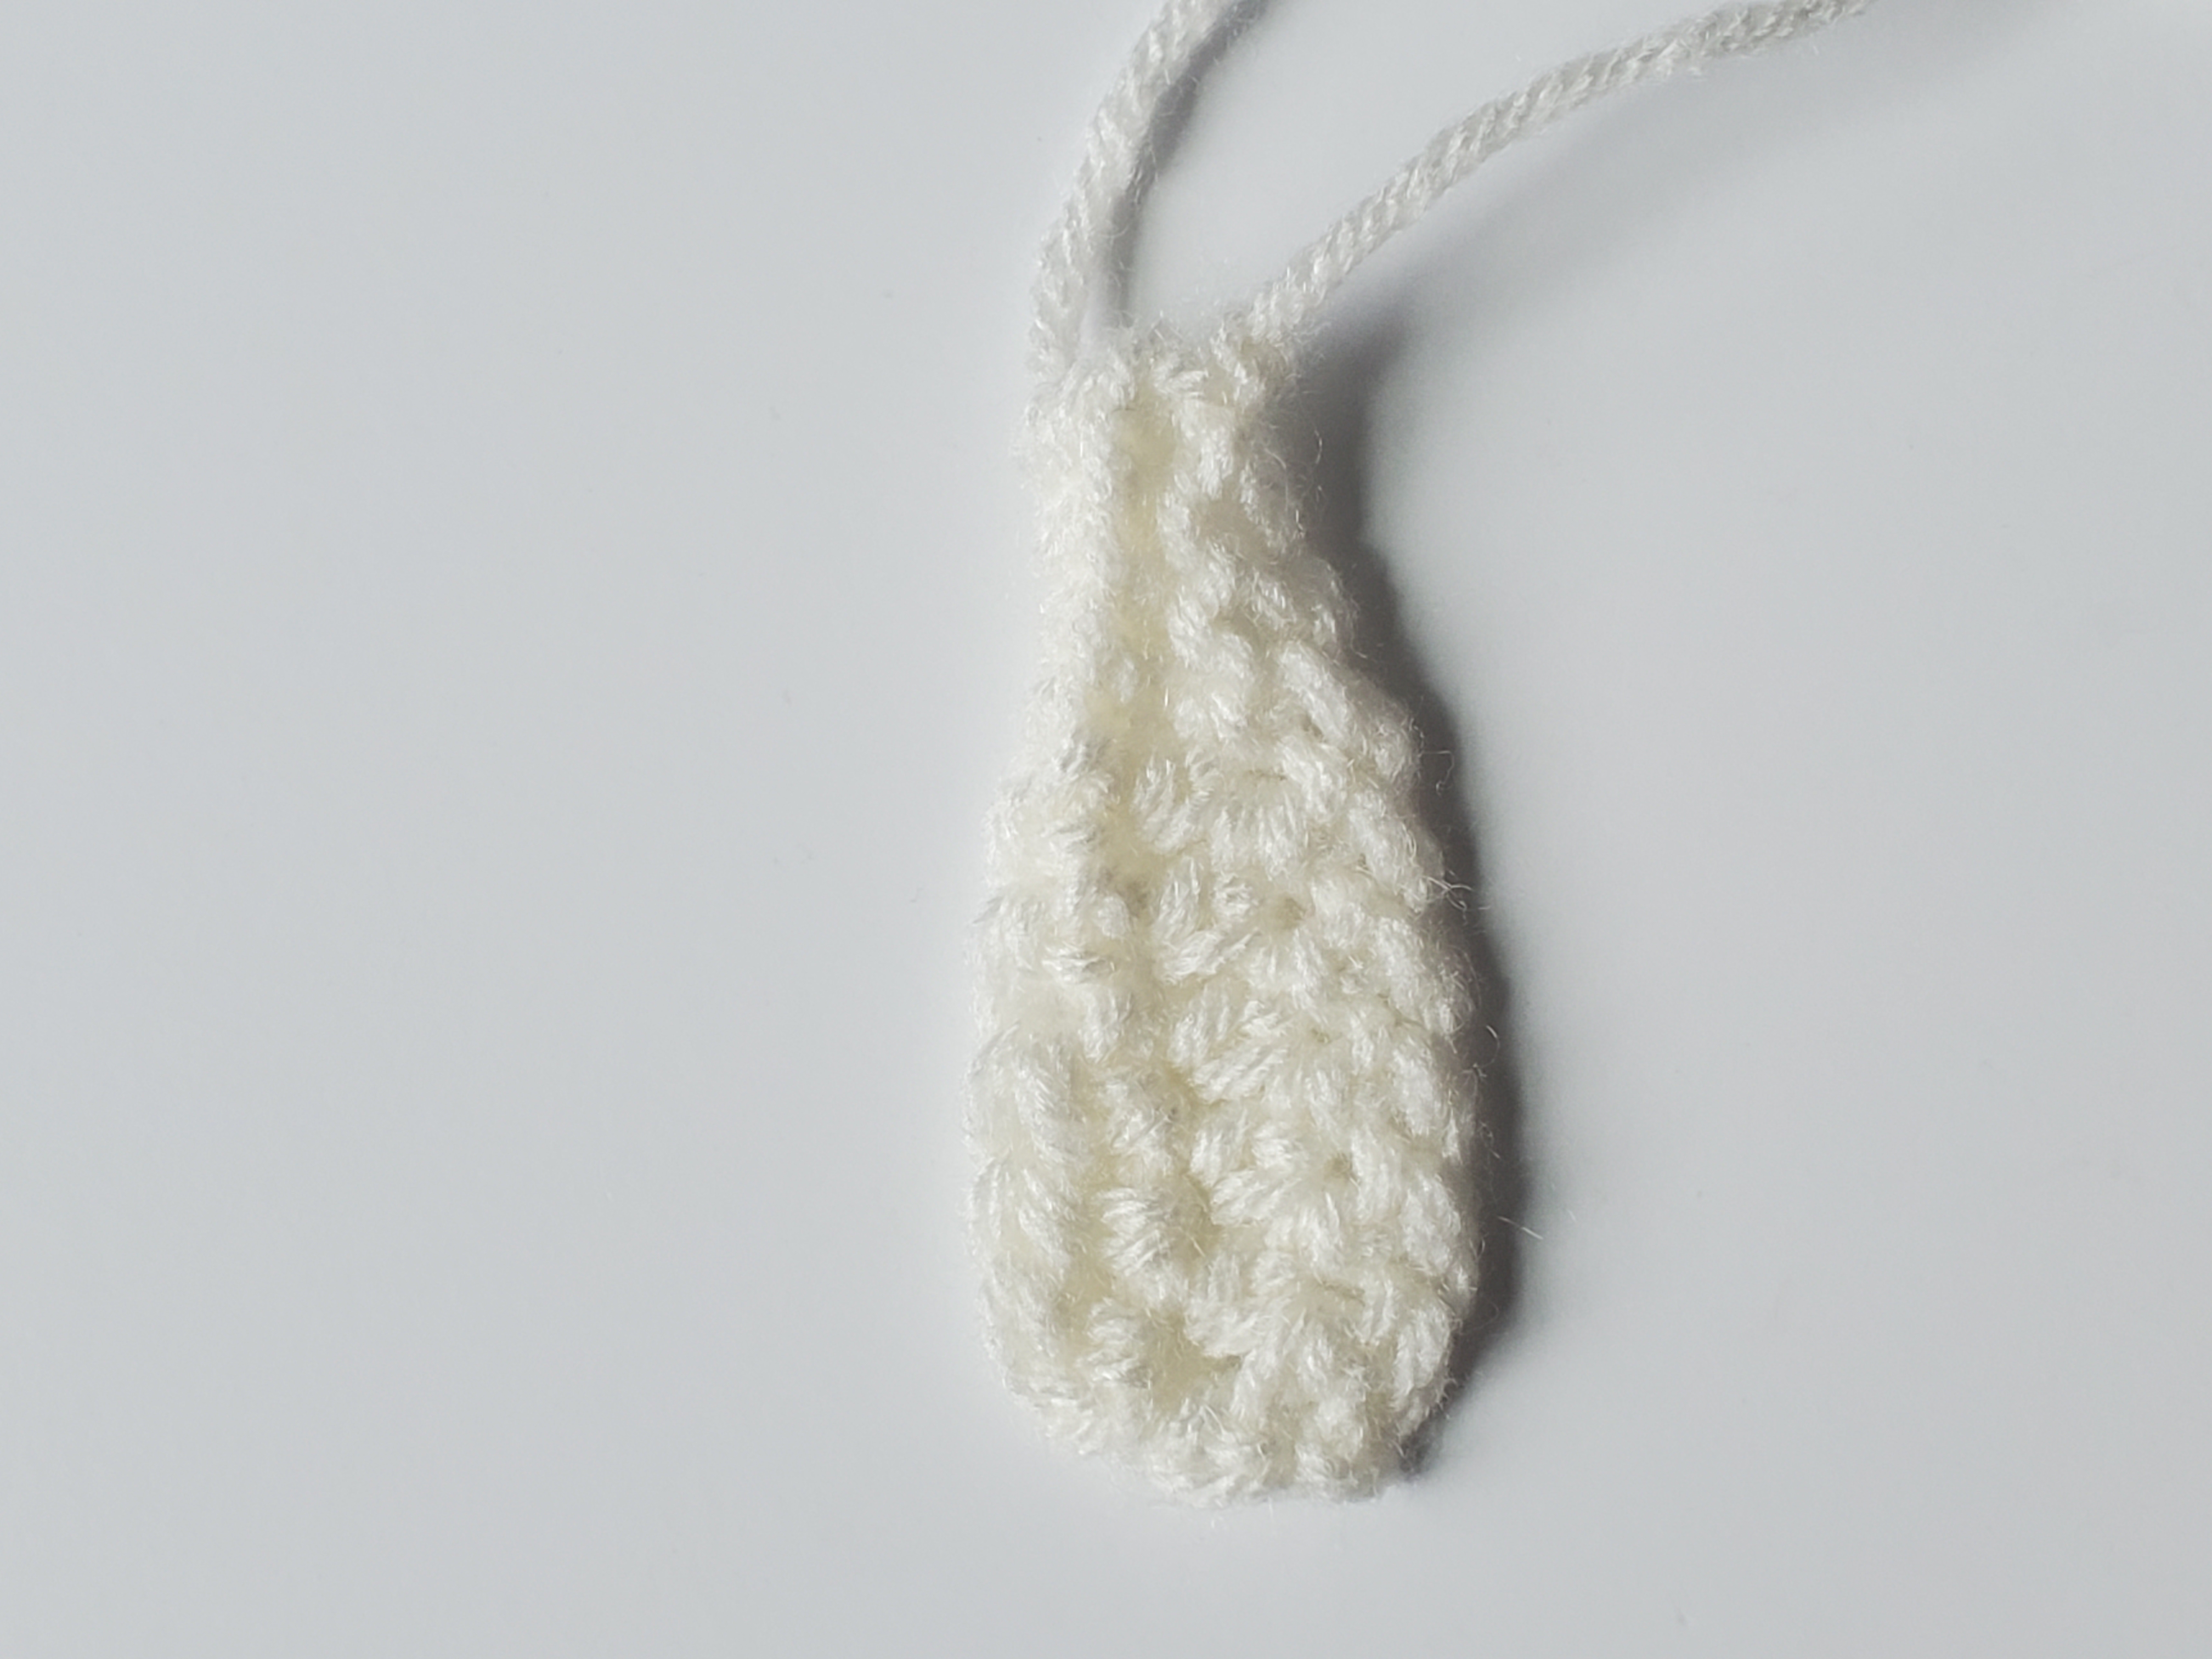
Cut a long piece of yarn of for sewing later and pull through.
Finished Whale Belly
Facial Features:
With your tapestry needle, sew the belly of the whale onto the front panel. Place the belly in the bottom middle of the crochet whale body.
Tie off excess yarn in the back of the panel (this will be hidden inside the whale when completed)
With Black yarn, cute 3 long strands off with scissors.
Sew on the left and right closed eyes, as well as the smile. I like to make a line straight across and then “catch” it a row or so below in the middle. This helps create the “U” shape. See picture below to use as a reference. Tie off excess yarn in the back.
Row 1: From second ch from hook, make 1 hdc in next 2 chs, sl st in last ch (3 sts)
Cut a length of yarn for sewing and pull through.
Finished Whale Arm
Front and Back Panels
Sew both crochet whale arms onto front panel. The whale’s right arm (your left) will be sewn right on the edge of the front panel. See picture above for reference. Tie off excess yarn in the back.
Pick up the back panel of the whale body. Line up the front and the back panels so that they match up evenly. Make sure that the correct sides are facing out.
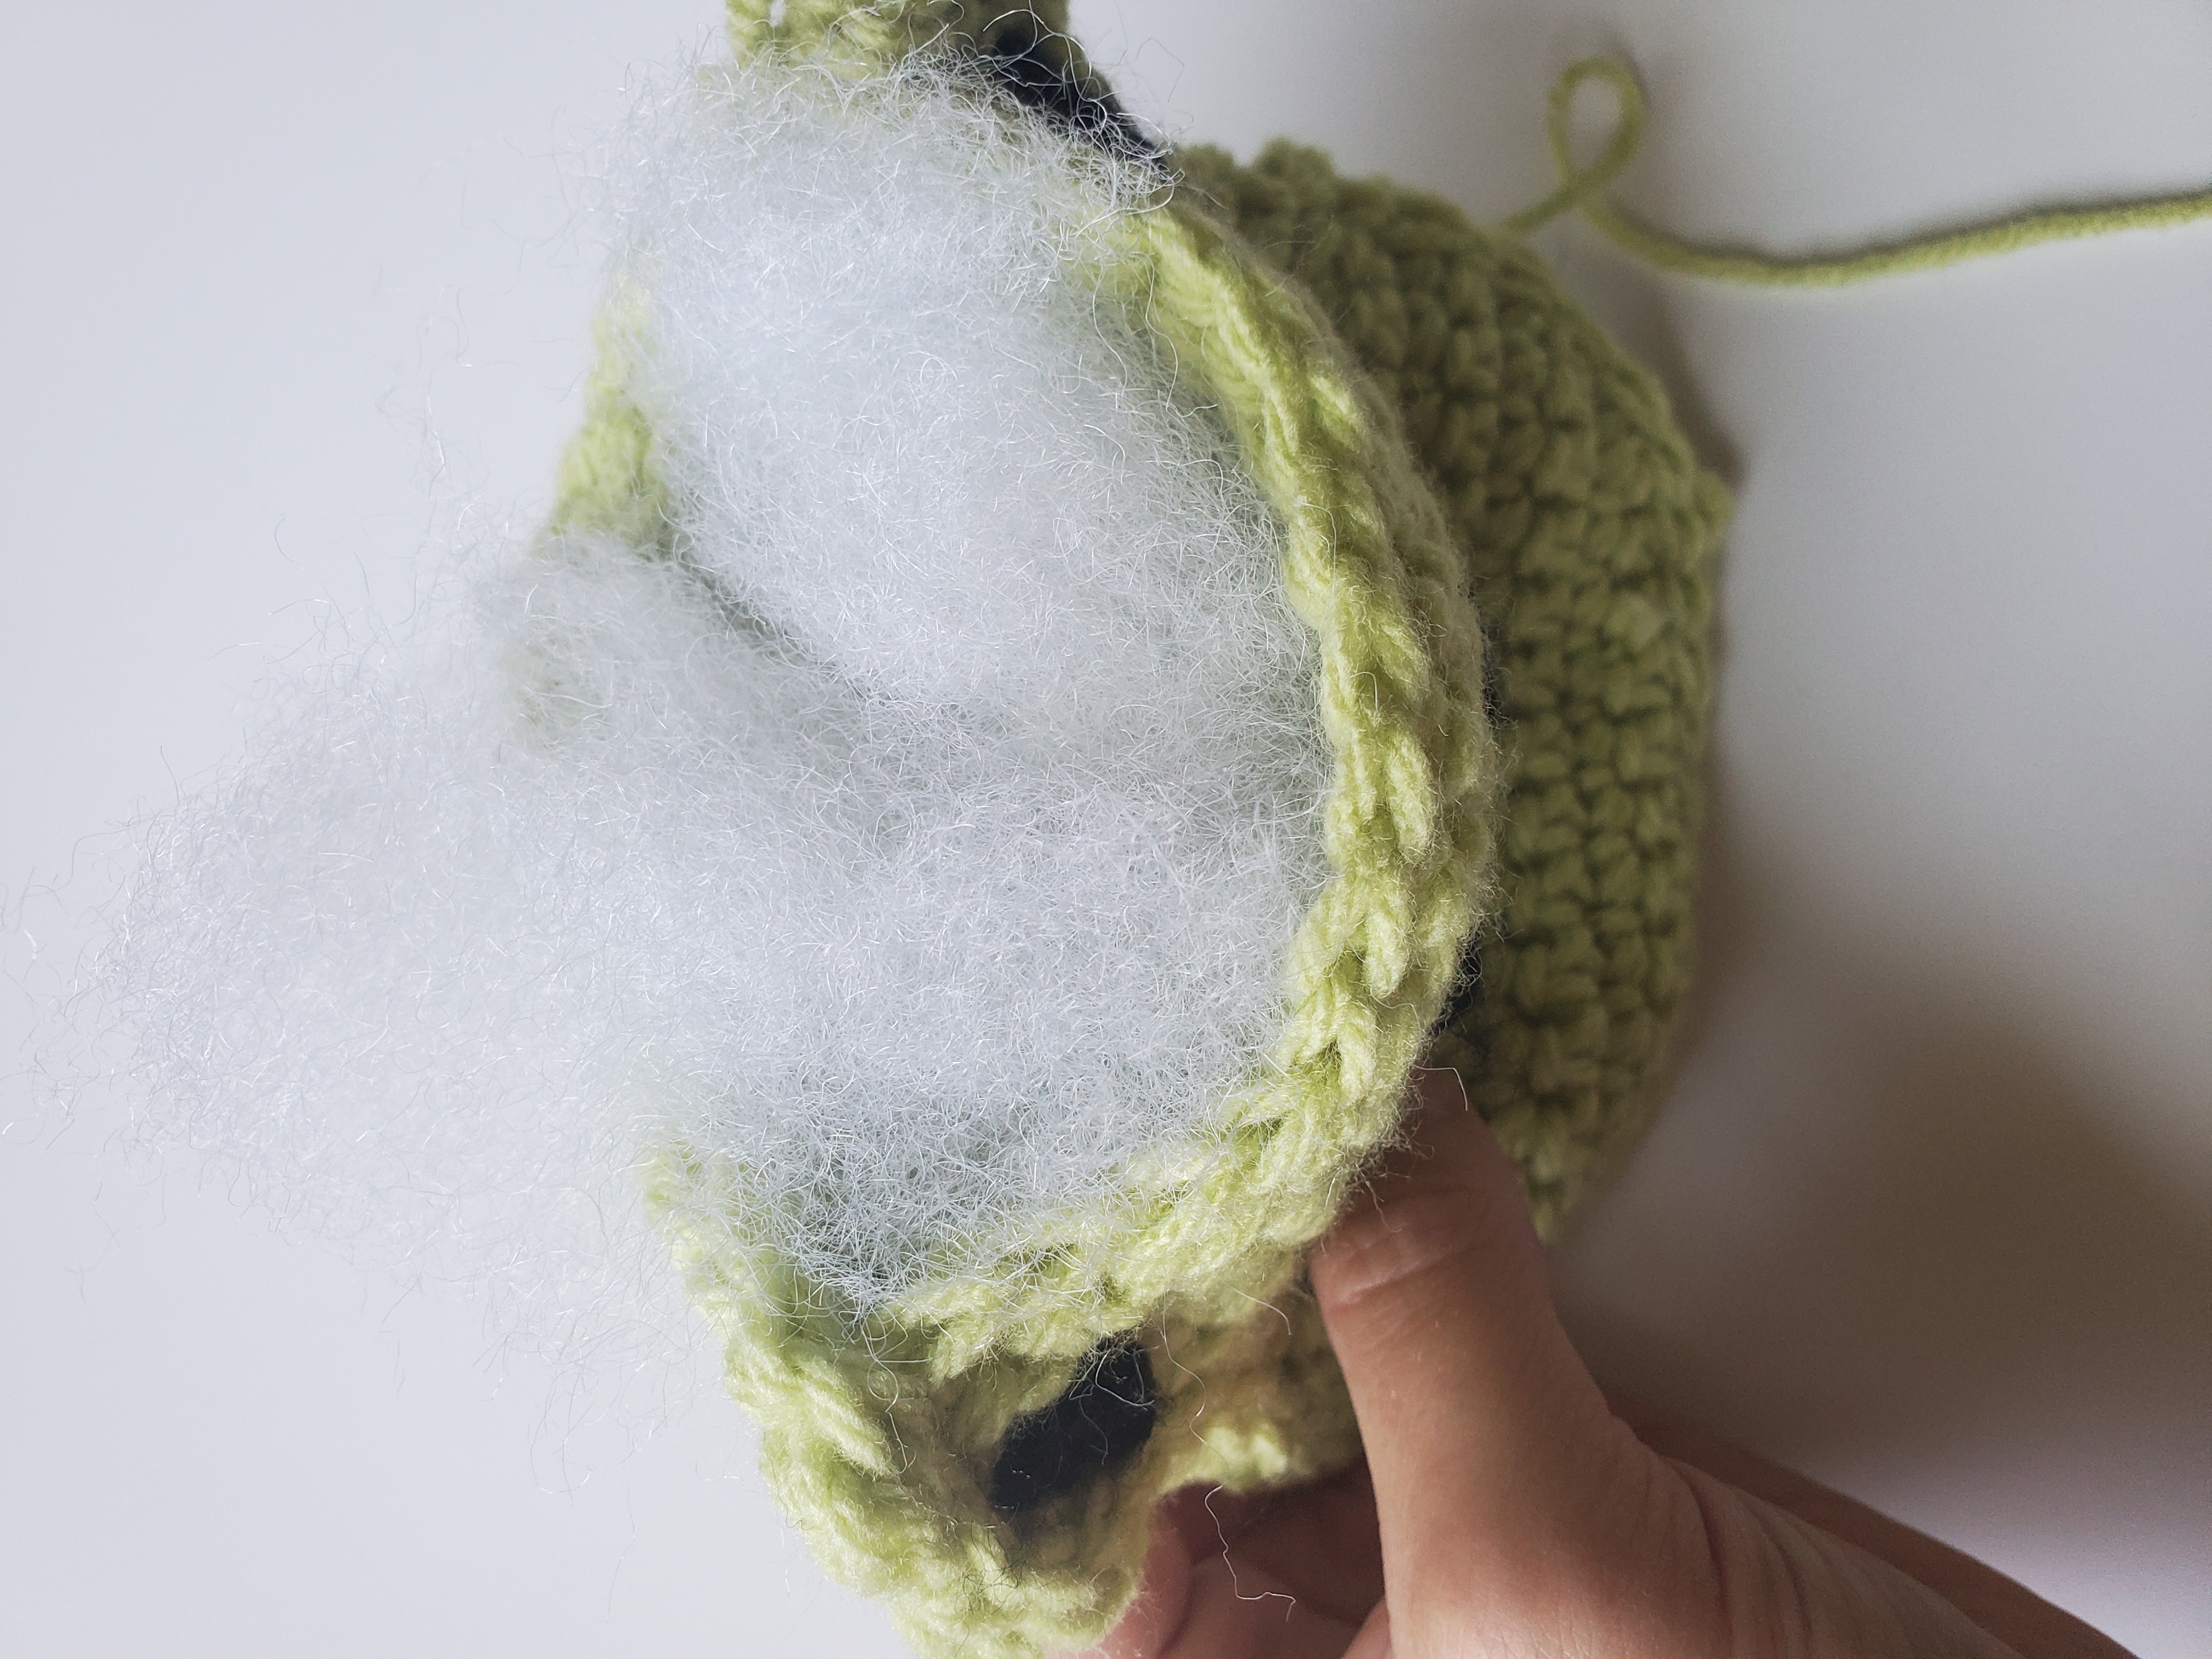
With your 5 mm crochet hook and the back panel, sl st into both the front and back panels of the crochet whale to sew them together. Do not completely sew shut.
Leave an open space large enough to stuff the body with poly-fil. Continue to sl st sew along after stuffing.
Cut yarn and pull through.
Weave in any extra yarn ends with tapestry needle.
And that’s it! I think this little crochet stuffed whale turned out pretty cute. What do you think?
As always, thank you for checking out my crochet patterns! Until next time!
Hello everyone! Today we are going to learn how to make a stuffed crochet frog toy! This pattern is so easy and quick, you can crochet this little guy in an afternoon!
***Please note that this post may contain affiliate links. This means that I may receive a commission if you purchase something through these links (at no cost to you!). Thank you for your support!***
Okay, so I was inspired to make my little frog friend to go along with my Frog Bucket Hat I made a few months ago. I use the same green yarn for both patterns so they match! Here they are side by side:
I think they’re so cute together!
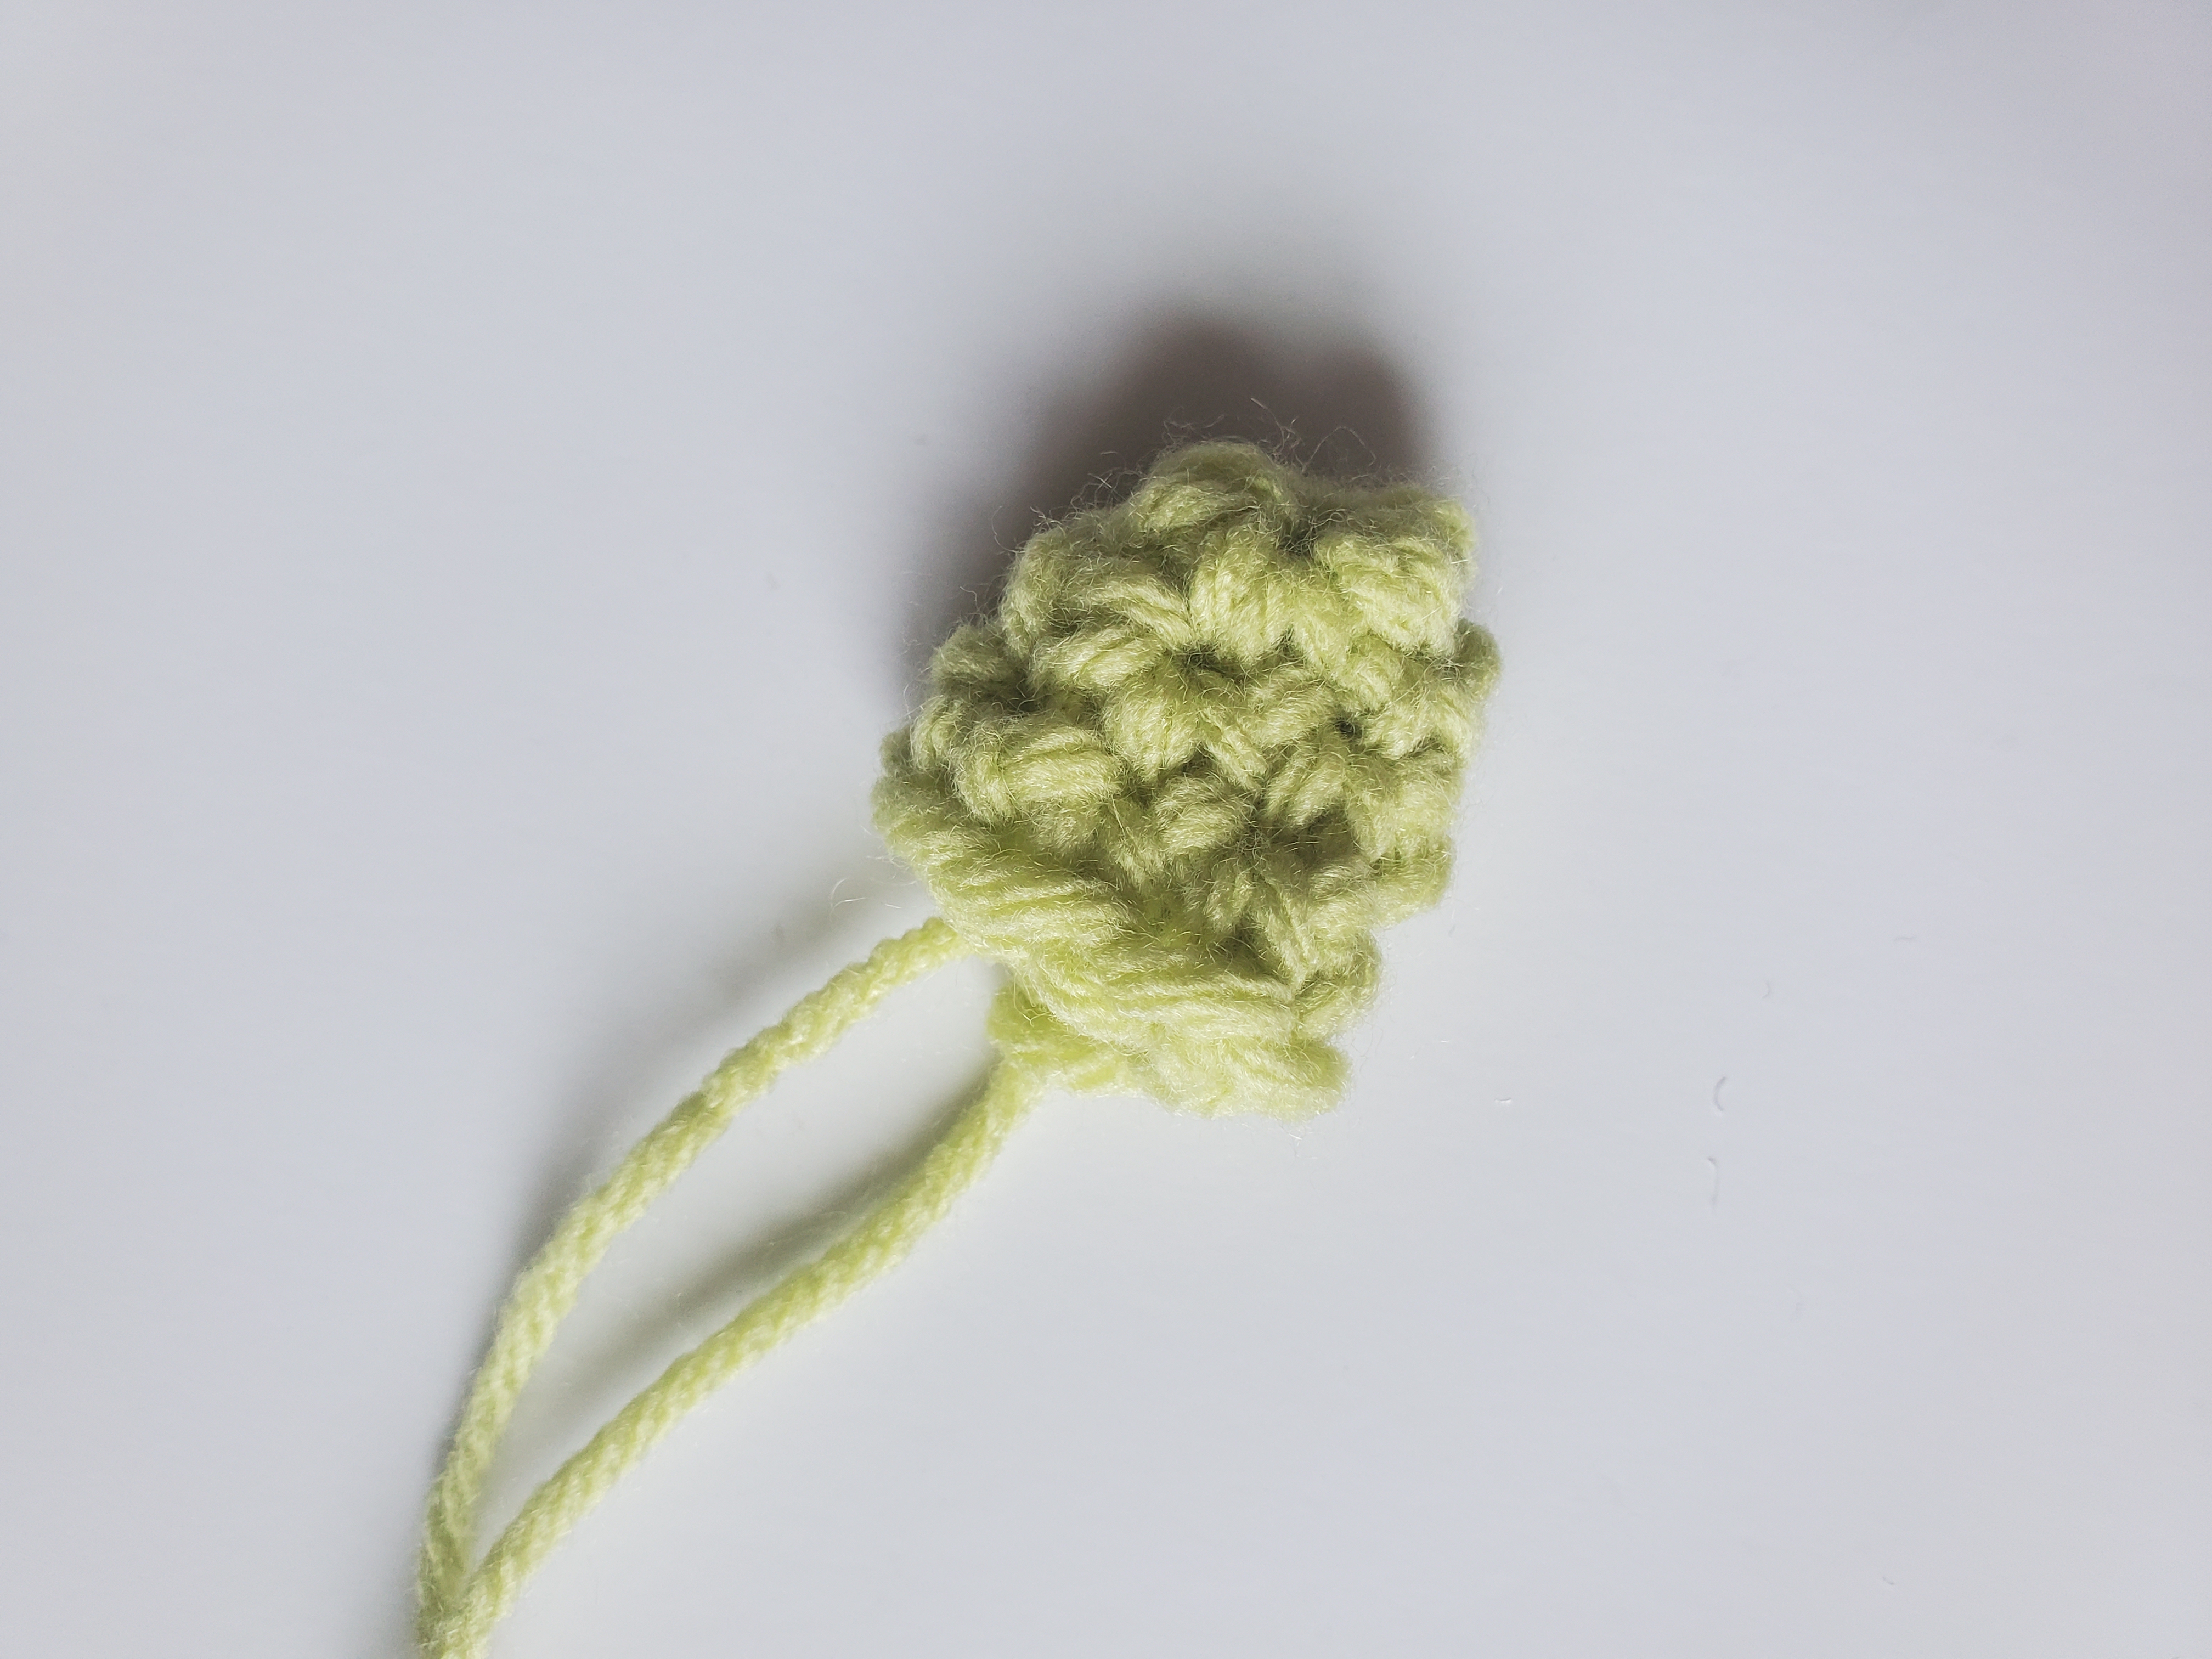
When I was creating this little crochet frog friend, I couldn’t decide if I wanted to give him arms or not. I decided to add arms, but did this using an amigurumi technique by working in a magic circle. The belly is also made with this technique.
If you like how your frog looks without the arms, you can leave them off.
I used medium 4 worsted weight, acrylic yarn. You can use any kind of yarn you would like as long as it’s the correct weight. I just really like the yarn from Red Heart for fun projects like this. Especially since it’s reasonably priced and comes in so many colors.
When finished, he is about 5″ x 5.5″ (give or take, all depends on your tension!)
Ready to learn how to make your cute, little, crochet frog stuffy? Let’s get started!
When making the body of the frog, the chain 1 does not count as a stitch.
When working in the magic circle, do not join to the first st with a slip stitch, just continue single crocheting around (a stitch marker is helpful to keep track of your rounds).
The number in parenthesis at the end of the row/round, indicates how many stitches you should have.
When finished with the 2nd body panel (do not cut yarn, leave your hook on there if you want to sl st them together)
Row 1: From second ch from hook, sc in each ch across (10 sts)
Row 2: Turn, ch 1, make 2 sc in first st, sc in each st across until last st, make 2 sc in last st (12 sts)
Row 3: Turn, ch 1, make 2 sc in first st, sc in each st across until last st, make 2 sc in last st (14 sts)
Row 4: Turn, ch 1, make 2 sc in first st, sc in each st across until last st, make 2 sc in last st (16 sts)
Row 5-8: Turn, ch 1, sc in each st across (16 sts)
Row 9: Turn, ch 1, sc2tog, sc in each st across until the last two sts, sc2tog (14 sts)
Row 10-11: Turn, ch 1, sc in each st across (14 sts)
Row 12: Turn, ch 1, make 3 sc in first st, sc in each st across until last st, make 3 sc in last st (18 sts)
Row 13: Turn, ch 1, make 2 sc in first st, sc in each st across until last st, make 2 sc in last st (20 sts)
Row 14: Turn, ch 1, sc2tog, sc in each st across until last two sts, sc2tog (18 sts)
Row 15: Turn, ch 1, sc2tog, 1 sc in next st, sl st into next 4 sts loosely, 1 sc in next 4 sts, sl st into next 4 sts loosely, 1 sc in next st, sc2tog (16 sts)
Row 16: Turn, ch 1, 2 sc in first st, sc2tog, sl st into next 3 sts loosely, 1 sc in next 4 sts, sl st into next 3 sts, sc2tog, 2 sc in last st (16 sts)
Sl st into same st, cut a reasonable length off and pull through for the FIRST PANEL.
If you don’t cut your yarn for the second panel, it can be easy to sew them together by sl sting later. If you want to make the arms, I would suggest sewing the panels together first and then making the arms (unless you would rather sew with your needle, totally up to you).
Cut a long piece of yarn off for sewing later and pull through.
Assembly:
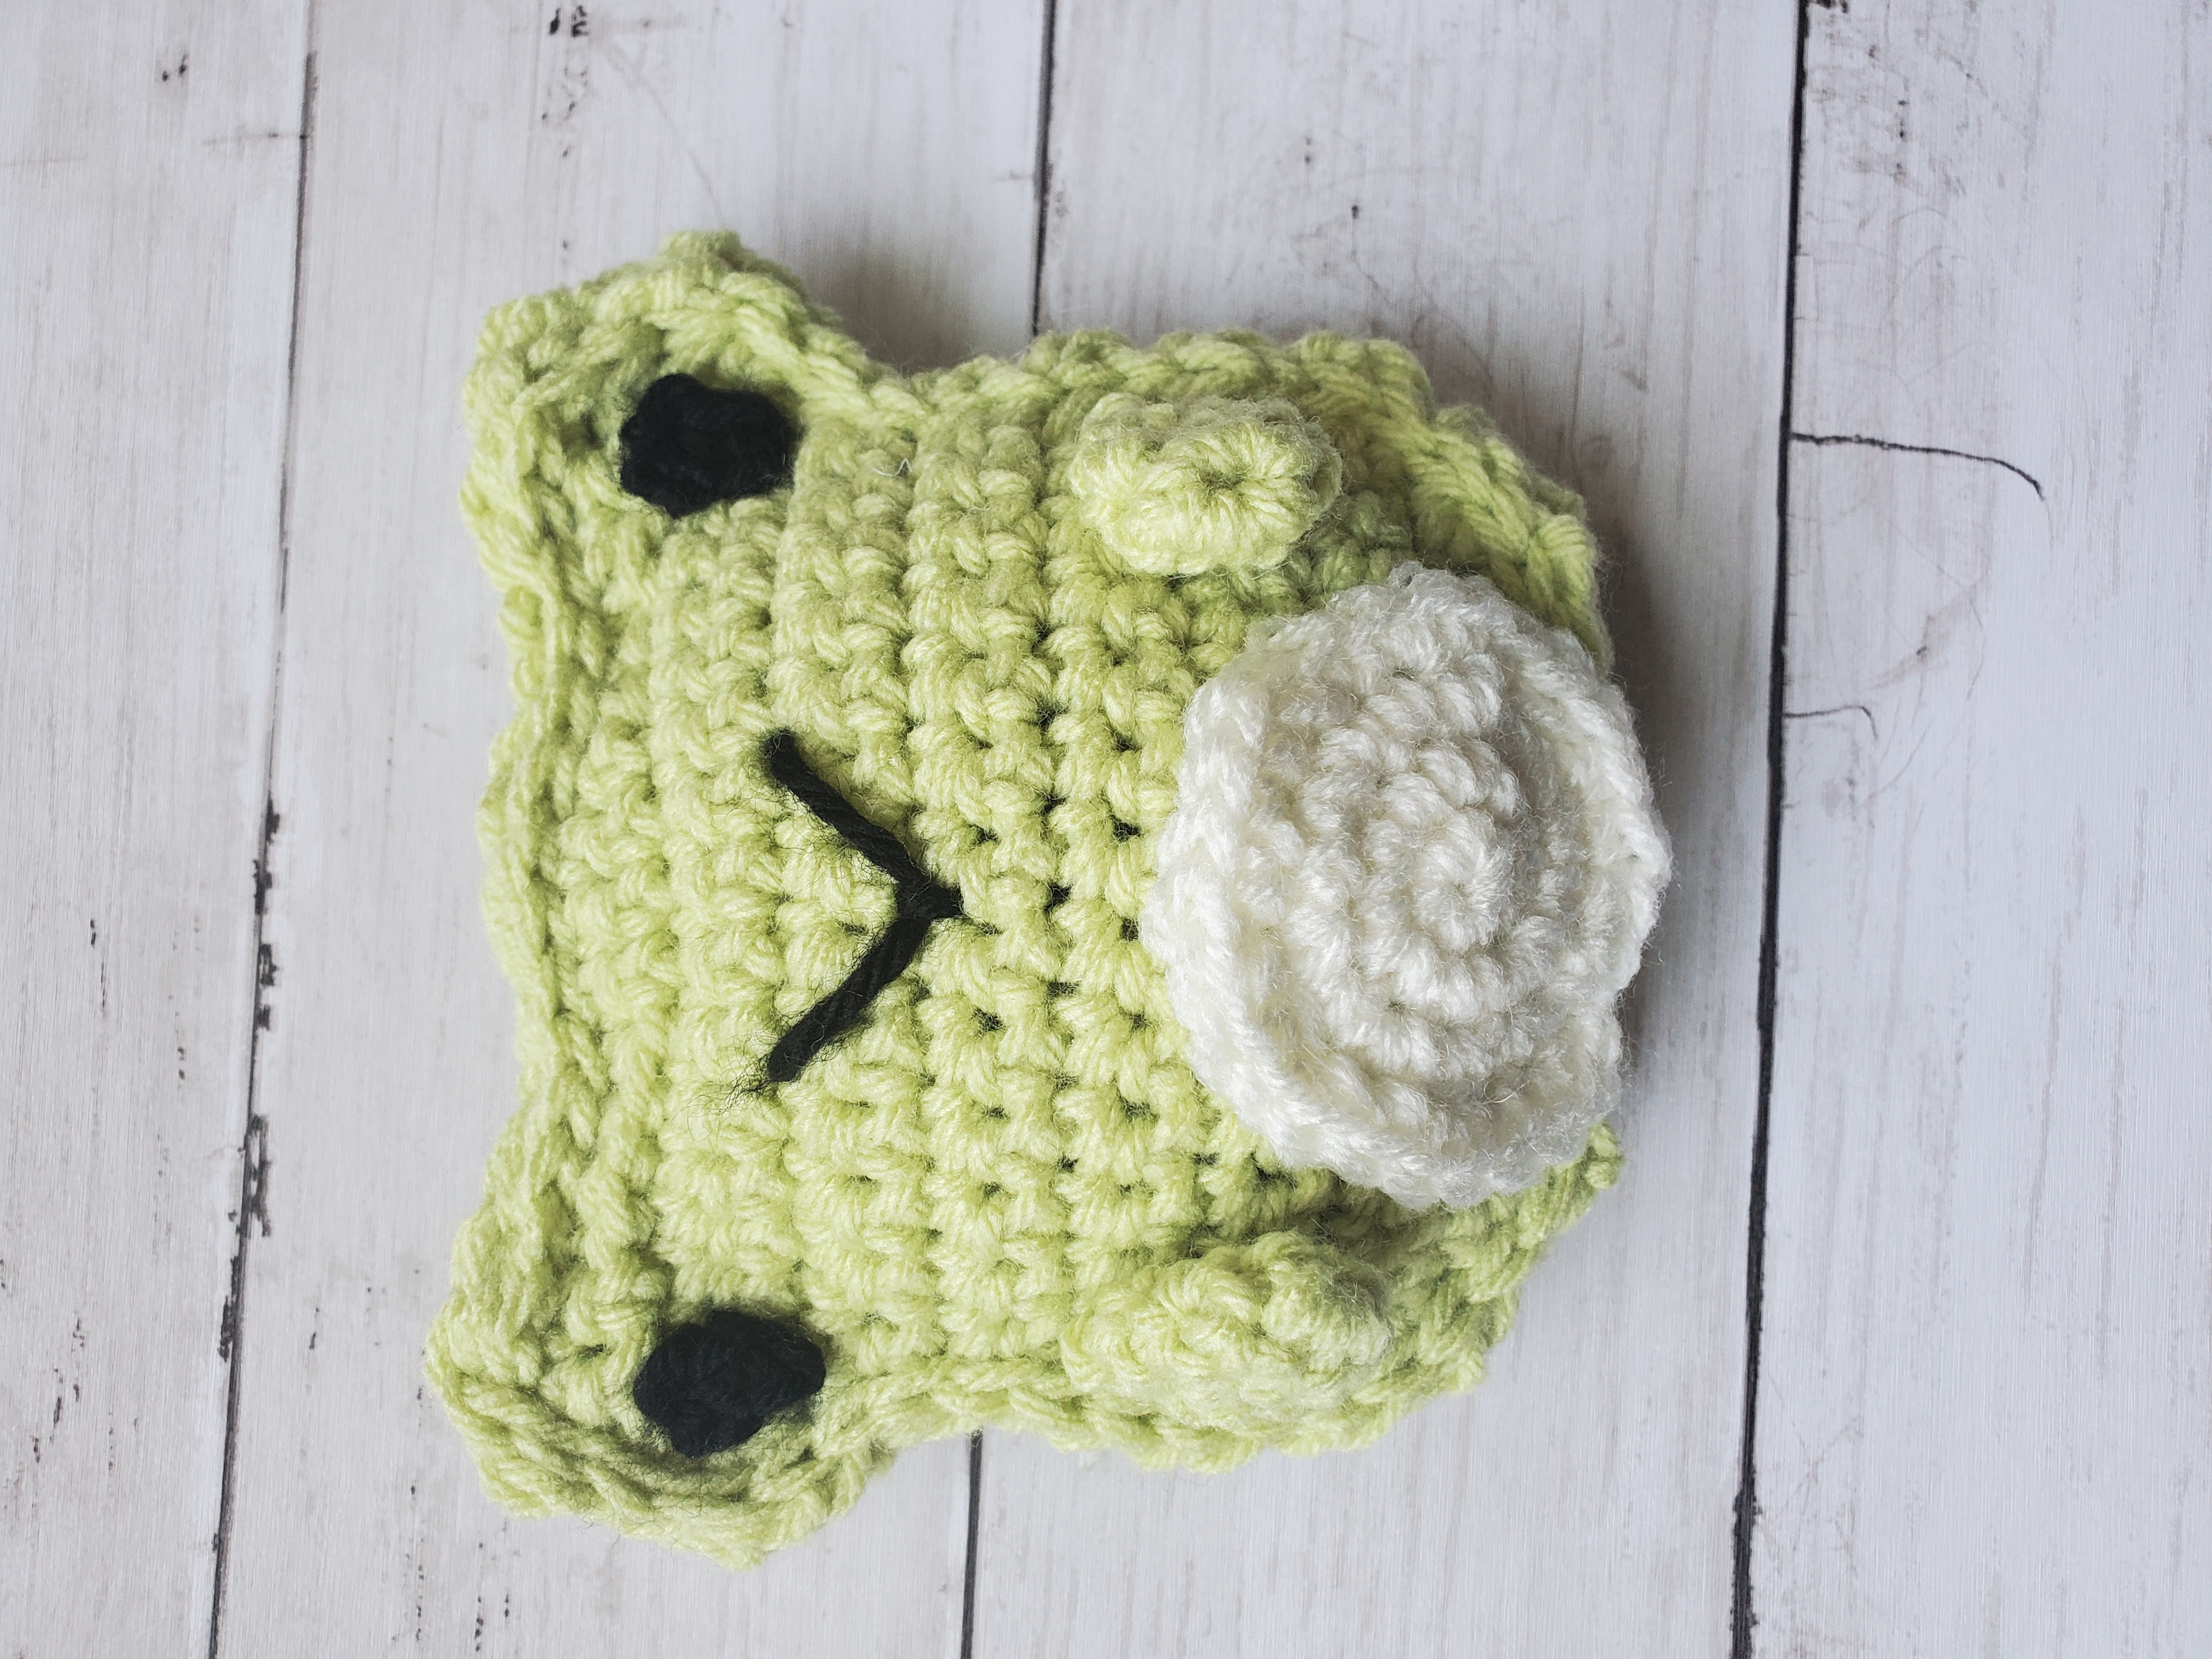
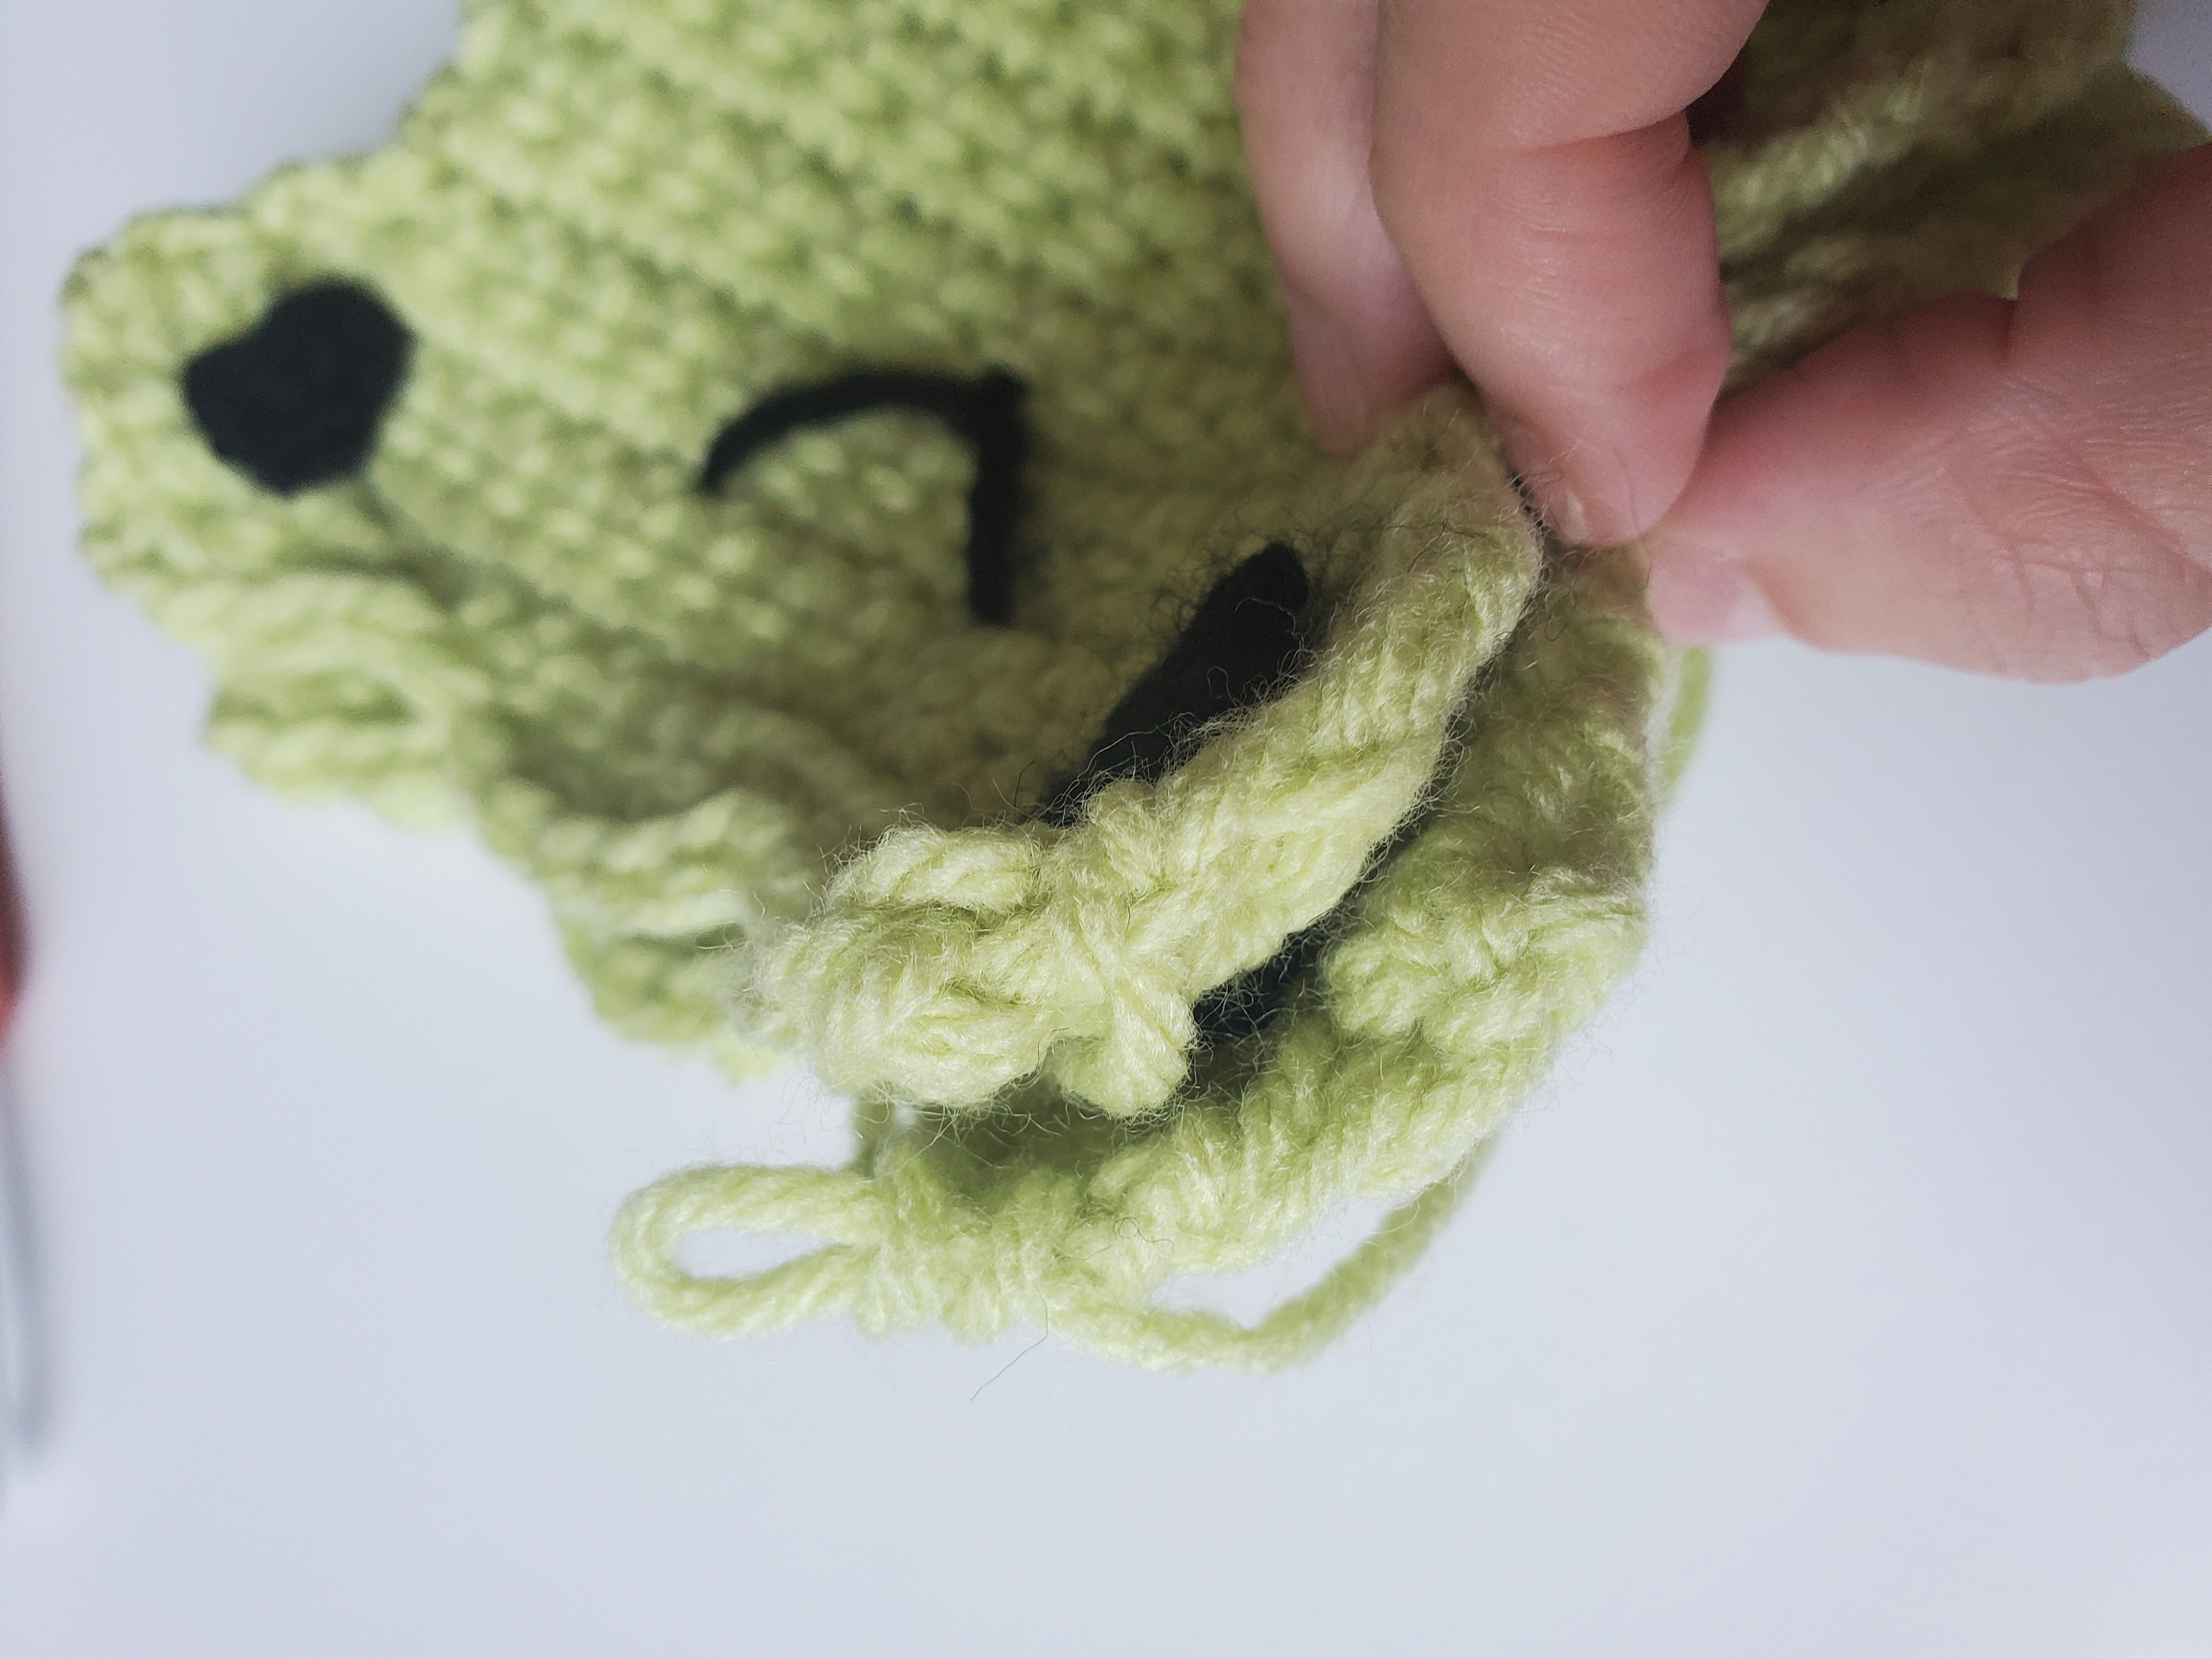
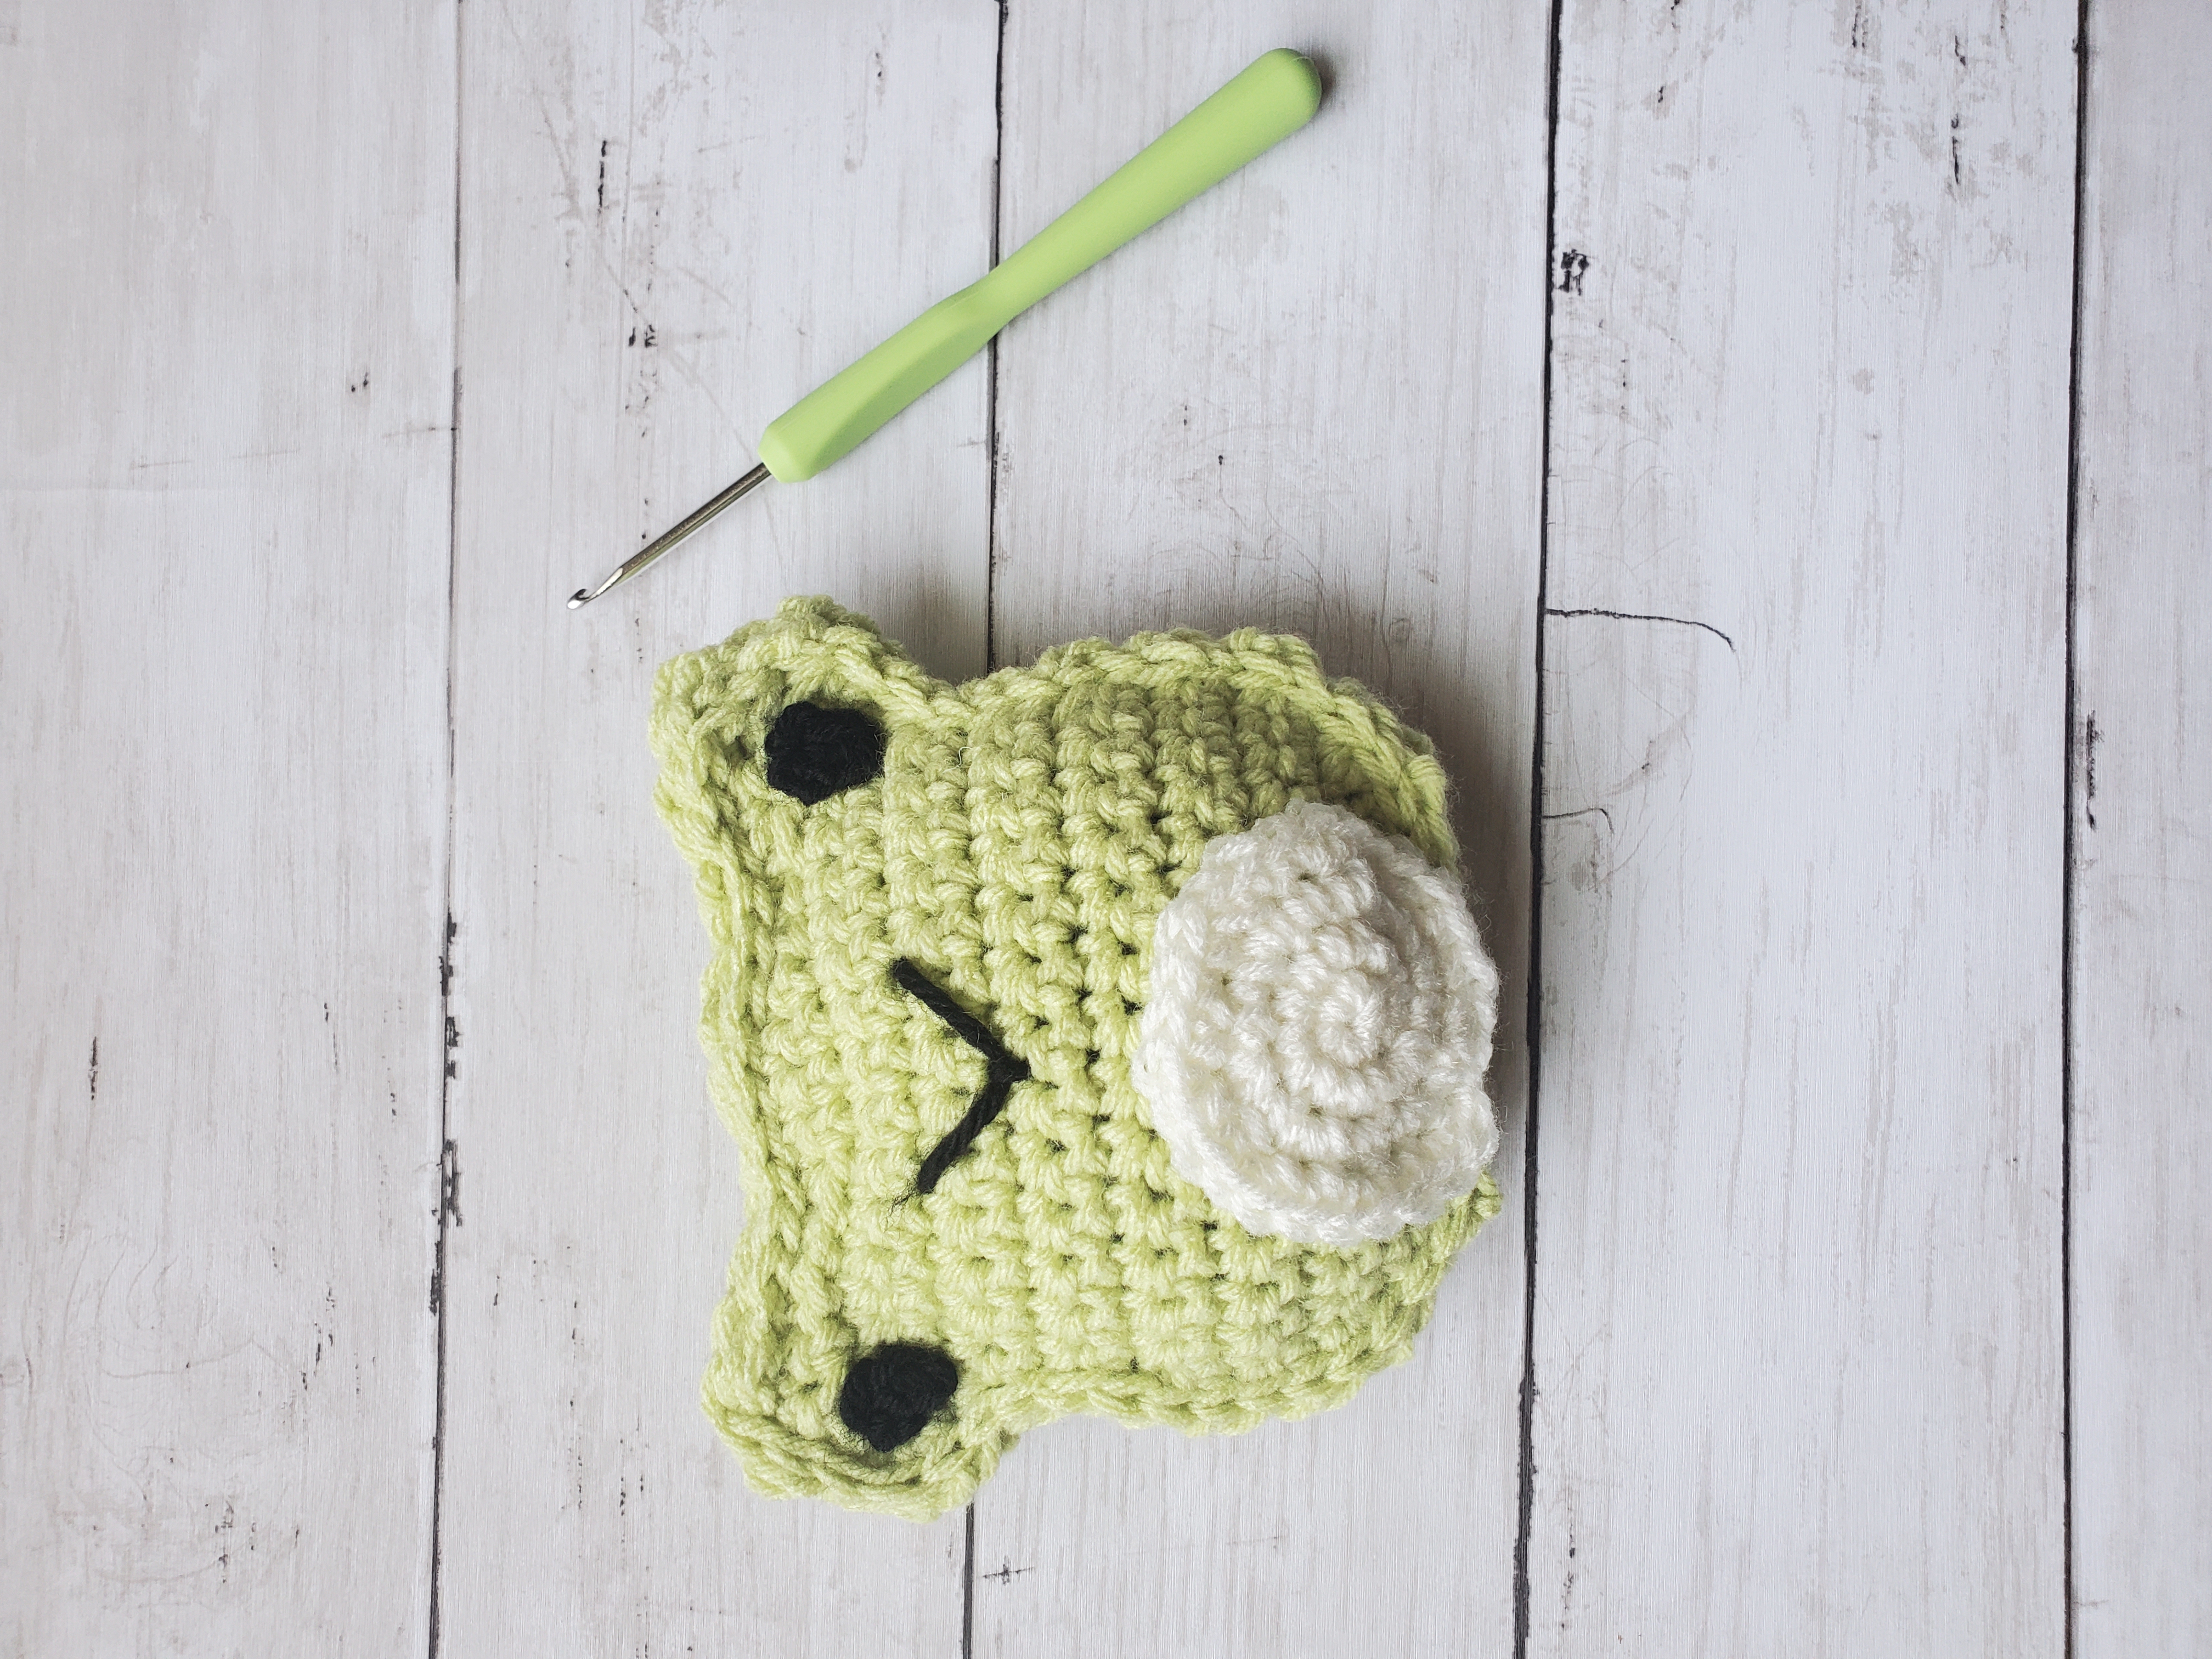
Step 1: Start by sewing facial features onto one of the body panels (see pic below). Tie excess yarn securely in the back.
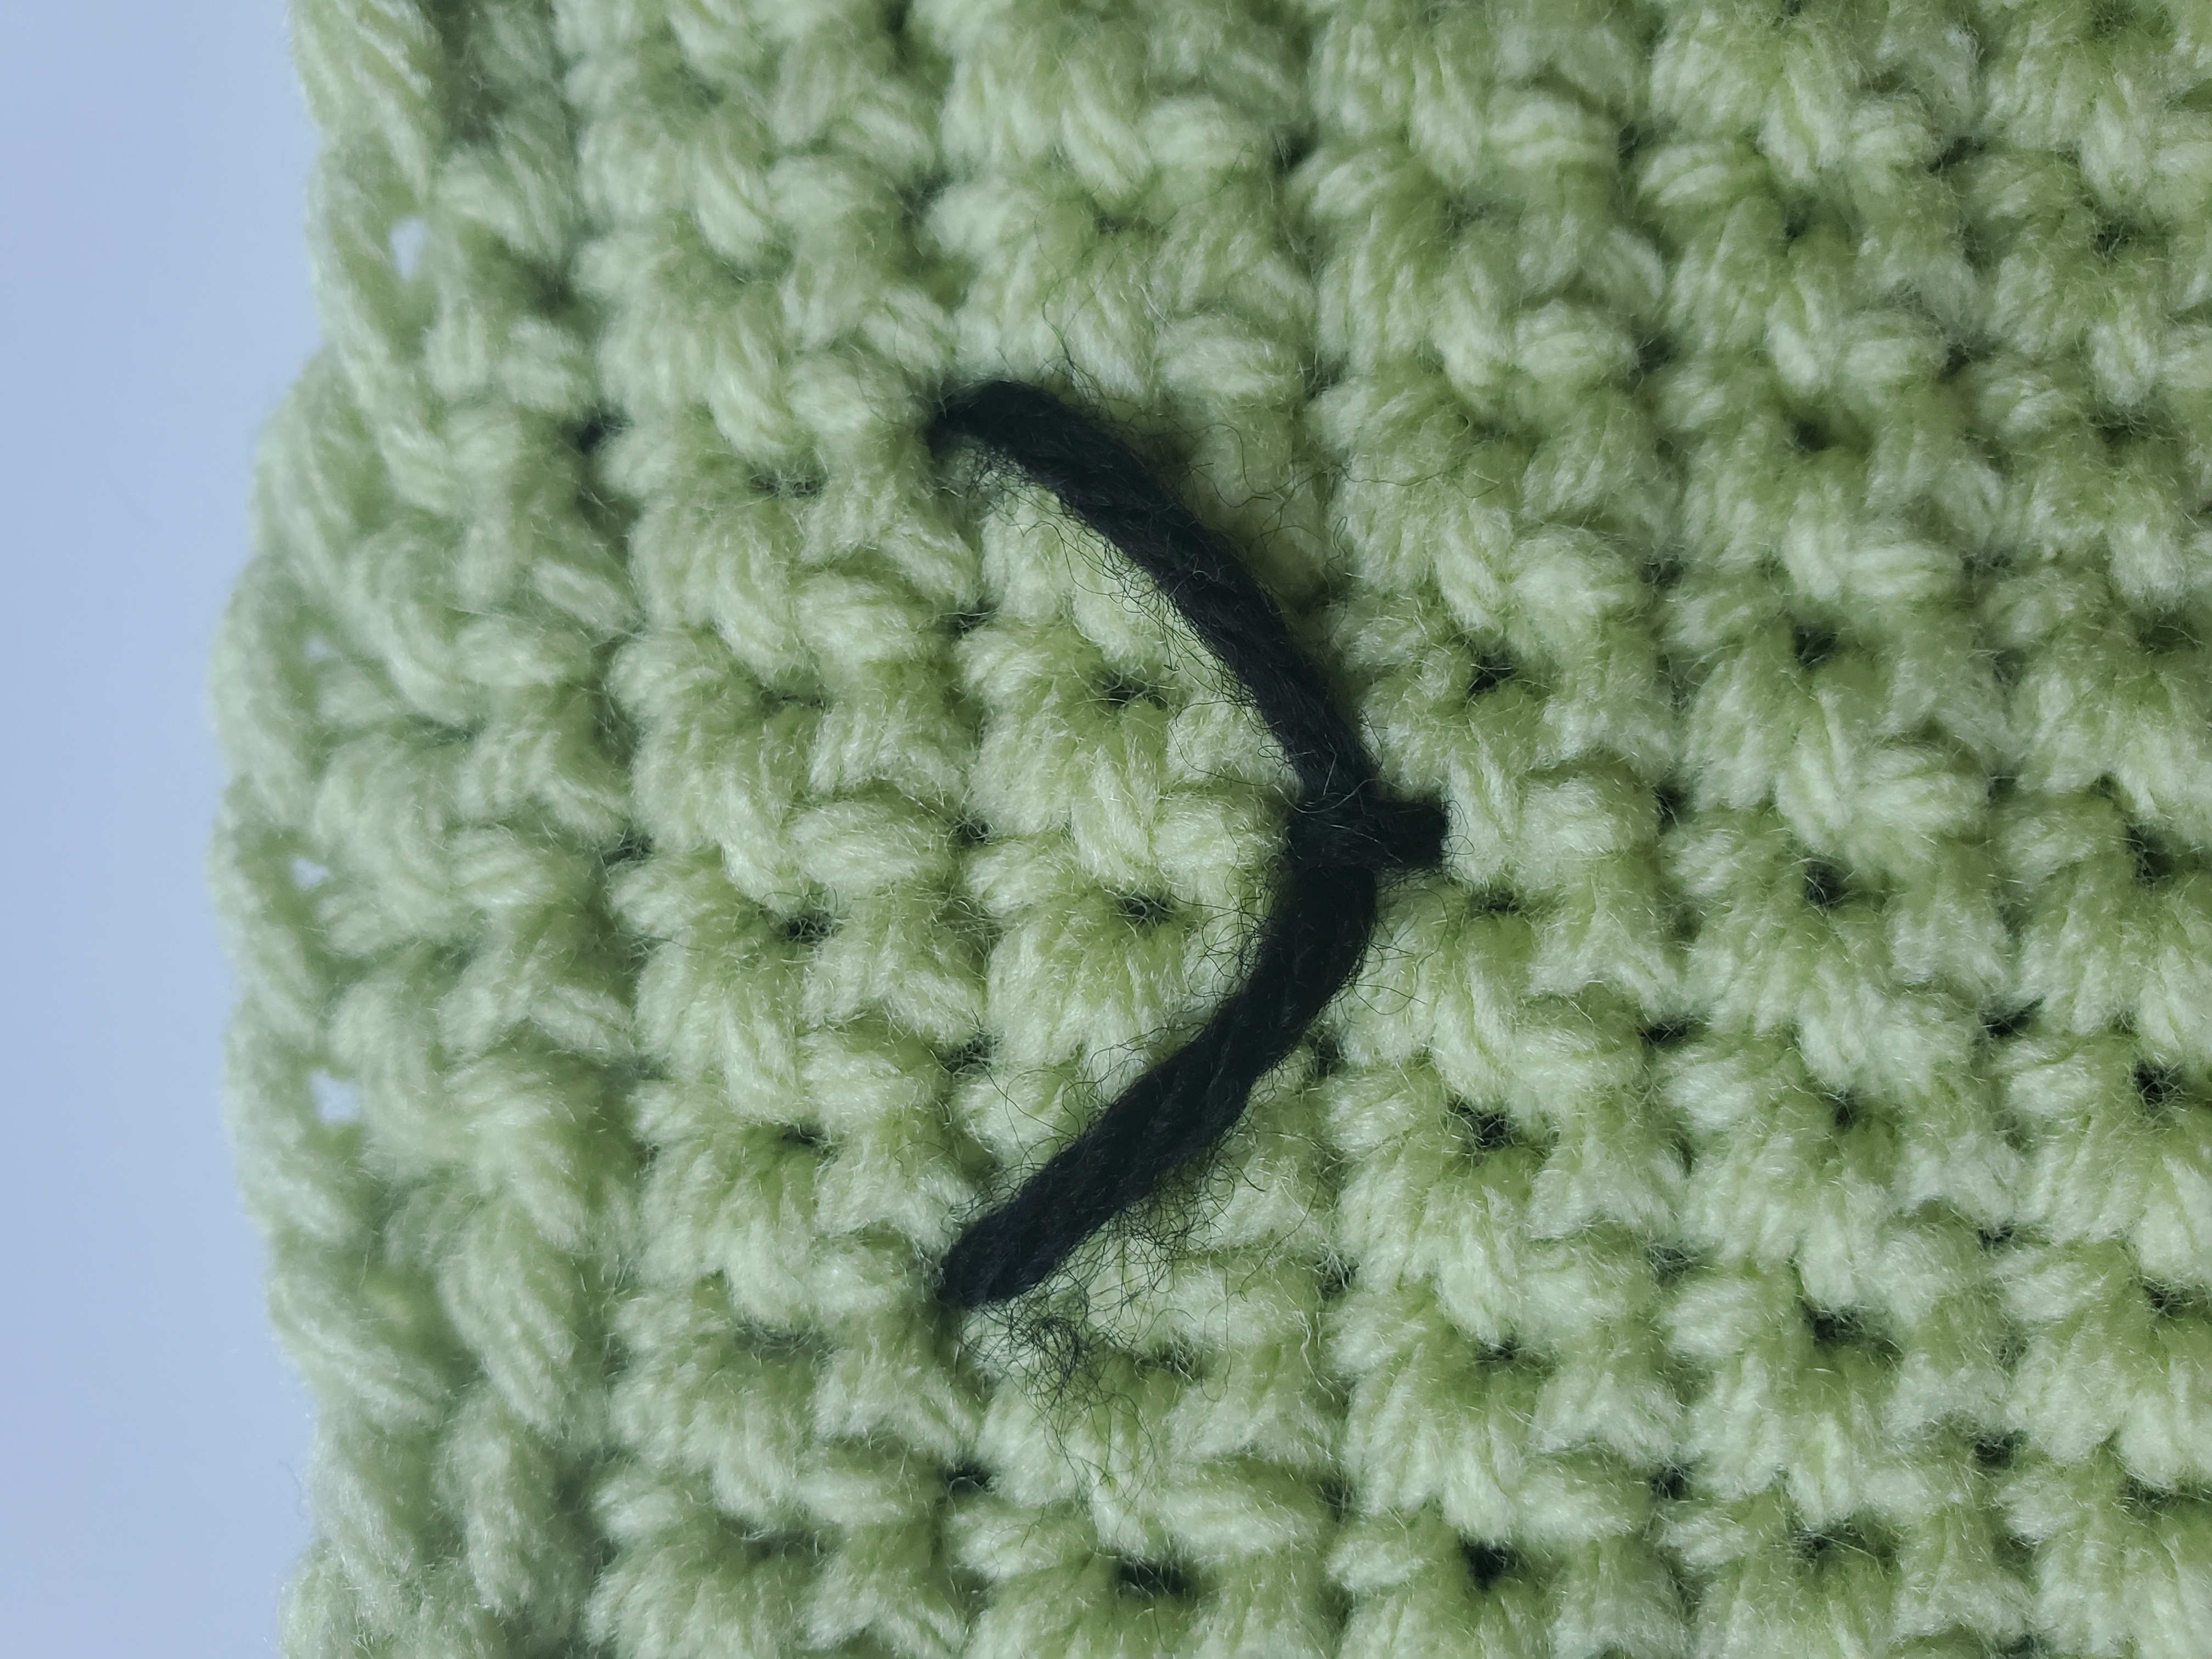
Step 2: Sew the mouth on with a piece of long black yarn. Insert needle into row even with the bottom of the eyes. Go 5 sts across. Insert needle 3 rows below your “line” and catch it to create a V smile (see pic below). Tie excess yarn securely in the back.
Step 3: Sew the belly on by lining the bottom of the belly up with the bottom of the body. Tie excess yarn securely in the back.
The tied off portions will be hidden inside the frog. Don’t worry about how messy your yarn looks for now!
Step 4: With the second body panel, line it up with the first. Use your crochet hook to sew them together by slip stitching around. Leave one side open.
Step 5: Stuff with poly-fil to your liking. Continue to sew across by slip stitching until the last st. Cut yarn and pull through. Sew tail with tapestry needle.
Step 1
Step 2
Step 4
Step 5
You’re all done! What a fun crochet project this was, and I really think it pairs well the Frog Bucket Hat. Make them both as a baby shower gift or just for fun for the kids!
Does the crochet frog stuffy look great with or without the arms? Which one do you think looks better? Let me know in the comments below!