Crochet Halloween Pattern – Beginner Washcloth

If you’re looking for an easy crochet Halloween pattern, then look no further! Today I have a beginner friendly, Halloween washcloth pattern for you. When I was new to crocheting, I wanted more simple patterns, especially for Halloween (it’s my FAVORITE holiday). There’s a lot of awesome patterns out there, but I needed something that would have simple stitches, and test my ability to crochet a bit (color changes). 

In this post, you’ll learn how to crochet a Halloween beginner washcloth.

This crochet Halloween pattern has two types of stitches, single crochet and double crochet. Each row alternates between two colors (orange and black) and single/double crochets.

I used yarn from Red Heart Super Saver for these crochet washcloths. I would say that their line of acrylic yarn is SUPER affordable and comes in so many different colors. This is great if you’re trying to learn your new hobby while saving some cash.

This Yarn Feels Too Scratchy! What Can I Do?

Even although acrylic yarn is cheap and comes in an array of colors, it does feel a little scratchy (at least in my opinion). That being said, don’t turn away from acrylic yarn just yet. There is a way to make it softer!

My number one favorite way to soften acrylic yarn is to WASH it.

Yep, it’s that easy. I wash my projects with cold water, laundry detergent and fabric softener along with my normal load. Once washed, place it in the dryer with a dryer sheet.

It usually comes out MUCH softer after this step. Now, the problem with washing is that you need to make sure your project will survive the wash. This is why it’s also important to weave in your ends really well.

Now, it might take another washing or two to get it to be super soft, but I find this to be the easiest way to make that cheap Red Heart Super Saver yarn less scratchy.

Feel free to use any type of yarn, it really doesn’t have to be acrylic,  just make sure it’s a 4 medium weight, otherwise your finished size will be a little different.

How to Color Change in this Pattern

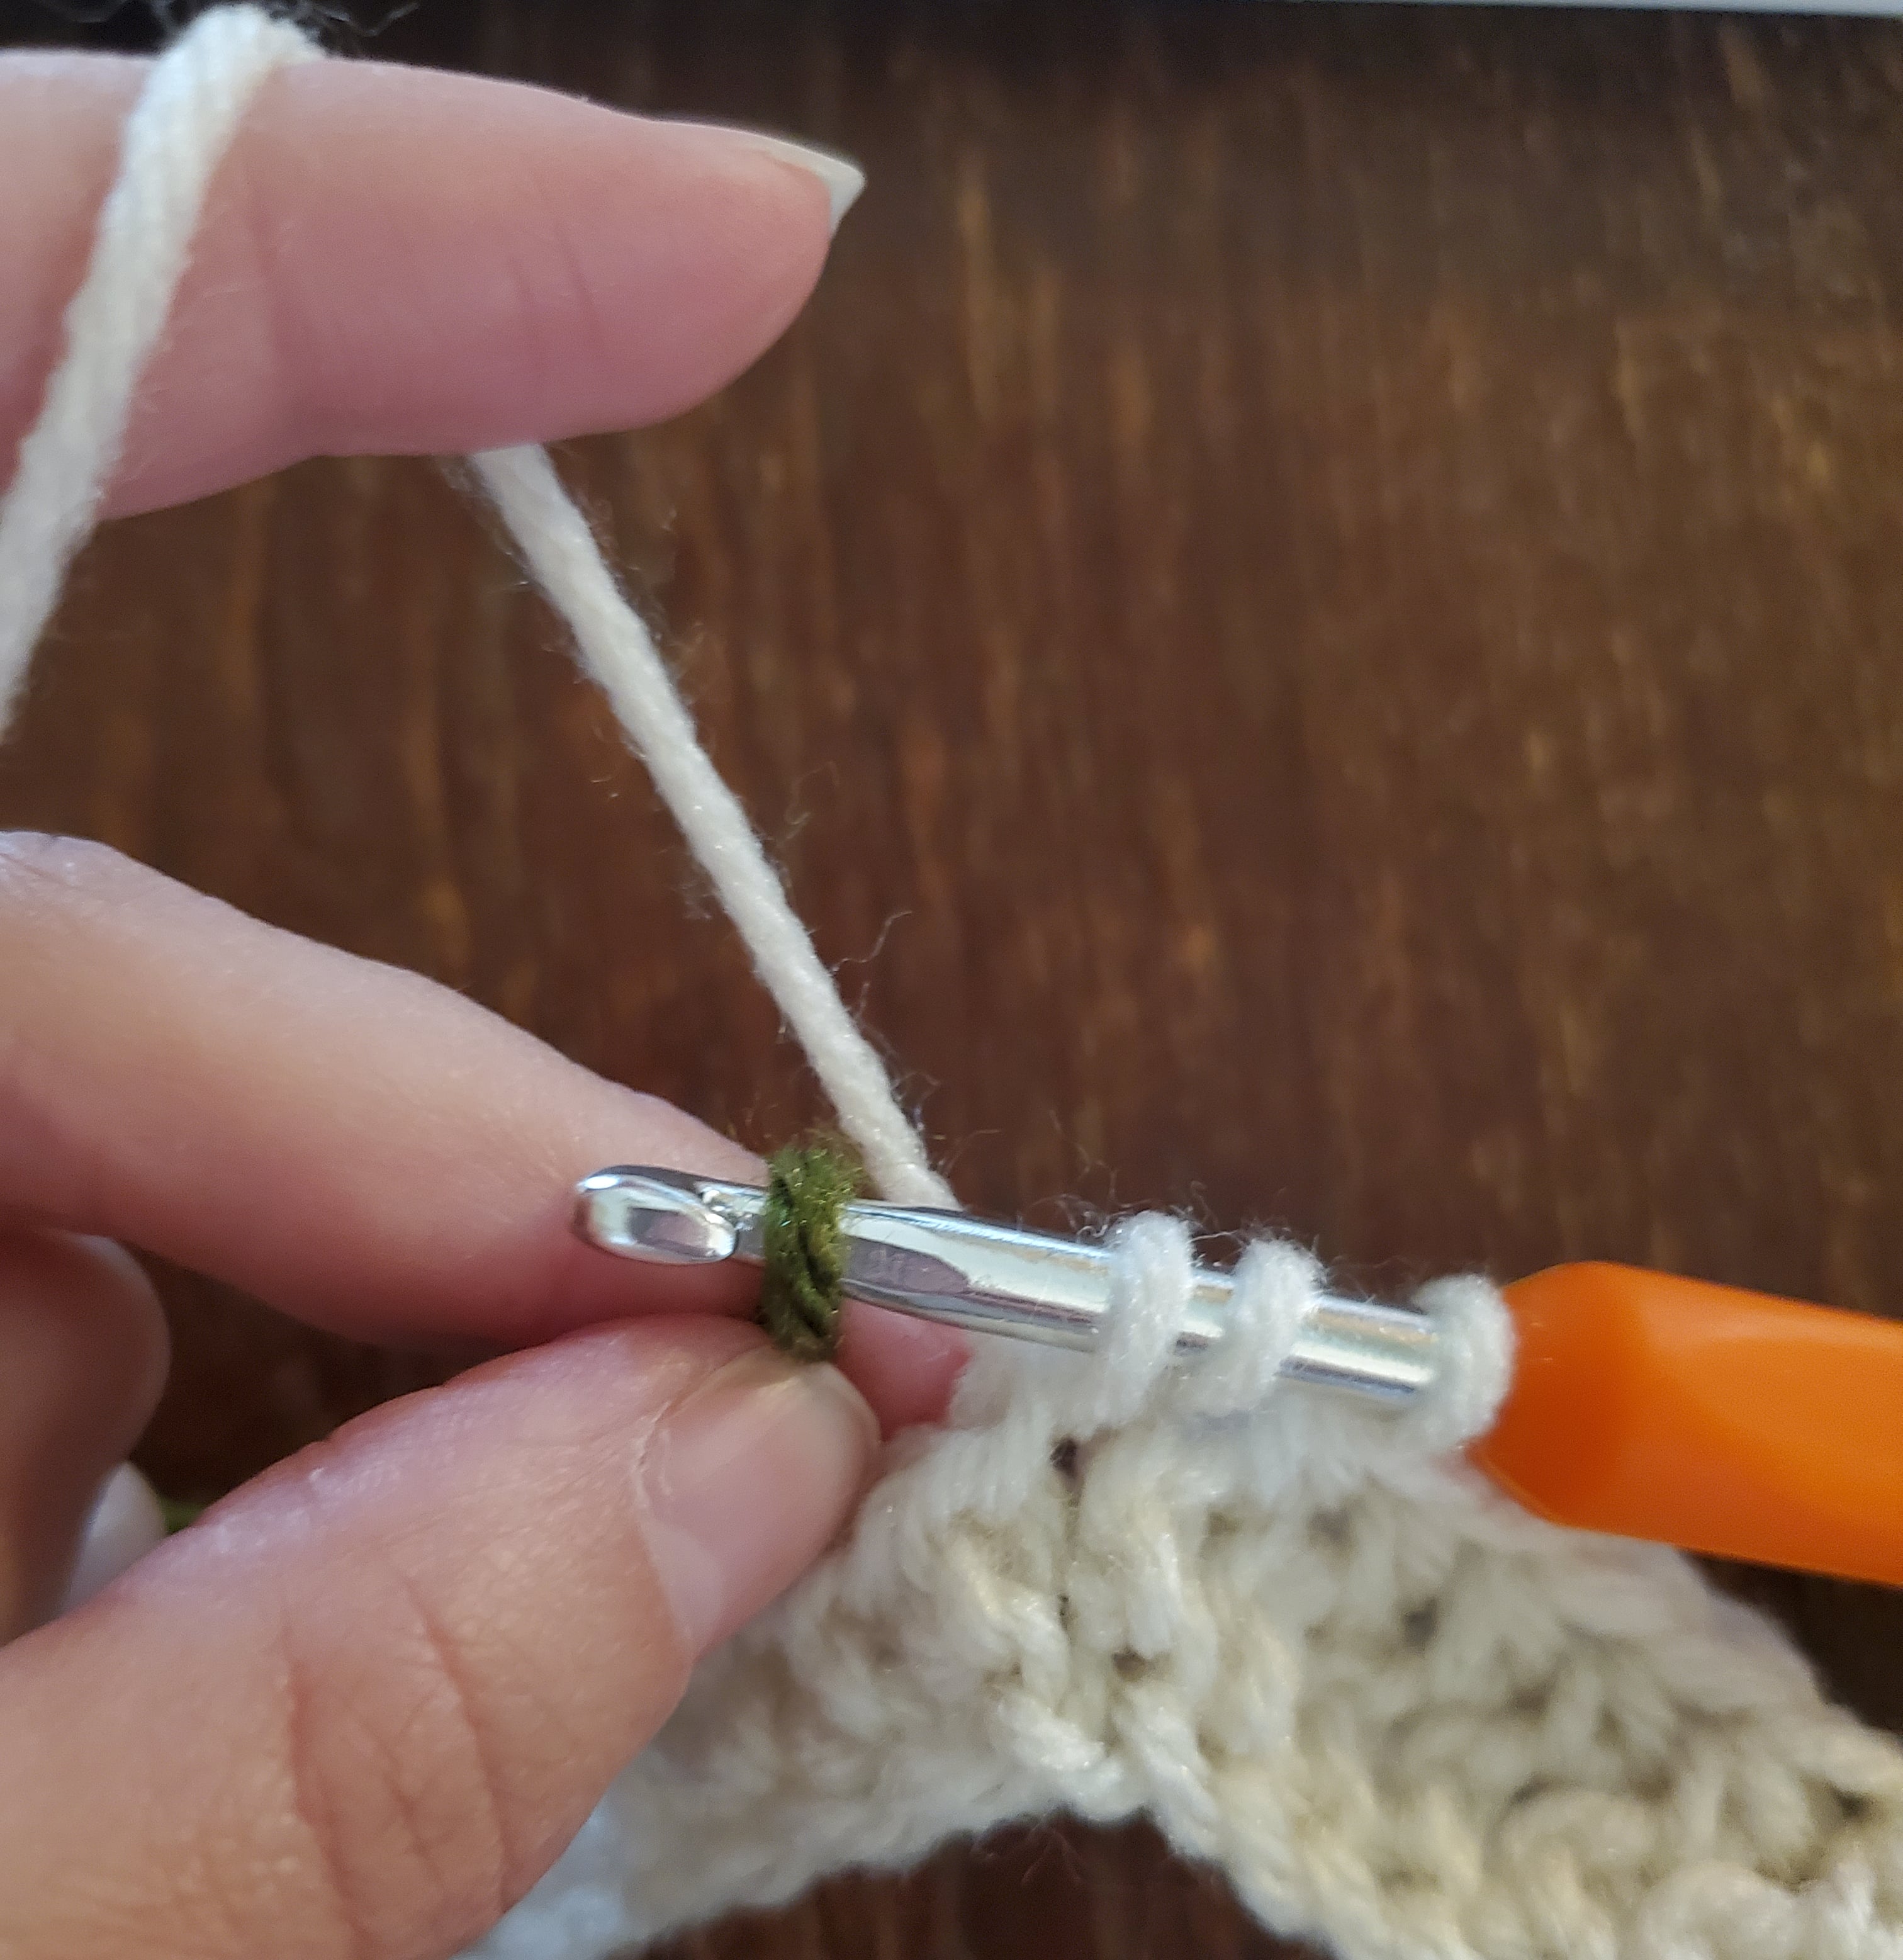
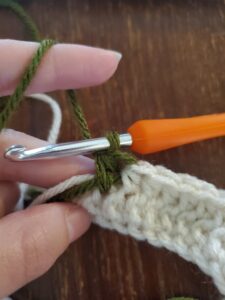
There will be color changes throughout this pattern, but they are at the end of the rows. If you’re not sure how to color change, there’s a lot of different ways to go about it. I personally like to color change this way:

  • Start making my last stitch, whether it be a single or double crochet, but don’t finish it all the way! Leave 2 loops on your hook, attach your new color by making a loop and placing it on your crochet hook. Pull the new color through the 2 loops.

If you need help color changing, I’ve made a post about How to Color Change in Crochet the Right Way that discusses my method.

Why you Should Carry Your Yarn

You can carry your yarn with you as you crochet if you hate weaving in ends (like I do). Carrying your yarn as you crochet will help when you need to switch colors, as you don’t need to cut with scissors every time.

In this crochet pattern, you won’t even see the yarn that you’re carrying between the stitches, even when you swap the colors. Some people don’t care that much, but for me, some projects, I REALLY don’t like seeing the carried yarn through the stitches.

To carry your yarn with you: 

  • Take the previous yarn color and place it in front or behind the next stitch.
  • Crochet as normal, but make sure that the previous yarn color is also being worked over (instead of being left behind).
  • At the end of the row, when a color change is needed, don’t finish your stitch, drop the yarn color you were using and pick up the yarn you’ve been carrying with you. Pull the new color yarn through your unfinished stitch.

You don’t have to do it this way, if you’re more comfortable cutting your yarn and attaching your new color, that’s fine too! 

Border Info

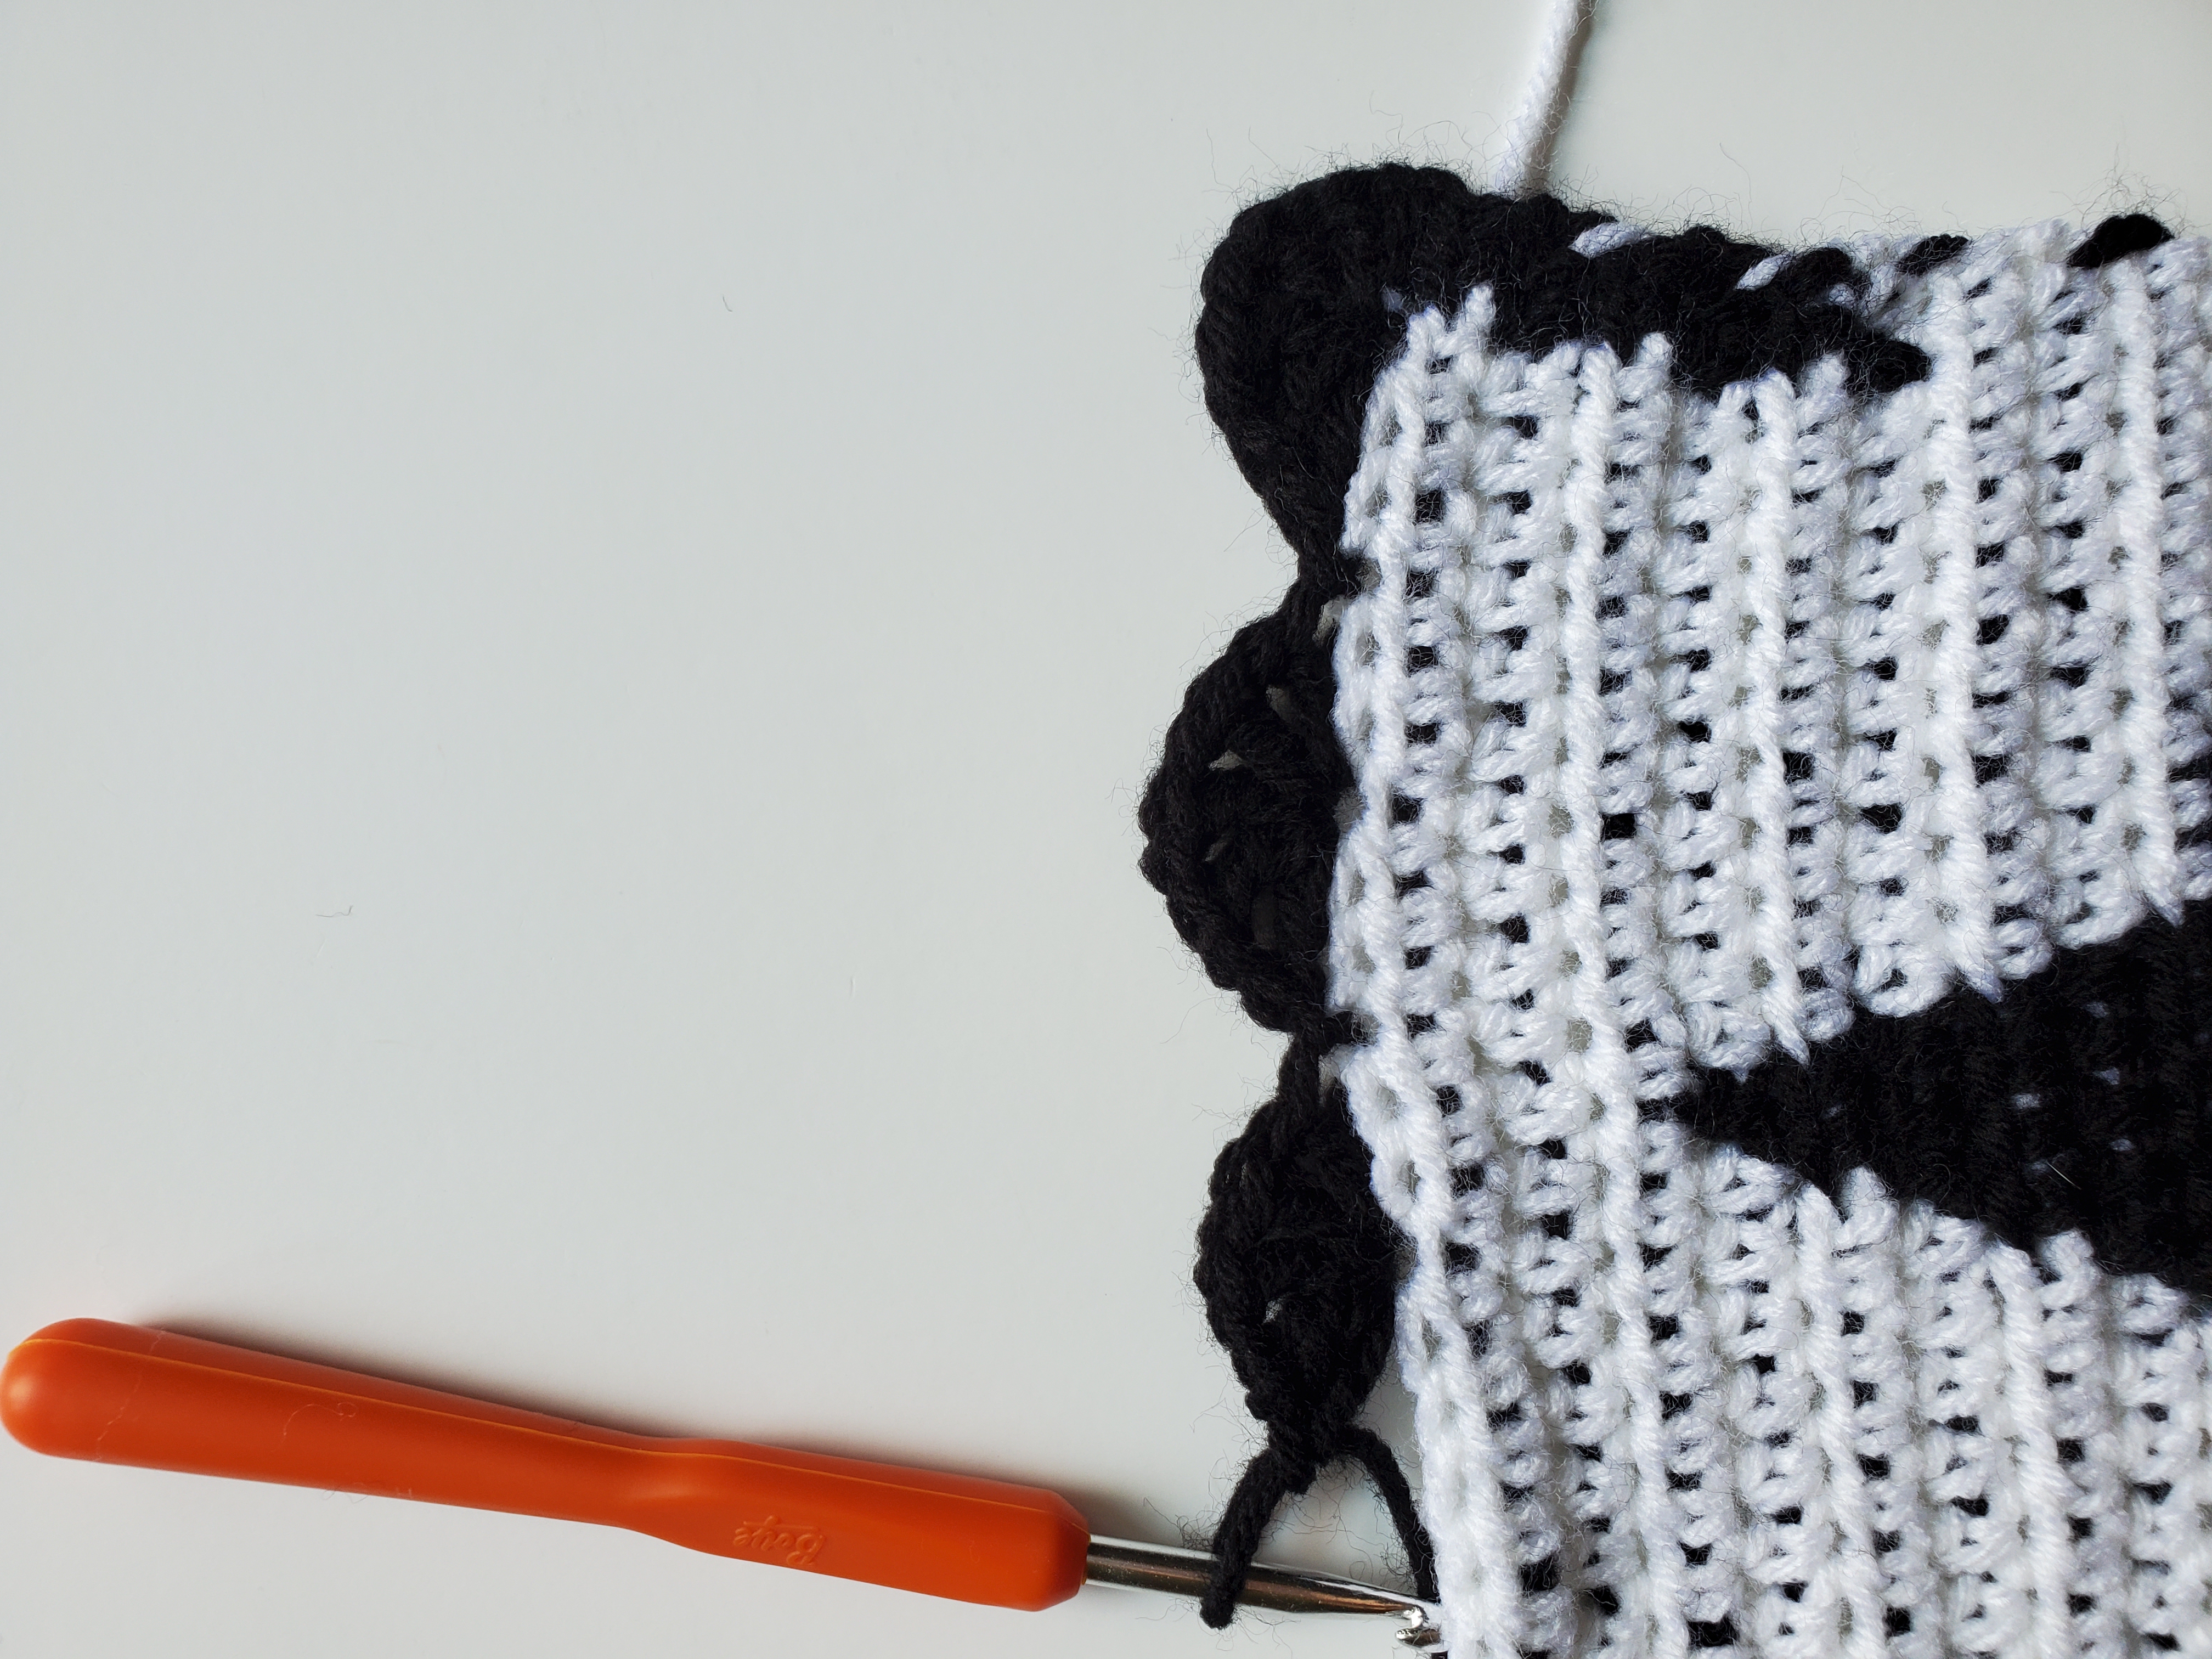
I’ve also placed a border on these washcloths, which consists of one simple row of single crochets. Borders aren’t absolutely necessary, but they make the final product look SO much cleaner. 

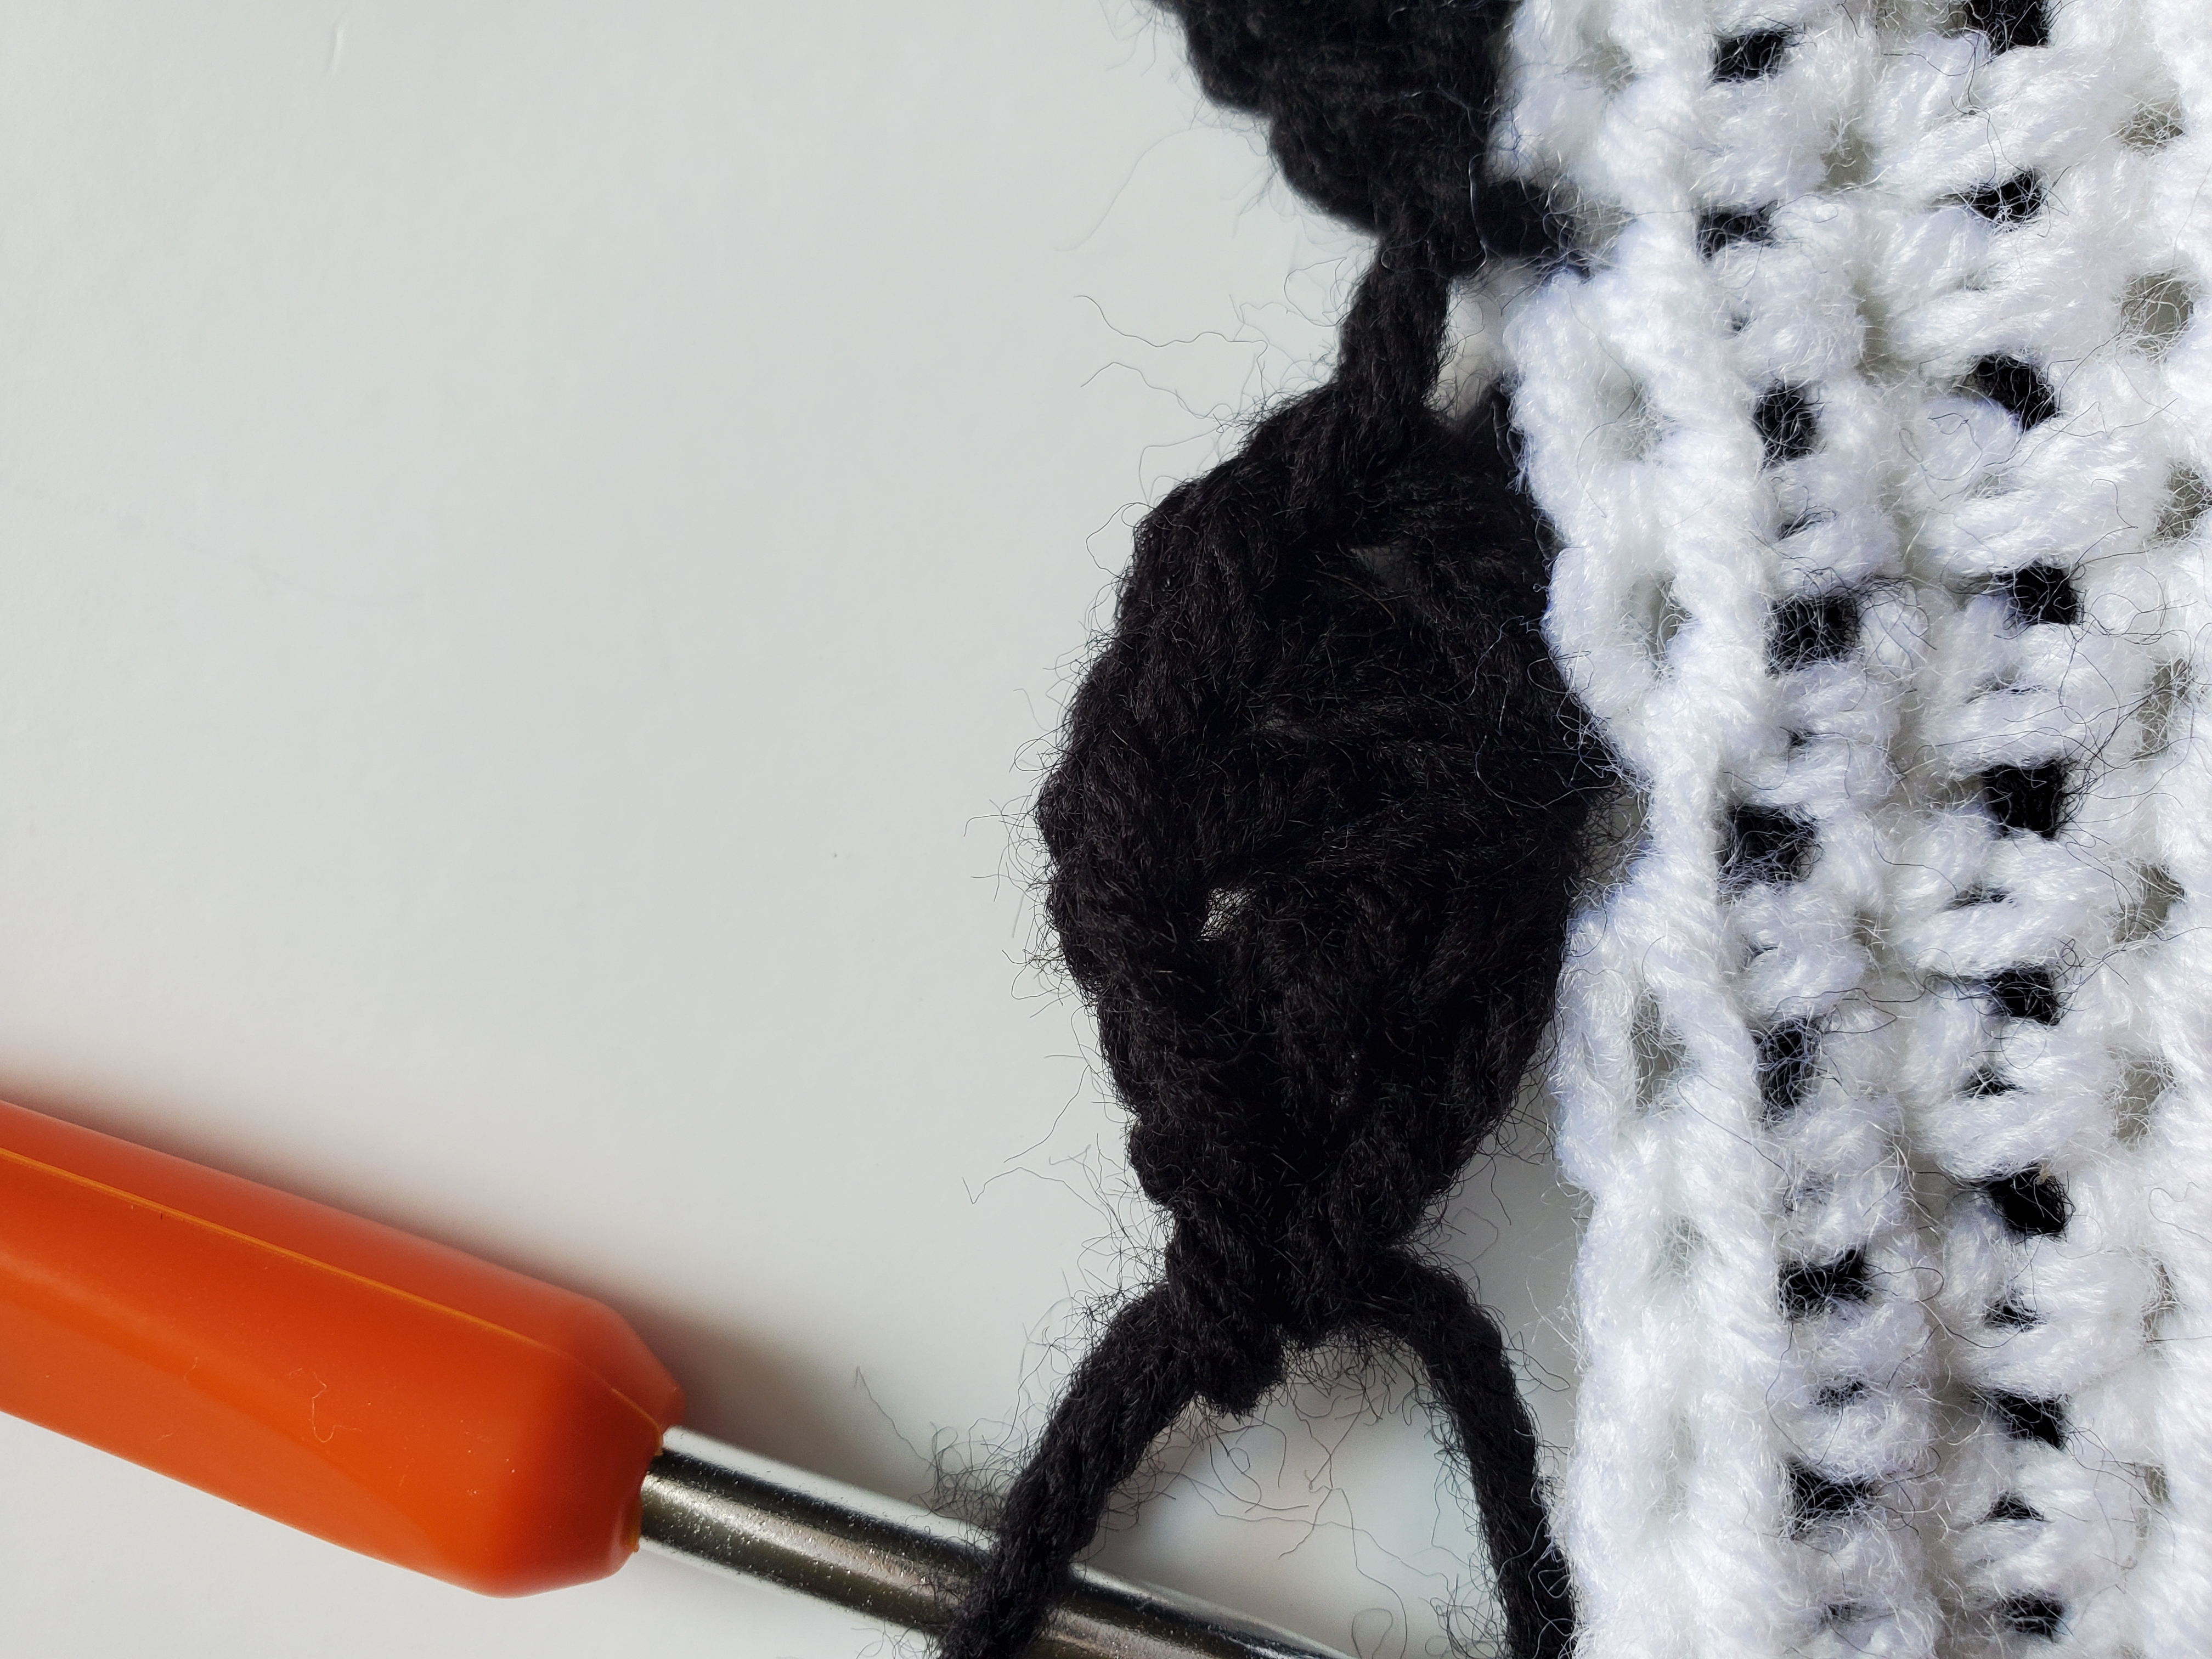
When you reach your corner stitch, you’ll single crochet, chain 3, and single crochet all in the same stitch

Alright, I think that’s enough talk, let’s jump into the pattern!

You Might Also Like:

Finished Size:

7” x 7” (give or take depending on your tension)

Please note that some of these links are affiliate links. That means that if you click on these links and make a purchase, I may receive a commission at no extra cost to you. You can find more information about our disclosure policy here. Thank you for helping out strommercrafts!

Materials Needed:

Abbreviations:

  • CH – chain
  • ST(S) – stitch(es)
  • SL ST – slip stitch
  • SC – single crochet
  • DC – double crochet

Helpful Tips:

  • The CH3’s on the DC rows count as a stitch.
  • The CH1’s on the SC rows do not count as a stitch.
  • The number in parenthesis at the end of a row indicates the number of stitches you should have when finished.

Crochet Halloween Pattern – Washcloth

 With black yarn

CH 23 

  • Row 1: DC in 3rd CH from hook, DC in each ST across (22 sts)

Switch to orange yarn

  • Row 2: CH1 (does not count as a SC), turn, SC in each ST across, place last SC in top of the CH3 from previous row (22 sts)

Switch to black yarn

  • Row 3: CH3 (counts as a DC), turn, DC in each ST across (22 sts)

Switch to orange

  • Row 4: Repeat row 2

Switch to black

  • Row 5: Repeat row 3
  • Row 6-13: Continue alternating between the orange SC row and the black DC row. Row 13 should be a row of the black DC. 

Cut the orange yarn, but leave the black yarn on.

Border

Carry the rest of the orange yarn with you (or you can weave in with tapestry needle if you prefer).

  • Row 1: CH1, (SC in the same ST, CH1, SC) in same ST, going down the side, SC in the “leg” of the DC, SC in the orange SC, SC in the top of the DC, then SC in the “leg” of the same DC. Continue SC down the side this way until the next corner. (SC, CH1, SC) in the corner ST. SC in each ST across the next side, create another (SC, CH1, SC) in the 3rd corner. Repeat how you SC up the next side like you did previously, but you’ll notice the CH3’s instead of DC. SC in the 1st and 2nd CH’s of those CH3’s. (SC, CH1, SC) in the 4th corner. SC across the top, SL ST into the first SC you made. 

Cut yarn, pull through, weave in end with tapestry needle.

For the Other Washcloth,

start with the opposite color that you started with (in this case it will be orange), CH23, and repeat rows 1-13. Add the border when finished.

That’s it! Enjoy your Halloween with this beginner friendly, crochet washcloth! I absolutely love how they turned out, and i really like how the contrast of the black and orange yarn give it a neat zig zag pattern.

This post was all about how to make a crochet Halloween pattern dishcloth.

Thank you for reading, if you liked this pattern or have any questions, let me know in the comments below!

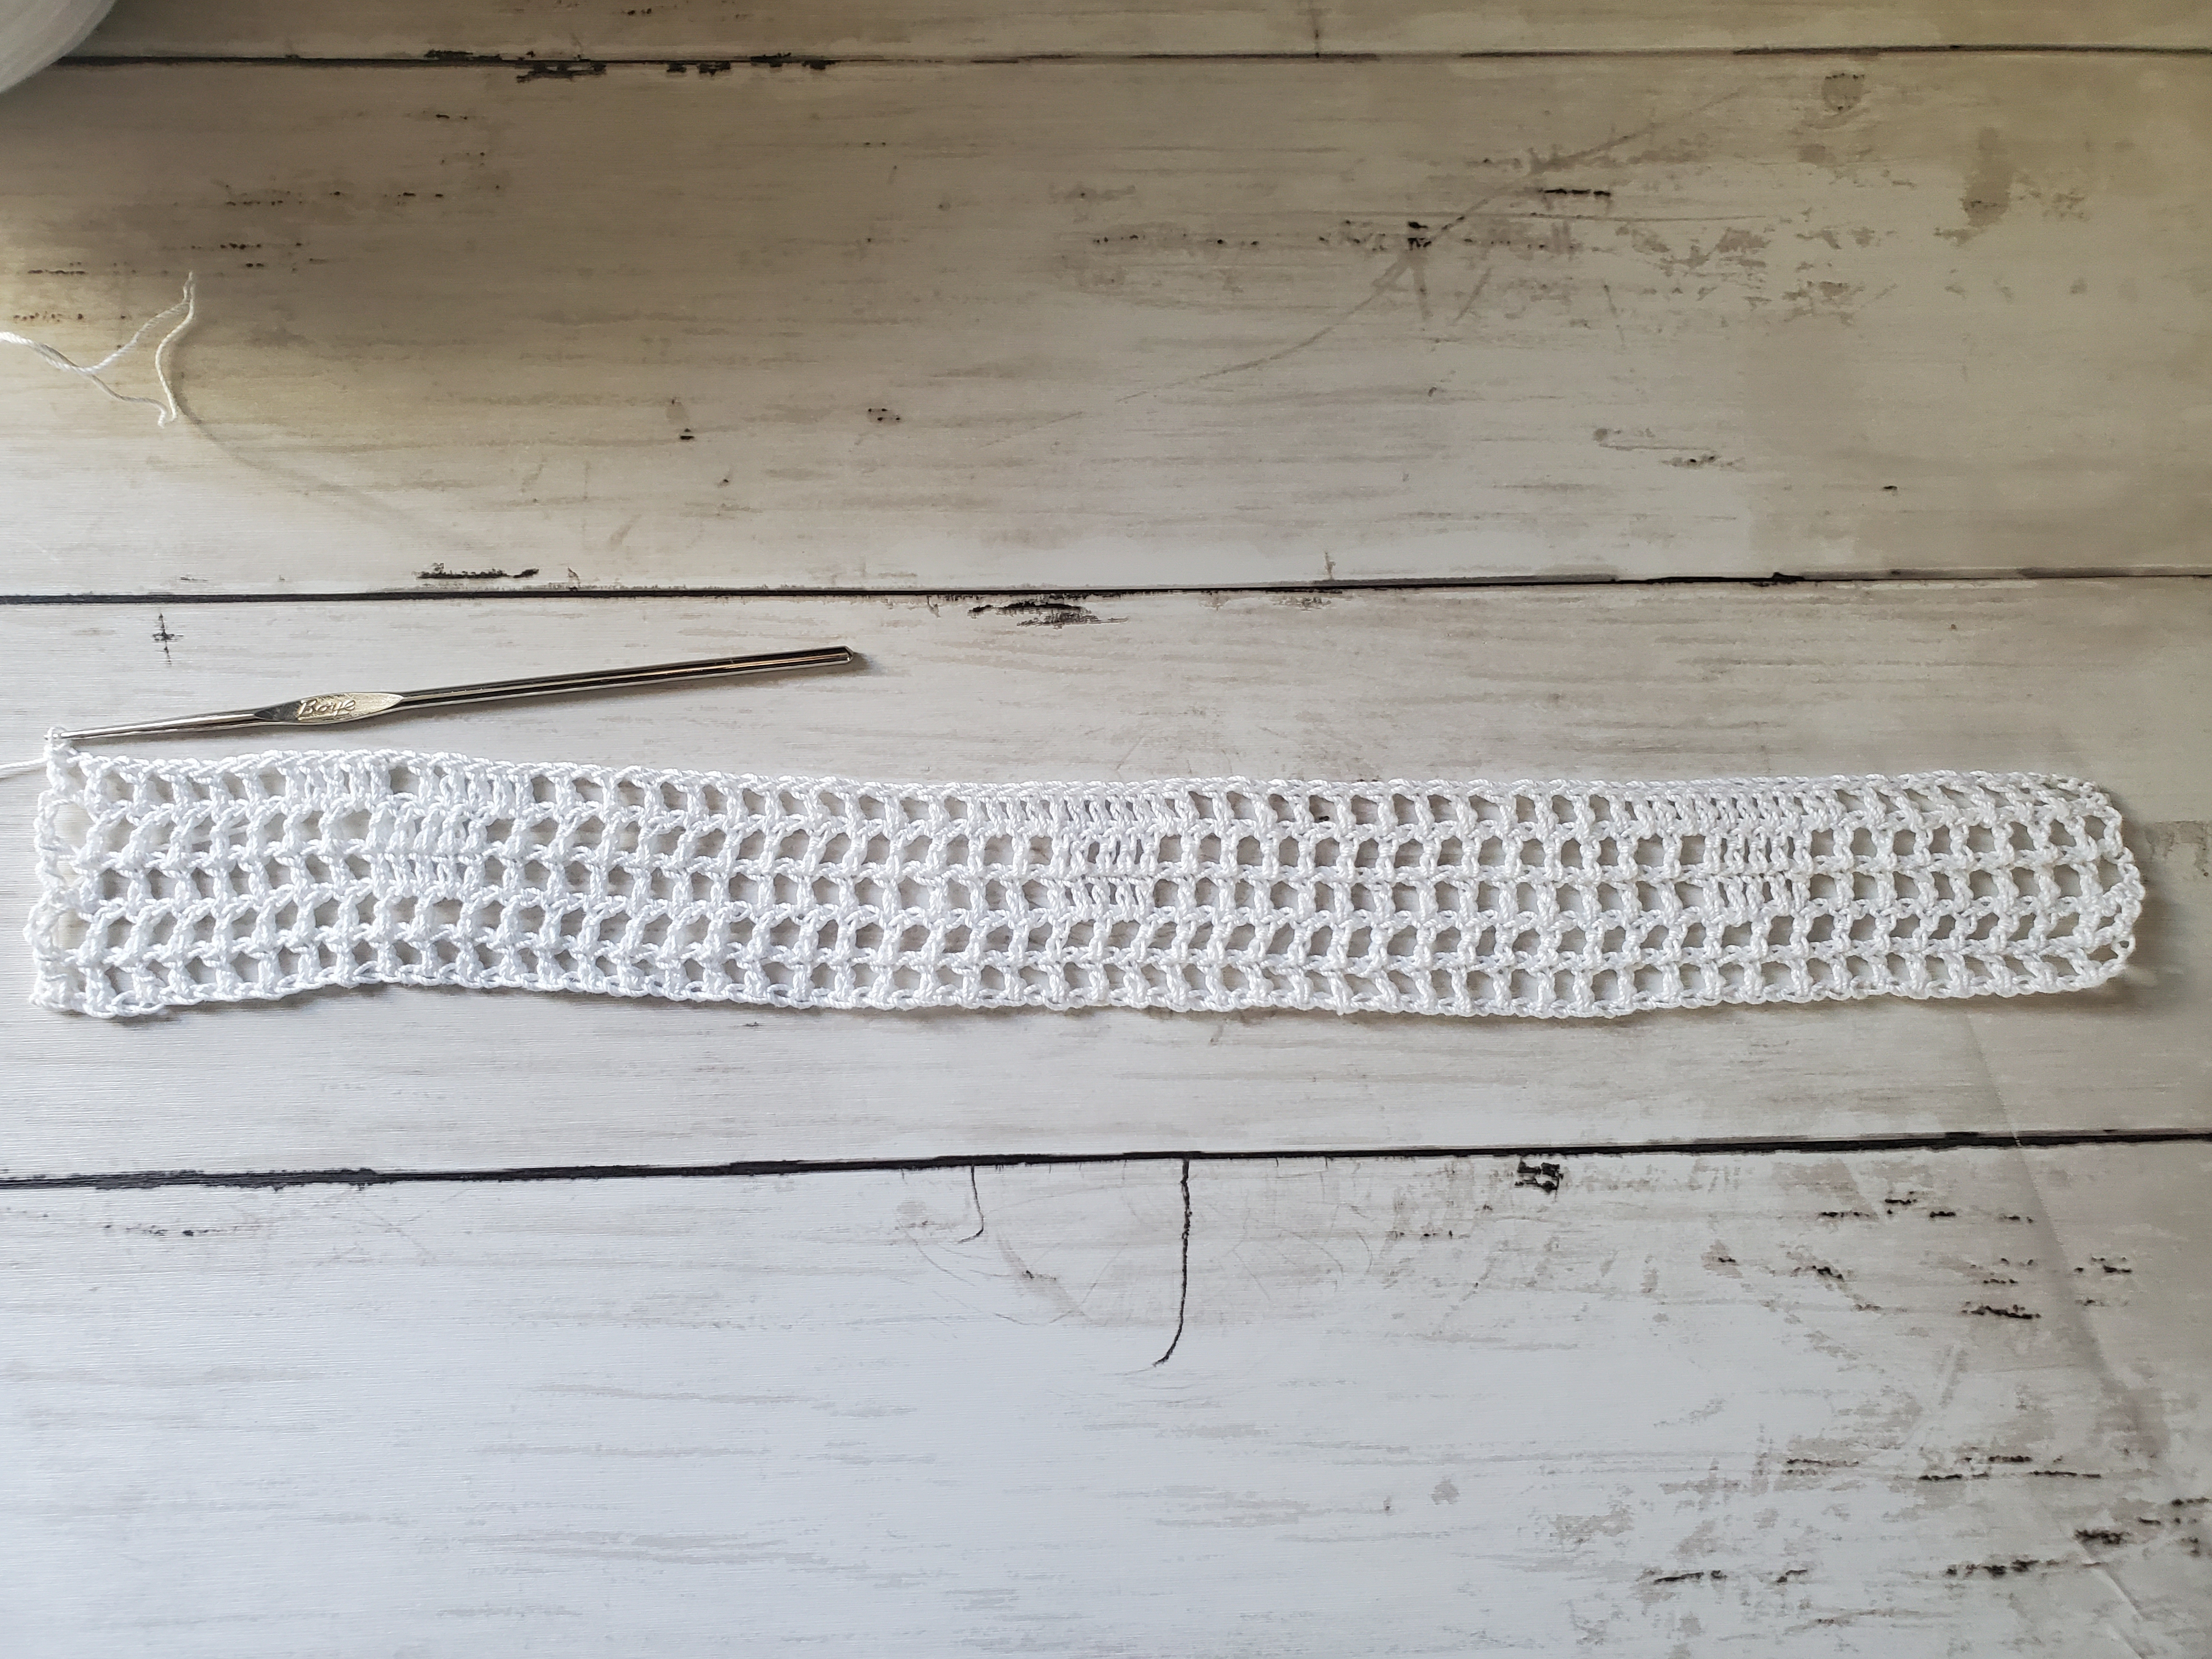
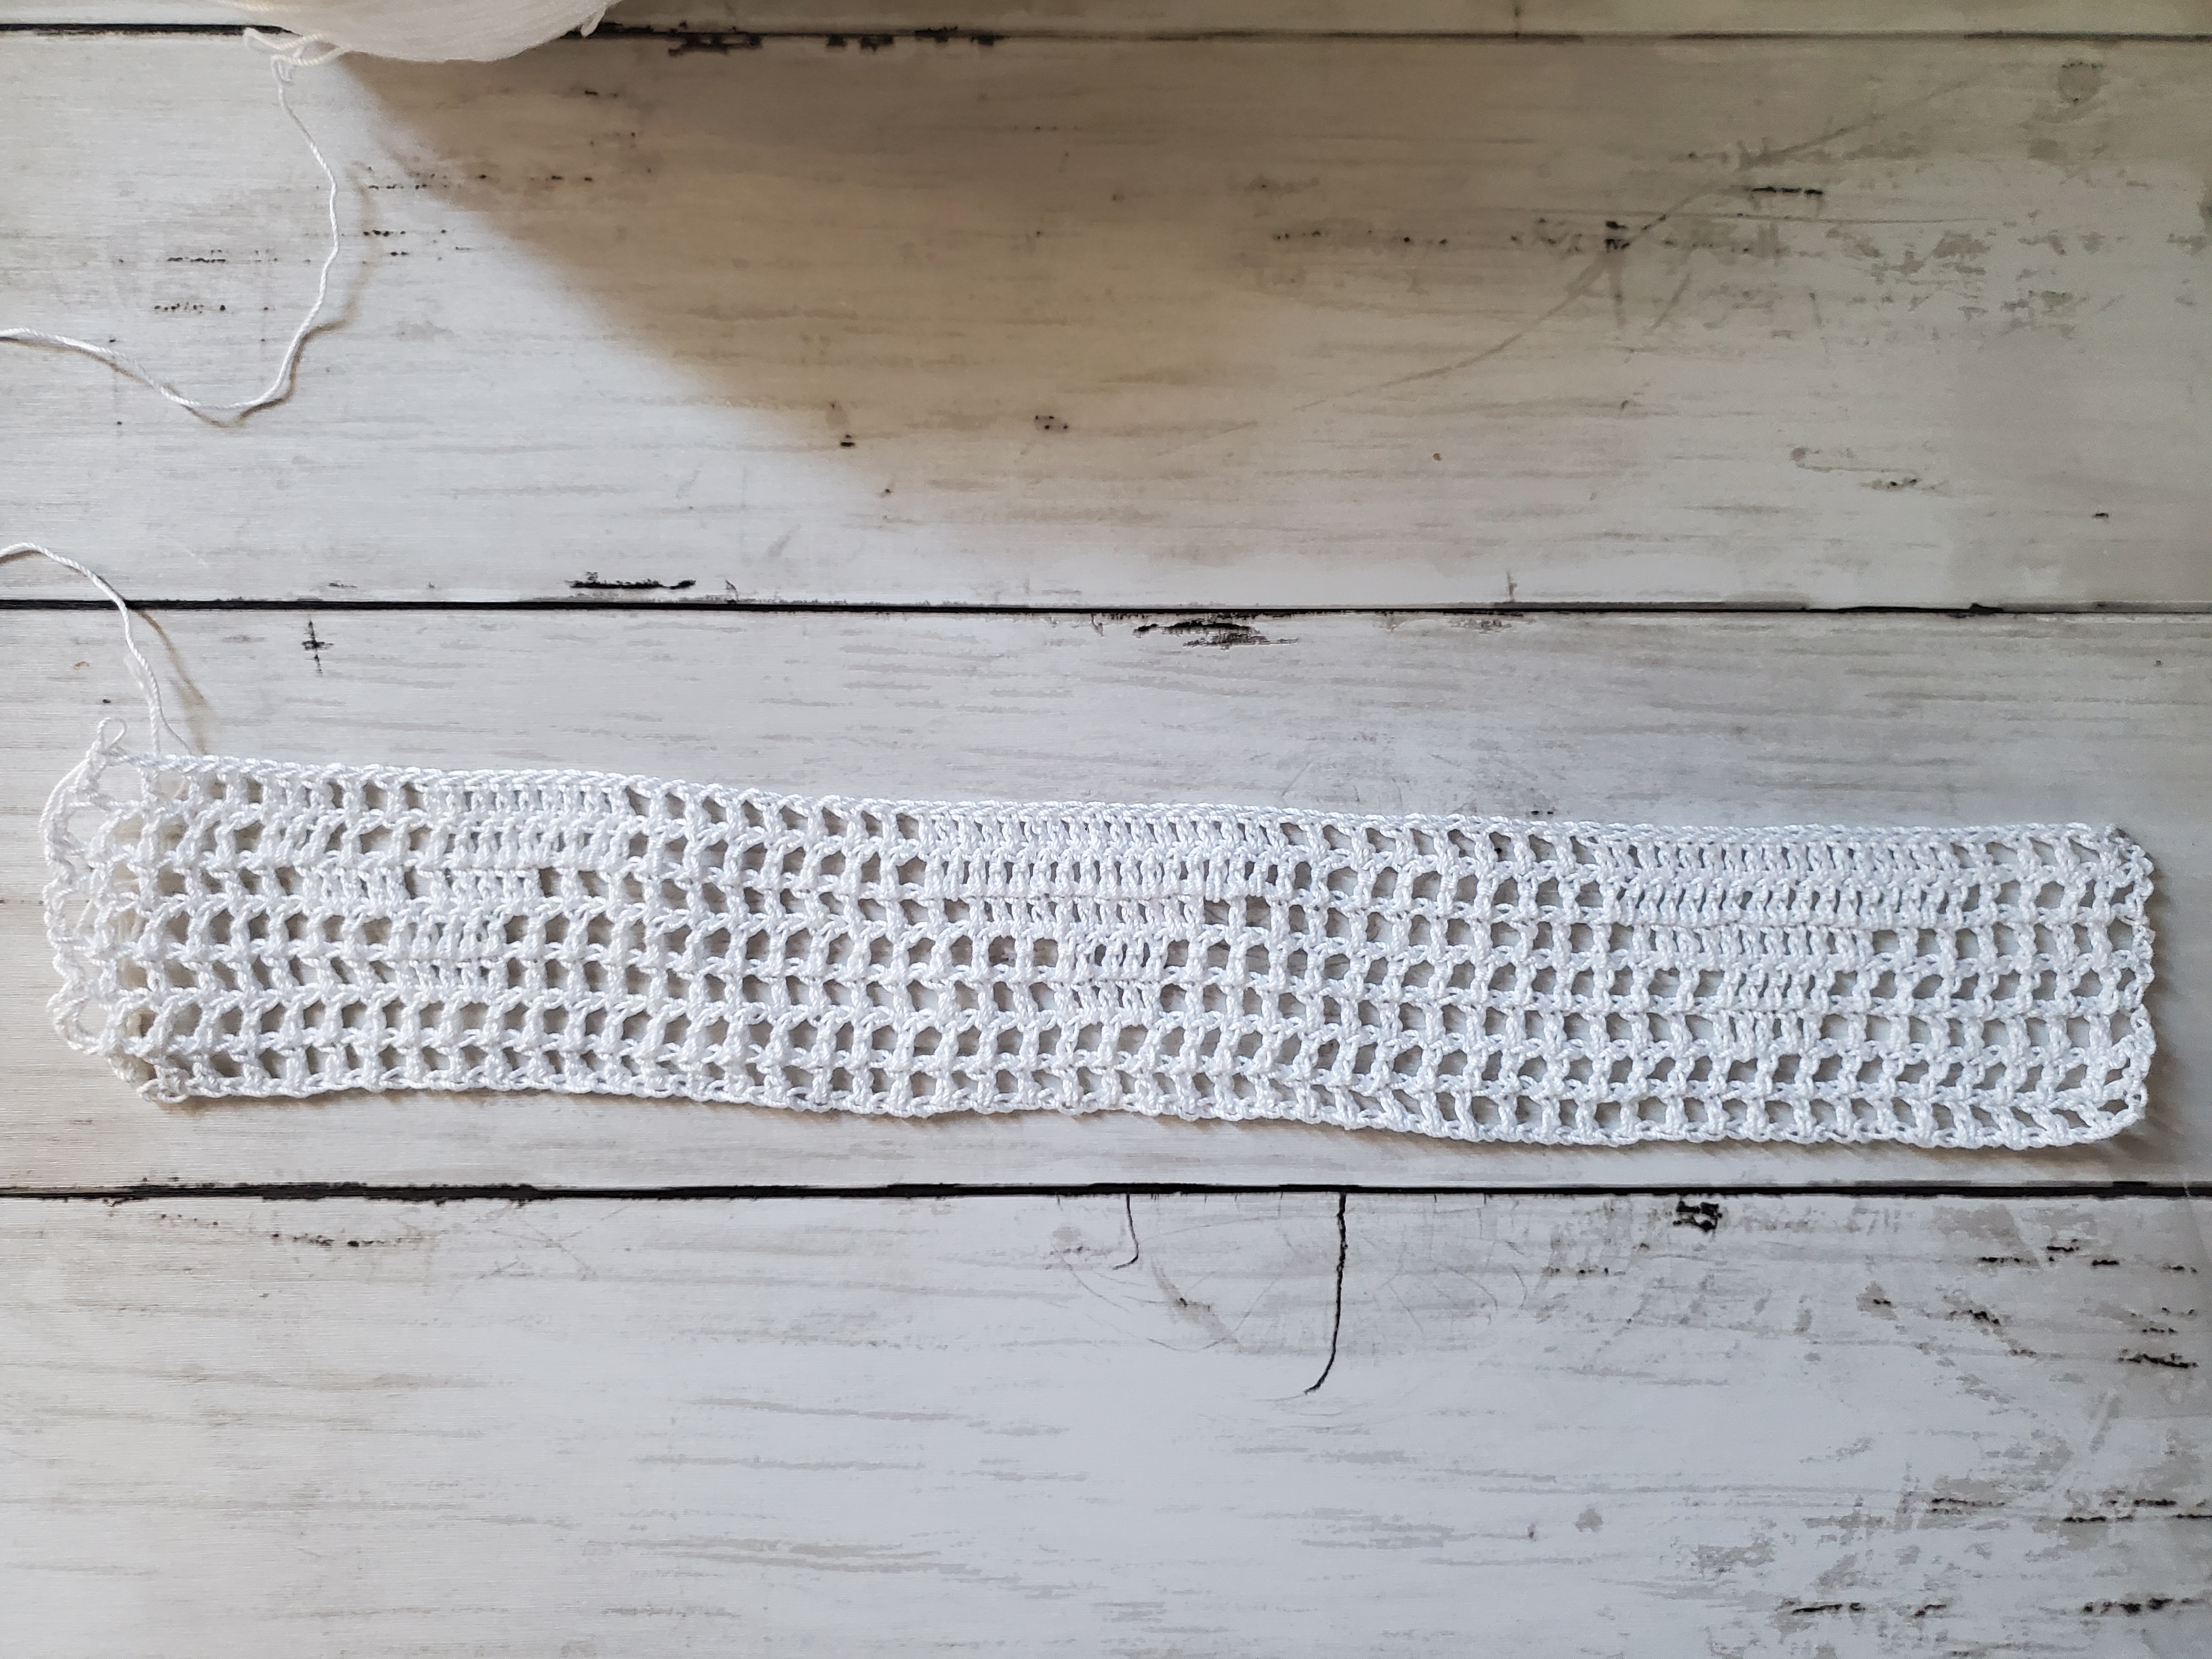
Crochet Infinity Veil for Mass – Free Pattern

Hello everyone, I hope summer has been treating you all well! Today I have a crochet infinity veil pattern for you.

The girls have been playing with my veil at mass and it got me inspired to make their own! I didn’t want to spend the money on getting veils for them when they’re this little, so I thought it would be fun to try making them myself.

I tried looking up a crochet pattern for a veil, but I couldn’t find much. It was mostly people trying to sell their finished crochet veils on Etsy (which I’m cheap so didn’t want to buy a pattern lol!). Or it was tutorials on how to sew your own veil together with different materials.

I did find this post helpful from Crocheting with Joy. I liked her idea of taking a shawl pattern and turning it into a veil. However, I personally wear an infinity veil and I wanted to recreate that style instead of a V shape. 

This pattern does require a teeny tiny hook (1.65 mm to be exact) and size 10 crochet thread. The delicacy of the tiny thread gives it a lovely, lacy look.

This was very much a labor of love, it did take a long time to get the crochet infinity veil to the length that I wanted it. With that said, once you get the pattern down, it’s easy to tackle while you’re watching your favorite show or listening to a podcast.

Why wear a veil to mass?

Although wearing a veil to mass is no longer a requirement, some women may want to continue the tradition of wearing one to mass.

One of the main reasons why women veil at mass is to humble herself before God during the mass where Christ is present in the Eucharist.

It is also seen as being modest and respectful.

Check out some of my other patterns here!

Materials Needed:

  • Red Heart Classic Crochet Thread in White, size 10
  • 1.65 mm crochet hook
  • Tapestry Needle
  • Scissors
  • Stitch markers (option)

Abbreviations Used:

Please note that these abbreviations are in US terms

  • Ch – chain
  • St(s) – stitch(es)
  • Sl st – slip stitch
  • Sc – single crochet
  • Dc – double crochet
  • Shell – 6 dc separated by ch 1s in same st. Or in simpler terms…dc, ch 1, dc, ch 1, dc ch 1, dc, ch 1, dc, ch 1, dc.

Crochet Infinity Veil for Mass Pattern:

You can make your own veil shorter or longer by chaining a series of 14 + 4 + 4. The 14 is the base repeat, the first +4 is to account for the 2 double crochets bordering on both sides, and the second +4 is to account for the turning chain. Please keep in mind that you will fold the crochet veil in half at the end to create the “infinity” part.

Ch 260

Protip: Use your stitch markers every 50 chs or a count of your choice. This helps if needing to recount.

Row 1: Dc in next ch, ch 1, skip 1 ch, (sc in next ch, ch 3, skip 2 chs, sc in next ch, x3 times), *ch 1, skip 2 chs, shell into next ch (dc, ch1, dc x6 times in same ch), ch 1, skip 2 chs, (sc in next ch, ch 3, skip 2 chs x3 times)* repeat from *to* until last 4 chs (should be finished with the shell at this point), ch 1, skip 2 chs, dc in last 2 chs

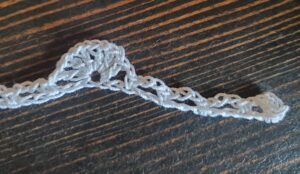
Start of row 1 for crochet veil
Beginning of Row 1

Row 2: Turn, ch 3 (counts as a dc), dc in next dc, ch 1, skip ch 1 and next dc, sc into the first space between the dc, ch 1, dc in the last shell made. *(Ch 3, sc into next open space into shell x 3 times). You should have 4 “petals” on top of the shell from the previous row. Ch 3, skip the next (sc, ch3 space, sc), and dc between the next (sc, ch3 space, sc). Ch 3 and dc in the same space. Ch 3, skip the last (sc, ch3, sc) and sc between the (dc, ch1, dc) in the next shell*. Repeat from *to* until the very last (dc, ch3, dc). Ch3, skip all sts and dc in next dc, dc in top ch of ch 3 from previous row.

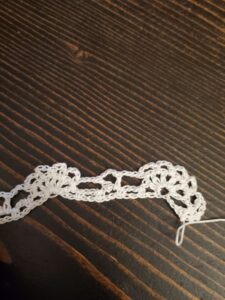
crochet veil row 2
Beginning of Row 2

Row 3: Turn, ch 3 (counts as a dc), dc in next dc, *ch 1, skip ch 3 and shell into the (dc, ch3, dc) space. Ch 1, skip ch 3, sc into the first (sc, ch3, sc) space, (ch 3, sc into next space x2 times). You should have 3 “petals.”* Repeat from *to* until the last (sc, ch3, sc), ch 1, dc in next dc, dc in top ch of ch 3 from previous row.

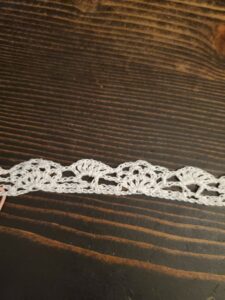
Crochet Veil Row 3
Beginning of Row 3

Row 4: Turn, ch 3 (counts as a dc), dc in next dc, *ch 3, place a (dc, ch3, dc) in the middle (sc, ch3, sc) petal, ch 3, sc into the first space between the dc, ch 1, dc in the last shell made. (Ch 3, sc into next open space into shell x 3 times). You should have 4 “petals” on top of the shell from the previous row.* Repeat from *to* until last petal made, ch 1, dc in next dc, dc in top ch of ch 3 from previous row.

Repeat rows 1-4 until desired length. 

End on row 3.

Row 5: Turn, ch 1, 1 sc in next 2 dc, *1 sc in ch 1 space, 1 sc in next sc, (2 sc in next ch 3 space, 1 sc in next sc x3 times), (sc in next ch 1 space, 1 sc in next dc x6 times)* repeat from *to* until end of row, 1 sc in next 2 dc. Do not cut thread yet.

Sewing Together:

Fold in the crochet veil in half. Line the edges up and insert your hook through both sides. Slip stitch down the edge to sew together. Try your best to line up the stitches as evenly as possible for a clean look. 

Cut thread with scissors and weave in ends with tapestry needle. 

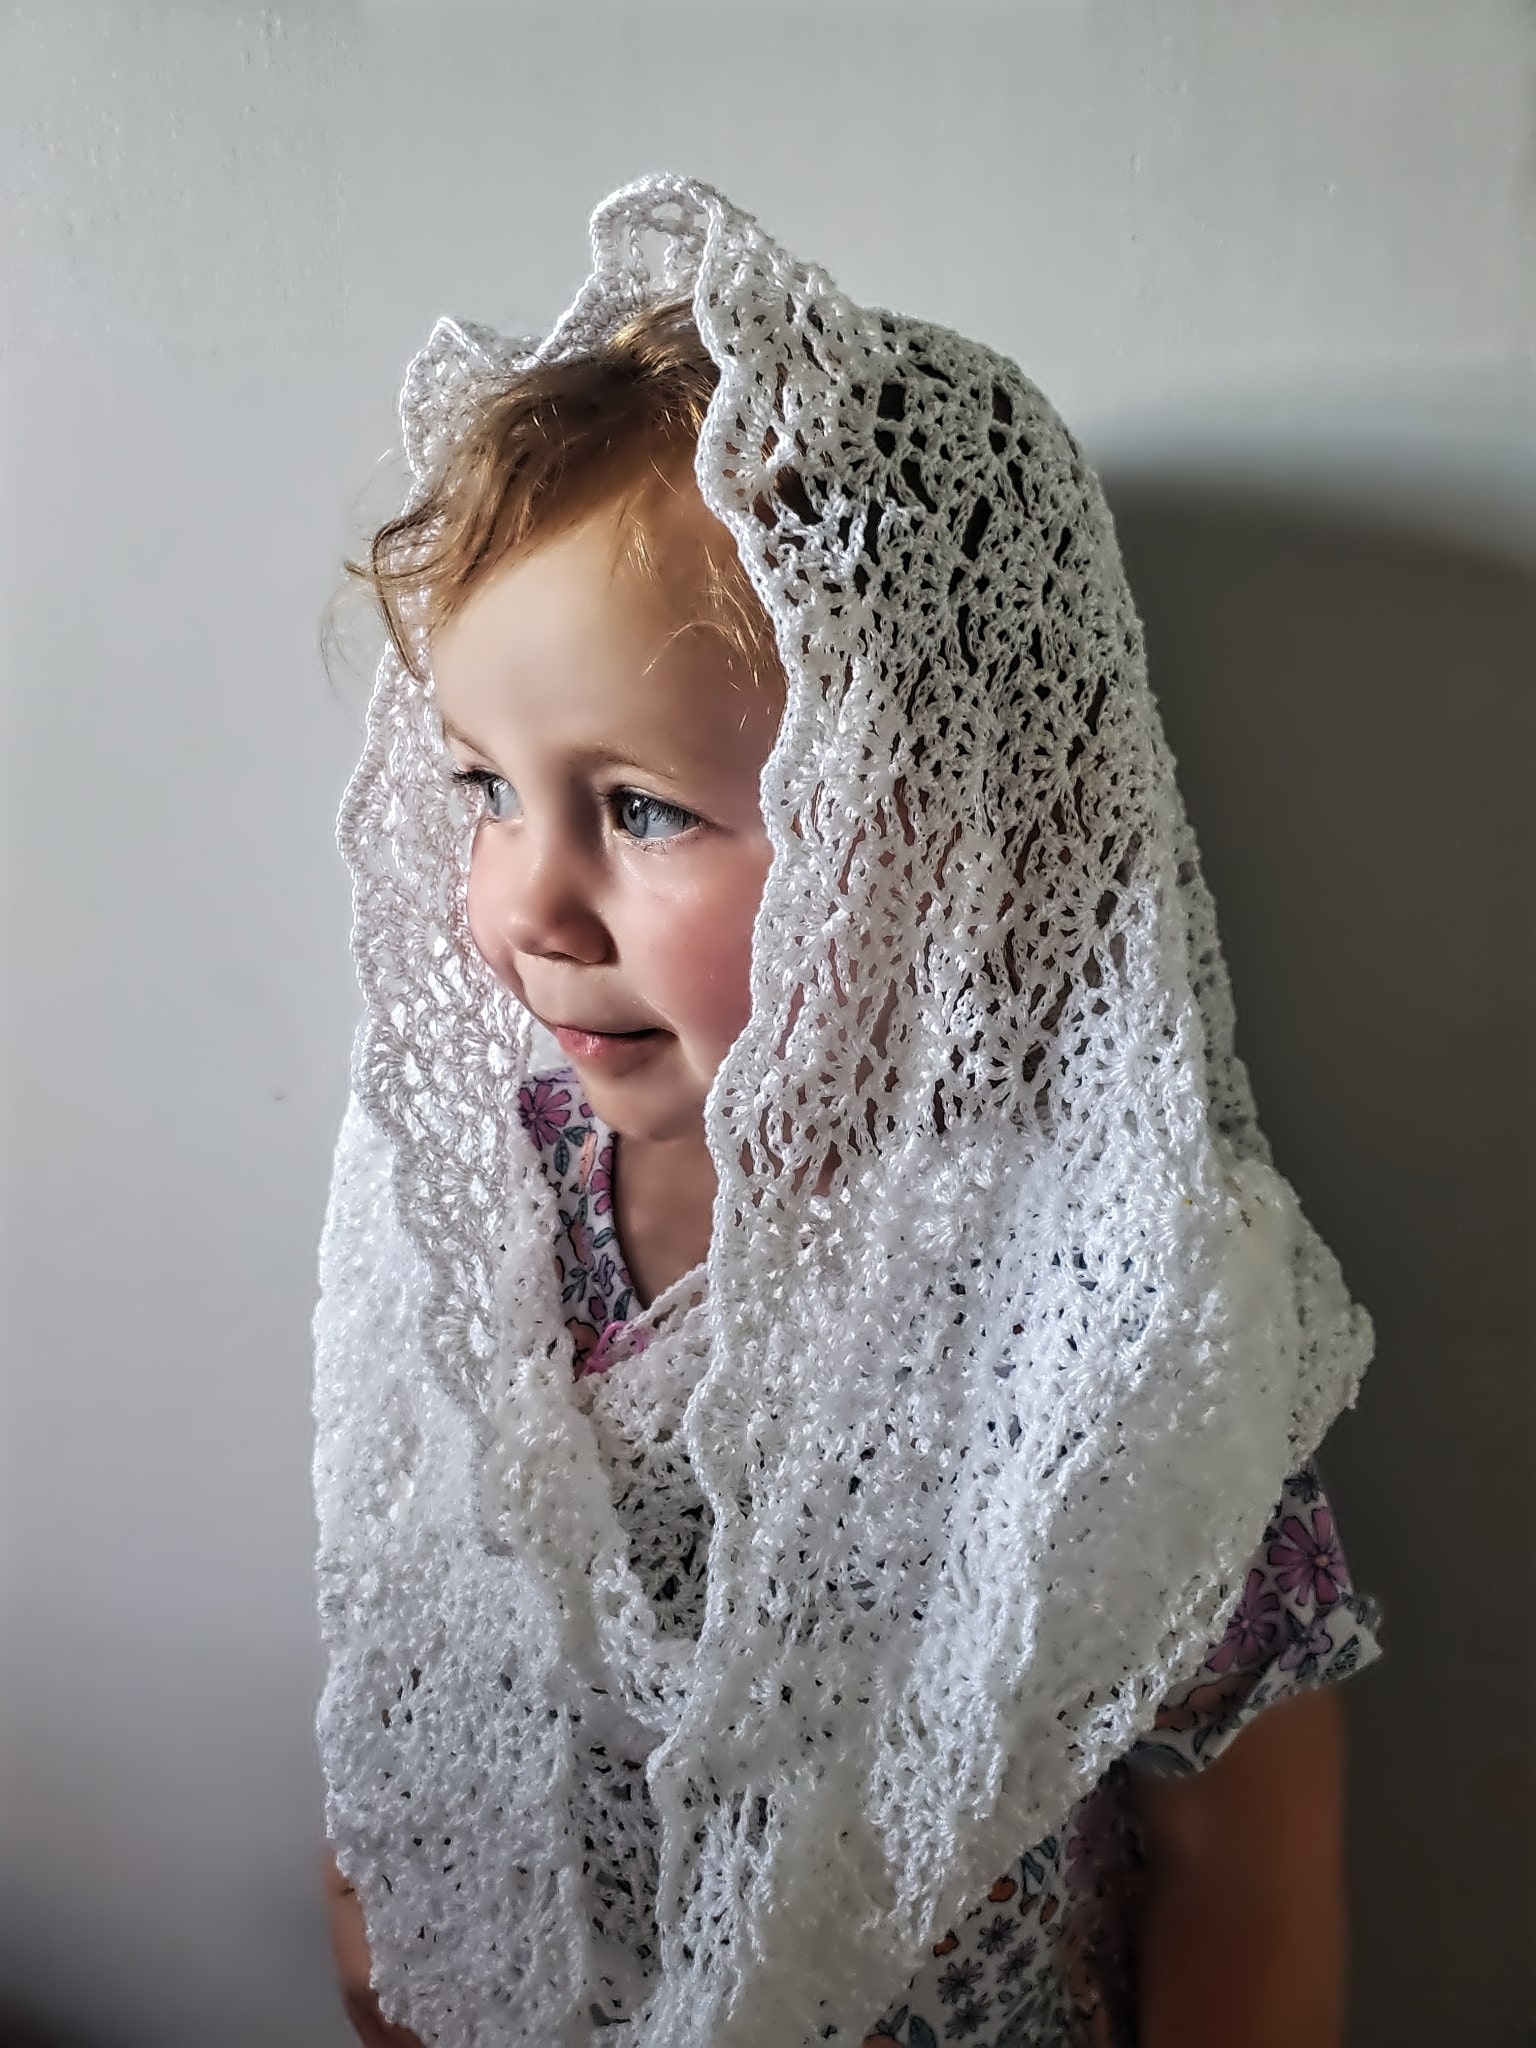
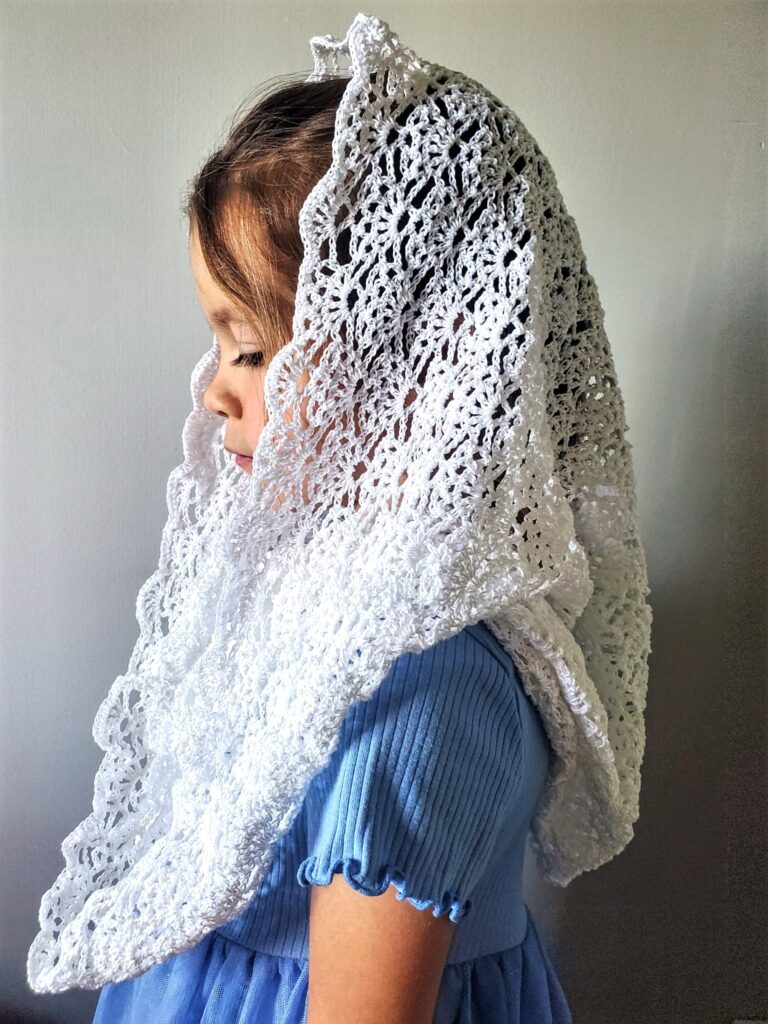
Crochet Infinity Veil worn by cute little girl

Here’s my oldest girl modeling the crochet veil. She was doing a great job being very serious for me lol!

Thank you as always. If you liked this pattern and want to share your crochet veil on Instagram, tag me @strommercrafts. I love to see everyone’s work!

Until next time.

Animal Crossing Crochet Tabletop Pattern – Free Pattern

Hello and welcome back to another free crochet pattern, created by yours truly! Today I have for you an Animal Crossing Crochet Tabletop Pattern! Now that summer is here, I always tend to crochet more decorative items, because let’s be real…wearing acrylic crochet is not much fun in the heat.

Animal Crossing is another video game that is near and dear to my heart. I’ve been feeling a little nostalgic recently and I have fond memories of playing Animal Crossing during my childhood. It’s such a relaxing game with lots of open ended play. 

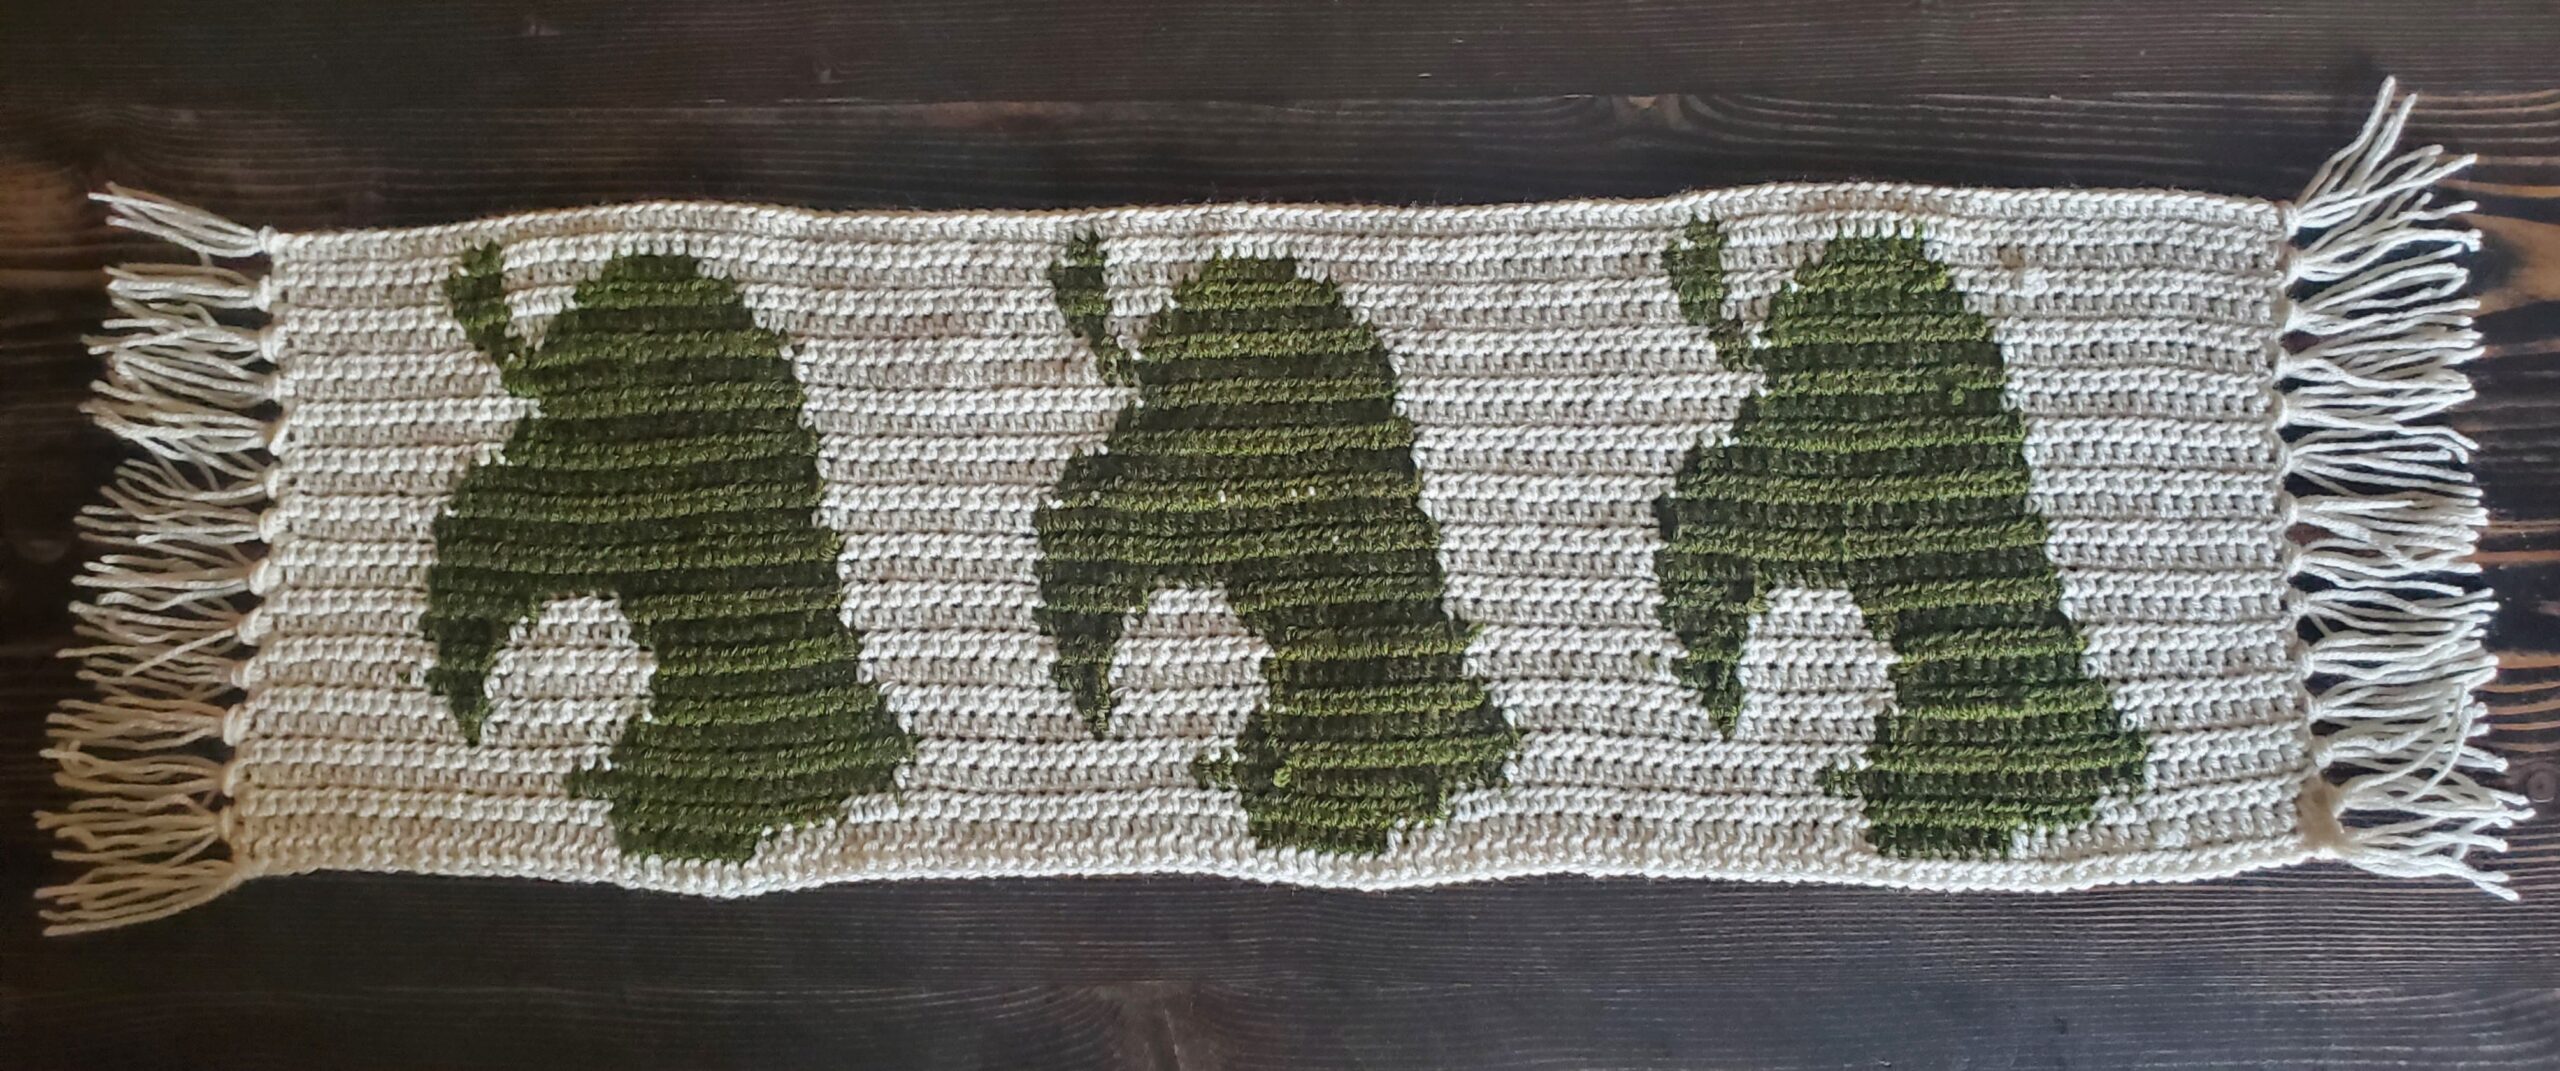
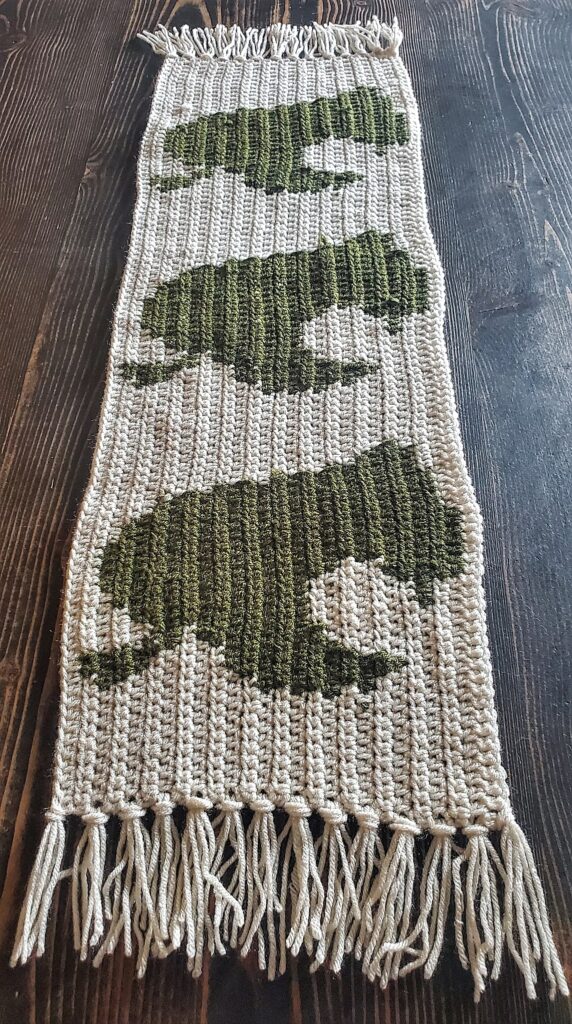
I would use this as a centerpiece for your table or coffee table. It’s a little too tall (thick? lol!) to be a runner for an end table in my opinion. When completed (and prior to blocking), my piece measured roughly 31″ x 9.5″ before adding fringe.

The Animal Crossing Crochet Tabletop Pattern has the iconic leaf logo from the game in a repeat of three. 

You’ll have to change between two colors throughout the pattern. I will explain my process below, however, feel free to use whatever method of color changing you prefer. If you need more help, you can check out my previous post on How to Color Change in Crochet the Right Way.

Tag me on Instagram with your finished projects @strommercrafts!

Thank you and I hope you enjoy this pattern! 🙂

Check out these other FREE Crochet Patterns!
Animal Crossing Crochet Tabletop Decor Runner

Materials Needed:

  • 5 mm crochet hook
  • 1 skein of Red Heart Super Saver Worsted Weight Size 4 in Aran color
  • 1 skein of Red Heart Super Saver Worsted Weight Size 4 in Thyme color
  • Tapestry Needle
  • Scissors
  • Stitch marker (optional)

Abbreviations Used:

  • ch – chain
  • st(s) – stitch(es)
  • hdc – half double crochet
  • CTA – change to aran
  • CTT – change to thyme

Useful Tips:

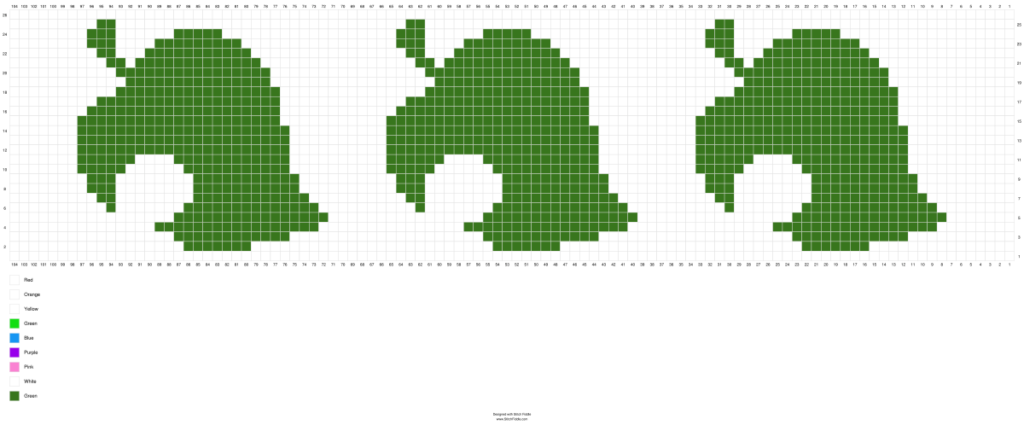
  • I have written out all the color changes below, but I have a picture and PDF of the chart if you’re more of a visual person. If using the chart, each square = 1 hdc.
  • Read the chart left to right for row 1, right to left for row 2 and so on. 
  • Use the stitch marker on one side to help you determine left from right.
  • When changing colors, you’ll always stop 1 st before the needed color change. Do not finish your hdc all the way (you’ll have 3 strands of yarn on your hook), put your new color on the hook and pull through.
    • For example: I have aran on my hook and need to switch to thyme on the 10th st (or square if using the chart). On the 9th stitch I will color change as described above.
  • I tend to crochet the ends of my yarn along the way when I can. You can weave the ends in if you’d rather. If you weave in too many ends, you tend to get a little wave/bulge going in your work.
  • I chose to carry the aran color throughout the pattern, even when working on the leaves, but I dropped the thyme color only in the spaces between the leaves. (Due to the light aran color, you can really see the thyme color between stitches, which is fine, it’s just not my preference).
Animal Crossing Crochet Tabletop Graph

Animal Crossing Crochet Tabletop Pattern:

  • Row 1 – With Aran color, Ch 105, hdc in second chain from hook, 1 hdc in each ch until end of row. (104 sts) 
  • Row 2 – Turn, ch 1, 1 hdc in next 15 sts (don’t finish the 15th stitch all the way, with 3 strands of yarn on your hook, switch to green yarn and pull through. Do this for switching between colors throughout the pattern), *with green yarn, 1 hdc in next 7 sts, CTA, 1 hdc in next 25 sts*. Repeat from *to* once more. CTT, 1 hdc in next 7 sts, CTA, 1 hdc in next 18 sts (104 sts) 
Color Changing in Crochet Step 1
Hdc, don't finish all the way, place thyme on hook
Color Change in Crochet Step 2
Pull through with thyme (you might have to pull on/keep taut both yarns to keep a tight stitch)
  • Row 3 – Turn, ch 1, 1 hdc in next 17 sts, *CTT, 1 hdc in next 12 sts, CTA, 1 hdc in next 20 sts*. Repeat from *to* once more. CTT, 1 hdc in next 12 sts, CTA, 1 hdc in next 11 sts (104 sts)
  • Row 4 – Turn, ch 1, 1 hdc in next 8 sts, *CTT, 1 hdc in next 17 sts, CTA, 1 hdc in next 15 sts*. Repeat from *to* two more times. (104 sts)
  • Row 5 – Turn, ch 1, 1 hdc in next 17 sts, *CTT, 1 hdc in next 16 sts, CTA, 1 hdc in next 16 sts*. Repeat from *to* once more. CTT, 1 hdc in next 16 sts, CTA, 1 hdc in next 7 sts (104 sts)
  • Row 6 – Turn, ch1, 1 hdc in next 8 sts, *CTT, 1 hdc in next 14 sts, CTA, 1 hdc in next 7 sts, CTT, 1 hdc in next st, CTA, 1 hdc in next 10 sts*. Repeat from *to* two more times. (104 sts)
  • Row 7 – Turn, ch 1, 1 hdc in next 9 sts, *CTT, 1 hdc in next 2 sts, CTA, 1 hdc in next 8 sts, CTT, 1 hdc in next 12 sts, CTA, 1 hdc in next 10 sts*. Repeat from *to* once more. CTT, 1 hdc in next 2 sts, CTA, 1 hdc in next 8 sts, CTT, 1 hdc in next 12 sts, CTA, 1 hdc in next 9 sts. (104 sts)
  • Row 8 – Turn, ch 1, 1 hdc in next 10 sts, *CTT, 1 hdc in next 11 sts, CTA, 1 hdc in next 8 sts, CTT, 1 hdc in next 3 sts, CTA, 1 hdc in next 10 sts*. Repeat from *to* once more. CTT, 1 hdc in next 11 sts, CTA, 1 hdc in next 8 sts, CTT, 1 hdc in next 3 sts, CTA, 1 hdc in next 8 sts. (104 sts)
  • Row 9 – Turn, ch 1, 1 hdc in next 8 sts, *CTT, 1 hdc in next 3 sts, CTA, 1 hdc in next 8 sts, CTT, 1 hdc in next 11 sts, CTA, 1 hdc in next 10 sts*. Repeat from *to* once more. CTT, 1 hdc in next 3 sts, CTA, 1 hdc in next 8 sts, CTT, 1 hdc in next 11 sts, CTA, 1 hdc in next 10 sts. (104 sts)
  • Row 10 – Turn, ch 1, 1 hdc in next 11 sts, *CTT, 1 hdc in next 11 sts, CTA, 1 hdc in next 6 sts, CTT, 1 hdc in next 5 sts, CTA, 1 hdc in next 10 sts*. Repeat from *to* once more. CTT, 1 hdc in next 11 sts, CTA, 1 hdc in next 6 sts, CTT, 1 hdc in next 5 sts, CTA, 1 hdc in next 7 sts. (104 sts)
  • Row 11 – Turn, ch 1, 1 hdc in next 7 sts, *CTT, 1 hdc in next 6 sts, CTA, 1 hdc in next 4 sts, CTT, 1 hdc in next 12 sts, CTA in next 10 sts*. Repeat from *to* once more. CTT, 1 hdc in next 6 sts, CTA, 1 hdc in next 4 sts, CTT, 1 hdc in next 12 sts, CTA in next 11 sts. (104 sts)
  • Row 12 – Turn, ch 1, 1 hdc in next 11 sts, *CTT, 1 hdc in next 22 sts, CTA, 1 hdc in next 10 sts*. Repeat from *to* once more. CTT, 1 hdc in next 22 sts, CTA, 1 hdc in next 7 sts. (104 sts).
  • Row 13 – Turn, ch 1, 1 hdc in next 7 sts, *CTT, 1 hdc in next 22 sts, CTA, 1 hdc in next 10 sts*. Repeat from *to* once more. CTT, 1 hdc in next 22 sts, CTA, 1 hdc in next 11 sts. (104 sts)
  • Row 14 – Turn, ch 1, 1 hdc in next 11 sts, * CTT, 1 hdc in next 22 sts, CTA, 1 hdc in next 10 sts*. Repeat from *to* once more. CTT, 1 hdc in next 22 sts, CTA, 1 hdc in next 7 sts. (104 sts)
  • Row 15 – Turn, ch 1, 1 hdc in next 7 sts, *CTT, 1 hdc in next 21 sts, CTA, 1 hdc in next 11 sts*. Repeat from *to* once more. CTT, 1 hdc in next 21 sts, CTA, 1 hdc in next 12 sts. (104 sts)
  • Row 16 – Turn, ch 1, 1 hdc in next 12 sts, *CTT, 1 hdc in next 20 sts, CTA, 1 hdc in next 12 sts*. Repeat from *to* once more. CTT, 1 hdc in next 20 sts, CTA, 1 hdc in next 8 sts. (104 sts)
  • Row 17 – Turn, ch 1, 1 hdc in next 9 sts, *CTT, 1 hdc in next 19 sts, CTA, 1 hdc in next 13 sts*. Repeat from *to* once more. CTT, 1 hdc in next 19 sts, CTA, 1 hdc in next 12 sts. (104 sts)
  • Row 18 – Turn, ch 1, 1 hdc in next 12 sts, *CTT, 1 hdc in next 17 sts, CTA, 1 hdc in next 15 sts*. Repeat from *to* once more. CTT, 1 hdc in next 17 sts, CTA, 1 hdc in next 11 sts. (104 sts)
  • Row 19 – Turn, ch 1, 1 hdc in next 12 sts, *CTT, 1 hdc in next 15 sts, CTA, 1 hdc in next 17 sts*. Repeat from *to* once more. CTT, 1 hdc in next 15 sts, CTA, 1 hdc in next 13 sts. (104 sts)
  • Row 20 – Turn, ch 1, 1 hdc in next 13 sts, *CTT, 1 hdc in next 16 sts, CTA, 1 hdc in next 16 sts*. Repeat from *to* once more. CTT, 1 hdc in next 16 sts, CTA, 1 hdc in next 11 sts. (104 sts)
  • Row 21 – Turn, ch 1, 1 hdc in next 10 sts, *CTT, 1 hdc in next 2 sts, CTA, 1 hdc in next st, CTT, 1 hdc in next 13 sts, CTA, 1 hdc in next 16 sts*. Repeat from *to* once more. CTT, 1 hdc in next 2 sts, CTA, 1 hdc in next st, CTT, 1 hdc in next 13 sts, CTA, 1 hdc in next 14 sts (104 sts)
  • Row 22 – Turn, ch 1, 1 hdc in next 15 sts, *CTT, 1 hdc in next 11 sts, CTA, 1 hdc in next 3 sts, CTT, 1 hdc in next 2 sts, CTA, 1 hdc in next 16 sts*. Repeat from *to* once more. CTT, 1 hdc in next 11 sts, CTA, 1 hdc in next 3 sts, CTT, 1 hdc in next 2 sts, CTA, 1 hdc in next 9 sts (104 sts)
  • Row 23 – Turn, ch 1, 1 hdc in next 8 sts, *CTT, 1 hdc in next 3 sts, CTA, 1 hdc in next 4 sts, CTT, 1 hdc in next 9 sts, CTA, 1 hdc in next 16 sts*. Repeat from *to* two more times. (104 sts)
  • Row 24 – Turn, ch 1, 1 hdc in next 18 sts, *CTT, 1 hdc in next 5 sts, CTA, 1 hdc in next 6 sts, CTT, 1 hdc in next 3 sts, CTA, 1 hdc in next 18 sts*. Repeat from *to* once more. CTT, 1 hdc in next 5 sts, CTA, 1 hdc in next 6 sts, CTT, 1 hdc in next 3 sts, CTA, 1 hdc in next 8 sts. (104 sts)
  • Row 25 – Turn, ch 1, 1 hdc in next 9 sts, *CTT, 1 hdc in next 2 sts, CTA, 1 hdc in next 30 sts*. Repeat from *to* once more. CTT, 1 hdc in next 2 sts, CTA, 1 hdc in next 29 sts. (104 sts)
  • Row 26 – Turn, ch 1, 1 hdc in each st across (104 sts). Cut yarn and pull through. Weave in ned with tapestry needle.

Fringe:

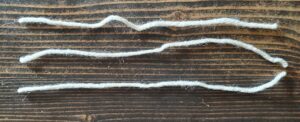
  • Cut 3 strands of aran yarn about 8″ long
3, 8 inch strands of aran yarn for fringe
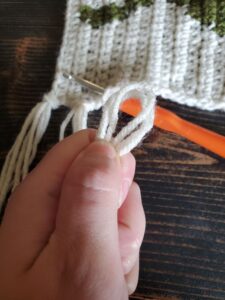
  • Line up strands and make a loop. Make sure the ends are lined up evenly.
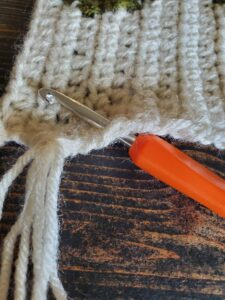
  • Insert 5 mm hook from bottom to top in end of row 26.
Loop strands for fringe
Insert hook bottom to top
  • Put your looped strands on the hook and pull through, but not all the way!
  • Pull the end of the strands through the loop, either with your hands or your hook.
  • Pull the strands snug.
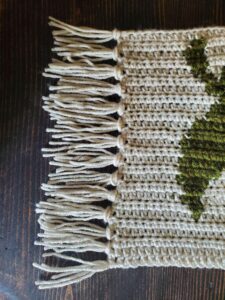
  • Repeat steps in every other row all the way down both edges. 
  • You’ll have to put the last two fringes next to each other.
  • Trim up any long strands with scissors.
Completed Fringe

And that is it! I hope this pattern was easy enough to follow! I would love to see your finished projects below…tag me on IG @strommercrafts!
Until next time! 🙂

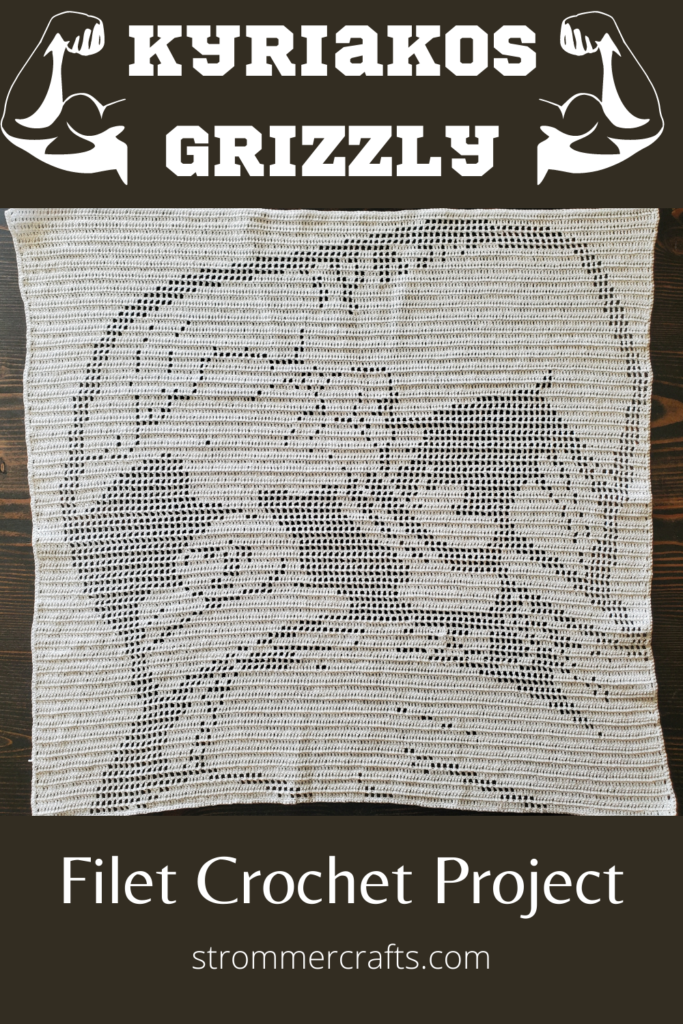
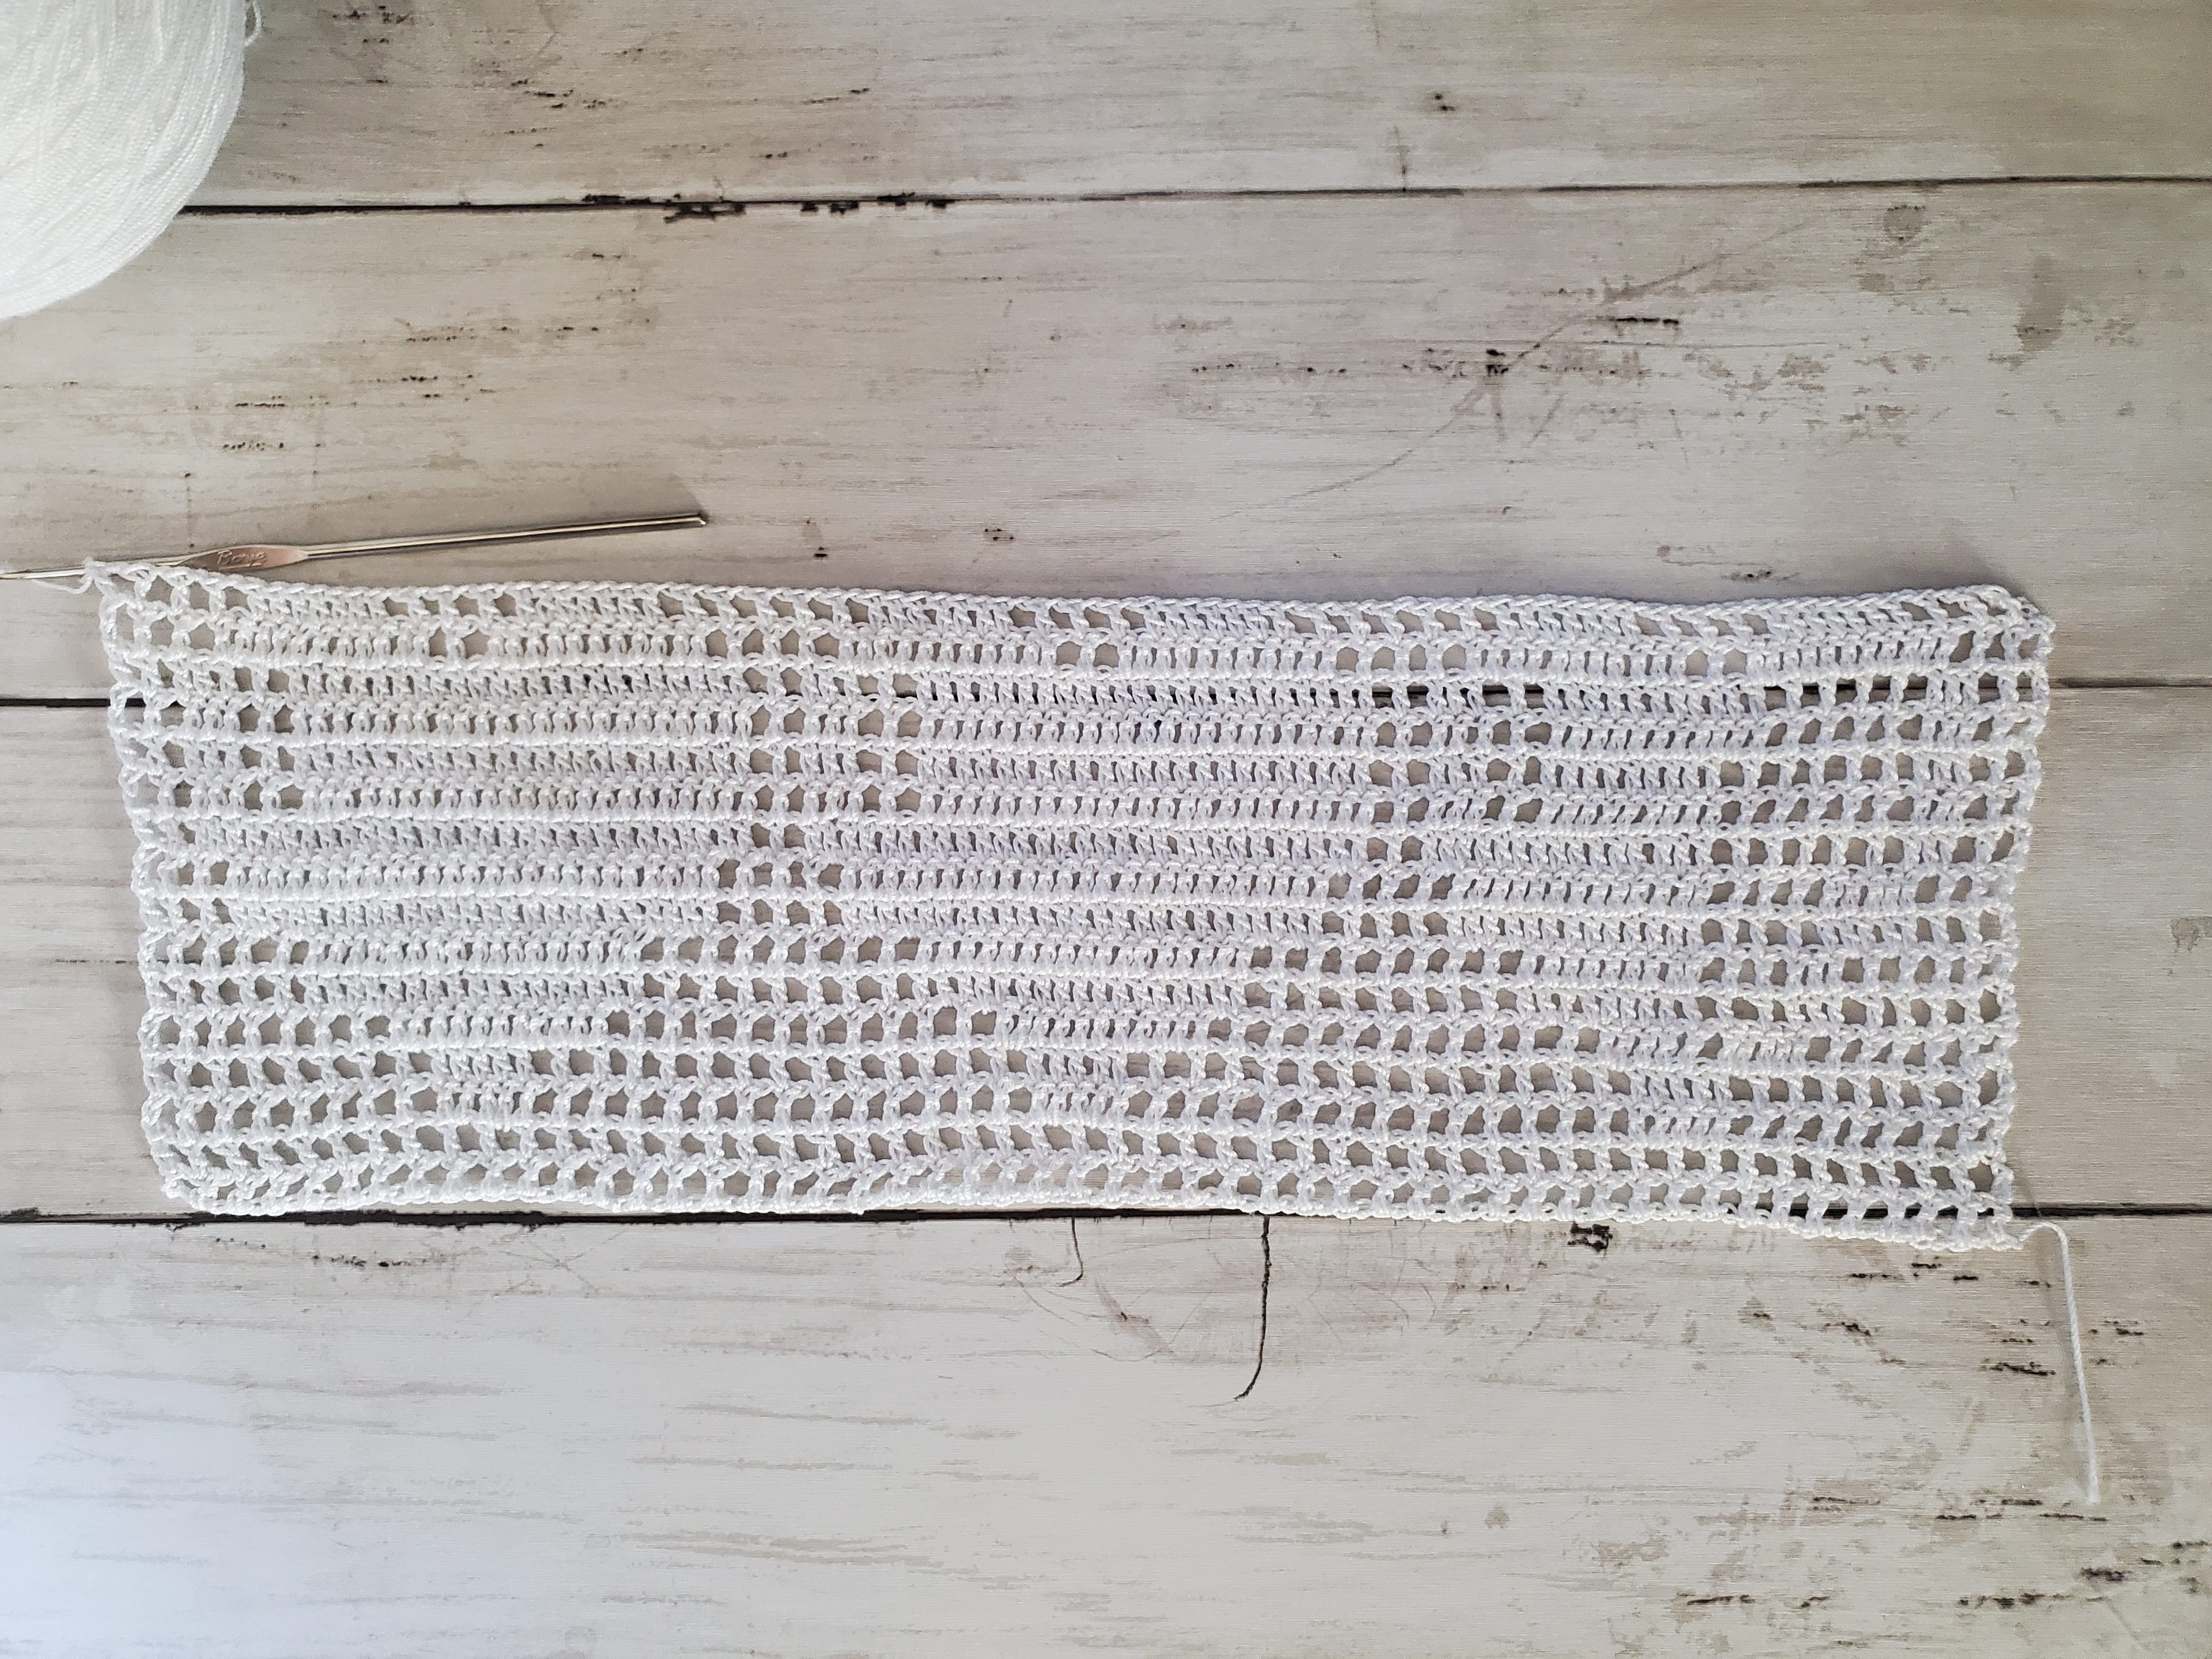
Kyriakos Grizzly Crochet Pattern

If you don’t know who Kyriakos Grizzly is, he’s a huge guy from Greece who posts videos on YouTube of himself working out and weightlifting in unconventional ways.

He’s become a meme in the fitness community and has been named the Bloat Lord due to his massiveness and ability to move an incredible amount of weight.

I was inspired to crochet this image of Kyriakos Grizzly after watching one of his most famous workout videos on YouTube, which can be found here.

In this workout video, he shrugs like 7 plates worth of weight on each side of the bar and then screams loudly when he’s done.

For those of you who aren’t familiar with weight lifting, a plate is 25 lbs. So if my math is correct, he’s shrugging something crazy, like 350 lbs. 

I can barely bench the bar, let alone hold that much weight. I think I’d probably collapse and die! 

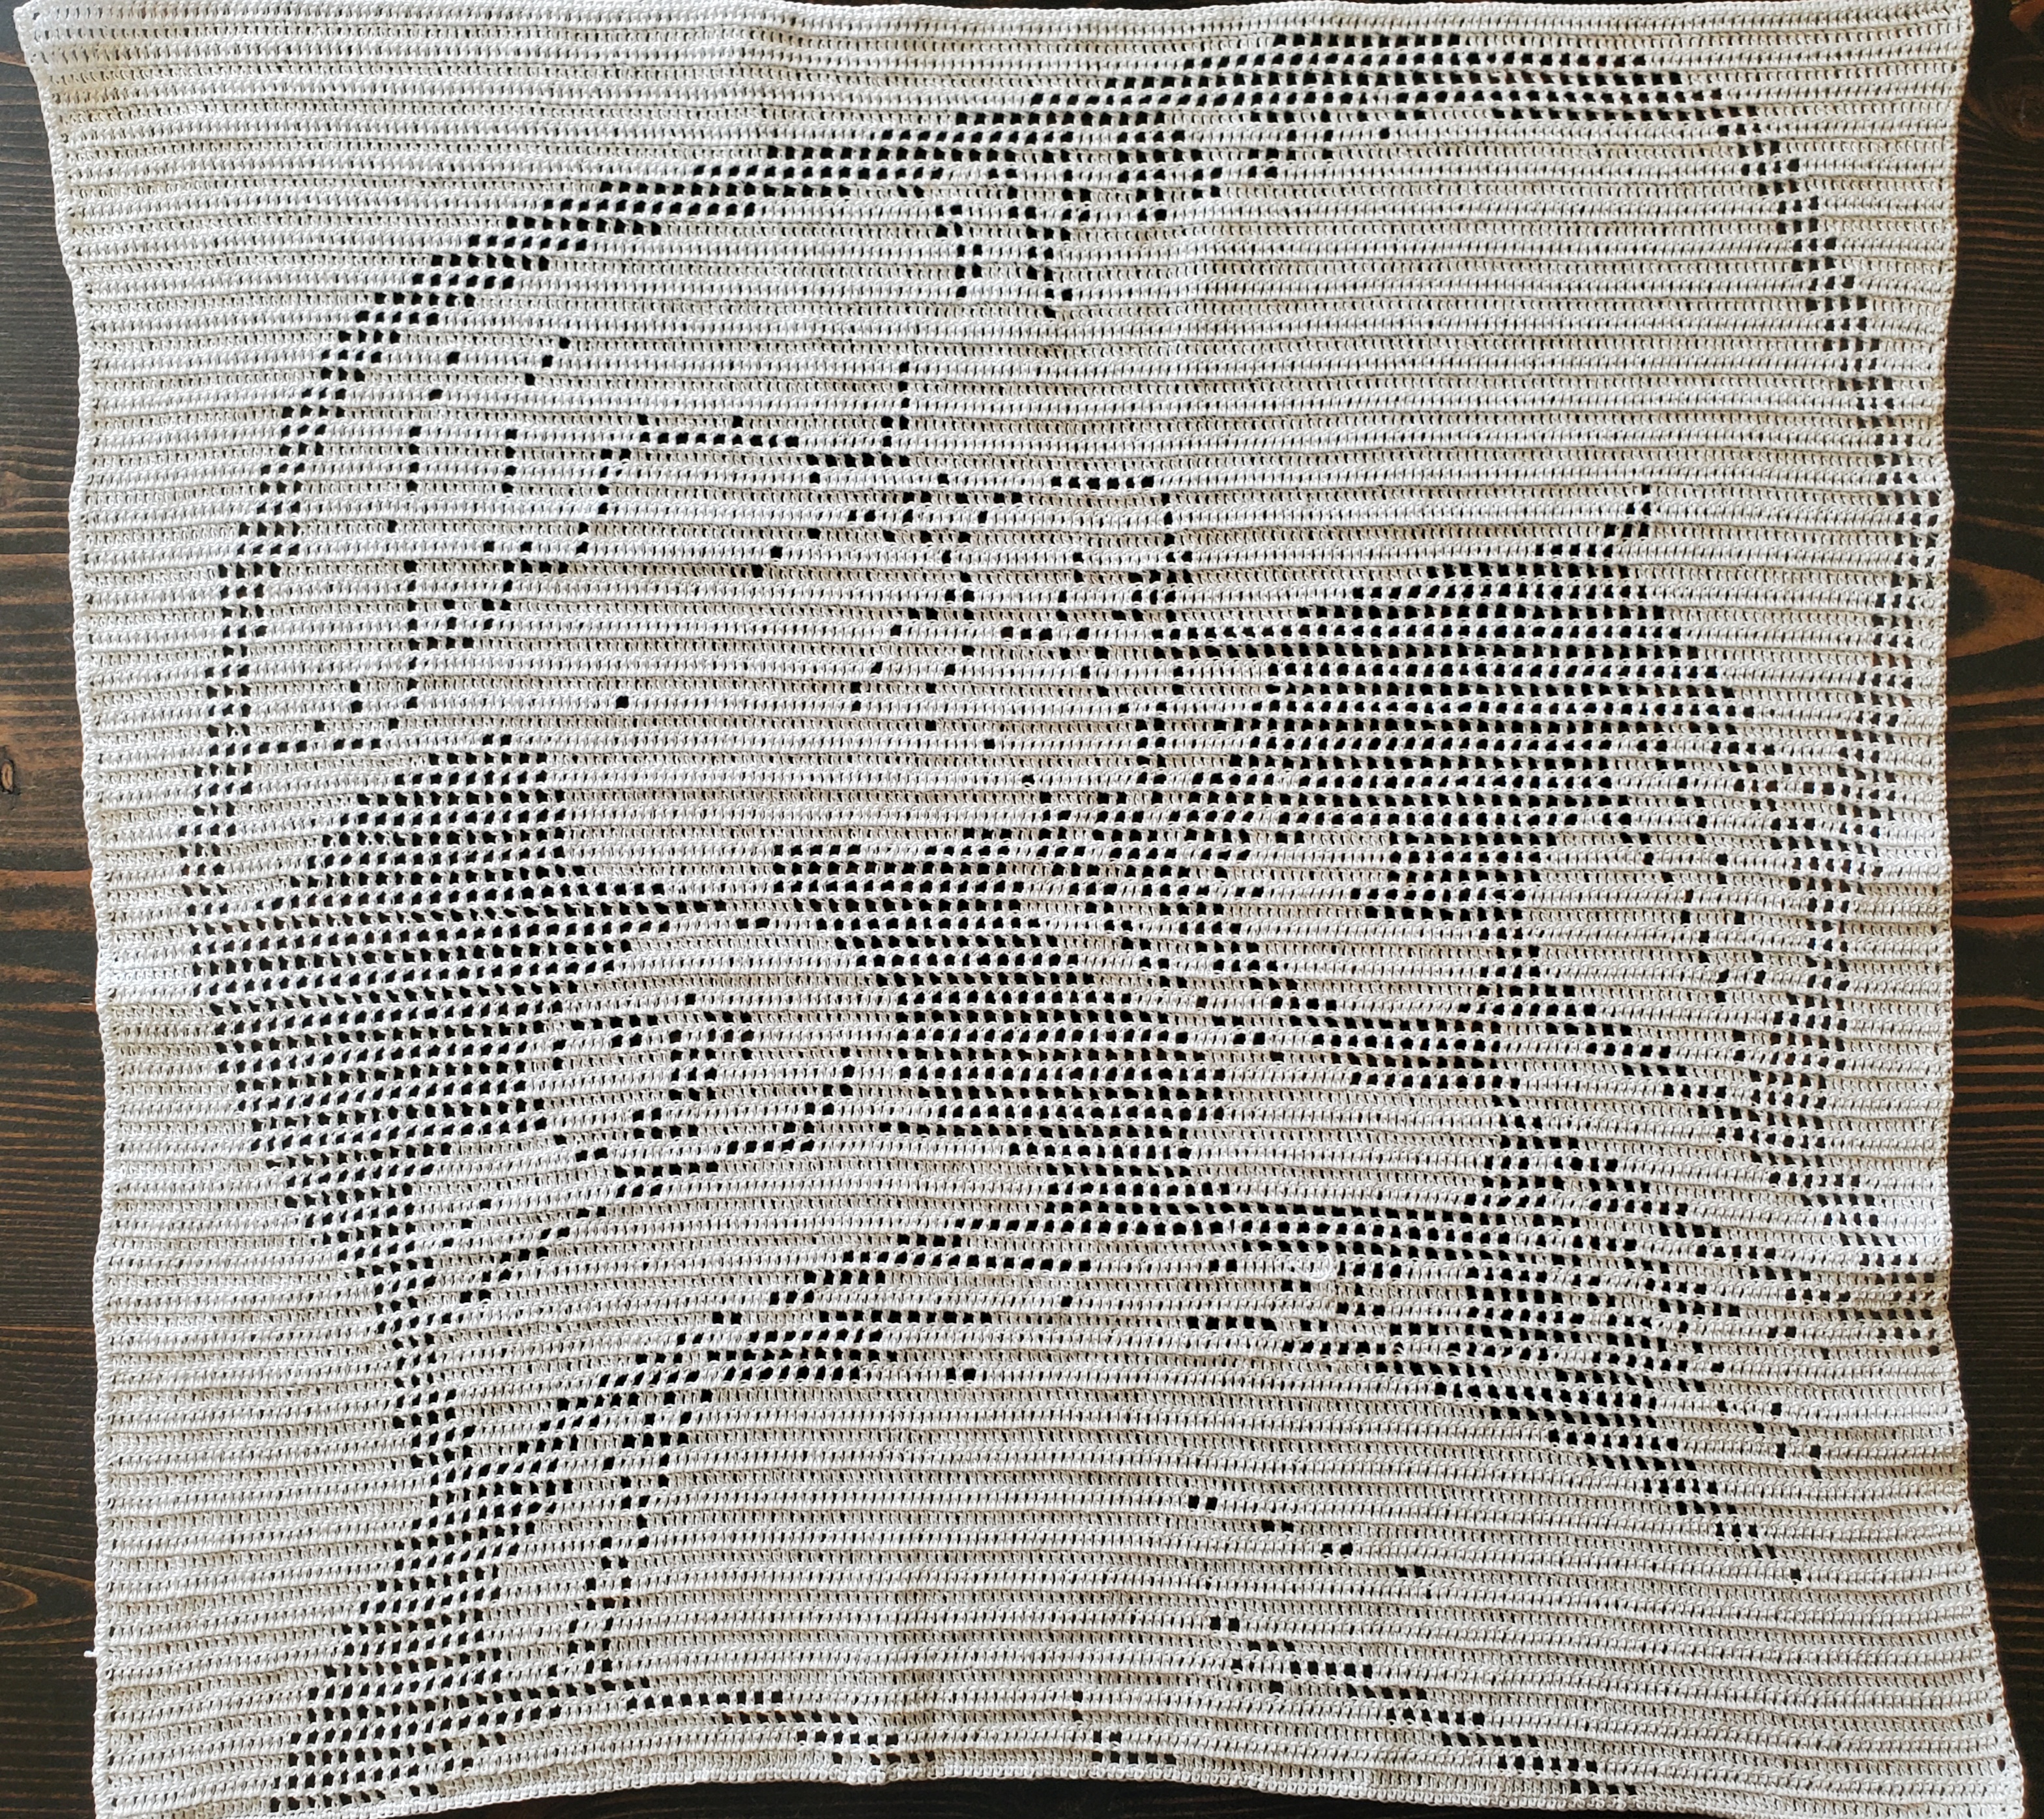
However, even if I can’t lift much weight, I’m still incredibly impressed. This is why I wanted to crochet the image of him screaming in that moment. That, and also my husband loves the meme, so I made it for him too!

If you’re interested in crocheting Kyriakos Grizzly screaming, keep reading!

Method Used

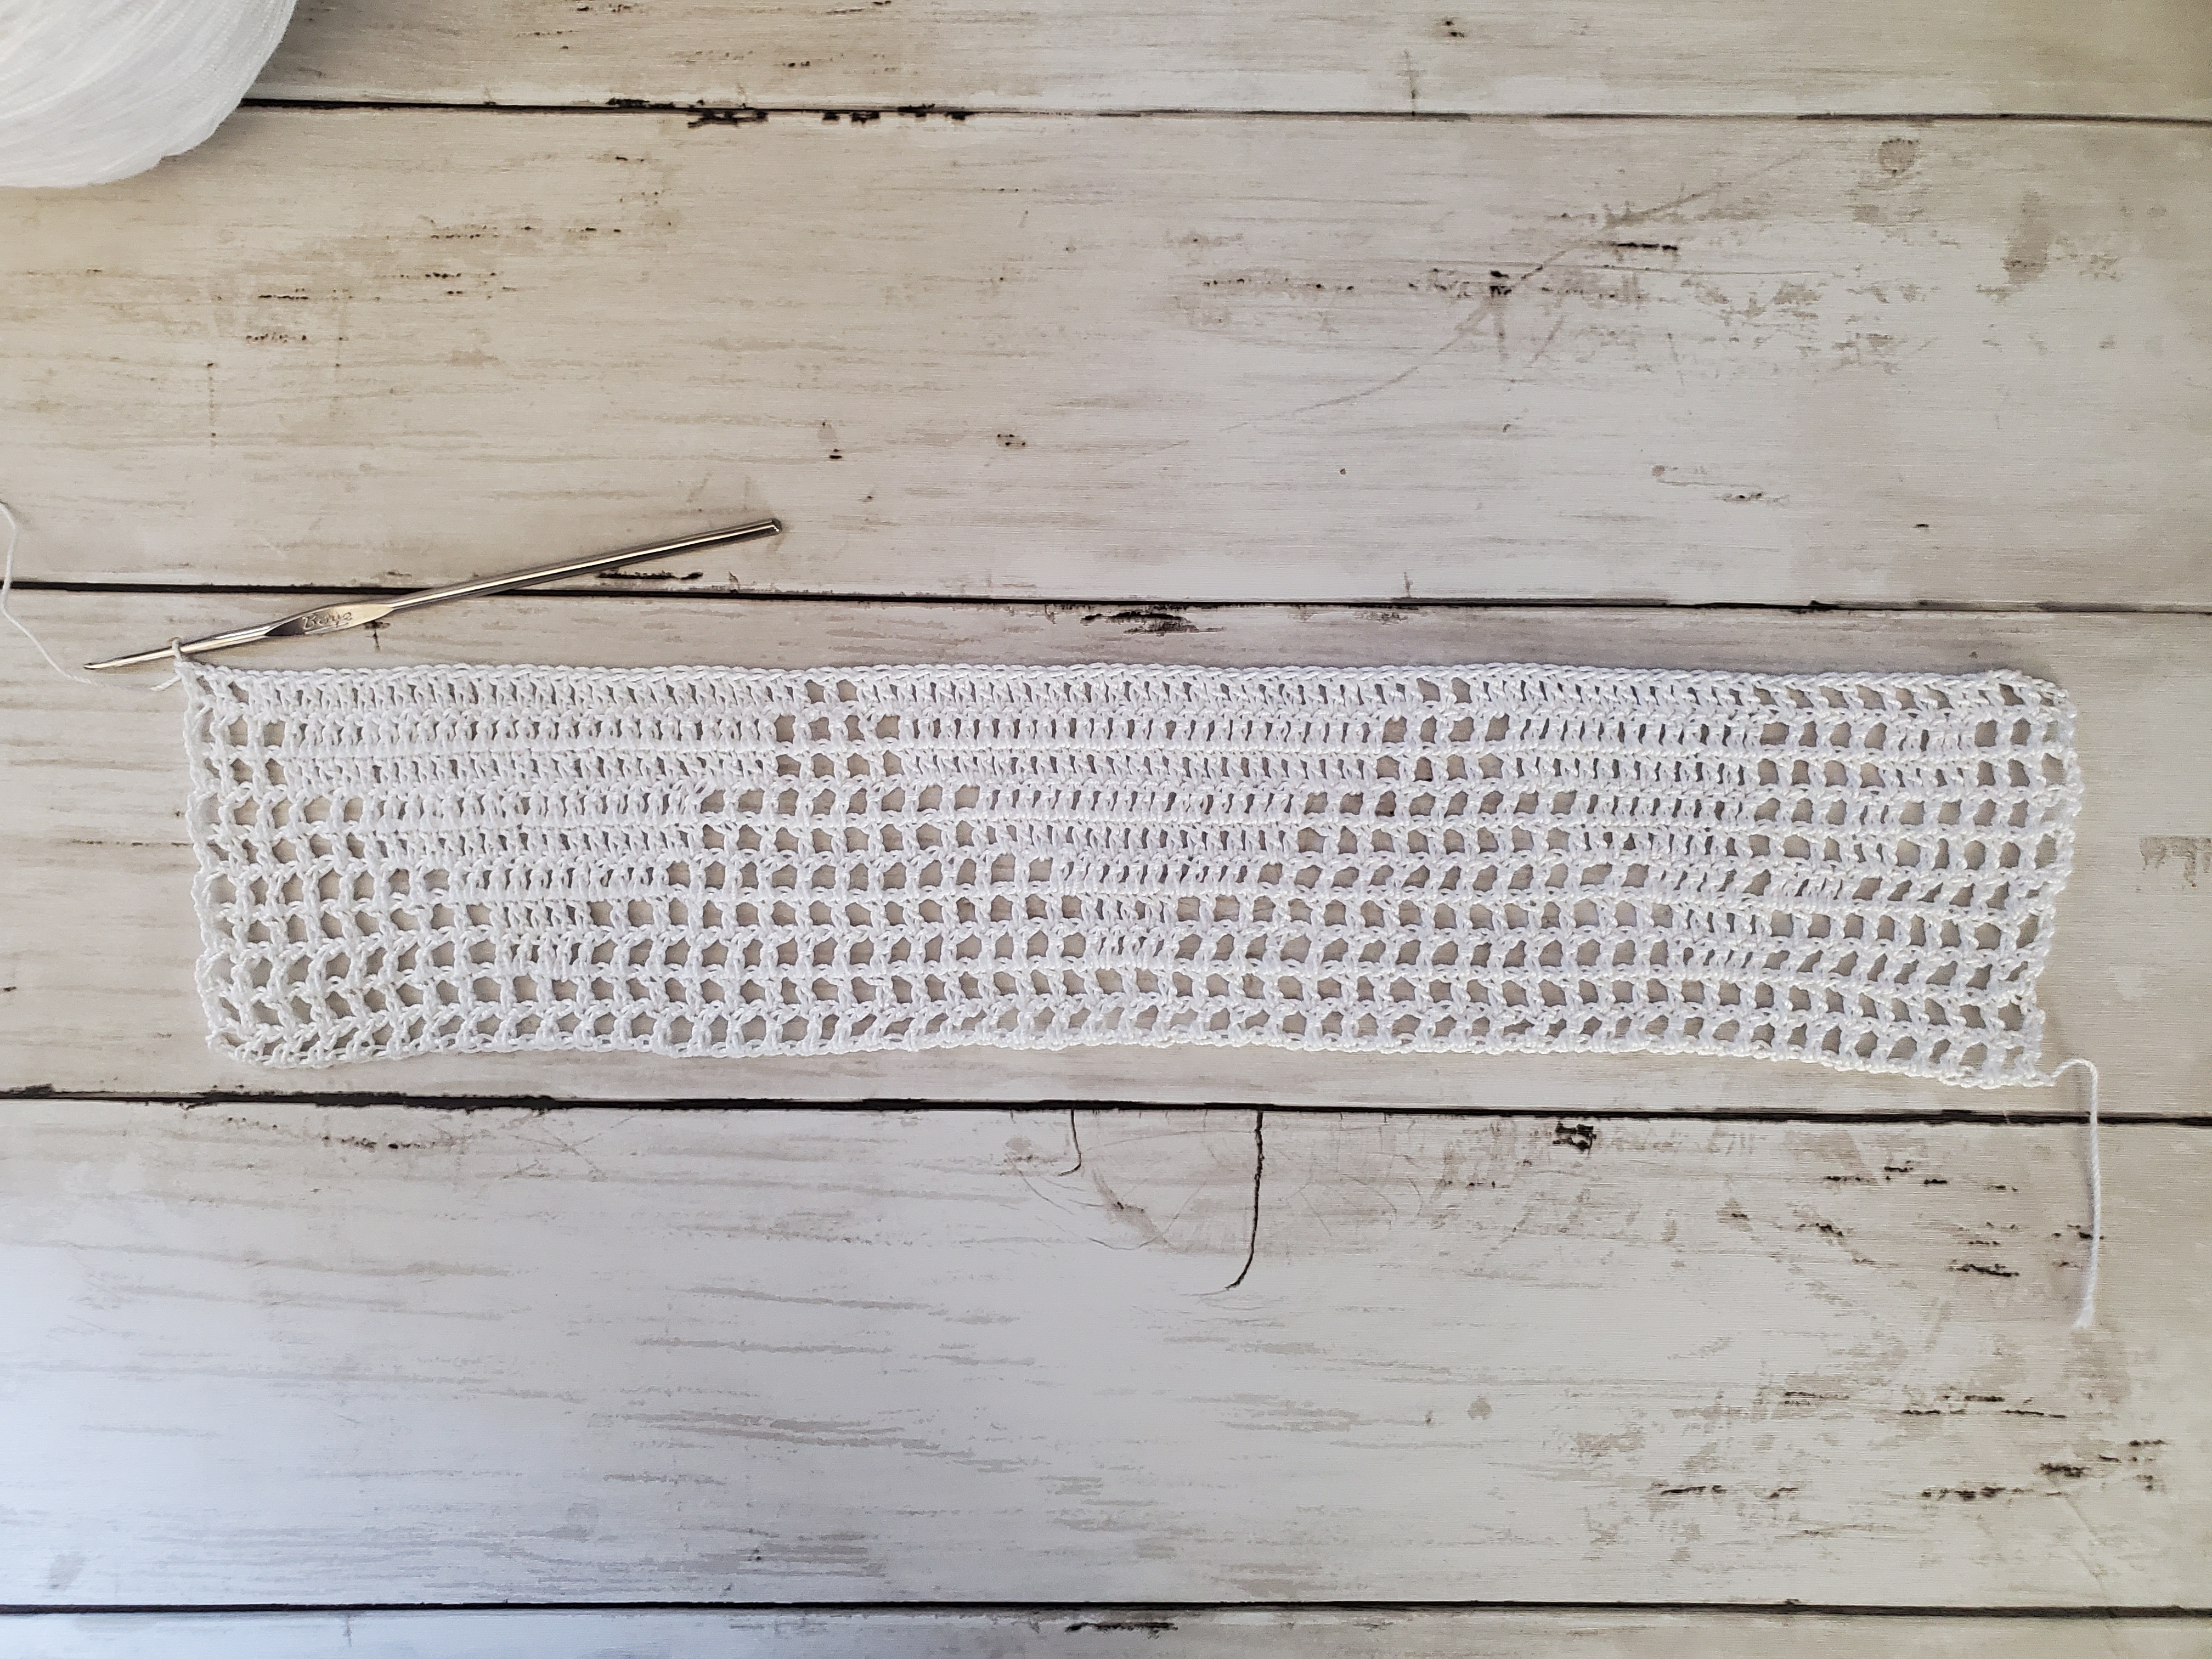
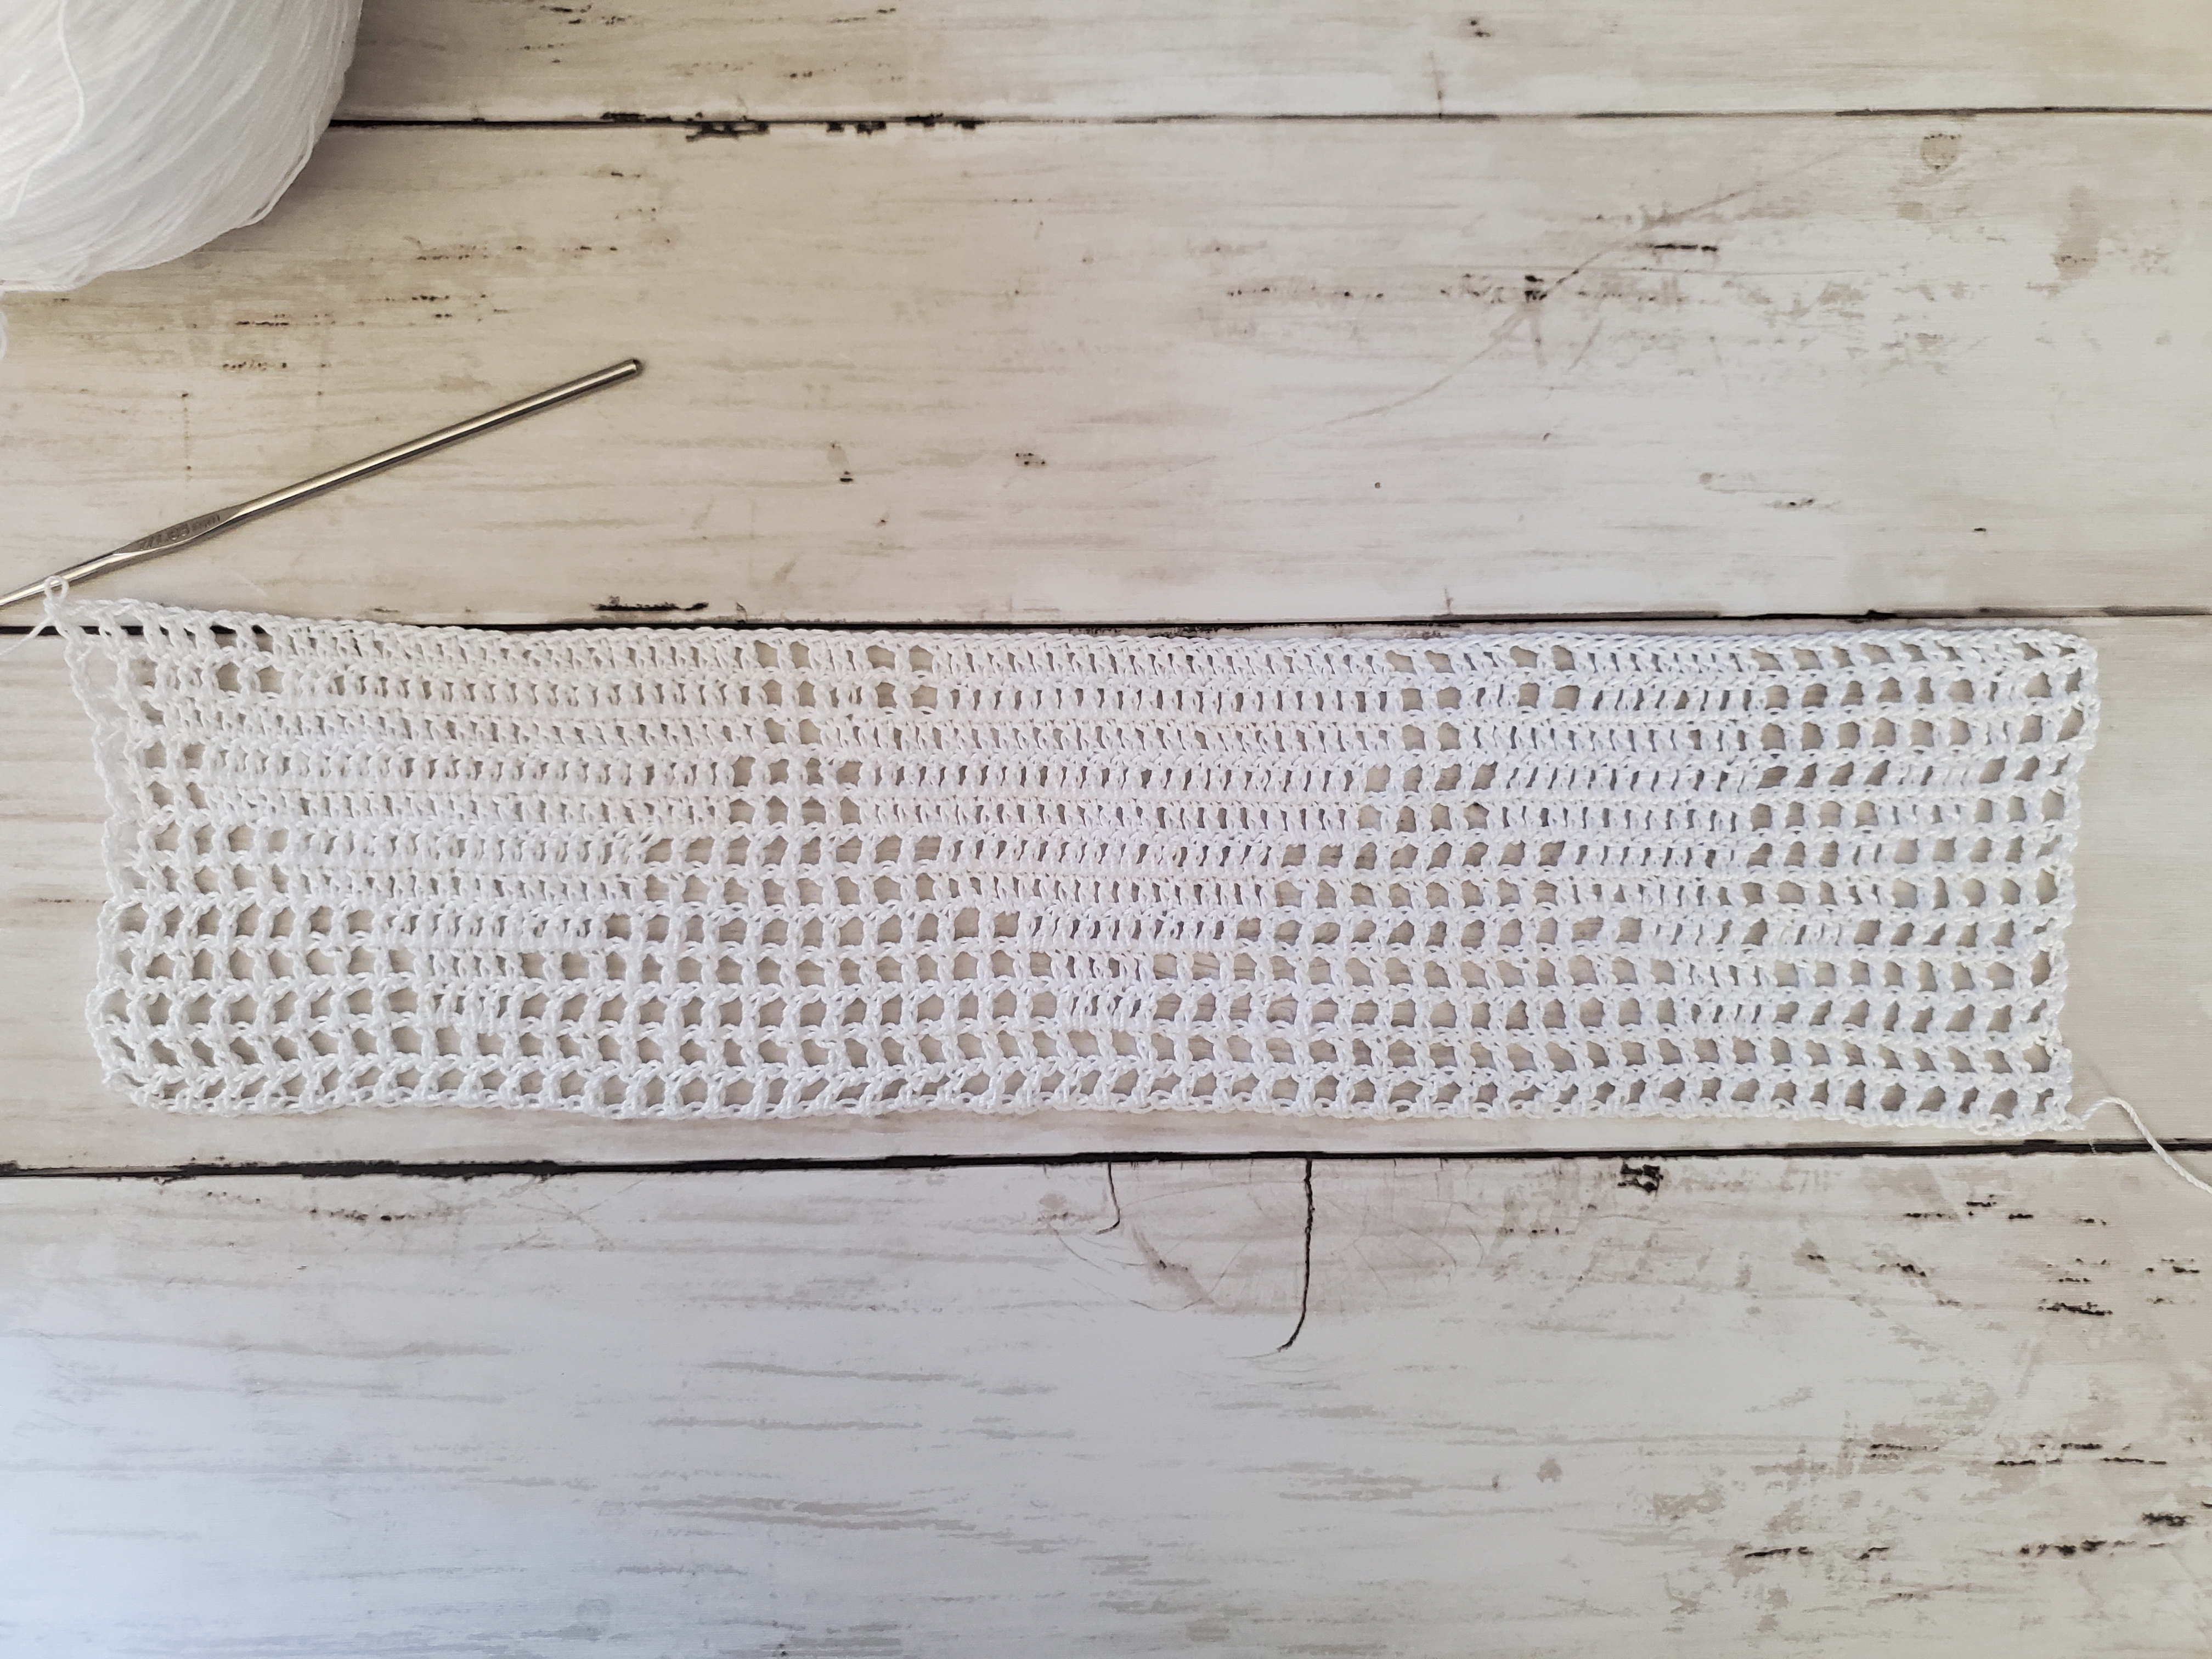
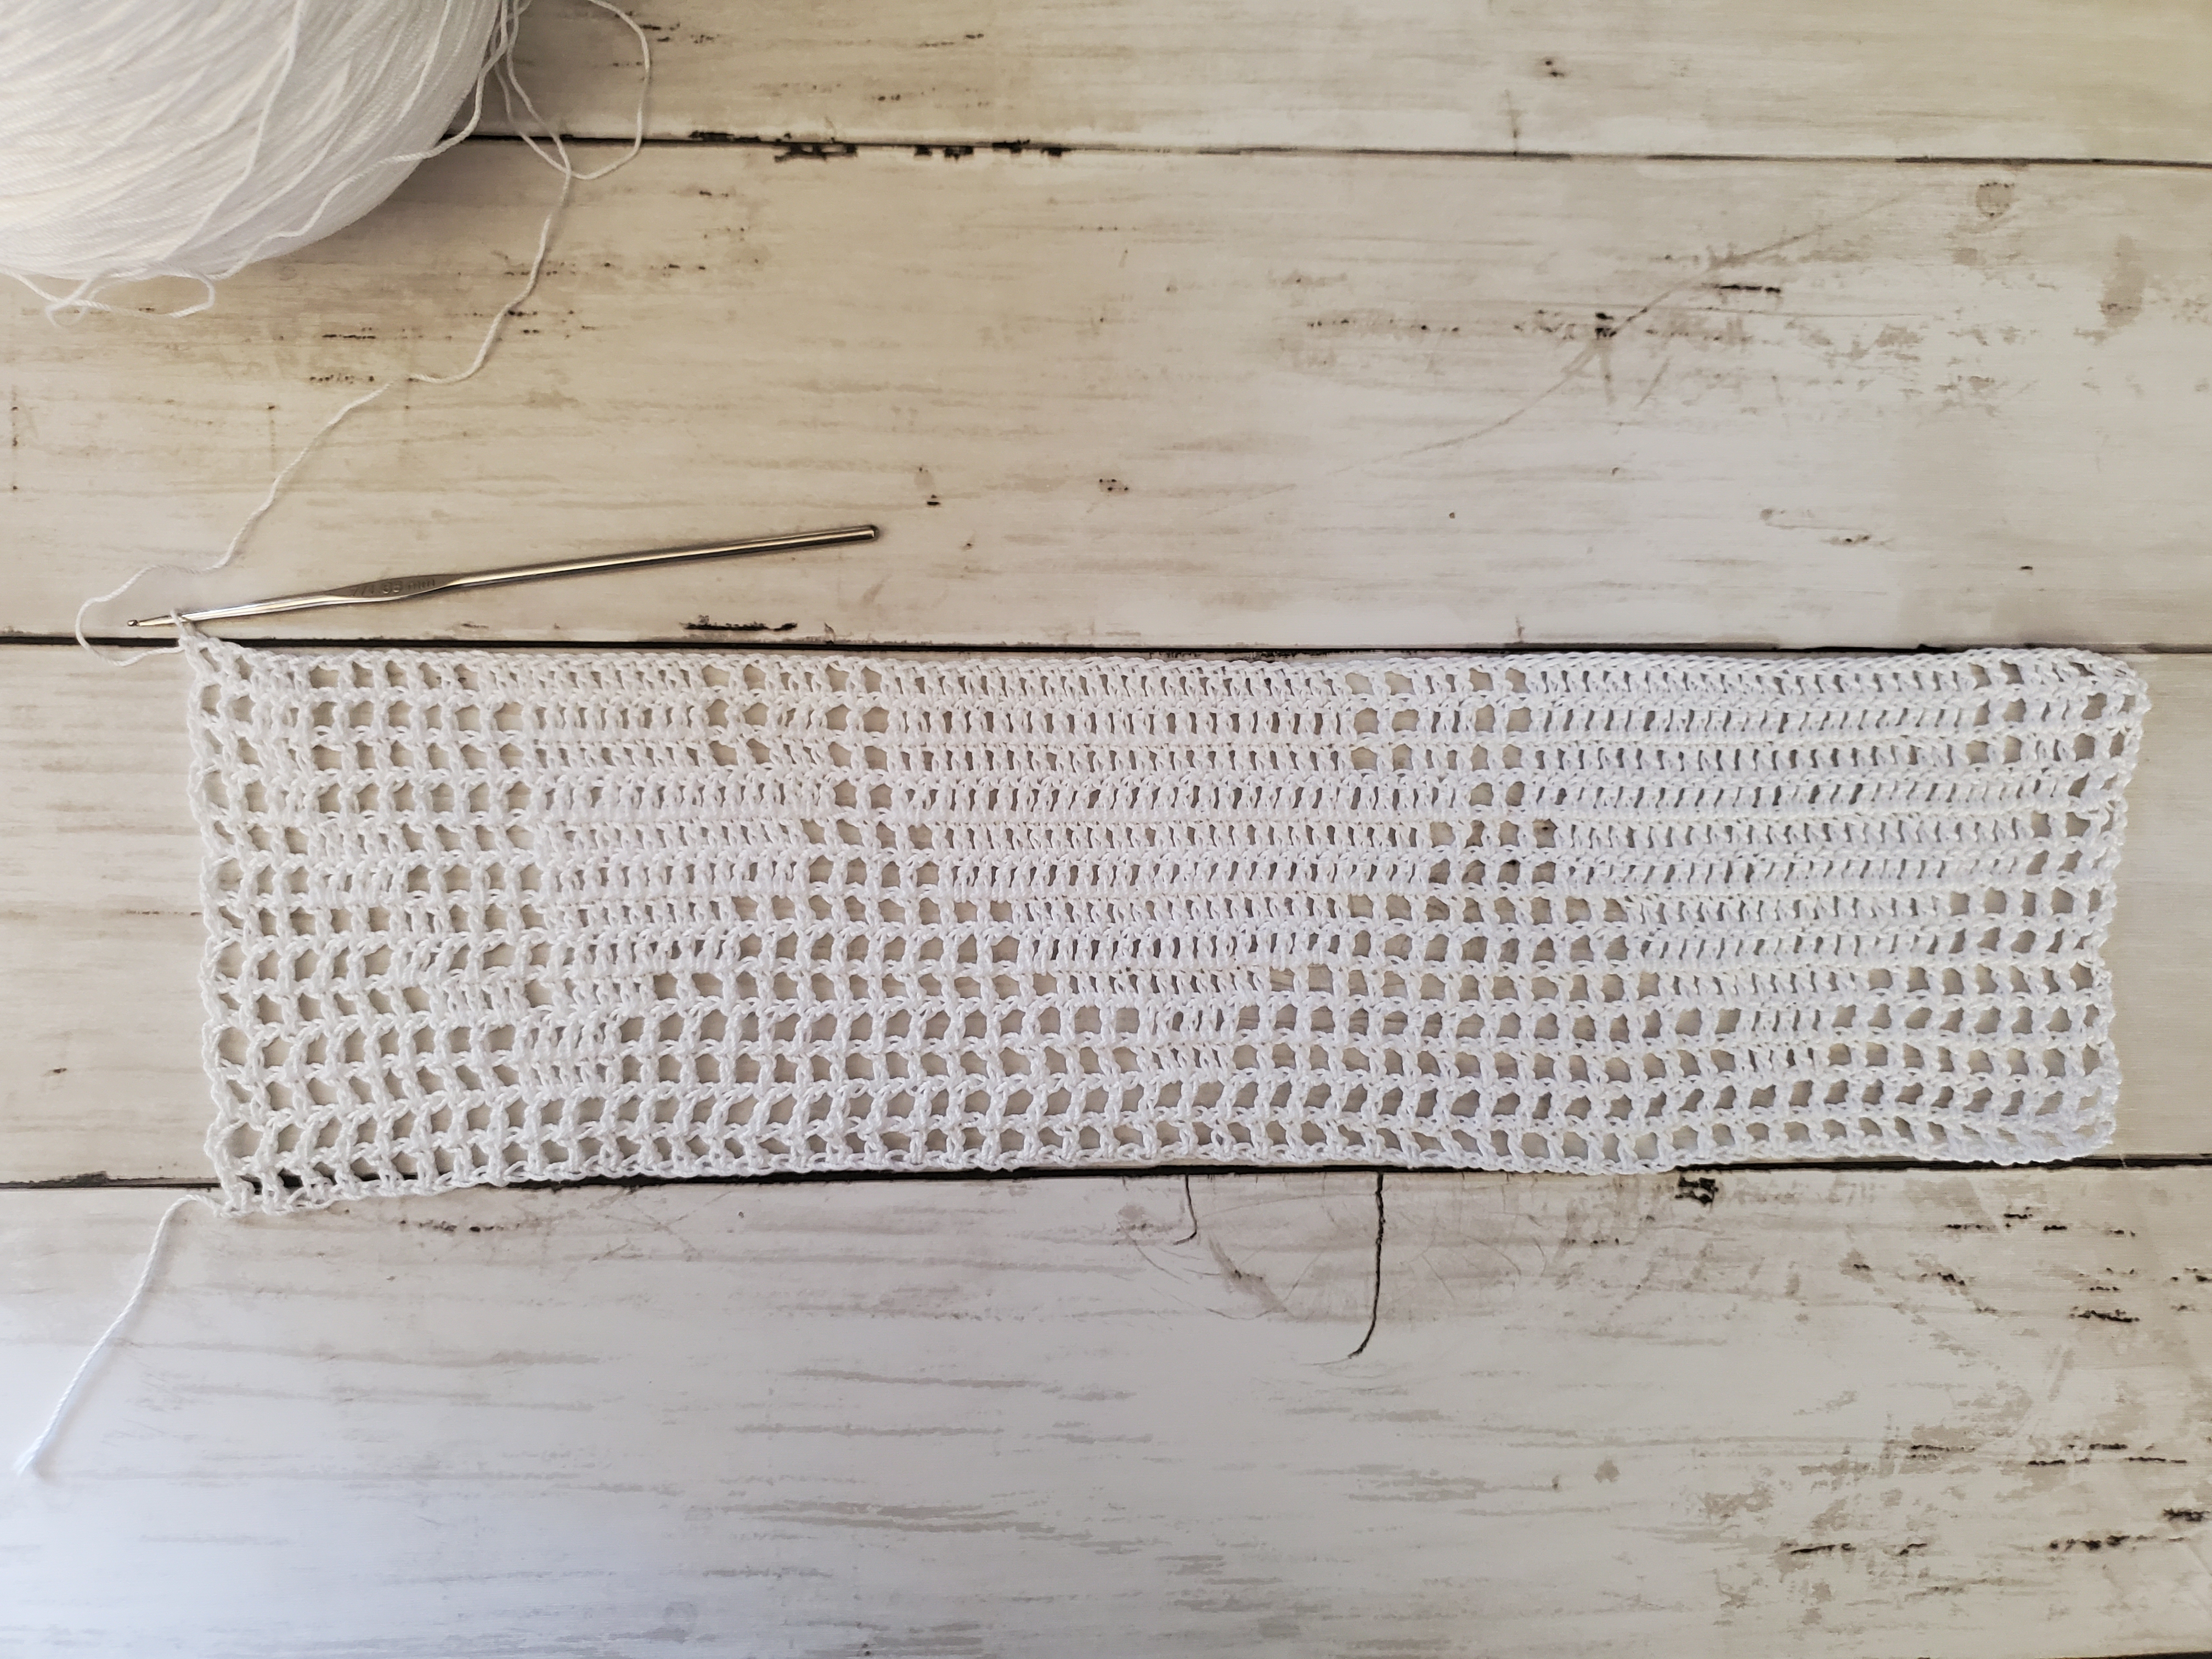
I used a method of crocheting called filet crochet to make this image. If you’re not familiar with how to filet crochet, I learned how to do it here

I also used 3DC, so 3 double crochet in a row = 1 block filled OR 1 double crochet, a ch 1, and then another double crochet = 1 open block.

How Long Will This Take?

This piece took me around a month of working 1-2 hours a day to complete. This is due to using a tiny crochet hook and thread to get all the details in his face.

I also made a few mistakes and had to frog a couple of rows. So if you’re careful and pay attention (unlike me lol!), your timeline might look different.

Materials Used:

  • 1.65 mm crochet hook
  • Red Heart Classic Crochet Thread Size 10 in White (1000 yards) x 2
  • Tapestry Needle
  • Scissors

Helpful Tips: 

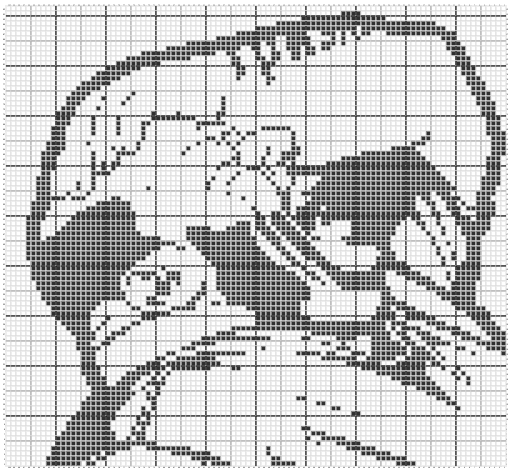
  • Below I have a link to the chart I used to make Kyriakos Grizzly’s face. You might have to create an account on Stitch Fiddle in order to view it, but I’m not entirely sure, but it’s totally free to do so.
  • On the chart; black squares = open blocks and white squares = closed blocks.
  • When you get to the end of a row, ch 3 and turn. This counts as a stitch.
  • If for some reason, the link is not working, I have a picture of the chart, although it may be difficult to see the squares.
  • I highly recommend finding a way to mark off squares as you go. I edited the chart on Stitch Fiddle and used different colored squares to show where I left off. You may also try to print out the chart and mark off as you go. Even writing down what row you’re on will be helpful.
  • You can also use a stitch marker or a scrap piece of thread/yarn to mark one side of the chart, so you don’t get turned around. I placed a stitch marker on the right side of my work so I could determine right from left (very helpful in the very beginning).

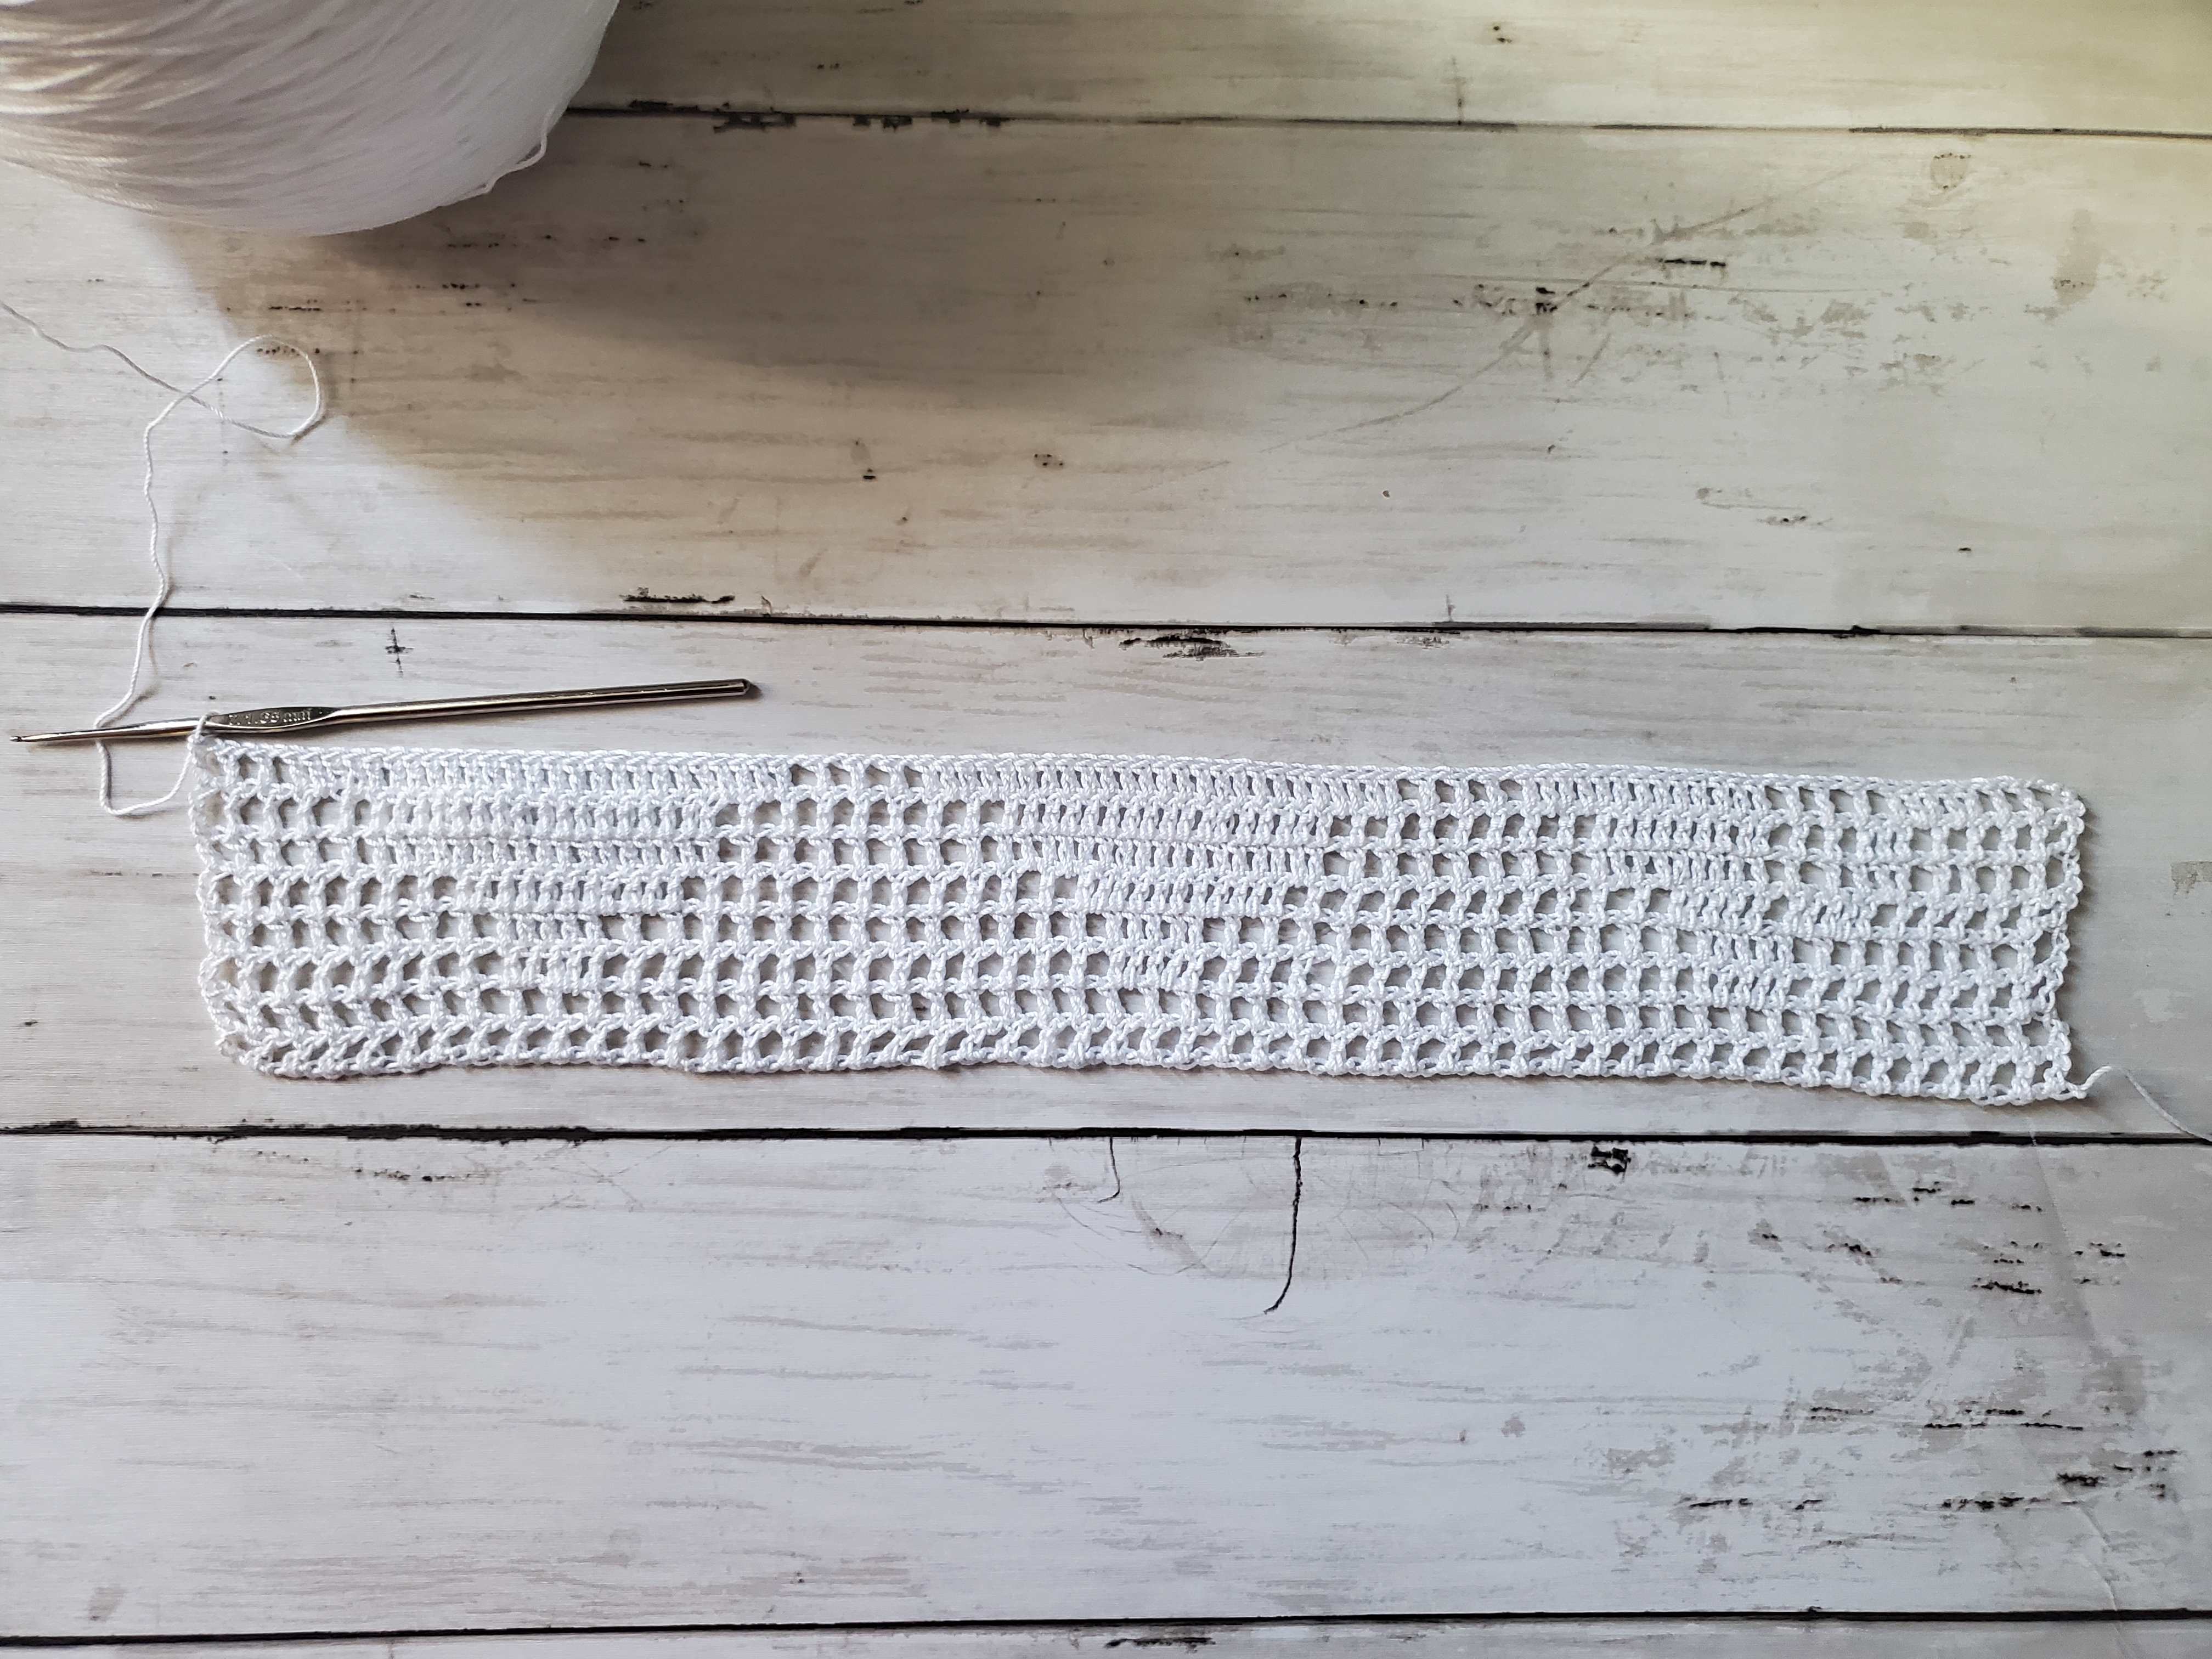
Kyriakos Grizzly Crochet Chart:

Link to Stitch Fiddle Chart of Kyriakos Grizzly: https://www.stitchfiddle.com/c/skcao8-jgdgil

Picture of Kyriakos Grizzly Crochet Chart

Starting Chain: Chain 204, double crochet into 5th chain from hook. Follow the chart starting from the bottom from left to right, placing 3 double crochet per white block (remember that 1 double crochet will be shared with the next block when you are counting. To make it easier multiply the number of needed blocks by 2 and add 1 double crochet). For the black blocks, chain 1, skip a chain, and then double crochet in the next chain. 

Continue until the end of the row, turn and ch 3 (counts as a double crochet) for row 2. 

Follow the chart reading from right to left now for the second row. At the end of this row, place a double crochet in the top of the ch 3 from the previous row.

Keep crocheting each based on the chart, I recommend counting your open blocks and making sure they line up correctly, especially on Kyriakos Grizzly’s t-shirt. 

Once the last row is completed, do not cut your thread!

Border: Chain 1, place a (single crochet, chain 1, single crochet) in the corner, single crochet down the side of the piece. Place another (single crochet, chain 1, single crochet) in the next corner stitch. 

Continue single crocheting in each stitch across all sides and placing in the corners a (single crochet, chain 1, single crochet). Slip stitch to the initial chain 1, cut thread of scissors and pull through.

Weave in end with tapestry needle.

Pinterest Pin of Kyriakos Grizzly Crochet

Blocking and Framing:

This is actually something I intend to do with this project, but just *haven’t* been able to do yet. 

I like to block my projects using cardboard and pins, but I am currently out of cardboard large enough to do this with. So once I get my hands on a piece large enough, I will be blocking this to get framed. 

As for framing, I plan on sewing the blocked piece with clear/invisible thread onto a dark place mat (I’ve heard using suede can be good, but sewing into it can be difficult). Once that’s completed, I will get this framed according to the blocked dimensions.

We have a framing business in our town that I plan on checking prices out on, however, I need to block and sew onto a place mat before doing this. 

Once I complete those steps I will try to update this post with pictures of the framed piece! 

Thank you as always and happy crocheting! 

Crochet Legend of Zelda Pattern – Hearts

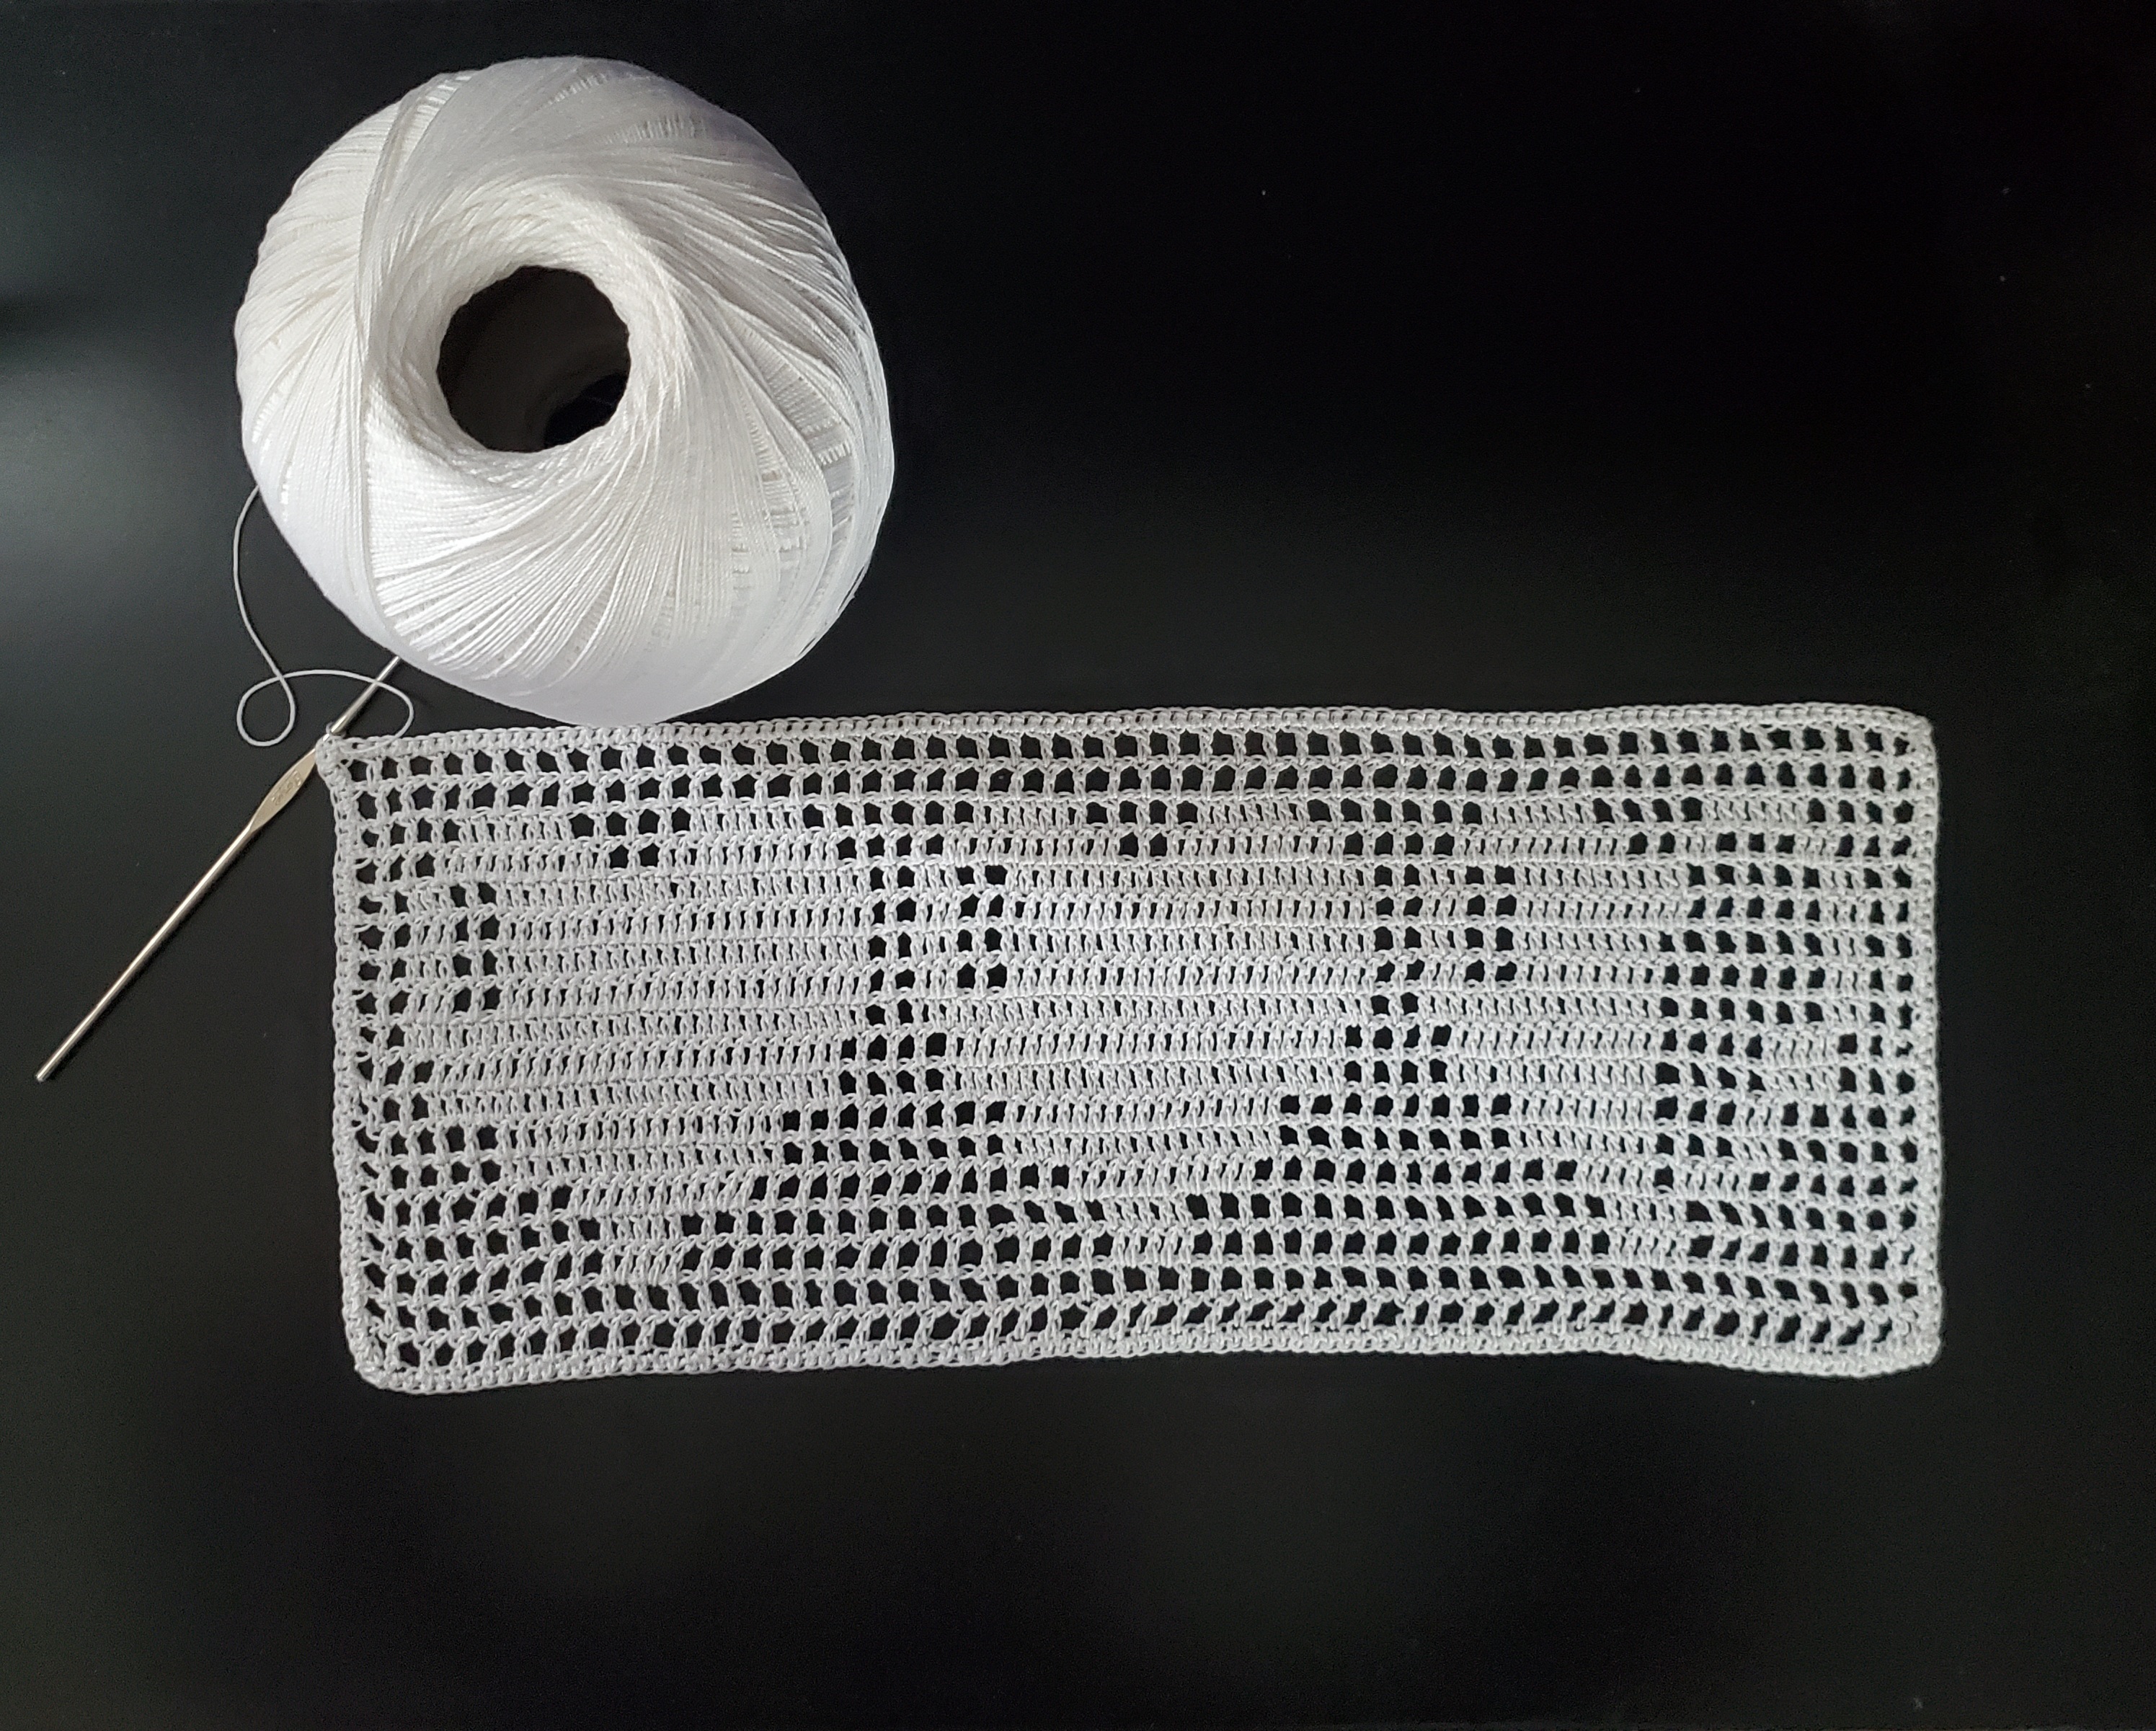
Hello everyone today I have another free, Zelda themed pattern; a Crochet Legend of Zelda Heart Pattern! I’ve recently been interested in a crochet technique called filet crochet. Have you ever heard of it? It creates a vintage vibe, and all you need is a super tiny hook and thread!

I think The Legend of Zelda series will always have a special place in my heart, it was one of the first video games that I ever played. The series of three hearts represents the amount of life you have when you start most Zelda games. As you play and get hurt by monsters, fall damage, etc., you lose parts or whole hearts until you collapse or replenish them.

Related Posts:

The filet crochet Legend of Zelda Hearts would look great if framed with a dark background and hung on the wall, or you can leave it as is and use it as a cute, nerdy place mat or table decoration. 

Alright, so before we get started there are a few basics about filet crochet we need to cover (it’s not too crazy, I promise).

Filet Crochet Basics:

In filet crochet, you can create your very own image using open or closed squares/gaps/holes. In order to create an open square, two sides of the square will be a dc and two sides will be a ch 1. A closed square will be comprised of 3 dc in a row. 

If you would like to add more columns to the sides, the correct math for the starting ch is x2 number of squares needed + 4 more chs, then dc in the 6th ch from your hook. So for this heart pattern, I have 50 squares across, so this gets me my 100 chs, plus 4 (the extra 4 make up a dc and a ch 1 for 1 side and the top of an open square). 

Clear as mud? Don’t worry, you’ll get the hang of it after a few rows!

Please note that some of these links are affiliate links. That means that if you click on these links and make a purchase, I may receive a commission at no extra cost to you. You can find more information about our disclosure policy here. Thank you for your support.

Materials Needed:

Abbreviations (US Terms):

  • ch – chain
  • sl st – slip stitch
  • sc – single crochet
  • dc – double crochet

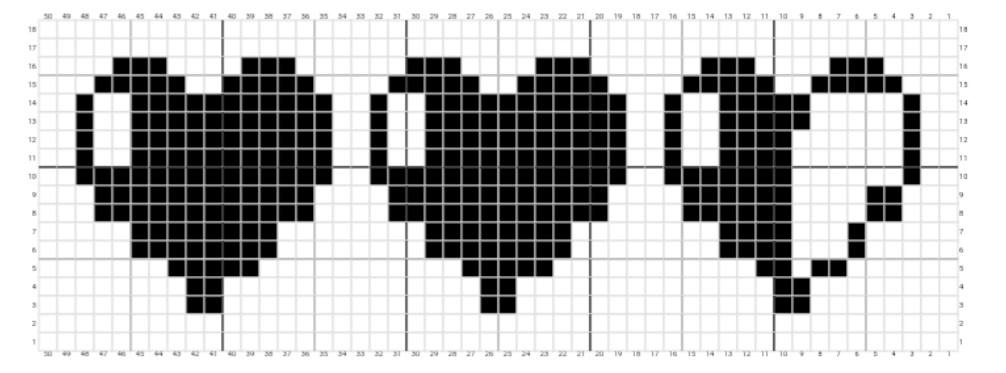
Pattern Chart:

The image below is a helpful chart if you’re more of a visual learner.

Tips for this Pattern:

  • For this filet pattern, we use 3 dc to make a closed square and dc, ch1, dc for an open square.
  • The turning chain counts as a dc, ch 1 throughout the whole pattern.
  • The ch 1 spaces count as a stitch.
  • You can place a stitch marker on the left or right side to help you keep track of where you are, however once you start making the 3rd half heart, it’s not difficult to determine.
  • Repeat instructions enclosed in () by the number indicated at the end. Example: (ch 1, skip ch 1 space, dc in next dc x3 times). 

Crochet Legend of Zelda Hearts Pattern

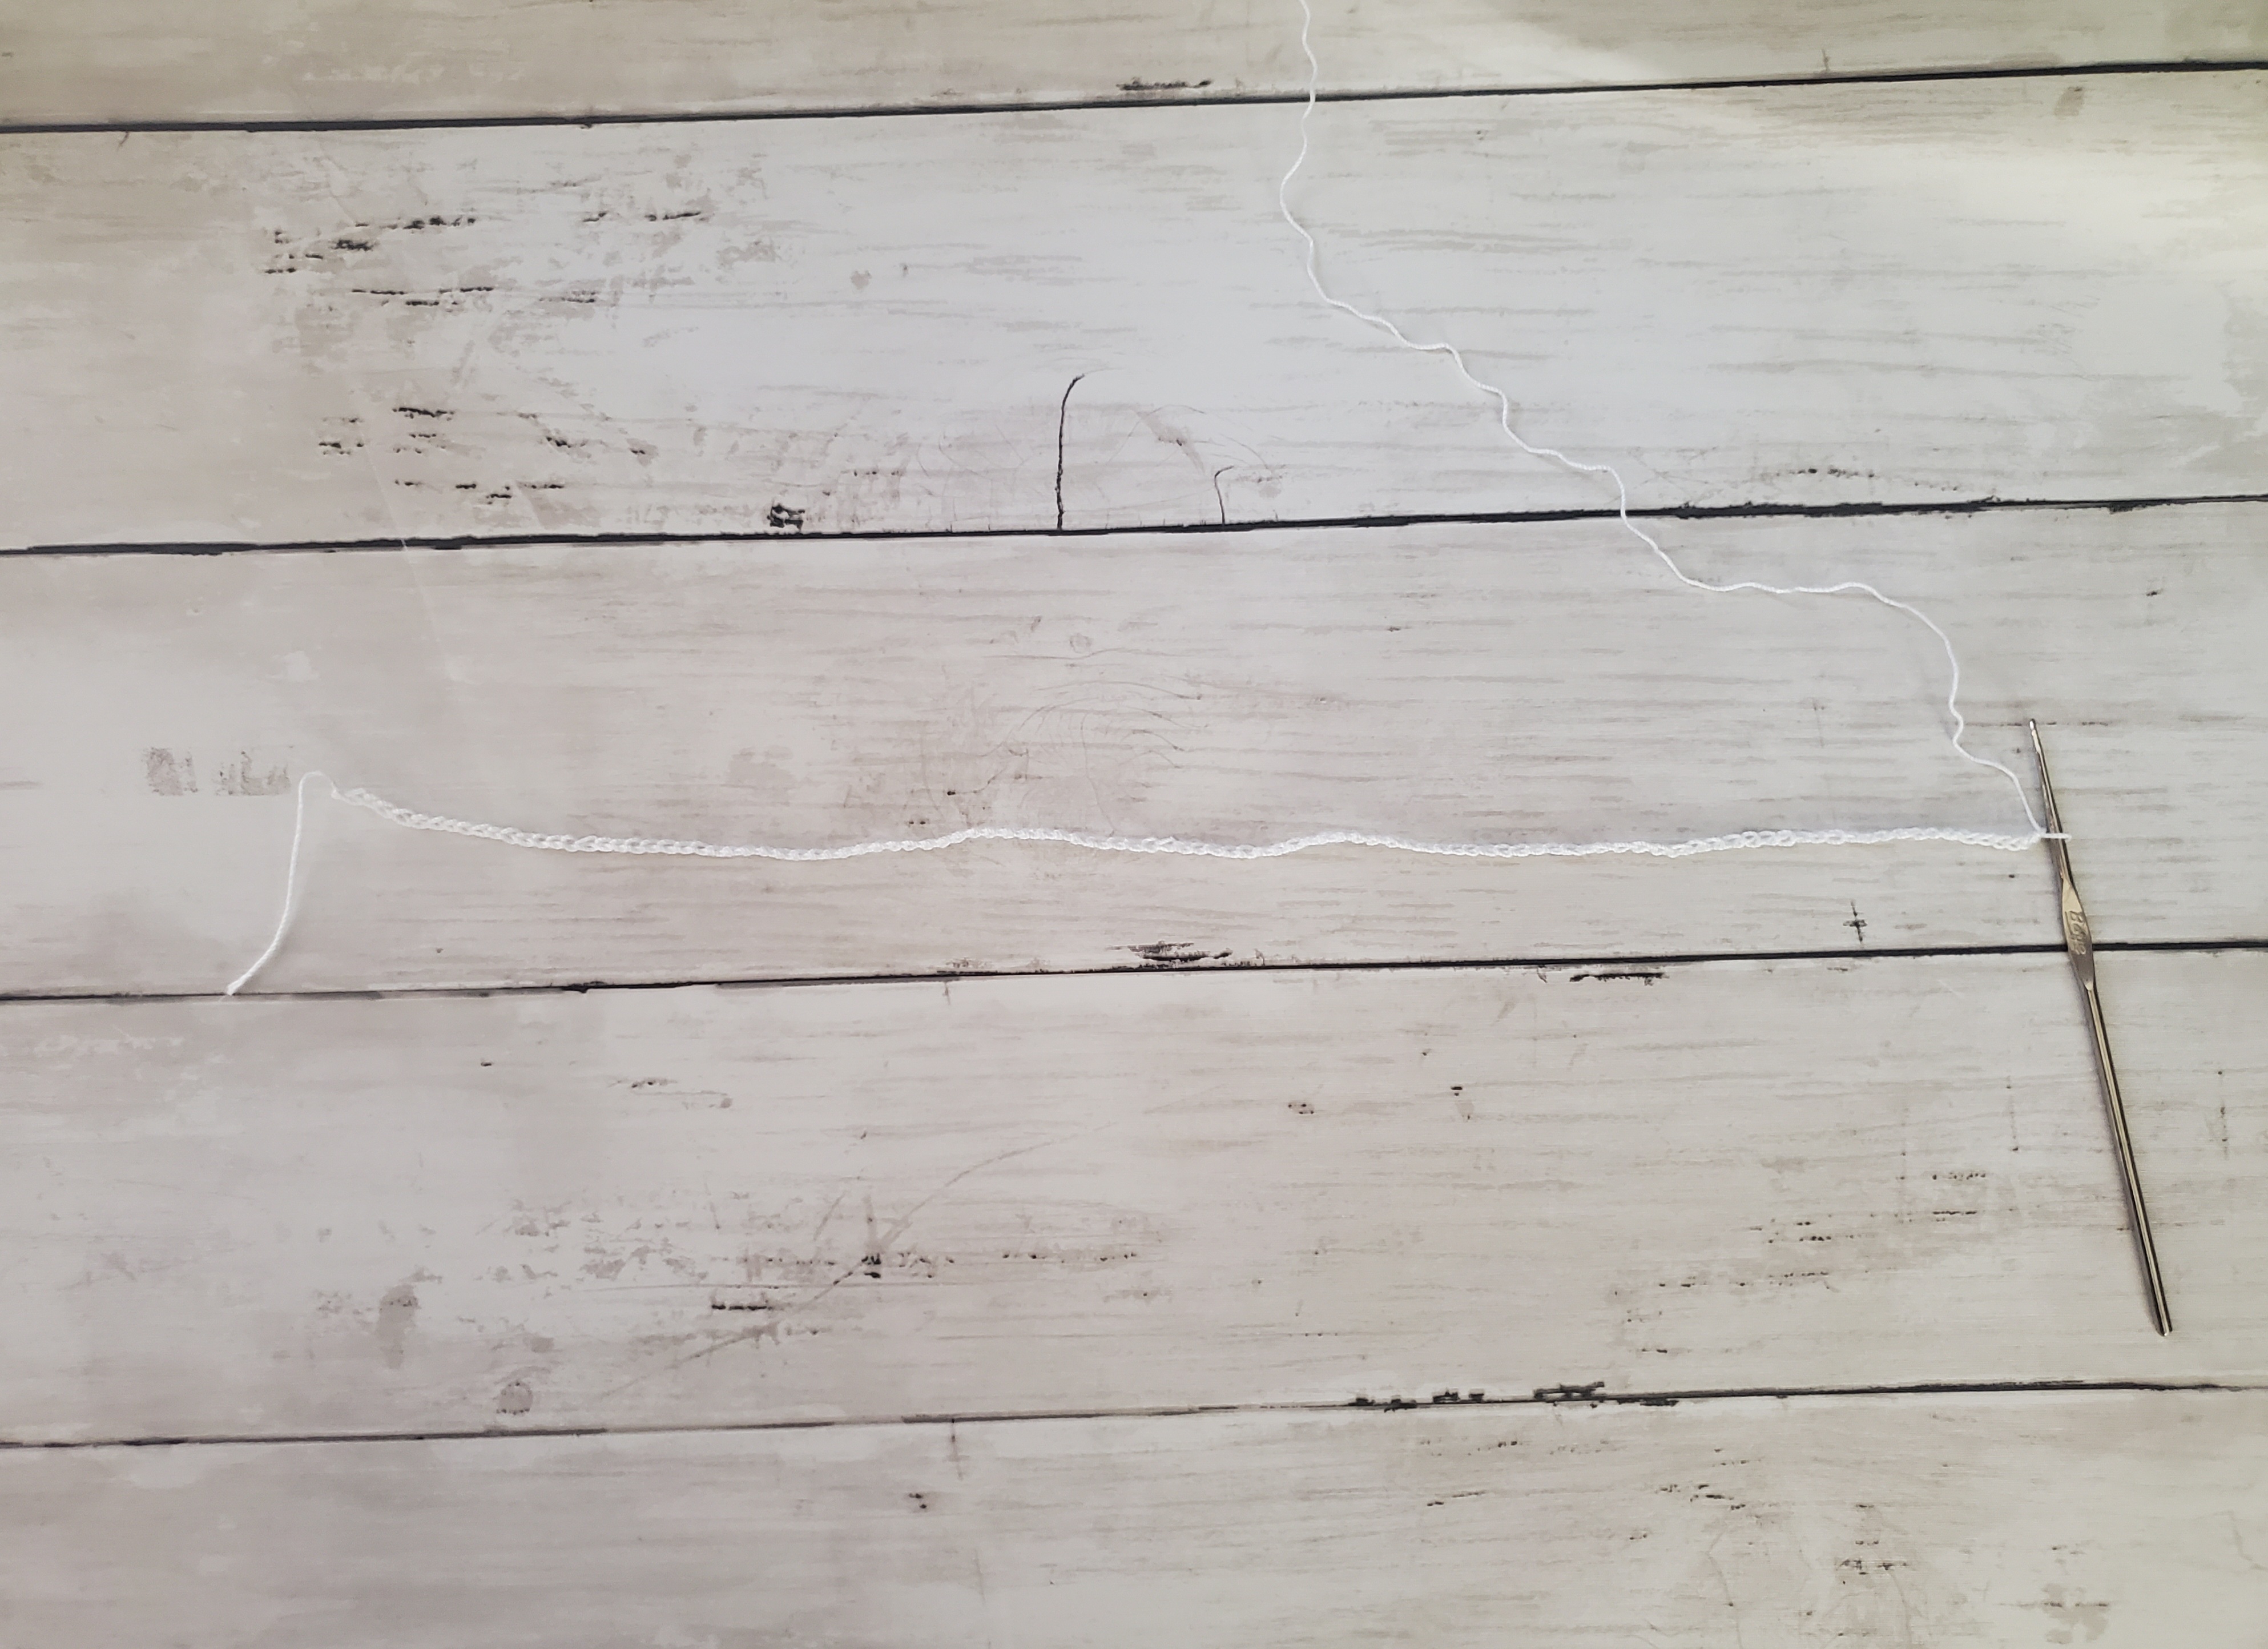
Ch 104

Foundation Chain for LOZ Heart Pattern
Ch 104

Row 1: Dc in 6th ch from hook, *ch 1, skip a ch, dc in next ch.* Repeat from *to.* End with a dc in the last ch (100 sts/50 open squares).

Dc in 6th ch from hook
Row 1 Completed
Row 1

Row 2: Turn, ch 4, skip ch 1 space, dc in next dc, *ch1, skip ch1 space, dc in next dc* Repeat from *to* (50 open squares).

Turn, ch 4, dc in next dc for Row 2
Beginning of Row 2: Turn, ch 4, dc in next dc

Row 3: Turn, ch 4, skip ch 1 space, dc in next dc, (ch 1, skip ch 1 space, dc in next dc x 7 times), (dc in ch 1 space, dc in next dc x 2). At this point you should have 8 open squares and 2 closed squares. *(Ch 1, skip ch 1 space, dc in next dc x 14), (dc in ch 1 space, dc in next dc x 2 times).* Repeat *to* once more. (Ch 1, skip ch 1 space, dc in next dc x 8 times). (44 open squares, 6 closed squares).

Row 3
Row 3

Row 4: Repeat row 3.

Row 5: Turn, ch 4, skip ch 1 space, dc in next dc, (ch 1, skip ch 1 space, dc in next dc x 6  times), *dc in next ch 1 space, dc in next 5 sts, (dc in ch 1 space, dc in next dc x2 times). (Ch 1, skip ch 1 space, dc in next dc x11 times).* Repeat from *to* once more. Start of 3rd half heart. Dc in next ch 1 space, dc in next 3 sts, ch 1 skip a st, dc in next dc, (dc in next ch 1 space, dc in next dc x2 times), (ch 1 skip ch 1 space , dc in next dc x6 times). (14 closed squares, 36 open squares).

Row 5
Row 5

Row 6: Turn, ch 4, skip ch 1 space, dc in next dc, (ch 1, skip ch 1 space, dc in next dc x 4 times). Dc in ch 1 space, dc in next dc, (ch 1, skip next st, dc in next st x2), ch 1, skip ch 1 space, dc in next 5 dc, (dc in ch 1 space, dc in next dc x2 times) (Ch 1, skip ch 1 space, dc in next dc x8 times), *dc in next ch 1 space, dc in next 11 sts, (dc in next ch 1 space, dc in next dc x2 times)* (ch 1, skip ch 1 space, dc in next dc x8 times). Repeat from *to* once more, (ch 1, skip ch 1 space, dc in next dc x5 times). (21 closed squares, 29 open squares).

Row 7: Turn, ch 4, skip ch 1 space, dc in next dc, (ch 1, skip ch 1 space, dc in next dc x 4 times), *dc in next 16 sts, (ch 1, skip ch 1 space, dc in next dc x8 times).* Repeat from to *to* once more. Dc in next 8 dc, (ch 1, skip ch 1 space, dc in next dc x3 times), dc in next 2 sts, (ch 1 skip ch 1 space, dc in next dc x5 times). (21 closed squares, 29 open squares).

Row 7
Row 7

Row 8: Turn, ch 4, skip ch 1 space, dc in next dc (ch 1, skip ch 1 space, dc in next dc x2 times), (dc in next ch 1 space, dc in next dc x2 times), ch 1, skip next st, dc in next st, (ch 1, skip ch 1 space, dc in next dc x3 times), dc in next 8 sts, (dc in next ch 1 space, dc in next dc x2 times), *(ch 1, skip ch 1 space, dc in next dc x 4 times), (dc in next ch 1 space, dc in next dc x2 times), dc in next 16 sts, (dc in next ch 1 space, dc in next dc x2 times).* Repeat from *to* once more. (Ch 1, skip ch 1 space, dc in next dc x3 times). (18 open squares, 32 closed squares).

Row 8 of LOZ Hearts
Row 8

Row 9: Turn, ch 4, skip ch 1 space ,dc in next dc (ch 1, skip ch 1 space, dc in next dc x2 times), *dc in next 24 sts, (ch 1, skip ch 1 space, dc in next dc x4 times.* Repeat from *to* once more. Dc in next 12 sts, (ch 1, skip ch 1 space, dc in next dc x4 times), dc in next 4 sts, (ch 1, skip ch 1 space, dc in next dc x3 times). (18 open squares, 32 closed squares).

Row 10: Turn, ch 4, skip ch 1 space, dc in next dc, ch 1, skip ch 1 space, dc in next dc, dc in ch 1 space, dc in next st (ch 1 skip ch 1 space, dc in next dc x6 times), dc in next 12 sts, *dc in ch 1 space, dc in next st, (ch 1 skip ch 1 space, dc in next dc x 2), dc in next ch 1 space, dc in next 25 sts.* Repeat from *to,* one more time, dc in ch 1 space, dc in next dc, (ch 1 skip ch 1 space, dc in next dc x2 times). (14 open squares, 36 closed squares).

Row 10 of filet crochet LOZ Hearts
Row 10

Row 11: Turn, ch 4, skip ch 1 space, dc in next dc, ch 1, skip ch 1 space, dc in next 3 sts (ch 1 skip ch 1 space, dc in next dc x2 times), dc in next 22 sts, (ch 1, skip ch 1 space, dc in next dc x2 times), dc in next 2 sts, (ch 1, skip ch 1 space, dc in next dc x2 times), dc in next 22 sts, (ch 1, skip ch 1 space, dc in next dc x2 times), dc in next 2 sts, (ch 1, skip ch 1 space, dc in next dc x2 times), dc in next 8 sts, (ch 1, skip ch 1 space, dc in next dc x6 times), dc in next 2 sts, (ch 1, skip ch 1 space, dc in next dc x2 times). (18 open squares, 32 closed squares).

Row 12: Turn, ch 4, skip ch 1 space, dc in next dc, ch 1, skip ch 1 space, dc in next dc, dc in next 2 sts, (ch 1, skip ch 1 space, dc in next dc x6 times), dc in next 8 sts, *(ch 1, skip ch 1 space, dc in next dc x2 times), dc in next 2 sts, (ch 1, skip ch 1 space, dc in next dc x2 times), dc in next 22 sts.* Repeat from *to* once more, (ch 1, skip ch 1 space, dc in next dc x2 times), dc in next 2 sts, (ch 1, skip ch 1 space, dc in next dc x2 times). (18 open squares, 32 closed squares).

Row 12 of filet crochet LOZ Hearts
Row 12

Row 13: Turn, ch 4, skip ch 1 space, dc in next dc, ch 1, skip ch 1 space, dc in next 3 dc, *(ch 1, skip ch 1 space, dc in next dc x2 times), dc in next 22 sts, (ch 1, skip ch 1 space, dc in next dc x2 times), dc in next 2 sts.* Repeat from *to* once more. (Ch 1, skip ch 1 space, dc in next dc x2 times), dc in next 8 sts, dc in ch 1 space, dc in next st, (ch 1, skip ch 1 space, dc in next dc x5 times), dc in next 2 sts, (ch 1, skip ch 1 space, dc in next dc x2 times). (19 open squares, 31 closed squares).

Row 13
Row 13

Row 14: Turn, ch 4, skip ch 1 space, dc in next dc, ch 1, skip ch 1 space, dc in next 3 sts, (ch 1, skip ch 1 space, dc in next dc x5 times), dc in next 10 sts, *(ch 1, skip, ch 1 space, dc in next dc x2 times), dc in next 2 sts, (ch 1, skip ch 1 space, dc in next dc x2 times), dc in next 22 sts.* Repeat from *to* once more. (Ch 1, skip ch 1 space, dc in next dc x2 times), dc in next 2 sts, (ch 1, skip ch 1 space, dc in next dc x2 times). (19 open squares, 31 closed squares).

Row 15: Turn, ch 4, skip ch 1 space, dc in next dc, ch 1, skip ch 1 space, dc in next dc, ch 1, skip a st, dc in next st, *(dc in next ch 1 space, dc in next dc x2 times), dc in next 6 sts, (ch 1, skip a st, dc in next st x2 times), dc in next 10 sts, ch 1, skip a st, dc in next st, (ch 1, skip ch 1 space, dc in next dc x2 times), ch 1, skip a st, dc in next st.* Repeat from *to* once more. (Dc in ch 1 space, dc in next st x2 times), dc in next 6 sts, (ch 1, skip a st, dc in next st x2 times), (dc in ch 1 space, dc in next dc x5 times), (ch 1, skip ch 1 space, dc in next dc x3 times). (20 open squares, 30 closed squares).

Row 16: Turn, ch 4, skip ch 1 space, dc in next dc, (ch 1, skip ch 1 space, dc in next dc x2 times), ch 1, skip a st, dc in next 7 sts, ch 1, skip a st, dc in next dc, (ch 1, skip ch 1 space, dc in next dc x2 times), ch 1, skip a st, dc in next st, dc in next 6 sts, *ch 1, skip a st, dc in next st, (ch 1, skip ch 1 space, dc in next dc x4 times), ch 1, skip a st, dc in next 7 sts, ch 1, skip a st, dc in next st, (ch 1, skip ch 1 space, dc in next dc x2 times), ch 1, skip a st, dc in next 7 sts.* Repeat from *to* once more. Ch 1, skip a st, dc in next st, (ch 1, skip ch 1 space, dc in next dc x2 times). (32 open squares, 18 closed squares).

Row 16
Row 16

Row 17-18: Turn, ch 4, dc in next dc, *ch 1, skip ch 1 space/next st, dc in next dc.* Repeat from *to.* (50 open squares).

Border:

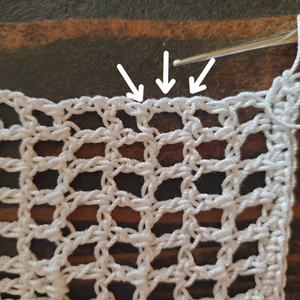
Turn, ch 1 (ch 1 does not count as a st), sc in each st across (sc inside the ch 1, not under), when you get to the end of the first row, (sc, ch 2, sc) for your corner stitch. Continue down the short side. See picture below for sc placement. Try to place a sc in the top and middle of the dcs. 

arrows pointing to where to sc on short side

The right most arrow points to the “top” of a dc, the middle arrow to the “middle” and the left arrow to the next “top.”

Place a (sc, ch 2, sc) in the next 3 corner spaces.

Continue until you finish the last corner, then sl st into first sc.

Cut thread with scissors and pull through. Weave in ends with tapestry needle.

Dc in 6th ch from hook

Optional: Blocking

If you want a super straight, and clean looking finished product, I would suggest blocking your work. This step is optional, and you don’t have to do this if you like the way your project looks.

There are many different ways to do this, however, my favorite is to soak the project in some water, place it on a towel and gently pat/soak of the excess water. I use a scrap cardboard box to to lay it on and place pins around the project into the cardboard to “stretch” it out. Let it air dry (usually 24 hours+) and take the pins out. 

Your crochet project should be much straighter! 

And there it is! I hope you all enjoyed this Crochet Legend of Zelda Heart Pattern! Let me know what you think on Instagram by tagging me @strommercrafts with your finished project :). 

Happy crocheting! Until next time xoxo.

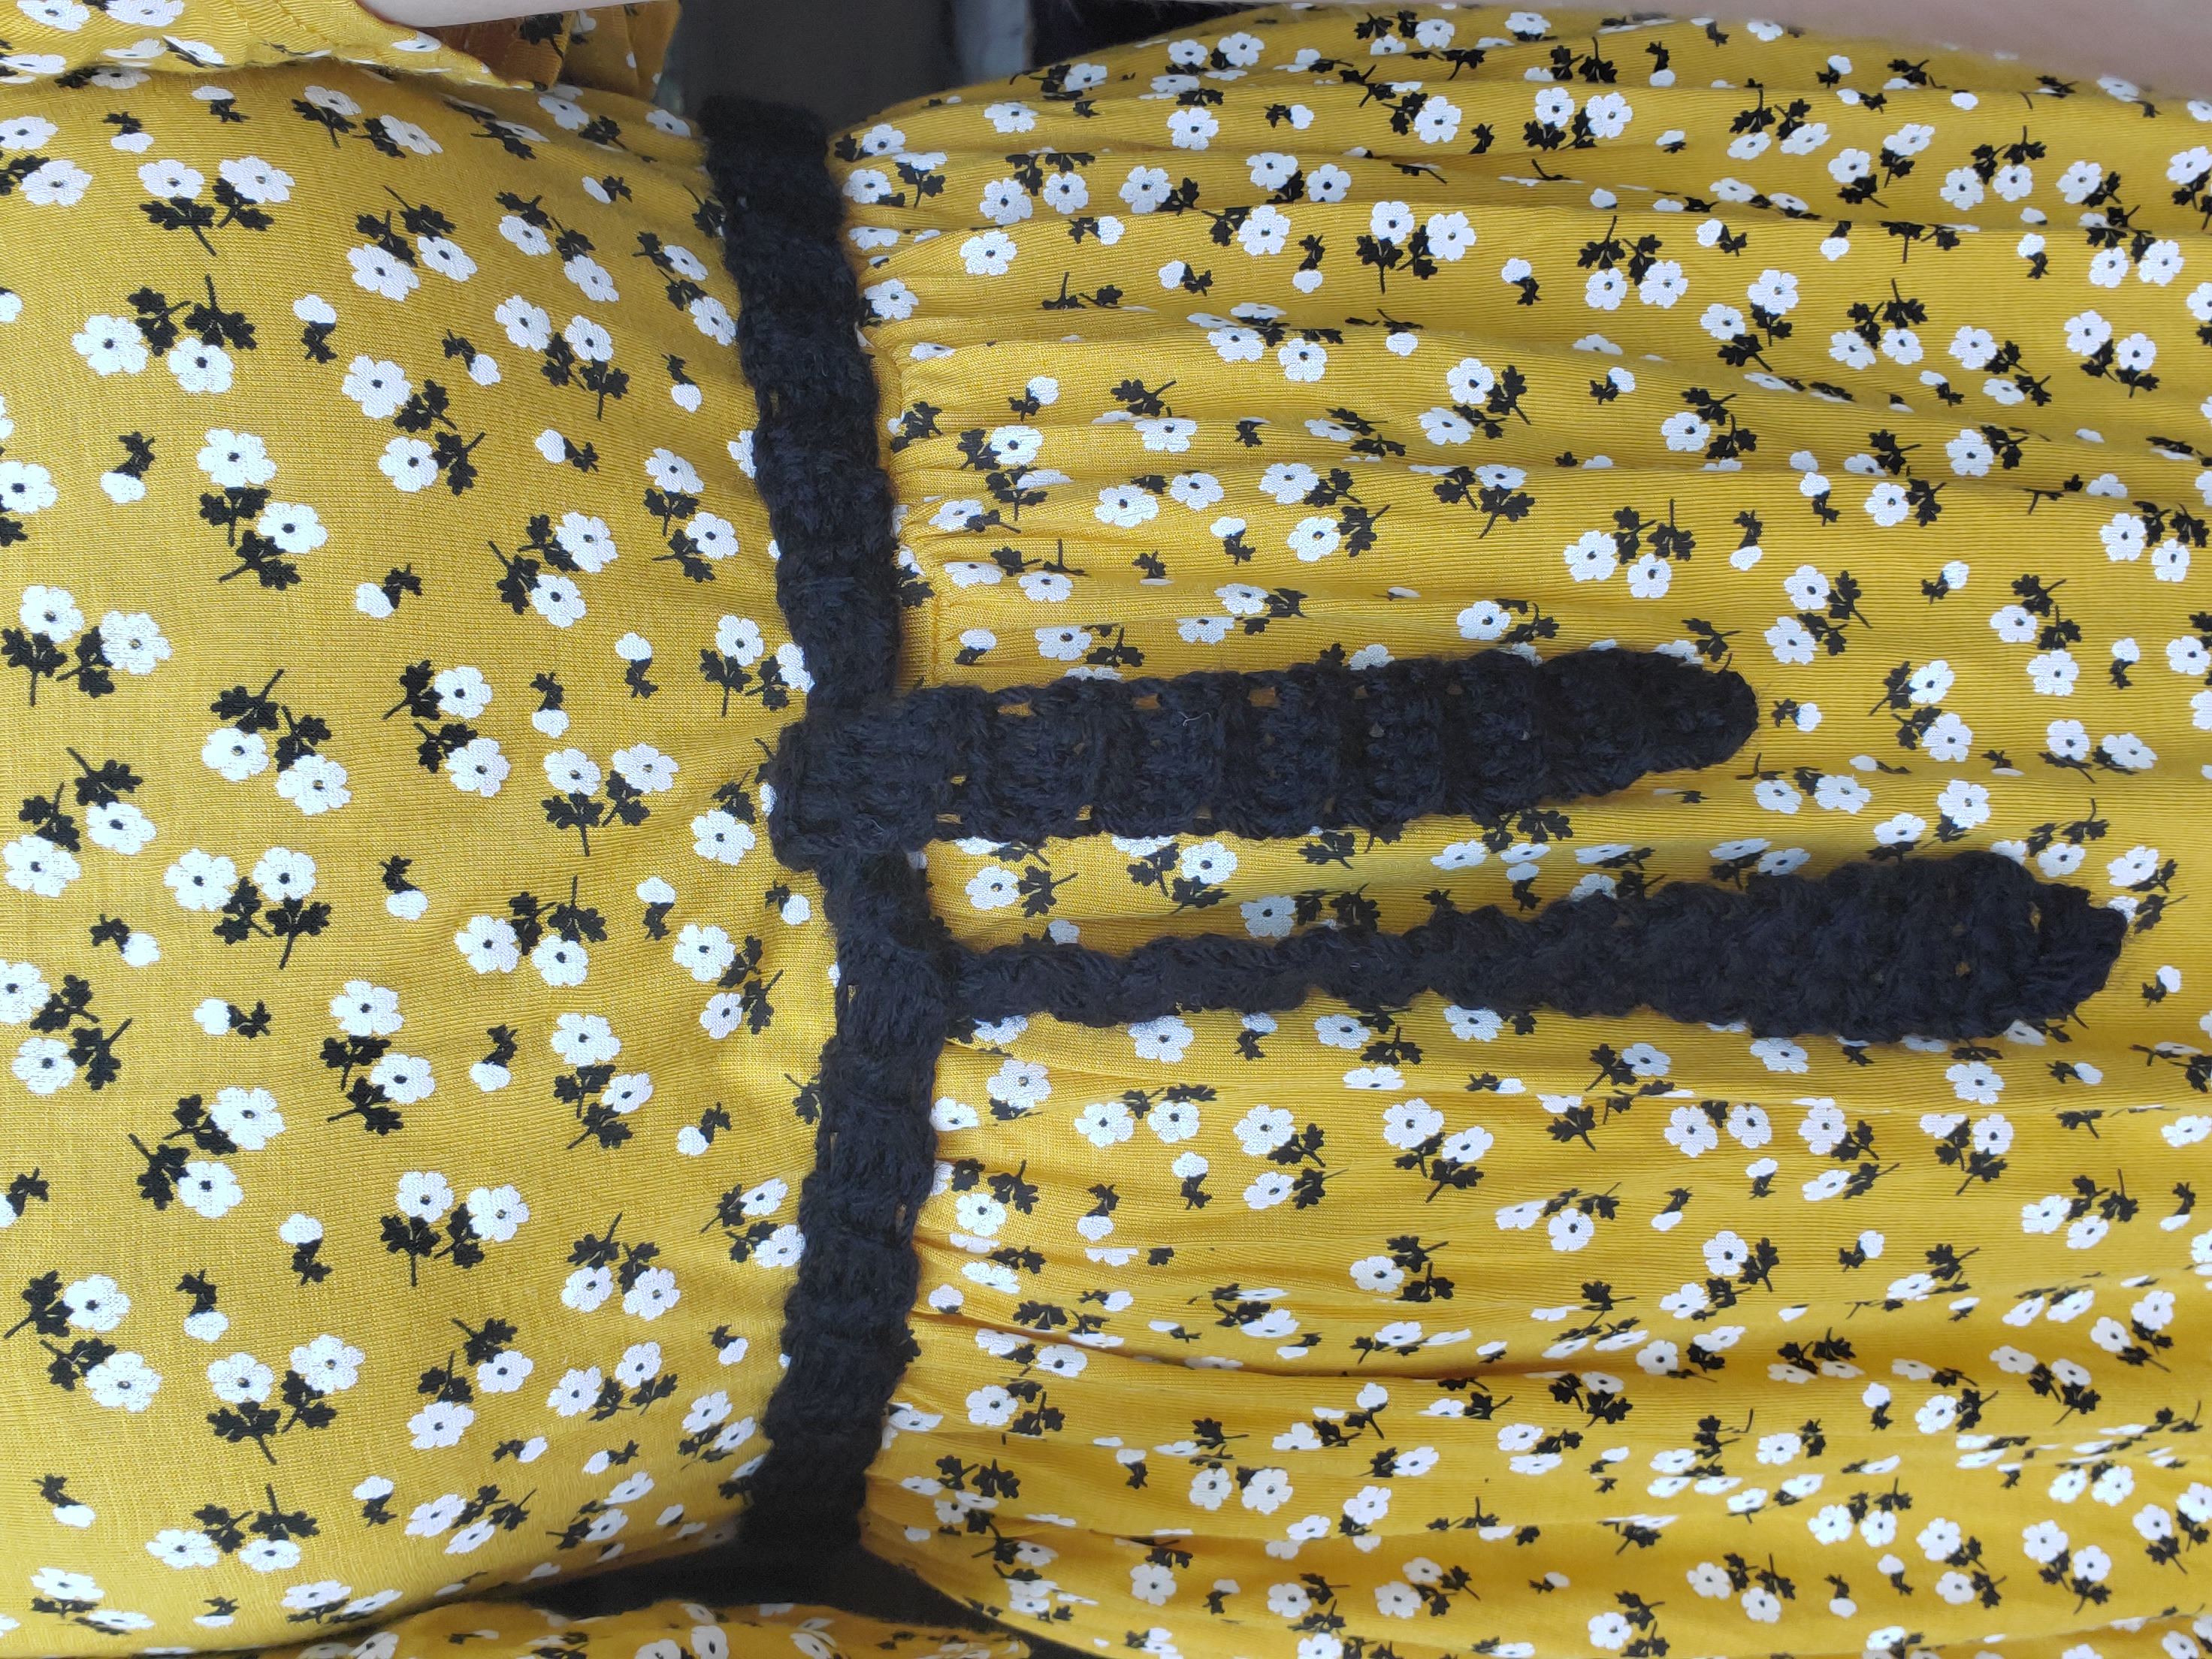
Simple and Cute Crochet Belt Pattern

Hello again, and welcome to Strommer Crafts. Today we will be learning how to make simple and cute crochet belt! I thought I would share this pattern even though anyone could have come up with it.

***Please note that this post may contain affiliate links. This means that I may receive a commission if you purchase something through these links (at no cost to you!). Thank you for your support!***

I had recently made an online purchase of a yellow, floral dress for my birthday. When it arrived, I tried it on and quickly noticed that it was missing something…

A belt! 

Although, I ashamedly admit, I didn’t have one (but now I do, yay!). So I started browsing through the internet for a cute black belt. After scrolling for a while and not being satisfied with the belt or price, it hit me; why not just make a belt?

I have so much yarn to use, I thought I would at least try to whip one up. Plus it would save me a little bit of cash, which is always a bonus in my book!

This is a great project for beginner crocheters! The only “weird” thing you do in the pattern is crochet in the back loop of your single crochets. 

Plus all you need is a bit of yarn and a crochet hook and you’re good to go! I used Black Yarn by Red Heart Super Saver and a 5 mm crochet hook, however, feel free to use whatever yarn and hook size you would like. Just note that different yarn and hook sizes might make your project wider or skinnier.

Feel free to adjust the number of chains at the beginning if you would like a wider or skinnier belt.

Simple and Cute Crochet Belt Pattern

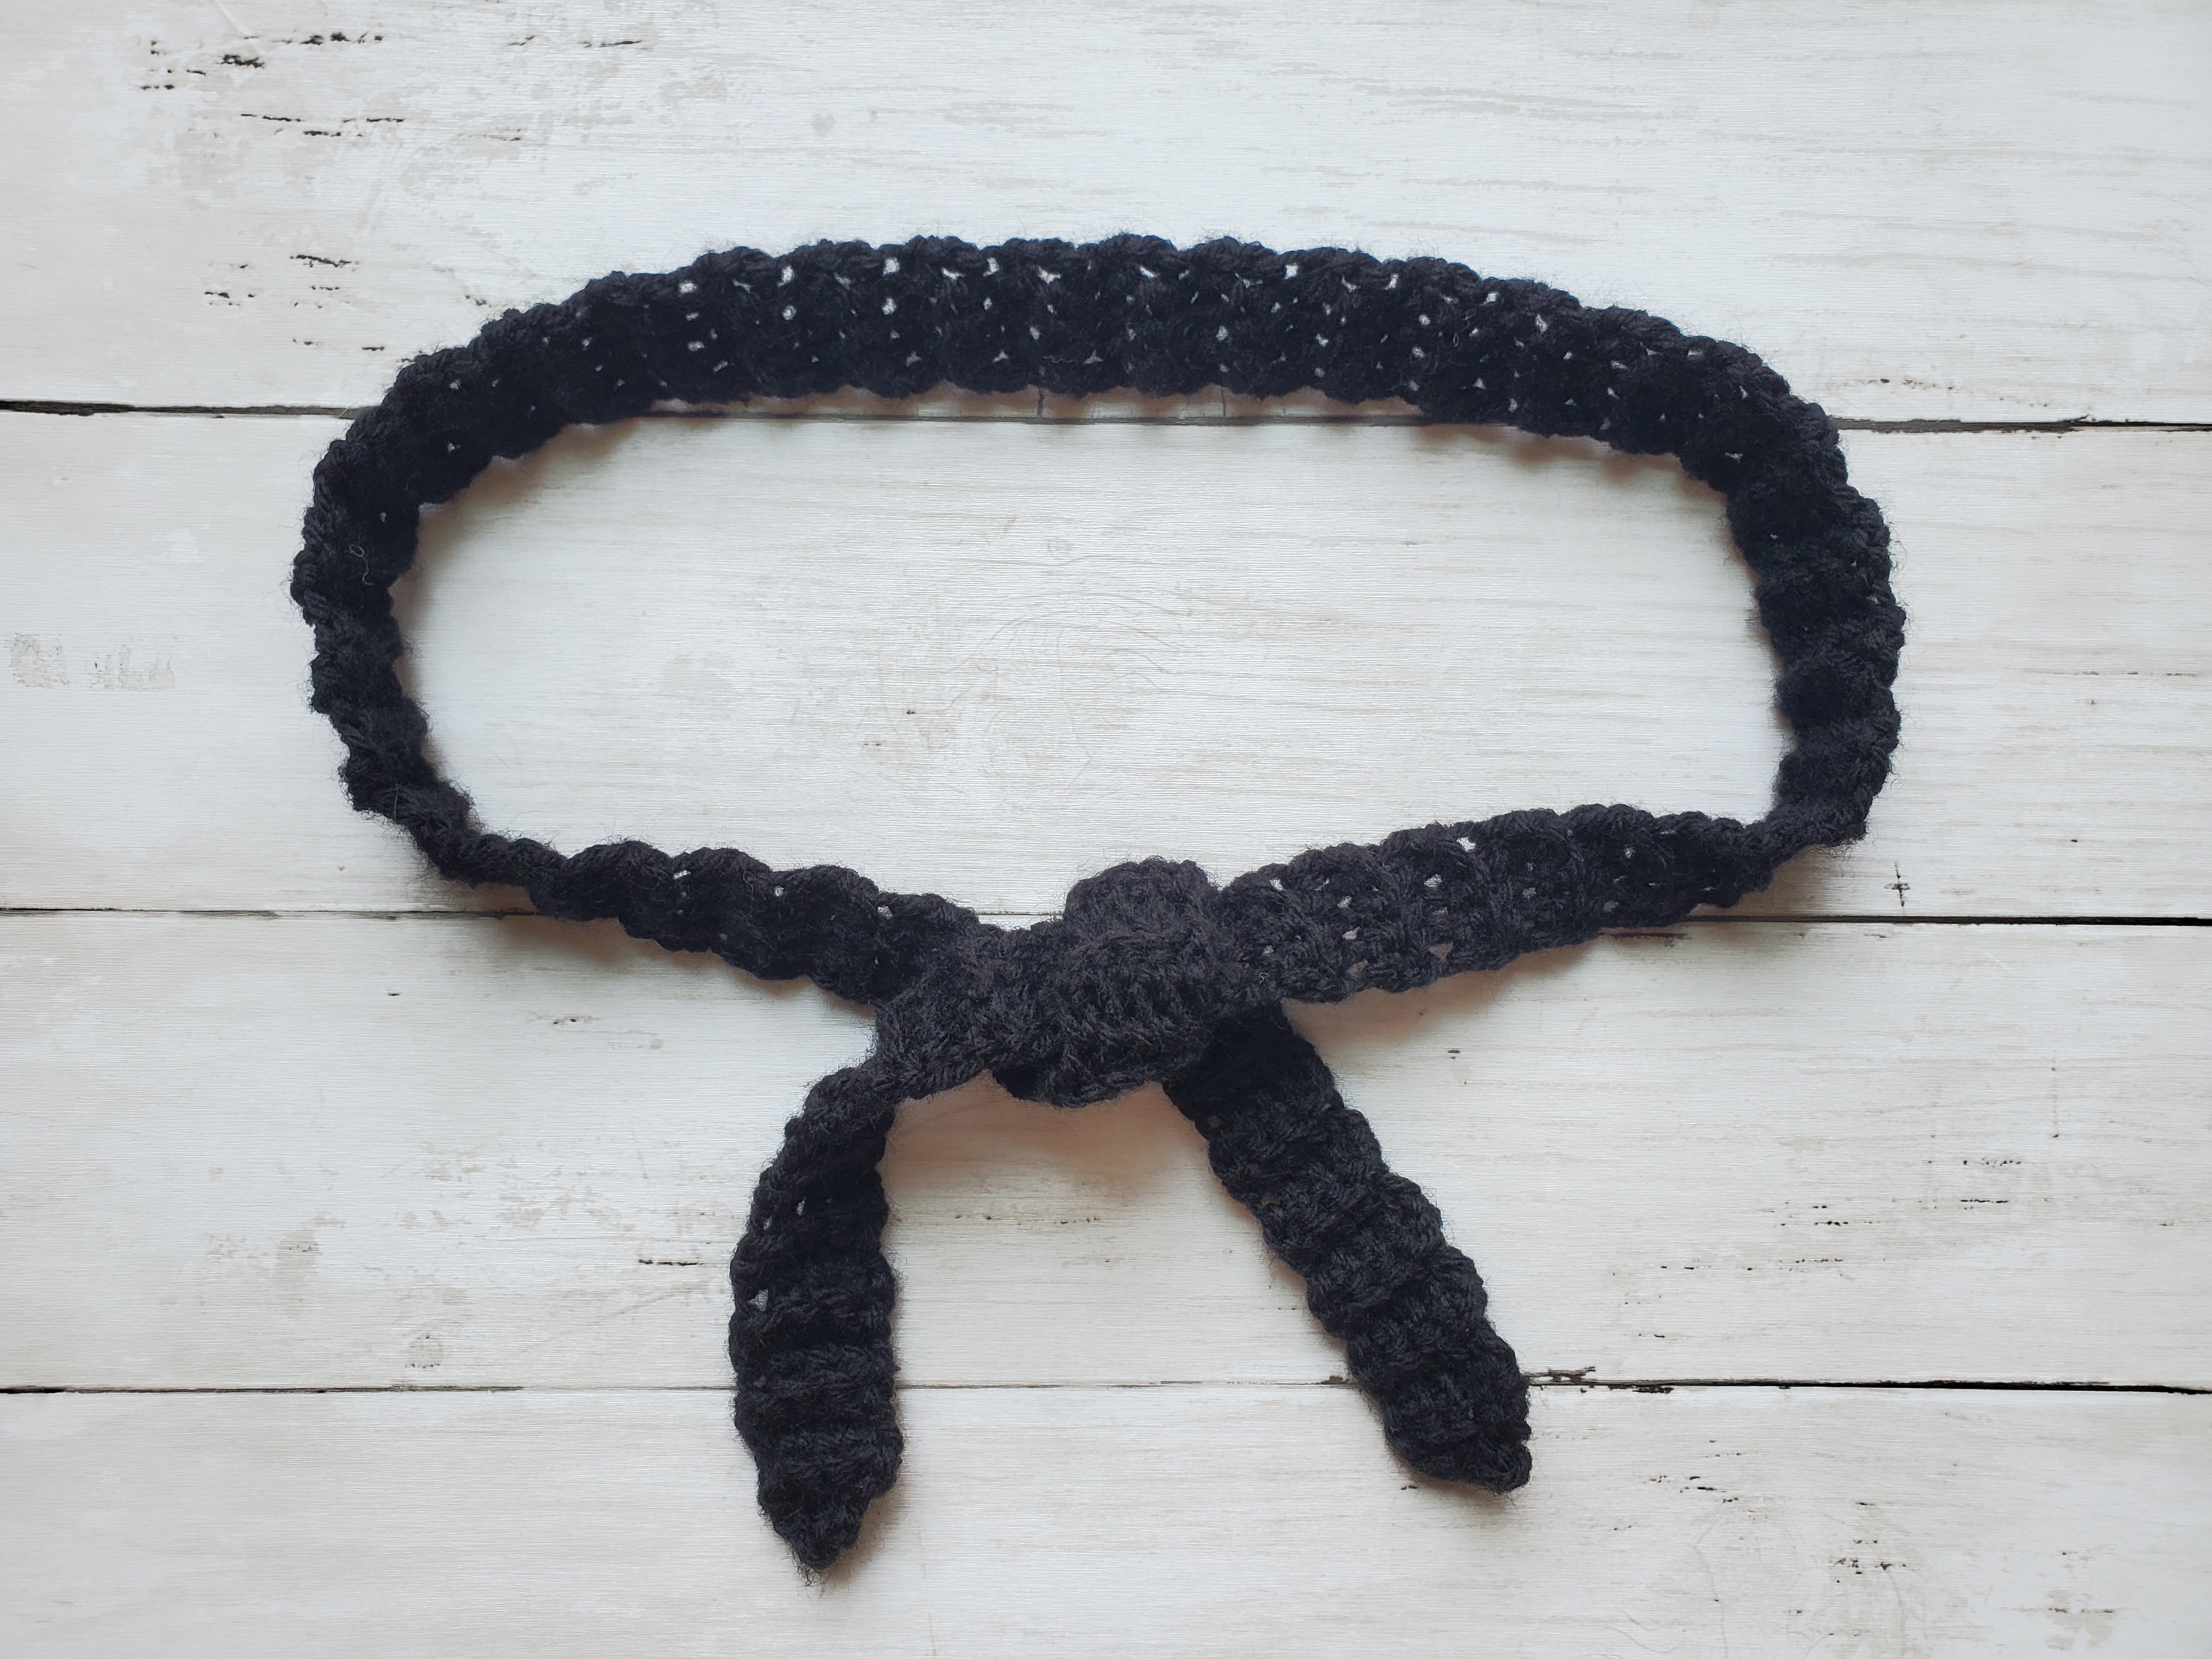
The pattern gives it a nice little “ridged” texture, as well as making the ends slightly pointy. I didn’t want my belt to be totally squared off at the ends, and I think the end result looks pretty decent.

I had originally thought about making a single crochet border around the finished belt, but decided against it. I thought the little gaps between the rows gave it a nice texture too. Of course, if you like a little more structure with your crochet projects, feel free to add a border of your choice around.

Alright, let’s get started!

Materials Needed:

Abbreviations Used:

  • Ch – chain
  • Sc – single crochet
  • Sc2tog – single crochet 2 stitches together

Simple and Cute Crochet Belt Pattern:

With Black yarn and 5 mm crochet hook: (if you need help putting your yarn on your hook by slip knotting click here).

  • Row 1: Ch 3, from second ch from hook, make 2 sc in that ch and in the next ch make another 2 sc (4 sts)
  • Row 2-desired length: Ch 1 and turn, sc in the back loop of each st, repeat for each row. (4sts)
    • What is the back loop? If you look straight down on your stitch…it has 2 sides and looks a little bit like a V, insert your hook into the side that is farthest away from you and make your sc. This helps create that nice ridged texture.
  • At desired length: Ch1, turn, sc2tog and then sc2tog again (2sts). At the end of your row, cut yarn with scissors and pull through. Weave in ends with tapestry needle.
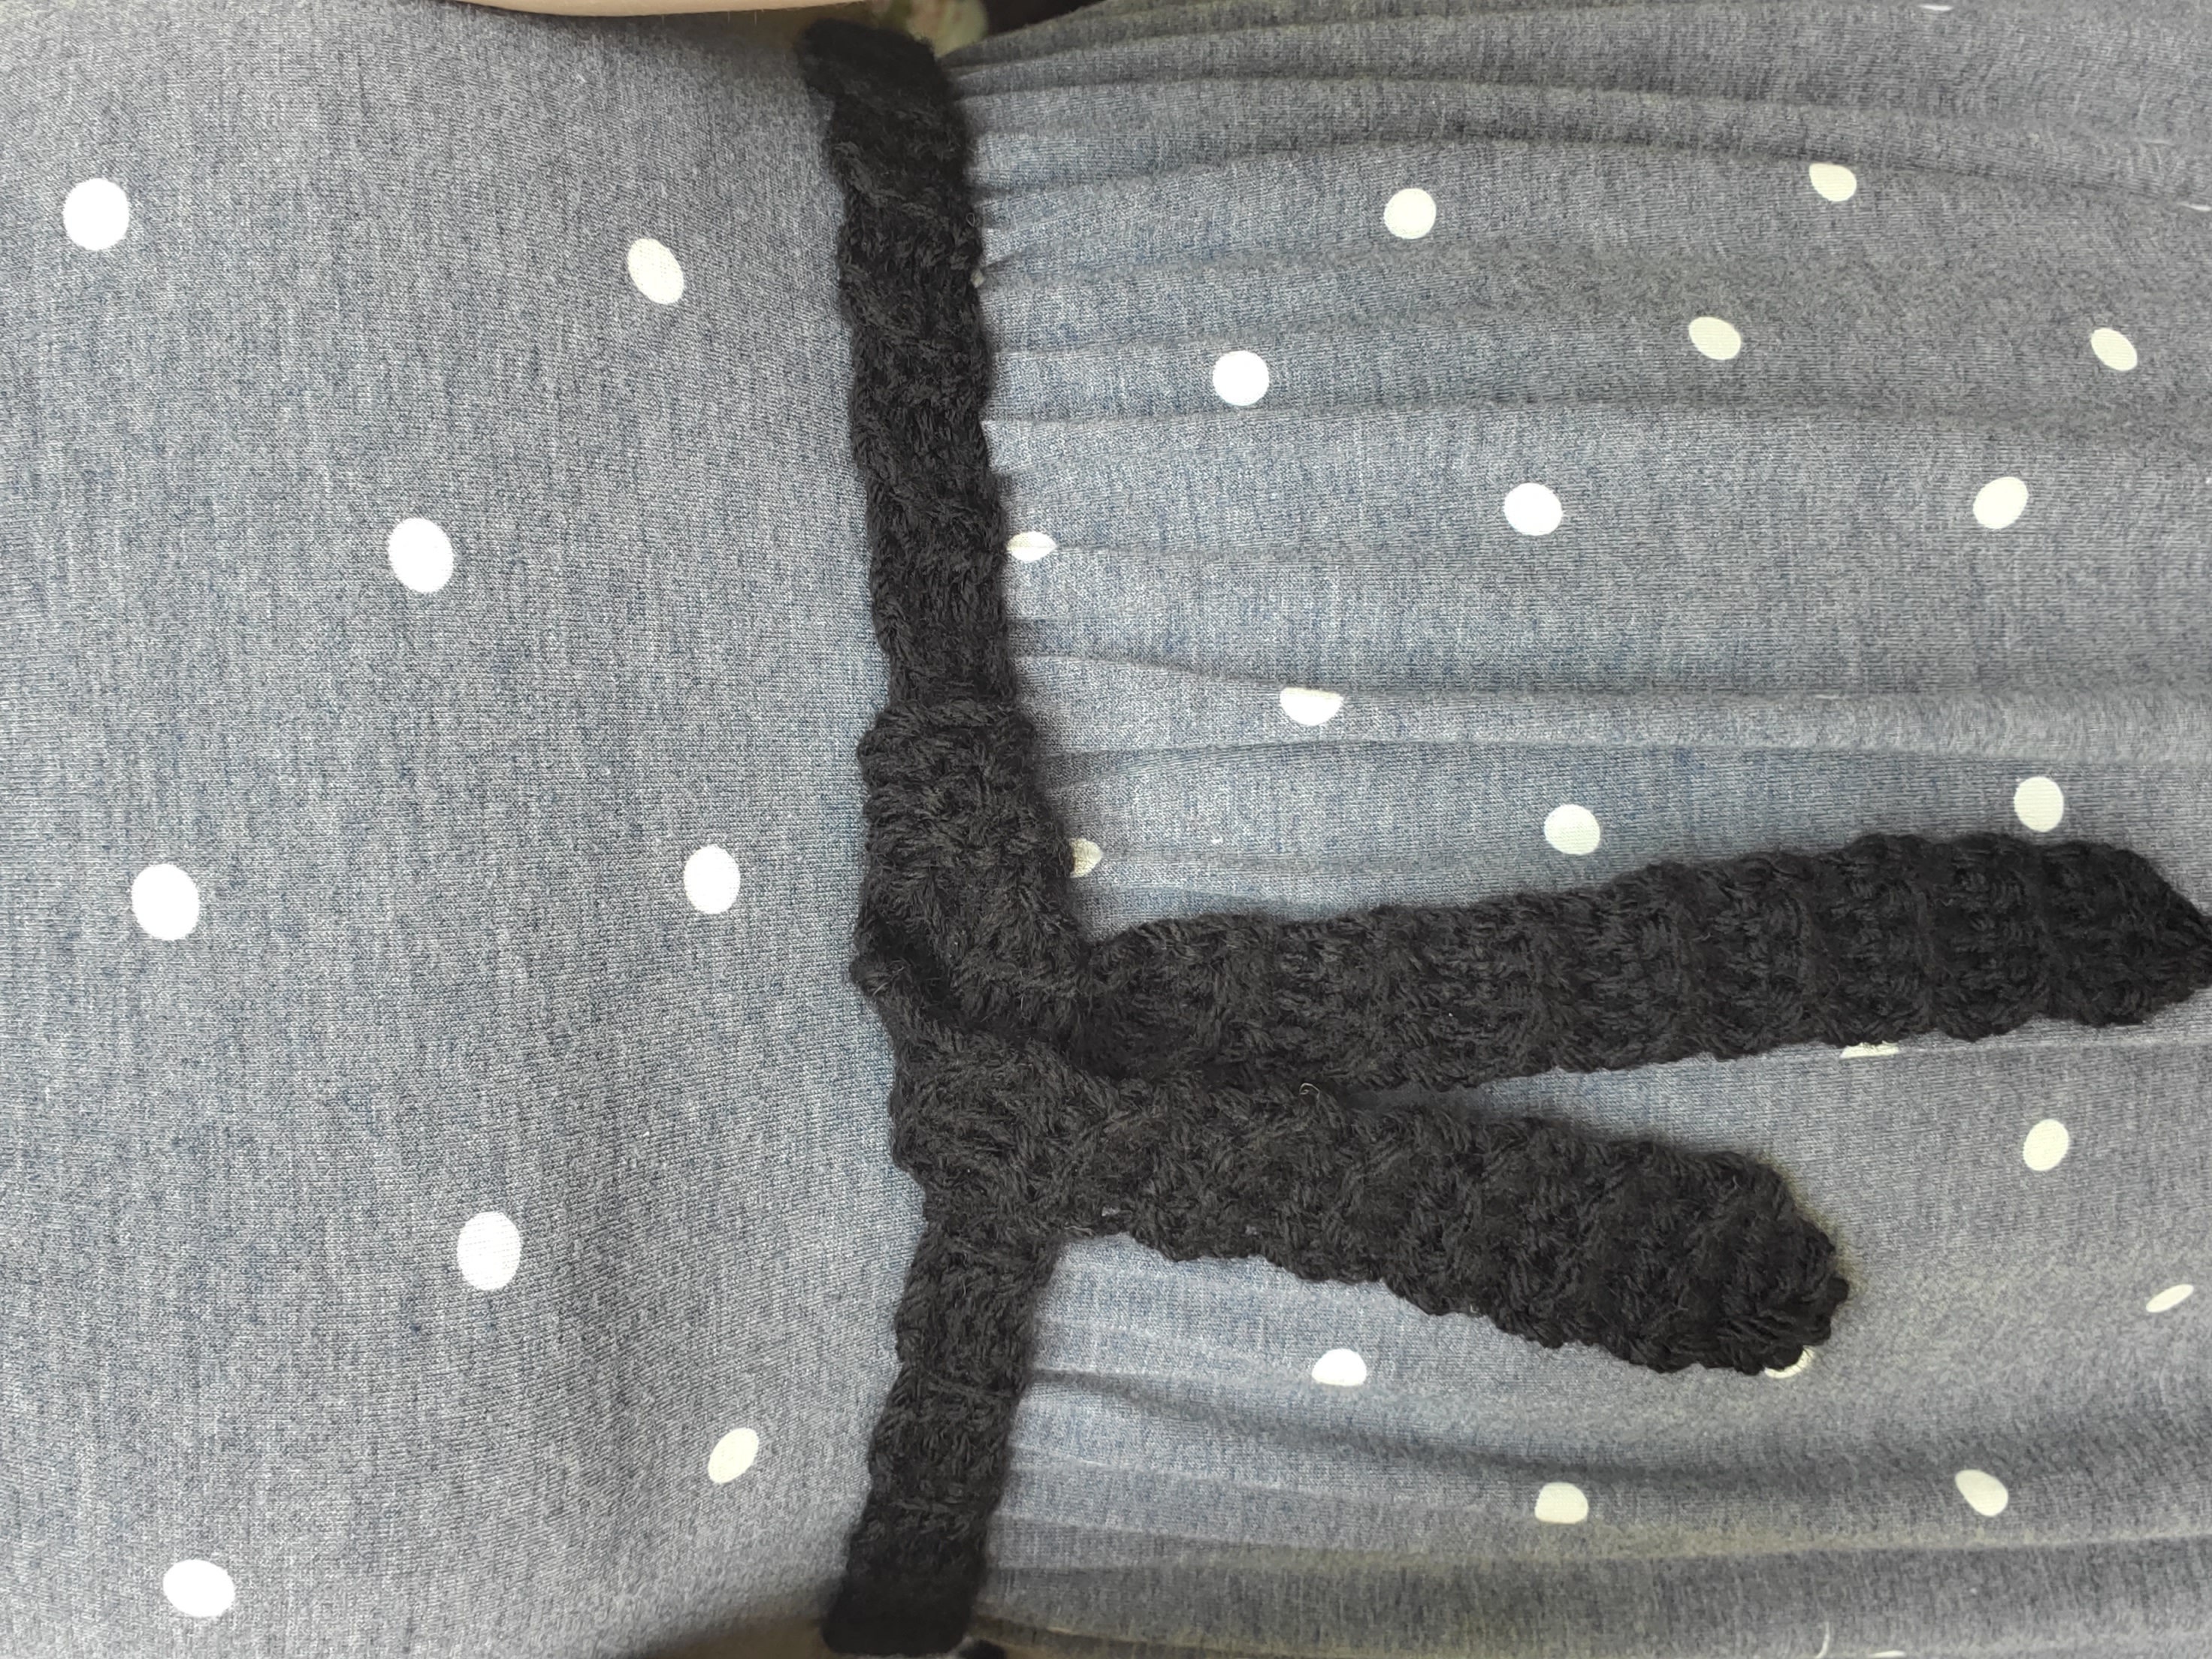
Simple and cute crochet belt with polka dot dress

Tada! It’s really that simple! Here’s another picture of the belt with a different dress. Get creative and tie it in different ways! 

Thank you as always for checking out my patterns, see you in the next one!

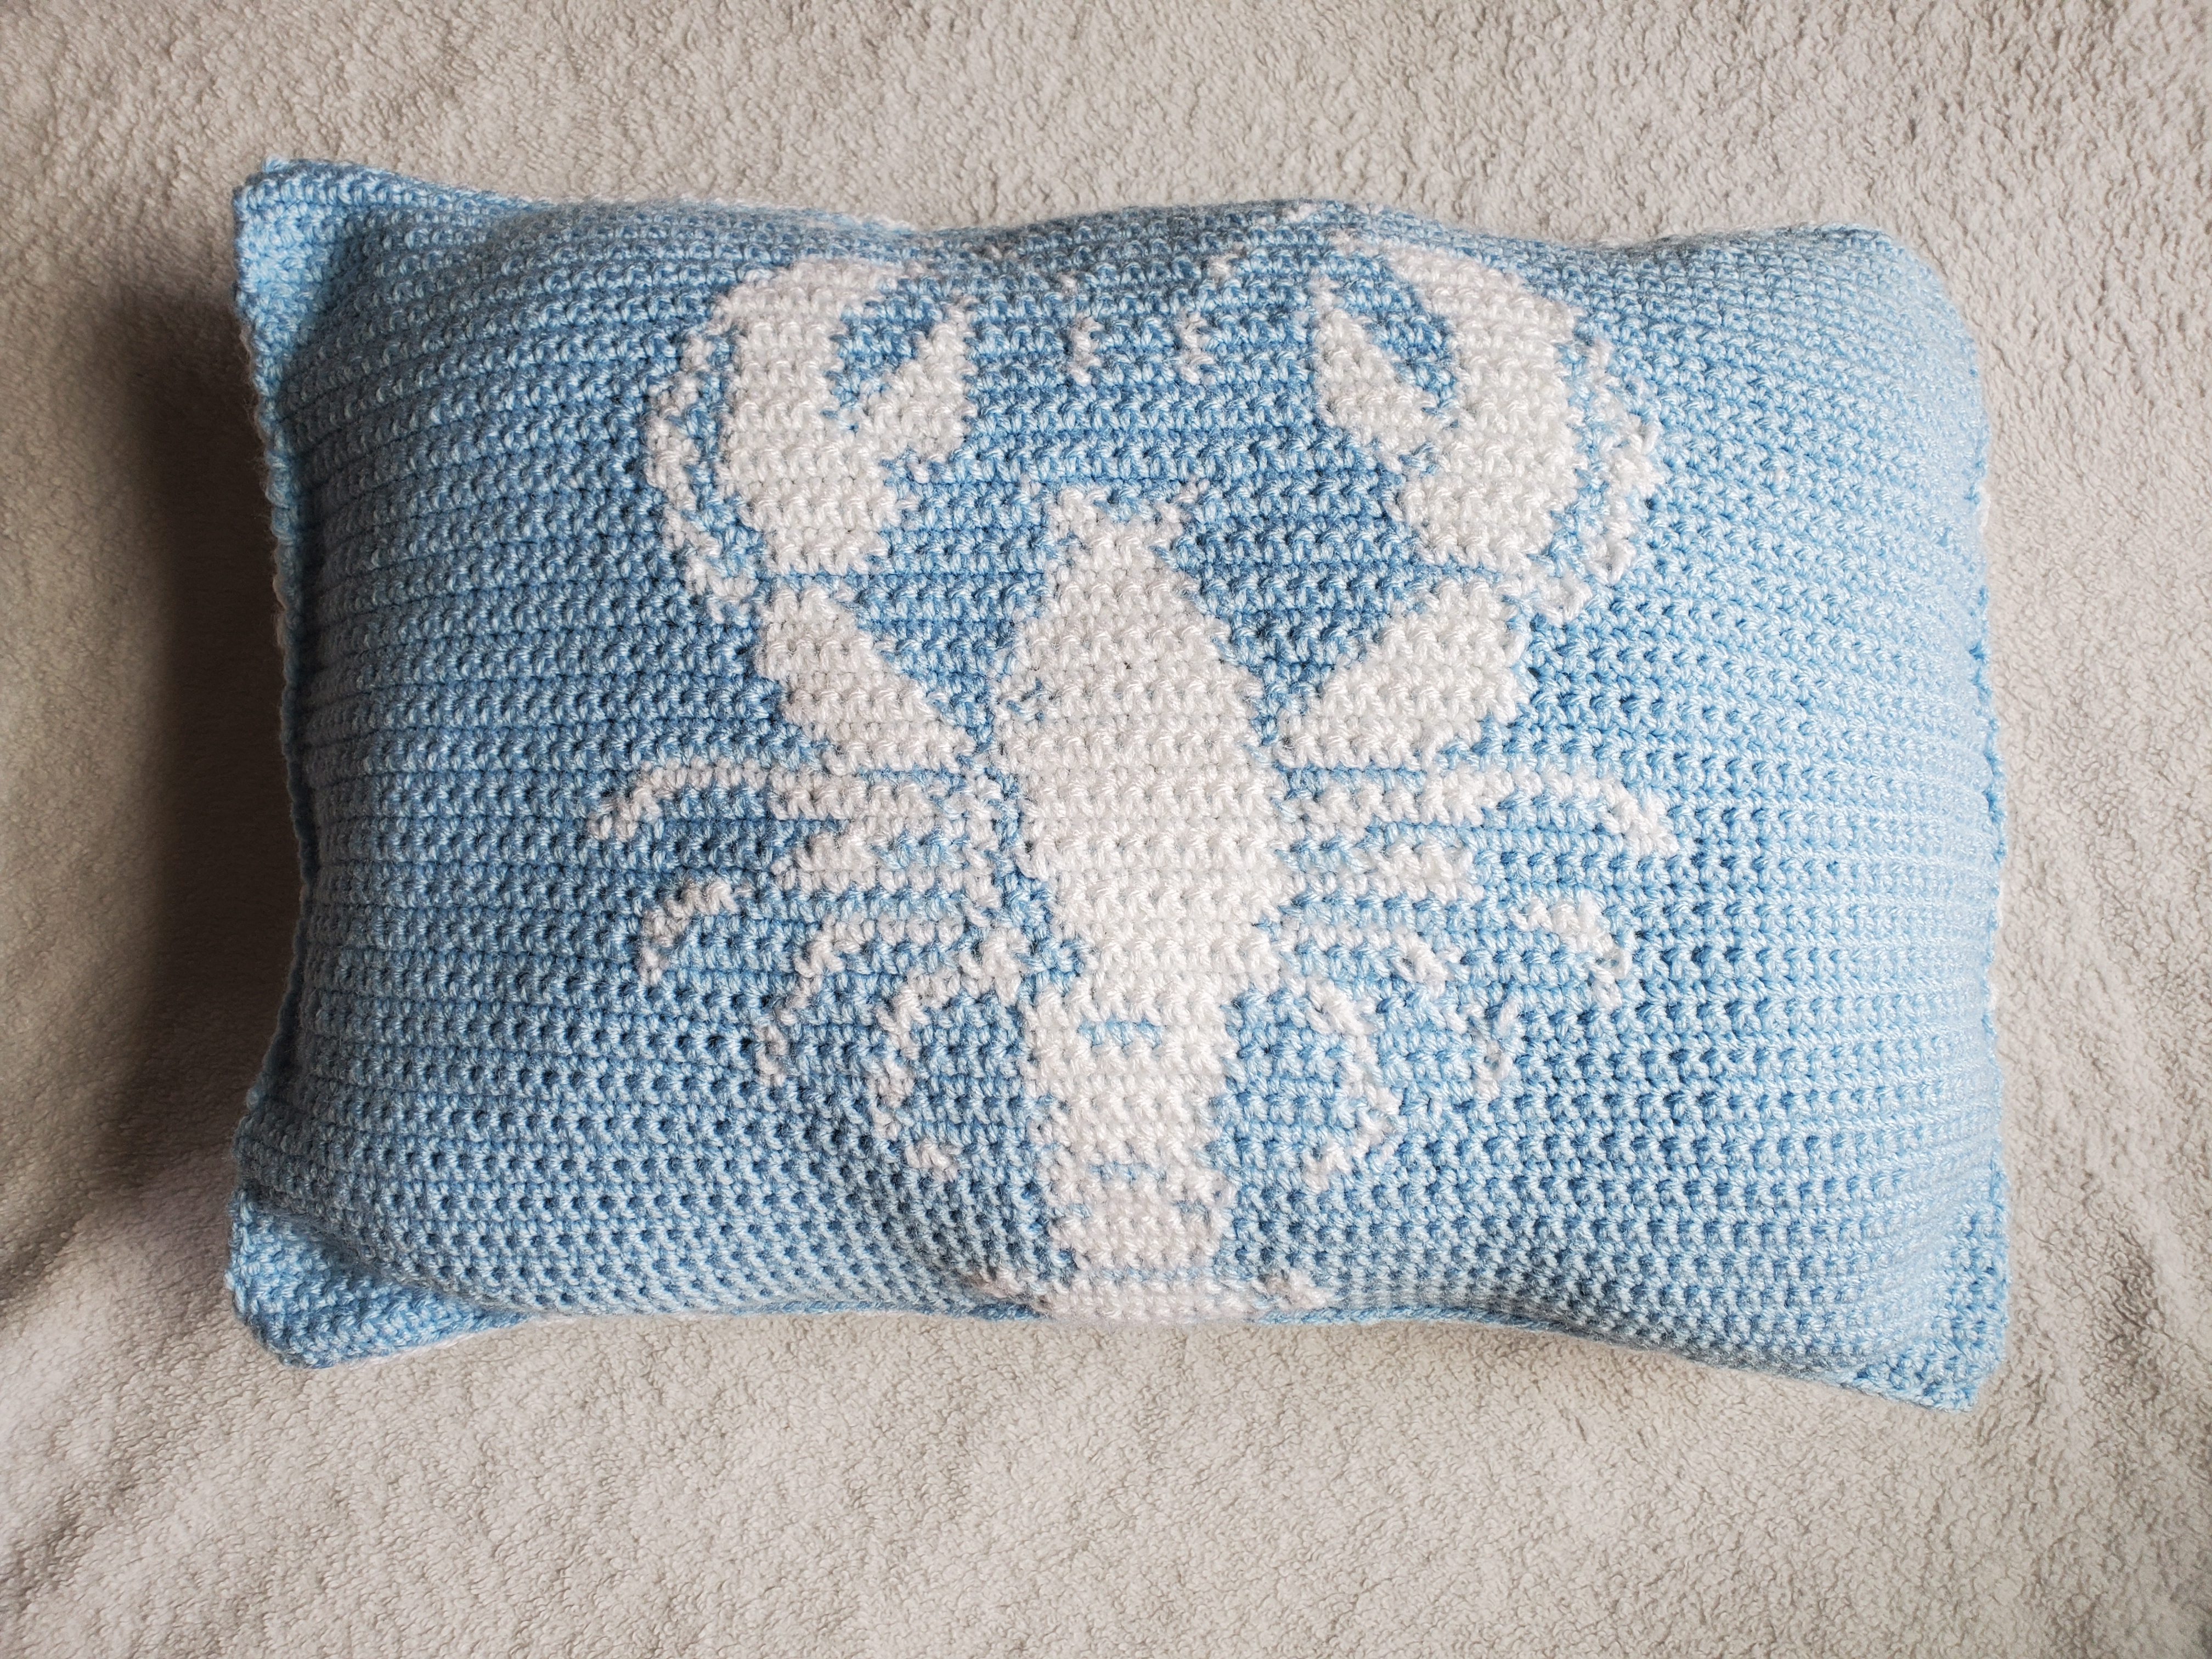
Crochet Lobster Pillow – Try Out This Free Summer Time Pattern

Hellow and welcome back to Strommer Crafts! Today we will be learning how to make a crochet Lobster Pillow! I thought this would be a fun pattern to make, especially since I’ve been experimenting with graphs. 
***Please note that this post may contain affiliate links. This means that I may receive a commission if you purchase something through these links (at no cost to you!). Thank you for your support!*** 

The finished lobster crochet pillow is about 19″ x 13″ when finished. This also depends on your gauge and how firmly you stuff your pillow :).

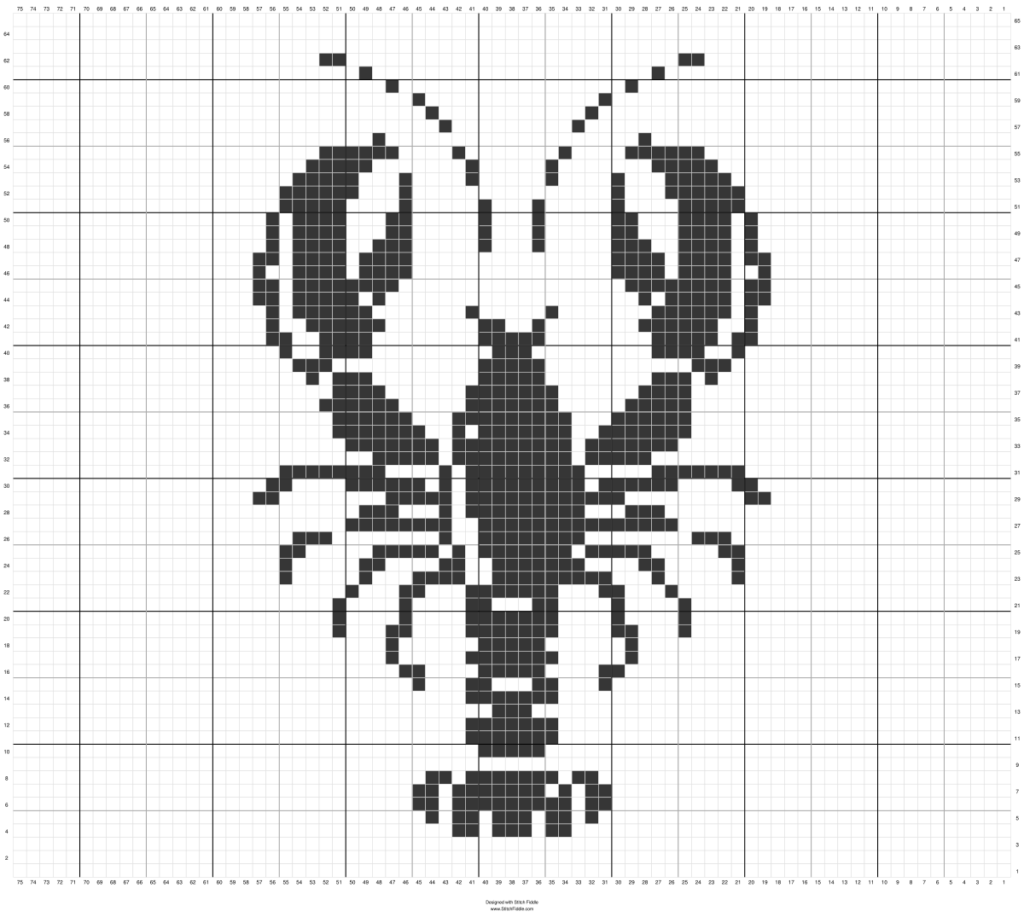
I like to use Stitch Fiddle to create some of my designs. I previously crocheted a Dark Souls Pillow and a Black and White Star Blanket that uses the same technique. I think this website is extremely helping when needing to make a grid/graph of an image or picture.

Here is an image of the graph I used below:

Lobster Crochet Pillow Graph from Stitch Fiddle

I also have a PDF of the graph that you can download here. It may be easier to see the rows on the PDF.

I suggest either printing out the PDF to mark where you are in the pattern, or write down somewhere what row you are on.

Each square on the graph represents 1 single crochet, and you always chain 1 and turn at the end of the rows to keep going.

The pillow is simple. You’ll need to crochet the front piece with the lobster and then make a separate back piece that’s the same size. Throw some stuffing in there, sew it up and viola! 

Even though you sew up the entire pillow, you can throw the whole thing into the wash, as poly-fil stuffing is 100% machine washable. 

I also used yarn from Red Heart Super Saver (medium 4 worsted weight). It’s acrylic, so it’s a little cheaper and it comes in so many different colors. As always, feel free to use a different yarn or yarn color if it suits you better! 

I decided to go with a smaller hook size than normal. It was difficult to obtain a clear image of the lobster and using my typical 5 mm hook would make the pillow a bit too big for my liking. Of course feel free to use a larger hook size, your pillow will just be bigger.

Pinterest Pin of Lobster Crochet Pillow

Materials Needed:

Abbreviations Used:

  • Ch – chain
  • St – stitch
  • Sl st – slip stitch
  • Sc – single crochet

 Special Instructions

  • The ch 1 at the beginning of each round does not count as a stitch.
  • I used a stitch marker to help me identify the left from the right side of the front panel of the Lobster Crochet Pillow. You don’t have to use one (a scrap piece of yarn also works), but I think it really helped me. Sometimes I would forget if I was going left to right, or right to left down the row I was on. Especially if I left the project and picked it up later.
  • Just make sure when you read it left to right, you’ll chain 1 and turn your work and then read the graph right to left
  • To change yarn colors from white to blue correctly, plan ahead! I always stop at the stitch prior to the needed color change and put my new color on. This keeps a nice even look to the color change. You’ll want to make a single crochet, but don’t completely finish it. You should have 2 loops on your hook. Loop your new color around your hook and pull it through. See my previous post on how to change colors correctly in crochet for further details.
  • I decided not to carry the white yarn along with me throughout the pillow. I only did this in the center area where the lobster is. A few rows required a switch to the white yarn but I had ended it a few stitches away in the row below. I went ahead and pulled the white from the previous row to where it needed to be in the next, and then crocheted while going underneath the long stretch of white to hide it…if that makes sense!
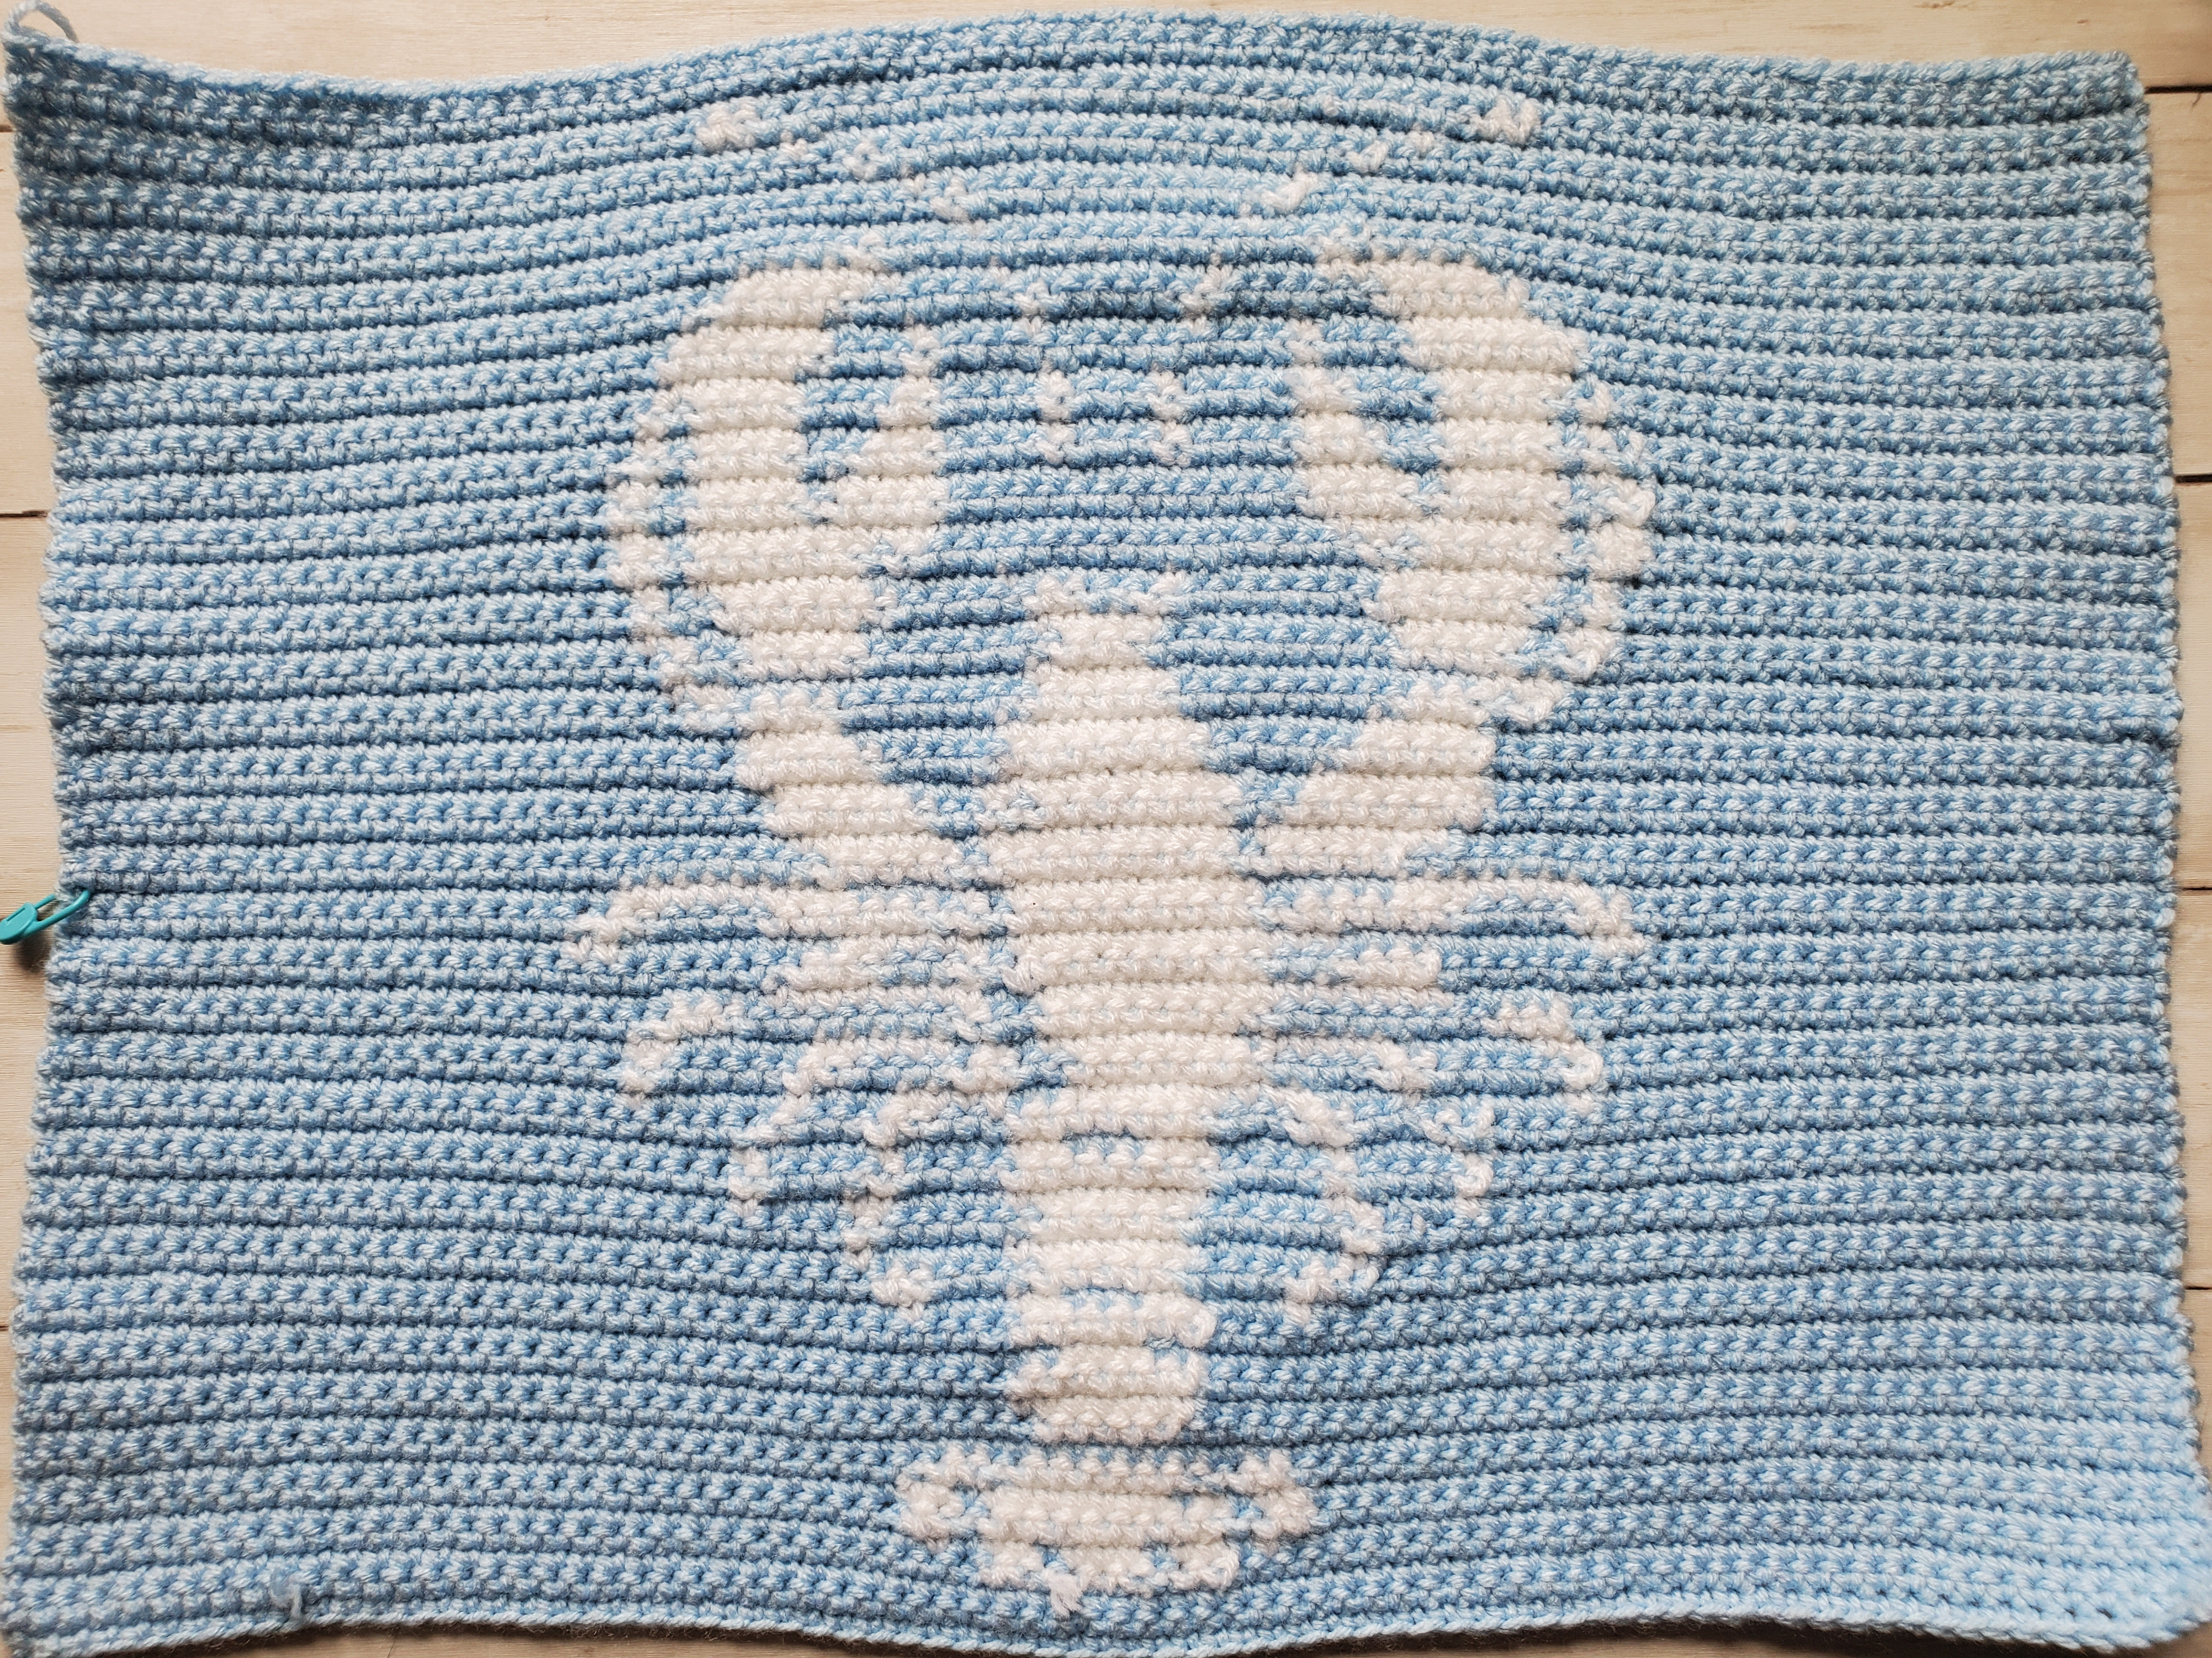
  • Don’t be alarmed if your front panel starts to get wavy around where the lobster image is. When you sew the back panel, and stuff the pillow, it’s very difficult to see it.

Crochet Lobster Pillow Pattern:

With 3.75 mm crochet hook and Light Blue Yarn:

Ch 76, from second ch from hook; sc in each ch across (75 sts)

Rows 1-65: Follow the lobster graph by starting left to right. At the end of each row, ch 1 and turn. Light Blue = the white squares and White = the black squares on the graph. Remember: 1 square = 1 sc.

Cut yarn with scissors and pull through. 

Finished front panel of crochet lobster pillow

Back Panel:

With 3.75 mm crochet hook and White Yarn:

Ch 76, from second ch from hook, sc in each ch across (75 sts)

Rows 1-65: Sc in each st across, turn and ch 1

Do not cut yarn.

With your back panel finished, line up both the front and the back panel with each other. (Make sure you have the front panel facing the correct way).

Start sewing the panels together by slip stitching into both sts all the way around the sides. Use the poly-fil to stuff the pillow firmly before completely sewing shut.

Cut off excess yarn and weave in any ends with tapestry needle.

Lobster Crochet Pillow

Black and White Star Crochet Baby Blanket

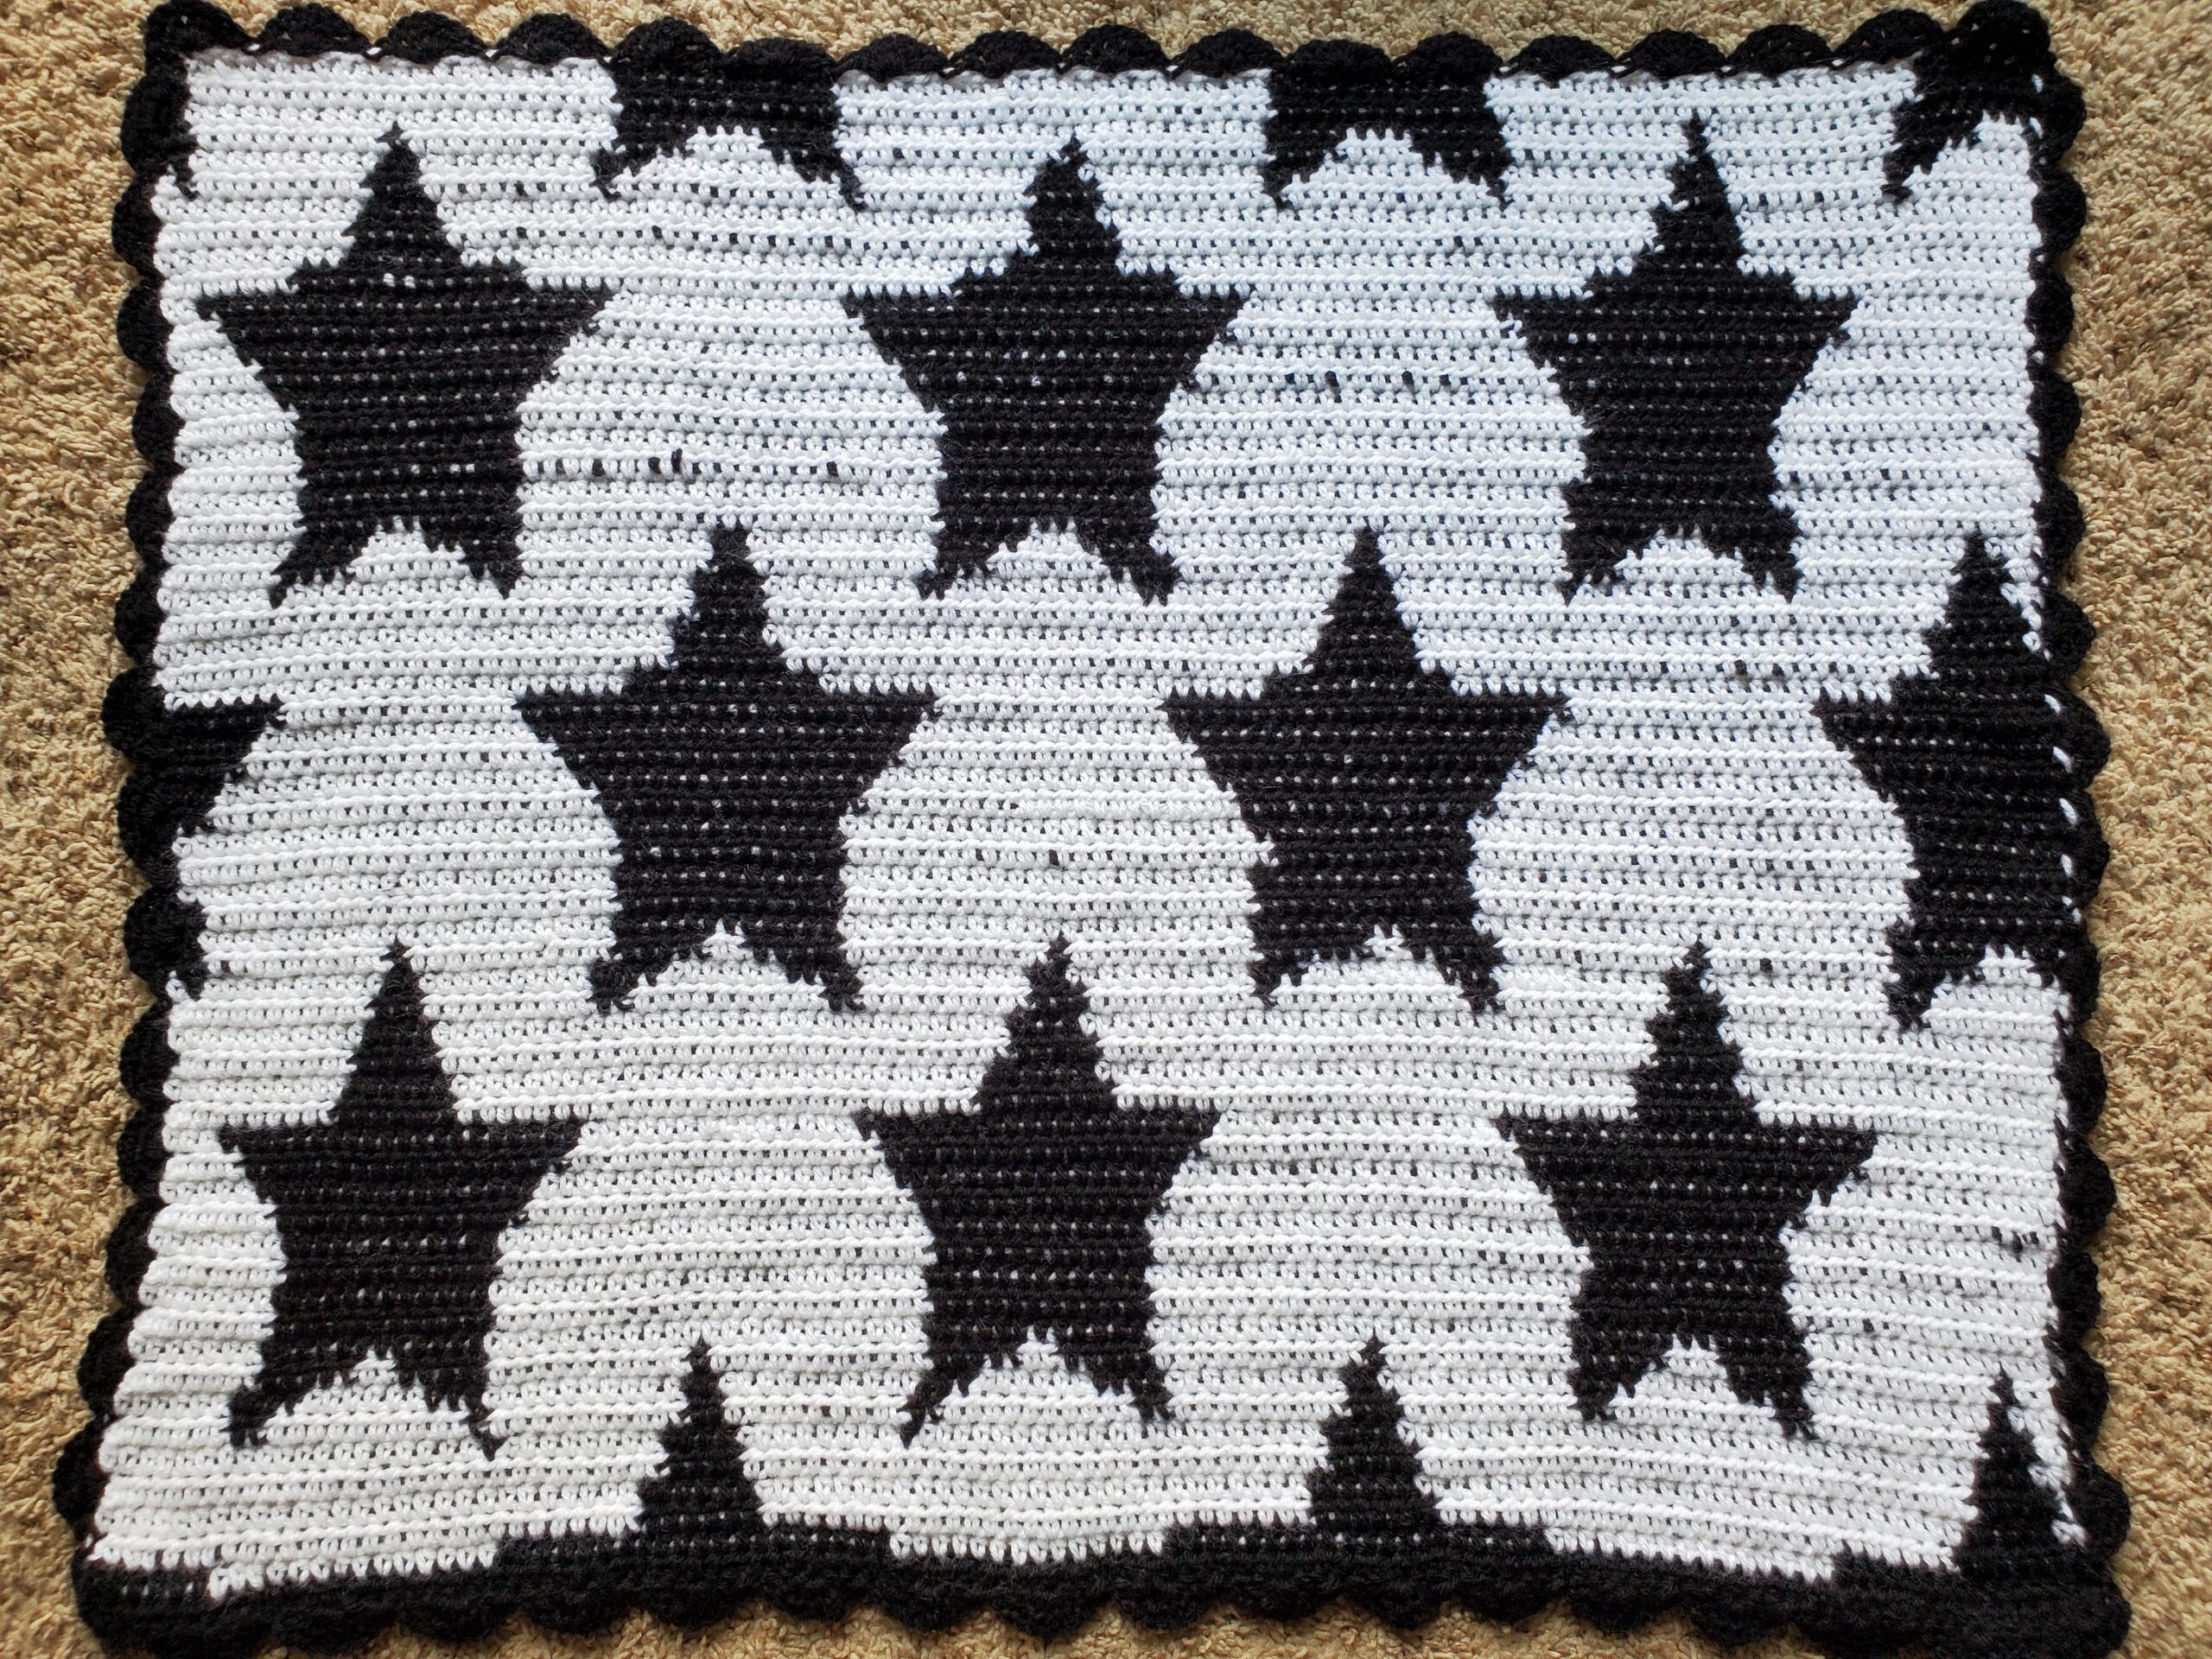
Hey there and welcome to StrommerCrafts, today I am presenting to you my first completed baby blanket pattern! A Black and White Star Crochet Baby Blanket! 

***Please note that this post may contain affiliate links. This means that I may receive a commission if you purchase something through these links (at no cost to you!). Thank you for your support!***

I used a 5 mm crochet hook and 1 jumbo skein of white yarn from Red Heart Super Saver and 1 jumbo skein of black yarn from Red Heart Super Saver. 

When finished, this blanket is about 33” x 27” depending on your gauge. 

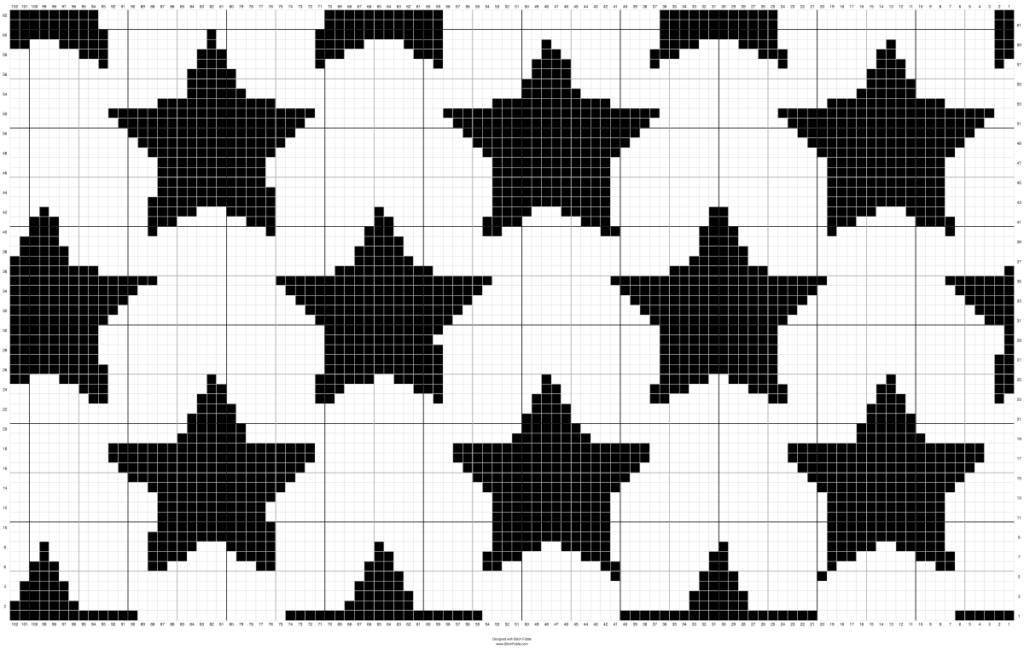
The stars are actually not a perfectly repeating pattern…I found an image of stars that I liked and used my favorite crochet graph generator, Stitch Fiddle, to create it.

Since the stars are not all the same, you can adjust the black stitches to be the exact same as the first whole star if the variations among the stars bothers you. I’m just lazy, so I left it as is ;).

You’ll also need to change colors correctly when following this pattern. When you switch between the two colored yarns, you’ll find that your skeins will start to get twisted. That is ok! That just tends to happen when you switch, just make sure that you unravel them occasionally so they don’t get knotted. 

Each square on the graph represents 1 half double crochet. I had originally used single crochets, but found that it took way too long to complete a baby blanket this way. Plus it was pretty stiff. The half double crochets worked perfectly, as the stars didn’t get stretched out too much (double crochets would distort the image and make it too tall…if that makes sense!).

Here is the graph I used to make the blanket:

Black and White Star Crochet Graph from Stitch Fiddle
Black and White Star Blanket Graph

Here is a link to a PDF of the pattern, which may be easier to see.

I suggest either printing the graph out to mark where you are in the Black and White Star Baby Blanket pattern or head over to Stitch Fiddle and mark where you are by using your own colored square (this is how I did it). You can also write down on a piece of paper or on your phone which row you last completed or are on.

It’s easy to get lost if you don’t have a way of marking which row you’re on, especially since this is a longer crochet project!

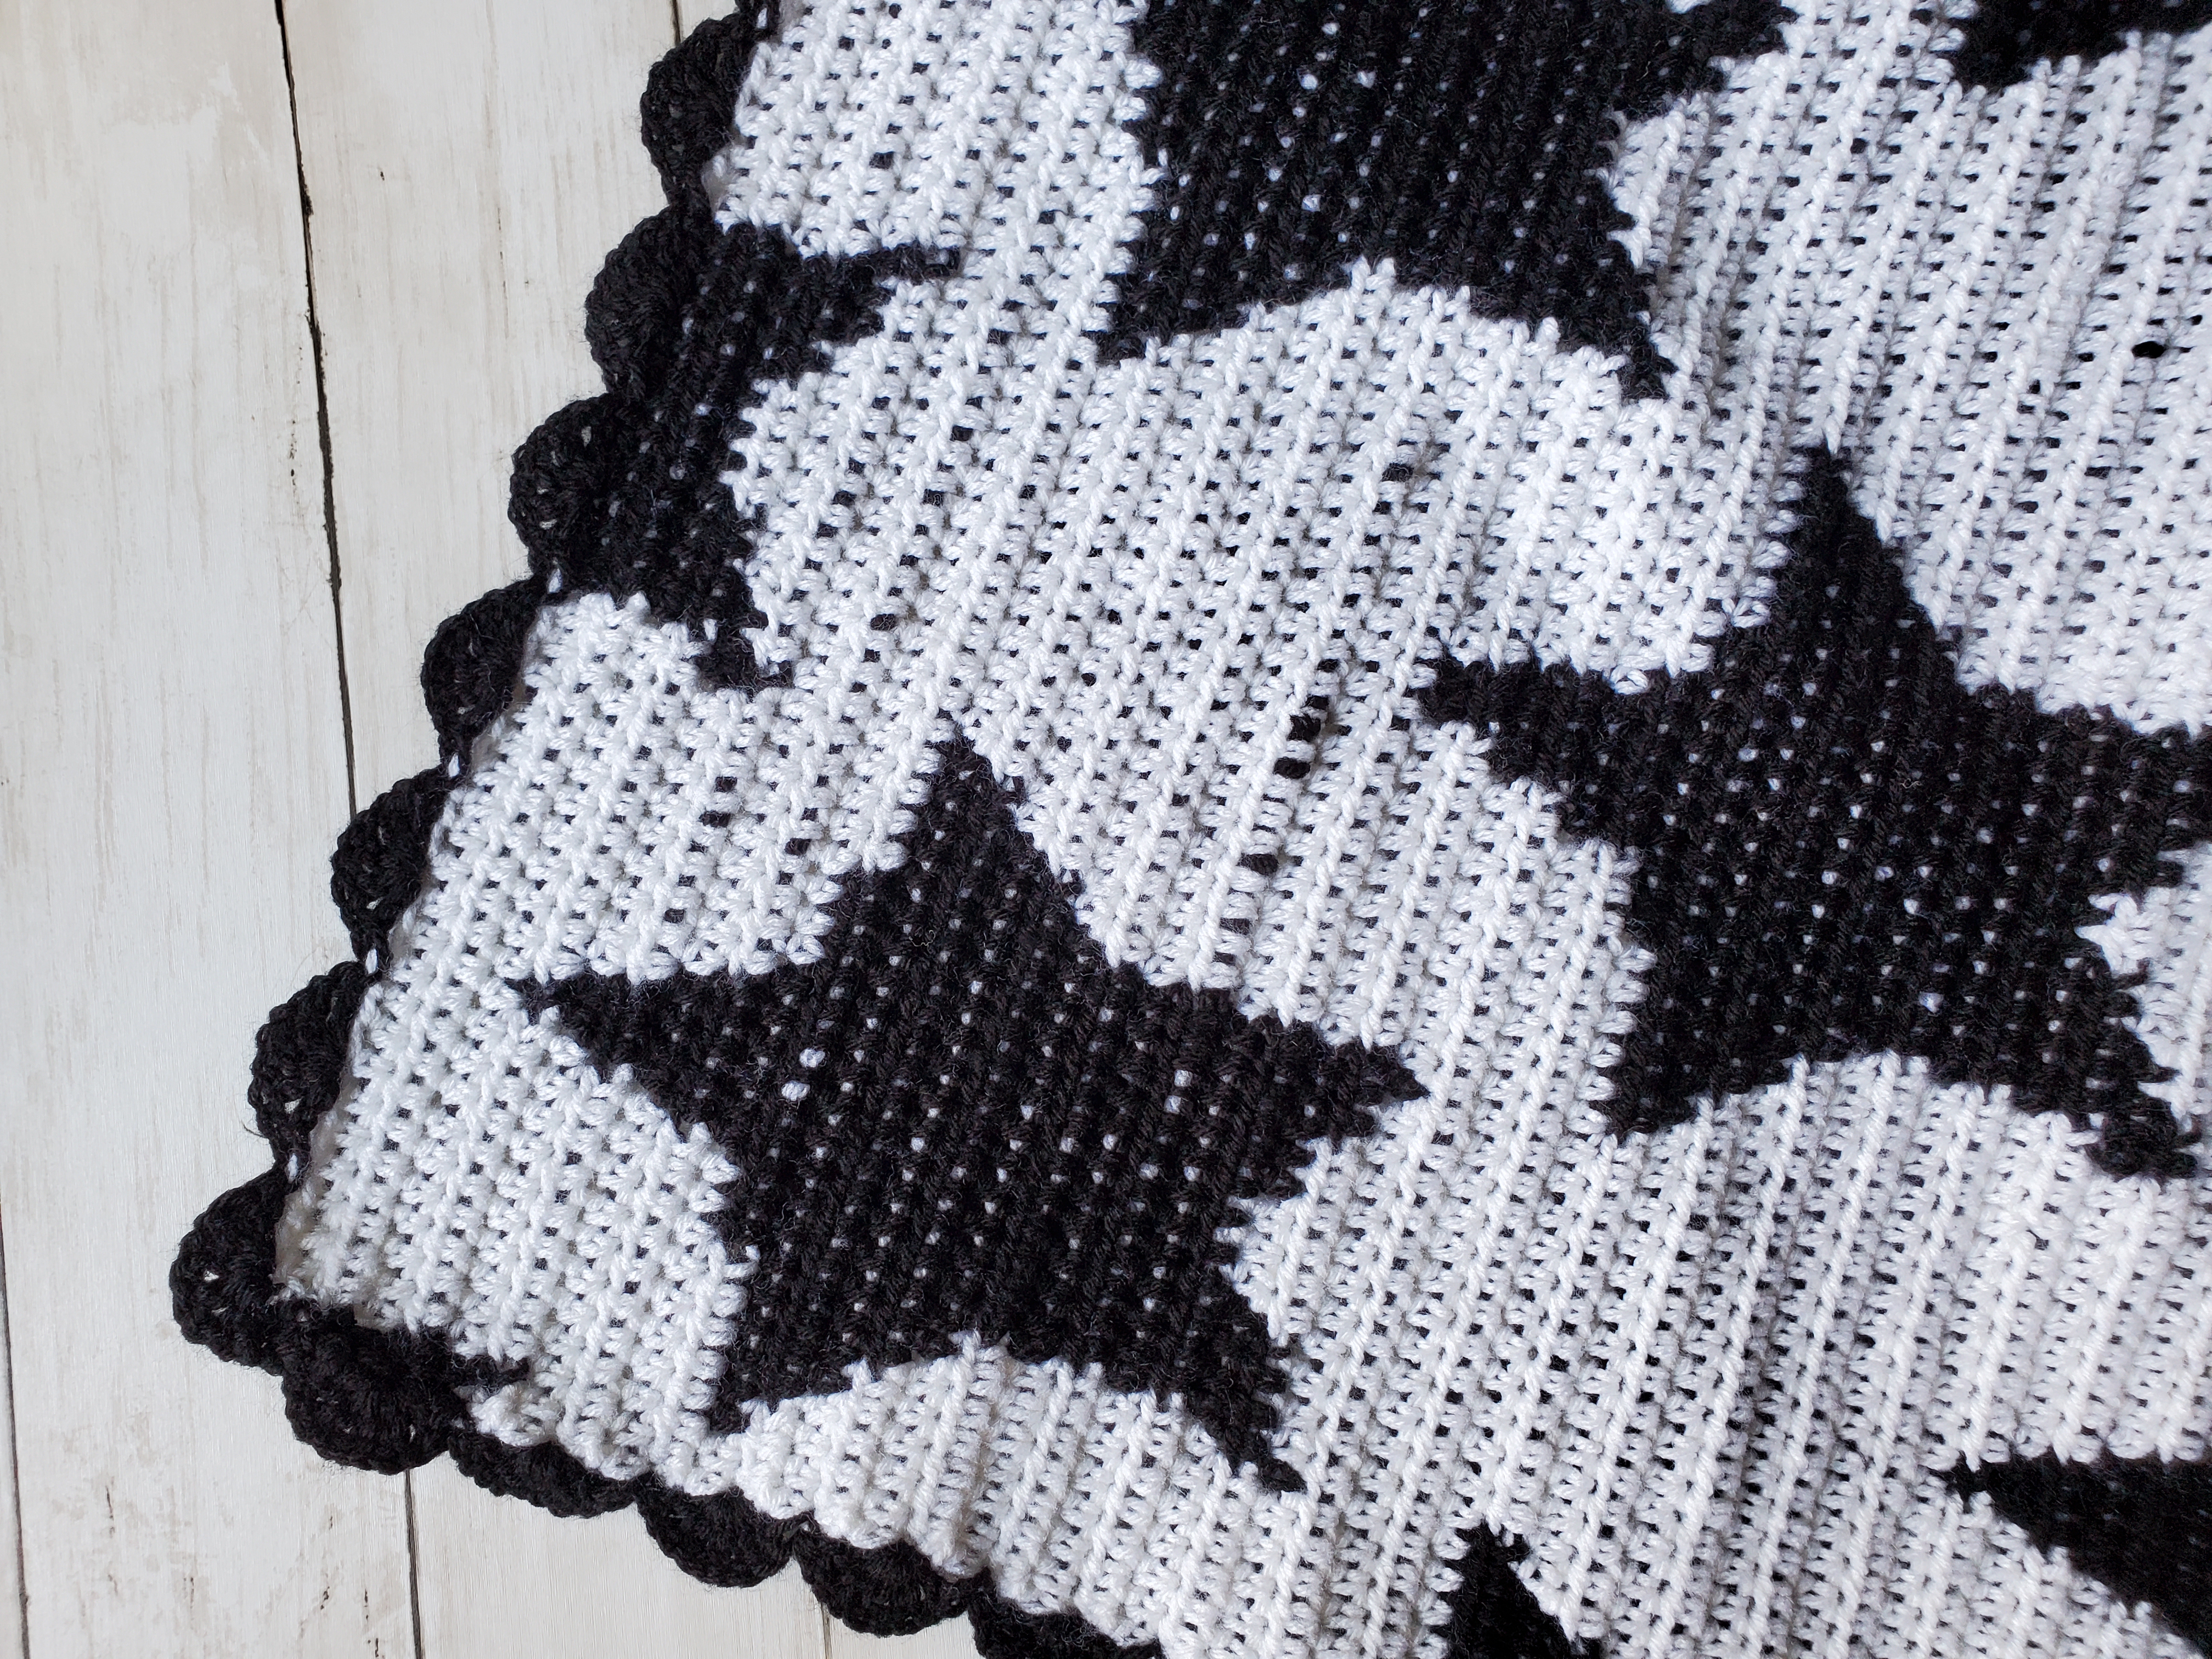
I also polished up the blanket by adding a shell stitch border around it. The shell border makes it look a little more feminine in my opinion, but you can add any border you like (or none at all!).

Corner shot of black and white star baby blanket with shell border
Check out that Shell Border!

Okay, let’s get started on our Black and White Star Crochet Baby Blanket!

Abbreviations Used:

  • Ch(s) – chain(s)
  • St – stitch
  • Sl st – slip stitch
  • Hdc – half double crochet
  • Dc – double crochet

Special Instructions:

  • Each square on the graph is equal to 1 half double crochet.
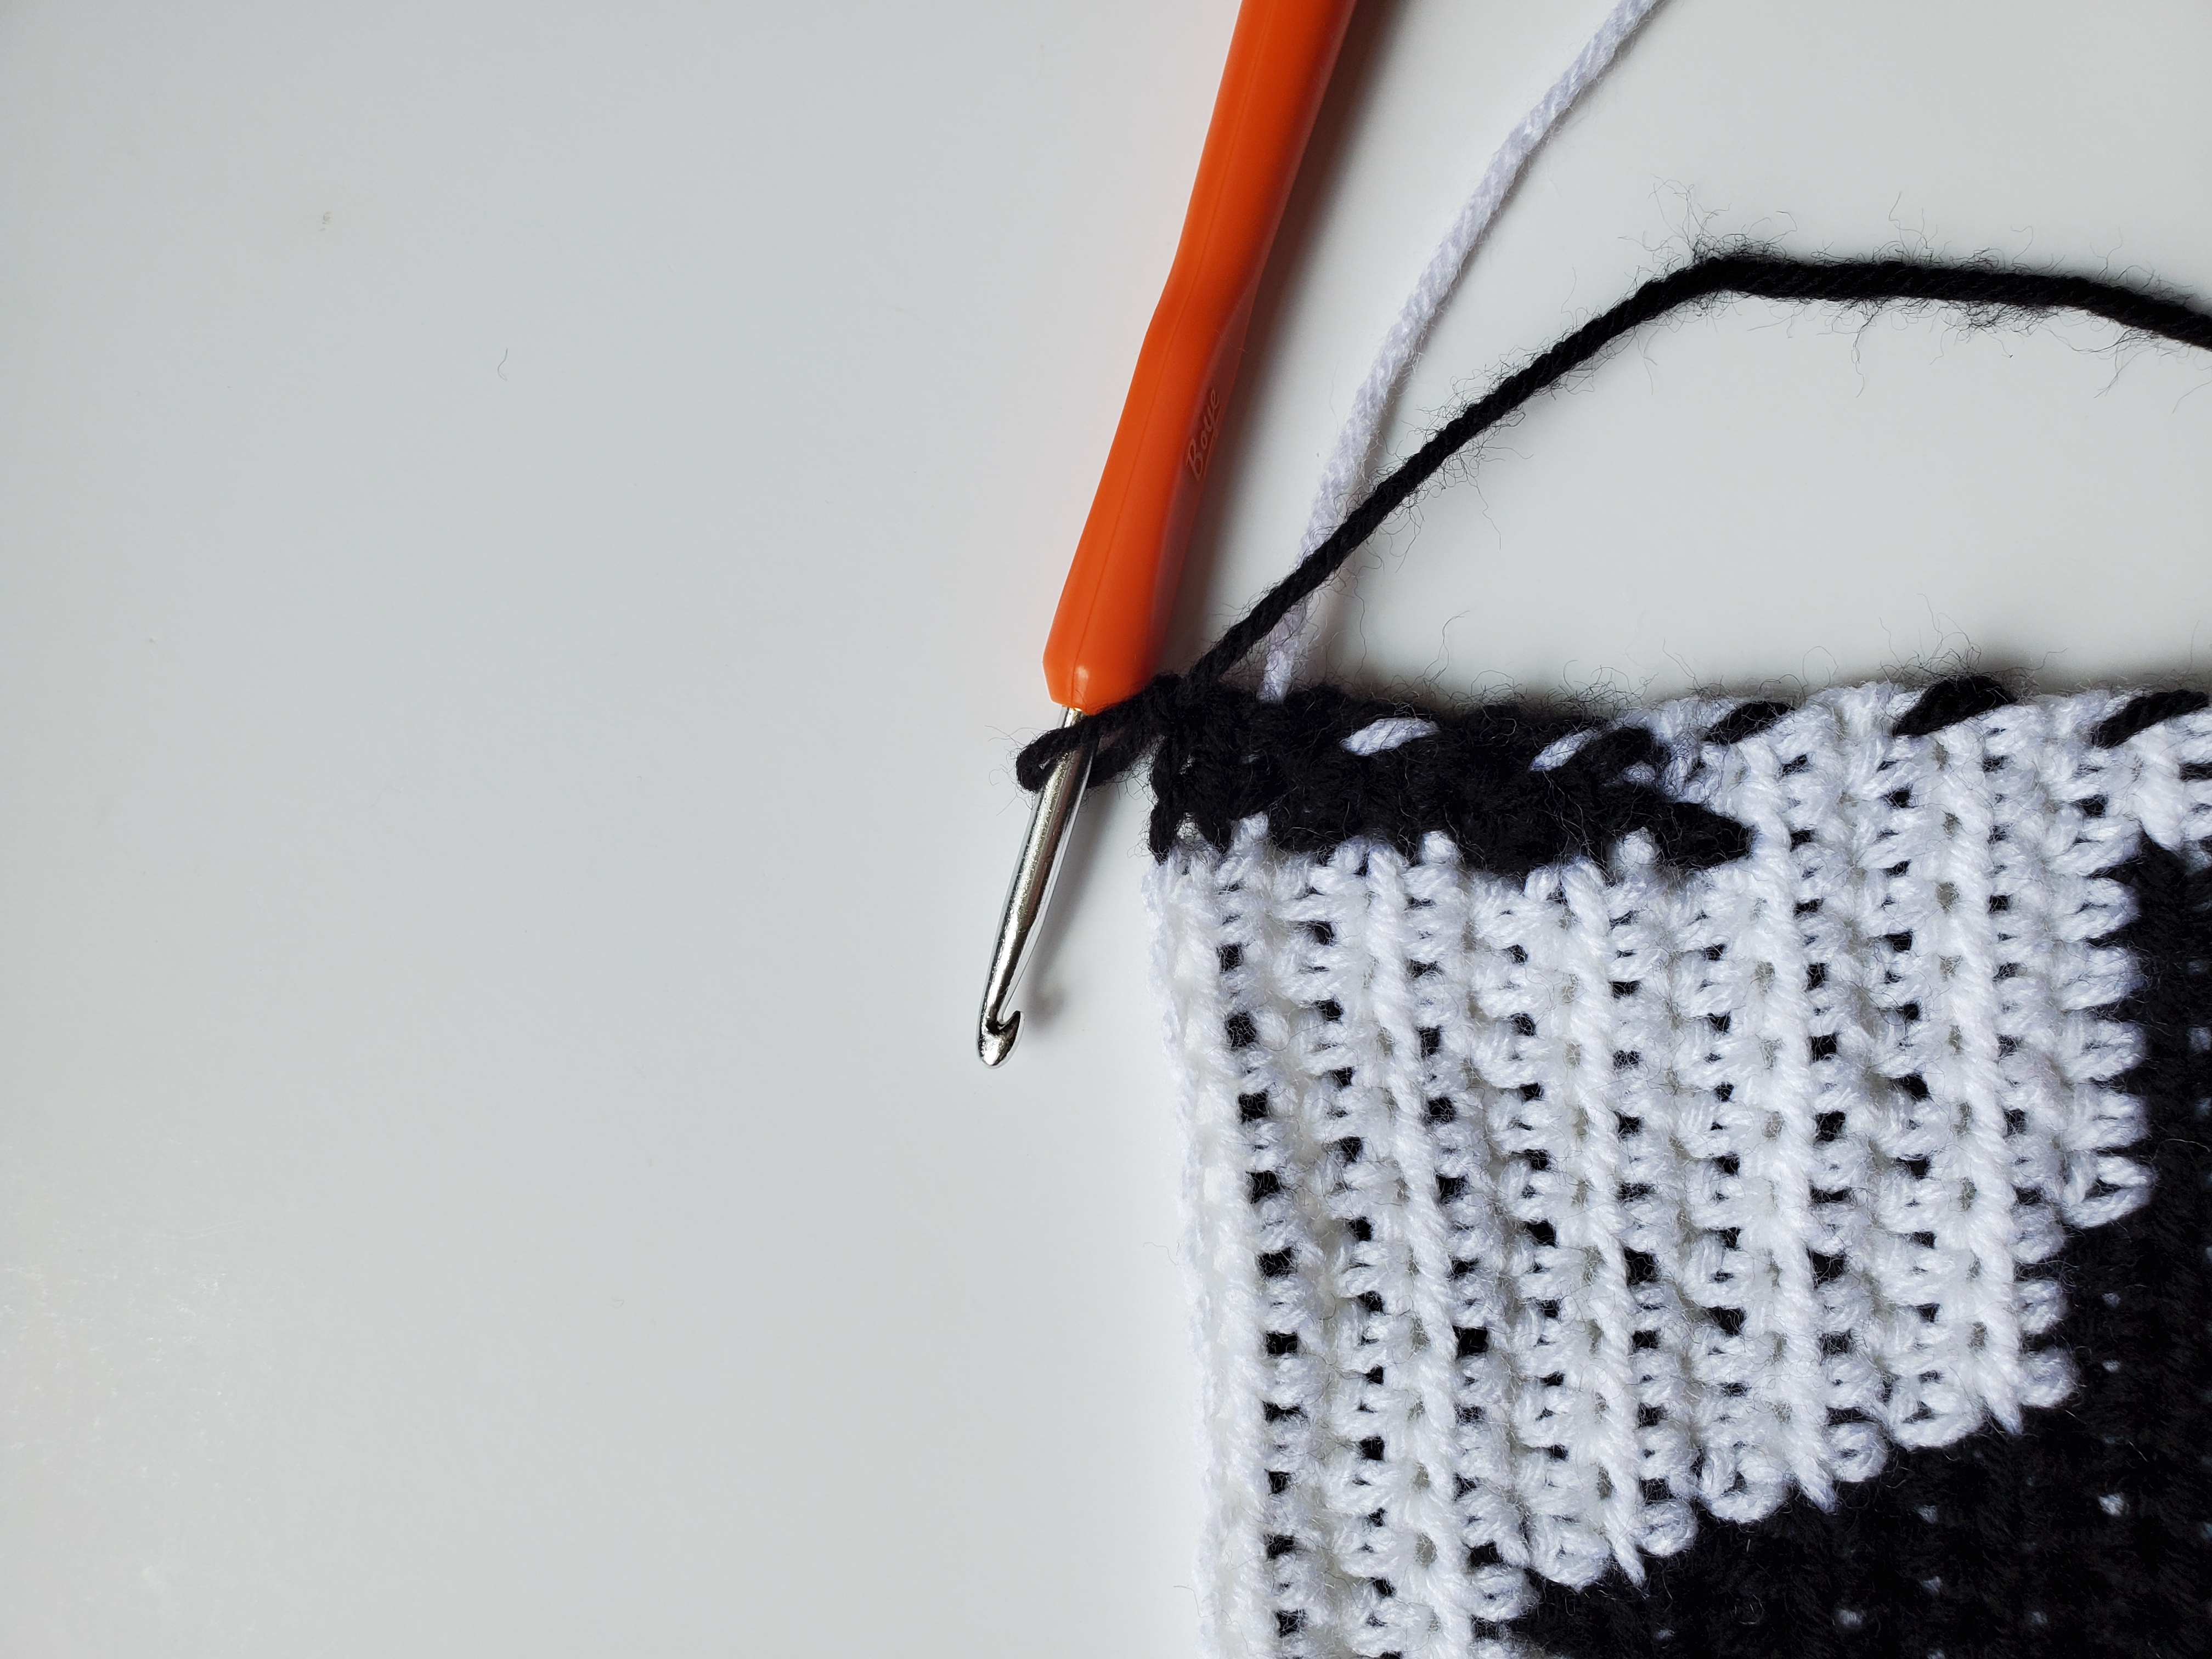
  • I carry the yarn color I’m not using with me. This prevents having a thousand ends that have to be weaved back into the project, however, you will be able to see the black yarn between the white. 
  • Make sure that you change yarn colors correctly. This prevents your colors from “straying” away.
  • Remember to untwist your skeins occasionally to prevent future knots and entanglement.

Black and White Star Baby Blanket Pattern:

With black yarn and 5 mm crochet hook:

  • Ch 103, in second ch from your hook, make 1 hdc in each ch across (102 sts)
  • Rows 1-62: Turn, ch 1 and follow the squares on the graph. The white squares indicate that 1 white hdc should be placed and the same with the black. I started Row 1 by reading the graph, left to right. Please see image above or high quality PDF below.
  • Click here for PDF version of the pattern.
  • If you want to make the shell border, don’t cut your yarn yet. When I ended the last row, I had black yarn on my hook already, so I went ahead and cut the white yarn off.

Shell Border (optional)

With 5 mm crochet hook and black yarn:

  • If you haven’t already, turn and ch 1. Skip 2 sts, in the third st make a total of 5 dcs, all separted by a ch 1 (do not ch 1 after the 5th dc).
  • In other words, in the same st: dc and ch 1, dc and ch1, dc and ch1, dc and ch1, and dc.
  • Skip 2 sts and make a sl st in the next st.
  • Repeat all the way to the end of the row. 
Start of the shell border
Turn and ch 1
Close up of shell stitch
Dc and ch 1 x4, dc
3 shell stitches for border
3 shells
  • You should end with a sl st in the last st (if not it’s ok if a shell is there, just keep repeating the pattern around).
  • If you end with a sl st in the last st, ch 1 to adjust for the corner and sl st into the same st.
  • Continue to skip 2 sts (or rows now that we’re down the side) make the shell, sl st, skip 2, all the way around the blanket.
  • The sides of the blanket can be difficult to see where you need to skip two and put your stitches. Try you’re best to stay consistent on both sides. I would count the shells to make sure they match.

And you’re done! I think this black and white star baby blanket turned out great! It took some time, but we always stitch with love, don’t we? 

As always, thank you for checking out my crochet patterns! Until next time!

A Whale of a Pattern! Try this Free Crochet Pattern Today!

Learn to crochet this free whale pattern in a day! This post contains: materials needed, the free whale pattern, and pictures to help guide you.

***Please note that this post may contain affiliate links. This means that I may receive a commission if you purchase something through these links (at no cost to you!). Thank you for your support!***

Summer is finally here! Can you believe it? I feel like this year has flown by so quickly and it’s more than halfway over! 

Why not celebrate by crocheting this cute little whale? I had a lot of fun coming up with another crochet stuffed animal, and having it be nautical themed just seemed appropriate for the season.

This crochet whale toy is made very similarly to my frog toy. I will admit, that I’ve been in the groove for making these flatter stuffed animals. They are kind of like amigurimi, but you have to sew two sides of the project together. 

When completed, the whale is about 7″ x 5,” but depends on your tension.

I use Red Heart Super Saver, medium 4 worsted weight yarn for this project. You can use a different type of yarn if you prefer. If it’s not medium 4 worsted weight, then it might come out bigger or smaller than expected!

This project took me less than a day to complete, so it’s a super quick crochet pattern. Perfect for a last minute crochet gift!

Alright let’s dive in!

Materials Needed:

  • 5 mm crochet hook 
  • <1 skein of Dusty Gray Yarn by Red Heart Super Saver 
  • <1 skein of Soft White Yarn by Red Heart Super Saver
  • <1 skein of Black Yarn by Red Heart Super Saver 
  • Poly-fil for stuffing
  • Stitch marker
  • Tapestry Needle
  • Scissors

Abbreviations Used:

(Please note that these are in US terms, not UK)

  • Ch – chain
  • Mc – magic circle
  • St – stitch
  • Sl st – slip stitch
  • Sc – single crochet
  • Hdc – half double crochet

Special Instructions:

  • When working on the body of the crochet whale, do not join to your first stitch with a slip stitch. Continue to single crochet around. Your stitch marker will come in handy to mark the beginning of your rounds. That way, you won’t get lost.
  • When working the tail of the whale (haha), you will notice that some of the rows do not require chain 1’s. This is intentional.
  • I sew both the whale panels together using slip stitches with the crochet hook. Instead of cutting my yarn and pulling through for the second side of the whale, I keep my hook on so I can do this. This step is up to you, you can sew with the tapestry needle instead if you would like.
  • Sew the facial features onto the front panel before joining the two panels together. This is so you can tie your strands of yarn securely inside of the whale.
  • The rounds end with a (x), where x represents the number of stitches you should have.

Crochet Whale Body (Front Panel)

With 5 mm crochet hook and Dusty Gray yarn:

Main Body:
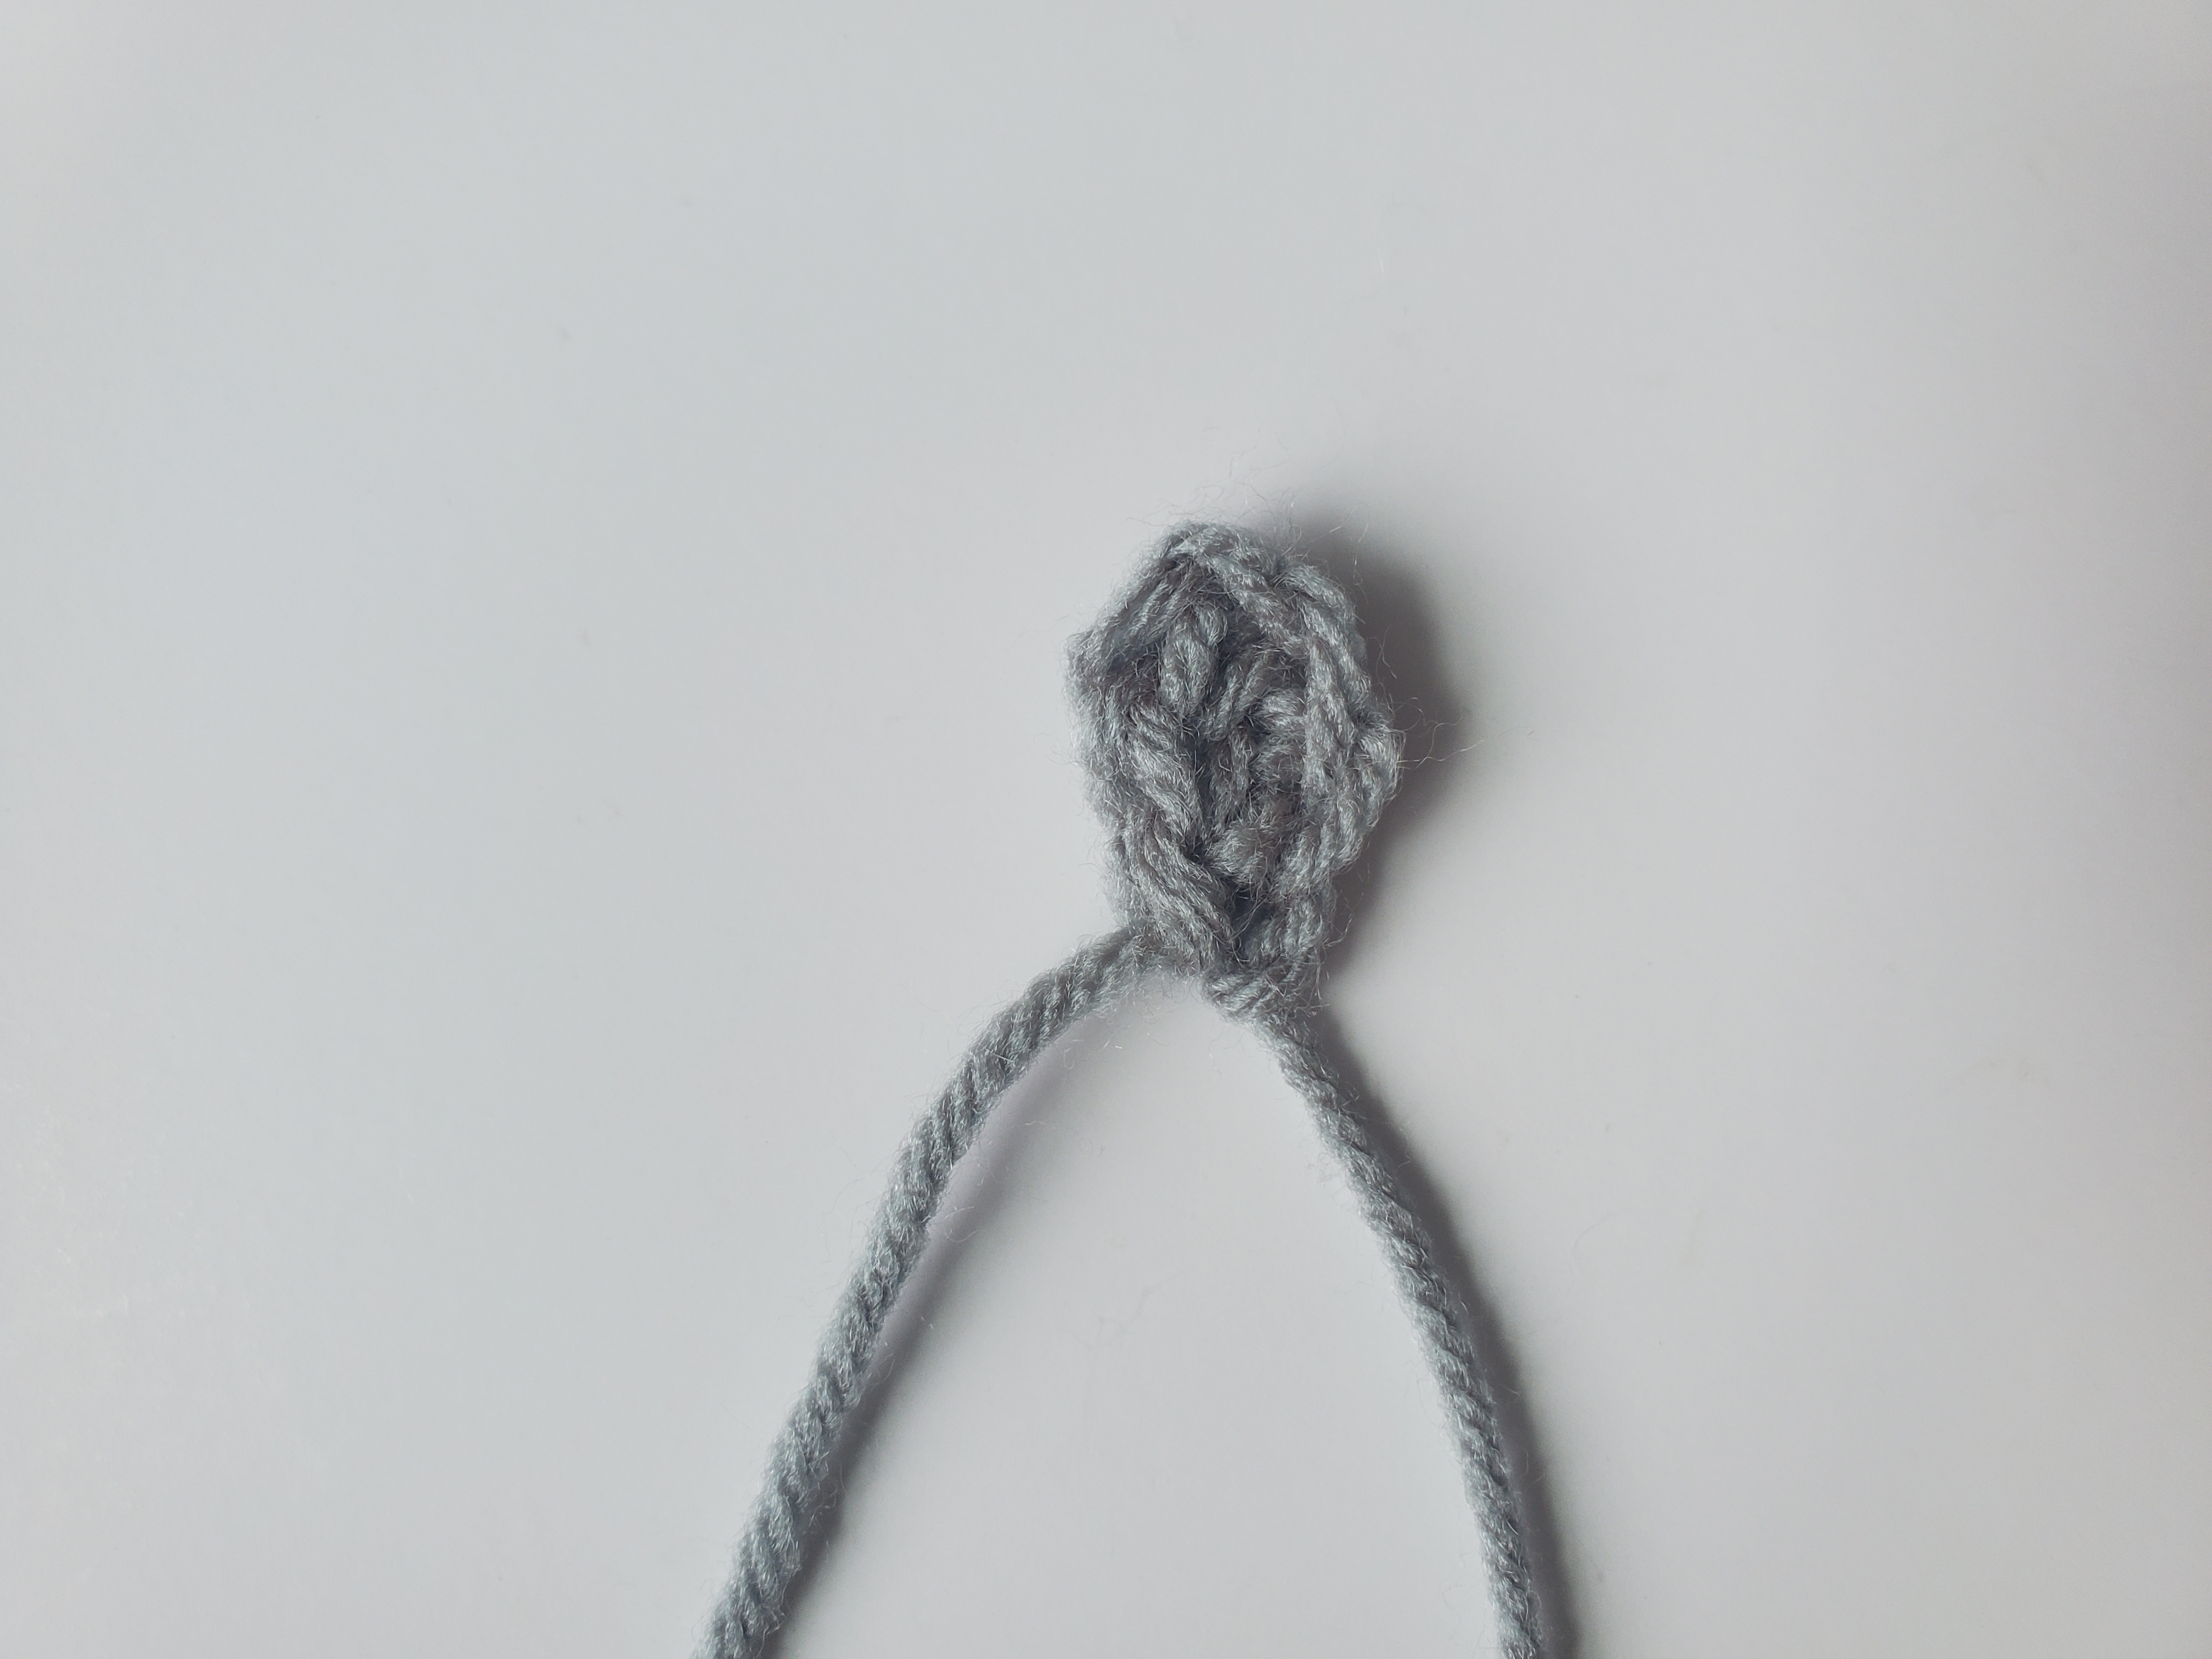
  • 6 sc in mc (if you don’t like the mc, you can ch 2 and start in the second from the hook, but the center “hole” tends to be a little bigger)
  • Round 1: 2 sc in each st around (12 sts)
  • Round 2: 2 sc in first st, 1 sc in next st. Repeat around (18 sts)
  • Round 3: 2 sc in first st, 1 sc in next 2 sts. Repeat around (24 sts)
  • Round 4: 2 sc in first st, 1 sc in next 3 sts. Repeat around (30 sts)
  • Round 5: 2 sc in first st, 1 sc in next 4 sts. Repeat around (36 sts)
  • Round 6: 2 sc in first st, 1 sc in next 5 sts. Repeat around (42 sts)
  • Round 7: 2 sc in first st, 1 sc in next 6 sts. Repeat around, sl st into the first st (48 sts)
Tail:
  • Round 8: Ch 1, turn, 1 sc in next 5 sts, sl st into next 5 sts (10 sts)
  • Round 9: Turn, sl st into next 3 sts (do not sl st into the first st after you turn…sl st into the next, you’ll lose a st here), 1 hdc into next 2 sts, 1 sc in next 4 sts (9 sts)
  • Round 10: Ch 1, turn, 1 sc into next 3 sts, sl st into next 2 sts (5 sts)
  • Round 11: Turn, sl st into next st (again, not the first st, but the next). 1 hdc in next st, 1 sc in next 2 sts (4 sts)
  • Round 12: Ch 1, turn, 1 sc in next sts (2 sts)
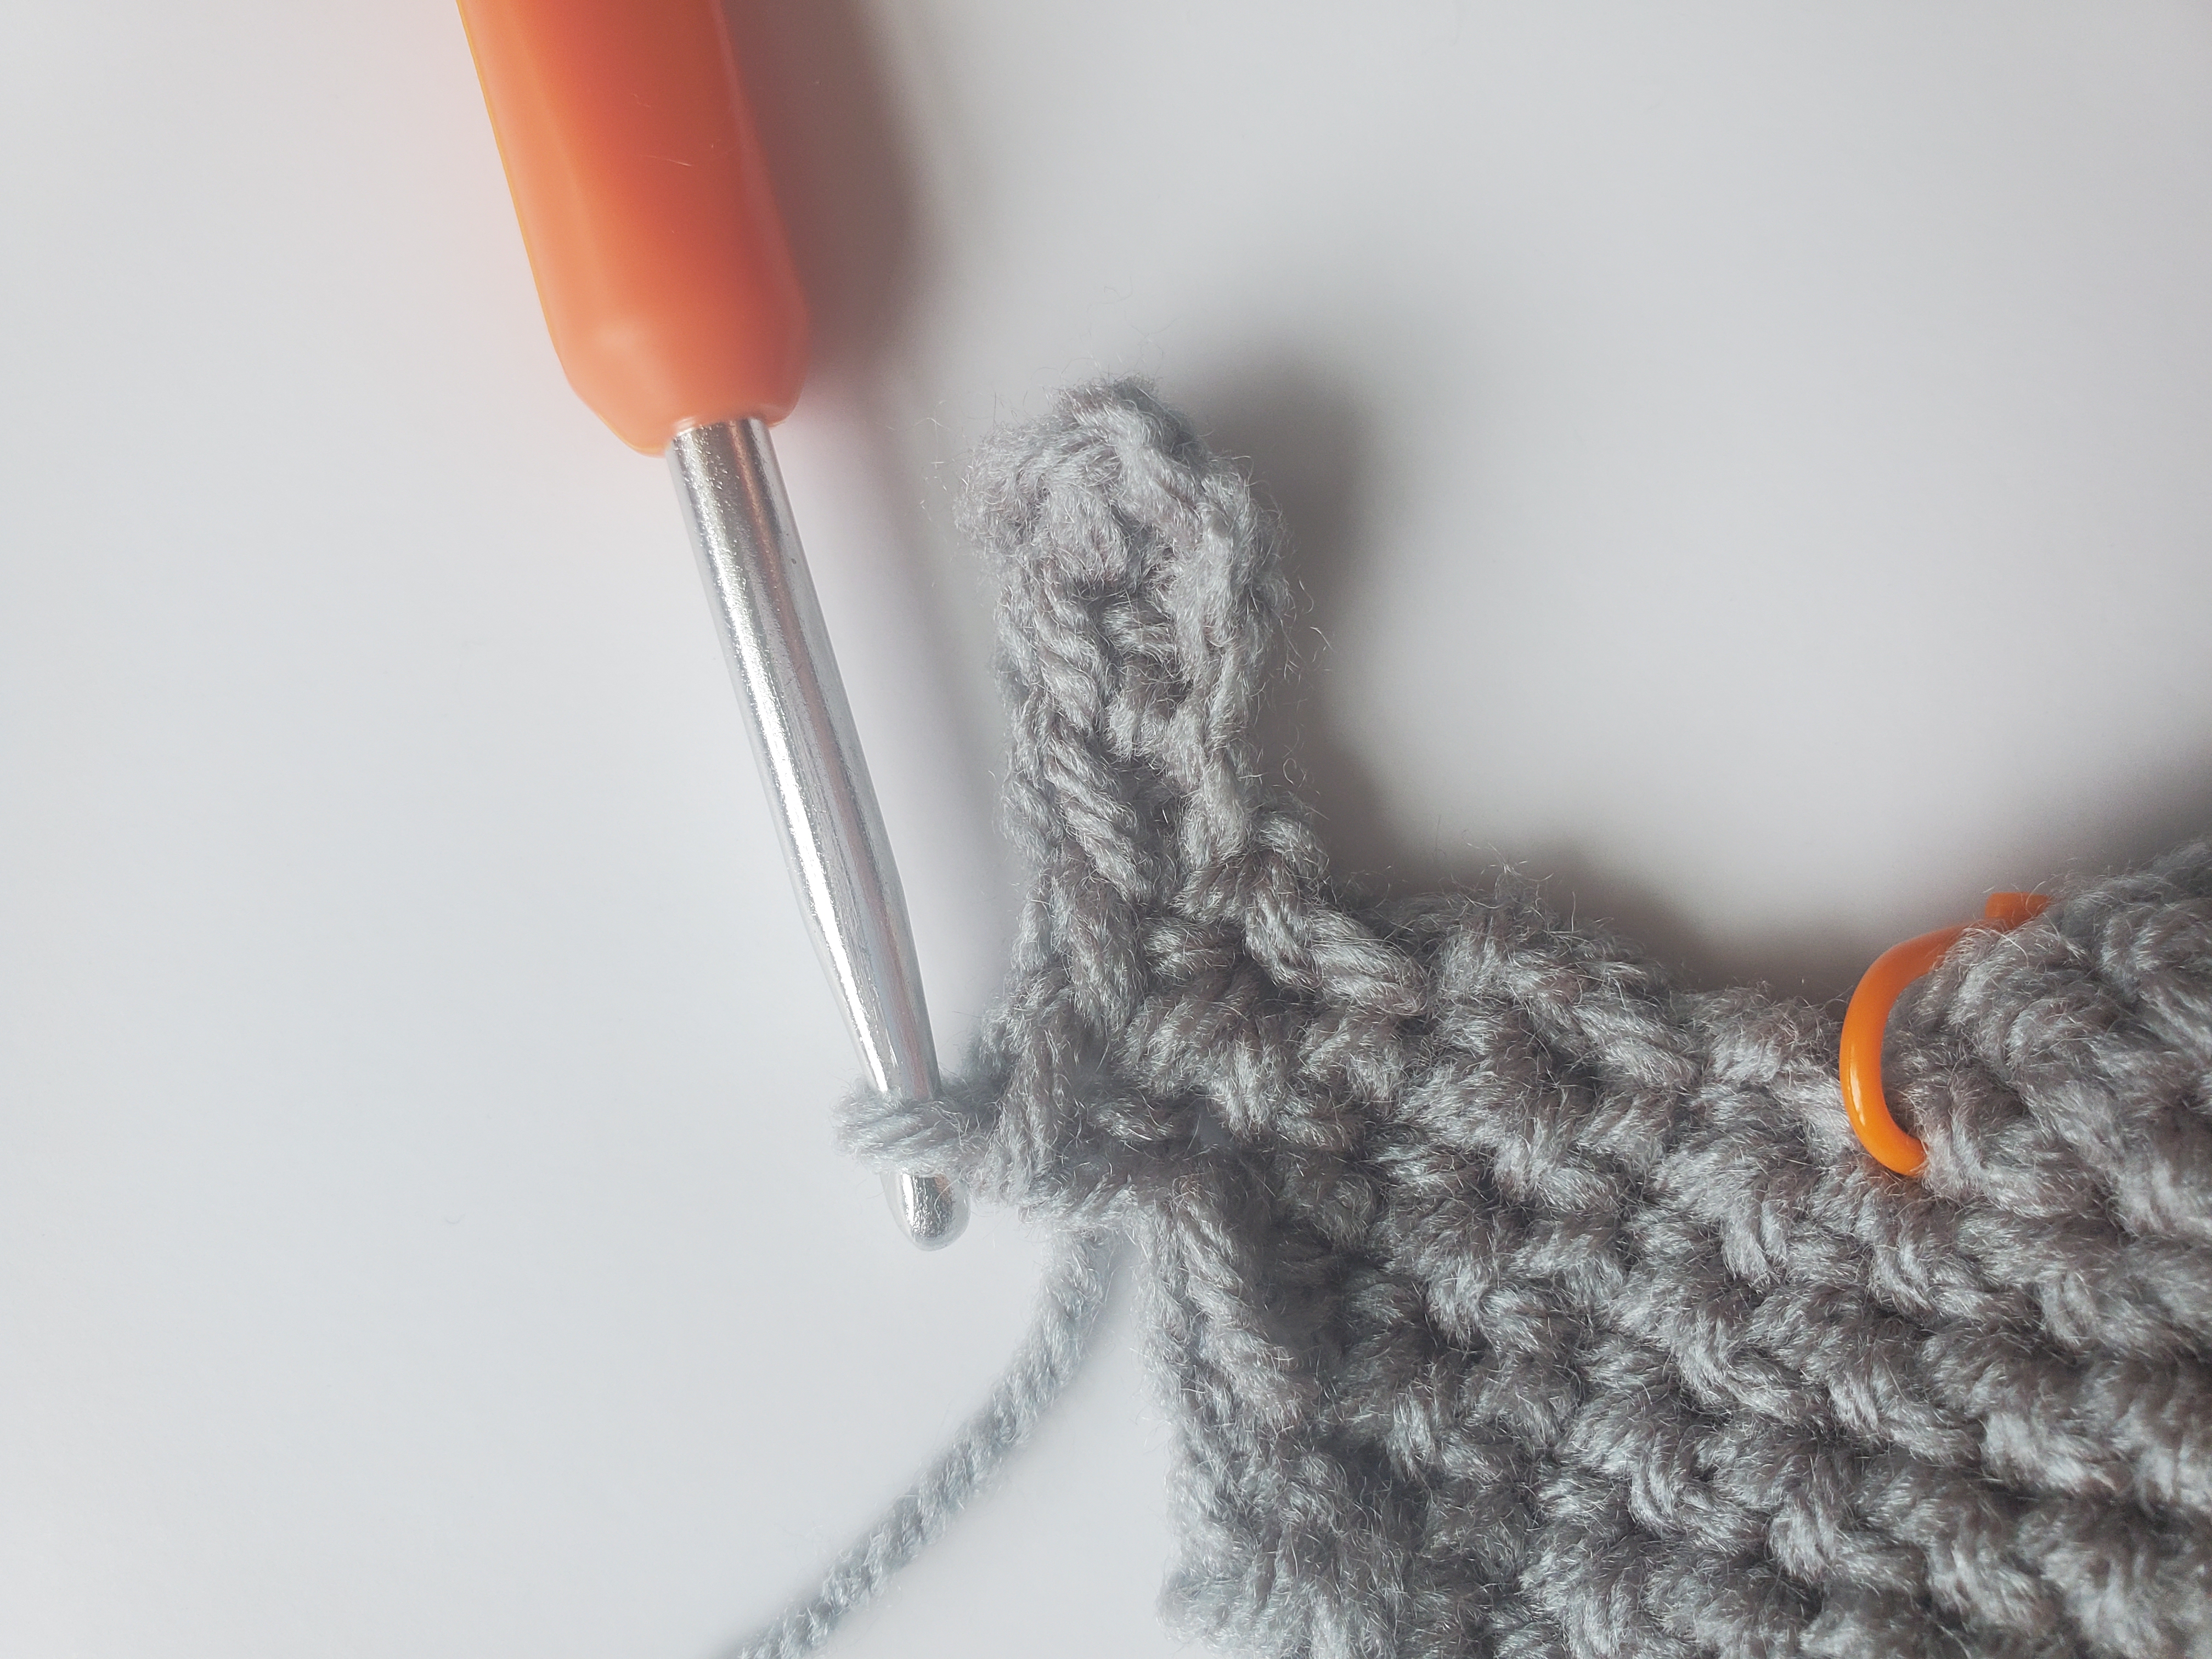
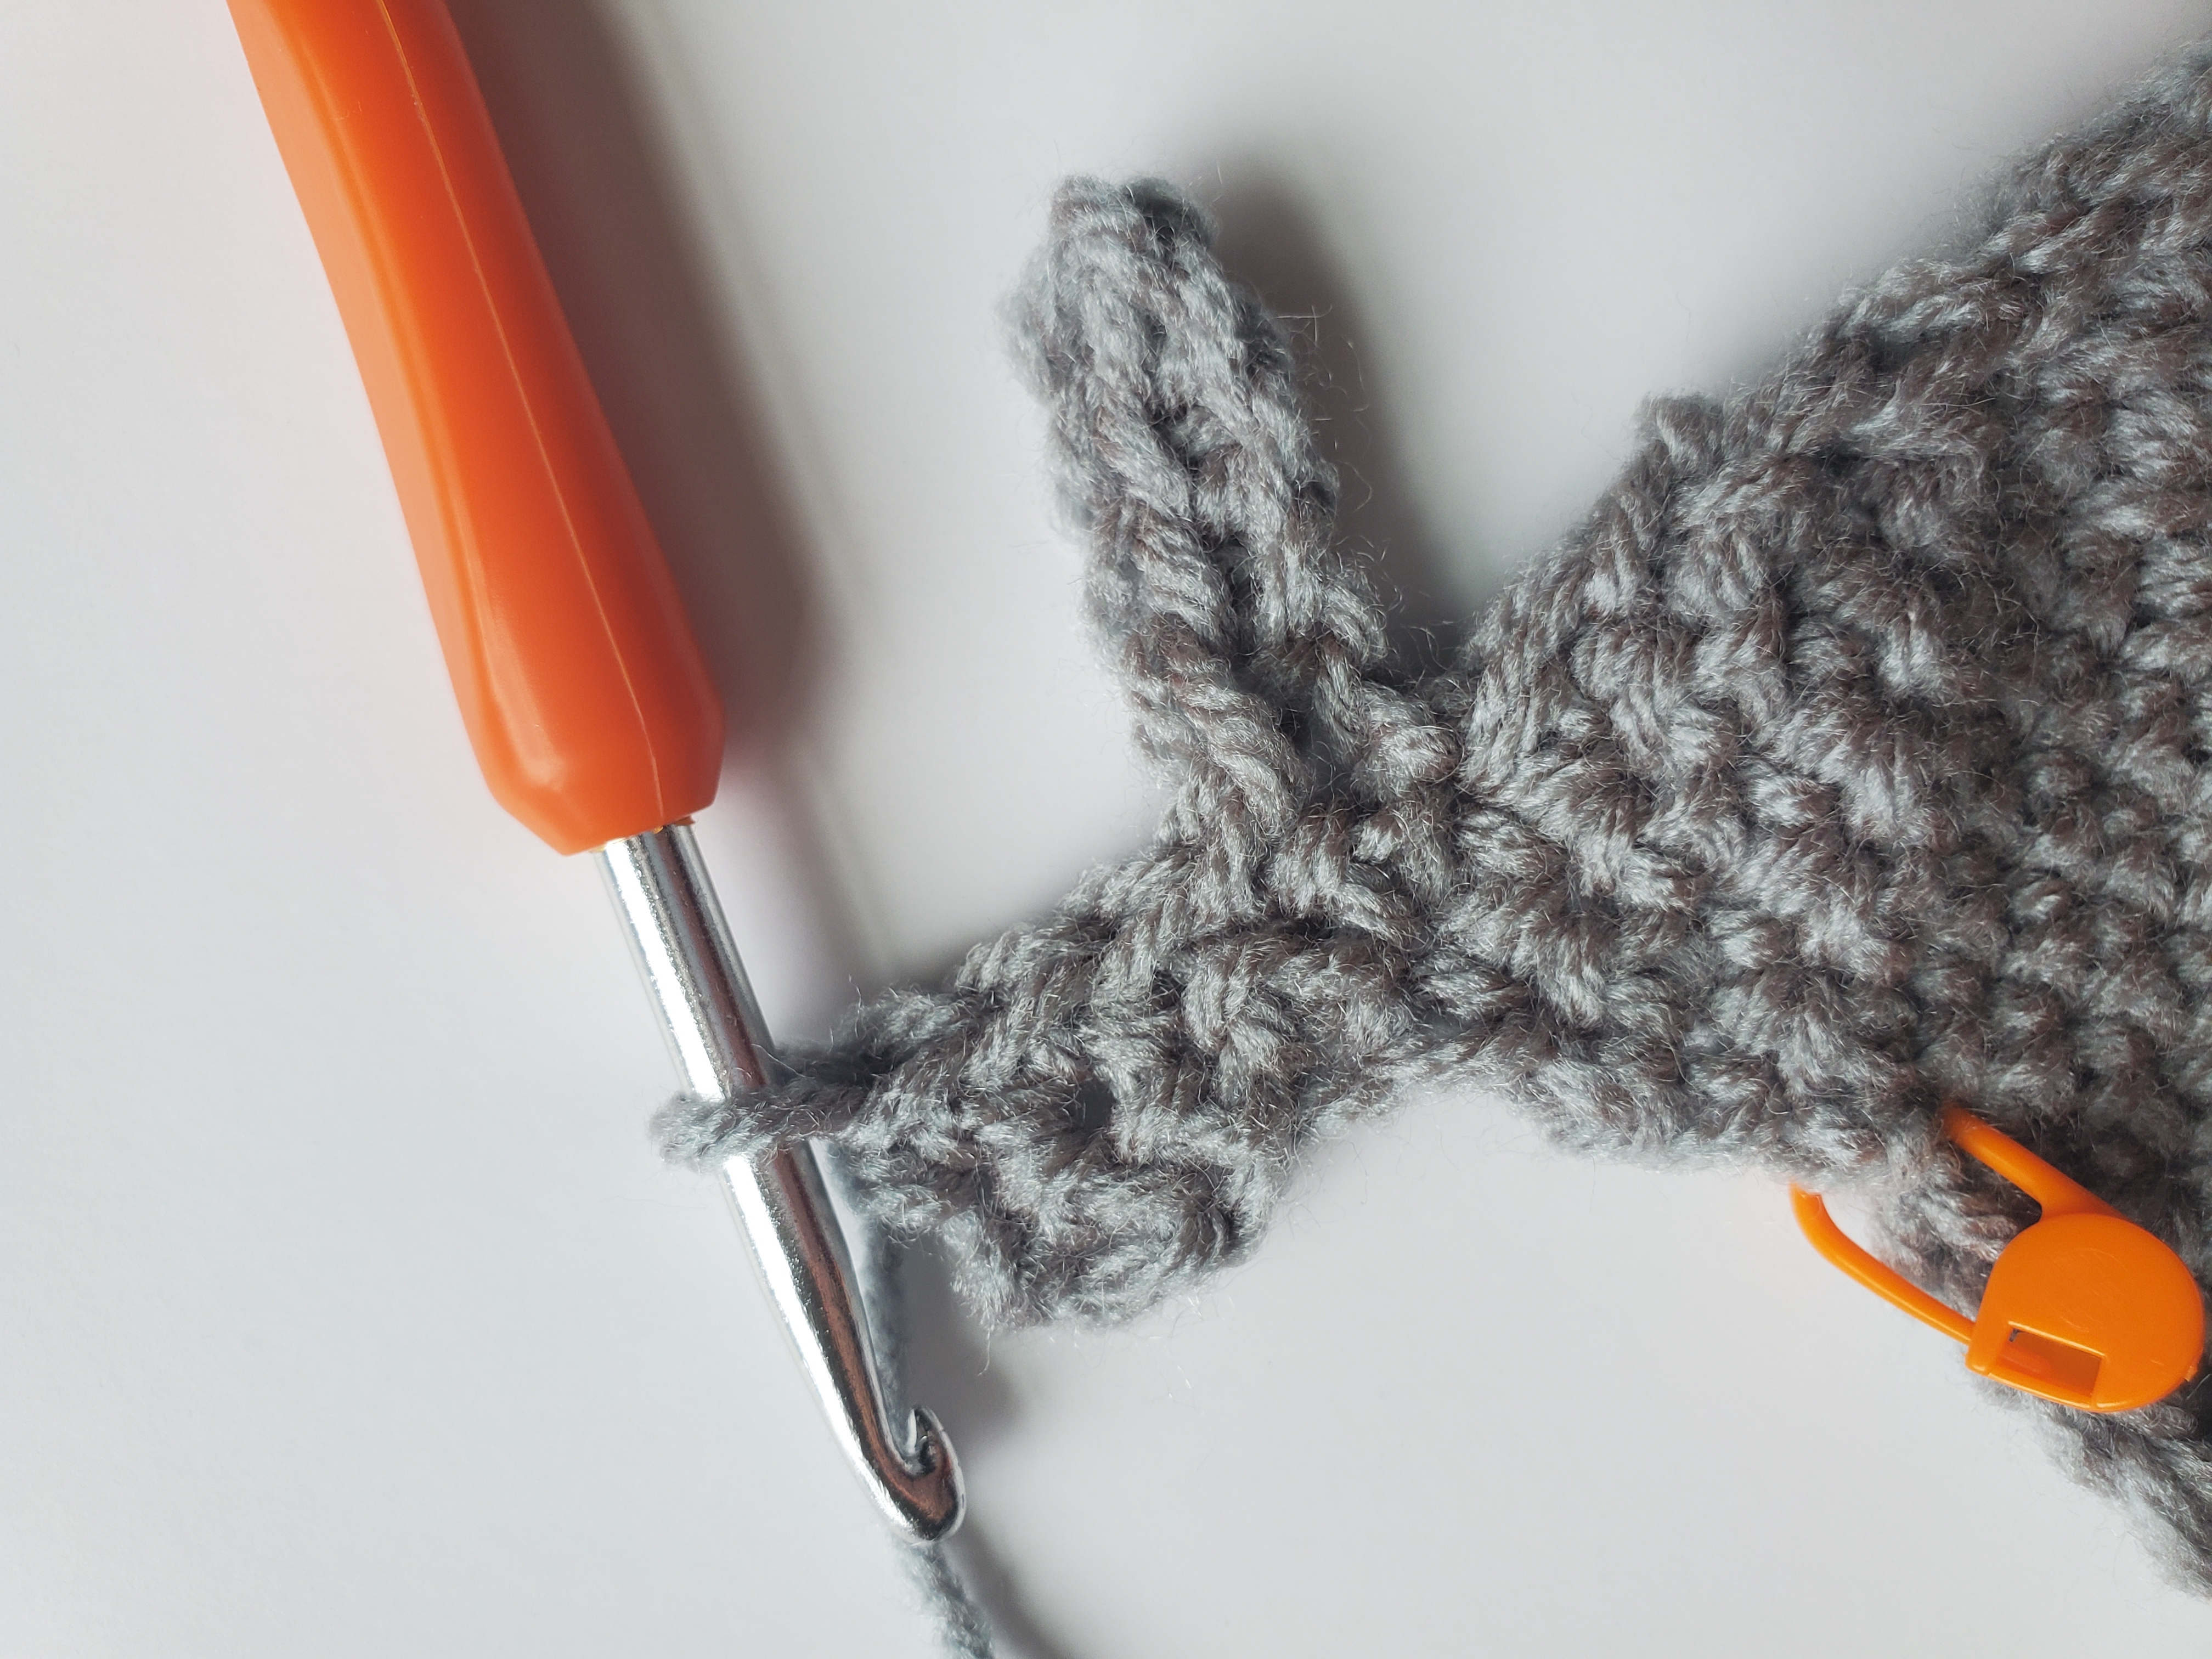
  • Round 13: Ch 4, turn, (from second ch from hook), 1 sc into next 5 sts (see pic below) (5 sts)
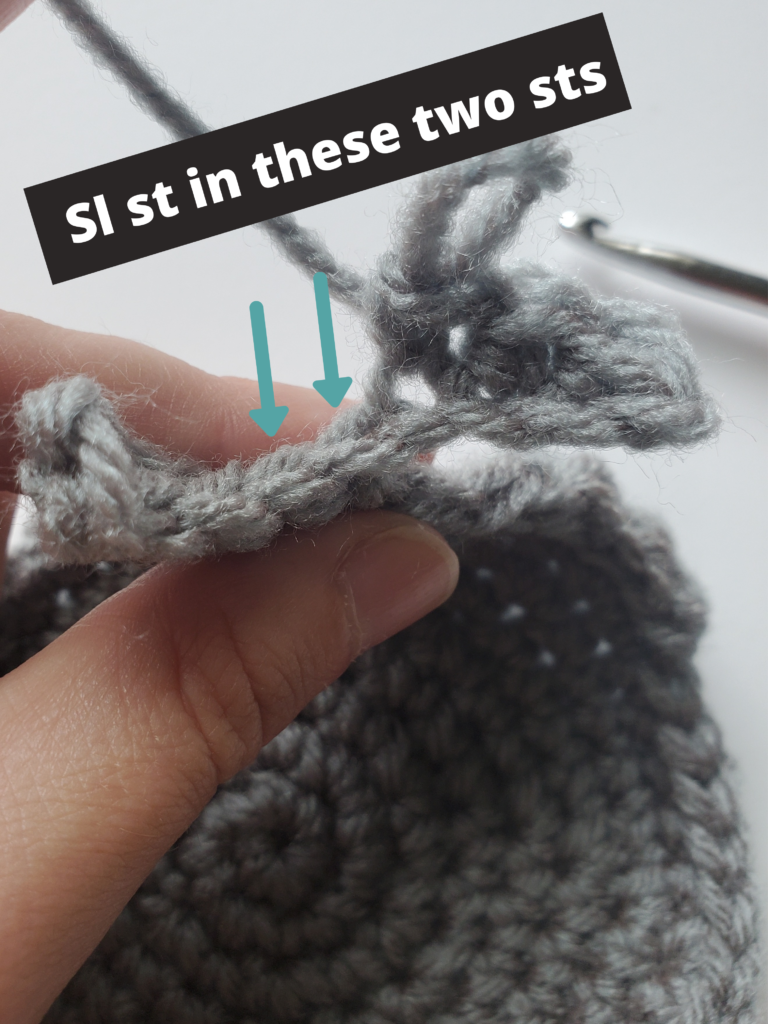
  • Round 14: Ch 4, turn, (from second ch from hook), 1 sc into next 3 sts, sl st into next 2 sts, 1 sc into next 3 sts (8 sts)
  • Round 15: Turn, sl st into next 4 sts, 1 sc in last 3 sts (7 sts)
  • Cut yarn with scissors and pull through.
Beginning of crochet whale fin
Round 13
Middle of crochet whale fin
Round 14 (where to sl st)
Finished fin
Round 15

Crochet Whale Body (Back Panel)

With 5 mm crochet hook and Dusty Gray yarn:

Body:
  • 6 sc in mc
  • Repeat Rounds 1-6 from front panel (above). 
  • Round 7: 2 sc in first st, 1 sc in next 6 sts, Repeat around (48 sts)
Tail (Back Panel):
  • Round 8: 1 sc in next 5 sts (5 sts)
  • Round 9: Ch 1, turn, 1 sc in next 5 sts, sl st into next 5 sts (10 sts)
  • Round 10: Turn, sl st into next 3 sts (do not sl st into the first st after you turn…sl st into the next, you’ll lose a st here), 1 hdc into next 2 sts, 1 sc in next 4 sts (9 sts)
  • Round 11: Ch 1, turn, 1 sc into next 3 sts, sl st into next 2 sts (5 sts)
  • Round 12: Turn, sl st into next st (again, not the first st, but the next). 1 hdc in next st, 1 sc in next 2 sts (4 sts)
  • Round 13: Ch 1, turn, 1 sc in next sts (2 sts)
  • Round 14: Ch 4, turn, (from second ch from hook), 1 sc into next 5 sts (see pic below) (5 sts)
  • Round 15: Ch 4, turn, (from second ch from hook), 1 sc into next 3 sts, sl st into next 2 sts, 1 sc into next 3 sts (8 sts)
  • Round 16: Turn, sl st into next 4 sts, 1 sc in last 3 sts (7 sts)
  • Do not cut yarn yet.

Belly

With 5 mm crochet hook and Soft White Yarn:

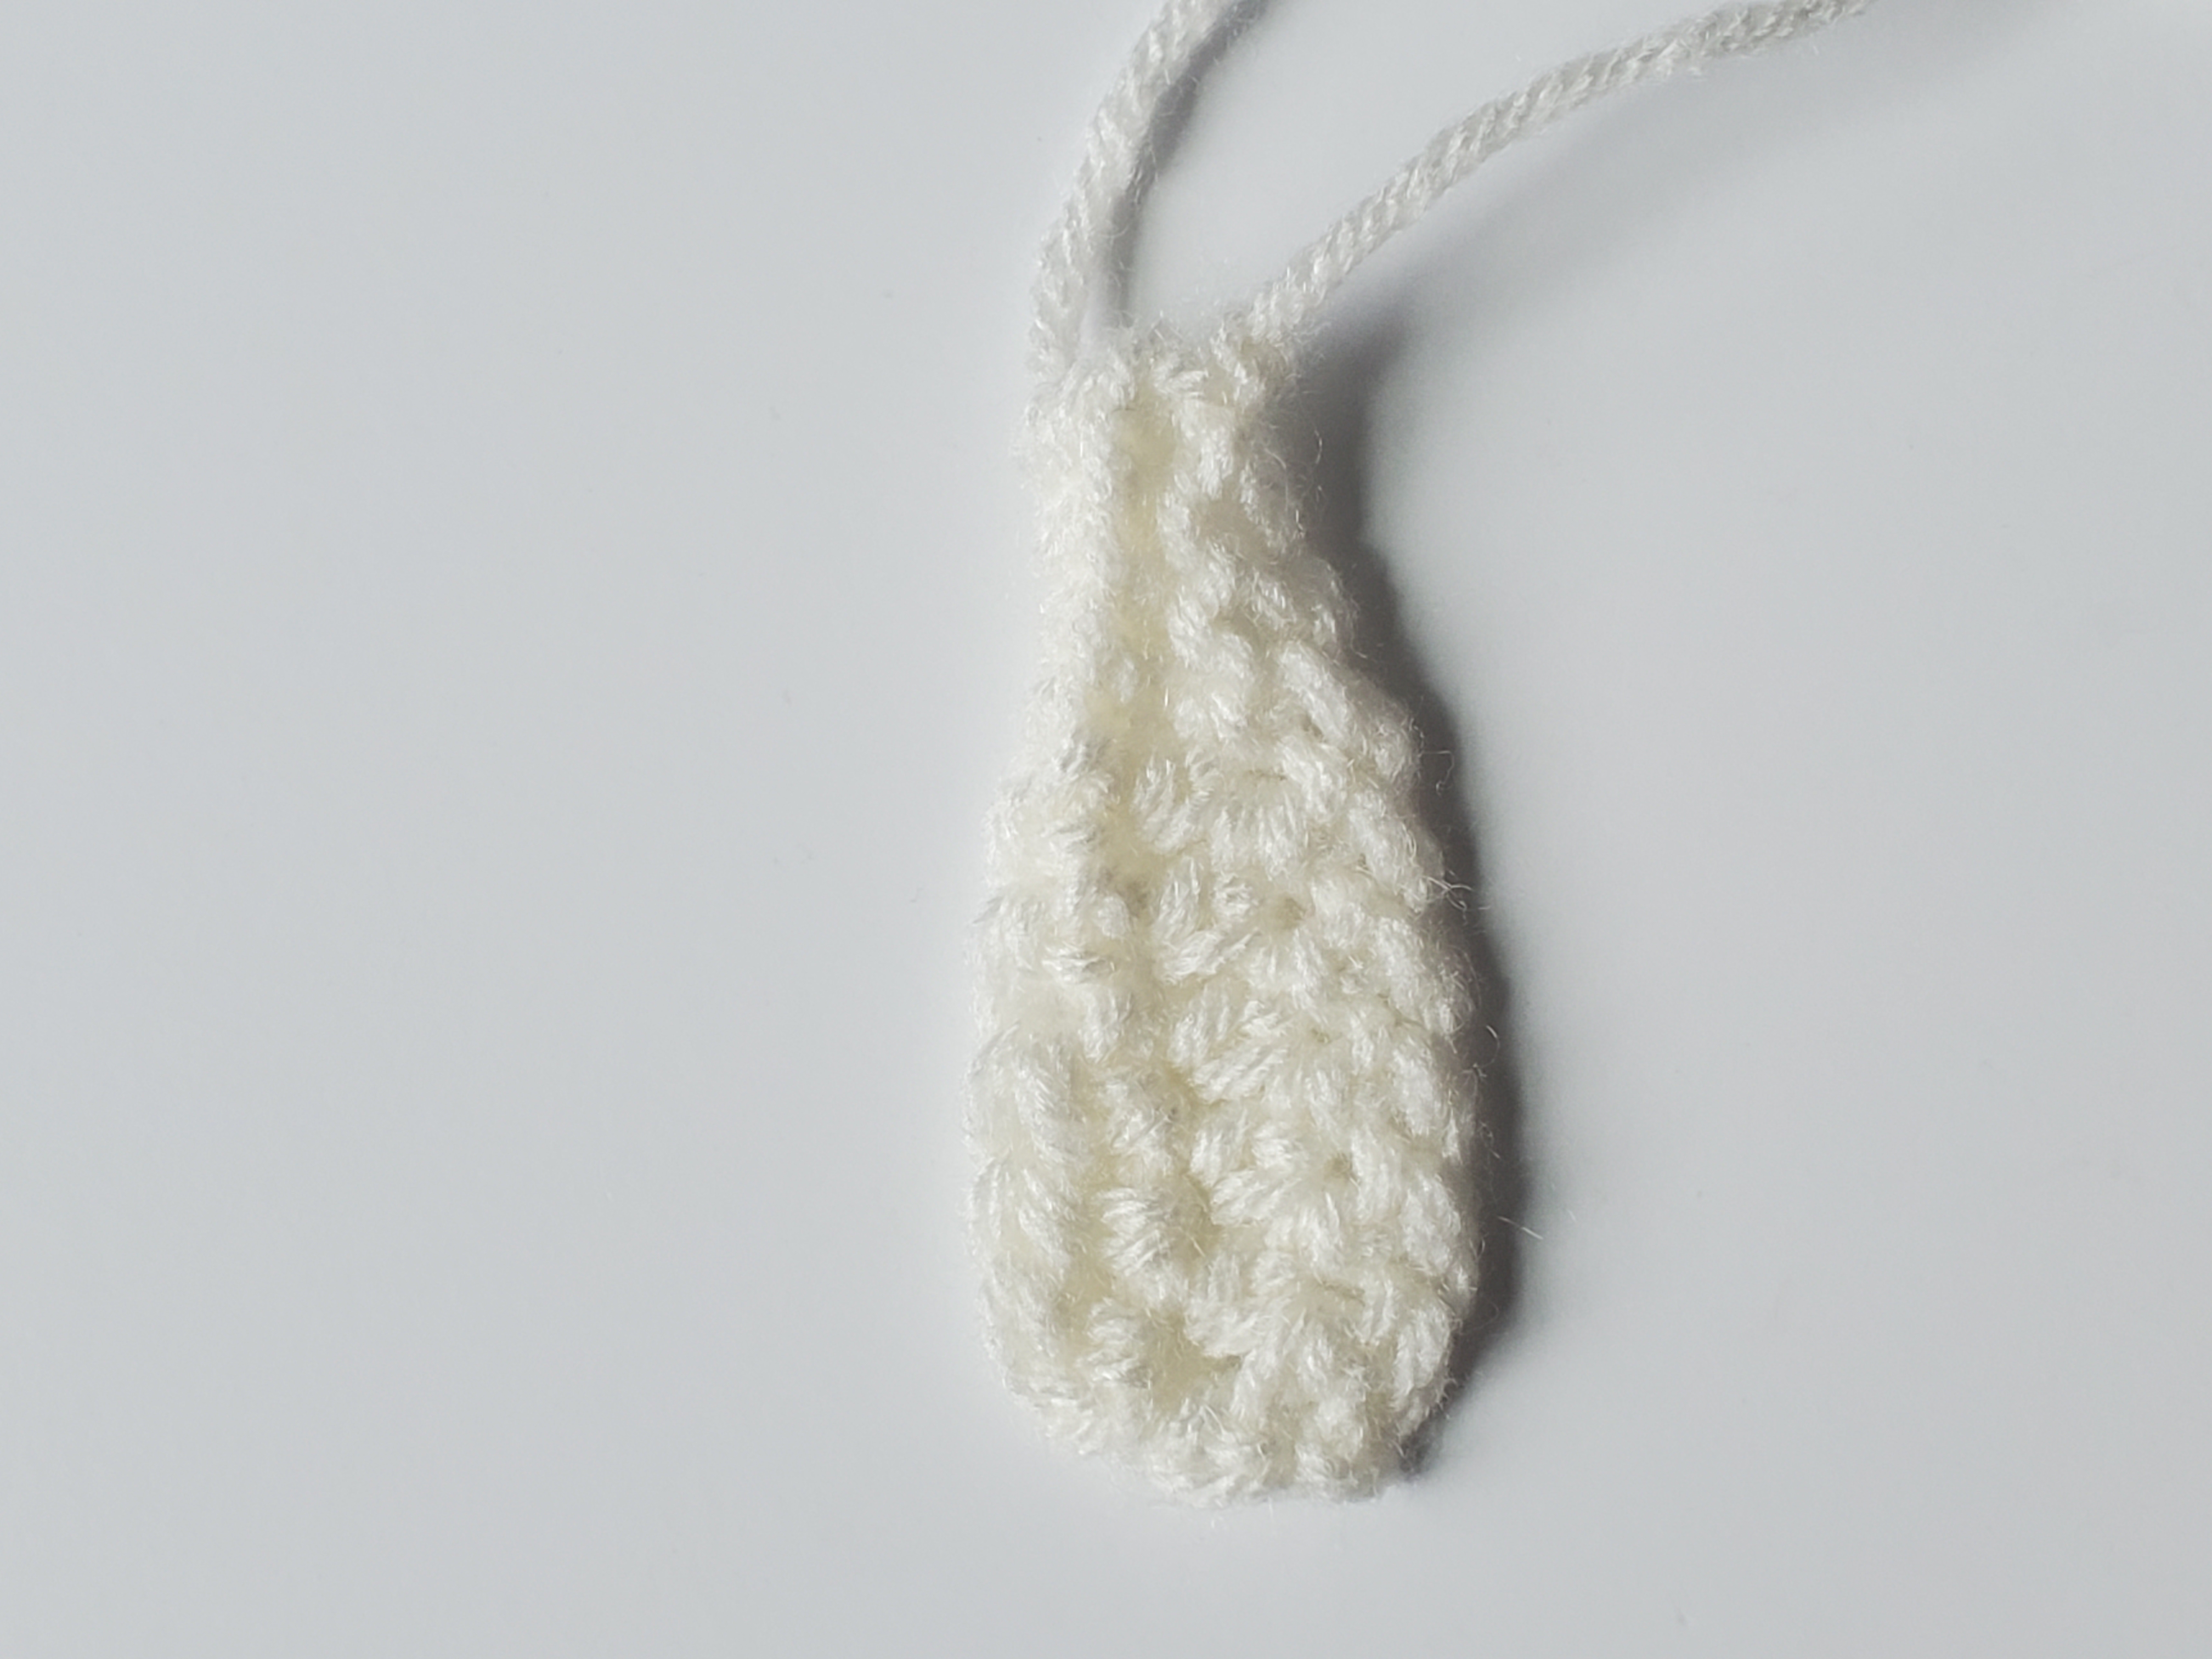
  • Ch 10
  • Row 1: From second ch from hook, 1 sc into the next 6 chs across, sl st into last 3 chs (9 sts)
  • Row 2: Ch 1, turn, sl st into the next 3 sts, make 1 hdc in next 6 sts (9 sts)
  • Row 3: Ch 1, turn, 1 hdc in next 3 sts, 1 sc in next 2 sts, sl st into the next 4 sts (9 sts)
  • Cut a long piece of yarn of for sewing later and pull through.
Belly of whale in soft white yarn
Finished Whale Belly

Facial Features:

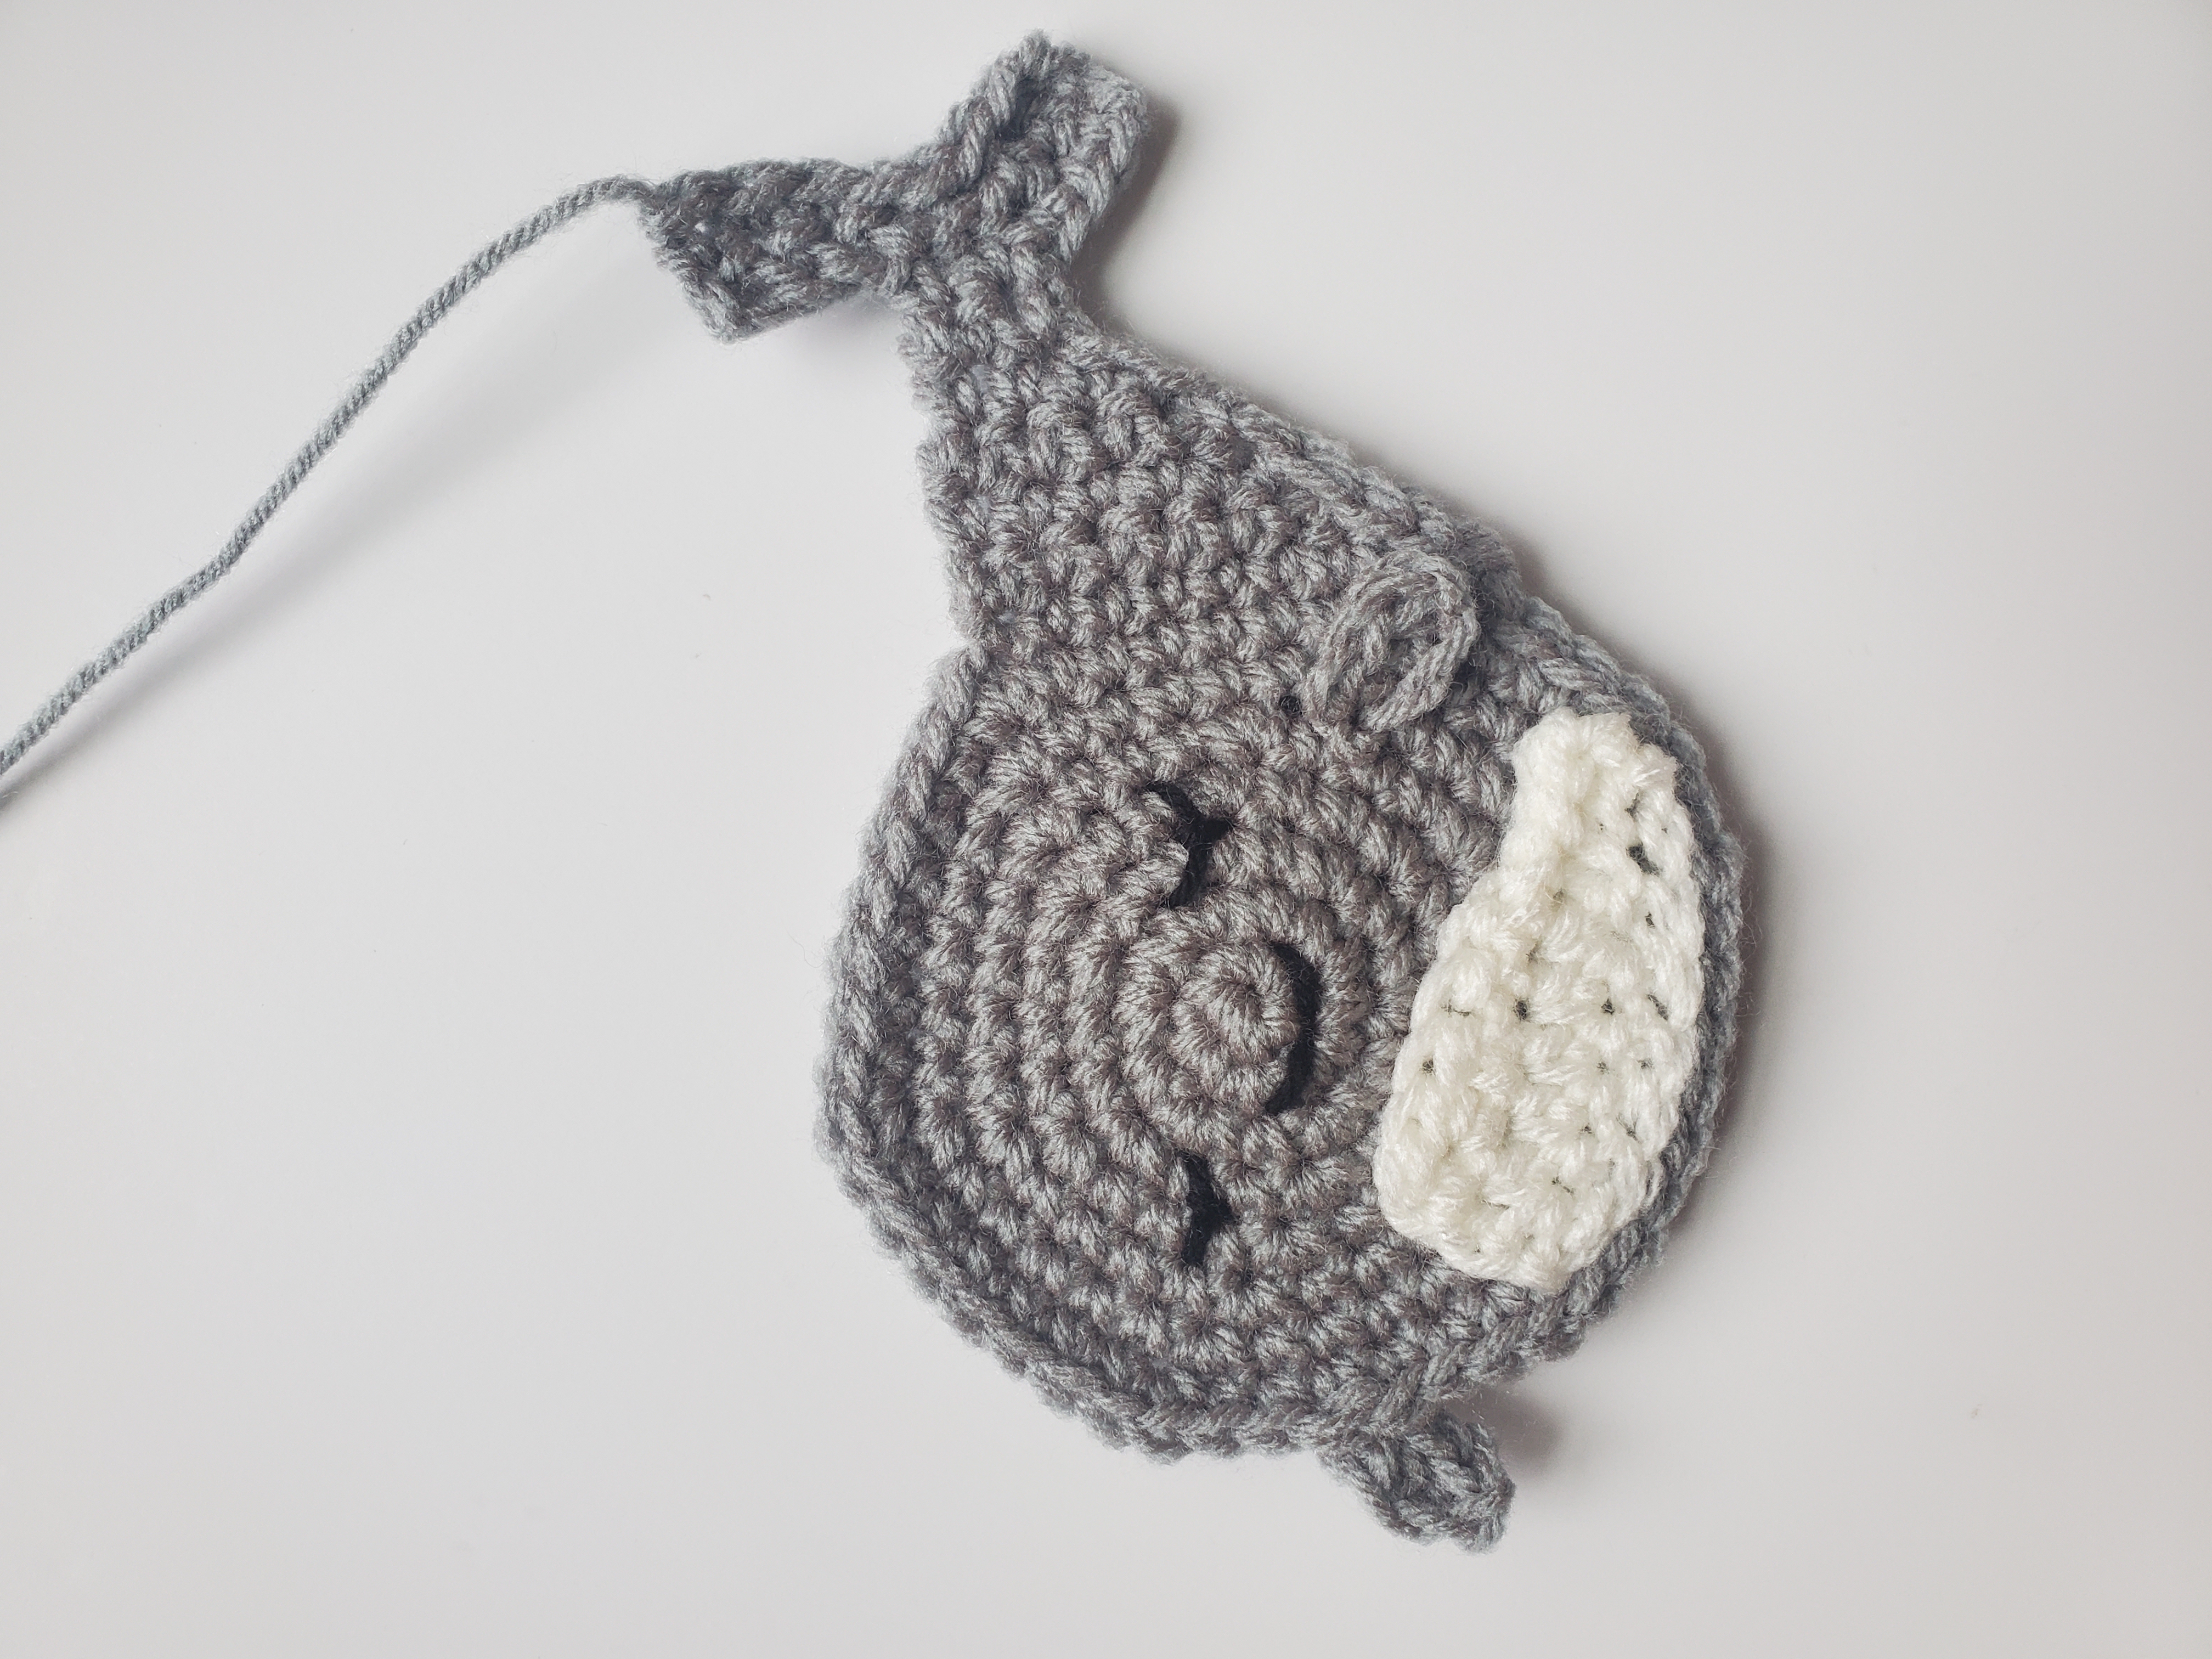
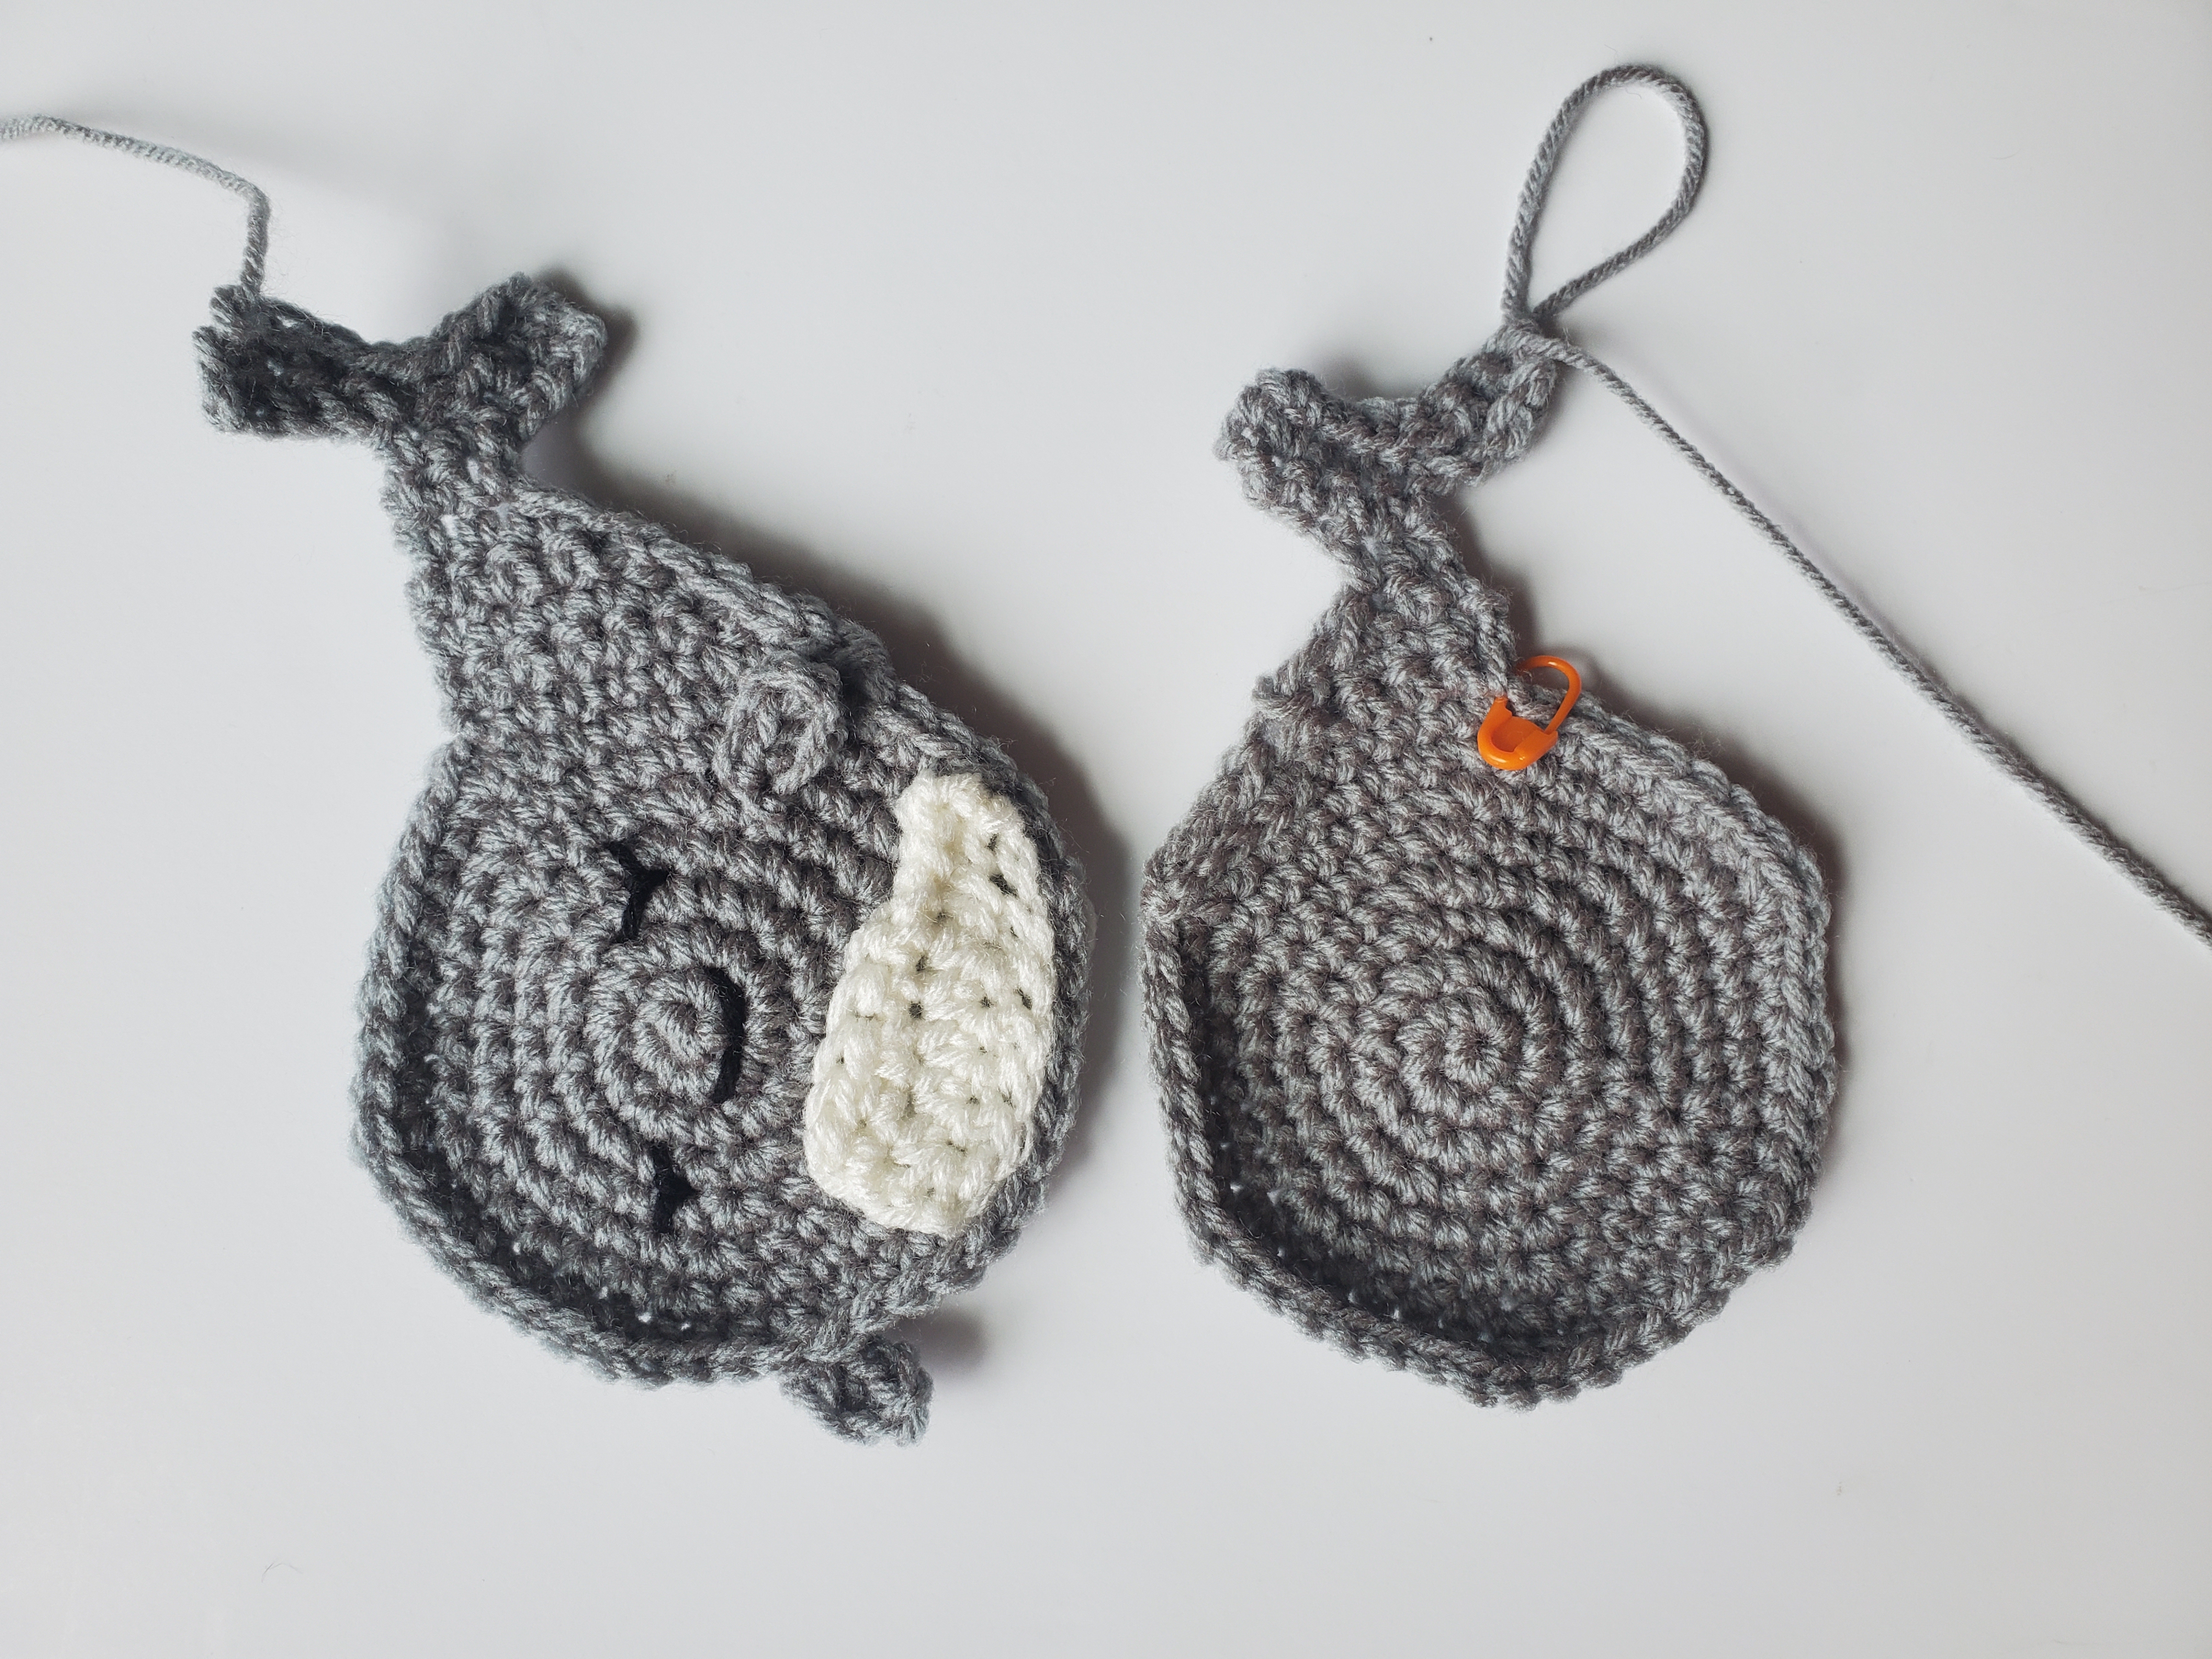
  • With your tapestry needle, sew the belly of the whale onto the front panel. Place the belly in the bottom middle of the crochet whale body.
  • Tie off excess yarn in the back of the panel (this will be hidden inside the whale when completed)
  • With Black yarn, cute 3 long strands off with scissors.
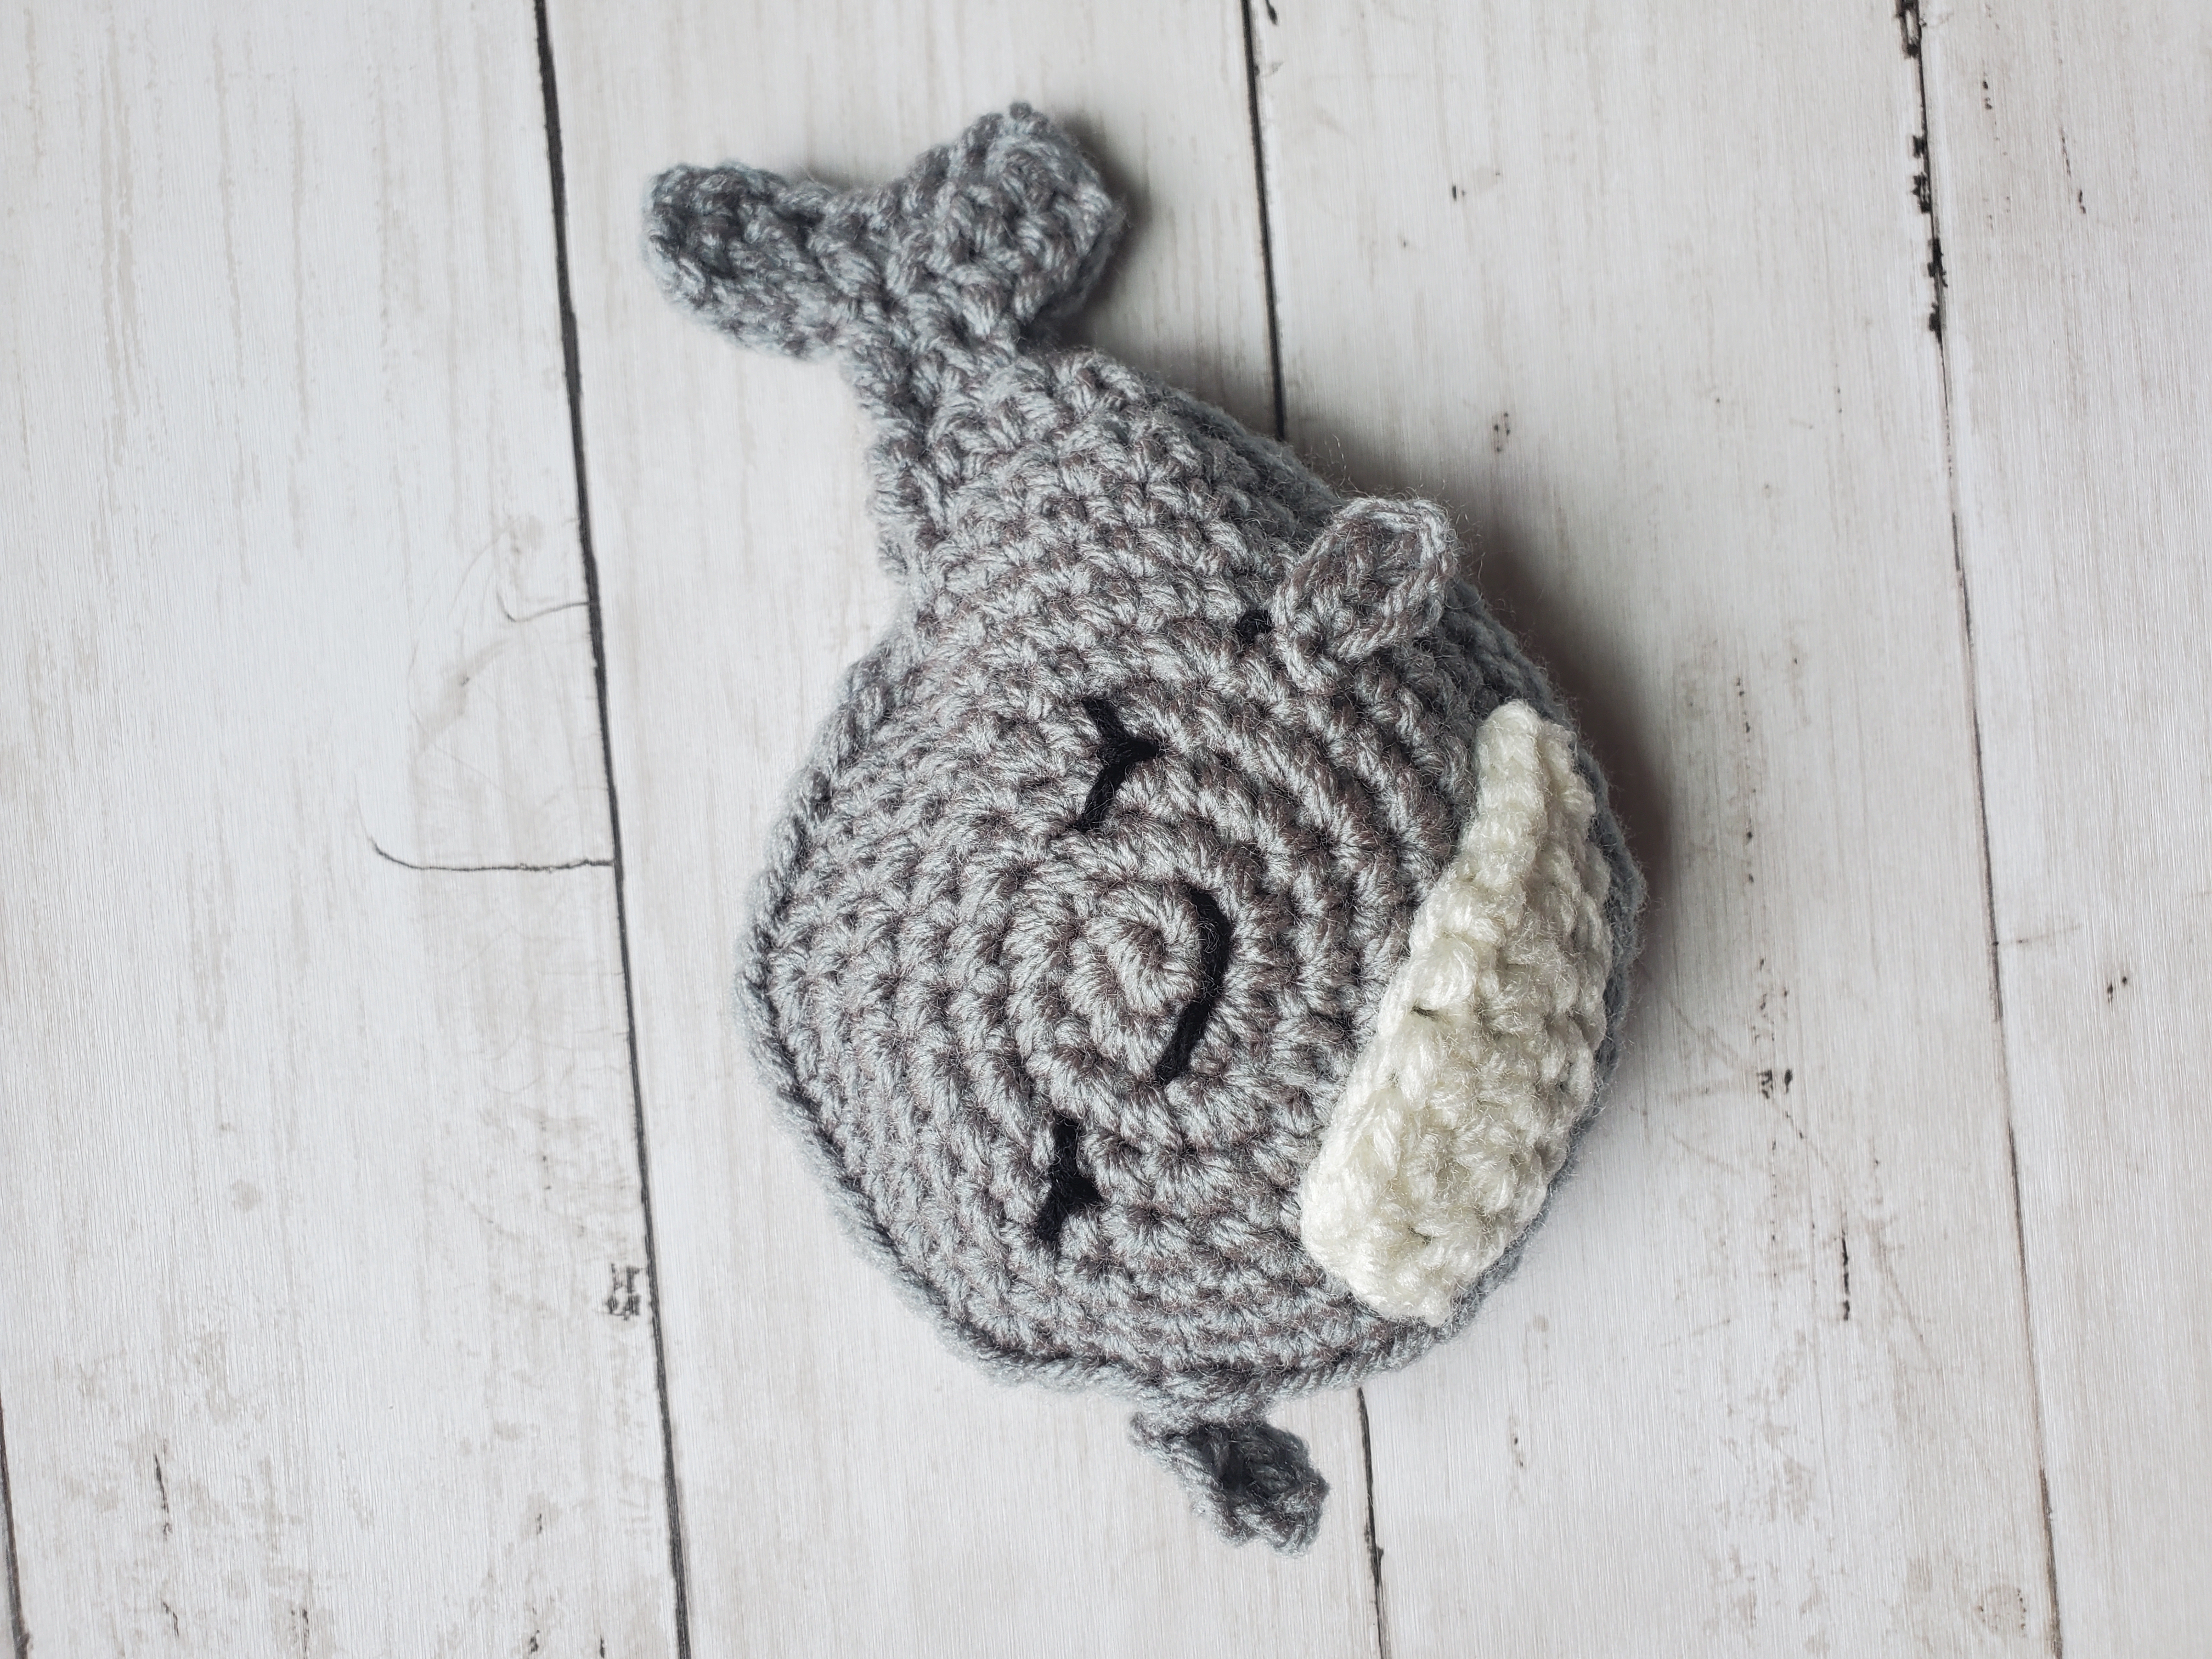
  • Sew on the left and right closed eyes, as well as the smile. I like to make a line straight across and then “catch” it a row or so below in the middle. This helps create the “U” shape. See picture below to use as a reference. Tie off excess yarn in the back.
Front panel of crochet whale with finished facial features
Finished Facial Features

Arms (make 2):

With 5 mm crochet hook and Dusty Gray yarn:

  • Ch 4
  • Row 1: From second ch from hook, make 1 hdc in next 2 chs, sl st in last ch (3 sts)
  • Cut a length of yarn for sewing and pull through.
Finished Crochet whale arm
Finished Whale Arm
Front and Back Panels of Crochet Whale Pattern
Front and Back Panels
  • Sew both crochet whale arms onto front panel. The whale’s right arm (your left) will be sewn right on the edge of the front panel. See picture above for reference. Tie off excess yarn in the back.
  • Pick up the back panel of the whale body. Line up the front and the back panels so that they match up evenly. Make sure that the correct sides are facing out.
  • With your 5 mm crochet hook and the back panel, sl st into both the front and back panels of the crochet whale to sew them together. Do not completely sew shut.
  • Leave an open space large enough to stuff the body with poly-fil. Continue to sl st sew along after stuffing.
  • Cut yarn and pull through.
  • Weave in any extra yarn ends with tapestry needle.

And that’s it! I think this little crochet stuffed whale turned out pretty cute. What do you think?

As always, thank you for checking out my crochet patterns! Until next time!

Crochet Whale Pattern by Strommercrafts Pin

Make a Stuffed Crochet Frog in an Afternoon!

Hello everyone! Today we are going to learn how to make a stuffed crochet frog toy! This pattern is so easy and quick, you can crochet this little guy in an afternoon!

***Please note that this post may contain affiliate links. This means that I may receive a commission if you purchase something through these links (at no cost to you!). Thank you for your support!***

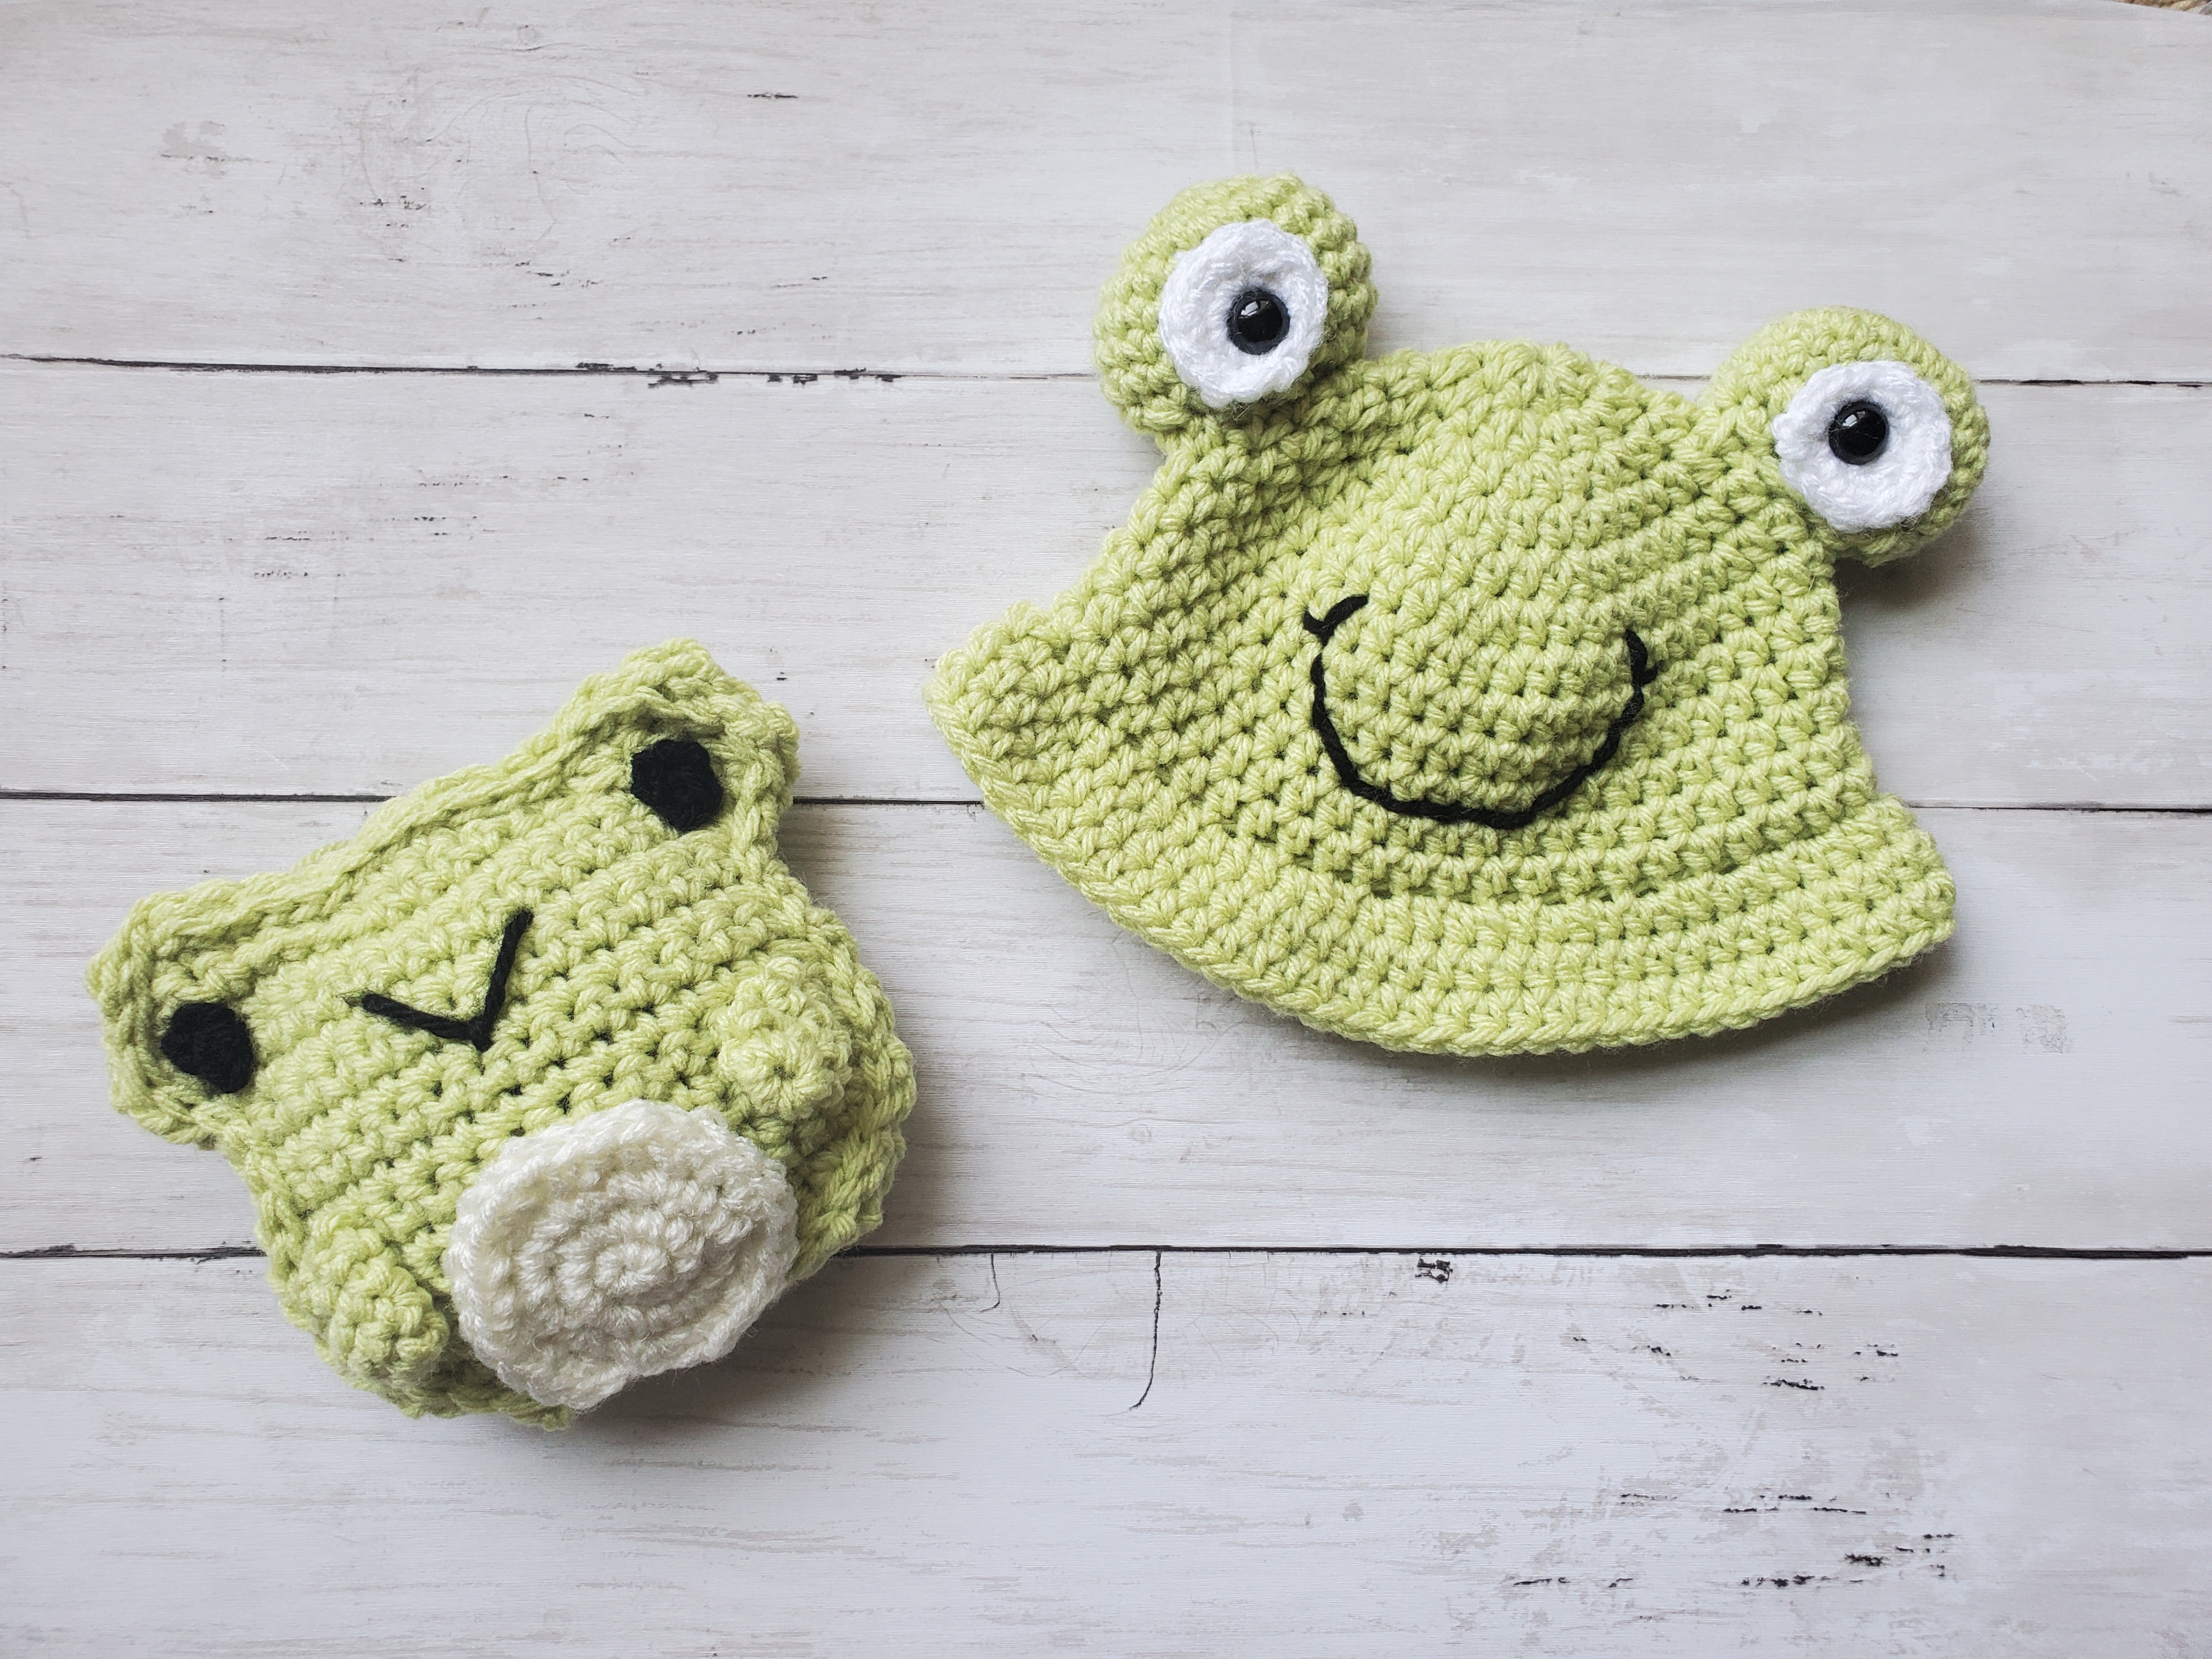
Okay, so I was inspired to make my little frog friend to go along with my Frog Bucket Hat I made a few months ago. I use the same green yarn for both patterns so they match! Here they are side by side:

Crochet Stuffed Frog and Crochet Frog Bucket Hat

I think they’re so cute together! 

When I was creating this little crochet frog friend, I couldn’t decide if I wanted to give him arms or not. I decided to add arms, but did this using an amigurumi technique by working in a magic circle. The belly is also made with this technique.

If you like how your frog looks without the arms, you can leave them off.

I used medium 4 worsted weight, acrylic yarn. You can use any kind of yarn you would like as long as it’s the correct weight. I just really like the yarn from Red Heart for fun projects like this. Especially since it’s reasonably priced and comes in so many colors.

When finished, he is about 5″ x 5.5″ (give or take, all depends on your tension!)  

Ready to learn how to make your cute, little, crochet frog stuffy? Let’s get started!

Materials Needed:

Abbreviations Used:

  • Ch – chain
  • St(s) – stitch(es)
  • Sl st – slip stitch
  • Sc – single crochet
  • Sc2tog – single crochet two stitches together
  • Mc – magic circle

Special Considerations:

  • When making the body of the frog, the chain 1 does not count as a stitch.
  • When working in the magic circle, do not join to the first st with a slip stitch, just continue single crocheting around (a stitch marker is helpful to keep track of your rounds).
  • The number in parenthesis at the end of the row/round, indicates how many stitches you should have.
  • When finished with the 2nd body panel (do not cut yarn, leave your hook on there if you want to sl st them together)

Body of Frog (make 2):

With 5 mm crochet hook and lime green yarn:

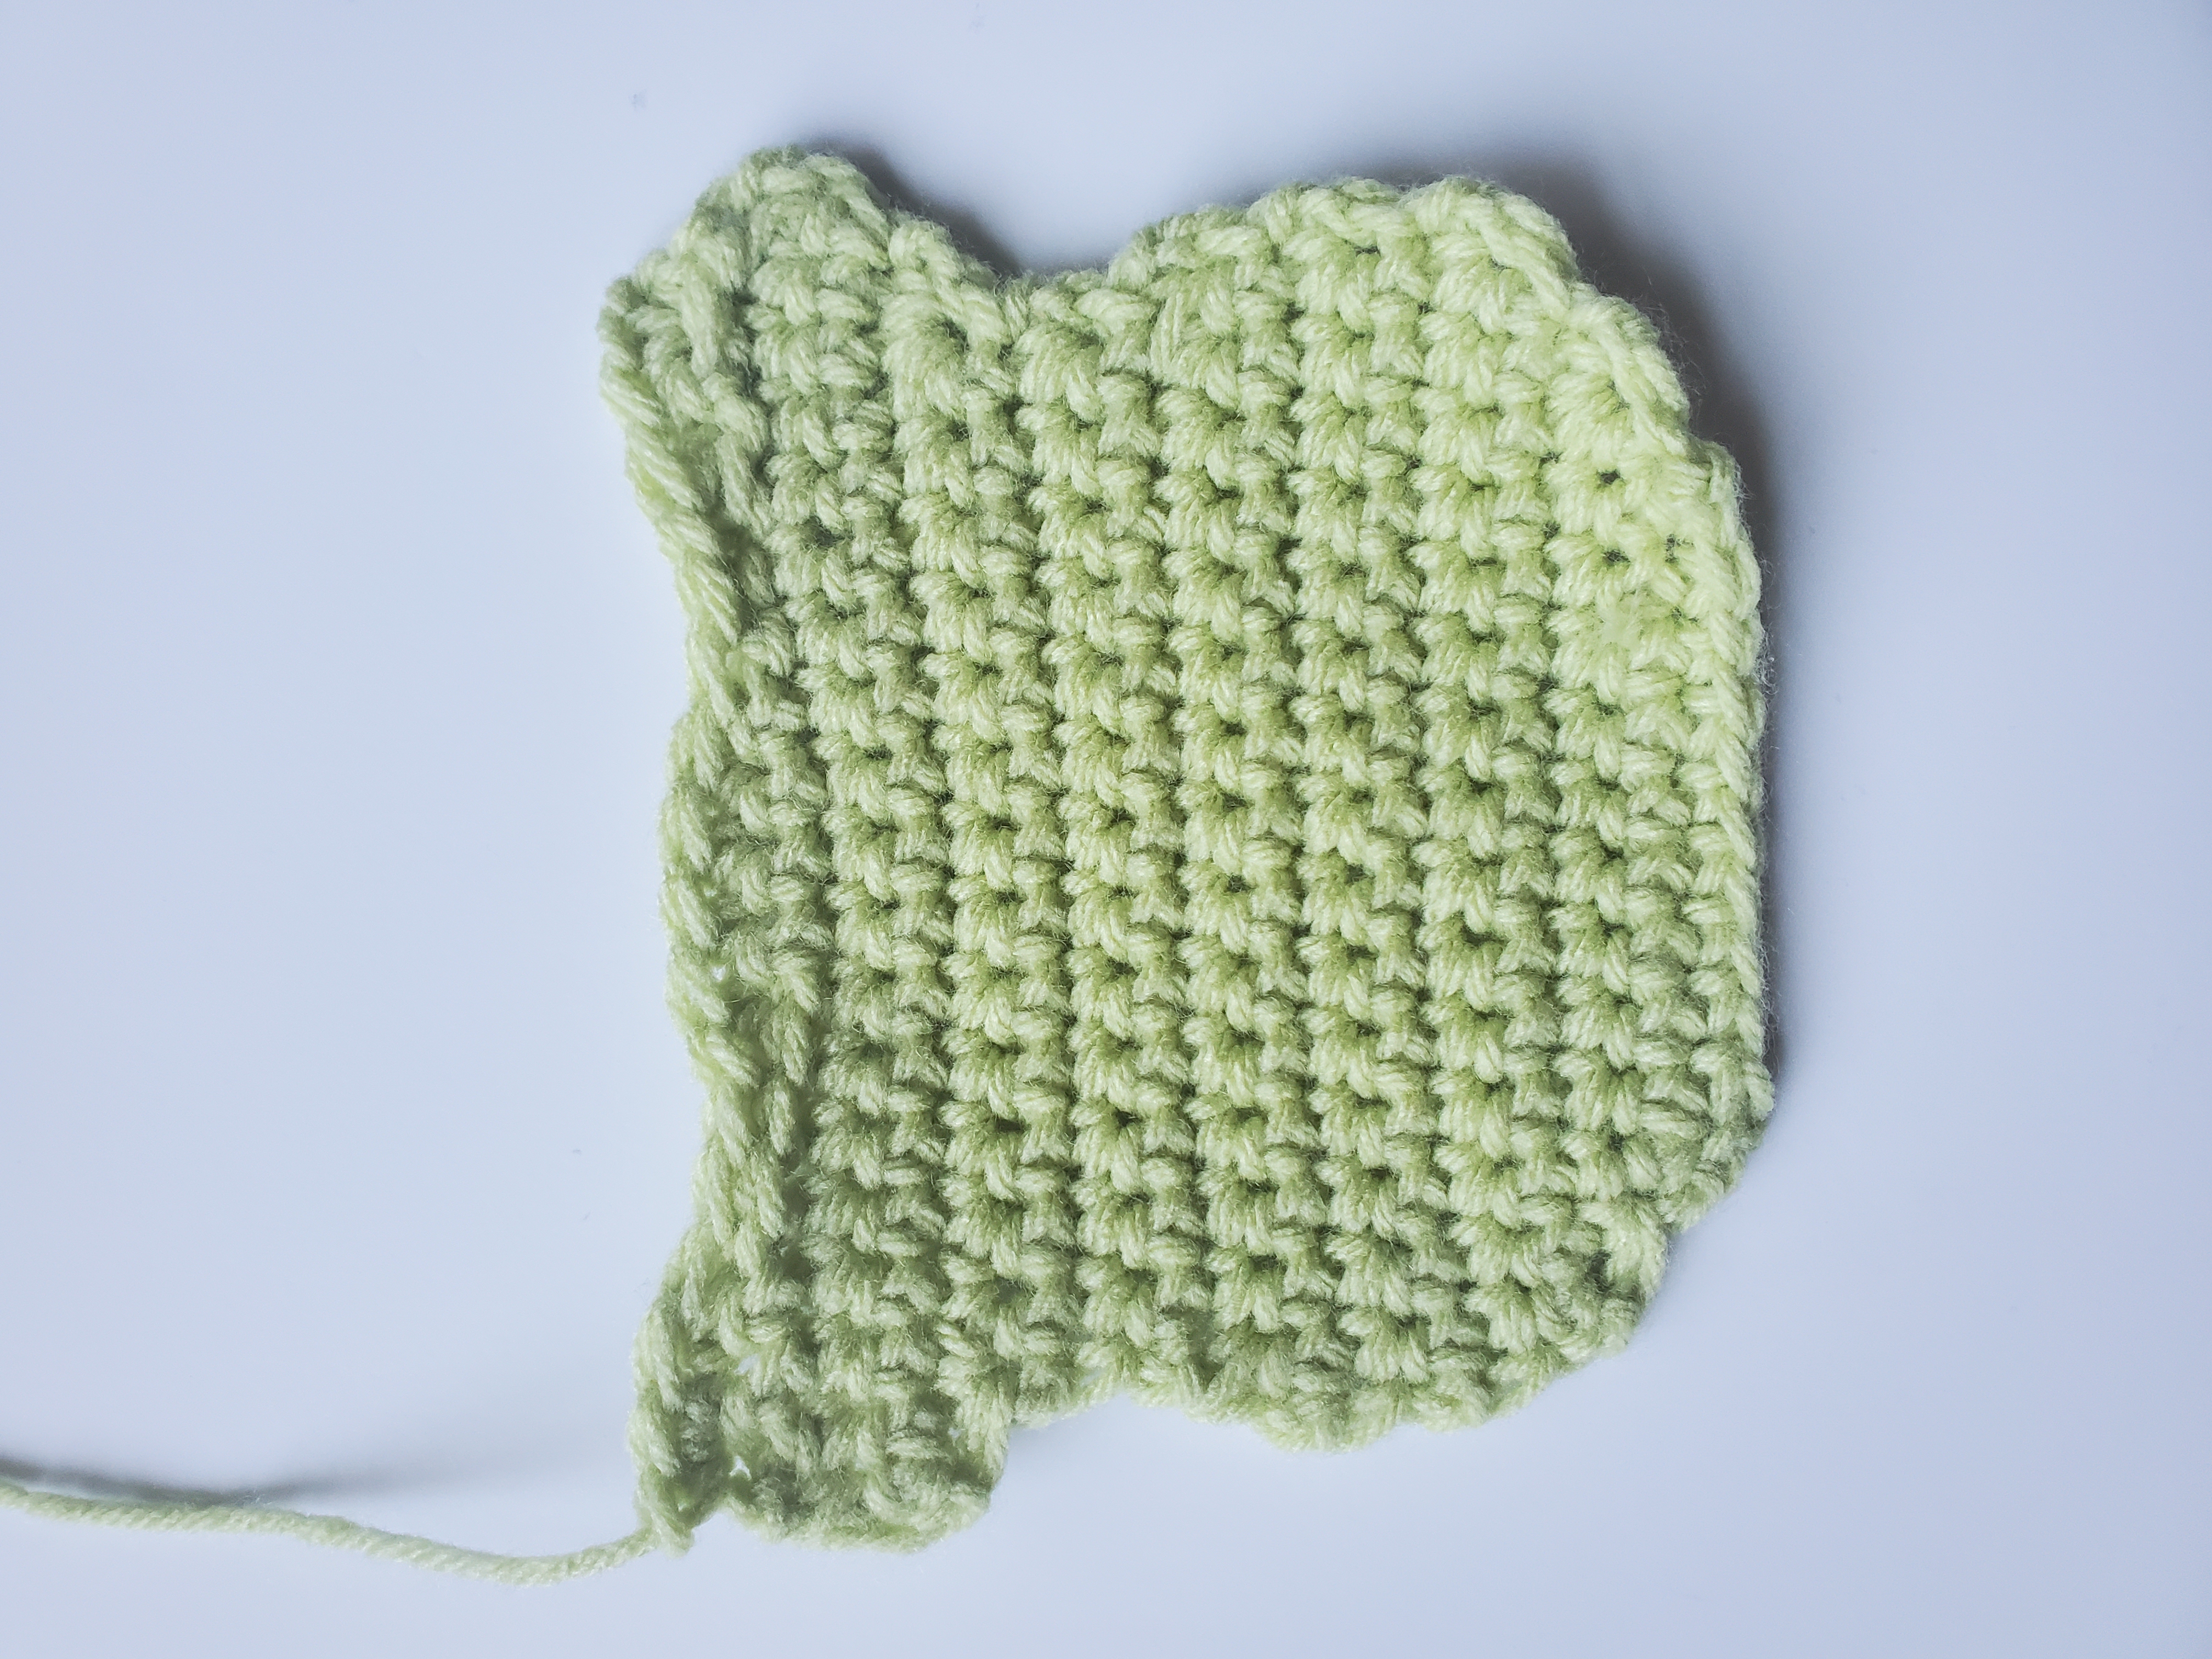
  • Ch 11
  • Row 1: From second ch from hook, sc in each ch across (10 sts)
  • Row 2: Turn, ch 1, make 2 sc in first st, sc in each st across until last st, make 2 sc in last st (12 sts)
  • Row 3: Turn, ch 1, make 2 sc in first st, sc in each st across until last st, make 2 sc in last st (14 sts)
  • Row 4: Turn, ch 1, make 2 sc in first st, sc in each st across until last st, make 2 sc in last st (16 sts)
  • Row 5-8: Turn, ch 1, sc in each st across (16 sts)
  • Row 9: Turn, ch 1, sc2tog, sc in each st across until the last two sts, sc2tog (14 sts)
  • Row 10-11:  Turn, ch 1, sc in each st across (14 sts)
  • Row 12: Turn, ch 1, make 3 sc in first st, sc in each st across until last st, make 3 sc in last st (18 sts)
  • Row 13: Turn, ch 1, make 2 sc in first st, sc in each st across until last st, make 2 sc in last st (20 sts)
  • Row 14: Turn, ch 1, sc2tog, sc in each st across until last two sts, sc2tog (18 sts)
  • Row 15: Turn, ch 1, sc2tog, 1 sc in next st, sl st into next 4 sts loosely, 1 sc in next 4 sts, sl st into next 4 sts loosely, 1 sc in next st, sc2tog (16 sts)
  • Row 16: Turn, ch 1, 2 sc in first st, sc2tog, sl st into next 3 sts loosely, 1 sc in next 4 sts, sl st into next 3 sts, sc2tog, 2 sc in last st (16 sts)
  • Sl st into same st, cut a reasonable length off and pull through for the FIRST PANEL.
  • If you don’t cut your yarn for the second panel, it can be easy to sew them together by sl sting later. If you want to make the arms, I would suggest sewing the panels together first and then making the arms (unless you would rather sew with your needle, totally up to you).
How body of crochet frog stuffy should look
Completed Body

Eyes (make 2):

With 5 mm hook and black yarn:

  • Ch 3
  • Row 1: From second ch from hook, 1 sc in next 2 chs (2 sts)
  • Cut a reasonable length of yarn for sewing and pull through.

Belly:

With 5 mm hook and soft white yarn:

  • Make 6 sc in mc (6 sts)
  • Round 1: Make 2 scs in each st around (12 sts) [You can use a stitch marker to mark the begining/end of your round so you can count your stitches]
  • Round 2: Make 2 scs in next st, 1 sc in next st. Repeat around (18 sts)
  • Round 3: Make 2 scs in next st, 1 sc in next 2 sts. Repeat around (24 sts)
  • Cut a long piece of yarn off for sewing later, and pull through.

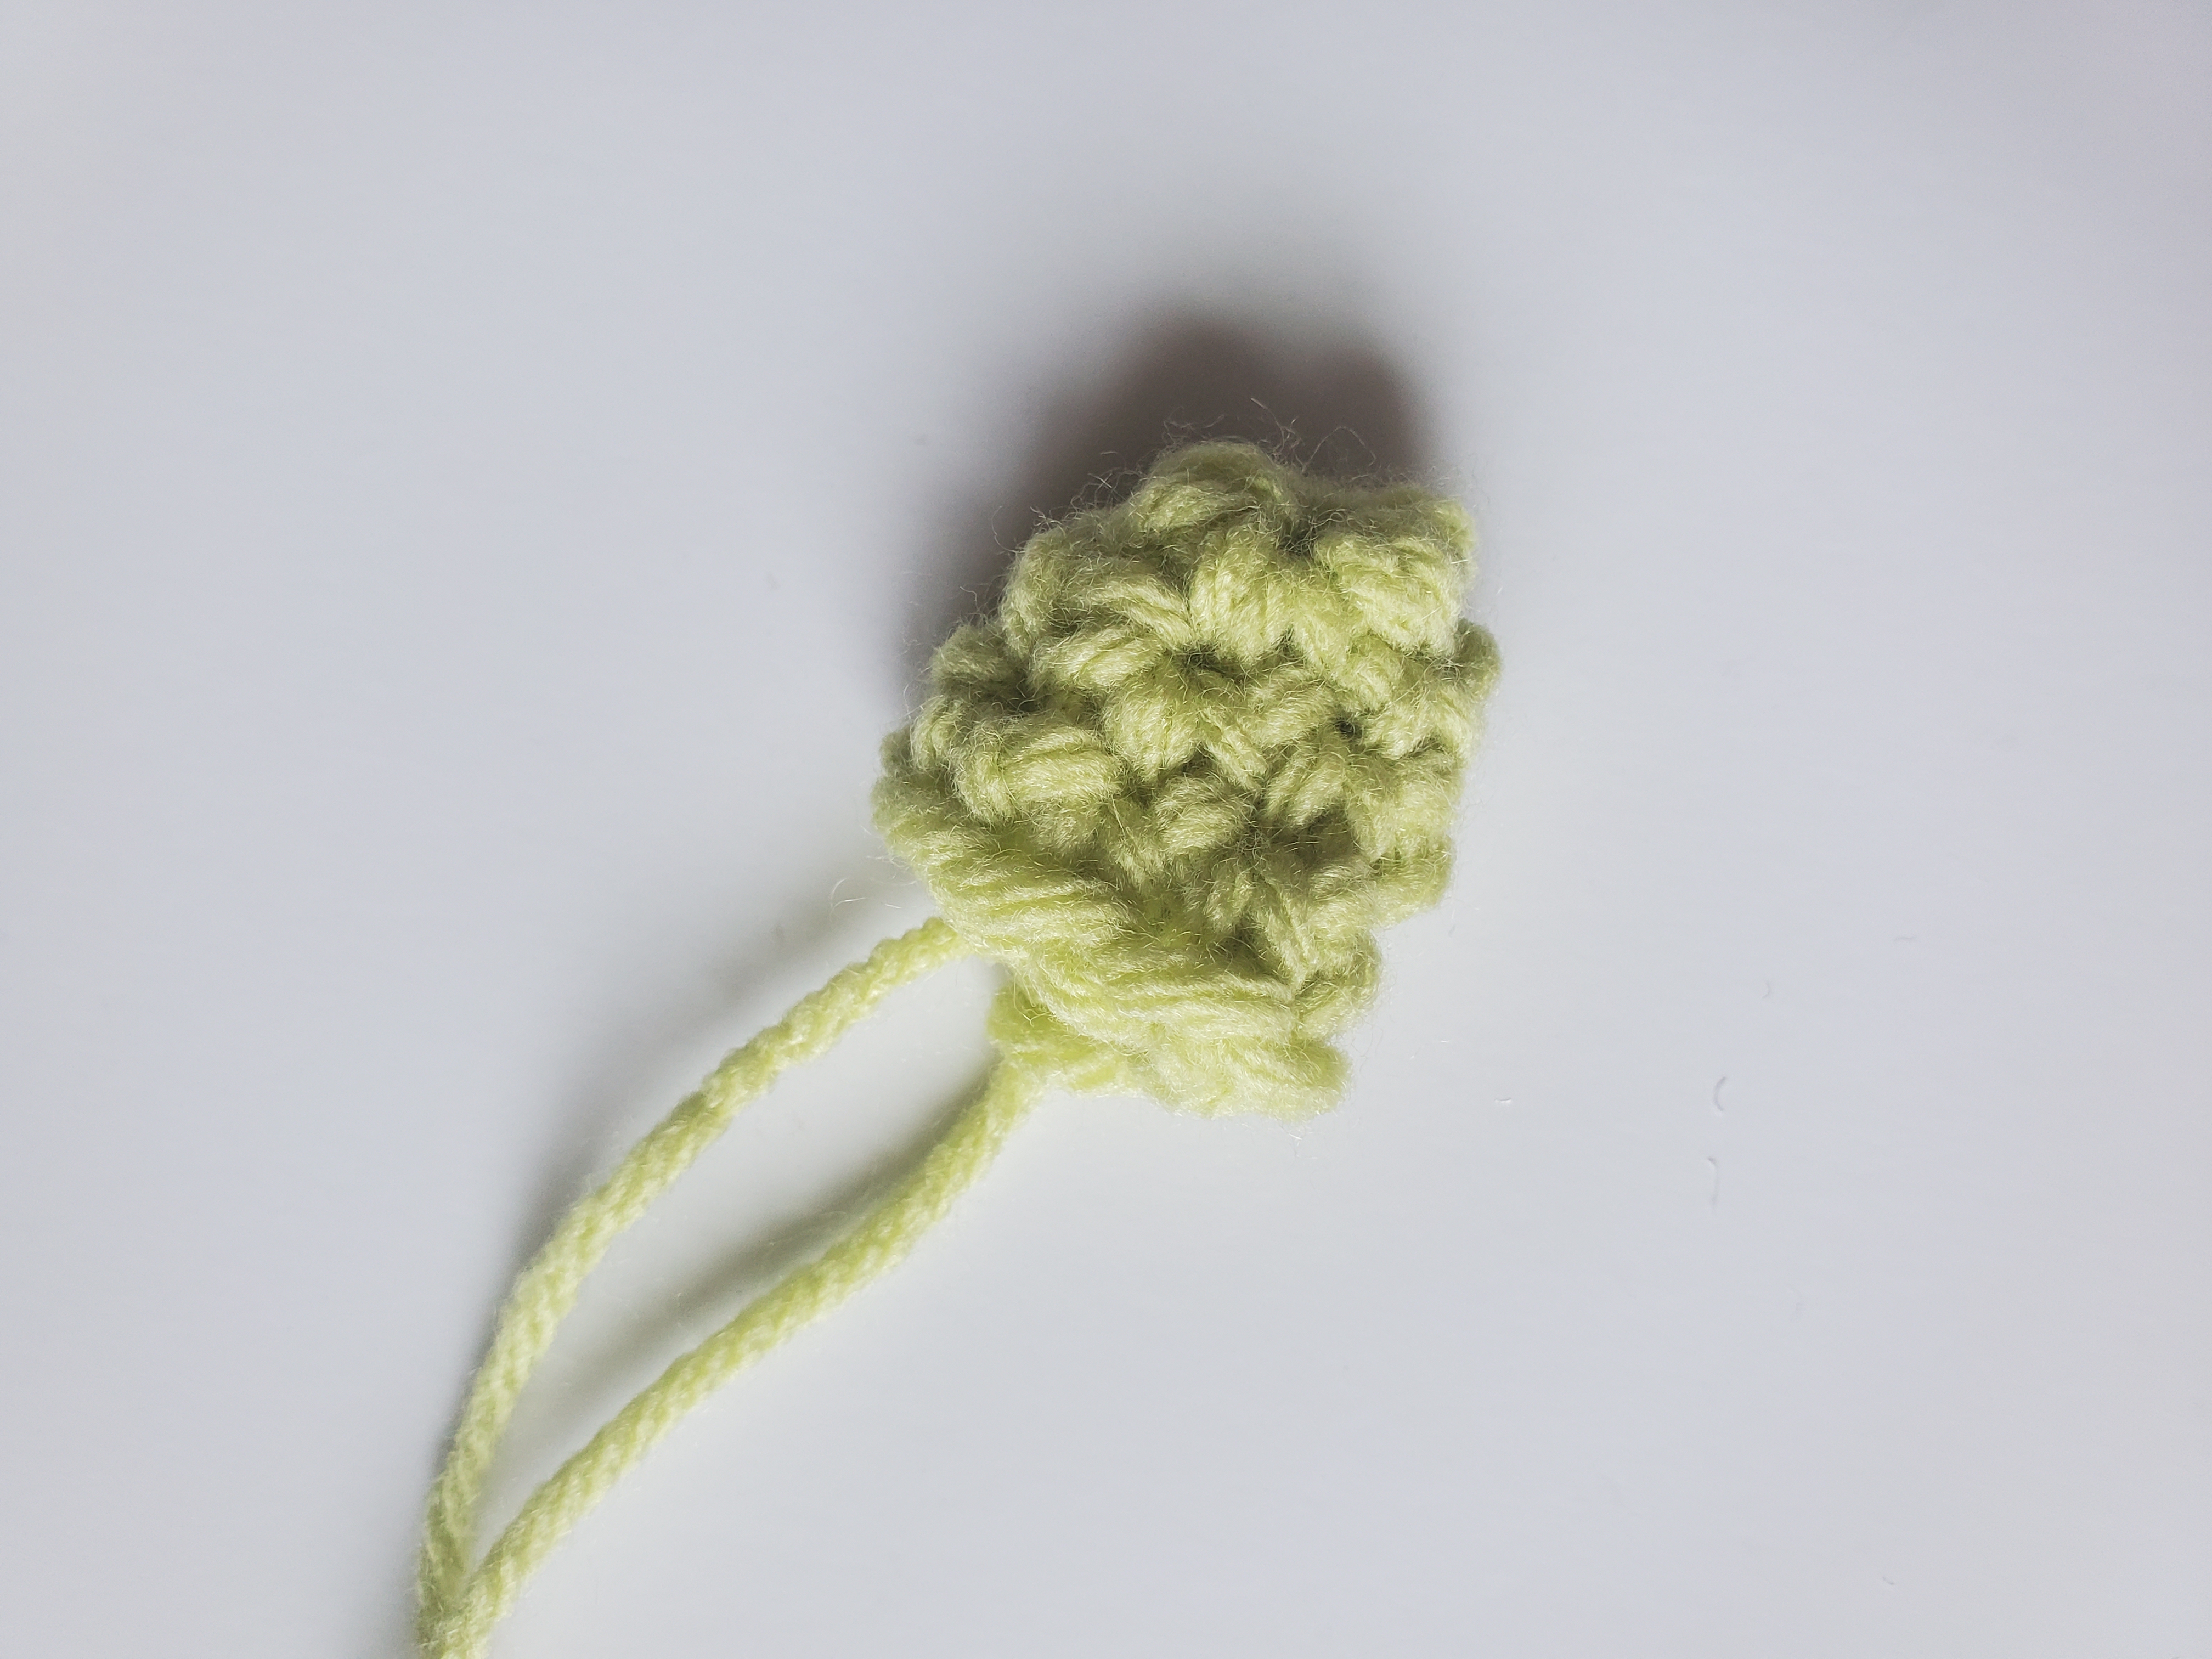
Arms (optional, make 2)

With 5 mm hook and lime green yarn:

  • Make 6 sc in mc (6 sts)
  • Round 1-3: Sc in each st around (6 sts)
  • Cut a long piece of yarn off for sewing later and pull through.
Finished frog arm

Assembly:

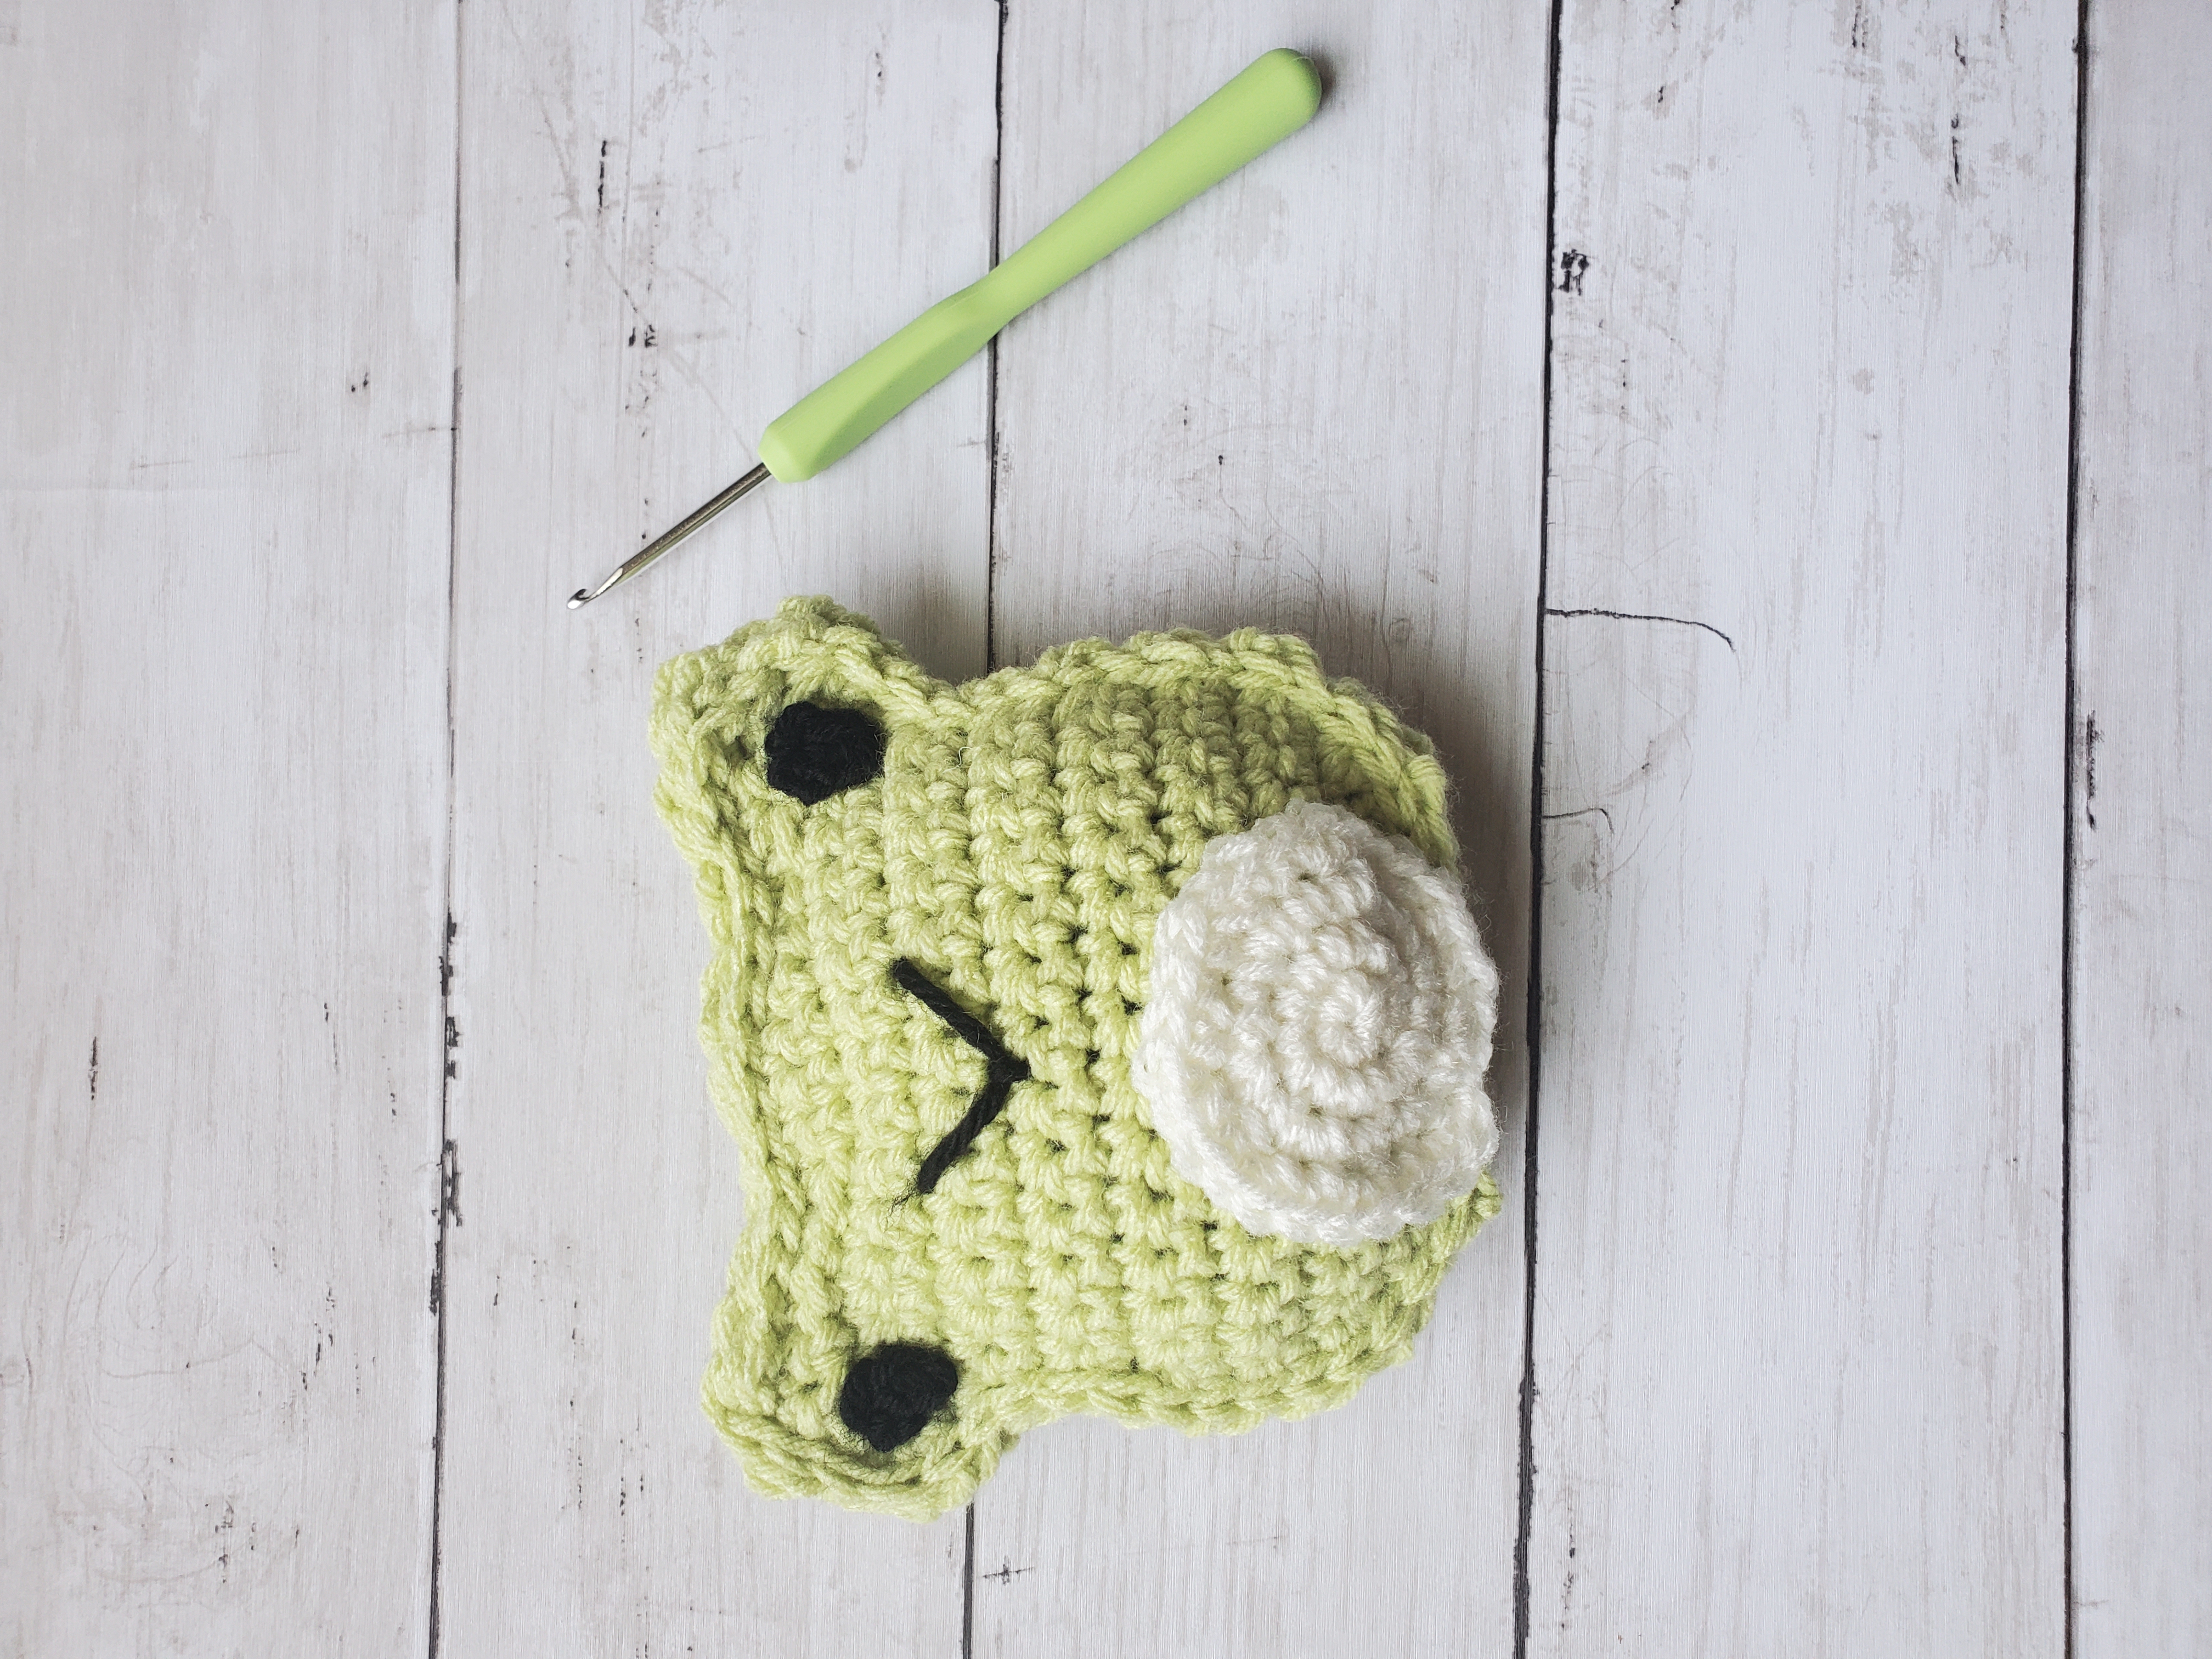
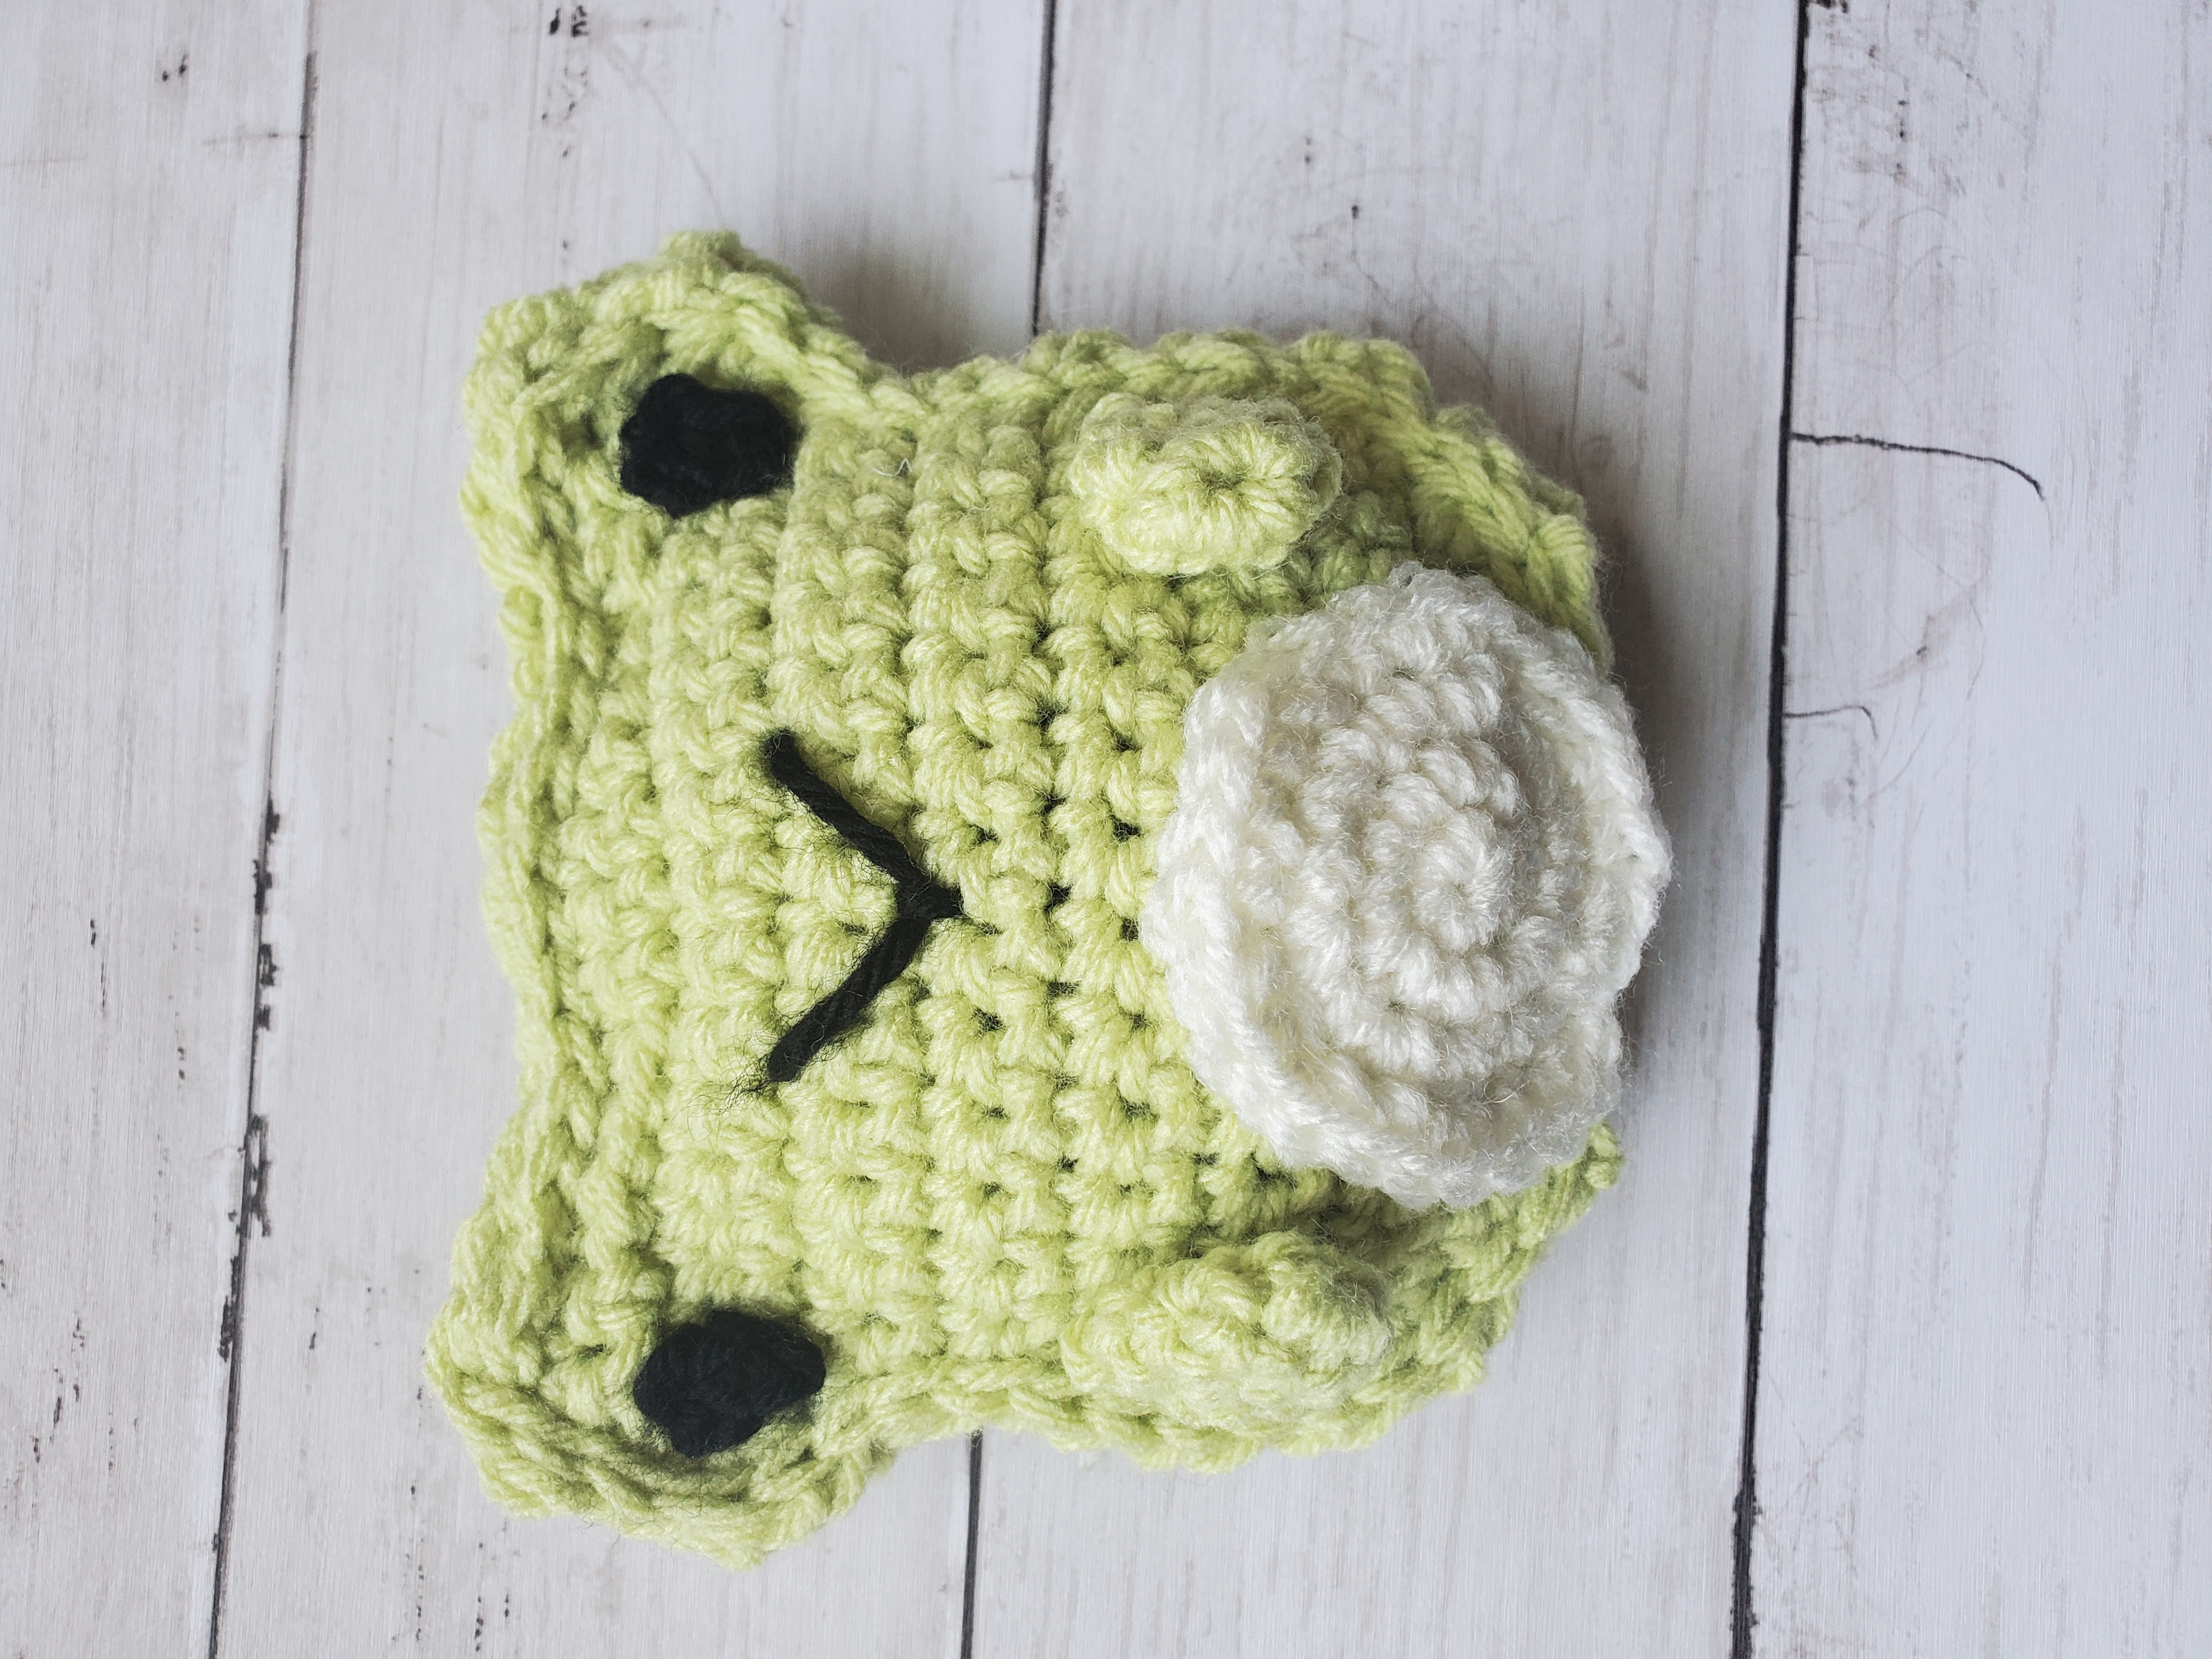
  • Step 1: Start by sewing facial features onto one of the body panels (see pic below). Tie excess yarn securely in the back.
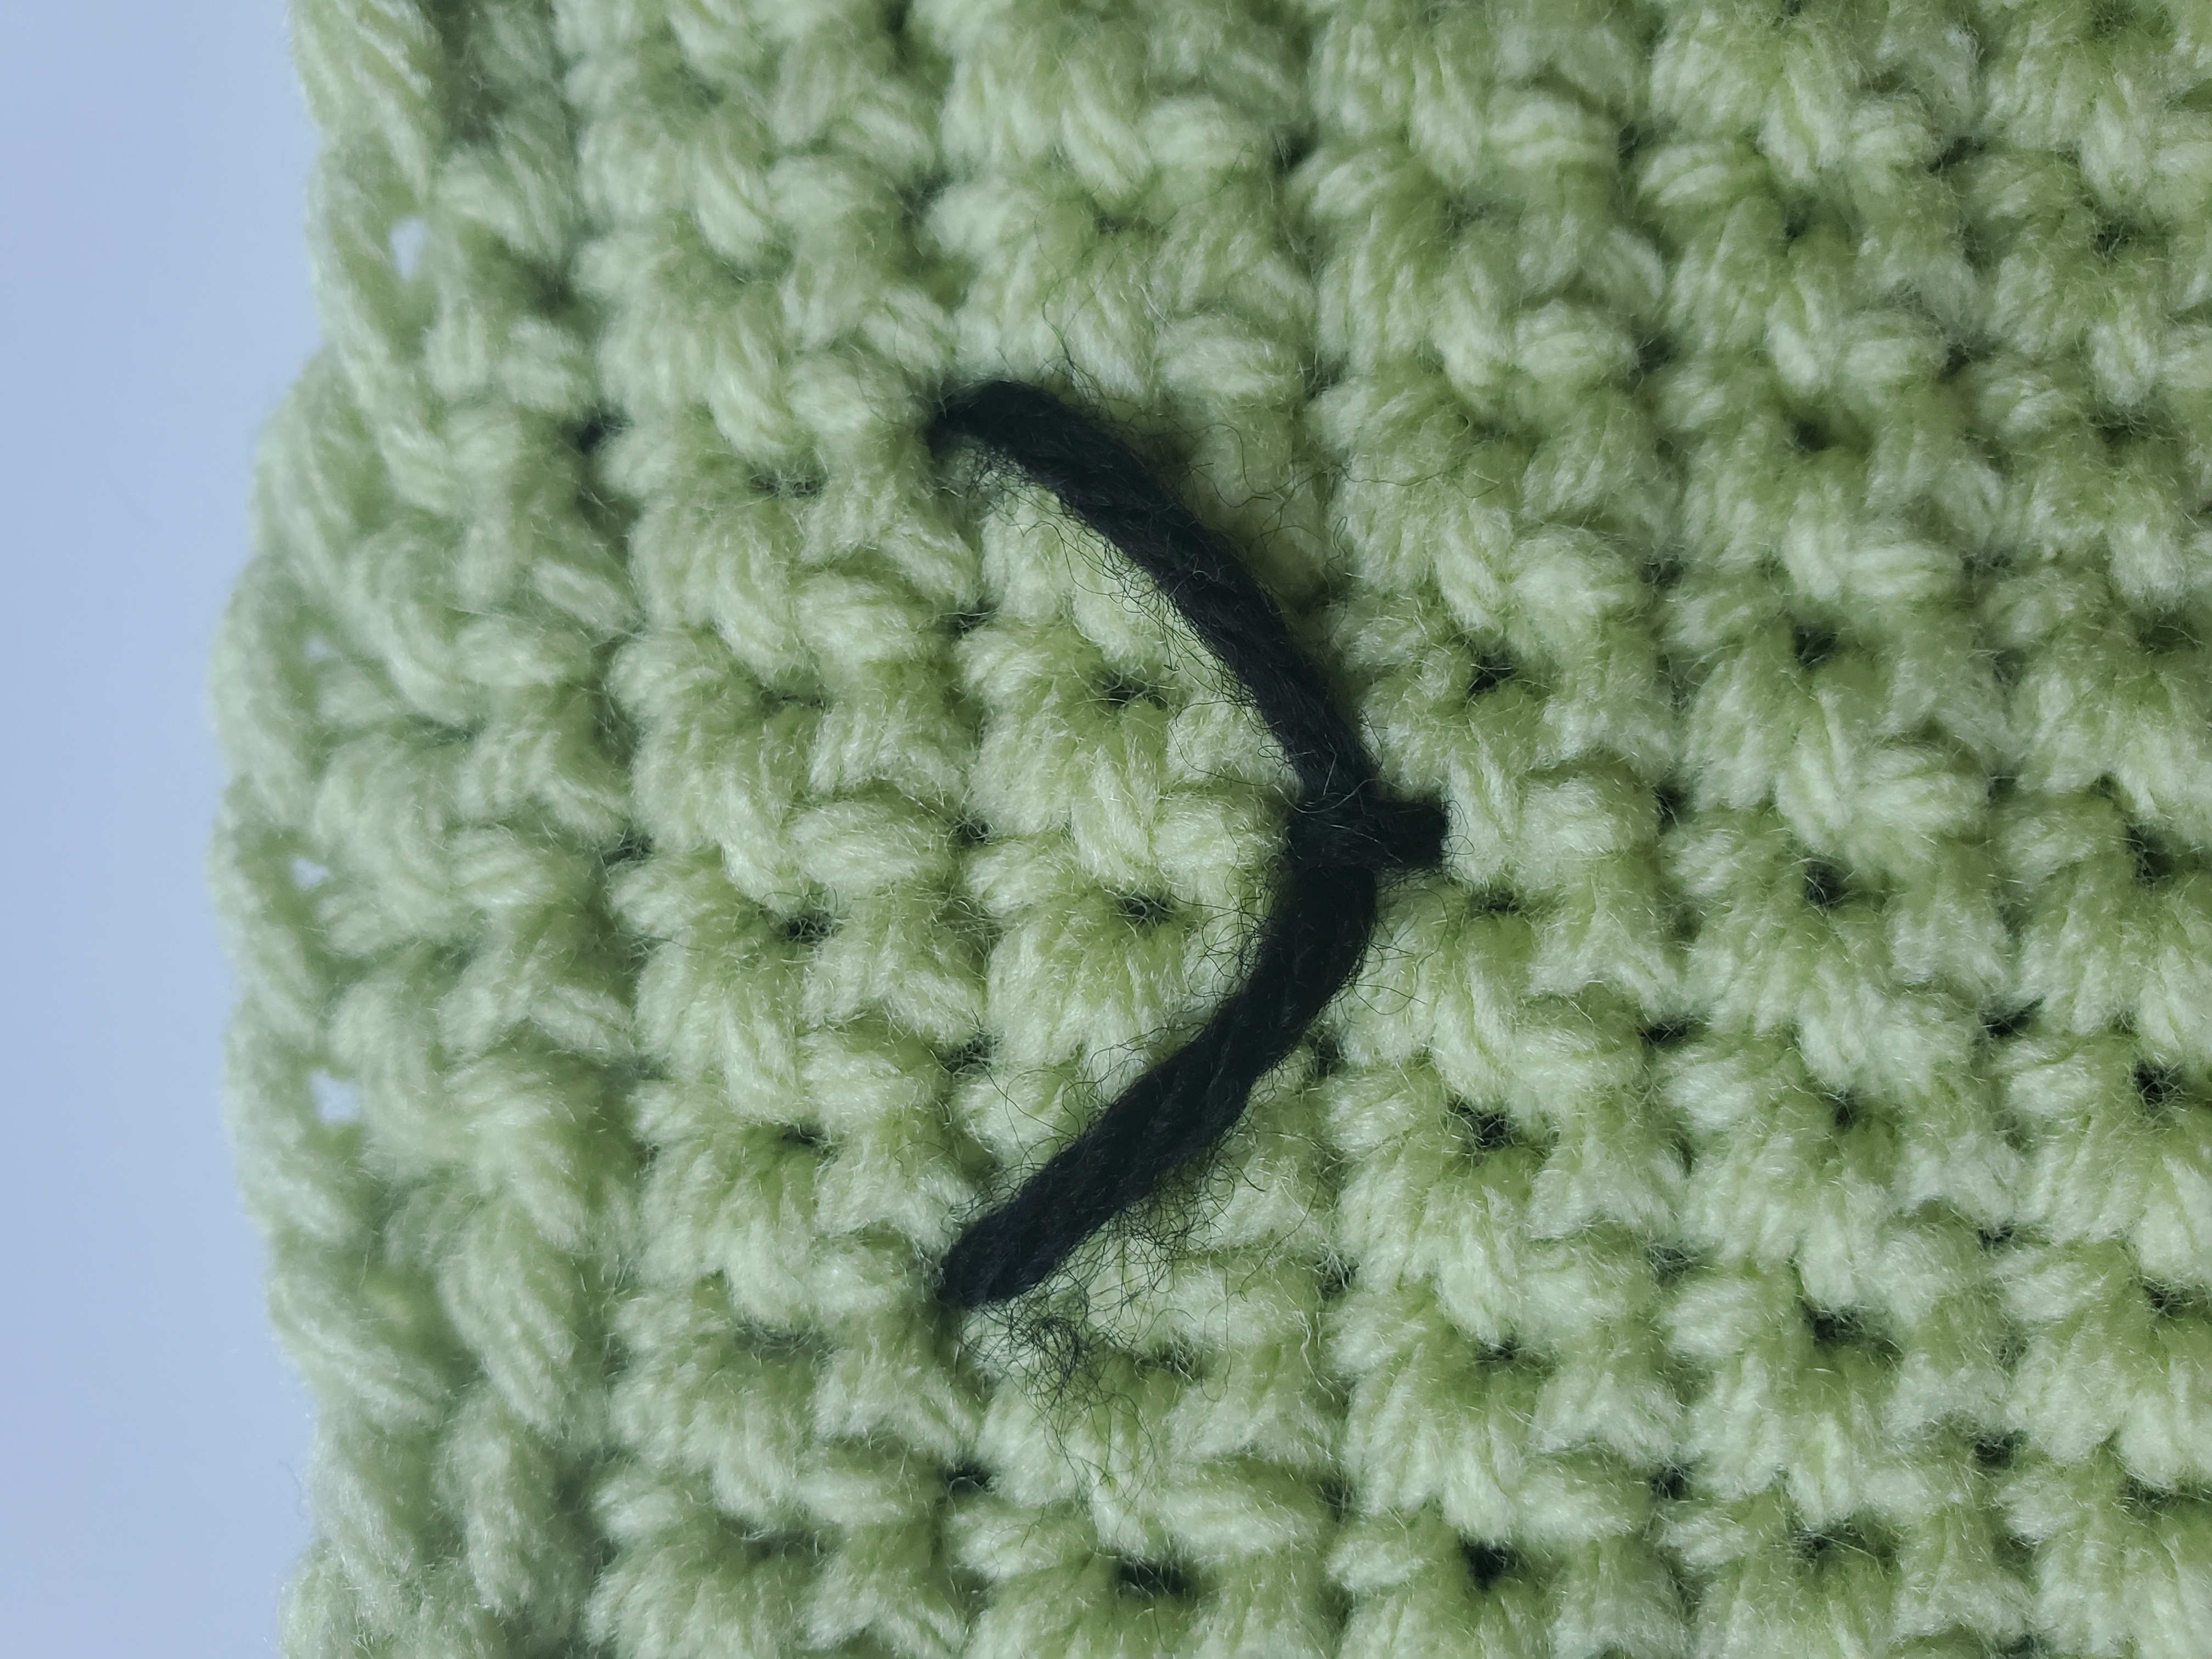
  • Step 2: Sew the mouth on with a piece of long black yarn. Insert needle into row even with the bottom of the eyes. Go 5 sts across. Insert needle 3 rows below your “line” and catch it to create a V smile (see pic below). Tie excess yarn securely in the back.
  • Step 3: Sew the belly on by lining the bottom of the belly up with the bottom of the body. Tie excess yarn securely in the back.
  • The tied off portions will be hidden inside the frog. Don’t worry about how messy your yarn looks for now!
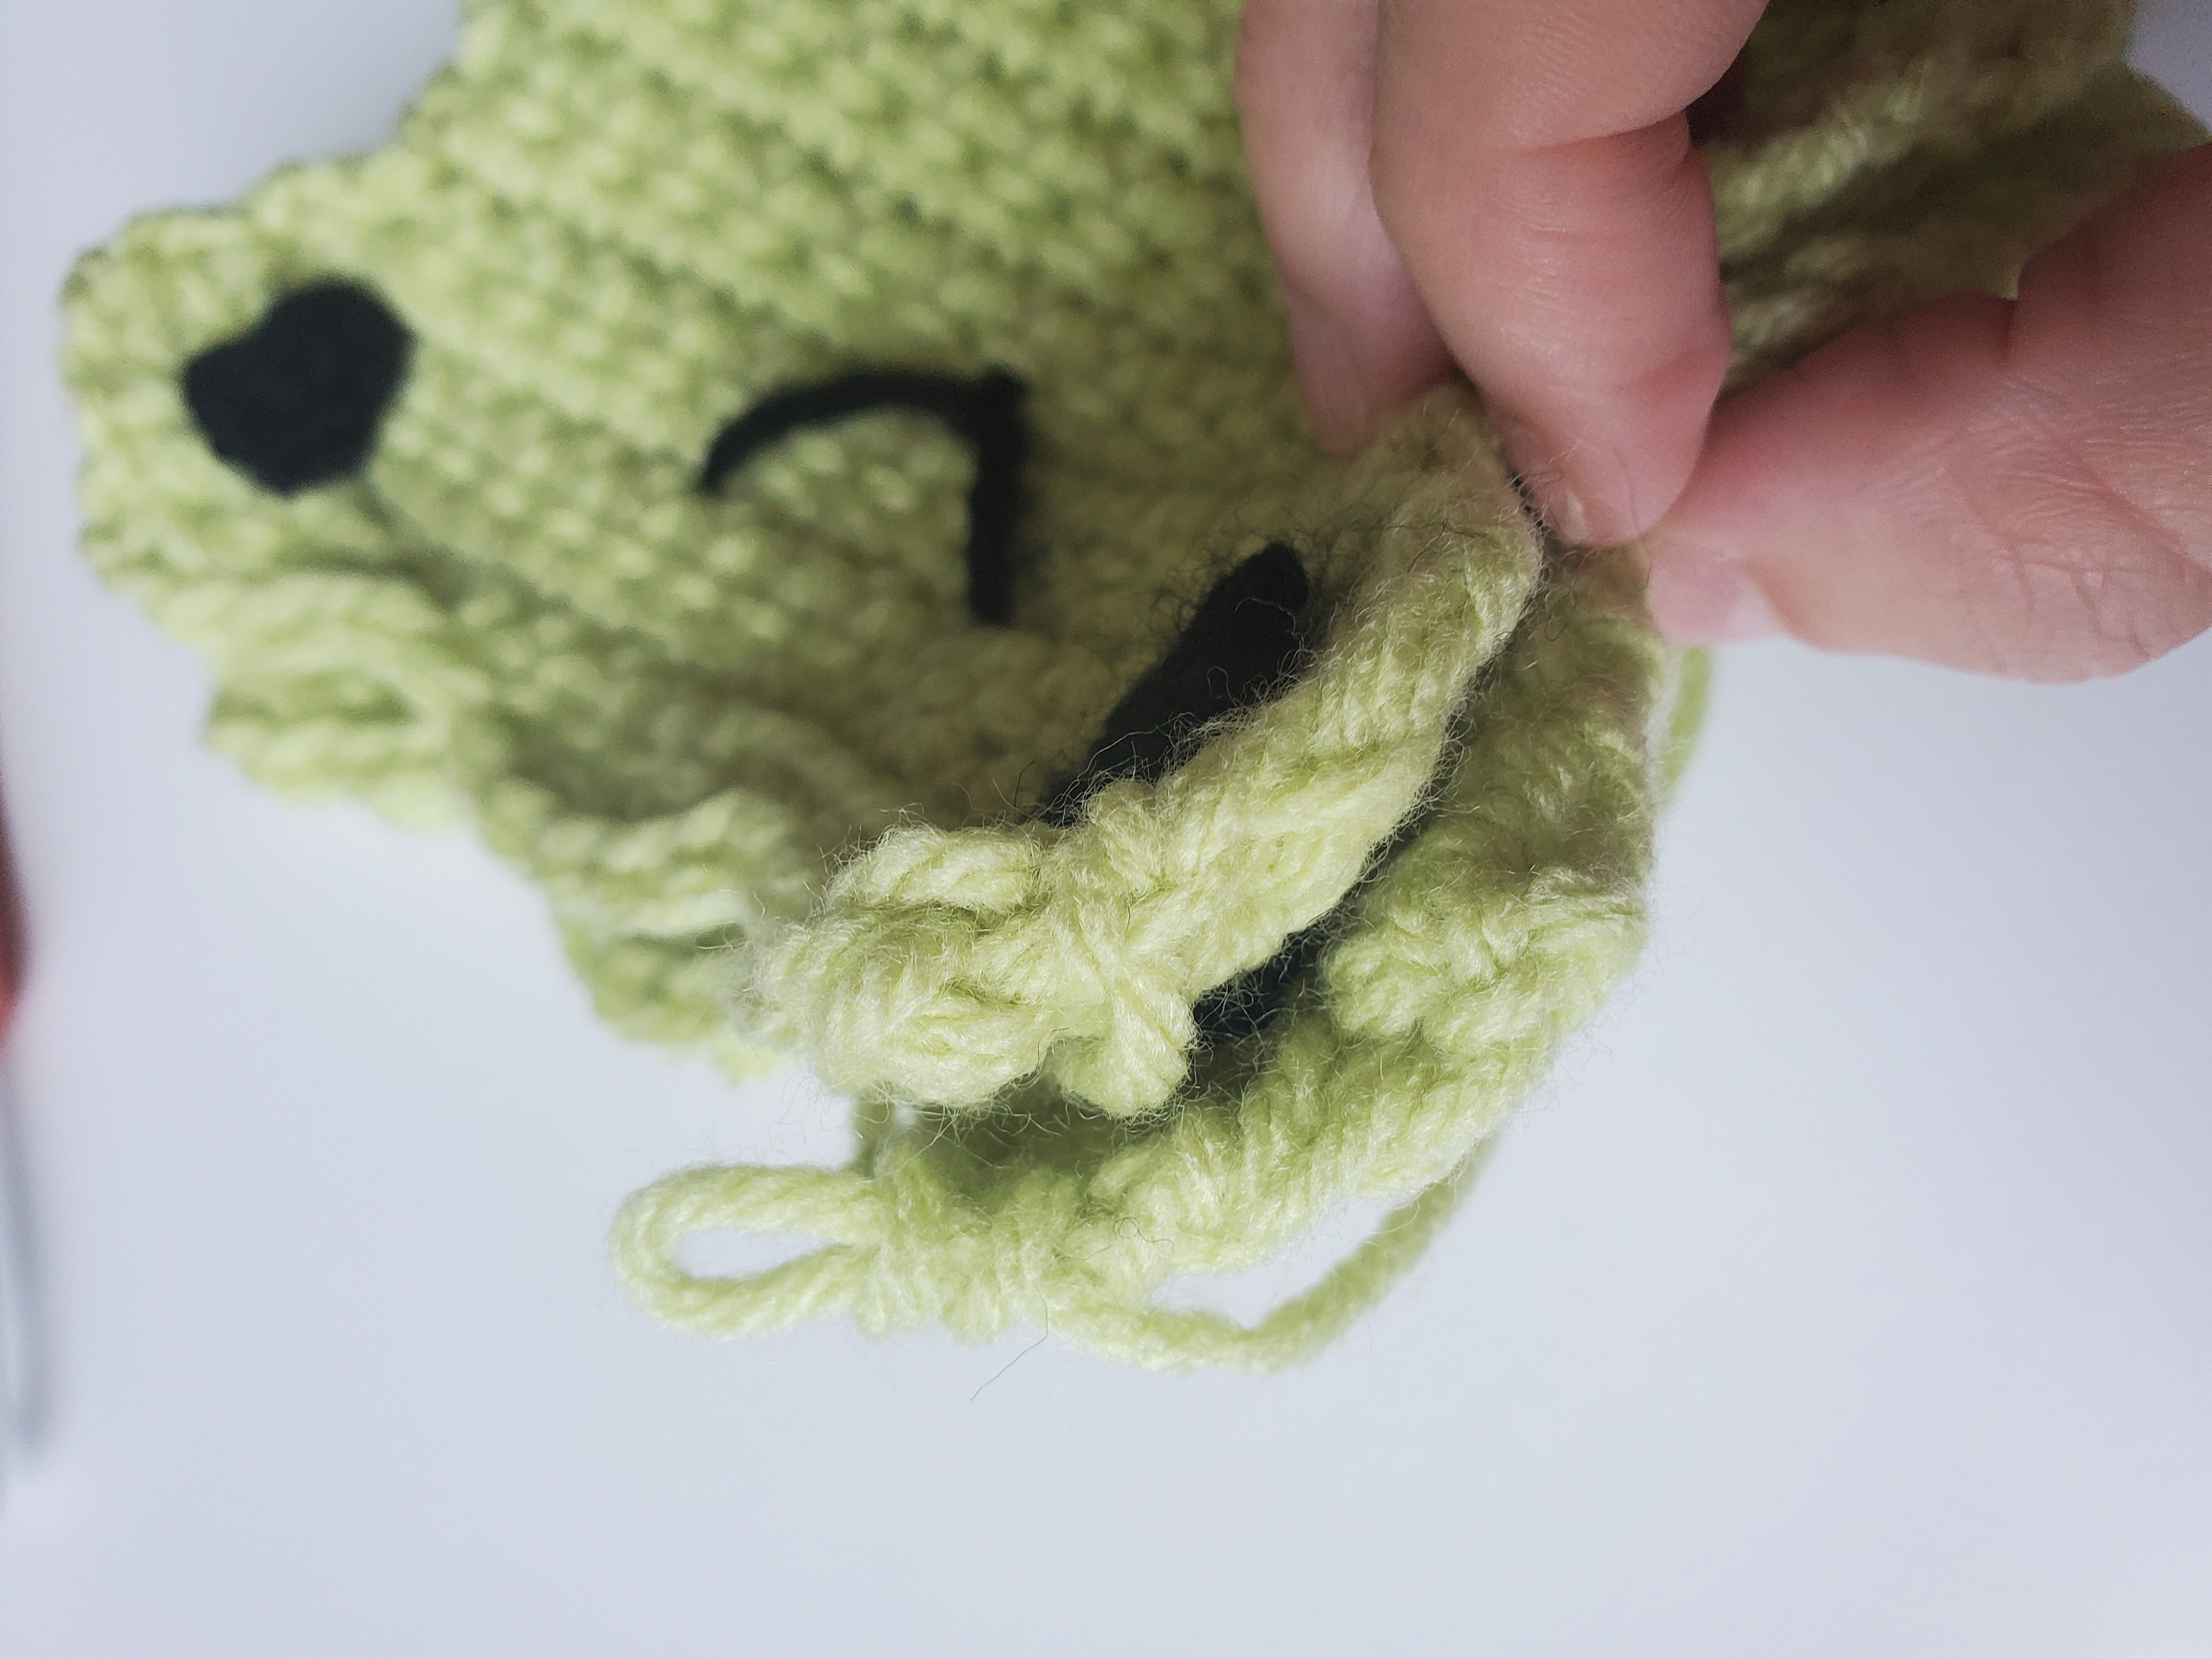
  • Step 4: With the second body panel, line it up with the first. Use your crochet hook to sew them together by slip stitching around. Leave one side open.
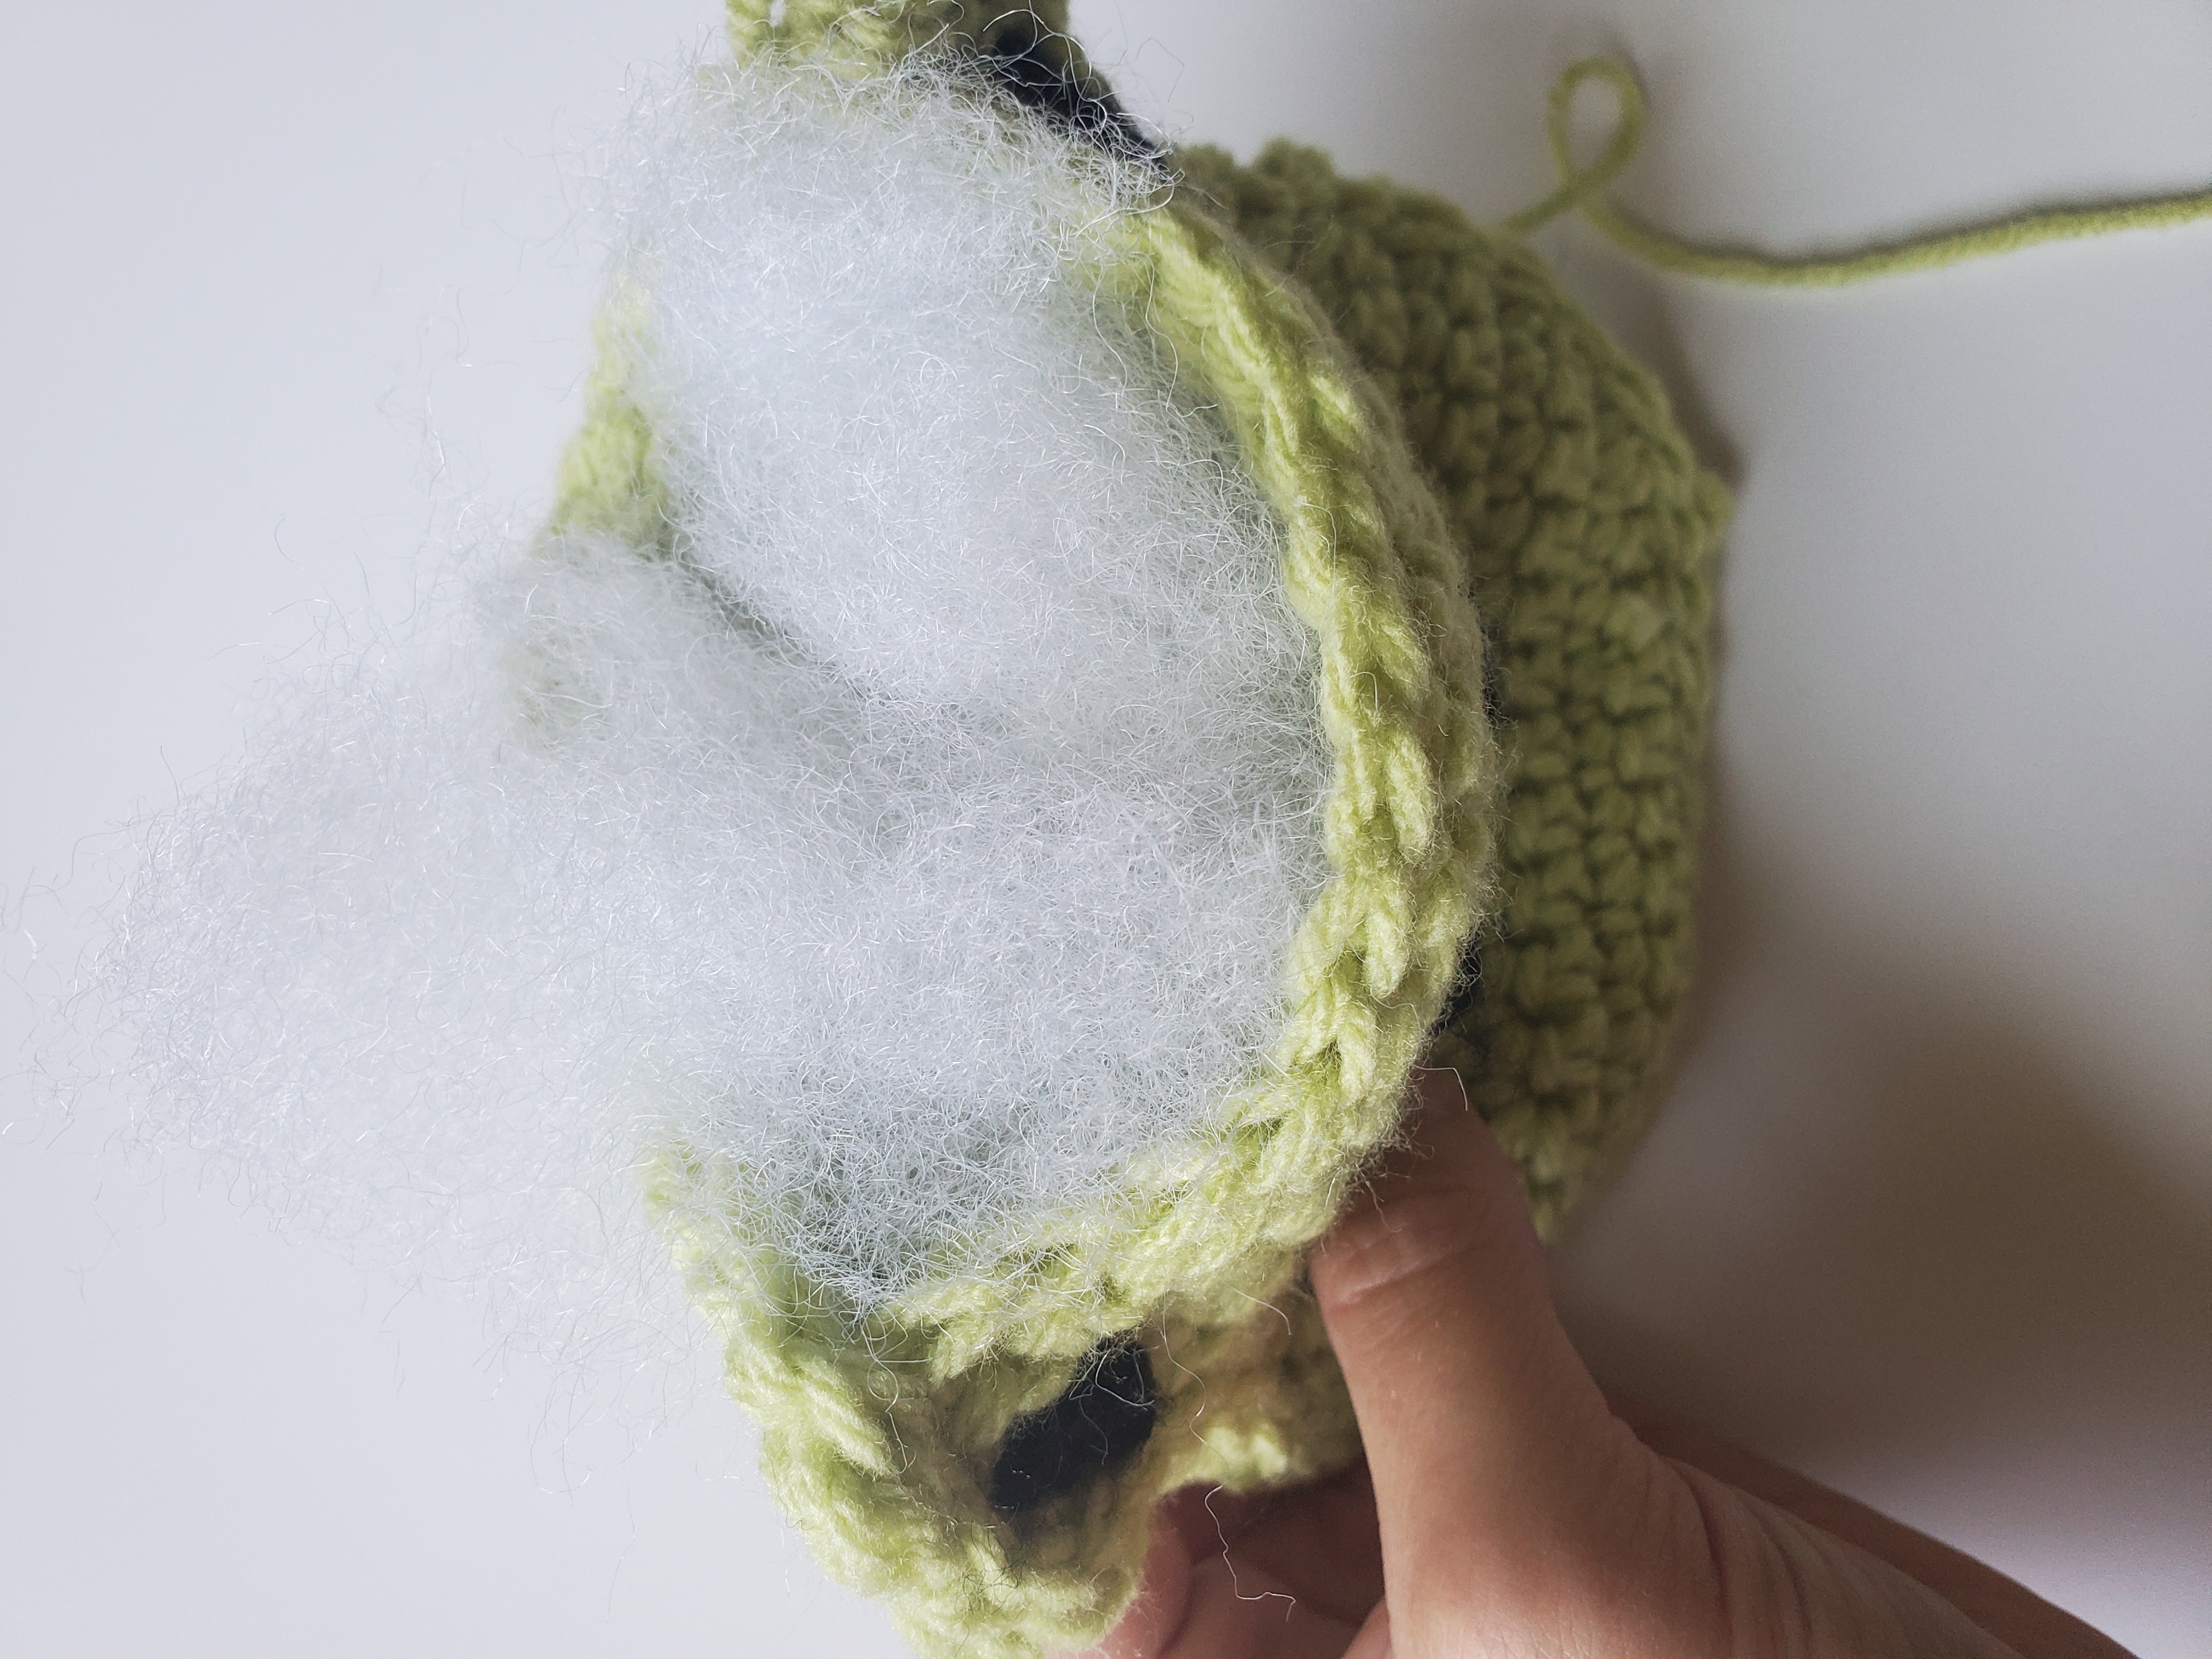
  • Step 5: Stuff with poly-fil to your liking. Continue to sew across by slip stitching until the last st. Cut yarn and pull through. Sew tail with tapestry needle.  
Finished crochet frog with arms
Step 1
How to sew on mouth
Step 2
Line up body panels of the frog
Step 4
Stuffing the body
Step 5

You’re all done! What a fun crochet project this was, and I really think it pairs well the Frog Bucket Hat. Make them both as a baby shower gift or just for fun for the kids!
Does the crochet frog stuffy look great with or without the arms? Which one do you think looks better? Let me know in the comments below!