Hellow and welcome back to Strommer Crafts! Today we will be learning how to make a crochet Lobster Pillow! I thought this would be a fun pattern to make, especially since I’ve been experimenting with graphs.
***Please note that this post may contain affiliate links. This means that I may receive a commission if you purchase something through these links (at no cost to you!). Thank you for your support!***
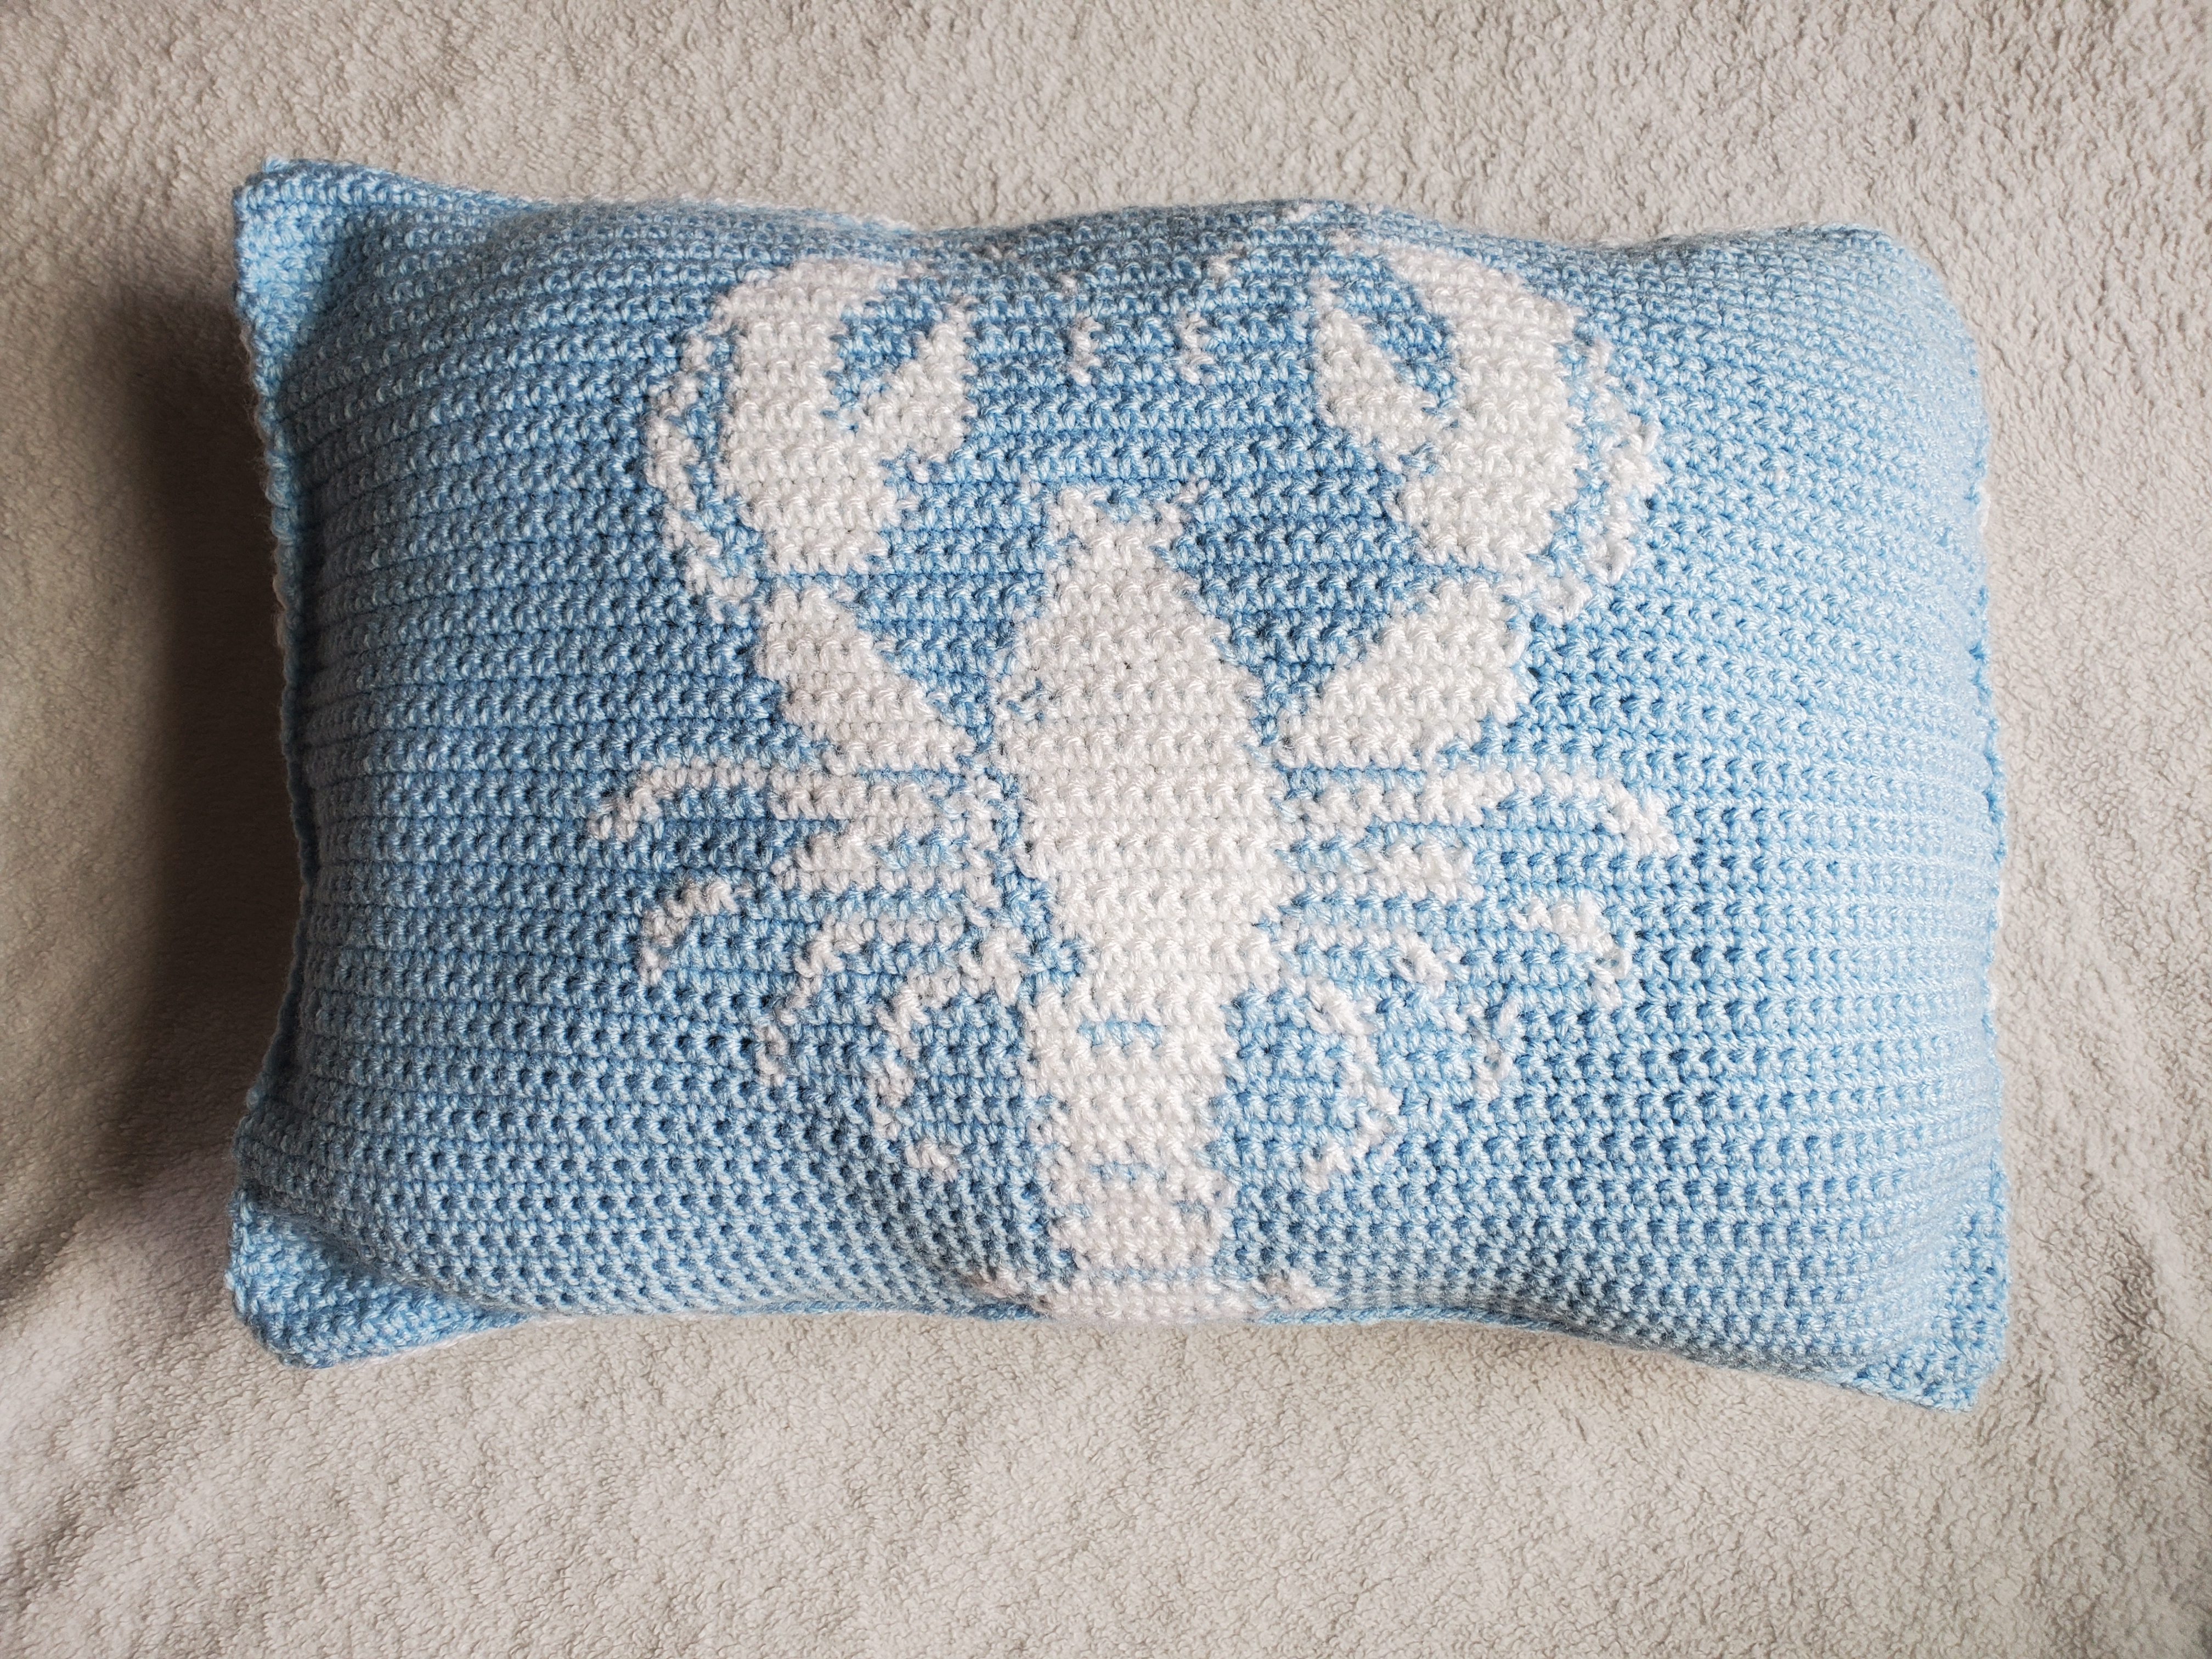
The finished lobster crochet pillow is about 19″ x 13″ when finished. This also depends on your gauge and how firmly you stuff your pillow :).
I like to use Stitch Fiddle to create some of my designs. I previously crocheted a Dark Souls Pillow and a Black and White Star Blanket that uses the same technique. I think this website is extremely helping when needing to make a grid/graph of an image or picture.
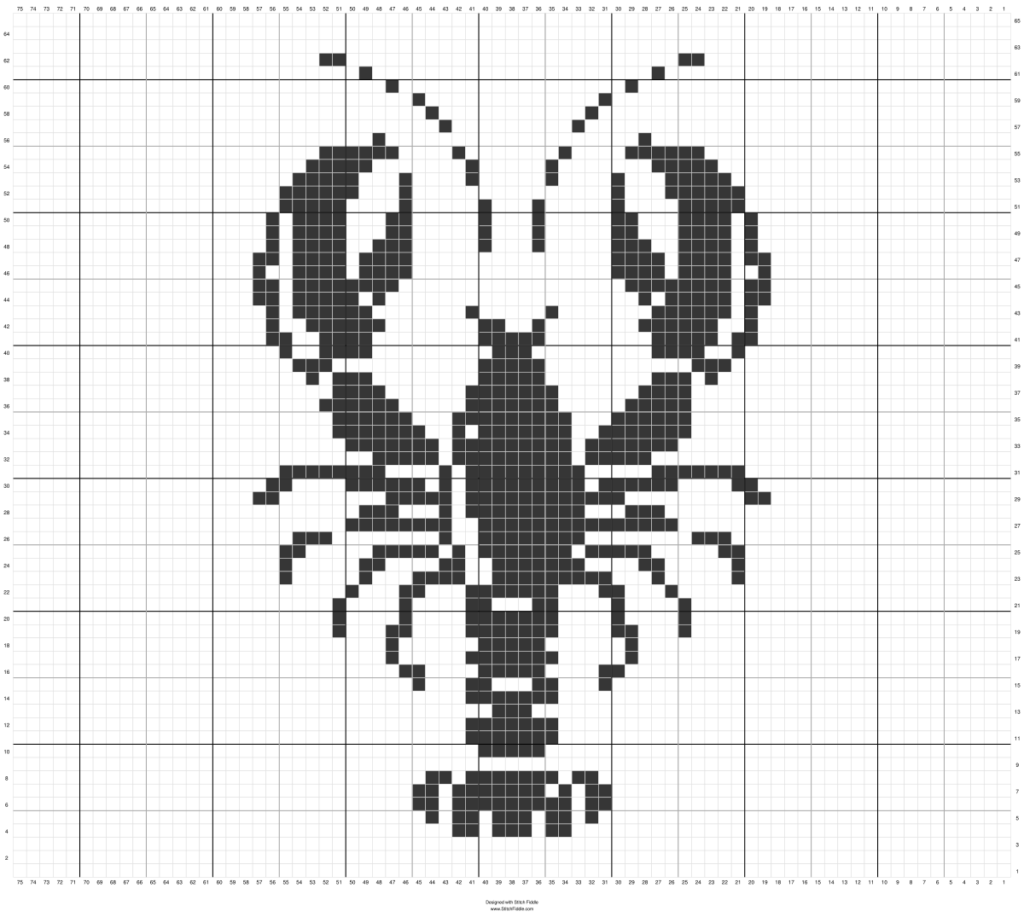
Here is an image of the graph I used below:
I also have a PDF of the graph that you can download here. It may be easier to see the rows on the PDF.
I suggest either printing out the PDF to mark where you are in the pattern, or write down somewhere what row you are on.
Each square on the graph represents 1 single crochet, and you always chain 1 and turn at the end of the rows to keep going.
The pillow is simple. You’ll need to crochet the front piece with the lobster and then make a separate back piece that’s the same size. Throw some stuffing in there, sew it up and viola!
Even though you sew up the entire pillow, you can throw the whole thing into the wash, as poly-fil stuffing is 100% machine washable.
I also used yarn from Red Heart Super Saver (medium 4 worsted weight). It’s acrylic, so it’s a little cheaper and it comes in so many different colors. As always, feel free to use a different yarn or yarn color if it suits you better!
I decided to go with a smaller hook size than normal. It was difficult to obtain a clear image of the lobster and using my typical 5 mm hook would make the pillow a bit too big for my liking. Of course feel free to use a larger hook size, your pillow will just be bigger.
The ch 1 at the beginning of each round does not count as a stitch.
I used a stitch marker to help me identify the left from the right side of the front panel of the Lobster Crochet Pillow. You don’t have to use one (a scrap piece of yarn also works), but I think it really helped me. Sometimes I would forget if I was going left to right, or right to left down the row I was on. Especially if I left the project and picked it up later.
Just make sure when you read it left to right, you’ll chain 1 and turn your work and then read the graph right to left.
To change yarn colors from white to blue correctly, plan ahead! I always stop at the stitch prior to the needed color change and put my new color on. This keeps a nice even look to the color change. You’ll want to make a single crochet, but don’t completely finish it. You should have 2 loops on your hook. Loop your new color around your hook and pull it through. See my previous post on how to change colors correctly in crochet for further details.
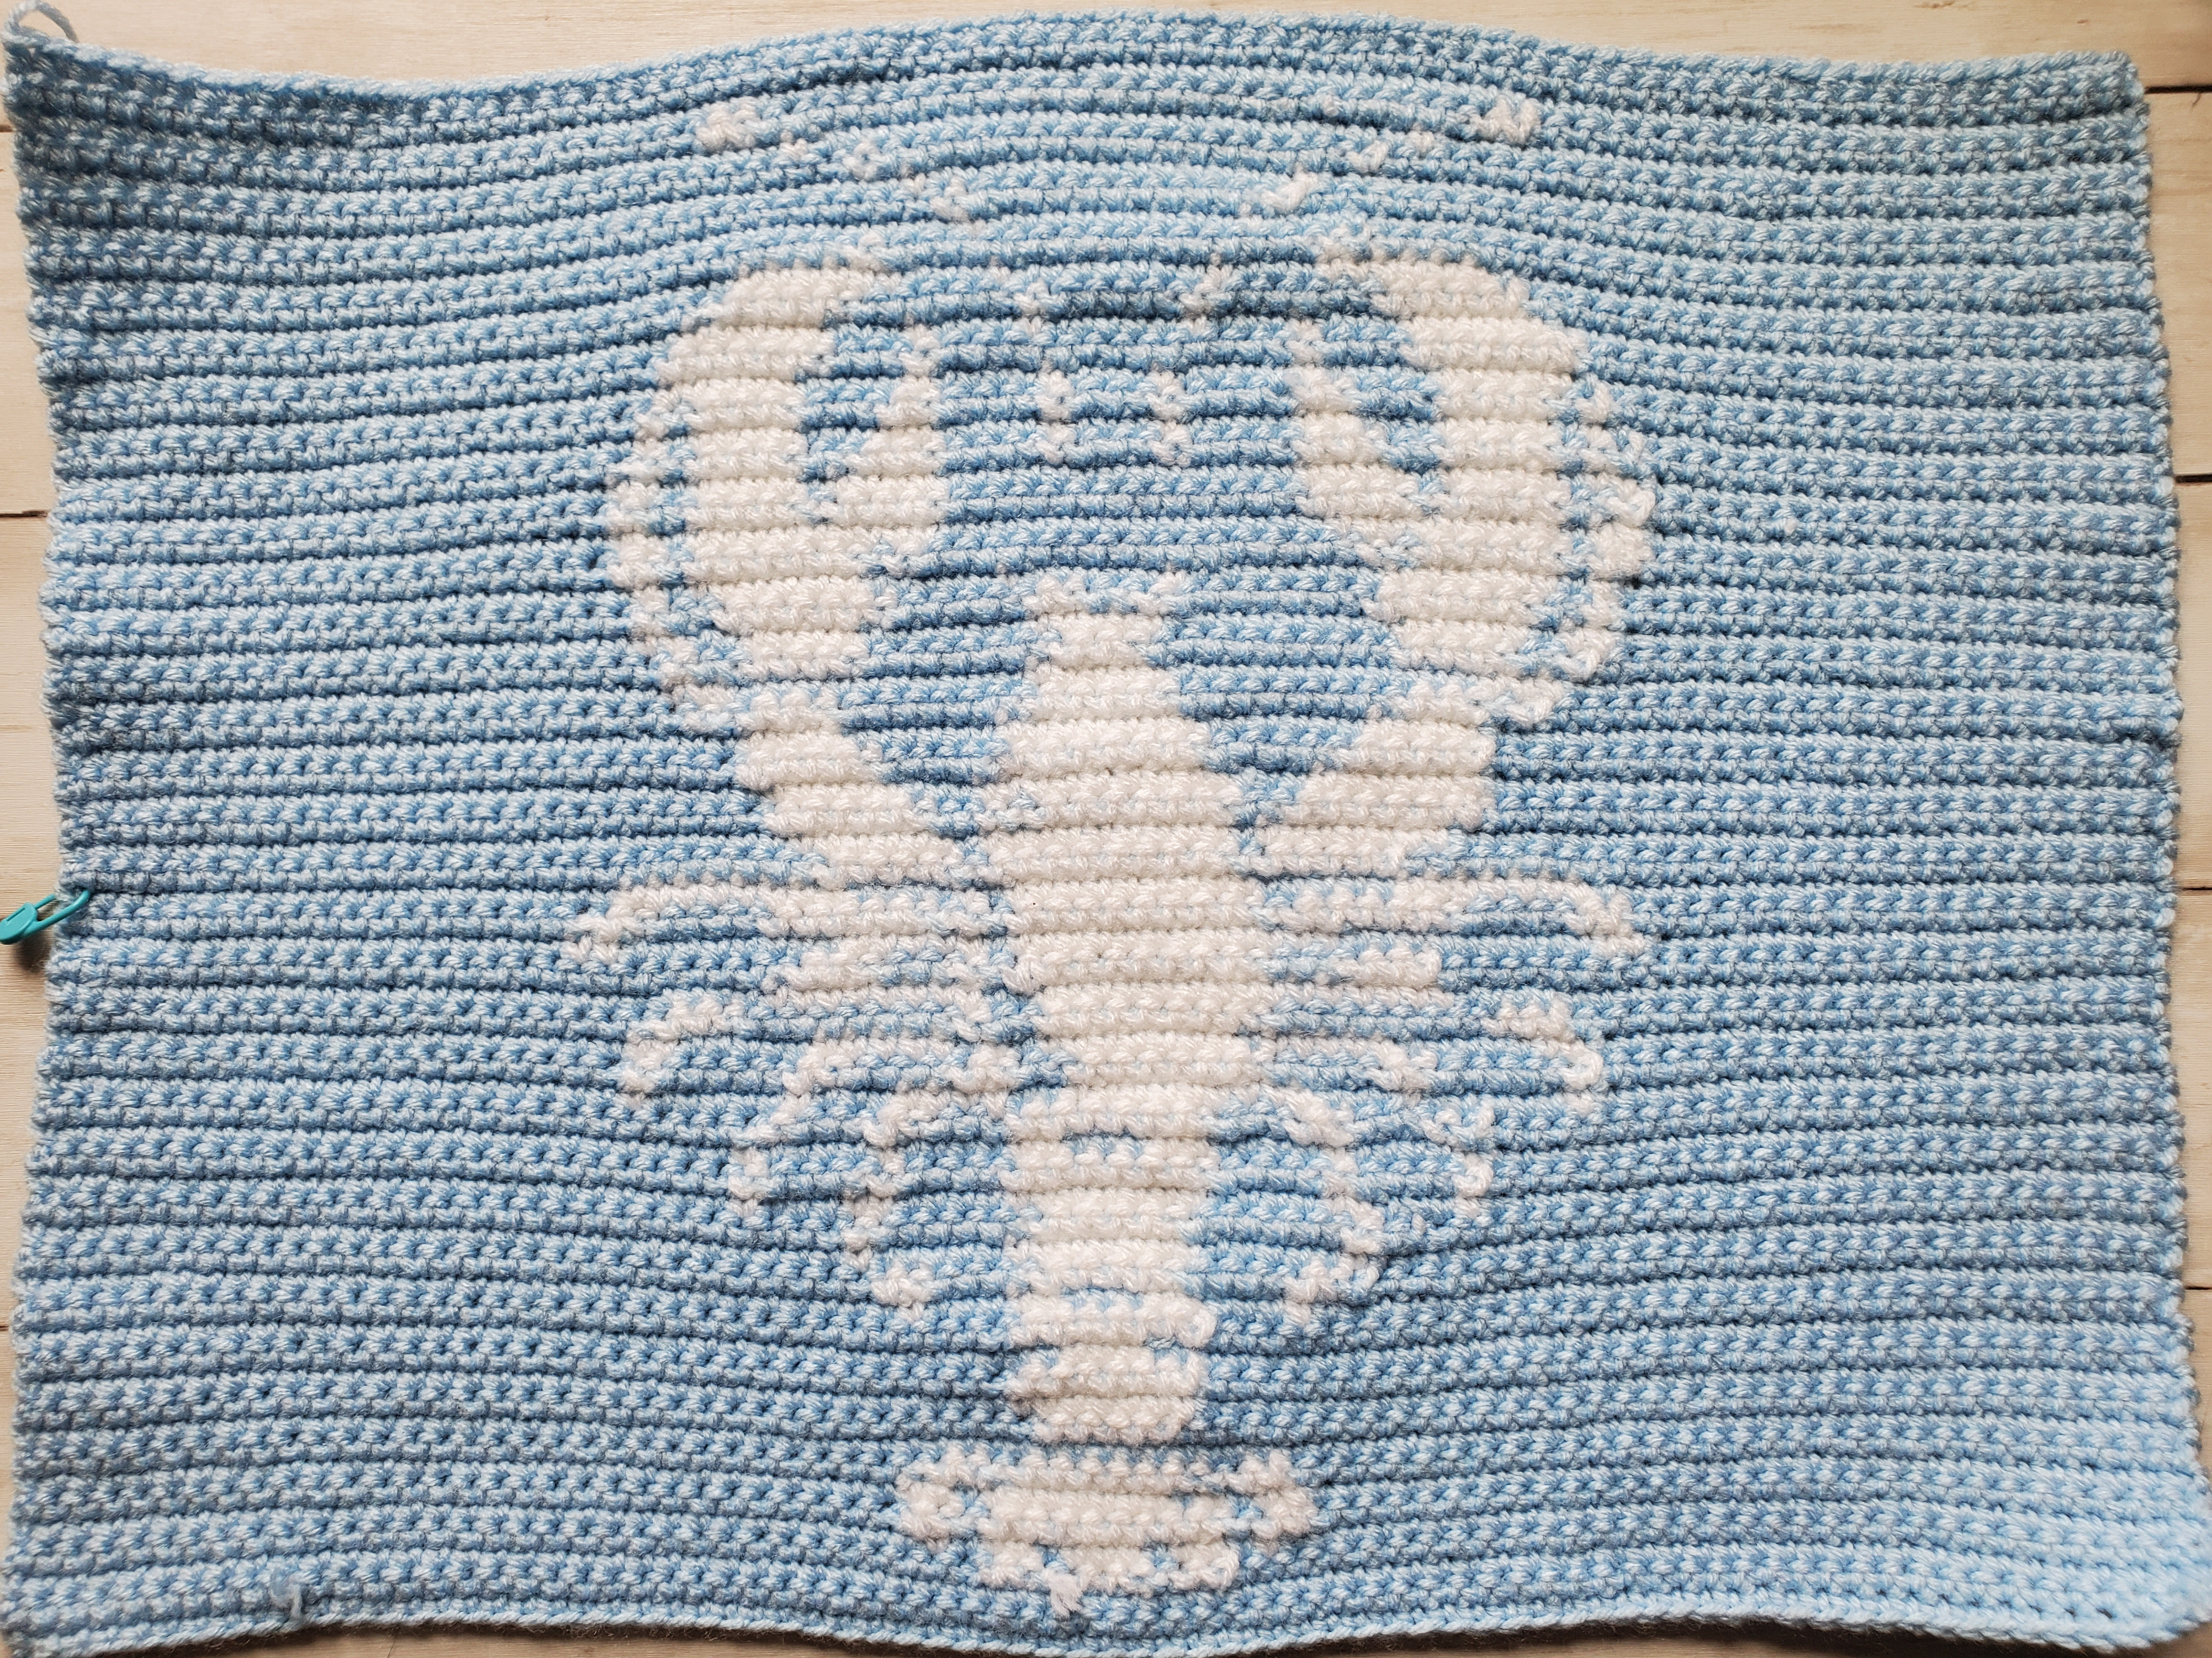
I decided not to carry the white yarn along with me throughout the pillow. I only did this in the center area where the lobster is. A few rows required a switch to the white yarn but I had ended it a few stitches away in the row below. I went ahead and pulled the white from the previous row to where it needed to be in the next, and then crocheted while going underneath the long stretch of white to hide it…if that makes sense!
Don’t be alarmed if your front panel starts to get wavy around where the lobster image is. When you sew the back panel, and stuff the pillow, it’s very difficult to see it.
Ch 76, from second ch from hook; sc in each ch across (75 sts)
Rows 1-65: Follow the lobster graph by starting left to right. At the end of each row, ch 1 and turn. Light Blue = the white squares and White = the black squares on the graph. Remember: 1 square = 1 sc.
Ch 76, from second ch from hook, sc in each ch across (75 sts)
Rows 1-65: Sc in each st across, turn and ch 1
Do not cut yarn.
With your back panel finished, line up both the front and the back panel with each other. (Make sure you have the front panel facing the correct way).
Start sewing the panels together by slip stitching into both sts all the way around the sides. Use the poly-fil to stuff the pillow firmly before completely sewing shut.
Cut off excess yarn and weave in any ends with tapestry needle.

Leave a Reply
You must be logged in to post a comment.