CROCHET SKULL PATTERN – Lace of the Dead

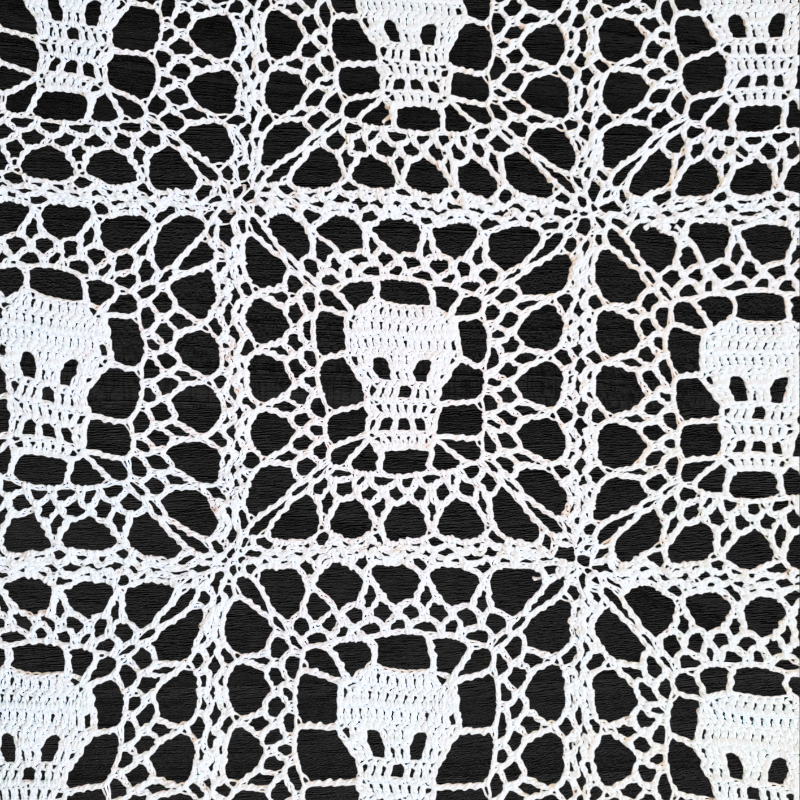
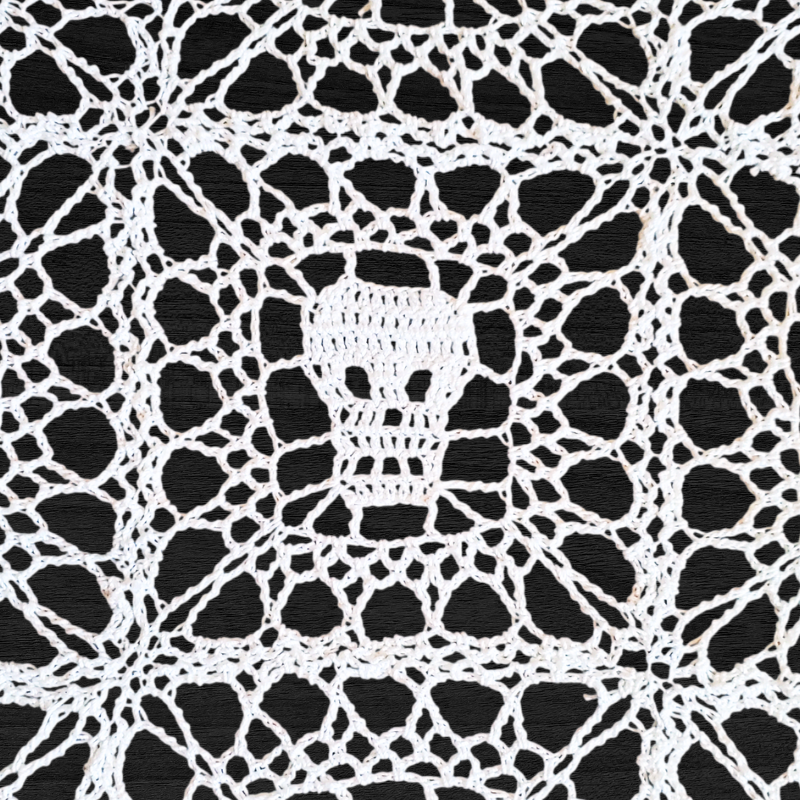
Hey everyone, today I have another crochet skull pattern for you to try, The Lace of the Dead! 

This is a lacy rectangle with a skull motif right in the center. It’s very similar to my Skully Squares Stitch Pattern, but we will be working in rows and in the round.

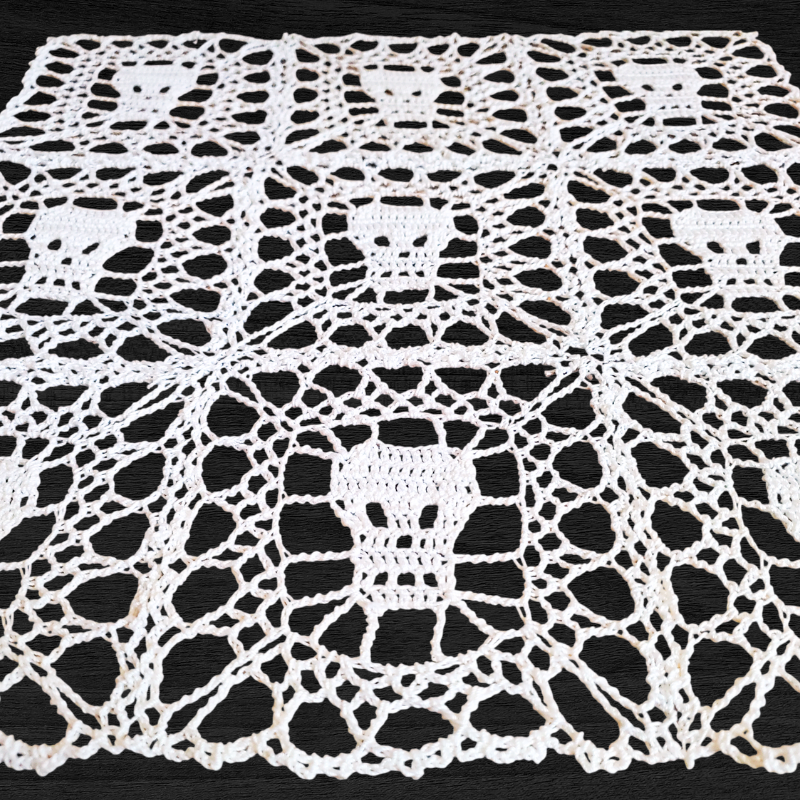
I think this pattern is awesome, and I hope you do too. It isn’t perfectly square, I think it’s more rectangular in shape, but I bet all you creative out there can think of fun and spooky ways to use this lace!

The Lace of the Dead would look AMAZING as a spooky table runner or as curtains. You could use it in Gothic attire, like in a shawl or shirt. The possibilities are endless!

You will need to join each finished piece together. I sewed mine with the same crochet thread I used to make it. It took me some time to sew them together, but the finished product is worth it in my opinion!

I am using size 10 crochet thread for this crochet skull pattern. You can always use whatever yarn and hook floats your boat, just remember it will be a different size than mine if you do.

Related Posts:
Please note that some of these links may be affiliate links. That means that if you click on these links and make a purchase, I may receive a commission at no extra cost to you. You can find more information about our disclosure policy here. Thank you for your support.

Materials Used:

Abbreviations Used (US Terms)

  • St(s) – stitch(es)
  • Ch(s) – chains
  • Sc – single crochet
  • Dc – double crochet
  • Dc3tog – double crochet 3 stitches together
  • Tr – treble crochet
  • Dtr – double treble crochet
  • Tr2tog – treble crochet 2 stitches together
YOUTUBE VIDEO NOT LOADING? CLICK TO LEARN THE LACE OF THE DEAD CROCHET PATTERN HERE.
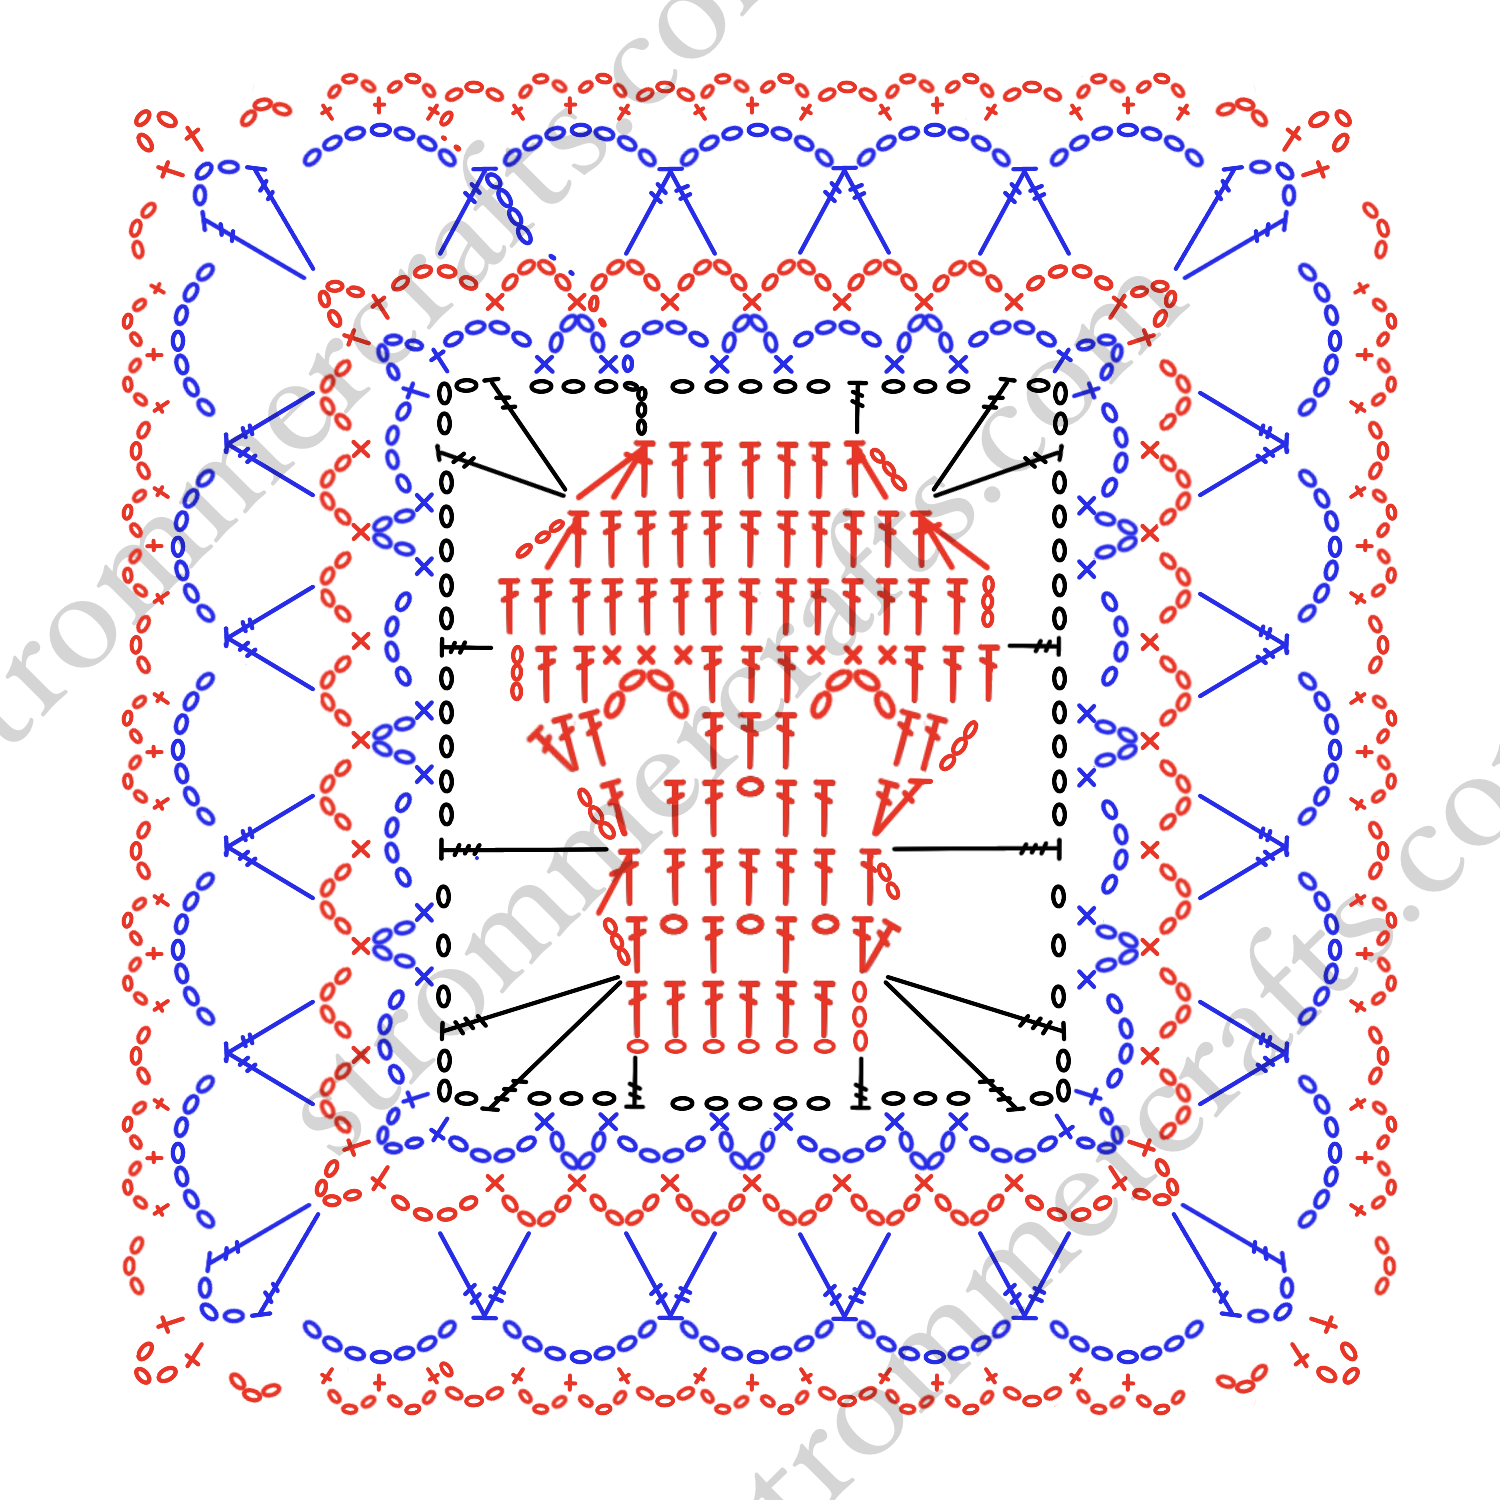
Lace of the Dead Pattern:

To start, we will be making the skull motif first and then work in the round.

Ch 9

Row 1: Dc into 4th ch away from hook, dc into each ch across (7 dc)

Row 2: Ch 3 (counts as dc), turn, dc in same st, ch 1, skip a st, dc in next st. Ch 1, skip a st, dc in next st, ch 1, skip a st, 2 dc in last st. (6 dc, 3 ch 1s)

Row 3: ch 2, dc into next st (the ch 2 and dc count as a 2dctog), *dc into next ch 1 space, dc in next dc* Repeat from *to* across until last 2 sts left, dc2tog in last 2 sts. (7 sts)

Row 4: Ch 3 (counts as dc), turn, dc in same st, dc in next 2 sts. Ch 1, skip a st, dc in next 2 sts, 2 dc in last st. (8 dc, 1 ch 1)

Row 5: Ch 3 (counts as dc), turn, dc in same st, dc in next st, ch 4, skip a st, dc in next st, dc in next ch 1 space, dc in next dc. Ch 4, skip a st, dc in next st, 2 dc in last st. (8 dc, 2 ch 4s)

Row 6: Ch 3 (counts as dc), dc in next 2 sts, 3 sc in next ch 4 space, dc in next 3 sts, 3 sc in next ch 4 space, 3 dc in last 3 sts. (9 dc, 6 sc)

Row 7: Ch 3 (counts as dc), turn, dc in each st across (15 dc)

Row 8: Ch 3 (counts as part of dc3tog), turn, dc2tog in next 2 sts. Dc in next 9 sts. Dc3tog in last 3 sts. (9 dc, 2 dc3togs)

Row 9: Ch 3 (counts as part of dc3tog), turn, dc2tog in next 2 sts. Dc in next 5 sts. Dc3tog in last 3 sts. (5 dc, 2 dc3togs)

At this point we are done with the skull and will start crocheting in the round.

Round 1: Ch 7 (counts as tr and ch 3), Now we will go down the side.

(tr, ch 3, tr) in the top of Row 8s starting dc3tog. Ch 5, tr in top of starting ch 3 in Row 6. Ch 5, dtr in last 2dctog in Row 3. Ch 3, (Dtr, ch 3, dtr) in top of the last dc in Row 1. 

Now turning on the underside, tr into the bottom of that same dc you just crocheted into from Row 1. Ch 5, skip 5 dc, tr into the first dc of Row 1(it is a ch 3). Ch 3.

Now we will go up the next side.

(Dtr, ch 3, dtr) in the top of that starting dc from Row 1 (the top of the ch 3). Ch 3, dtr into first dc2tog in Row 3. Ch 5, tr into the last dc of Row 6. Ch 5, (tr, ch 3, tr) into last dc3tog of Row 8.

Now turning into the next side, tr into the first dc3tog of Row 9. Ch 5, sl st into the 4th ch of our starting ch 7.

Round 2: Sl st into the next ch 3 space. (Sc, ch 4, sc) in the same ch 3 space. Ch 4, (sc, ch 4, sc) in the next ch 3 corner space.  

Ch 4, (sc, ch 4, sc) in next ch 5 space. Ch 4, (sc, ch 4, sc) in next ch 5 space. Ch 4, (sc, ch 4, sc) in next ch 3 space. 

Ch 4, (sc, ch 4, sc) in next ch 3 corner space. Ch 4, (sc, ch 4, sc) in next ch 3 space. Ch 4, (sc, ch 4, sc) in next ch 5 space. Ch 4, (sc, ch 4, sc) in the next ch 3 space.

Ch 4, (sc, ch 4, sc) in next ch 3 corner space. Ch 4, (sc, ch 4, sc) in next ch 3 space. Ch 4, (sc, ch 4, sc) in next ch 5 space. Ch 4, (sc, ch 4, sc) in next ch 5. 

Ch 4, (sc, ch 4, sc) in next ch 3 corner space. Ch 4, (sc, ch 4, sc) in next ch 3 space. Ch 4, (sc, ch 4, sc) in next ch 5 space, ch 4 sl st to 4th ch of starting ch 7.

Round 3: Sl st into ch 3 space. Ch 1, sc in same ch 3 space. Ch 4, sc in next ch 4 space. Ch 4, (sc, ch 4, sc) in next ch 4 corner space.

*Ch 4, sc in next ch 4 space*

Repeat from *to* until the ch 4 corner spaces. (Sc, ch 4, sc) in those spaces. Sl st to beginning sc.

Round 4: Sl st into next 2 chs. Ch 4, tr in next ch 4 space. Ch 7, (tr, ch 3, tr) in next ch 4 corner space. 

*Ch 7, tr2tog with the first leg in the next ch 4 space and the second leg in the next ch 4 space.*

Repeat from *to* until the corner space. (Tr, ch 3, tr) in ch 4 corner spaces. Sl st to first tr made this round.

Round 5: Sl st into next 2 chs. Ch 1, (sc, ch 3, sc, ch 3, sc) in the same ch 7 space. Ch 3, (sc, ch 3, sc) in next ch 3 corner space. 

*Ch 3, (sc, ch 3, sc, ch 3, sc) in next ch 7 corner space.*

Repeat from *to* around until corner spaces. (Sc, ch 3, sc) in ch 3 corner spaces. Sl st to first sc made.

Cut thread with scissors, weave in any loose ends with tapestry needle. 

I suggest blocking your work first and then sewing the squares together. I used the same crochet thread and my tapestry needle, but you can use any thread you like.

That’s all for the latest crochet skull pattern, the Lace of the Dead! I hope you guys enjoyed this pattern. 

Other Posts You May Like:
Crochet Skull Pattern Lace of the Dead

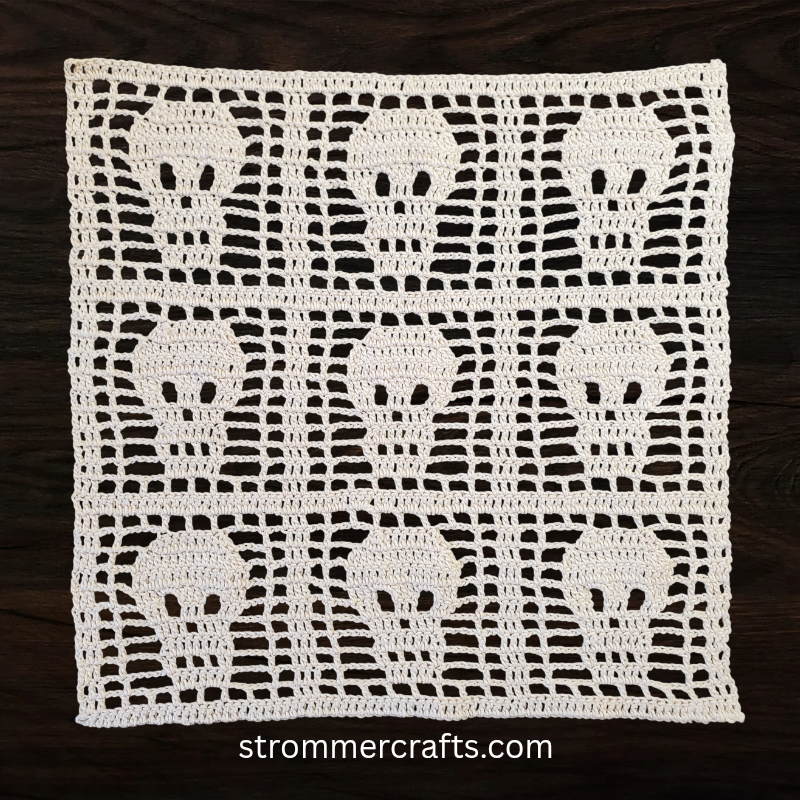
Crochet Skull Stitch – Skully Squares

Hey everyone, today I’m excited to share my latest creation! It’s a crochet skull stitch that I’m calling the Skully Squares!!

It took a lot of trial and error (and frogging and restarting), but I am FINALLY happy with the way Skully Squares turned out and want to teach you all how to make it!

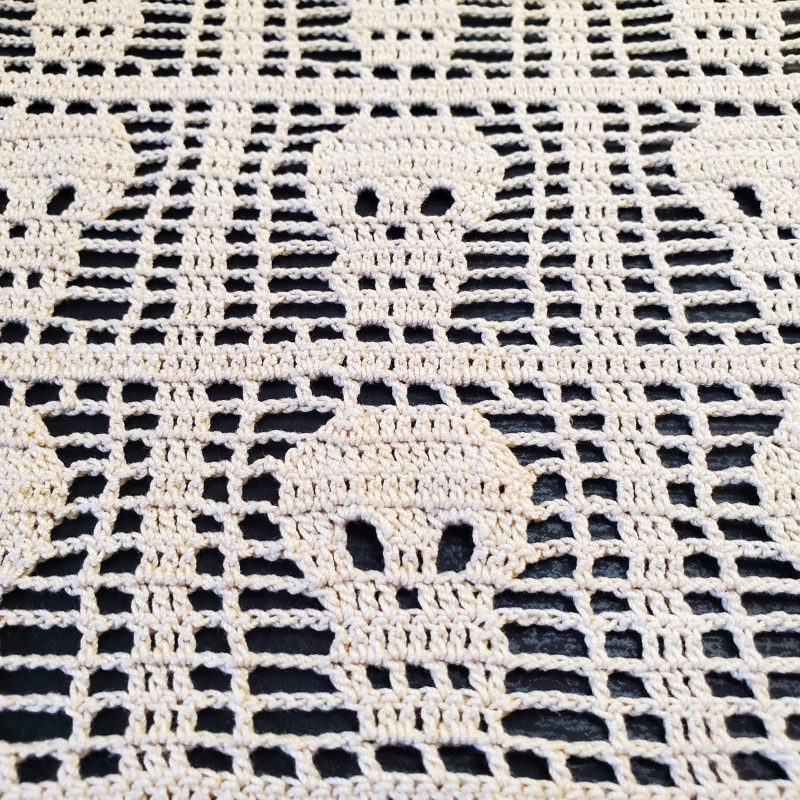
This is a very lacy crochet pattern, with a skull motif centered in the middle of a solid square of double crochets.

I’ve created this pattern in a way that allows you to make this as big as you want. 

I typically use crochet thread to make my patterns, but you can try using different sizes of yarn if you’d like, just remember that it will be bigger than mine if you do.

As with most of my projects (especially if you use crochet thread), I highly recommend blocking your work when you’re done. It’s extra work, but it’s worth it. Your crochet projects look so much neater and lay flatter! 

Ideas for how to use this pattern:

Since this stitch pattern is very open, I think some of the strongest uses for this would be:

  • As a whole crochet lace curtain panel
  • Trim for a curtain
  • A decorative crochet table runner
  • A square centerpiece
  • Trim for a table runner
  • Crochet gothic scarf
  • Used as a border or trim for garments.

I’m sure there are plenty of other uses for this particular pattern, but these are some of the best and most obvious ones I could think of.

Related Posts:

Please note that some of these links may be affiliate links. That means that if you click on these links and make a purchase, I may receive a commission at no extra cost to you. You can find more information about our disclosure policy here. Thank you for your support.

Crochet Skull Stitch

Materials Used:

Abbreviations Used (US terms):

  • St(s) – stitch(es)
  • Ch(s) – chains 
  • Sc – single crochet
  • Dc – double crochet
  • Dc2tog – double crochet 2 stitches together
  • Dc3tog – double crochet 3 stitches together
YOUTUBE VIDEO NOT LOADING? CLICK TO LEARN THE CROCHET SKULL STITCH – SKULLY SQUARES HERE.

Crochet Skull Stitch – Skully Squares

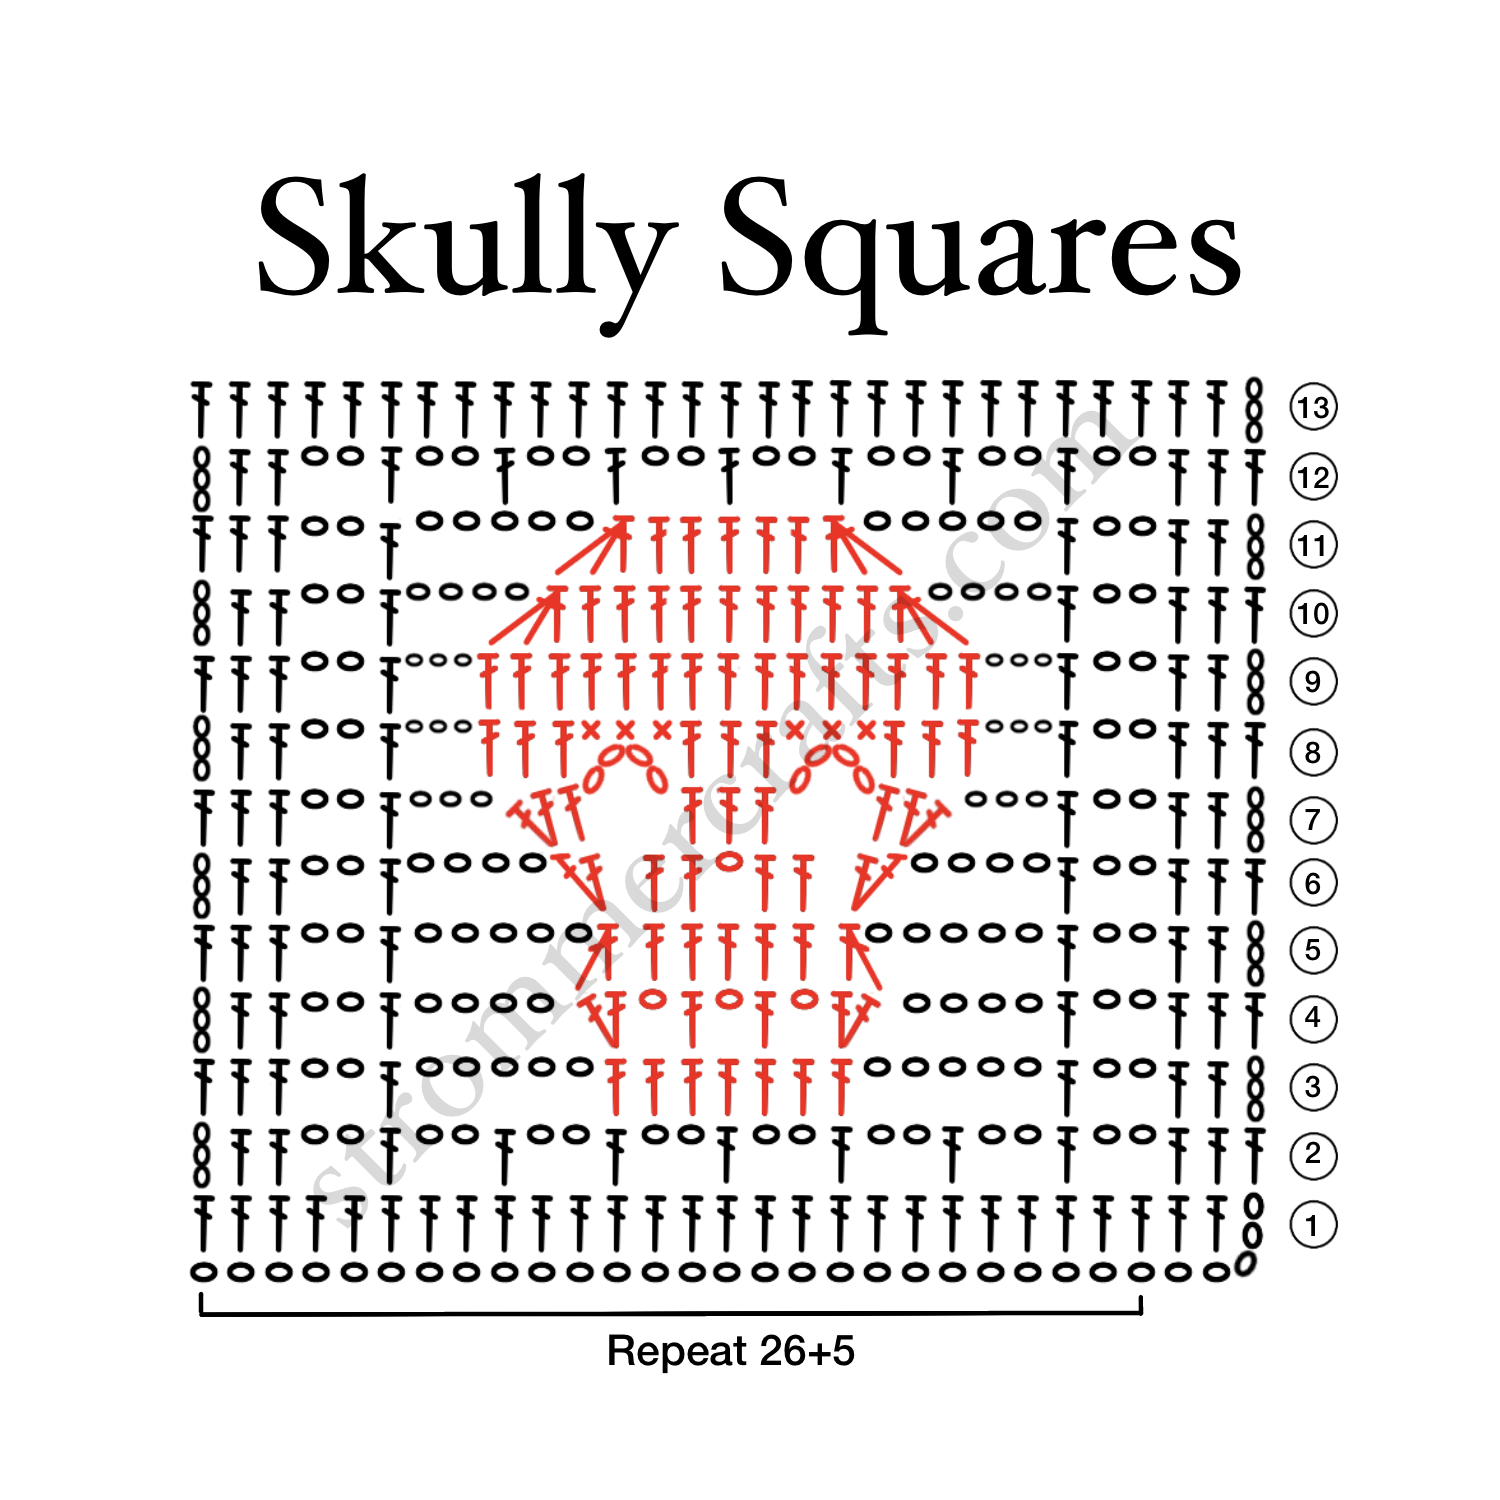
Ch a repeat of 26+5 

All that means is to chain 26 over and over until you’re happy with the length and then add 5 more chains onto the end of that.

Row 1: Dc into 4th ch away from hook, dc into each ch across

Row 2: Ch 3 (counts as a dc in this row and throughout), turn, dc into next 2 dc. *Ch 2, skip 2 chs, dc unto next ch.* 

Repeat from *to* until you’ve made 8 ch 2 spaces. Dc into next dc, last dc goes into the top ch from previous row.

Row 3: Ch 3, turn dc into next 2 dc. Ch 2, skip next ch 2 space, dc into next dc. Ch 5, skip over the next (ch 2 space, dc, ch 2 space) and dc into the next dc. 

(2 dc into next ch 2 space, dc into next dc x2 times). 

Ch 5, skip over the next (ch 2 space, dc, ch 2 space) and dc into the next dc.

Ch 2, skip next ch 2 space, dc into last 3 dc

Row 4: Ch 3, turn, dc in next 2 dc. Ch 2, skip ch 2 space, dc into next dc. Ch 4, skip next ch 5 space, 2 dc in next dc.

(Ch 1, skip dc, dc into next dc x2 times). Ch 1, skip dc, 2 dc in next dc.

Ch 4, skip next ch 5 space, dc into next dc, ch 2, skip next ch 2 space, dc in last 3 dc.

Row 5: Ch 3, turn, dc into next 2 dc, ch 2, skip ch 2 space, dc into next dc, ch 5, skip ch 4 space and dc2tog in next 2 dc.

(Dc in next ch 1 space, dc in next dc x2 times), dc in next ch 1 space, dc2tog in next 2 dc.

Ch 5, skip ch 4 space, dc in next dc. Ch 2, skip ch 2 space, dc in last 3 dc.

Row 6: Ch 3, turn, dc in next 2 dc, ch 2, skip ch 2 space, dc in next dc. Ch 4, skip ch 5 space, 2 dc in next dc2tog. Dc in next 2 dc. Ch 1, skip a dc, dc in next 2 dc, 2 dc in next dc2tog. 

Ch 4, skip ch 5, dc in next dc, ch 2, skip next ch 2 space, dc in last 3 dc.

Row 7: Ch 3, turn, dc in next 2 dc. Ch 2, skip ch 2 space, dc in next dc, ch 3, skip ch 4 space, 2 dc in next dc, dc in next dc.

Ch 4, skip a dc, dc in next dc, dc in next ch 1 space, dc in next dc.

Ch 4, skip a dc, dc in next dc, 2 dc in next dc. Ch 3, skip ch 4 space, dc in next dc, ch 2, skip ch 2 space, dc in last 3 dc.

Row 8: Ch 3, turn, dc in next 2 dc, ch 2, skip ch 2 space, dc in next dc. Ch 3, skip ch 3 space, dc in next 3 dc. (3 sc in ch 4 space. Dc in next 3 dc x2 times). Ch 3, skip ch 3 space, dc in next dc. Ch 2, skip ch 2 space, dc in last 3 dc.

Row 9: Ch 3, turn, dc in next 2 dc, ch 2, skip ch 2 space, dc in next dc. Ch 3, skip ch 3 space, dc in next dc and in each st across the skull. 

Ch 3, skip ch 3 space, dc in next dc, ch 2, skip ch 2 space, dc in last 3 dc.

Row 10: Ch 3, turn, dc in next 2 dc. Ch 2, skip ch 2 space, dc in next dc, ch 4, skip ch 3 space, dc3tog in the next 3 dc. Dc in the next 9 dc. Dc3tog in last 3 dc of skull. 

Ch 4, skip ch 3 space, dc in next dc. Ch 2, skip ch 2 space, dc in last 3 dc.

Row 11: Ch 3, turn, dc in next 2 dc. Ch 2, skip ch 2 space, dc in next dc. Ch 5, skip ch 4 space, 3dctog in next 3 dc. Dc in next 5 dc, 3dctog in last 3 dc of skull. Ch 5, skip ch 4 space, dc in next dc. Ch 2, skip ch 2 space, dc in last 3 dc 

Row 12: Ch 3, turn, dc in next 2 dc. Ch 2, skip ch 2 space, dc in next dc. Ch 2, dc into 3rd ch of next ch 5. Ch 2, dc into next dc3tog. Ch 2, skip 2 dc, dc in next dc, ch 2, skip 2 dc, dc into next dc3tog. Ch 2, dc into 3rd ch of next ch 5. Ch 2, dc in next dc. Ch 2, skip ch 2 space, dc in last 3 dc.

Row 13: Ch 3, turn, dc in each dc and ch across.

Repeat Rows 2-13 until desired height

Cut thread with scissors, pull thread through and weave in any loose ends.

Blocking (optional):

To make the Skully Squares absolutely flat, I would block it.

You can block crochet projects by using plain  water or a starch solution if you like them crispy.

I like to use water since I never have starch solution and I’m probably not going to make any on my own! 

To block I simply soak my projects in water for a few minutes (the water really needs to infiltrate I to those stitches). After it soaks, pull it out and gently pat out the excess water on a towel.

Take a blocking board (or just grab a thick enough piece of cardboard), and pin it into the exact shape you need it. For this one, I used a square shape.

Place your board in a safe place and allow it to dry for 24-48 hours or until it’s no longer wet.

I hope you enjoyed this crochet skull stitch pattern. I think the Skully Squares turned out really great. I’d love to see your finished work!

You can tag me on Instagram @strommer.crafts 

Until next time!

Other Posts You May Like: