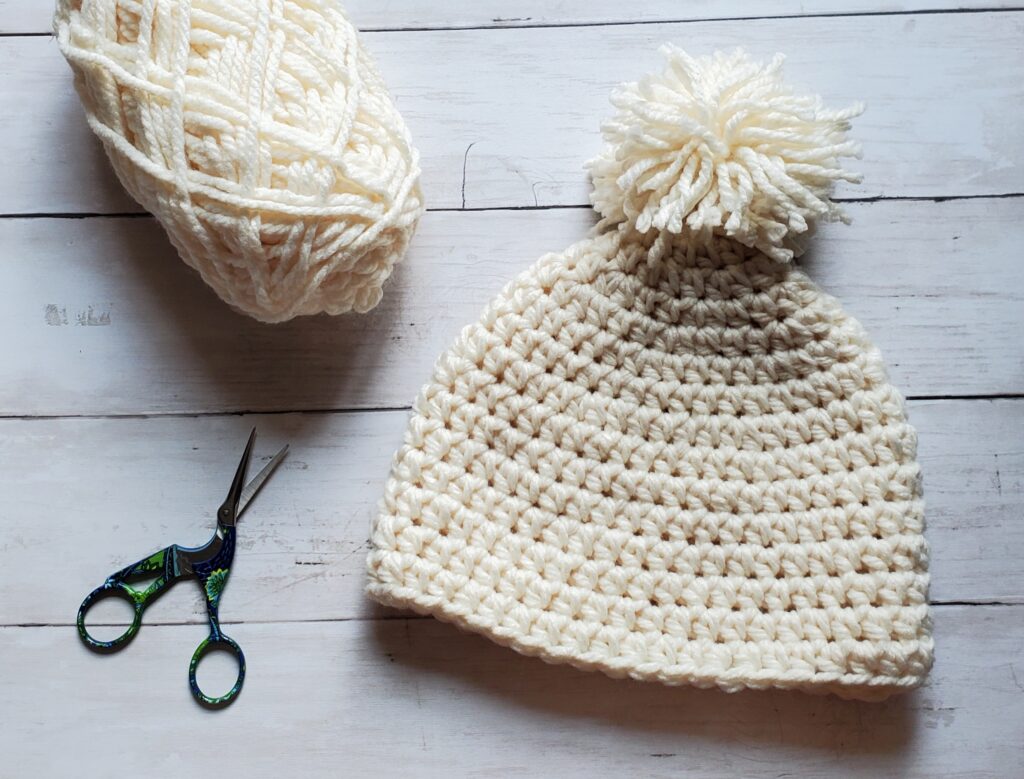
Pink Crochet Hat Pattern
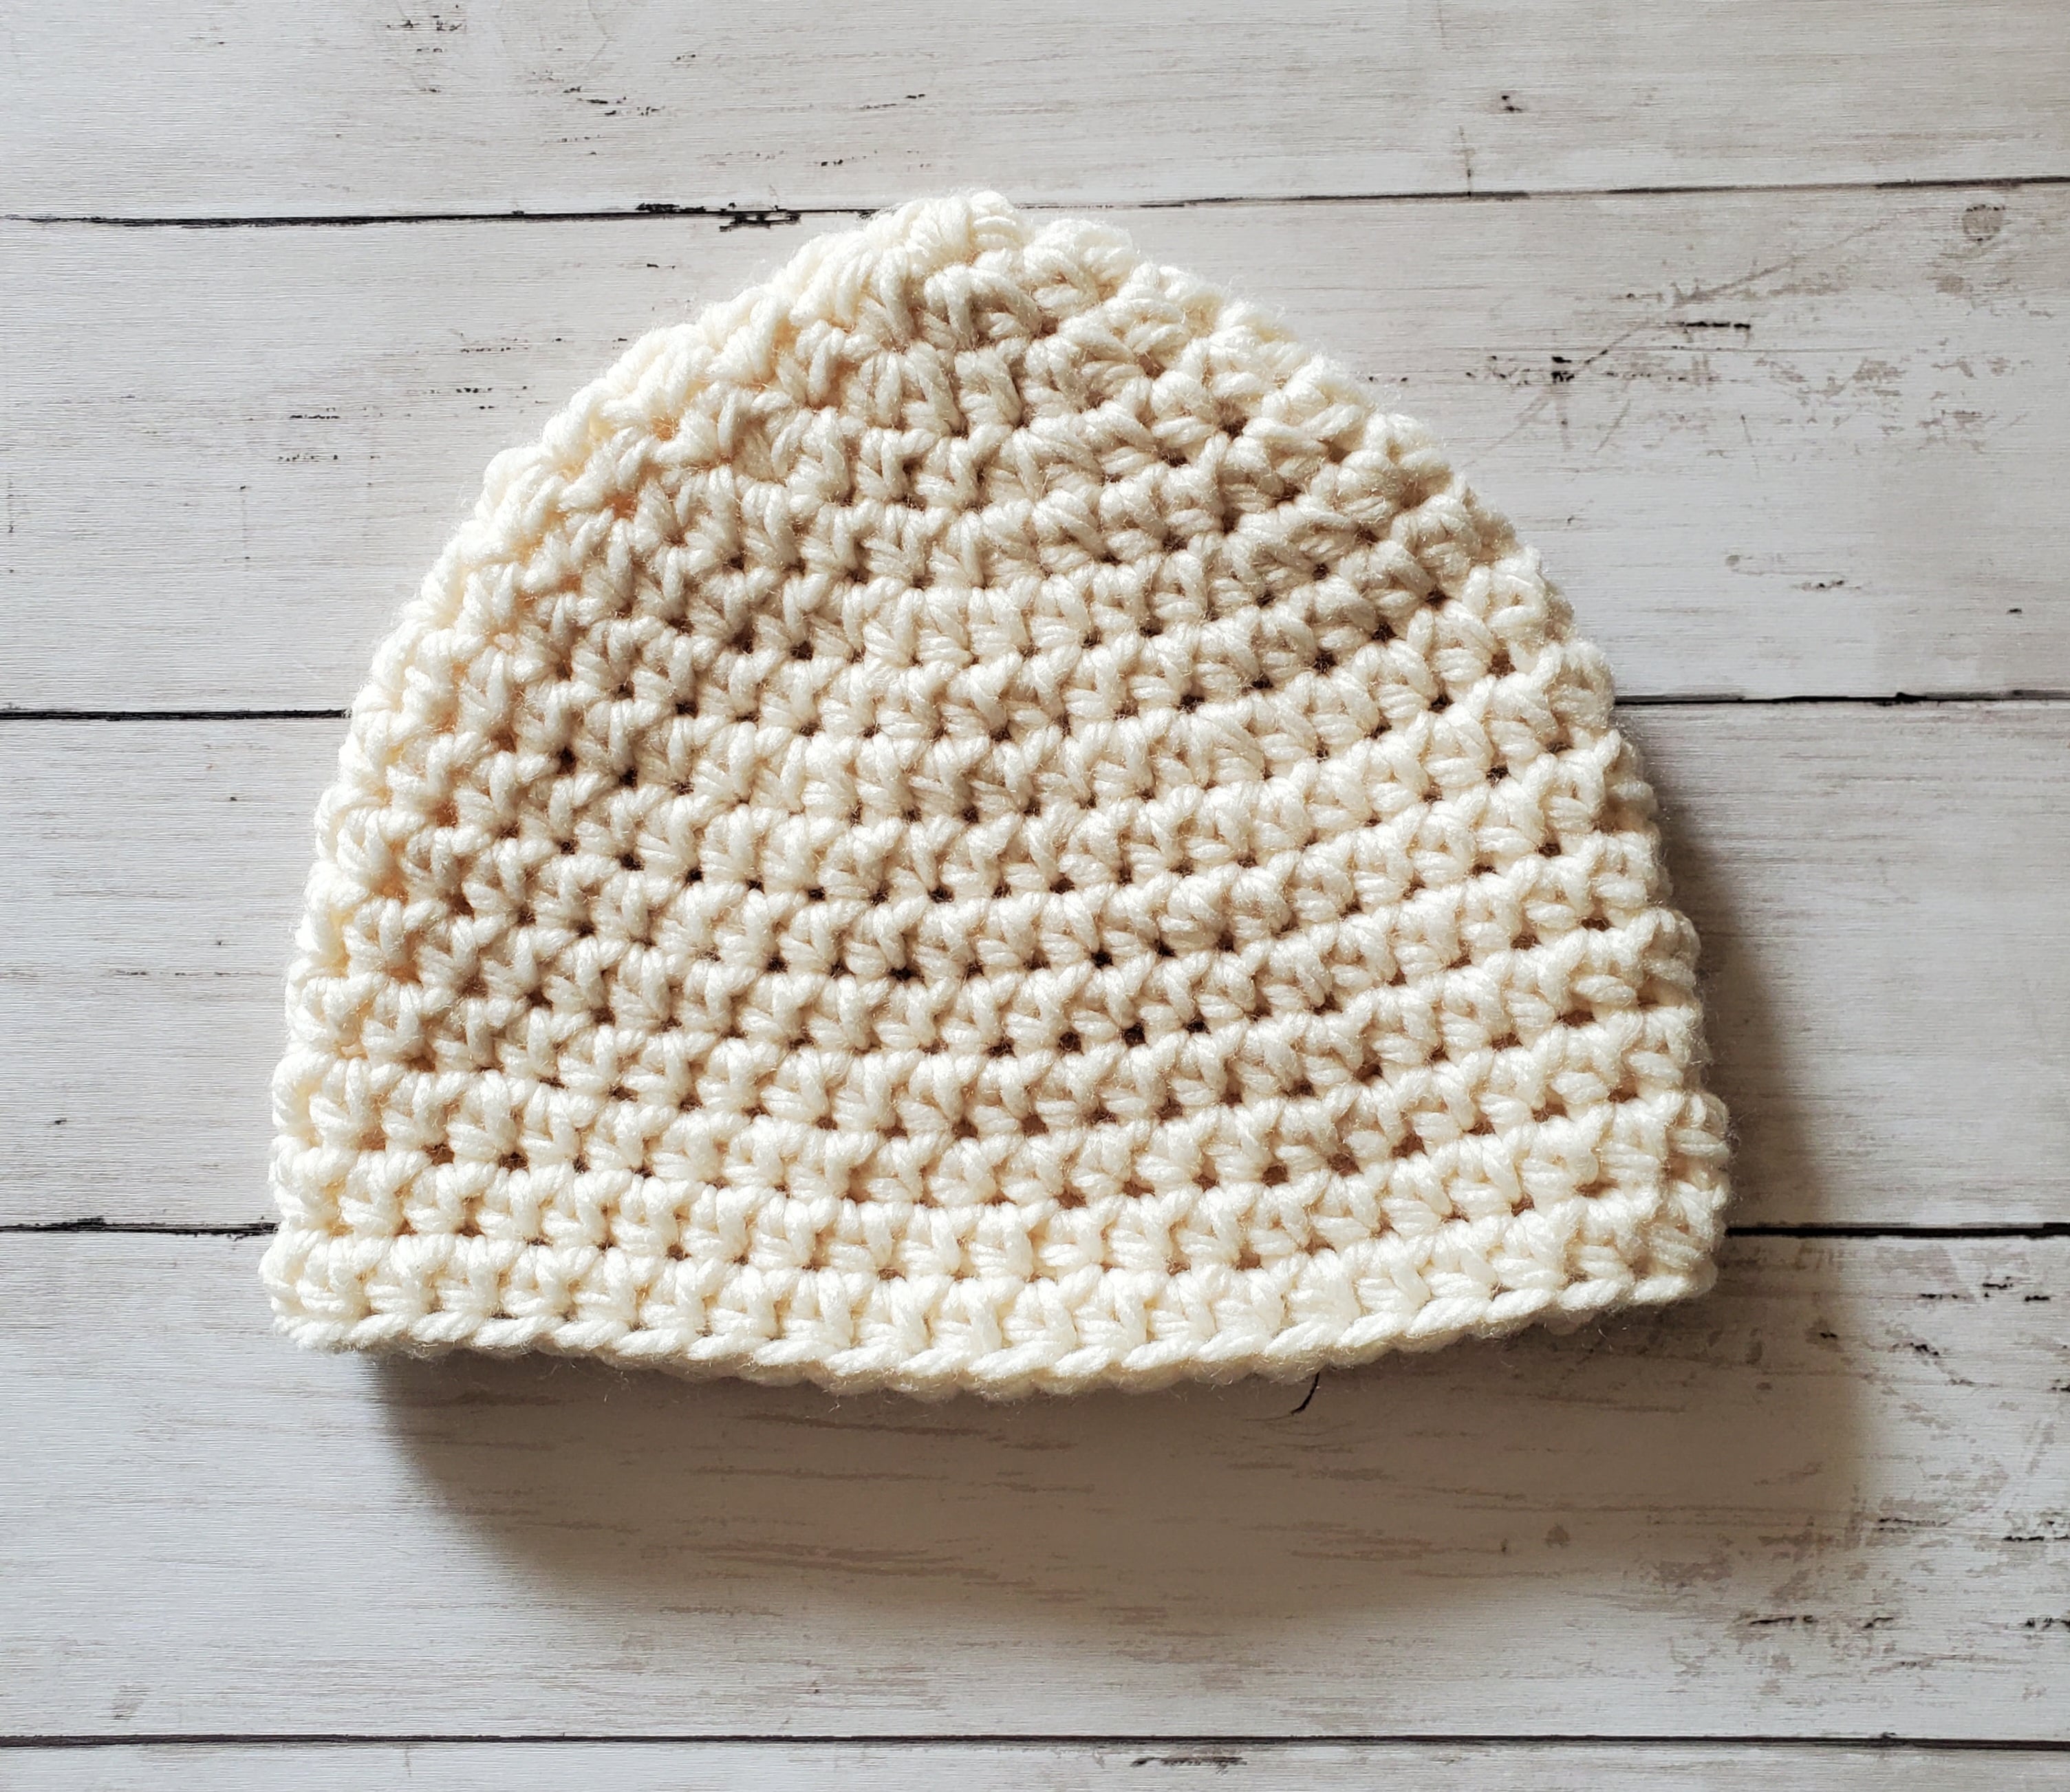
Happy new year everyone! Today I have a pink crochet hat pattern for you!
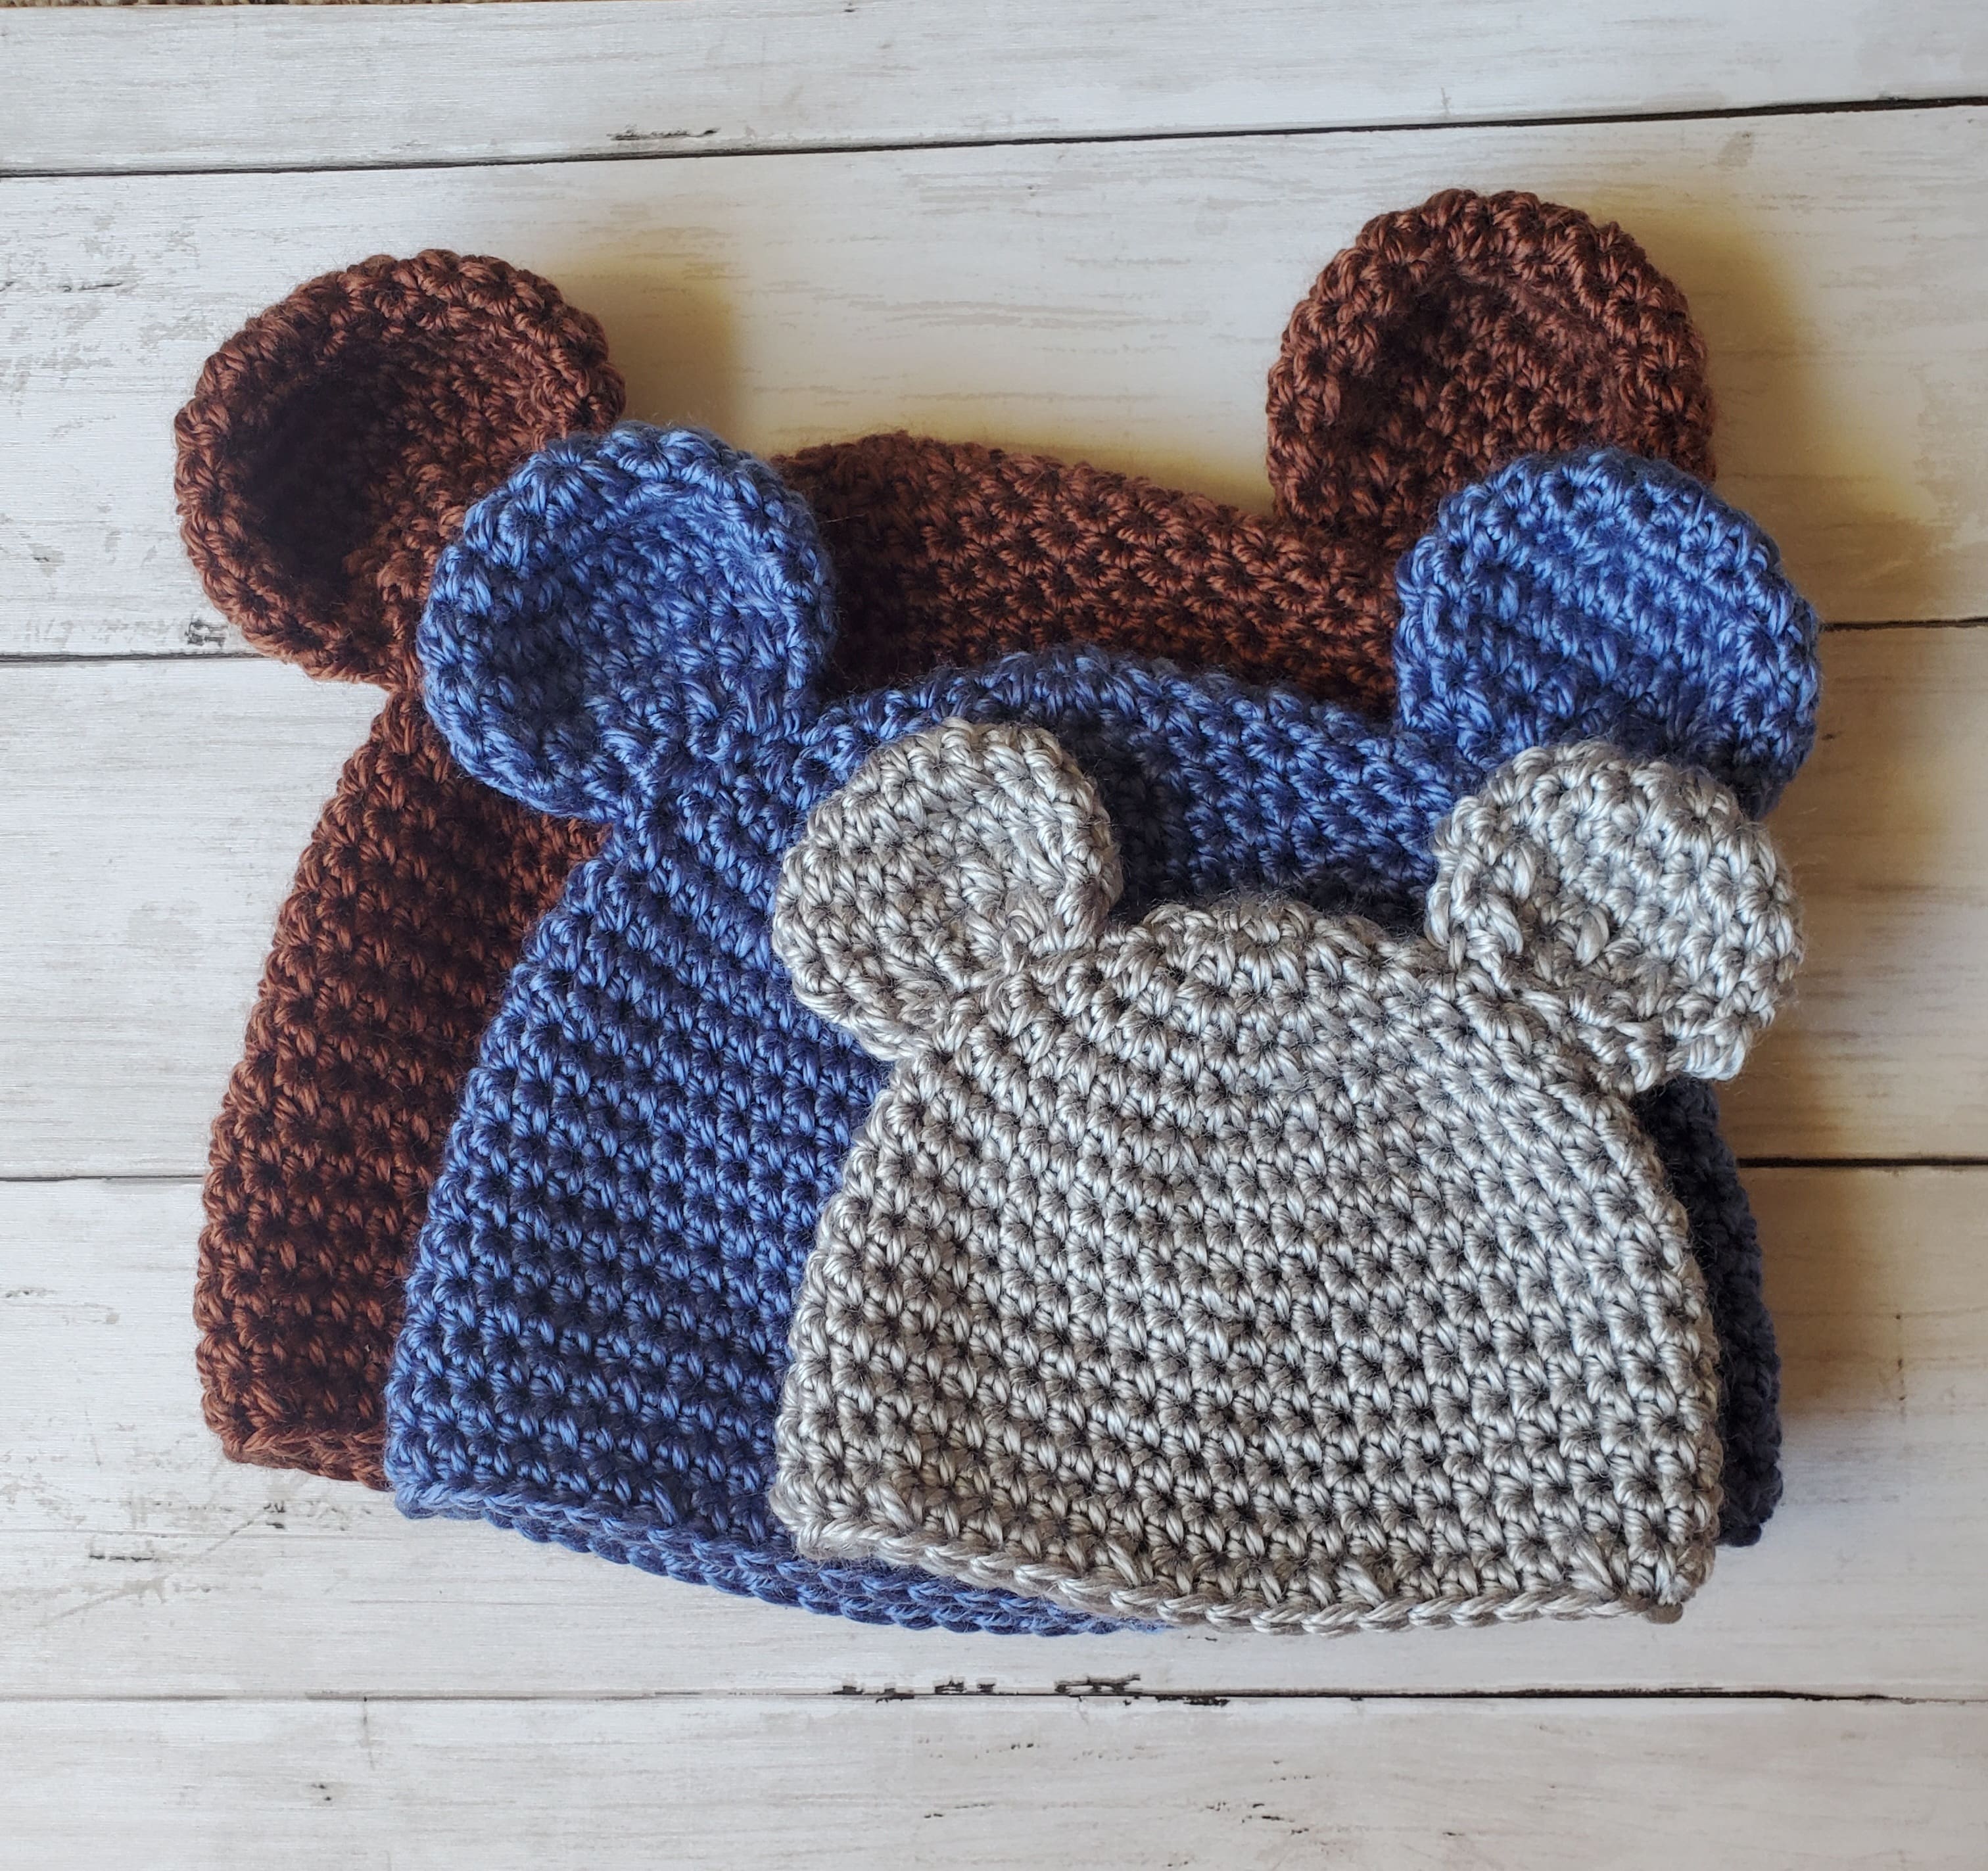
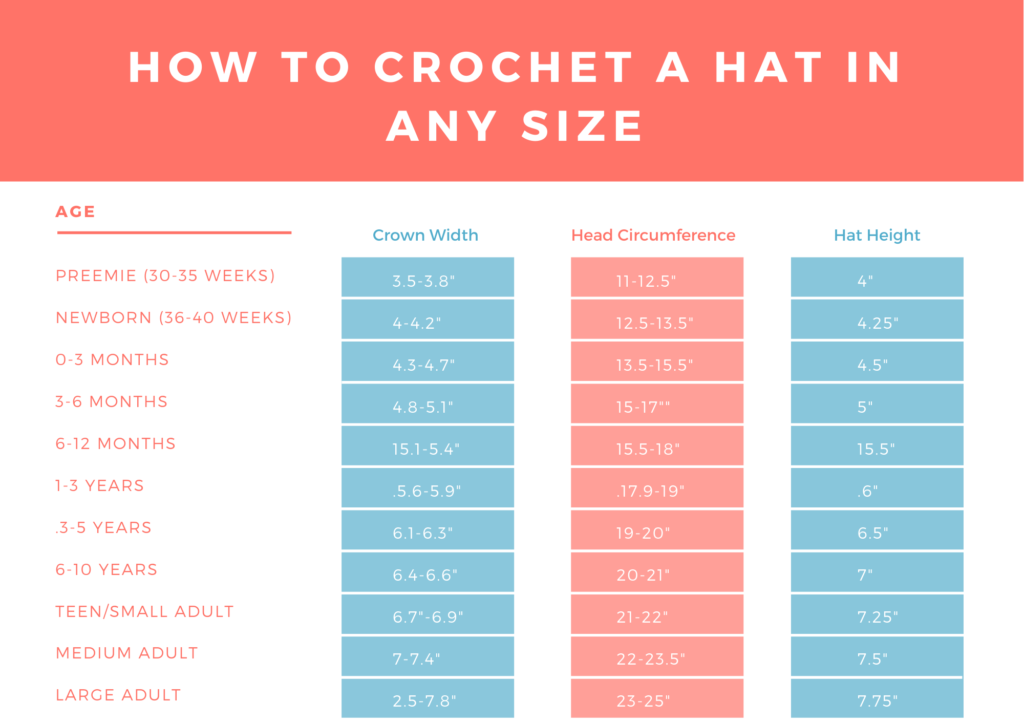
This hat is available in sizes newborn to large adult. I have the averages for head circumference and hat height per age.
As always, I recommend obtaining accurate measurements with a tape measure and then finding the instructions for those measurements below.
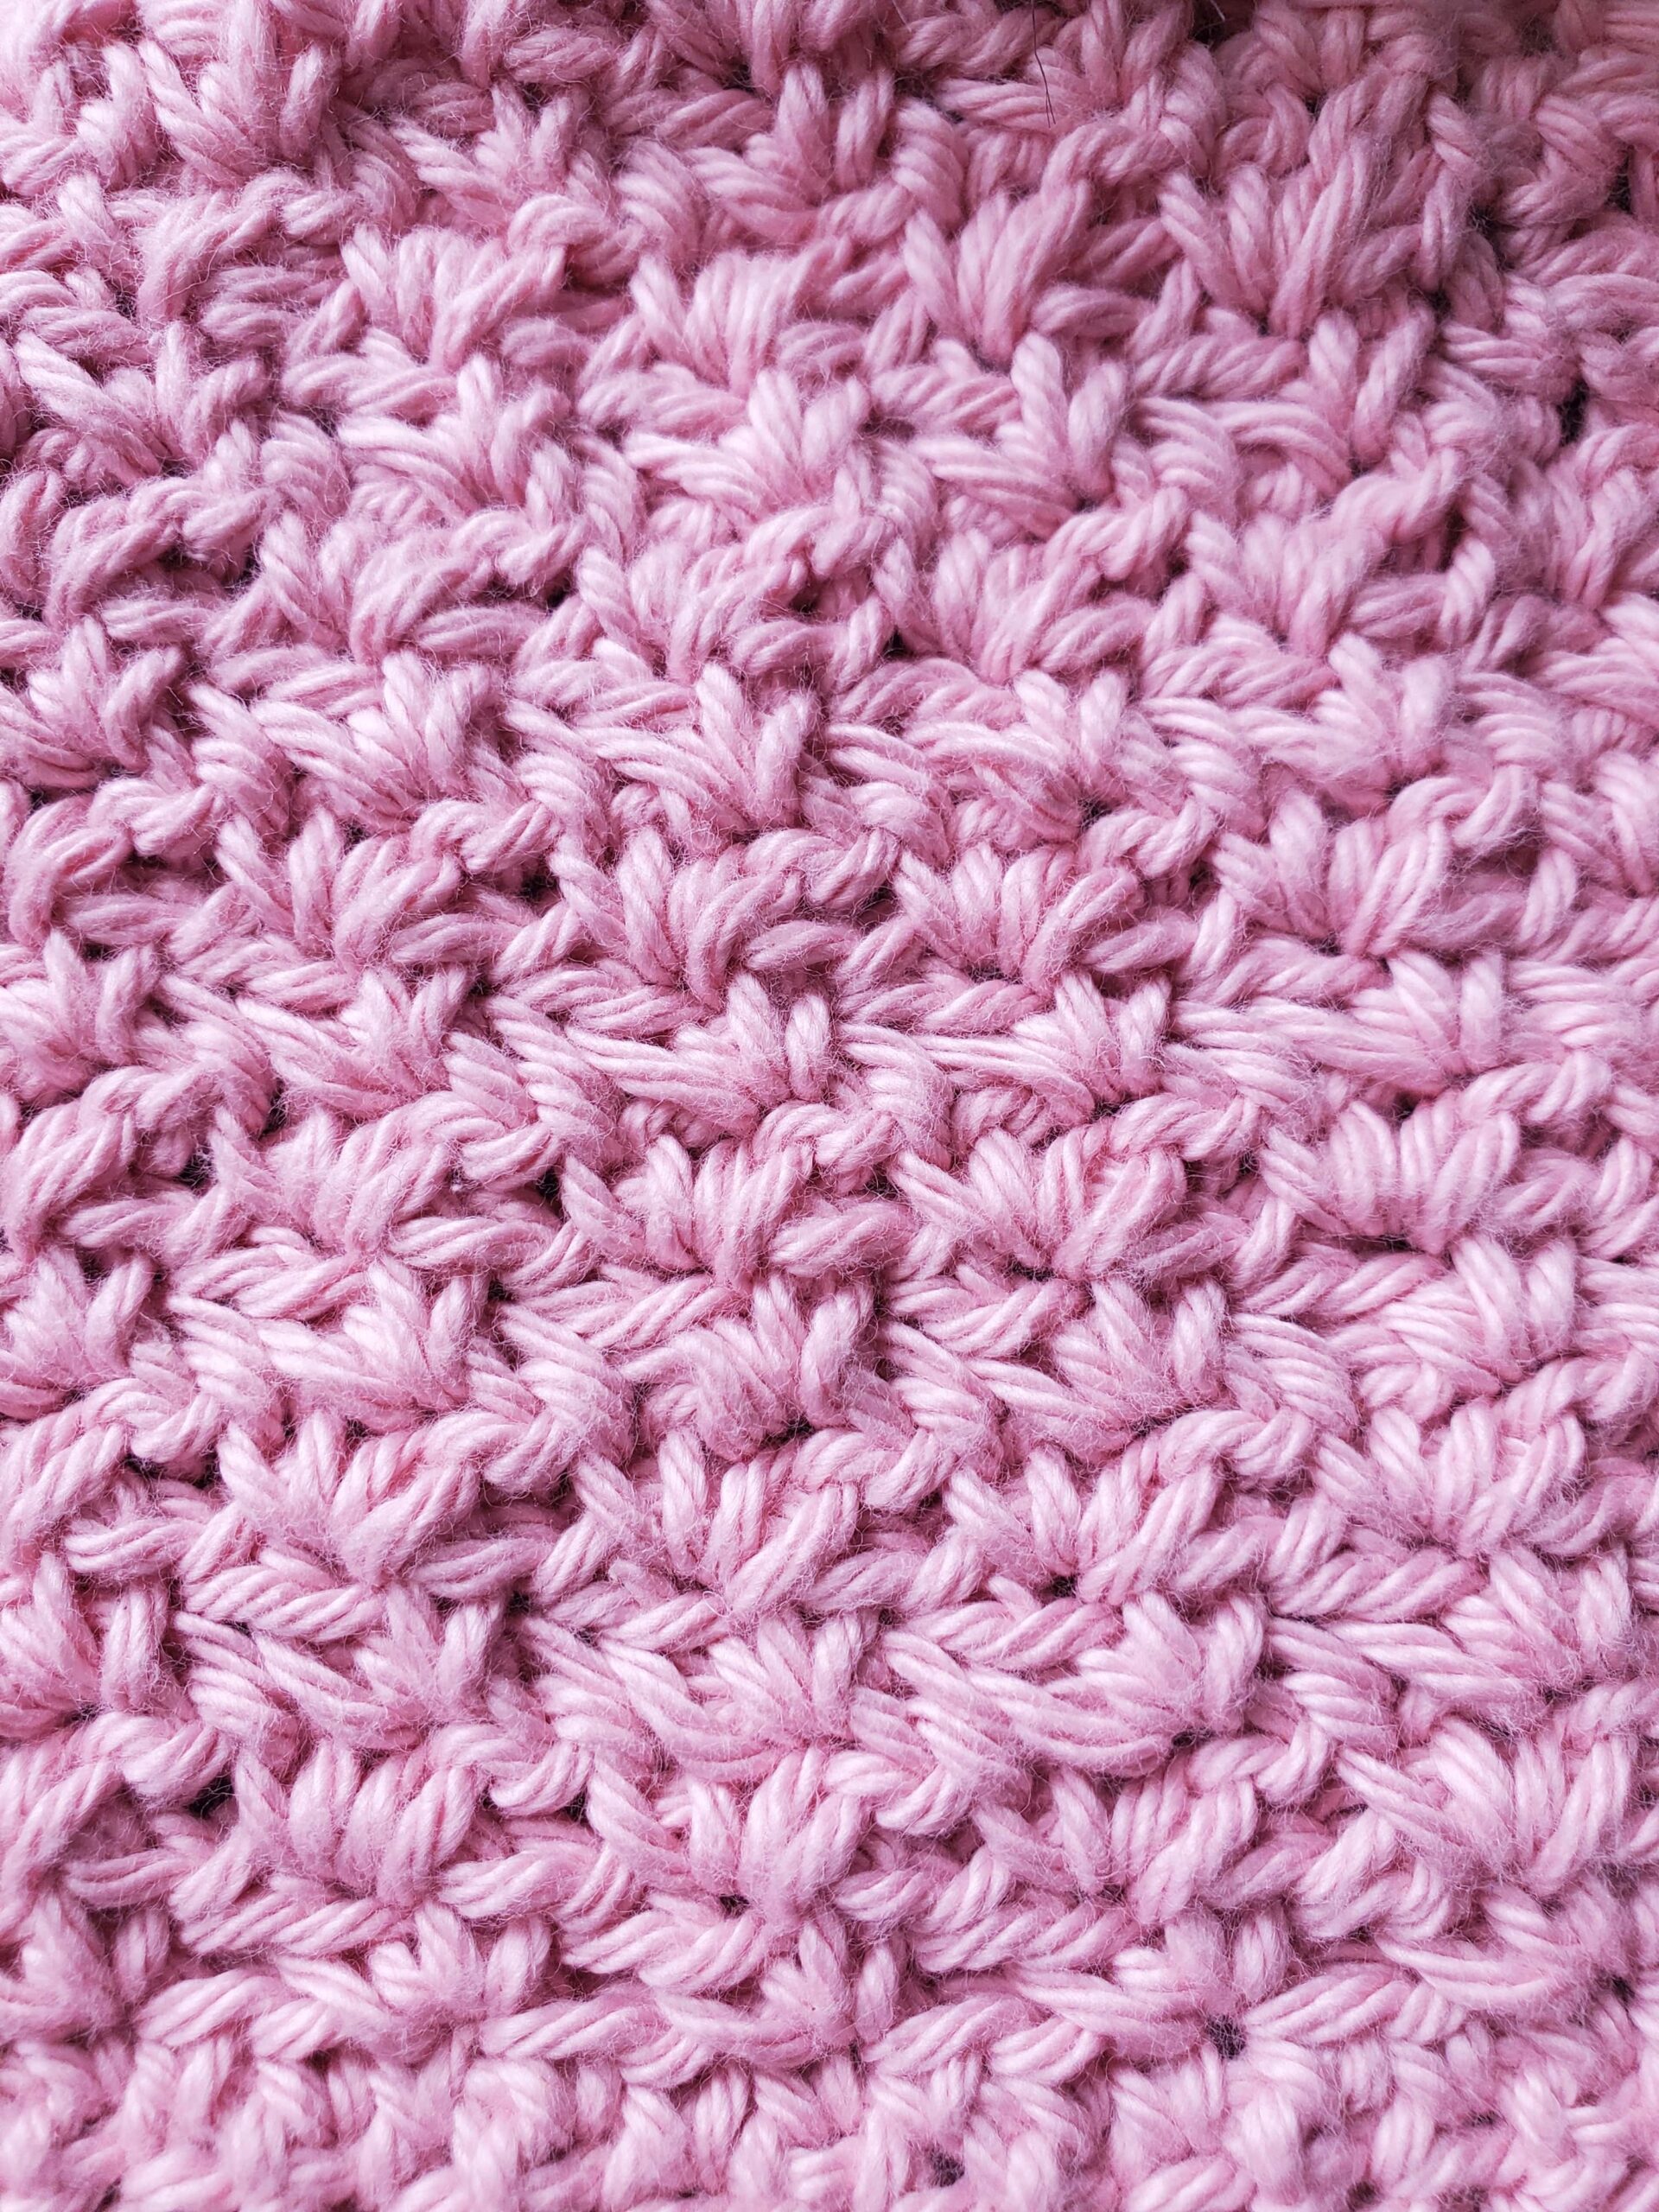
I decided to use one of my favorite textured crochet stitches for this pattern…the wattle stitch! I’ve used this stitch in some of my previous patterns. It’s a simple stitch that creates a beautiful texture that looks like little flowers.
The yarn I’m using today is from Mainstays 100% Cotton Yarn in Daylily Pink. This natural cotton yarn is nice and soft, and has a variety of neutral and muted shades available (so if pink isn’t your kind of color, check them out!). If you’re using the same pink yarn, this would be the perfect gift for a girl or a baby girl.
Keep in mind that this yarn is a 4 worsted weight, so if you want to use a different yarn, make sure that it is also a 4 worsted weight or your final product might end up too big or too small.
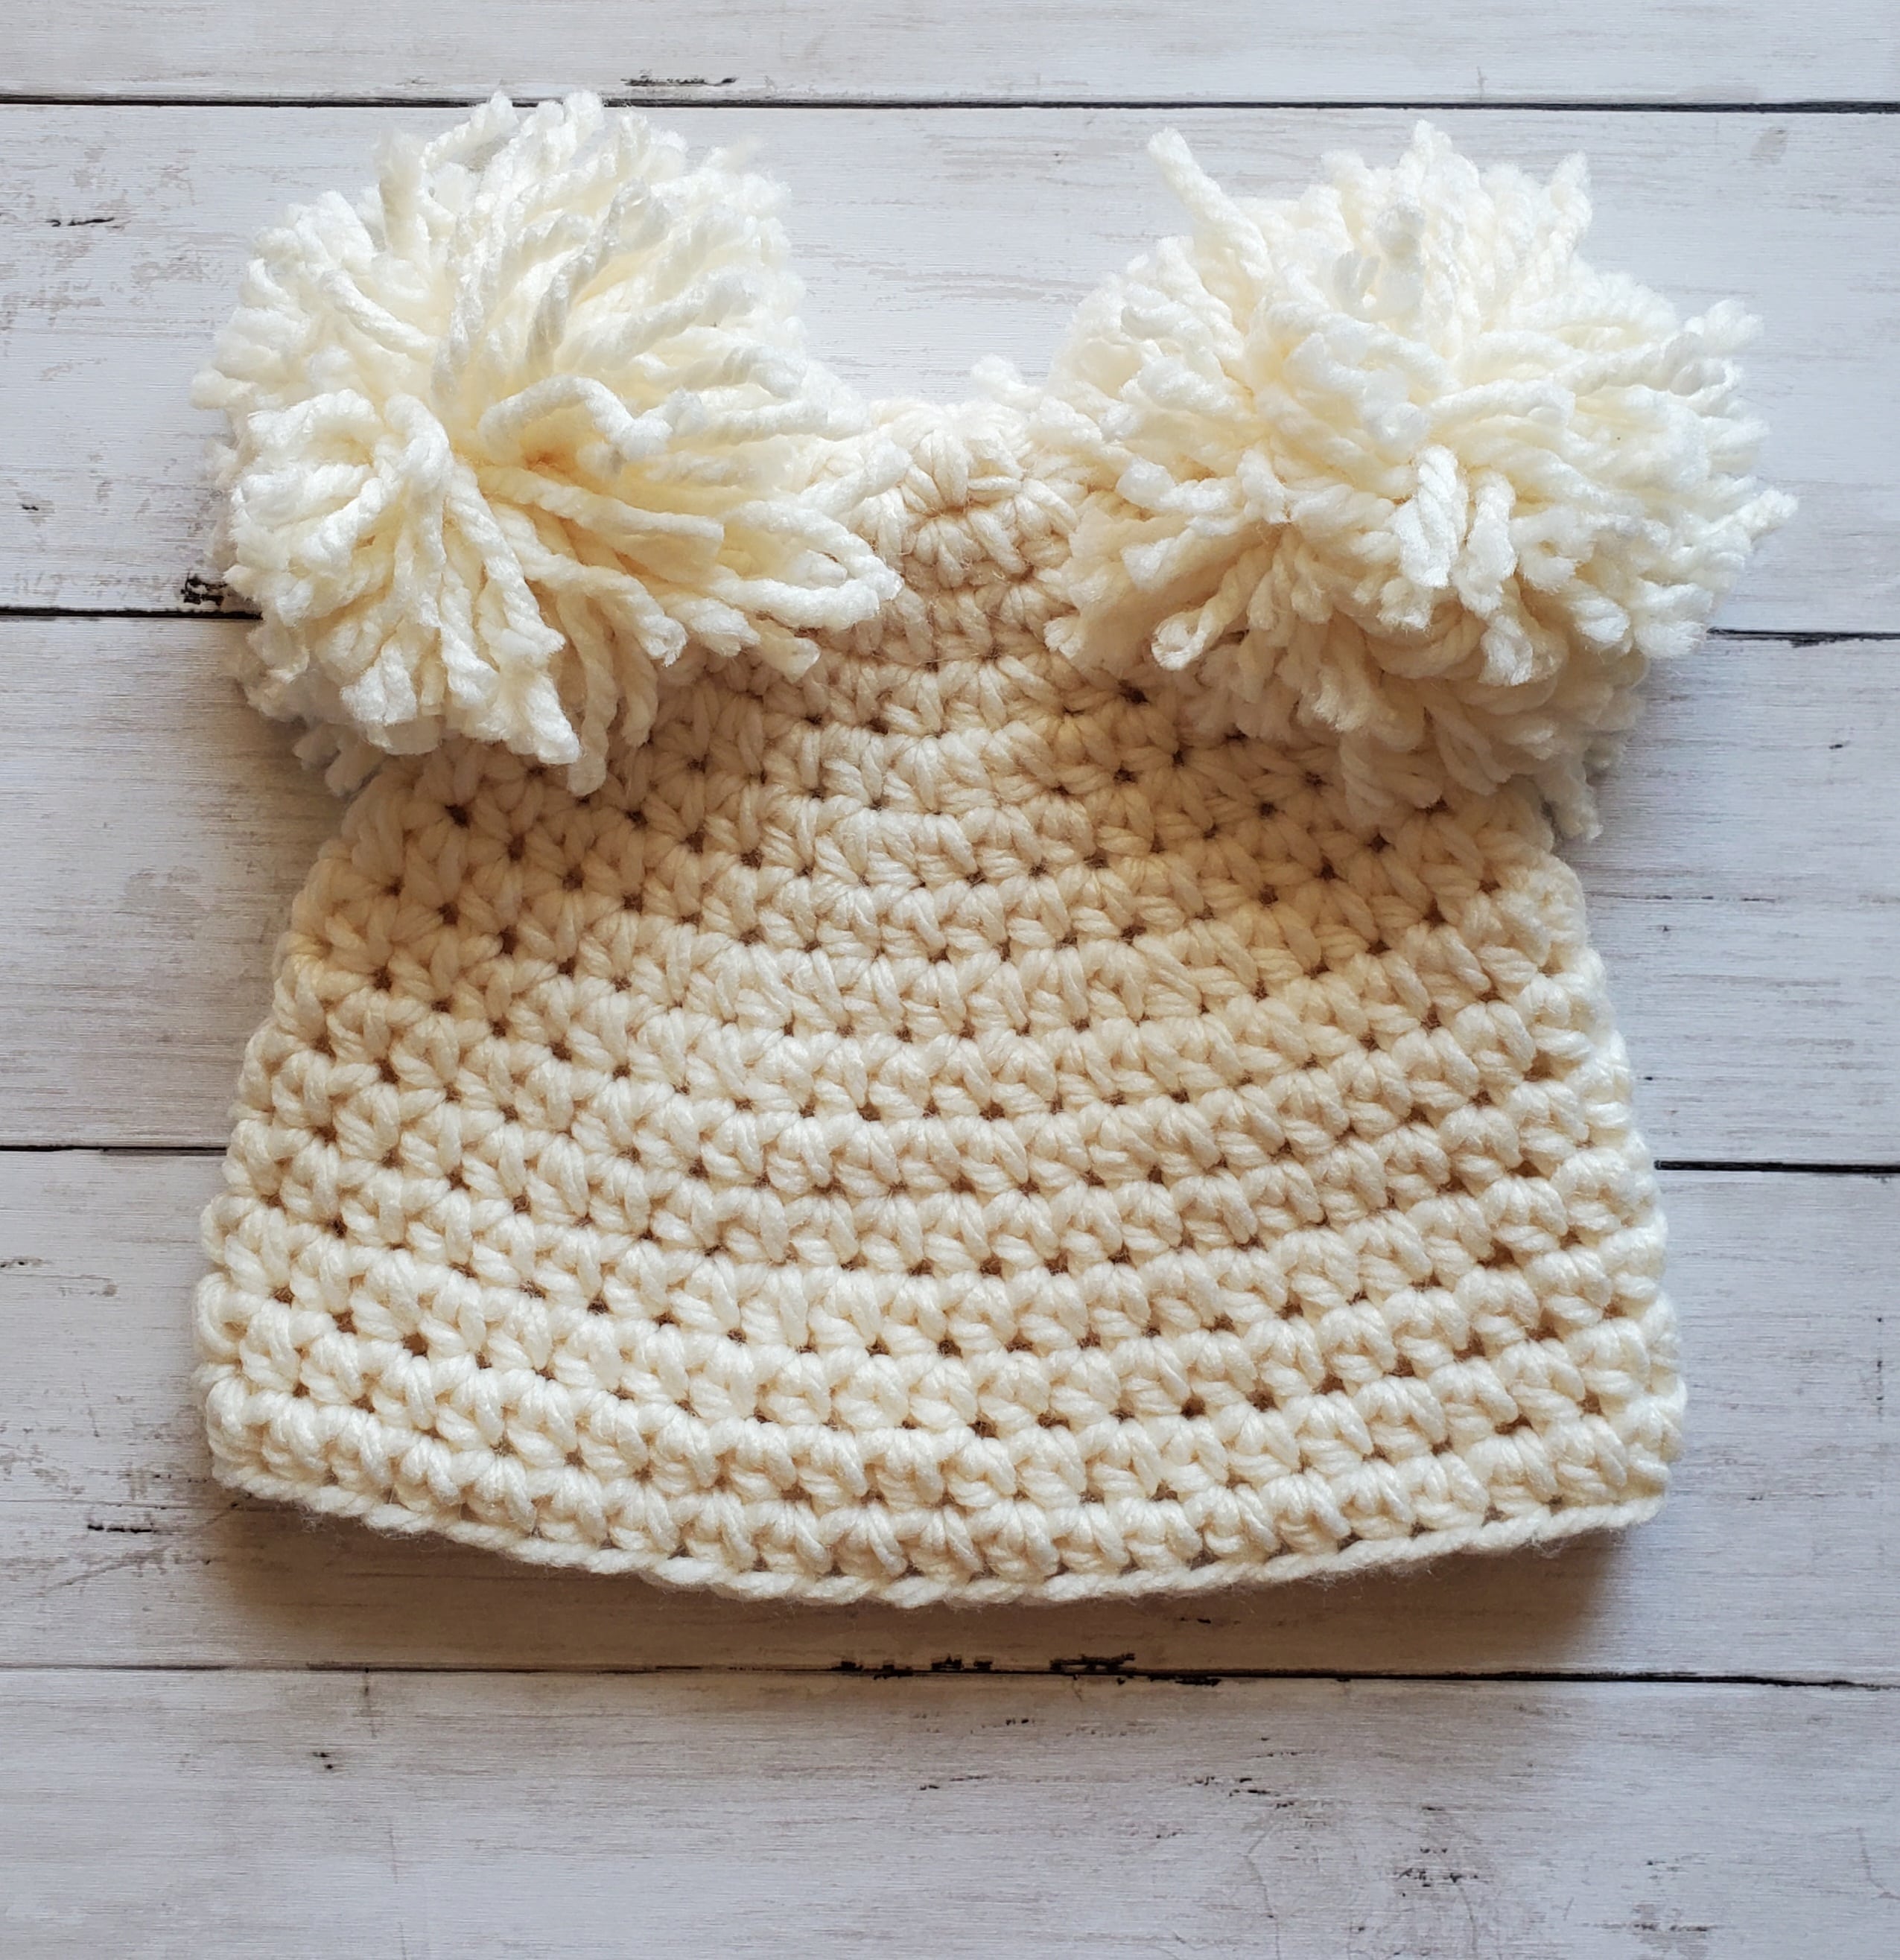
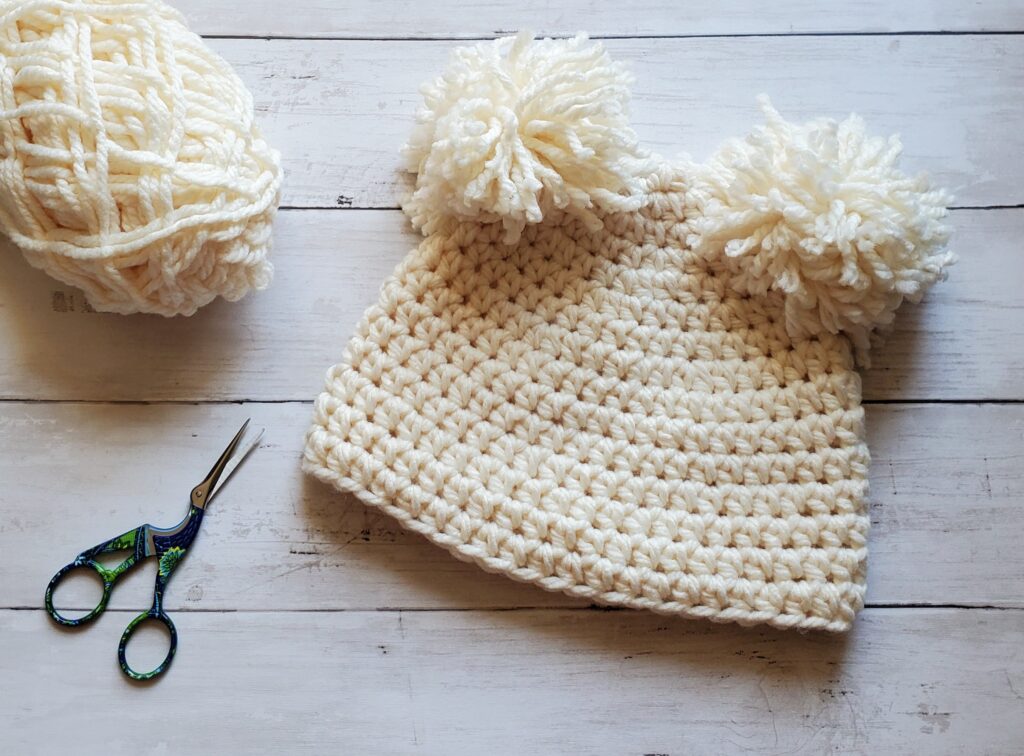
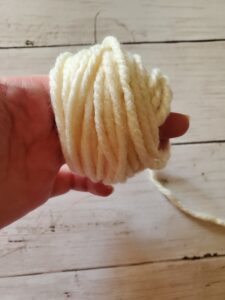
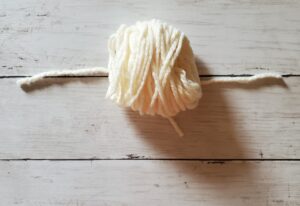
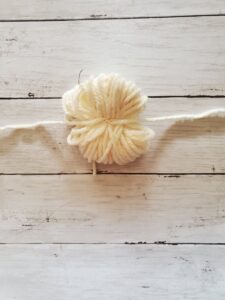
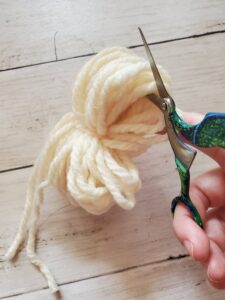
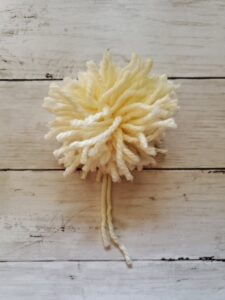
I’ve also decided to sew a faux fur pom pom to the top of this pink crochet hat. If you don’t have a pom pom, you can always make one out of any left over yarn you have.
Related Posts:
Please note that some of these links are affiliate links. That means that if you click on these links and make a purchase, I may receive a commission at no extra cost to you. You can find more information about our disclosure policy here. Thank you for your support.
Materials Needed:
- 5 mm crochet hook
- Mainstays 100% Cotton Yarn in Daylily Pink (180 yards) x 2 skeins
- Faux Fur Pom Pom – I used these ones.
- Stitch Marker (optional)
- Tapestry Needle
- Scissors
Abbreviations Used:
Please note these are in US terms, not UK.
- St(s) – stitch(es)
- Sl st – slip stitch
- Ch – chain
- Sc – single crochet
- Dc – double crochet
- Sc2tog – single crochet two stitches together
- Sc3tog – single crochet three stitches together
Special Instructions:
- The beginning ch 1’s do not count as a stitch.
- This pink crochet hat is worked from the bottom, up.
- We will be turning our work after each row, this helps the wattle stitch’s texture show.
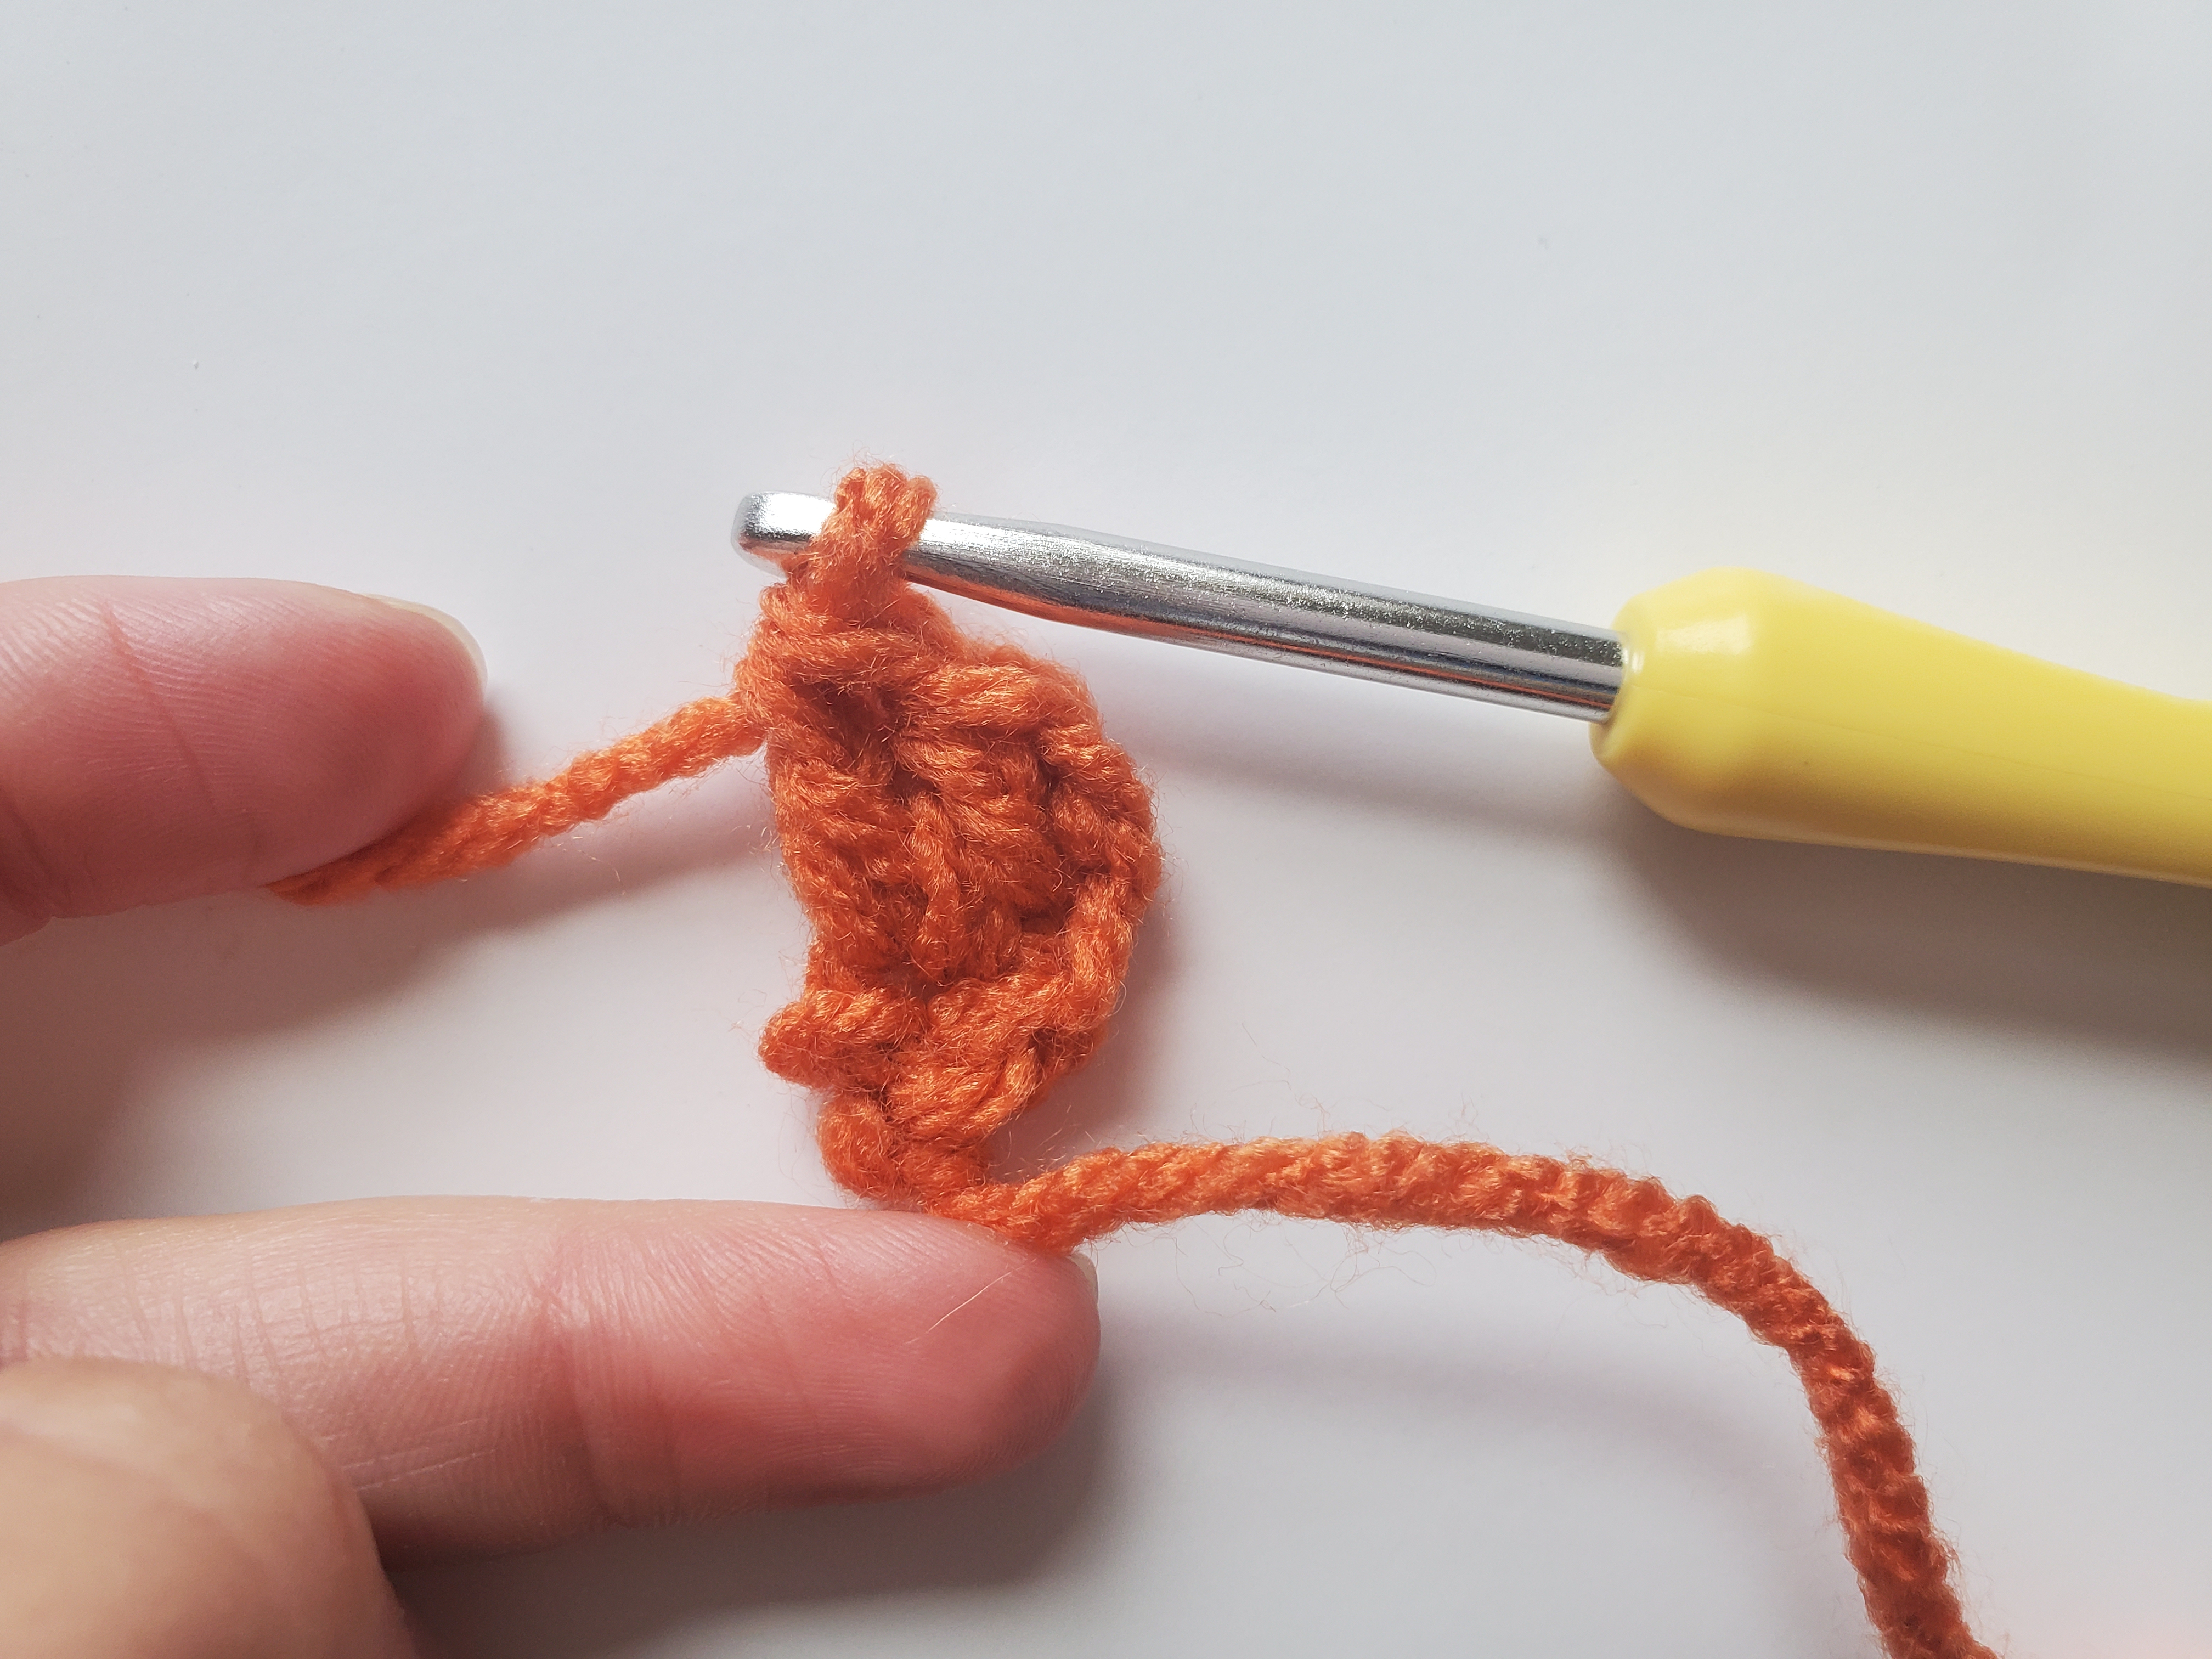
- A wattle stitch is comprised of a (sc, ch 1, dc) all in the same stitch. Instead of stating the number of individual stitches at the end of each row, the number of wattle stitches are provided once the body of the hat is started.
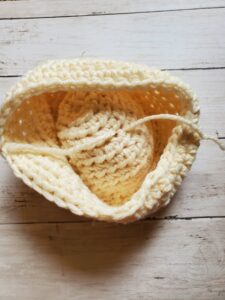
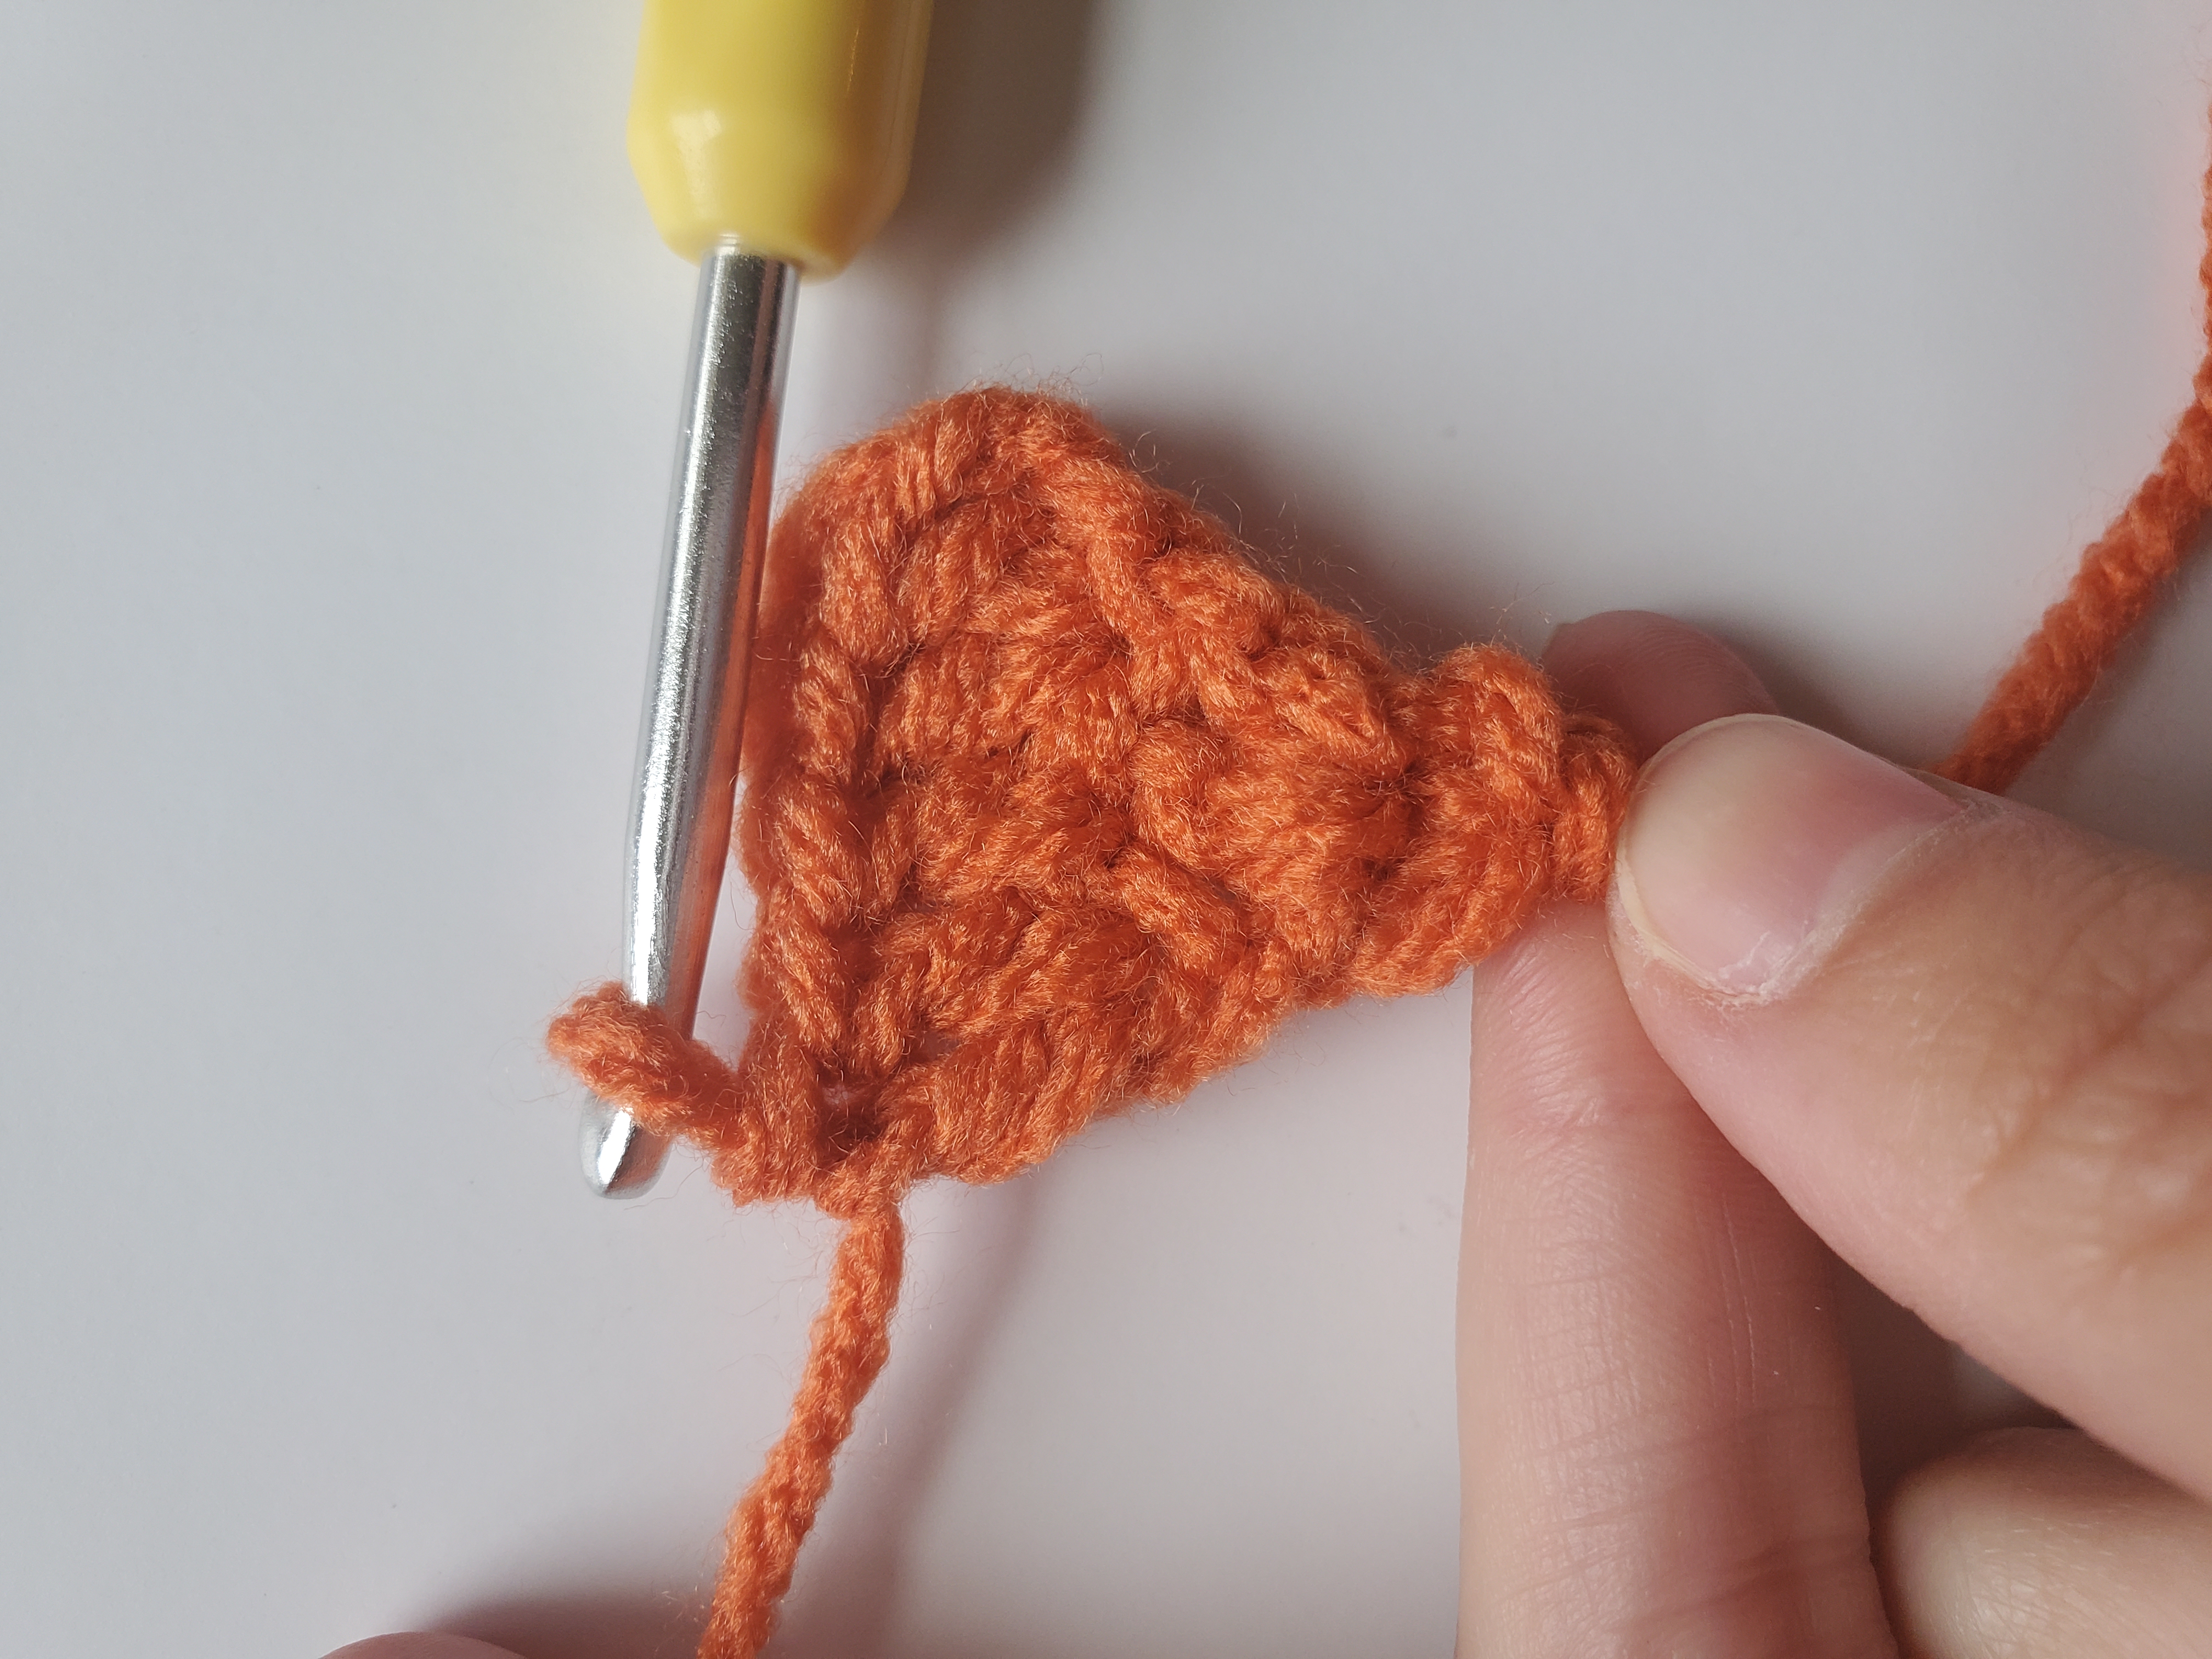
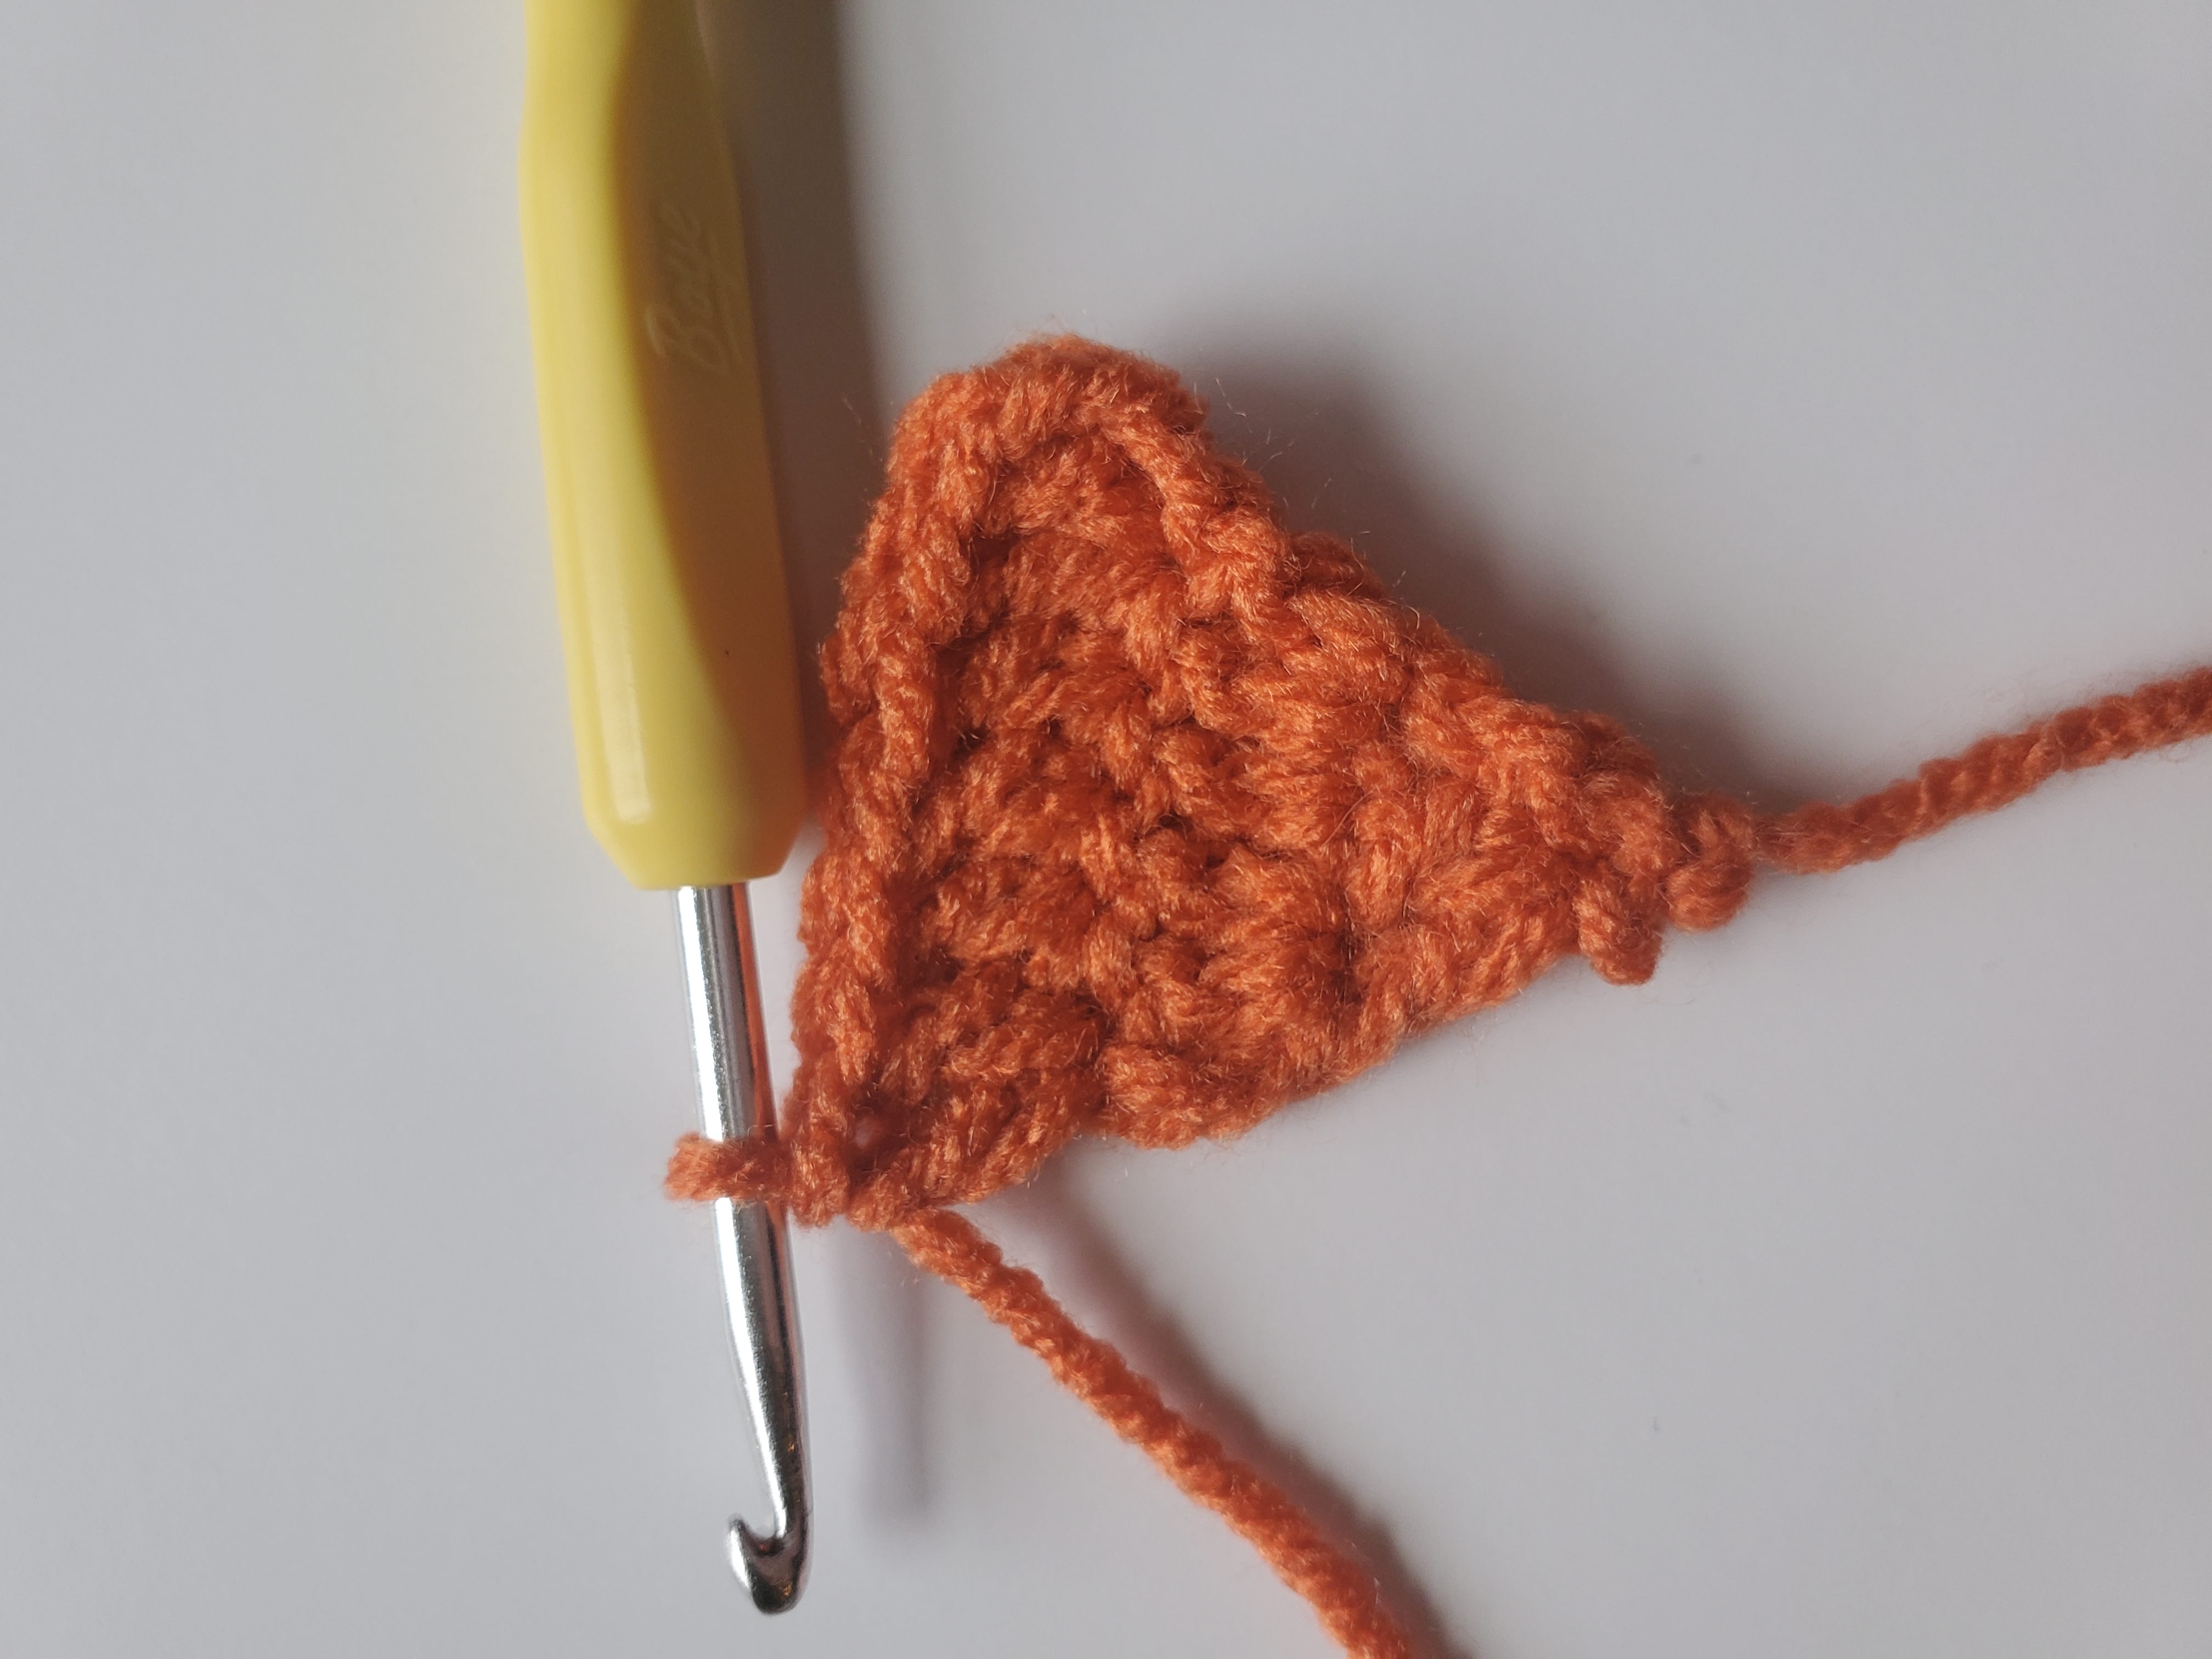
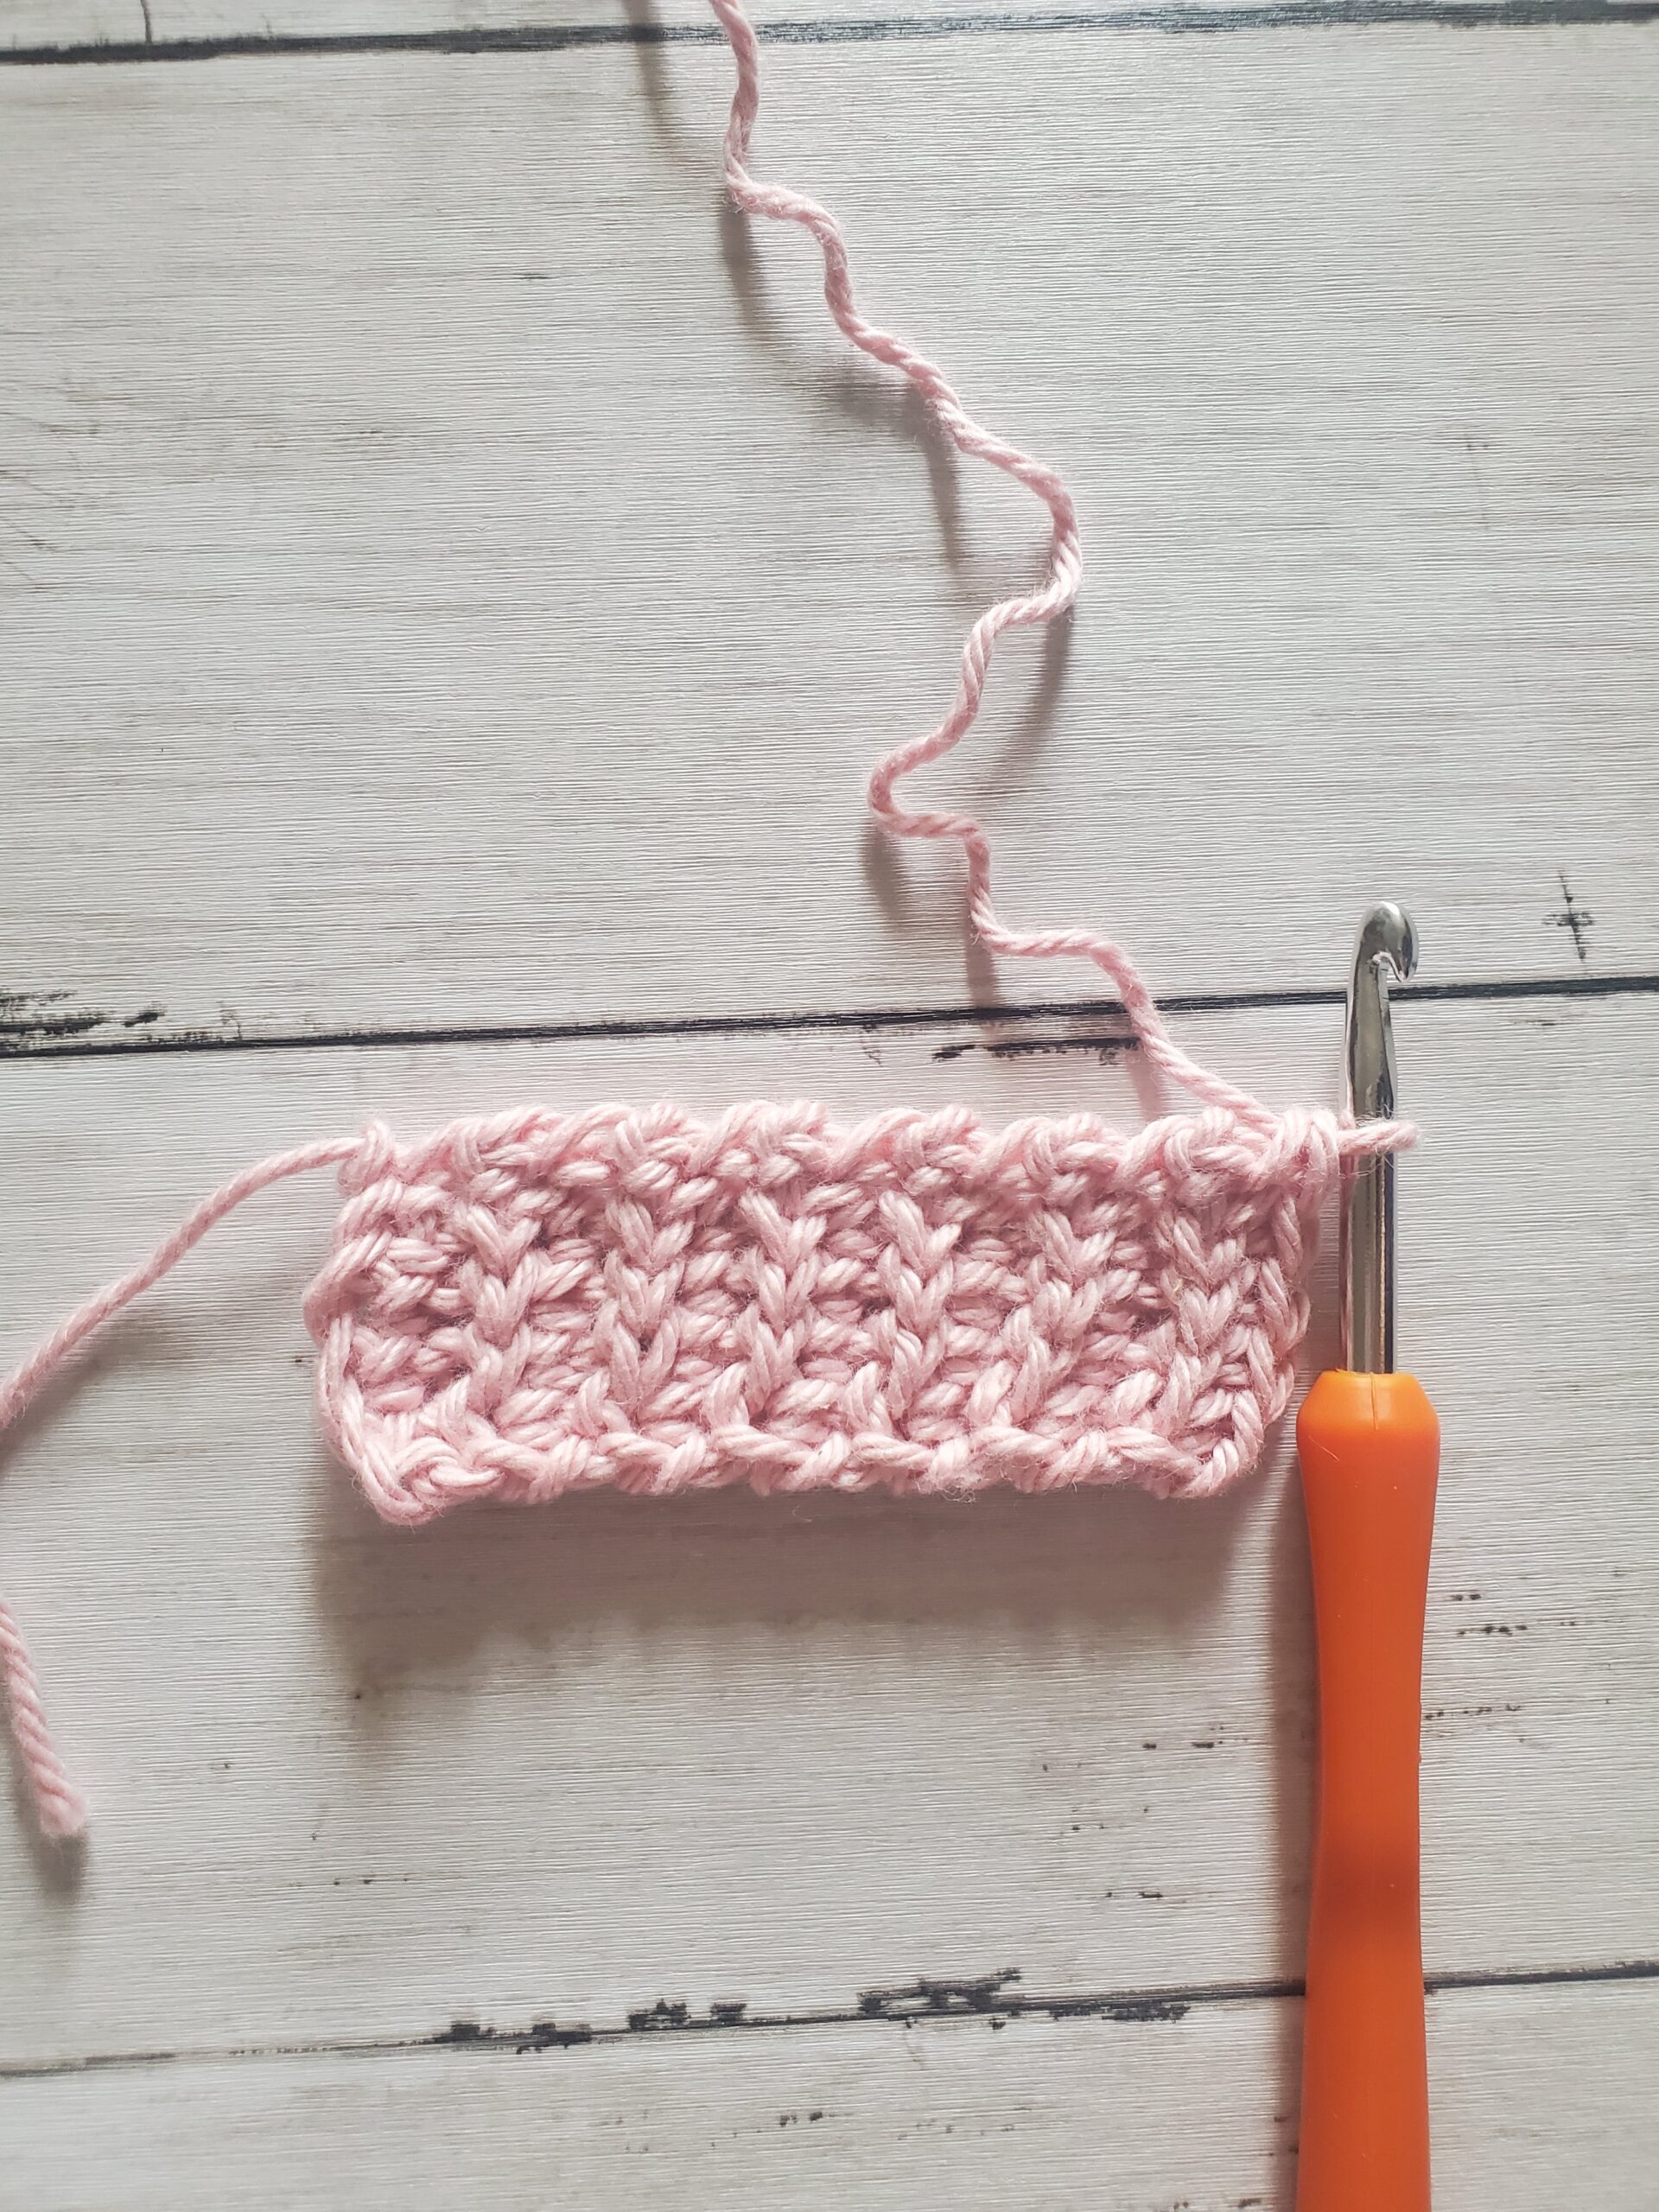
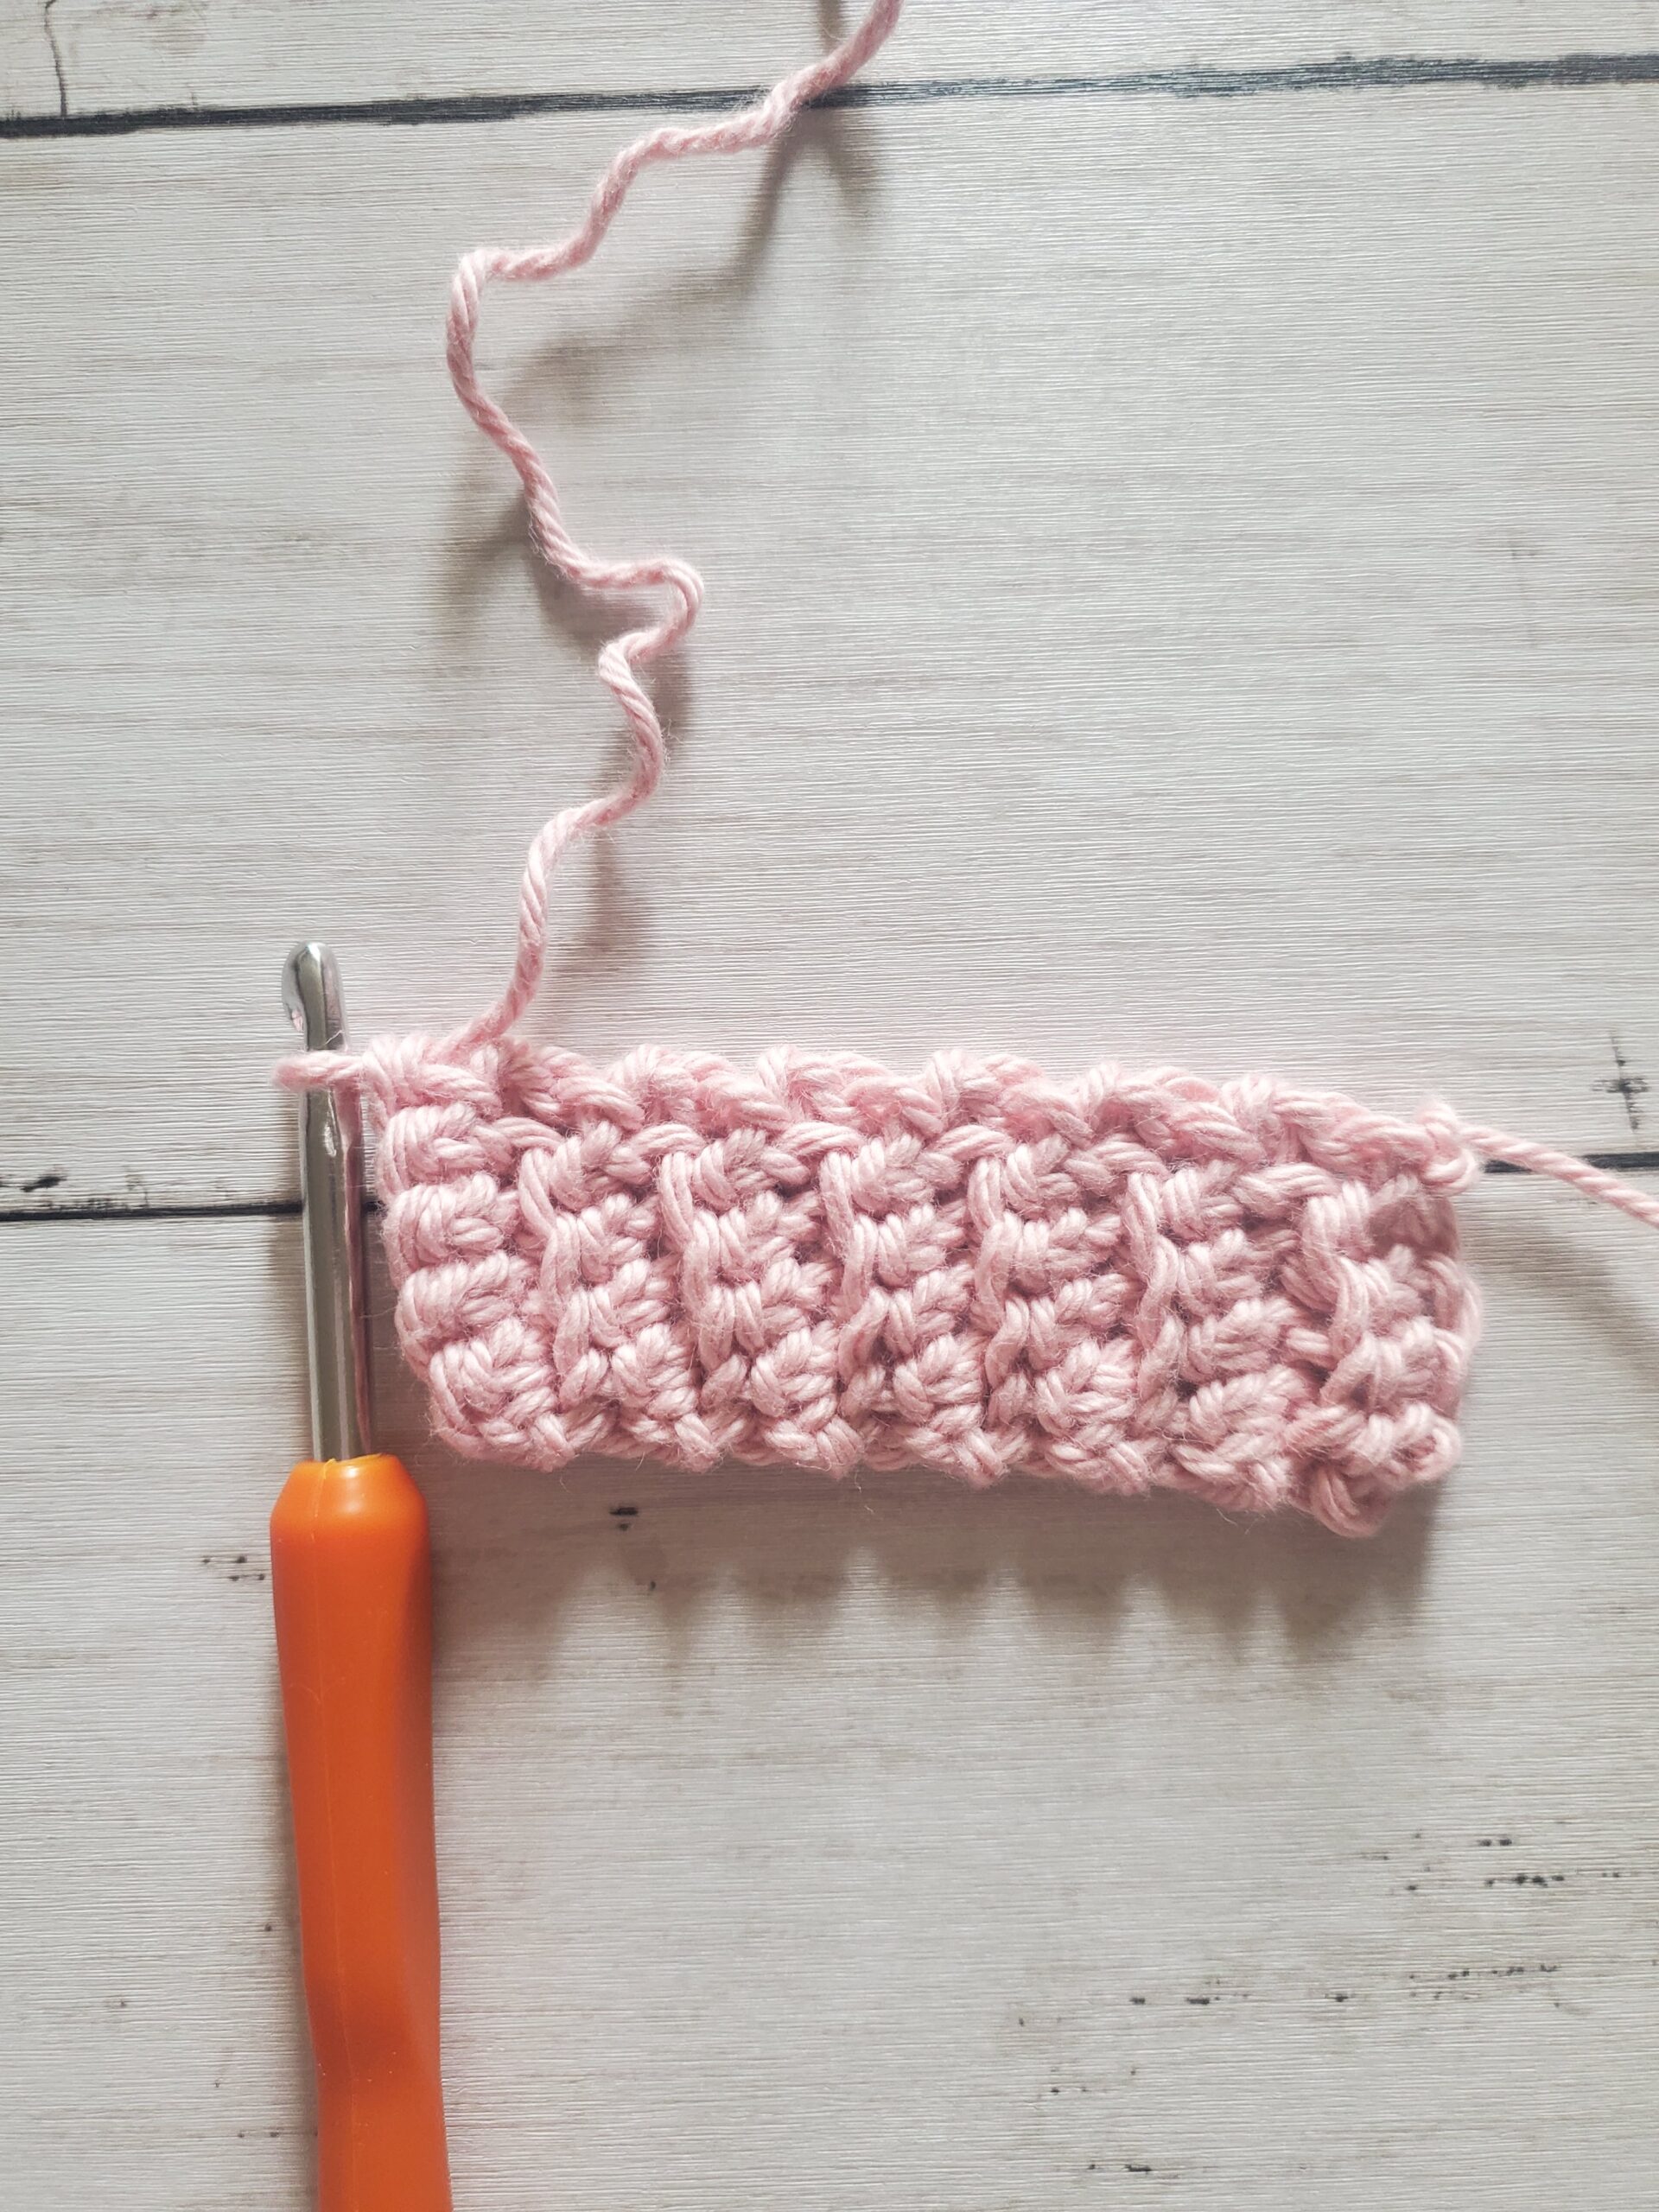
- The bottom ribbing of the hat has a different texture depending on what side you use. See below pic.
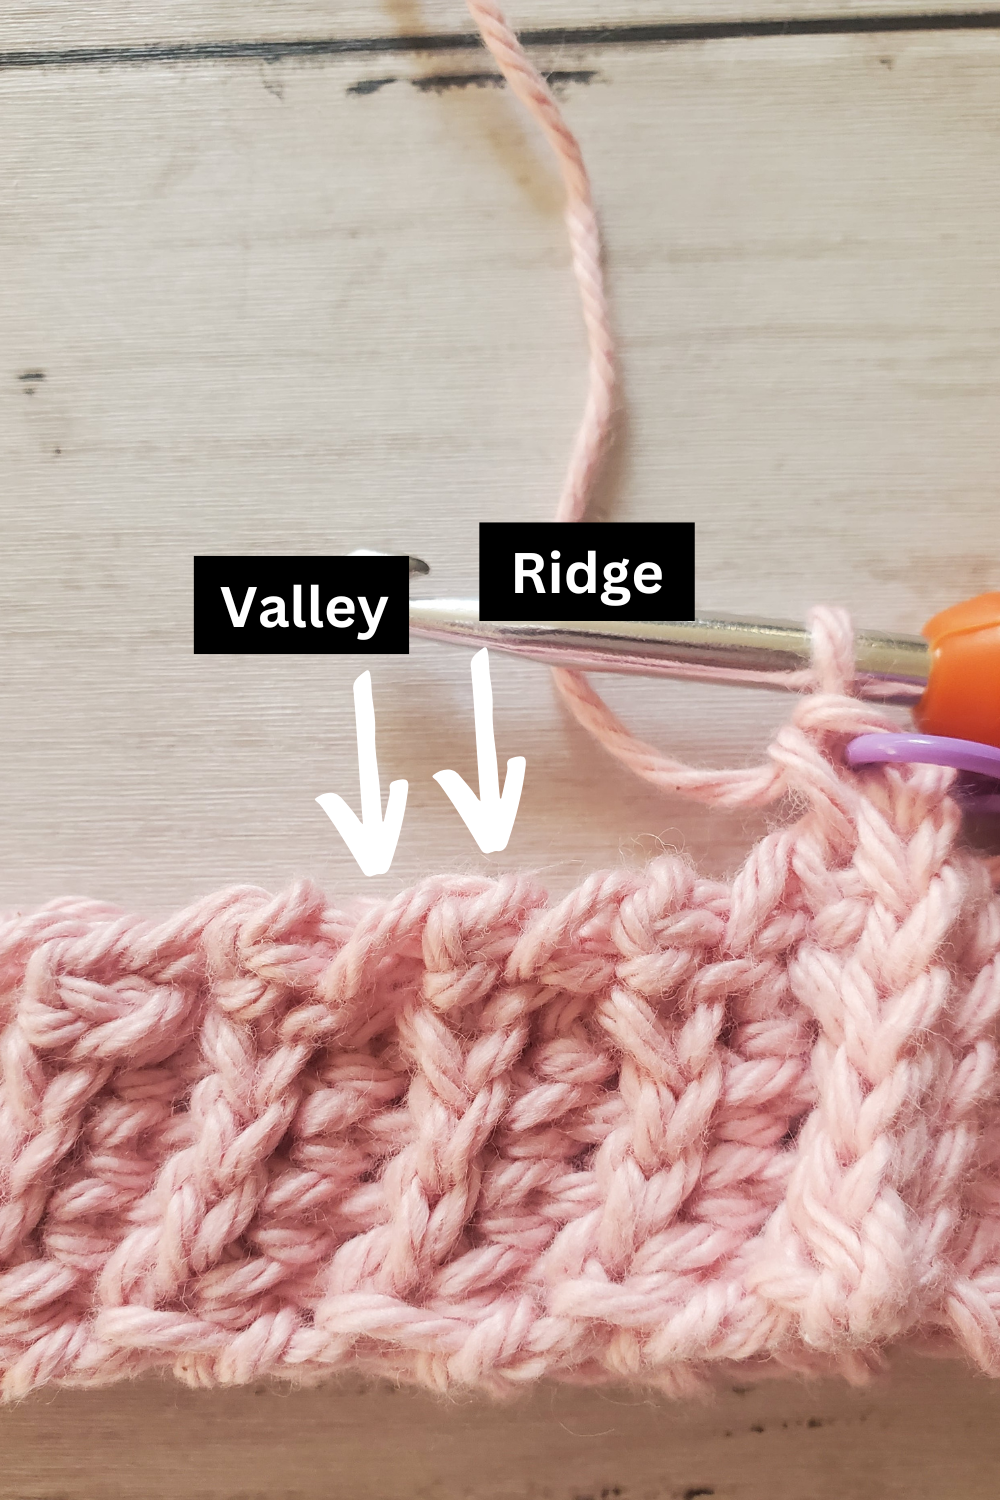
- After the bottom ribbing is made, instructions state to sc in each “valley” and “ridge” of the side of the ribbing. See below pic.
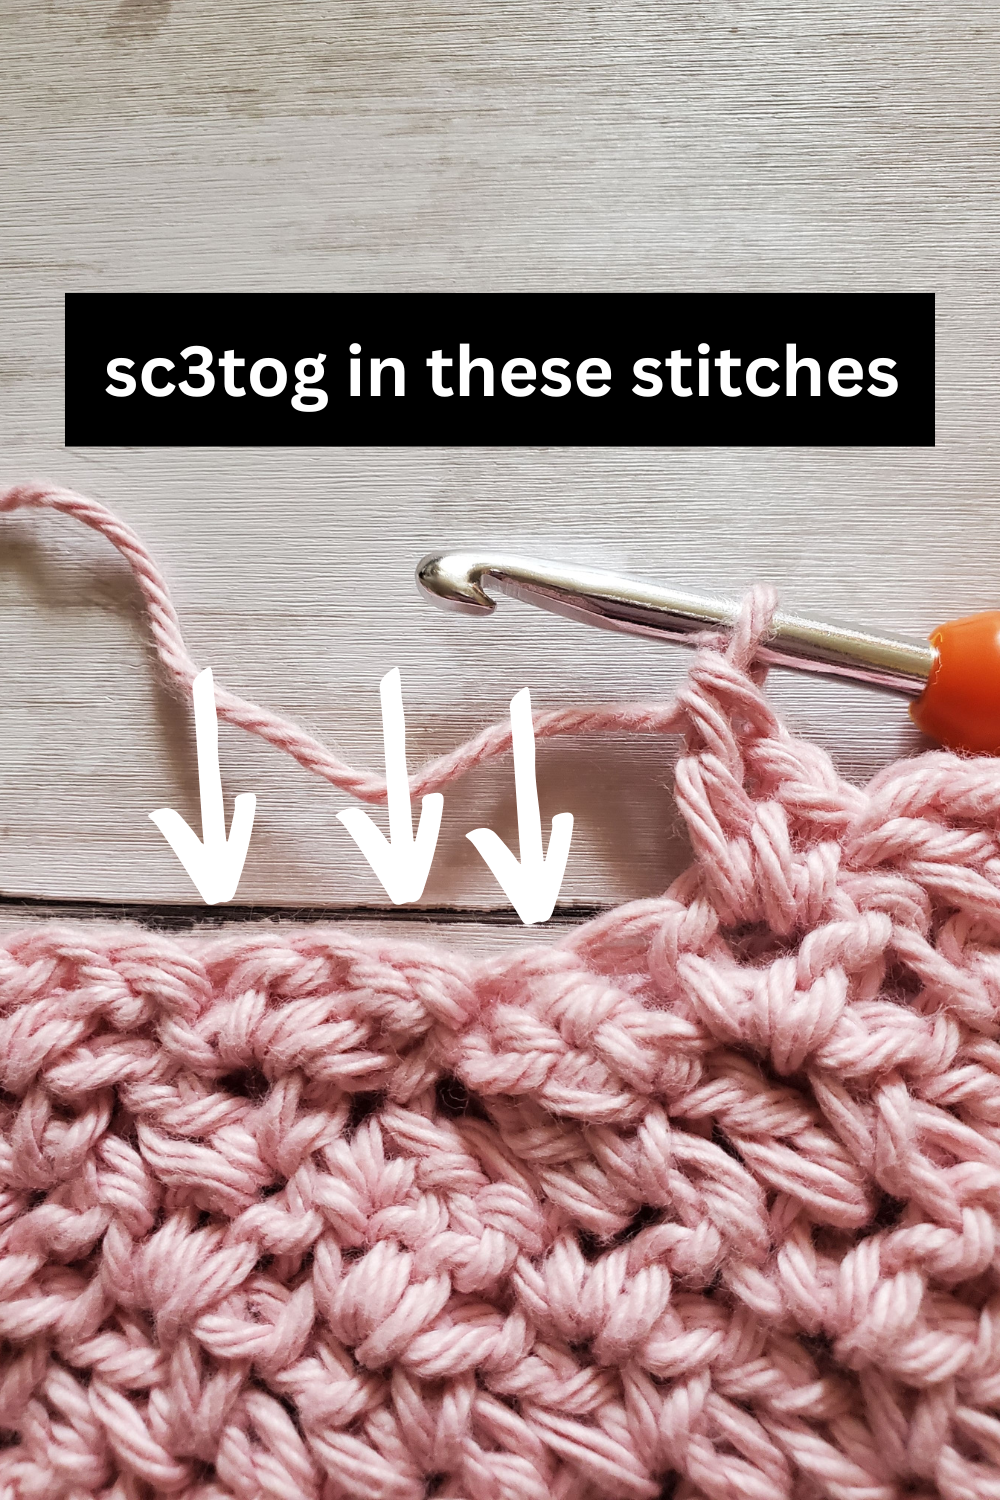
- To sc3tog, insert hook into next st and pull up a loop. Insert hook into the 2nd st and pull up a loop (3 loops on hook). Insert hook into the 3rd st and pull up a loop (4 loops on hook). Yarn over and pull through all 4 loops.

Pink Crochet Hat Pattern:
Newborn-3 Months
| Head Circumference: 13-14 inches | Hat Height: 4.5-6 inches |
Ribbing:
- Row 1: Ch 6, sc into 2nd ch from hook and next 4 chs (5 sts)
- Row 2: Ch 1, sl st loosely into first st, sl st loosely into back loop of next 3 sts, sl st loosely into both loops of last st (5 sts)
- Row 3: Ch 1, sc into first st, sc in back loop of next 3 sts, sc in last st (5 sts)
- Row 4-45: Repeat rows 2-3 (5 sts)
- Row 46: Ch 1, turn, fold ribbing together and sl st into each st to sew together, sl st into next st on the top of the ribbing, ch 1, and sc in the same st (mark sc with a st marker to help with counting in the next row, the last ch 1 does not count as a st).
Body of Hat:
- Row 1: Sc in each “ridge” and “valley of the ribbing. The sc count here needs to be a multiple of 3. Sl st join into the first (marked) stitch. (51 sts)
- Row 2: Ch 1, we will now wattle stitch in the first st. (Sc, ch 1, dc) in the first st (you can remove your st marker if you like), *skip 2 sts, (sc, ch 1, dc) in next st,* repeat from *to* until last 2 sts, skip last 2 sts, sl st join into first sc. (45 sts or 15 wattle stitches)
- Row 3: Ch 1, turn, skip the next st and (sc, ch 1, dc) in next ch 1 space, *skip 2 sts and (sc, ch 1, dc) in next ch 1 space,* repeat from *to,* until last you’ve wattle stitched in the last ch 1 space, skip a st, sl st join into the first sc. (15 wattle stitches)
- Row 4-9: Repeat row 3. (15 wattle stitches)
- Row 10: Ch 1, turn, *sc2tog in the dc and sc of next wattle stitch from previous row, wattle stitch into next 4 ch 1 spaces*, repeat from *to,* sl st join into first st. (12 wattle stitches)
- Row 11: Ch 1, turn, sc2tog in the dc and sc of next wattle stitch, wattle stitch into next 3 ch 1 spaces, *sc3tog in sc2tog from previous row and dc and sc of next wattle stitch, wattle stitch into next 3 ch 1 spaces,* repeat from *to,* join by sc2tog into last sc and first sc of this row. (9 wattle stitches)
- Row 12: Ch 1, turn, sc2tog in the dc and sc of next wattle stitch, wattle stitch into next 2 ch 1 spaces, *sc3tog in sc2tog from previous row and dc and sc of next wattle stitch, wattle stitch into next 2 ch 1 spaces,* repeat from *to,* join by sc2tog into last sc and first sc of this row. (6 wattle stitches)
- Row 13: Ch 1, turn, sc2tog in the dc and sc of next wattle stitch, wattle stitch into next ch 1 space, *sc3tog in sc2tog from previous row and dc and sc of next wattle stitch, wattle stitch into next ch 1 space,* repeat from *to,* join by sc2tog into last sc and first sc of this row. (3 wattle stitches)
Cut a long length of yarn to sew the top of the hat shut with tapestry needle, attach your pom pom by sewing to the center of the top of your hat.
Cut off any excess yarn with scissors. Weave in any ends with tapestry needle.
3-6 Months
| Head Circumference: 14-15 inches | Hat Height: 6-6.25 inches |
Ribbing:
- Row 1: Ch 6, sc into 2nd ch from hook and next 4 chs (5 sts)
- Row 2: Ch 1, sl st loosely into first st, sl st loosely into back loop of next 3 sts, sl st loosely into both loops of last st (5 sts)
- Row 3: Ch 1, sc into first st, sc in back loop of next 3 sts, sc in last st (5 sts)
- Row 4-51: Repeat rows 2-3 (5 sts)
- Row 52: Ch 1, turn, fold ribbing together and sl st into each st to sew together, sl st into next st on the top of the ribbing, ch 1, and sc in the same st (mark sc with a st marker to help with counting in the next row, the last ch 1 does not count as a st).
Body of Hat:
- Row 1: Sc in each “ridge” and “valley of the ribbing. The sc count here needs to be a multiple of 3. Sl st join into the first (marked) stitch. (51 sts)
- Row 2: Ch 1, we will now wattle stitch in the first st. (Sc, ch 1, dc) in the first st (you can remove your st marker if you like), *skip 2 sts, (sc, ch 1, dc) in next st,* repeat from *to* until last 2 sts, skip last 2 sts, sl st join into first sc. (51 sts or 17 wattle stitches)
- Row 3: Ch 1, turn, skip the next st and (sc, ch 1, dc) in next ch 1 space, *skip 2 sts and (sc, ch 1, dc) in next ch 1 space,* repeat from *to,* until last you’ve wattle stitched in the last ch 1 space, skip a st, sl st join into the first sc. (17 wattle stitches)
- Row 4-11: Repeat row 3. (17 wattle stitches)
- Row 12: Ch 1, turn, sc2tog in the dc and sc of next wattle stitch from previous row, wattle stitch into next 5 ch 1 spaces, sc2tog in the dc and sc of next wattle stitch, wattle stitch in next 4 ch 1 spaces, sc2tog in the dc and sc of next wattle stitch, wattle stitch in next 5 ch 1 spaces, sl st join into first st. (14 wattle stitches)
- Row 13: Ch 1, turn, sc2tog in the dc and sc of next wattle stitch from previous row, wattle stitch into next 4 ch 1 spaces, *sc3tog in sc2tog of previous row and the dc and sc of next wattle stitch*, wattle stitch in next 3 ch 1 spaces, repeat from *to* once more, wattle stitch in next 4 ch 1 spaces, sc2tog in last st and first st of row to join. (11 wattle stitches)
- Row 14: Ch 1, turn, sc2tog in the dc and sc of next wattle stitch from previous row, wattle stitch into next 3 ch 1 spaces, *sc3tog in sc2tog of previous row and the dc and sc of next wattle stitch*, wattle stitch in next 2 ch 1 spaces, repeat from *to* once more, wattle stitch in next 3 ch 1 spaces, sc2tog in last st and first st of row to join. (8 wattle stitches)
- Row 15: Ch 1, turn, sc2tog in the dc and sc of next wattle stitch from previous row, wattle stitch into next 2 ch 1 spaces, *sc3tog in sc2tog of previous row and the dc and sc of next wattle stitch*, wattle stitch in next ch 1 space, repeat from *to* once more, wattle stitch in next 2 ch 1 spaces, sc2tog in last st and first st of row to join. (5 wattle stitches)
Cut a long length of yarn to sew the top of the hat shut with tapestry needle, attach your pom pom by sewing to the center of the top of your hat.
Cut off any excess yarn with scissors. Weave in any ends with tapestry needle.
6-12 Months
| Head Circumference: 16-18 inches | Hat Height: 6.25-6.5 inches |
Ribbing:
- Row 1: Ch 6, sc into 2nd ch from hook and next 4 chs (5 sts)
- Row 2: Ch 1, sl st loosely into first st, sl st loosely into back loop of next 3 sts, sl st loosely into both loops of last st (5 sts)
- Row 3: Ch 1, sc into first st, sc in back loop of next 3 sts, sc in last st (5 sts)
- Row 4-57: Repeat rows 2-3 (5 sts)
- Row 58: Ch 1, turn, fold ribbing together and sl st into each st to sew together, sl st into next st on the top of the ribbing, ch 1, and sc in the same st (mark sc with a st marker to help with counting in the next row, the last ch 1 does not count as a st).
Body of Hat:
- Row 1: Sc in each “ridge” and “valley of the ribbing. The sc count here needs to be a multiple of 3. Sl st join into the first (marked) stitch. (57 sts)
- Row 2: Ch 1, we will now wattle stitch in the first st. (Sc, ch 1, dc) in the first st (you can remove your st marker if you like), *skip 2 sts, (sc, ch 1, dc) in next st,* repeat from *to* until last 2 sts, skip last 2 sts, sl st join into first sc. (57 sts or 19 wattle stitches)
- Row 3: Ch 1, turn, skip the next st and (sc, ch 1, dc) in next ch 1 space, *skip 2 sts and (sc, ch 1, dc) in next ch 1 space,* repeat from *to,* until last you’ve wattle stitched in the last ch 1 space, skip a st, sl st join into the first sc. (19 wattle stitches)
- Row 4-12: Repeat row 3. (19 wattle stitches)
- Row 13: Ch 1, turn, sc2tog in the dc and sc of next wattle stitch from previous row, wattle stitch into next 5 ch 1 spaces, sc2tog in the dc and sc of next wattle stitch, wattle stitch in next 6 ch 1 spaces, sc2tog in the dc and sc of next wattle stitch, wattle stitch in next 5 ch 1 spaces, sl st join into first st. (16 wattle stitches)
- Row 14: Ch 1, turn, sc2tog in the dc and sc of next wattle stitch from previous row, wattle stitch into next 4 ch 1 spaces, *sc3tog in sc2tog of previous row and the dc and sc of next wattle stitch*, wattle stitch in next 5 ch 1 spaces, repeat from *to* once more, wattle stitch in next 4 ch 1 spaces, sc2tog in last st and first st of row to join. (13 wattle stitches)
- Row 15: Ch 1, turn, sc2tog in the dc and sc of next wattle stitch from previous row, wattle stitch into next 3 ch 1 spaces, *sc3tog in sc2tog of previous row and the dc and sc of next wattle stitch*, wattle stitch in next 4 ch 1 spaces, repeat from *to* once more, wattle stitch in next 3 ch 1 spaces, sc2tog in last st and first st of row to join. (10 wattle stitches)
- Row 16: Ch 1, turn, sc2tog in the dc and sc of next wattle stitch from previous row, wattle stitch into next 2 ch 1 spaces, *sc3tog in sc2tog of previous row and the dc and sc of next wattle stitch*, wattle stitch in next 3 ch 1 spaces, repeat from *to* once more, wattle stitch in next 2 ch 1 spaces, sc2tog in last st and first st of row to join. (7 wattle stitches)
- Row 17: Ch 1, turn, sc2tog in the dc and sc of next wattle stitch from previous row, wattle stitch into next ch 1 space, *sc3tog in sc2tog of previous row and the dc and sc of next wattle stitch*, wattle stitch in next 2 ch 1 spaces, repeat from *to* once more, wattle stitch in next ch 1 space, sc2tog in last st and first st of row to join. (4 wattle stitches)
Cut a long length of yarn to sew the top of the hat shut with tapestry needle, attach your pom pom by sewing to the center of the top of your hat.
Cut off any excess yarn with scissors. Weave in any ends with tapestry needle.
Toddler
| Head Circumference: 18-19 inches | Hat Height: 7.25-7.5 inches |
Ribbing:
- Row 1: Ch 6, sc into 2nd ch from hook and next 4 chs (5 sts)
- Row 2: Ch 1, sl st loosely into first st, sl st loosely into back loop of next 3 sts, sl st loosely into both loops of last st (5 sts)
- Row 3: Ch 1, sc into first st, sc in back loop of next 3 sts, sc in last st (5 sts)
- Row 4-60: Repeat rows 2-3 (5 sts)
- Row 61: Ch 1, turn, fold ribbing together and sl st into each st to sew together, sl st into next st on the top of the ribbing, ch 1, and sc in the same st (mark sc with a st marker to help with counting in the next row, the last ch 1 does not count as a st).
Body of Hat:
- Row 1: Sc in each “ridge” and “valley of the ribbing. The sc count here needs to be a multiple of 3. Sl st join into the first (marked) stitch. (60 sts)
- Row 2: Ch 1, we will now wattle stitch in the first st. (Sc, ch 1, dc) in the first st (you can remove your st marker if you like), *skip 2 sts, (sc, ch 1, dc) in next st,* repeat from *to* until last 2 sts, skip last 2 sts, sl st join into first sc. (60 sts or 20 wattle stitches)
- Row 3: Ch 1, turn, skip the next st and (sc, ch 1, dc) in next ch 1 space, *skip 2 sts and (sc, ch 1, dc) in next ch 1 space,* repeat from *to,* until last you’ve wattle stitched in the last ch 1 space, skip a st, sl st join into the first sc. (20 wattle stitches)
- Row 4-15: Repeat row 3. (20 wattle stitches)
- Row 16: Ch 1, turn, sc2tog in the dc and sc of next wattle stitch from previous row, wattle stitch into next 6 ch 1 spaces, sc2tog in the dc and sc of next wattle stitch, wattle stitch in next 5 ch 1 spaces, sc2tog in the dc and sc of next wattle stitch, wattle stitch in next 6 ch 1 spaces, sl st join into first st. (17 wattle stitches)
- Row 17: Ch 1, turn, sc2tog in the dc and sc of next wattle stitch from previous row, wattle stitch into next 5 ch 1 spaces, *sc3tog in sc2tog of previous row and the dc and sc of next wattle stitch*, wattle stitch in next 4 ch 1 spaces, repeat from *to* once more, wattle stitch in next 5 ch 1 spaces, sc2tog in last st and first st of row to join. (14 wattle stitches)
- Row 18: Ch 1, turn, sc2tog in the dc and sc of next wattle stitch from previous row, wattle stitch into next 4 ch 1 spaces, *sc3tog in sc2tog of previous row and the dc and sc of next wattle stitch*, wattle stitch in next 3 ch 1 spaces, repeat from *to* once more, wattle stitch in next 4 ch 1 spaces, sc2tog in last st and first st of row to join. (11 wattle stitches)
- Row 19: Ch 1, turn, sc2tog in the dc and sc of next wattle stitch from previous row, wattle stitch into next 3 ch 1 spaces, *sc3tog in sc2tog of previous row and the dc and sc of next wattle stitch*, wattle stitch in next 2 ch 1 spaces, repeat from *to* once more, wattle stitch in next 3 ch 1 spaces, sc2tog in last st and first st of row to join. (8 wattle stitches)
- Row 20: Ch 1, turn, sc2tog in the dc and sc of next wattle stitch from previous row, wattle stitch into next 2 ch 1 spaces, *sc3tog in sc2tog of previous row and the dc and sc of next wattle stitch*, wattle stitch in next ch 1 space, repeat from *to* once more, wattle stitch in next 2 ch 1 spaces, sc2tog in last st and first st of row to join. (5 wattle stitches)
Cut a long length of yarn to sew the top of the hat shut with tapestry needle, attach your pom pom by sewing to the center of the top of your hat.
Cut off any excess yarn with scissors. Weave in any ends with tapestry needle.
Child
| Head Circumference: 19-20 inches | Hat Height: 7.5-8 inches |
Ribbing:
- Row 1: Ch 6, sc into 2nd ch from hook and next 4 chs (5 sts)
- Row 2: Ch 1, sl st loosely into first st, sl st loosely into back loop of next 3 sts, sl st loosely into both loops of last st (5 sts)
- Row 3: Ch 1, sc into first st, sc in back loop of next 3 sts, sc in last st (5 sts)
- Row 4-63: Repeat rows 2-3 (5 sts)
- Row 64: Ch 1, turn, fold ribbing together and sl st into each st to sew together, sl st into next st on the top of the ribbing, ch 1, and sc in the same st (mark sc with a st marker to help with counting in the next row, the last ch 1 does not count as a st).
Body of Hat:
- Row 1: Sc in each “ridge” and “valley of the ribbing. The sc count here needs to be a multiple of 3. Sl st join into the first (marked) stitch. (63 sts)
- Row 2: Ch 1, we will now wattle stitch in the first st. (Sc, ch 1, dc) in the first st (you can remove your st marker if you like), *skip 2 sts, (sc, ch 1, dc) in next st,* repeat from *to* until last 2 sts, skip last 2 sts, sl st join into first sc. (63 sts or 21 wattle stitches)
- Row 3: Ch 1, turn, skip the next st and (sc, ch 1, dc) in next ch 1 space, *skip 2 sts and (sc, ch 1, dc) in next ch 1 space,* repeat from *to,* until last you’ve wattle stitched in the last ch 1 space, skip a st, sl st join into the first sc. (21 wattle stitches)
- Row 4-15: Repeat row 3. (21 wattle stitches)
- Row 16: Ch 1, turn, *sc2tog in the dc and sc of next wattle stitch from previous row, wattle stitch into next 6 ch 1 spaces*, repeat from *to,* sl st join into first st. (18 wattle stitches)
- Row 17: Ch 1, turn, sc2tog in the dc and sc of next wattle stitch, wattle stitch into next 5 ch 1 spaces, *sc3tog in sc2tog from previous row and dc and sc of next wattle stitch, wattle stitch into next 5 ch 1 spaces,* repeat from *to,* join by sc2tog into last sc and first sc of this row. (15 wattle stitches)
- Row 18: Ch 1, turn, sc2tog in the dc and sc of next wattle stitch, wattle stitch into next 4 ch 1 spaces, *sc3tog in sc2tog from previous row and dc and sc of next wattle stitch, wattle stitch into next 4 ch 1 spaces,* repeat from *to,* join by sc2tog into last sc and first sc of this row. (12 wattle stitches)
- Row 19: Ch 1, turn, sc2tog in the dc and sc of next wattle stitch, wattle stitch into next 3 ch 1 spaces, *sc3tog in sc2tog from previous row and dc and sc of next wattle stitch, wattle stitch into next 3 ch 1 spaces,* repeat from *to,* join by sc2tog into last sc and first sc of this row. (9 wattle stitches)
- Row 20: Ch 1, turn, sc2tog in the dc and sc of next wattle stitch, wattle stitch into next 2 ch 1 spaces, *sc3tog in sc2tog from previous row and dc and sc of next wattle stitch, wattle stitch into next 2 ch 1 spaces,* repeat from *to,* join by sc2tog into last sc and first sc of this row. (6 wattle stitches)
- Row 21: Ch 1, turn, sc2tog in the dc and sc of next wattle stitch, wattle stitch into next ch 1 space, *sc3tog in sc2tog from previous row and dc and sc of next wattle stitch, wattle stitch into next ch 1 space,* repeat from *to,* join by sc2tog into last sc and first sc of this row. (3 wattle stitches)
Cut a long length of yarn to sew the top of the hat shut with tapestry needle, attach your pom pom by sewing to the center of the top of your hat.
Cut off any excess yarn with scissors. Weave in any ends with tapestry needle.
Teenager/Small Adult
| Head Circumference: 20-21 inches | Hat Height: 8-8.5 inches |
Ribbing:
- Row 1: Ch 6, sc into 2nd ch from hook and next 4 chs (5 sts)
- Row 2: Ch 1, sl st loosely into first st, sl st loosely into back loop of next 3 sts, sl st loosely into both loops of last st (5 sts)
- Row 3: Ch 1, sc into first st, sc in back loop of next 3 sts, sc in last st (5 sts)
- Row 4-66: Repeat rows 2-3 (5 sts)
- Row 67: Ch 1, turn, fold ribbing together and sl st into each st to sew together, sl st into next st on the top of the ribbing, ch 1, and sc in the same st (mark sc with a st marker to help with counting in the next row, the last ch 1 does not count as a st).
Body of Hat:
- Row 1: Sc in each “ridge” and “valley of the ribbing. The sc count here needs to be a multiple of 3. Sl st join into the first (marked) stitch. (66 sts)
- Row 2: Ch 1, we will now wattle stitch in the first st. (Sc, ch 1, dc) in the first st (you can remove your st marker if you like), *skip 2 sts, (sc, ch 1, dc) in next st,* repeat from *to* until last 2 sts, skip last 2 sts, sl st join into first sc. (66 sts or 22 wattle stitches)
- Row 3: Ch 1, turn, skip the next st and (sc, ch 1, dc) in next ch 1 space, *skip 2 sts and (sc, ch 1, dc) in next ch 1 space,* repeat from *to,* until last you’ve wattle stitched in the last ch 1 space, skip a st, sl st join into the first sc. (22 wattle stitches)
- Row 4-17: Repeat row 3. (22 wattle stitches)
- Row 18: Ch 1, turn, sc2tog in the dc and sc of next wattle stitch from previous row, wattle stitch into next 6 ch 1 spaces, sc2tog in the dc and sc of next wattle stitch, wattle stitch in next 7 ch 1 spaces, sc2tog in the dc and sc of next wattle stitch, wattle stitch in next 6 ch 1 spaces, sl st join into first st. (19 wattle stitches)
- Row 19: Ch 1, turn, sc2tog in the dc and sc of next wattle stitch from previous row, wattle stitch into next 5 ch 1 spaces, *sc3tog in sc2tog of previous row and the dc and sc of next wattle stitch*, wattle stitch in next 6 ch 1 spaces, repeat from *to* once more, wattle stitch in next 5 ch 1 spaces, sc2tog in last st and first st of row to join. (16 wattle stitches)
- Row 20: Ch 1, turn, sc2tog in the dc and sc of next wattle stitch from previous row, wattle stitch into next 4 ch 1 spaces, *sc3tog in sc2tog of previous row and the dc and sc of next wattle stitch*, wattle stitch in next 5 ch 1 spaces, repeat from *to* once more, wattle stitch in next 4 ch 1 spaces, sc2tog in last st and first st of row to join. (13 wattle stitches)
- Row 21: Ch 1, turn, sc2tog in the dc and sc of next wattle stitch from previous row, wattle stitch into next 3 ch 1 spaces, *sc3tog in sc2tog of previous row and the dc and sc of next wattle stitch*, wattle stitch in next 4 ch 1 spaces, repeat from *to* once more, wattle stitch in next 3 ch 1 spaces, sc2tog in last st and first st of row to join. (10 wattle stitches)
- Row 22: Ch 1, turn, sc2tog in the dc and sc of next wattle stitch from previous row, wattle stitch into next 2 ch 1 spaces, *sc3tog in sc2tog of previous row and the dc and sc of next wattle stitch*, wattle stitch in next 3 ch 1 spaces, repeat from *to* once more, wattle stitch in next 2 ch 1 spaces, sc2tog in last st and first st of row to join. (7 wattle stitches)
- Row 23: Ch 1, turn, sc2tog in the dc and sc of next wattle stitch from previous row, wattle stitch into next ch 1 space, *sc3tog in sc2tog of previous row and the dc and sc of next wattle stitch*, wattle stitch in next 2 ch 1 spaces, repeat from *to* once more, wattle stitch in next ch 1 space, sc2tog in last st and first st of row to join. (4 wattle stitches)
Cut a long length of yarn to sew the top of the hat shut with tapestry needle, attach your pom pom by sewing to the center of the top of your hat.
Cut off any excess yarn with scissors. Weave in any ends with tapestry needle.
Adult
| Head Circumference: 22 inches | Hat Height: 8.5-9 inches |
Ribbing:
- Row 1: Ch 6, sc into 2nd ch from hook and next 4 chs (5 sts)
- Row 2: Ch 1, sl st loosely into first st, sl st loosely into back loop of next 3 sts, sl st loosely into both loops of last st (5 sts)
- Row 3: Ch 1, sc into first st, sc in back loop of next 3 sts, sc in last st (5 sts)
- Row 4-72: Repeat rows 2-3 (5 sts)
- Row 73: Ch 1, turn, fold ribbing together and sl st into each st to sew together, sl st into next st on the top of the ribbing, ch 1, and sc in the same st (mark sc with a st marker to help with counting in the next row, the last ch 1 does not count as a st).
Body of Hat:
- Row 1: Sc in each “ridge” and “valley of the ribbing. The sc count here needs to be a multiple of 3. Sl st join into the first (marked) stitch. (72 sts)
- Row 2: Ch 1, we will now wattle stitch in the first st. (Sc, ch 1, dc) in the first st (you can remove your st marker if you like), *skip 2 sts, (sc, ch 1, dc) in next st,* repeat from *to* until last 2 sts, skip last 2 sts, sl st join into first sc. (72 sts or 24 wattle stitches)
- Row 3: Ch 1, turn, skip the next st and (sc, ch 1, dc) in next ch 1 space, *skip 2 sts and (sc, ch 1, dc) in next ch 1 space,* repeat from *to,* until last you’ve wattle stitched in the last ch 1 space, skip a st, sl st join into the first sc. (24 wattle stitches)
- Row 4-18,: Repeat row 3.
- Row 19: Ch 1, turn, *sc2tog in the dc and sc of next wattle stitch from previous row, wattle stitch into next 7 ch 1 spaces*, repeat from *to,* sl st join into first st. (21 wattle stitches)
- Row 20: Ch 1, turn, sc2tog in the dc and sc of next wattle stitch from previous row, wattle stitch into next 6 ch 1 spaces, *sc3tog in next sc2tog from previous row and dc and sc of next wattle stitch, wattle stitch into next 6 ch 1 spaces* repeat from *to,* sc2tog in last st and first st of row to join. (18 wattle stitches)
- Row 21: Ch 1, turn, sc2tog in the dc and sc of next wattle stitch from previous row, wattle stitch into next 5 ch 1 spaces, *sc3tog in next sc2tog from previous row and dc and sc of next wattle stitch, wattle stitch into next 5 ch 1 spaces* repeat from *to,* sc2tog in last st and first st of row to join. (15 wattle stitches)
- Row 22: Ch 1, turn, sc2tog in the dc and sc of next wattle stitch from previous row, wattle stitch into next 4 ch 1 spaces, *sc3tog in next sc2tog from previous row and dc and sc of next wattle stitch, wattle stitch into next 4 ch 1 spaces* repeat from *to,* sc2tog in last st and first st of row to join. (12 wattle stitches)
- Row 23: Ch 1, turn, sc2tog in the dc and sc of next wattle stitch from previous row, wattle stitch into next 3 ch 1 spaces, *sc3tog in next sc2tog from previous row and dc and sc of next wattle stitch, wattle stitch into next 3 ch 1 spaces* repeat from *to,* sc2tog in last st and first st of row to join. (9 wattle stitches)
- Row 24: Ch 1, turn, sc2tog in the dc and sc of next wattle stitch from previous row, wattle stitch into next 2 ch 1 spaces, *sc3tog in next sc2tog from previous row and dc and sc of next wattle stitch, wattle stitch into next 2 ch 1 spaces* repeat from *to,* sc2tog in last st and first st of row to join. (6 wattle stitches)
- Row 25: Ch 1, turn, sc2tog in the dc and sc of next wattle stitch from previous row, wattle stitch into next ch 1 space, *sc3tog in next sc2tog from previous row and dc and sc of next wattle stitch, wattle stitch into next ch 1 space* repeat from *to,* sc2tog in last st and first st of row to join. (3 wattle stitches)
Cut a long length of yarn to sew the top of the hat shut with tapestry needle, attach your pom pom by sewing to the center of the top of your hat.
Cut off any excess yarn with scissors. Weave in any ends with tapestry needle.
Large Adult
| Head Circumference: 23 inches | Hat Height: 9-9.5 inches |
Ribbing:
- Row 1: Ch 6, sc into 2nd ch from hook and next 4 chs (5 sts)
- Row 2: Ch 1, sl st loosely into first st, sl st loosely into back loop of next 3 sts, sl st loosely into both loops of last st (5 sts)
- Row 3: Ch 1, sc into first st, sc in back loop of next 3 sts, sc in last st (5 sts)
- Row 4-78: Repeat rows 2-3 (5 sts)
- Row 79: Ch 1, turn, fold ribbing together and sl st into each st to sew together, sl st into next st on the top of the ribbing, ch 1, and sc in the same st (mark sc with a st marker to help with counting in the next row, the last ch 1 does not count as a st).
Body of Hat:
- Row 1: Sc in each “ridge” and “valley of the ribbing. The sc count here needs to be a multiple of 3. Sl st join into the first (marked) stitch. (78 sts)
- Row 2: Ch 1, we will now wattle stitch in the first st. (Sc, ch 1, dc) in the first st (you can remove your st marker if you like), *skip 2 sts, (sc, ch 1, dc) in next st,* repeat from *to* until last 2 sts, skip last 2 sts, sl st join into first sc. (78 sts or 26 wattle stitches)
- Row 3: Ch 1, turn, skip the next st and (sc, ch 1, dc) in next ch 1 space, *skip 2 sts and (sc, ch 1, dc) in next ch 1 space,* repeat from *to,* until last you’ve wattle stitched in the last ch 1 space, skip a st, sl st join into the first sc. (26 wattle stitches)
- Row 4-20: Repeat row 3. (26 wattle stitches)
- Row 21: Ch 1, turn, sc2tog in the dc and sc of next wattle stitch from previous row, wattle stitch into next 8 ch 1 spaces, sc2tog in the dc and sc of next wattle stitch, wattle stitch in next 7 ch 1 spaces, sc2tog in the dc and sc of next wattle stitch, wattle stitch in next 8 ch 1 spaces, sl st join into first st. (23 wattle stitches)
- Row 22: Ch 1, turn, sc2tog in the dc and sc of next wattle stitch from previous row, wattle stitch into next 7 ch 1 spaces, *sc3tog in sc2tog of previous row and the dc and sc of next wattle stitch*, wattle stitch in next 6 ch 1 spaces, repeat from *to* once more, wattle stitch in next 7 ch 1 spaces, sc2tog in last st and first st of row to join. (20 wattle stitches)
- Row 23: Ch 1, turn, sc2tog in the dc and sc of next wattle stitch from previous row, wattle stitch into next 6 ch 1 spaces, *sc3tog in sc2tog of previous row and the dc and sc of next wattle stitch*, wattle stitch in next 5 ch 1 spaces, repeat from *to* once more, wattle stitch in next 6 ch 1 spaces, sc2tog in last st and first st of row to join. (17 wattle stitches)
- Row 24: Ch 1, turn, sc2tog in the dc and sc of next wattle stitch from previous row, wattle stitch into next 5 ch 1 spaces, *sc3tog in sc2tog of previous row and the dc and sc of next wattle stitch*, wattle stitch in next 4 ch 1 spaces, repeat from *to* once more, wattle stitch in next 5 ch 1 spaces, sc2tog in last st and first st of row to join. (14 wattle stitches)
- Row 25: Ch 1, turn, sc2tog in the dc and sc of next wattle stitch from previous row, wattle stitch into next 4 ch 1 spaces, *sc3tog in sc2tog of previous row and the dc and sc of next wattle stitch*, wattle stitch in next 3 ch 1 spaces, repeat from *to* once more, wattle stitch in next 4 ch 1 spaces, sc2tog in last st and first st of row to join. (11 wattle stitches)
- Row 26: Ch 1, turn, sc2tog in the dc and sc of next wattle stitch from previous row, wattle stitch into next 3 ch 1 spaces, *sc3tog in sc2tog of previous row and the dc and sc of next wattle stitch*, wattle stitch in next 2 ch 1 spaces, repeat from *to* once more, wattle stitch in next 3 ch 1 spaces, sc2tog in last st and first st of row to join. (8 wattle stitches)
- Row 27: Ch 1, turn, sc2tog in the dc and sc of next wattle stitch from previous row, wattle stitch into next 2 ch 1 spaces, *sc3tog in sc2tog of previous row and the dc and sc of next wattle stitch*, wattle stitch in next ch 1 space, repeat from *to* once more, wattle stitch in next 2 ch 1 spaces, sc2tog in last st and first st of row to join. (5 wattle stitches)
Cut a long length of yarn to sew the top of the hat shut with tapestry needle, attach your pom pom by sewing to the center of the top of your hat. Cut off any excess yarn with scissors. Weave in any ends with tapestry needle.
Thank you for checking out my pink crochet hat pattern. If you have any questions, please feel free to ask in the comments below!
Other Posts You May Like: