Flower Diamond Crochet Veil Pattern

Hello everyone, today I have another free crochet veil pattern for you all…the Crochet Flower Diamond Veil! This crochet veil has a 10 petaled flower worked in a diamond shape and sewn into the infinity style. I hope you like it!

This veil pattern is created for use at Catholic mass, or at least, that’s what I use it for! Some women wear a veil during mass as an outward way to humble themselves before God. According to Fr. Anthony Dorsa from Catholic Answers, “…women are to be veiled in the presence of that which is holy, because they themselves are, in a sense, sacred.” 

As with some of my previous crochet veil patterns, this is a project that will take a little bit of time to complete. Using the tiny crochet thread makes the veil look dainty, and because of that, it’s a labor of love. I believe this veil took me about 3 weeks to finish. Of those 3 weeks, I worked on it for about 1-2 hours a day, your time may vary of course.

The Flower Diamond Crochet Veil is worked up in 10 rows and then repeated from rows 3-10 until you’ve reached your desired length. 

The veil can be adjusted in length, the repeat formula is 36+4. This means to make a series of 36 chains until you’re happy with the length and then add 4 more chains for the turning chain.

I suggest making your starting chain and then draping it over your head, while bringing the ends together to get an idea of what size you need. I like to give my veils enough room around my neck and chest area, otherwise I feel constricted.

Okay, let’s get into this beautiful crochet veil pattern!

Related Posts:

Please note that some of these links are affiliate links. That means that if you click on these links and make a purchase, I may receive a commission at no extra cost to you. You can find more information about our disclosure policy here. Thank you for your support.

Materials Needed:

Abbreviations Used:

Please note these are in US terms, not UK.

  • Ch(s) – chain(s)
  • Sc – single crochet
  • Dc – double crochet
  • Tr – treble crochet
  • Ch 3 picot – ch 3, insert hook into top of last stitch, make a slip stitch
Flower Diamond Veil Close Up

Flower Diamond Crochet Veil Pattern

Ch a repeat of 36+4 until desired length.

  • Row 1: Dc in 5th ch from hook, ch 5, skip 5 chs, 1 sc in next 5 chs, *ch 5, skip 5 chs, 1 dc in next 3 chs, ch 5, skip 5 chs, 1 sc in next 5 chs.* Repeat from *to* until 7 chs are left. Ch 5, skip 5 chs, 1 dc in last 2 chs.
Row 1
  • Row 2: Ch 3, turn, skip first dc, *dc in next dc, 1 dc in 1st and 2nd chs of next ch 5, ch 5, skip next sc, 1 sc in next 3 sc, ch 5, skip 3 chs of next ch 5, 1 dc in 4th and 5th chs, dc in next dc, ch 1, skip next dc.* Repeat from *to* until last repeat completed. Dc in next dc, 1 dc in 1st and 2nd chs of next ch 5, ch 5, skip next sc, 1 sc in next 3 sc, ch 5, 1 dc in 4th and 5th chs of next ch 5, 1 dc in next dc, 1 dc in top of turning ch from previous row.
Row 2
  • Row 3: Ch 8, turn, skip next 3 dc, *1 dc in next dc, 1 dc in 1st and 2nd chs of next ch 5, ch 3, skip next sc, tr in next sc, ch 3, skip 3 chs of next ch 5, 1 dc in 4th and 5th chs, 1 dc in next dc, ch 4, tr in next ch 1 space, ch 4, skip next 2 dc.* Repeat from *to* until last repeat completed. 1 dc in next dc, 1 dc in 1st and 2nd chs of next ch 5, ch 3, skip next sc, tr in next sc, ch 3, skip 3 chs of next ch 5, 1 dc in 4th and 5th chs, 1 dc in next dc, ch 4, tr in top of ch 3 turning ch from previous row.
Row 3
  • Row 4: Ch 1, turn, skip tr, sc in 1st ch of next ch 4, *ch 4, skip next 2 dc, 1 dc in next dc, 2 dc in next ch 3 space, ch 1, skip tr, 2 dc in next ch 3 space, 1 dc in next dc, ch 4, skip next 2 dc and 3 chs in next ch 4 space, sc in 4th ch, sc in tr, sc in 1st ch in next ch 4 space.* Repeat from *to* until last repeat completed. Ch 4, skip next 2 dc, 1 dc in next dc, 2 dc in next ch 3 space, ch 1, skip tr, 2 dc in next ch 3 space, 1 dc in next dc, ch 4, skip next 2 dc, skip 3 chs of previous rows turning ch, 1 sc in next 2 chs.
Row 4
  • Row 5: Ch 1, turn, skip 1st sc, sc in next sc, sc in 1st ch of next ch 4 space, *ch 5, skip next 2 dc, dc in next dc, dc in ch 1 space, dc in next dc, ch 5, skip next 2 dc, skip 3 chs of next ch 4 space, sc in next ch, 1 sc in next 3 sc, 1 sc in 1st ch of next ch 4 space.* Repeat from *to* until until last repeat completed. Ch 5, skip next 2 dc, dc in next dc, dc in ch 1 space, dc in next dc, ch 5, skip next 2 dc, skip next 3 chs of next ch 4 space, sc in next ch, sc in next sc, sc in ch 1 turning ch from previous row.
Row 5
  • Row 6: Ch 1, turn, skip 1st sc, sc in next sc, skip next sc, *ch 5, skip 3 chs of next ch 5 space, dc in 4th and 5th chs, dc in next dc, ch 1, skip dc, dc in next dc, dc in 1st and 2nd chs of next ch 5 space, ch 5, skip next sc, 1 sc in next 3 sc, skip next sc.* Repeat from *to* until last repeat completed, ch 5, skip 3 chs of next ch 5 space, dc in 4th and 5th chs, dc in next dc, ch 1, skip dc, dc in next dc, dc in 1st and 2nd chs of next ch 5 space, ch 5, skip next sc, sc in next sc, sc in ch 1 turning ch from previous row.
Row 6
  • Row 7: Ch 7, turn, skip next 2 sc and 3 chs of next ch 5 space, dc in 4th and 5th chs, *dc in next dc, ch 4, skip next 2 dc, tr in ch 1 space, ch 4, skip next 2 dc, dc in next dc, dc in 1st and 2nd chs of next ch 5 space, ch 3, skip next sc, tr in next sc, ch 3, skip next sc, skip 3 chs of next ch 5 space, dc in 4th and 5th chs.* Repeat from *to* until last repeat completed, dc in next dc, ch 4, skip next 2 dc, tr in ch 1 space, ch 4, skip next 2 dc, dc in next dc, dc in 1st and 2nd chs of next ch 5 space, ch 3, skip next sc, tr in ch 1 turning ch of previous row
Row 7
  • Row 8: Ch 3, turn, 2 dc in ch 3 space, dc in next dc, *ch 4, skip next 2 dc and 3 chs of next ch 4 space, sc in 4th ch, sc in tr, sc in 1st ch of next ch 4 space, ch 4, skip next 2 dc, dc in next dc, 2 dc in next ch 3 space, ch 1, skip tr, 2 dc in next ch 3 space, dc in next dc.* Repeat from *to* until last repeat completed, ch 4, skip next 2 dc and 3 chs of next ch 4 space, sc in 4th ch, sc in tr, sc in 1st ch of next ch 4 space, ch 4, skip next 2 dc, dc in next dc, 3 dc in ch 7 turning ch from previous row.
Row 8
  • Row 9: Ch 3, turn, skip 1st dc, dc in next dc, *ch 5, skip 3 chs of next ch 4 space, sc in 4th ch, sc in next 3 sc, sc in 1st ch of next ch 4 space, ch 5, skip next 2 dc, dc in next dc, dc in ch 1 space, dc in next dc, skip next 2 dc.* Repeat from *to* until last repeat completed, ch 5, skip 3 chs of next ch 4 space, sc in 4th ch, sc in next 3 sc, sc in 1st ch of next ch 4 space, ch 5, skip next 2 dc, dc in next dc, dc in top of ch 3 turning ch from previous row.
Row 9
  • Row 10: Ch 3, turn, skip 1st dc, *dc in next dc, dc in 1st and 2nd ch of next ch 5 space, ch 5, skip next sc, sc in next 3 sc, ch 5, skip next sc and 3 chs of next ch 5 space, dc in 4th and 5th chs, dc in next dc, ch 1, skip next dc.* Repeat from *to* until last repeat completed, dc in next dc, dc in 1st and 2nd ch of next ch 5 space, ch 5, skip next sc, sc in next 3 sc, ch 5, skip next sc and 3 chs of next ch 5 space, dc in 4th and 5th chs, dc in next dc, dc in top of ch 3 turning ch from previous row.

Repeat rows 3-10 until desired length. End after a row 3 repeat. 

Row 10
  • Edging: Ch 1, turn, *sc in tr, 2 sc in next ch space, ch 3 picot, 2 sc in same ch space, sc in next 3 dc, 2 sc in next ch space, ch 3 picot, 2 sc in same ch space.* Repeat from *to* until end. 

DO NOT CUT THREAD

Edging
  • Assembly: Fold the veil in half, sew the edges together by slip stitching into both sides as evenly as possible. Cut thread, sew in ends with tapestry needle. 

Thank you for trying out the Flower Diamond Crochet Veil pattern. I try my best to make pattern instructions as clear as possible, but if you have questions or notice a mistake, please let me know in the comments below.

Until next time!

Other Posts You May Like:

Floral Lace Infinity Veil – Free Crochet Veil Pattern

Hello everyone, today I have another beautiful crochet veil pattern that you can wear to mass for you…the Floral Lace Infinity Veil! With spring just around the corner, I wanted to create a veil that had flowers throughout it, and I think this veil turned out great!

As with some of my previous crochet veil patterns, this one will also take a little bit of time to finish, especially depending on how big you want yours. This pattern is also finished by folding your piece together and sewing to make the veil an infinity type veil. 

The Floral Lace Infinity Veil pattern is worked up in 5 rows with a repeat of rows 2-5. You’ll notice these rows are similar, with the only difference being offsetting the flowers so they look more pleasing to the eye. Here’s a close up of the flower repeats:

The veil is worked up with a repeat of 11+7. This means that you will crochet a chain with a multiple of 11 and then add 7 more chains once you’re happy with your chain length. 

The veil pictured above is a size small, so if you’re making this for an adult, make your starting chain longer. I suggest making your starting chain, draping it over your head and bring the ends together so you can get an idea of what the length will be while worn. 

I also found that in row 1, it’s easy to skip chains on accident since the crochet thread is so tiny and when you make your treble crochets, sometimes it’s hard to tell which chain you’ve crocheted into (or maybe this is just a problem for me, lol!). 

If you find that you’ve reached the end of the starting chain and you don’t have the exact number of chains left according to the pattern instructions…I would just fudge it the best you can. That’s just me, but when you’re done sewing the veil at the end, I promise that no one is going to be able to tell that you had to skip more or less chains at the end.

Alright, let’s jump into the crochet Floral Lace Infinity Veil pattern!

Similar Posts:

Floral Infinity Veil Pattern
Here's my other girly modeling the veil for me 🙂
Crochet Flower Veil Close Up
You can see how the flowers repeat themselves in this close up of the veil

Please note that some of these links are affiliate links. That means that if you click on these links and make a purchase, I may receive a commission at no extra cost to you. You can find more information about our disclosure policy here. Thank you for your support.

Materials Needed: 

Abbreviations Used:

Please note these are in US terms, not UK.

  • Ch – chain
  • St – stitch
  • Sl st – slip stitch
  • Sc – single crochet
  • Tr – treble crochet

Special Stitches:

This crochet veil pattern uses treble cluster stitches. When you make a cluster stitch, you will make 2 or 3 treble crochets, but hold back the last pull through until all 2 or 3 treble crochets are made, and then pull through all loops to finish. Here are more detailed instructions: 

2 Tr Cluster:

  • Yarn over twice, insert hook into next stitch, draw up a loop, yarn over, pull through two loops, yarn over, pull through two loops (you should have two loops on your hook)
  • Yarn over twice, insert hook into same stitch, draw up a loop, yarn over, pull through two loops, yarn over, pull through two loops, yarn over, pull through all three loops.

3 Tr Cluster: 

  • Yarn over twice, insert hook into next stitch, draw up a loop, yarn over, pull through two loops, yarn over, pull through two loops (you should have two loops on your hook)
  • Yarn over twice, insert hook into same stitch, draw up a loop, yarn over, pull through two loops, yarn over, pull through two loops (you should have three loops on your hook)
  • Yarn over twice, insert hook into same stitch, draw up a loop, yarn over, pull through two loops, yarn over, pull through two loops, yarn over and pull through all four loops.

Crochet Flower Lace Infinity Veil

Repeat is 11+7 

Loosely Ch 205 or until desired length using the repeat formula above. (Protip: use stitch markers to mark every 50 stitches or so if you find yourself getting distracted or losing count) 

  • Row 1: Tr in 10th ch from hook, *ch 5, tr in same ch as first tr
  • ch 5, 2 tr cluster in front two loops of last tr (hold back the last pull through, you should have 3 loops on your hook)
  • skip 2 chs, 3 tr cluster in next ch (hold back the last pull through, 6 loops on your hook)
  • skip 4 chs, 3 tr cluster in next ch (pull through all 9 loops on your hook)
  • sl st into any loop of the last tr cluster leg to “secure” the center of your flower petal (this prevents a big hole from forming later in the center)
  • Ch 5, 2 tr cluster in the “center” of your flower petal. You should have a 4 petaled flower made up of 3 tr clusters at this point.
  • Skip 2 chs, tr in next ch.* Repeat from *to* until end, you should have 3 chs left, but if you don’t I would just work the last bit the best you can (it’s easy to miss chains with how small the thread is). Ch 5, tr in same ch as previous tr, ch 1, tr in last ch.
  • Row 2: Ch 10, turn, sc in the 3rd ch in previous row’s ch 5 space
  • *ch 7, 3 tr cluster in center of next flower, ch 3, 3 tr cluster again in center of same flower, ch 7, sc in 3rd ch of next ch 5 space from previous row.* Repeat from *to* until last ch 5 space sc into, ch 5, tr in 2nd ch away from last tr of previous row.
  • Row 3 (this row is similar to row 1, but we are offsetting the flowers): Ch 10, turn, 2 tr cluster in 5th ch from hook (hold back last pull through, 3 loops on hook), looking at the sc in the top of row 1’s ch 5, 3 tr cluster in 3rd ch from the right of the next sc (hold back last pull through, 6 loops on hook), *3 tr cluster in the 4th ch from the left of the same sc (pull through all 9 loops)
  • Sl st into any loop of the last tr cluster leg, ch 5, 2 tr cluster in center of flower. Tr in the middle ch of the next ch 3 from row 2, ch 5, tr in same ch as previous tr made
  • Ch 5, 2 tr cluster in front two loops of last tr (hold back last pull through, 3 loops on hook), 3 tr cluster in 4th ch from the right of the next sc (hold back last pull through, 6 loops on hook).* Repeat from *to* until last sc from previous row, 3 tr cluster in 3rd ch from the left of the last sc, pull through all 9 loops, sl st into any thread of last tr cluster leg, ch 5, 2 tr cluster in center of flower, skip 2 chs, tr in 3rd ch of previous rows turning ch.
  • Row 4 (this row is similar to row 2, but offset again): Ch 6, turn, *3 tr cluster in center of next flower, ch 3, 3 tr cluster in center of the same flower, ch 7, sc in 3rd ch of previous row’s ch 5, ch 7.* Repeat from *to* until last flower, 3 tr cluster in center of last flower, ch 3, 3 tr cluster in center of same flower, ch 1, tr in next ch.

Row 5 (similar to row 1): Ch 6, turn, *tr in middle of ch 3 from previous row, ch 5, tr in same ch, ch 5, 2 tr cluster in two front loops of last tr (hold back last pull through, 3 loops on hook), 3 tr cluster in 4th ch from the right of the next sc (hold back last pull through, 6 loops on hook), 3 tr cluster in 4th ch from the left of the same sc, pull through all 9 loops, sl st into any loop of last tr cluster leg, ch 5, 2 tr cluster in center of flower.* Repeat from *to* until last flower completed, tr in middle of next ch 3, ch 5, tr in same ch as previous tr made, ch 1, skip 1 ch, tr in next ch.

Repeat Rows 2-5 until you’ve reached your desired length. End on a repeat of row 2 for the edging.         

Edging: Ch 1, turn, 3 sc in ch 5 space, ch 3 picot, 3 sc in same ch 5 space, sc in next sc, *3 sc in next ch 7 space, ch 3 picot, 3 sc in same ch 7 space,  sc in top of 3 treble cluster, sc in ch 3 space, ch 3 picot, sc in same ch 3 space, sc in top of next 3 treble cluster, 3 sc in next ch 7 space, ch 3 picot, 3 sc in same ch 7 space, sc in next sc,* repeat from *to* until you’ve sc in last sc of row, 3 sc in last ch space, ch 3 picot, 3 sc in same ch space.

DO NOT CUT THREAD

Assembly:  Fold your veil in half, line up the edges as evenly as possible, and sl st into both sides of the veil all the way down. This will “sew” the sides together.

Leave a long enough piece of thread for sewing, cut with scissors, and pull through. Sew the end in with tapestry needle and any other ends.

Thank you for viewing the Floral Lace Infinity Veil pattern! If you find a mistake, or need help, please don’t hesitate to leave a comment or question below. 

Until next time!

Other Posts You May Like:


13 Beautifully Gothic Crochet Doilies

Hello everyone, today I have compiled a list of 13 Beautifully Gothic Crochet Doilies for you. Some people say that crocheting with black yarn is difficult, but with a little determination and good lighting, you can create these doilies and add a little gothic flair to your home today.

All of these patterns are available for free at the time of writing this post, links to the patterns are above the descriptions. 

The patterns may suggest different size thread or size hooks, however, I just stuck with my size 10 black crochet thread and my trusty 1.65 mm crochet hook. This just made it easier not having to switch around, but you can use whatever hook size you prefer. 

I love the way all these black crochet doilies turned out. They were honestly a lot of fun to make, and if you’re not too scared to try out using black thread and small crochet hooks, it’s a great way to pass the time. 

Blocking your Crochet Doily

When finished crocheting these doilies, I always block them one way or another. Some crocheters like to starch their doilies to make them stiff, but usually skip the starch. 

When I block my doilies, I fill up a mixing bowl full of water and throw the doily in there. I’ll use my hand to swish it around and make sure all the threads are soaked. 

With a towel next to me, I’ll pull the doily out and let it drip as much water back into the bowl and then place it on the towel. I try not to wring out or squeeze the doily too hard so it doesn’t pull the threads out in undesirable ways. With the towel, I just pat the doily until it’s dry enough to work with.

I use an old pizza box to block my doilies, but there are blocking mats you can buy that are made for blocking crochet or knit projects. Then I’ll use pins to stretch out and pin my doily to the box. Once I’m happy with the way it’s blocked, I’ll set the box down where the kids can’t get to it and let it dry for at least a day.

Okay, let’s dive into this list of 13 Beautifully Gothic Crochet Doilies!

Related Posts:

Please note that some of these links are affiliate links. That means that if you click on these links and make a purchase, I may receive a commission at no extra cost to you. You can find more information about our disclosure policy here. Thank you for your support.

Materials Needed:

crochet gothic doily
Two Tone Crochet Doily

Two Tone Crochet Doily

Get the pattern here.

The Two Tone Crochet Doily, has you use two different colors of thread (but it looks amazing in just black). This pattern is fairly easy, and I would recommend this pattern for a beginner doily maker. 

gothic crochet patterns
Mable Doily

The Mable Doily

Get the pattern here.

The Mable Doily is designed by Grace Fearon, and is probably one of the most beautiful gothic crochet doilies I’ve personally made. Her pattern is completely free and she has a video tutorial if you need more help.

spider web crochet doily
Spider Web Doily

Spider Web Doily Pattern

Get the pattern here. 

The Spider Web Doily Pattern is a vintage, gothic crochet doily. It was originally published in a magazine dedicated to doily patterns from the American Thread Company. Luckily, we have the pattern available totally for free!. The Spider Web Doily truly looks like a spider web, which will give you an aesthetically pleasing gothic vibe to any room. This is a 24 round pattern composed of mostly chains, single/double/treble crochets, with small double crochet clusters and picots at the very end.

crowns of majesty doily
Crowns of Majesty Doily

Crowns of Majesty Doily

Get the pattern here.

The Crowns of Majesty Doily is designed by Wilma Baker, and is absolutely gorgeous. If you use all black thread, it becomes a lovely gothic doily. This one is a larger doily, and you might need two rolls of black crochet thread instead of one (depending on your yardage and what size of crochet hook you use).

black tesla crochet doily
Tesla Doily

Tesla Doily  

Get the pattern here.

The Tesla Doily is designed by Victoriia Gul, and is a small, delicate looking doily. I would not suggest this doily for a beginner, as there are many different types of stitches in her pattern. You’ll need to be comfortable crocheting front post stitches, puff stitches, cluster stitches, and picots. She suggests using a stitch marker for a few rounds in her pattern, but I did not find it totally necessary. This doily would be great to use underneath a candle, or underneath small plates.

crochet lace black doilies
Moonpetals

Moonpetals

Get the pattern here.

The Moonpetals Doily is designed by Julia Hart. It’s a beautiful crochet doily pattern that truly reminds me of a flower in the moonlight! It’s a 21 round pattern that is easy to follow, but I would suggest this doily for an intermediate crocheter. You’ll need to know how to crochet puff stitches, picots, clusters, and treble crochets (but don’t worry, she has instructions for the special stitches).

gothic crochet pattern
Pretty Crochet Doily Pattern

Pretty Crochet Doily Pattern 

Get the pattern here.

The Pretty Crochet Doily Pattern is a simple, lacey doily that looks great under a vase of flowers or candles. The pattern states that this is for an intermediate crocheter, but I honestly think this is a fine doily pattern for a beginner to try. This is a 15 round pattern, made mostly of chains, double crochets and single crochets.

black lace crochet doilies
Delicate Doily Pattern

Delicate Doily Pattern

Get the pattern here.

The Delicate Doily Pattern is a gorgeous gothic doily that looks almost like a cathedral window. The long chains combined with treble, double, and single crochets creates a circular “window pane.” This is a 16 round pattern, and don’t get discouraged trying to open the link to this pattern…I experienced a slow load time at the time of this article, but it did go through!

beautiful gothic crochet doily
Spider Web Doily #2

Spider Web Doily #2

Get the pattern here.

Yes…another Spider Web Doily, but this one is much different than the doily before. This one is also brought to you by the American Thread Company Magazine (so many good doily patterns by them by the way). I honestly think this doily looks more like wispy, dandelion puffs than a spider web, but I’ll let you decide. The Spider Web Doily is long and big, with a whopping 33 rounds. With such a big doily, you could use it as a large centerpiece for a dinner table.

Aunt Lydia’s Skulduggery Doily

Aunt Lydia’s Skulduggery Doily

Get the pattern here.

Aunt Lydia’s Skulduggery Doily is the perfect gothic crochet doily. The pattern has a beautiful way of laying out the little skulls throughout the doily. I used white thread for the Skulduggery Doily so the skulls could really pop out, but feel free to continue with the black crochet thread theme within this post. If you’re using the size 10 black crochet thread from Red Heart, you might need 2 rolls for this pattern. I would suggest trying this pattern if you’re an intermediate to experienced crochet doily maker.

beautiful crochet doily
Starshine Doily

Aunt Lydia’s Starshine Doily

Get the pattern here.

Aunt Lydia pulls through again with another amazing gothic crochet doily. This pattern is worked up into a beautiful star shape. The Starshine Doily is a small to medium sized doily and the suggested skill level is for an intermediate crocheter.

mini trellis
Mini Trellis Doily

Mini Trellis Doily

Get the pattern here.

The Mini Trellis Doily is a simple 11 round crochet doily pattern made available by Adrienne R. Congdon. When crocheted with black thread, it looks almost like a small cathedral window. This is a great pattern for beginners, as it works up quickly and uses simple crochet stitches.

agnes crochet doily in black
Agnes Doily

Agnes Doily

Get the pattern here.

The Agnes Doily, designed by Zoya Matyushenko, is an intermediate to advanced pattern that is seriously stunning. Her pattern is probably one of the hardest ones in this list, but the instructions for the Agnes Doily are pretty clear.

Thank you for checking out this list of 13 Beautifully Gothic Crochet Doilies! I hope you found a crochet pattern that you liked, until next time!

Other Posts You May Like:

17 Crochet Stitches that Look Like Flowers

Are you looking for crochet stitches that look like flowers to incorporate into your next project? Here are 17 different stitches/patterns that you can use to get some floral inspiration…for free! 

Click the headings to take you to the tutorials.

1: The Jasmine Stitch

The Jasmine Stitch is a gorgeous stitch that creates the look of flower blossoms using a series of puff stitches. It’s one of the prettiest crochet stitches, but it can be a little difficult to master at first. The Jasmine Stitch is a thick stitch, which means that it uses up a lot of yarn quickly, so make sure you purchase enough yarn to complete your project. This is a great stitch to use for headbands, hats, or scarves.

2: Lace Flower Stitch 

This is a delicate looking, lacy flower stitch that’s perfect for adding a decorative floral pattern to your crochet projects. Try using this stitch for a lacy shawl or scarf, or even a beautiful table runner. A series of three puff stitches separated by chains, creates the flowery look of this stitch.

3: Flower Stitch

This is a cute little crochet flower stitch that resembles a row of tulips or rose buds. The Flower Stitch tutorial has three color changes, so keep that in mind. Try using this stitch for blankets, scarves, or shawls. The “ground” is made up of 2 rows of single crochets, the “stems” are made of V stitches, and the flower is made up of a 3 double crochet puff stitch.

4: Crochet Flower Stitch 

The Crochet Flower Stitch is a dainty, openwork stitch that creates a four petaled flower. This would be a great stitch for any lace work, like a doily or a table runner. The Crochet Flower stitch tutorial includes step-by-step pictures and is made up of 5 different rows to create the floral look.

5: Wattle Stitch

The Wattle Stitch adds a stunning texture to many crochet projects. The series of double crochets, chains, and single crochets, makes it look like tiny little flowers throughout your work. It’s beginner friendly and great for a variety of crochet projects. The Wattle Stitch is great for baby blankets, hats, scarves, or dishcloths. 

Here are some patterns I’ve made using the wattle stitch: 

6: Crochet Garden Flower Stitch 

The Crochet Garden Flower Stitch is similar to the #4 Crochet Flower Stitch, however, this flower has 6 petals instead of 4, and is actually a little easier to work up. This is another lacy stitch that would be great for projects that need a floral border like a dress or a doily. The video tutorial in the link is in Spanish, so keep that in mind if you don’t speak the language, however there is a diagram that is available in the tutorial.

7: Lace Crochet Flowers

The Lace Crochet Flowers pattern creates a 5 petal flower using chains, double crochets, and single crochets. It’s a repeat of 8 rows, but it’s easy to get a hang of after some practice. The Lace Crochet Flower pattern uses the gaps made from the chains to create the petals in the flower. This particular pattern would be great for blankets, scarves, or borders. 

8: Crochet Puff Flower Blanket 

The Crochet Puff Flower stitch is a series of flowers made up of puff stitches. This is another tutorial that is in Spanish, so again, if you don’t speak or understand Spanish, turn on closed captioning and change the language setting to your preferred language. 

These flowers are then connected to one another by crocheting into the top of the petals. This is different from most other types of flower stitches, as each flower is crocheted, connected and then cut with scissors. However, don’t let that discourage you, the way the flowers are connected keeps them secure and almost impossible to unravel. Not only is this great for a beautiful blanket, but a pillow would also be a good project for this stitch.

9: Flower Trellis Stitch

The Flower Trellis Stitch is an elegant crochet flower stitch that looks like flowers or roses peaking out behind a trellis. The bobble stitches and front post stitches create an interesting 3D effect in your work. You will also need 3 different colors of yarn to complete this pattern. The Flower Trellis Stitch would be great to use for blankets, crochet wraps, or any crochet garments. 

10: Lace Flower Scarf

The Lace Flower Scarf stitch is another gorgeous crochet flower stitch that can be used for more than just scarves. It’s a lacy floral pattern that is crocheted in strips and then crocheted together. This is a great stitch to use for scarves, table runners, lacy curtains, summer tops or shawls.

11: Edging with Puff Stitch Flowers 

The Edging with Puff Stitch Flowers is a cute way to add flowers to any crochet project that has a straight border. The flowers are made of puff stitches, somewhat similar to the Jasmine stitch, but chains and double crochets are incorporated in the pattern. This is a great stitch to add to a crochet baby blanket for a girl.

12: Vela Flower Square

The Vela Flower Square is a beautiful granny square made up of tiny, four petaled flowers. The way the flowers pop out of the square gives it an interesting texture. The Velma Flower Square pattern is easy to follow, and you only crochet with single crochets, double crochets, chains and slip stitches. This would be a good stitch to use for blankets, washcloths, or wraps.

13: Bobble Drops Flower Granny Square

The Bobble Drops Flower Granny Square is a pleasing, modern-looking crochet flower design. The pattern is created with 4 simple rows, so it works up quickly. The front post bobbles in the pattern creates this pretty flower square. This crochet stitch would be great for blankets, bags, cushions, or garments. Using thicker yarn or a bigger crochet hook may be helpful to cover more area quickly with this pattern.

14: Crochet Velvet Flowers Throw 

The Crochet Velvet Flowers Throw is another cute way to incorporate flowers for a blanket or throw. Flowers are made throughout the blanket by crocheting bobbles in groups. The bobbles can be pushed out to make the flowers “pop.” This would be a great pattern for blankets, garments, or scarves.

15: Sunburst Granny Square 

The Sunburst Granny Square is a wonderful way to get the look of sunflowers in your projects. There’s 4 color changes and a variety of different ways to arrange the colors to get the sunflower look you want. The sunflower is created by crocheting puff stitches and bobbles for the petals. The Sunburst Granny Square is great for blankets, bags, pillows, and garments.

16: African Flower Crochet Pattern 

The African Flower Crochet Pattern is a floral, hexagonal “granny square.” This is another pattern with 4 different color changes. Figuring out which color changes look the best is part of the fun with these types of flower crochet patterns. The African Flower is created with mostly double crochets and chains. This is a great pattern for crochet blankets, pillows, and even animals made from motifs.

17: Simple Daisy Stitch

The Simple Daisy Stitch is a textured stitch that looks like little crochet daisy flowers or stars. The stitch is created with chains and pulling through loops. The Simple Daisy Stitch is great to incorporate into a variety of projects including scarves, blankets, bags, washcloths, or wraps.

I hope these 17 crochet stitches that look like flowers have inspired you! 

Until next time.

Other Posts You May Like:

Solomon’s Knot Crochet Veil Pattern

Hey there everyone, today I have another crochet veil pattern for you, the Solomon’s Knot Crochet Veil! 

I’ve been having a lot of fun making these lacey veils lately. It’s very therapeutic, and I can somewhat turn my brain off when making them (bonus!).

These crochet veils are typically worn during a Catholic Mass. Wearing a veil to mass is not a requirement, but some women continue the tradition of wearing one as a way to humble oneself before God.

With that said, if you like wearing a veil to mass, you may have noticed that these veils can be a little pricey. I wanted to make one that would fit my 4 year old, but didn’t want to spend 20-30 dollars on one that she’d grow out of eventually. 

Luckily, crochet thread is still super cheap, so all you need is the time to make the actual veil. Making this child size one took me about 4 days of crocheting off and on.  

The Solomon’s Knot Crochet Veil is made up entirely of a special stitch called…you guessed it; the solomon’s knot. The solomon’s knot stitch is made simply by pulling up “longer” loops than normal and single crochets. This creates a lacey, diamond-like shape in your work. 

I’ve made a child size crochet veil for this project today, but you can easily adjust the length of your veil by using a repeat of 2+4. 

Related Posts:

Please note that some of these links are affiliate links. That means that if you click on these links and make a purchase, I may receive a commission at no extra cost to you. You can find more information about our disclosure policy here. Thank you for your support.

Solomon's Knot Crochet Stitch
Close up of Solomon's Knot Crochet Veil

Materials Needed:

Abbreviations Used:

Please note these are in US terms, not UK.

  • Ch – chain
  • Sl st – slip stitch
  • Sc – single crochet
  • SK – solomon’s knot (see Row 1)

Solomon’s Knot Crochet Veil Pattern:

To make your foundation chain, make a repeat of 2+4

This means to make a multiple of 2 SK stitches plus 4 SK stitches at the end for your turning ch.

For this child size veil, make 90 SK stitches.

Row 1: Ch 2, sc in first ch. Pull up a loop about ¾” tall (or to your desired height) with your crochet hook. Yarn over, and pull through your big loop. Insert your hook into the single, back “bump” of your work, make a sc in that bump. This is a solomon’s knot (SK) stitch. Continue making SK stitches until you reach your desired length (remember, it needs to be able to drape over your head comfortably).

Pull up a 3/4" loop and yarn over
Insert hook into the single back bump of your work
Make a sc

Row 2: Turn, sc in the 4th sc from your hook, *make 2 SK stitches, skip a sc, sc in next sc*. Repeat from *to* until end of row. You should end with a sc in the last sc.

Sc here
Make 2 SK stitches
Row 2

Row 3: Make 3 SK stitches, turn, sc in the “middle” sc of previous rows 2 SK stitches, *make 2 SK stitches, skip a sc, sc in next sc.* Repeat from *to.*

Row 3

Repeat Row 3 until you’ve reached the desired length for your veil. 

Edge:

To make a ch 3 picot: ch 3, insert your hook into the previous sc made and make a sl st in that sc.

Row 1: Ch 1, *sc in next sc, 2 sc in first loop, (sc, ch 3 picot, sc) in middle sc, 2 sc in next loop, sc in next sc.* Repeat from *to*

Assembly:

Fold the crochet veil in half, line up the sides and sew together by slip stitching into both sides all the way down. Try to sl st as evenly as possible on both sides.

Fold in half and sl st to sew down the edge.
Crochet Veil Child Size
Here is my oldest wearing the veil!

Thank you for checking out my Solomon’s Knot Crochet Veil! If you have any questions, please leave a comment down below.

Until next time!

Other Posts You May Like:


Pink Crochet Hat Pattern

Happy new year everyone! Today I have a pink crochet hat pattern for you! 

This hat is available in sizes newborn to large adult. I have the averages for head circumference and hat height per age. 

As always, I recommend obtaining accurate measurements with a tape measure and then finding the instructions for those measurements below.

I decided to use one of my favorite textured crochet stitches for this pattern…the wattle stitch! I’ve used this stitch in some of my previous patterns. It’s a simple stitch that creates a beautiful texture that looks like little flowers.

The yarn I’m using today is from Mainstays 100% Cotton Yarn in Daylily Pink. This natural cotton yarn is nice and soft, and has a variety of neutral and muted shades available (so if pink isn’t your kind of color, check them out!). If you’re using the same pink yarn, this would be the perfect gift for a girl or a baby girl. 

Keep in mind that this yarn is a 4 worsted weight, so if you want to use a different yarn, make sure that it is also a 4 worsted weight or your final product might end up too big or too small.

I’ve also decided to sew a faux fur pom pom to the top of this pink crochet hat. If you don’t have a pom pom, you can always make one out of any left over yarn you have.

Related Posts:

Wattle Stitch in Pink
Here's a close up of the Wattle Stitch.

Please note that some of these links are affiliate links. That means that if you click on these links and make a purchase, I may receive a commission at no extra cost to you. You can find more information about our disclosure policy here. Thank you for your support.

Materials Needed:

Abbreviations Used:

Please note these are in US terms, not UK.

  • St(s) – stitch(es)
  • Sl st – slip stitch
  • Ch – chain
  • Sc – single crochet
  • Dc – double crochet
  • Sc2tog – single crochet two stitches together
  • Sc3tog – single crochet three stitches together

Special Instructions:

  • The beginning ch 1’s do not count as a stitch.
  • This pink crochet hat is worked from the bottom, up. 
  • We will be turning our work after each row, this helps the wattle stitch’s texture show.
  • A wattle stitch is comprised of a (sc, ch 1, dc) all in the same stitch. Instead of stating the number of individual stitches at the end of each row, the number of wattle stitches are provided once the body of the hat is started.
  • The bottom ribbing of the hat has a different texture depending on what side you use. See below pic.
  • After the bottom ribbing is made, instructions state to sc in each “valley” and “ridge” of the side of the ribbing. See below pic.
  • To sc3tog, insert hook into next st and pull up a loop. Insert hook into the 2nd st and pull up a loop (3 loops on hook). Insert hook into the 3rd st and pull up a loop (4 loops on hook). Yarn over and pull through all 4 loops.
sc3tog in these stitches
Sc3tog in these stitches
4 loops on hook
Pink Crochet Hat Ribbing Side 1
Side 1 of bottom ribbing. I prefer this side facing out.
Pink Crochet Hat Ribbing Side 2
Side 2 of bottom ribbing. I prefer this side on the inside of the hat.
valley and ridge
Sc in each "valley" and "ridge" of the side of the bottom ribbing.

Pink Crochet Hat Pattern:


Newborn-3 Months

| Head Circumference: 13-14 inches | Hat Height: 4.5-6 inches |
Ribbing:
  • Row 1: Ch 6, sc into 2nd ch from hook and next 4 chs (5 sts)
  • Row 2: Ch 1, sl st loosely into first st, sl st loosely into back loop of next 3 sts, sl st loosely into both loops of last st (5 sts)
  • Row 3: Ch 1, sc into first st, sc in back loop of next 3 sts, sc in last st (5 sts)
  • Row 4-45: Repeat rows 2-3 (5 sts)
  • Row 46: Ch 1, turn, fold ribbing together and sl st into each st to sew together, sl st into next st on the top of the ribbing, ch 1, and sc in the same st (mark sc with a st marker to help with counting in the next row, the last ch 1 does not count as a st). 
Body of Hat:
  • Row 1: Sc in each “ridge” and “valley of the ribbing. The sc count here needs to be a multiple of 3. Sl st join into the first (marked) stitch. (51 sts)
  • Row 2: Ch 1, we will now wattle stitch in the first st. (Sc, ch 1, dc) in the first st (you can remove your st marker if you like), *skip 2 sts, (sc, ch 1, dc) in next st,* repeat from *to* until last 2 sts, skip last 2 sts, sl st join into first sc. (45 sts or 15 wattle stitches)
  • Row 3: Ch 1, turn, skip the next st and (sc, ch 1, dc) in next ch 1 space, *skip 2 sts and (sc, ch 1, dc) in next ch 1 space,* repeat from *to,* until last you’ve wattle stitched in the last ch 1 space, skip a st, sl st join into the first sc. (15 wattle stitches) 
  • Row 4-9: Repeat row 3. (15 wattle stitches)
  • Row 10: Ch 1, turn, *sc2tog in the dc and sc of next wattle stitch from previous row, wattle stitch into next 4 ch 1 spaces*, repeat from *to,* sl st join into first st. (12 wattle stitches)
  • Row 11: Ch 1, turn, sc2tog in the dc and sc of next wattle stitch, wattle stitch into next 3 ch 1 spaces, *sc3tog in sc2tog from previous row and dc and sc of next wattle stitch, wattle stitch into next 3 ch 1 spaces,* repeat from *to,* join by sc2tog into last sc and first sc of this row. (9 wattle stitches)
  • Row 12: Ch 1, turn, sc2tog in the dc and sc of next wattle stitch, wattle stitch into next 2 ch 1 spaces, *sc3tog in sc2tog from previous row and dc and sc of next wattle stitch, wattle stitch into next 2 ch 1 spaces,* repeat from *to,* join by sc2tog into last sc and first sc of this row. (6 wattle stitches)
  • Row 13: Ch 1, turn, sc2tog in the dc and sc of next wattle stitch, wattle stitch into next ch 1 space, *sc3tog in sc2tog from previous row and dc and sc of next wattle stitch, wattle stitch into next ch 1 space,* repeat from *to,* join by sc2tog into last sc and first sc of this row. (3 wattle stitches)

Cut a long length of yarn to sew the top of the hat shut with tapestry needle, attach your pom pom by sewing to the center of the top of your hat.

Cut off any excess yarn with scissors. Weave in any ends with tapestry needle.

3-6 Months

| Head Circumference: 14-15 inches | Hat Height: 6-6.25 inches |
Ribbing:
  • Row 1: Ch 6, sc into 2nd ch from hook and next 4 chs (5 sts)
  • Row 2: Ch 1, sl st loosely into first st, sl st loosely into back loop of next 3 sts, sl st loosely into both loops of last st (5 sts)
  • Row 3: Ch 1, sc into first st, sc in back loop of next 3 sts, sc in last st (5 sts)
  • Row 4-51: Repeat rows 2-3 (5 sts)
  • Row 52: Ch 1, turn, fold ribbing together and sl st into each st to sew together, sl st into next st on the top of the ribbing, ch 1, and sc in the same st (mark sc with a st marker to help with counting in the next row, the last ch 1 does not count as a st). 
Body of Hat:
  • Row 1: Sc in each “ridge” and “valley of the ribbing. The sc count here needs to be a multiple of 3. Sl st join into the first (marked) stitch. (51 sts)
  • Row 2: Ch 1, we will now wattle stitch in the first st. (Sc, ch 1, dc) in the first st (you can remove your st marker if you like), *skip 2 sts, (sc, ch 1, dc) in next st,* repeat from *to* until last 2 sts, skip last 2 sts, sl st join into first sc. (51 sts or 17 wattle stitches)
  • Row 3: Ch 1, turn, skip the next st and (sc, ch 1, dc) in next ch 1 space, *skip 2 sts and (sc, ch 1, dc) in next ch 1 space,* repeat from *to,* until last you’ve wattle stitched in the last ch 1 space, skip a st, sl st join into the first sc. (17 wattle stitches) 
  • Row 4-11: Repeat row 3. (17 wattle stitches)
  • Row 12: Ch 1, turn, sc2tog in the dc and sc of next wattle stitch from previous row, wattle stitch into next 5 ch 1 spaces, sc2tog in the dc and sc of next wattle stitch, wattle stitch in next 4 ch 1 spaces, sc2tog in the dc and sc of next wattle stitch, wattle stitch in next 5 ch 1 spaces, sl st join into first st. (14 wattle stitches)
  • Row 13: Ch 1, turn, sc2tog in the dc and sc of next wattle stitch from previous row, wattle stitch into next 4 ch 1 spaces, *sc3tog in sc2tog of previous row and the dc and sc of next wattle stitch*, wattle stitch in next 3 ch 1 spaces, repeat from *to* once more, wattle stitch in next 4 ch 1 spaces, sc2tog in last st and first st of row to join. (11 wattle stitches)
  • Row 14: Ch 1, turn, sc2tog in the dc and sc of next wattle stitch from previous row, wattle stitch into next 3 ch 1 spaces, *sc3tog in sc2tog of previous row and the dc and sc of next wattle stitch*, wattle stitch in next 2 ch 1 spaces, repeat from *to* once more, wattle stitch in next 3 ch 1 spaces, sc2tog in last st and first st of row to join. (8 wattle stitches)
  • Row 15: Ch 1, turn, sc2tog in the dc and sc of next wattle stitch from previous row, wattle stitch into next 2 ch 1 spaces, *sc3tog in sc2tog of previous row and the dc and sc of next wattle stitch*, wattle stitch in next ch 1 space, repeat from *to* once more, wattle stitch in next 2 ch 1 spaces, sc2tog in last st and first st of row to join. (5 wattle stitches)

Cut a long length of yarn to sew the top of the hat shut with tapestry needle, attach your pom pom by sewing to the center of the top of your hat.

Cut off any excess yarn with scissors. Weave in any ends with tapestry needle.

6-12 Months

| Head Circumference: 16-18 inches | Hat Height: 6.25-6.5 inches |
Ribbing:
  • Row 1: Ch 6, sc into 2nd ch from hook and next 4 chs (5 sts)
  • Row 2: Ch 1, sl st loosely into first st, sl st loosely into back loop of next 3 sts, sl st loosely into both loops of last st (5 sts)
  • Row 3: Ch 1, sc into first st, sc in back loop of next 3 sts, sc in last st (5 sts)
  • Row 4-57: Repeat rows 2-3 (5 sts)
  • Row 58: Ch 1, turn, fold ribbing together and sl st into each st to sew together, sl st into next st on the top of the ribbing, ch 1, and sc in the same st (mark sc with a st marker to help with counting in the next row, the last ch 1 does not count as a st). 
Body of Hat:
  • Row 1: Sc in each “ridge” and “valley of the ribbing. The sc count here needs to be a multiple of 3. Sl st join into the first (marked) stitch. (57 sts)
  • Row 2: Ch 1, we will now wattle stitch in the first st. (Sc, ch 1, dc) in the first st (you can remove your st marker if you like), *skip 2 sts, (sc, ch 1, dc) in next st,* repeat from *to* until last 2 sts, skip last 2 sts, sl st join into first sc. (57 sts or 19 wattle stitches)
  • Row 3: Ch 1, turn, skip the next st and (sc, ch 1, dc) in next ch 1 space, *skip 2 sts and (sc, ch 1, dc) in next ch 1 space,* repeat from *to,* until last you’ve wattle stitched in the last ch 1 space, skip a st, sl st join into the first sc. (19 wattle stitches) 
  • Row 4-12: Repeat row 3. (19 wattle stitches)
  • Row 13: Ch 1, turn, sc2tog in the dc and sc of next wattle stitch from previous row, wattle stitch into next 5 ch 1 spaces, sc2tog in the dc and sc of next wattle stitch, wattle stitch in next 6 ch 1 spaces, sc2tog in the dc and sc of next wattle stitch, wattle stitch in next 5 ch 1 spaces, sl st join into first st. (16 wattle stitches)
  • Row 14: Ch 1, turn, sc2tog in the dc and sc of next wattle stitch from previous row, wattle stitch into next 4 ch 1 spaces, *sc3tog in sc2tog of previous row and the dc and sc of next wattle stitch*, wattle stitch in next 5 ch 1 spaces, repeat from *to* once more, wattle stitch in next 4 ch 1 spaces, sc2tog in last st and first st of row to join. (13 wattle stitches)
  • Row 15: Ch 1, turn, sc2tog in the dc and sc of next wattle stitch from previous row, wattle stitch into next 3 ch 1 spaces, *sc3tog in sc2tog of previous row and the dc and sc of next wattle stitch*, wattle stitch in next 4 ch 1 spaces, repeat from *to* once more, wattle stitch in next 3 ch 1 spaces, sc2tog in last st and first st of row to join. (10 wattle stitches)
  • Row 16: Ch 1, turn, sc2tog in the dc and sc of next wattle stitch from previous row, wattle stitch into next 2 ch 1 spaces, *sc3tog in sc2tog of previous row and the dc and sc of next wattle stitch*, wattle stitch in next 3 ch 1 spaces, repeat from *to* once more, wattle stitch in next 2 ch 1 spaces, sc2tog in last st and first st of row to join. (7 wattle stitches)
  • Row 17: Ch 1, turn, sc2tog in the dc and sc of next wattle stitch from previous row, wattle stitch into next ch 1 space, *sc3tog in sc2tog of previous row and the dc and sc of next wattle stitch*, wattle stitch in next 2 ch 1 spaces, repeat from *to* once more, wattle stitch in next ch 1 space, sc2tog in last st and first st of row to join. (4 wattle stitches)

Cut a long length of yarn to sew the top of the hat shut with tapestry needle, attach your pom pom by sewing to the center of the top of your hat.

Cut off any excess yarn with scissors. Weave in any ends with tapestry needle.

Toddler 

| Head Circumference: 18-19 inches | Hat Height: 7.25-7.5 inches |
Ribbing:
  • Row 1: Ch 6, sc into 2nd ch from hook and next 4 chs (5 sts)
  • Row 2: Ch 1, sl st loosely into first st, sl st loosely into back loop of next 3 sts, sl st loosely into both loops of last st (5 sts)
  • Row 3: Ch 1, sc into first st, sc in back loop of next 3 sts, sc in last st (5 sts)
  • Row 4-60: Repeat rows 2-3 (5 sts)
  • Row 61: Ch 1, turn, fold ribbing together and sl st into each st to sew together, sl st into next st on the top of the ribbing, ch 1, and sc in the same st (mark sc with a st marker to help with counting in the next row, the last ch 1 does not count as a st). 
Body of Hat:
  • Row 1: Sc in each “ridge” and “valley of the ribbing. The sc count here needs to be a multiple of 3. Sl st join into the first (marked) stitch. (60 sts)
  • Row 2: Ch 1, we will now wattle stitch in the first st. (Sc, ch 1, dc) in the first st (you can remove your st marker if you like), *skip 2 sts, (sc, ch 1, dc) in next st,* repeat from *to* until last 2 sts, skip last 2 sts, sl st join into first sc. (60 sts or 20 wattle stitches)
  • Row 3: Ch 1, turn, skip the next st and (sc, ch 1, dc) in next ch 1 space, *skip 2 sts and (sc, ch 1, dc) in next ch 1 space,* repeat from *to,* until last you’ve wattle stitched in the last ch 1 space, skip a st, sl st join into the first sc. (20 wattle stitches) 
  • Row 4-15: Repeat row 3. (20 wattle stitches)
  • Row 16: Ch 1, turn, sc2tog in the dc and sc of next wattle stitch from previous row, wattle stitch into next 6 ch 1 spaces, sc2tog in the dc and sc of next wattle stitch, wattle stitch in next 5 ch 1 spaces, sc2tog in the dc and sc of next wattle stitch, wattle stitch in next 6 ch 1 spaces, sl st join into first st. (17 wattle stitches)
  • Row 17: Ch 1, turn, sc2tog in the dc and sc of next wattle stitch from previous row, wattle stitch into next 5 ch 1 spaces, *sc3tog in sc2tog of previous row and the dc and sc of next wattle stitch*, wattle stitch in next 4 ch 1 spaces, repeat from *to* once more, wattle stitch in next 5 ch 1 spaces, sc2tog in last st and first st of row to join. (14 wattle stitches)
  • Row 18: Ch 1, turn, sc2tog in the dc and sc of next wattle stitch from previous row, wattle stitch into next 4 ch 1 spaces, *sc3tog in sc2tog of previous row and the dc and sc of next wattle stitch*, wattle stitch in next 3 ch 1 spaces, repeat from *to* once more, wattle stitch in next 4 ch 1 spaces, sc2tog in last st and first st of row to join. (11 wattle stitches)
  • Row 19: Ch 1, turn, sc2tog in the dc and sc of next wattle stitch from previous row, wattle stitch into next 3 ch 1 spaces, *sc3tog in sc2tog of previous row and the dc and sc of next wattle stitch*, wattle stitch in next 2 ch 1 spaces, repeat from *to* once more, wattle stitch in next 3 ch 1 spaces, sc2tog in last st and first st of row to join. (8 wattle stitches)
  • Row 20: Ch 1, turn, sc2tog in the dc and sc of next wattle stitch from previous row, wattle stitch into next 2 ch 1 spaces, *sc3tog in sc2tog of previous row and the dc and sc of next wattle stitch*, wattle stitch in next ch 1 space, repeat from *to* once more, wattle stitch in next 2 ch 1 spaces, sc2tog in last st and first st of row to join. (5 wattle stitches)

Cut a long length of yarn to sew the top of the hat shut with tapestry needle, attach your pom pom by sewing to the center of the top of your hat.

Cut off any excess yarn with scissors. Weave in any ends with tapestry needle.

Child 

| Head Circumference: 19-20 inches | Hat Height: 7.5-8 inches |
Ribbing:
  • Row 1: Ch 6, sc into 2nd ch from hook and next 4 chs (5 sts)
  • Row 2: Ch 1, sl st loosely into first st, sl st loosely into back loop of next 3 sts, sl st loosely into both loops of last st (5 sts)
  • Row 3: Ch 1, sc into first st, sc in back loop of next 3 sts, sc in last st (5 sts)
  • Row 4-63: Repeat rows 2-3 (5 sts)
  • Row 64: Ch 1, turn, fold ribbing together and sl st into each st to sew together, sl st into next st on the top of the ribbing, ch 1, and sc in the same st (mark sc with a st marker to help with counting in the next row, the last ch 1 does not count as a st). 
Body of Hat:
  • Row 1: Sc in each “ridge” and “valley of the ribbing. The sc count here needs to be a multiple of 3. Sl st join into the first (marked) stitch. (63 sts)
  • Row 2: Ch 1, we will now wattle stitch in the first st. (Sc, ch 1, dc) in the first st (you can remove your st marker if you like), *skip 2 sts, (sc, ch 1, dc) in next st,* repeat from *to* until last 2 sts, skip last 2 sts, sl st join into first sc. (63 sts or 21 wattle stitches)
  • Row 3: Ch 1, turn, skip the next st and (sc, ch 1, dc) in next ch 1 space, *skip 2 sts and (sc, ch 1, dc) in next ch 1 space,* repeat from *to,* until last you’ve wattle stitched in the last ch 1 space, skip a st, sl st join into the first sc. (21 wattle stitches) 
  • Row 4-15: Repeat row 3. (21 wattle stitches)
  • Row 16: Ch 1, turn, *sc2tog in the dc and sc of next wattle stitch from previous row, wattle stitch into next 6 ch 1 spaces*, repeat from *to,* sl st join into first st. (18 wattle stitches)
  • Row 17: Ch 1, turn, sc2tog in the dc and sc of next wattle stitch, wattle stitch into next 5 ch 1 spaces, *sc3tog in sc2tog from previous row and dc and sc of next wattle stitch, wattle stitch into next 5 ch 1 spaces,* repeat from *to,* join by sc2tog into last sc and first sc of this row. (15 wattle stitches)
  • Row 18: Ch 1, turn, sc2tog in the dc and sc of next wattle stitch, wattle stitch into next 4 ch 1 spaces, *sc3tog in sc2tog from previous row and dc and sc of next wattle stitch, wattle stitch into next 4 ch 1 spaces,* repeat from *to,* join by sc2tog into last sc and first sc of this row. (12 wattle stitches)
  • Row 19: Ch 1, turn, sc2tog in the dc and sc of next wattle stitch, wattle stitch into next 3 ch 1 spaces, *sc3tog in sc2tog from previous row and dc and sc of next wattle stitch, wattle stitch into next 3 ch 1 spaces,* repeat from *to,* join by sc2tog into last sc and first sc of this row. (9 wattle stitches)
  • Row 20: Ch 1, turn, sc2tog in the dc and sc of next wattle stitch, wattle stitch into next 2 ch 1 spaces, *sc3tog in sc2tog from previous row and dc and sc of next wattle stitch, wattle stitch into next 2 ch 1 spaces,* repeat from *to,* join by sc2tog into last sc and first sc of this row. (6 wattle stitches)
  • Row 21: Ch 1, turn, sc2tog in the dc and sc of next wattle stitch, wattle stitch into next ch 1 space, *sc3tog in sc2tog from previous row and dc and sc of next wattle stitch, wattle stitch into next ch 1 space,* repeat from *to,* join by sc2tog into last sc and first sc of this row. (3 wattle stitches)

Cut a long length of yarn to sew the top of the hat shut with tapestry needle, attach your pom pom by sewing to the center of the top of your hat.

Cut off any excess yarn with scissors. Weave in any ends with tapestry needle.

Teenager/Small Adult

| Head Circumference: 20-21 inches | Hat Height: 8-8.5 inches |
Ribbing:
  • Row 1: Ch 6, sc into 2nd ch from hook and next 4 chs (5 sts)
  • Row 2: Ch 1, sl st loosely into first st, sl st loosely into back loop of next 3 sts, sl st loosely into both loops of last st (5 sts)
  • Row 3: Ch 1, sc into first st, sc in back loop of next 3 sts, sc in last st (5 sts)
  • Row 4-66: Repeat rows 2-3 (5 sts)
  • Row 67: Ch 1, turn, fold ribbing together and sl st into each st to sew together, sl st into next st on the top of the ribbing, ch 1, and sc in the same st (mark sc with a st marker to help with counting in the next row, the last ch 1 does not count as a st). 
Body of Hat:
  • Row 1: Sc in each “ridge” and “valley of the ribbing. The sc count here needs to be a multiple of 3. Sl st join into the first (marked) stitch. (66 sts)
  • Row 2: Ch 1, we will now wattle stitch in the first st. (Sc, ch 1, dc) in the first st (you can remove your st marker if you like), *skip 2 sts, (sc, ch 1, dc) in next st,* repeat from *to* until last 2 sts, skip last 2 sts, sl st join into first sc. (66 sts or 22 wattle stitches)
  • Row 3: Ch 1, turn, skip the next st and (sc, ch 1, dc) in next ch 1 space, *skip 2 sts and (sc, ch 1, dc) in next ch 1 space,* repeat from *to,* until last you’ve wattle stitched in the last ch 1 space, skip a st, sl st join into the first sc. (22 wattle stitches) 
  • Row 4-17: Repeat row 3. (22 wattle stitches)
  • Row 18: Ch 1, turn, sc2tog in the dc and sc of next wattle stitch from previous row, wattle stitch into next 6 ch 1 spaces, sc2tog in the dc and sc of next wattle stitch, wattle stitch in next 7 ch 1 spaces, sc2tog in the dc and sc of next wattle stitch, wattle stitch in next 6 ch 1 spaces, sl st join into first st. (19 wattle stitches)
  • Row 19: Ch 1, turn, sc2tog in the dc and sc of next wattle stitch from previous row, wattle stitch into next 5 ch 1 spaces, *sc3tog in sc2tog of previous row and the dc and sc of next wattle stitch*, wattle stitch in next 6 ch 1 spaces, repeat from *to* once more, wattle stitch in next 5 ch 1 spaces, sc2tog in last st and first st of row to join. (16 wattle stitches)
  • Row 20: Ch 1, turn, sc2tog in the dc and sc of next wattle stitch from previous row, wattle stitch into next 4 ch 1 spaces, *sc3tog in sc2tog of previous row and the dc and sc of next wattle stitch*, wattle stitch in next 5 ch 1 spaces, repeat from *to* once more, wattle stitch in next 4 ch 1 spaces, sc2tog in last st and first st of row to join. (13 wattle stitches)
  • Row 21: Ch 1, turn, sc2tog in the dc and sc of next wattle stitch from previous row, wattle stitch into next 3 ch 1 spaces, *sc3tog in sc2tog of previous row and the dc and sc of next wattle stitch*, wattle stitch in next 4 ch 1 spaces, repeat from *to* once more, wattle stitch in next 3 ch 1 spaces, sc2tog in last st and first st of row to join. (10 wattle stitches)
  • Row 22: Ch 1, turn, sc2tog in the dc and sc of next wattle stitch from previous row, wattle stitch into next 2 ch 1 spaces, *sc3tog in sc2tog of previous row and the dc and sc of next wattle stitch*, wattle stitch in next 3 ch 1 spaces, repeat from *to* once more, wattle stitch in next 2 ch 1 spaces, sc2tog in last st and first st of row to join. (7 wattle stitches)
  • Row 23: Ch 1, turn, sc2tog in the dc and sc of next wattle stitch from previous row, wattle stitch into next ch 1 space, *sc3tog in sc2tog of previous row and the dc and sc of next wattle stitch*, wattle stitch in next 2 ch 1 spaces, repeat from *to* once more, wattle stitch in next ch 1 space, sc2tog in last st and first st of row to join. (4 wattle stitches)

Cut a long length of yarn to sew the top of the hat shut with tapestry needle, attach your pom pom by sewing to the center of the top of your hat.

Cut off any excess yarn with scissors. Weave in any ends with tapestry needle.

Adult 

| Head Circumference: 22 inches | Hat Height: 8.5-9 inches |
Ribbing:
  • Row 1: Ch 6, sc into 2nd ch from hook and next 4 chs (5 sts)
  • Row 2: Ch 1, sl st loosely into first st, sl st loosely into back loop of next 3 sts, sl st loosely into both loops of last st (5 sts)
  • Row 3: Ch 1, sc into first st, sc in back loop of next 3 sts, sc in last st (5 sts)
  • Row 4-72: Repeat rows 2-3 (5 sts)
  • Row 73: Ch 1, turn, fold ribbing together and sl st into each st to sew together, sl st into next st on the top of the ribbing, ch 1, and sc in the same st (mark sc with a st marker to help with counting in the next row, the last ch 1 does not count as a st). 
Body of Hat:
  • Row 1: Sc in each “ridge” and “valley of the ribbing. The sc count here needs to be a multiple of 3. Sl st join into the first (marked) stitch. (72 sts) 
  • Row 2: Ch 1, we will now wattle stitch in the first st. (Sc, ch 1, dc) in the first st (you can remove your st marker if you like), *skip 2 sts, (sc, ch 1, dc) in next st,* repeat from *to* until last 2 sts, skip last 2 sts, sl st join into first sc. (72 sts or 24 wattle stitches)
  • Row 3: Ch 1, turn, skip the next st and (sc, ch 1, dc) in next ch 1 space, *skip 2 sts and (sc, ch 1, dc) in next ch 1 space,* repeat from *to,* until last you’ve wattle stitched in the last ch 1 space, skip a st, sl st join into the first sc. (24 wattle stitches)
  • Row 4-18,: Repeat row 3. 
  • Row 19: Ch 1, turn, *sc2tog in the dc and sc of next wattle stitch from previous row, wattle stitch into next 7 ch 1 spaces*, repeat from *to,* sl st join into first st. (21 wattle stitches)
  • Row 20: Ch 1, turn, sc2tog in the dc and sc of next wattle stitch from previous row, wattle stitch into next 6 ch 1 spaces, *sc3tog in next sc2tog from previous row and dc and sc of next wattle stitch, wattle stitch into next 6 ch 1 spaces* repeat from *to,* sc2tog in last st and first st of row to join. (18 wattle stitches)
  • Row 21: Ch 1, turn, sc2tog in the dc and sc of next wattle stitch from previous row, wattle stitch into next 5 ch 1 spaces, *sc3tog in next sc2tog from previous row and dc and sc of next wattle stitch, wattle stitch into next 5 ch 1 spaces* repeat from *to,* sc2tog in last st and first st of row to join. (15 wattle stitches)
  • Row 22: Ch 1, turn, sc2tog in the dc and sc of next wattle stitch from previous row, wattle stitch into next 4 ch 1 spaces, *sc3tog in next sc2tog from previous row and dc and sc of next wattle stitch, wattle stitch into next 4 ch 1 spaces* repeat from *to,* sc2tog in last st and first st of row to join. (12 wattle stitches)
  • Row 23: Ch 1, turn, sc2tog in the dc and sc of next wattle stitch from previous row, wattle stitch into next 3 ch 1 spaces, *sc3tog in next sc2tog from previous row and dc and sc of next wattle stitch, wattle stitch into next 3 ch 1 spaces* repeat from *to,* sc2tog in last st and first st of row to join. (9 wattle stitches)
  • Row 24: Ch 1, turn, sc2tog in the dc and sc of next wattle stitch from previous row, wattle stitch into next 2 ch 1 spaces, *sc3tog in next sc2tog from previous row and dc and sc of next wattle stitch, wattle stitch into next 2 ch 1 spaces* repeat from *to,* sc2tog in last st and first st of row to join. (6 wattle stitches)
  • Row 25: Ch 1, turn, sc2tog in the dc and sc of next wattle stitch from previous row, wattle stitch into next ch 1 space, *sc3tog in next sc2tog from previous row and dc and sc of next wattle stitch, wattle stitch into next ch 1 space* repeat from *to,* sc2tog in last st and first st of row to join. (3 wattle stitches)

Cut a long length of yarn to sew the top of the hat shut with tapestry needle, attach your pom pom by sewing to the center of the top of your hat.

Cut off any excess yarn with scissors. Weave in any ends with tapestry needle.

Large Adult 

| Head Circumference: 23 inches | Hat Height: 9-9.5 inches |
Ribbing:
  • Row 1: Ch 6, sc into 2nd ch from hook and next 4 chs (5 sts)
  • Row 2: Ch 1, sl st loosely into first st, sl st loosely into back loop of next 3 sts, sl st loosely into both loops of last st (5 sts)
  • Row 3: Ch 1, sc into first st, sc in back loop of next 3 sts, sc in last st (5 sts)
  • Row 4-78: Repeat rows 2-3 (5 sts)
  • Row 79: Ch 1, turn, fold ribbing together and sl st into each st to sew together, sl st into next st on the top of the ribbing, ch 1, and sc in the same st (mark sc with a st marker to help with counting in the next row, the last ch 1 does not count as a st). 
Body of Hat:
  • Row 1: Sc in each “ridge” and “valley of the ribbing. The sc count here needs to be a multiple of 3. Sl st join into the first (marked) stitch. (78 sts) 
  • Row 2: Ch 1, we will now wattle stitch in the first st. (Sc, ch 1, dc) in the first st (you can remove your st marker if you like), *skip 2 sts, (sc, ch 1, dc) in next st,* repeat from *to* until last 2 sts, skip last 2 sts, sl st join into first sc. (78 sts or 26 wattle stitches)
  • Row 3: Ch 1, turn, skip the next st and (sc, ch 1, dc) in next ch 1 space, *skip 2 sts and (sc, ch 1, dc) in next ch 1 space,* repeat from *to,* until last you’ve wattle stitched in the last ch 1 space, skip a st, sl st join into the first sc. (26 wattle stitches)
  • Row 4-20: Repeat row 3. (26 wattle stitches)
  • Row 21: Ch 1, turn, sc2tog in the dc and sc of next wattle stitch from previous row, wattle stitch into next 8 ch 1 spaces, sc2tog in the dc and sc of next wattle stitch, wattle stitch in next 7 ch 1 spaces, sc2tog in the dc and sc of next wattle stitch, wattle stitch in next 8 ch 1 spaces, sl st join into first st. (23 wattle stitches)
  • Row 22: Ch 1, turn, sc2tog in the dc and sc of next wattle stitch from previous row, wattle stitch into next 7 ch 1 spaces, *sc3tog in sc2tog of previous row and the dc and sc of next wattle stitch*, wattle stitch in next 6 ch 1 spaces, repeat from *to* once more, wattle stitch in next 7 ch 1 spaces, sc2tog in last st and first st of row to join. (20 wattle stitches)
  • Row 23: Ch 1, turn, sc2tog in the dc and sc of next wattle stitch from previous row, wattle stitch into next 6 ch 1 spaces, *sc3tog in sc2tog of previous row and the dc and sc of next wattle stitch*, wattle stitch in next 5 ch 1 spaces, repeat from *to* once more, wattle stitch in next 6 ch 1 spaces, sc2tog in last st and first st of row to join. (17 wattle stitches)
  • Row 24: Ch 1, turn, sc2tog in the dc and sc of next wattle stitch from previous row, wattle stitch into next 5 ch 1 spaces, *sc3tog in sc2tog of previous row and the dc and sc of next wattle stitch*, wattle stitch in next 4 ch 1 spaces, repeat from *to* once more, wattle stitch in next 5 ch 1 spaces, sc2tog in last st and first st of row to join. (14 wattle stitches)
  • Row 25: Ch 1, turn, sc2tog in the dc and sc of next wattle stitch from previous row, wattle stitch into next 4 ch 1 spaces, *sc3tog in sc2tog of previous row and the dc and sc of next wattle stitch*, wattle stitch in next 3 ch 1 spaces, repeat from *to* once more, wattle stitch in next 4 ch 1 spaces, sc2tog in last st and first st of row to join. (11 wattle stitches)
  • Row 26: Ch 1, turn, sc2tog in the dc and sc of next wattle stitch from previous row, wattle stitch into next 3 ch 1 spaces, *sc3tog in sc2tog of previous row and the dc and sc of next wattle stitch*, wattle stitch in next 2 ch 1 spaces, repeat from *to* once more, wattle stitch in next 3 ch 1 spaces, sc2tog in last st and first st of row to join. (8 wattle stitches)
  • Row 27: Ch 1, turn, sc2tog in the dc and sc of next wattle stitch from previous row, wattle stitch into next 2 ch 1 spaces, *sc3tog in sc2tog of previous row and the dc and sc of next wattle stitch*, wattle stitch in next ch 1 space, repeat from *to* once more, wattle stitch in next 2 ch 1 spaces, sc2tog in last st and first st of row to join. (5 wattle stitches)

Cut a long length of yarn to sew the top of the hat shut with tapestry needle, attach your pom pom by sewing to the center of the top of your hat. Cut off any excess yarn with scissors. Weave in any ends with tapestry needle.

Thank you for checking out my pink crochet hat pattern. If you have any questions, please feel free to ask in the comments below! 

Other Posts You May Like:


Crochet Sweater for Child – Free Pattern

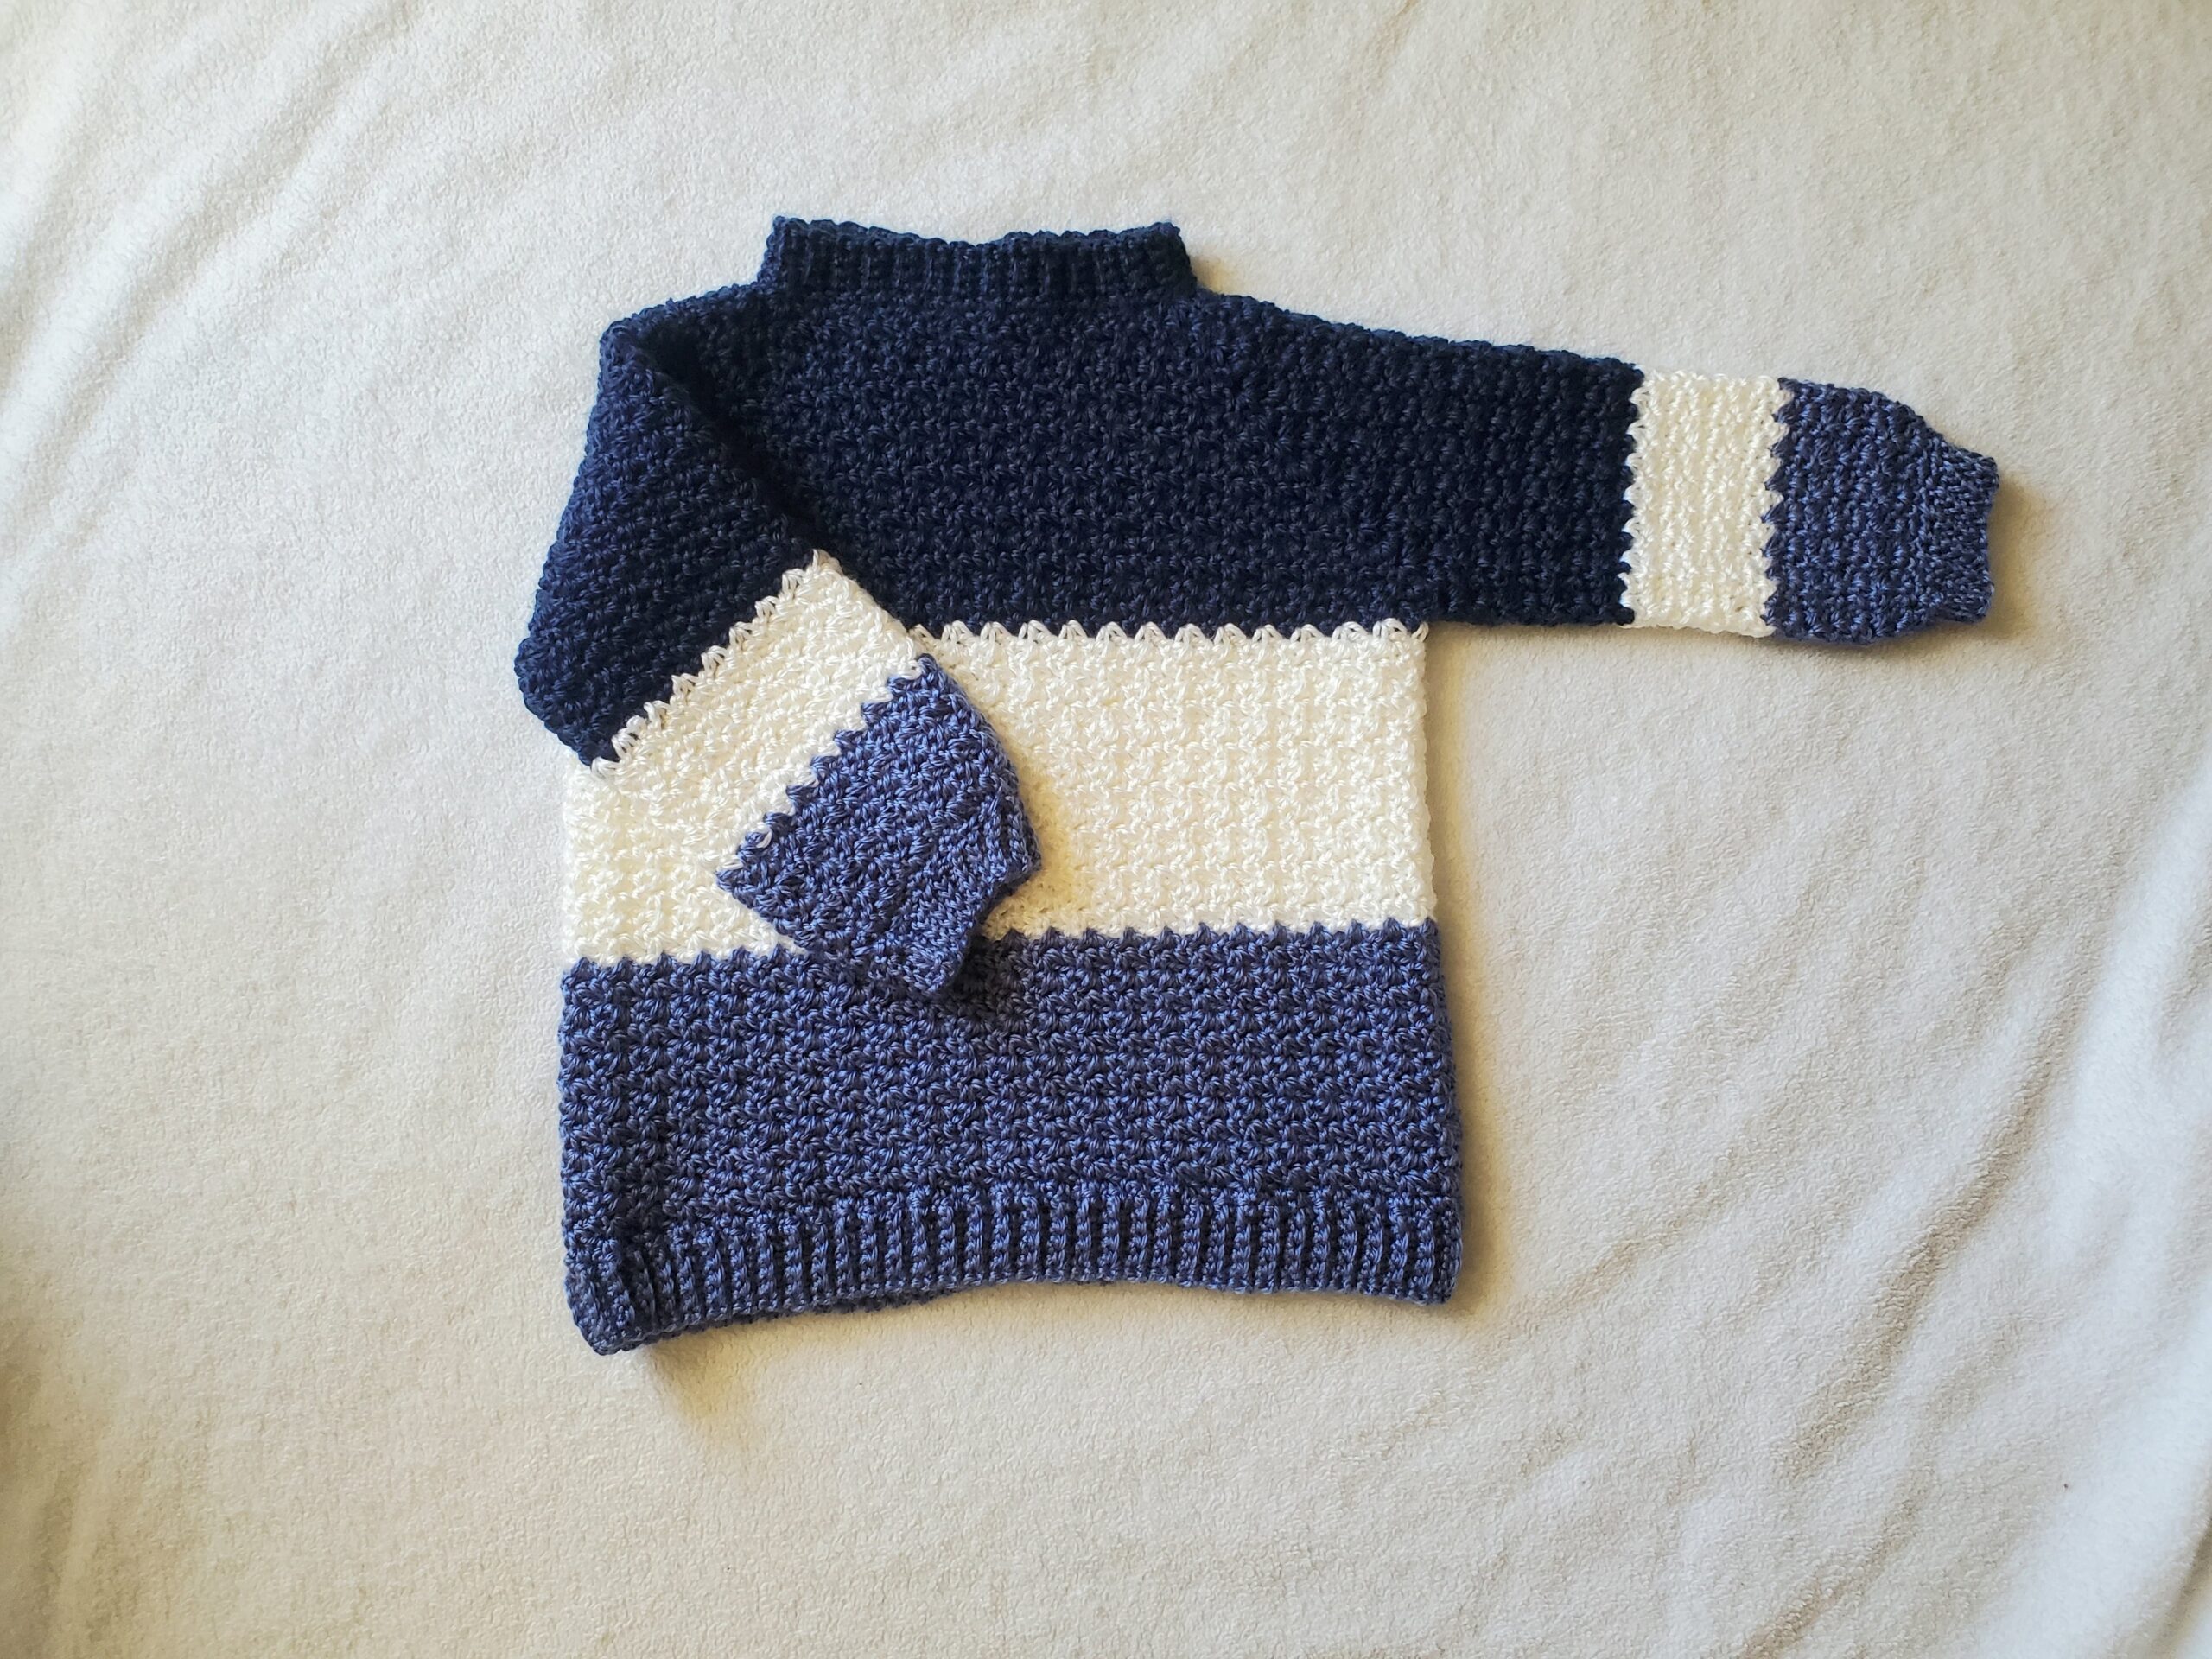
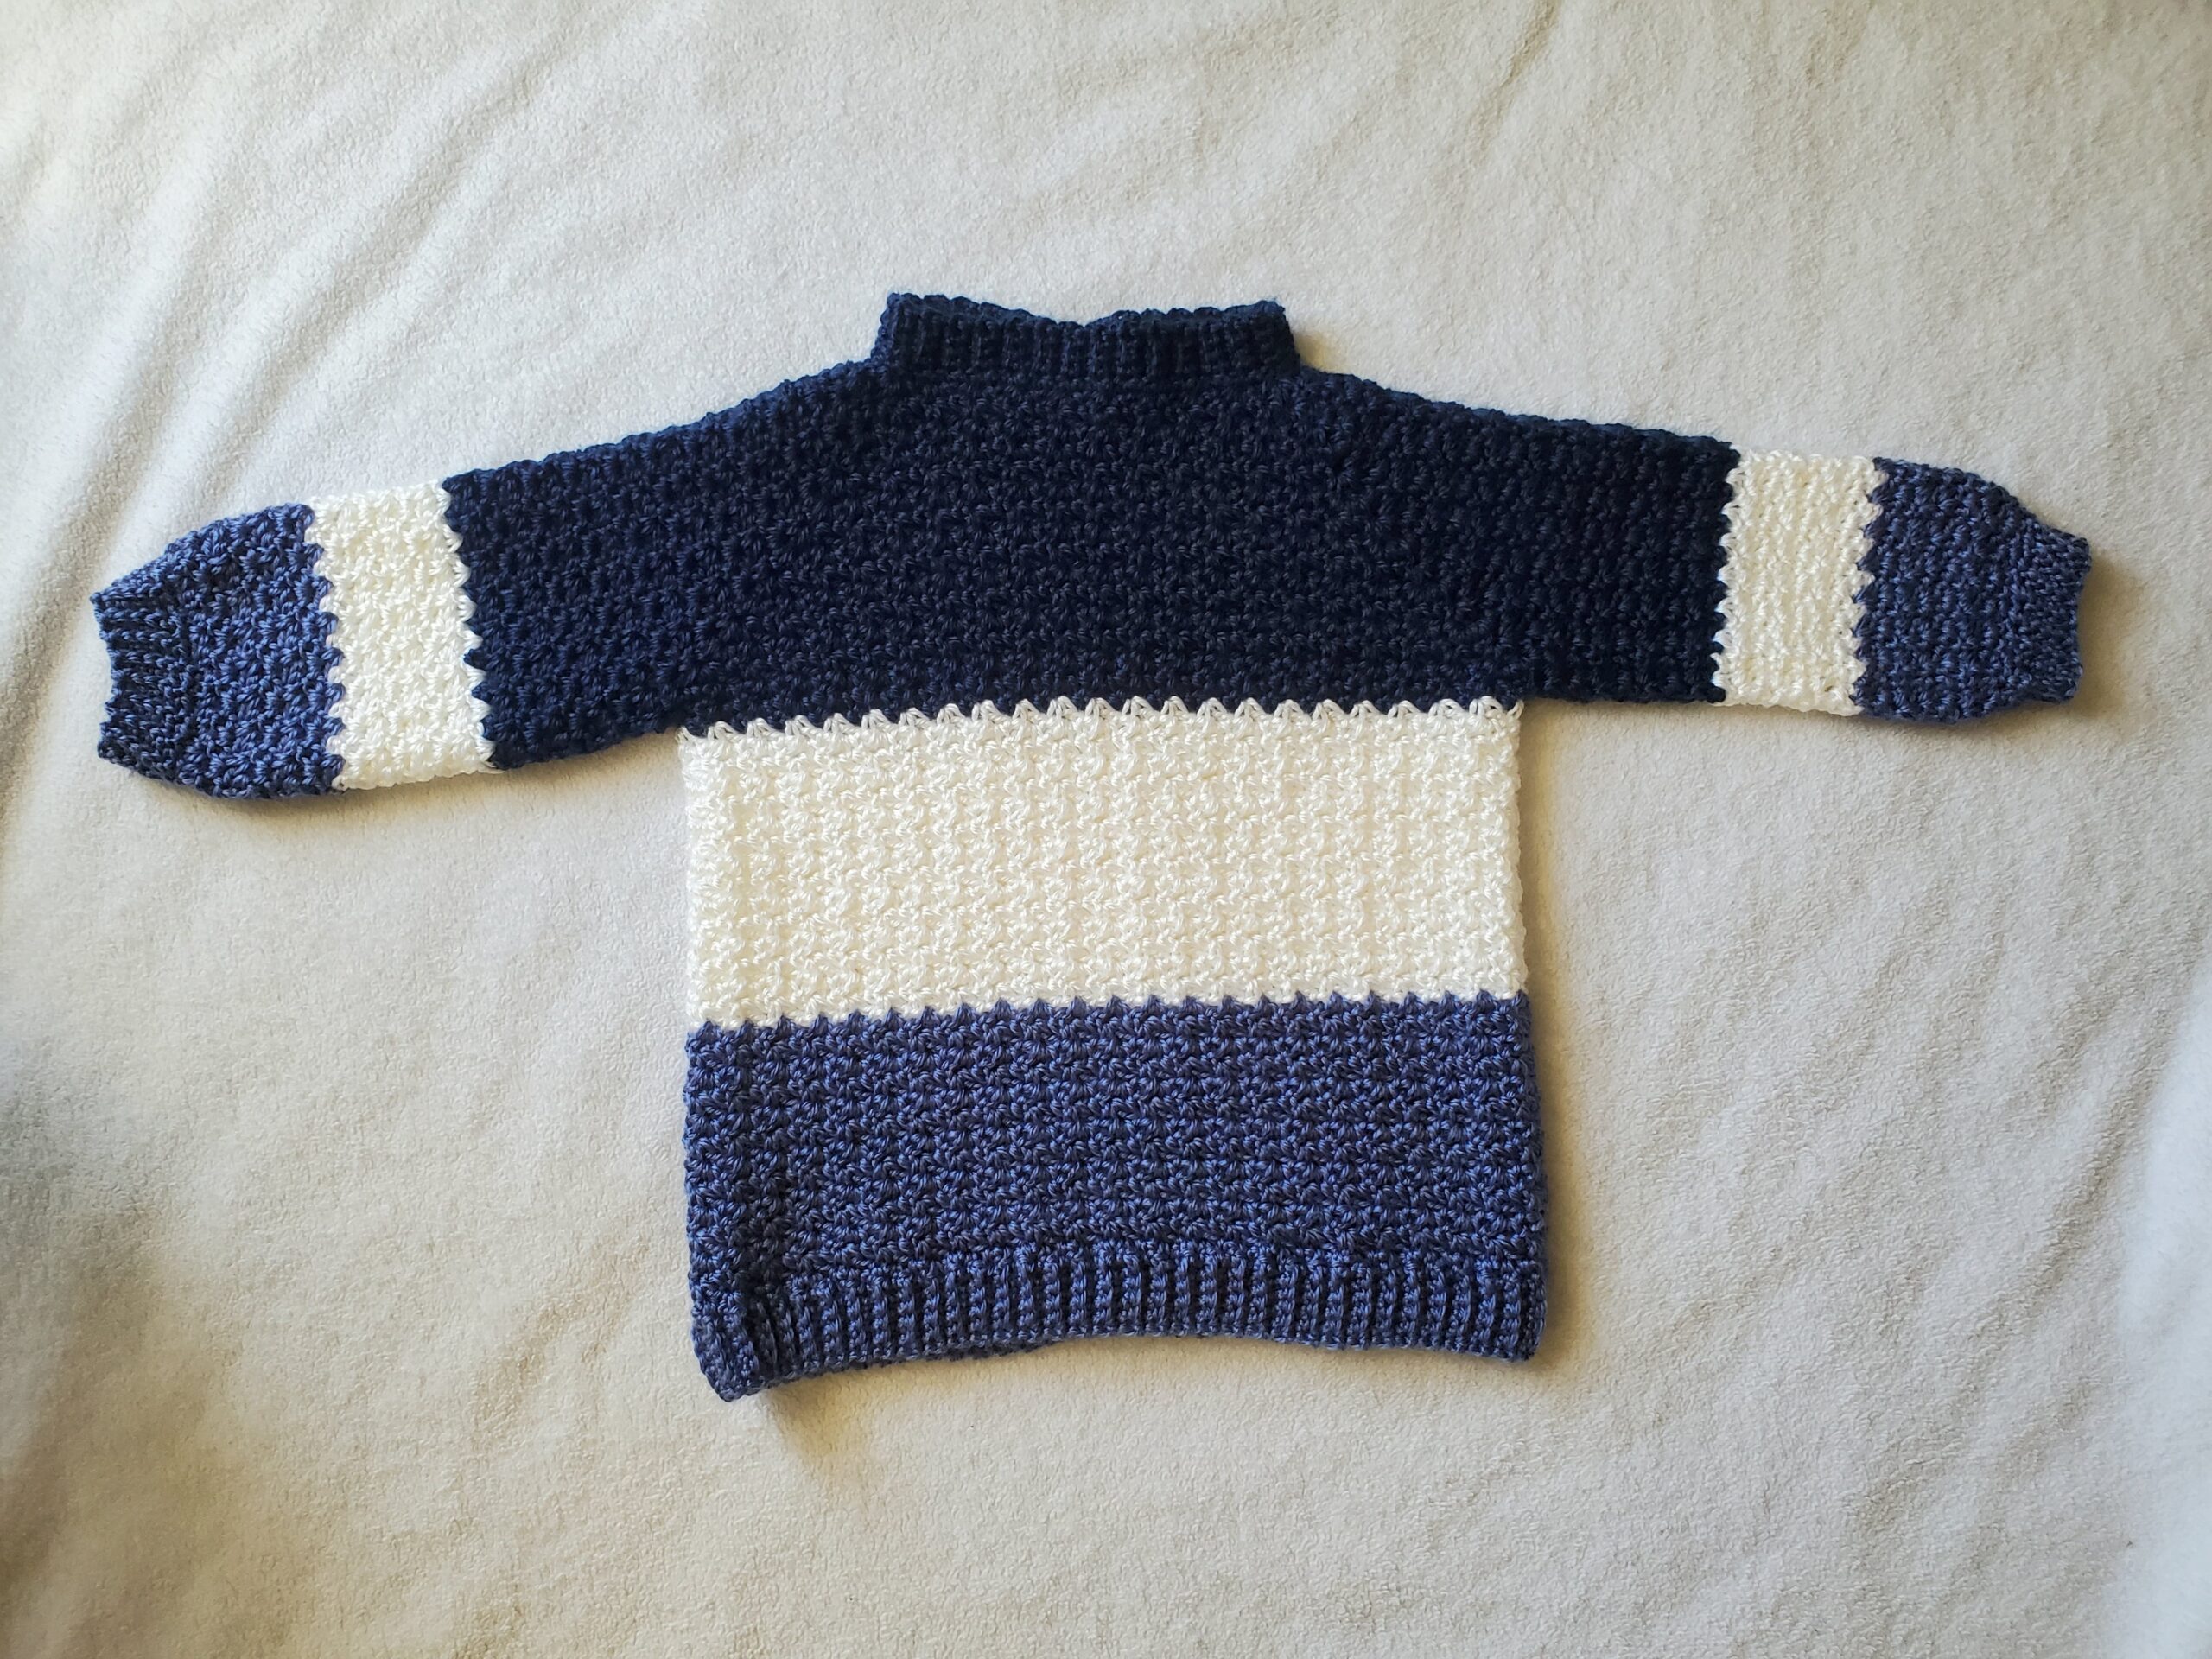
Hello everyone, I hope you have all enjoyed the holidays and have had a happy new year’s! Today I have a crochet sweater for a child pattern for you. 

I’ve made a few sweaters in the past for my girls, but now that they’re a little bigger, they no longer fit. I decided to see if I could crochet a bigger one with yarn from Yarn Bee’s Soft Secret line. 

I’m really enjoying working with this kind of yarn. It’s acrylic (so not as expensive as other yarn types), but incredibly soft and stretchy. The soft, stretchiness of the yarn is perfect for a nice, drapey sweater. 

Yarn Bee claims that this yarn is a 4 medium weight, but to be perfectly honest, after using this yarn for a few projects, I think it’s a little lighter/smaller than that. So keep that in mind if you’re using a different type of yarn.

Caron Simply Soft yarn would be my second go to for this crochet sweater pattern. It also claims to be a 4 medium weight, but seems to be a little lighter in my opinion. It’s also an incredibly soft acrylic yarn.

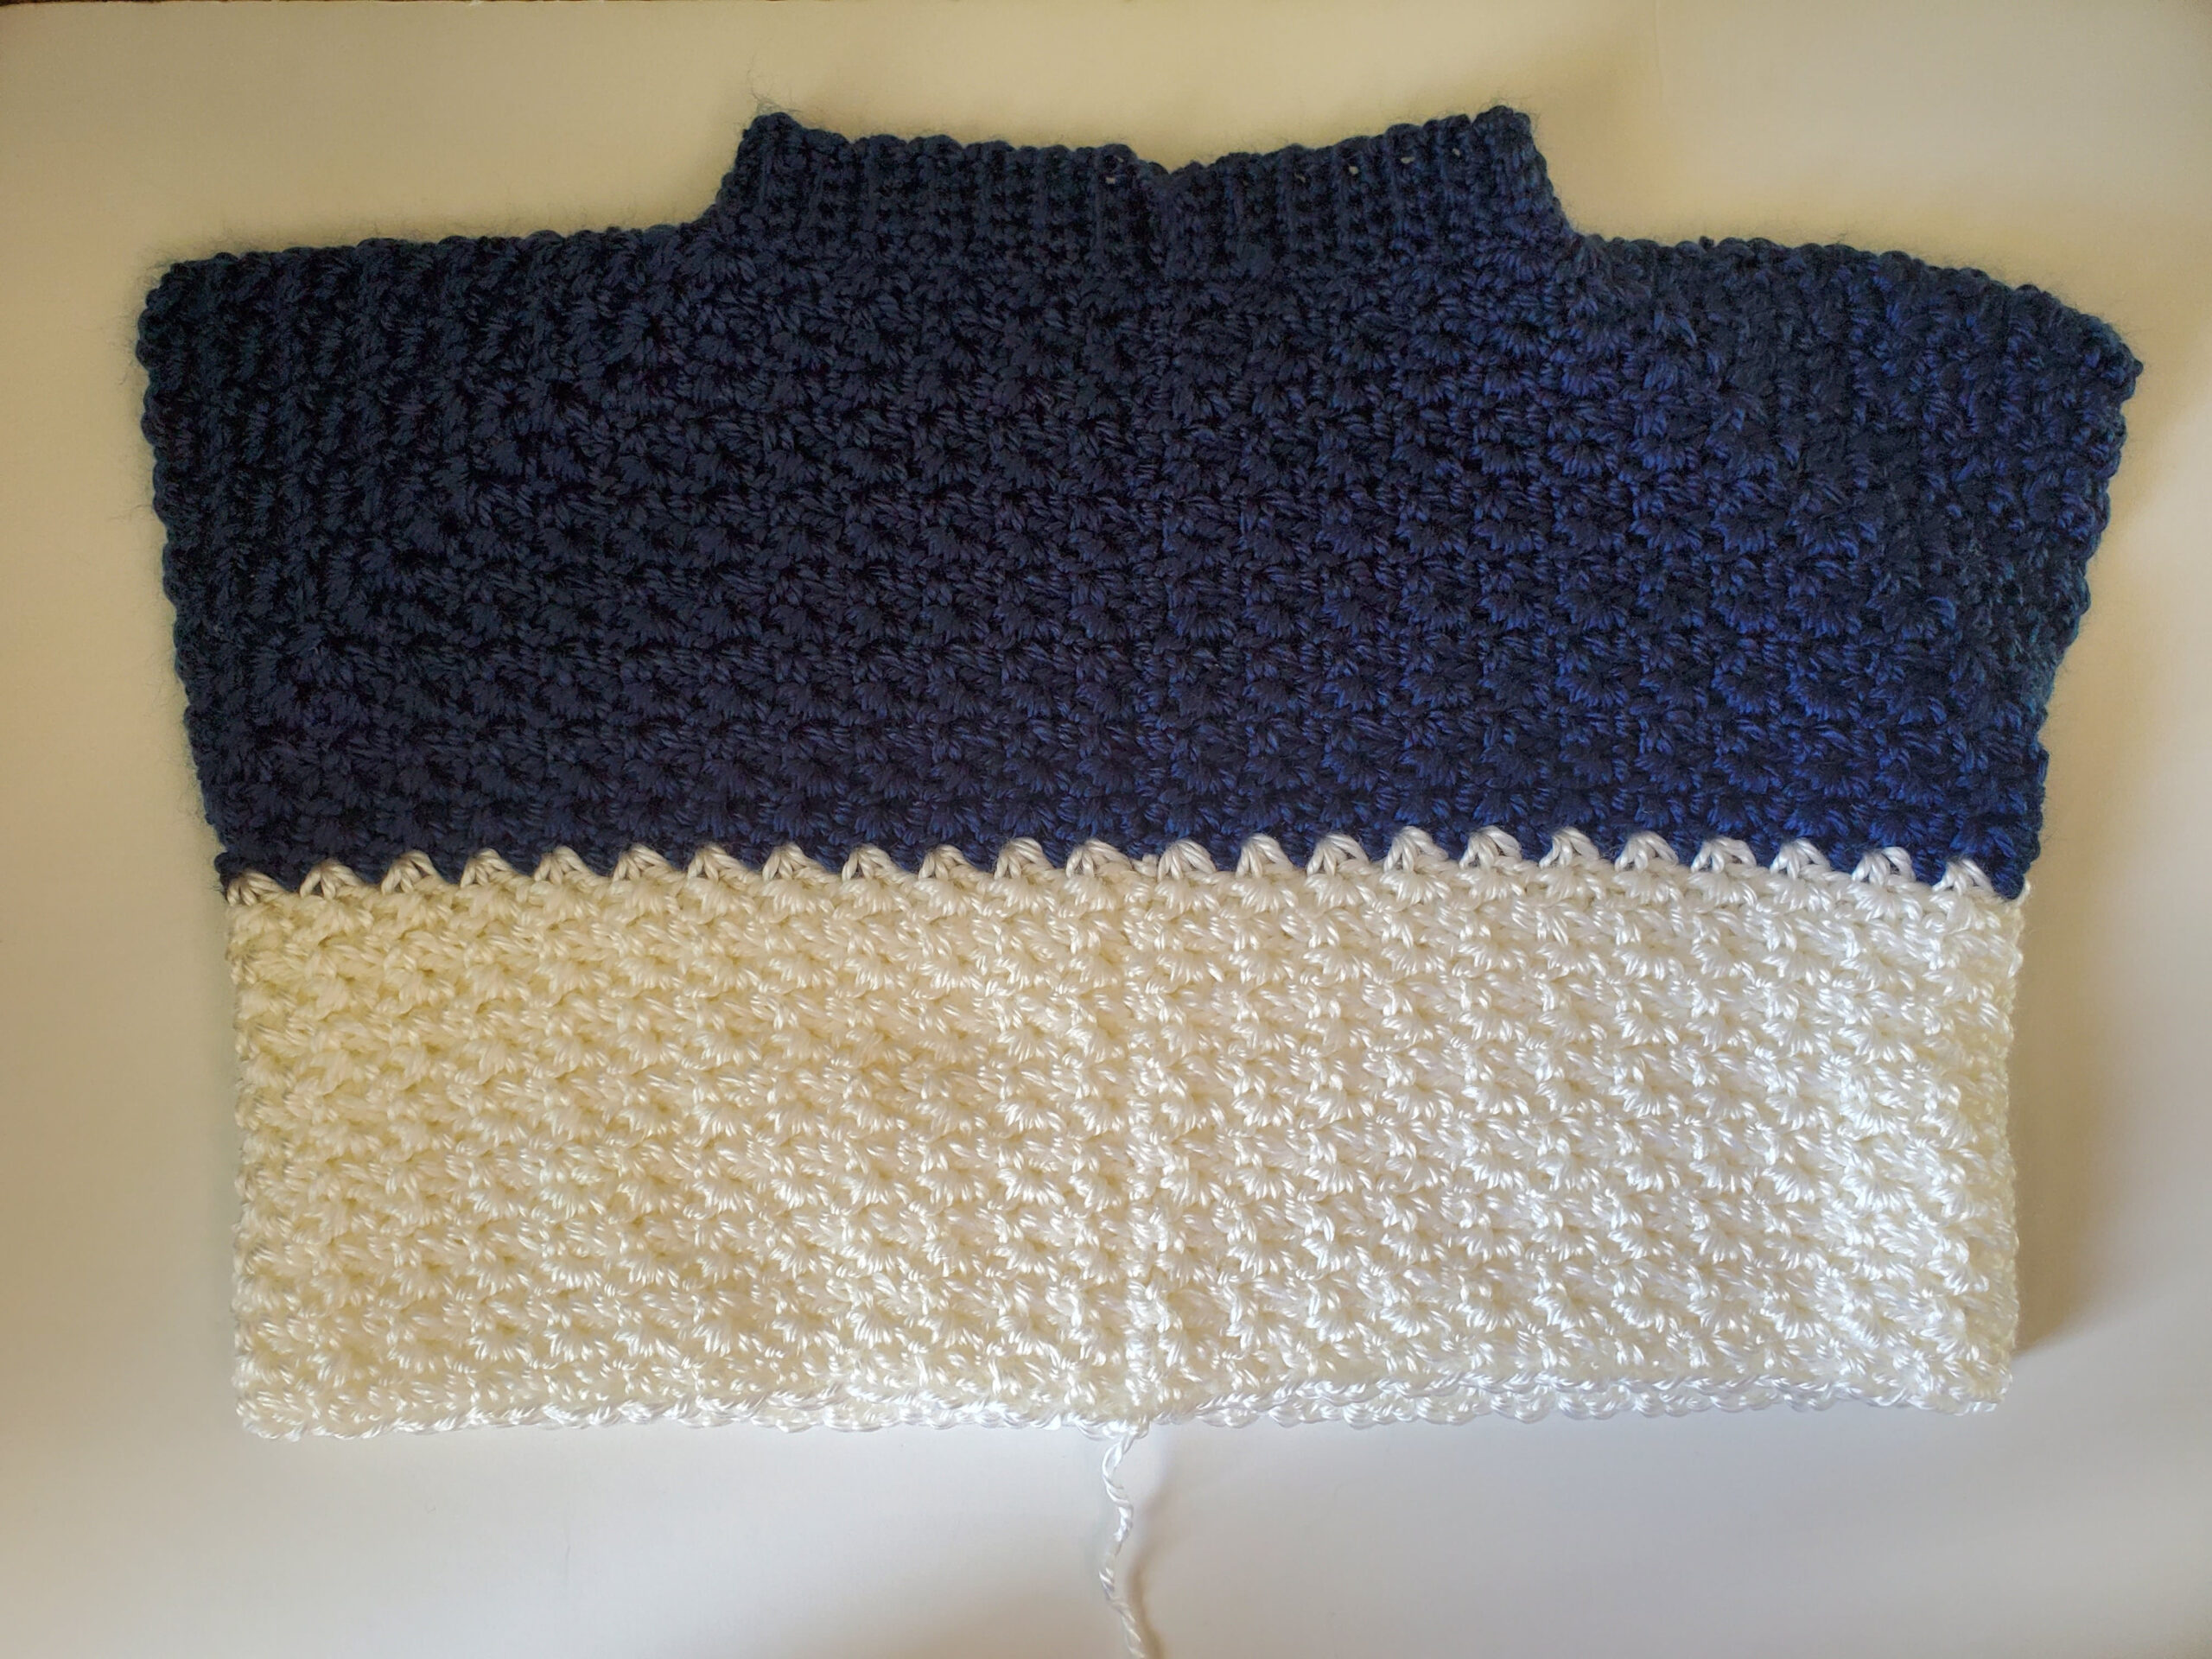
One thing that I love about this sweater, is that it’s worked from the top, down. 

This was nice because I had my little models close by and I could just slip the sweater over them and make adjustments as needed. Other sweater patterns might have you make a bunch of different panels and sew them together (which is fine, but the less sewing, the better imo).

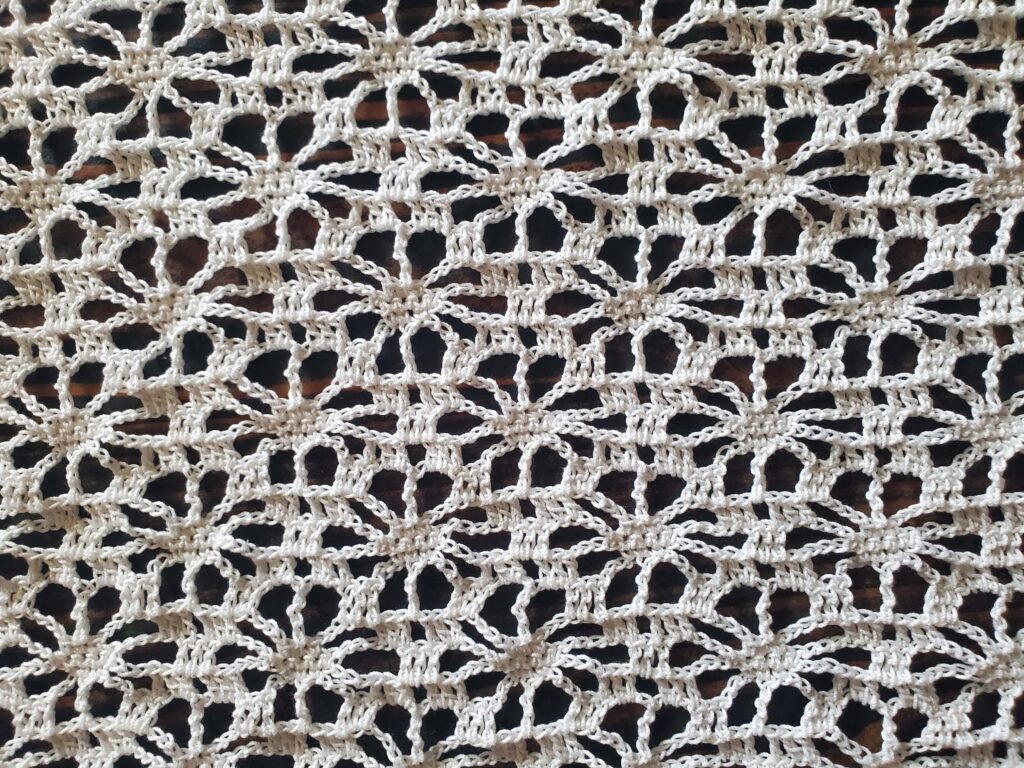
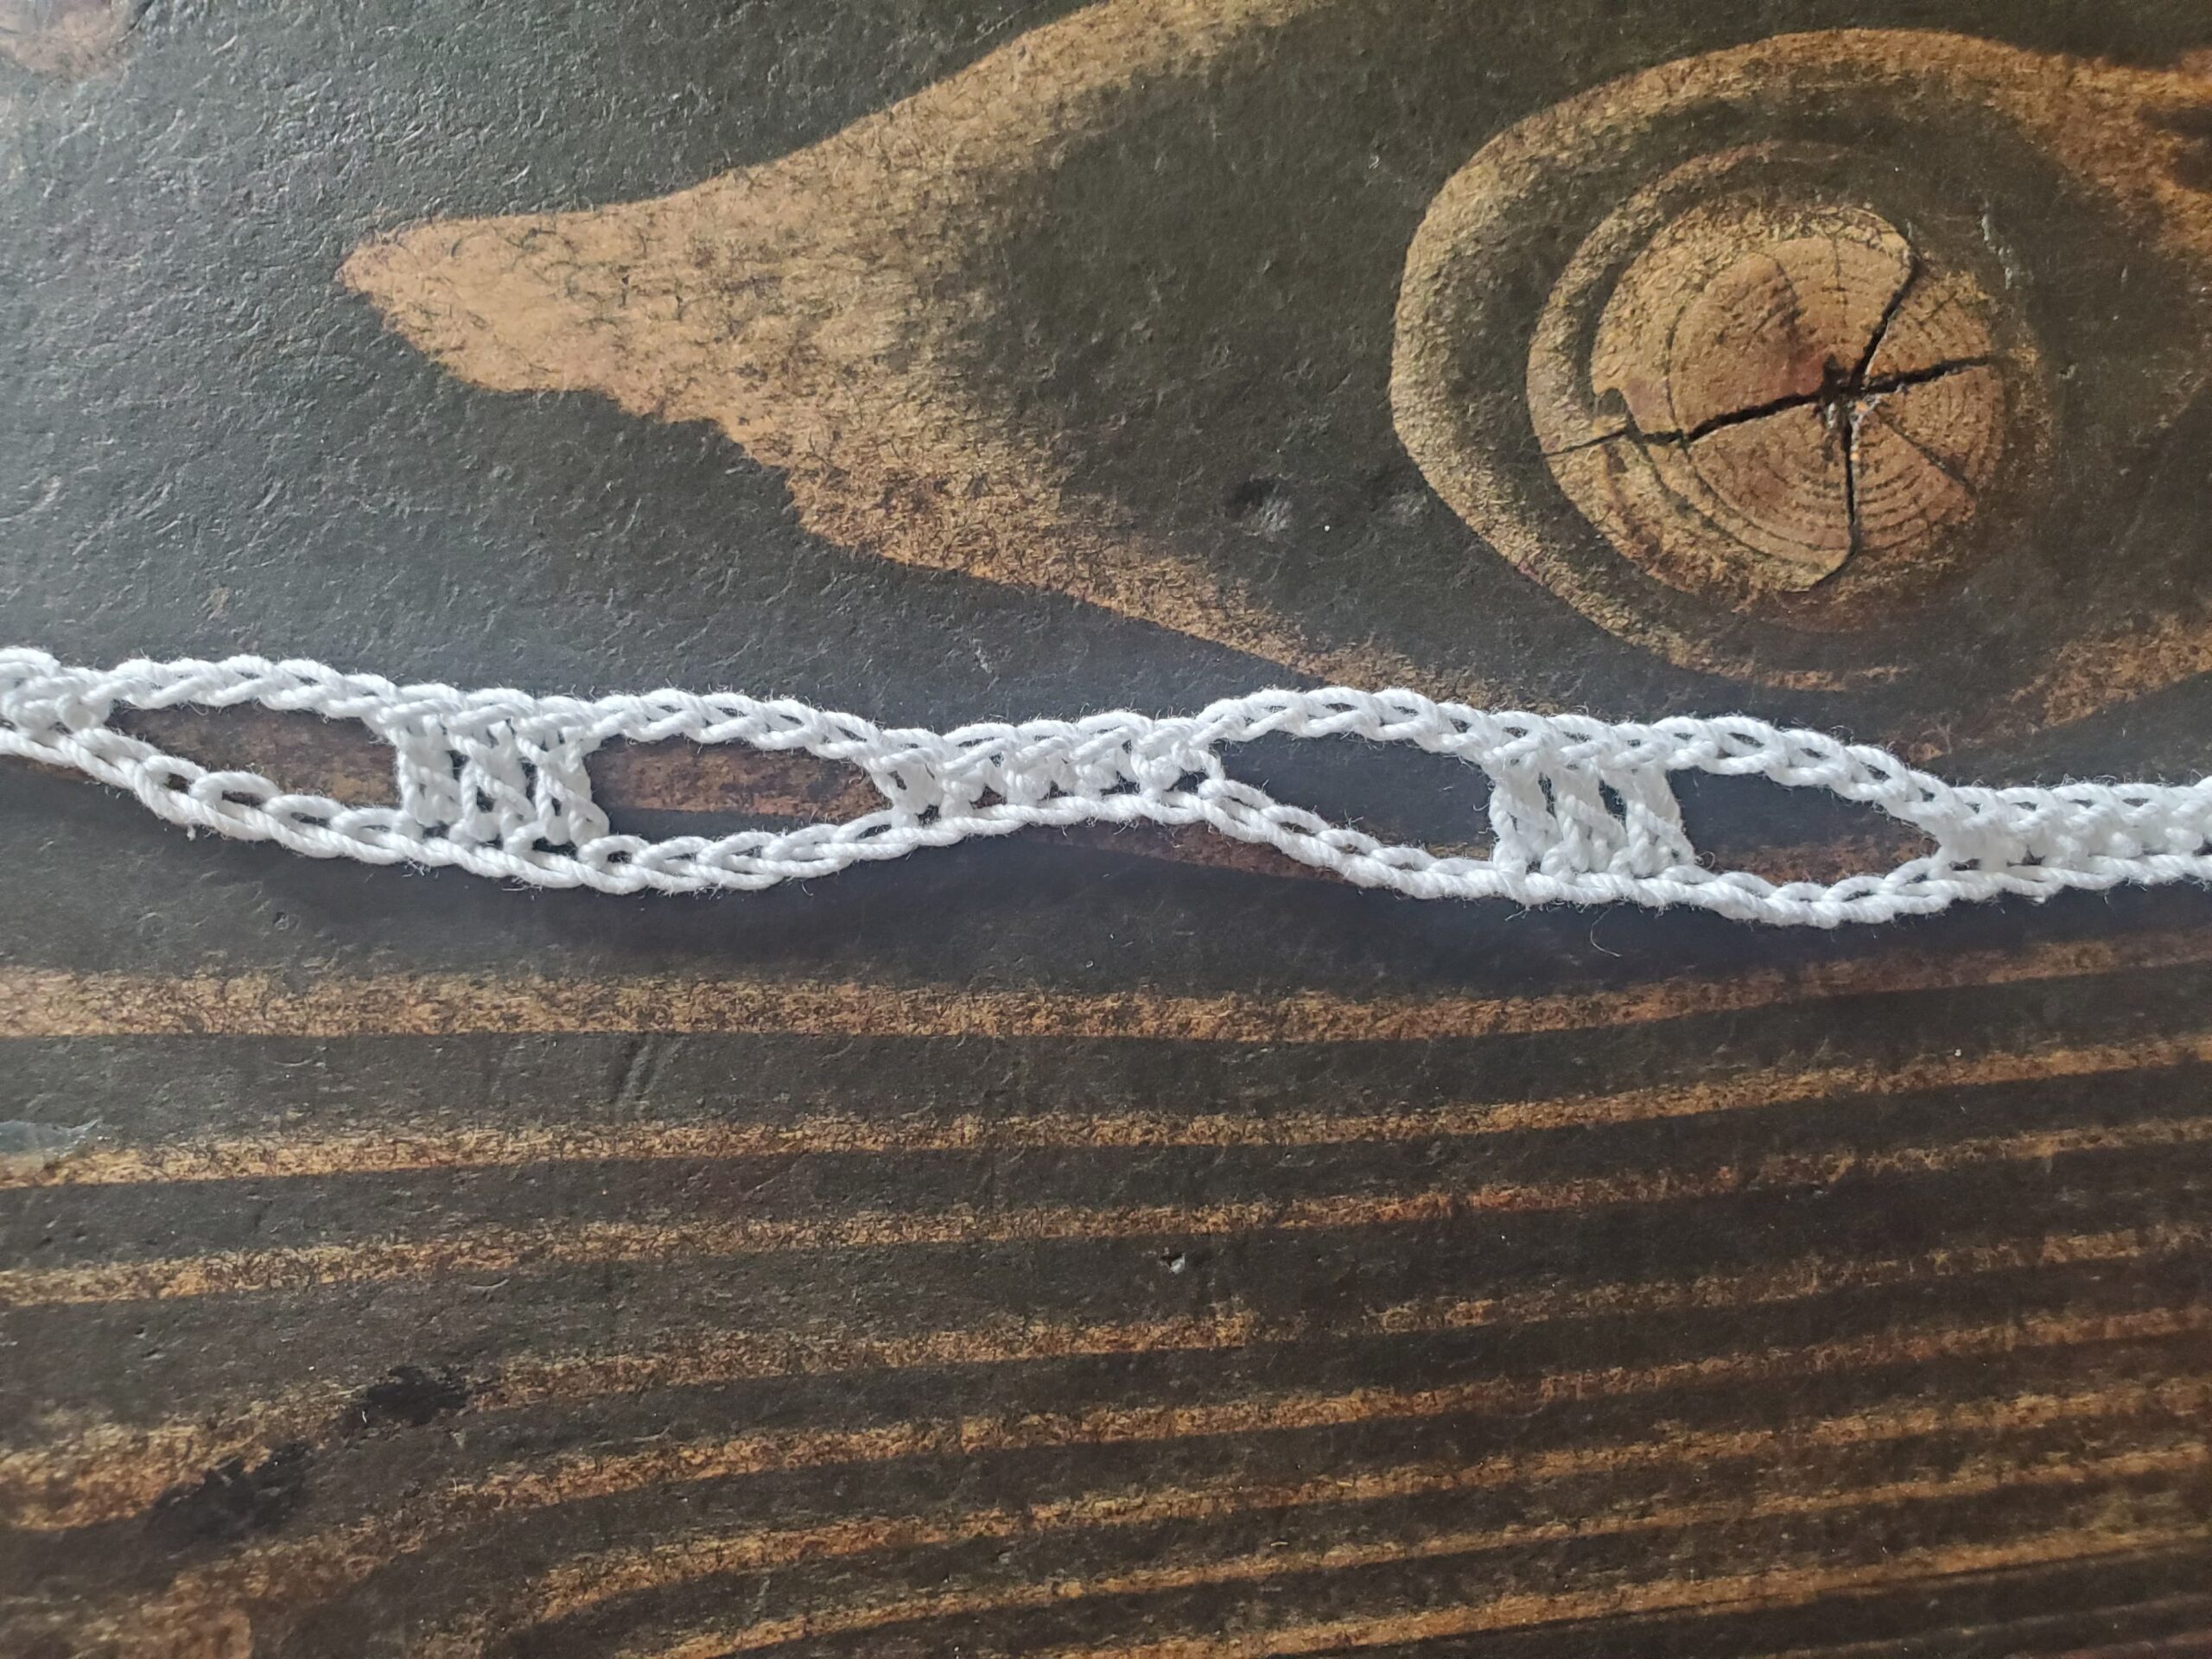
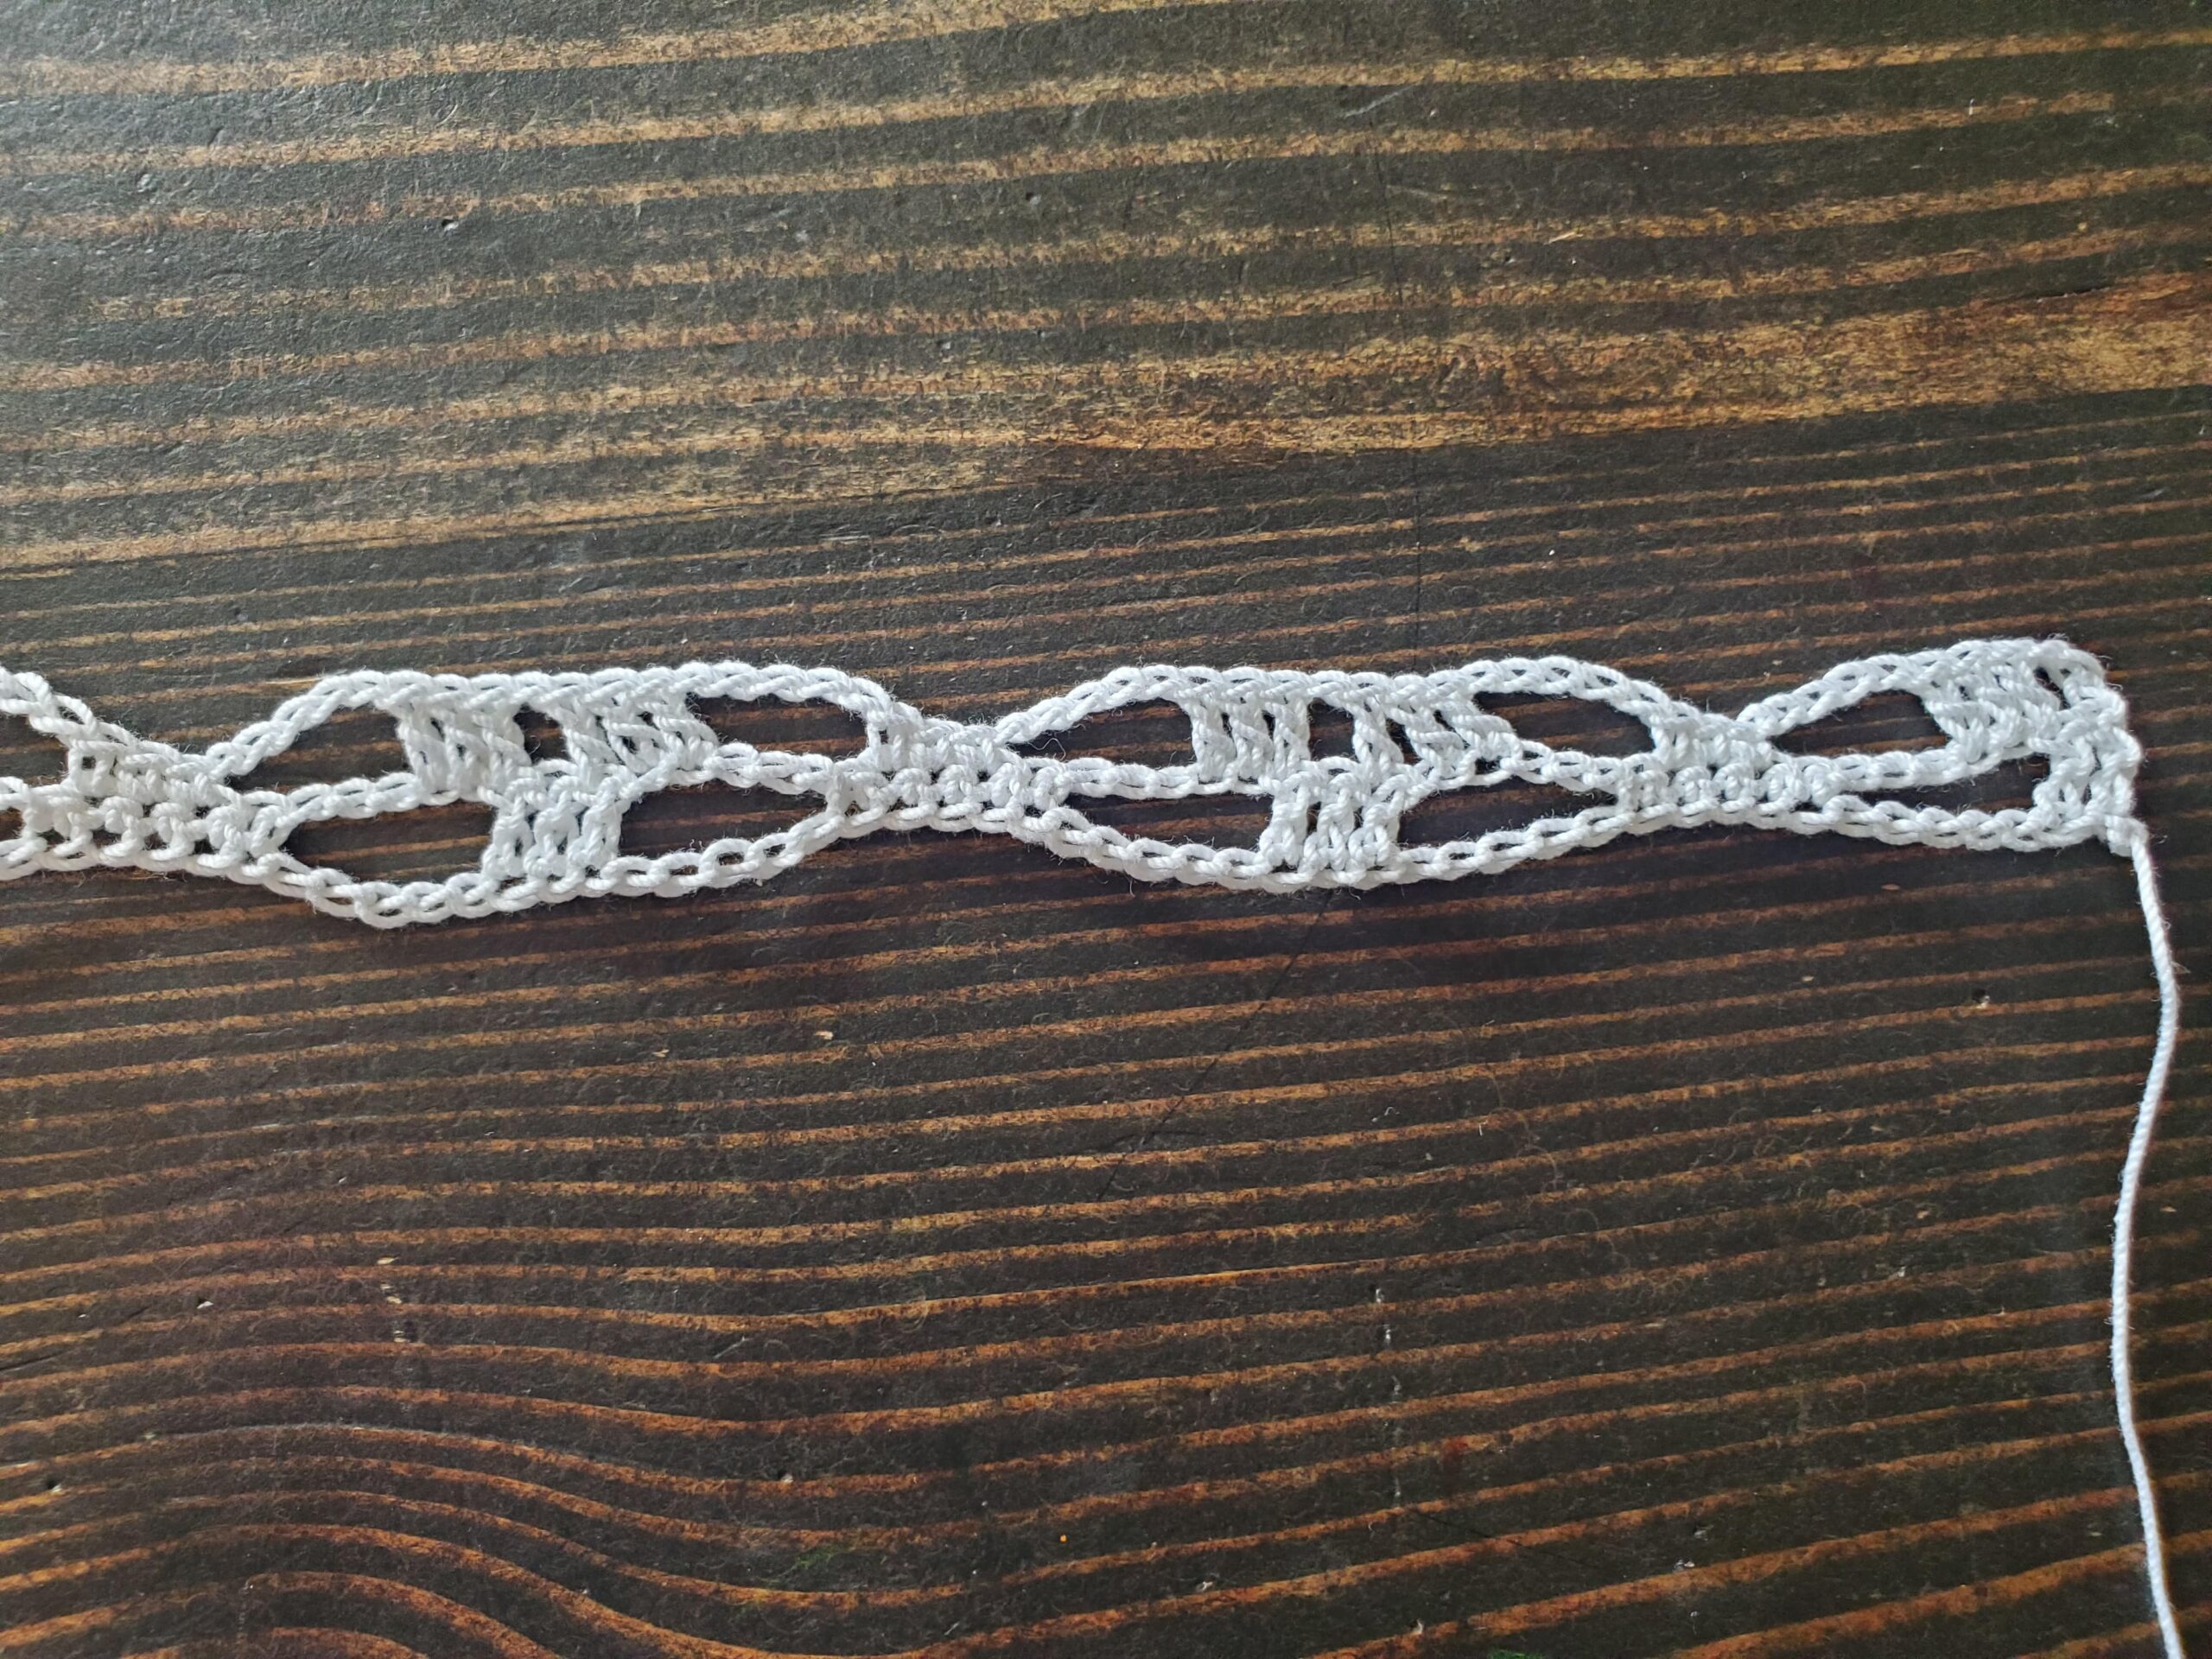
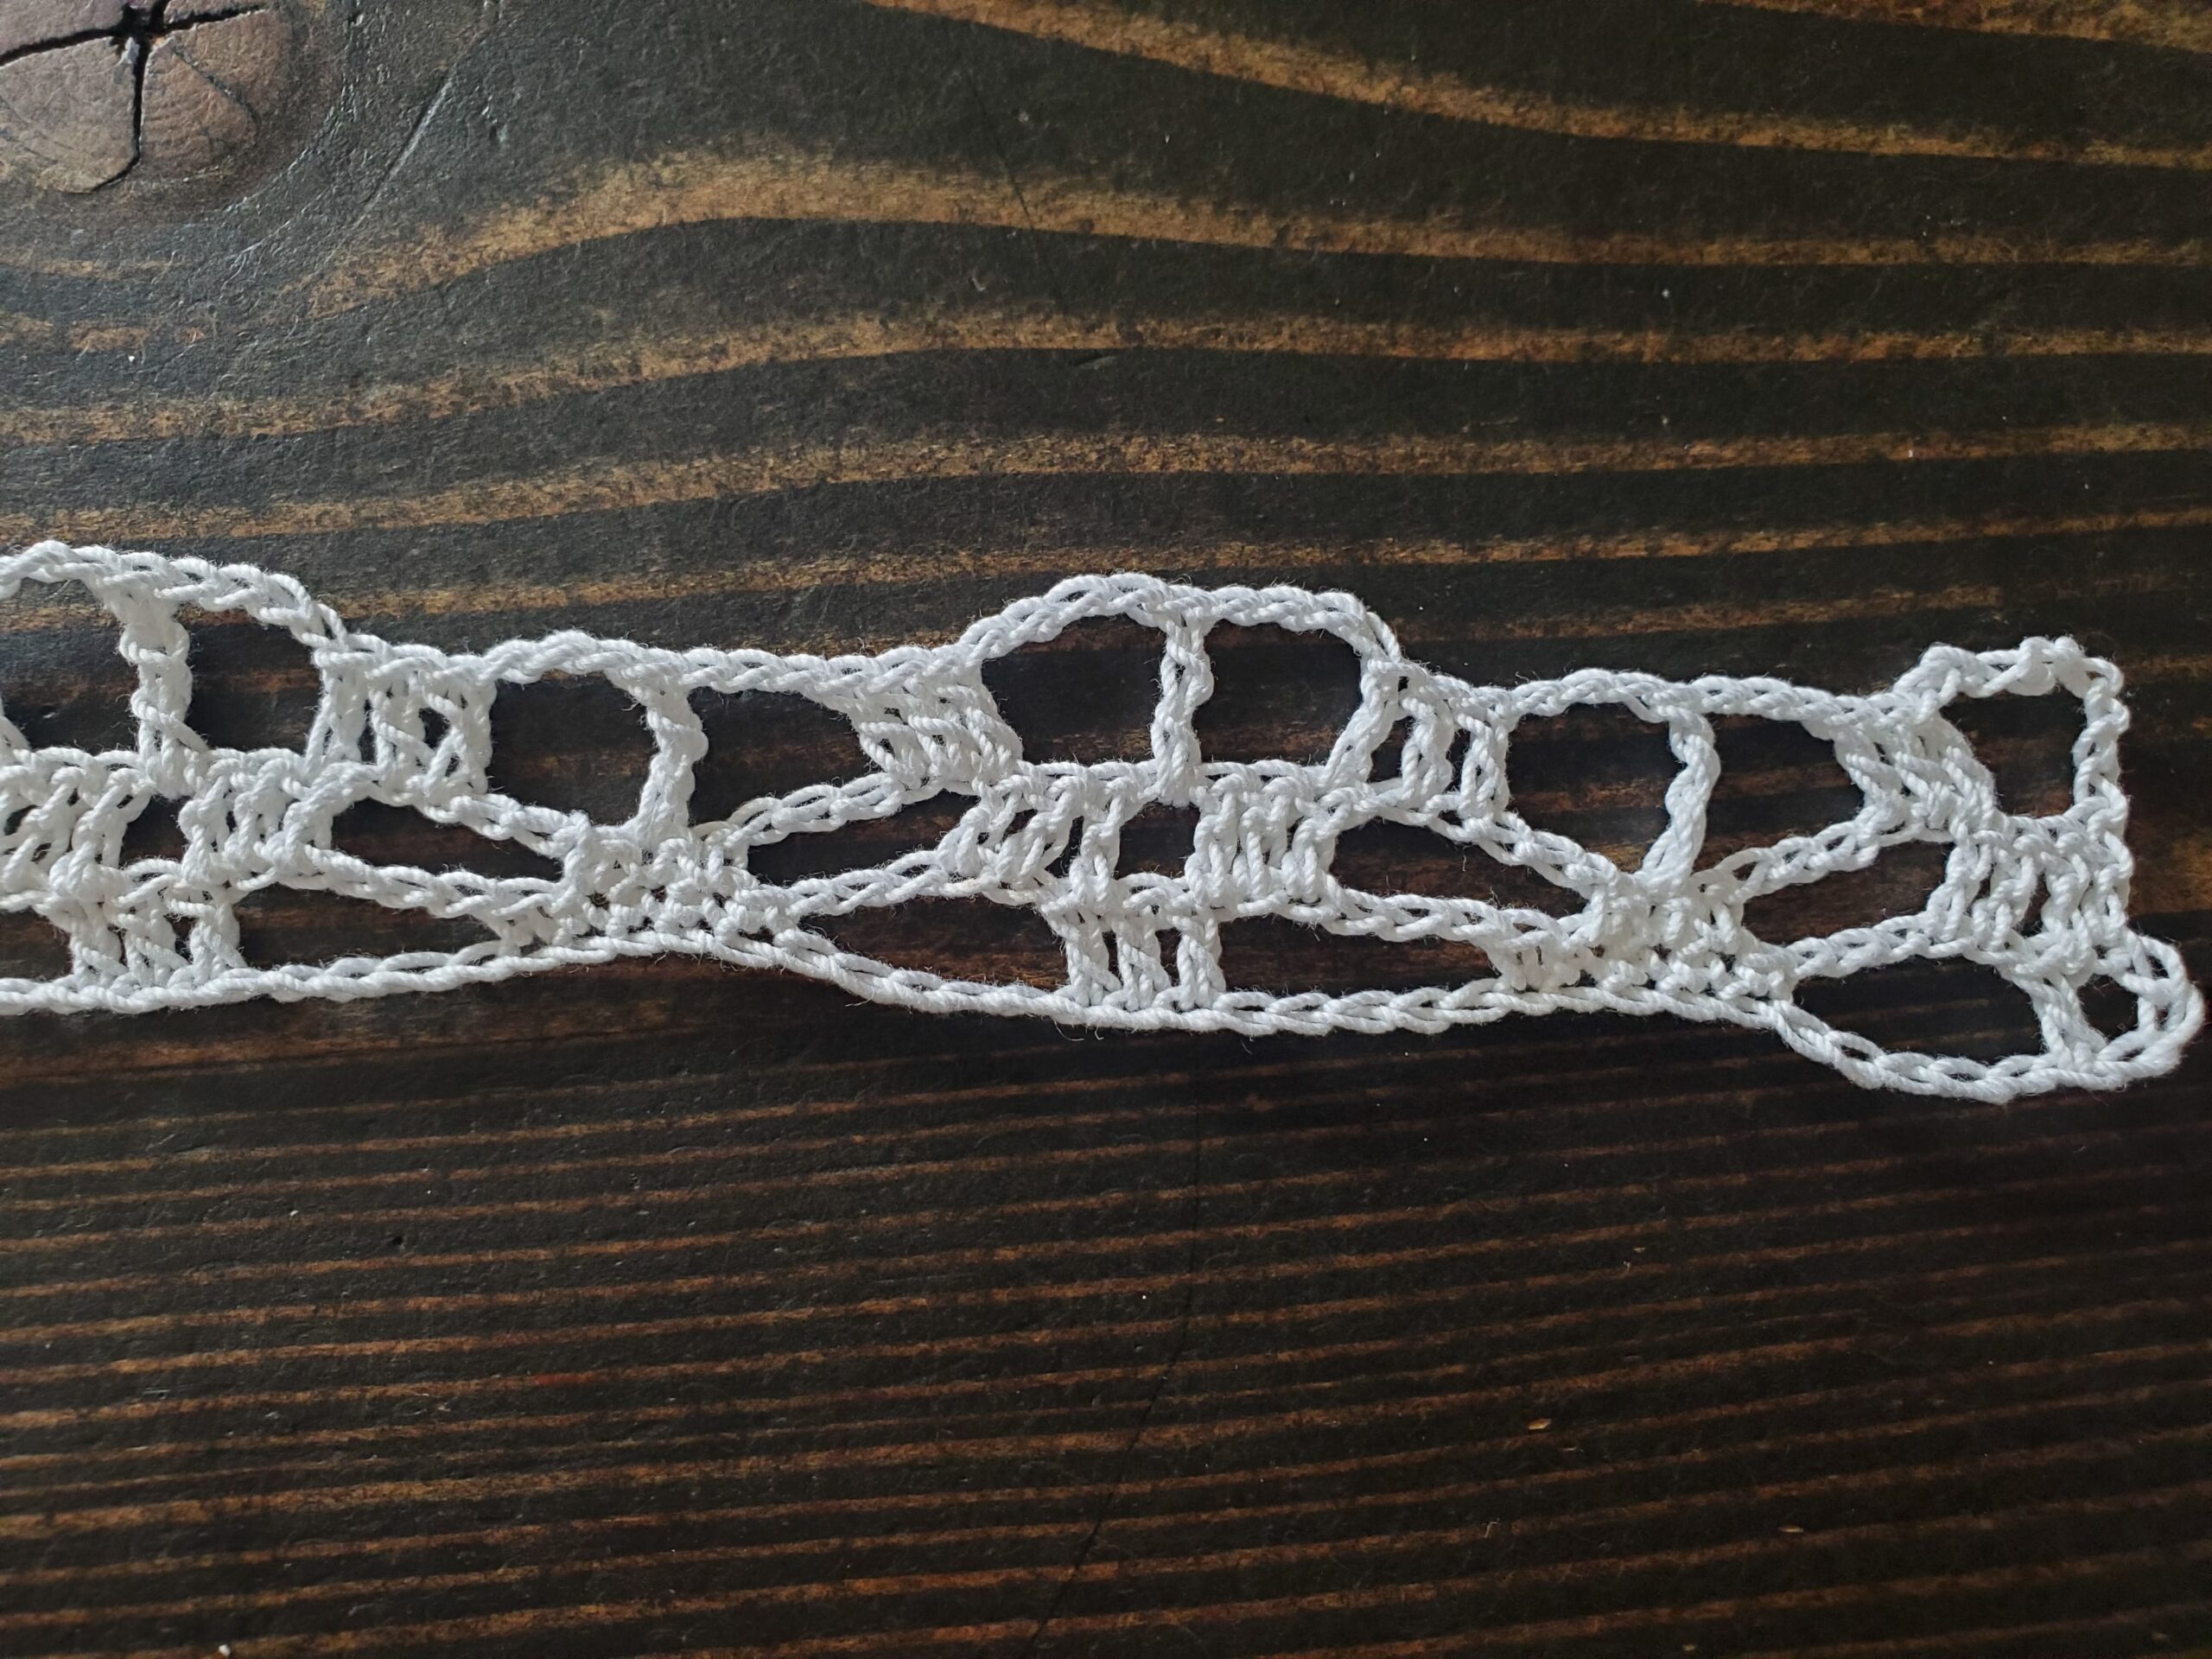
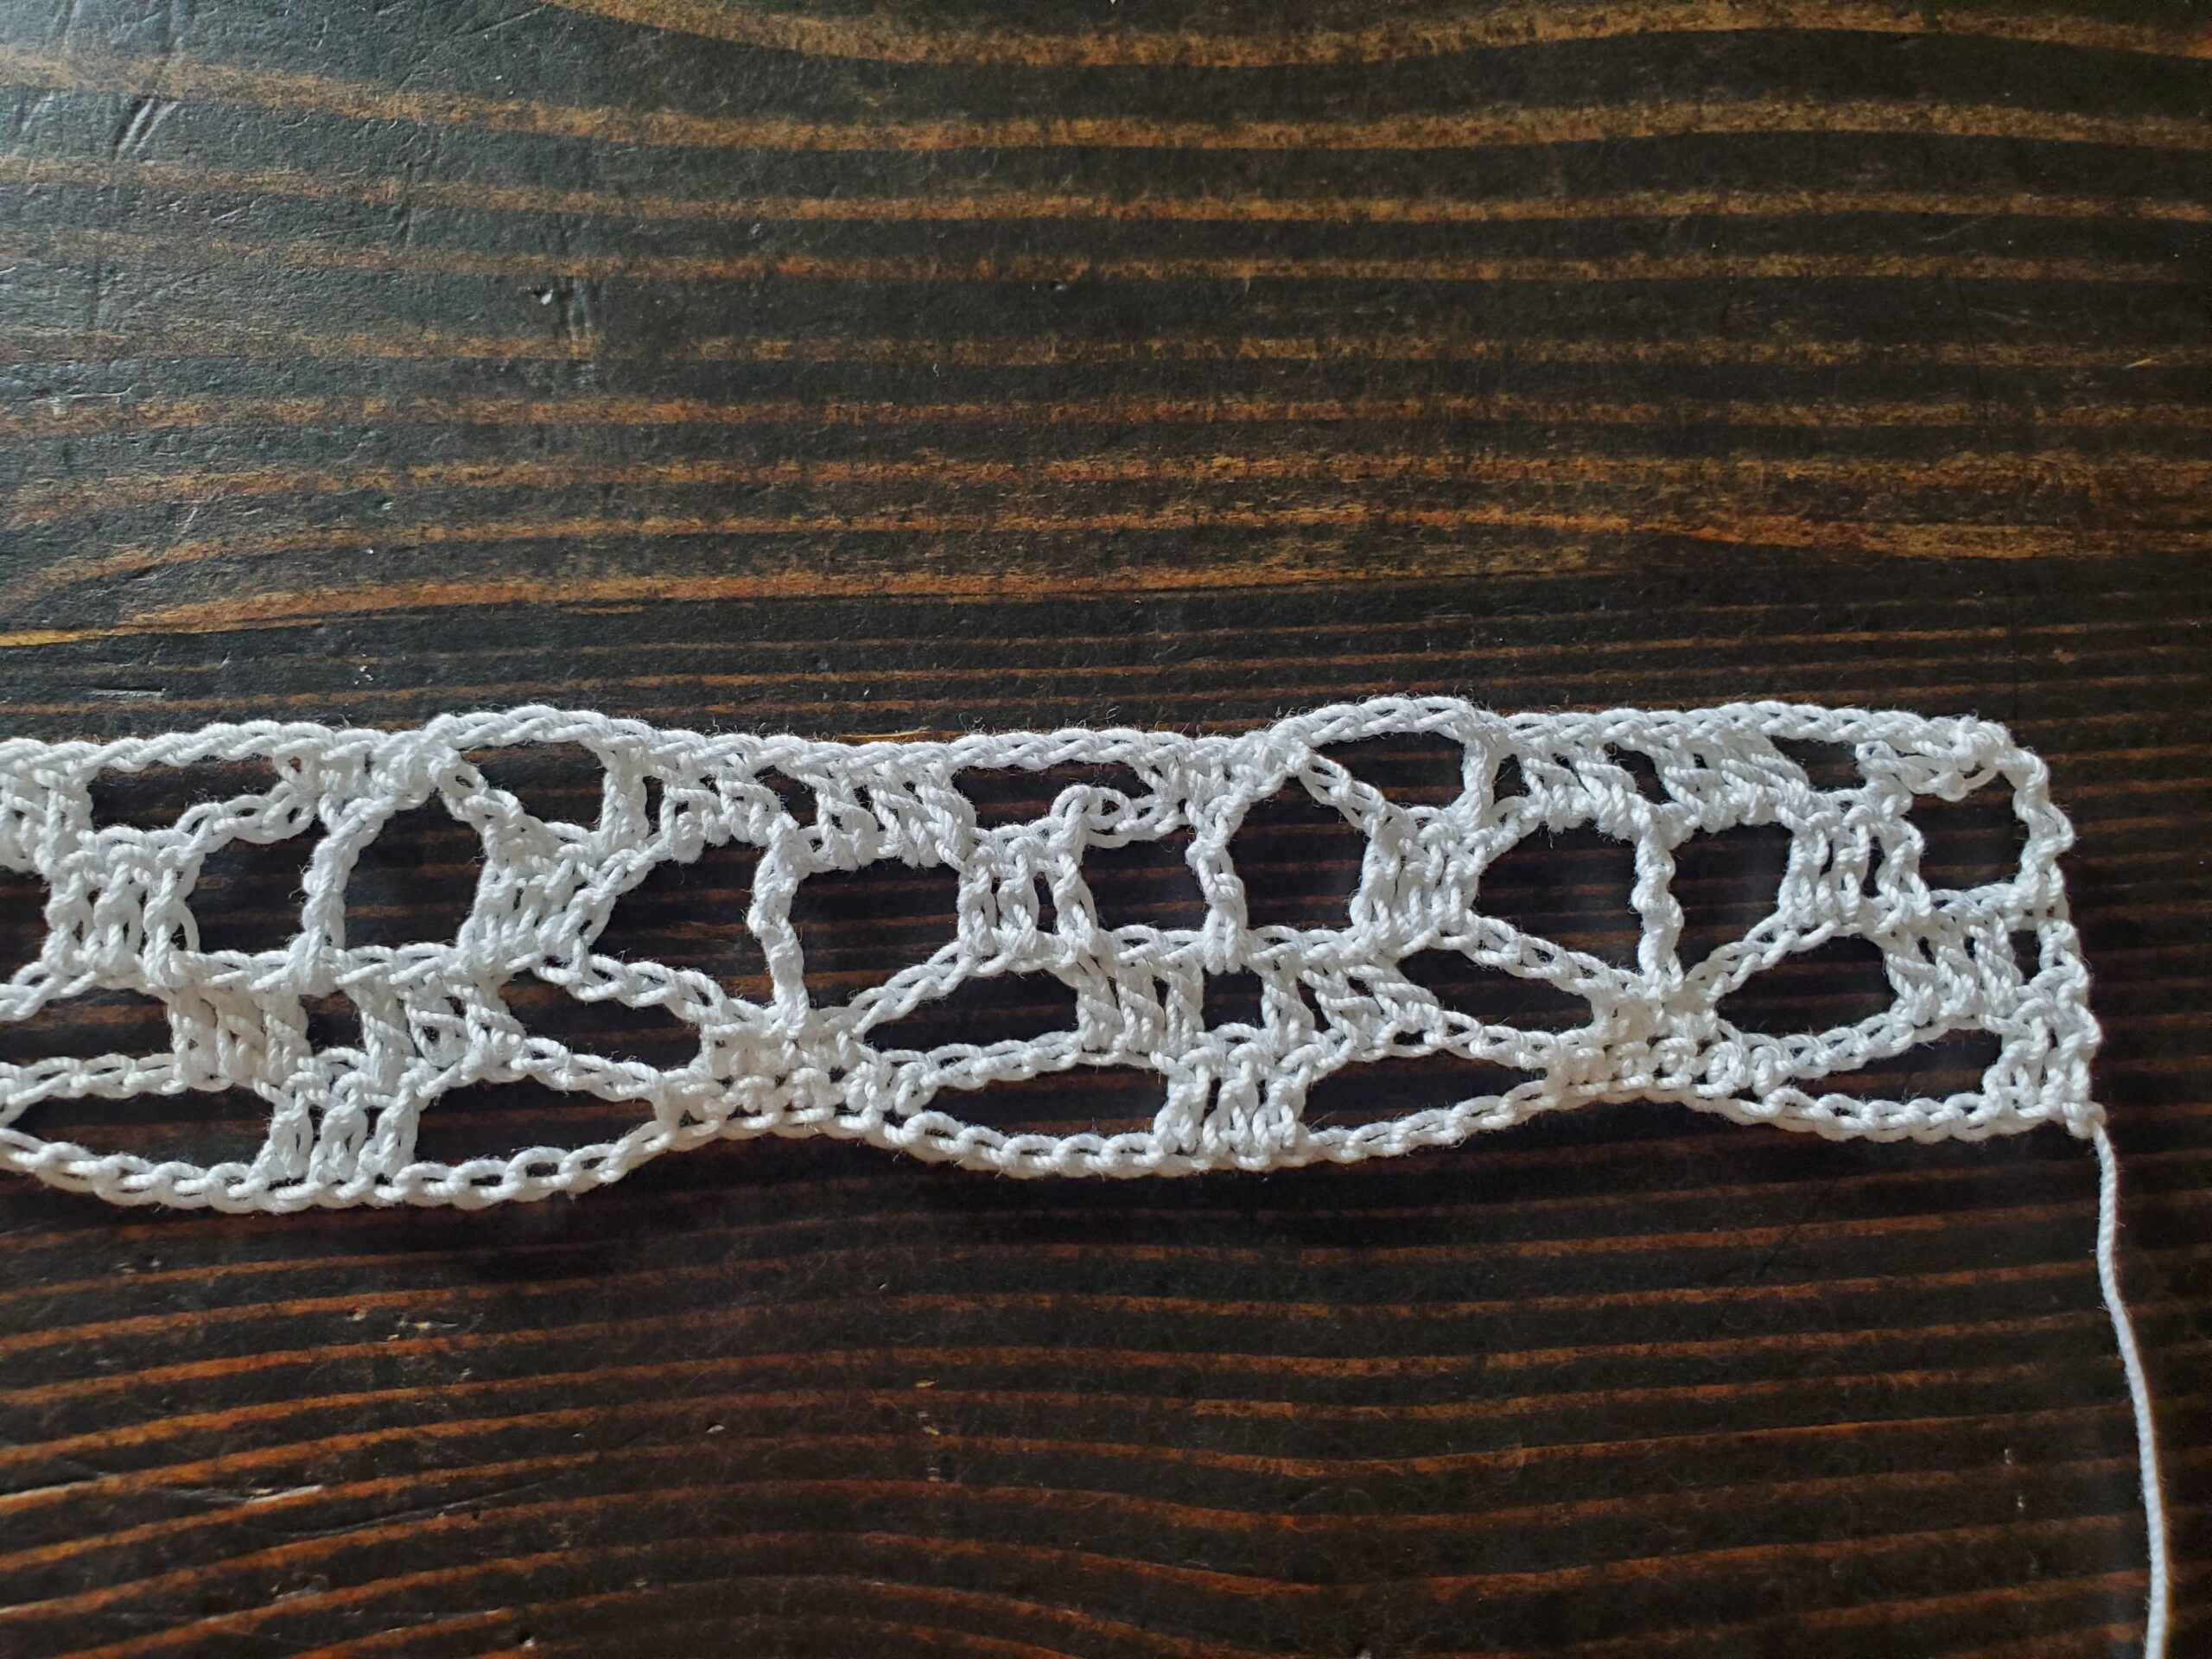
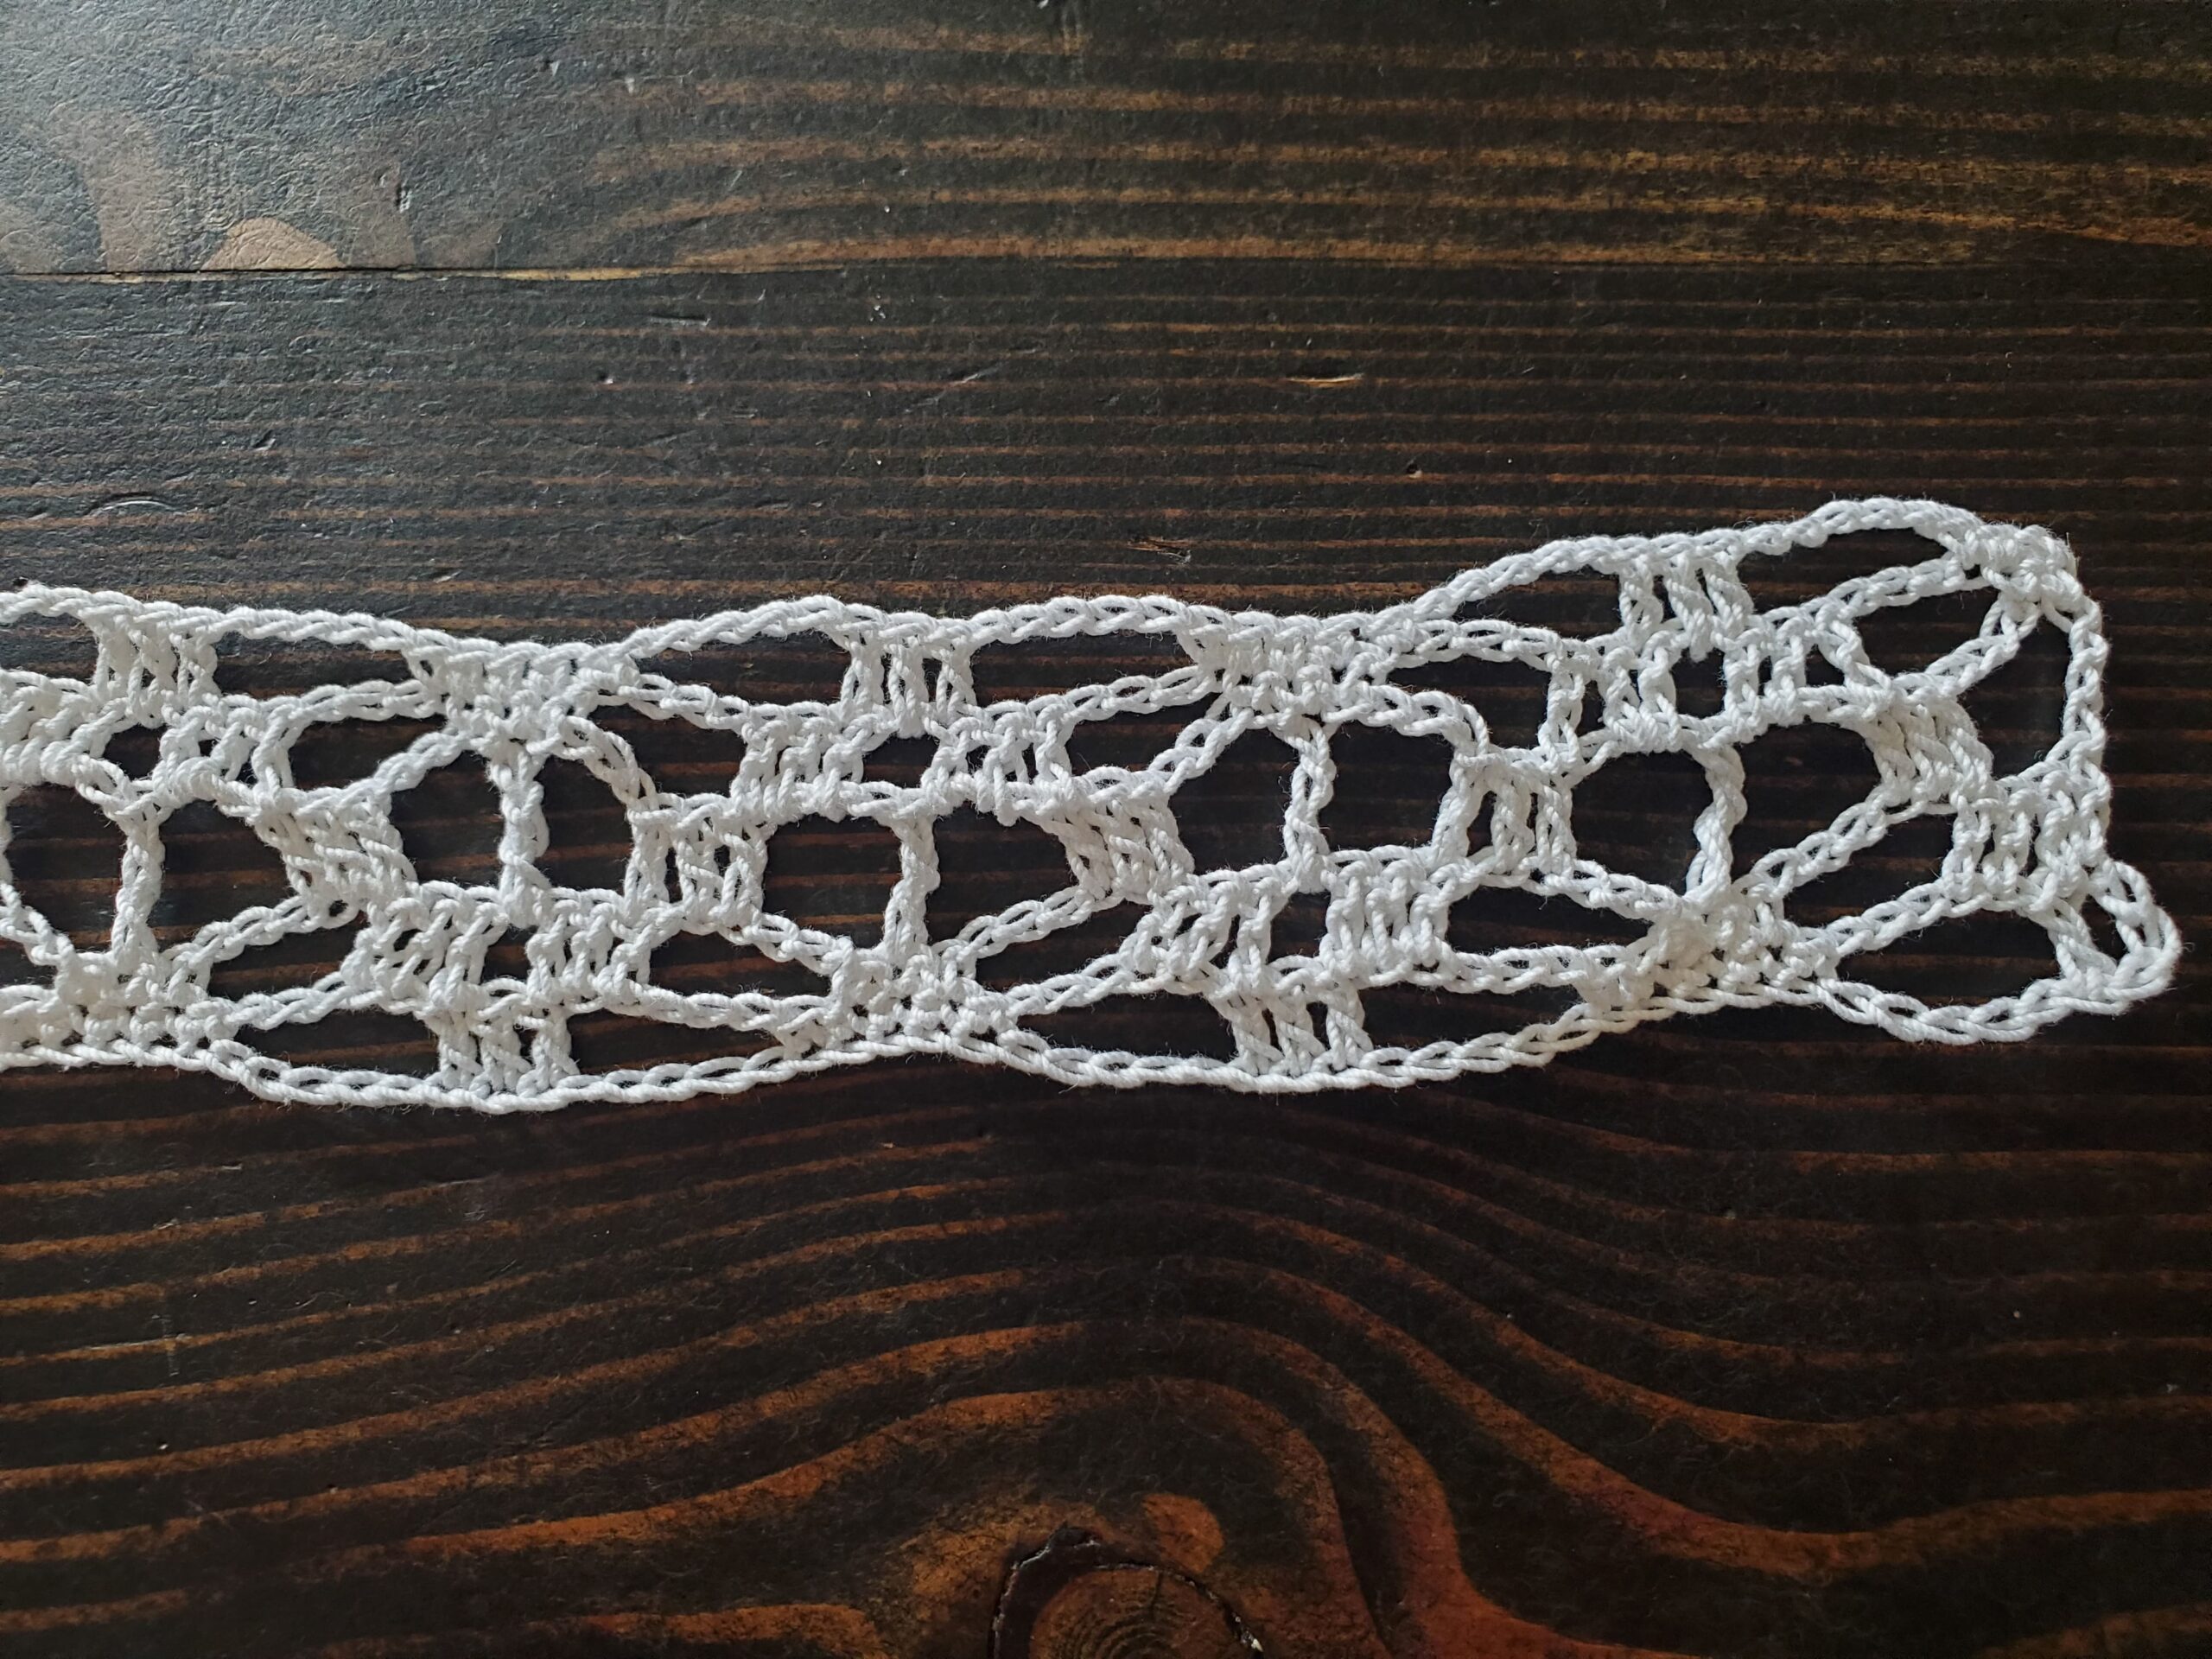
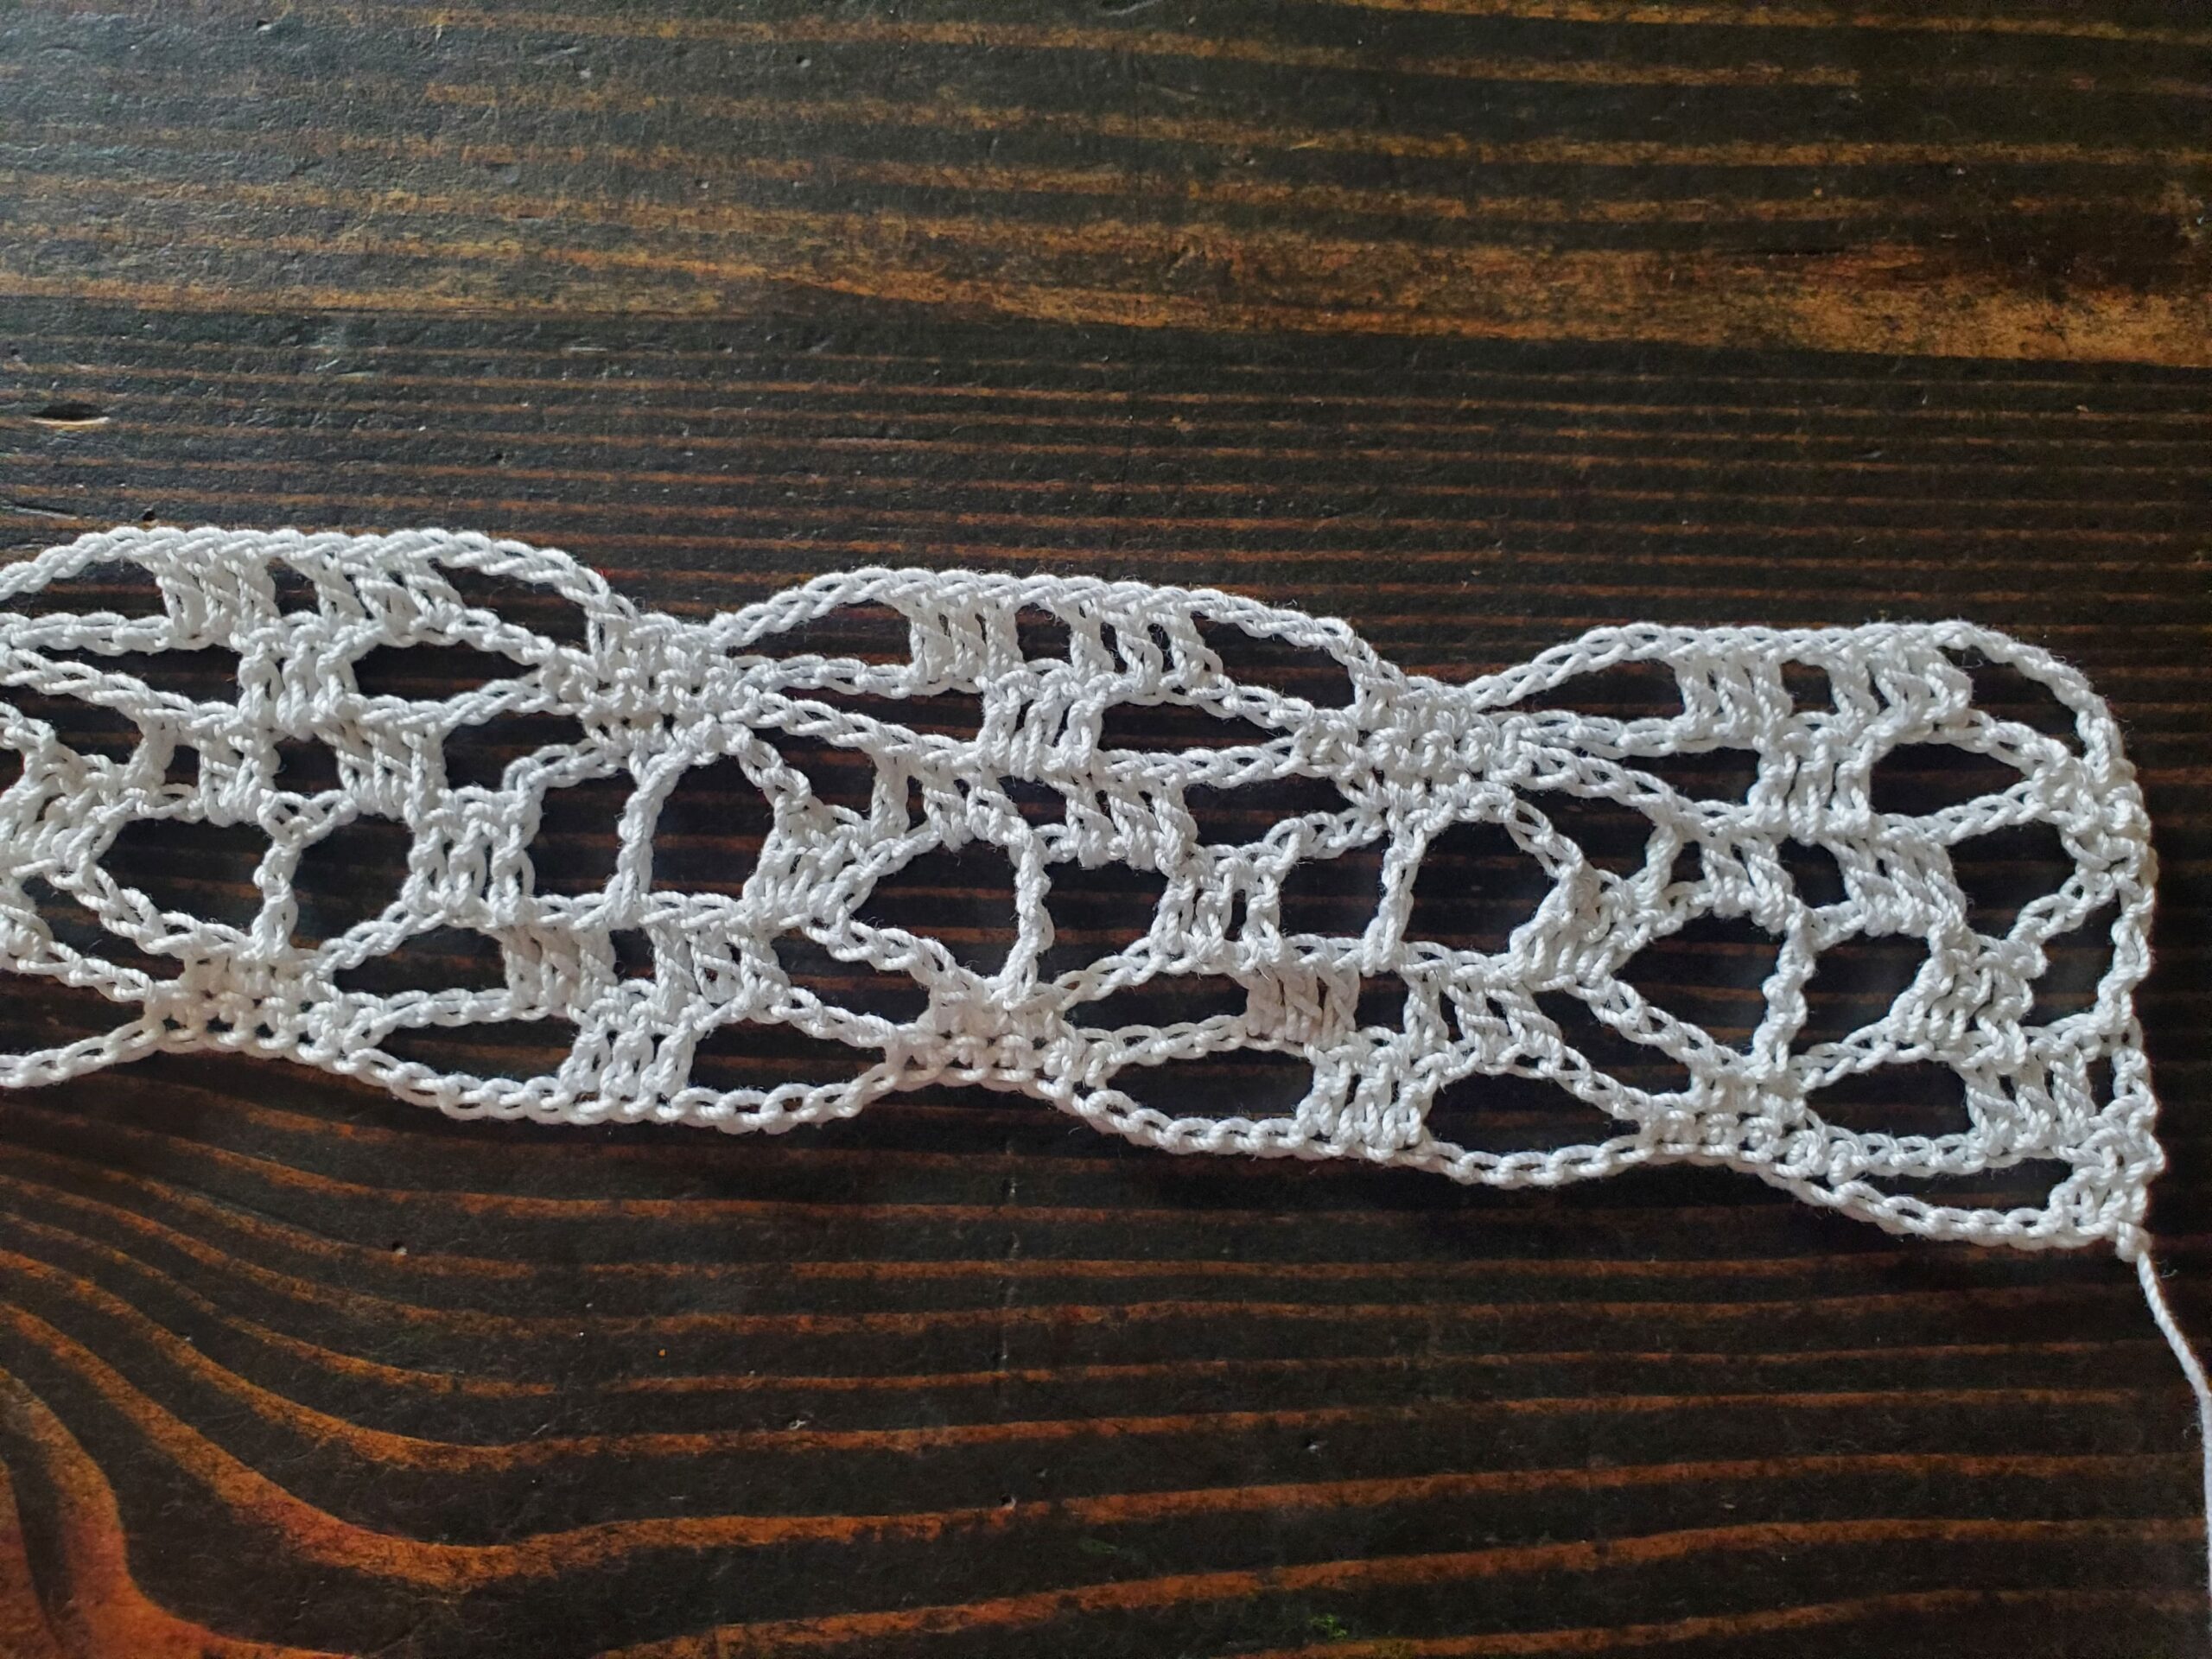
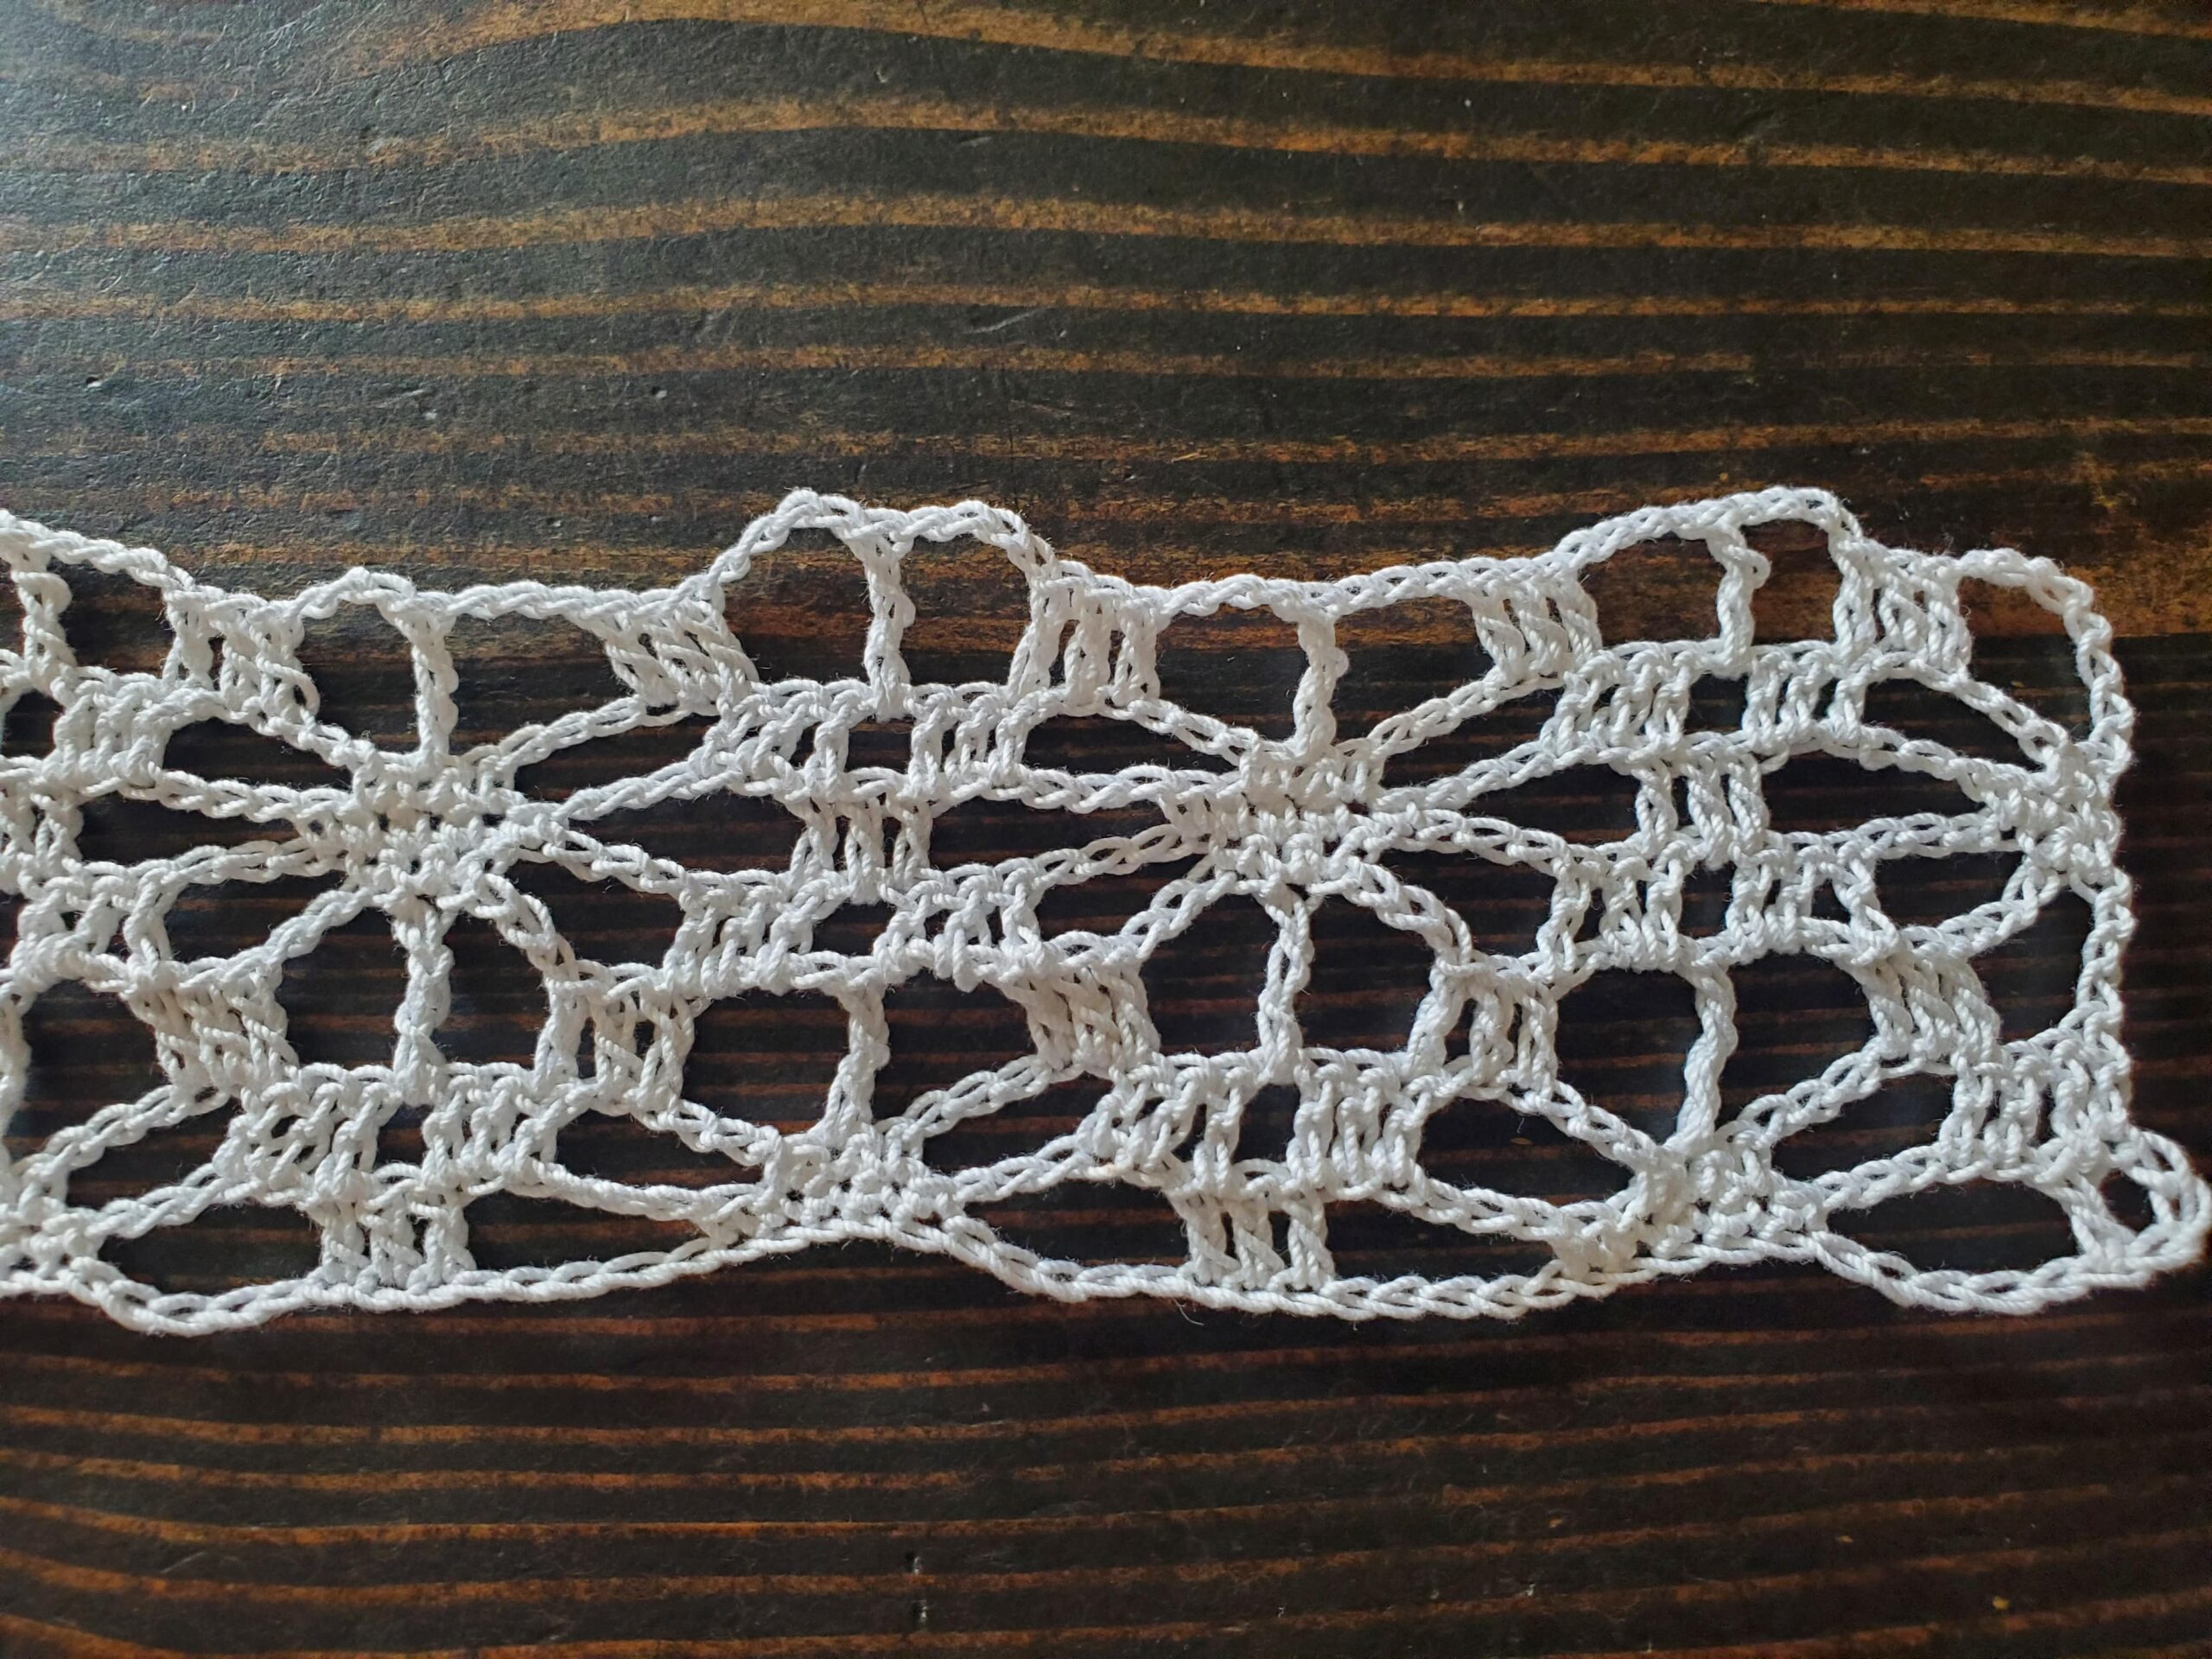
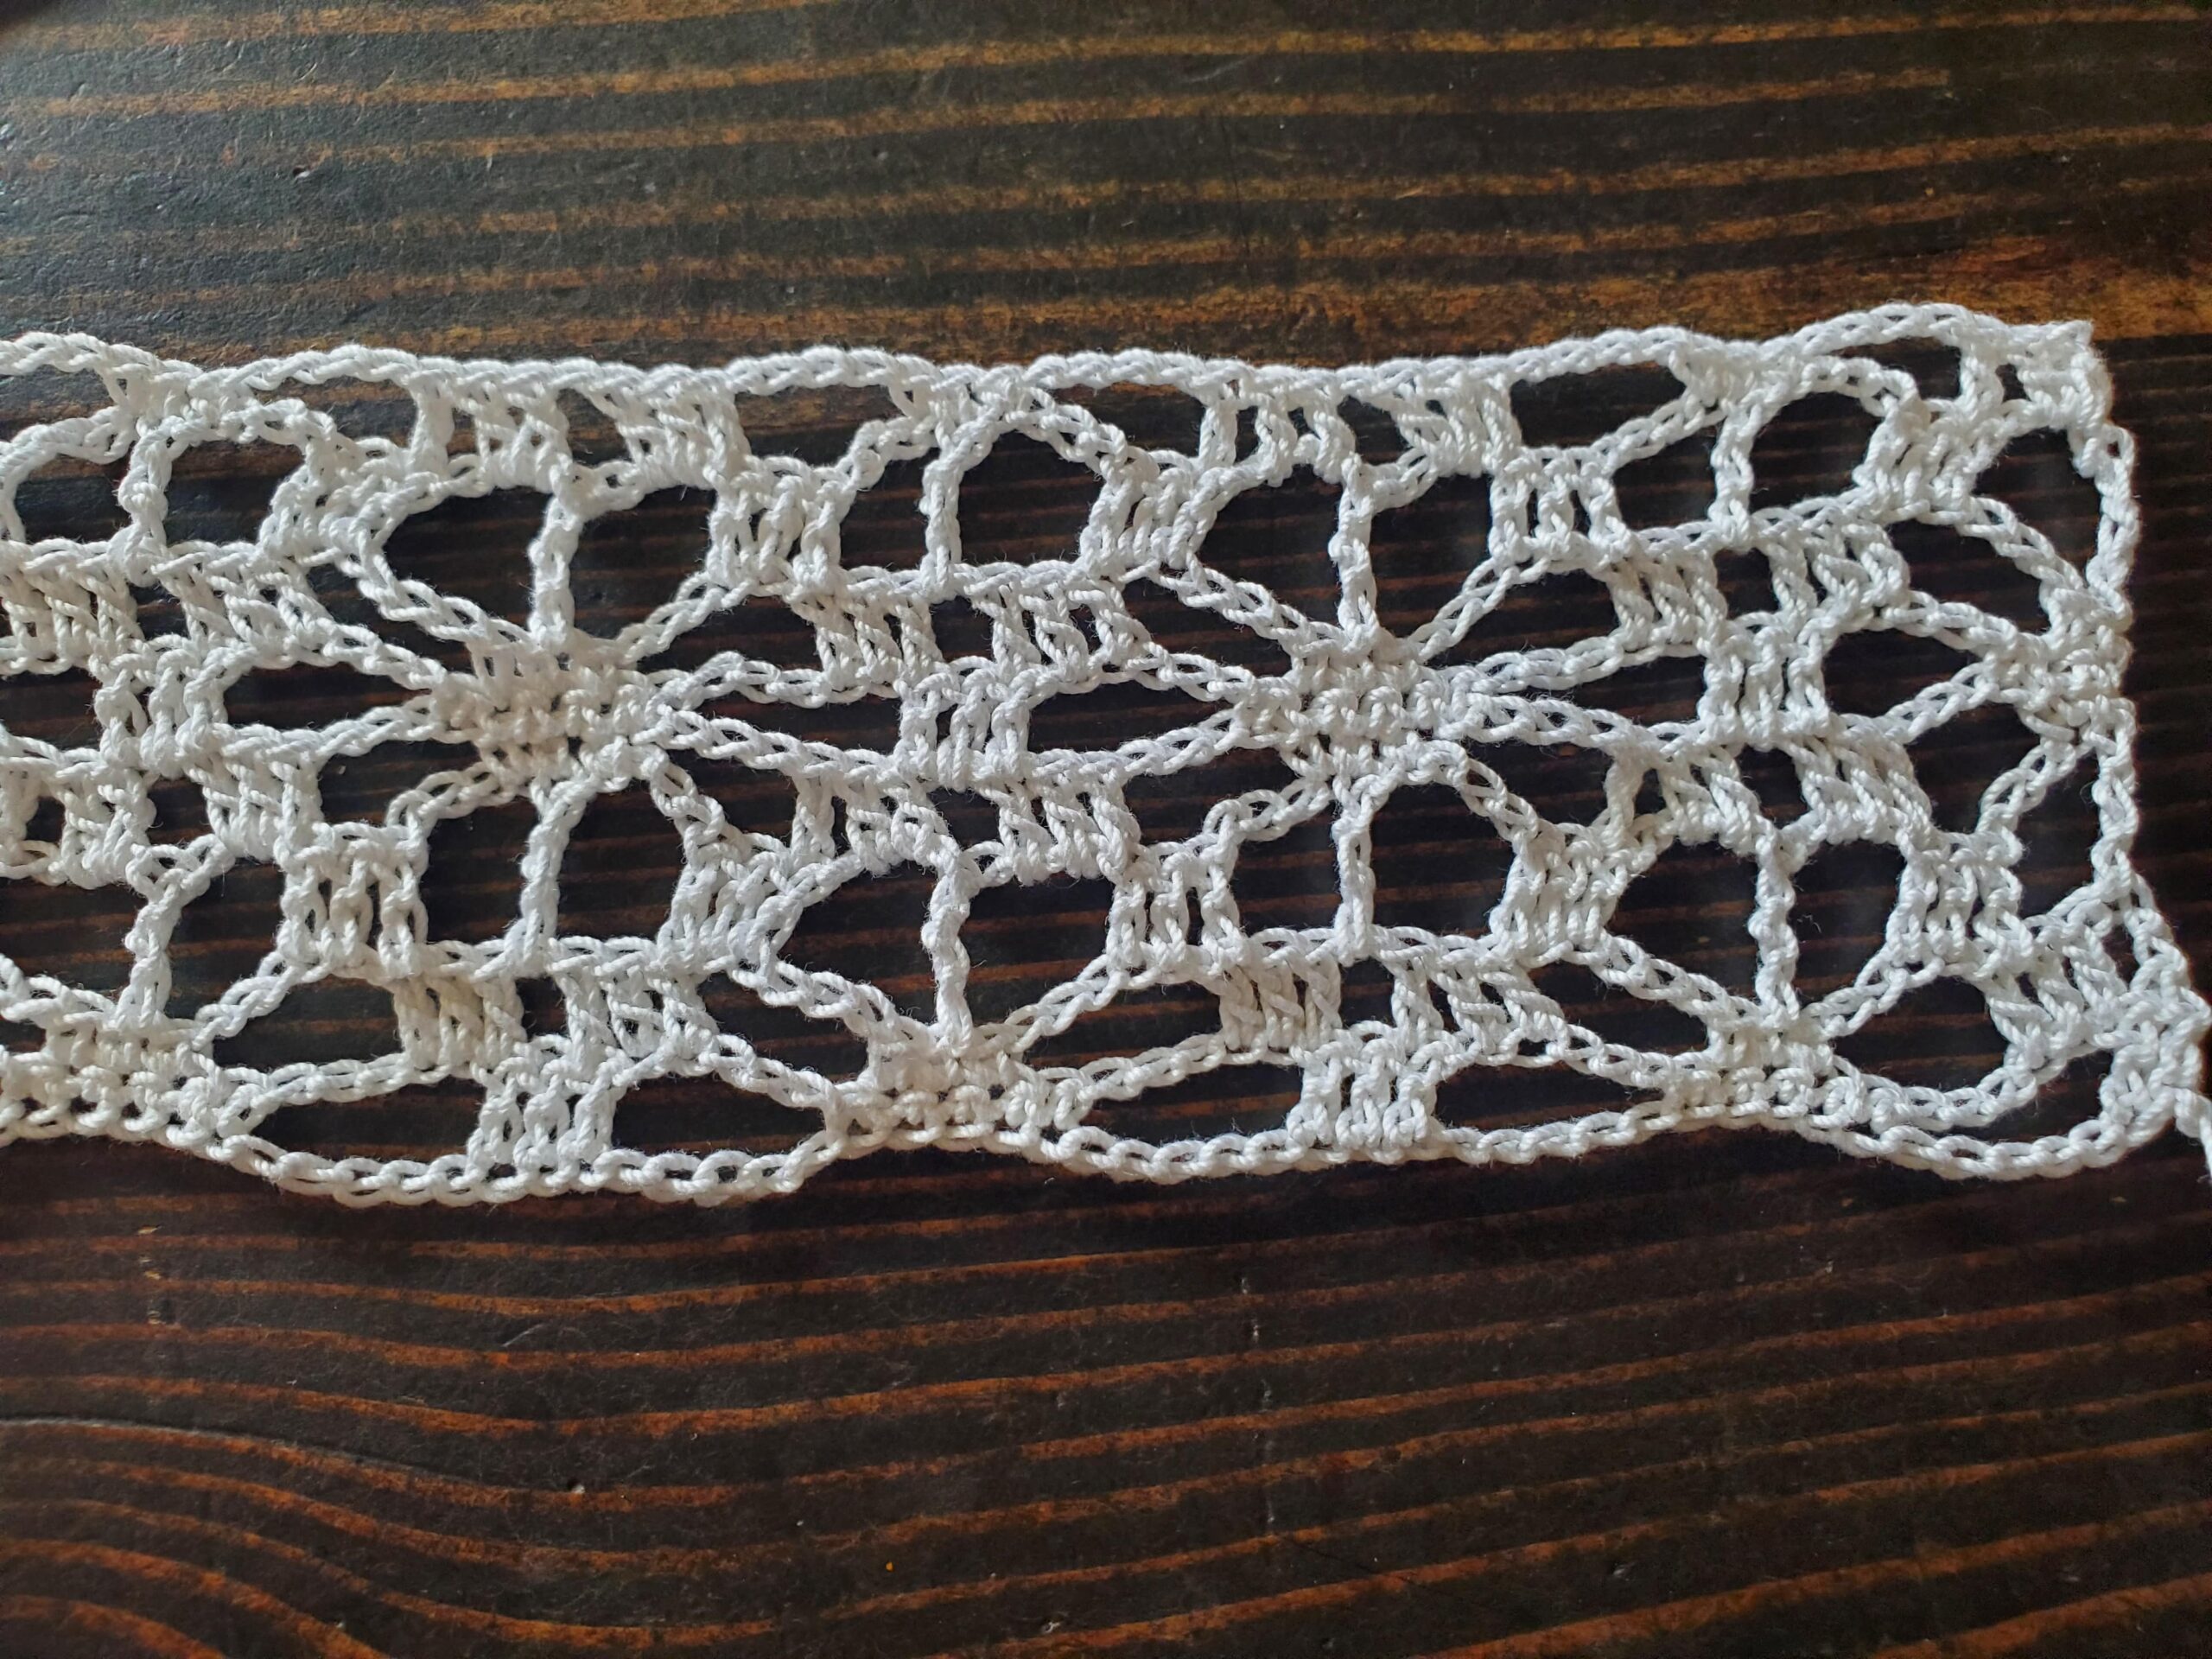
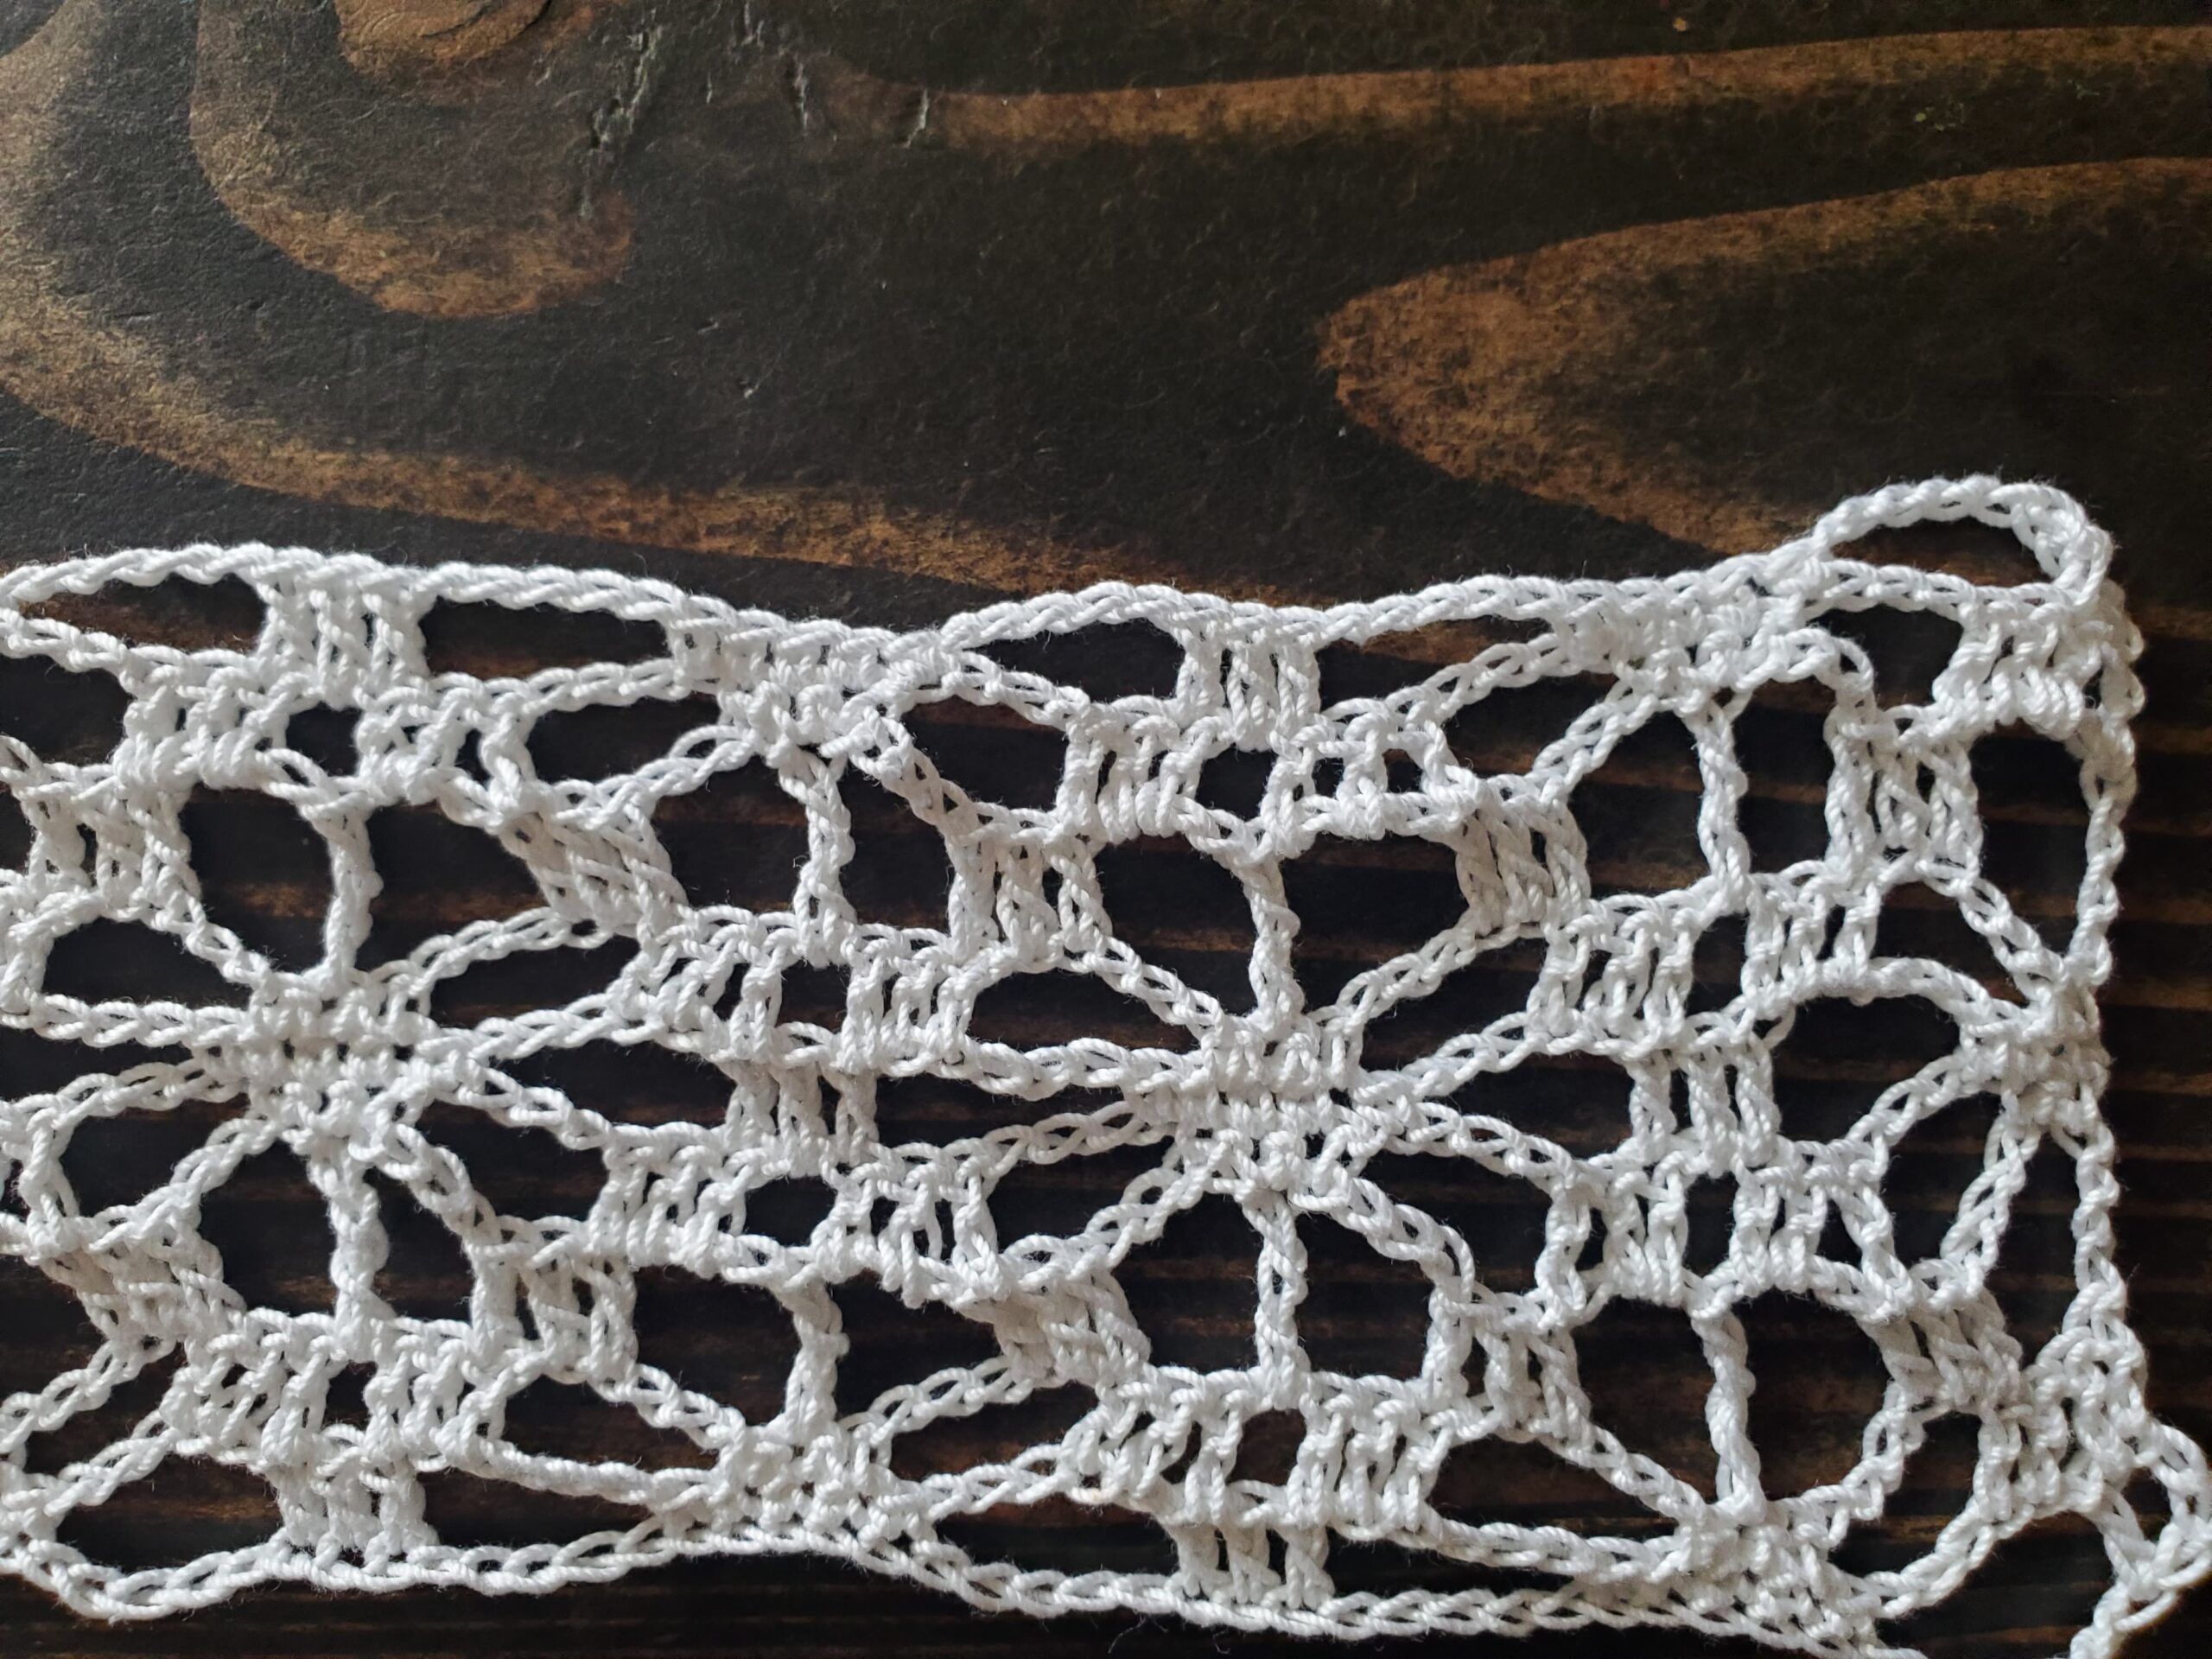
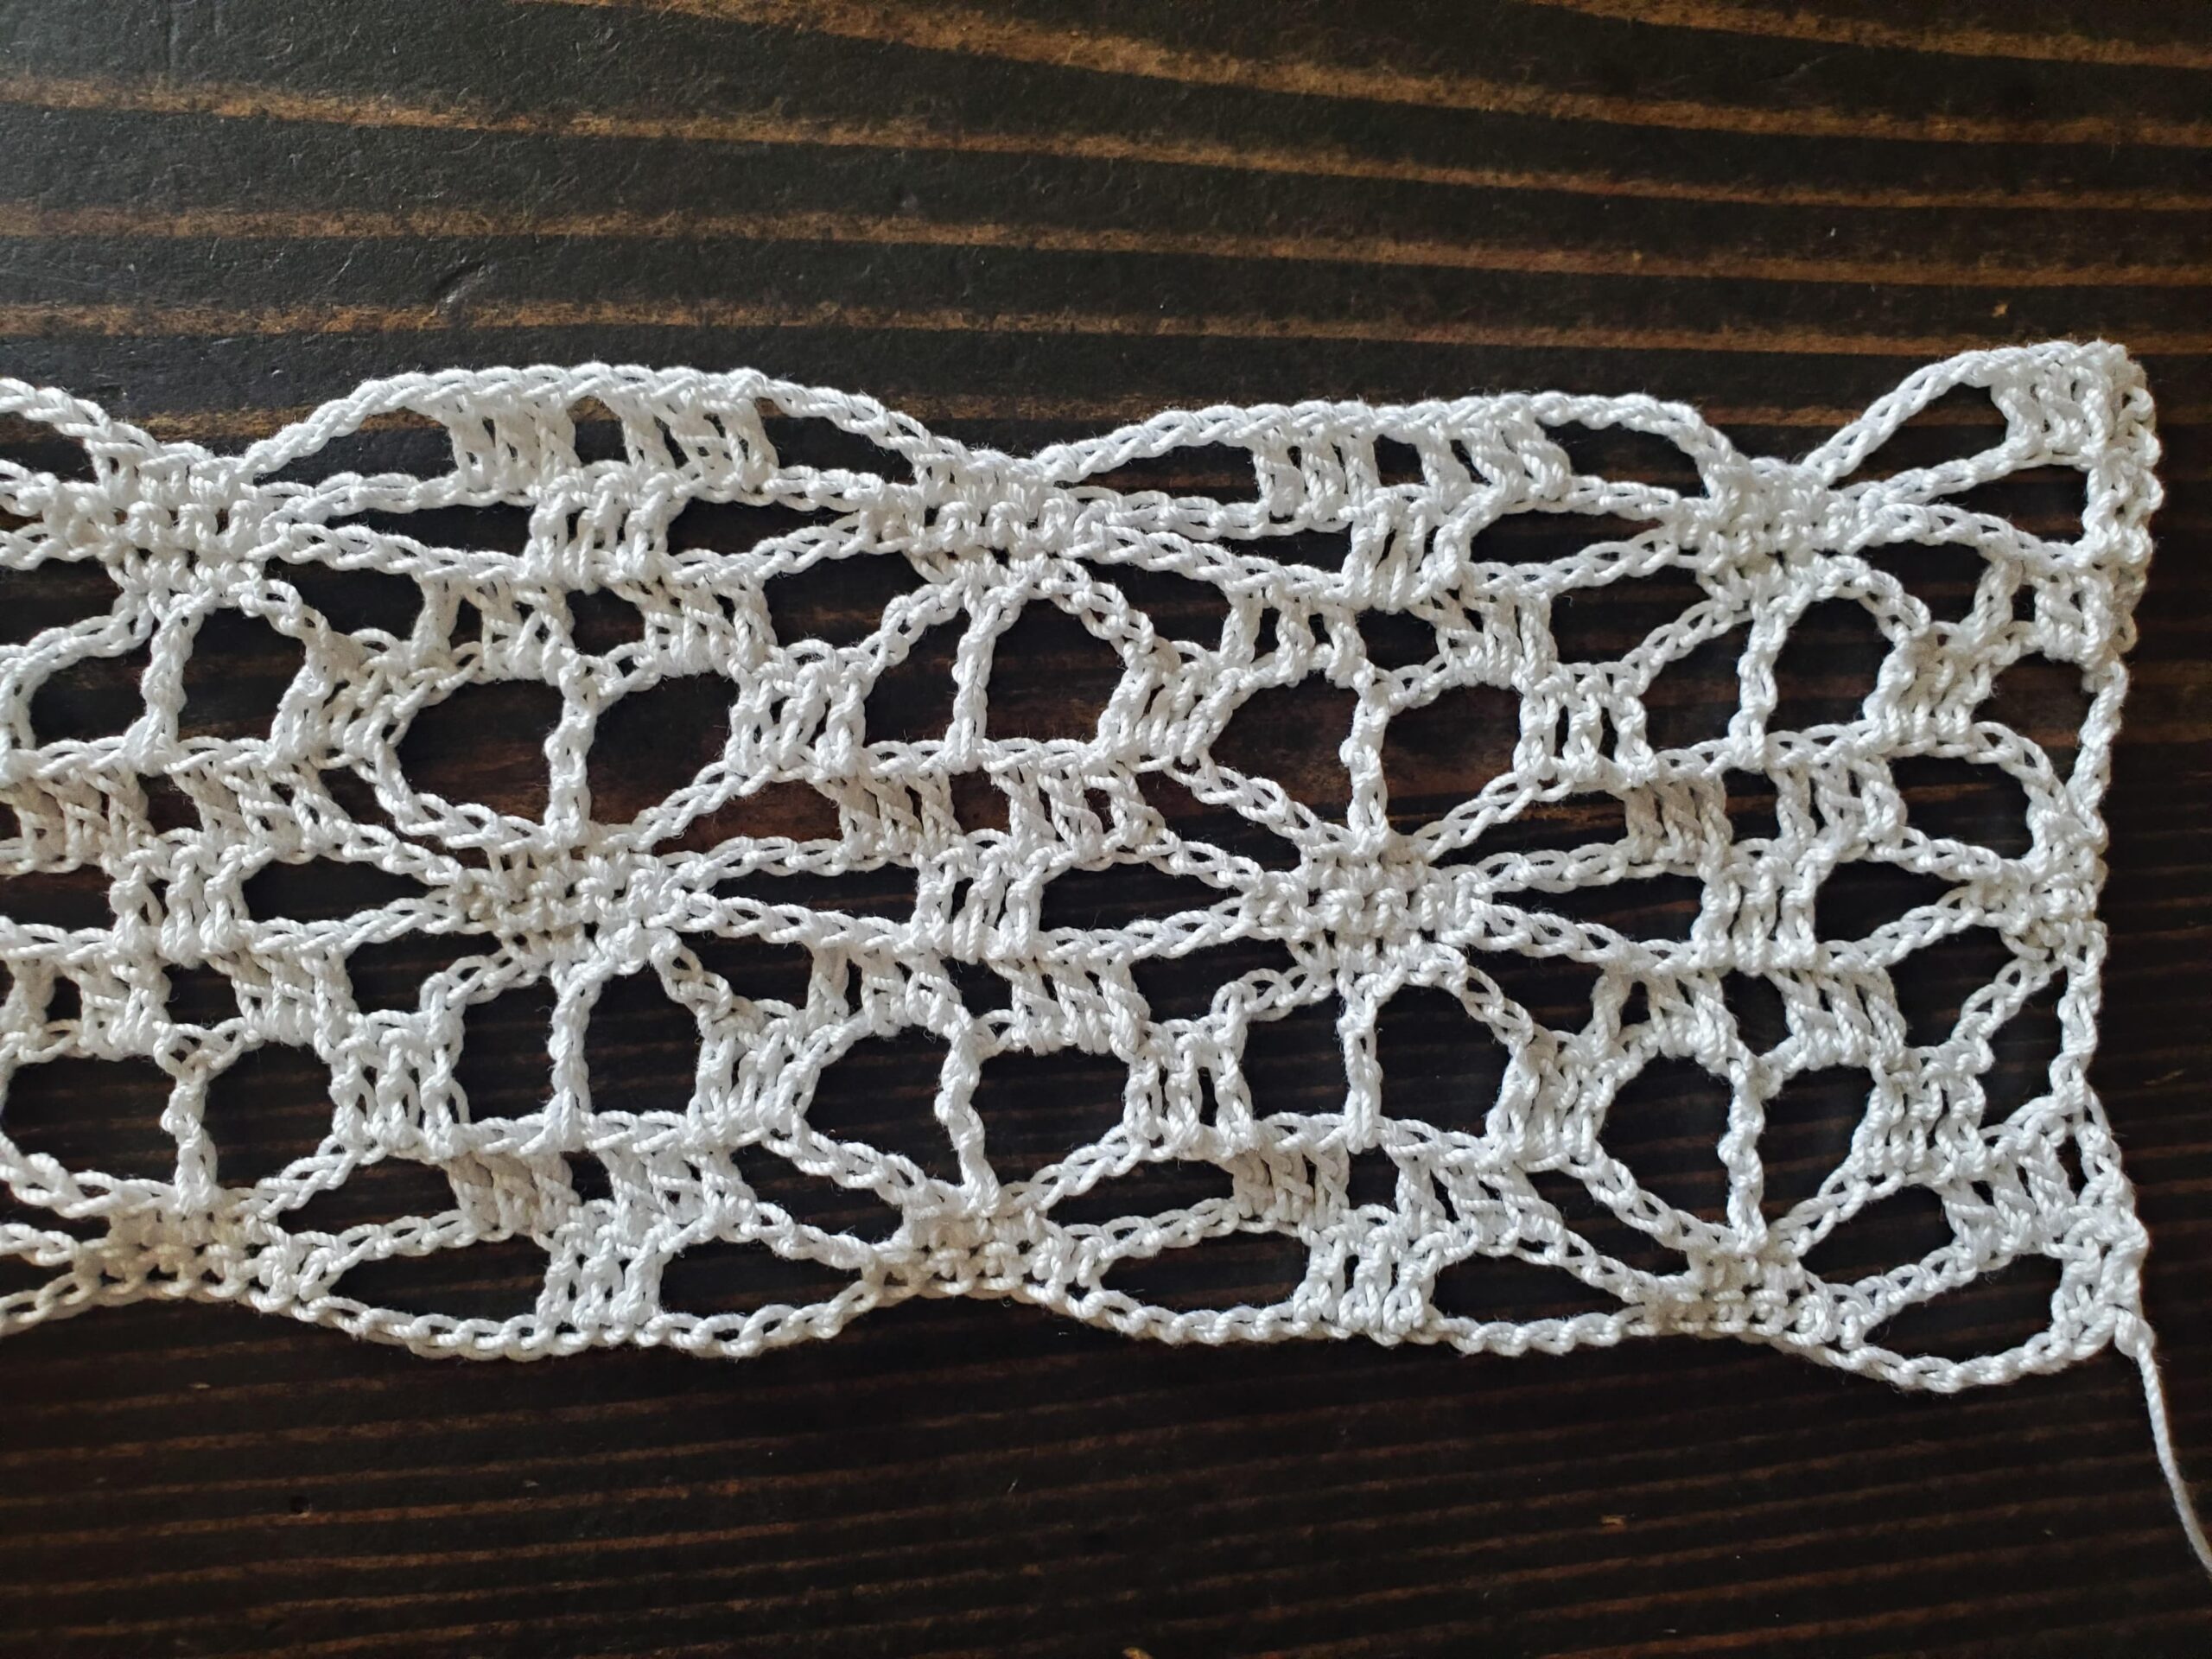
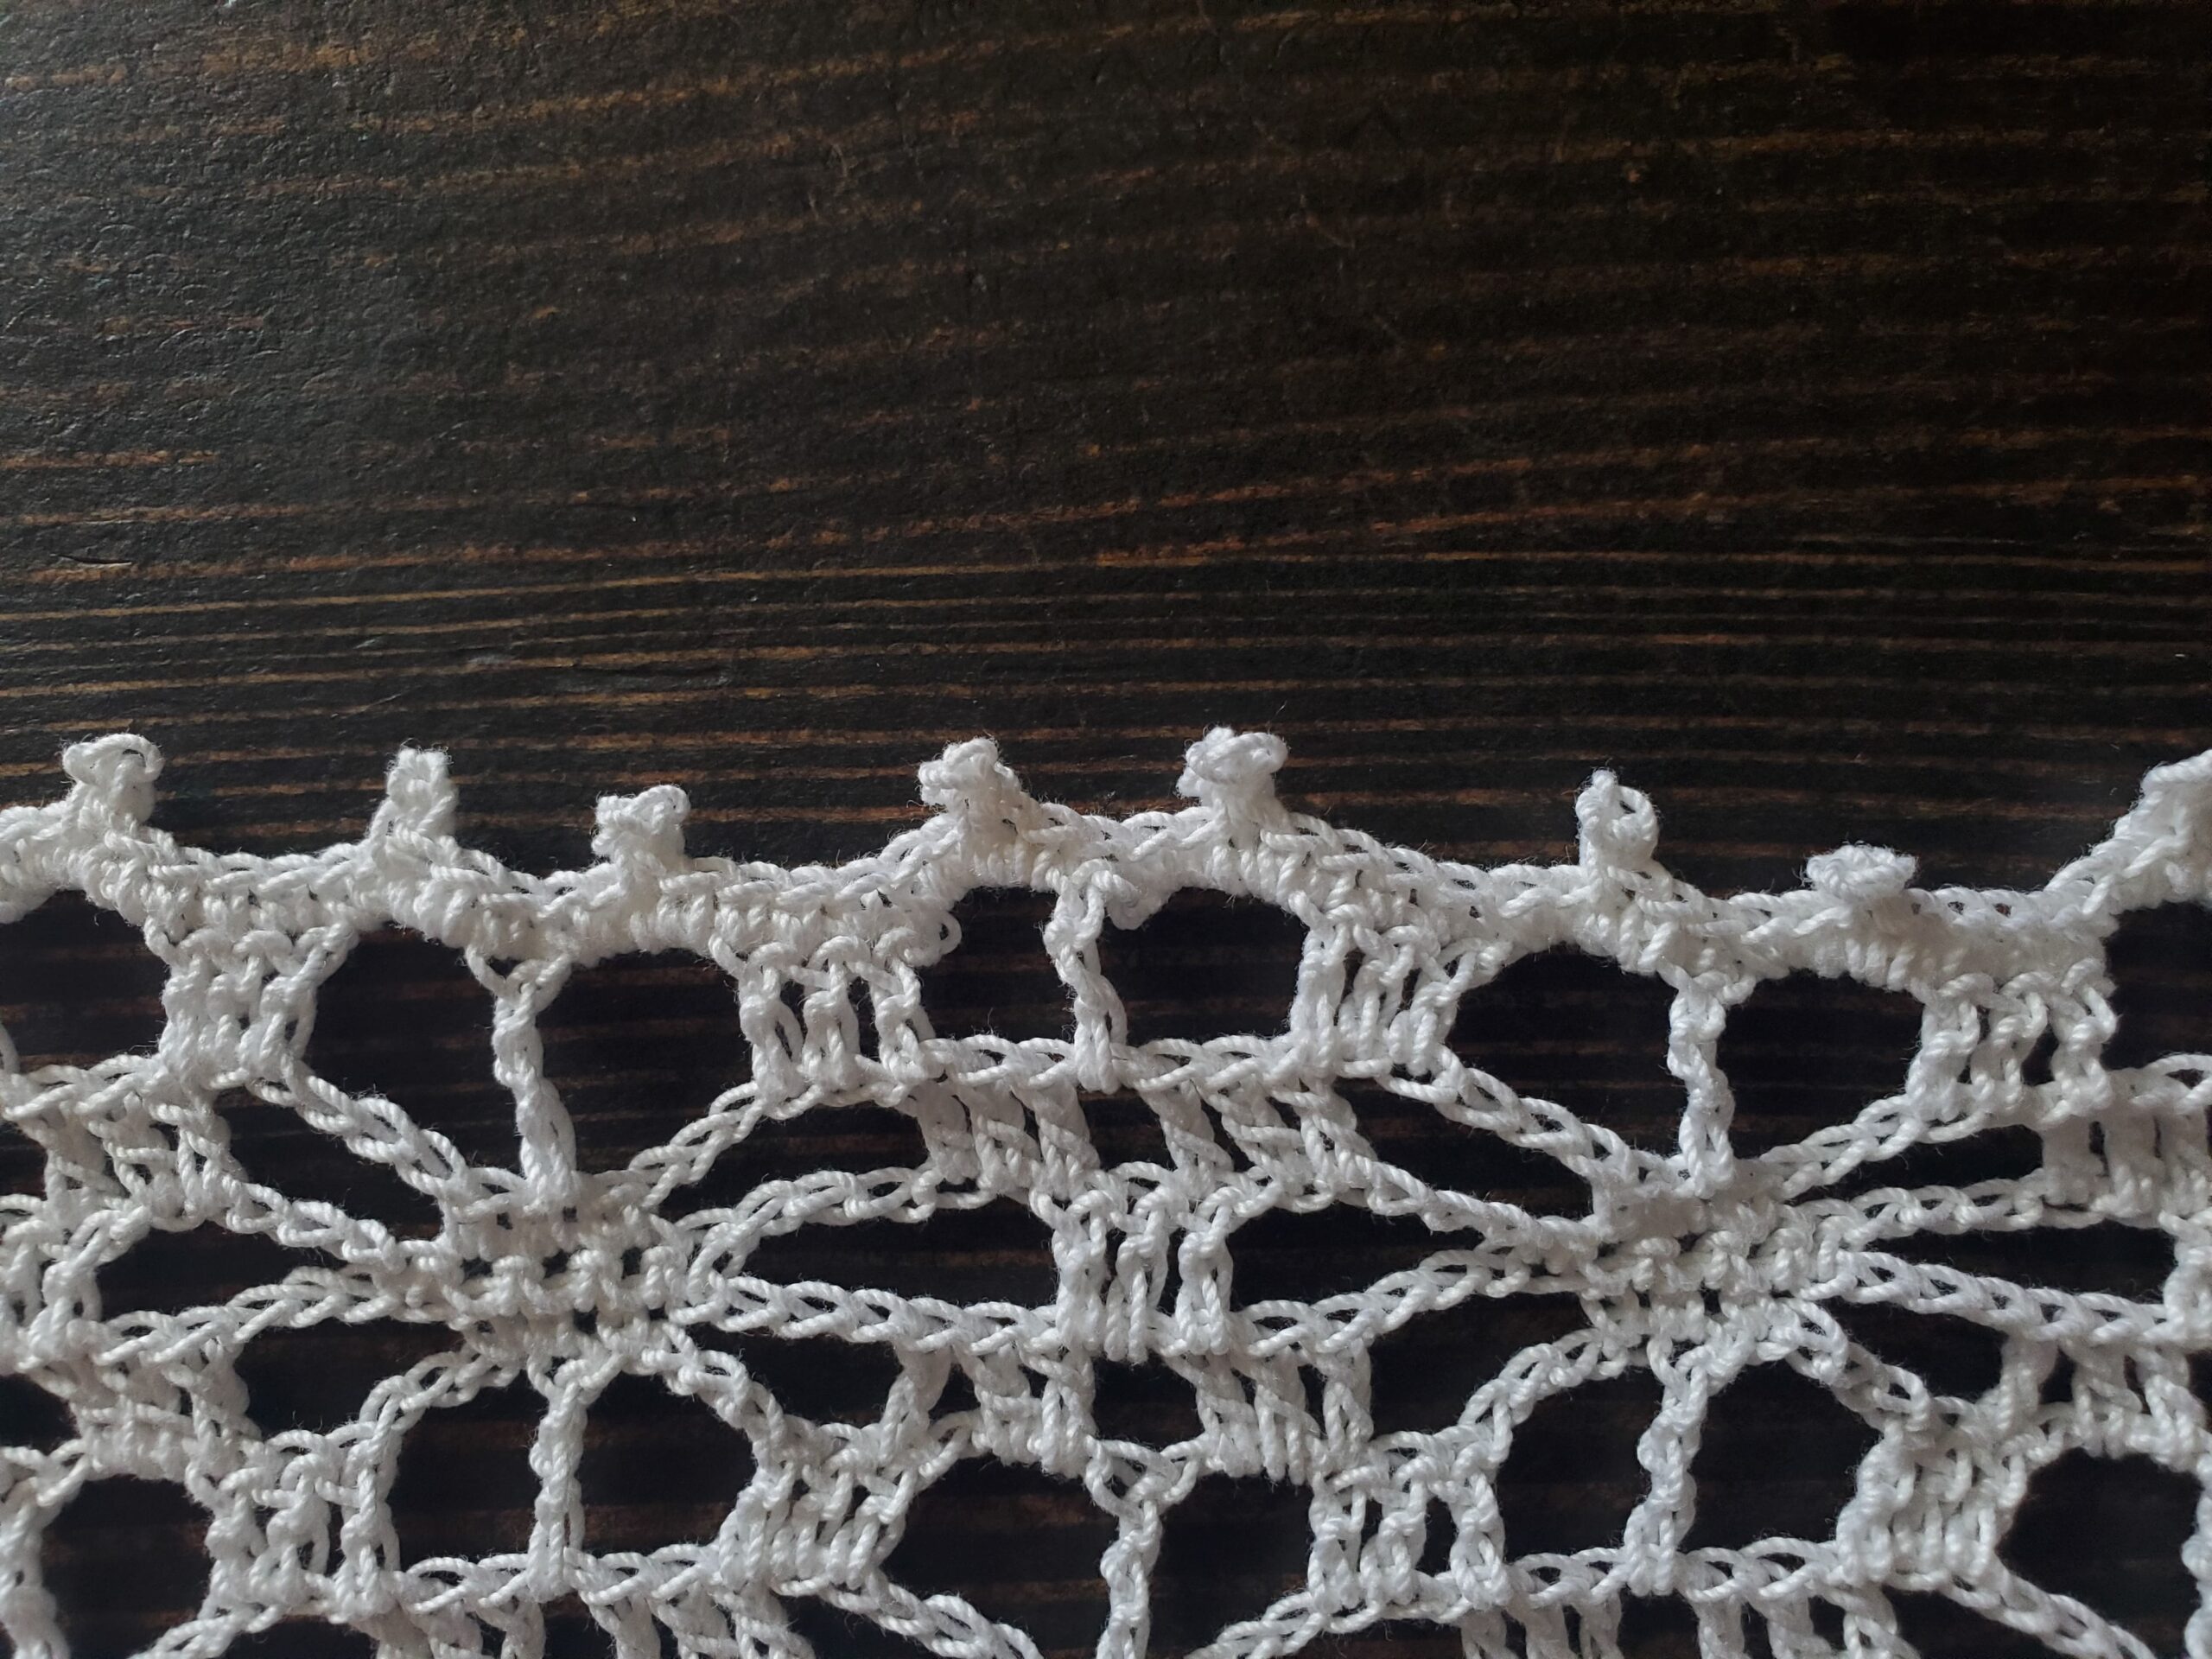
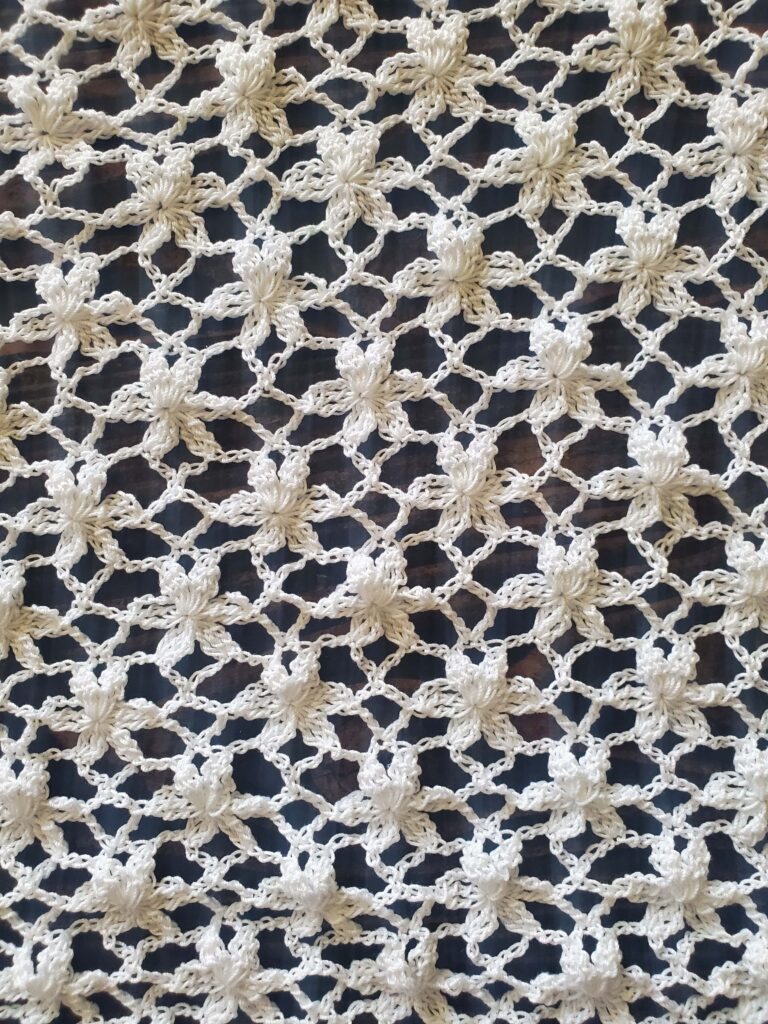
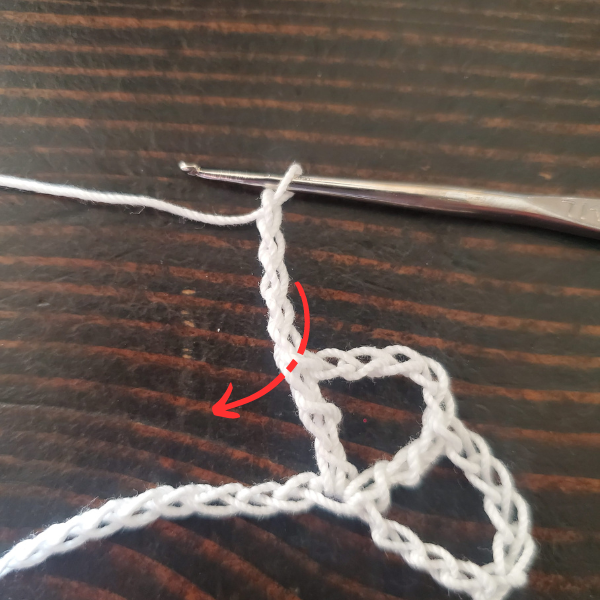
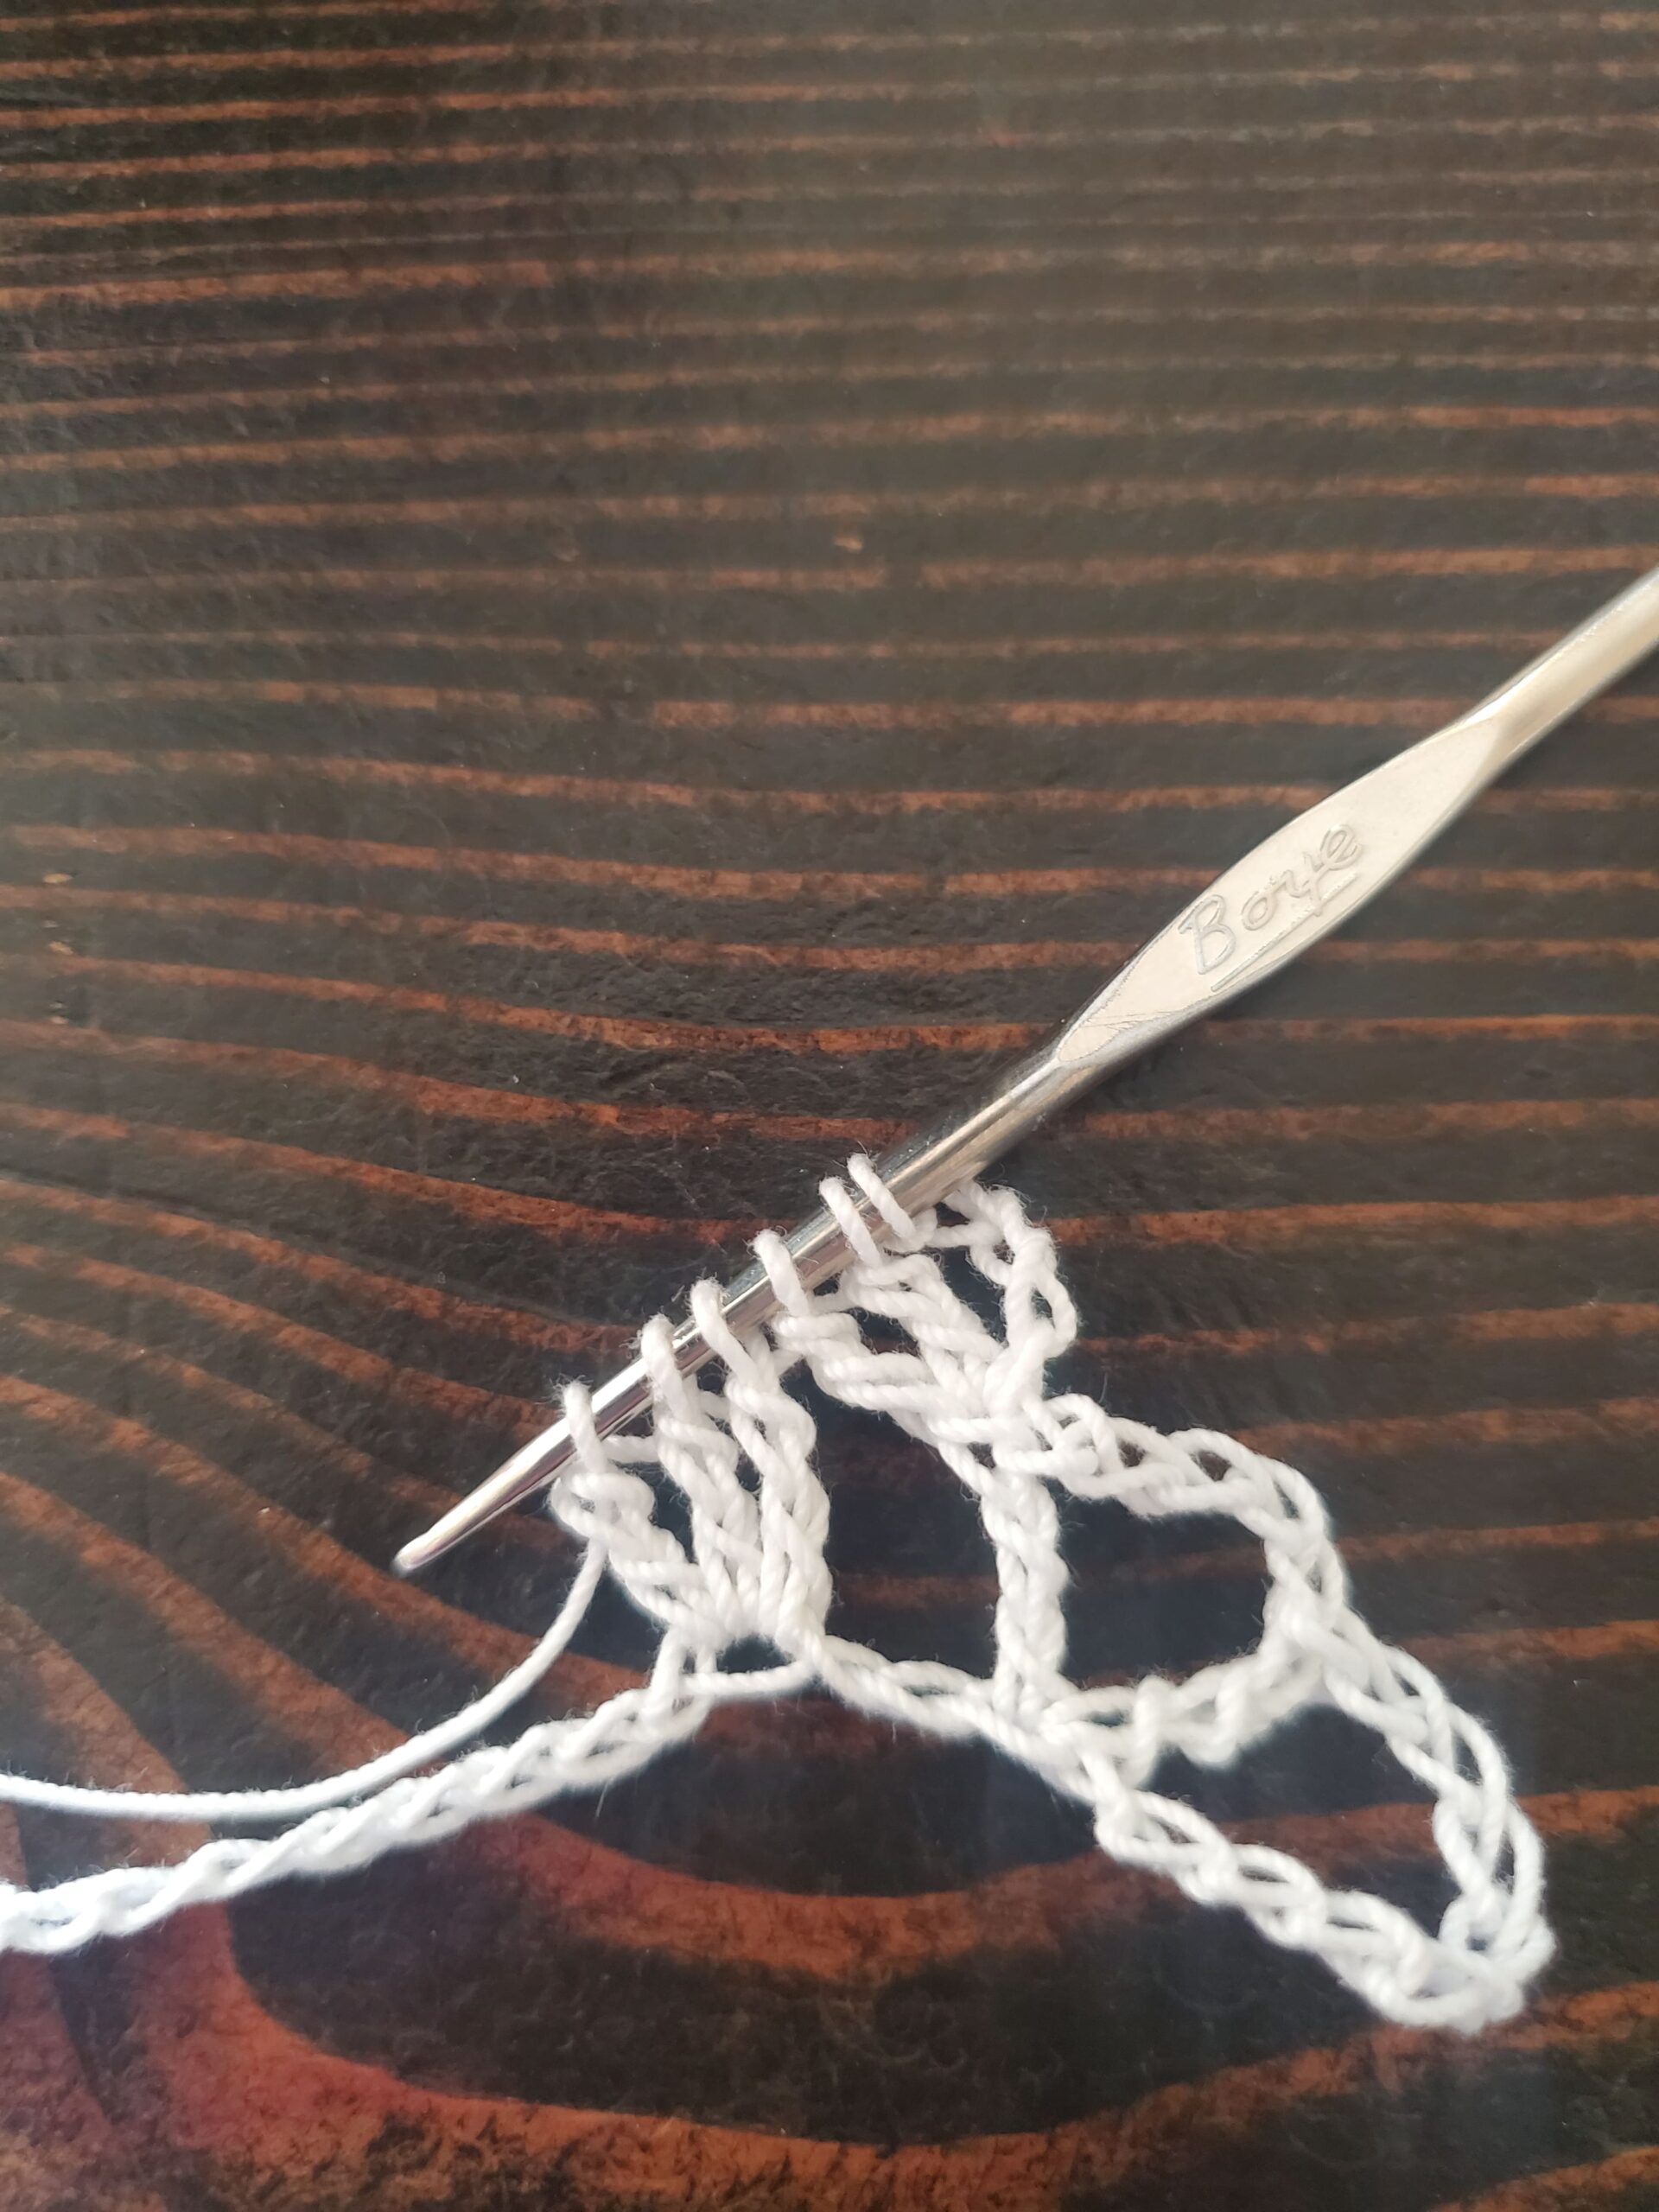
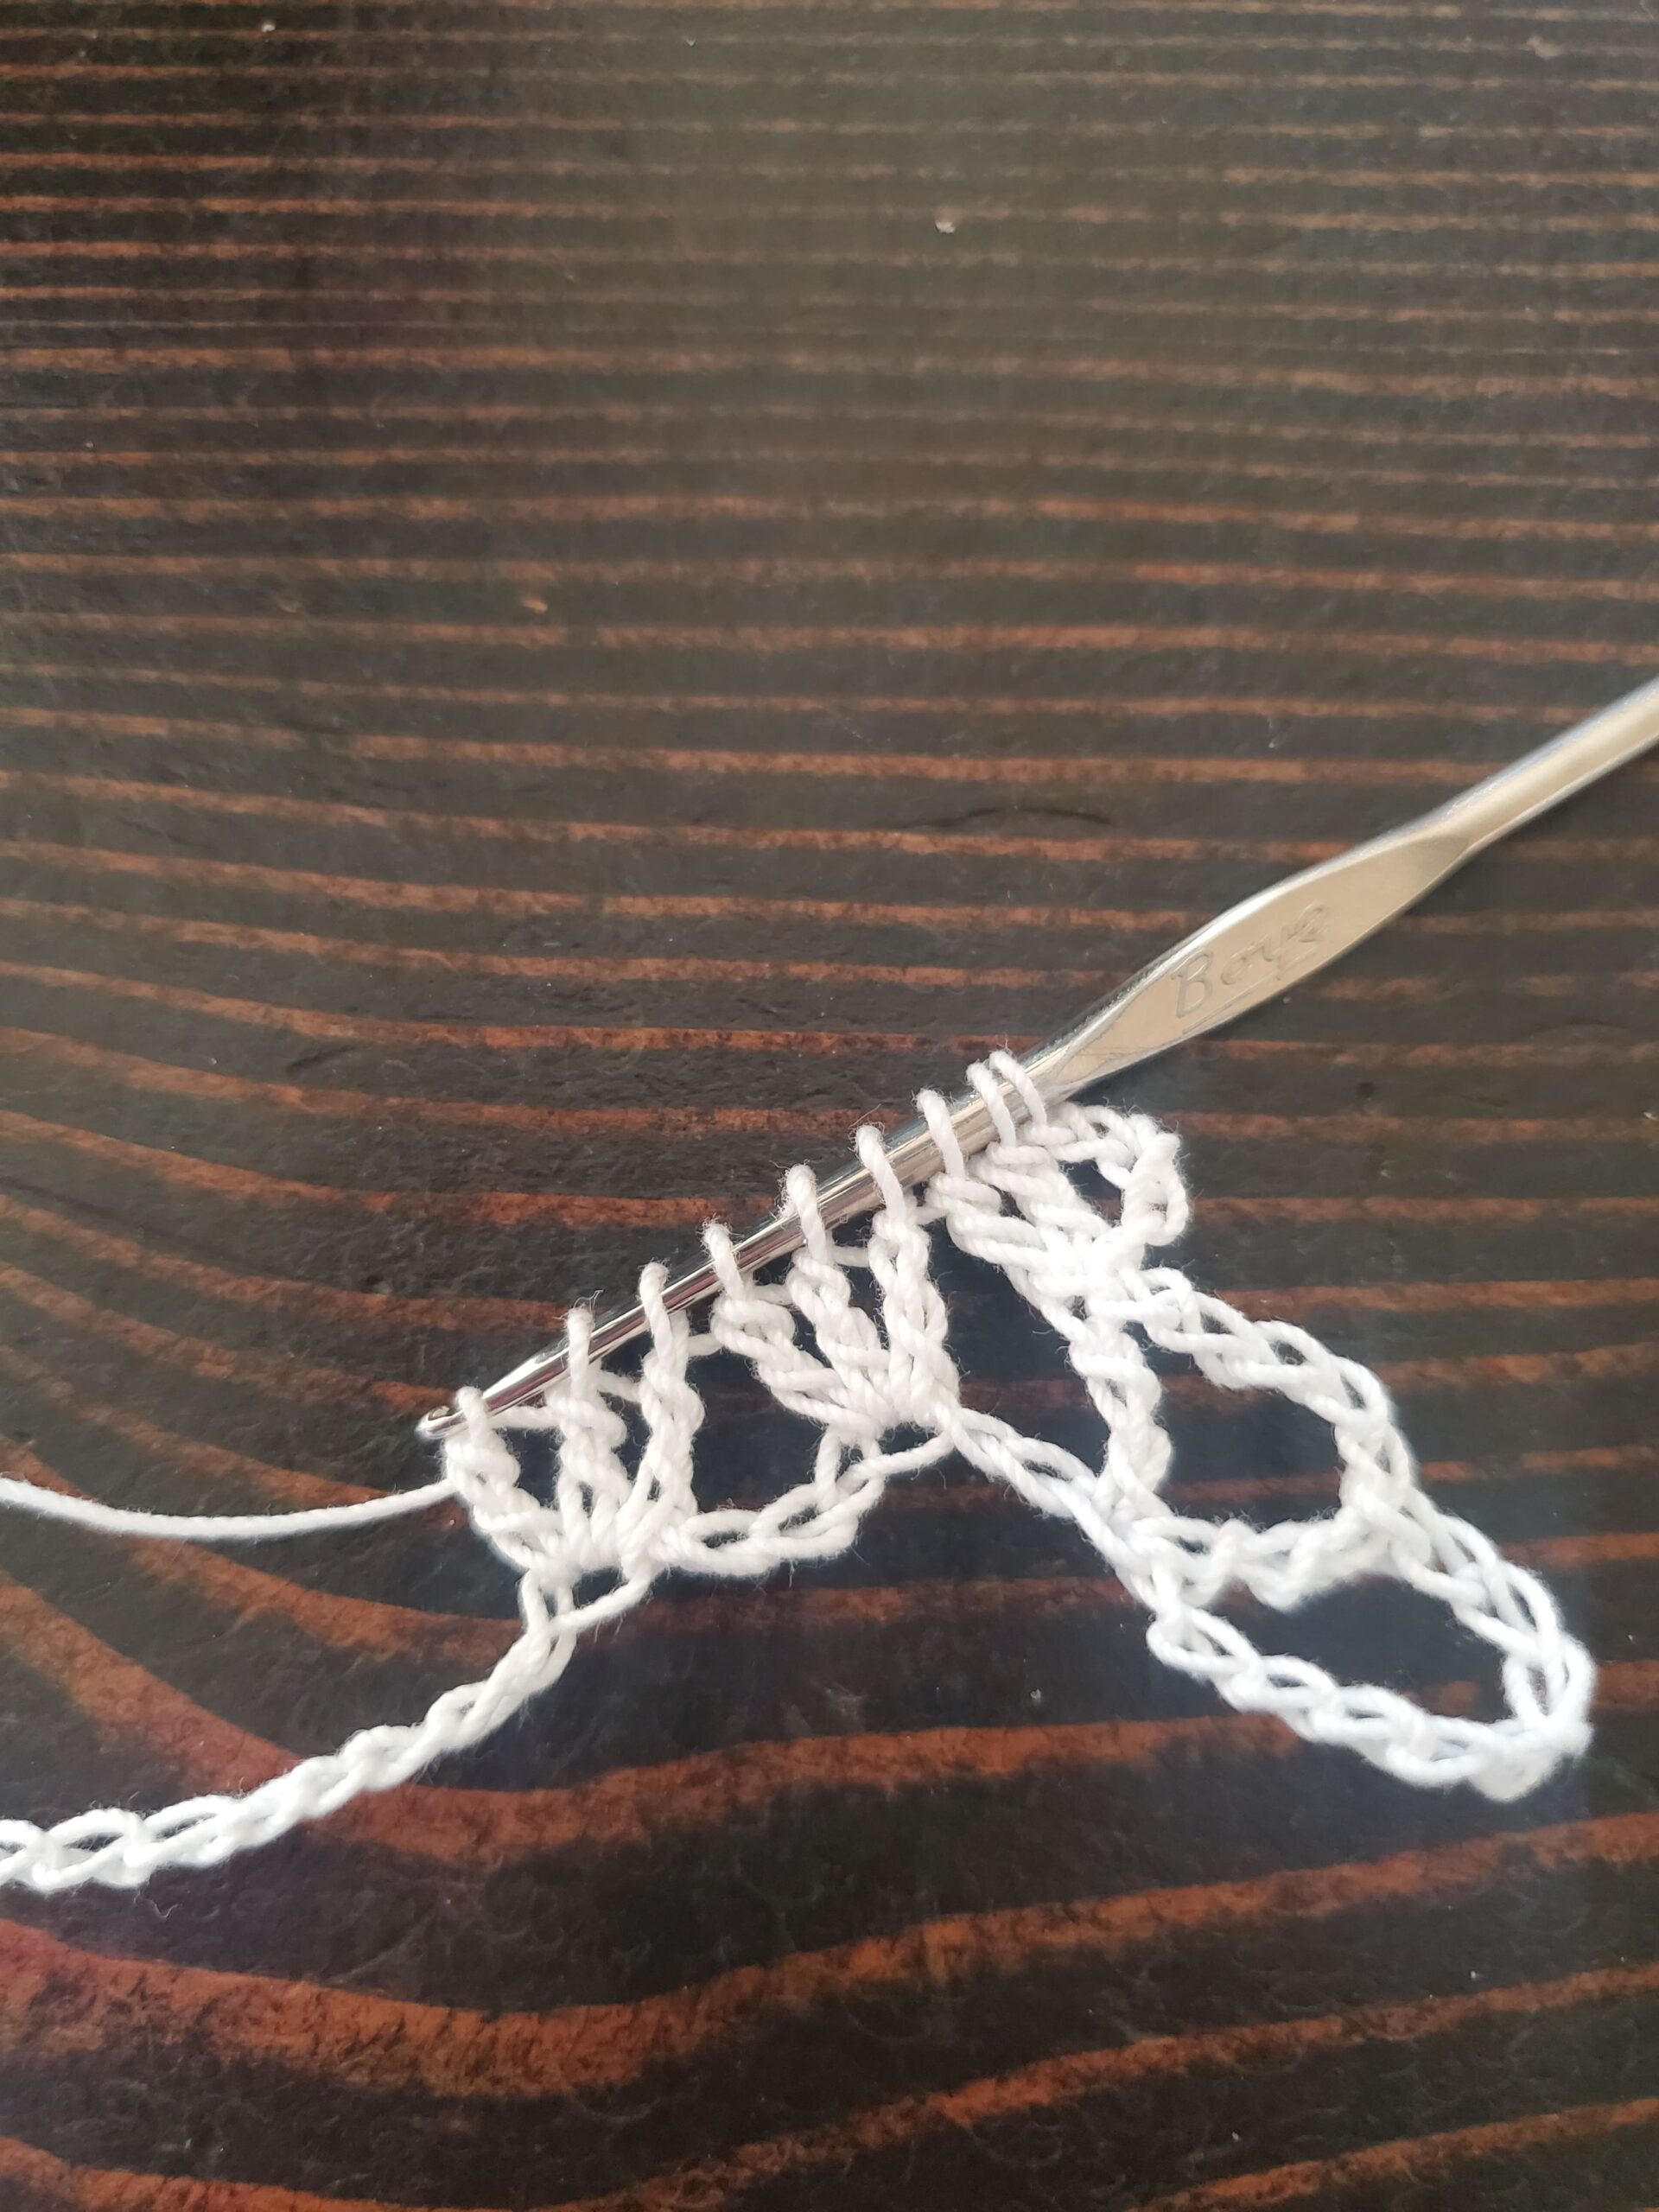
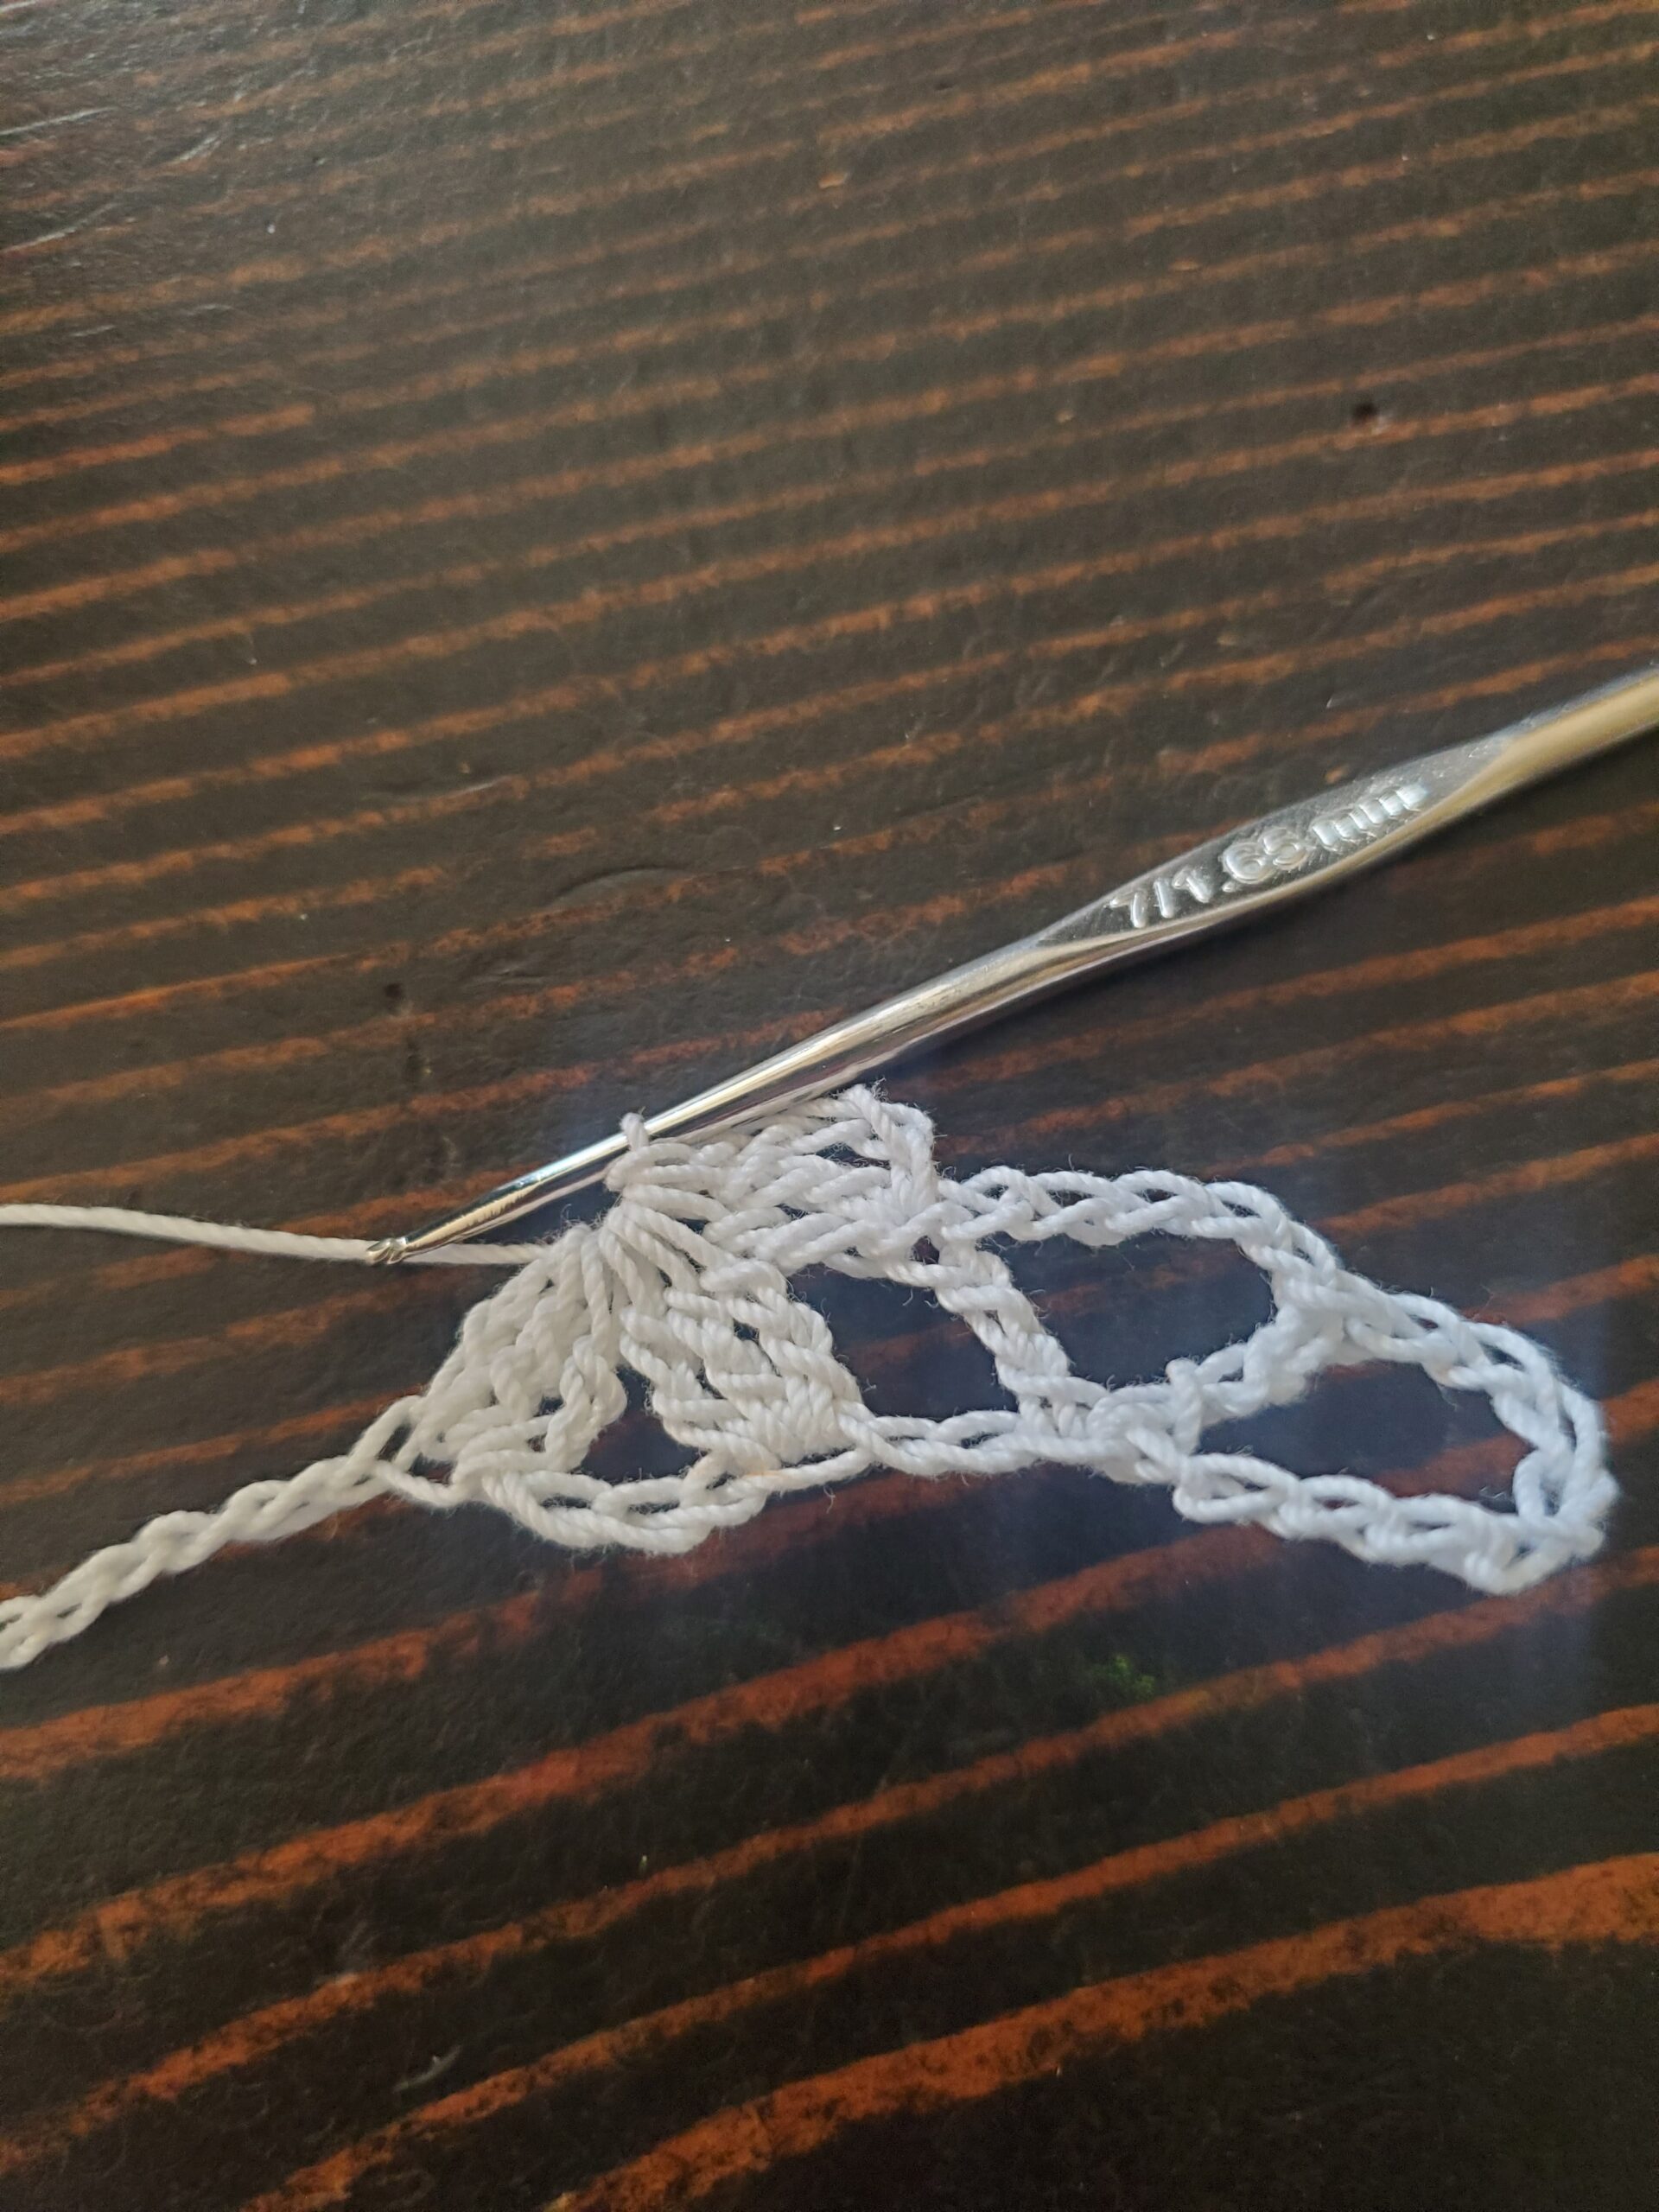
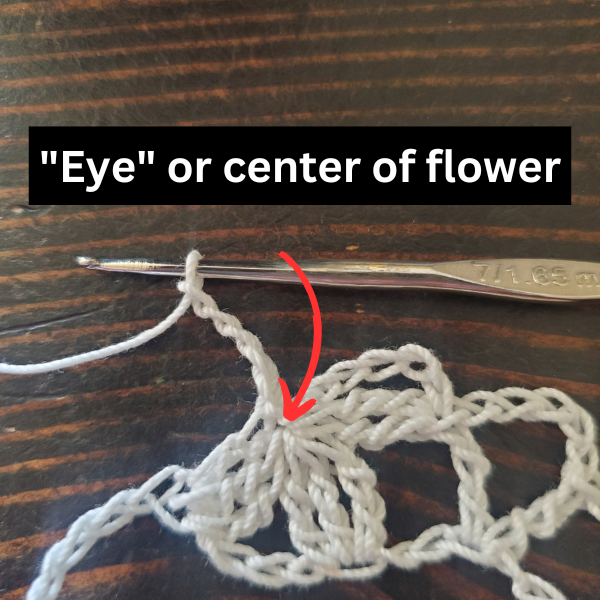
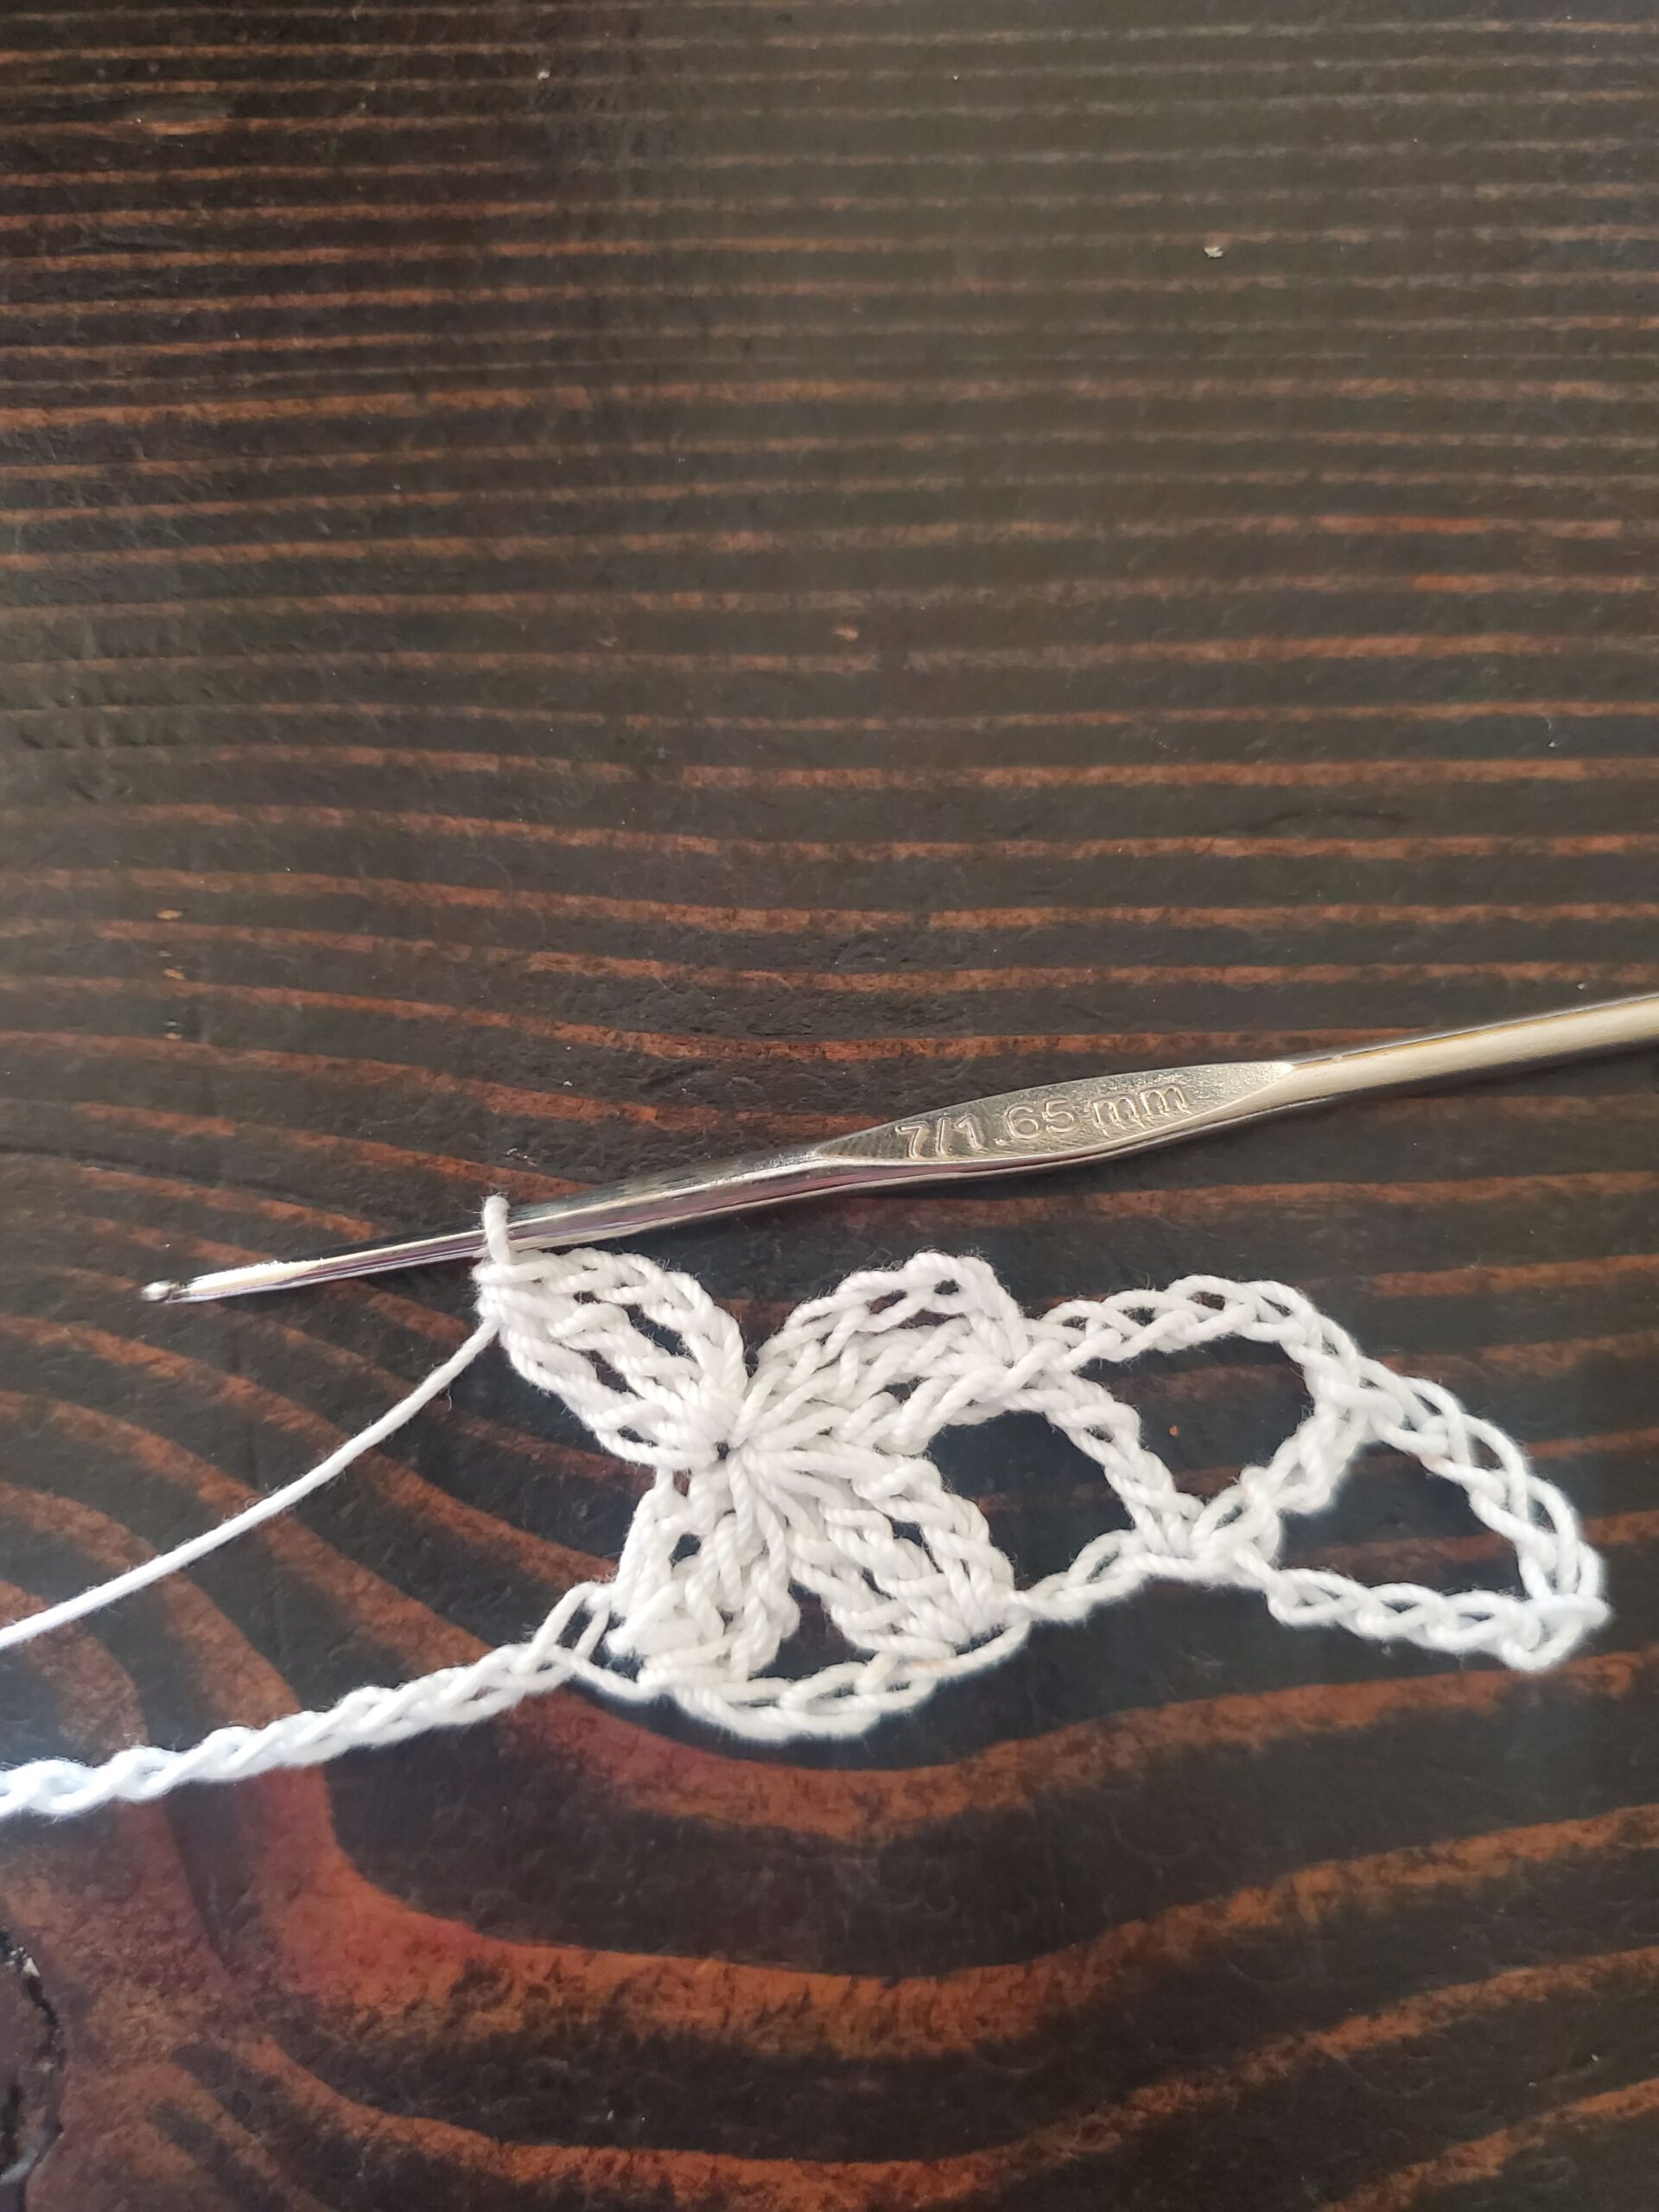
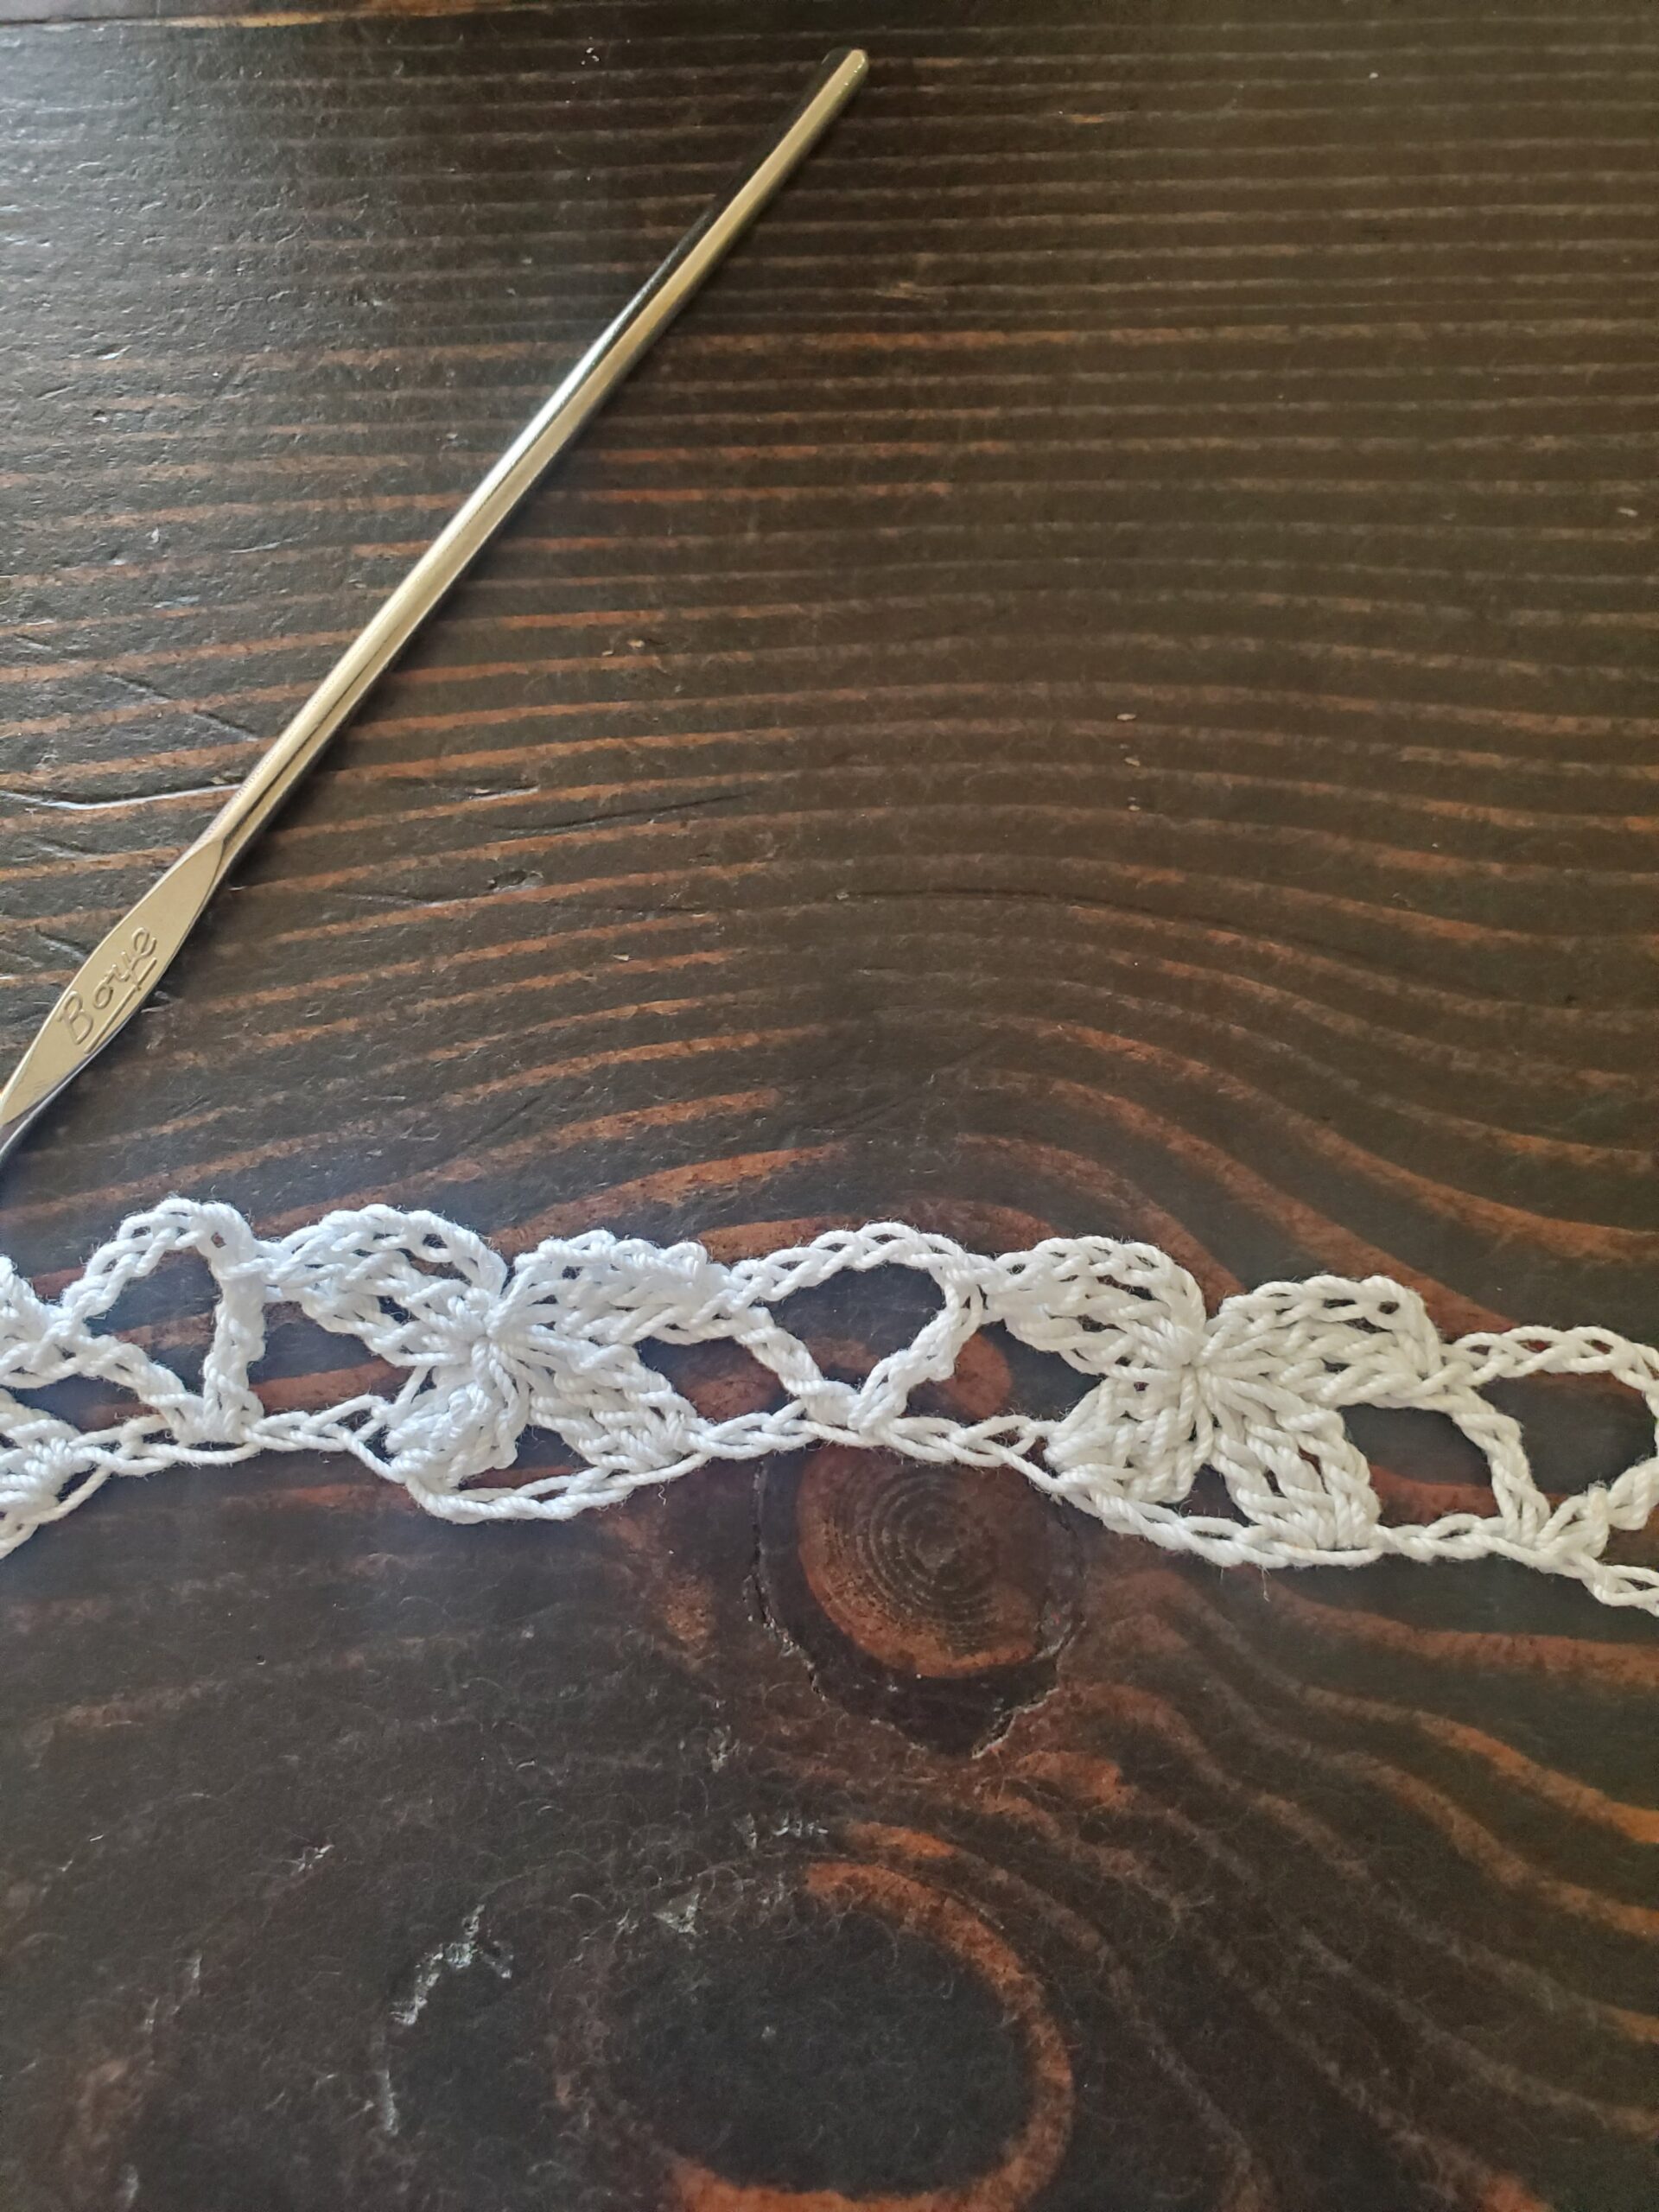
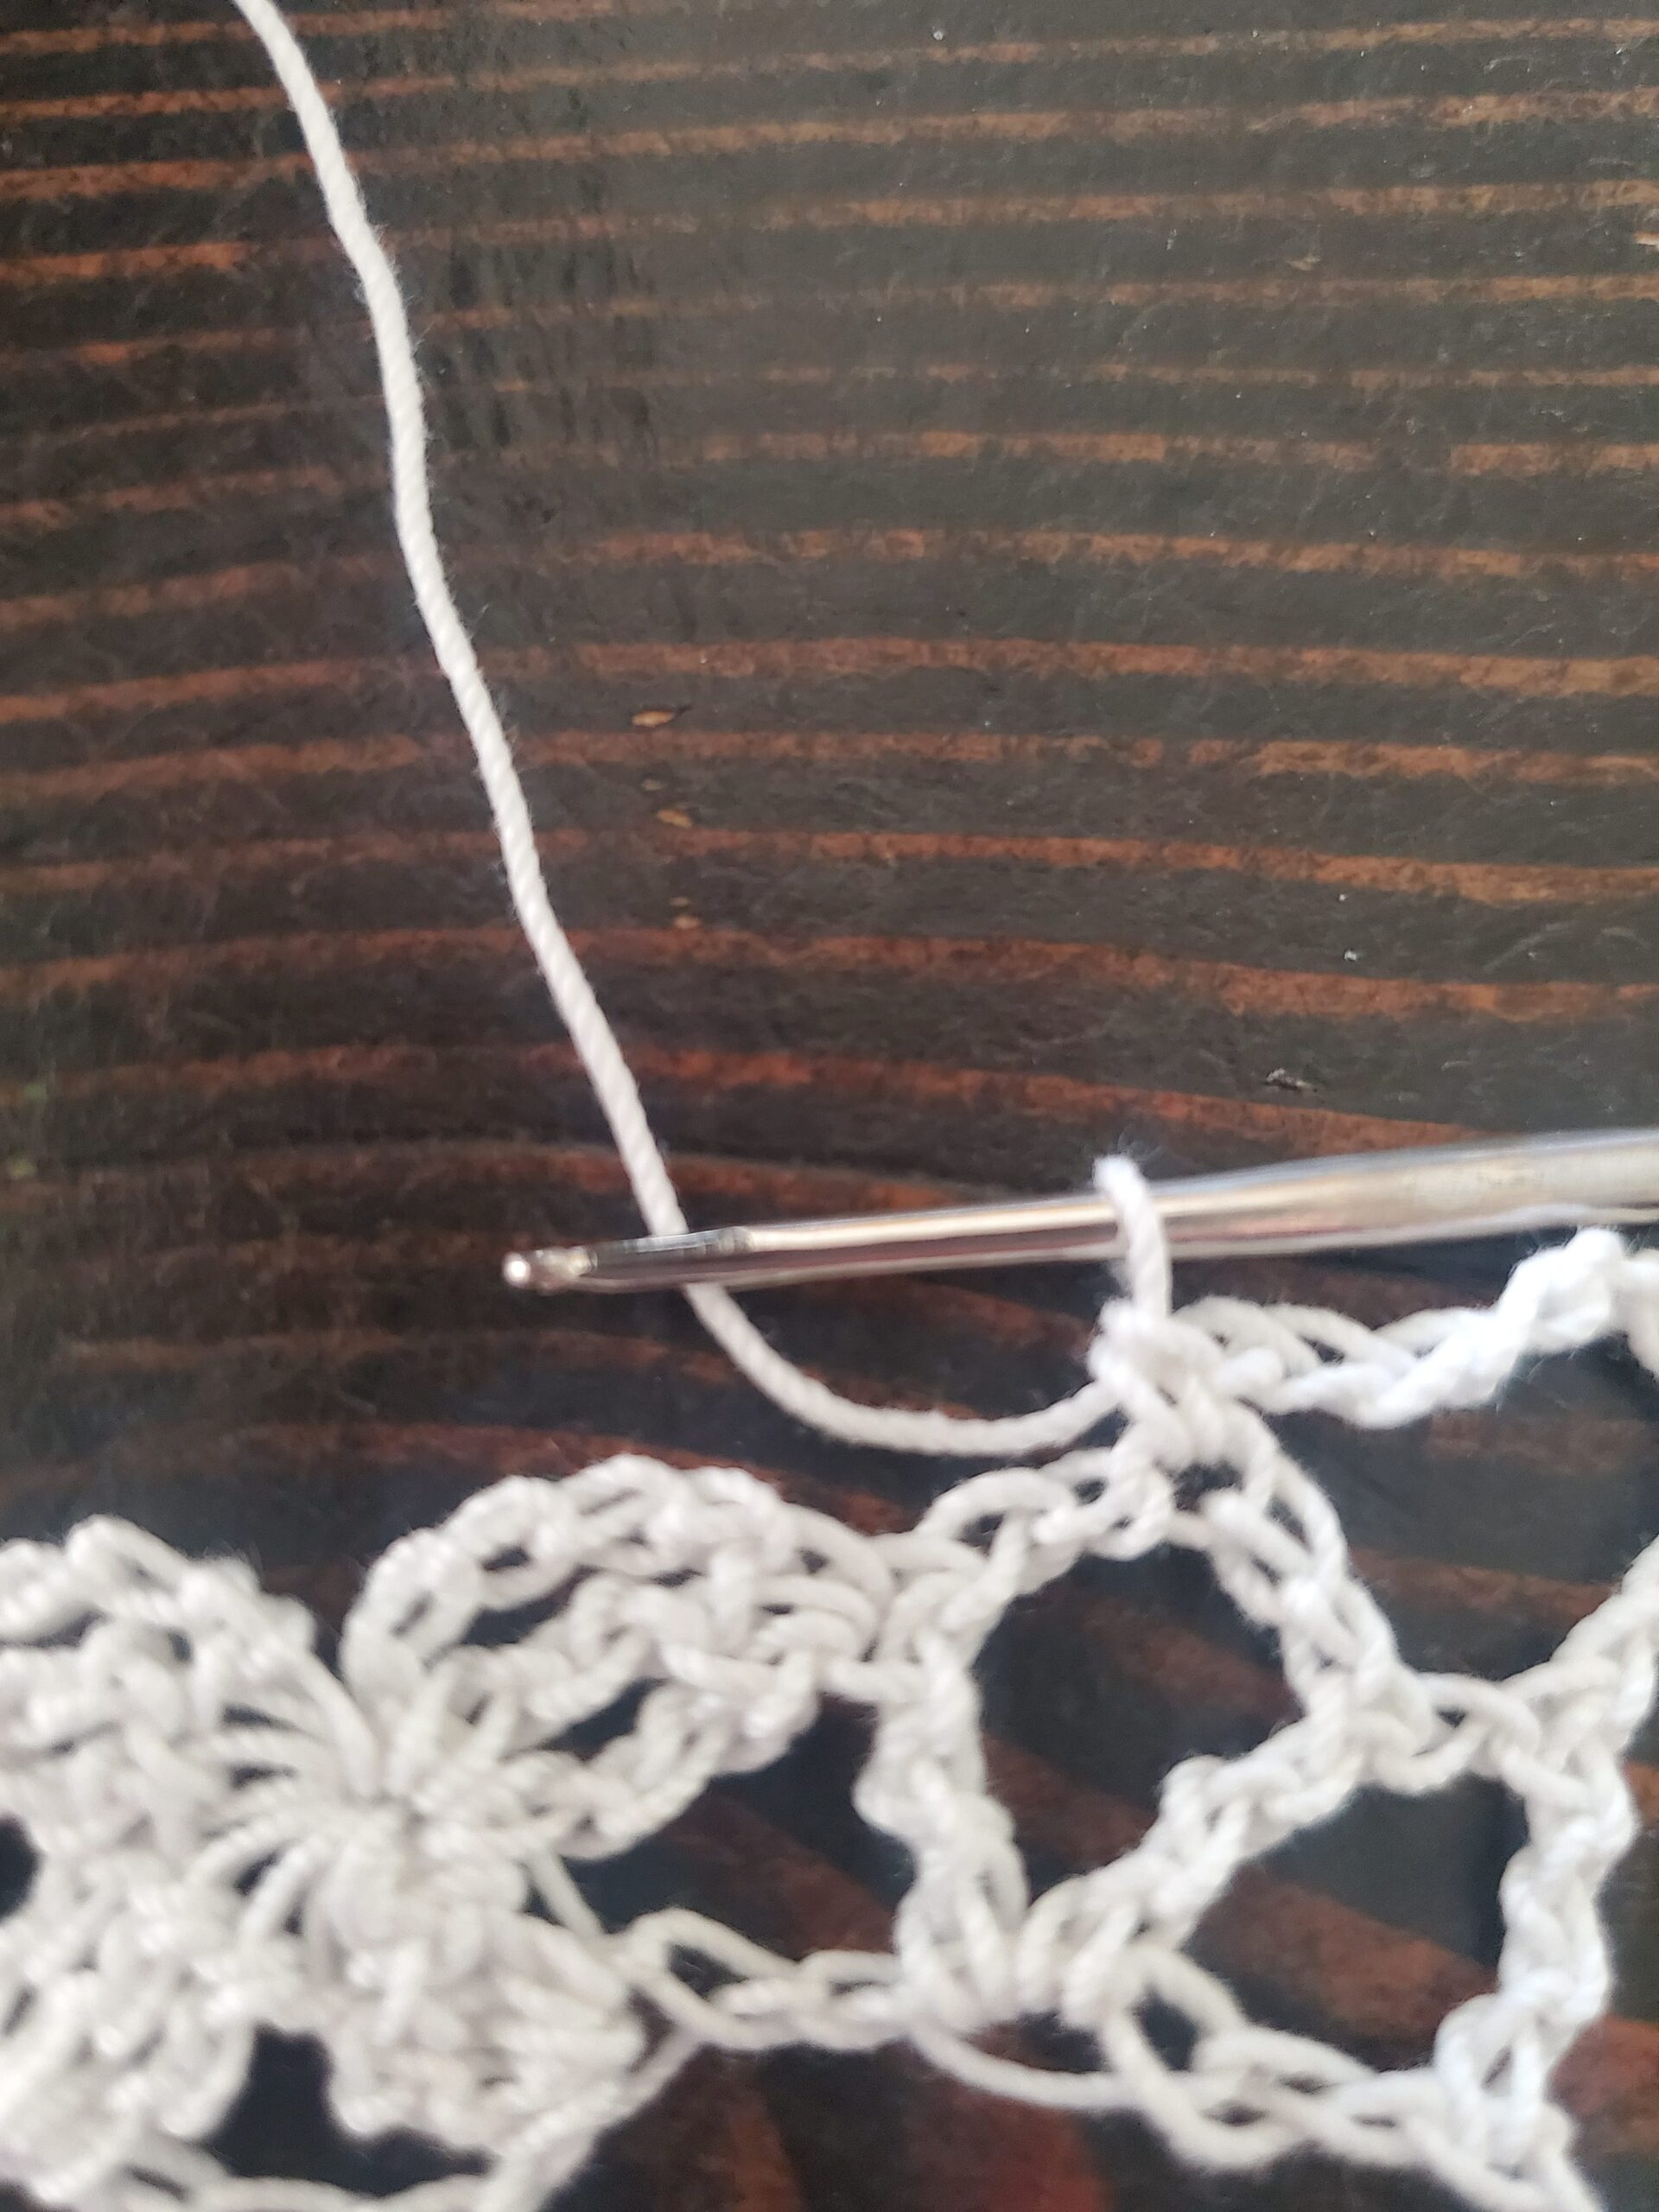
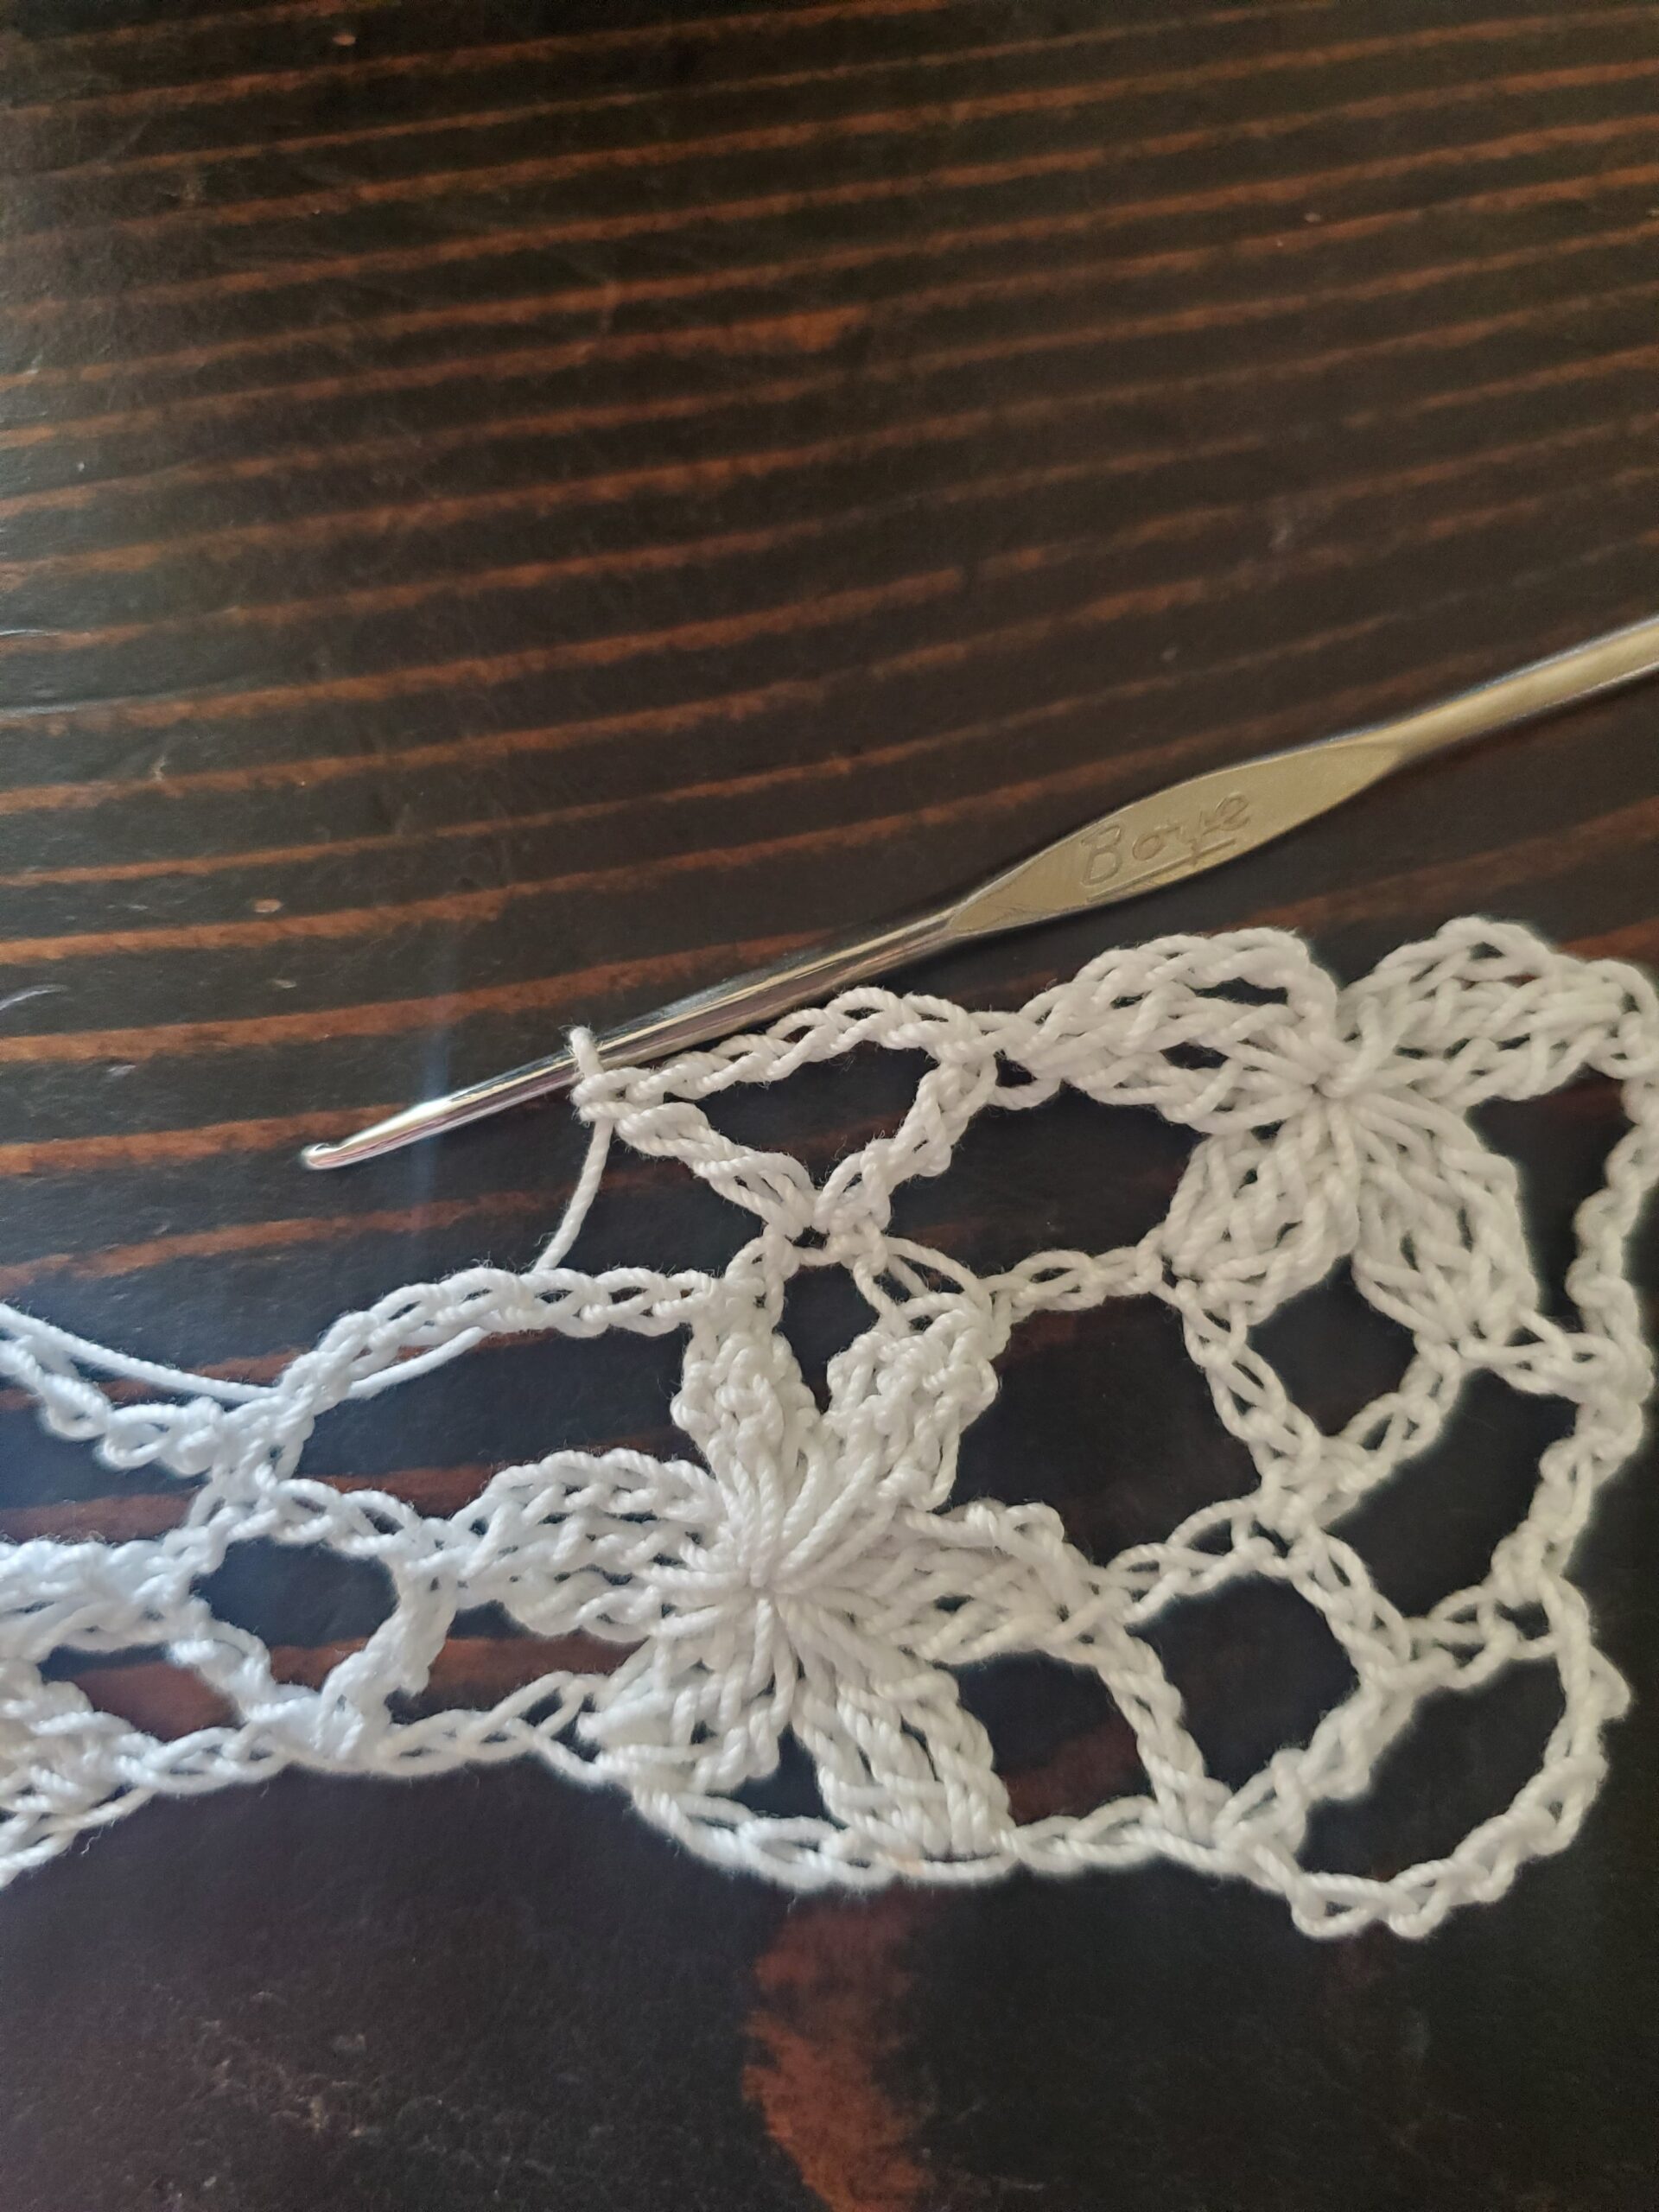
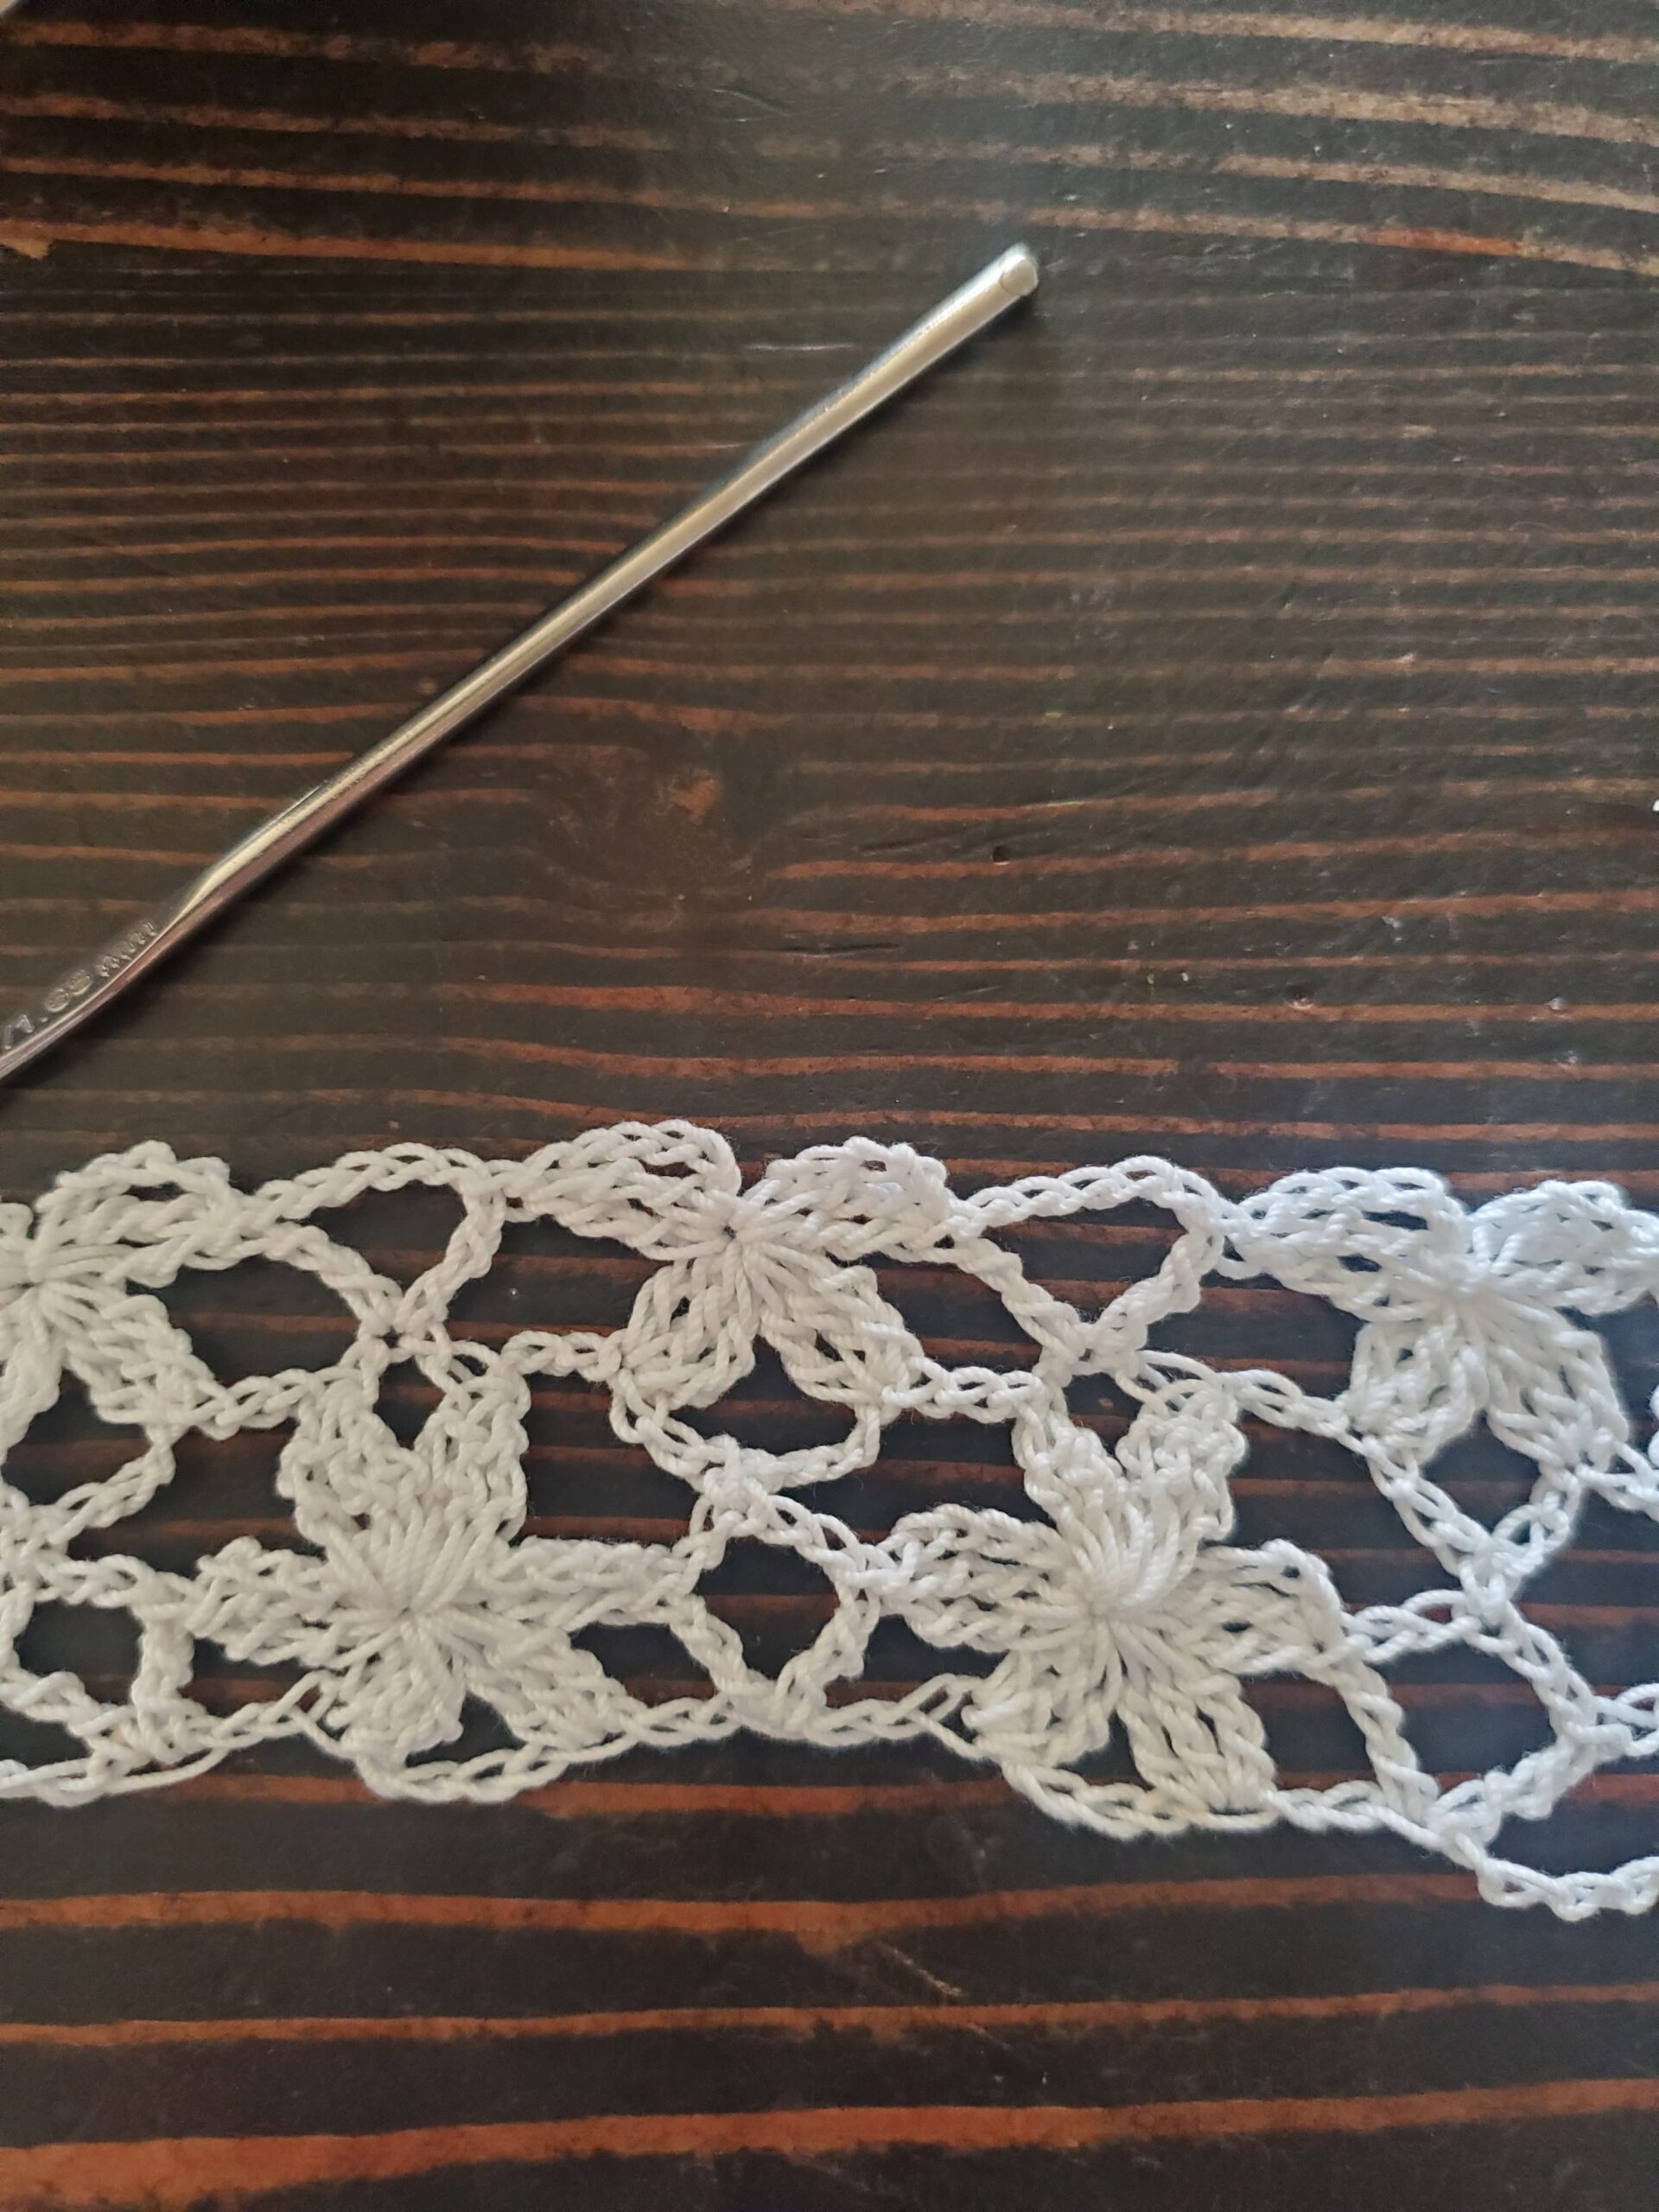
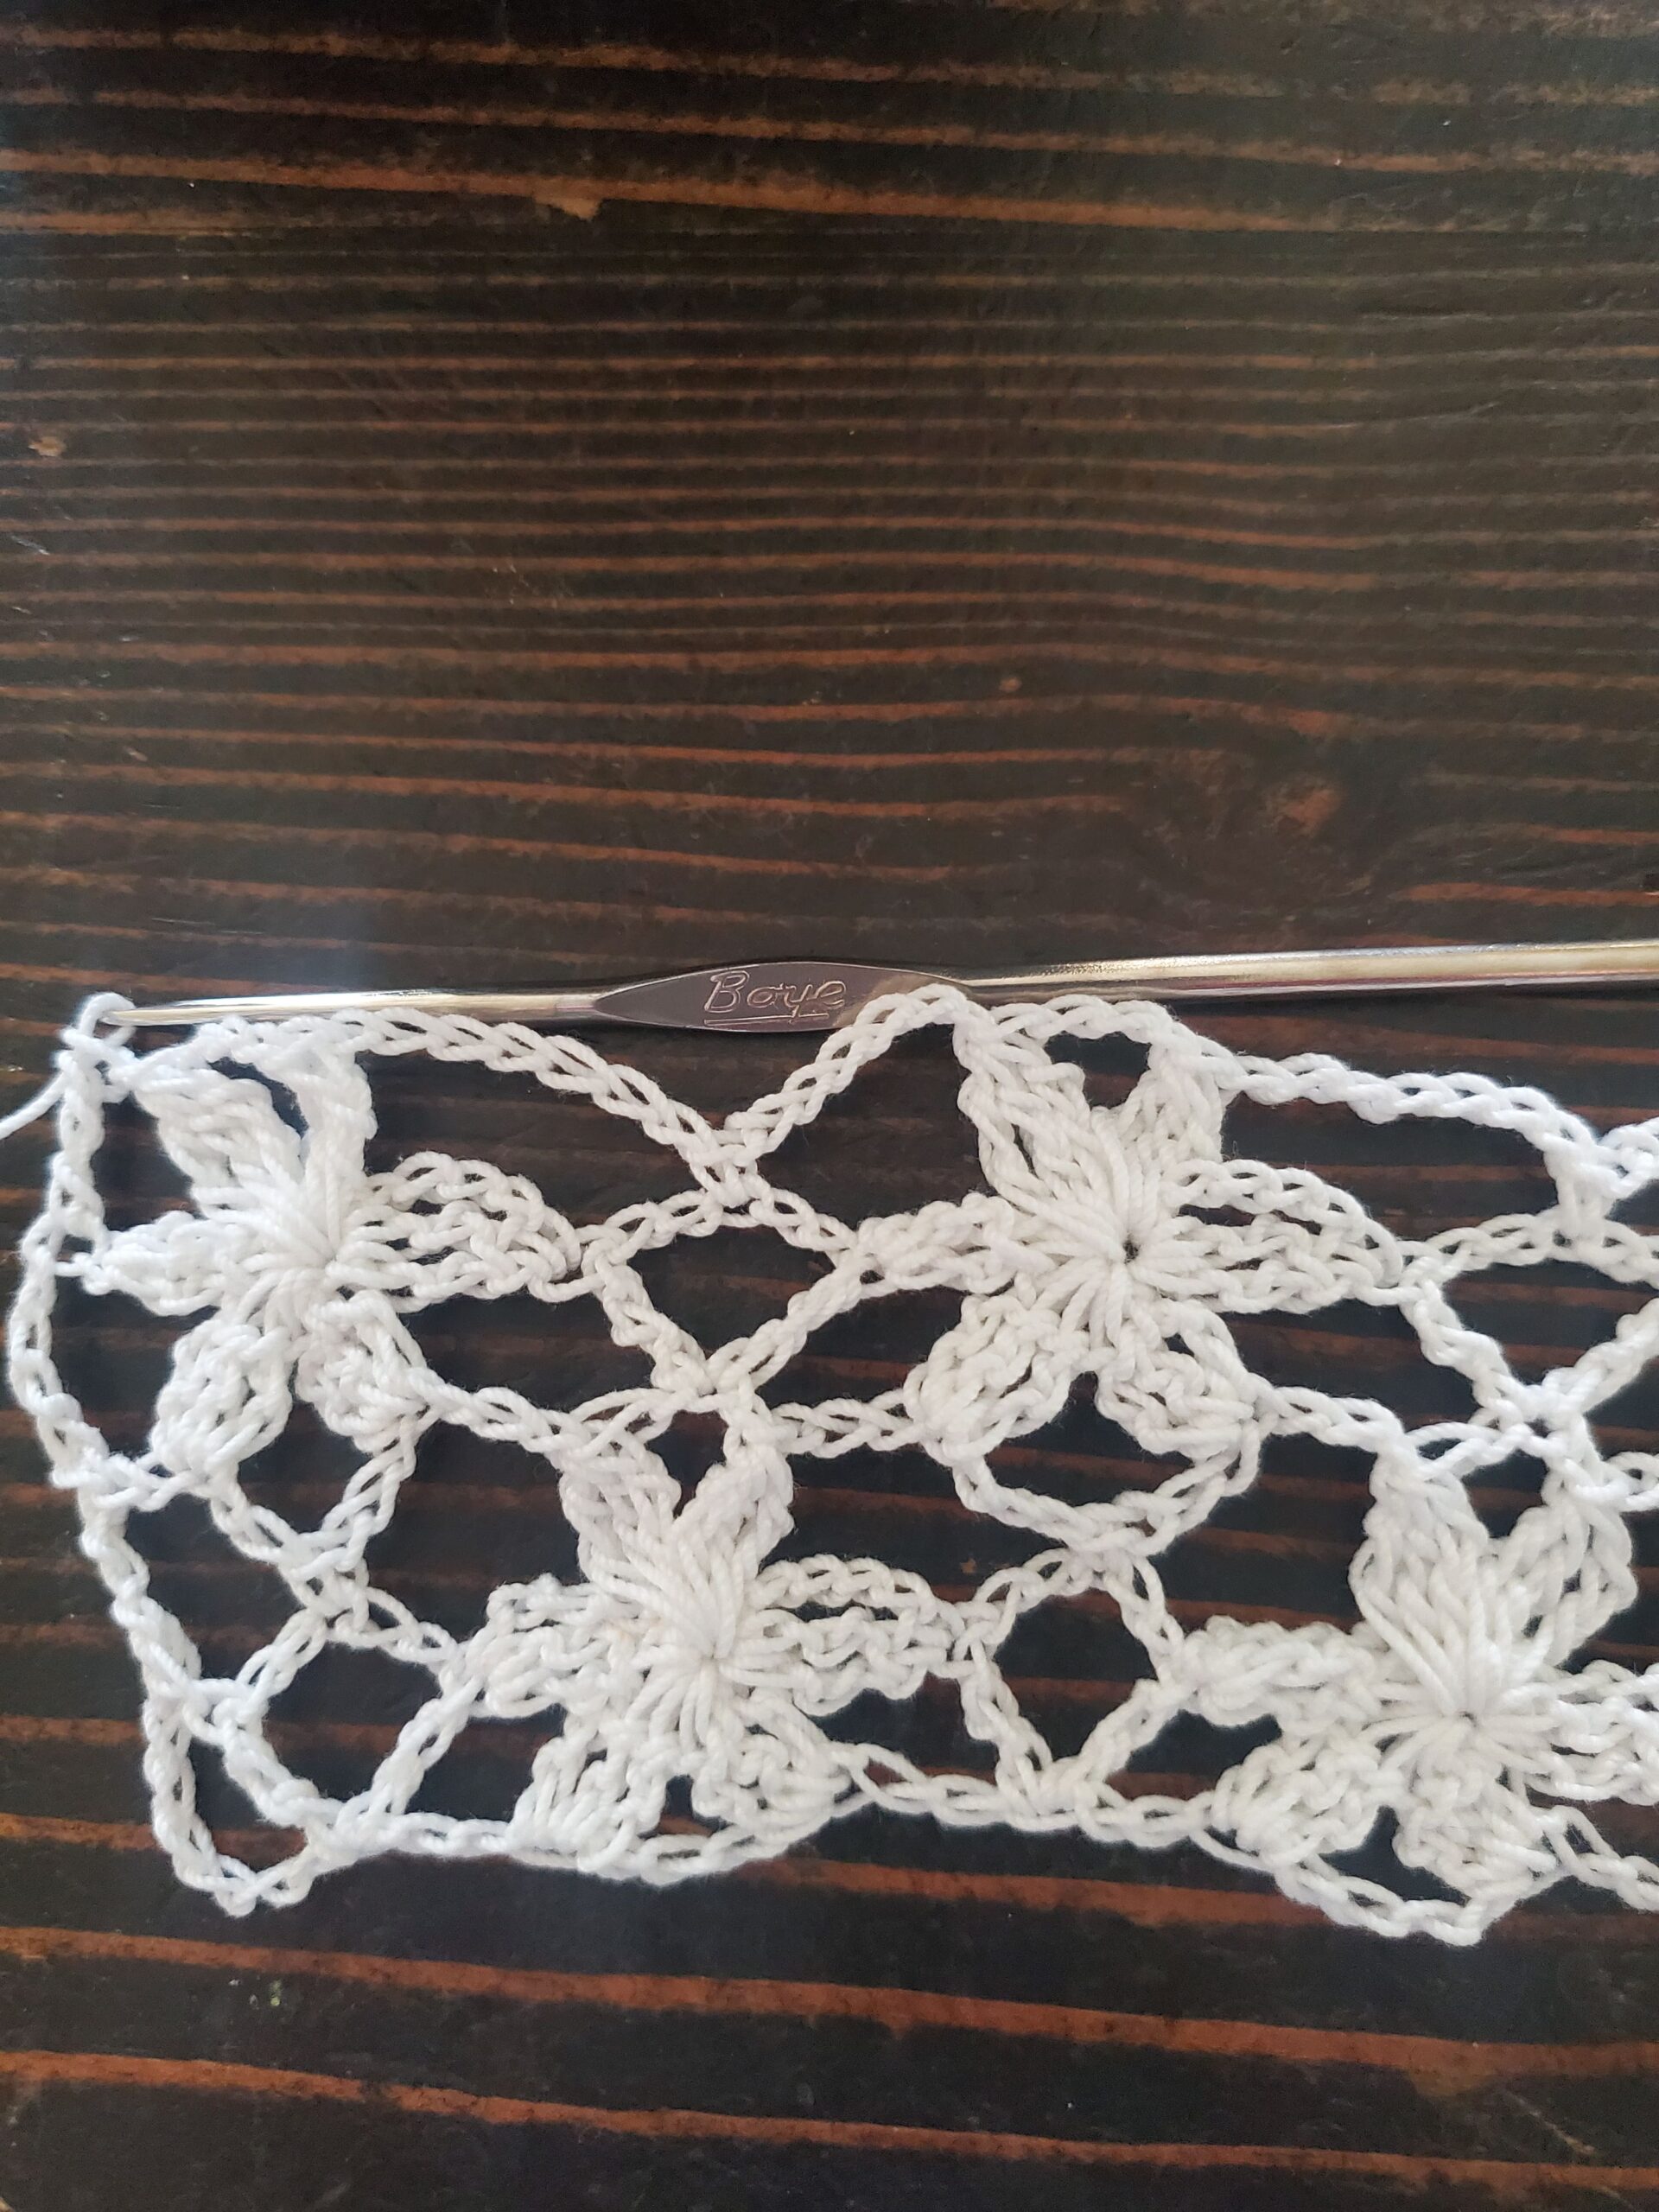
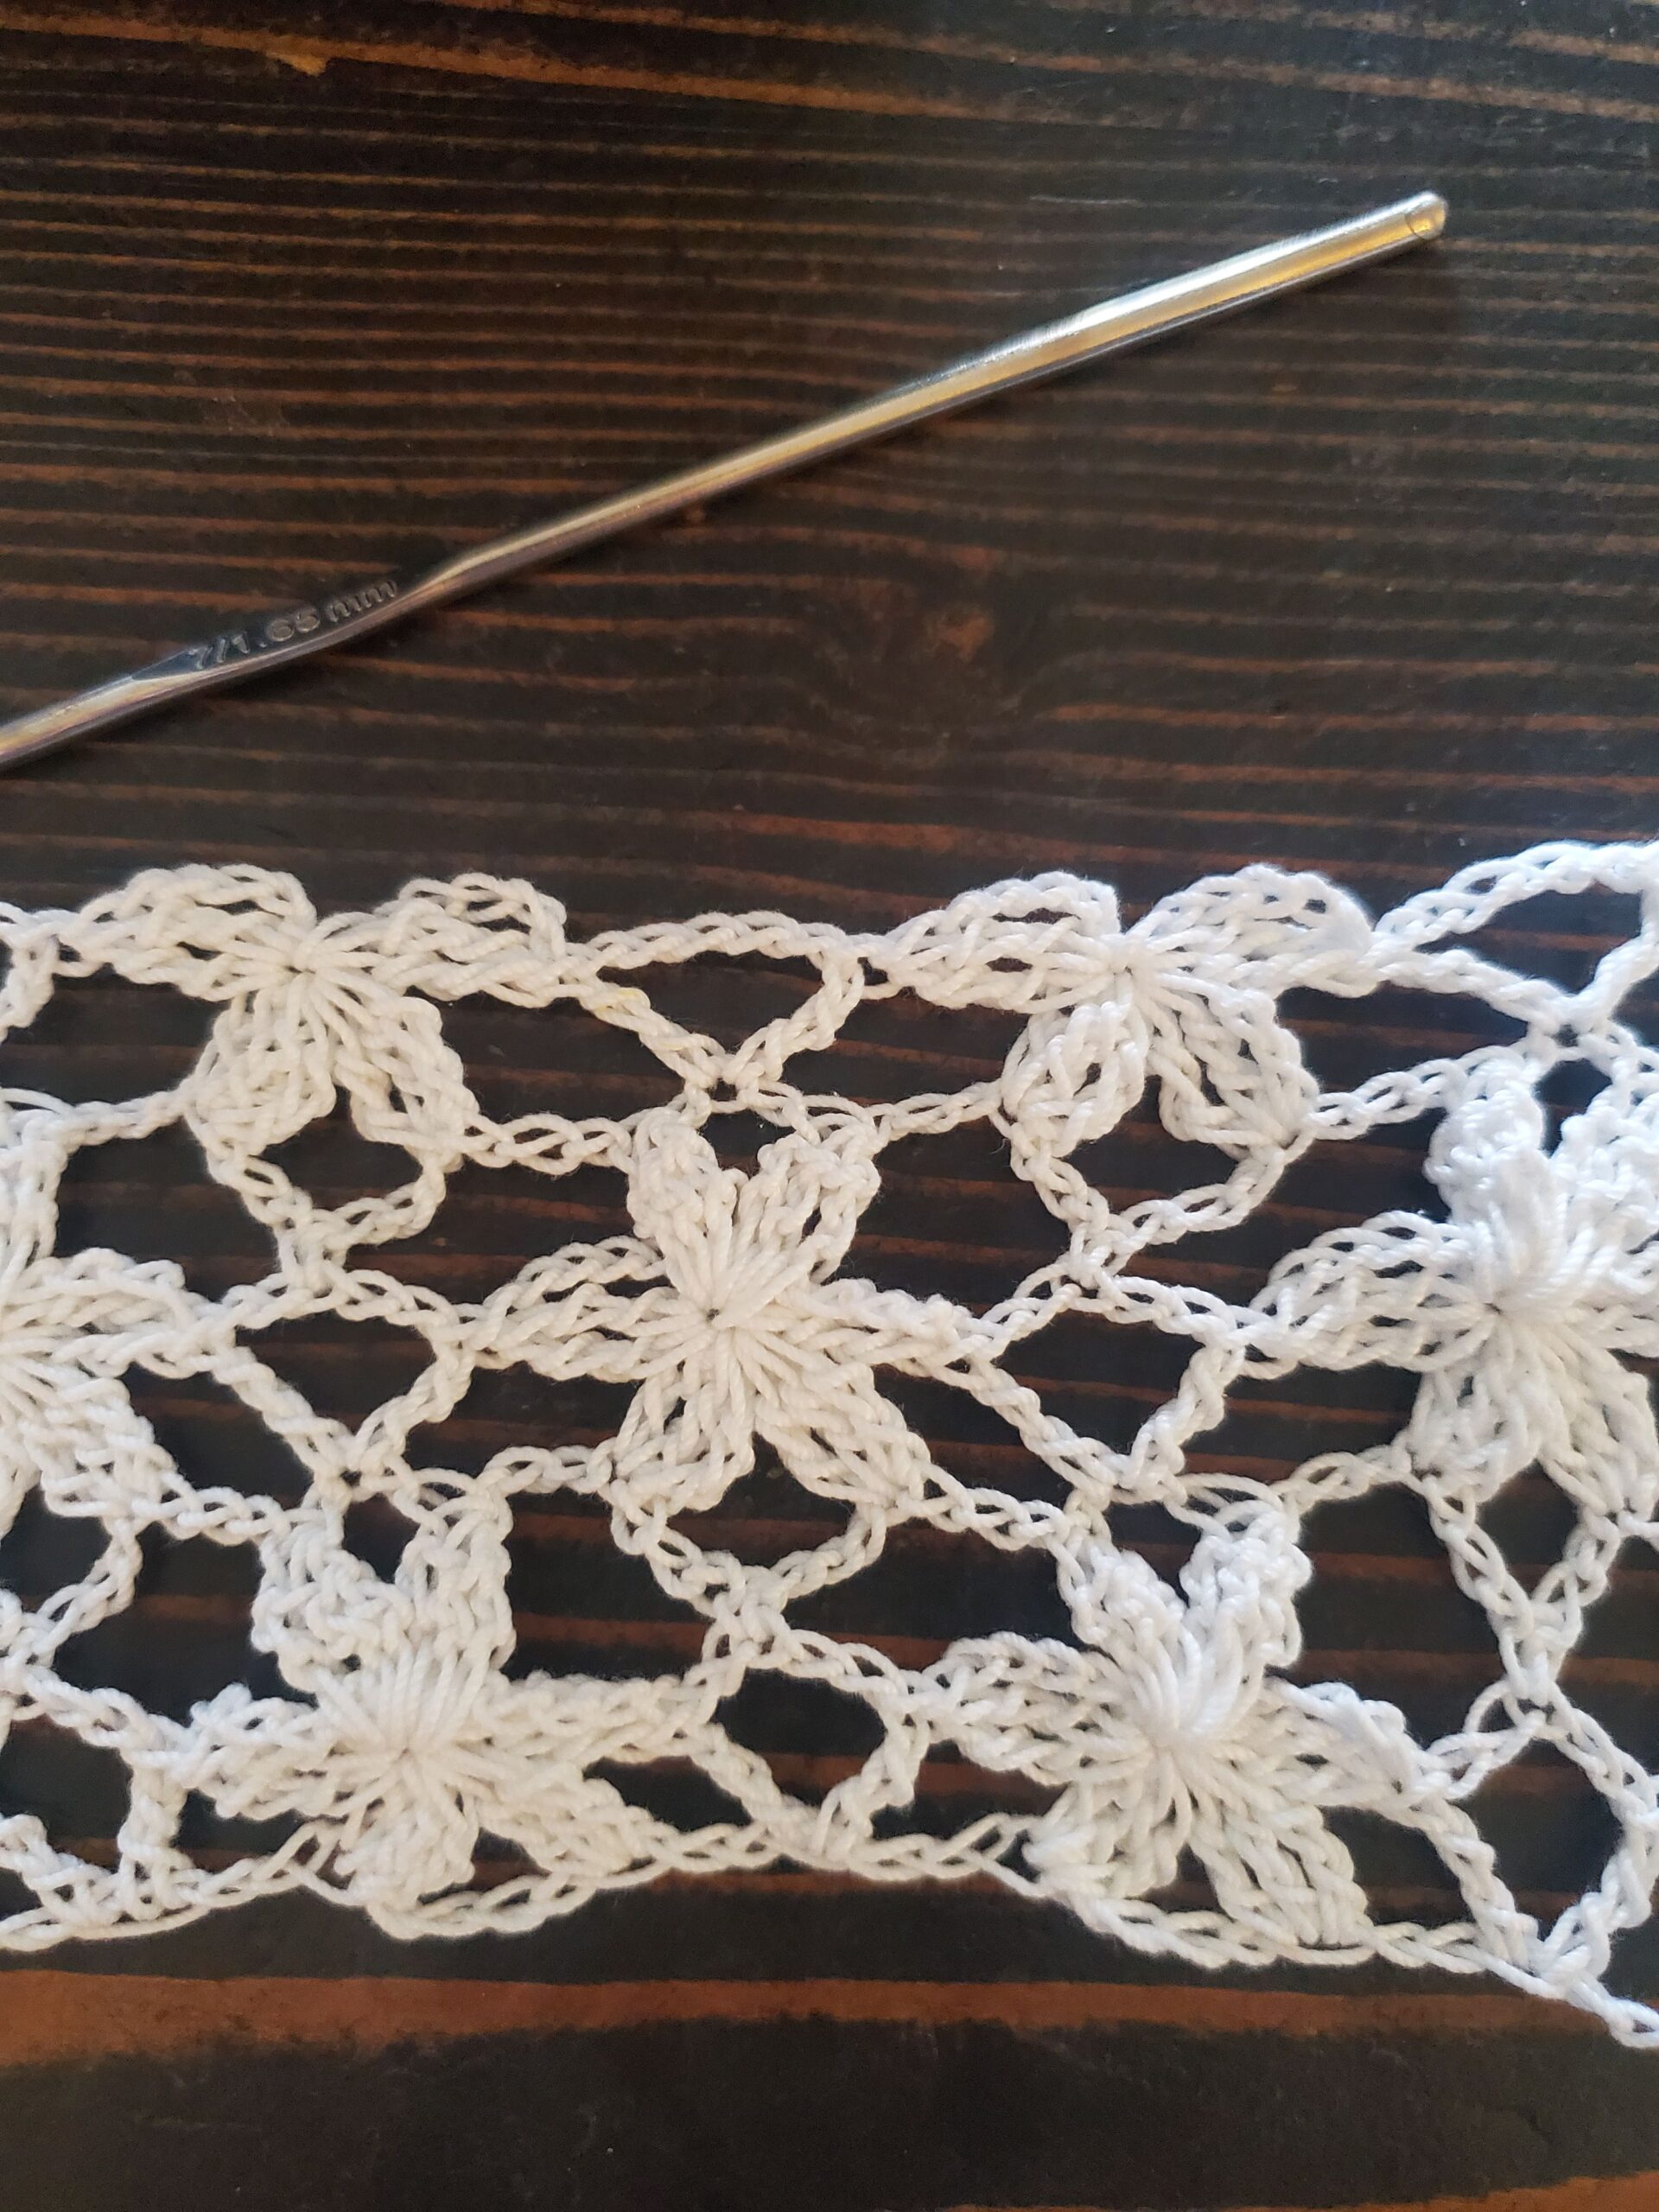
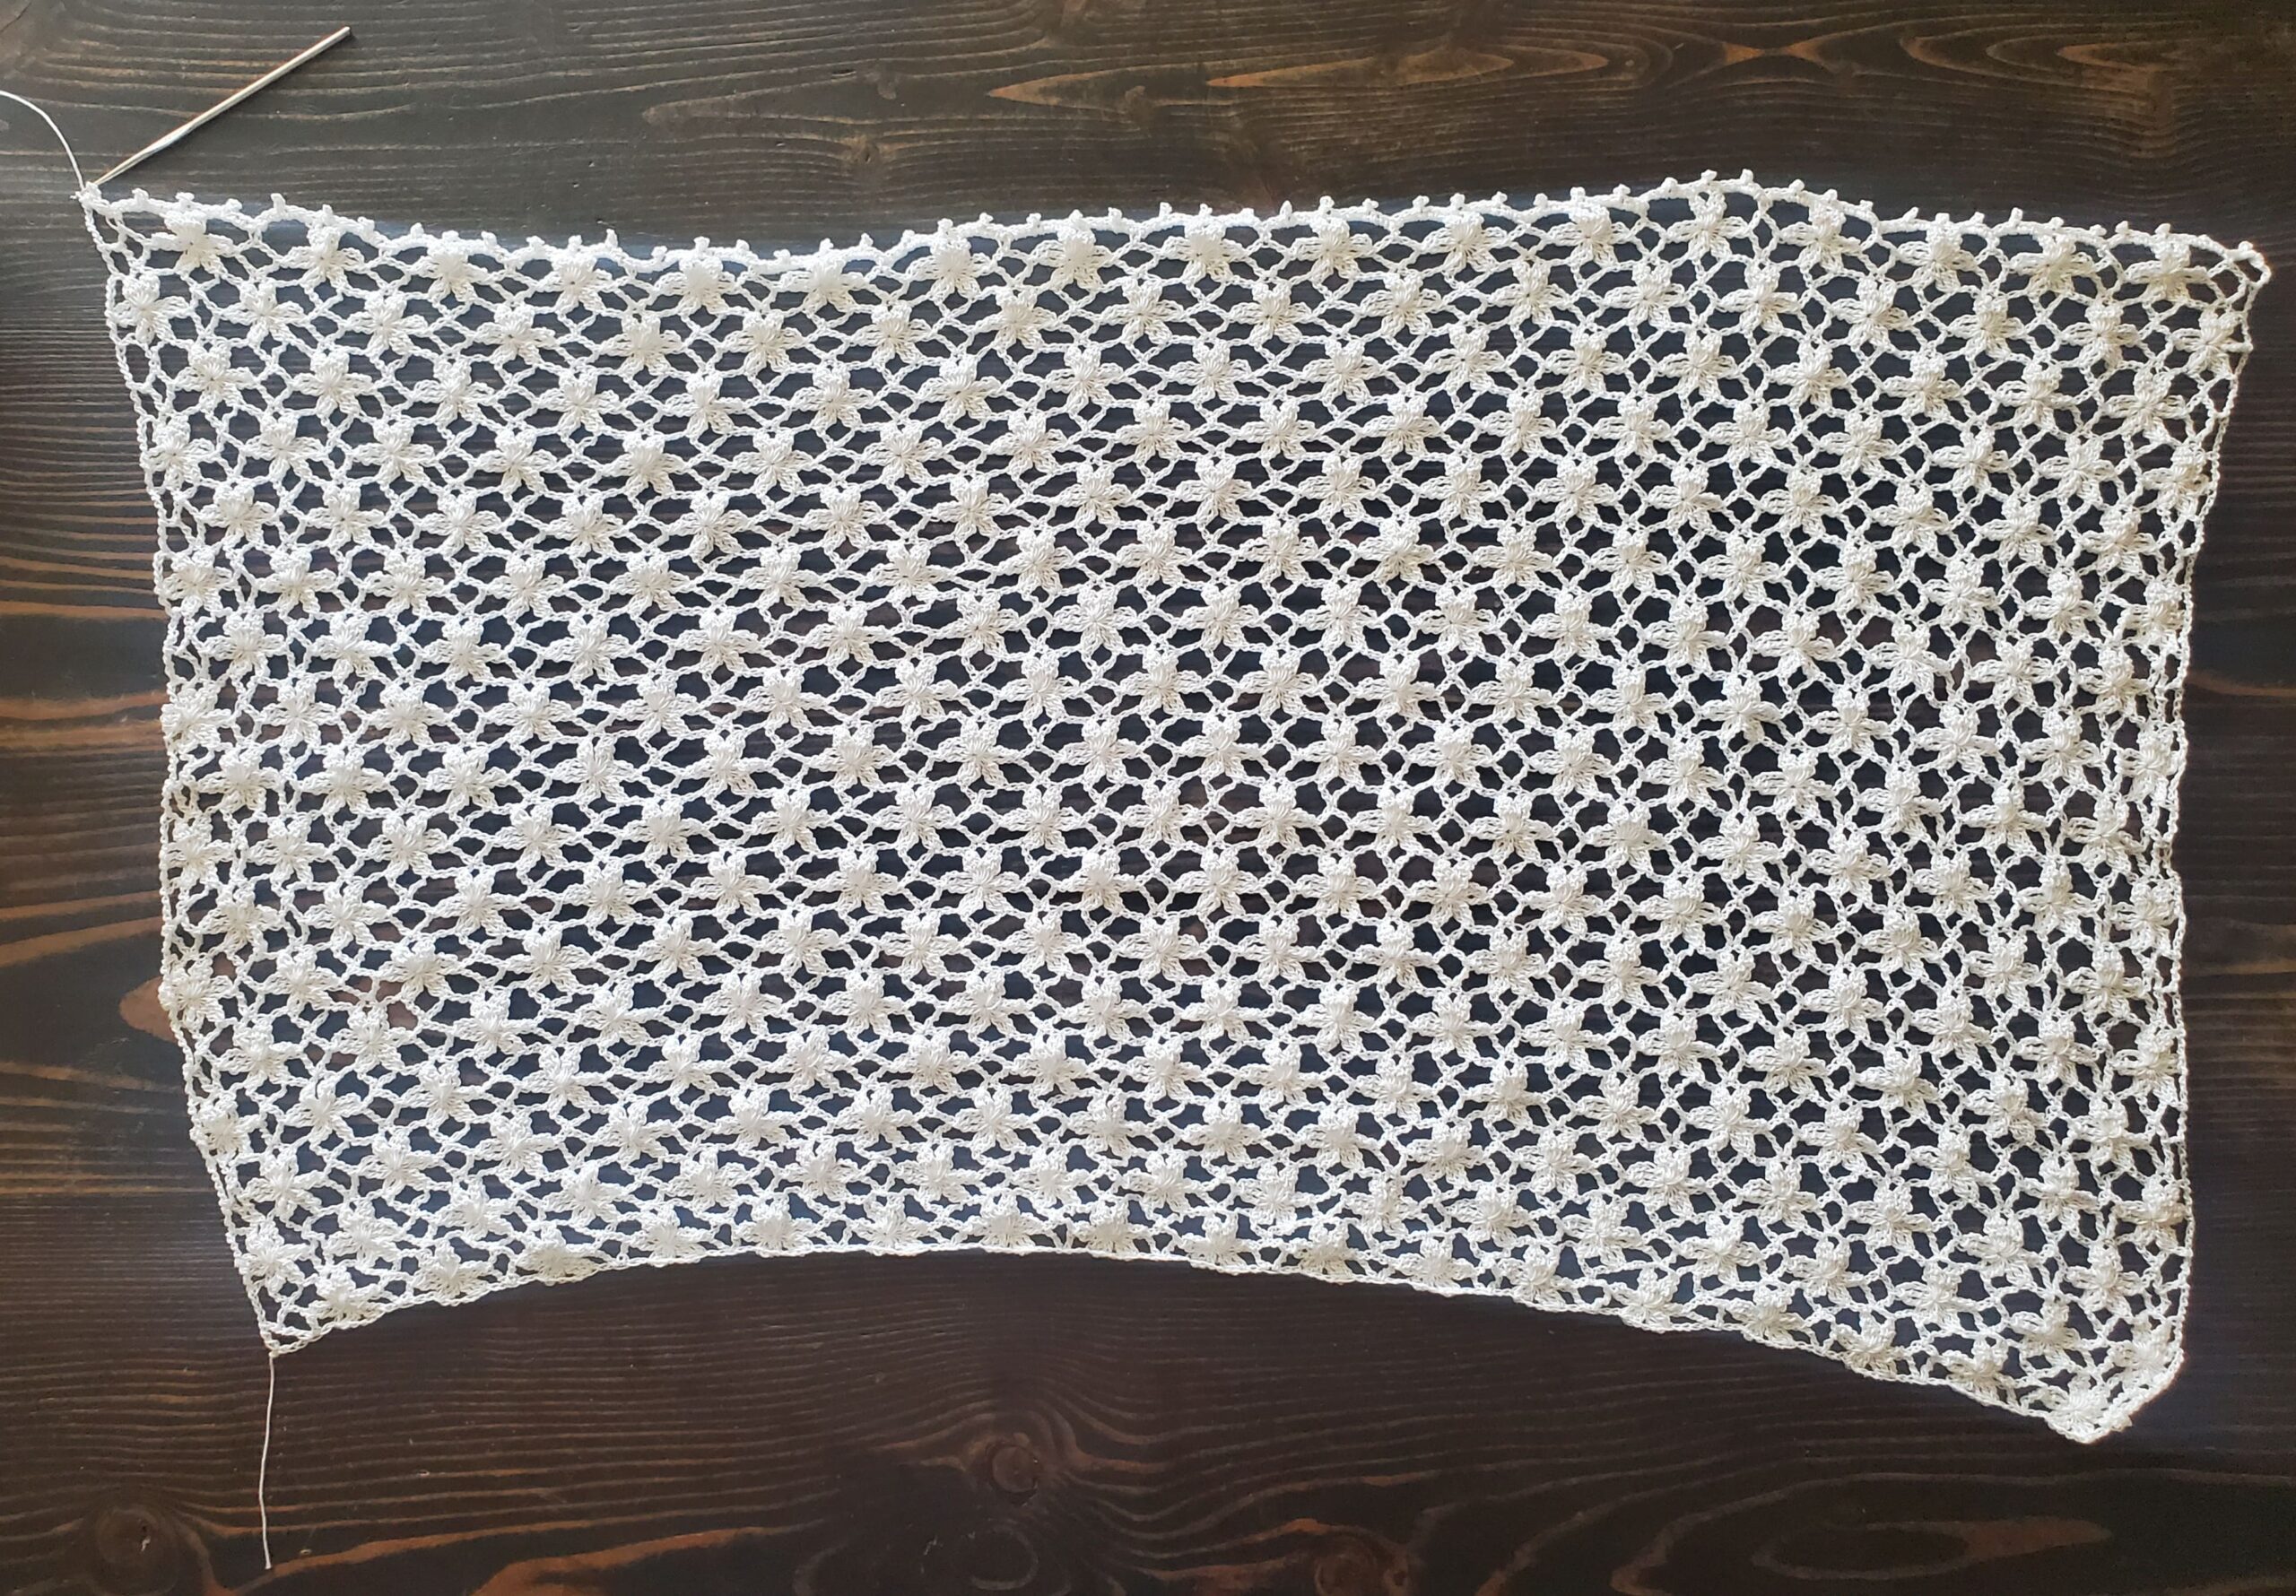
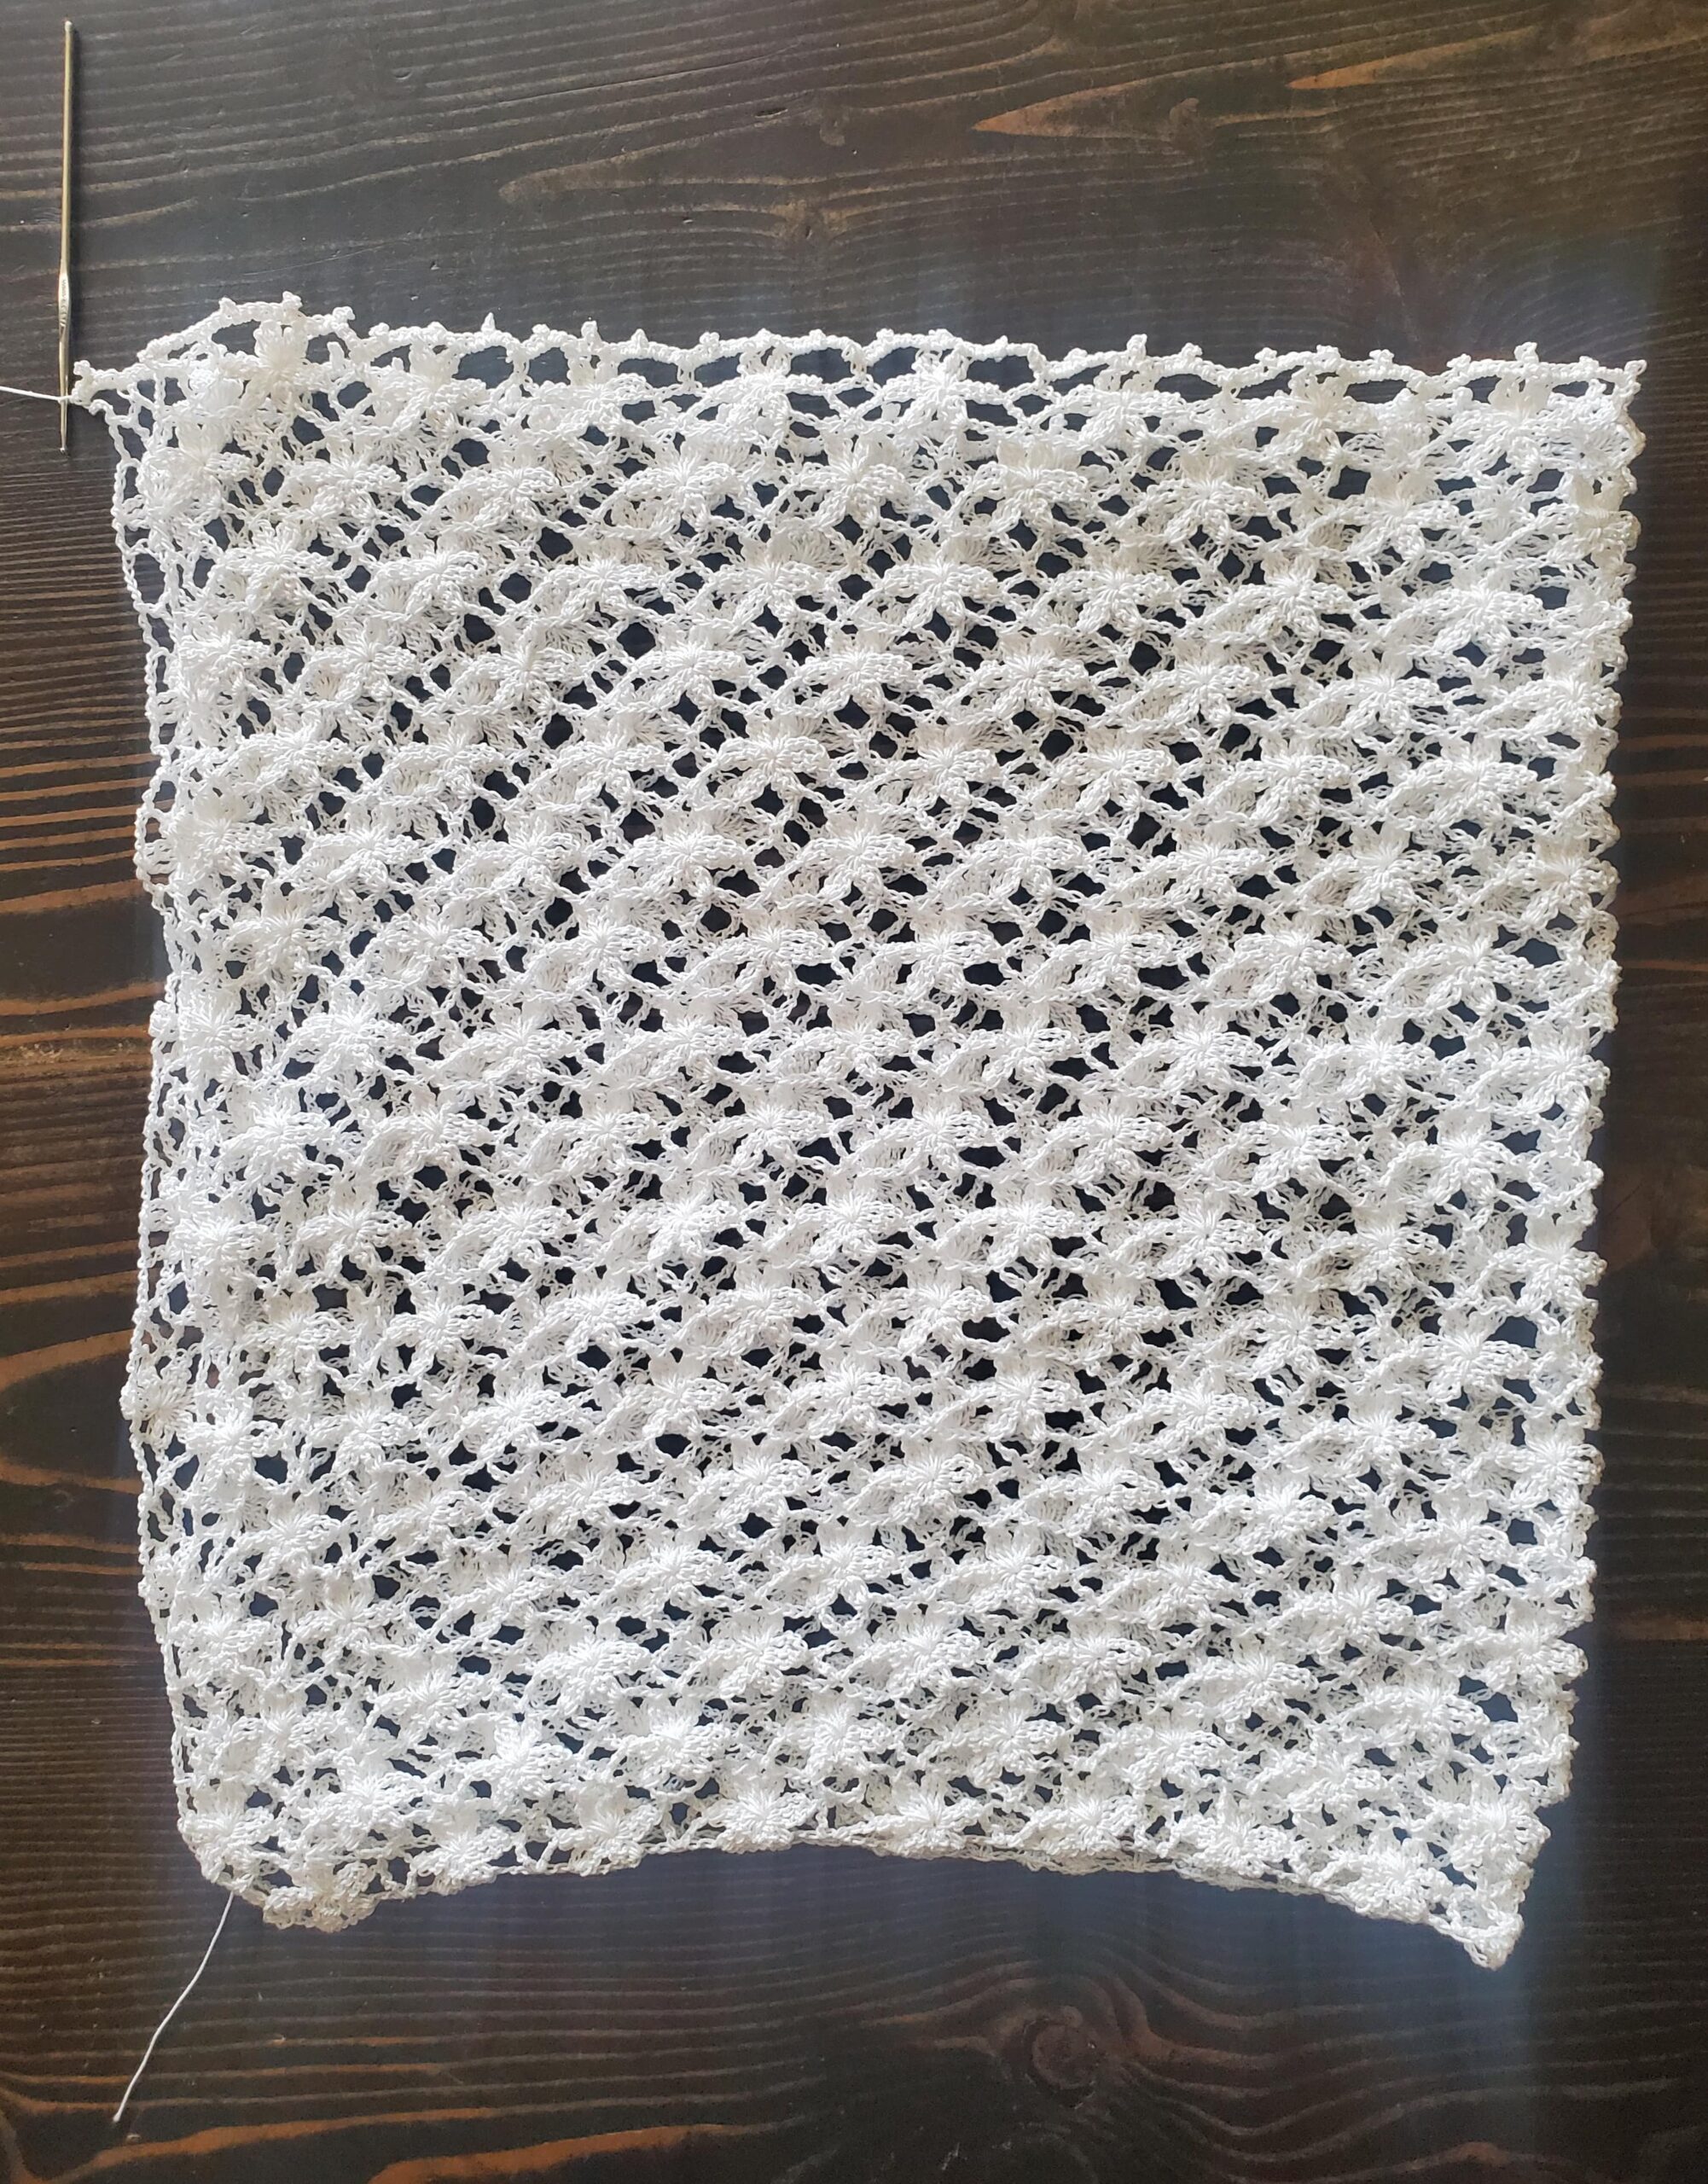
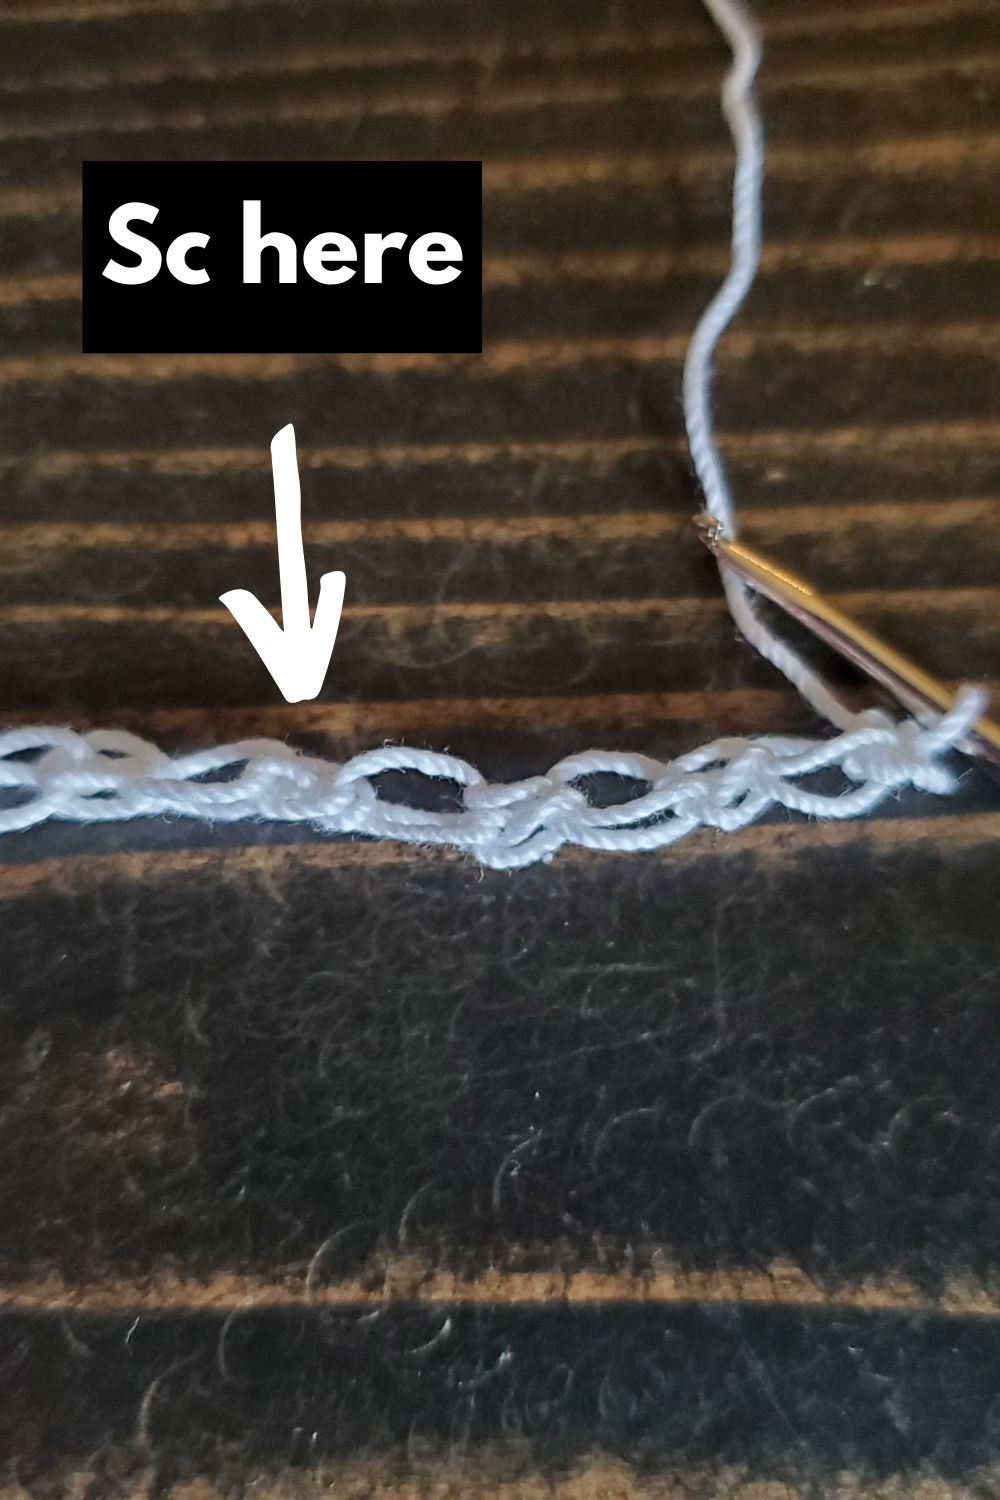
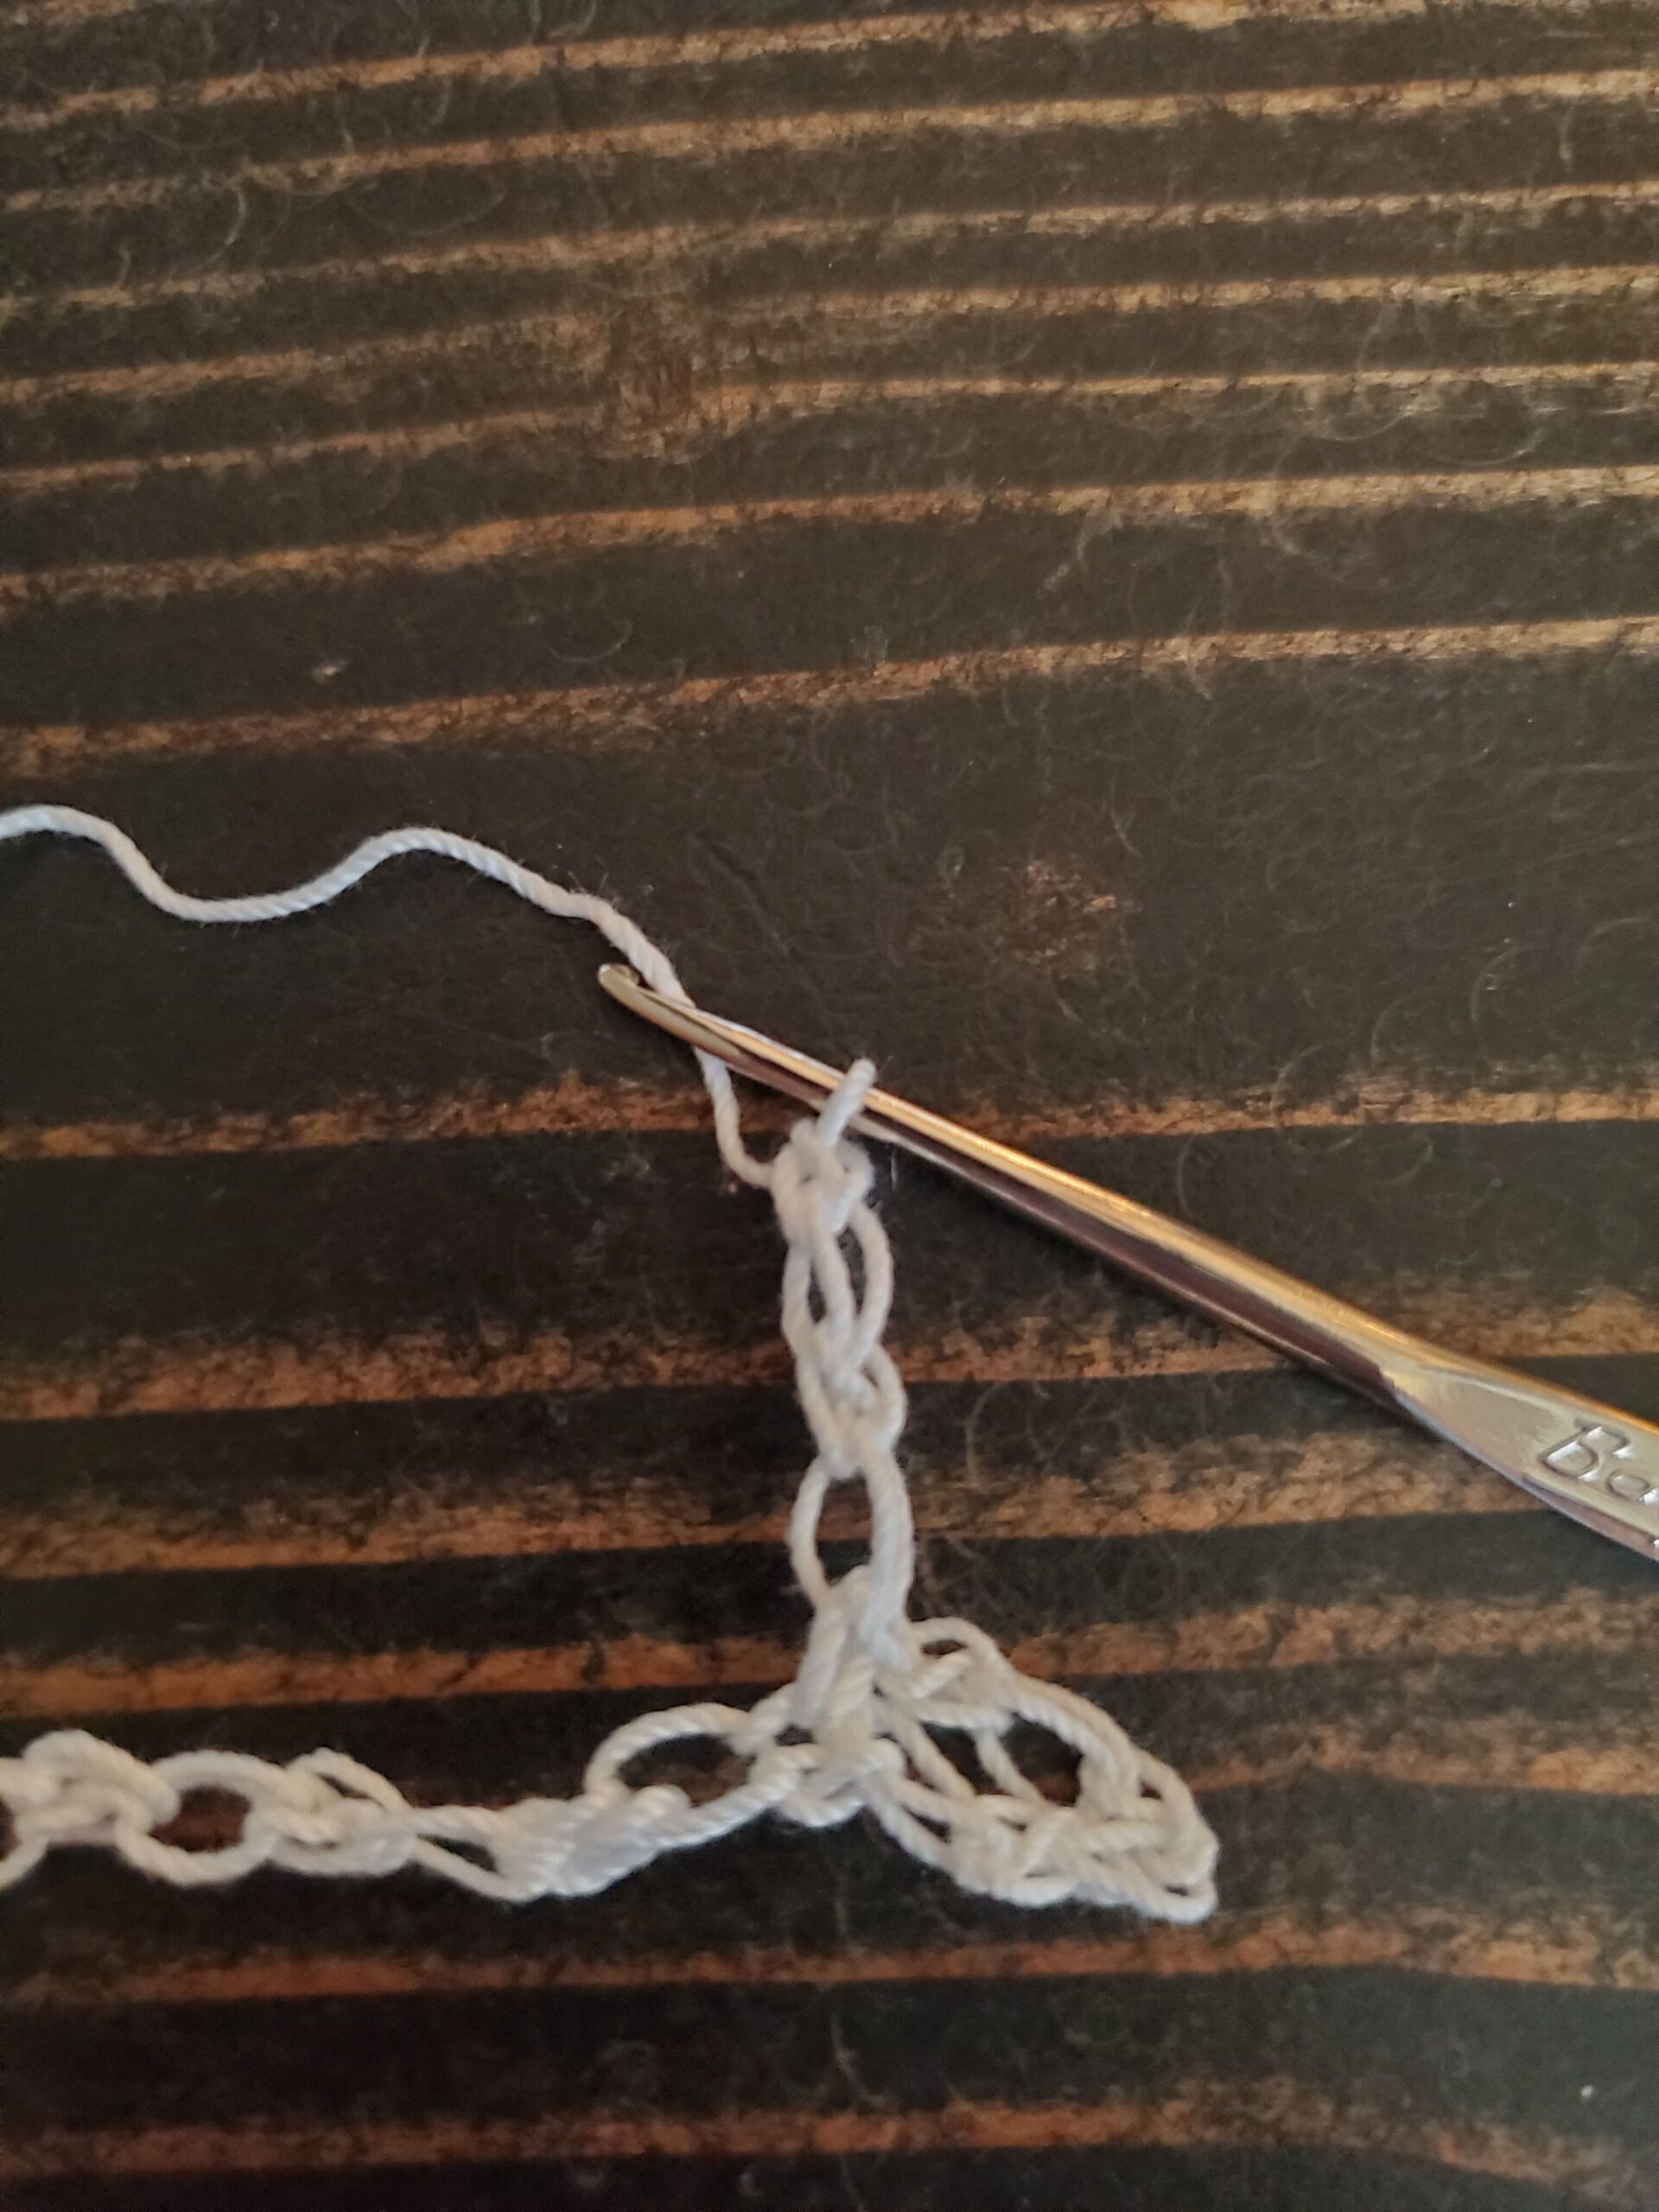
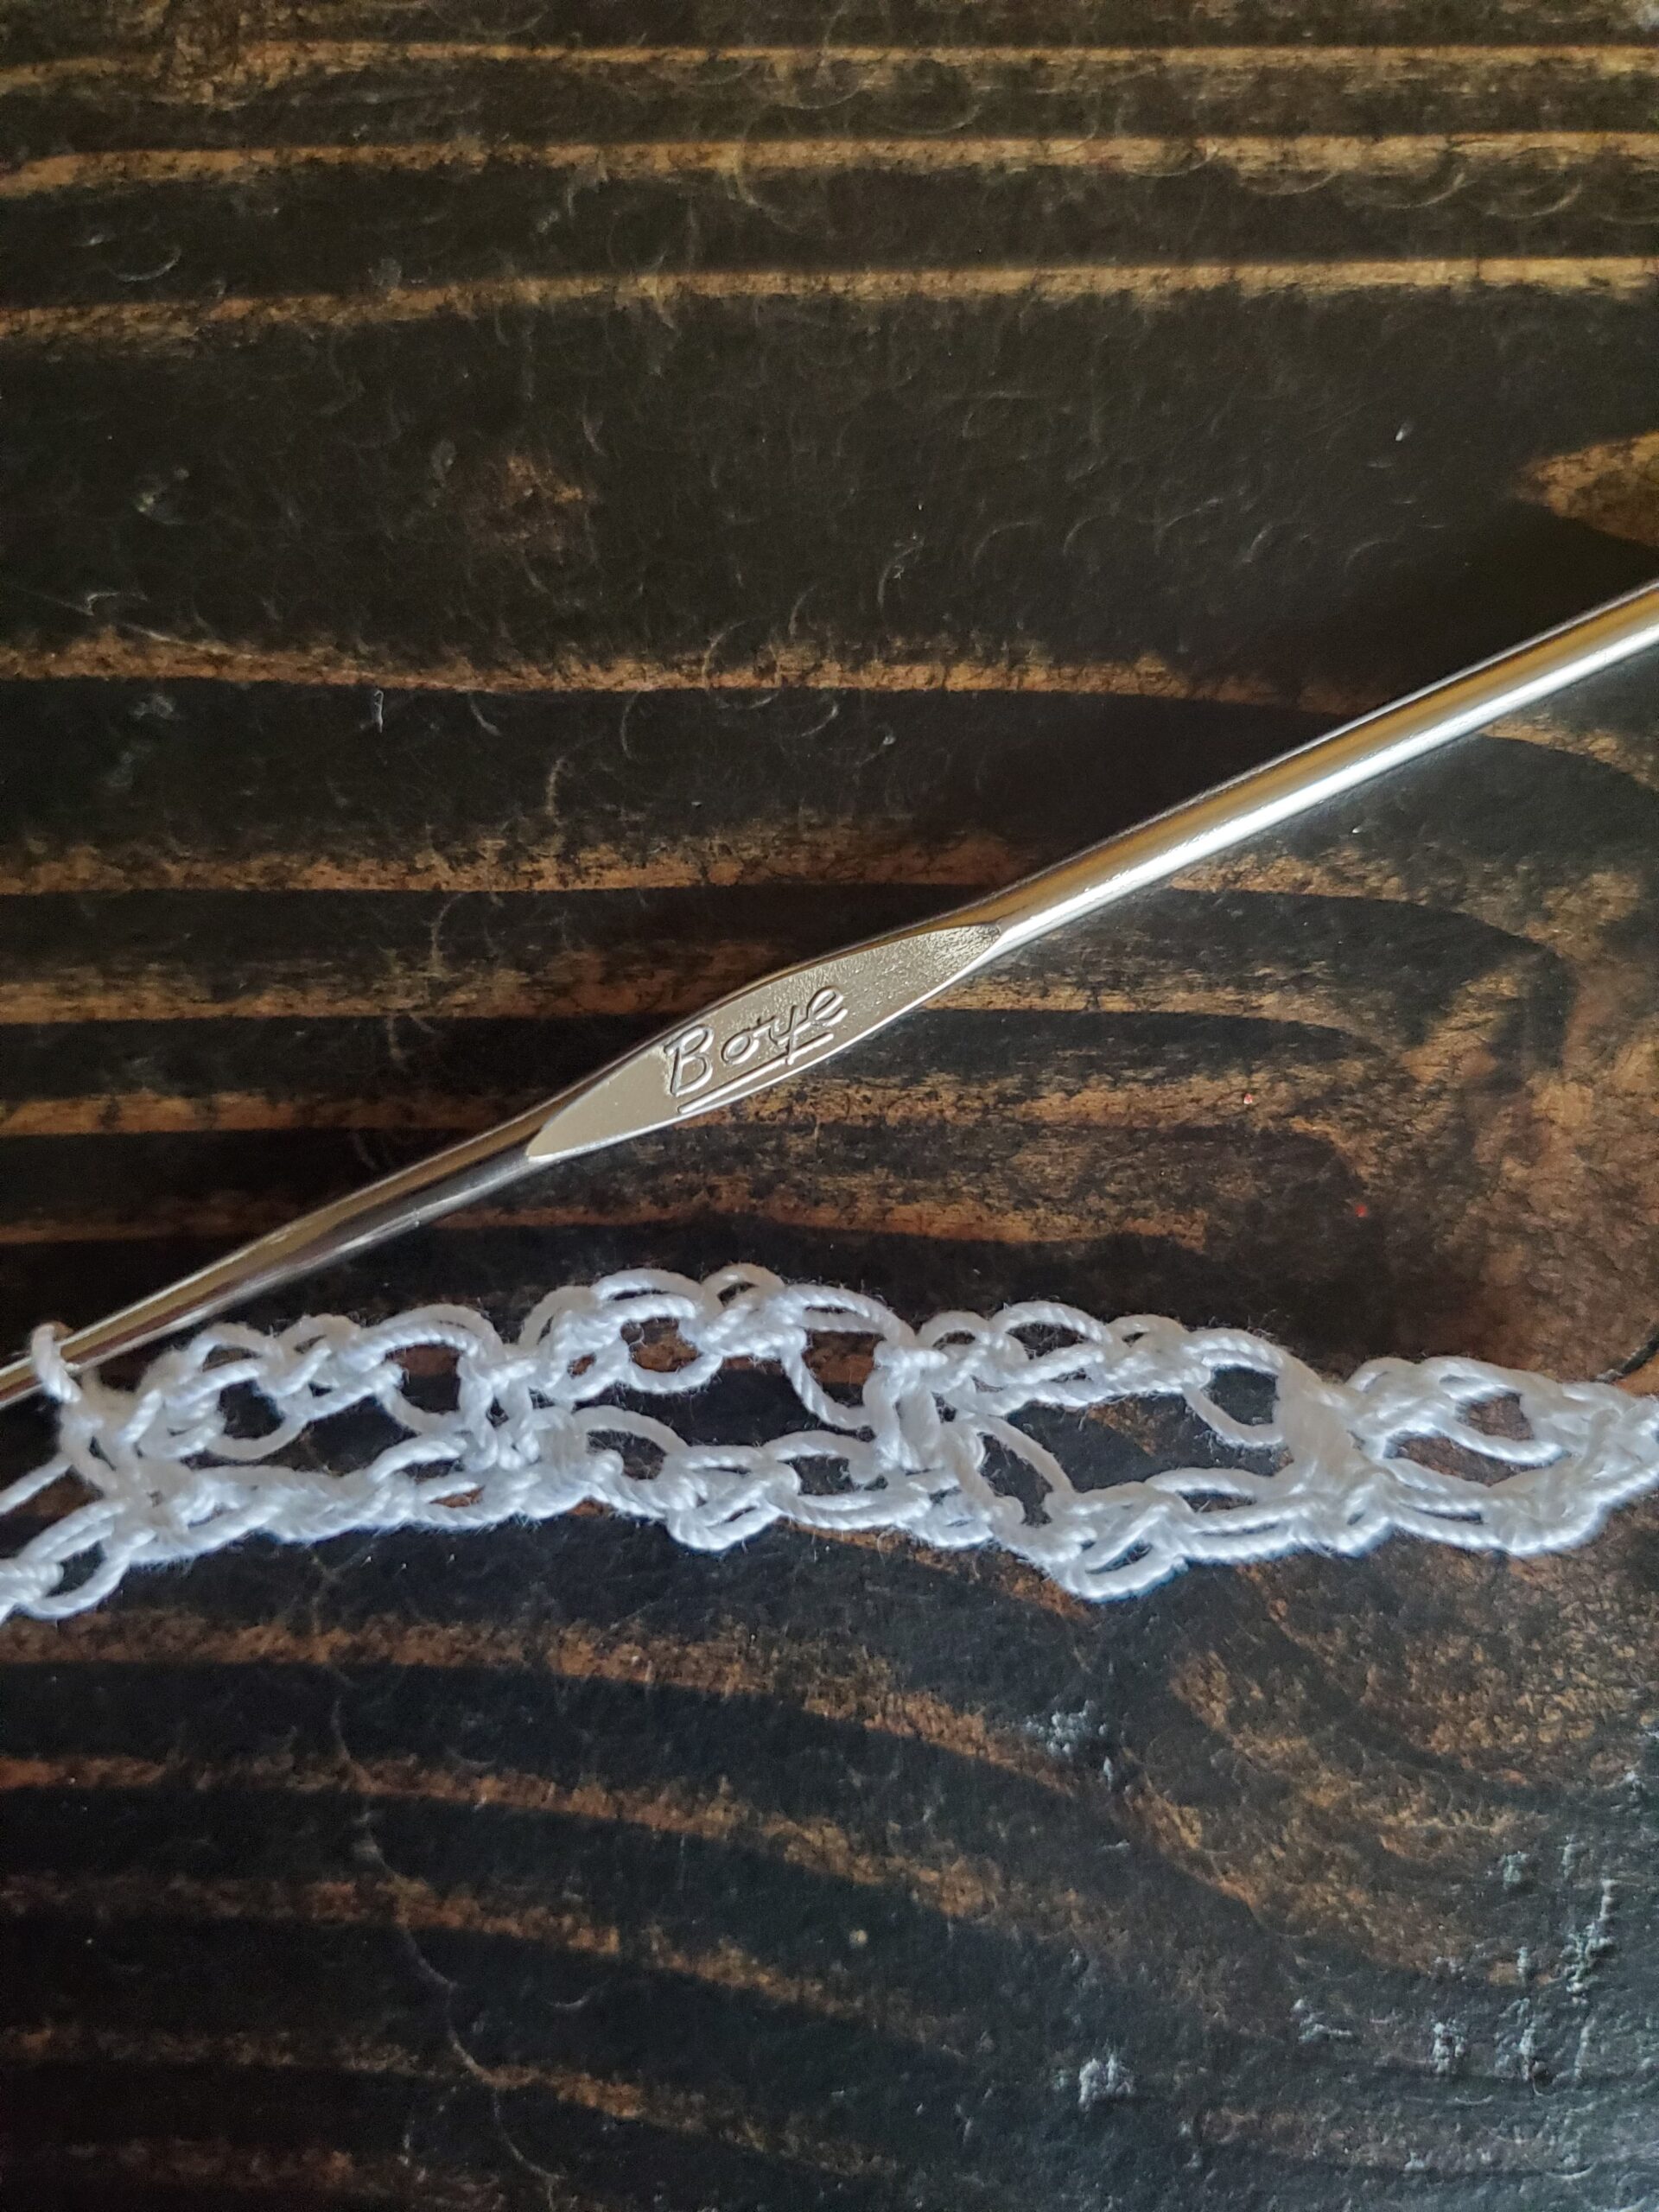
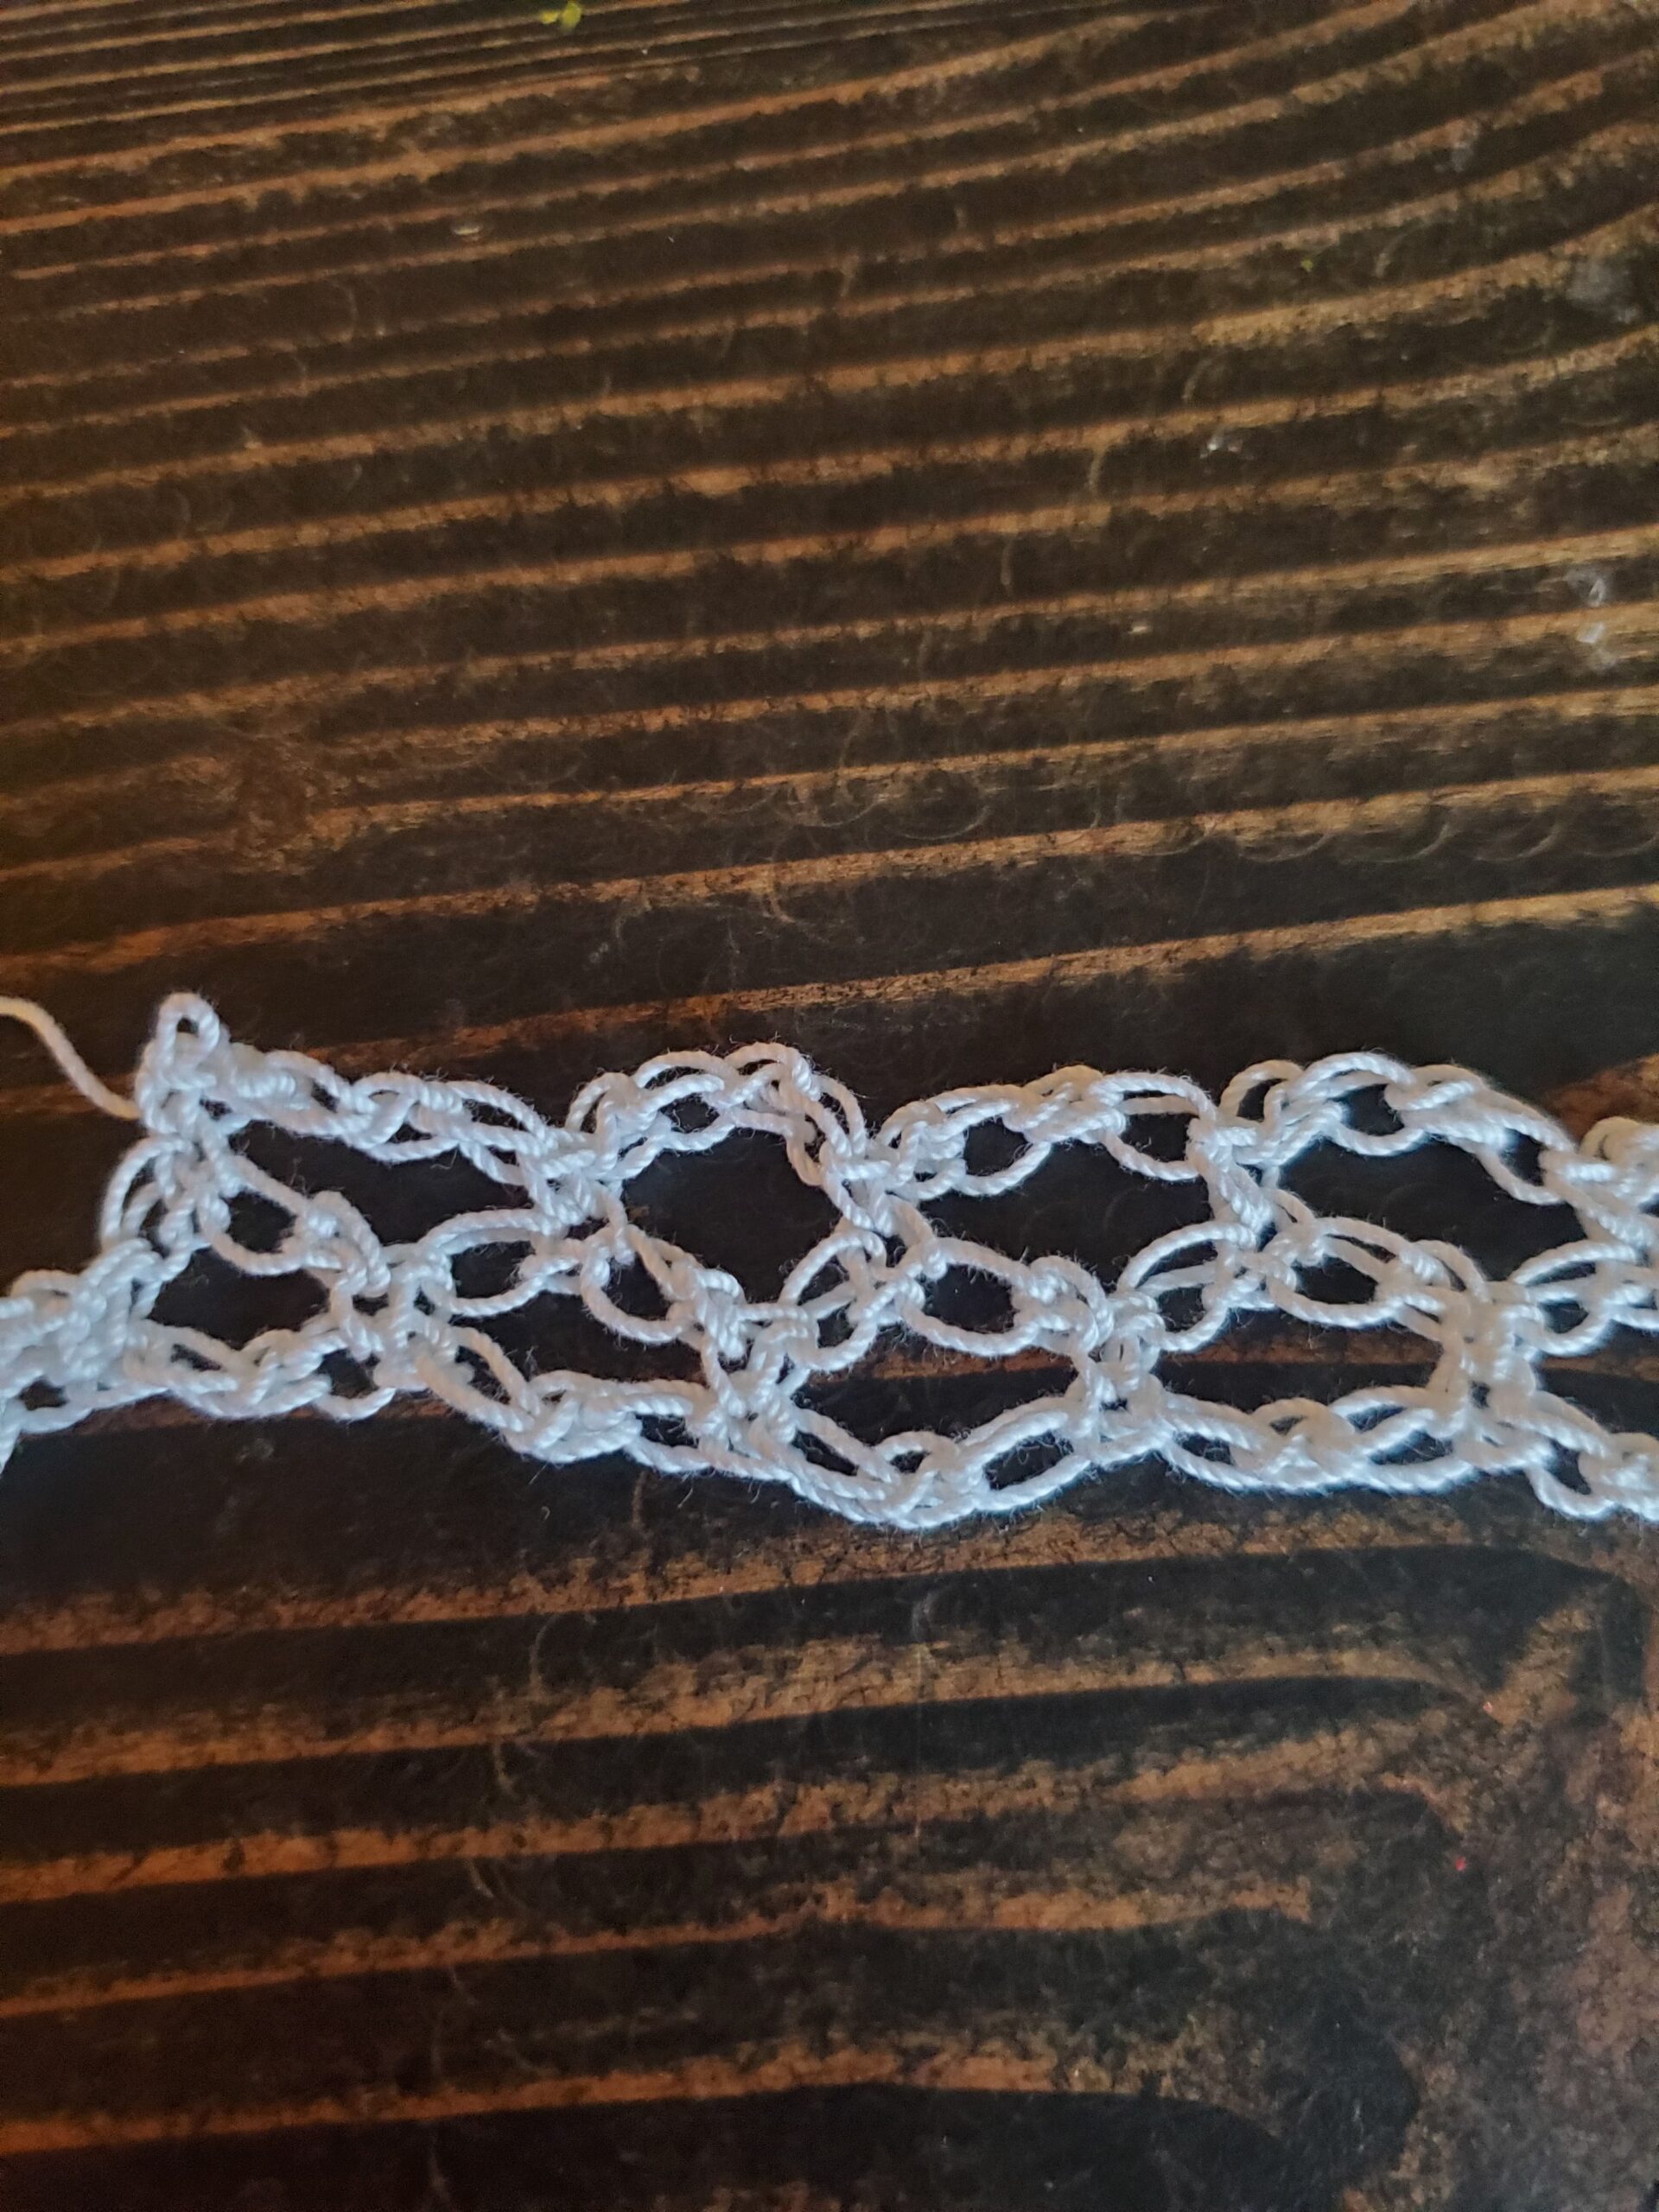
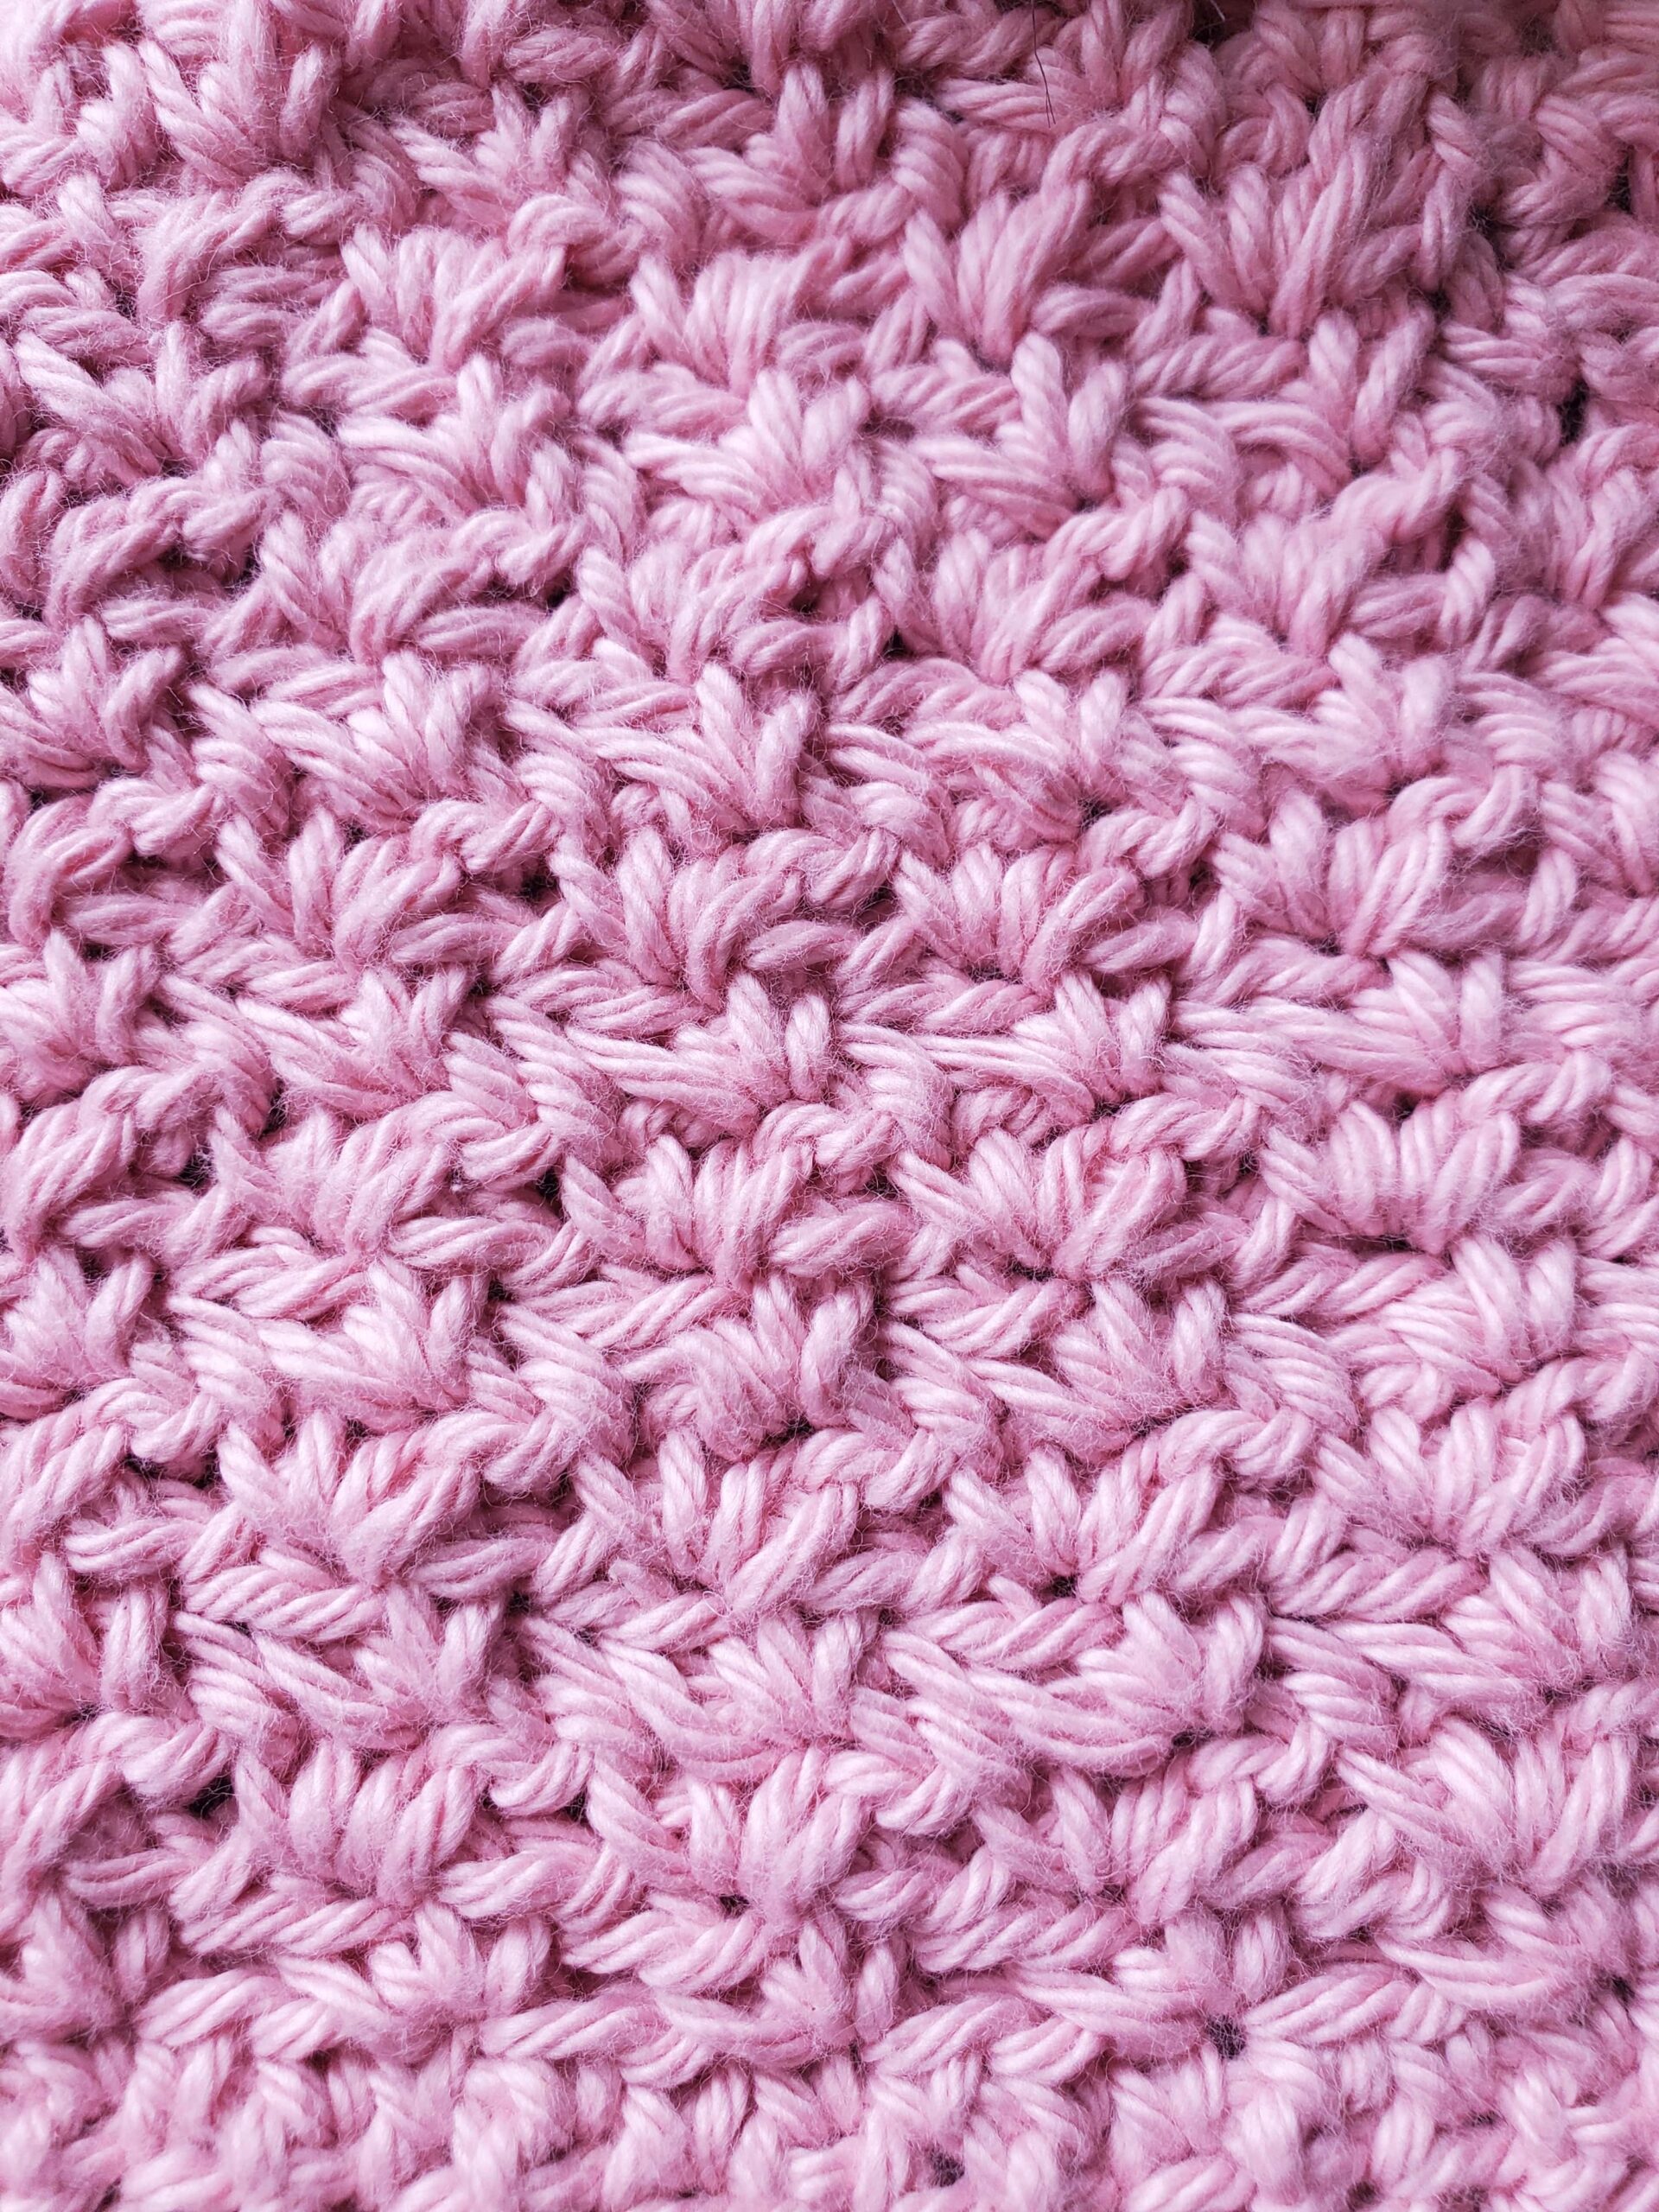
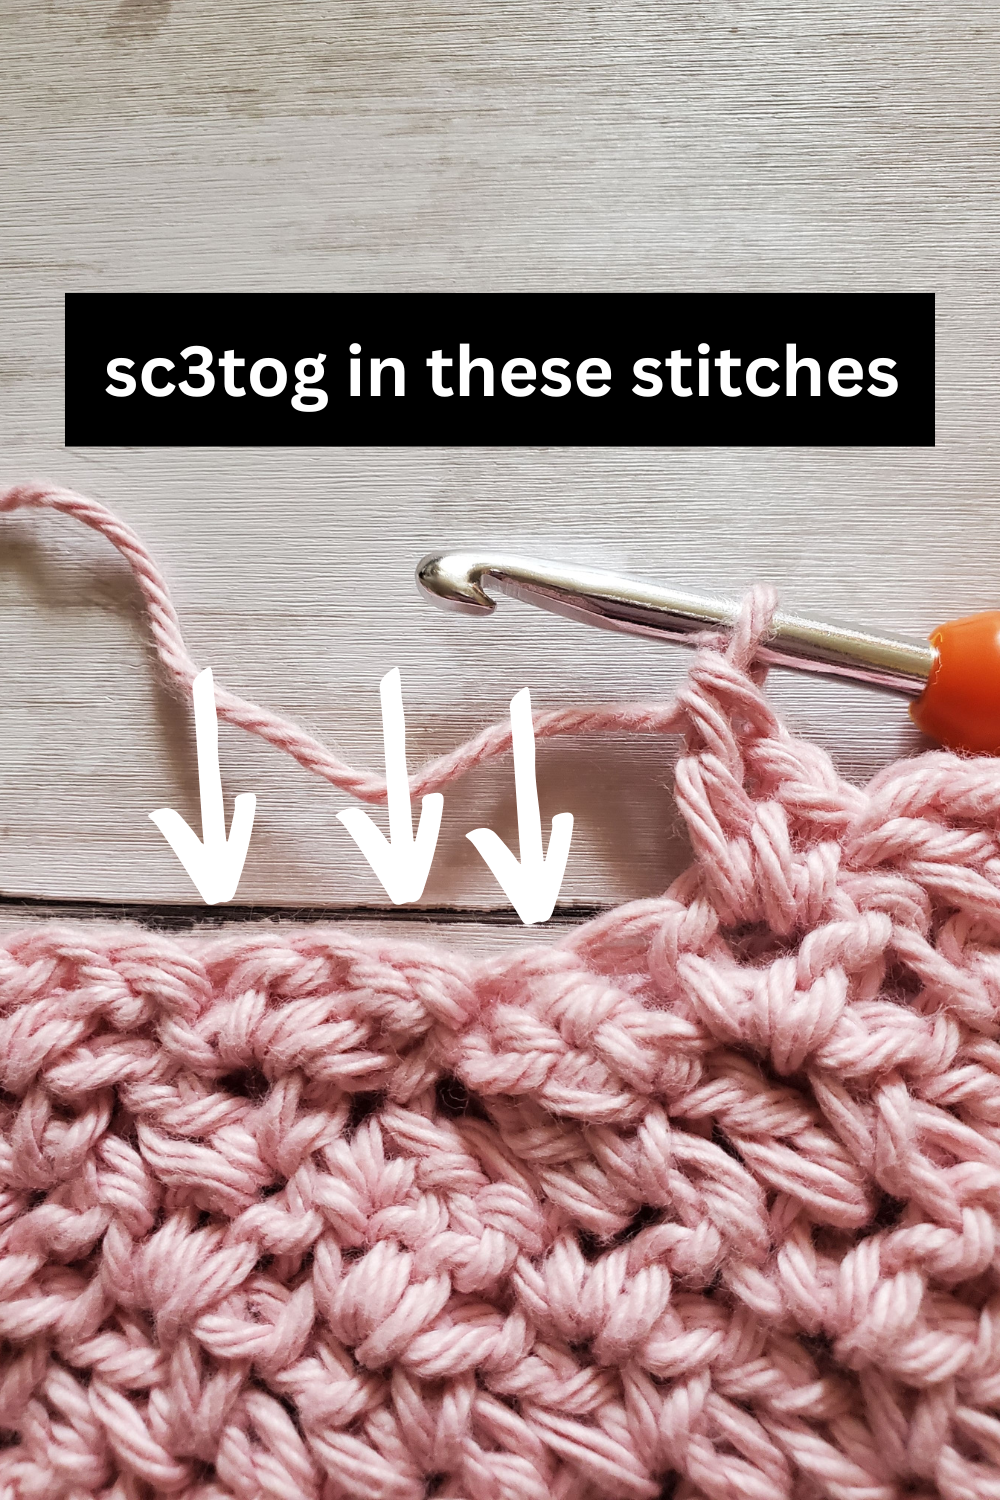
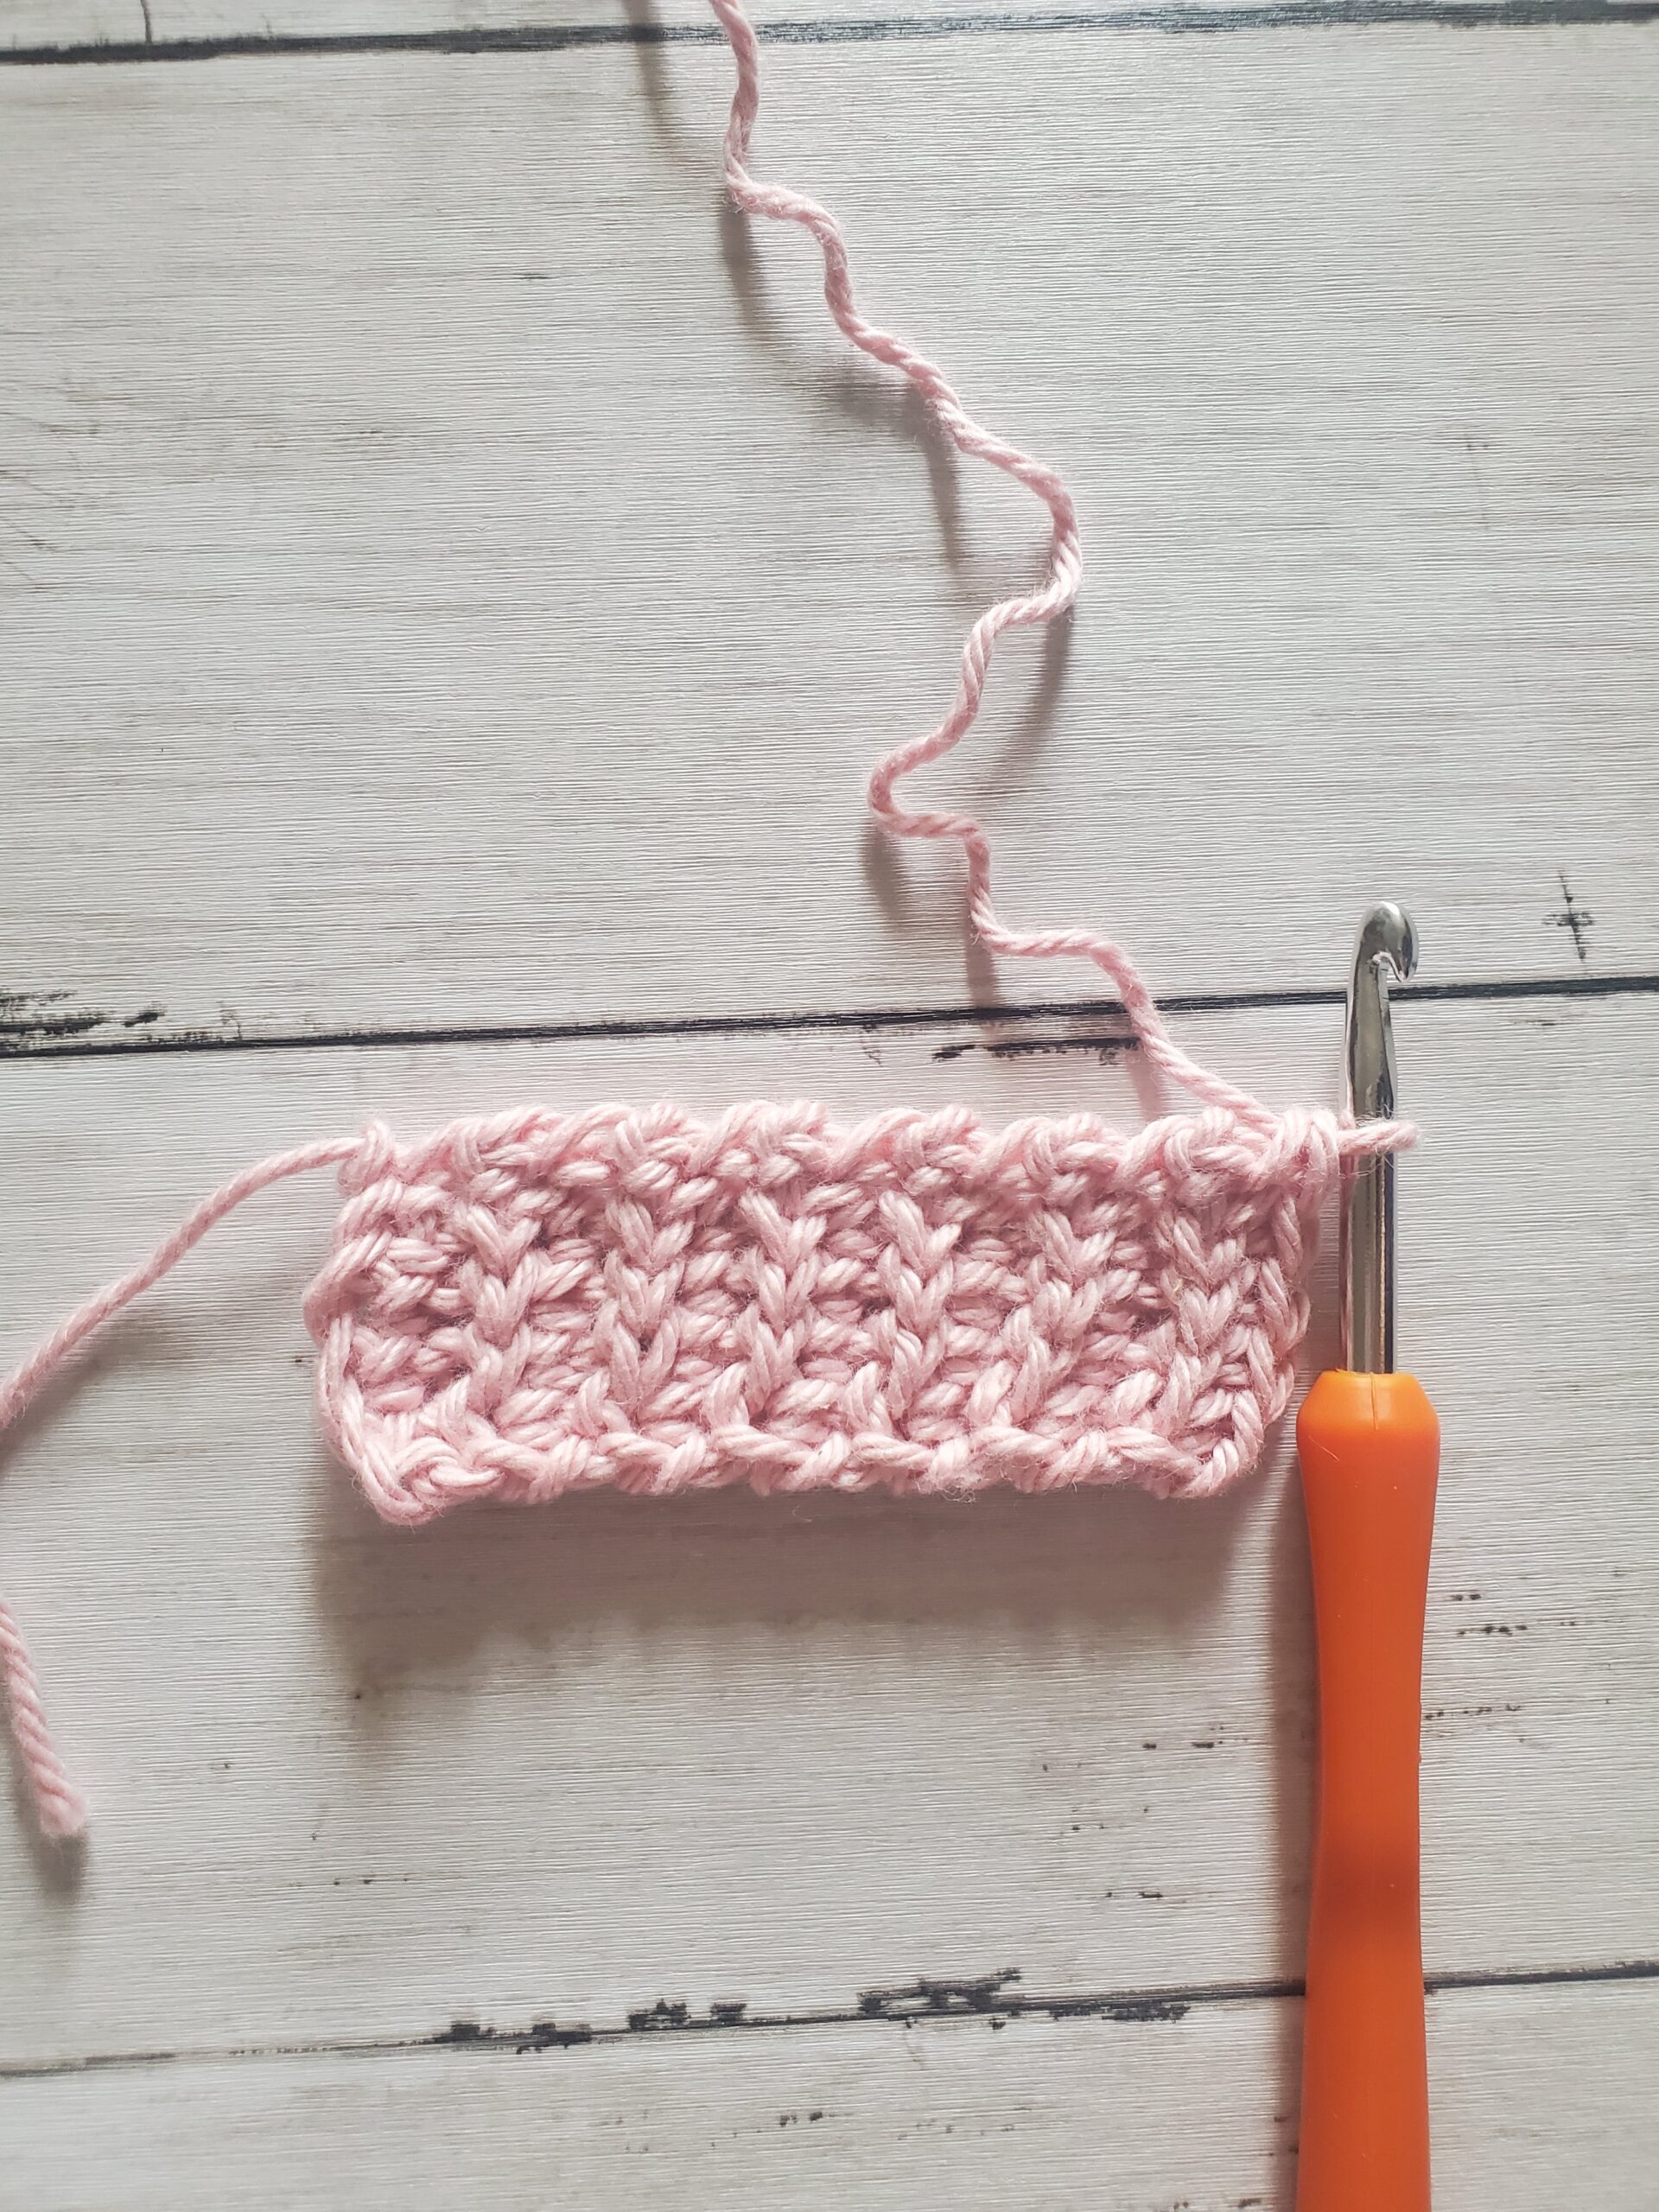
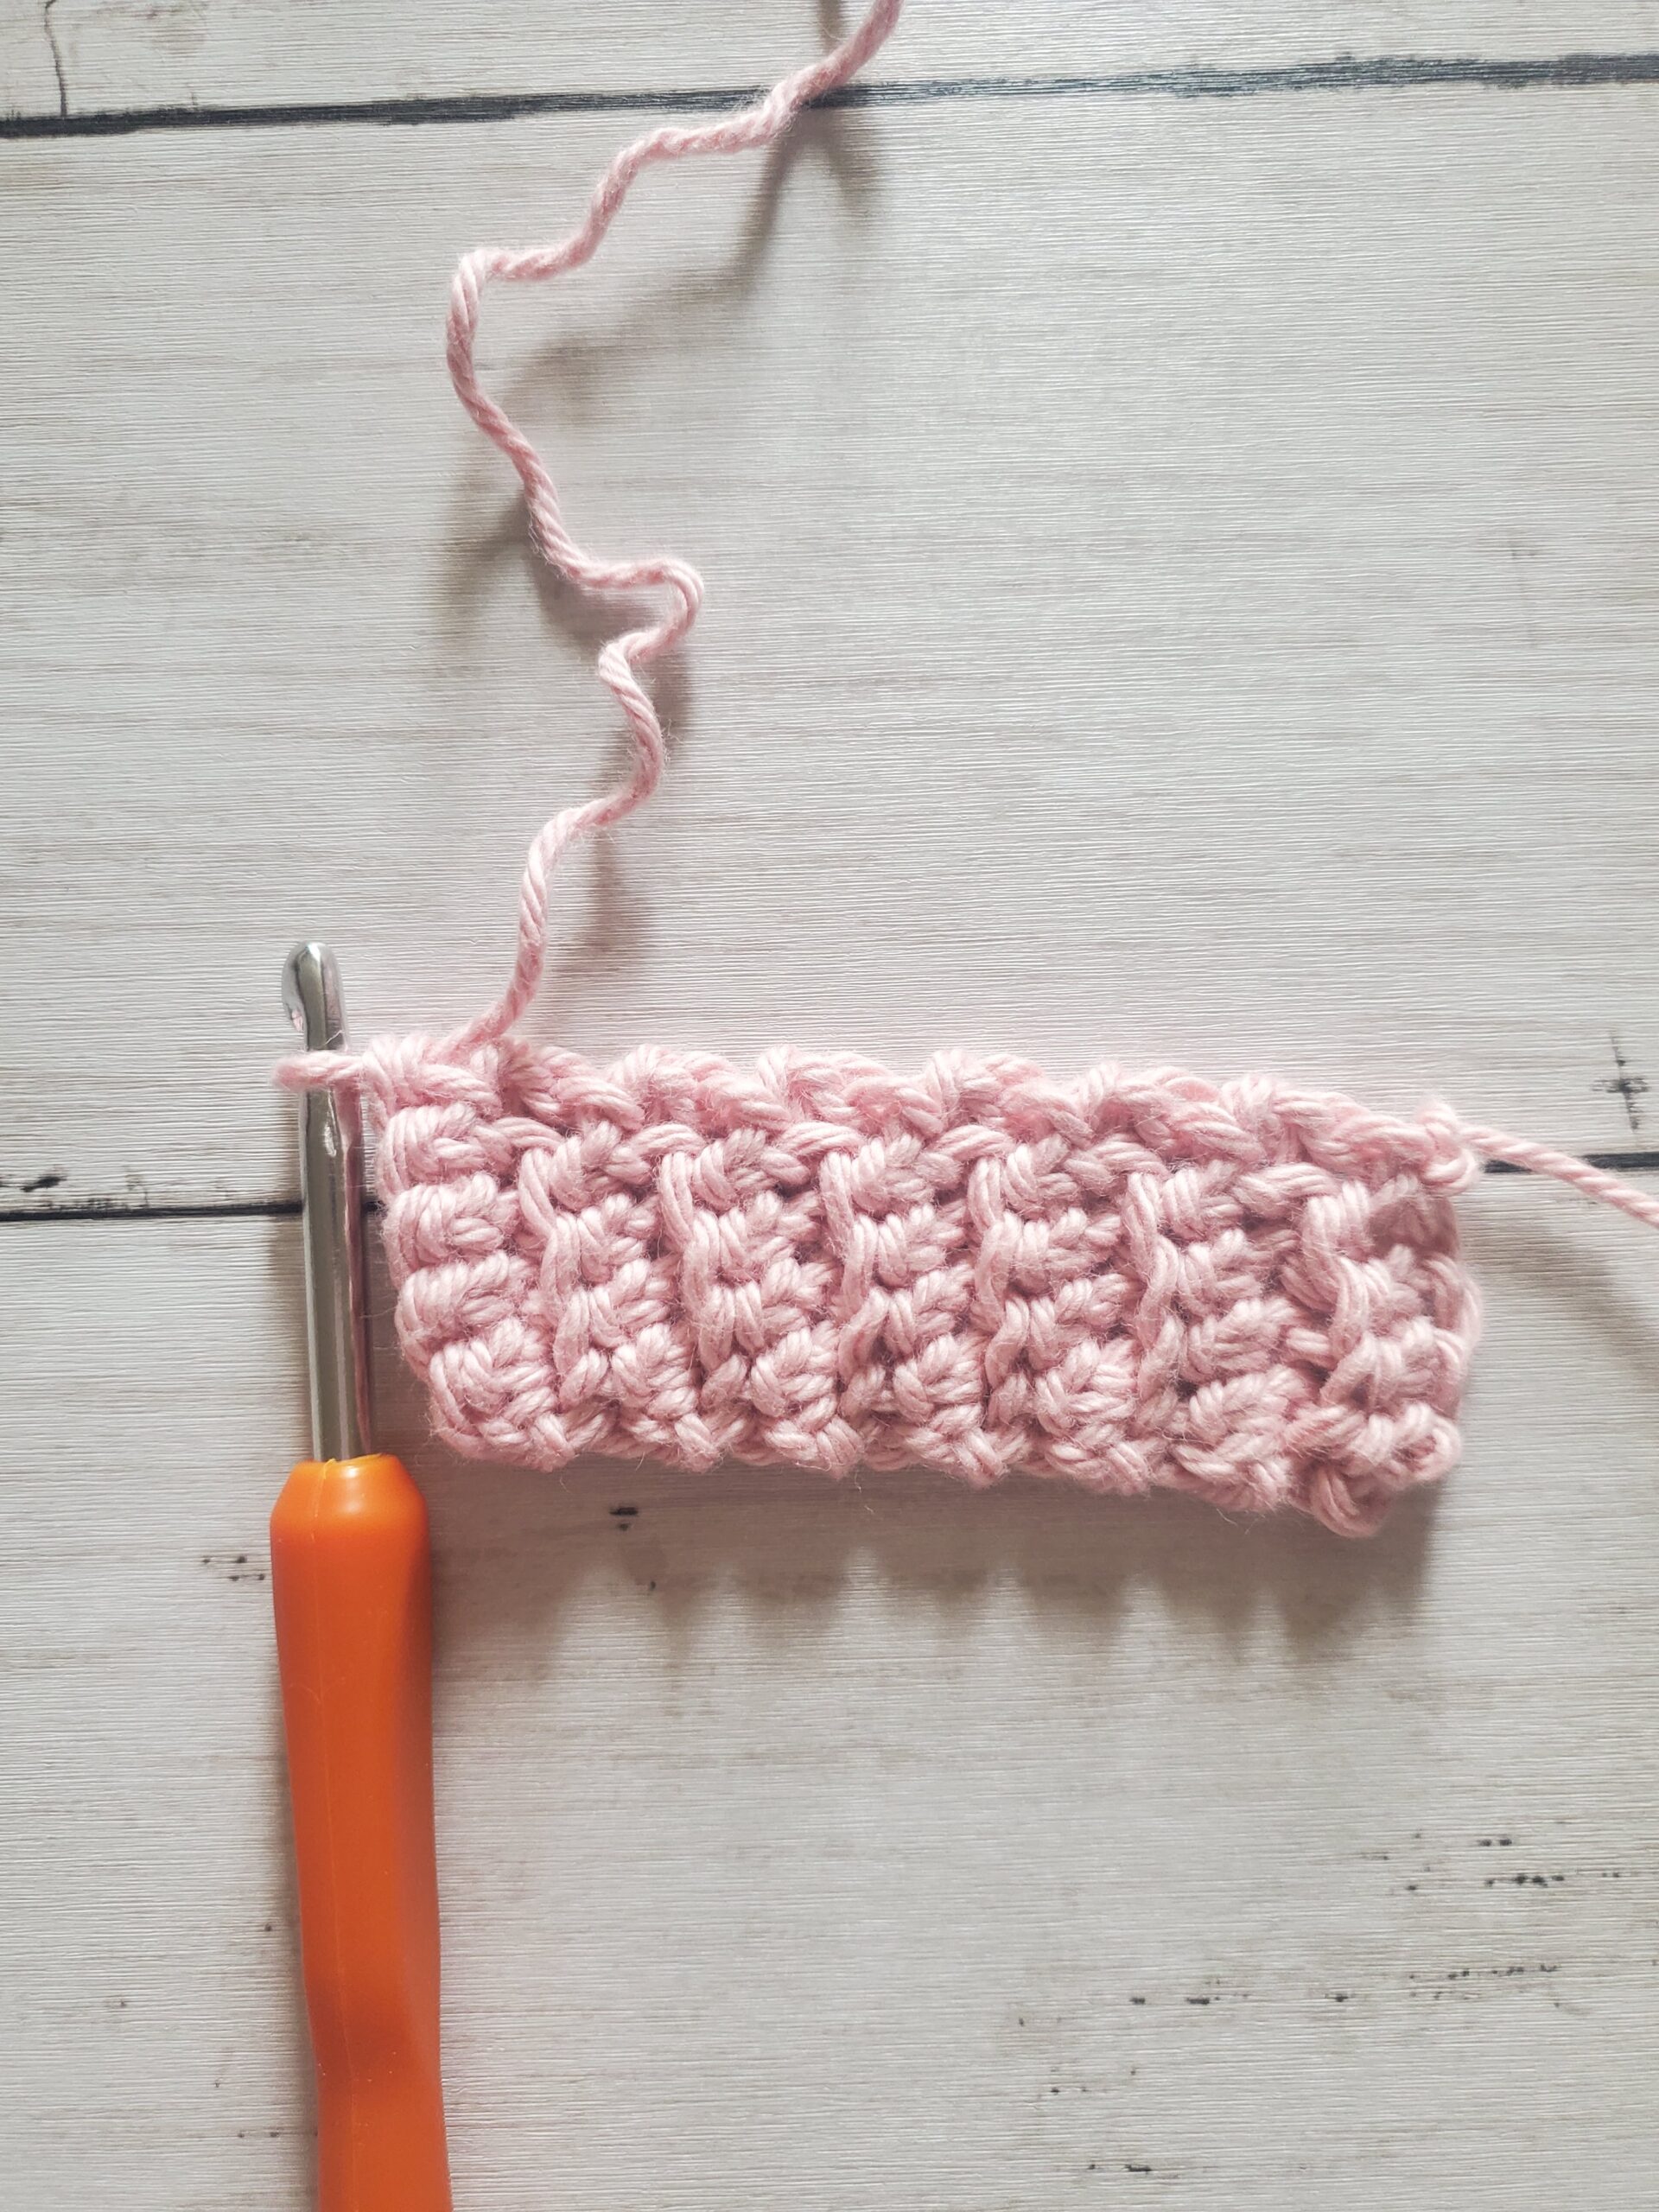
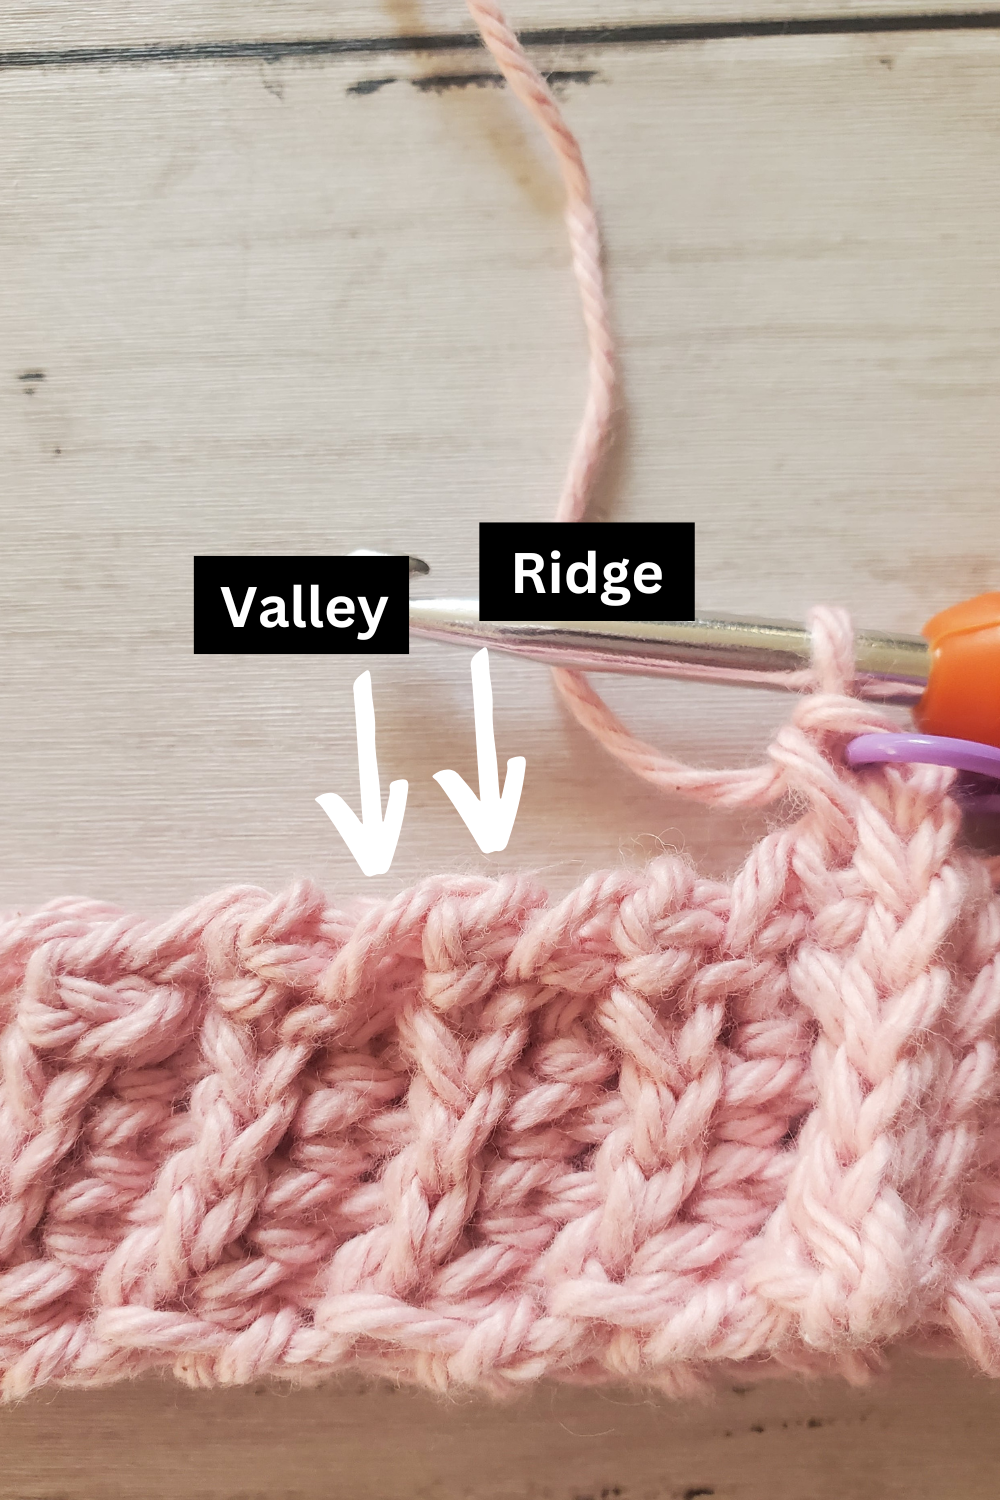
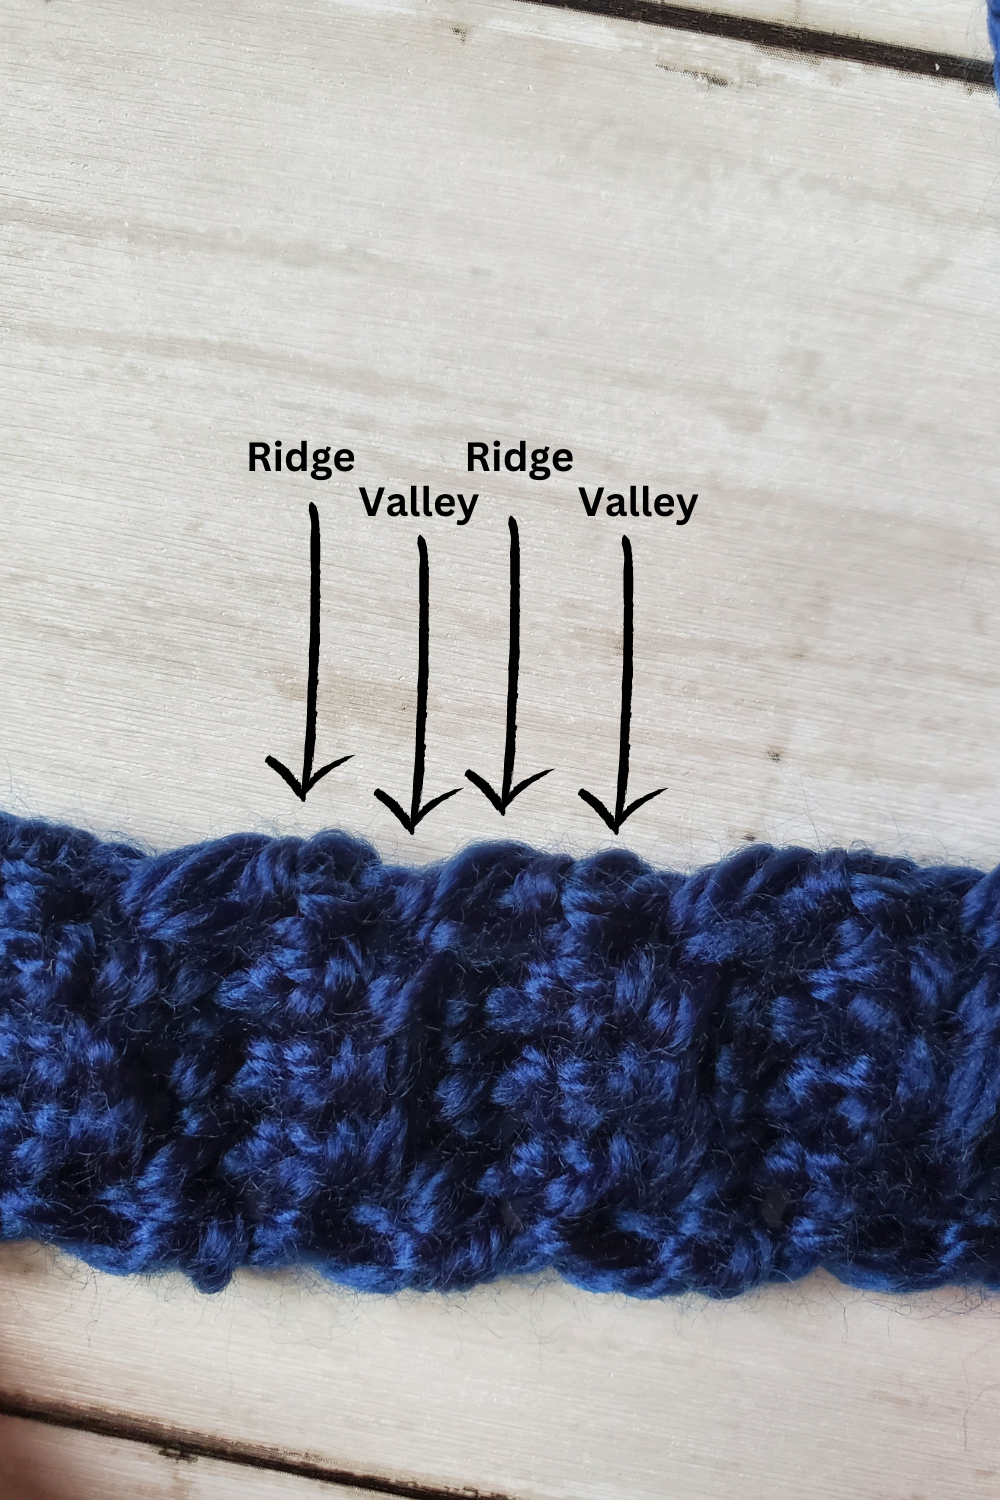
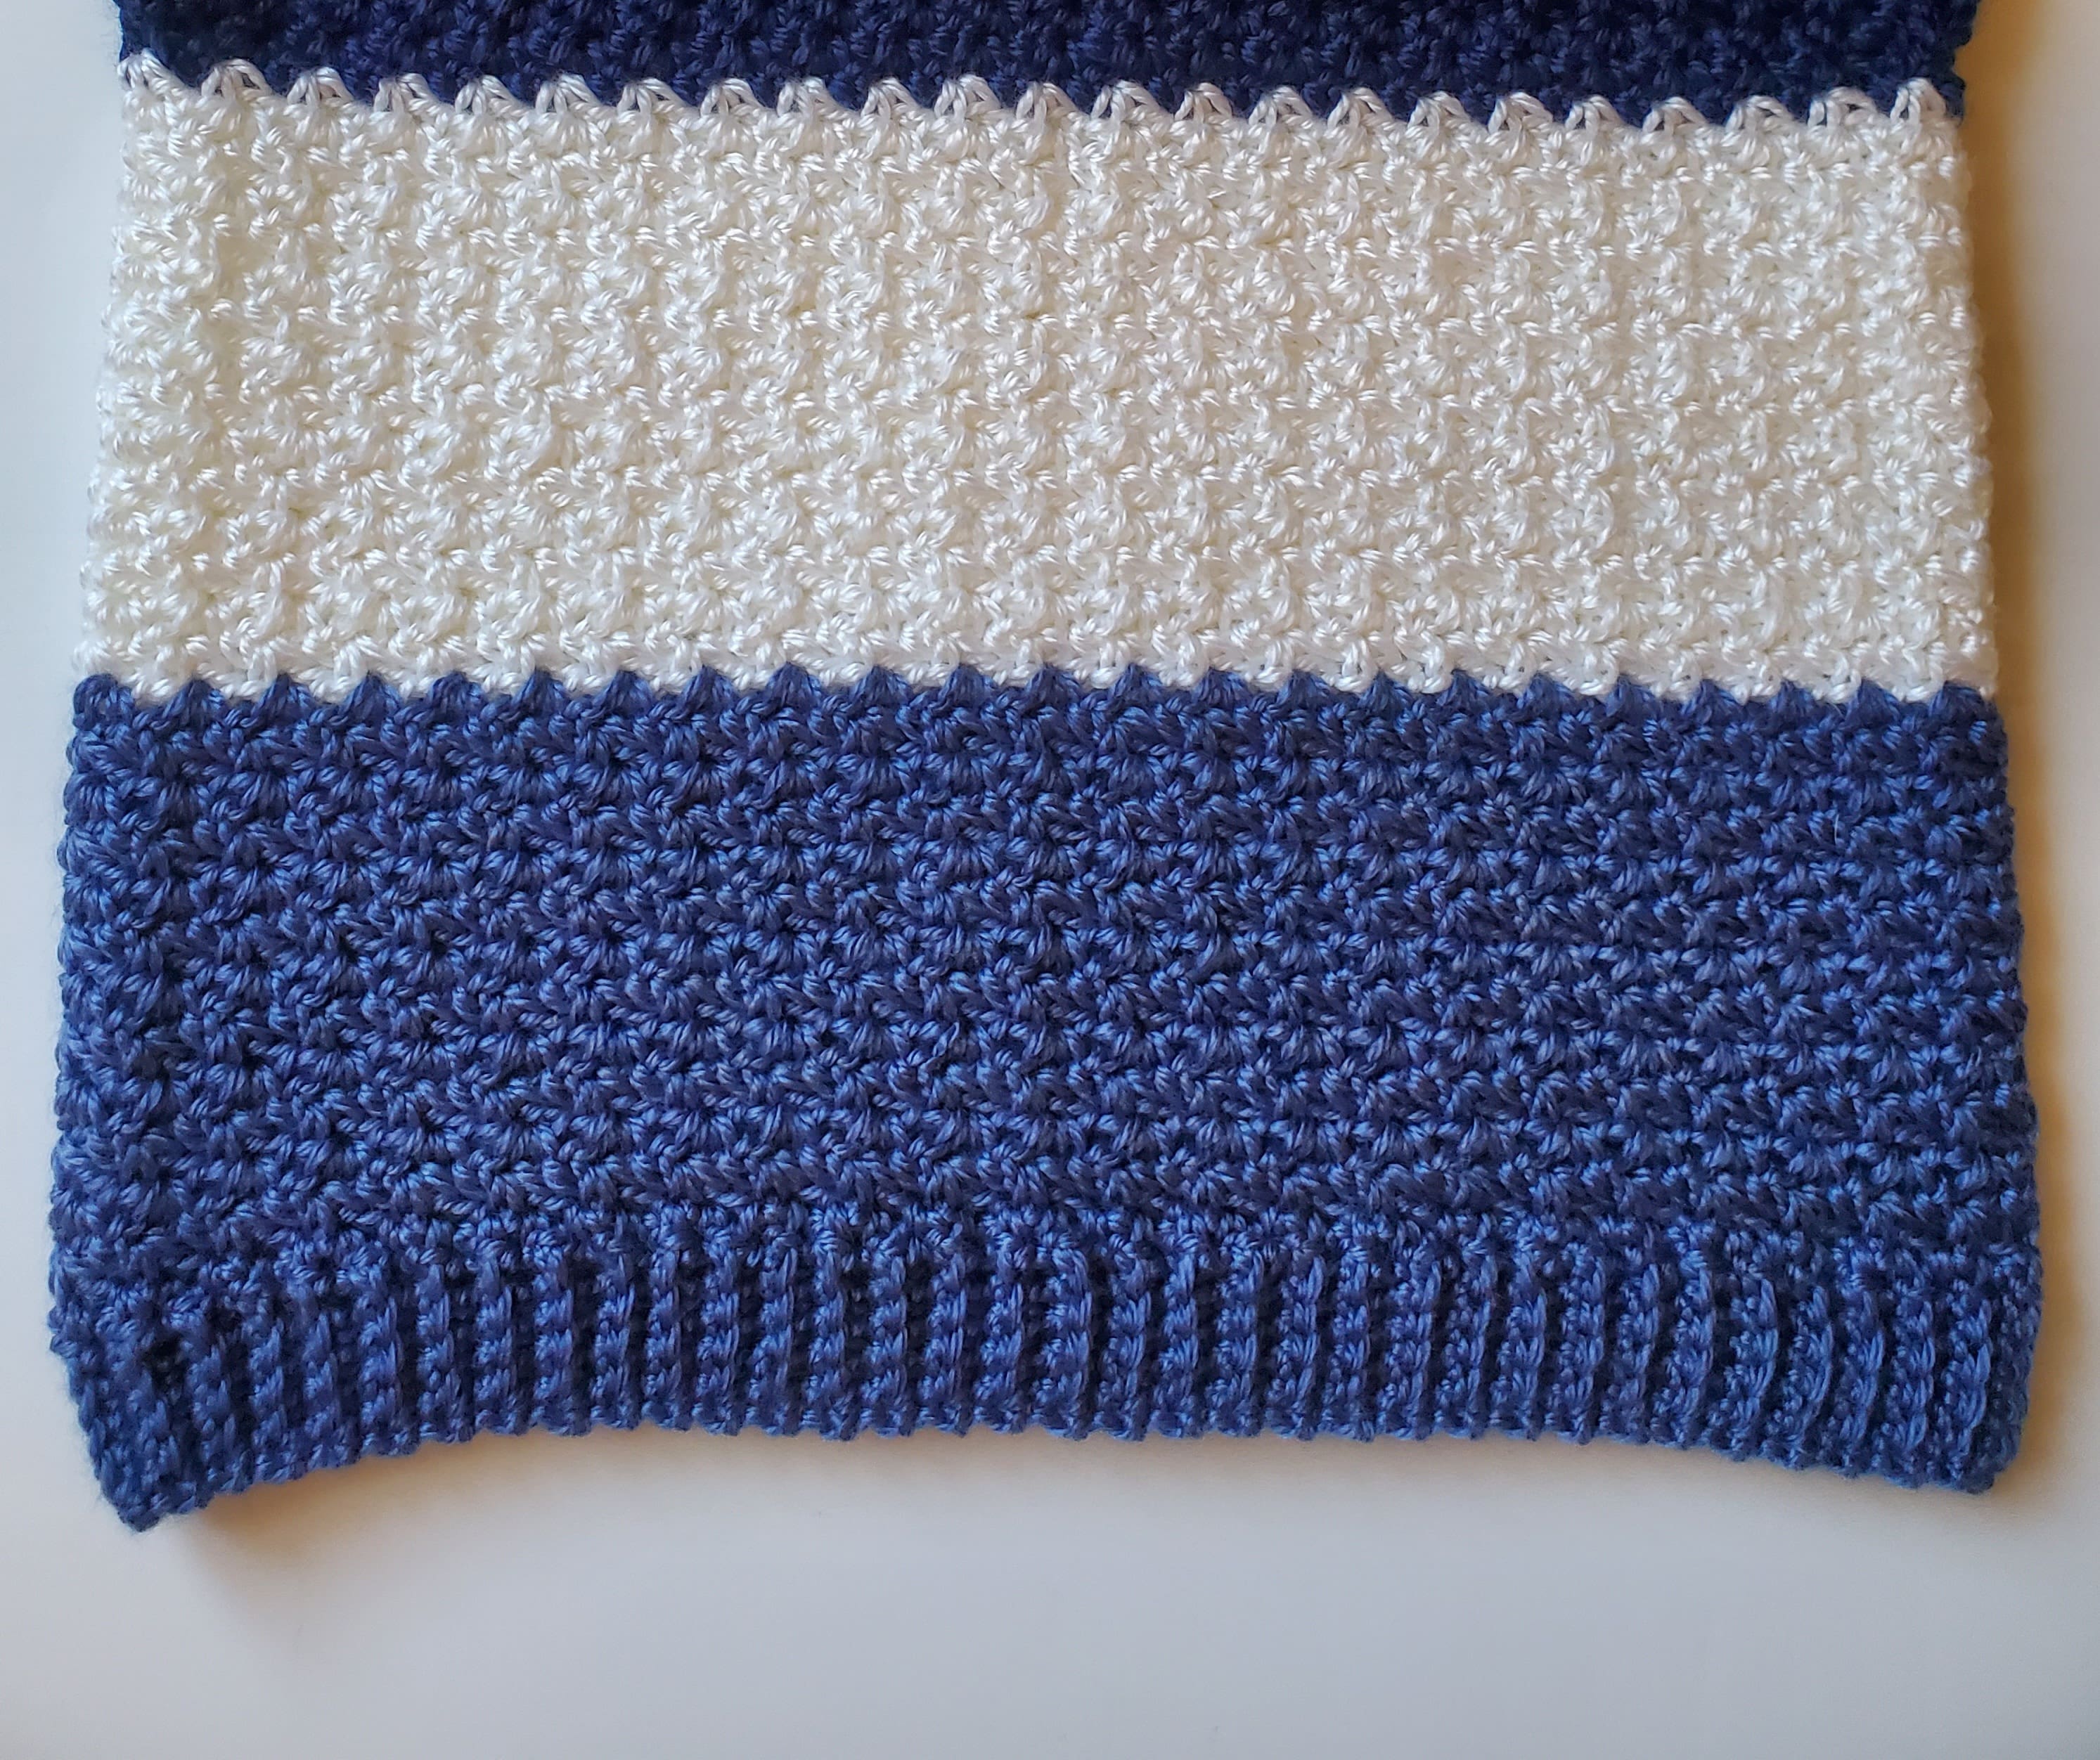
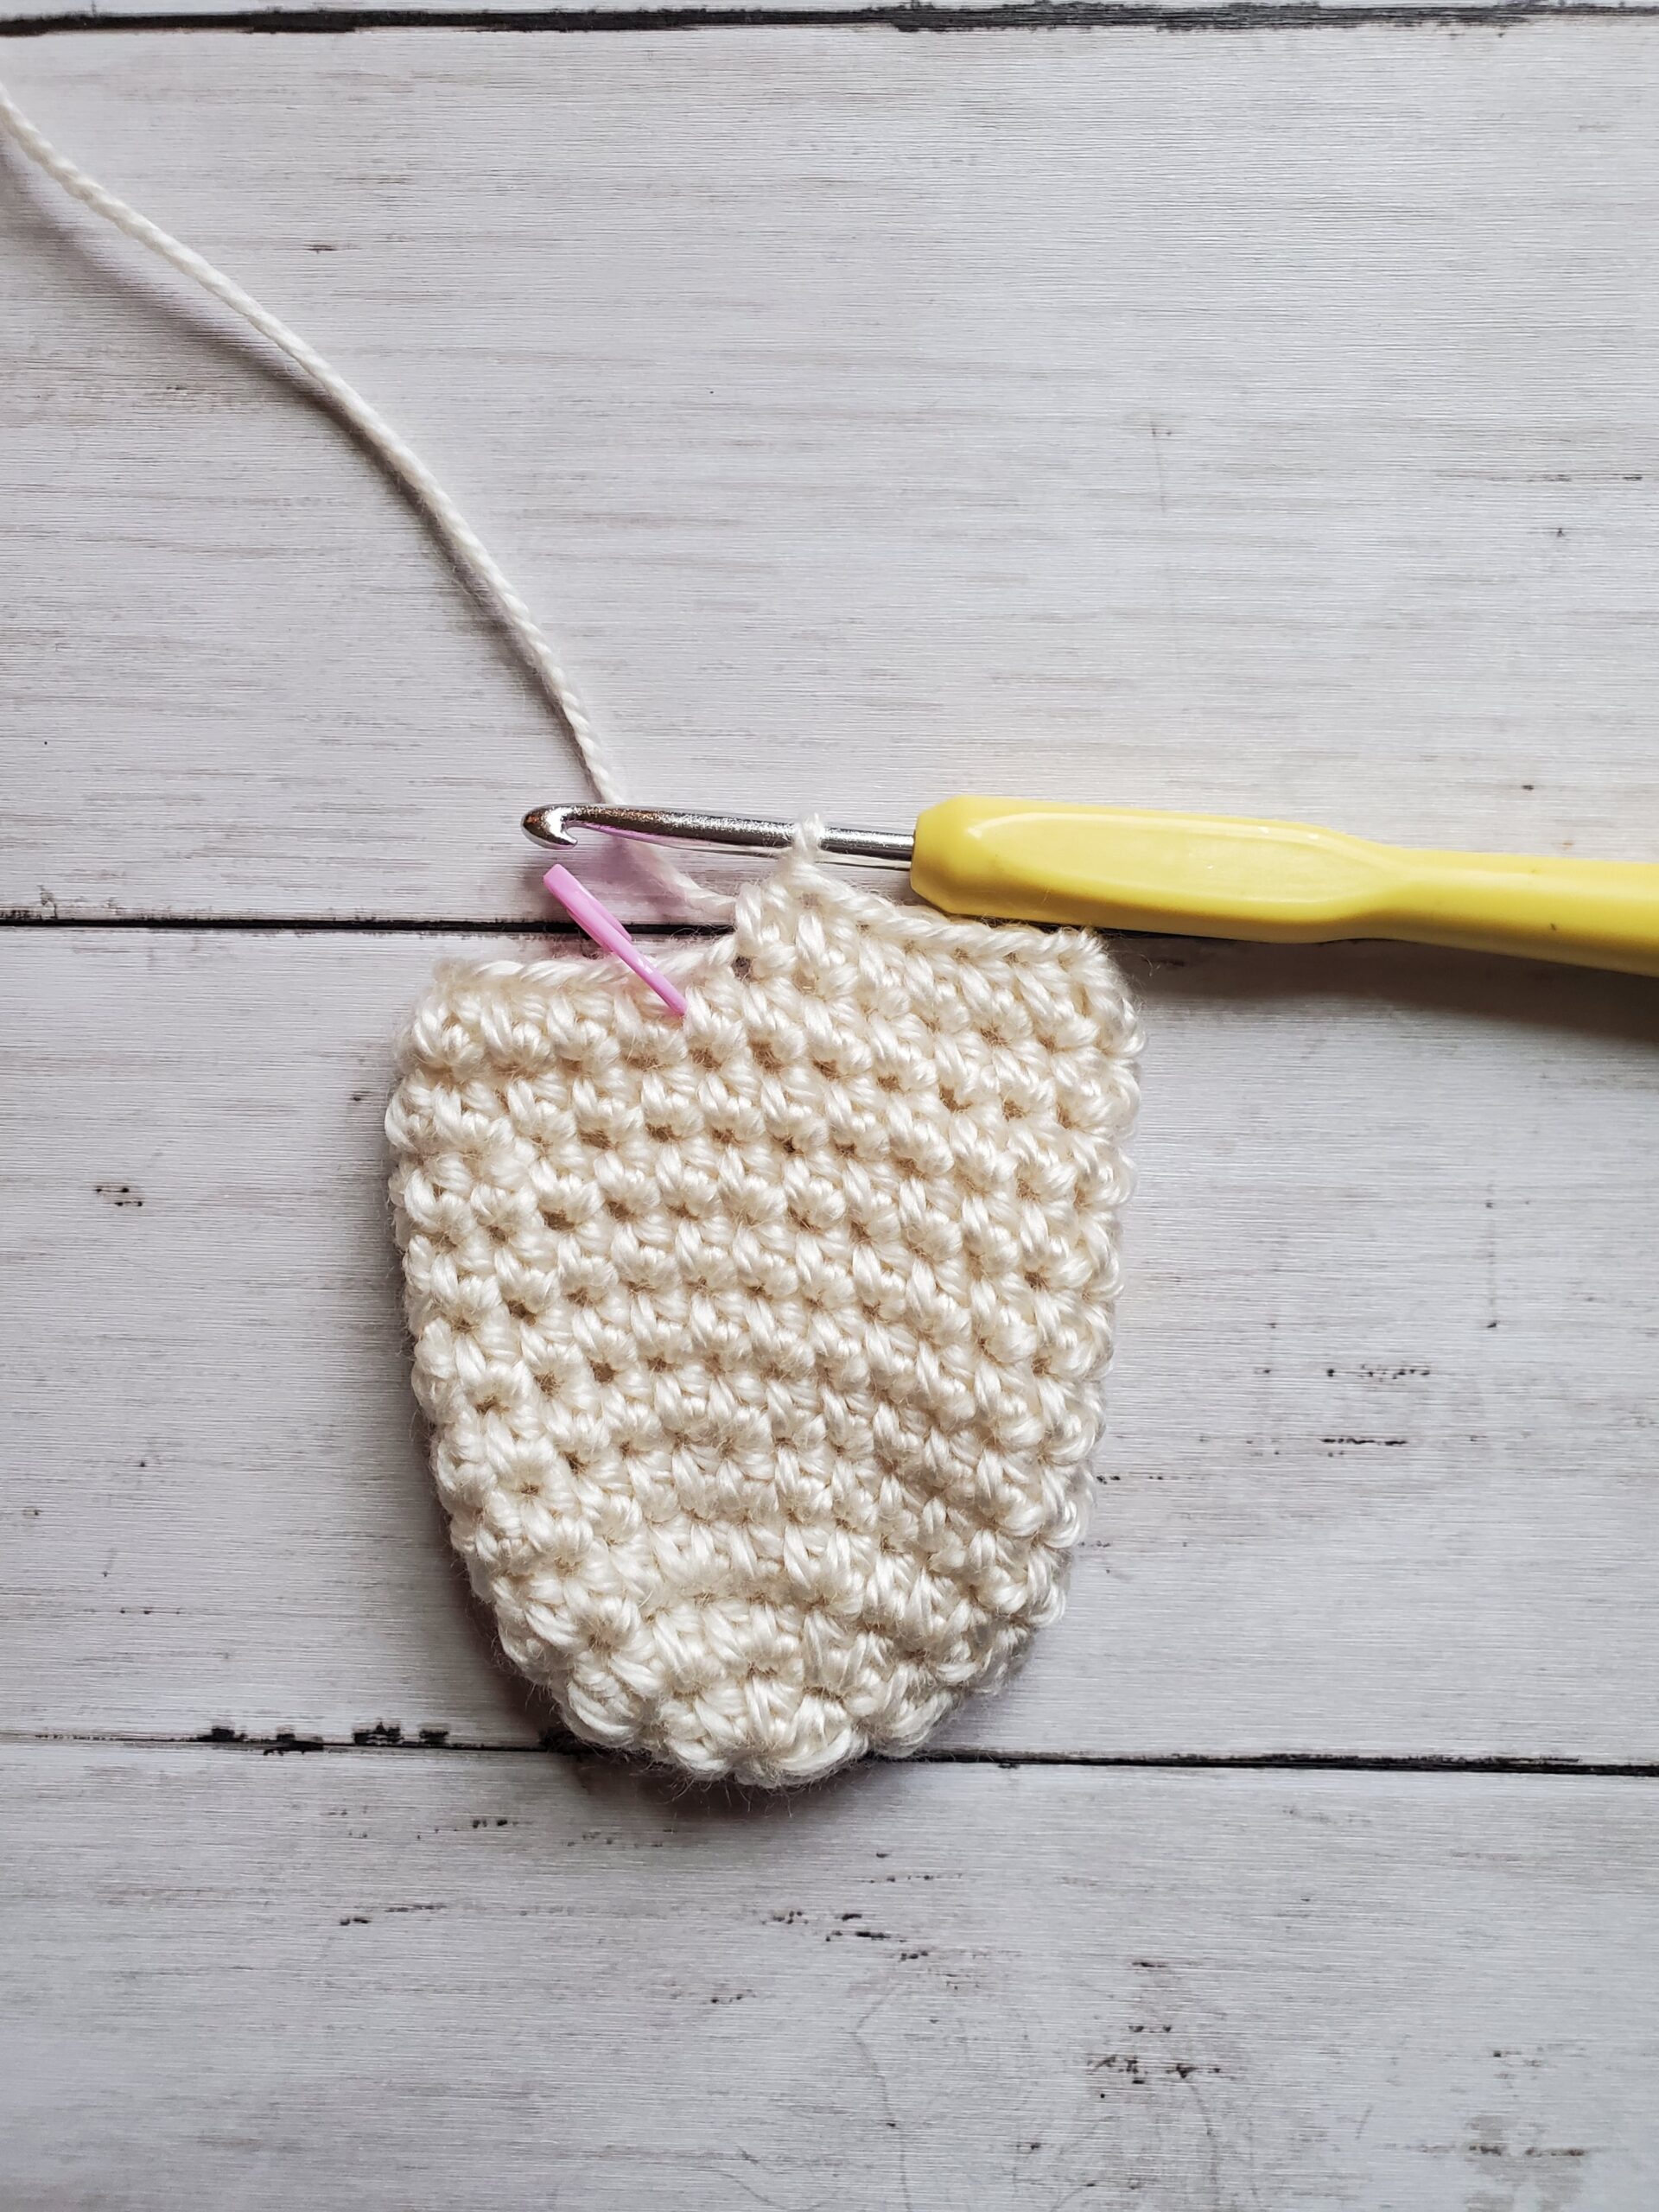
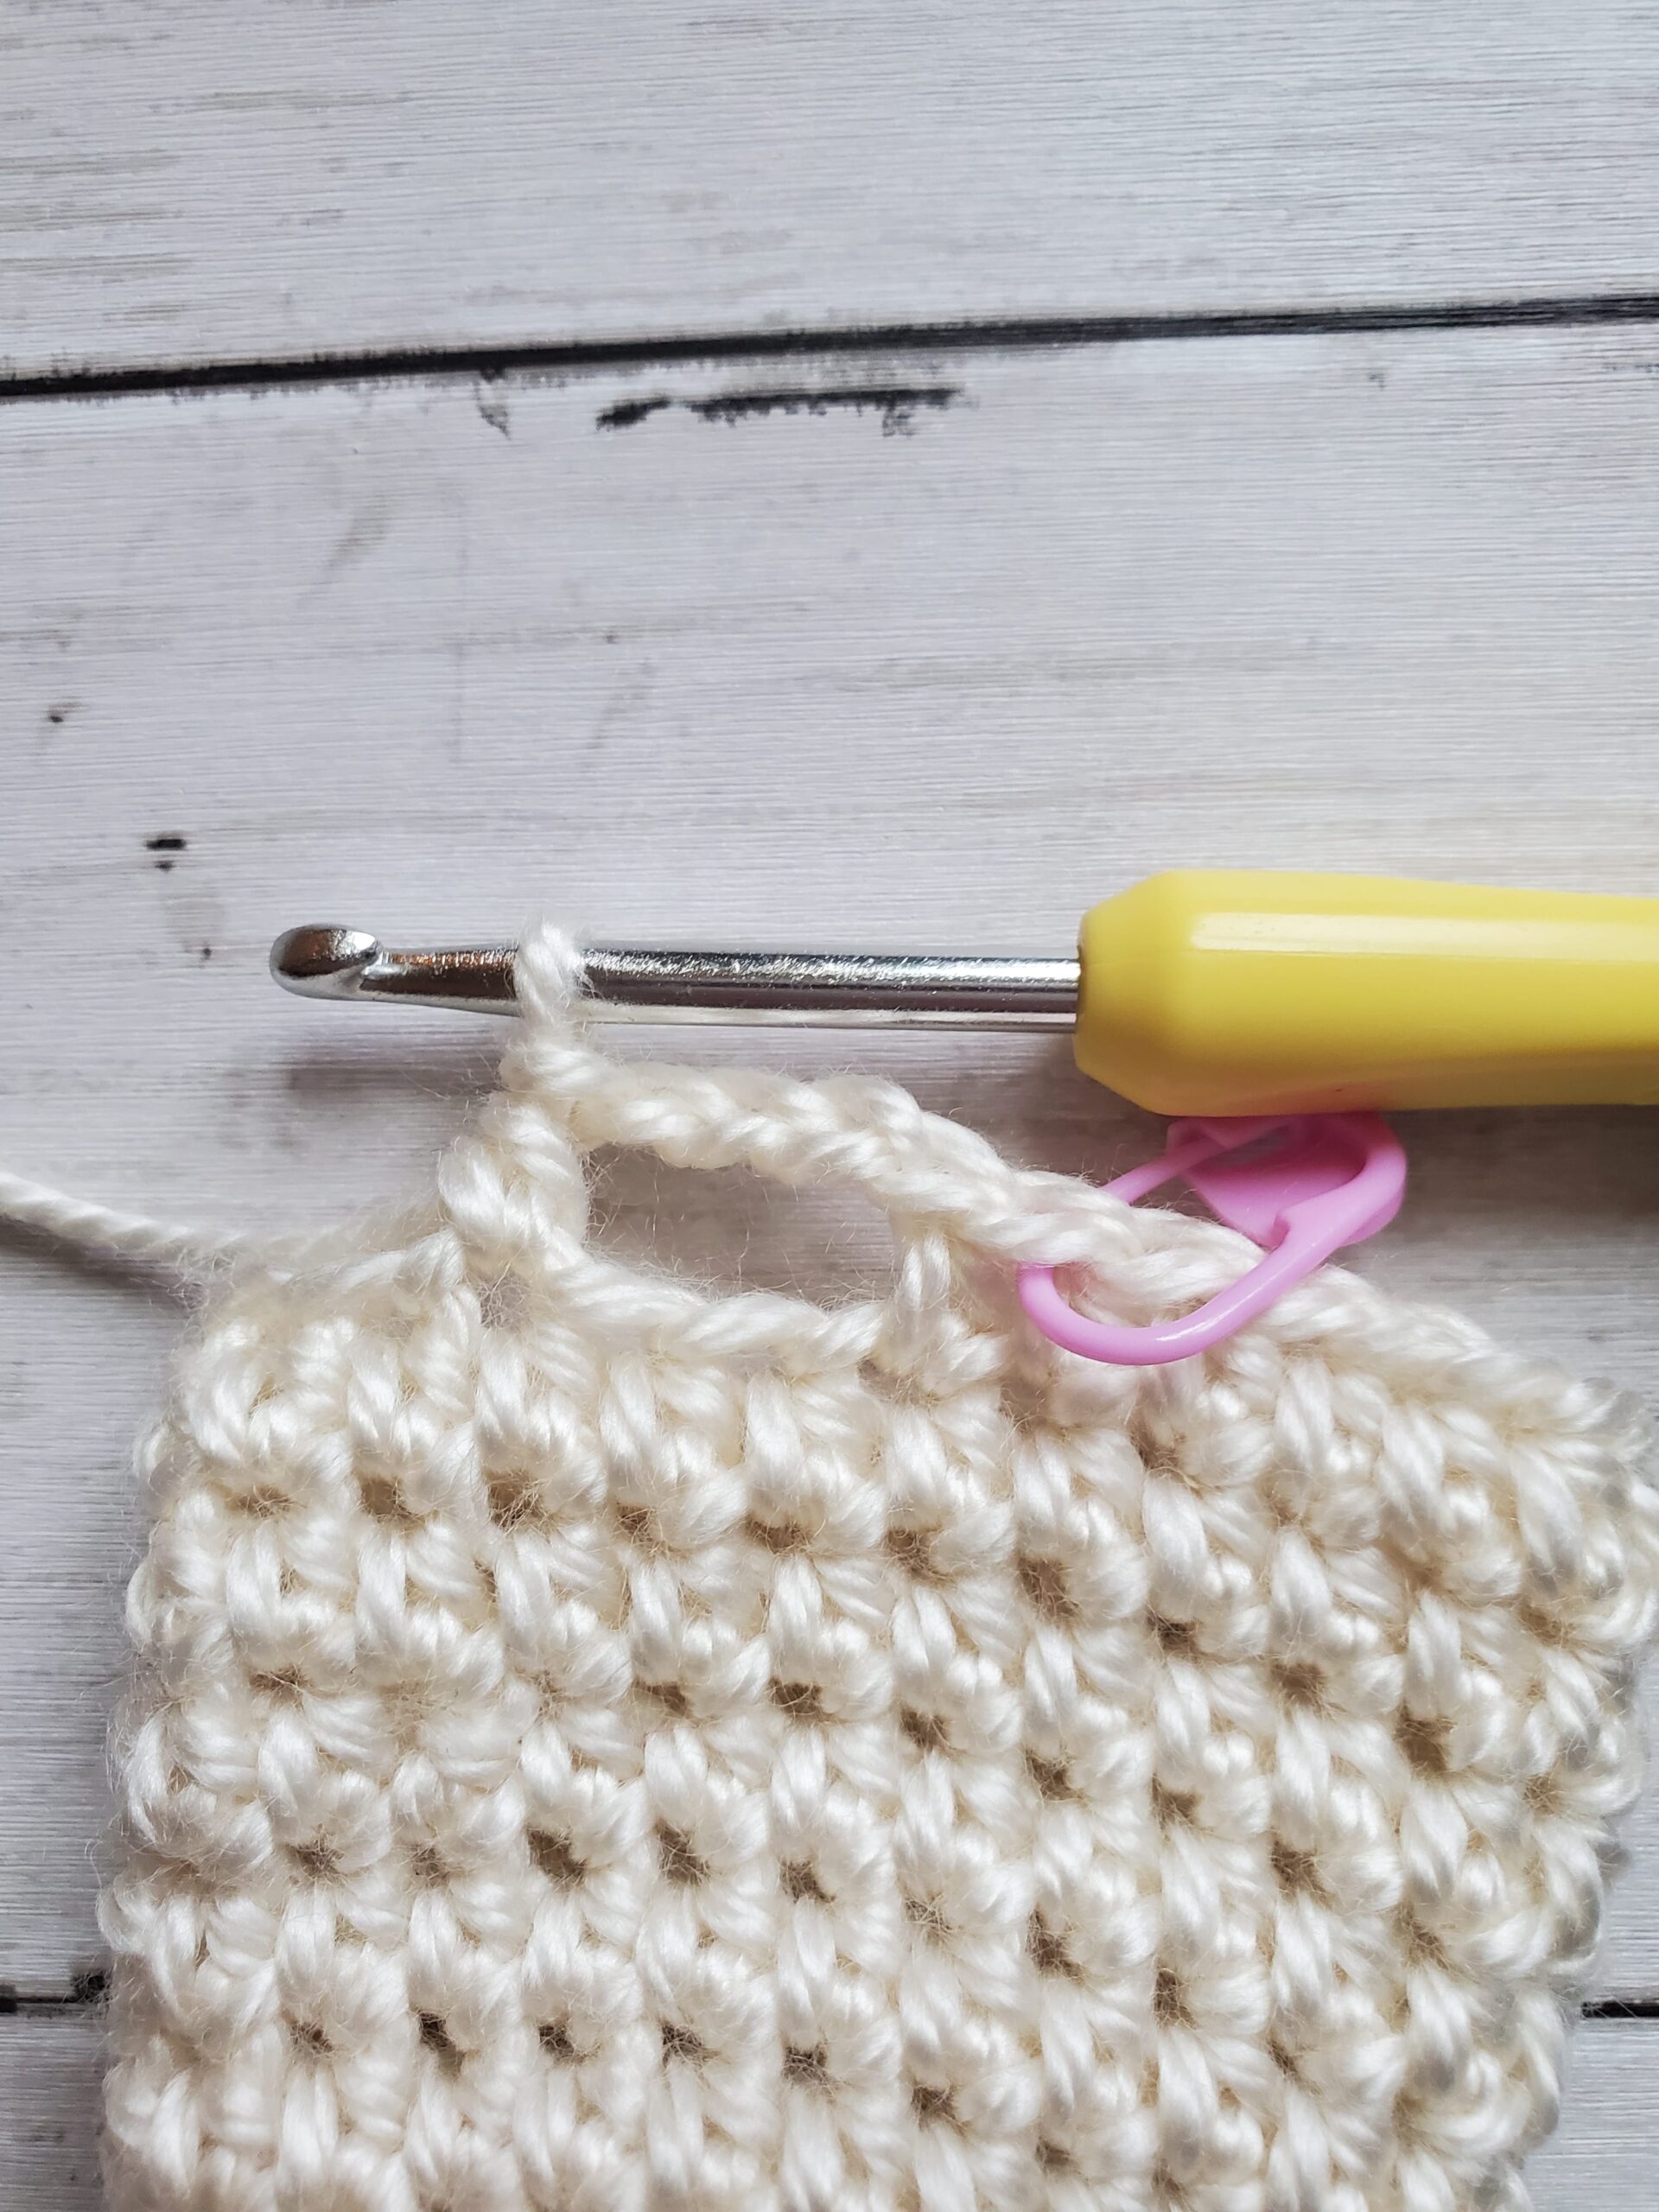
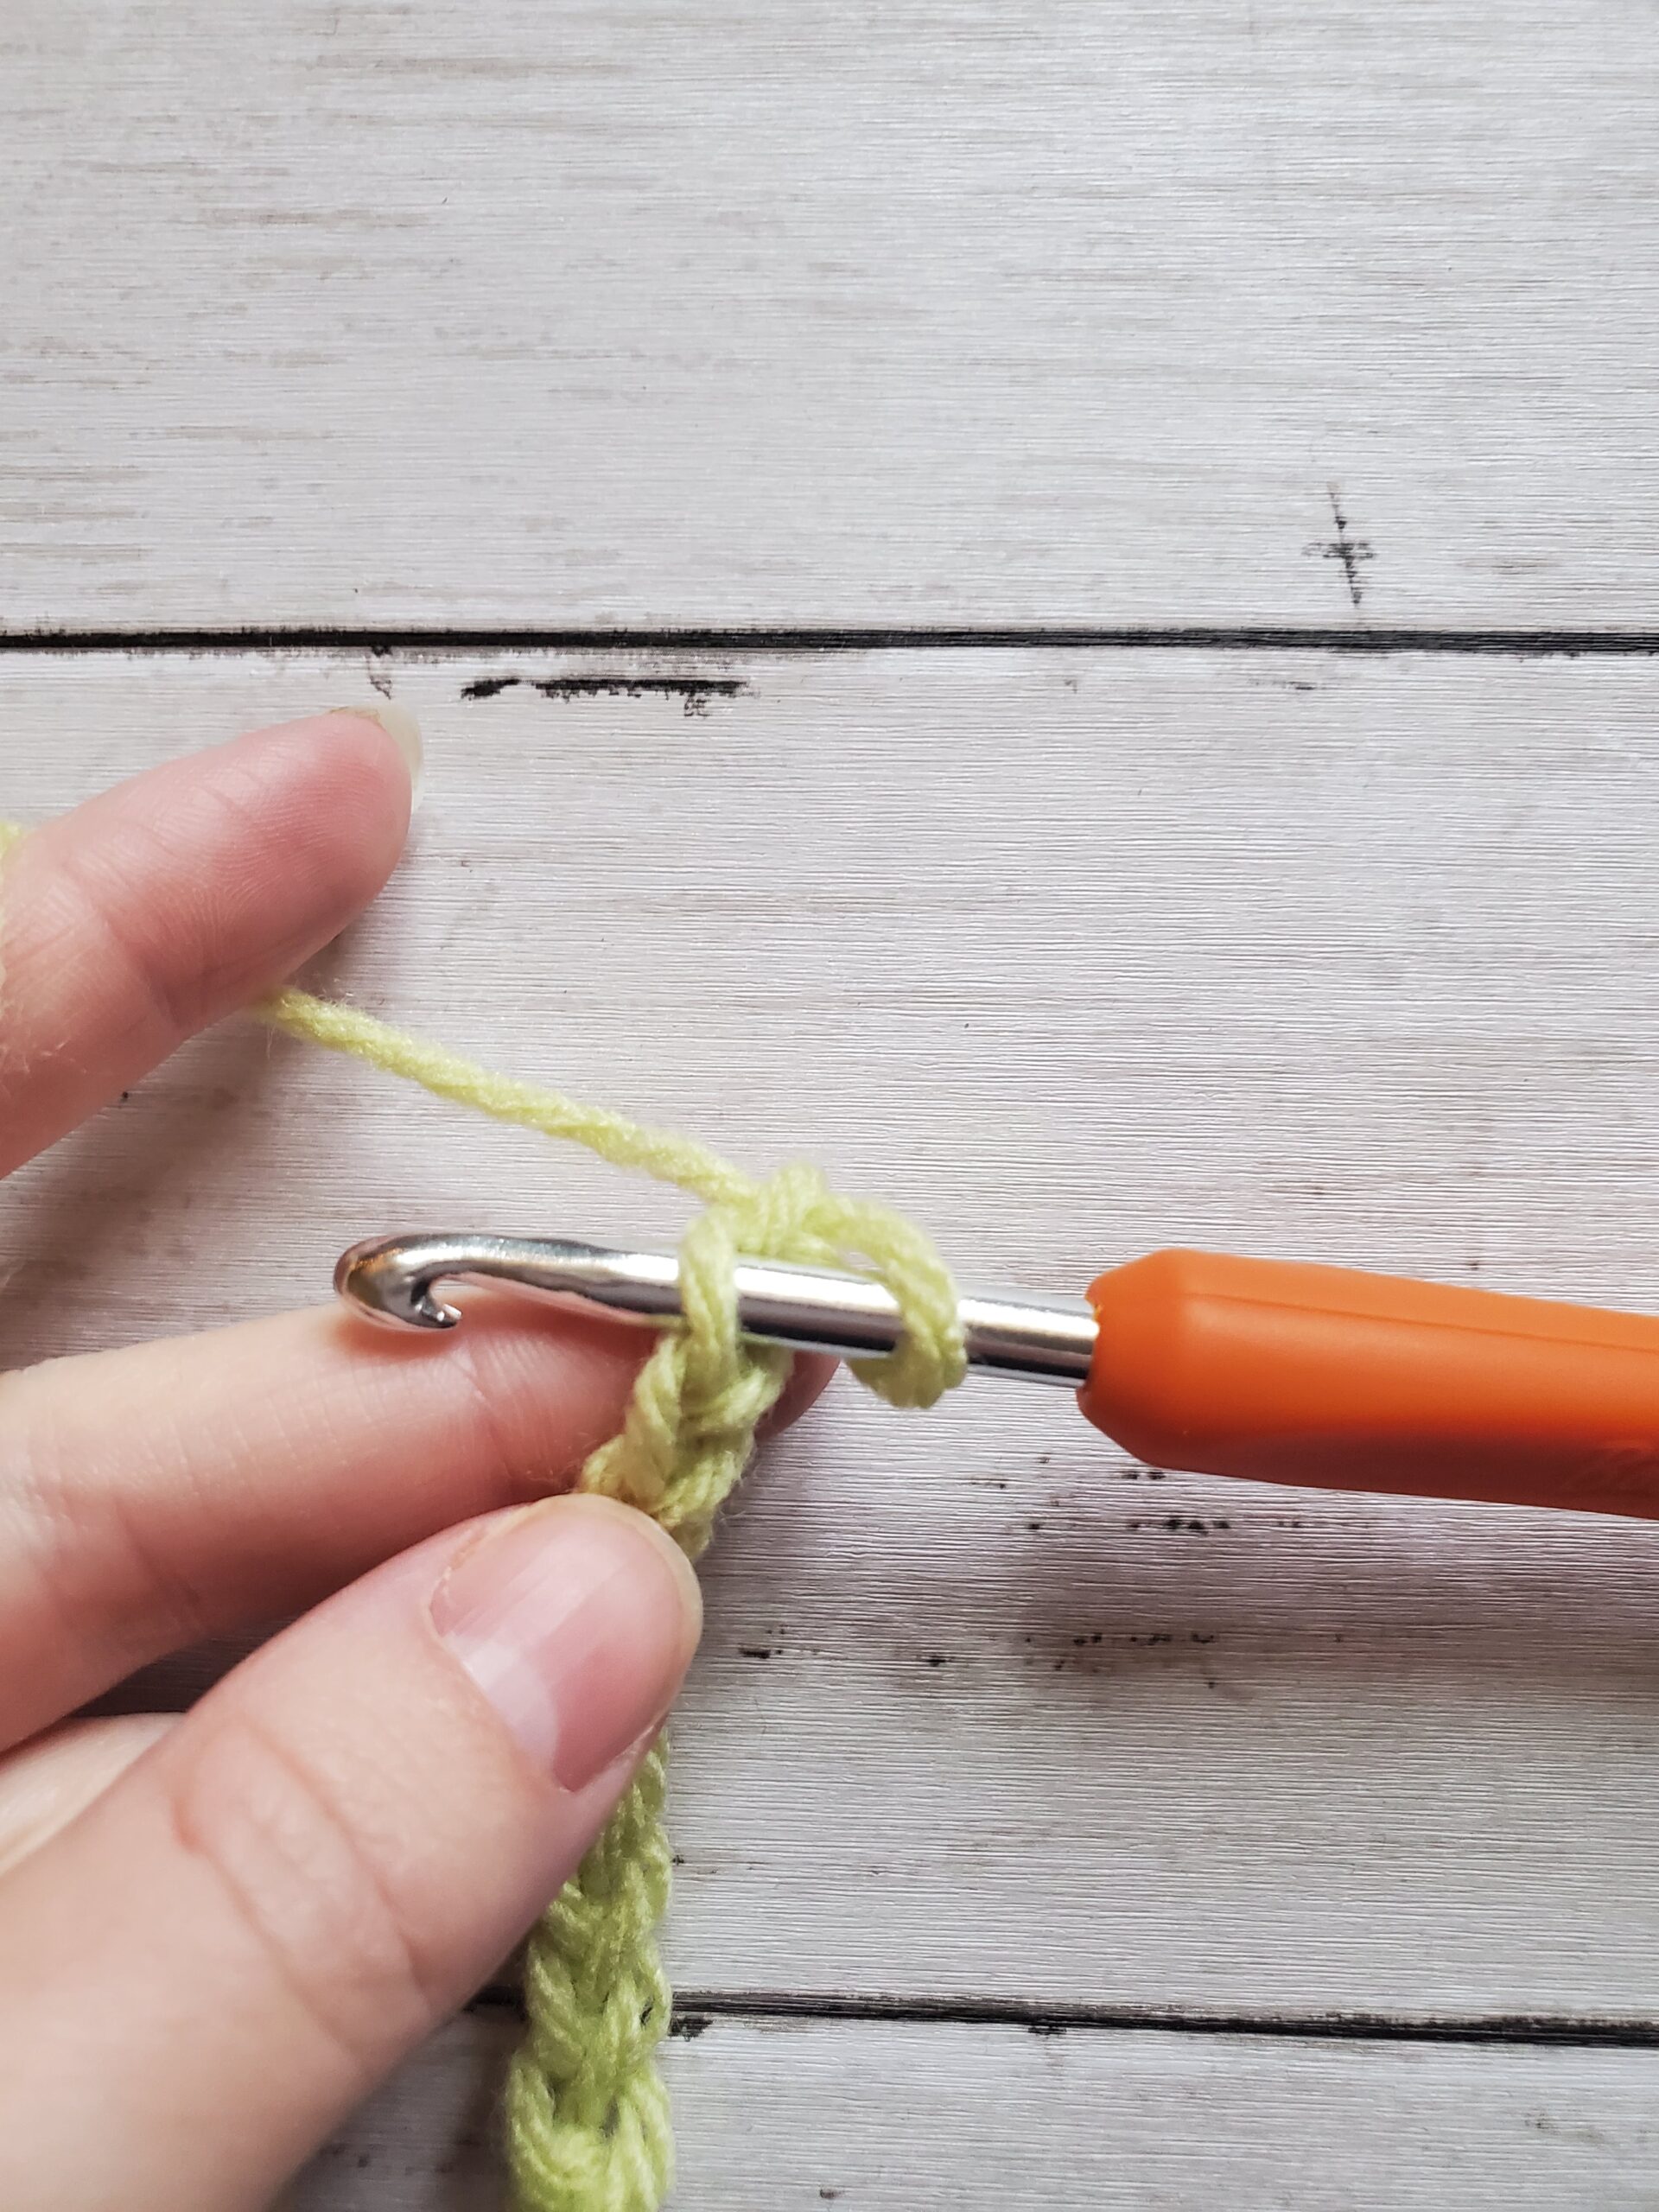
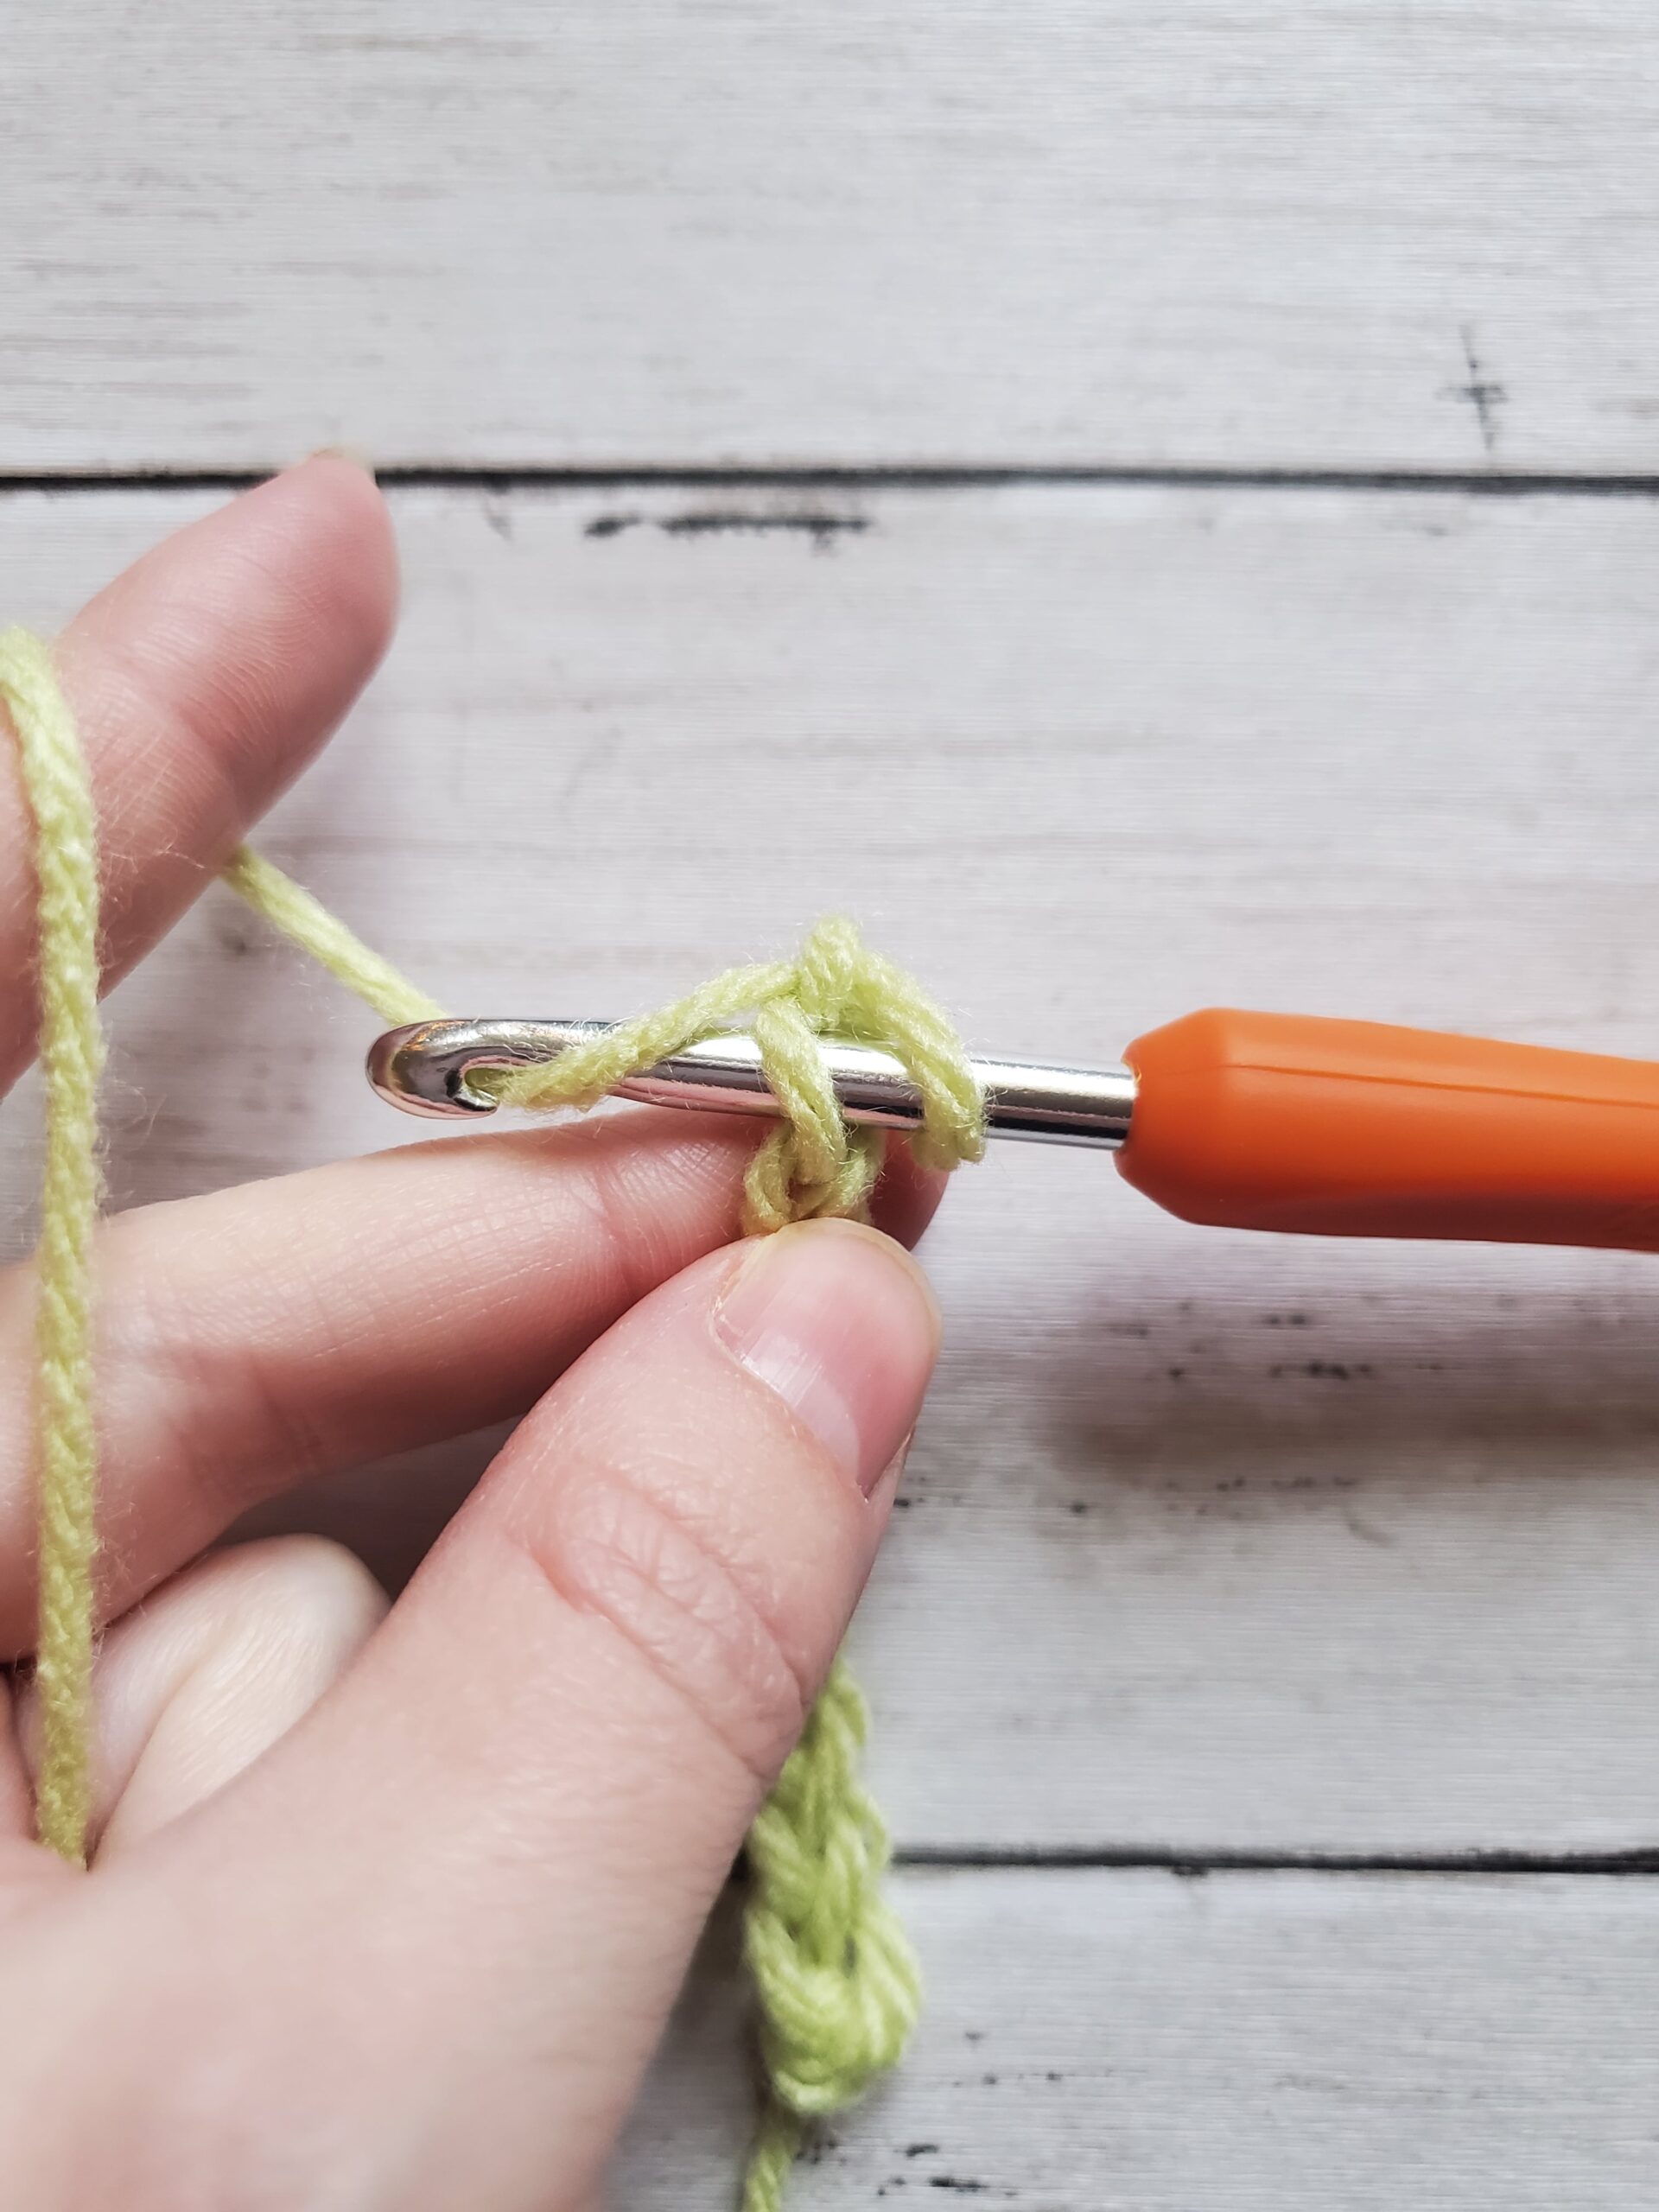
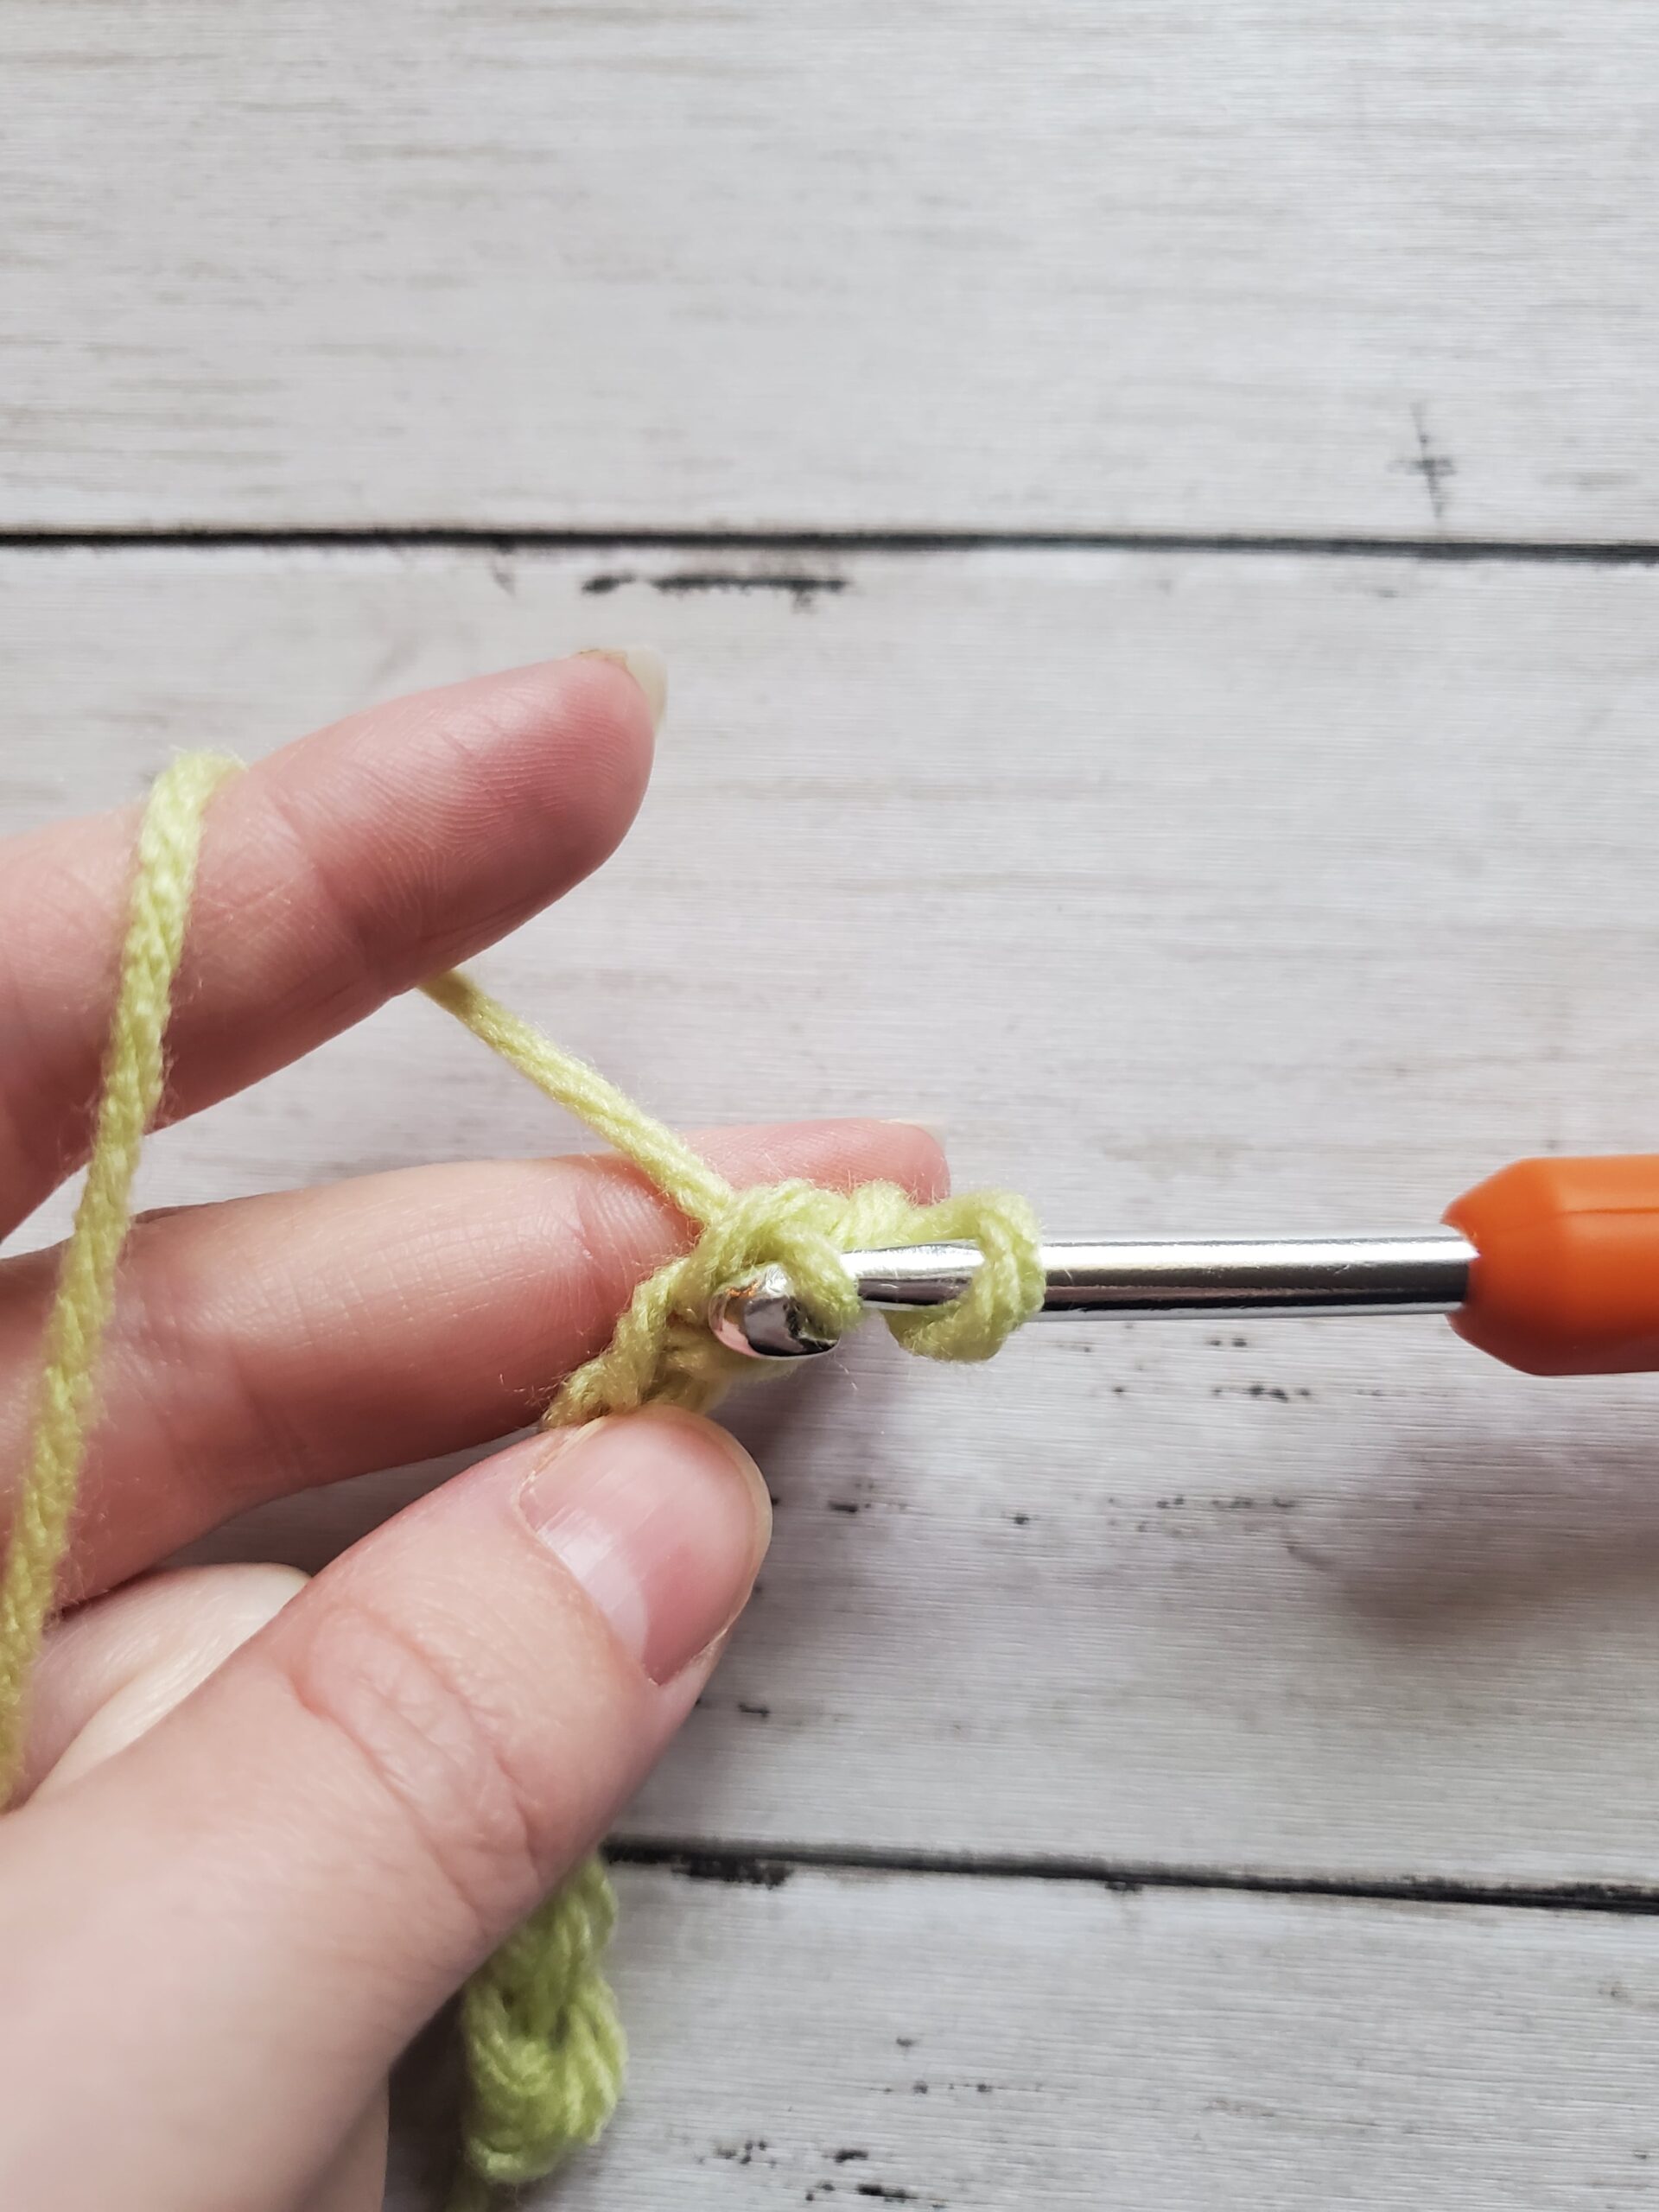
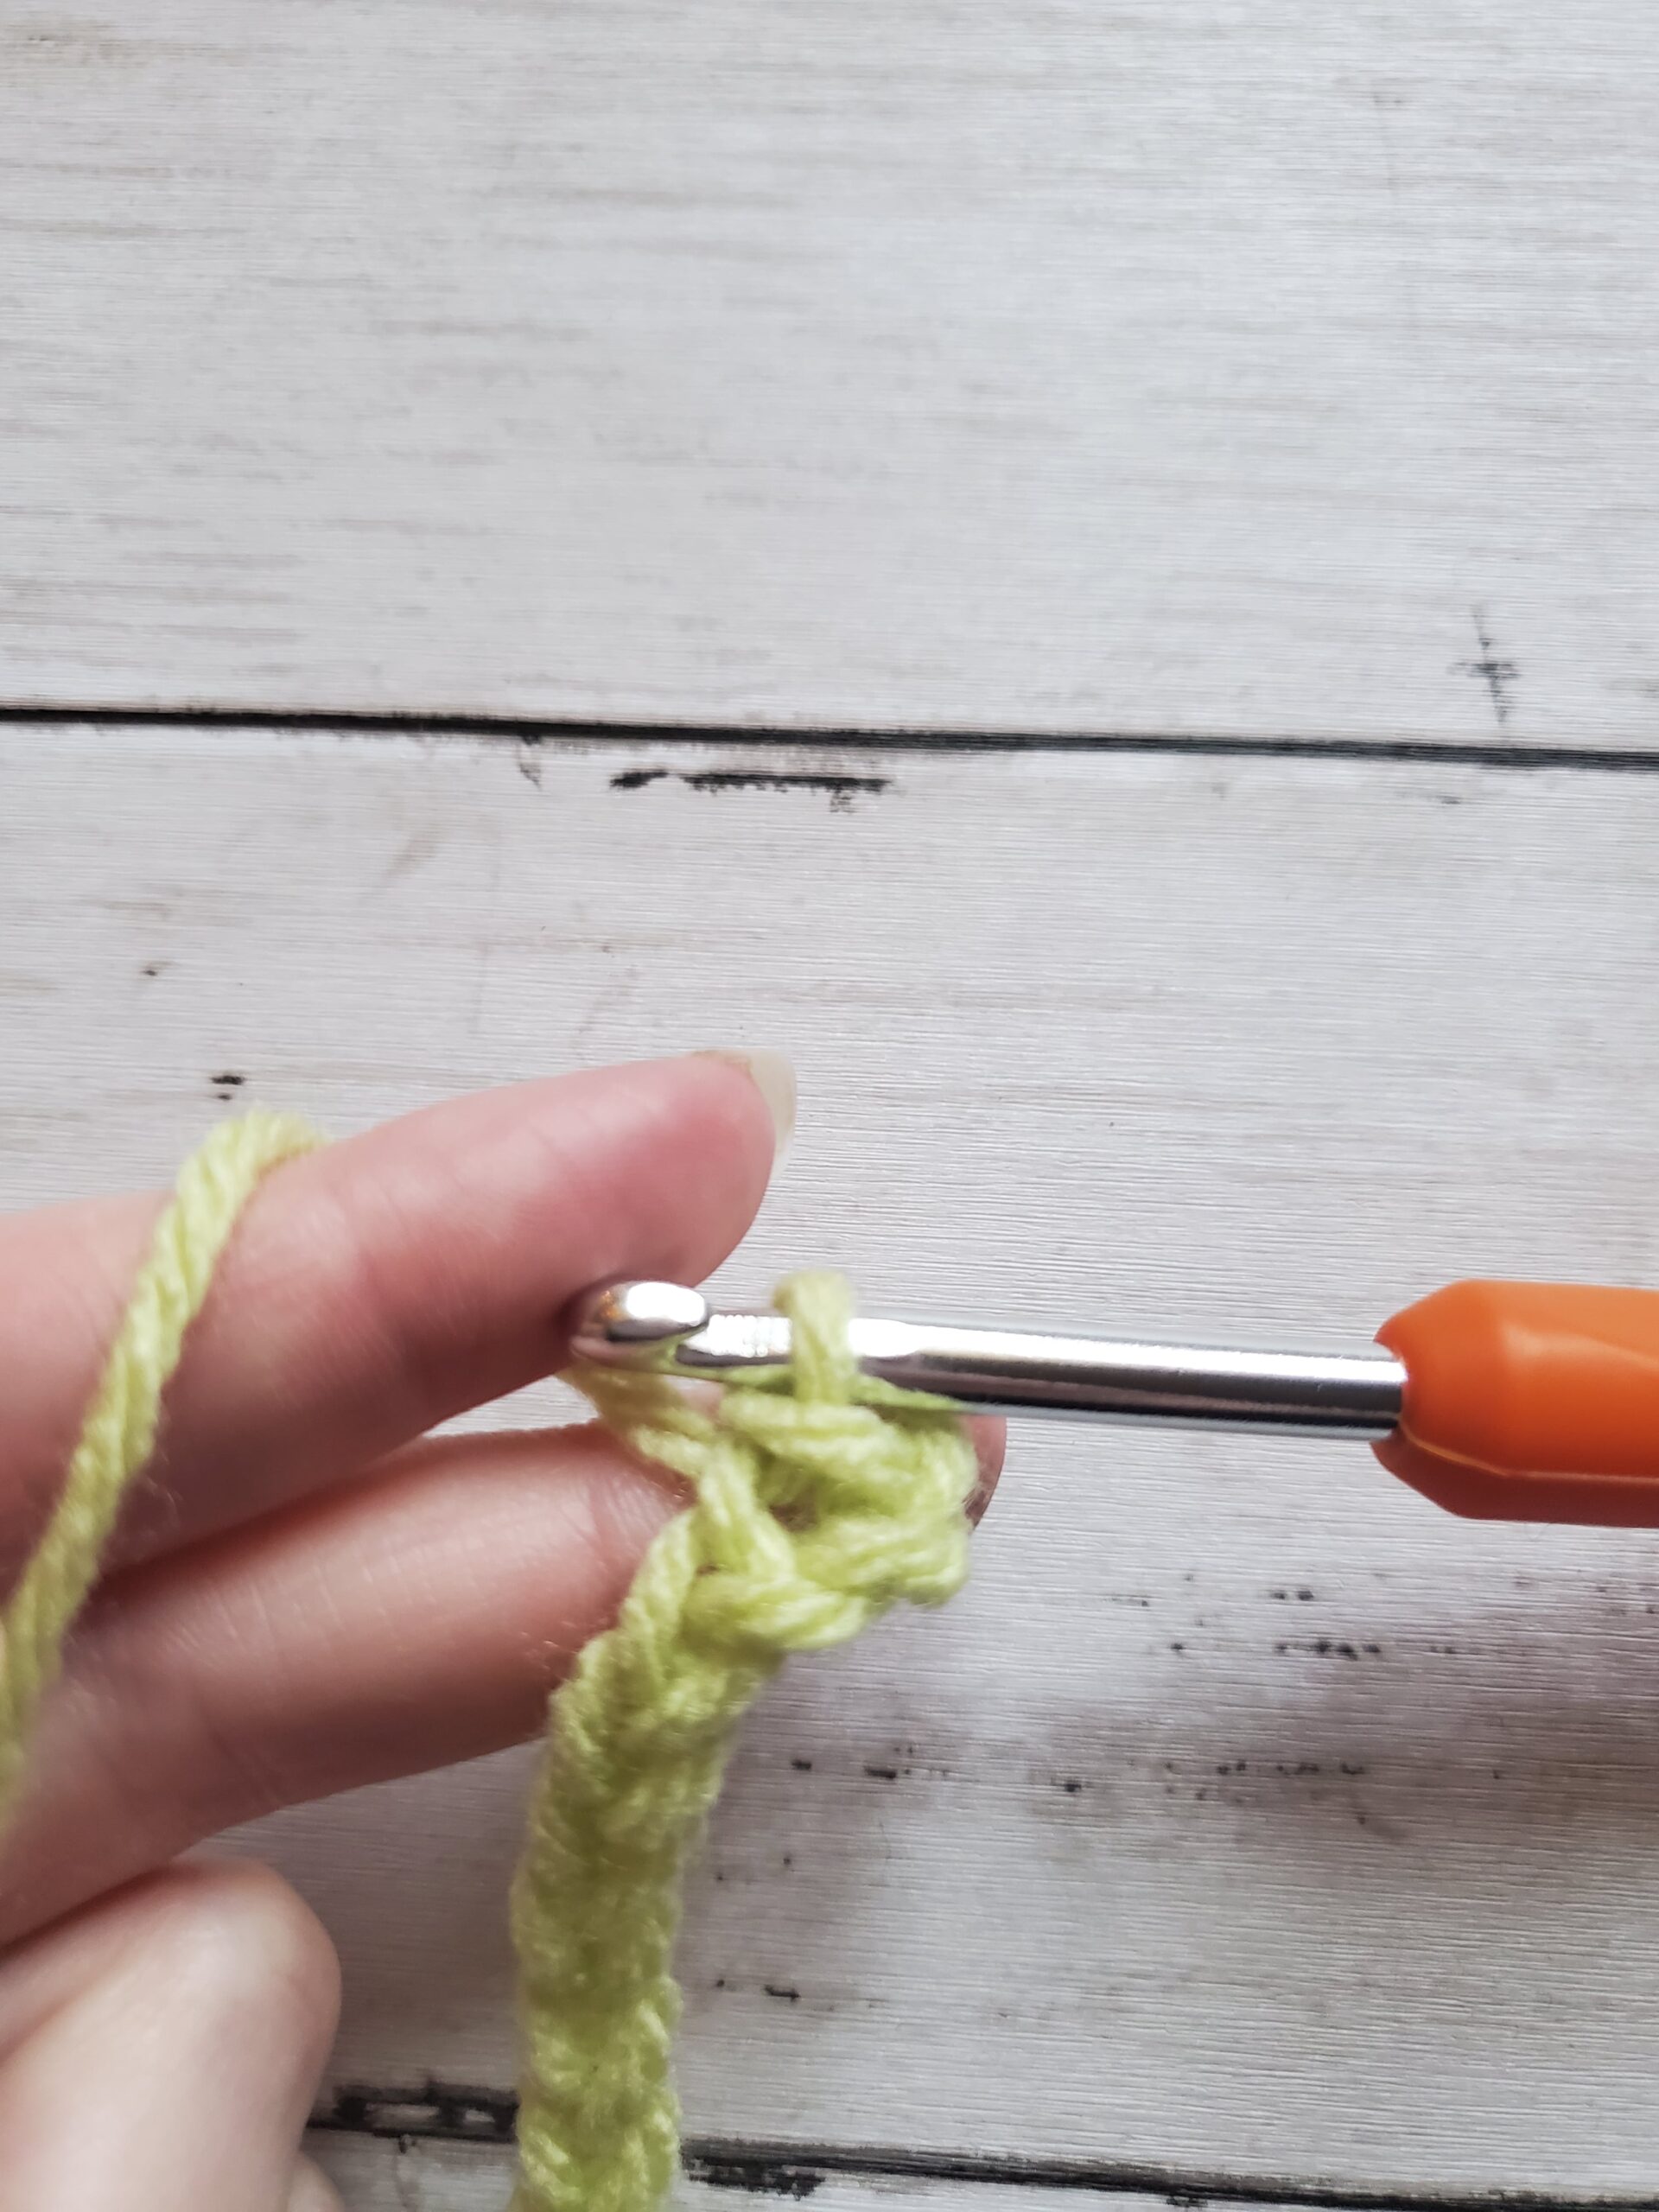
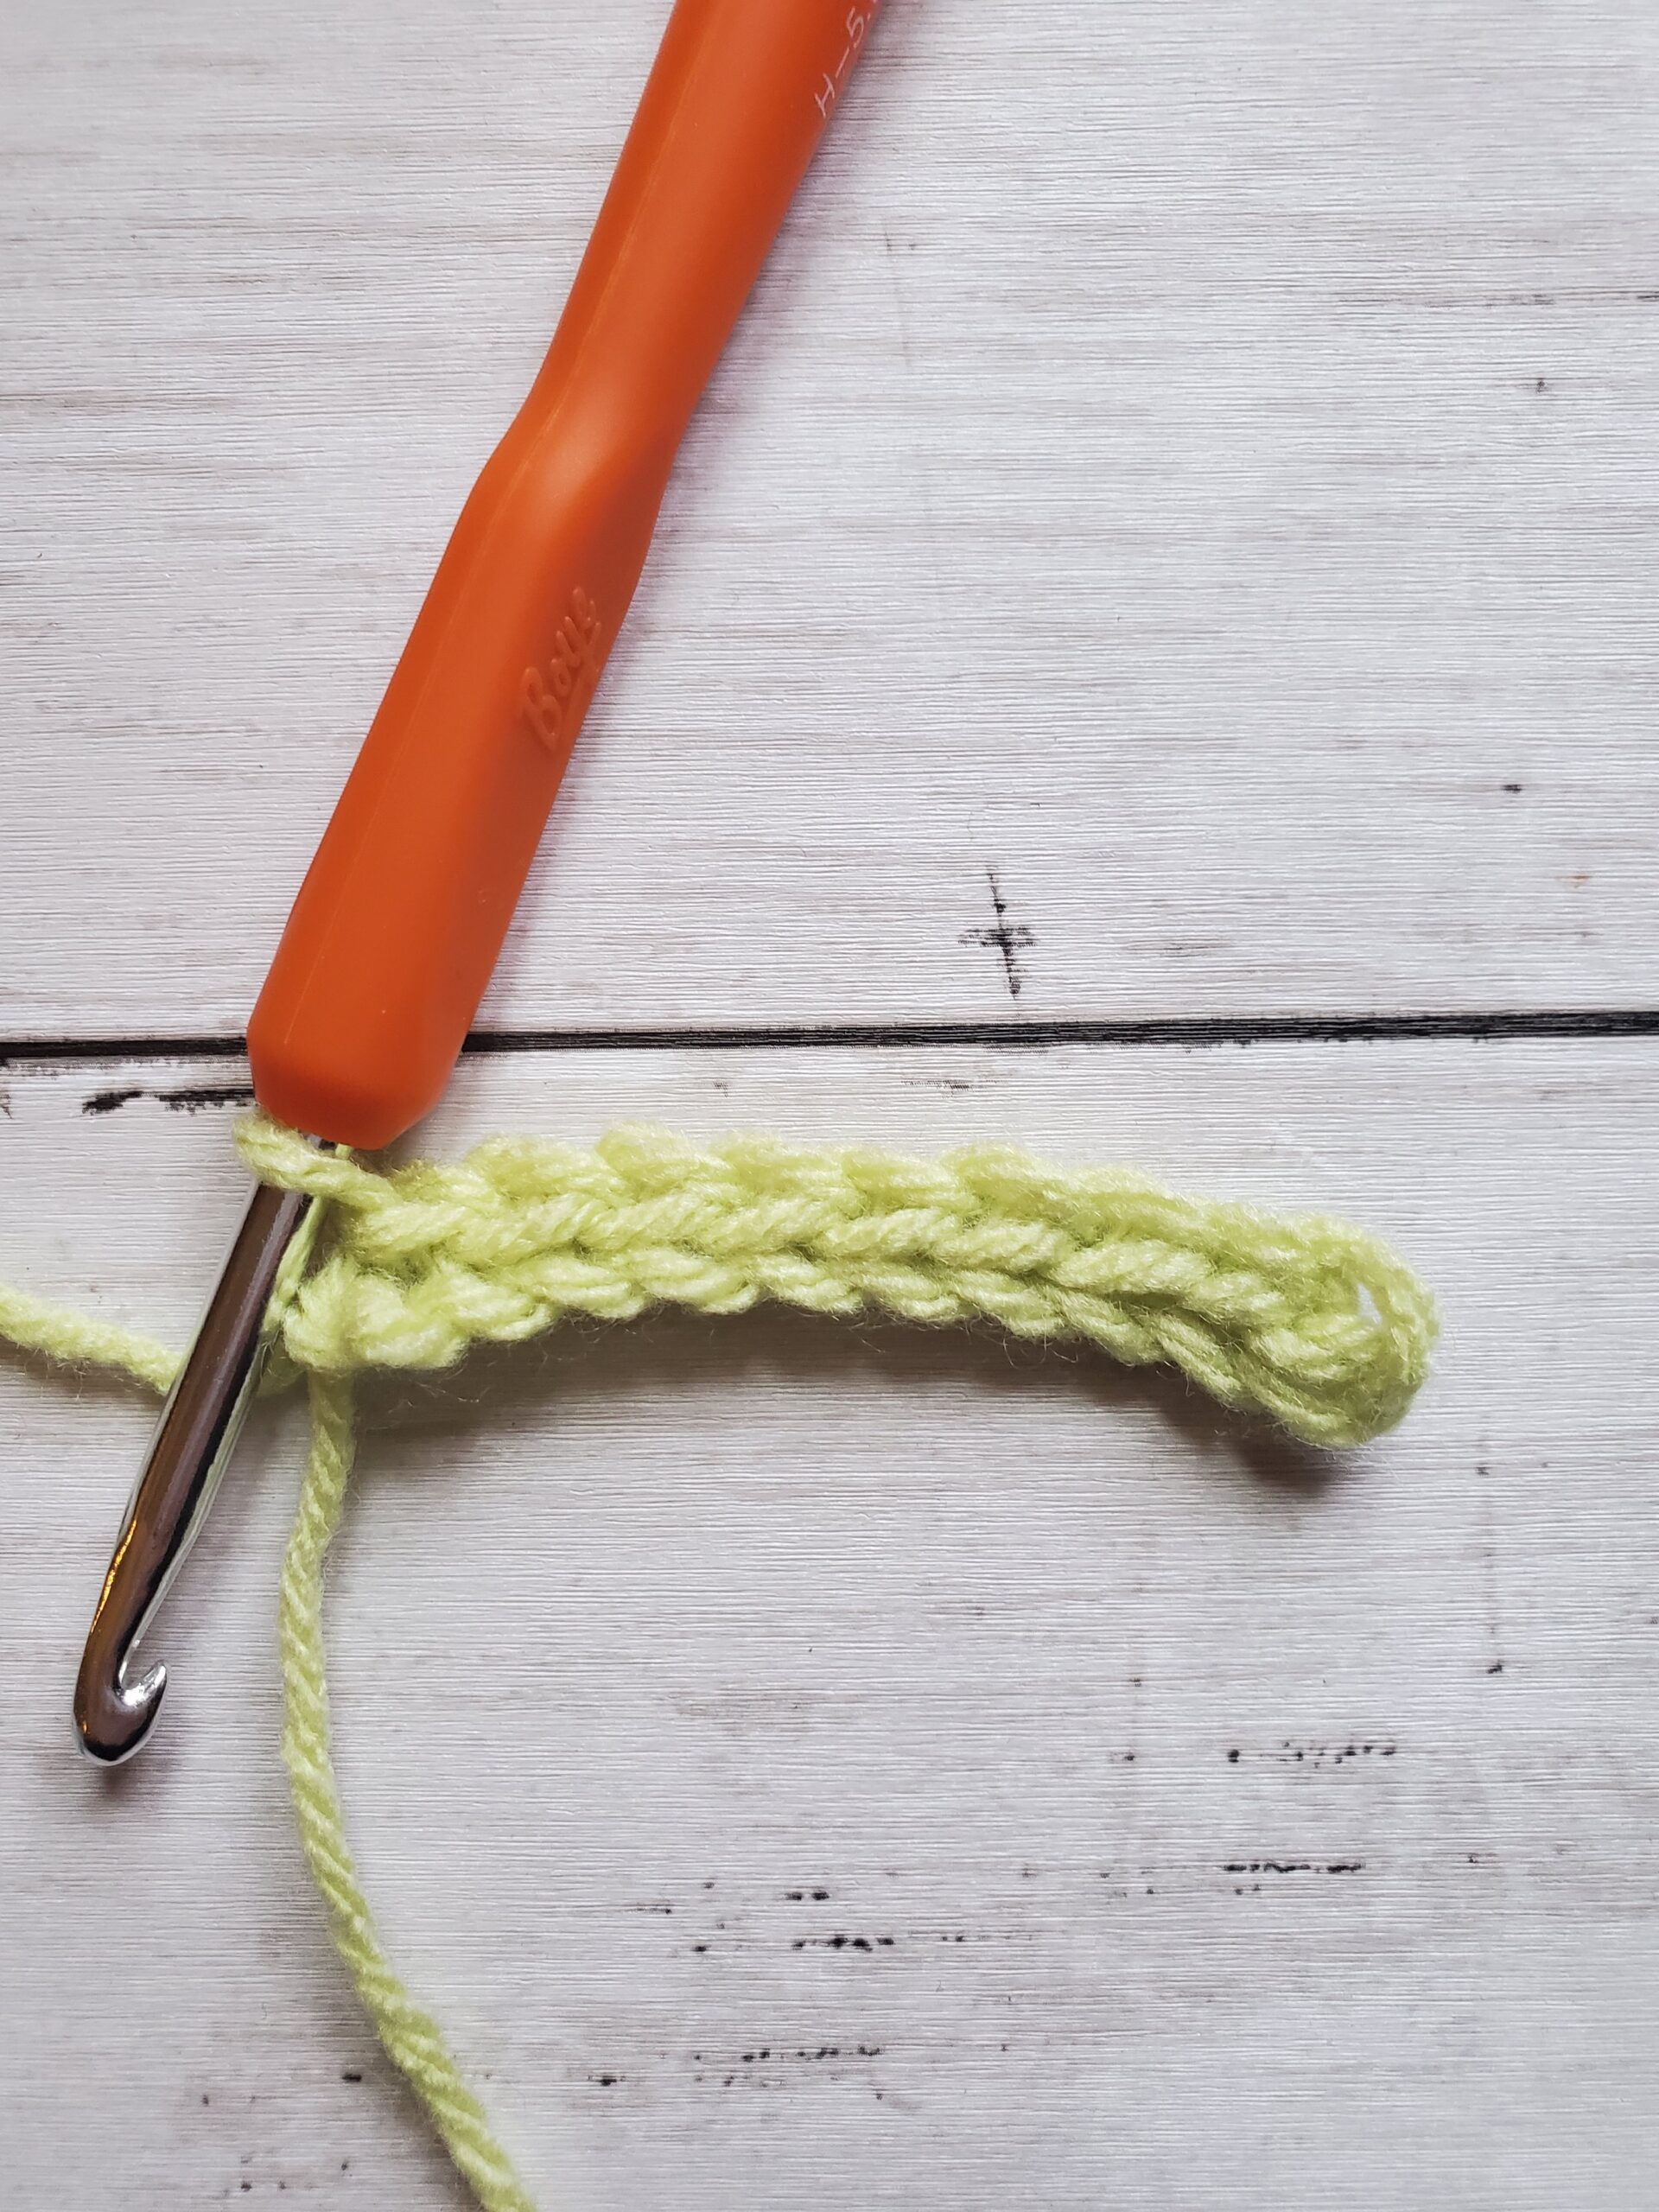
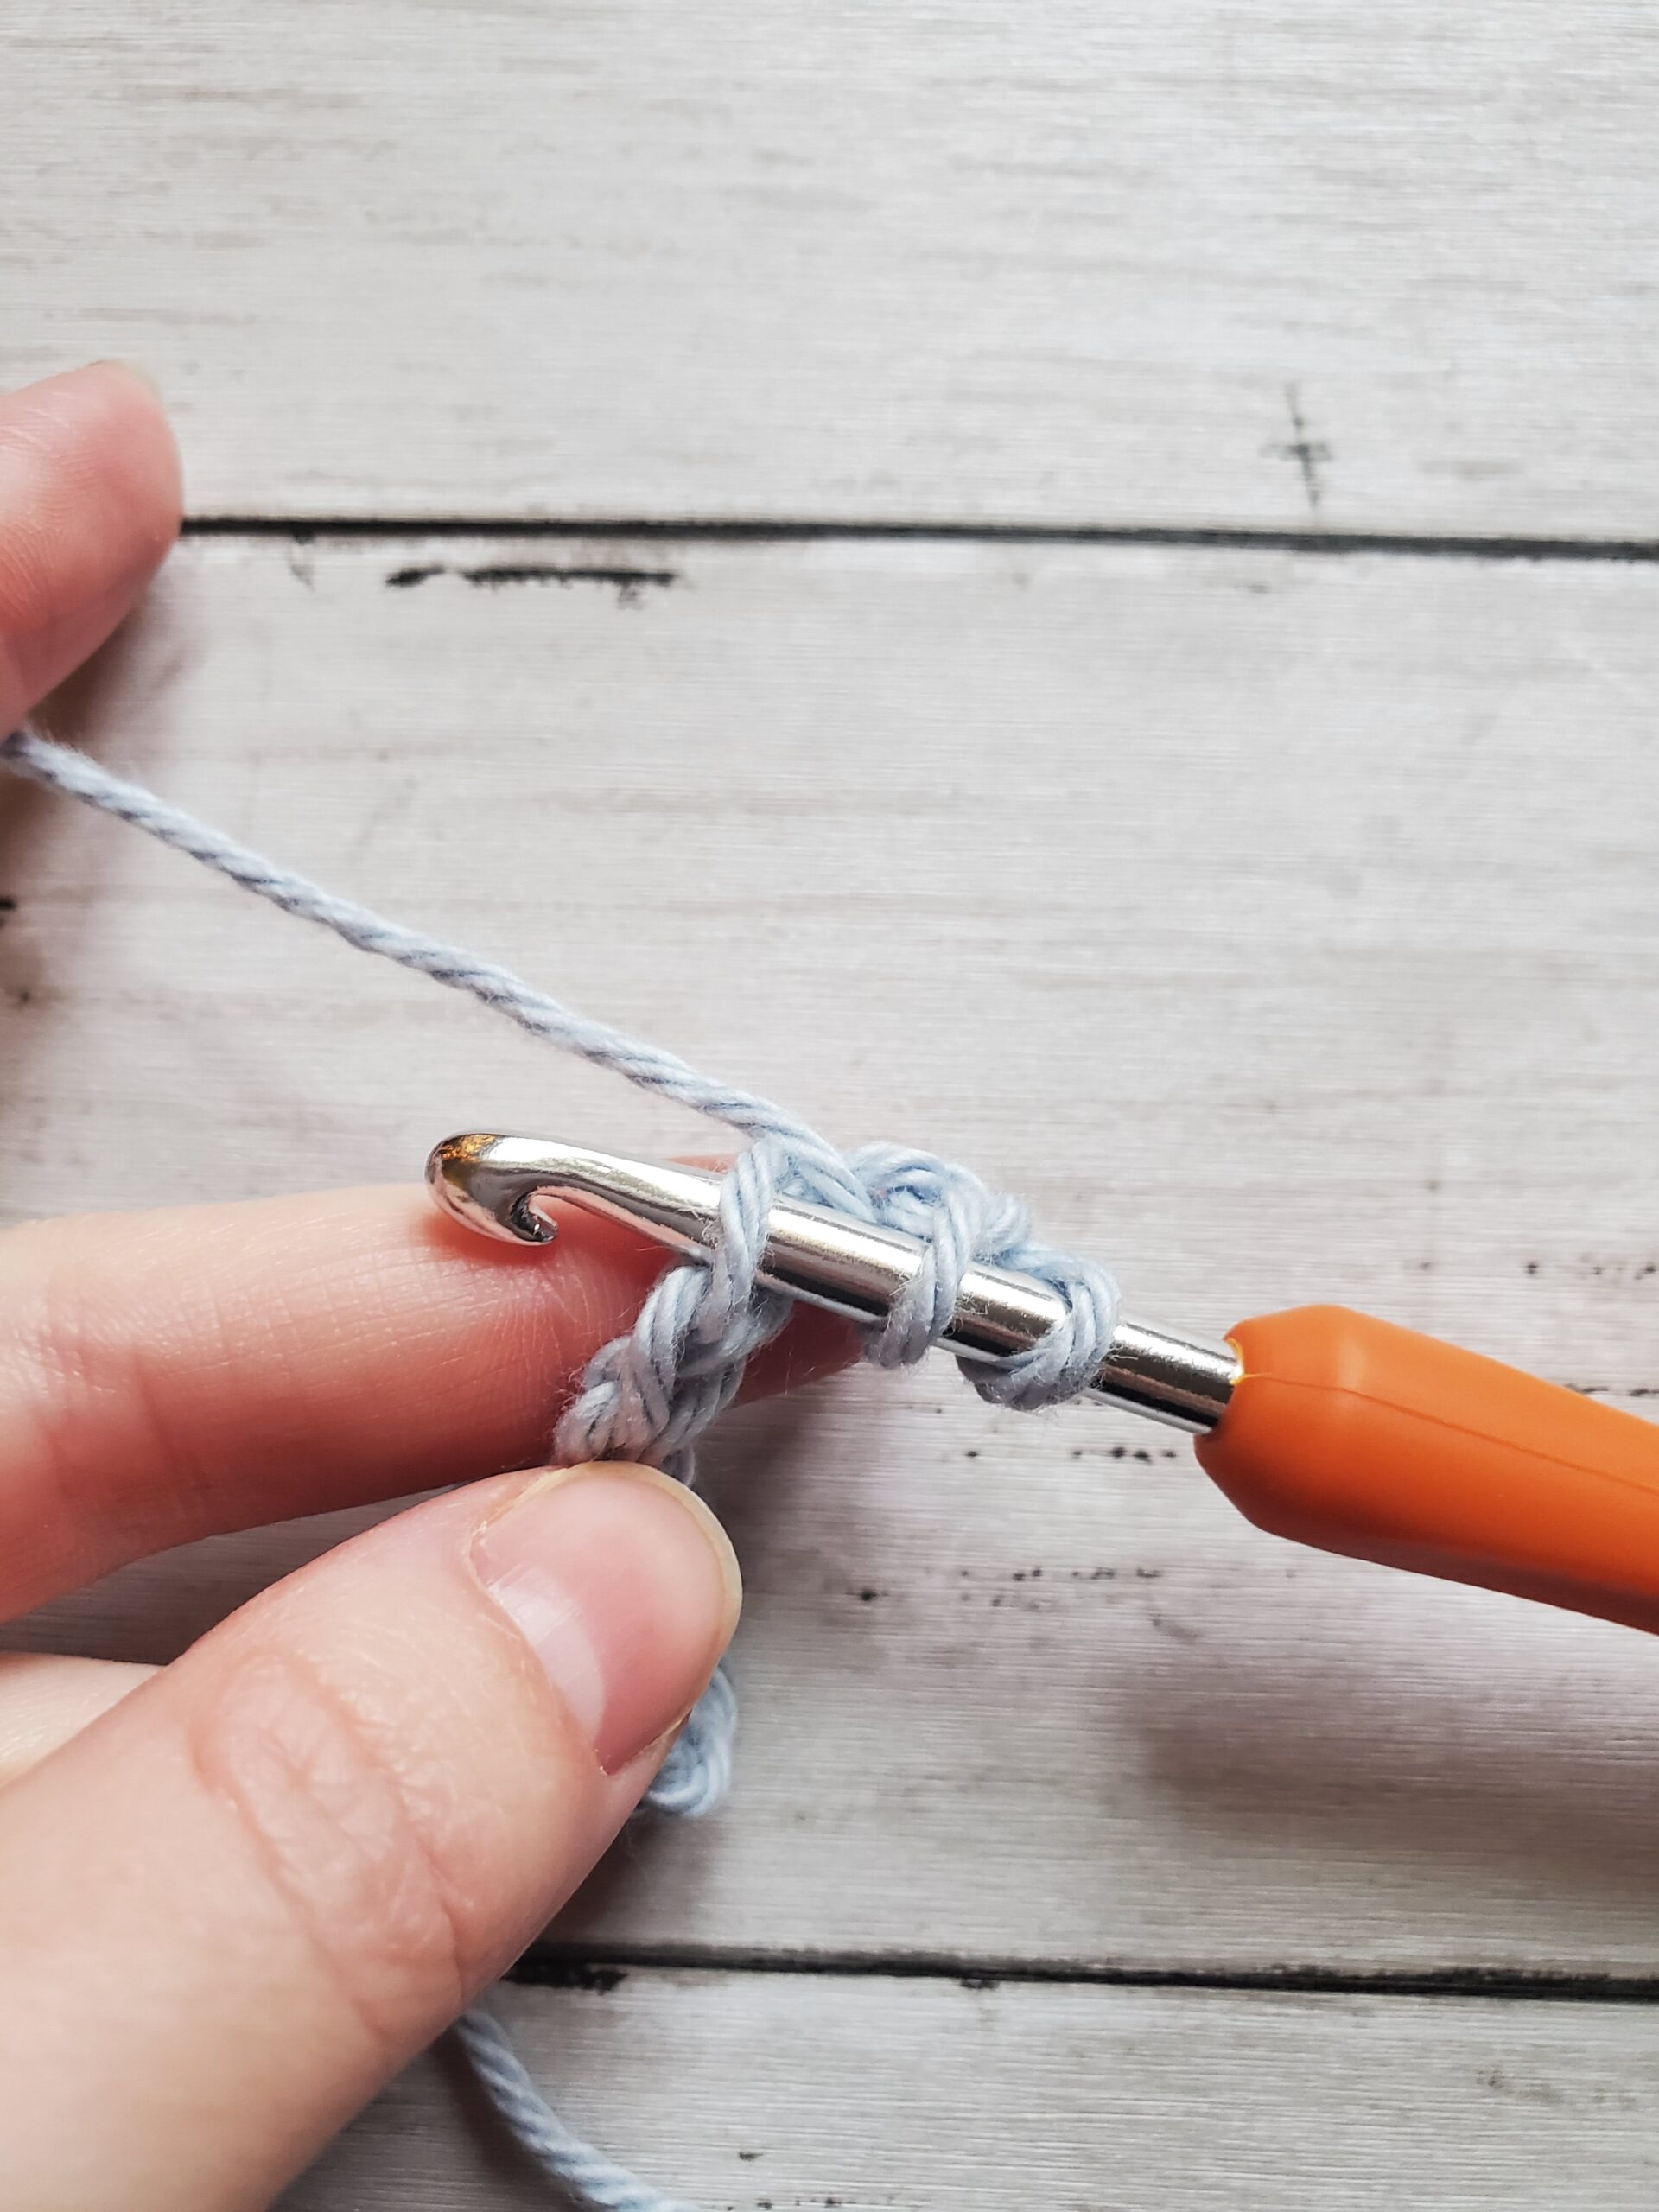
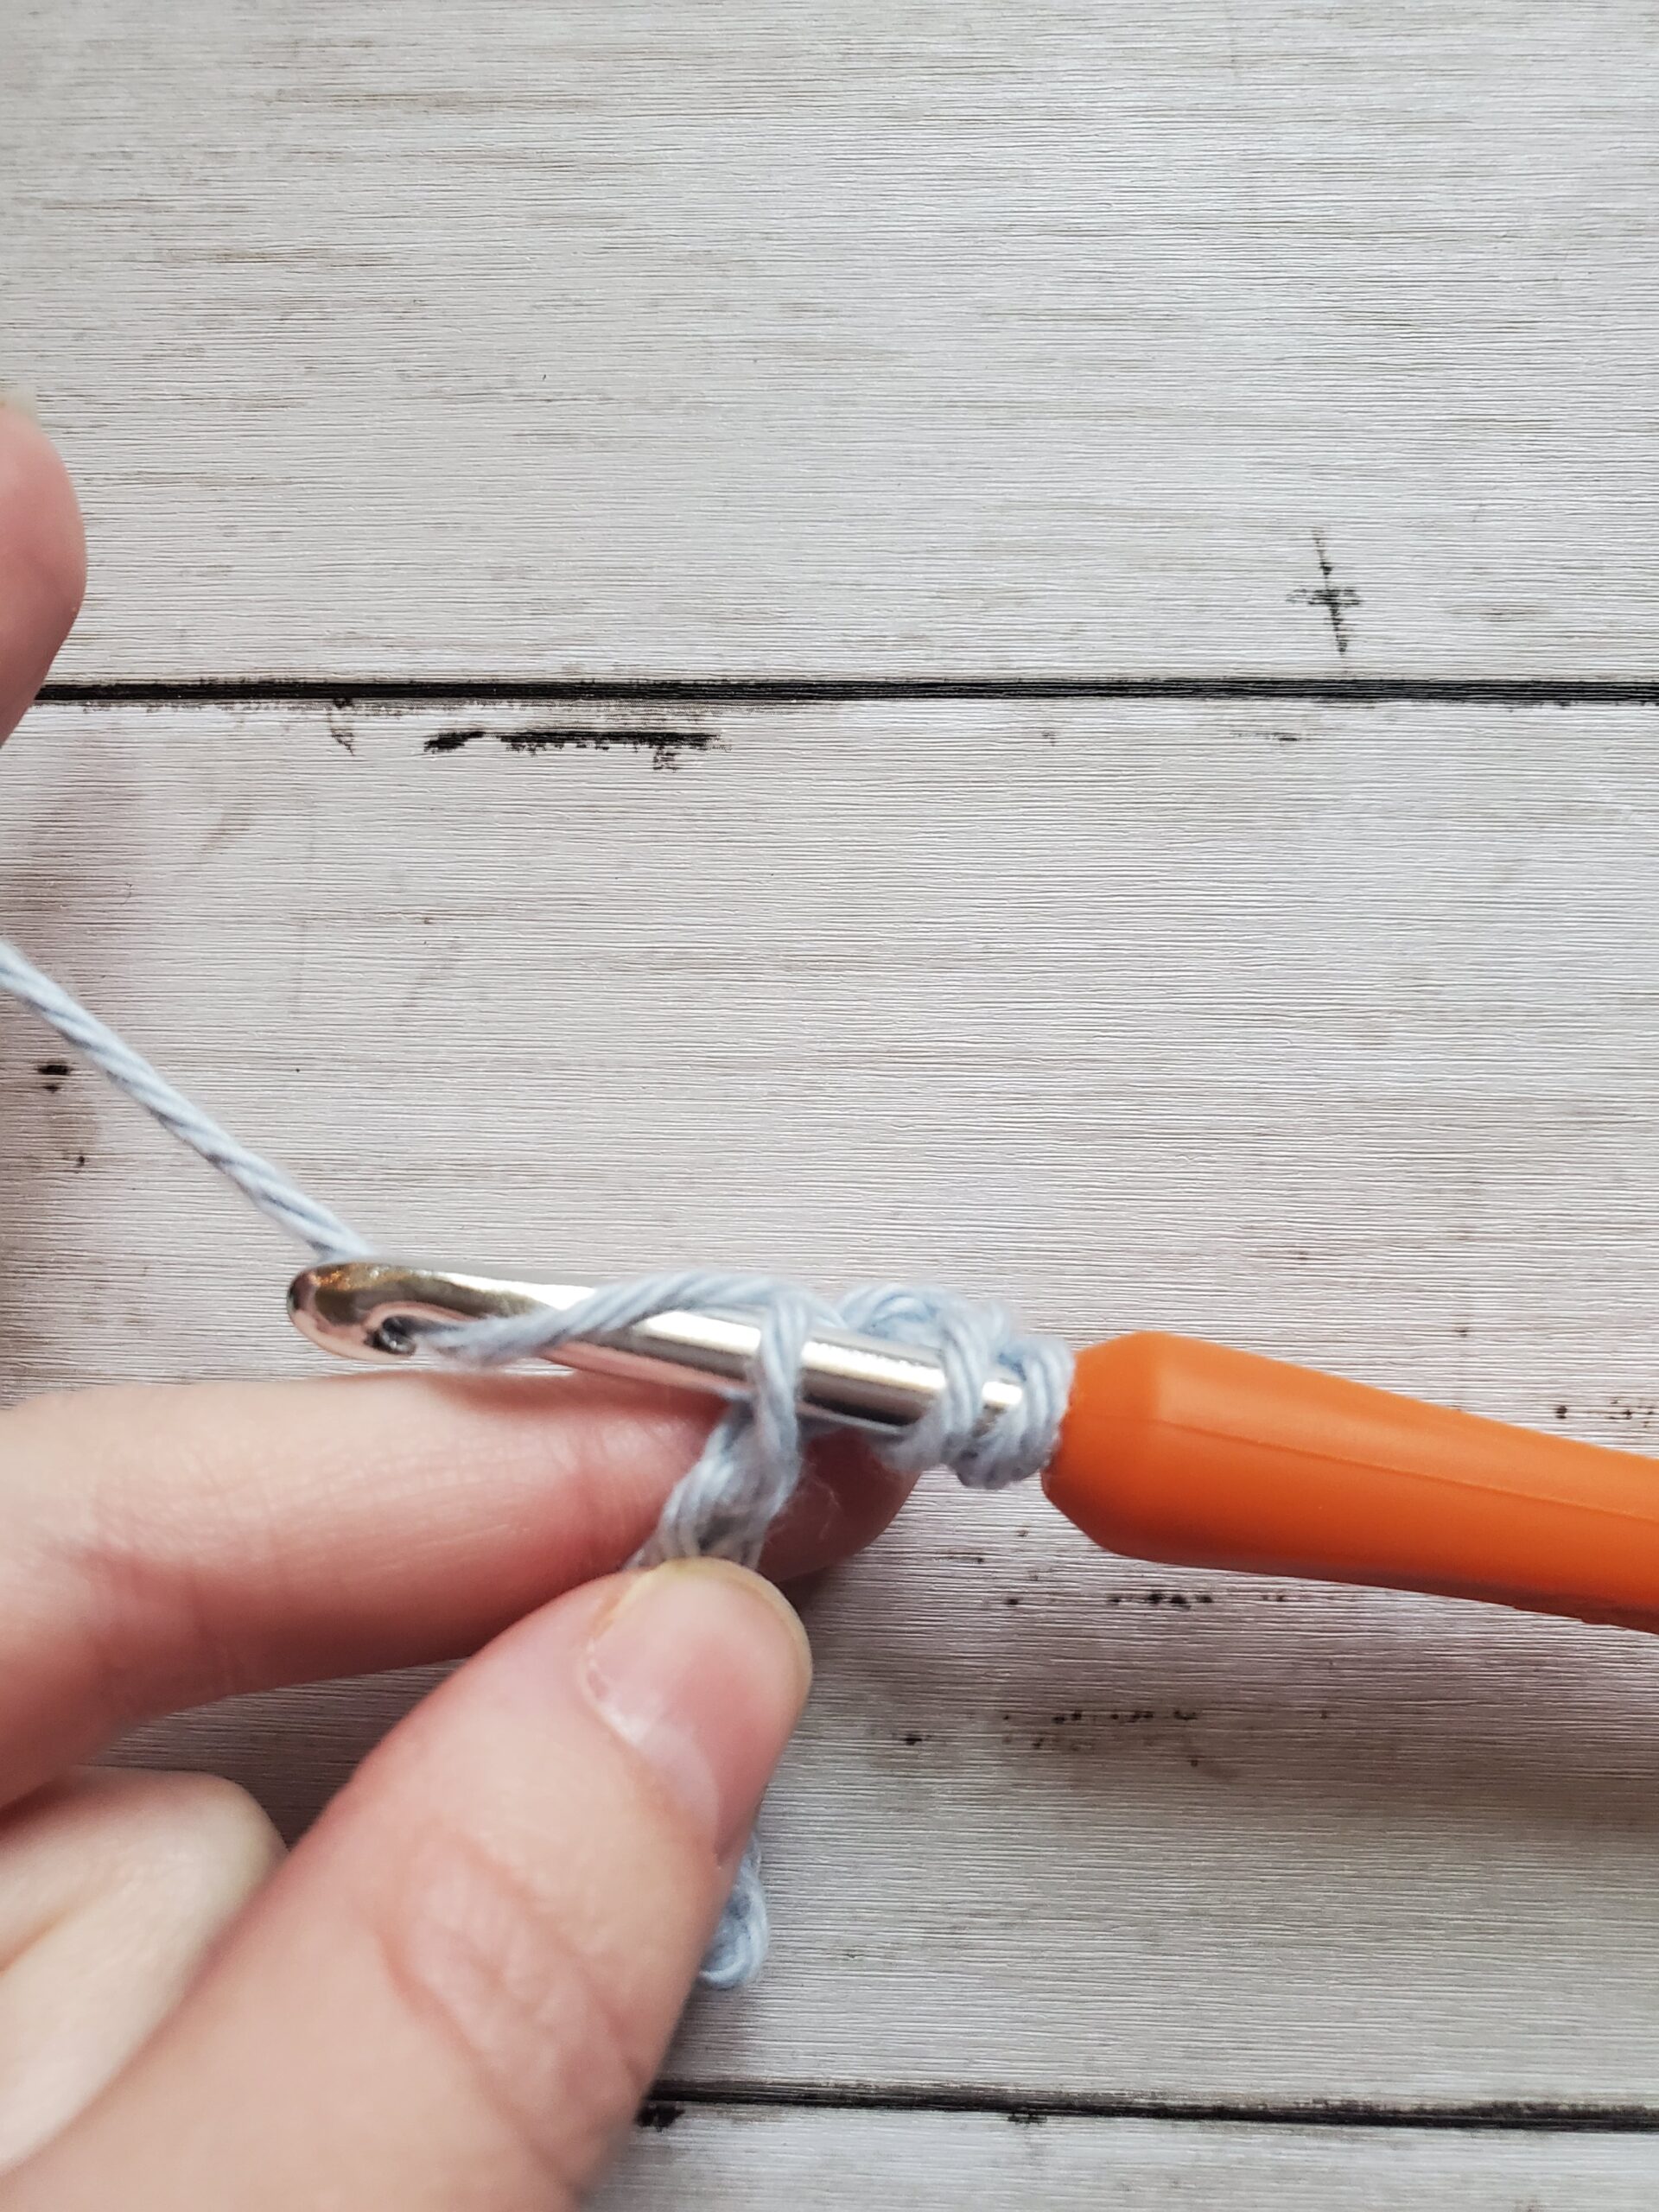
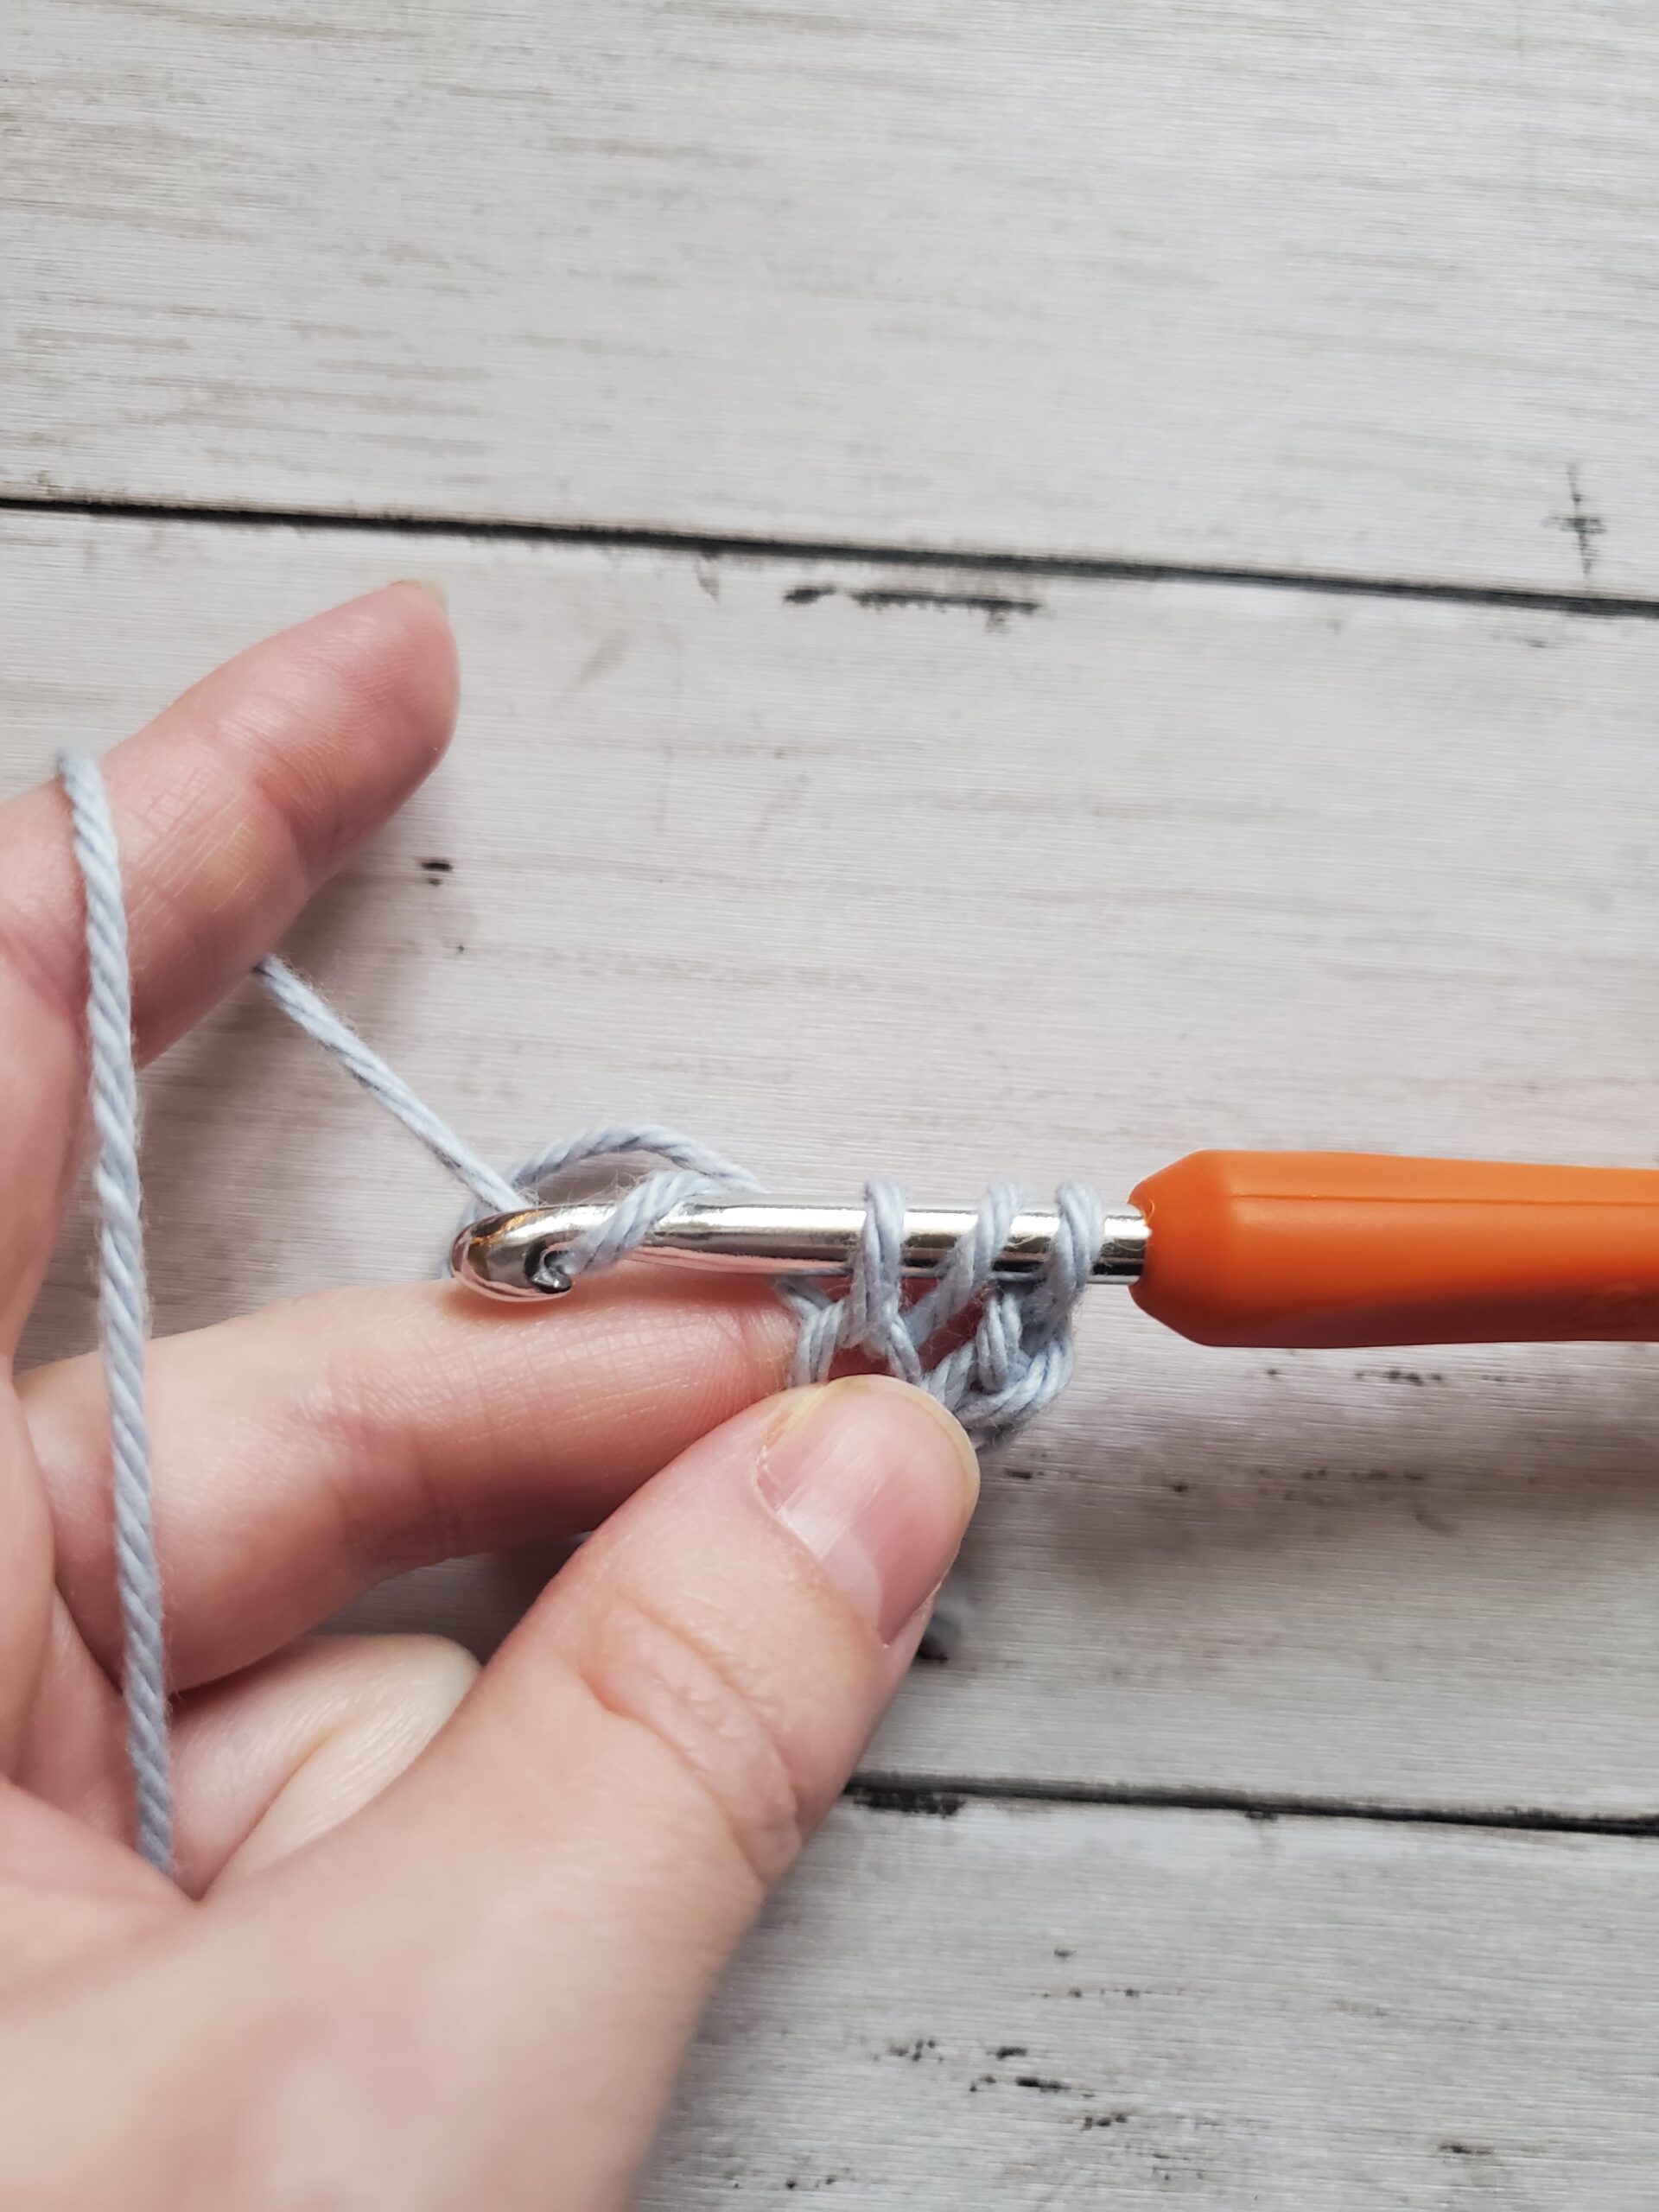
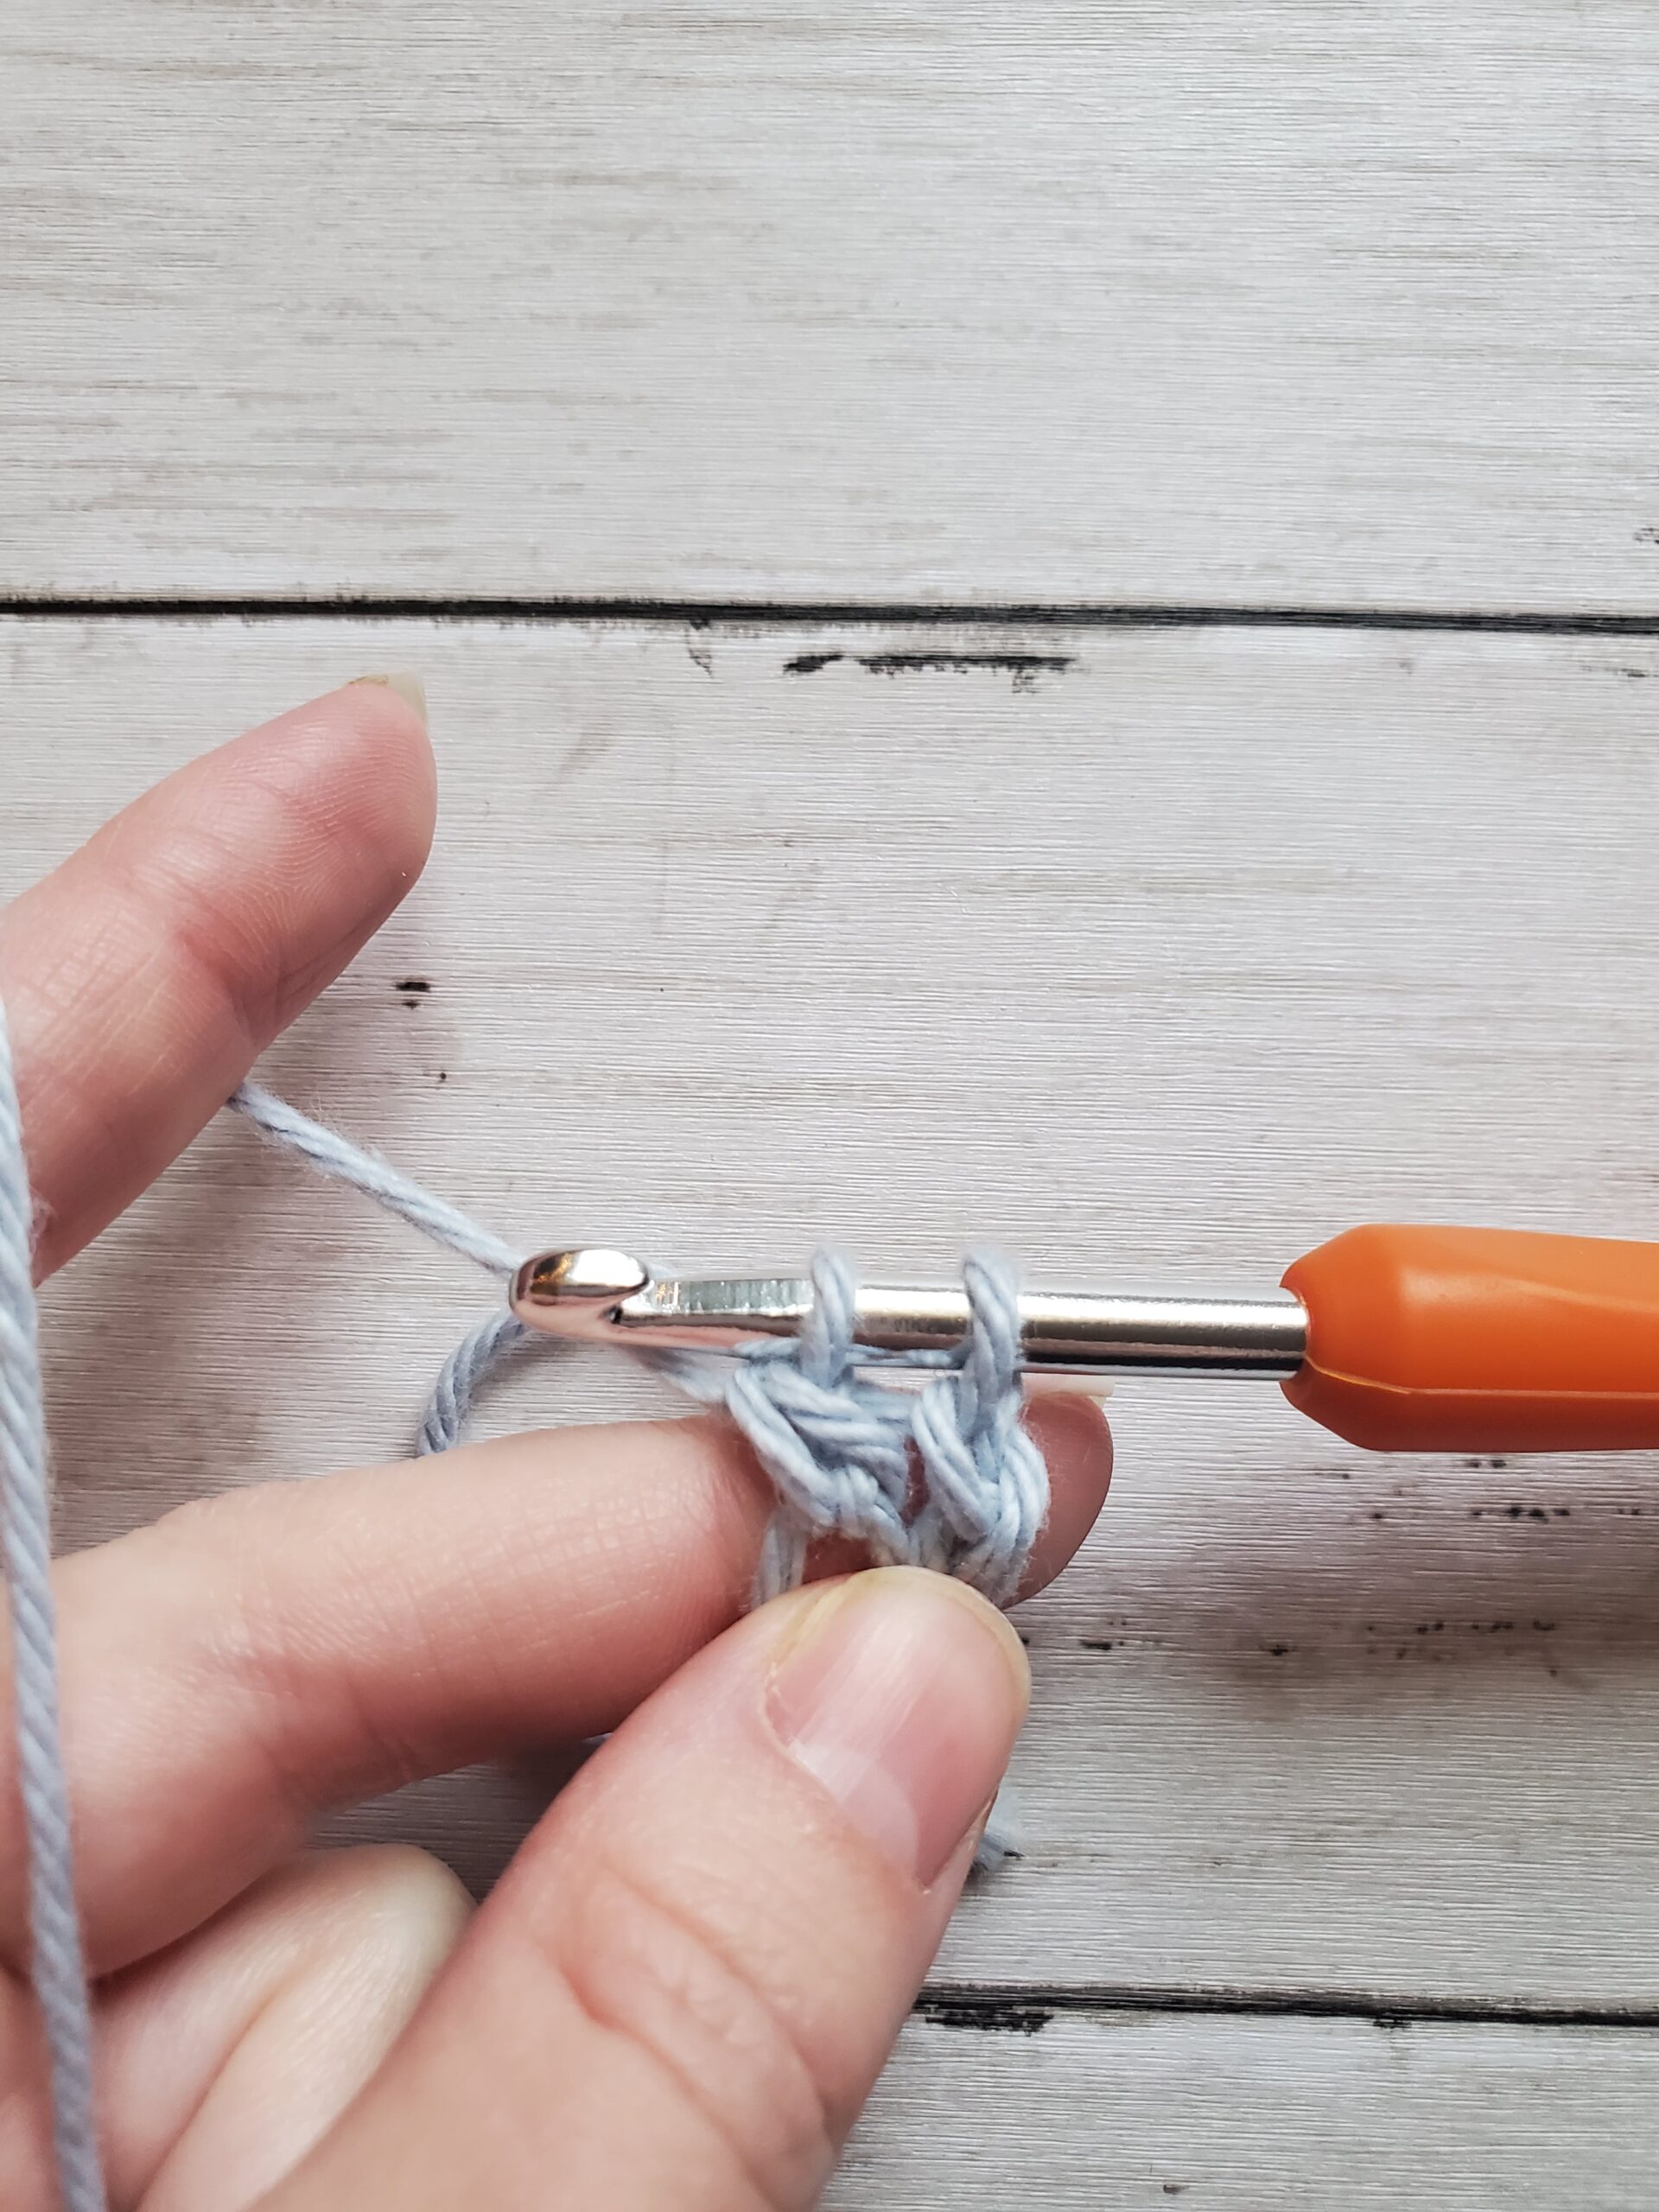
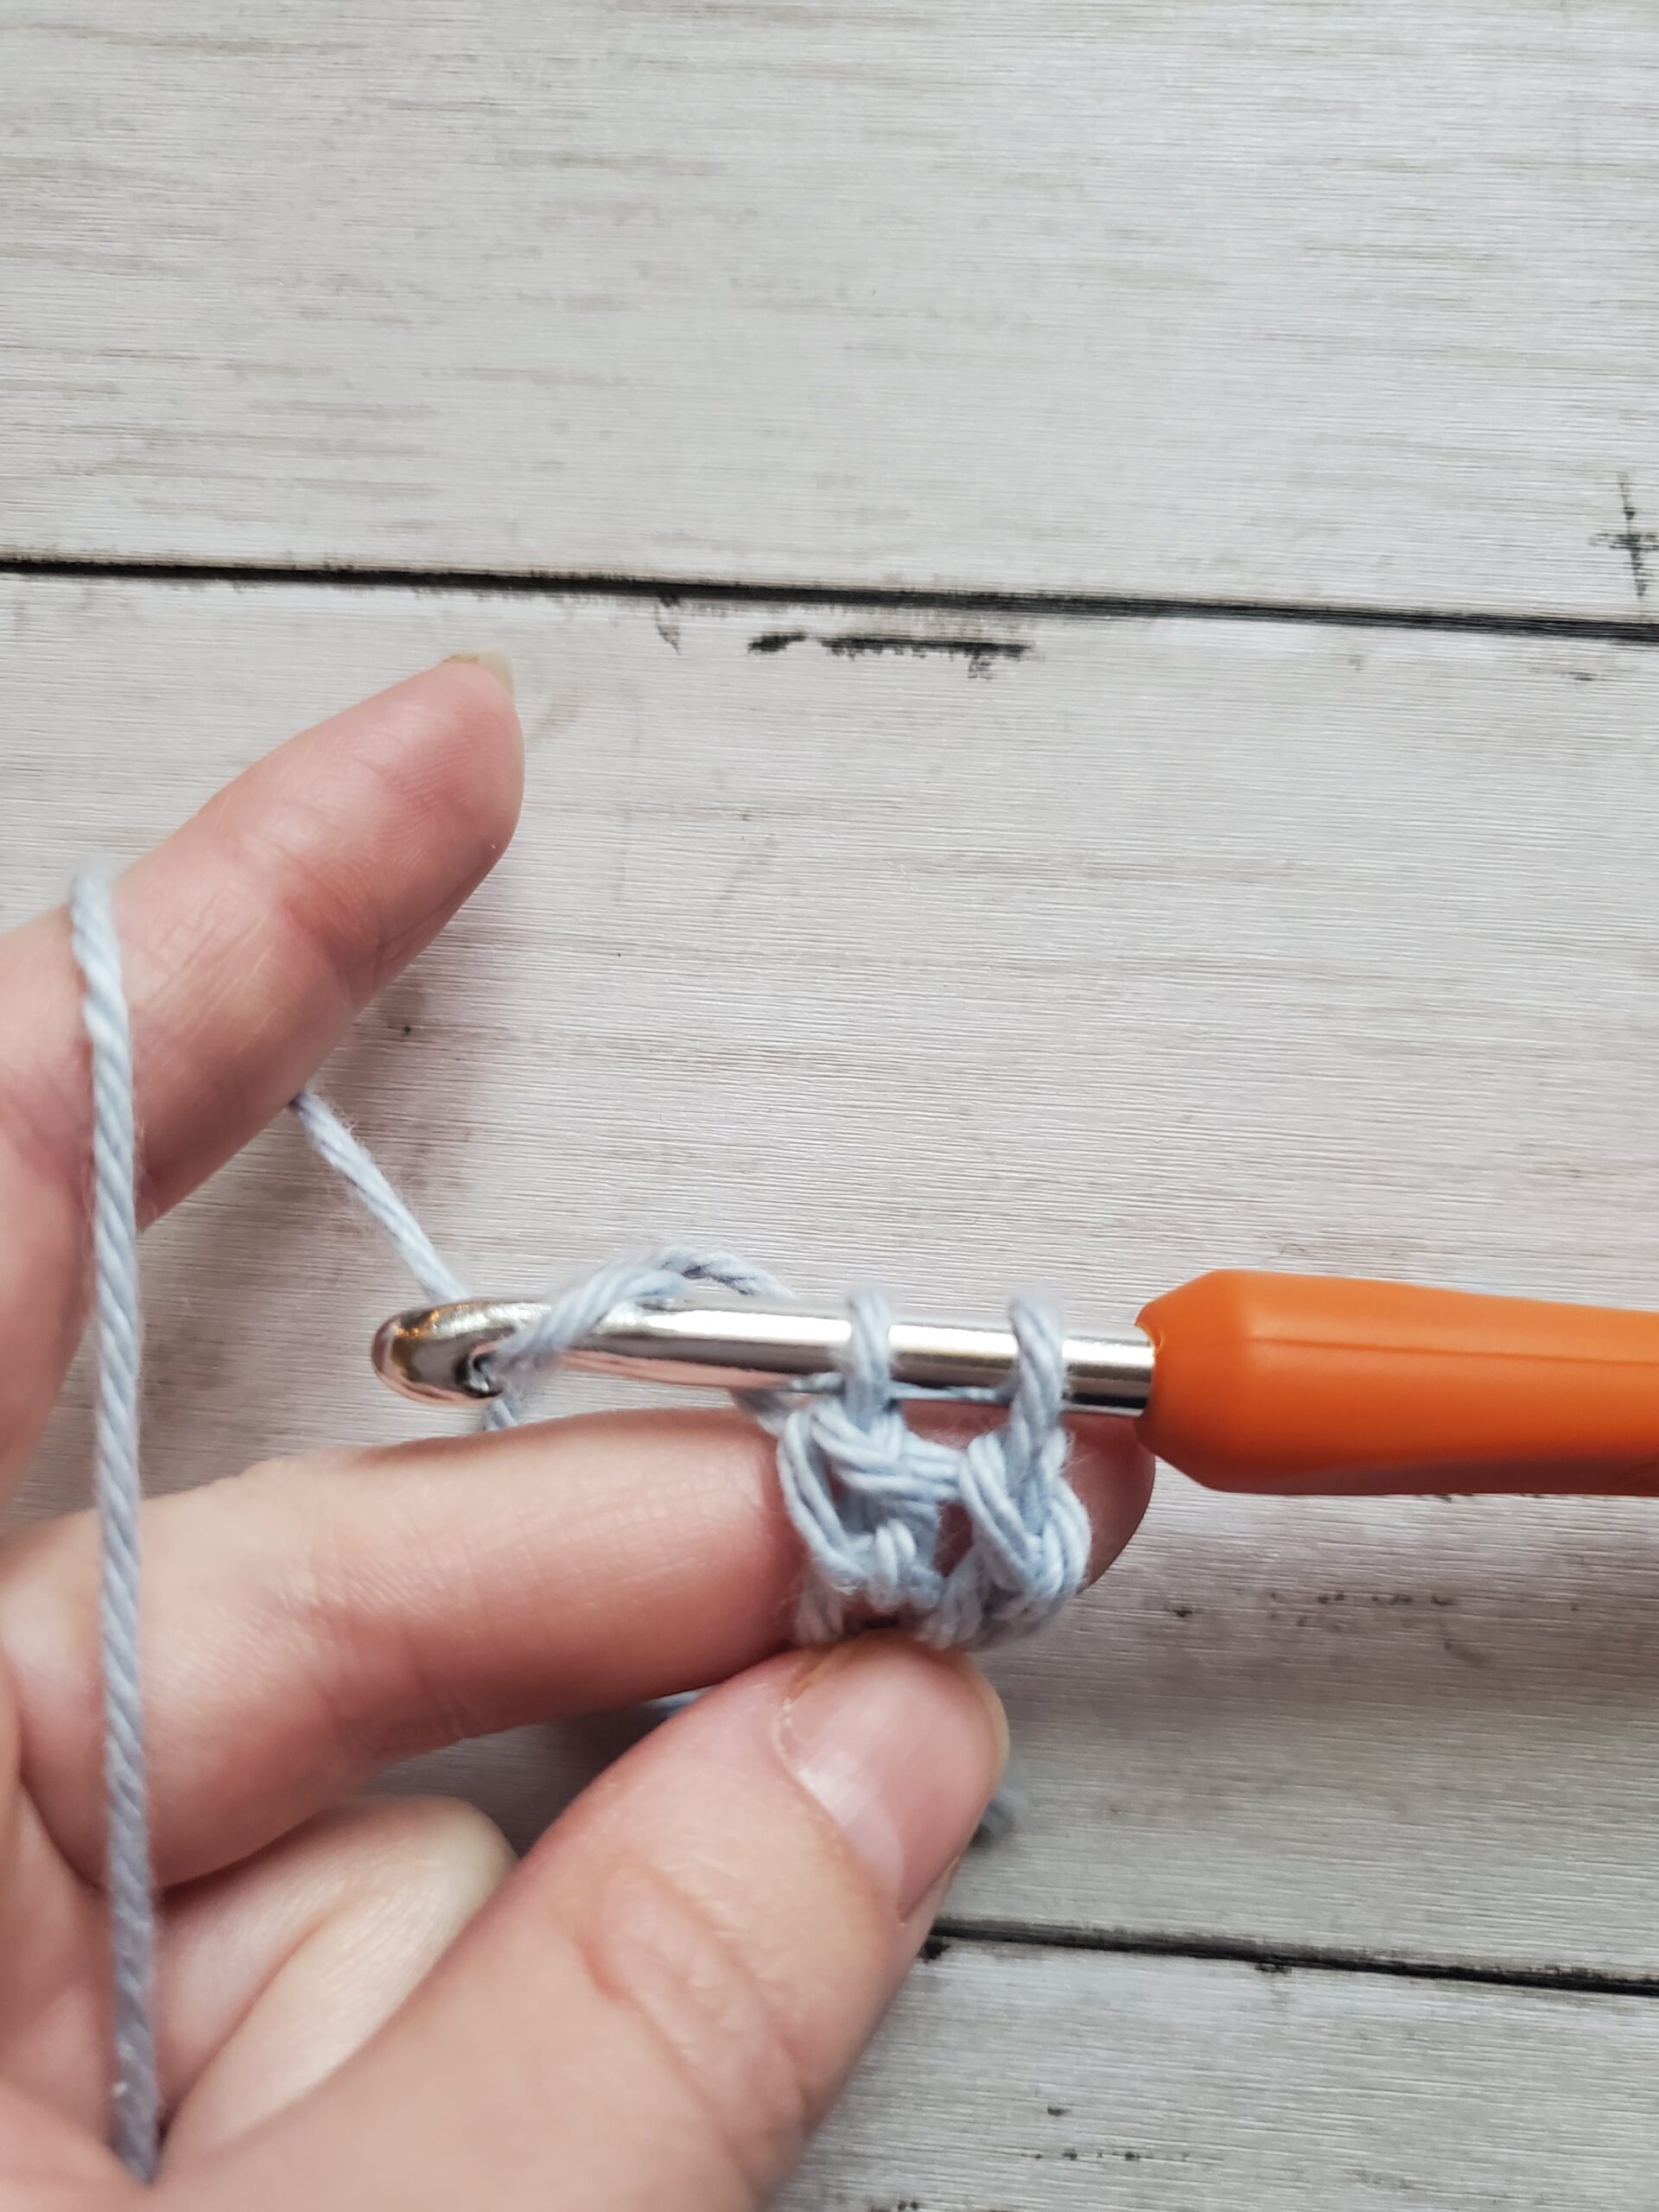
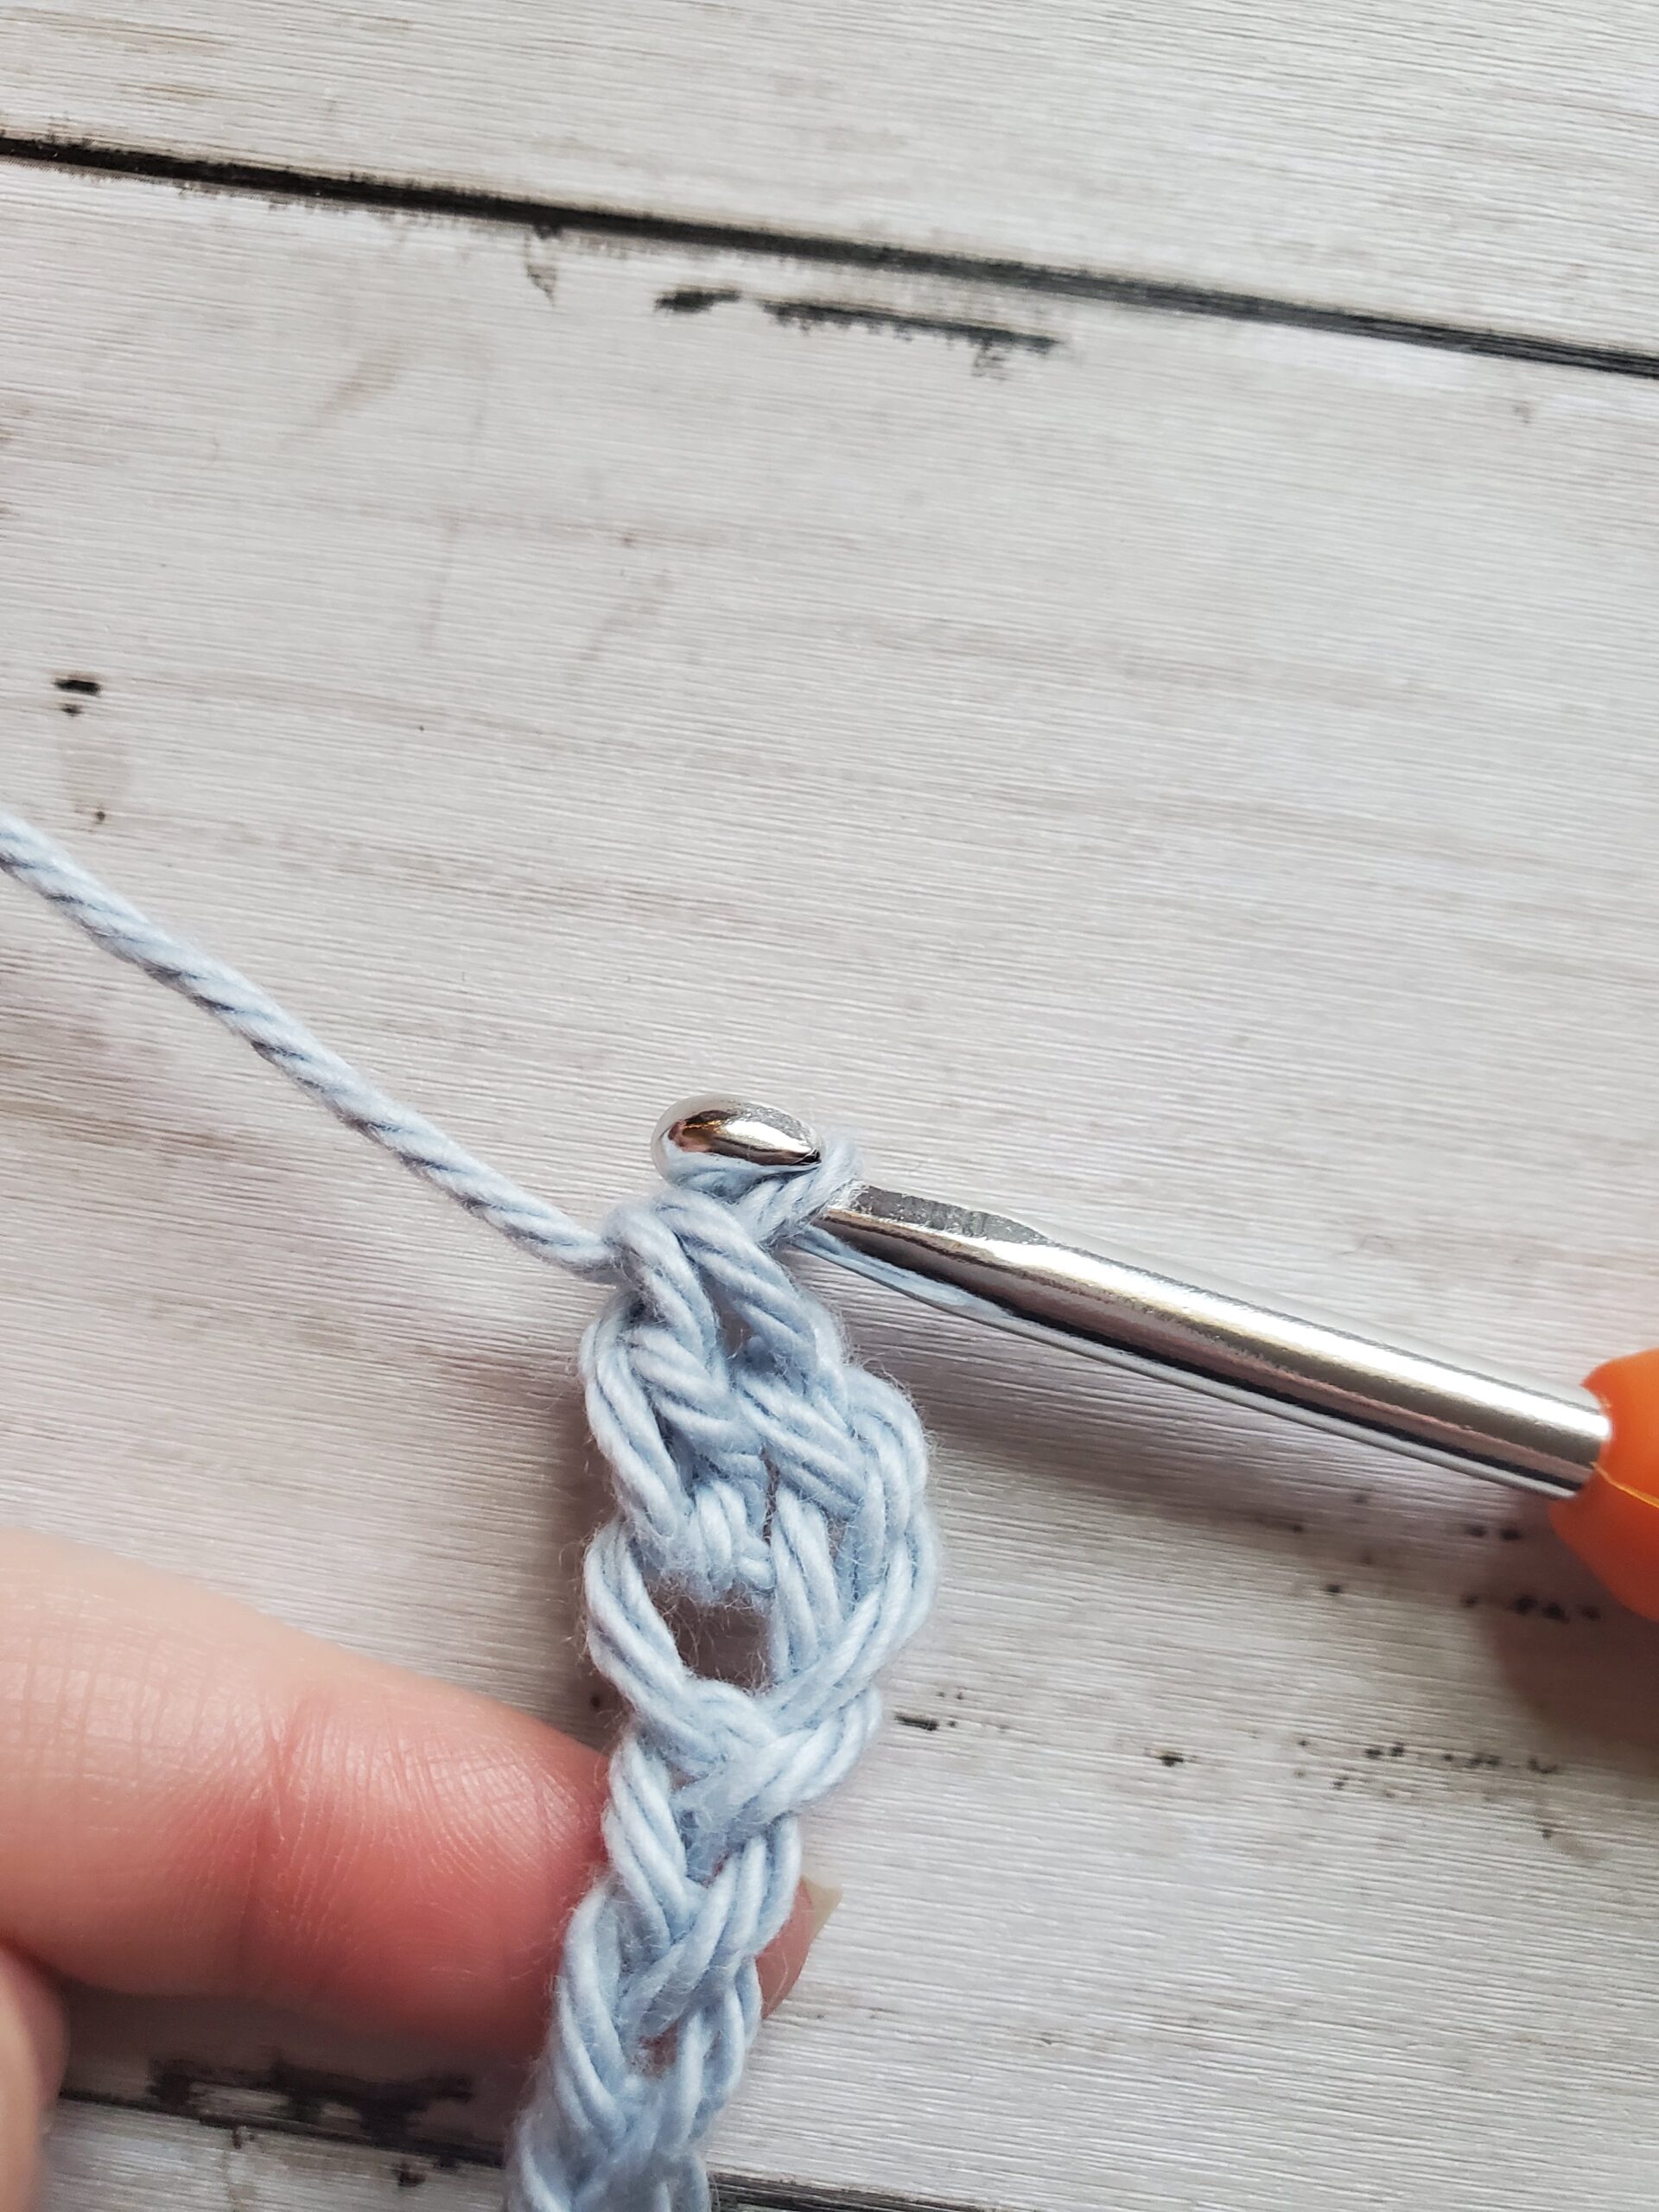
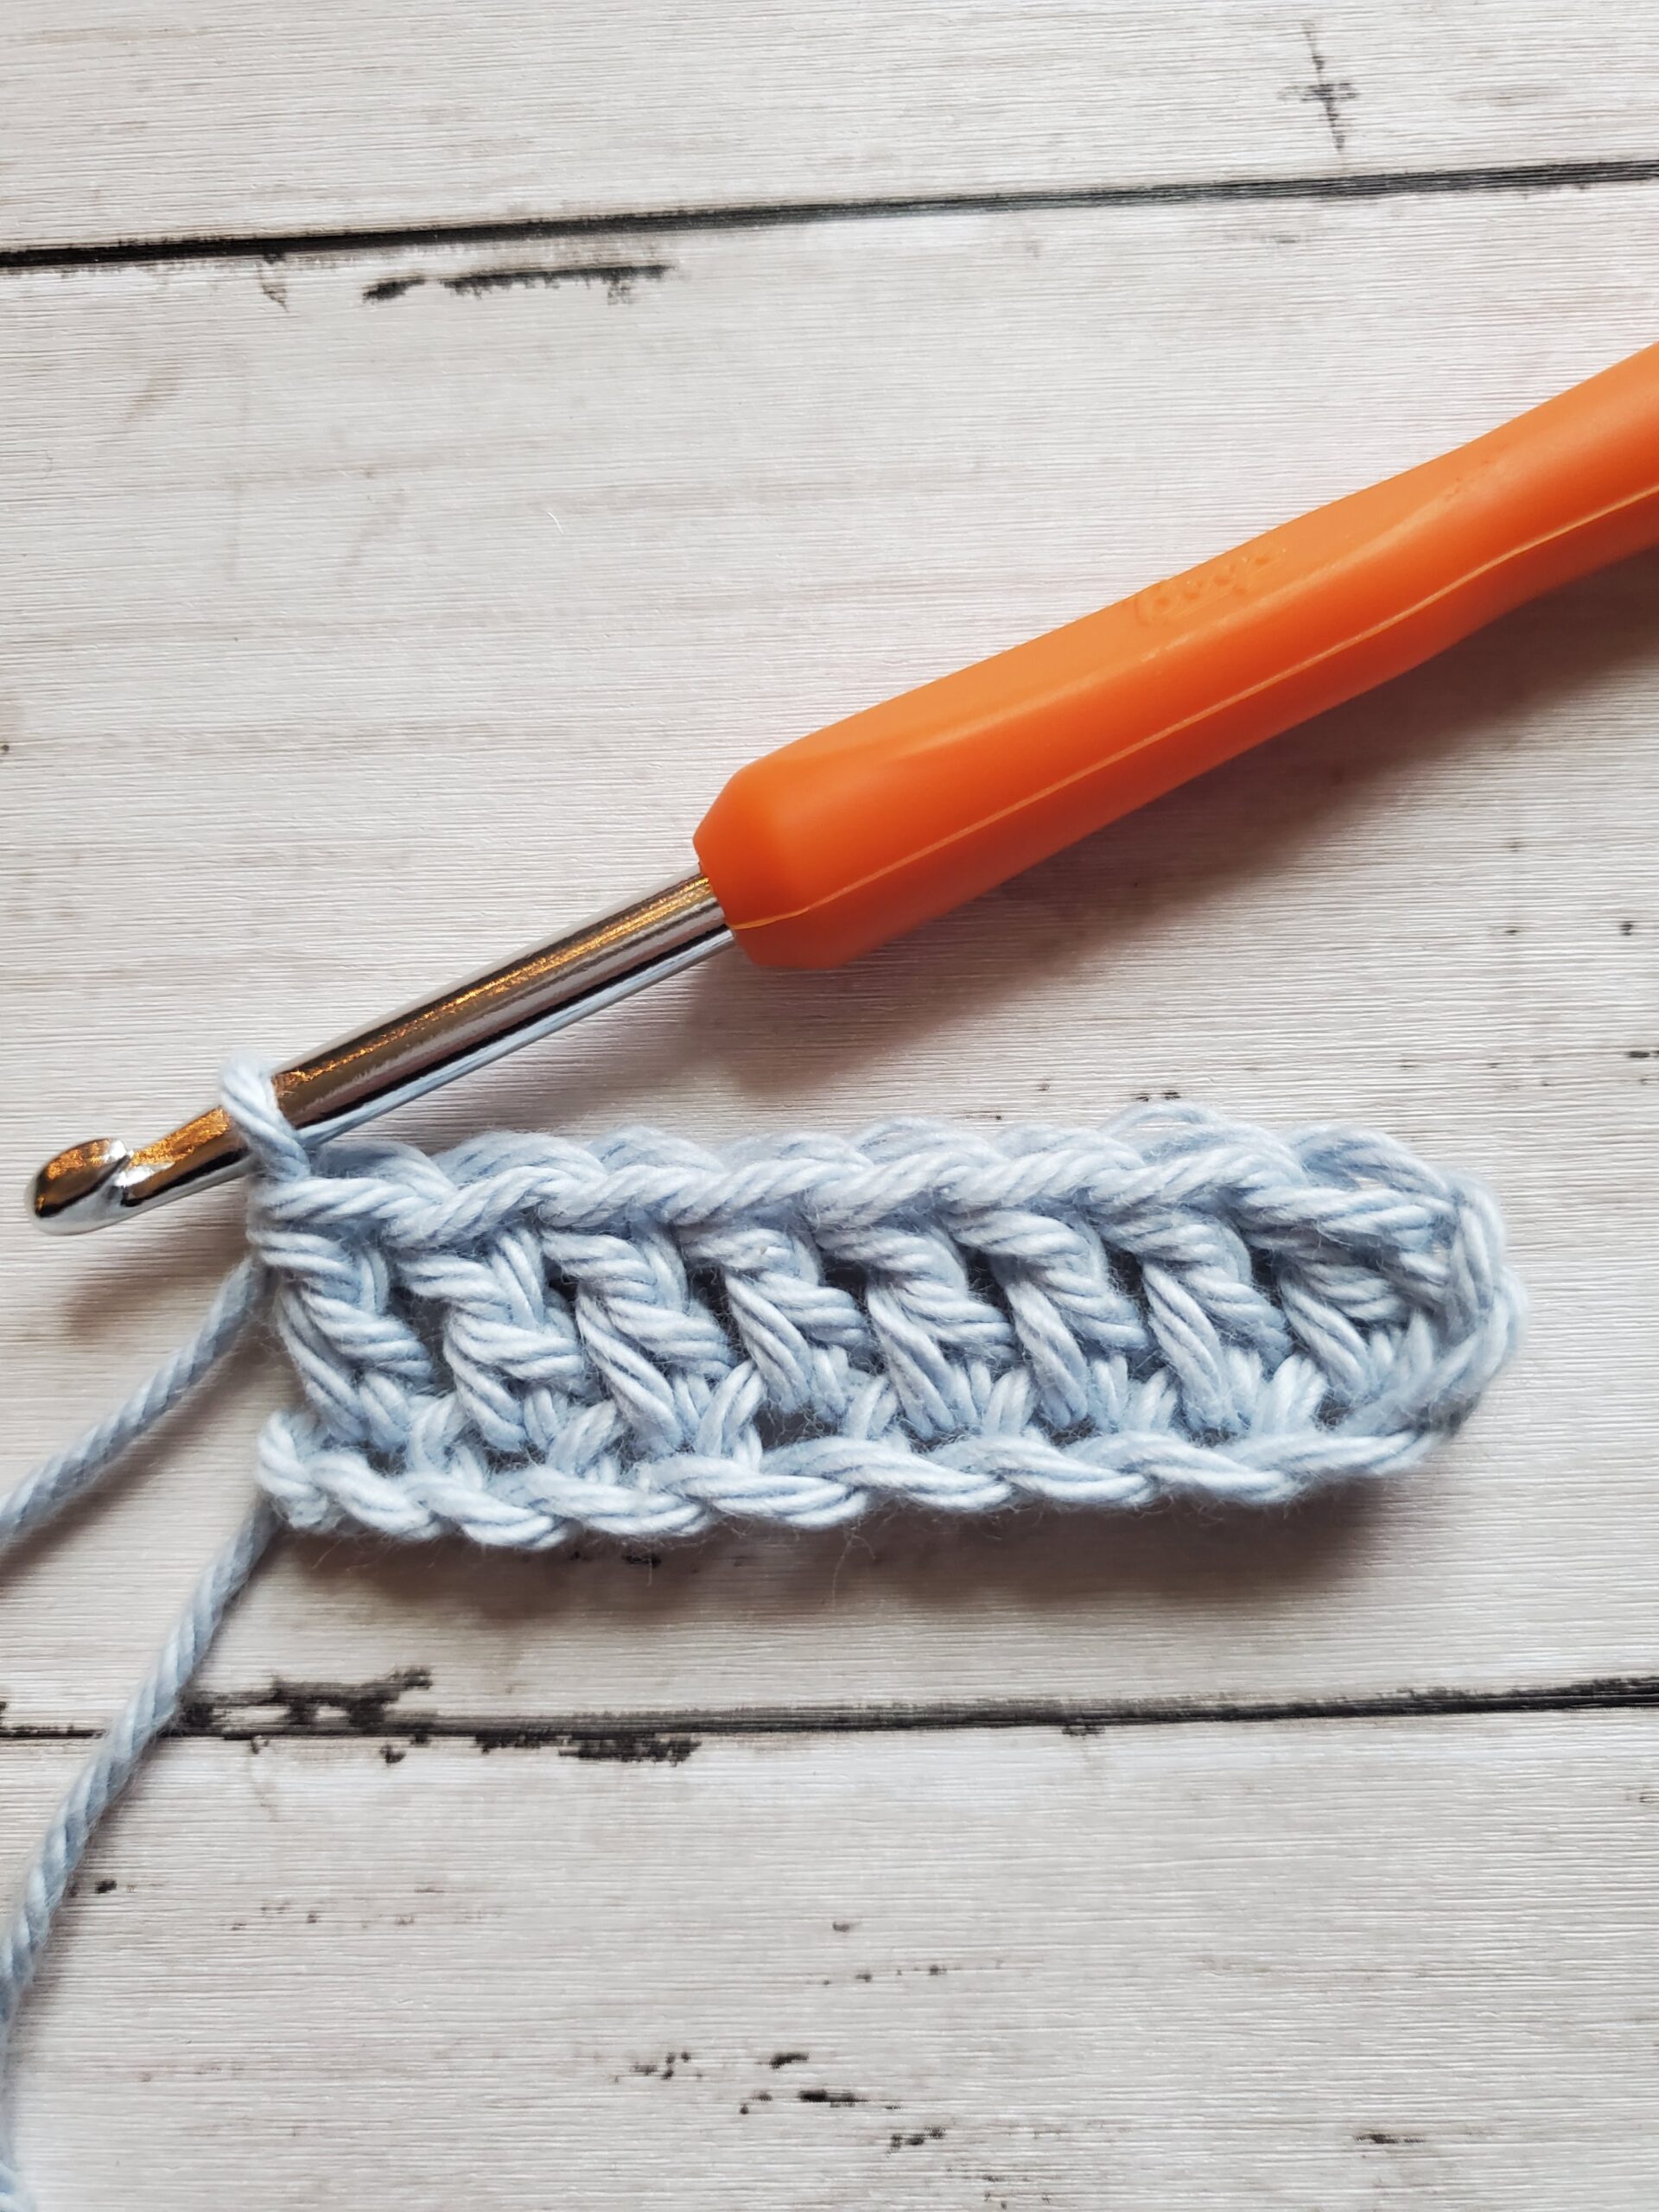
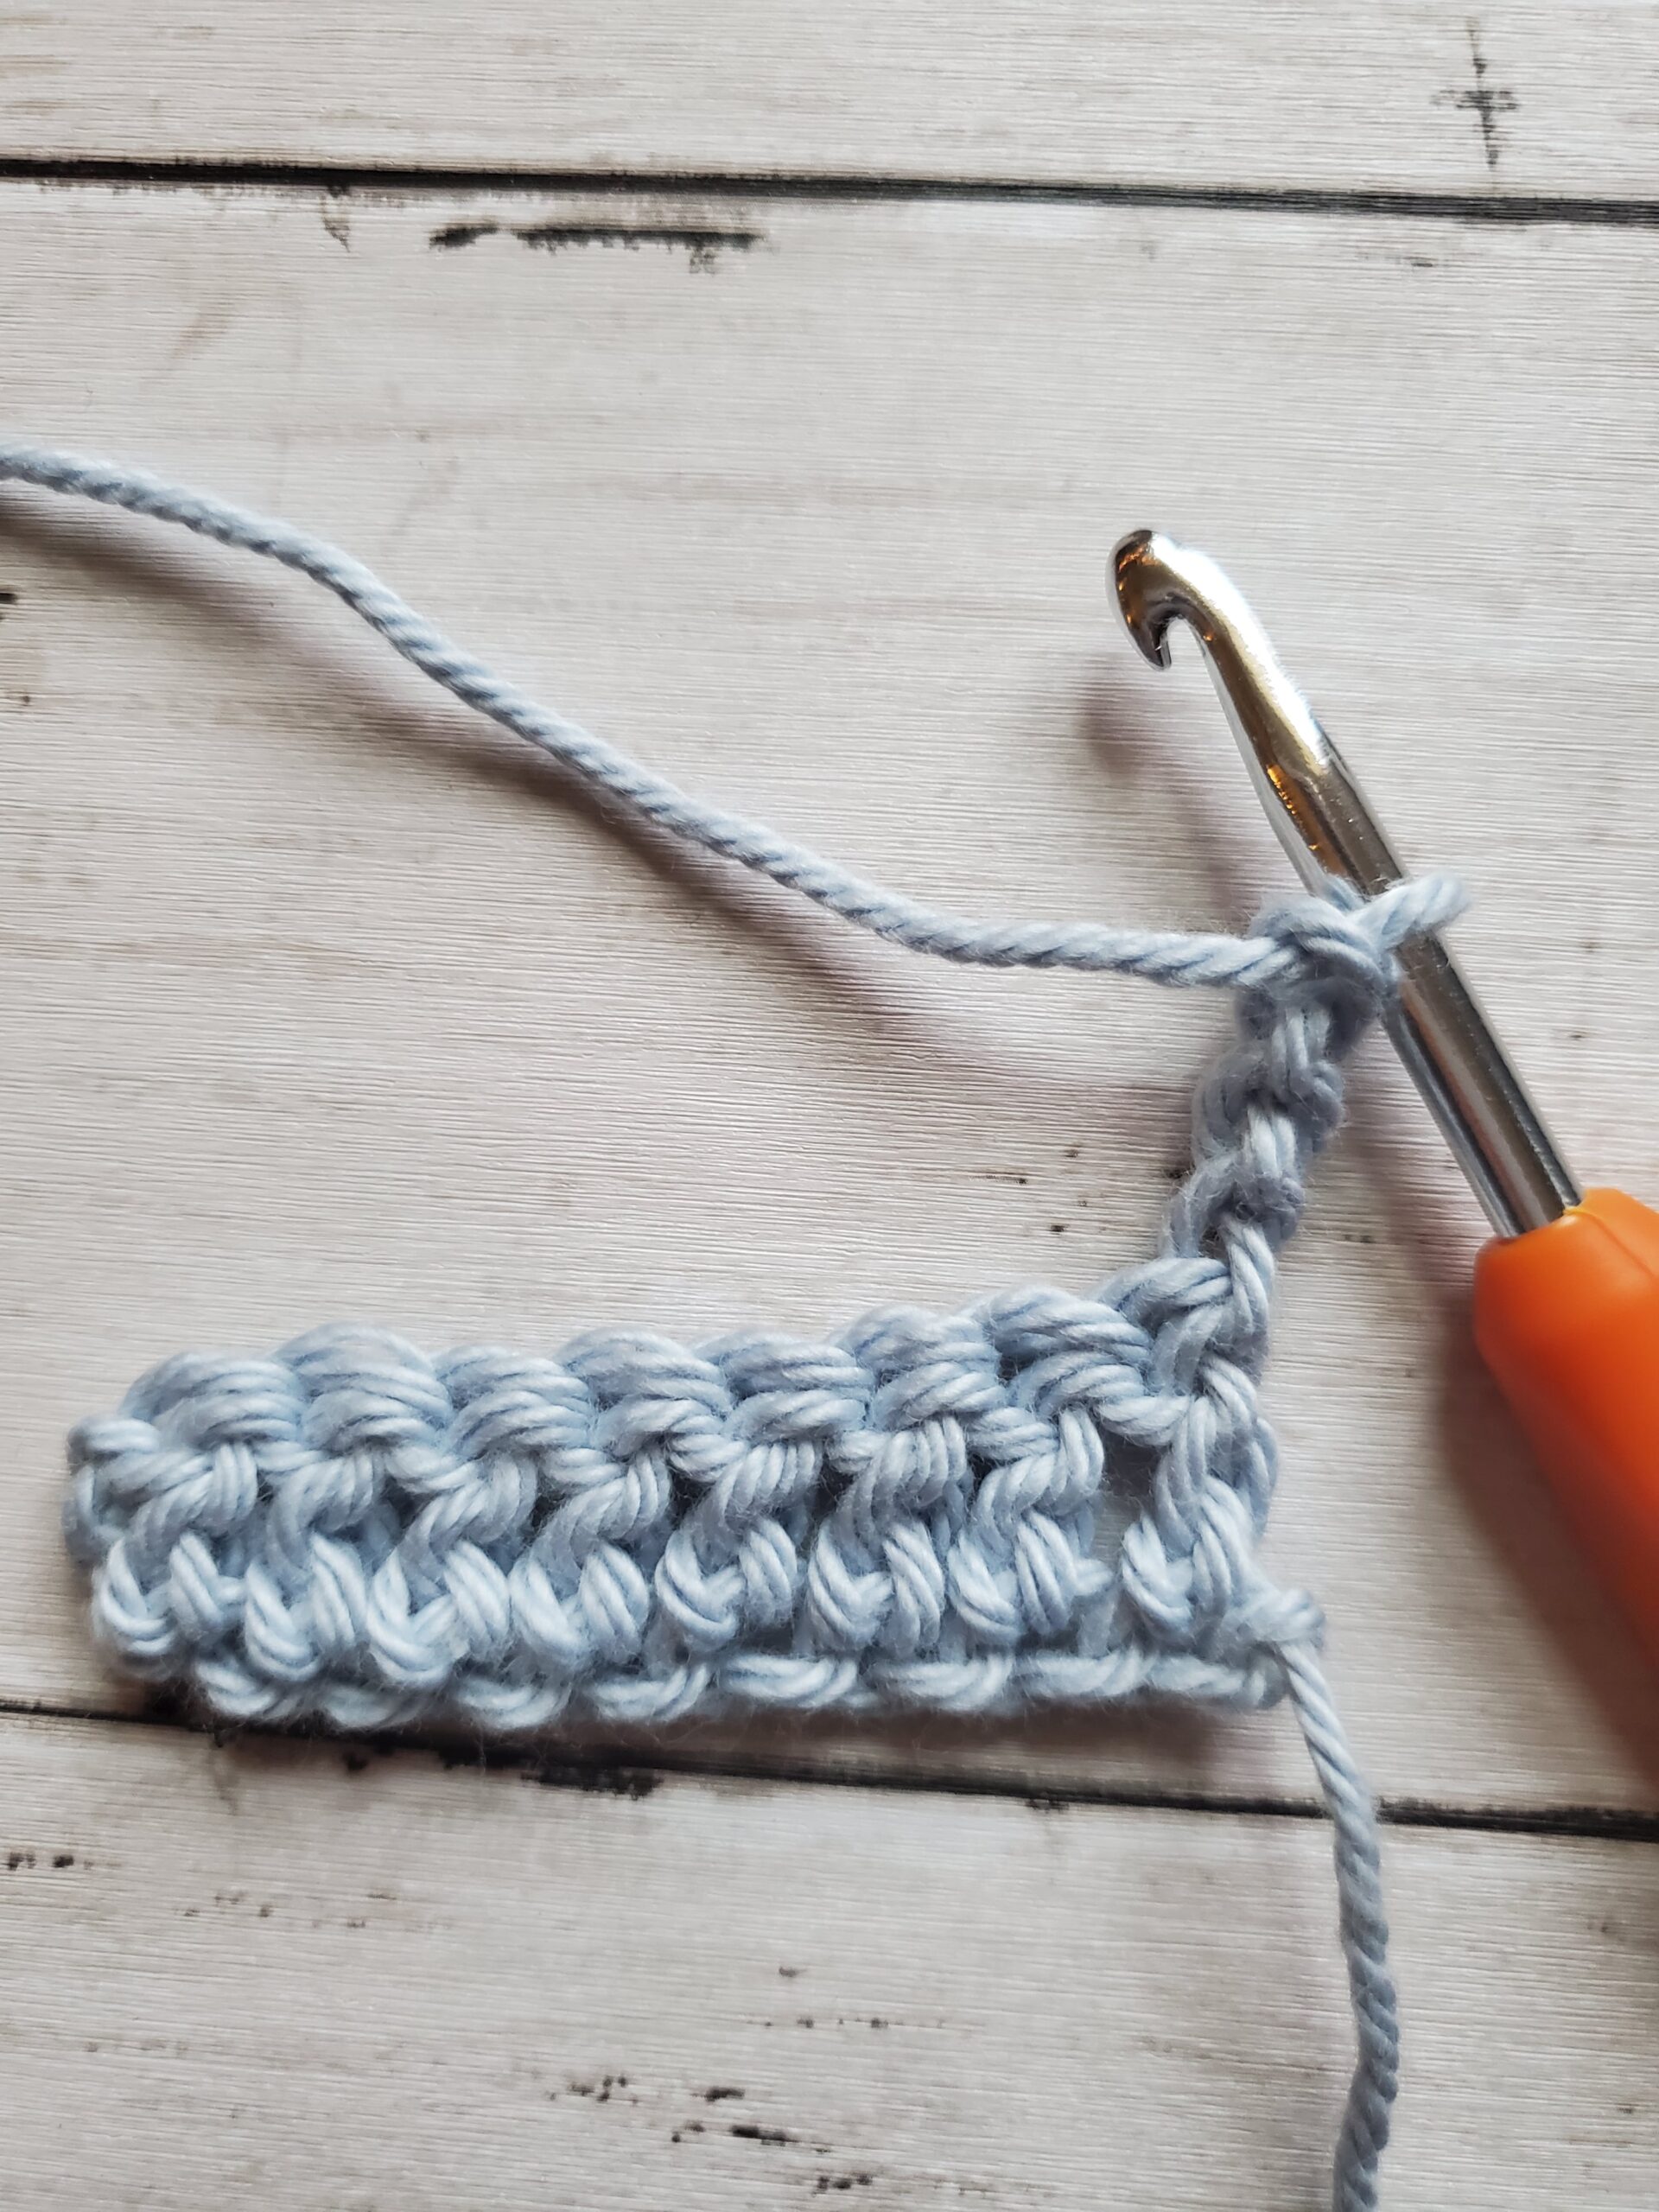
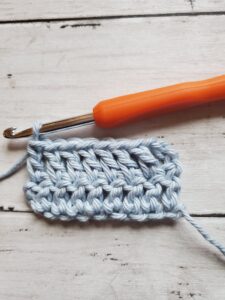
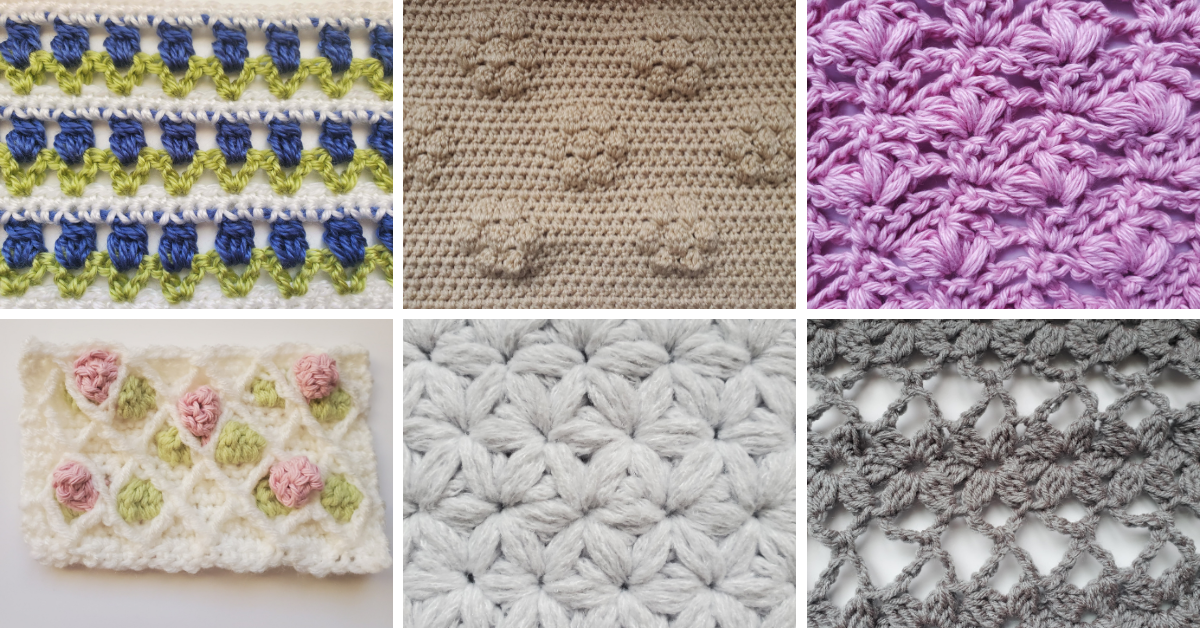
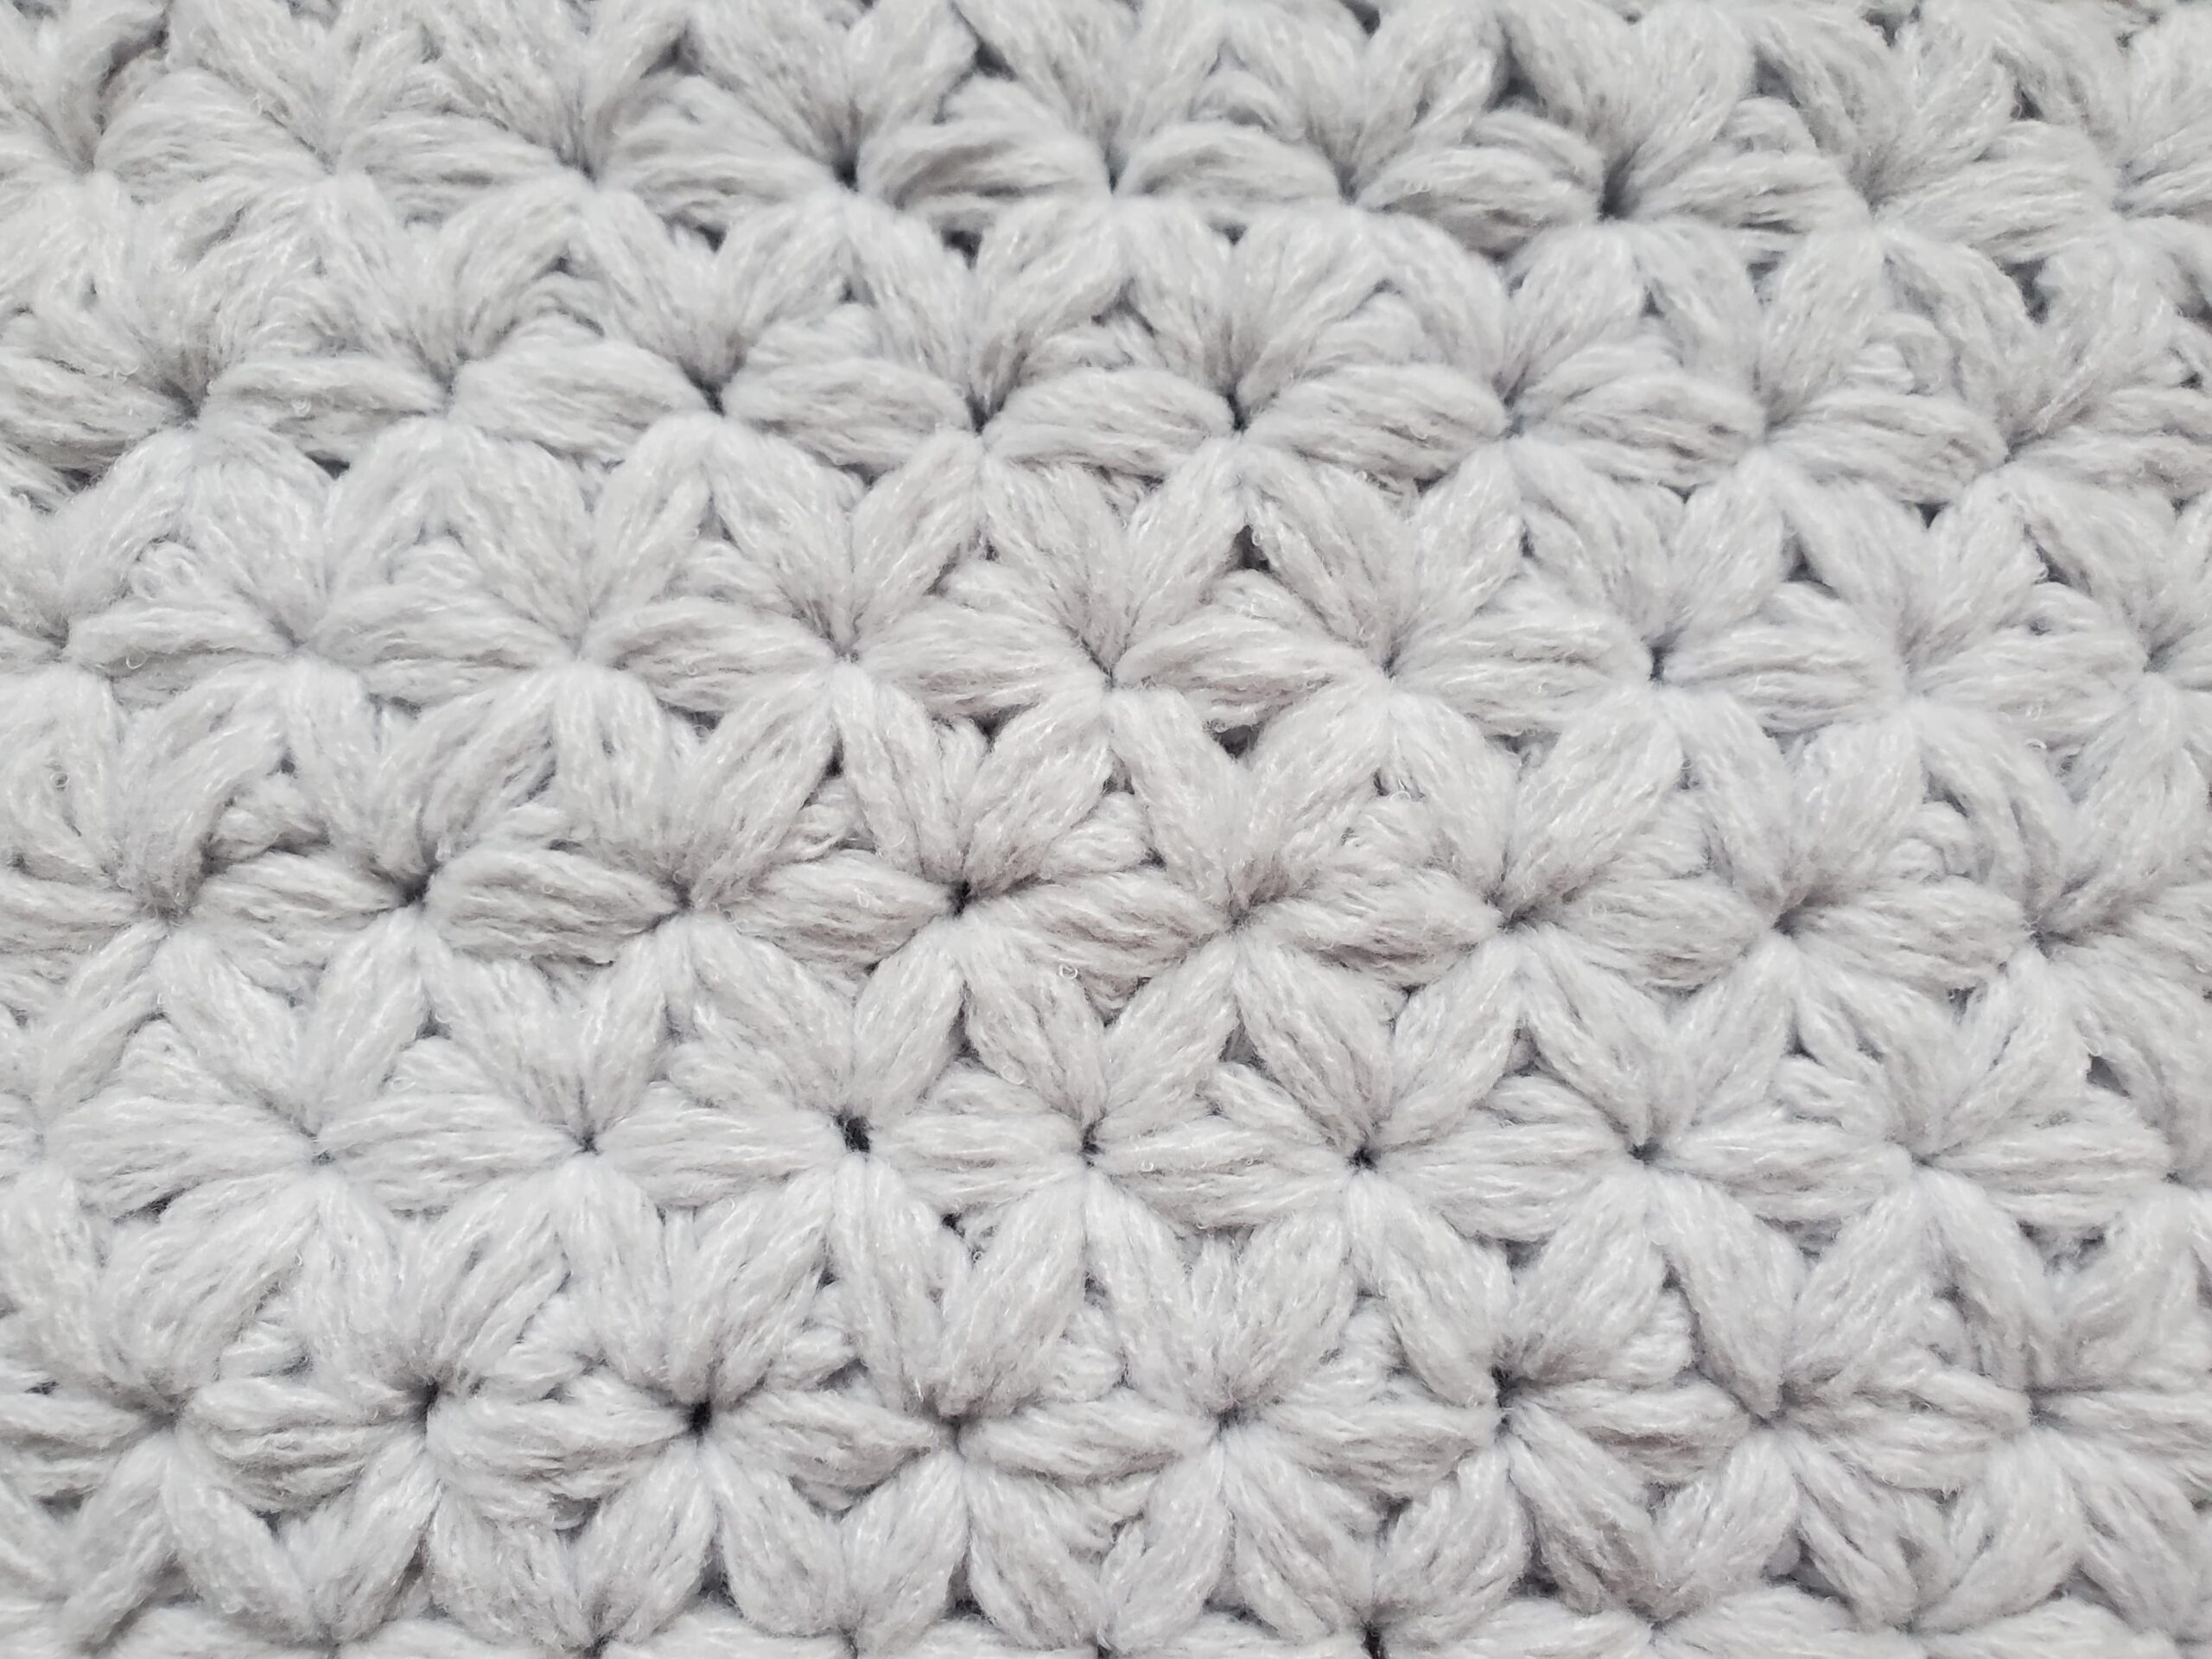
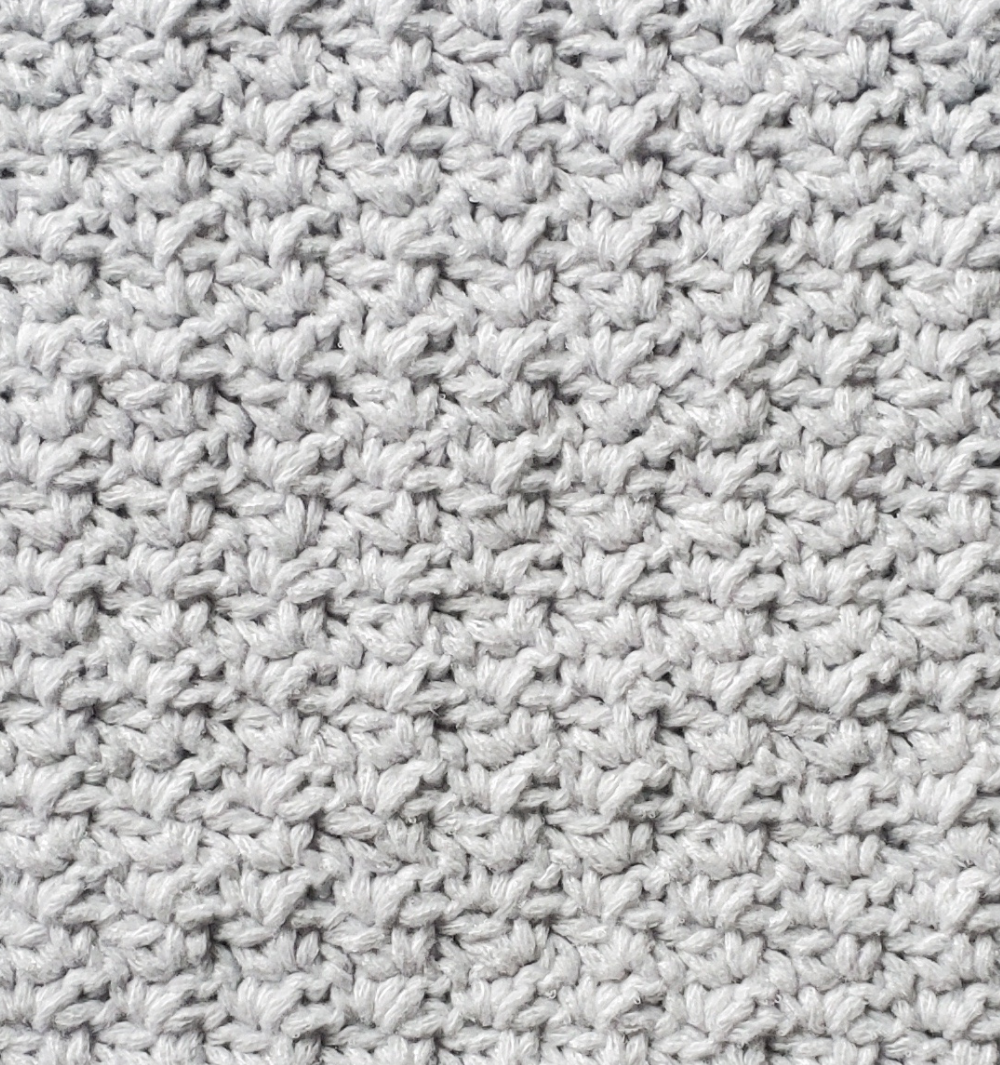
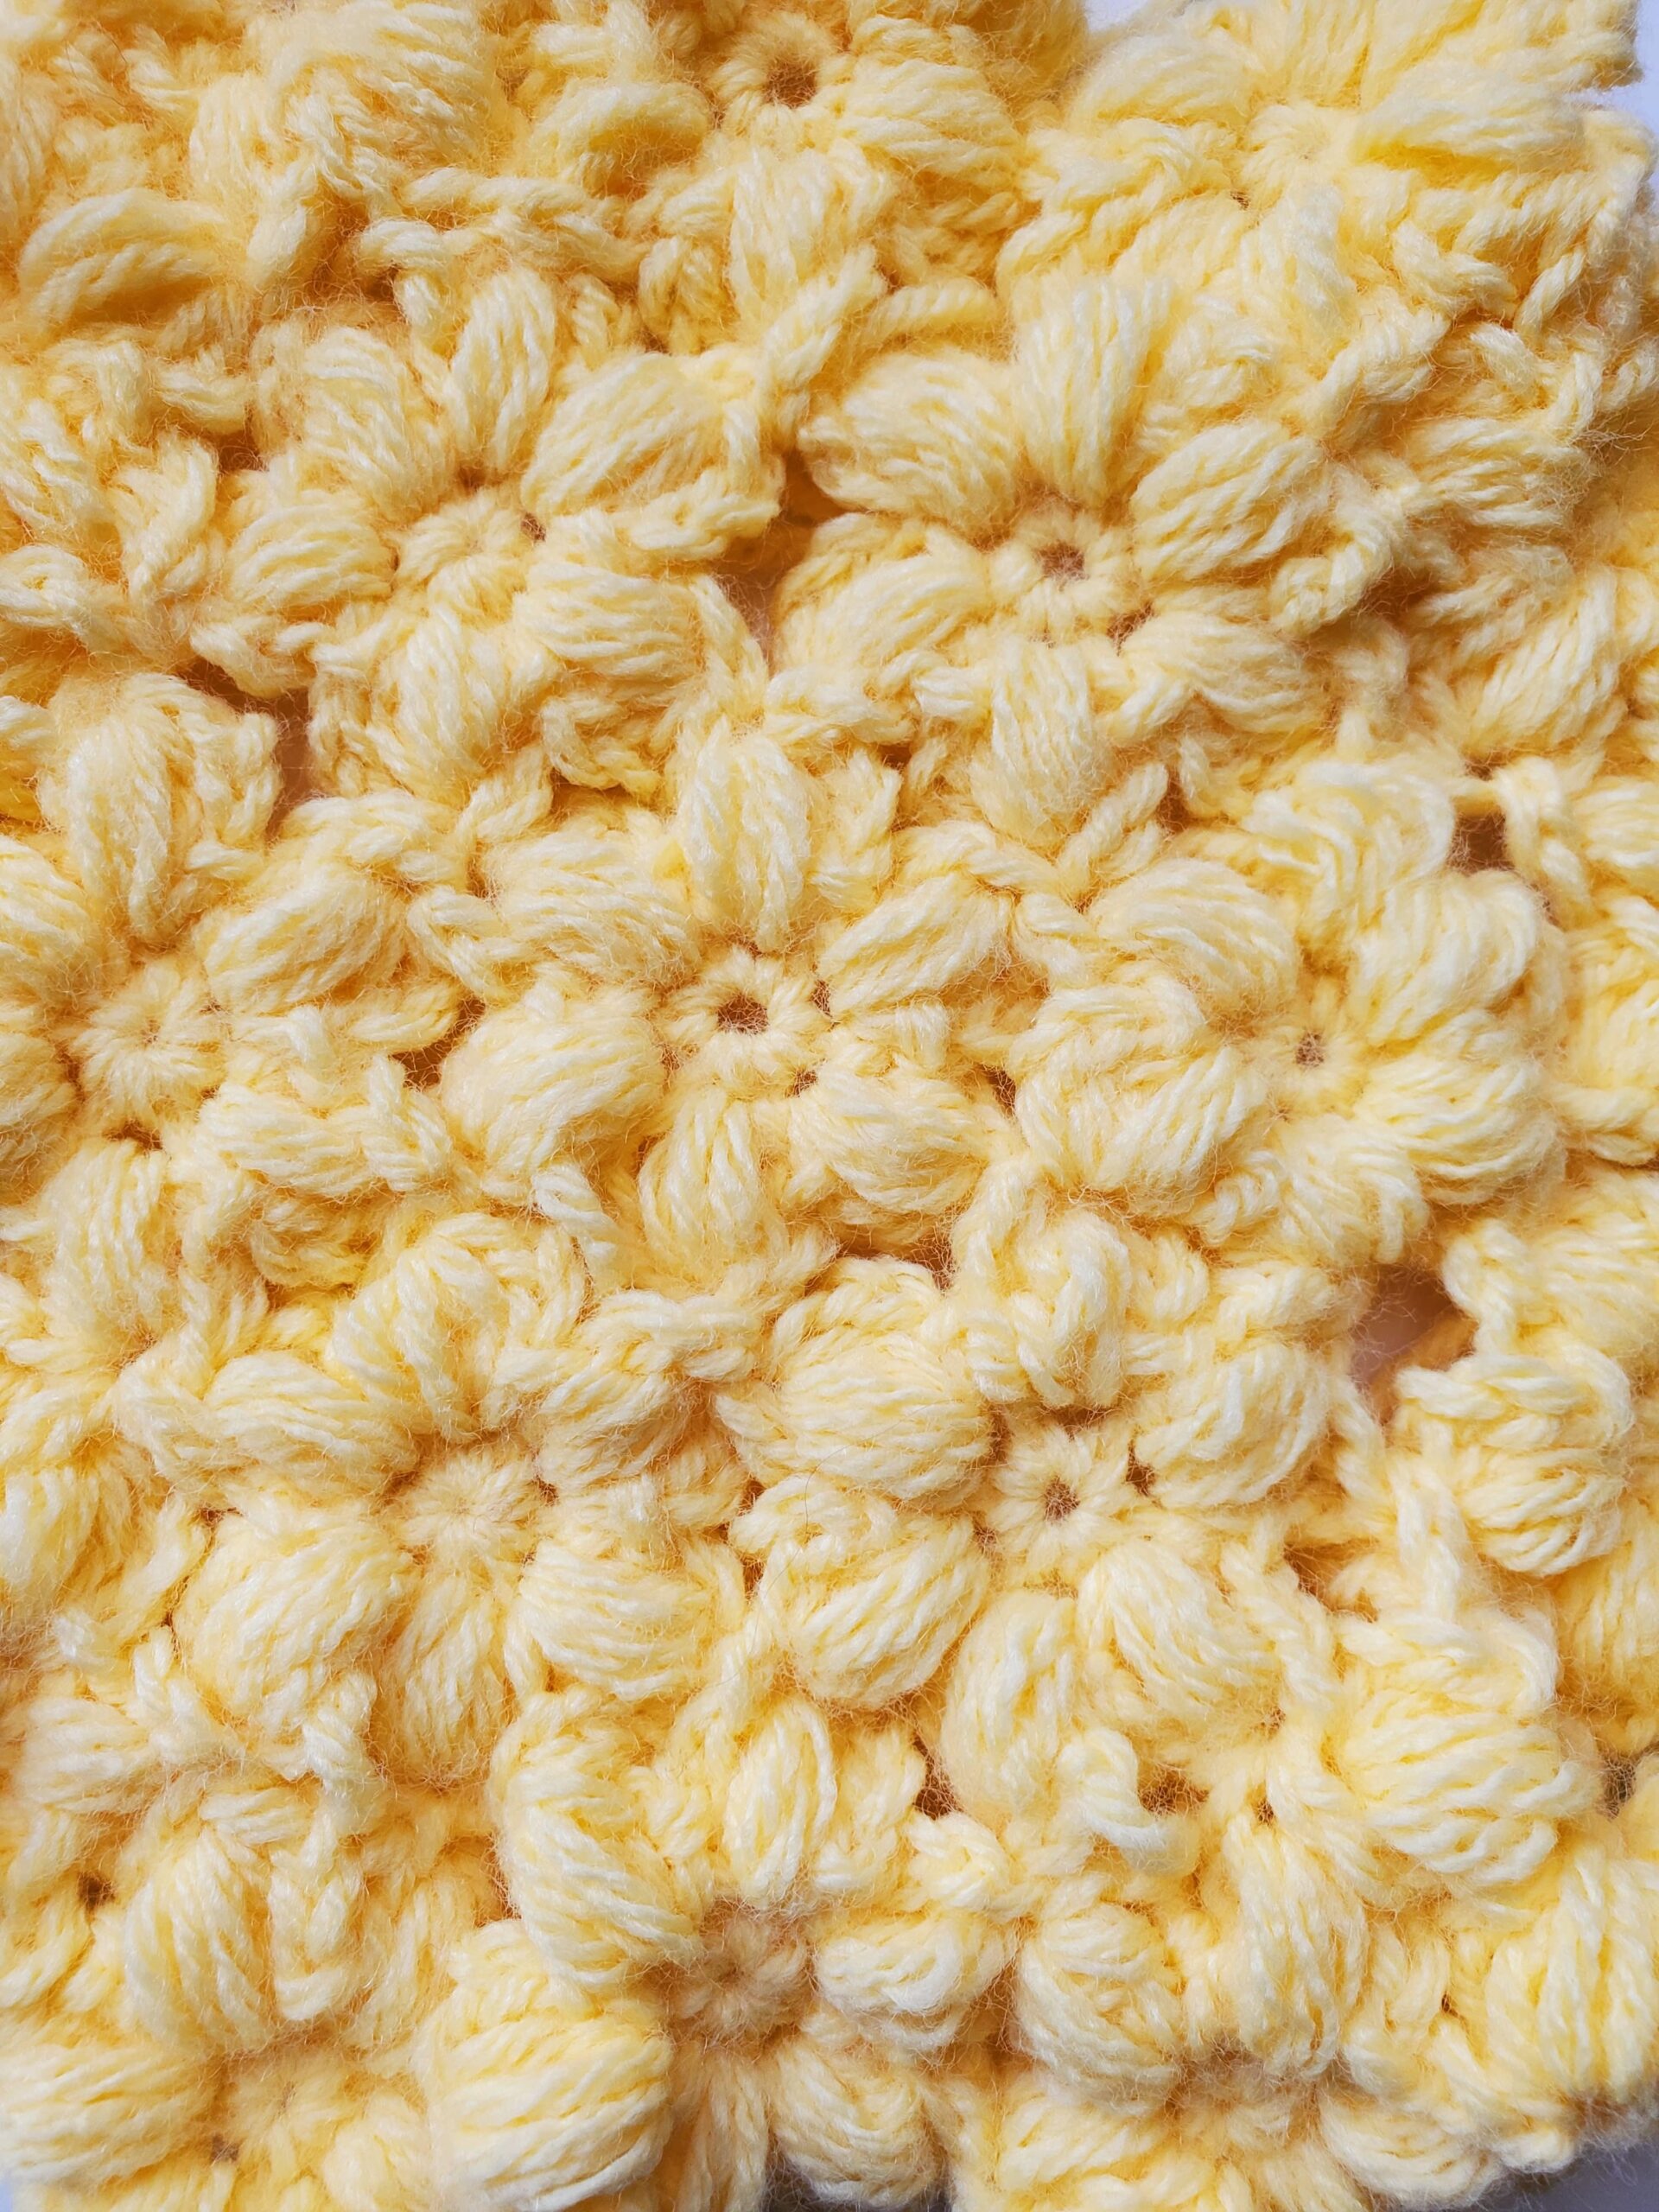
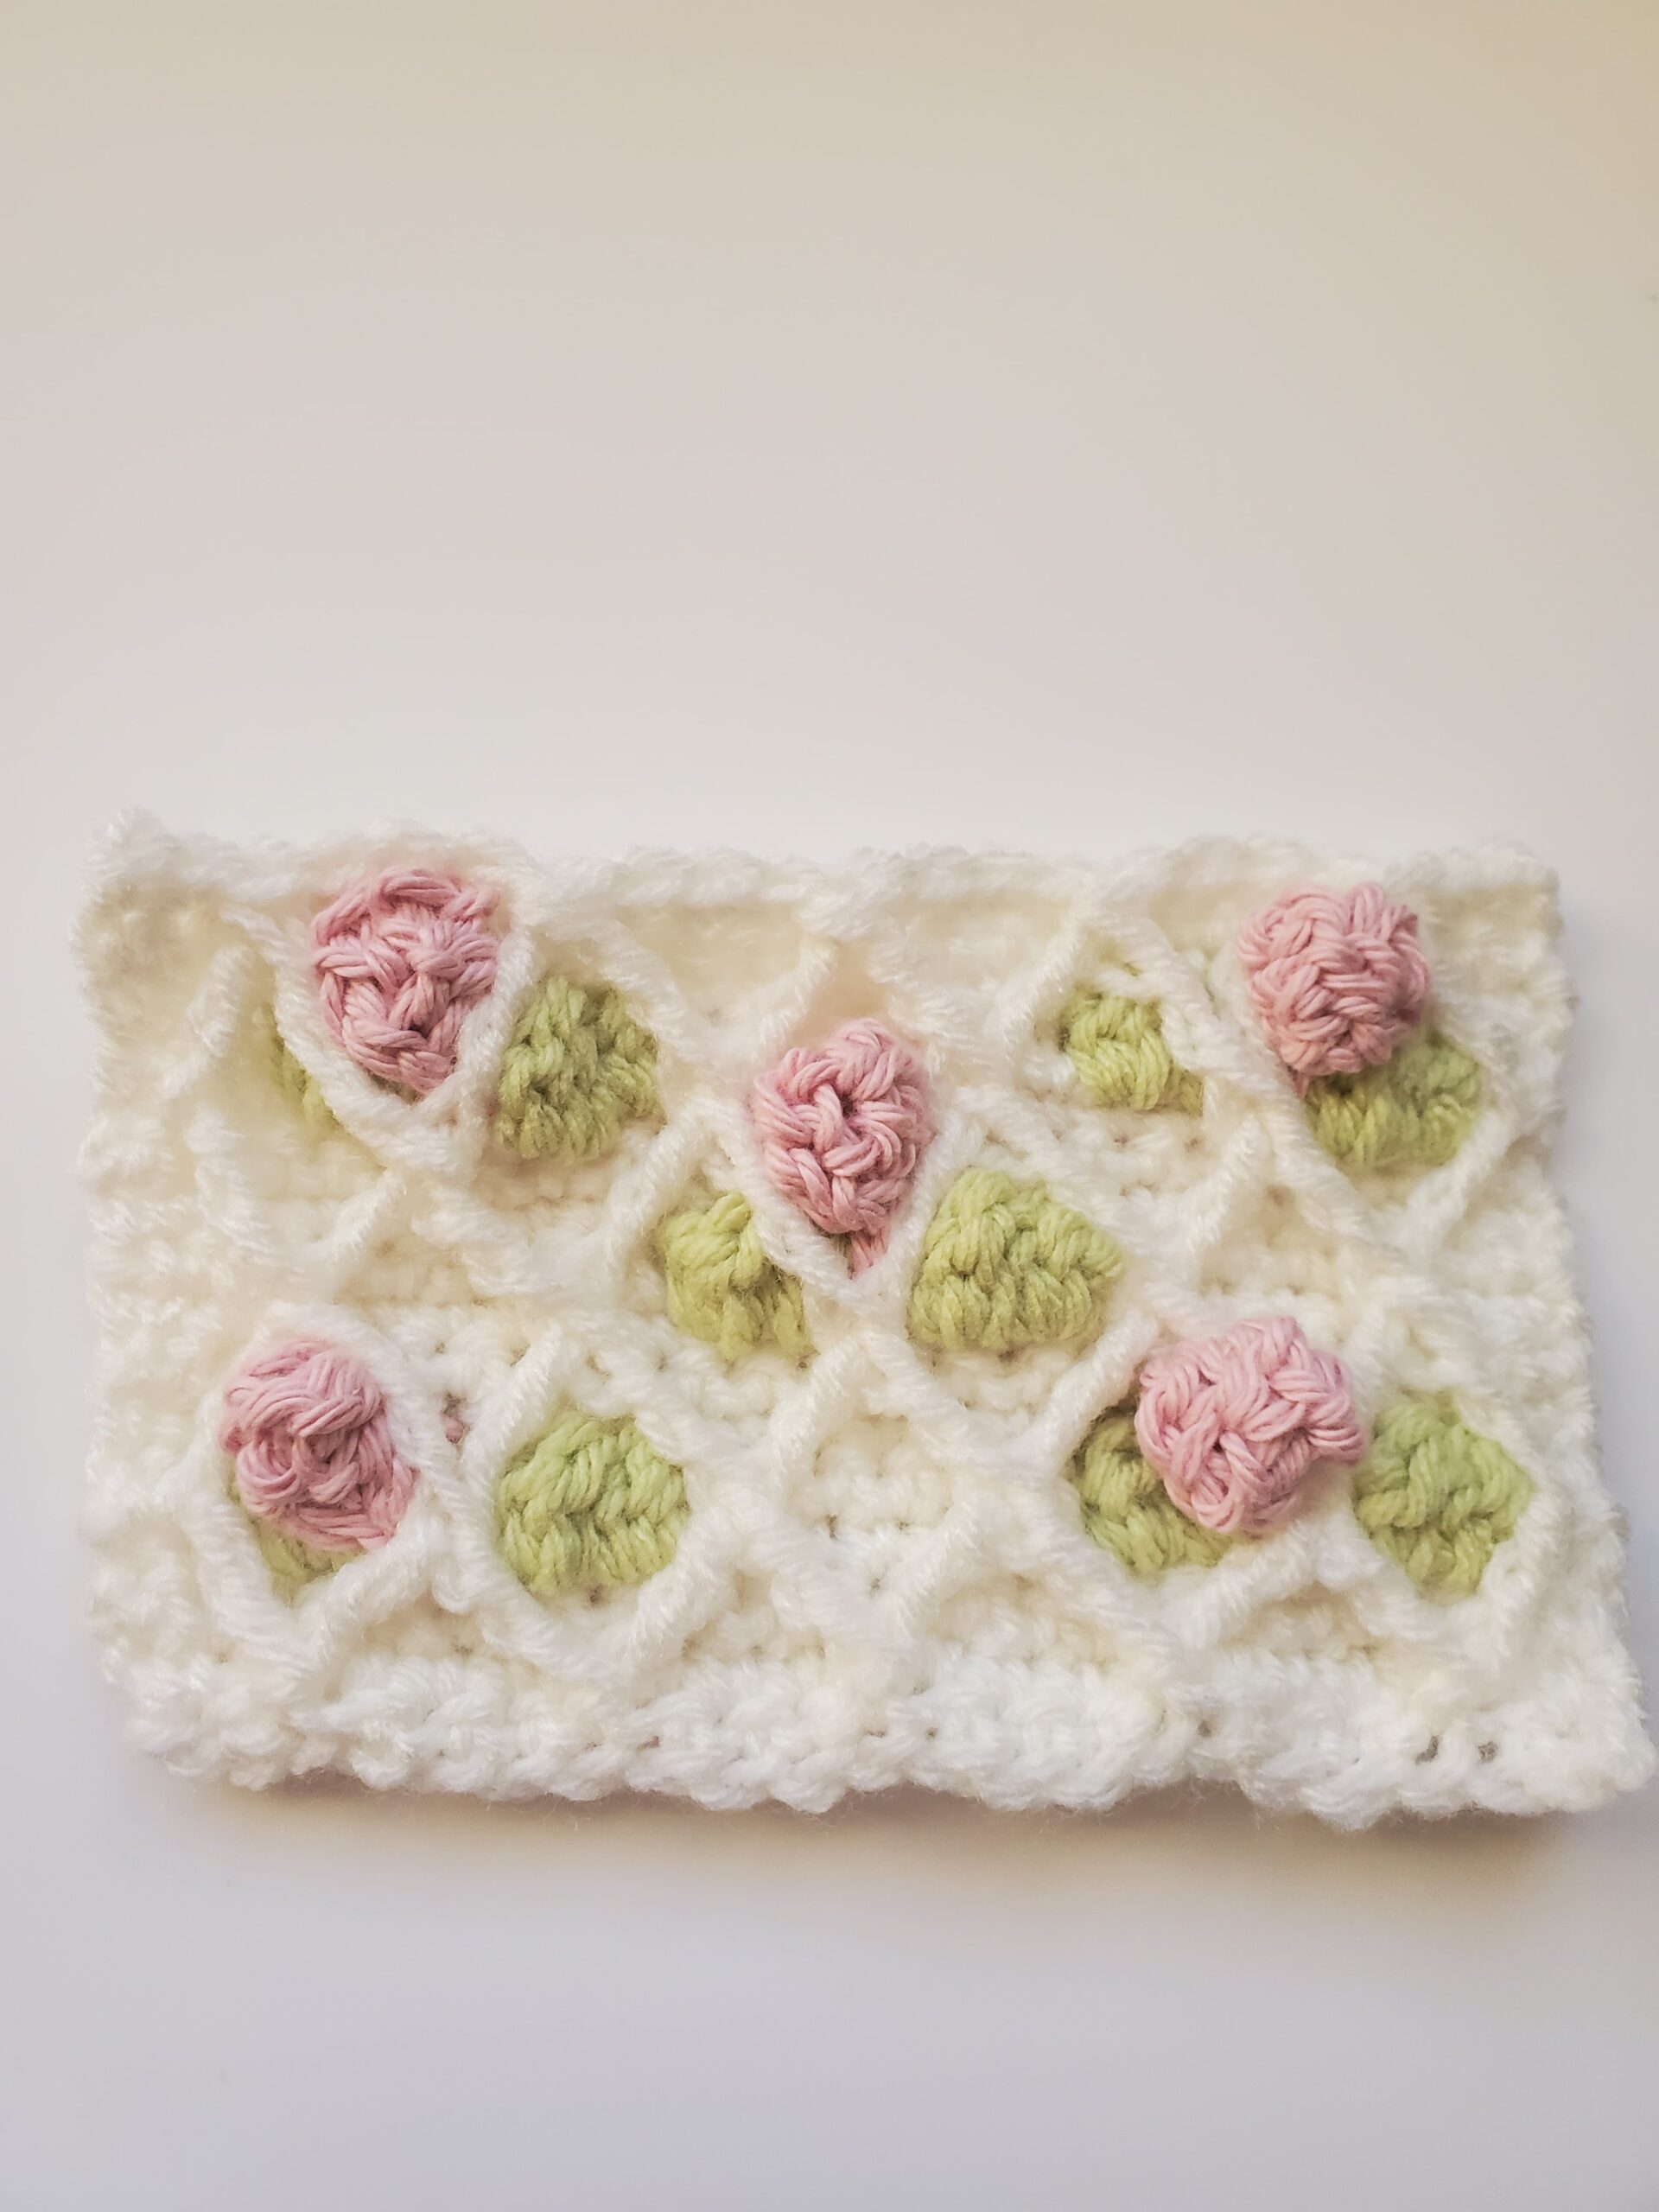
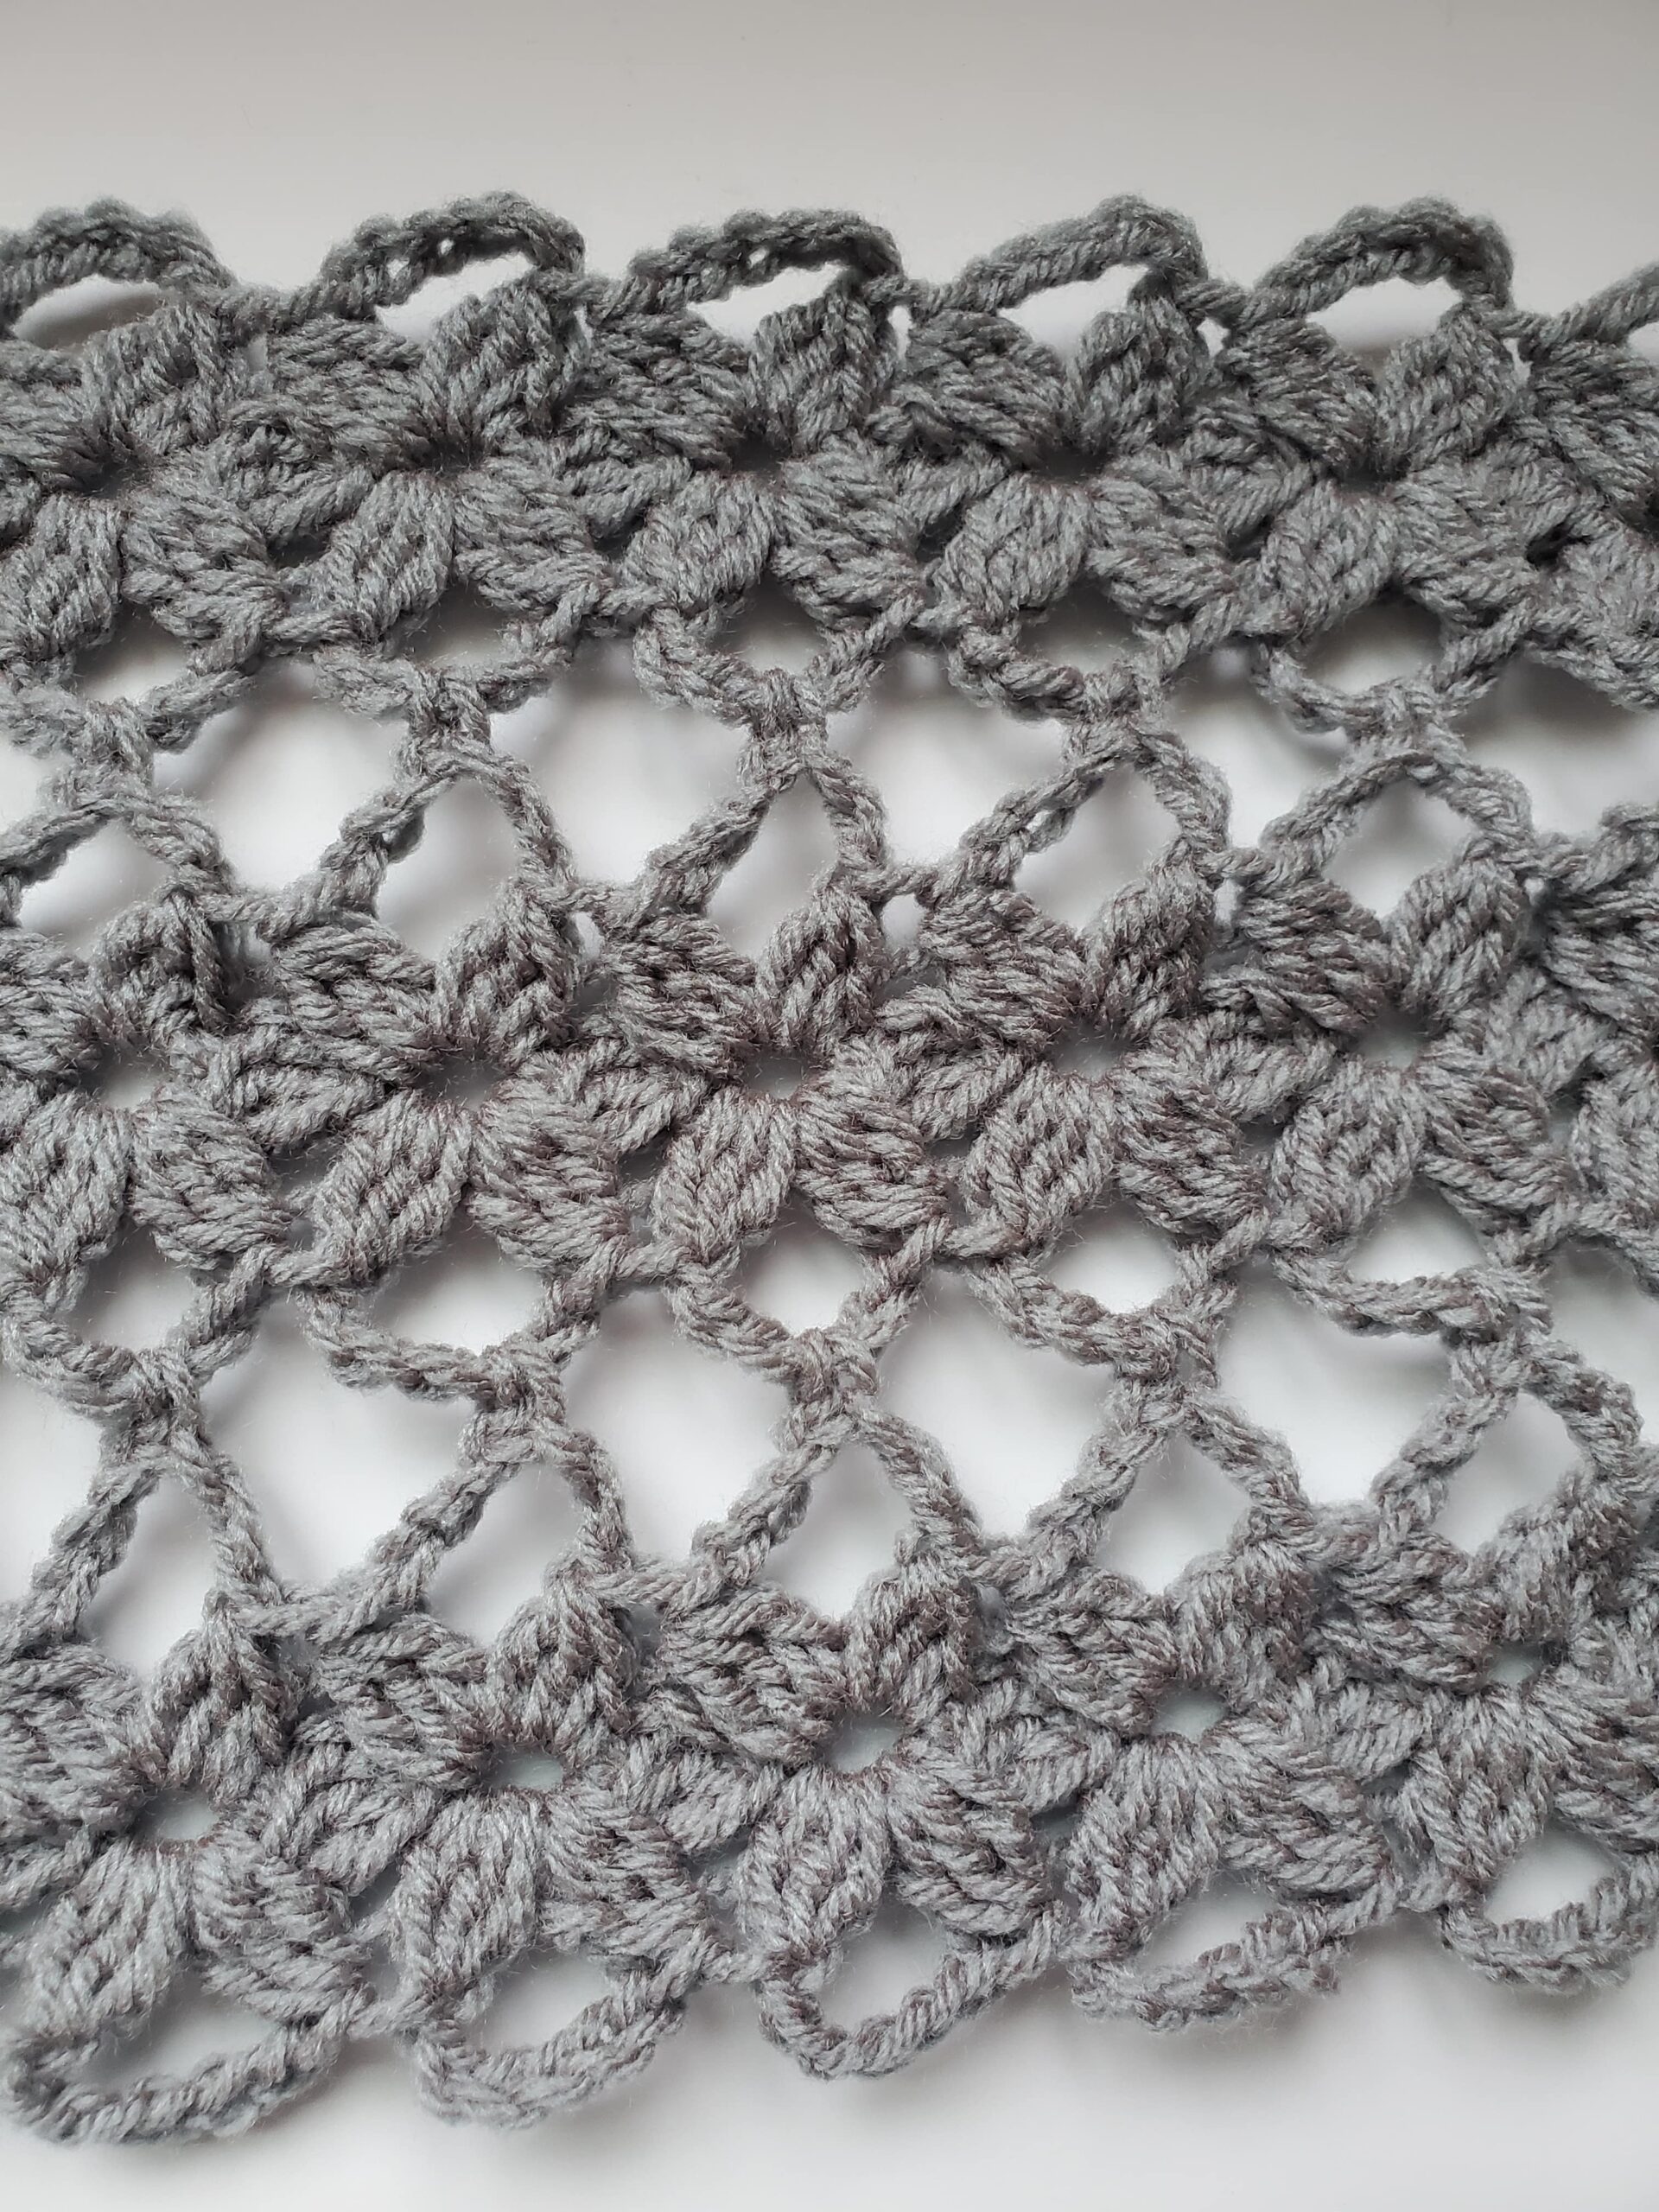
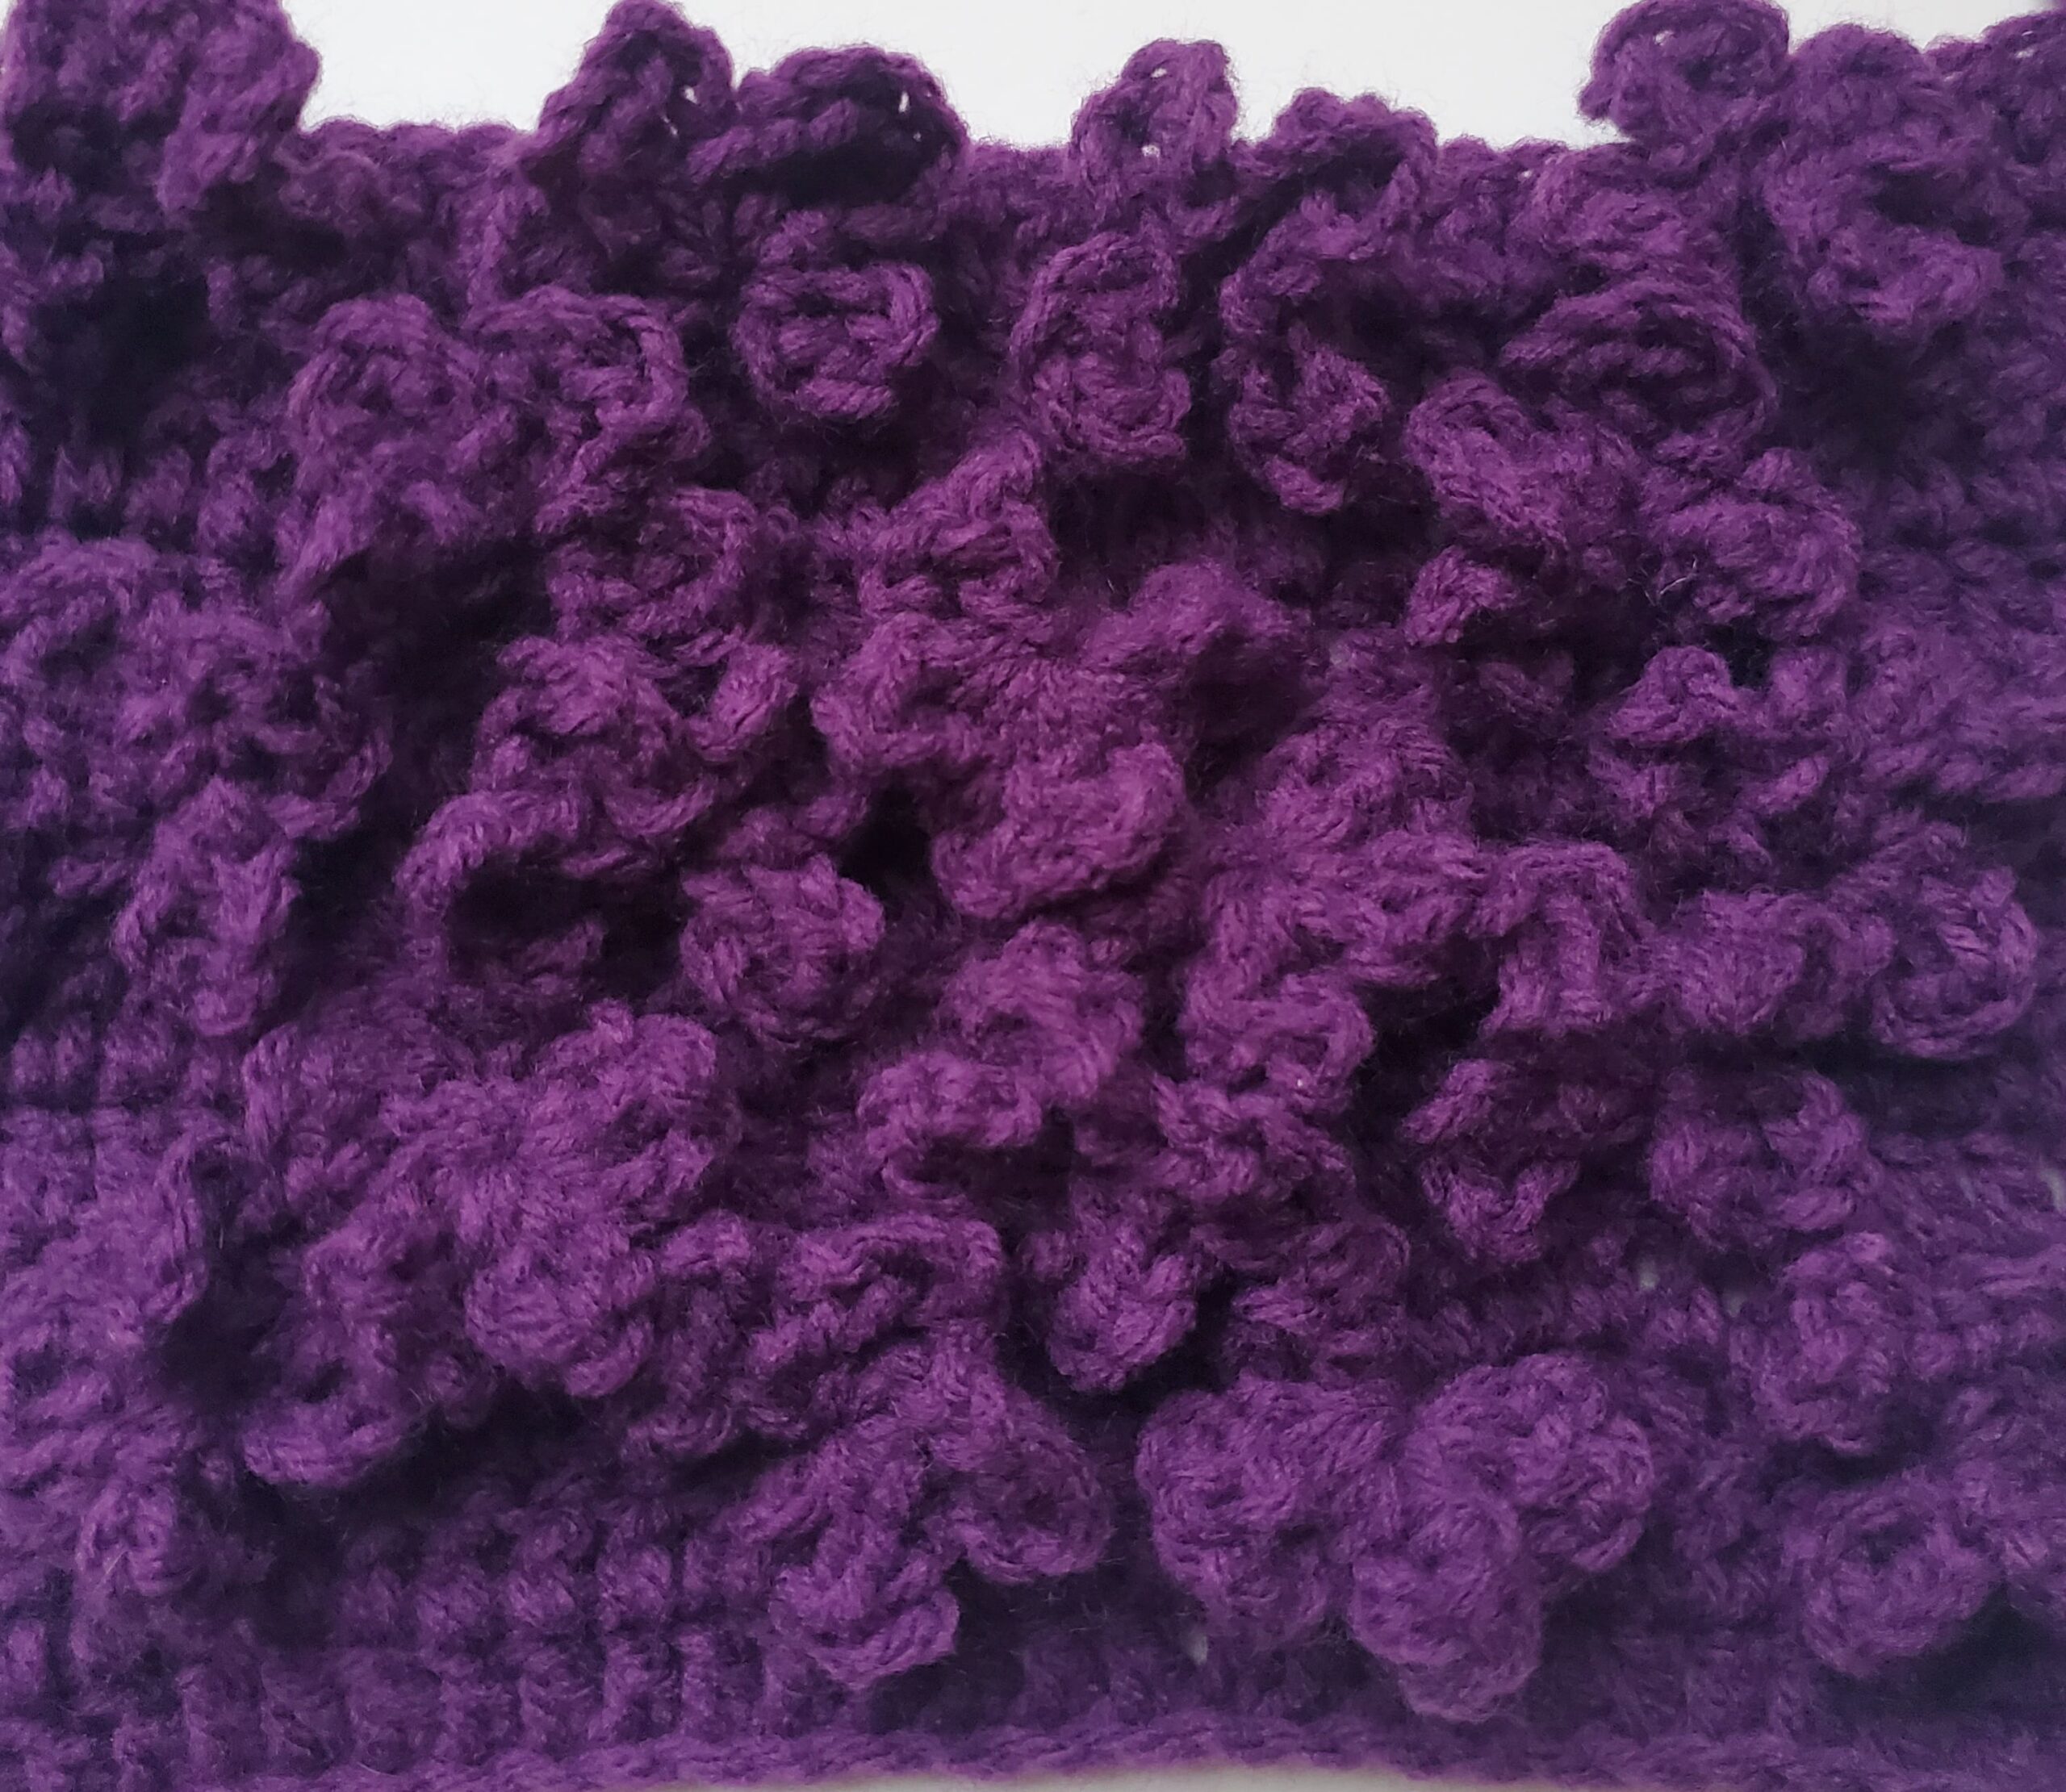
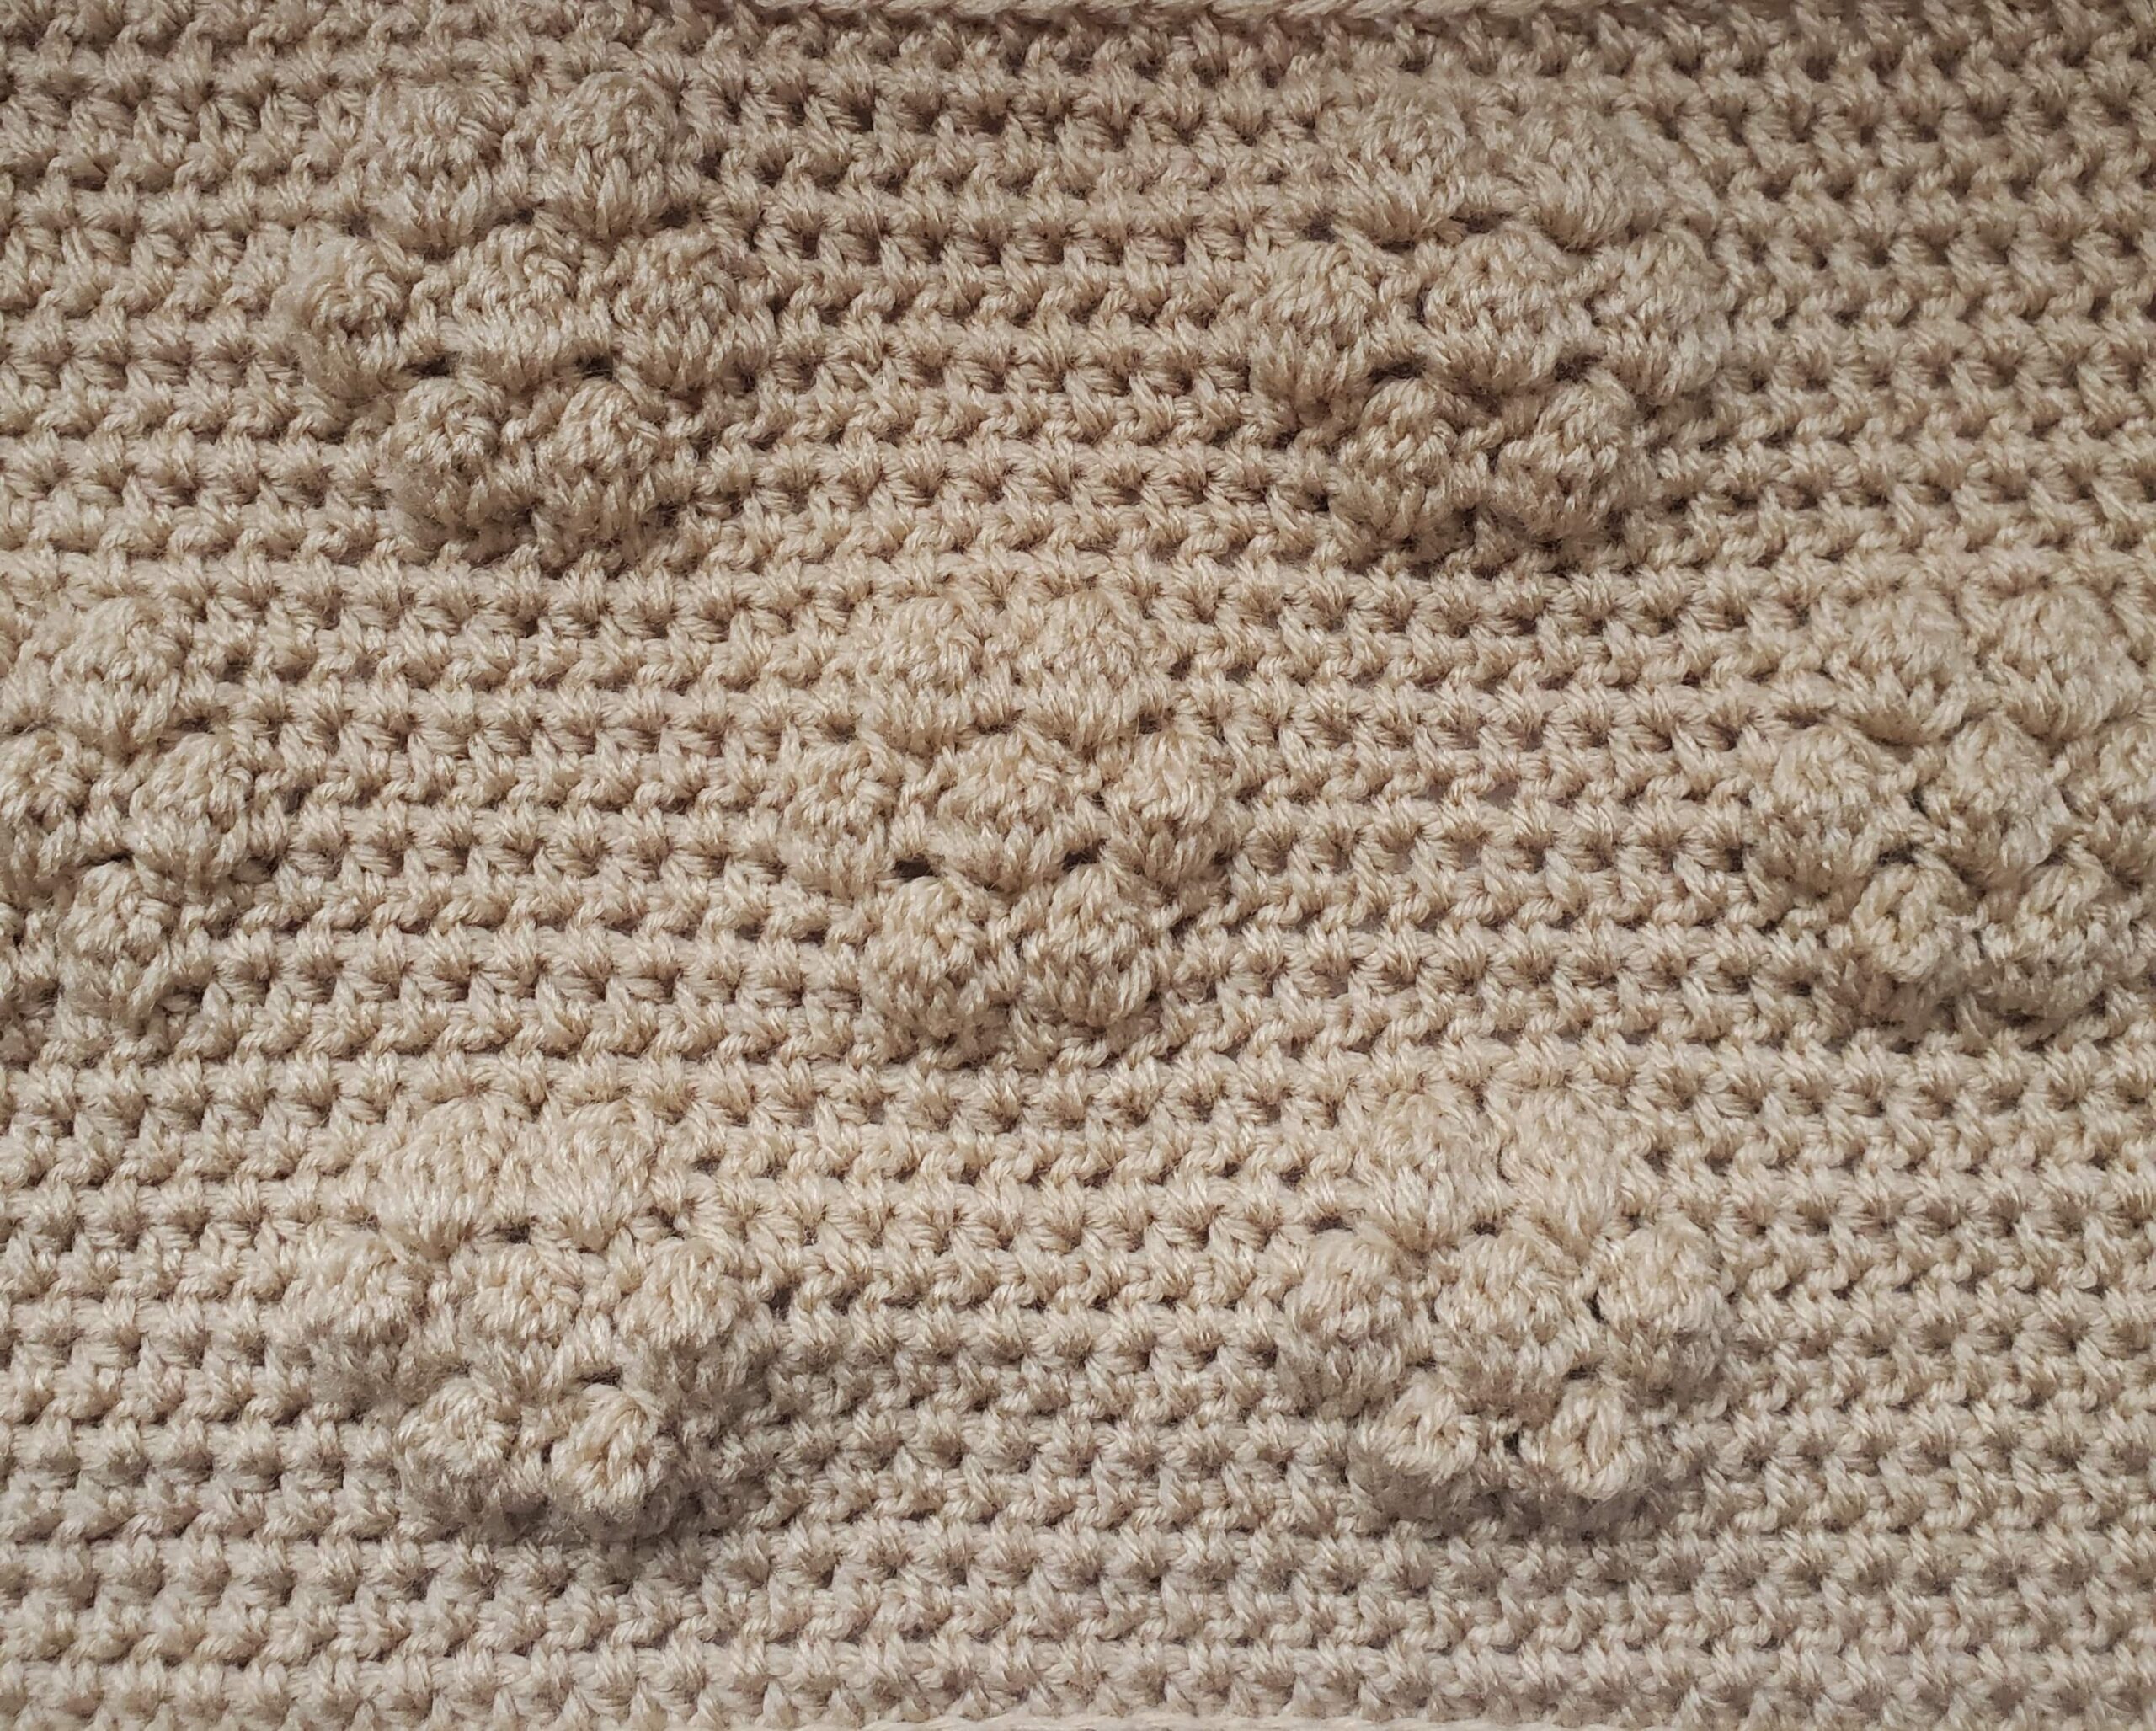
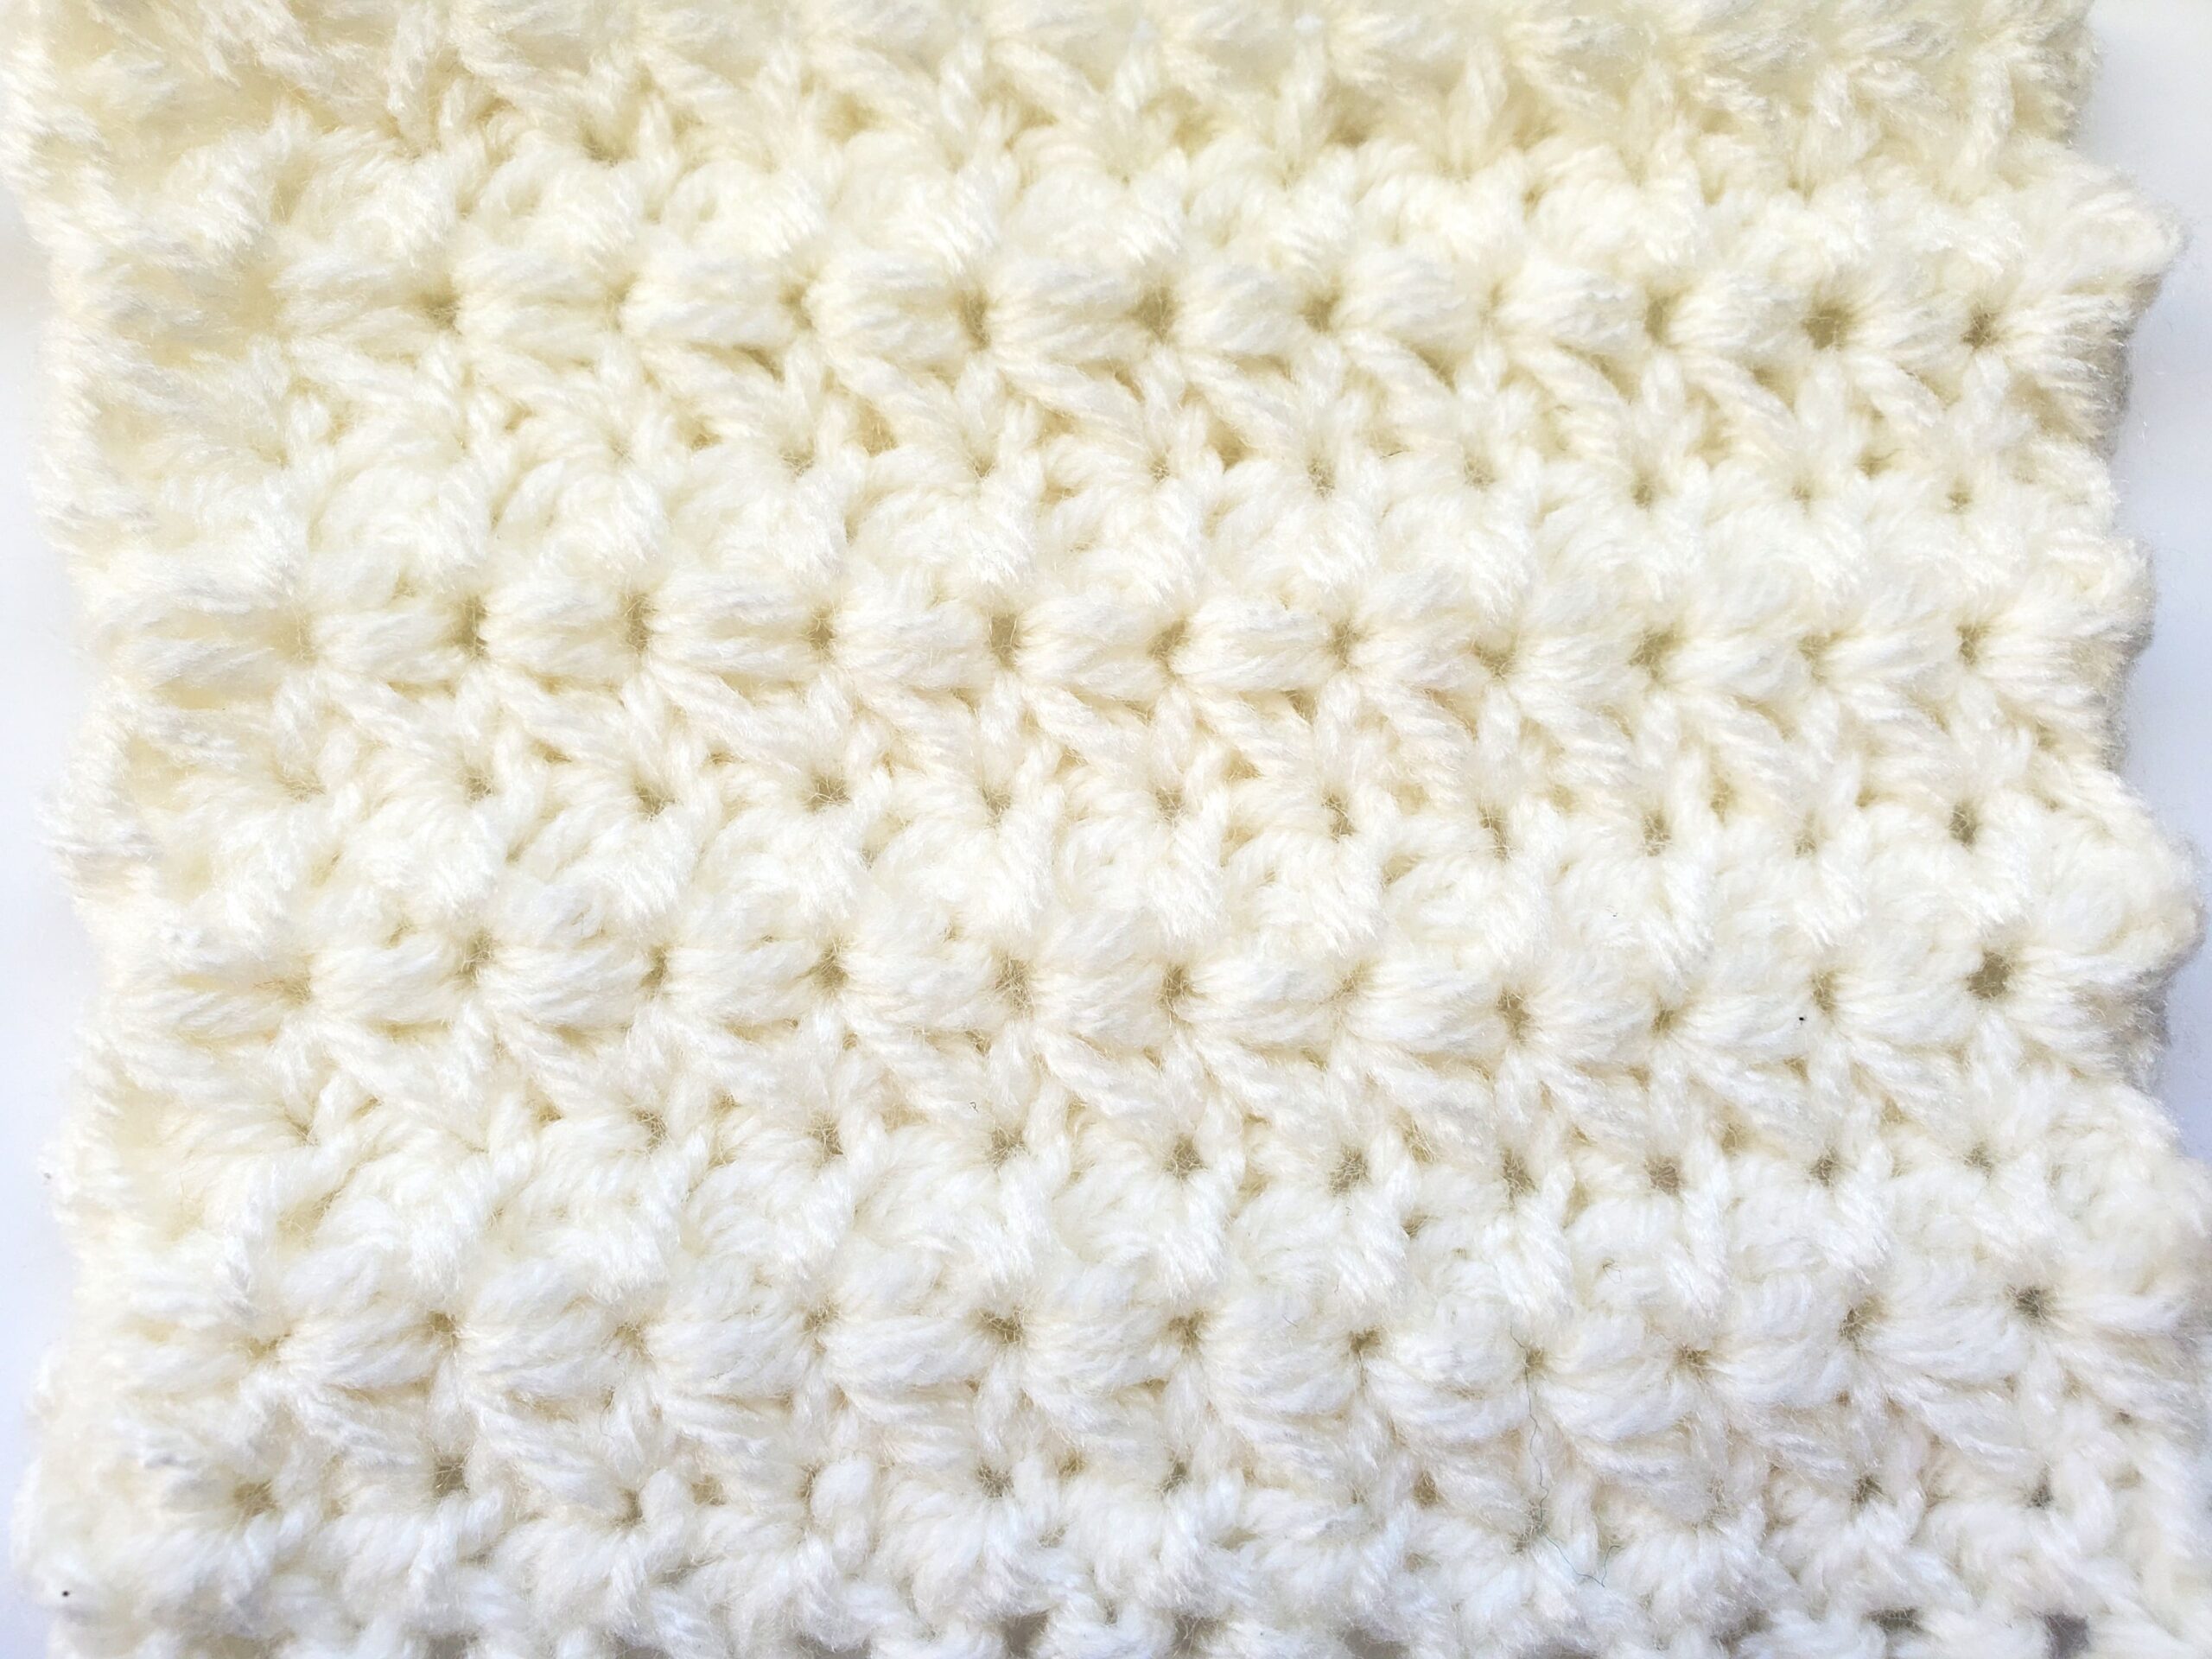
Another thing I love about the sweater is that it has a wonderful texture to it! It’s created with one of my favorite types of stitches: the wattle stitch! This stitch is simple and creates a lovely texture that isn’t boring. 

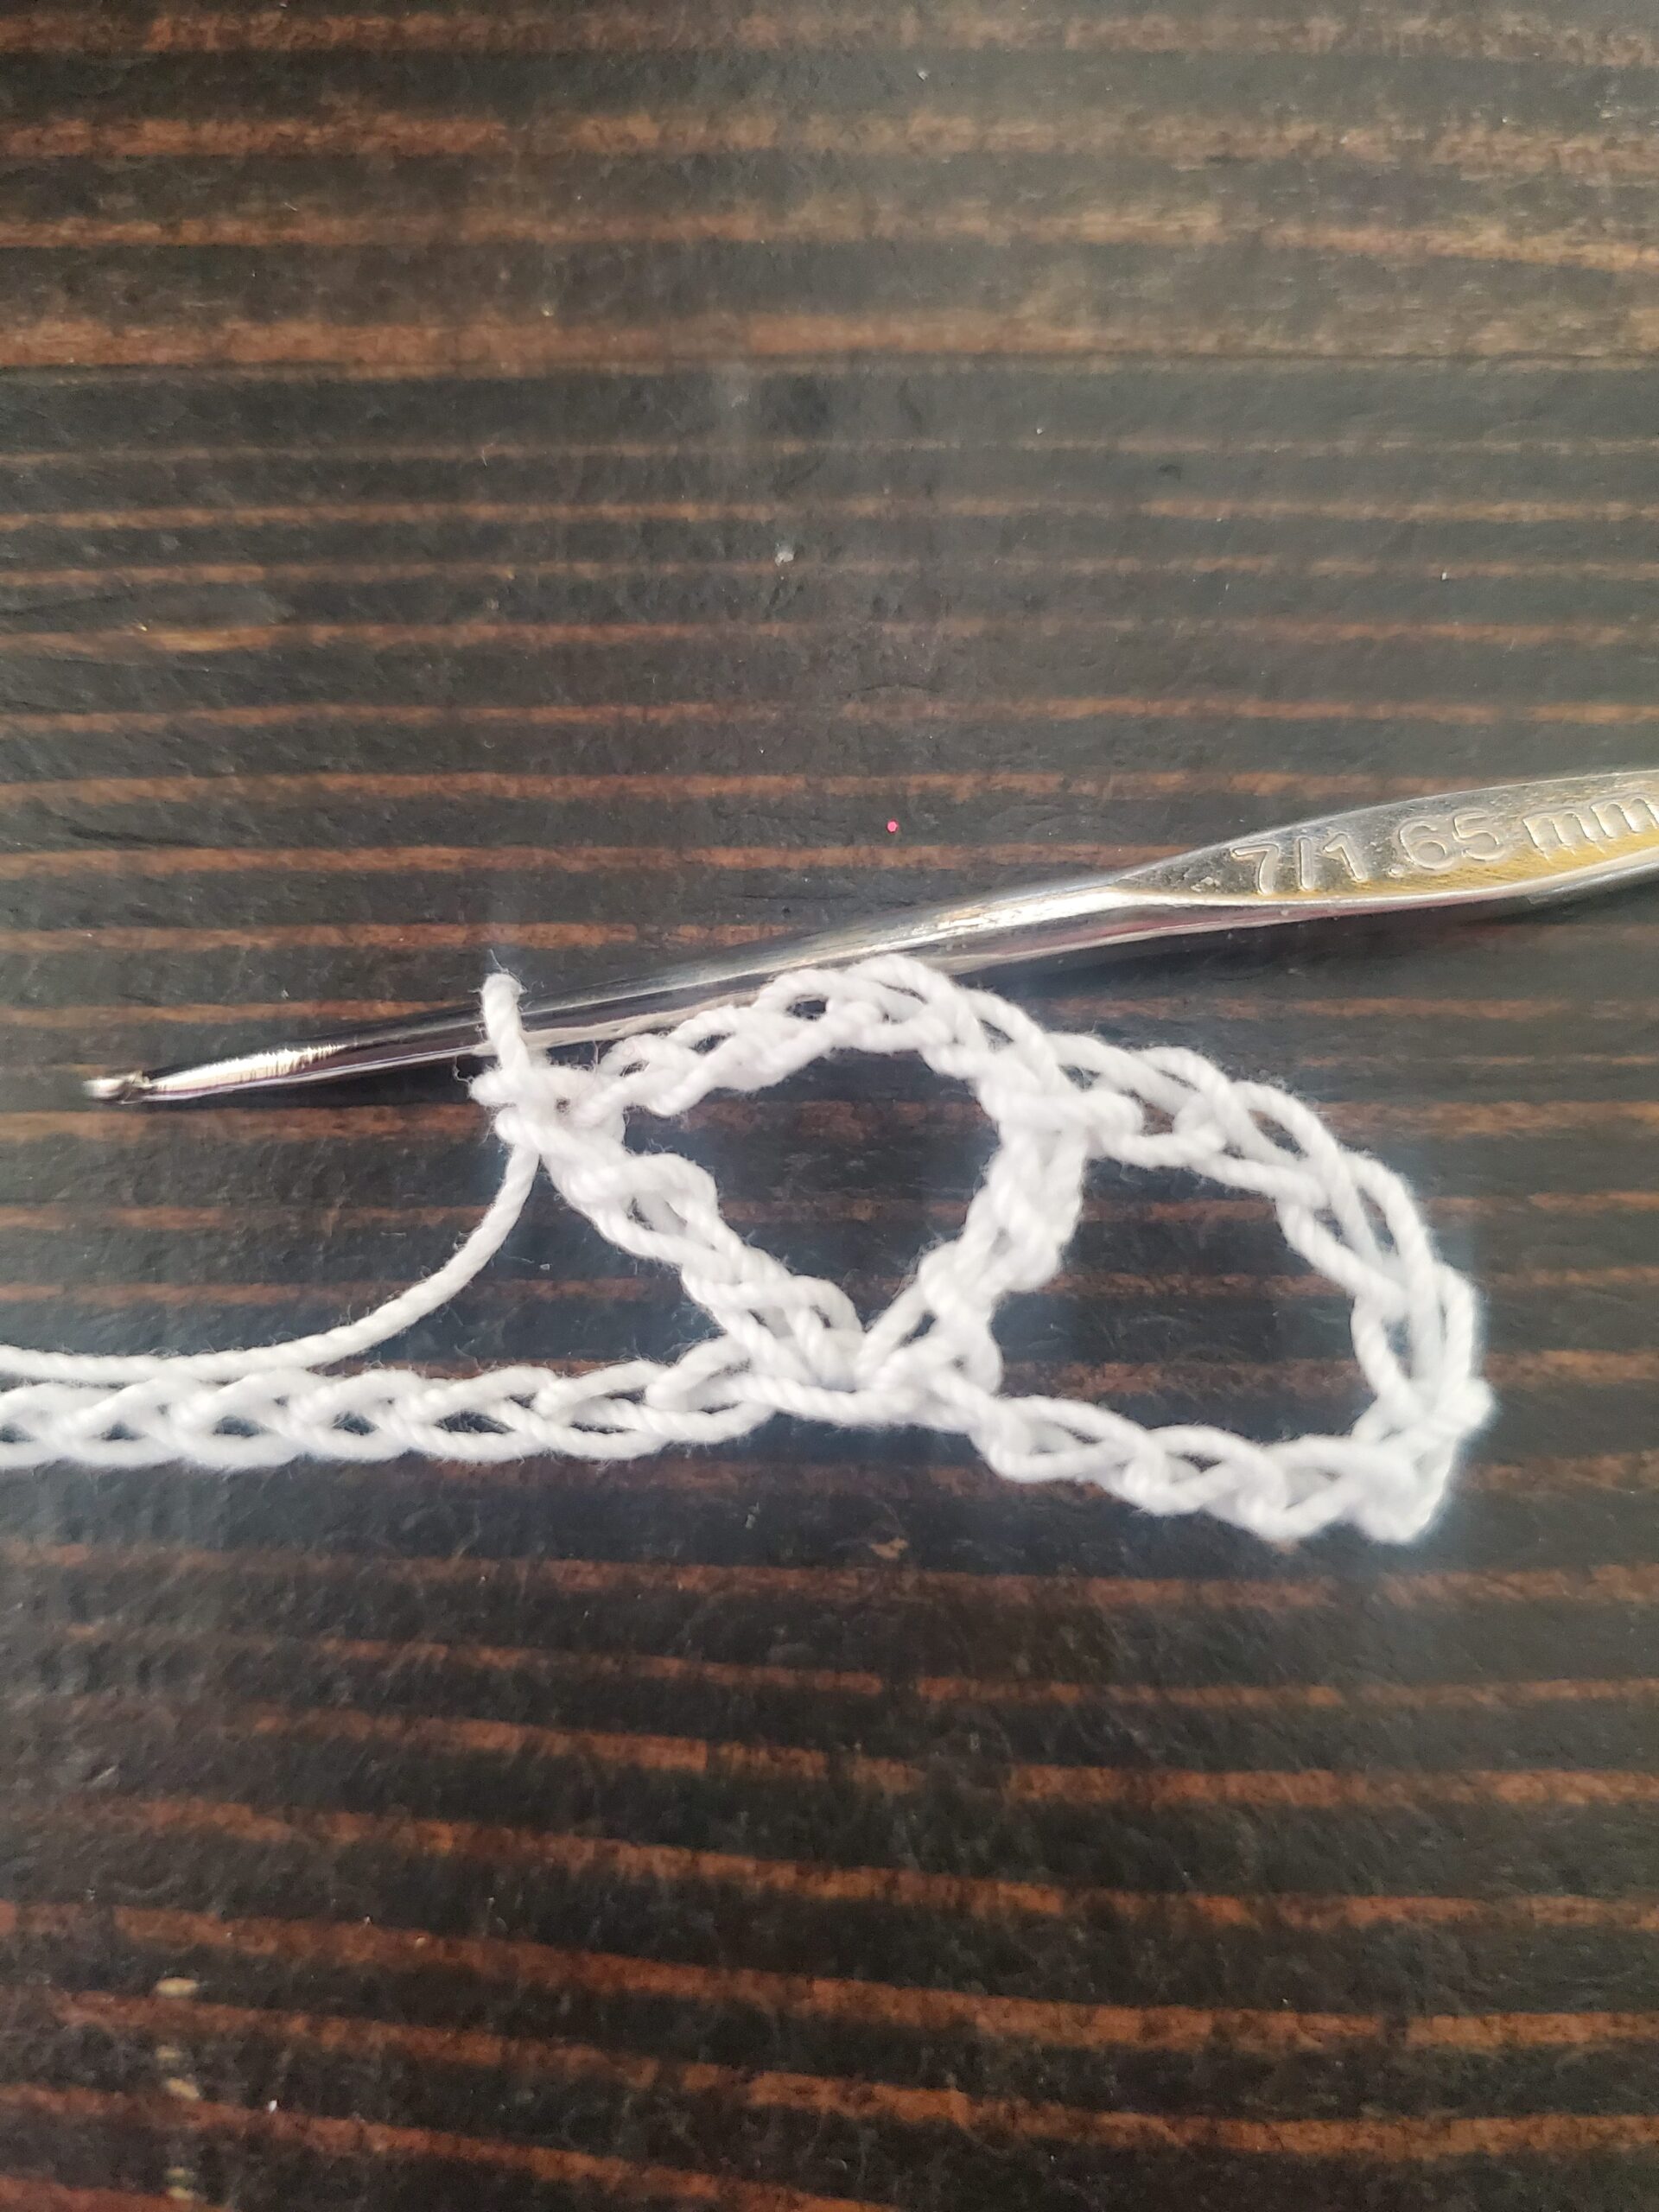
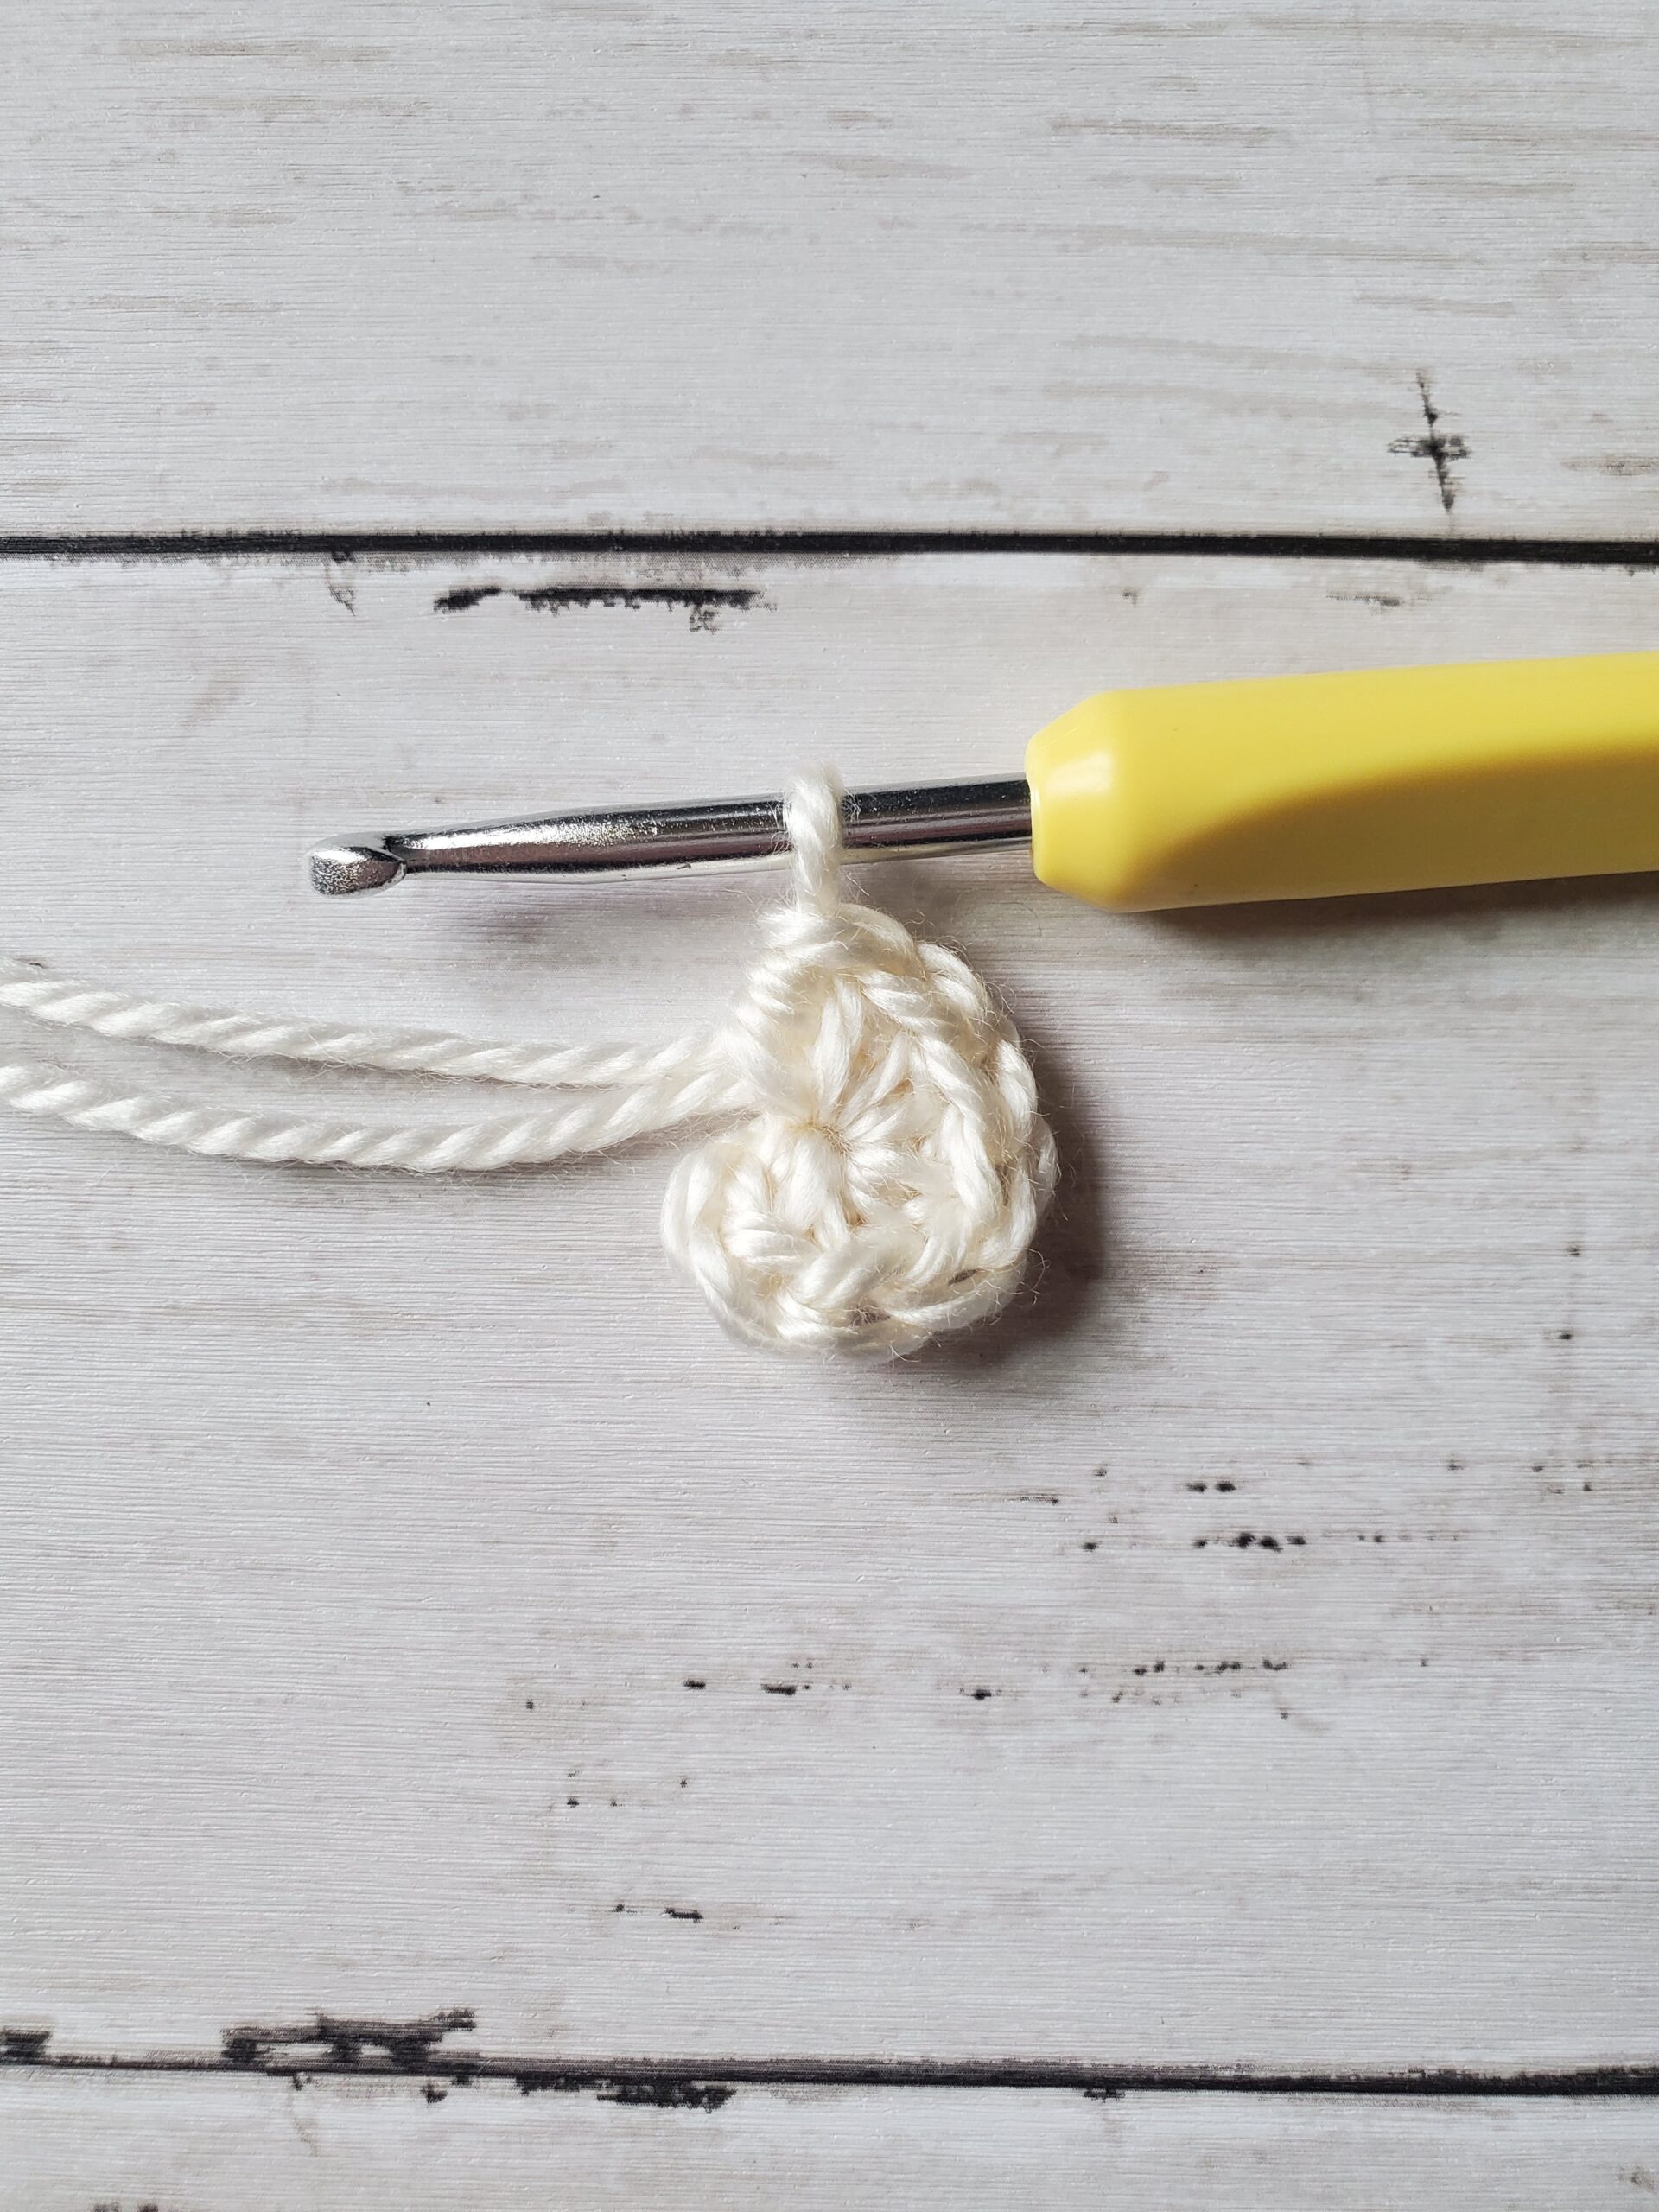
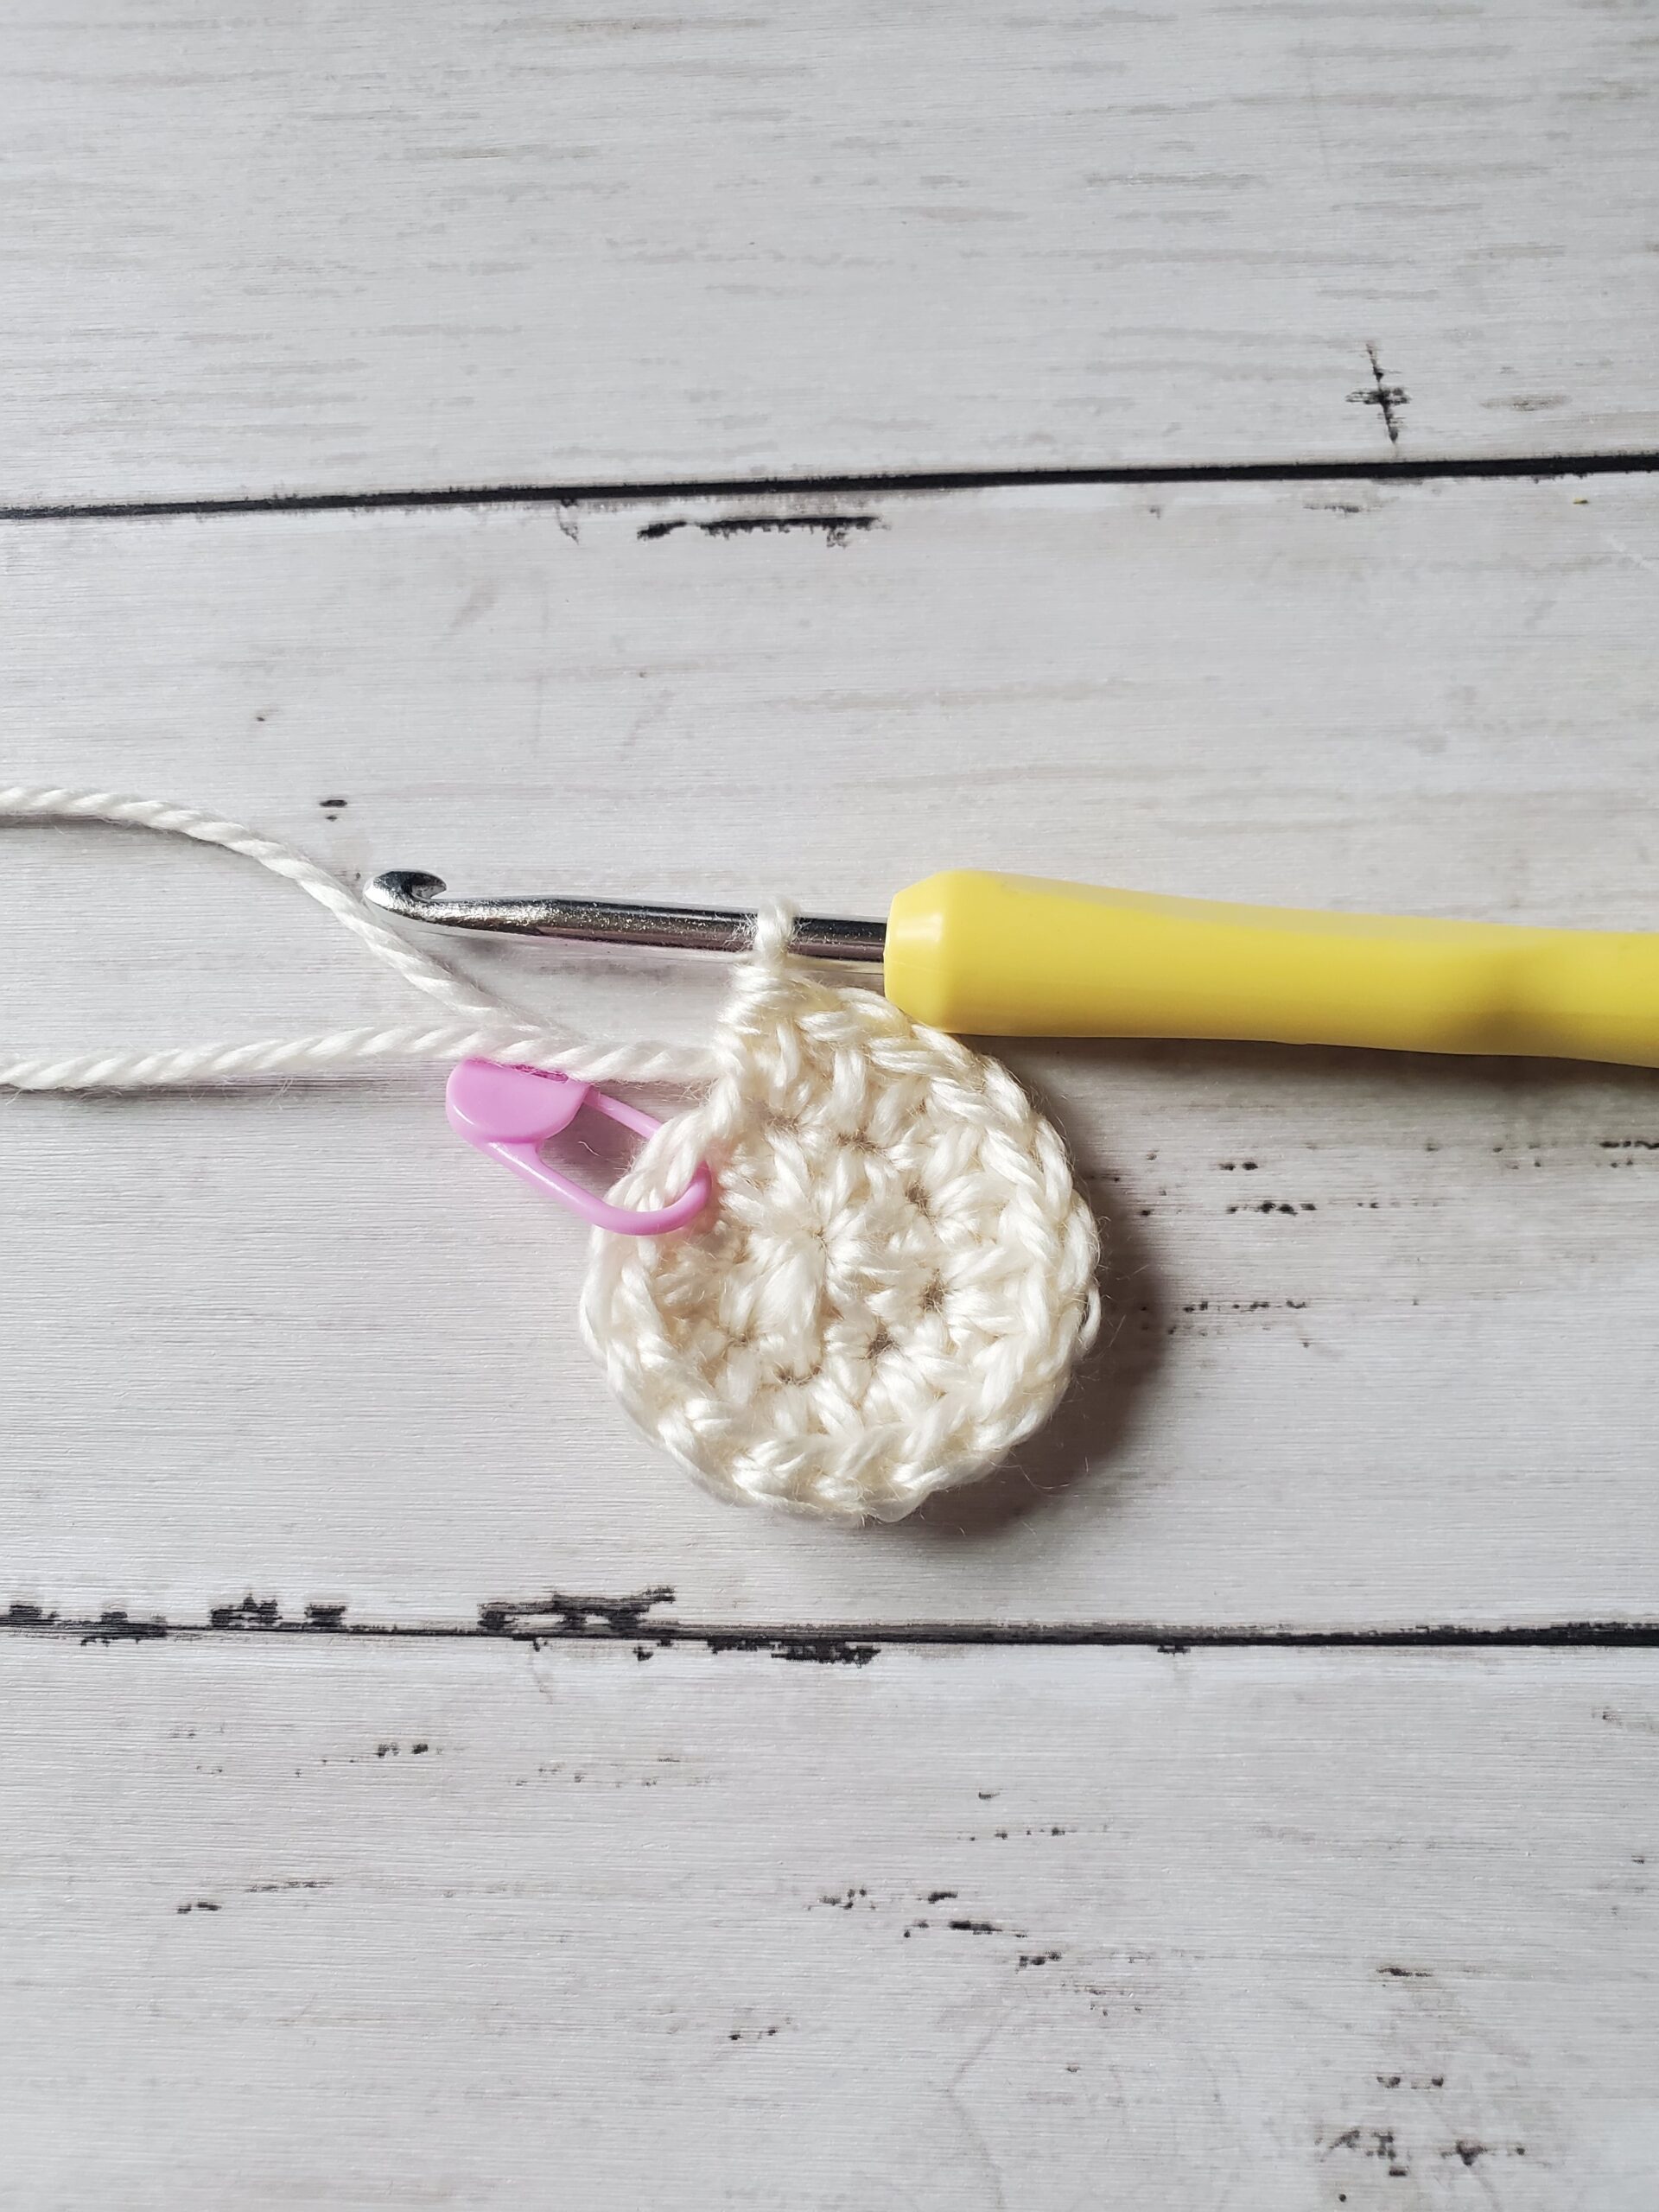
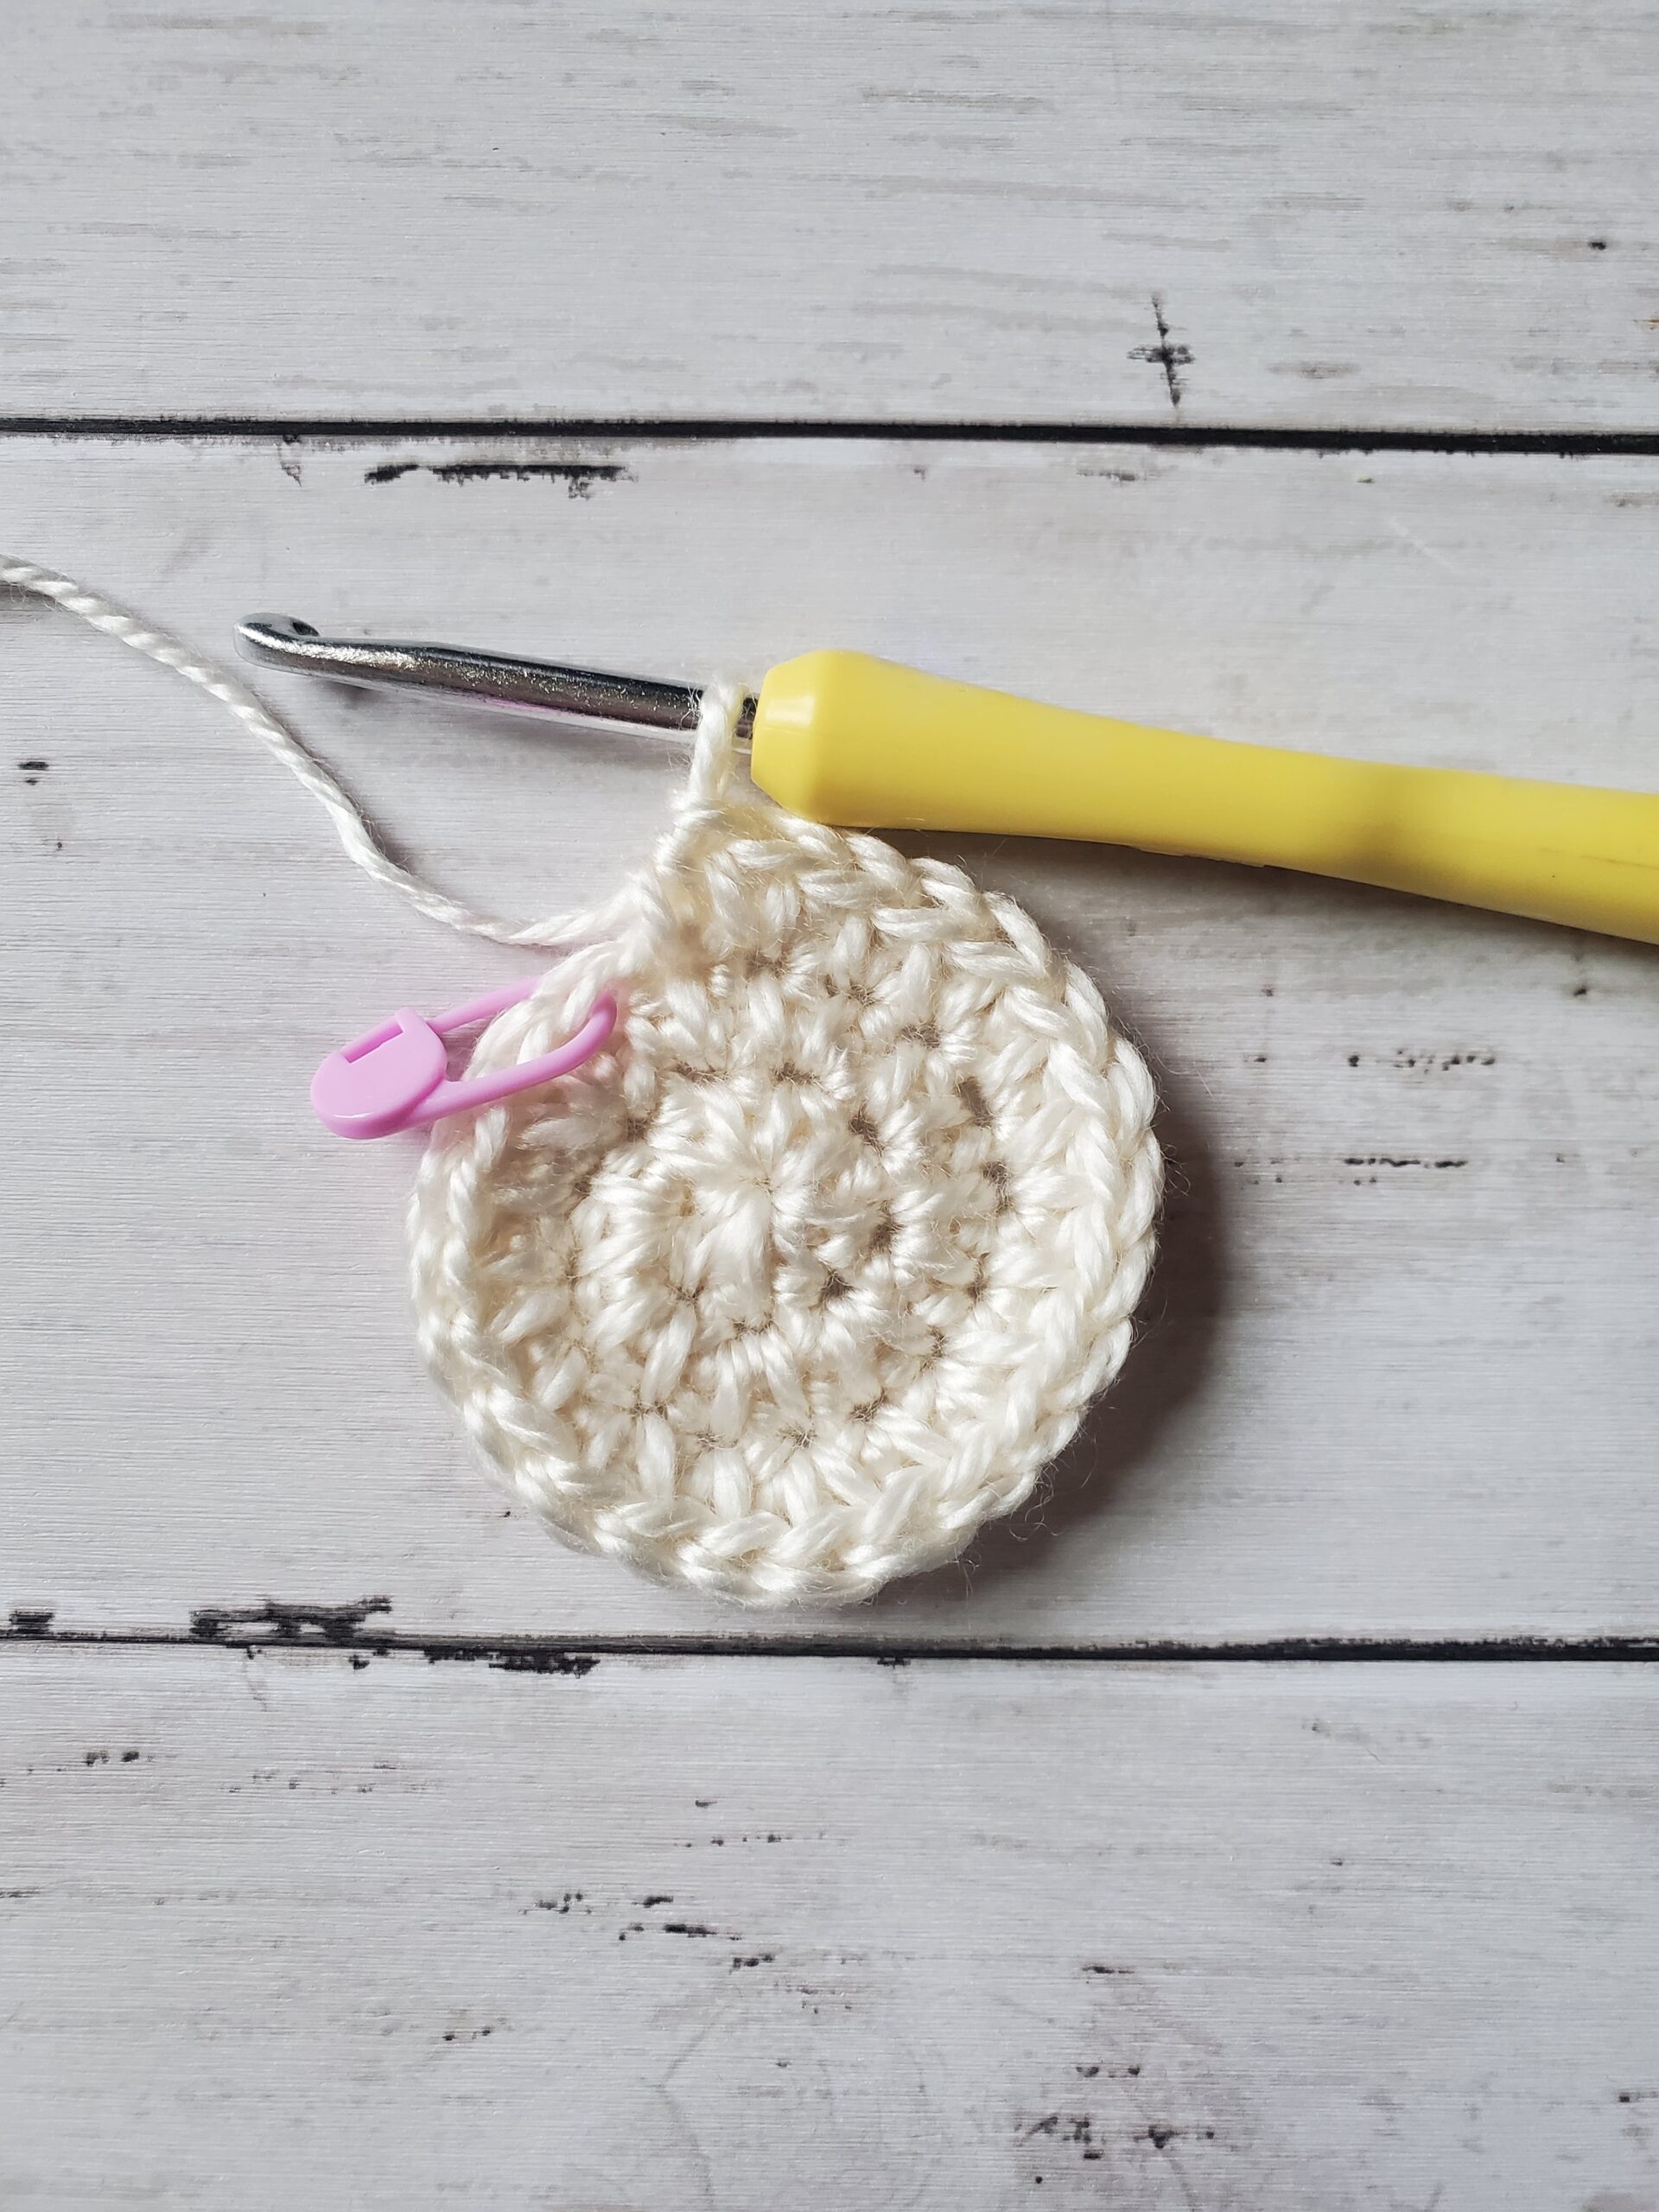
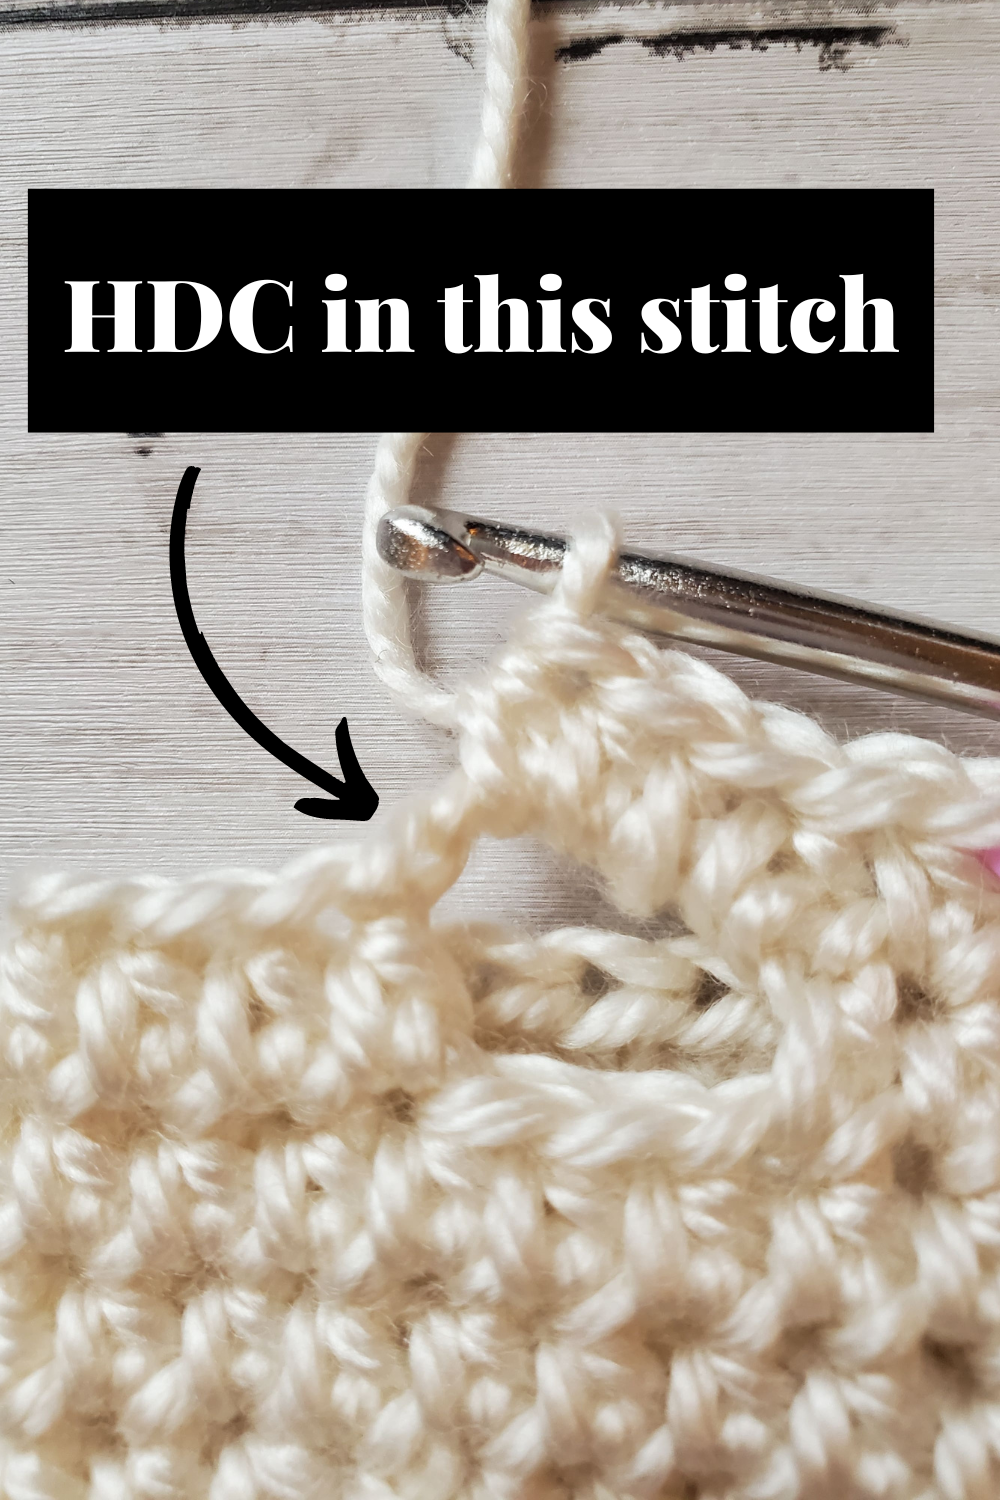
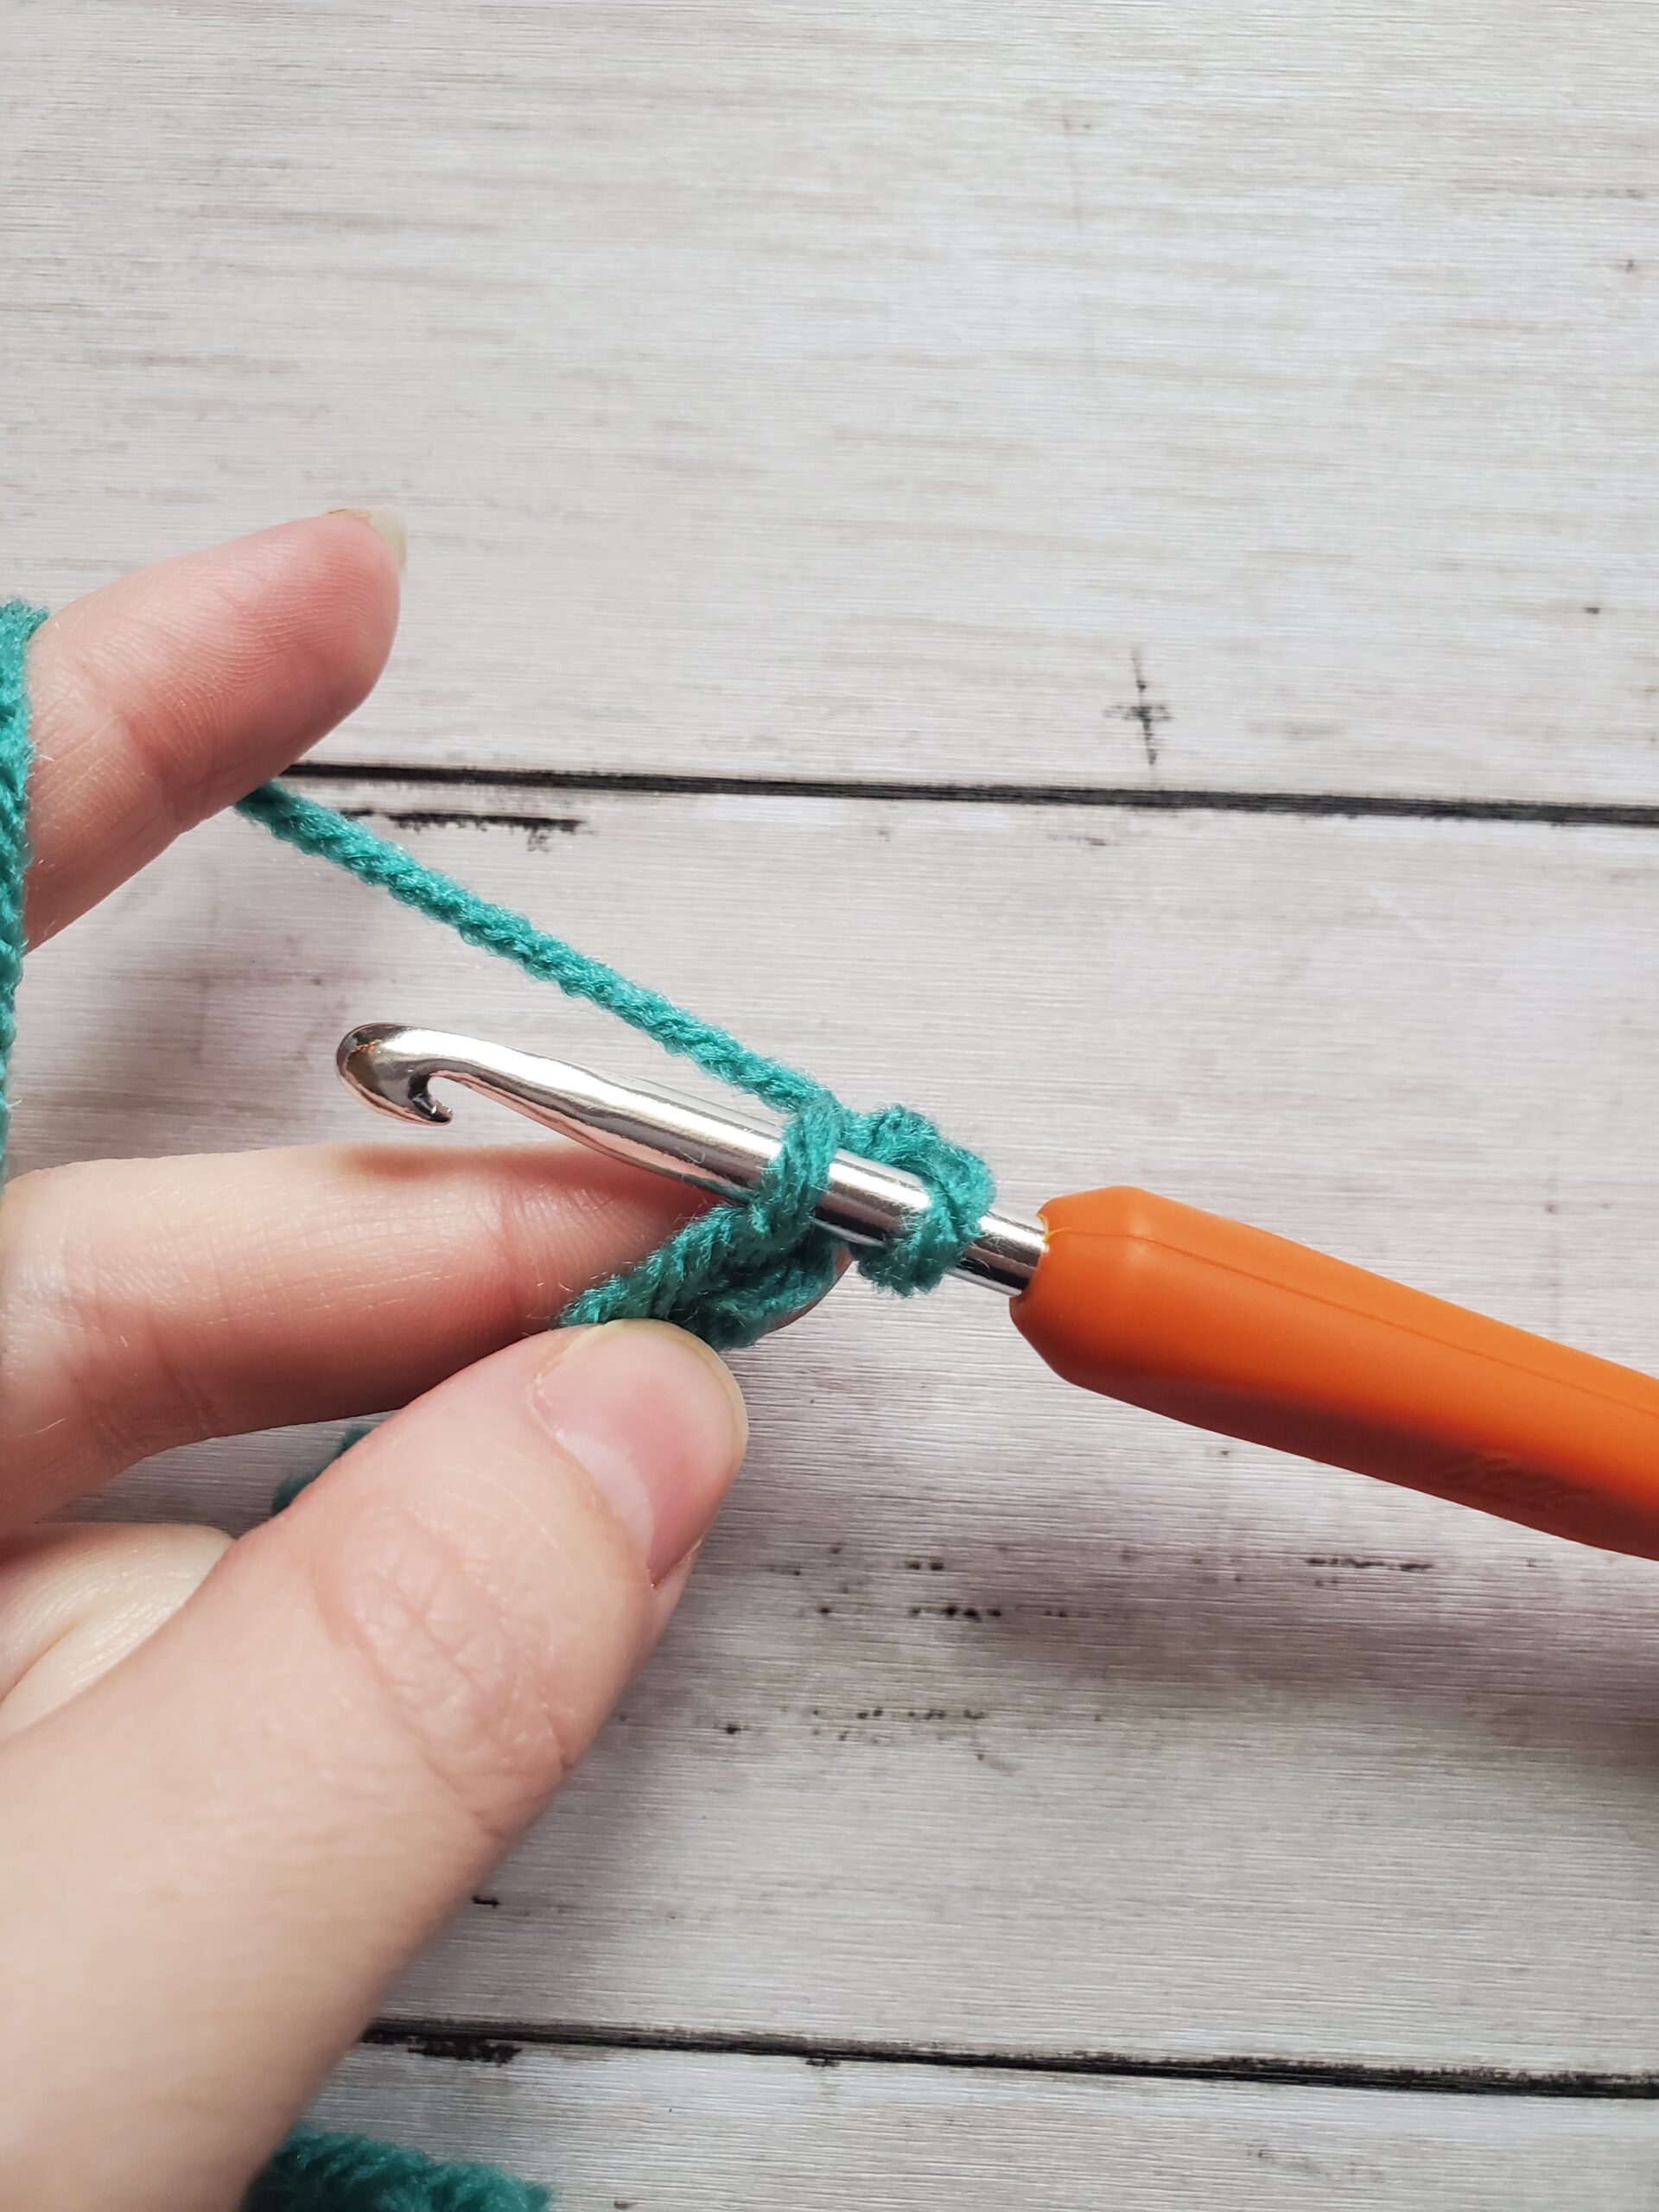
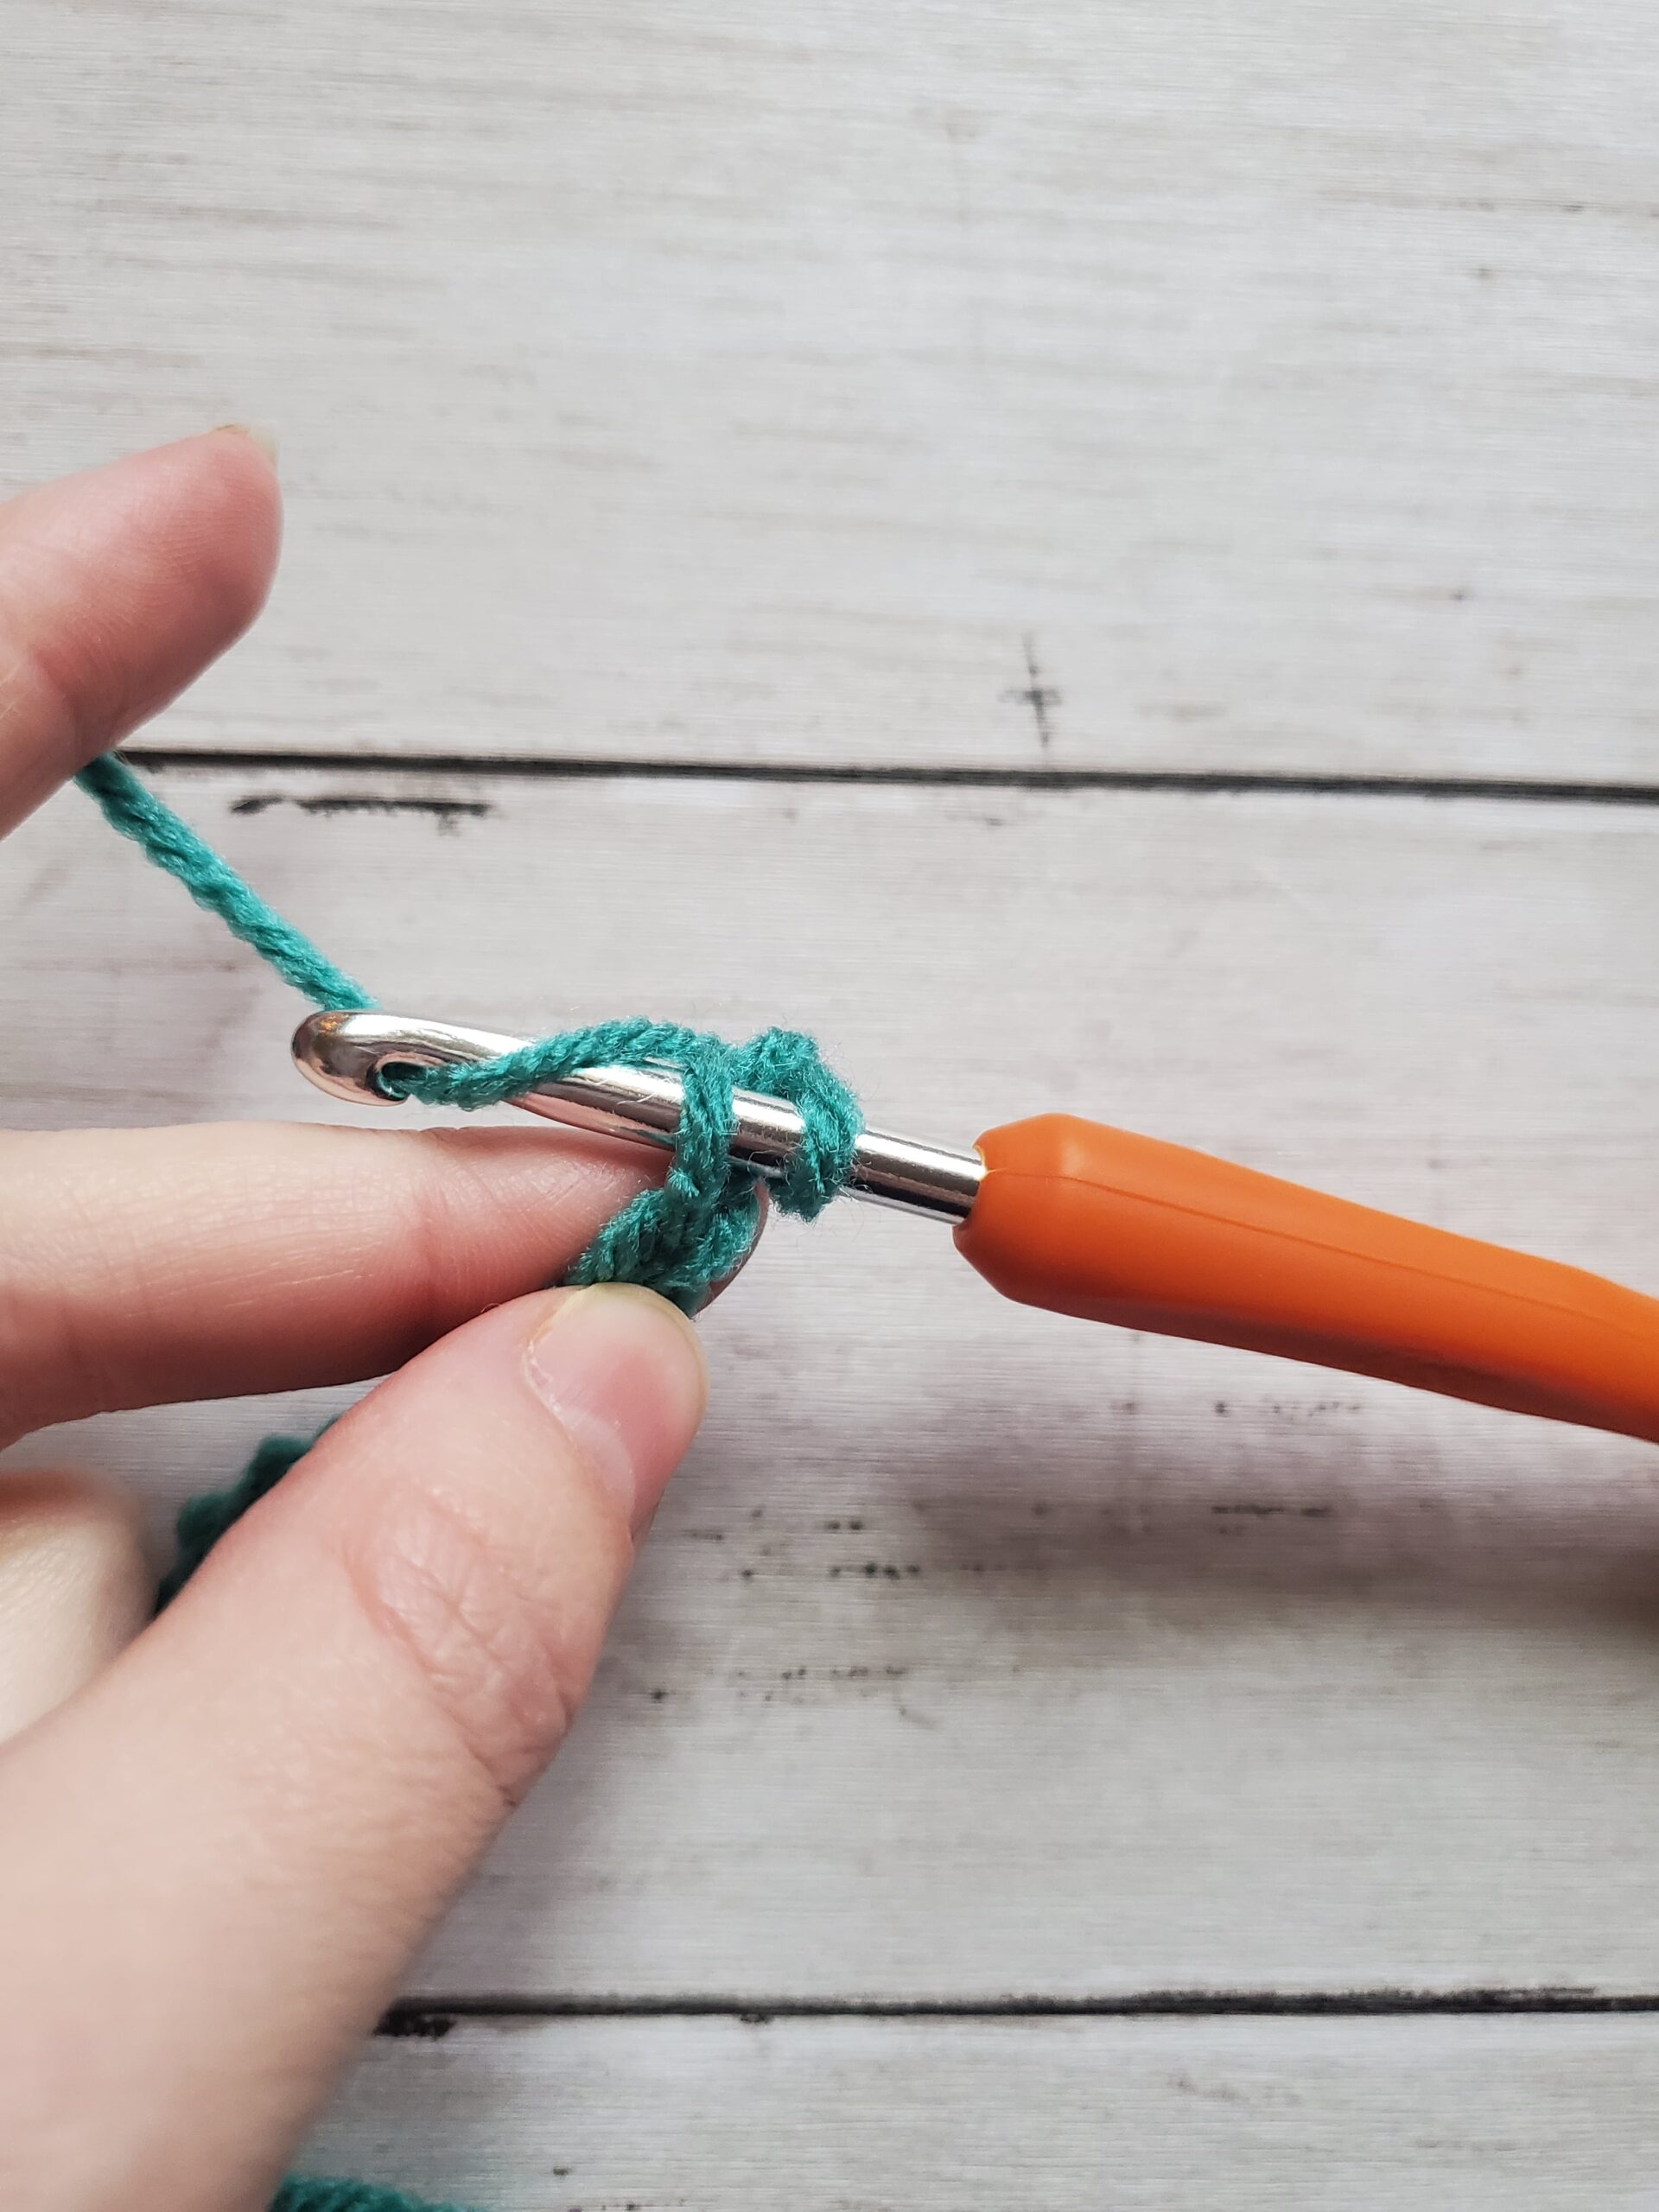
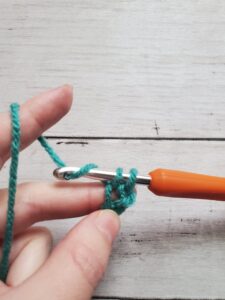
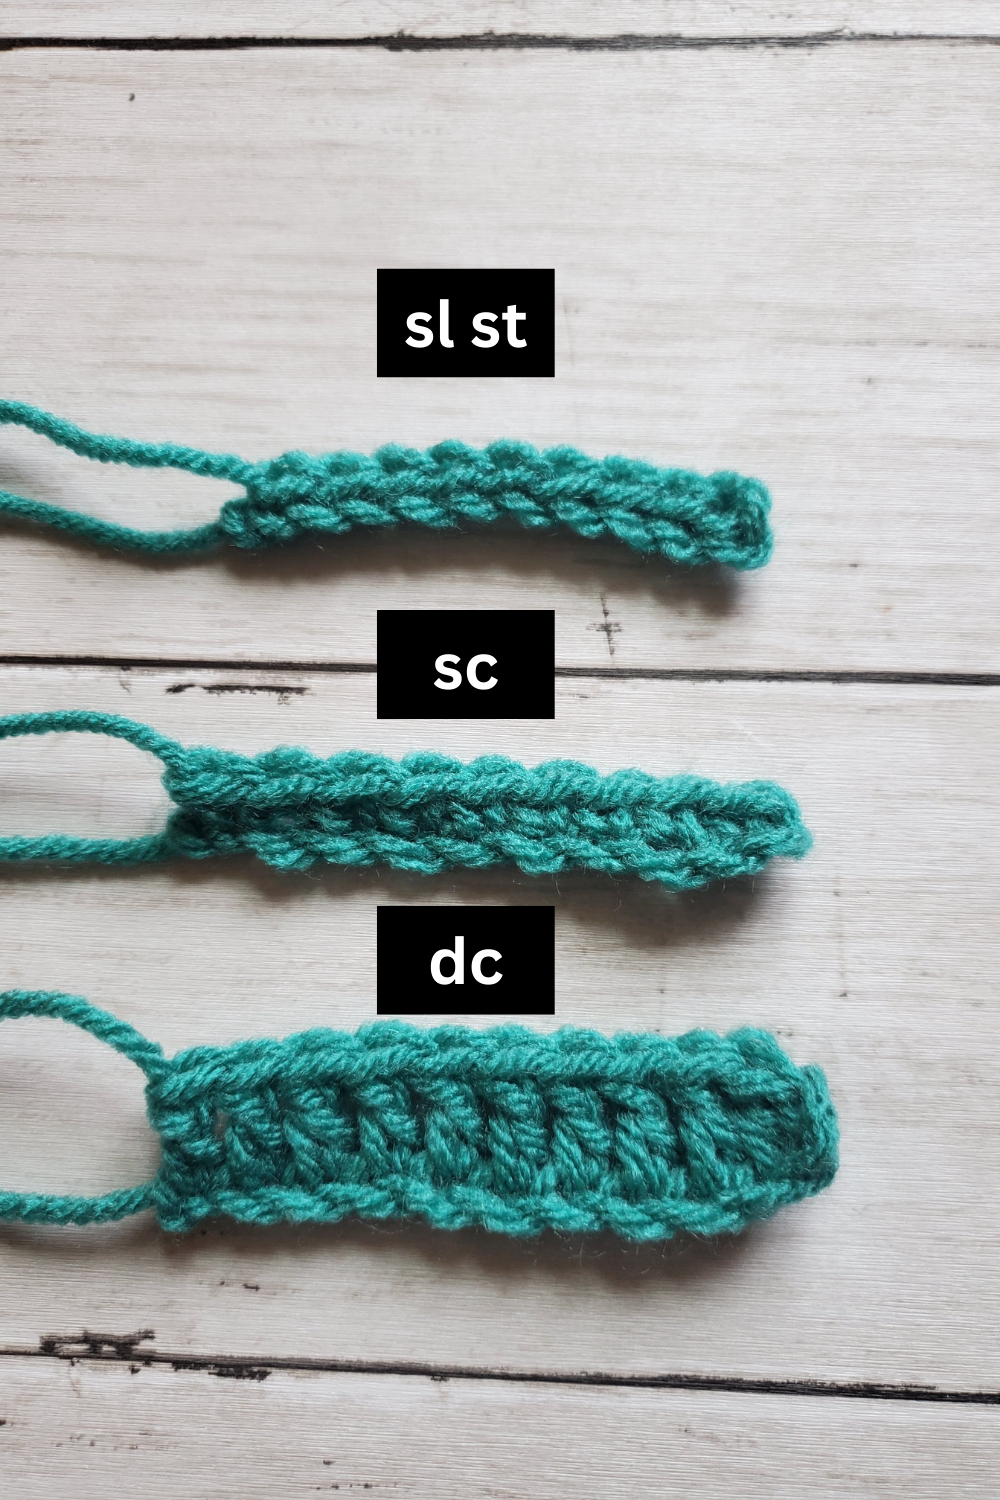
To wattle stitch you; (sc, ch 1, dc) all in the same stitch, skip two stitches and repeat. Then when you wattle stitch in the next round, you (sc, ch 1, dc) in the ch 1 spaces from the previous wattle stitch. 

Related Posts:

This sweater will fit a preschooler to a small child, but you can make this sweater a bigger or smaller size

Here are the general steps to create this sweater in a different size:
  • Measure the head circumference of whoever this sweater is for, take note of that number.
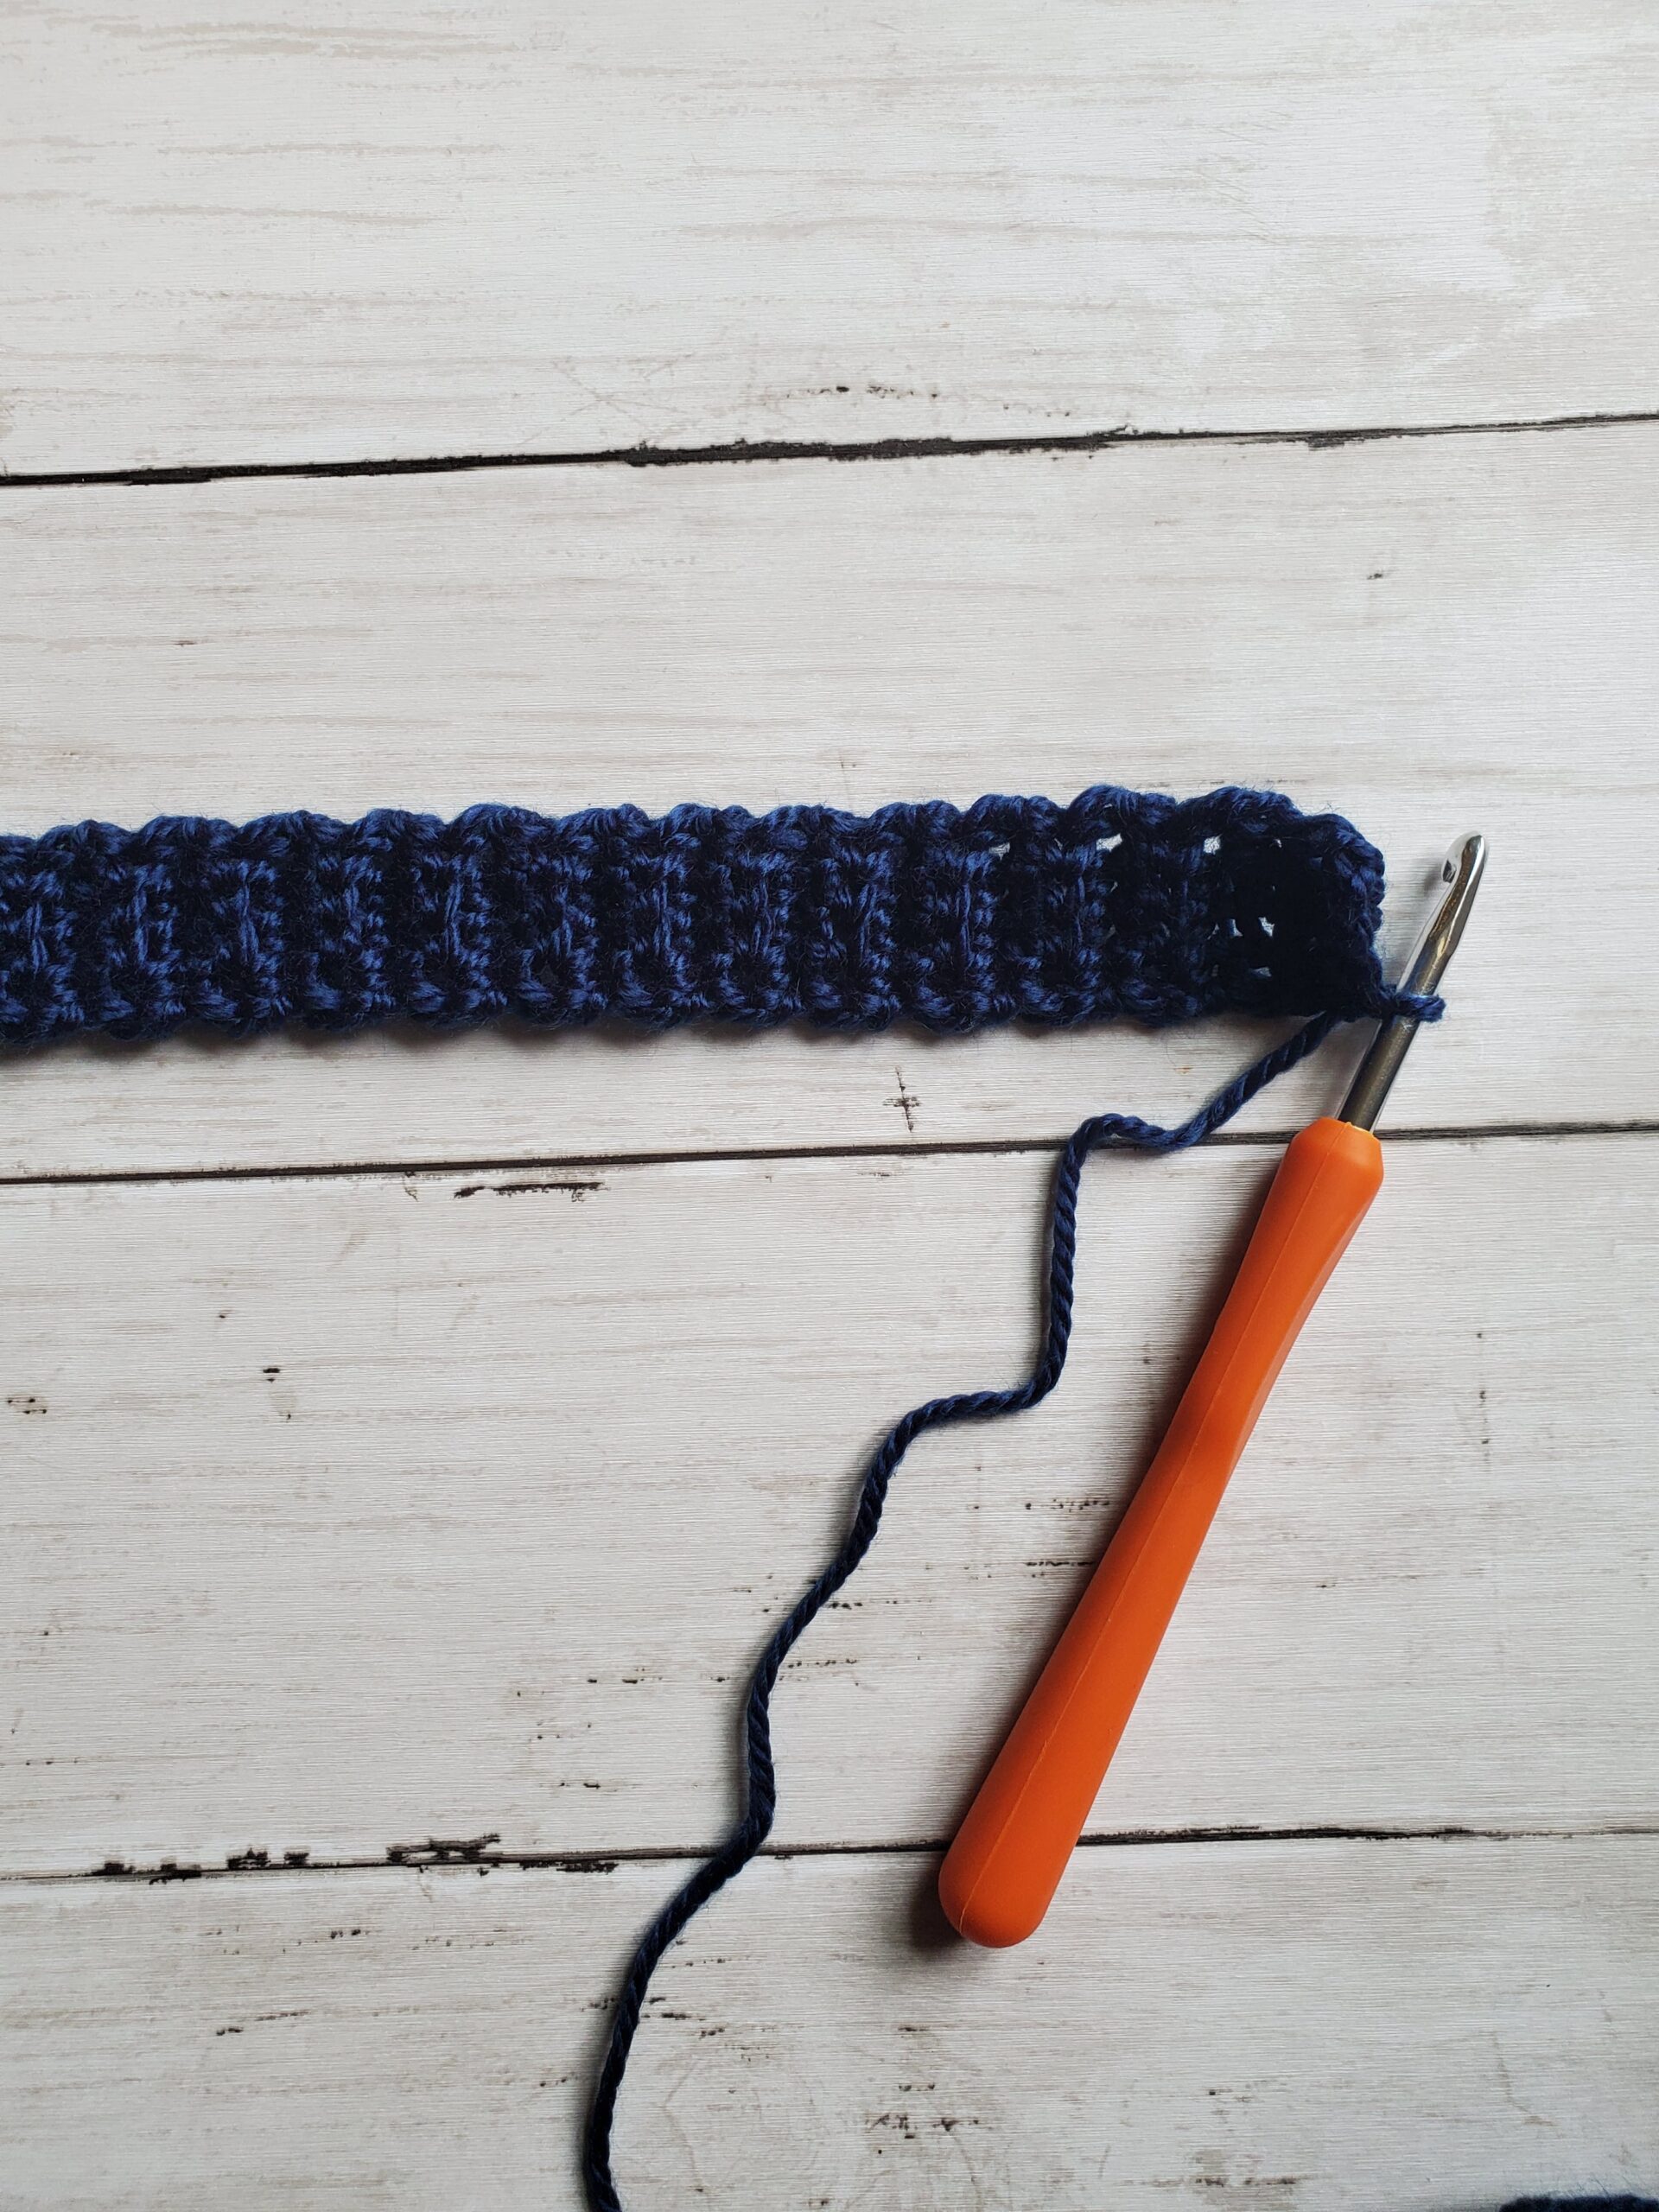
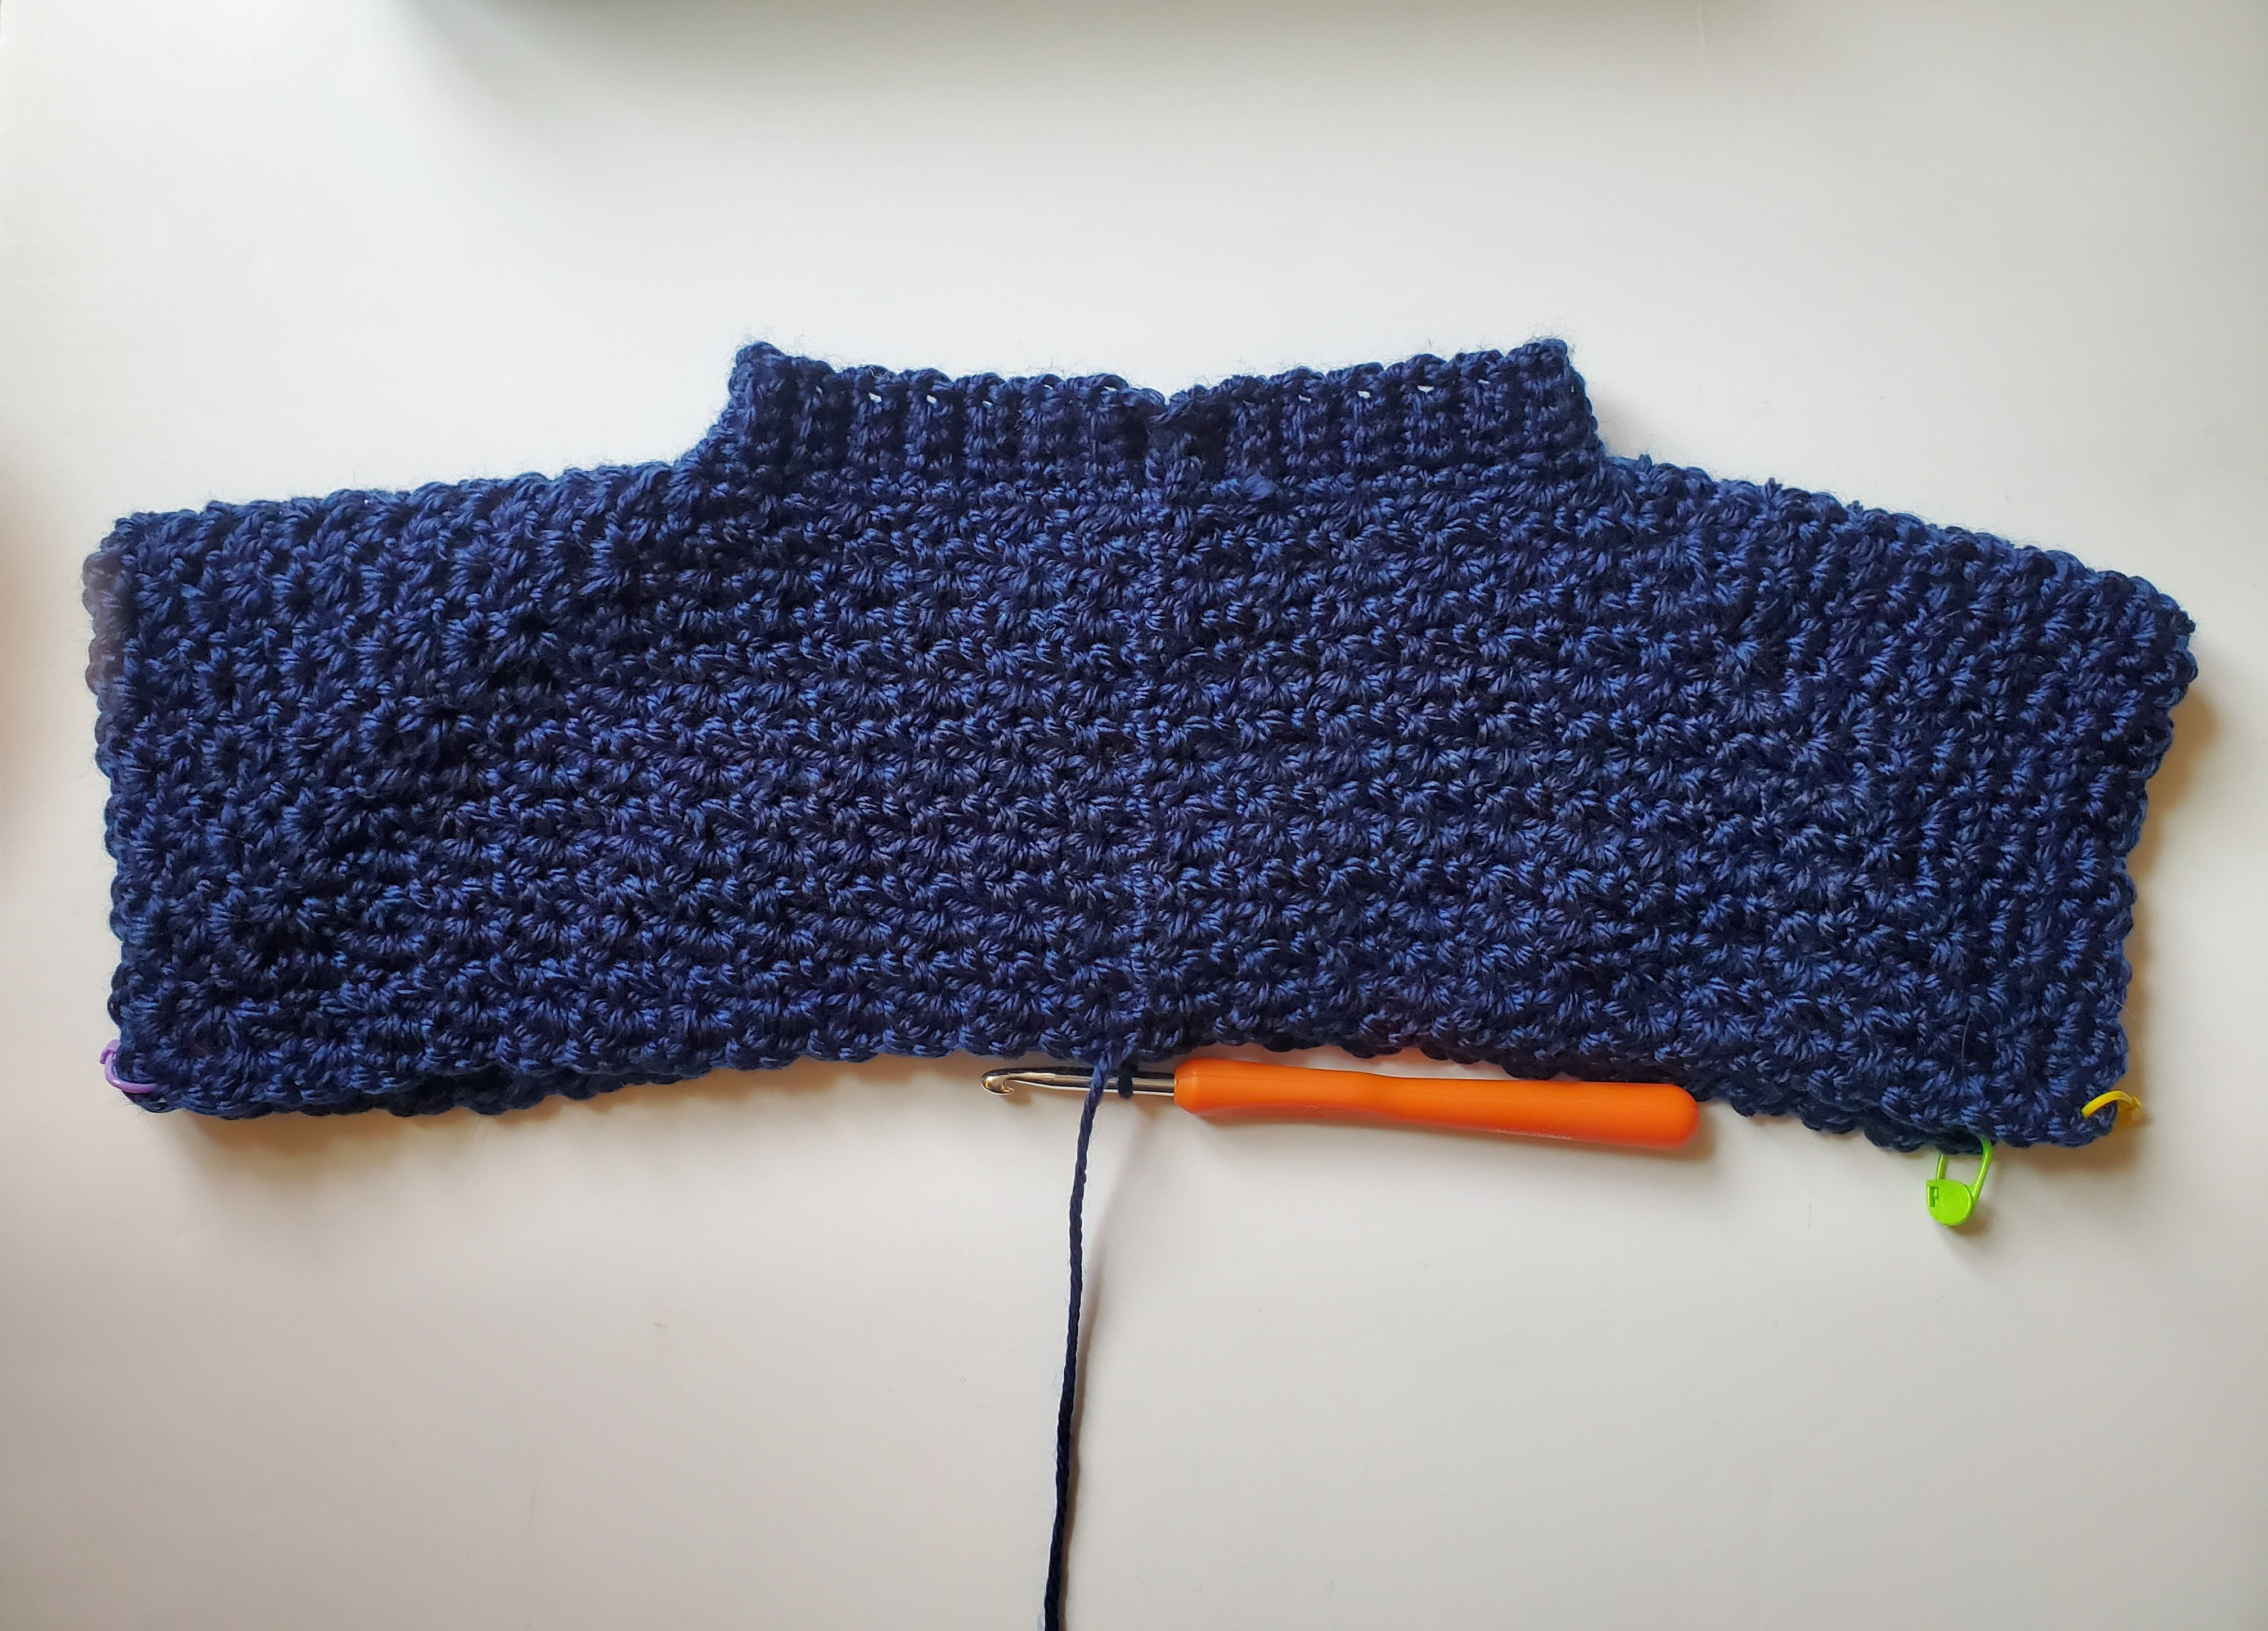
  • Make the neck ribbing long enough so that it will stretch to that head circumference number (if you make the ribbing the exact same size as the head circumference, the sweater might end up being too baggy).
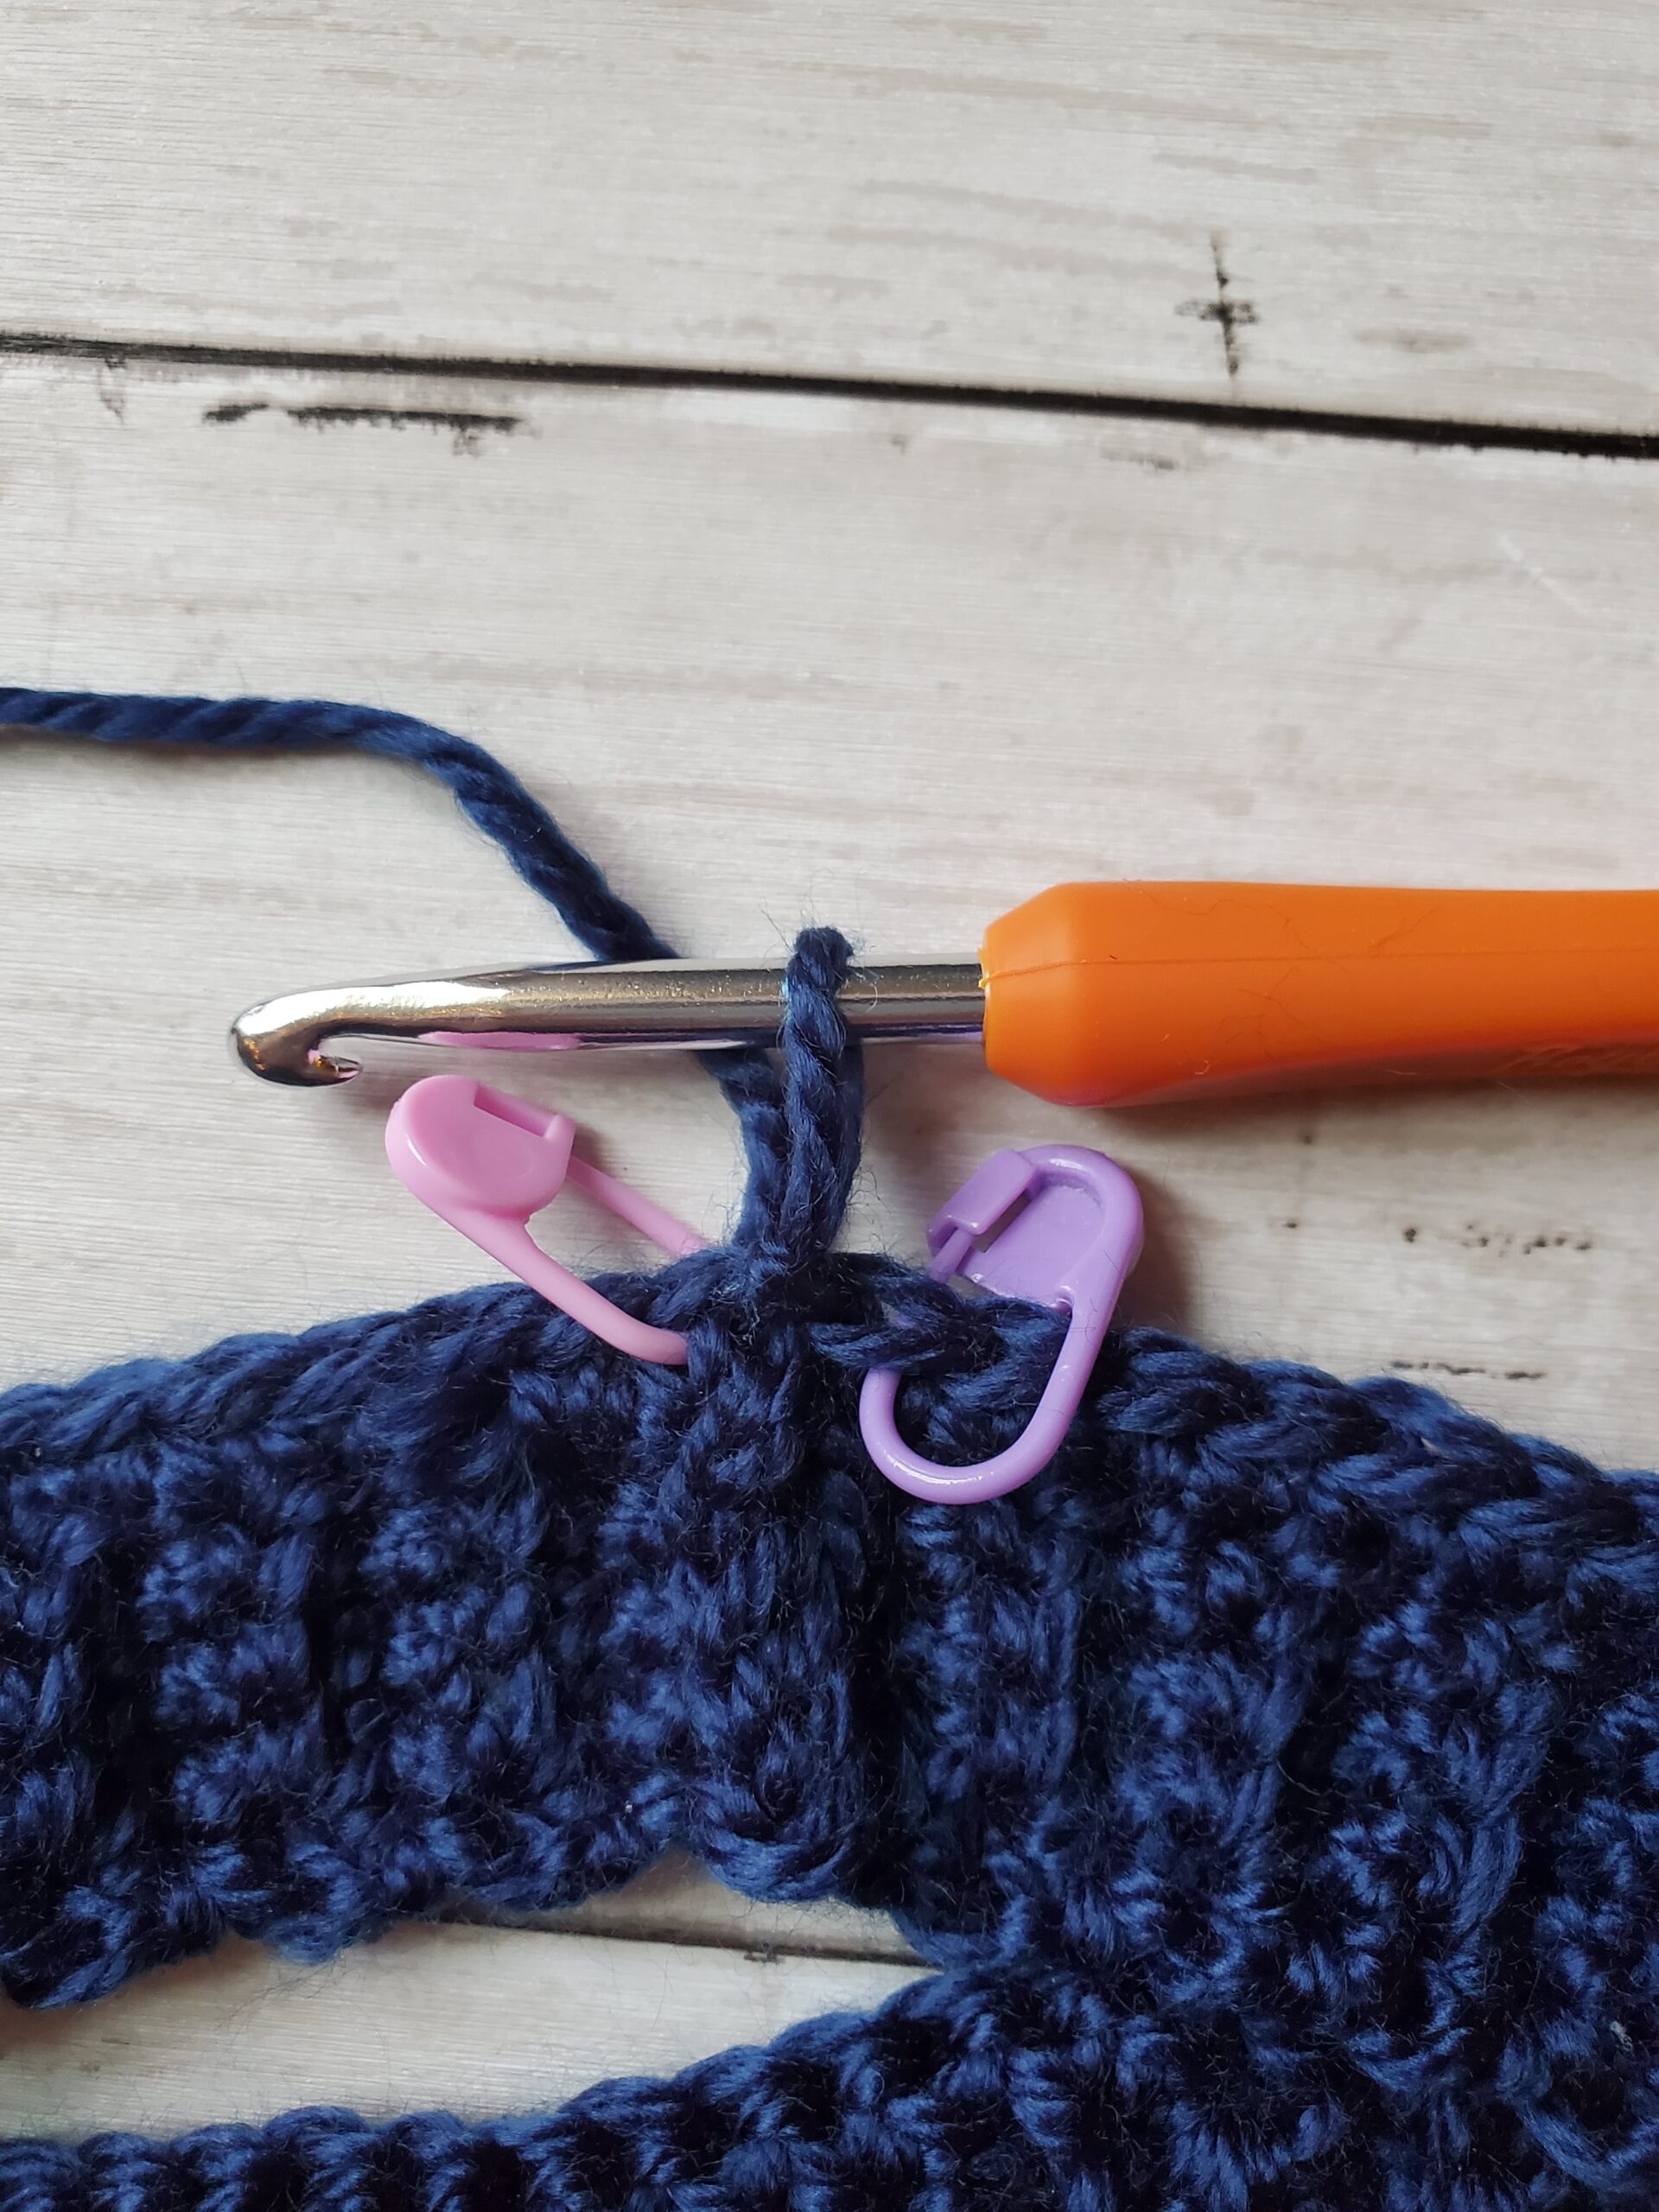
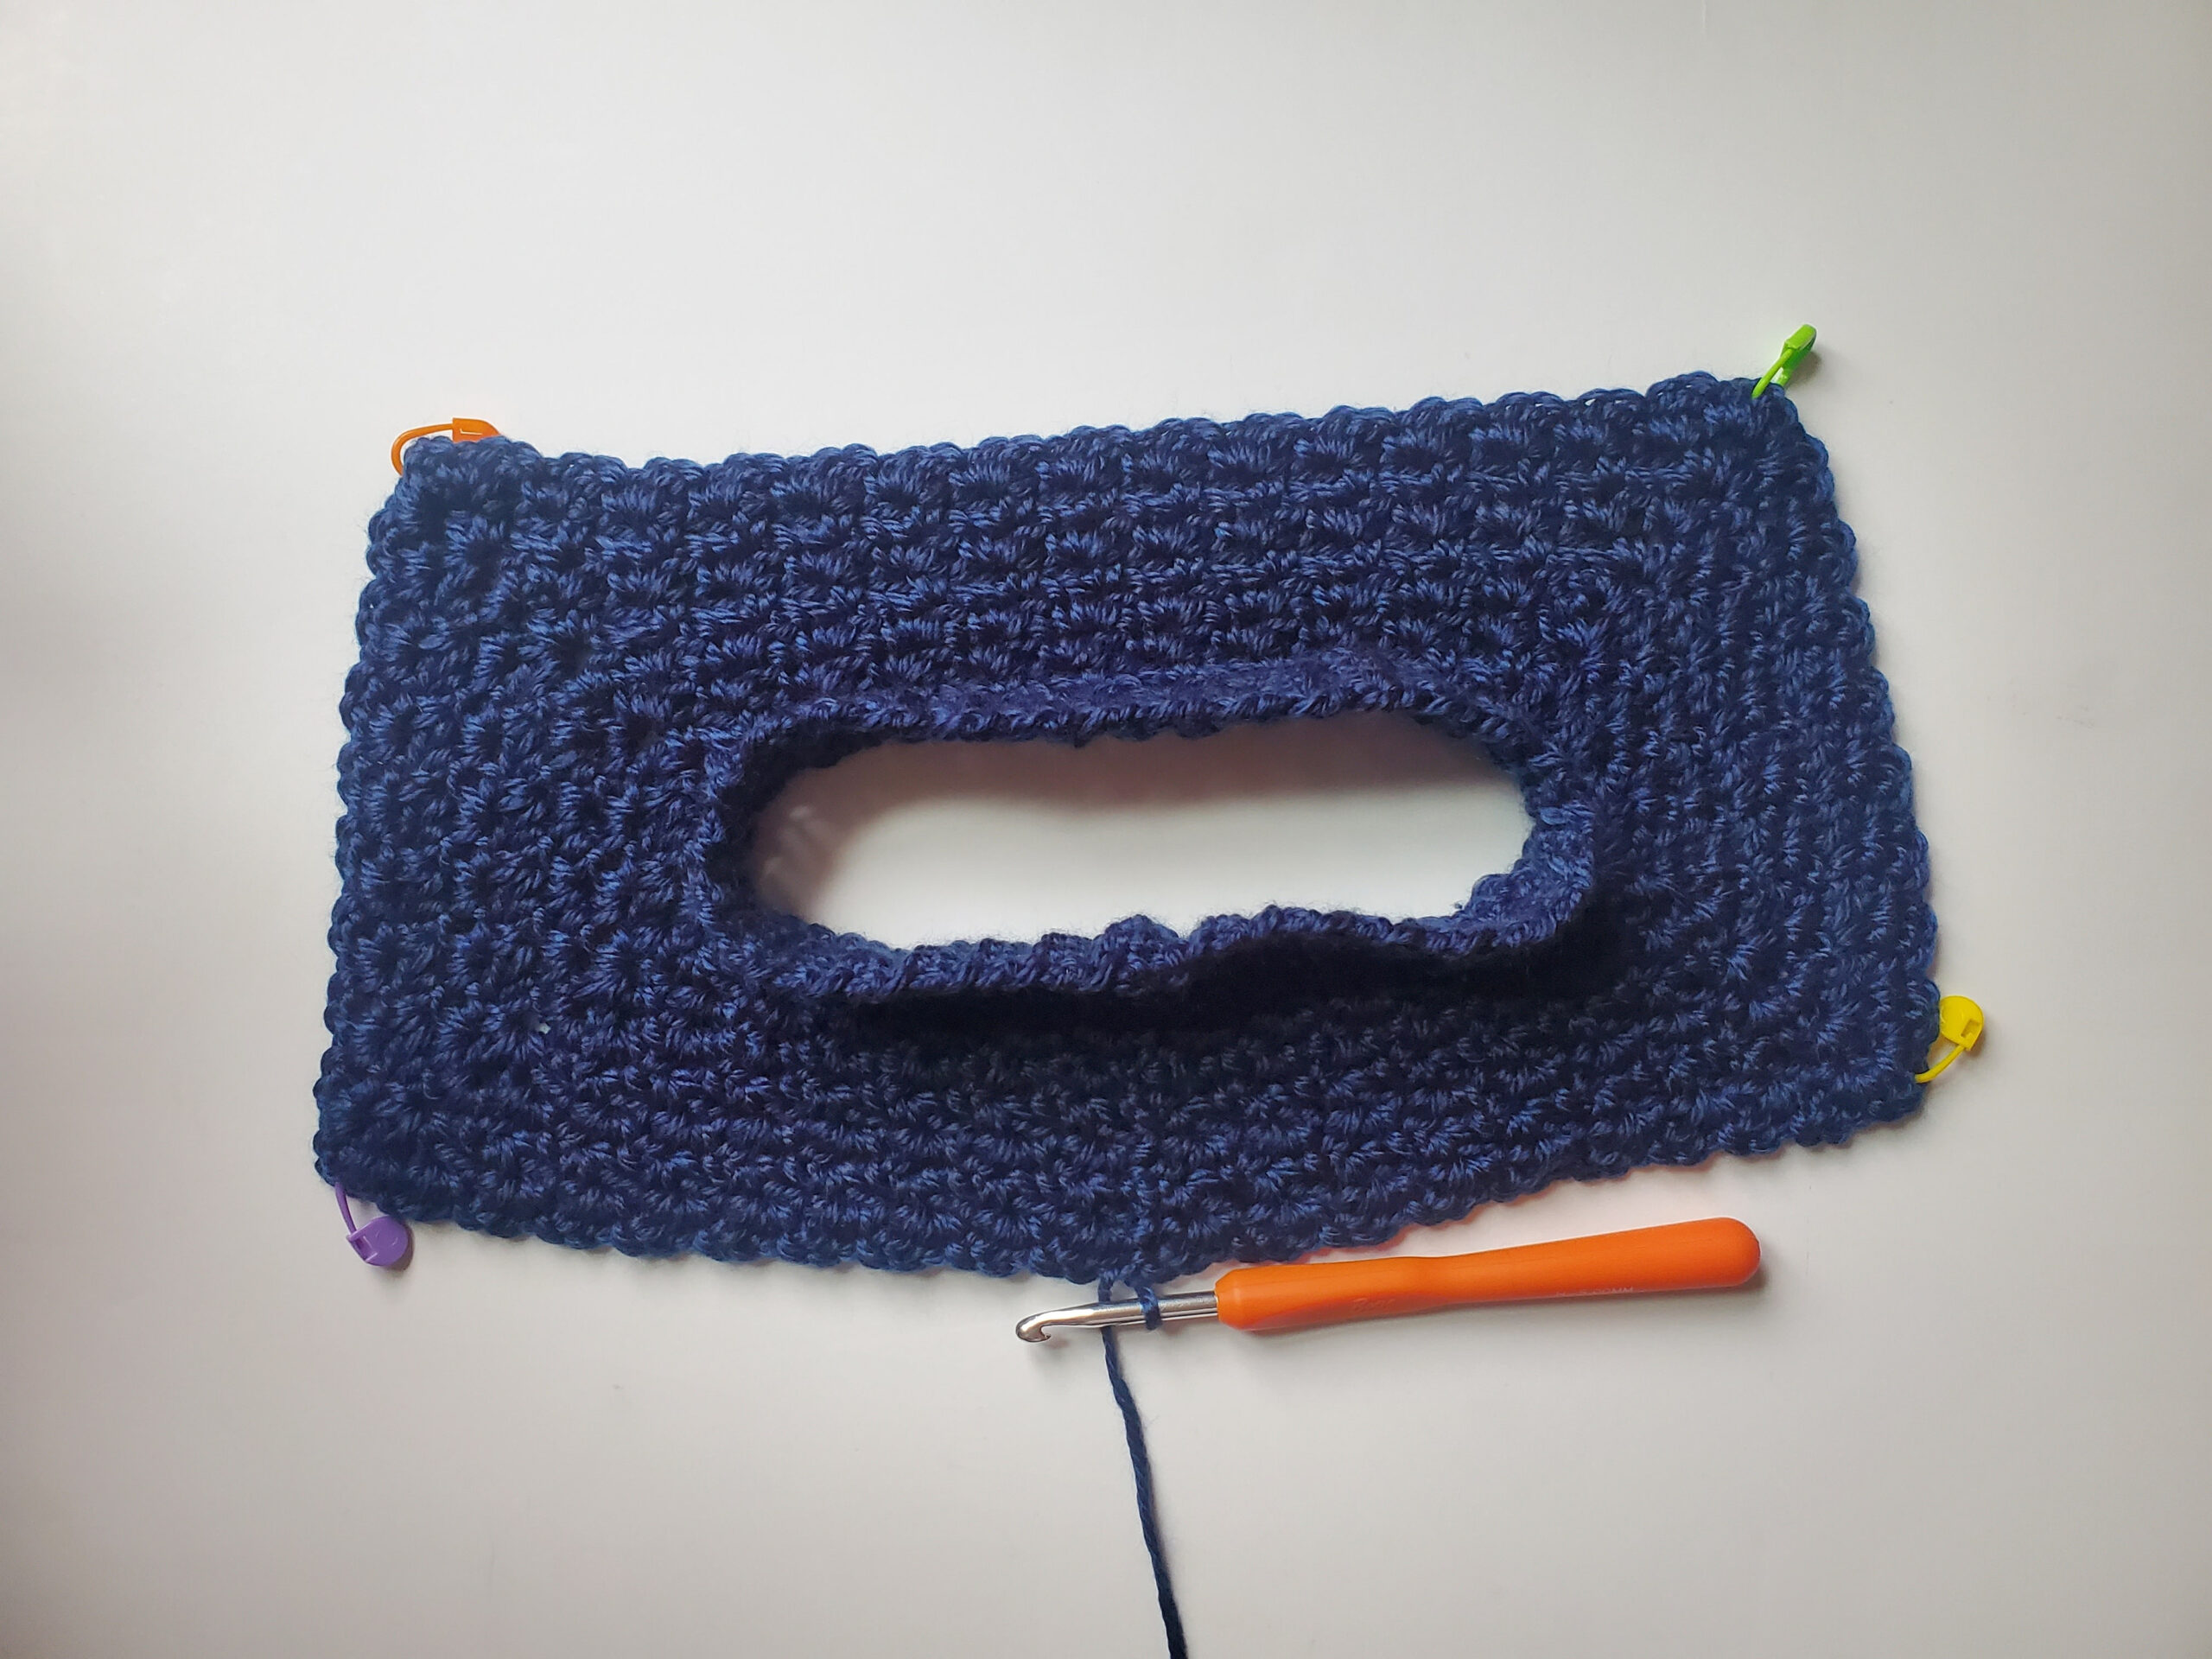
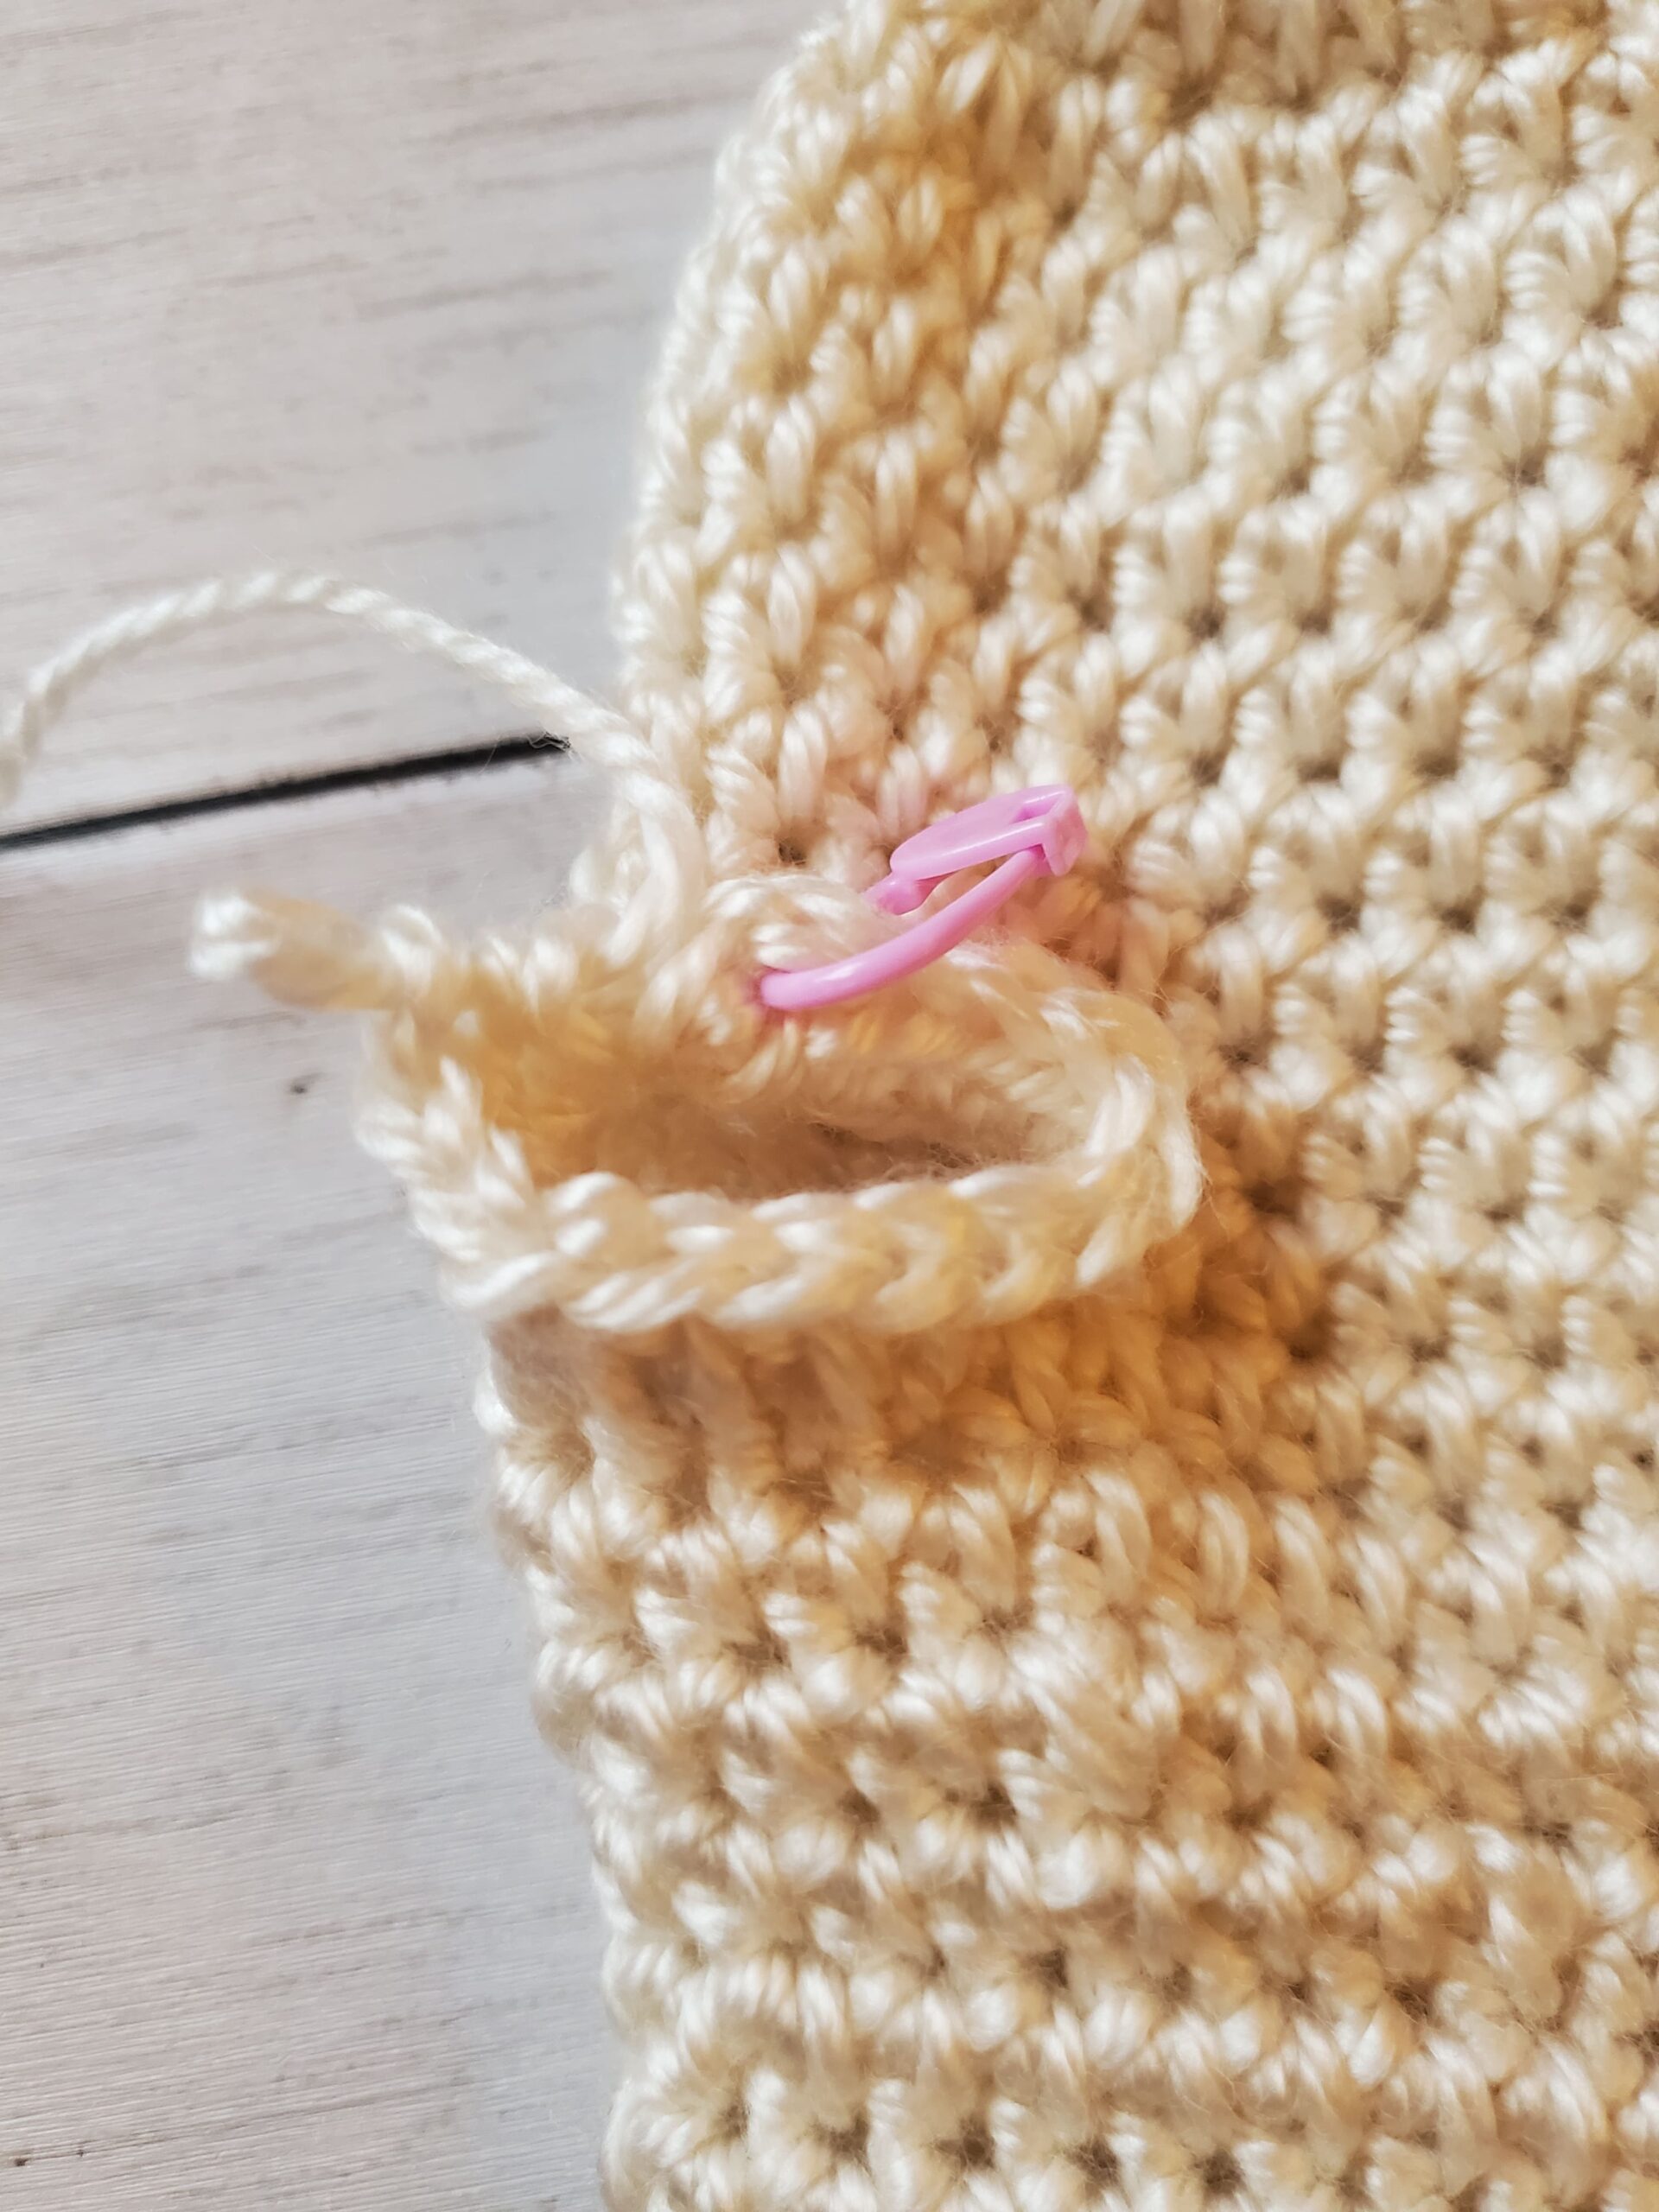
  • Find the corners for the shoulders. This is done by counting the stitches after the single crochet row (round 61) of the neck ribbing, dividing it by 4 and rounding up or down. The number you get after dividing by 4, will tell you how many stitches from the beginning and end of your sweater, you should place your stitch markers. 
  • Continue crocheting around the neck ribbing and make increases where you placed the stitch markers.
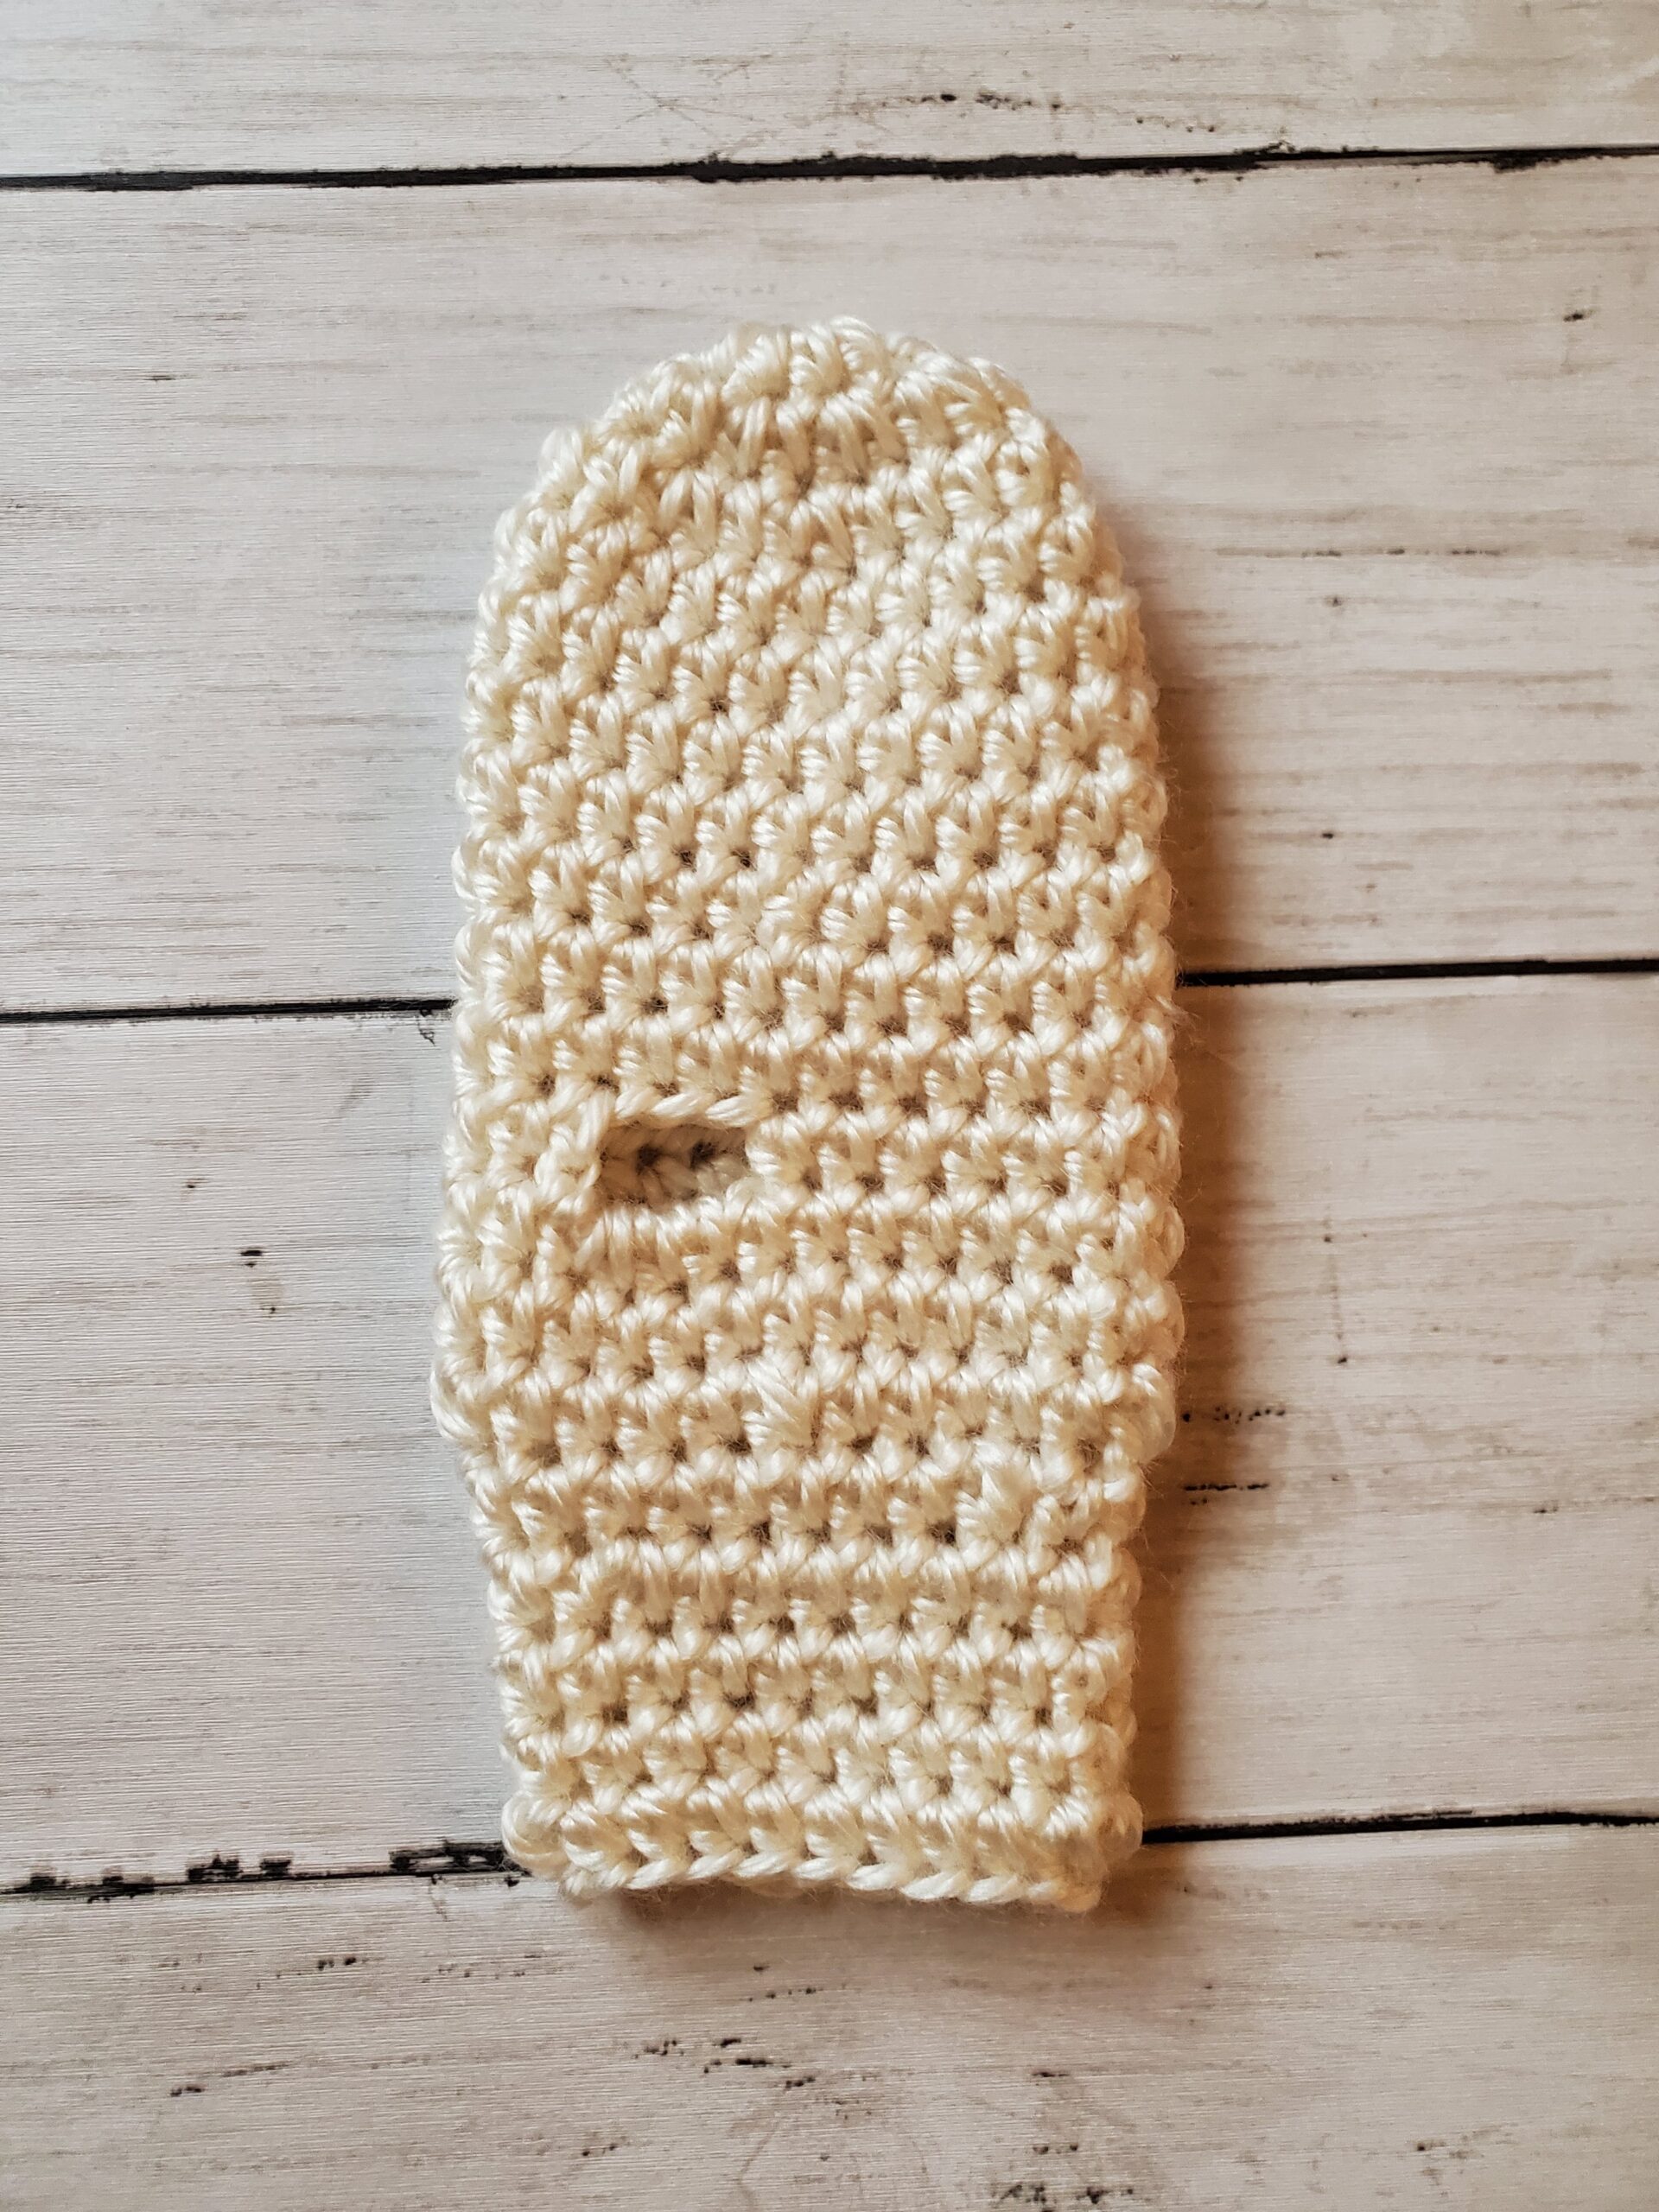
  • At some point you should be able to fold the sweater in half and determine if you have enough space for the arms, if not keep making increases. Once you’re happy with the arm hole size, you’ll join them together by crocheting the corner increases together.
  • Continue crocheting until you reach the sweater length that you desire. 
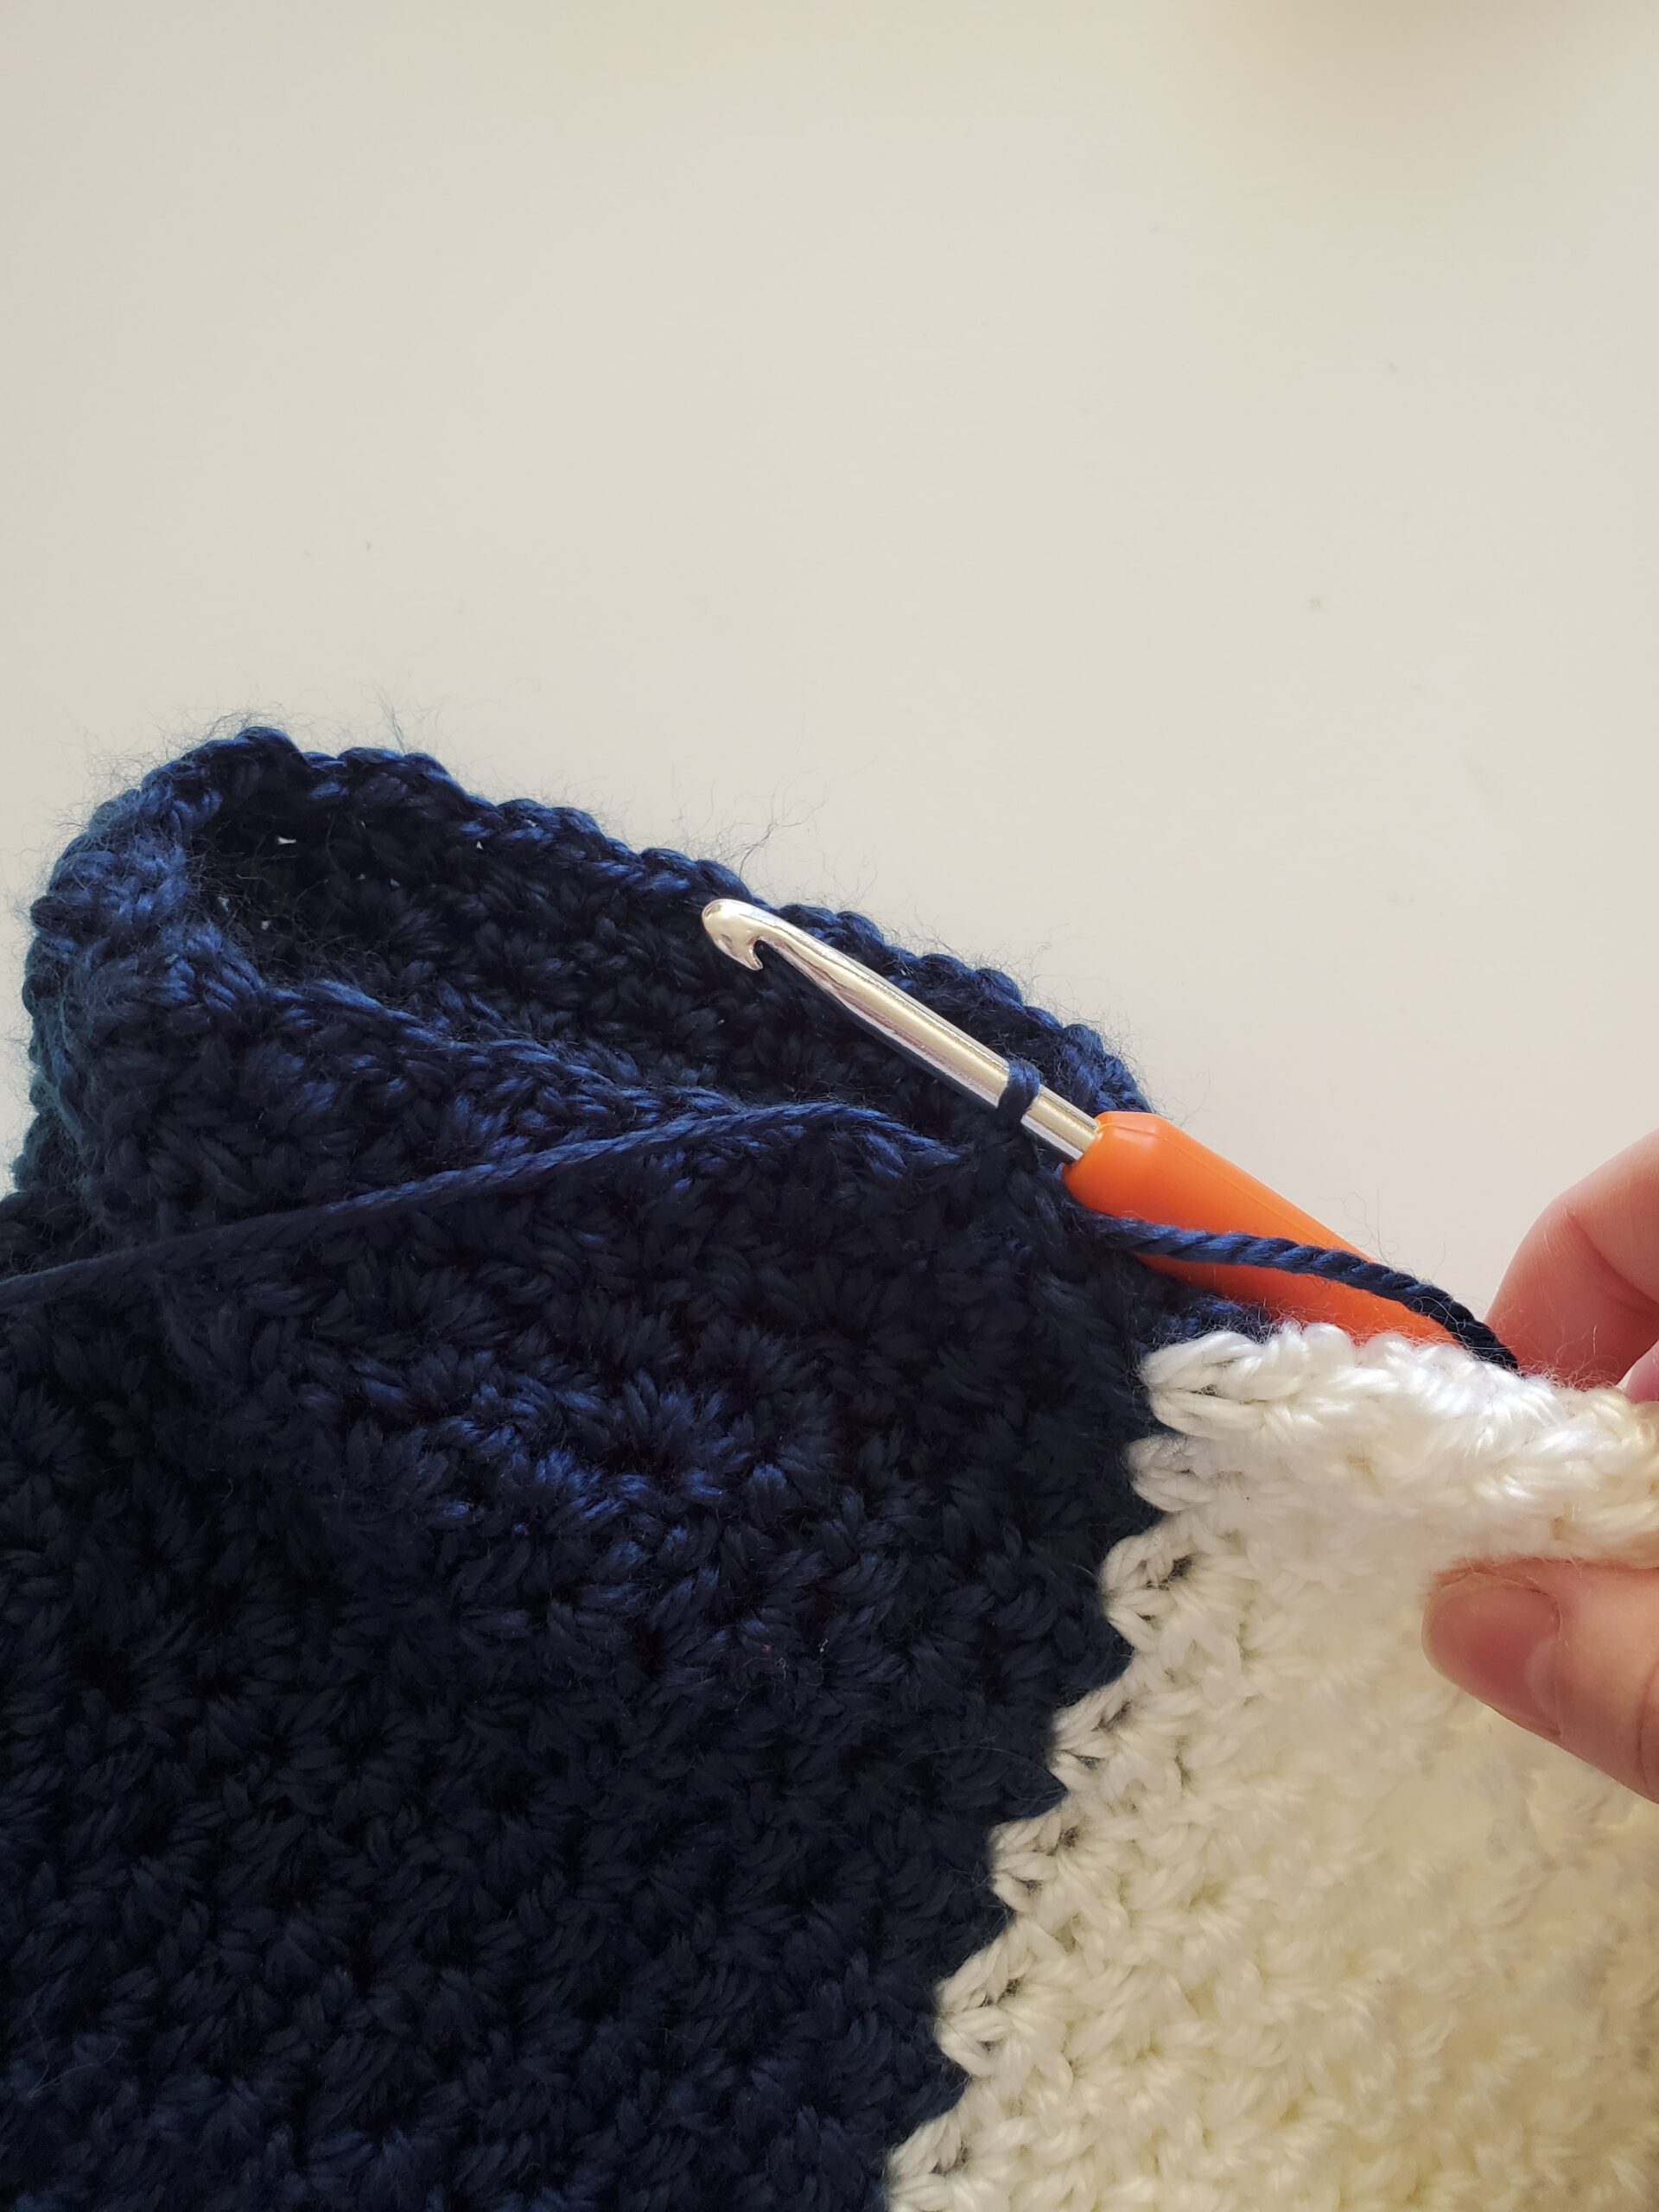
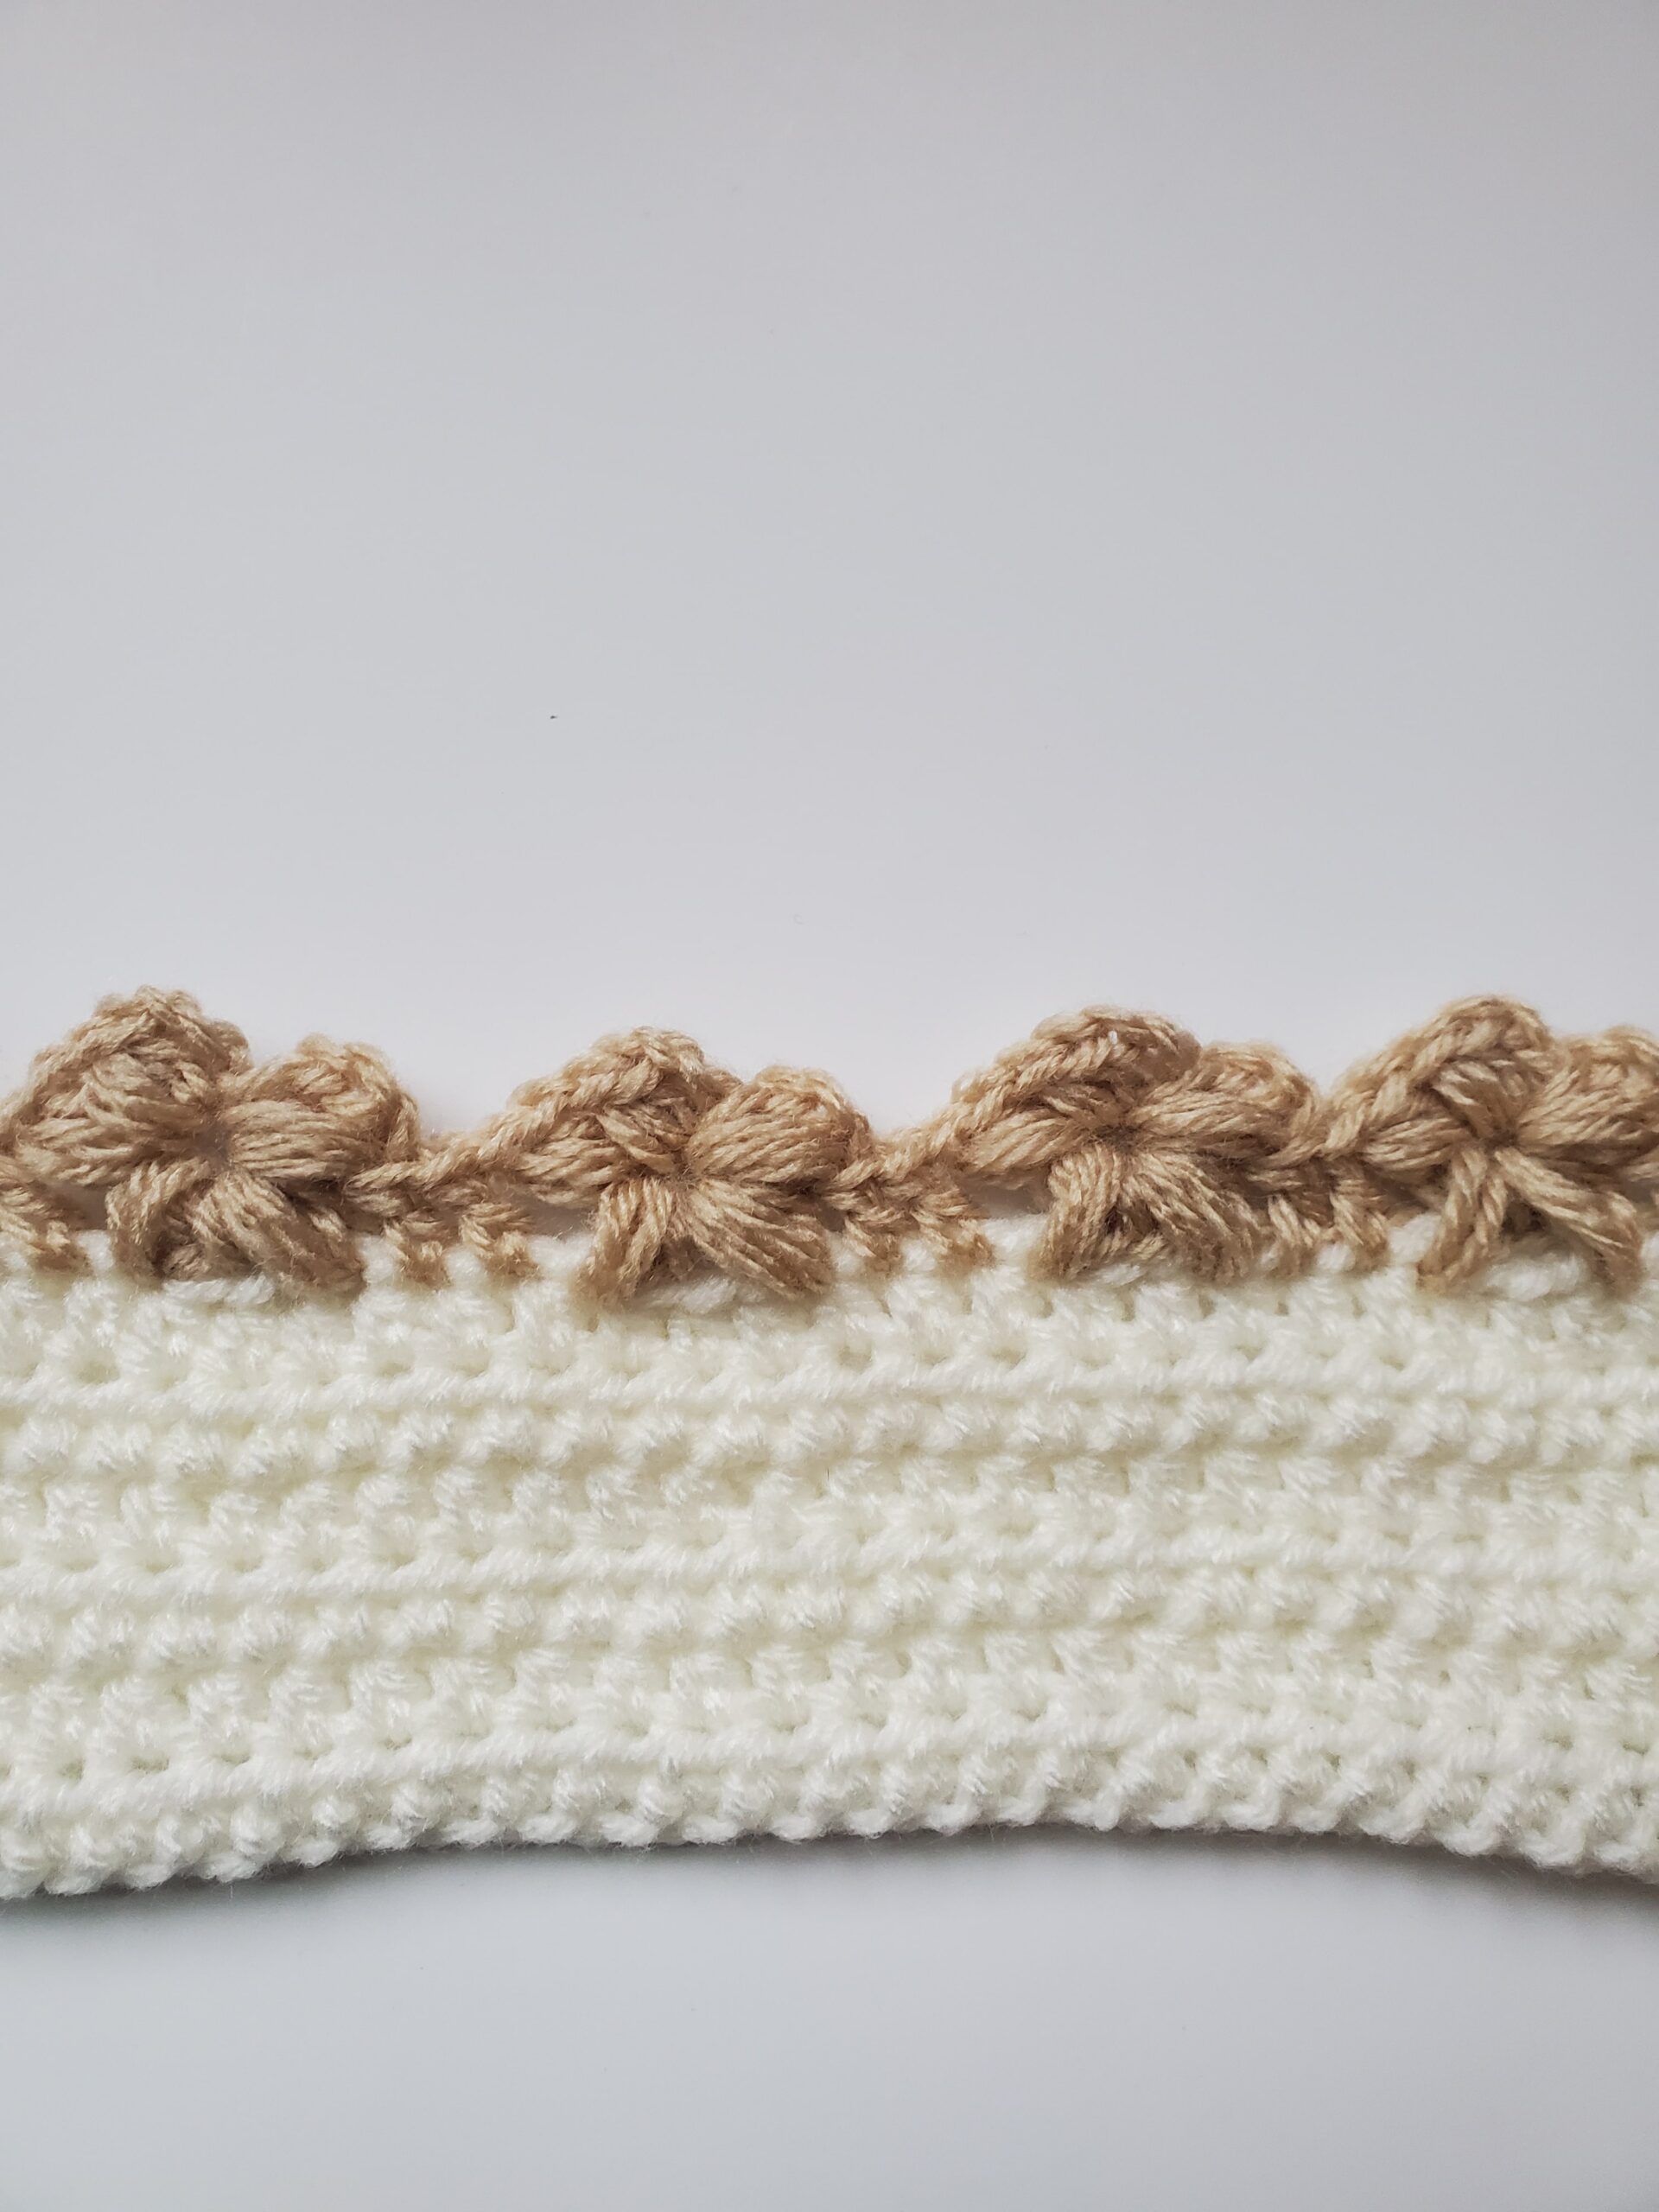
  • Create the bottom ribbing.
  • Make the arm sleeves by crocheting in the arm hole you created earlier until desired length and then make your sleeve cuffs.

Easy peasy, right? No worries, it will all make sense as we go along. 

Please note that some of these links are affiliate links. That means that if you click on these links and make a purchase, I may receive a commission at no extra cost to you. You can find more information about our disclosure policy here. Thank you for your support.

Materials Needed:

Abbreviations Used:

Please note these are in US terms, not UK.

  • Ch – chain
  • St(s) – stitch(es)
  • Sl st – slip stitch
  • Sc – single crochet
  • Dc – double crochet
  • Sc2tog – single crochet two stitches together
  • Wattle stitch – series of (sc, ch 1, dc) in same st/space. 

Crochet Sweater for Child Pattern:

Neck Ribbing: 

With Navy Blue yarn;

  • Round 1: Ch 5, insert hook into 2nd ch from hook and sc across (4 sts)
  • Round 2-60: Ch 1, turn, sc in first st, sc in back loop of next 2 sts, sc in last st (4 sts)

Fold together and make 4 slip sts in the top to sew into a band.

crochet sweater for child neck ribbing
Round 2-60

Round 61: Sl st into the edge of your band, ch 1, sc in same space, mark this stitch with a stitch marker. We will be making 1 sc into every “valley” and “ridge” of the band. Mark the last stitch with a stitch marker. Join with a sl st to first st (60 sts). Remember, whatever your stitch count is, if making a different size, make this a multiple of 3.

We will now mark corner stitches in the neck ribbing to start our increases for the shoulders. Mark the 15th st, 18th st, 43rd st, and 46th st with stitch markers if following this pattern.

Instructions for different sizes: To find the corner stitches for the shoulders, I’m essentially taking the total sc stitch count I have, and dividing it by 4, placing a stitch marker in that number away from the first stitch and placing another stitch 3 stitches away from that one. Then I do the same on the other side by counting from the last stitch and going the opposite way.

For example: I had 60 sts, 60/4 = 15.25. I round down and place a stitch marker in the 15th stitch away from the first and last stitch. I then count 3 stitches more and place another stitch marker. 

Neck and Shoulders:

  • Round 1: Ch 1 and turn your work. *(sc, ch 1, dc) (this is called the wattle stitch) in next st (your first st marked with the marker), skip 2 sts*, repeat from *to,* you should have 1 st left before the first corner st marker, skip 1 st, (sc, ch 1, dc, ch 2, sc, ch 1, dc) in the first corner stitch marked. Move your stitch marker into the ch 2 space. Skip 2 sts and (sc, ch 1, dc, ch 2, sc, ch 1, dc) in the next corner stitch marked. Move your st marker into ch 2 space as well.
  • Skip 1 st, **(sc, ch 1, dc) in next st, skip 2 sts,** repeat from **to** until you have 1 st before the next marked corner st. Skip 1 st, (sc, ch 1, dc, ch 2, sc, ch 1, dc) in the first corner stitch marked. Move your stitch marker into the ch 2 space. Skip 2 sts and (sc, ch 1, dc, ch 2, sc, ch 1, dc) in the next corner stitch marked. Move next corner st marker into the ch 2 space.  Skip 1 st, repeat from **to** again. You should have a (sc, ch 1, dc) in the last st of the round, sl st to first st.
  • Round 2: Ch 1, turn, *(sc, ch 1, dc) in next ch 1 space of previous round, skip sc and dc of previous row and (sc, ch 1, dc) again,* repeat from *to* until you reach the marked ch 2 space of previous round’s corner stitch. **(sc, ch 2, dc) in ch 2 space. Place stitch marker in ch 2 space. (sc, ch 1, dc) in next ch 1 space, (sc, ch 1, dc) in next ch 1 space again. (sc, ch 2, dc) in next ch 2 corner space**. Repeat from *to* until next corner spaces. Repeat **to**. Repeat *to* once more. Sl st to first sc of round. 
  • Round 3: Ch 1, turn, *(sc, ch 1, dc) in next ch 1 space, skip sc and dc* repeat from *to* until next ch 2 corner space. **(sc, ch 1, dc, ch 2, sc, ch 1, dc) in ch 2 space. (sc, ch 1, dc) in next ch 1 space, skip sc and dc until next corner. (sc, ch 1, dc, ch 2, ch 1, dc) in next ch 2 corner space.** Repeat from *to* until next set of corner spaces. Repeat from **to** in next set of corner spaces. Repeat from *to* once more. Sl st to first sc of round. 
  • Round 4: Ch 1, turn, repeat round 2.
  • Round 5: repeat round 3.
  • Round 6: repeat round 2.
  • Round 7: repeat round 3.
  • Round 8: repeat round 2.
  • Round 9: repeat round 3.
  • Round 10: repeat round 2.
  • Round 11: repeat round 3.
  • Round 12: repeat round 2.
  • Round 13: repeat round 3
  • Round 14: repeat round 2

Length from bottom of neckline to bottom of chest at this point is about 4.5 inches. End on a repeat from round 2 if crocheting a different size. 

Armholes:

Round 15: Ch 1, turn, *(sc, ch 1, dc) in next ch 1 space, skip sc and dc* repeat from *to* until first ch 2 corner space. Fold so both ch 2 corner spaces are touching, inserting your hook into both ch 2 spaces, (sc, ch 1, dc). You might have to turn your work a little to get the dc into ch 2 space correctly. This creates one of the arm holes. Continue wattle stitching across (don’t wattle stitch around the sleeves) until the next set of ch 2 spaces. Fold together and wattle stitch into both the ch 2 spaces. Wattle stitch until end of row. Sl st into first st.

Cut yarn and switch to White. Sl st into first st.

crochet sweater armhole join
Creating the arm hole by folding and crocheting over.
Round 15
  • Round 16-31: Ch 1, turn, wattle stitch around, sl st to first st.

Cut yarn and switch to Denim. Sl st into first st.

crochet sweater for kid color change
Round 31

Round 32-43: Ch 1, turn, wattle stitch around, sl st to first st.

Bottom Ribbing:

  • Round 44: Ch 6, insert hook into 2nd ch from hook and sc across ch and sc into the same space as sl st join from round 40. (5 sts)
  • Round 45: Sc into ch 1 space from wattle stitch from round 40, turn, skip first st, sc into back loop of next 4 sts, sc into last st (5 sts)
  • Round 46: turn, (do not ch 1), sc into first st, sc into back loop of next 4 sts, sc into dc of wattle stitch from round 40, sc into sc of next wattle stitch
  • Round 47: turn, skip first two sts, sc into back loop of next 4 sts, sc into last st
  • Round 48: turn (do not ch 1), sc into first st, sc into back loop of next 4 sts, sc into ch 1 space, sc into dc of wattle stitches from round 40.
  • Round 49: repeat round 47.
  • Round 50: turn (do not ch 1), sc into first st, sc into back loop of next 4 sts, sc into sc of wattle stitch, sc into ch 1 space of wattle stitch.

Continue making the ribbing this way and attaching to the body of the sweater by sc into the sc, ch 1 space, and dc of the wattle stitches from round 40. 

Once you reach the beginning of the bottom ribbing, fold together and sew together into each st with a sl st. 

Cut yarn, pull through, weave in end with tapestry needle.

Sleeves x2:

Change to Navy Blue 

  • Round 1: Insert hook into the armpit of the sleeve and attach with a sl st. Ch 1, wattle stitch around, sl st to first sc (make sure you are crocheting in the opposite way of the previous round of the arm hole, you should be looking at your wattle stitches with a dc first and then ch 1 and sc. This keeps the texture of the sweater consistent throughout the sleeves).

Round 2-7: Ch 1, turn, wattle stitch around, sl st to first st. 

Cut yarn, pull through

Change to White, attach with a sl st in same space as previous sl st from round 7.

  • Round 8-14: Ch 1, turn, wattle stitch around, sl st to first st. 

Cut yarn and pull through

Change to Denim, attach with a sl st in same space as previous sl st from round 14.

  • Round 15-21: Ch 1, turn, wattle stitch around, sl st to first st
  • Round 22: Ch 1, turn, wattle stitch in the first ch 1 space, *sc into the next ch 1 space, wattle stitch in the next ch 1 space,* repeat from *to* around, ending with a sc in the last ch 1 space.

Sleeve Cuff x2:

Make sure that the same side of the sleeve cuff is facing out on both sides for consistency. You’ll notice that the texture on the front is different than the back. If the second cuff isn’t quite matching your first cuff’s texture, try turning and going the opposite way when you start your ch 6.

  • Round 23: Ch 6, turn, sc into 2nd ch from hook and next 3 chs, sc2tog in last ch and in same st as sl st. (5 sts)
  • Round 24: sl st into next st on the sleeve, turn, (going up the ch 6), skip sl st just made, sl st loosely into back loop of next 5 sts.
  • Round 25: Ch 1, turn, sc in back loop of next 4 sts (these may be a little tight to get into as they are slip stitches, that’s why we are sl sting loosely in round 24), sc2tog in the last st and in the next st along the edge of the sleeve. 
  • Round 26: sl st into next st on the sleeve, turn, skip sl st just made, sl st loosely into back loop of next 5 sts.

Repeat rounds 25-26 until you’ve reached the beginning of round 23.

Line both ends of the cuff together and sl st to sew into each st. Cut yarn with scissors, pull through, weave in end with tapestry needle.  

Round 23 of Sleeve Cuff
Round 24 of Sleeve Cuff
Round 25 of Sleeve Cuff
crochet striped sweater
Completed Sleeve with Cuff

There you go! I hope your sweater turned out just as lovely as mine! If you have any questions, don’t hesitate to ask below. 

Until next time!

Other Posts You May Like:


Simple Crochet Mittens for Toddlers

Hello everyone, today I have a crochet mitten pattern for a toddler! Winter is finally here and my girls have been needing some new mittens this year. 

I ran out to our local Walmart, and seriously, I think everyone has a kid the same size or age as mine because I could not find ANY in the size I needed. It was either 24 months and under or adult mittens. Aghhh! 

So I thought maybe I could crochet my girls a pair of simple mittens with some of Yarn Bee’s Soft Secret yarn. 

I think these turned out pretty great, and they fit perfectly since I was able to size their hands myself!

These simple crochet mittens should fit ages 2-4 years of age. You can easily adjust this pattern if you’d like however. If you need a smaller size, skip round 3 and continue on, keeping in mind your stitch count will be a tad less. If you need a larger size, add another round of increases by continuing to place 2 hdc in one st and 2 in the next 2 stitches after round 3.

You can also make the cuff length as long as you want (and to be honest, it might be better to make it a little bit longer, especially if you’re like me and have kiddos that ask for help putting their mittens back on frequently). 

These mittens fit both of my girls who are 2 and 4 years of age. Their hand width measured 5-5.25 inches and their hand length measured 4-4.25 inches.

Now, these mittens are soft and warm, but they are not made for playing in the snow. I honestly don’t recommend letting your kids wear crochet mittens for snow play, even if it’s really thick, bulky yarn. It just gets wet and soggy and your child will probably not have a very good time. 

Again, I’m using Yarn Bee Soft Secret in Ivory yarn for these mittens. This yarn is technically a 4 – medium weight, but I think it feels a little smaller and lighter than that, which is why I’m using a 4.25 mm crochet hook instead of a 5 mm crochet hook. It’s also 100% acrylic, but it’s incredibly soft, so it’s great for those little toddler hands!

Related Posts:

Please note that some of these links are affiliate links. That means that if you click on these links and make a purchase, I may receive a commission at no extra cost to you. You can find more information about our disclosure policy here. Thank you for your support.

Materials Needed:

Abbreviations Used:

Please note these are in US terms and not UK.

  • Ch – chain
  • Mc – magic circle
  • St(s) – stitch(es)
  • Sl st – slip stitch
  • Hdc – half double crochet
  • Hdc2tog – half double crochet two stitches together

Special Considerations:

  • These simple crochet mittens are crocheted in a continuous round. This is to prevent a visible seam in your mittens. Use stitch markers or a scrap piece of yarn to help you determine the beginning and end of your rounds.
  • To half double crochet two stitches together (hdc2tog):
    • Yarn over, insert your hook into next stitch, pull up a loop (3 loops on your hook)
    • Yarn over, insert your hook into the next stitch, pull up a loop (5 loops on your hook)
    • Yarn over, pull through all 5 loops on your hook. 

Crochet Mittens (Make Two)

  • Round 1: 8 hdc in mc (alternatively, ch 2 and crochet in first ch) (8 sts)
  • Round 2: 2 hdc in each st around (16 sts)
  • Round 3: 2 hdc in next st, 1 hdc in next st around (24 sts)
  • Round 4-11: 1 hdc in each st around (24 sts)
  • Round 12: 1 hdc in first st, ch 4, skip 2 sts, 1 hdc in next st and each st around (22 sts and 1 ch 4)
  • Round 13: 1 hdc in first st, 4 hdc in ch 4 space, 1 hdc in each st around (make sure to hdc in the st right after the ch 4, see pic below) (26 sts)
  • Round 14: 1 hdc in each st around (26 sts)
  • Round 15: hdc2tog, *1 hdc in next 4 sts, hdc2tog, 1 hdc in next 5 sts*, repeat from *to* once more (22 sts)
  • Round 16: hdc in next 9 sts, hdc2tog, hdc in next 9 sts, hdc2tog (20 sts)
  • Round 17-20 (or until desired length): 1 hdc in each st around, sl st to first st (20 sts)

Cut yarn with scissors, pull yarn through and weave in end with tapestry needle.

Crochet Mittens for Toddlers Round 1
Round 1
Crochet Mitten Pattern Round 2
Round 2
Crochet Mittens for Toddler Free Pattern Round 3
Round 3
Crochet Toddler Mittens for Beginners
Round 4-11
Crochet Mittens
Round 12
HDC in this stitch
Round 13
Crochet Mittens with Thumb
Round 20

Thumb:

  • Round 1: holding your mitten downwards, join in the ch 4 space with a slip st in any st. Ch 1, hdc in same st, hdc in each st around, there will be a part in the thumb space where you will have to hdc in sts that are upside from round 12 of the mitten. Make 14 hdc around total (14 sts)
  • Round 2-3: 1 hdc in each st around (14 sts)
  • Round 4: hdc2tog, 1 hdc in next 5 sts, hdc2tog, 1 hdc in next 5 sts (12 sts)
  • Round 5: *hdc2tog, 1 hdc in next st,* repeat from *to* around (8 sts)

Leave enough yarn for sewing, cut with scissors, weave the top of the thumb shut with tapestry needle.

Crochet Mittens Pattern Free
Round 1 of Thumb

Viola! These simple crochet mittens are so soft and cute, I hope your little ones enjoy them too!

Thank you for checking out this pattern, until next time!

Other Posts You May Like:

A Quick Start Guide on How to Crochet

New to crochet? Wondering where to start? Not sure what to do with that cool yarn you picked up at the store? Well, good news! We are going back to basics and learning how to crochet for beginners with this quick start guide.

What is Crochet?

According to Wikipedia, crochet is a method of creating textiles by using a crochet hook to interlock loops of yarn, thread or strands of other materials. 

What Can I Make with Crochet?

There are so many possibilities when it comes to making things with crochet! You can make almost anything out of crochet, but some of the most popular items include: 

  • Blankets
  • Hats and Headbands
  • Scarves
  • Sweaters and Tops
  • Socks
  • Market Bags
  • Toys (Amigurumi)
  • Doilies
  • Table Runners
  • Pillows
  • Tapestries/Wall Decorations

Not only do you get to choose the type of yarn and color combinations to make these items, you get the satisfaction of knowing that you made something by hand! How awesome is that?

Where to Start When Crocheting

If you haven’t already, visit your local craft or big box store (or check out online) and head to the yarn aisle. Pick out a yarn that you’re drawn to, and check out the label on your yarn. 

On the yarn label, it should have a recommended hook size that you should use when working with that yarn. It’ll probably have knitting needle sizes on there too, but disregard those recommendations. 

Crochet hooks should be nearby, grab the number hook your yarn label recommends. Most hooks are measured in millimeters, but some have letters. The most common hook size used is a H-8 or 5mm.

Grab a tapestry needle and some scissors as well. You’ll need the tapestry needle to hide any ends of your yarn that show after you’re done with your project.

Learn How to Hold Your Hook and Yarn

There’s a couple different ways you can hold your yarn and hook, but I would just hold your yarn and hook in a way that feels the most comfortable for you

It’s probably going to feel weird and clunky when you first try, that’s ok, just keep practicing. As you learn to crochet, you’ll learn how tight or loose (this is called tension) to make your stitches. Just remember to relax! 

How to Put Your Yarn on Your Crochet Hook

In order to start crocheting, you will have to attach the yarn to the hook with a slip knot.

How to Hold Your Yarn in Crochet
Hold your yarn in your non dominant hand.
Easy Way to Hold Yarn in Crochet
Hold the yarn with your middle, ring, and pinky finger, use your index finger to lift your yarn up.
Hand Placement for Crochet
Use your middle finger and thumb to pinch your slip kno so it's not super tight to chain through.

Crochet A Starting Chain (Ch)

Most crochet patterns will tell you how many chains to start with. This is usually abbreviated as ch.

To make your first chain, you need to grab your yarn with your crochet hook and pull it through the slip knot. This is called yarning over and pulling through. You might need to loosen up your slip knot if you find it difficult to get your hook through.

It’s important to relax and not make your chains super tight.

It’s really hard to get your hook into your tight chains when you go back over the top, plus your hands will most likely cramp. This part takes practice until you can get a consistent tension down. 

Stop after you’ve made the number of chains your pattern says or until you’re happy with the length.

Yarn Over in Crochet
Yarn over or grab your yarn with your crochet hook.
How to Make a Chain in Crochet
Pull the yarn through the loop on your hook. This is 1 chain (ch).
starting chain of 10 chains
Here is an example of a chain of 10.

Turning Your Work and Crocheting into the Starting Chain

Many patterns will tell you what kind of stitches to crochet into your starting chain. You’ll need to go back down or turn to crochet back into the chain. 

Let’s look at a couple of beginner stitches that will be useful for you.

Crocheting a Slip Stitch (Sl St)

A slip stitch, also abbreviated as sl st, is typically used to join your work or make very small stitches

Slip stitches aren’t usually used in the starting chain, as it can be difficult to crochet into such a small space, but you can practice a slip stitch into yours if you’d like.

Steps to Slip Stitch (sl st):

  • Insert your hook into the 2nd chain of your foundation chain, or into the stitch.
  • Grab your yarn with your crochet hook (yarn over), pull the yarn through your chain (or stitch). You will have what looks like two loops on your hook.
  • Pull the yarn all the way through or in other words, pull the loop closest to your hook through the second loop.
Insert Hook into Chain
Insert your hook into the 2nd chain (or next stitch).
Yarn Over
Yarn over.
Pull Yarn Through Chain
Pull the yarn all the way through the chain (first loop on your hook).
Finished Slip Stitch in Crochet
Finished slip stitch (sl st).
Foundation Row of Slip Stitches
Slip stitches (sl sts) down a foundation chain.

Crocheting a Single Crochet (Sc)

A single crochet, also abbreviated as sc, is a very common stitch used. I suggest practicing going down your starting chain with this stitch first. 

Single crochets are used for many projects and are typically the only stitch used if you’re making crochet toys (also called amigurumi).

They are a little taller than slip stitches, but shorter than double crochets.

Steps to single crochet (sc):

  • Insert your hook into the second chain from your crochet hook (or into the next stitch). Inserting it into the first chain doesn’t really work, you can try it if you want to see what I mean.
  • Grab your yarn with your crochet hook (yarn over), pull the yarn through the chain. You should have two loops on your hook.
  • Yarn over again and pull it through both loops on your hook. 
  • Move onto the next chain and practice another single crochet. Try not to single crochet in the same chain you just single crocheted into. 
Insert Crochet Hook into 2nd Chain
Insert your hook into the second chain or into the next stitch.
Yarning Over for Single Crochet
Yarn over.
Two Loops on Hook for Single Crochet
Pull through the chain, notice how I turn my hook upwards to prevent my yarn from slipping off.
Grab Yarn with Hook Again
Yarn over again and pull it through both the loops on your hook.
Completed Single Crochet in 2nd Chain
Completed single crochet in the second chain. Notice how the single crochet makes a larger hole in the foundation chain? Don't single crochet there, but in the next chain. The hole is the chain you just crocheted into.

Crocheting a Double Crochet (Dc)

A double crochet, also abbreviated as dc, is another common stitch used in many crochet patterns. 

Double crochets are much taller than single crochets. Patterns like blankets, will use this stitch to achieve the desired length or height quickly.

Steps to double crochet (dc):

  • Grab your yarn with your hook/wrap it around your hook (yarn over) then insert your hook into the third chain from your crochet hook. 
  • Yarn over again and pull it through your chain (you should have three loops on your hook).
  • Yarn over again and pull it through the first two loops on your hook (you should have two loops on your hook).
  • Yarn over again (yes I know), and pull it through the last two loops on your hook.
Yarning Over and Then Inserting Hook for Double Crochet
Yarn over and insert your hook into the third chain or into the next stitch.
Grabbing Yarn with Crochet Hook
Yarn over.
Pull Yarn Through First Loop for Double Crochet
Three loops on her hook.
Yarning Over 2nd Time
Yarn over again.
Pull Yarn Through First Two Loops
Pull the yarn through the first two loops on your hook. You have two loops on your hook now.
Yarn Over 3rd Time in Double Crochet
Yarn over once again and pull through both loops on your hook.
Completed Double Crochet in 3rd Chain
Completed double crochet in 3rd chain.
Double Crochet Foundation Row
Double crochets in foundation chain.
A Quick Start Guide on How to Crochet
Here's a comparison of the stitches we've covered in this post. Notice the differences in height.

Chaining and Turning Your Work Again

Once you reach the end of your starting chain with single or double crochets, you’ll need to keep building on top of your stitches. 

I find that chaining a number of chains first and then turning works better, but you can turn your work first and then chain if you prefer. 

Your pattern should tell you how many chains to chain, if you’re planning on single crocheting in the first stitch of your next row, chain 1.

If you’re planning on double crocheting in the first stitch of your next row, chain 3. 

Your pattern will also tell you whether or not your chains are going to be considered a stitch or not, this will determine which stitch you crochet into first. 

Single crochet or double crochet into your first stitch and every stitch down your row. 

Chain and turn your work again. Be sure to count your stitches as it’s easy to skip a stitch after turning your work.

Continue this way until you’ve reached the height you desire.

Chaining and Turning Crochet Work
Here I'm working on double crochets. I have chained 3 chains and have turned my work the opposite way.
Double Crochet Again in Row 2
This is what double crochets look like on the second row. I'm considering the chain 3 as a double crochet in this picture.

Finishing Your Crochet Project and Weaving in Yarn Ends

Once you’ve reached the length and height of your crochet project, leave a little length of yarn and cut it with your scissors.

Pull the rest of the yarn through with your crochet hook.

With your tapestry needle, thread your yarn through the eye of the needle and weave in and out through your stitches to hide the yarn. Make sure the yarn is weaved securely and cut off any excess.

Wrapping Up…

These are the basic steps you should take in order to learn how to crochet. Remember, grab your yarn and hook, make a starting chain, crochet back into the starting chain and build on top of your stitches, cut your yarn and weave in your ends.

As a beginner crocheter, I learned a lot from video tutorials (there’s tons out there). I would slow down the play back speed of any video tutorial if you find that they’re going to fast. 

Start small. Try out small, beginner projects first like a square coaster, dishcloth, or bracelets until you get a feel for what stitches look like and get better at crocheting.

Don’t be afraid to post questions online to other fellow crocheters if you’re not sure how to read a pattern or are stuck. r/crochet on Reddit is a fairly active and helpful source of crochet information.

Good luck and happy crocheting! 

Other Posts You May Like:

Crochet Veil Pattern – Infinity Snowflakes

Hello everyone! Today I am presenting another beautiful crochet veil pattern that you can wear to mass. 

I still don’t see too many crochet veil patterns for free available, so I thought I would make another one for you.

This crochet veil is made in a lacey fashion with a simple 2 row repeat. The lacey stitches gives the veil the appearance of having stars or snowflakes, which I think is wonderful, especially this time of year!

My last crochet veil has a floral appearance, which you should check out if you enjoy this pattern.

This veil is also made in an infinity veil style. 

Like with my previous crochet veil pattern, this one does take a little bit of time to complete, but it looks so beautiful when finished. 

I believe this took me about 2-3 weeks of irregular crocheting (anywhere from 0-3 hours a day) to get done. Once you get the hang of the repeat rows, it’s a nice pattern to do while you listen to a podcast or watch your favorite show (or take to the park while your kids run around!). 

You can easily adjust the size of the crochet veil if you wish. The starting chain is a repeat of 16 + 7. This means that you will be chaining a series of 16 chains until you reach your desired length and then add 7 chains to the end of that. 

I suggest using stitch markers or writing down the number of chains you have for your starting chain so you don’t get lost, especially if you’re like me and easily distracted or need to help a kiddo or two in the meantime!

Also, don’t get too discouraged if your starting chain doesn’t end exactly as it should on the first row.

I found that it’s fairly easy to miss or skip extra chains on accident, especially after you single crochet twice into the same chain…it makes the next chain easy to miss when counting.

If you don’t end up with exactly 4 remaining chains at the end of the first row, it’ll be ok. Nobody is going to know or tell that you’re missing a chain or two, everything will work out :).

Crochet Veil Free Pattern
Close up of the lacey, snowflake-like stitches.

Please note that some of these links are affiliate links. That means that if you click on these links and make a purchase, I may receive a commission at no extra cost to you. You can find more information about our disclosure policy here. Thank you for your support.

Related Posts:

Materials

Abbreviations

Please note these are in US terms, not UK.

  • St – stitch
  • Sl st – slip stitch
  • Ch – chain
  • Sc – single crochet

Special Stitches

  • Ch 3 Picot – ch 3, sl st into sc previously made

Crochet Veil Pattern – Infinity Snowflakes

Ch 279 or a repeat of 16 + 7.

  • Row 1: Insert into 11th ch from hook and make a sc, *ch 4, skip 3 chs and (sc in the next ch, ch 6, sc in the same ch), ch 4, skip 3 chs, sc in next ch* repeat from *to* until you have 4 chs left before the last ch, ch 4, sc in last ch.
  • Row 2: Ch 6, turn, *ch 4, skip ch 4, (sc in next sc, ch 6, sc in same sc), ch 4, skip ch 4, sc in ch 6 space,* repeat from *to* until the end (you should end with a (sc, ch 6, sc)), ch 4, skip 3 chs and sc in next ch.
  • Row 3: Ch 6, turn, *sc in ch 6 space, ch 4, skip ch 4, (sc in next sc, ch 6, sc in same sc), ch 4,* repeat from *to* until end of row, ch 4, skip 3 chs, sc in next ch.

Repeat rows 2-3 until desired length is reached, ending on a row 3 repeat.

  • Trim: Ch 1, turn, *4 sc in ch 4 space, skip next sc, 4 sc in next ch 4 space, 2 sc in ch 6 space/loop, ch 3 picot, 2 sc in same ch 6 space/loop,* repeat from *to* until end of row, 4 sc in ch 4 space, skip next sc, 4 sc in last ch 4 space. 

Do not cut your yarn.

  • Sewing: Fold your veil in half (short side to short side), with your yarn still on your hook, sl st into the first sc from the trim row, sl st into both sides of the veil into every ch until the bottom. It’s important to line up the chs on both sides as evenly as possible to create a straight seam. 

Cut yarn with scissors, pull through, weave in any ends with your tapestry needle. 

Crochet Veil for Mass

Thank you for trying out this crochet veil pattern, I hope you enjoyed making it! Have a Merry Christmas everyone!   

Other Posts You May Like: