Crochet Witch Hat Pattern
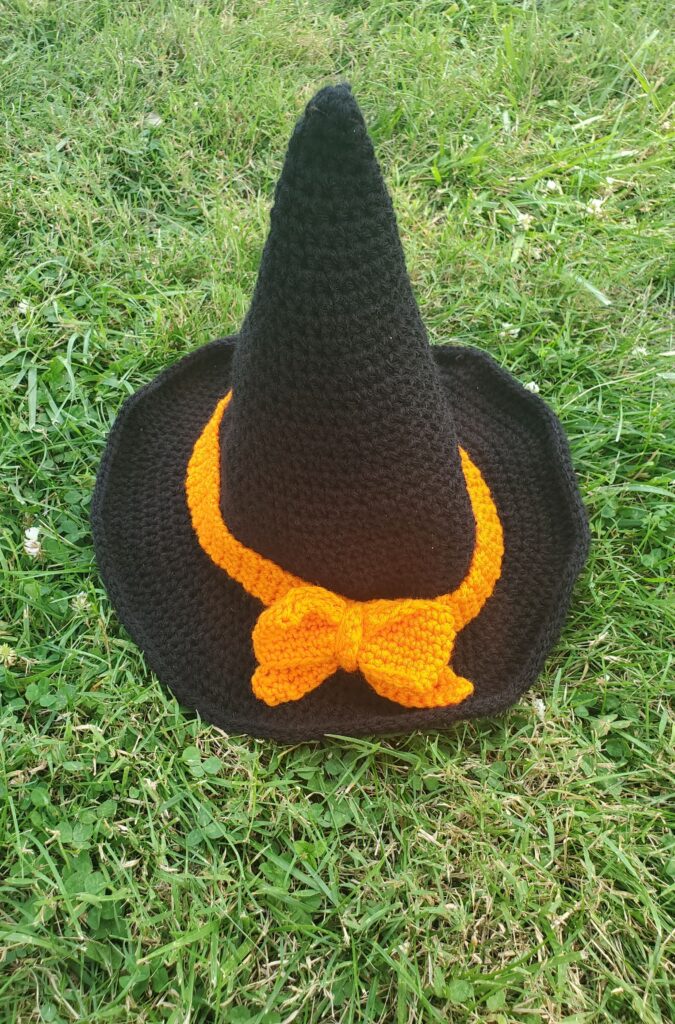
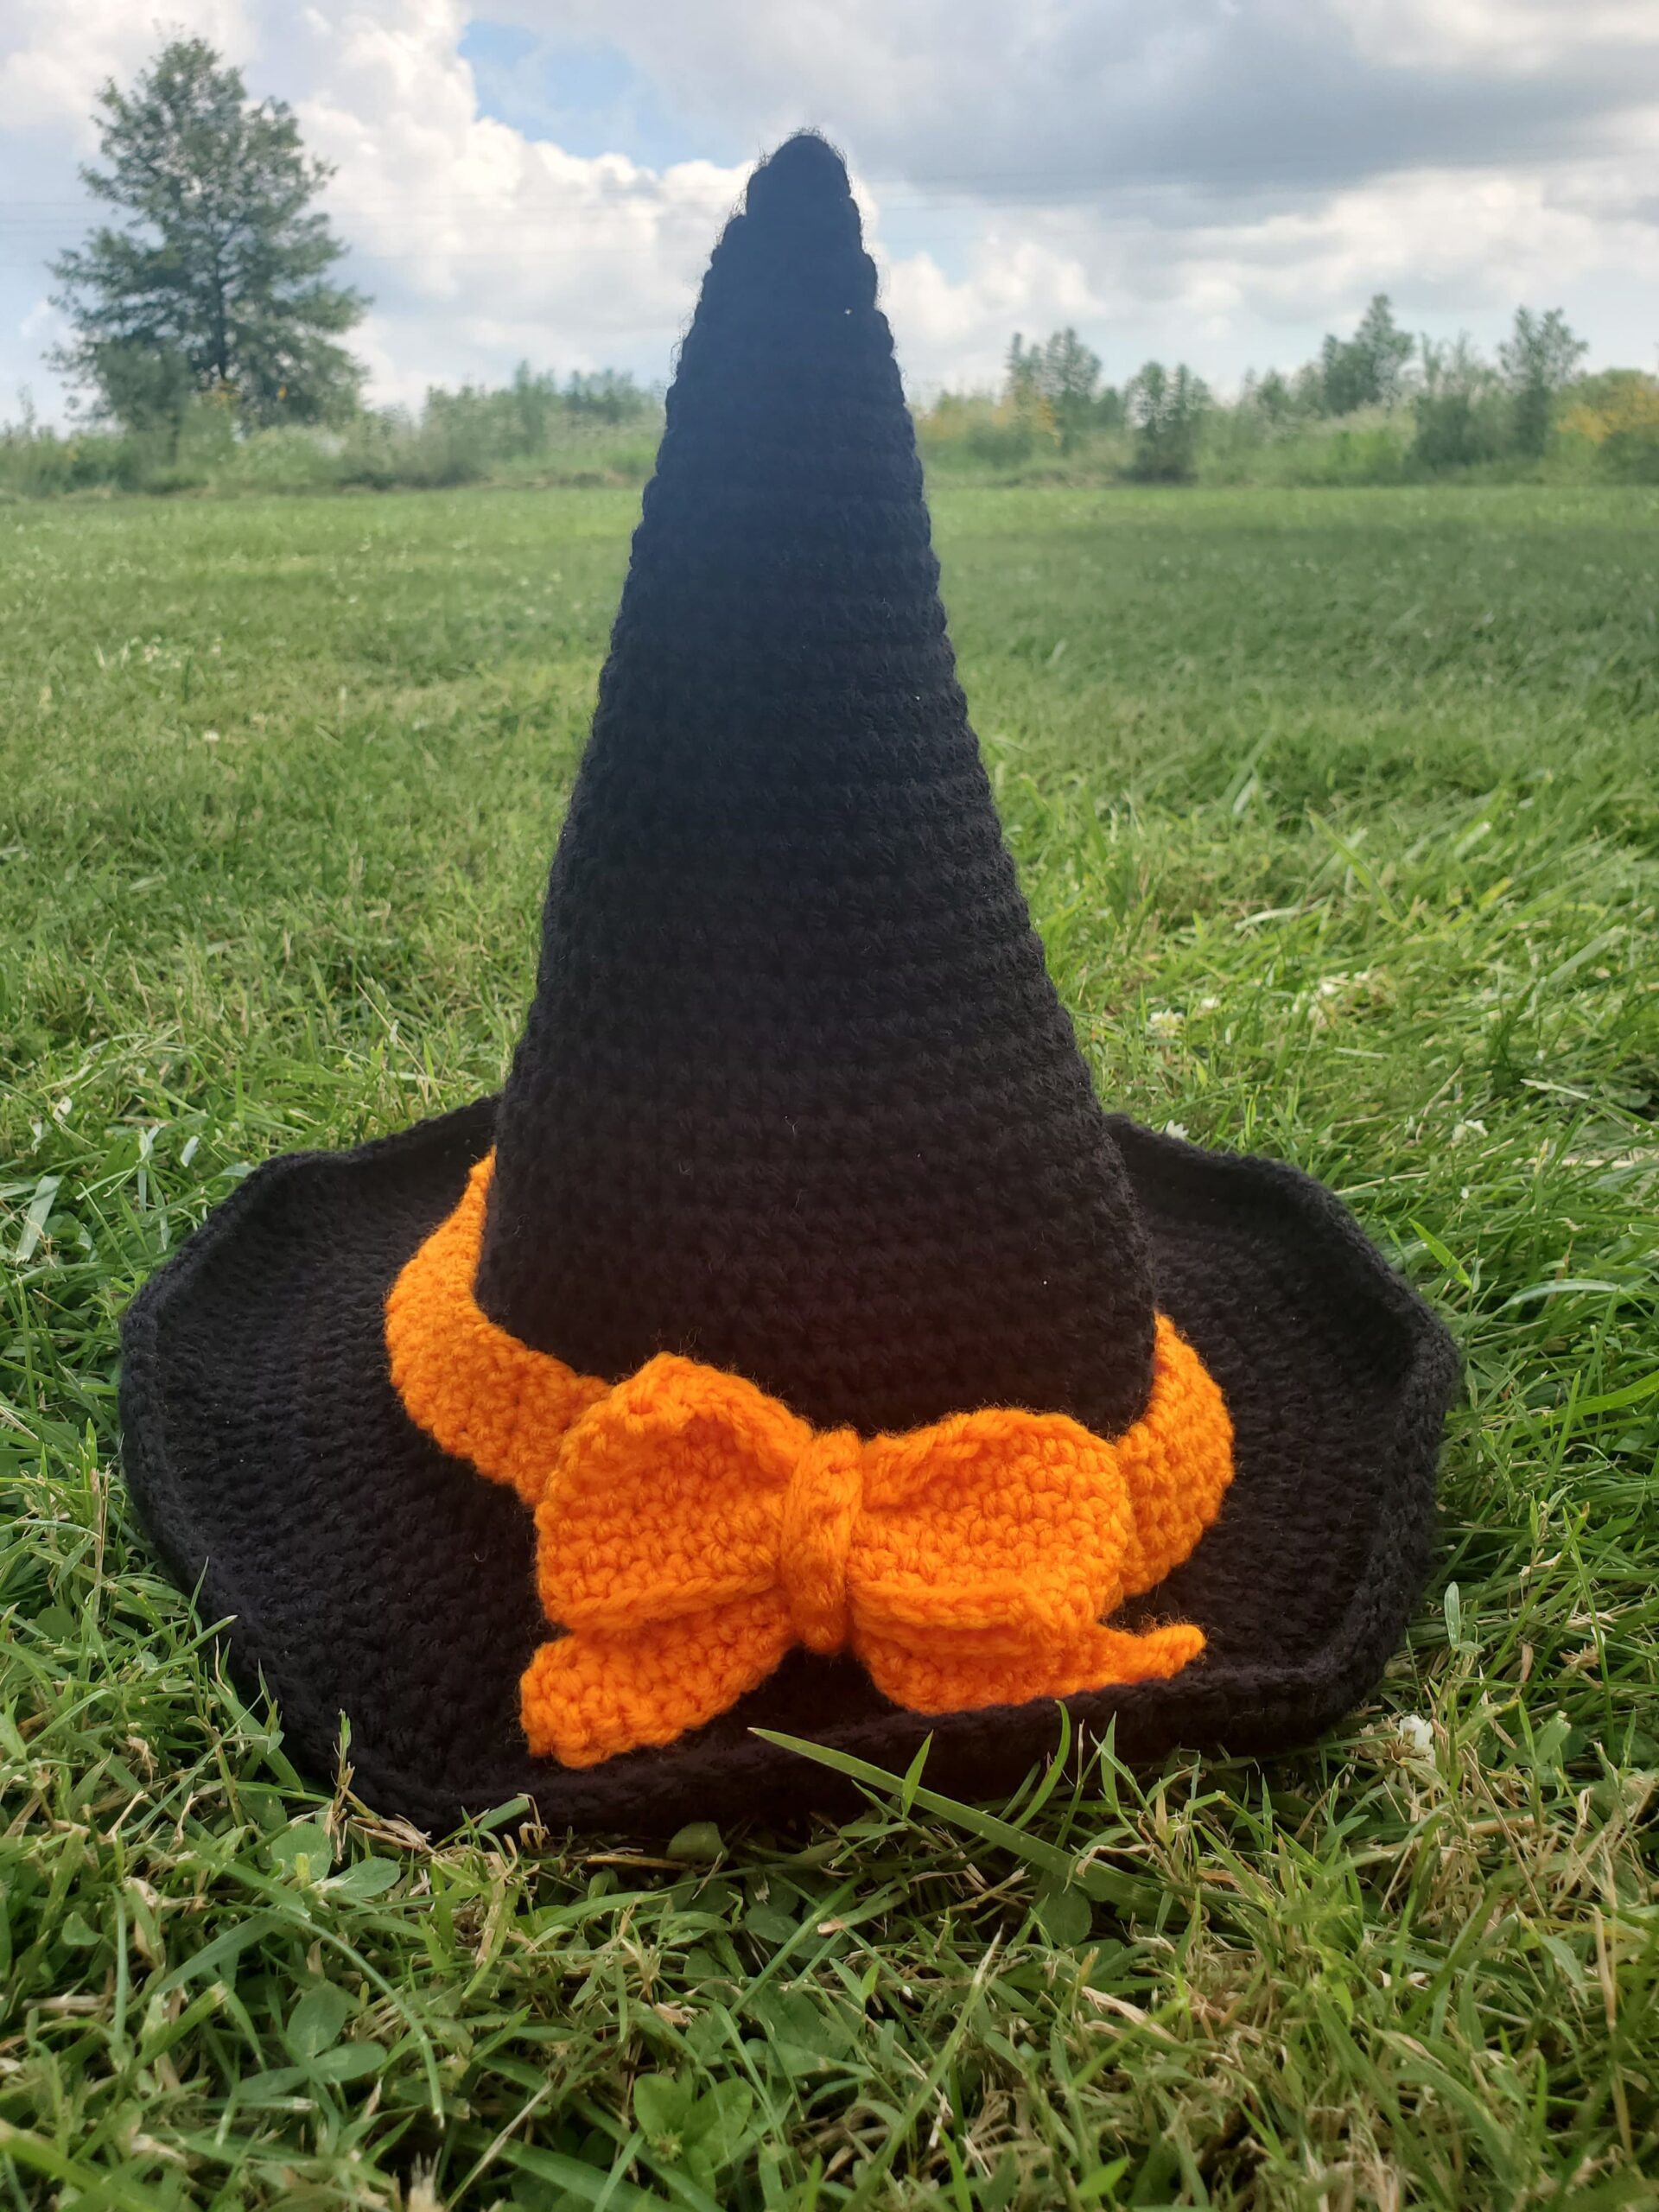
Hello everyone, today I have a crochet witch hat pattern for you! A few years ago I had my oldest daughter dress as a cute little witch for Halloween, but the one essential piece I needed was a witch hat.
I thought, heck, I could make one of those, BUT I could not find a pattern for a toddler that I really liked. So I made my own instead!
This post is all about how to crochet a witch hat with step by step instructions and pictures.
Can you make this hat different sizes?
Yes! The witch hat pattern I have written below fits my 4 year old perfectly and my 2.5 year old (a little big). If you’re needing a smaller or bigger size, you can stop early or add more rows. The formula for making the cone shape is increasing, doing a row of single crochets, doing another row of increases, then another row of single crochets and so on until you reach the desired size.
If you alter the size, keep in mind that you’ll have to adjust the crochet band and possibly the bow. You may need to decrease or add the amount of brim too.
I suggest using a measuring tape to obtain accurate head measurements and then crocheting until you meet those measurements. Here is a head measurement guide that has average head circumferences by age if you need help.
What is the best yarn to use for this pattern?
I use acrylic yarn from Red Heart Super Saver. Acrylic yarn is perfect for keeping the witch hat and brim stiff. I think that if you use a softer yarn, your hat would most likely slouch and be floppier.
Do I have to crochet the band and bow?
Nope! Honestly, it would be easier to buy a ribbon and tie a pretty bow around the hat. If you’re like me, I didn’t have any ribbon, nor did I feel like buying any…so I used orange yarn from my stash instead.
Please note that some of these links are affiliate links. That means that if you click on these links and make a purchase, I may receive a commission at no extra cost to you. You can find more information about our disclosure policy here. Thank you for your support.
Materials Needed:
- 5 mm crochet hook
- Black Yarn by Red Heart Super Saver (1 skein)
- Pumpkin Yarn by Red Heart Super Saver (1 skein)
- Stitch marker
- Tapestry Needle
- Scissors
Abbreviations Used:
Please note that these are in US terms, not UK.
- Mc – magic circle/ring (see this post if you need help putting this on your hook)
- St(s) – stitch(es)
- Sl st – slip stitch
- Ch(s) – chain(s)
- Sc – single crochet
- Hdc – half double crochet
Helpful Tips:
- The number in parenthesis at the end of the rows indicates the number of stitches you should have.
- The hat is made in a continuous row, meaning that we will not be slip stitching and chaining to get to the next row height. This is where you will need a stitch marker to help you determine the beginning and end of your rounds. You can use a scrap piece of yarn or a paperclip if you don’t have stitch markers on hand.
- The first round of the brim is made by crocheting in the front loops. If you look at the top your stitches, you’ll notice it looks like a little V, insert your hook into the part of the V that is closest to you. That is the front loop.
- Sew the bow directly onto the band (not into the hat), this helps prevent a bunch of uncomfortable yarn pushing against your head.
Crochet Witch Hat Pattern
- Row 1: make a mc, ch 1 (does not count as st), 5 hdc in mc (5 sts)
- Row 2: 1 hdc in each st around (5 sts)
- Row 3: 2 hdc in each st around (10 sts)
- Row 4: 1 hdc in each st around (10 sts)
- Row 5: 2 hdc in 1st st, 1 hdc in next st (15 sts)
- Row 6: 1 hdc in each st around (15 sts)
- Row 7: 2 hdc in 1st st, 1 hdc in next 2 sts (20 sts)
- Row 8: 1 hdc in each around (20 sts)
- Row 9: 2 hdc in 1st st, 1 hdc in next 3 sts (25 sts)
- Row 10: 1 hdc in each st around (25 sts)
- Row 11: 2 hdc in 1st st, 1 hdc in next 4 sts (30 sts)
- Row 12: 1 hdc in each st around (30 sts)
- Row 13: 2 hdc in 1st st, 1 hdc in next 5 sts (35 sts)
- Row 14: 1 hdc in each st around (35 sts)
- Row 15: 2 hdc in 1st st, 1 hdc in next 6 sts (40 sts)
- Row 16: 1 hdc in each st around (40 sts)
- Row 17: 2 hdc in 1st st, 1 hdc in next 7 sts (45 sts)
- Row 18: 1 hdc in each st around (45 sts)
- Row 19: 2 hdc in 1st st, 1 hdc in next 8 sts (50 sts)
- Row 20: 1 hdc in each st around (50 sts)
- Row 21: 2 hdc in 1st st, 1 hdc in next 9 sts (55 sts)
- Row 22: 1 hdc in each st around (55 sts)
- Row 23: 2 hdc in 1st st, 1 hdc in next 10 sts (60 sts)
- Row 24: 1 hdc in each st around (60 sts)
- Row 25: 2 hdc in 1st st, 1 hdc in next 11 sts (65 sts)
- Row 26: 1 hdc in each st around (65 sts)
- Row 27: 2 hdc in 1st st, 1 hdc in next 12 sts (70 sts)
- Row 28: 1 hdc in each st around (70 sts)
- Row 29: 2 hdc in 1st st, 1 hdc in next 13 sts (75 sts)
- Row 30: 1 hdc in each st around (75 sts)
- Row 31: 2 hdc in 1st st, 1 hdc in next 14 sts (80 sts)
- Row 32: 1 hdc in each st around, sl st to first st (80 sts)
If you need to make your size larger, continue in this fashion until you reach your desired size For smaller sizes, stop at whatever row you feel is appropriate.
Crochet Witch Hat Brim
- Row 33: ch 1, (in front loop) 2 hdc in same st, hdc in next 7 sts, 2 hdc in next st around, sl st to first st (90 sts)
- Row 34: ch 1, 2 hdc in same st, hdc in next 8 sts, 2 hdc in next st around, sl st to first st (100 sts)
- Row 35: ch 1, 2 hdc in same st, hdc in next 9 sts, 2 hdc in next st around, sl st to first st (110 sts)
- Row 36: ch 1, 2 hdc in same st, hdc in next 10 sts, 2 hdc in next st around, sl st to first st (120 sts)
- Row 37: ch 1, 2 hdc in same st, hdc in next 11 sts, 2 hdc in next st around, sl st to first st (130 sts)
- Row 38: ch 1, 2 hdc in same st, hdc in next 12 sts, 2 hdc in next st around, sl st to first st (140 sts)
- Row 39: ch 1, 2 hdc in same st, hdc in next 13 sts, 2 hdc in next st around, sl st to first st (150 sts)
Keep increasing in this fashion if you need a longer brim or stop earlier for a shorter brim.
Cut yarn with scissors. Weave in end with tapestry needle.
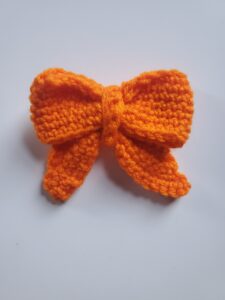
Orange Bow (optional)
We will be making the bow in three different parts and sewing them together later.
You don’t have to make the bow or the band, but I think they give the witch hat a nice finishing touch, especially if you’re making this for a little girl.
Center Part:
This is easily adjustable by reducing or increasing the amount of starting chains.
- Row 1: ch 31, without twisting, sl st to first st to create a loop (30 sts)
- Row 2-7: turn, ch 1, sc in each ch around, sl st to first st (30 sts)
Leave a long tail, cut yarn with scissors and pull through. Take the tail and wrap it around the middle of the bow. Weave in the end back into the middle part to secure it.
Bow “Tails”:
This is adjustable by chaining less or more, and then placing increases in the beginning and end stitches of each row.
- Row 1: ch 12, sc in second ch from hook, sc in each ch across (11 sts)
- Row 2: turn, ch 1 (does not count as a st this row and following rows), 2 sc in first st, sc in next 9 sts, 2 sc in last st (13 sts)
- Row 3: turn, ch 1, 2 sc in first st, sc in next 11 sts, 2 sc in last st (15 sts)
- Row 4: turn, ch 1, 2 sc in first st, sc in next 13 sts, 2 sc in last st (17 sts)
- Row 5: turn, ch 1, 2 sc in first st, sc in next 15 sts, 2 sc in last st (19 sts)
- Row 6: turn, ch 1, 2 sc in first st, sc in next 17 sts, 2 sc in last st (21 sts)
Leave a long tail, cut yarn with scissors and pull through.
Weave in the tail back through the last row’s stitches until the 10th stitch. Wrap your tail around the middle of the “tails.” Hold the tails open firmly with one hand so the side that we weaved the tail in doesn’t curl on you.
Weave in the end back into the middle part to secure it.
Bow Middle Section:
This part is made to hide the yarn that we wrapped around the center and tails.
Adjust length by chaining more chains in the beginning.
- Row 1: ch 14, turn, sc in second ch from hook and each ch across (13 sts)
Leave a long tail, cut yarn with scissors and pull through.
Bow Assembly:
Sew together all three parts by placing the middle section over the center and tail pieces. Make sure the tail piece is sew with the shorter side on top.
This part can be a little difficult as you are trying to keep all the pieces together, but don’t sweat it! I ended up having to overlap the middle section to get the tightness I wanted.

Orange Band around Witch Hat:
Adjust size by decreasing or increasing the amount of rows. You want to make sure the band will fit around the hat nicely without it being too short or too long.
- Row 1: ch 5, insert hook into second ch from hook, sc in each st across (4 sts)
- Row 2: turn, ch 1, (does not count as a stitch), sc in each st across (4 sts)
- Row 3-84: Repeat row 2
My band length is approximately 23.5 inches.
Fold the band together without twisting. Insert hook into both sts and sl st across to sew together.
Bow and Band Assembly
After you’ve sewed the bow pieces together, sew the bow directly onto where you joined the band together.
Now place the band with the bow onto the hat. Cut a very long piece of orange yarn, attach to the back side of the band and sew the band across the hat. Try to sew in the same row of stitches on the hat to give the band a nice, even look.
Sew yarn securely. Cut any excess yarn off with scissors.

Your crochet witch hat is complete! I hope you found this pattern helpful, if you have any questions feel free to leave a comment below. Thank you and have a Happy Halloween!
Did you make this pattern? Tag me on instagram @strommercrafts.


Leave a Reply
You must be logged in to post a comment.