Crochet Lobster Pillow – Try Out This Free Summer Time Pattern

Hellow and welcome back to Strommer Crafts! Today we will be learning how to make a crochet Lobster Pillow! I thought this would be a fun pattern to make, especially since I’ve been experimenting with graphs. 

***Please note that this post may contain affiliate links. This means that I may receive a commission if you purchase something through these links (at no cost to you!). Thank you for your support!*** 

The finished lobster crochet pillow is about 19″ x 13″ when finished. This also depends on your gauge and how firmly you stuff your pillow :).

I like to use Stitch Fiddle to create some of my designs. I previously crocheted a Dark Souls Pillow and a Black and White Star Blanket that uses the same technique. I think this website is extremely helping when needing to make a grid/graph of an image or picture.

Here is an image of the graph I used below:
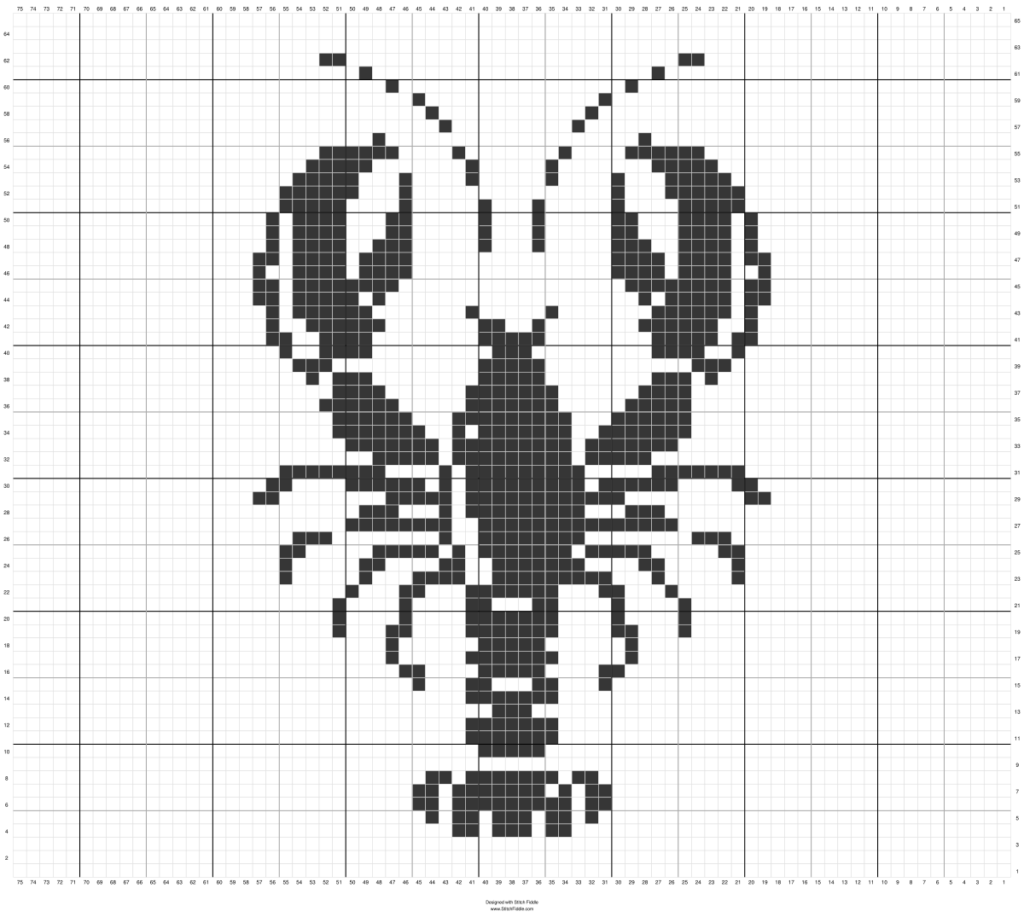
Lobster Crochet Pillow Graph from Stitch Fiddle

I also have a PDF of the graph that you can download here. It may be easier to see the rows on the PDF.

I suggest either printing out the PDF to mark where you are in the pattern, or write down somewhere what row you are on.

Each square on the graph represents 1 single crochet, and you always chain 1 and turn at the end of the rows to keep going.

The pillow is simple. You’ll need to crochet the front piece with the lobster and then make a separate back piece that’s the same size. Throw some stuffing in there, sew it up and viola! 

Even though you sew up the entire pillow, you can throw the whole thing into the wash, as poly-fil stuffing is 100% machine washable. 

I also used yarn from Red Heart Super Saver (medium 4 worsted weight). It’s acrylic, so it’s a little cheaper and it comes in so many different colors. As always, feel free to use a different yarn or yarn color if it suits you better! 

I decided to go with a smaller hook size than normal. It was difficult to obtain a clear image of the lobster and using my typical 5 mm hook would make the pillow a bit too big for my liking. Of course feel free to use a larger hook size, your pillow will just be bigger.

Pinterest Pin of Lobster Crochet Pillow

Materials Needed:

Abbreviations Used:

  • Ch – chain
  • St – stitch
  • Sl st – slip stitch
  • Sc – single crochet

 Special Instructions

  • The ch 1 at the beginning of each round does not count as a stitch.
  • I used a stitch marker to help me identify the left from the right side of the front panel of the Lobster Crochet Pillow. You don’t have to use one (a scrap piece of yarn also works), but I think it really helped me. Sometimes I would forget if I was going left to right, or right to left down the row I was on. Especially if I left the project and picked it up later.
  • Just make sure when you read it left to right, you’ll chain 1 and turn your work and then read the graph right to left
  • To change yarn colors from white to blue correctly, plan ahead! I always stop at the stitch prior to the needed color change and put my new color on. This keeps a nice even look to the color change. You’ll want to make a single crochet, but don’t completely finish it. You should have 2 loops on your hook. Loop your new color around your hook and pull it through. See my previous post on how to change colors correctly in crochet for further details.
  • I decided not to carry the white yarn along with me throughout the pillow. I only did this in the center area where the lobster is. A few rows required a switch to the white yarn but I had ended it a few stitches away in the row below. I went ahead and pulled the white from the previous row to where it needed to be in the next, and then crocheted while going underneath the long stretch of white to hide it…if that makes sense!
  • Don’t be alarmed if your front panel starts to get wavy around where the lobster image is. When you sew the back panel, and stuff the pillow, it’s very difficult to see it.

Crochet Lobster Pillow Pattern:

With 3.75 mm crochet hook and Light Blue Yarn:

Ch 76, from second ch from hook; sc in each ch across (75 sts)

Rows 1-65: Follow the lobster graph by starting left to right. At the end of each row, ch 1 and turn. Light Blue = the white squares and White = the black squares on the graph. Remember: 1 square = 1 sc.

Cut yarn with scissors and pull through. 
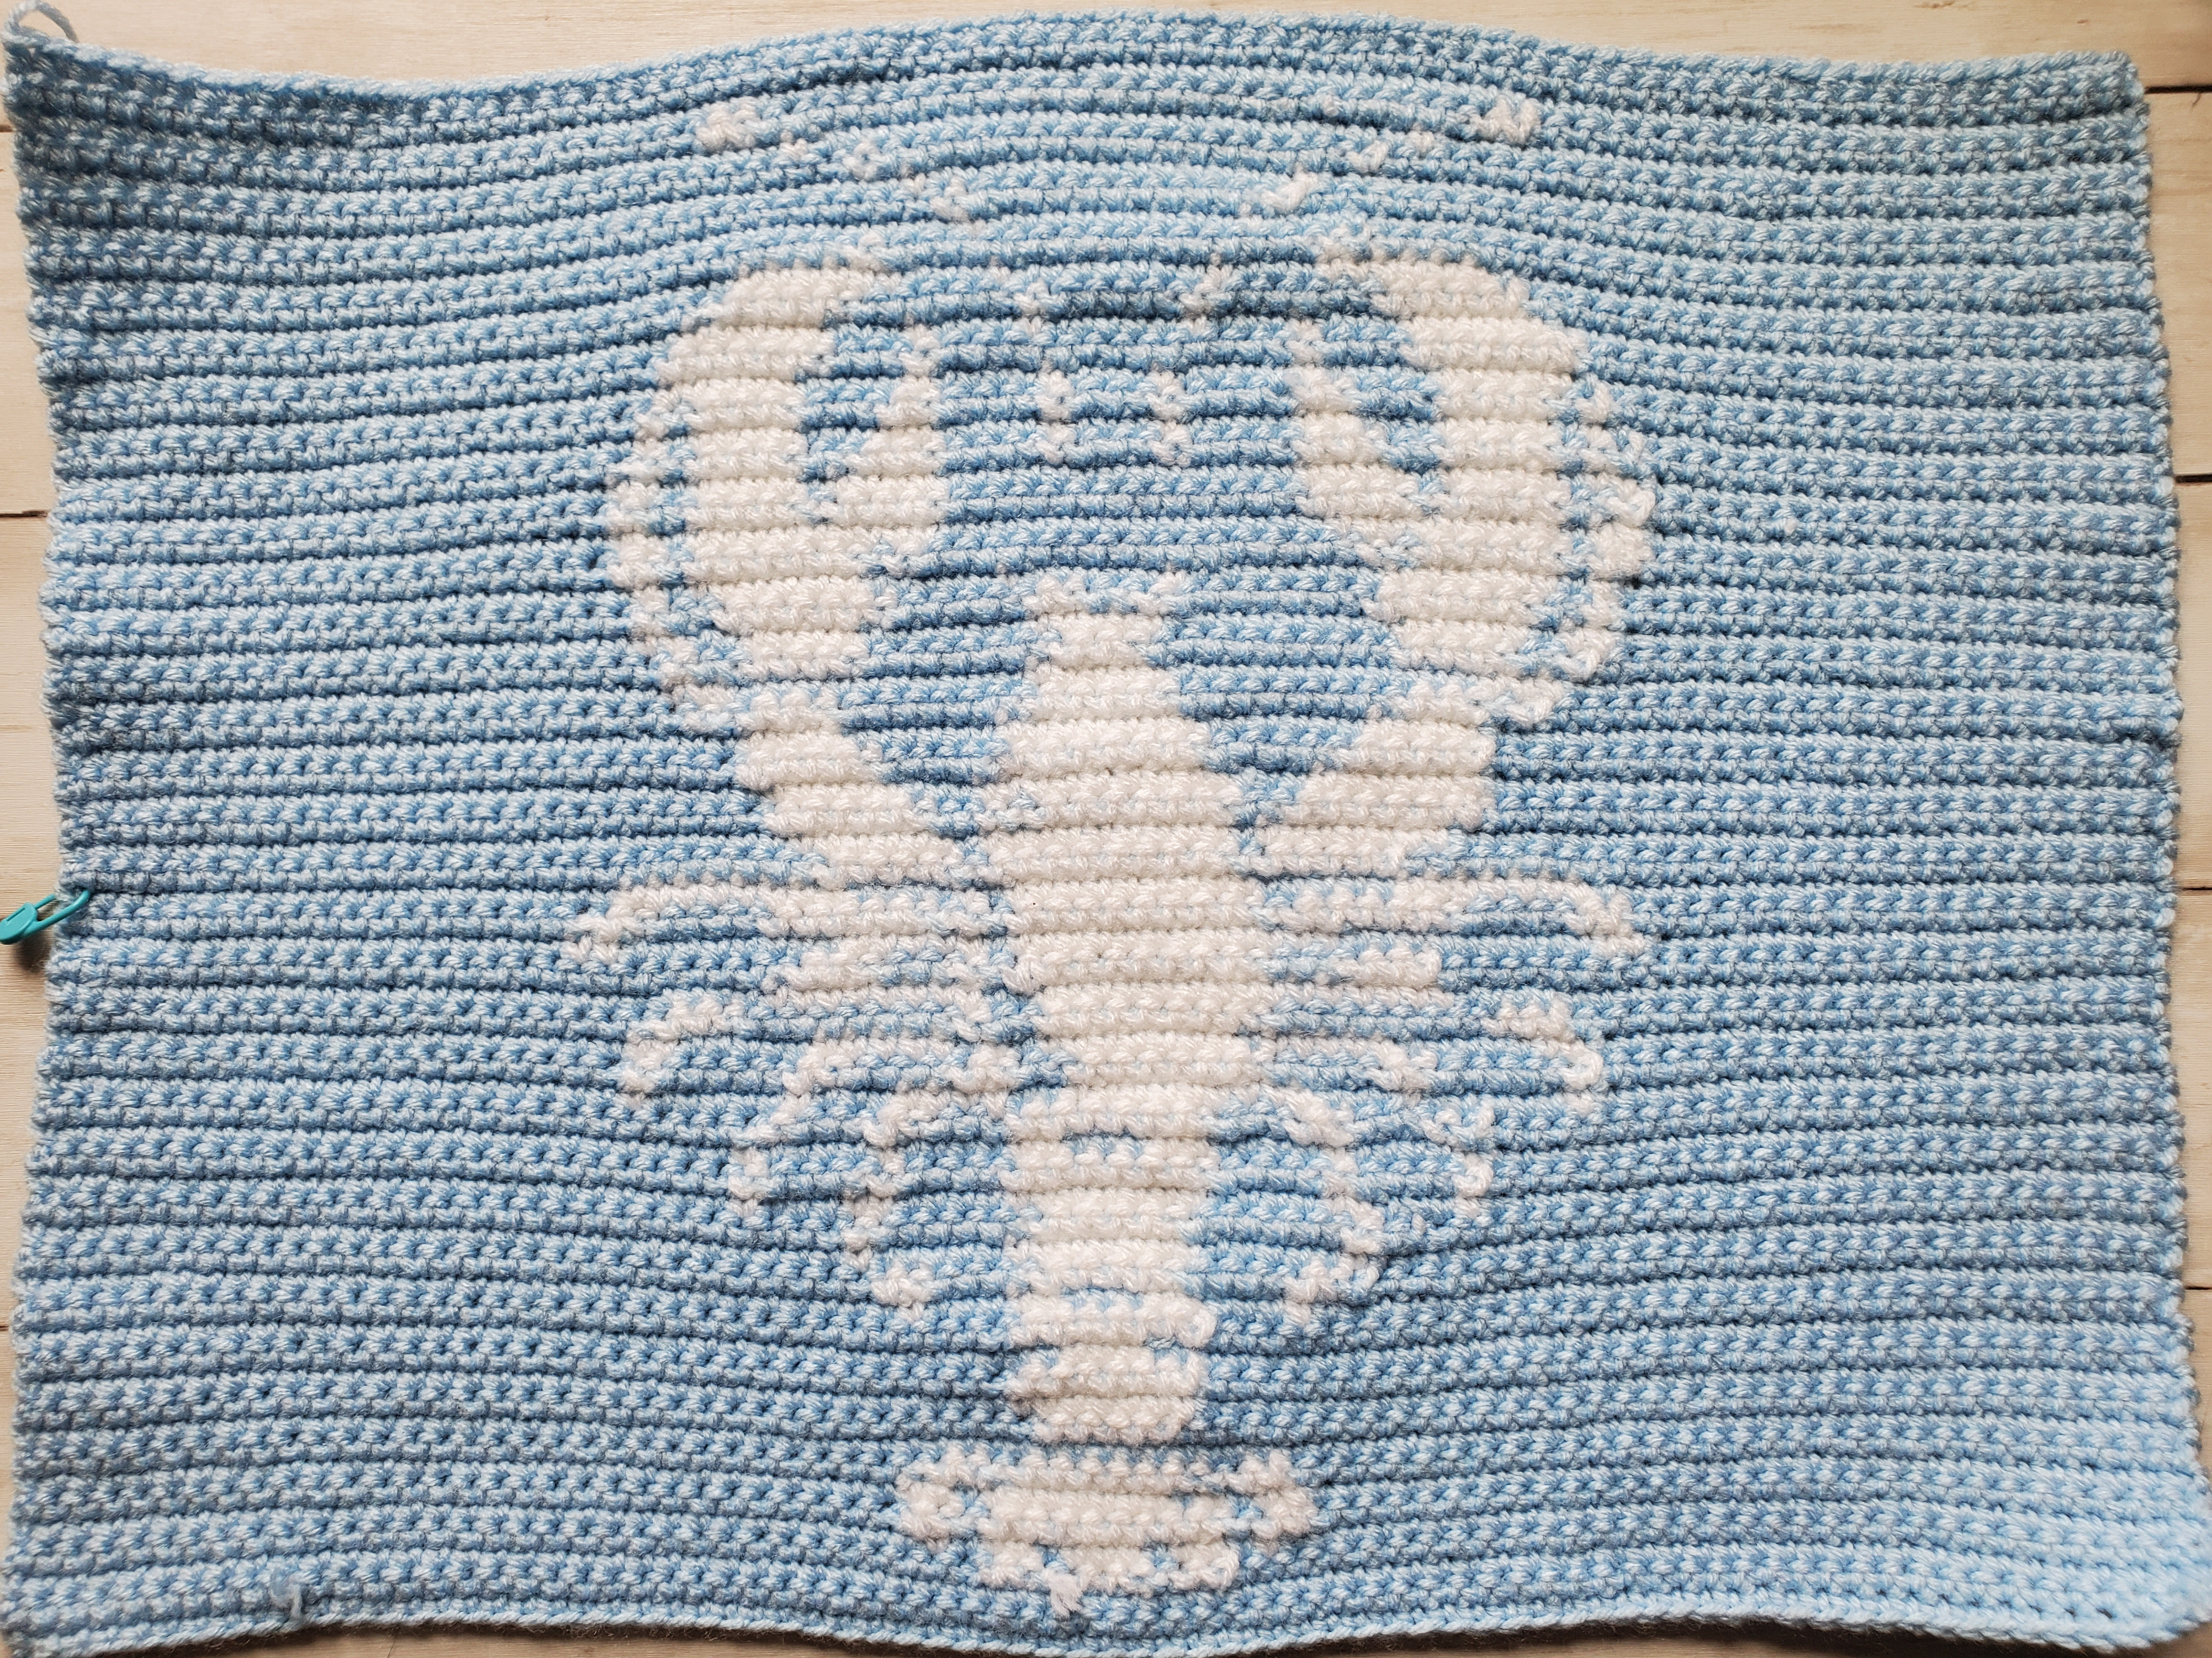
Finished front panel of crochet lobster pillow

Back Panel:

With 3.75 mm crochet hook and White Yarn:

Ch 76, from second ch from hook, sc in each ch across (75 sts)

Rows 1-65: Sc in each st across, turn and ch 1

Do not cut yarn.

With your back panel finished, line up both the front and the back panel with each other. (Make sure you have the front panel facing the correct way).

Start sewing the panels together by slip stitching into both sts all the way around the sides. Use the poly-fil to stuff the pillow firmly before completely sewing shut.

Cut off excess yarn and weave in any ends with tapestry needle.
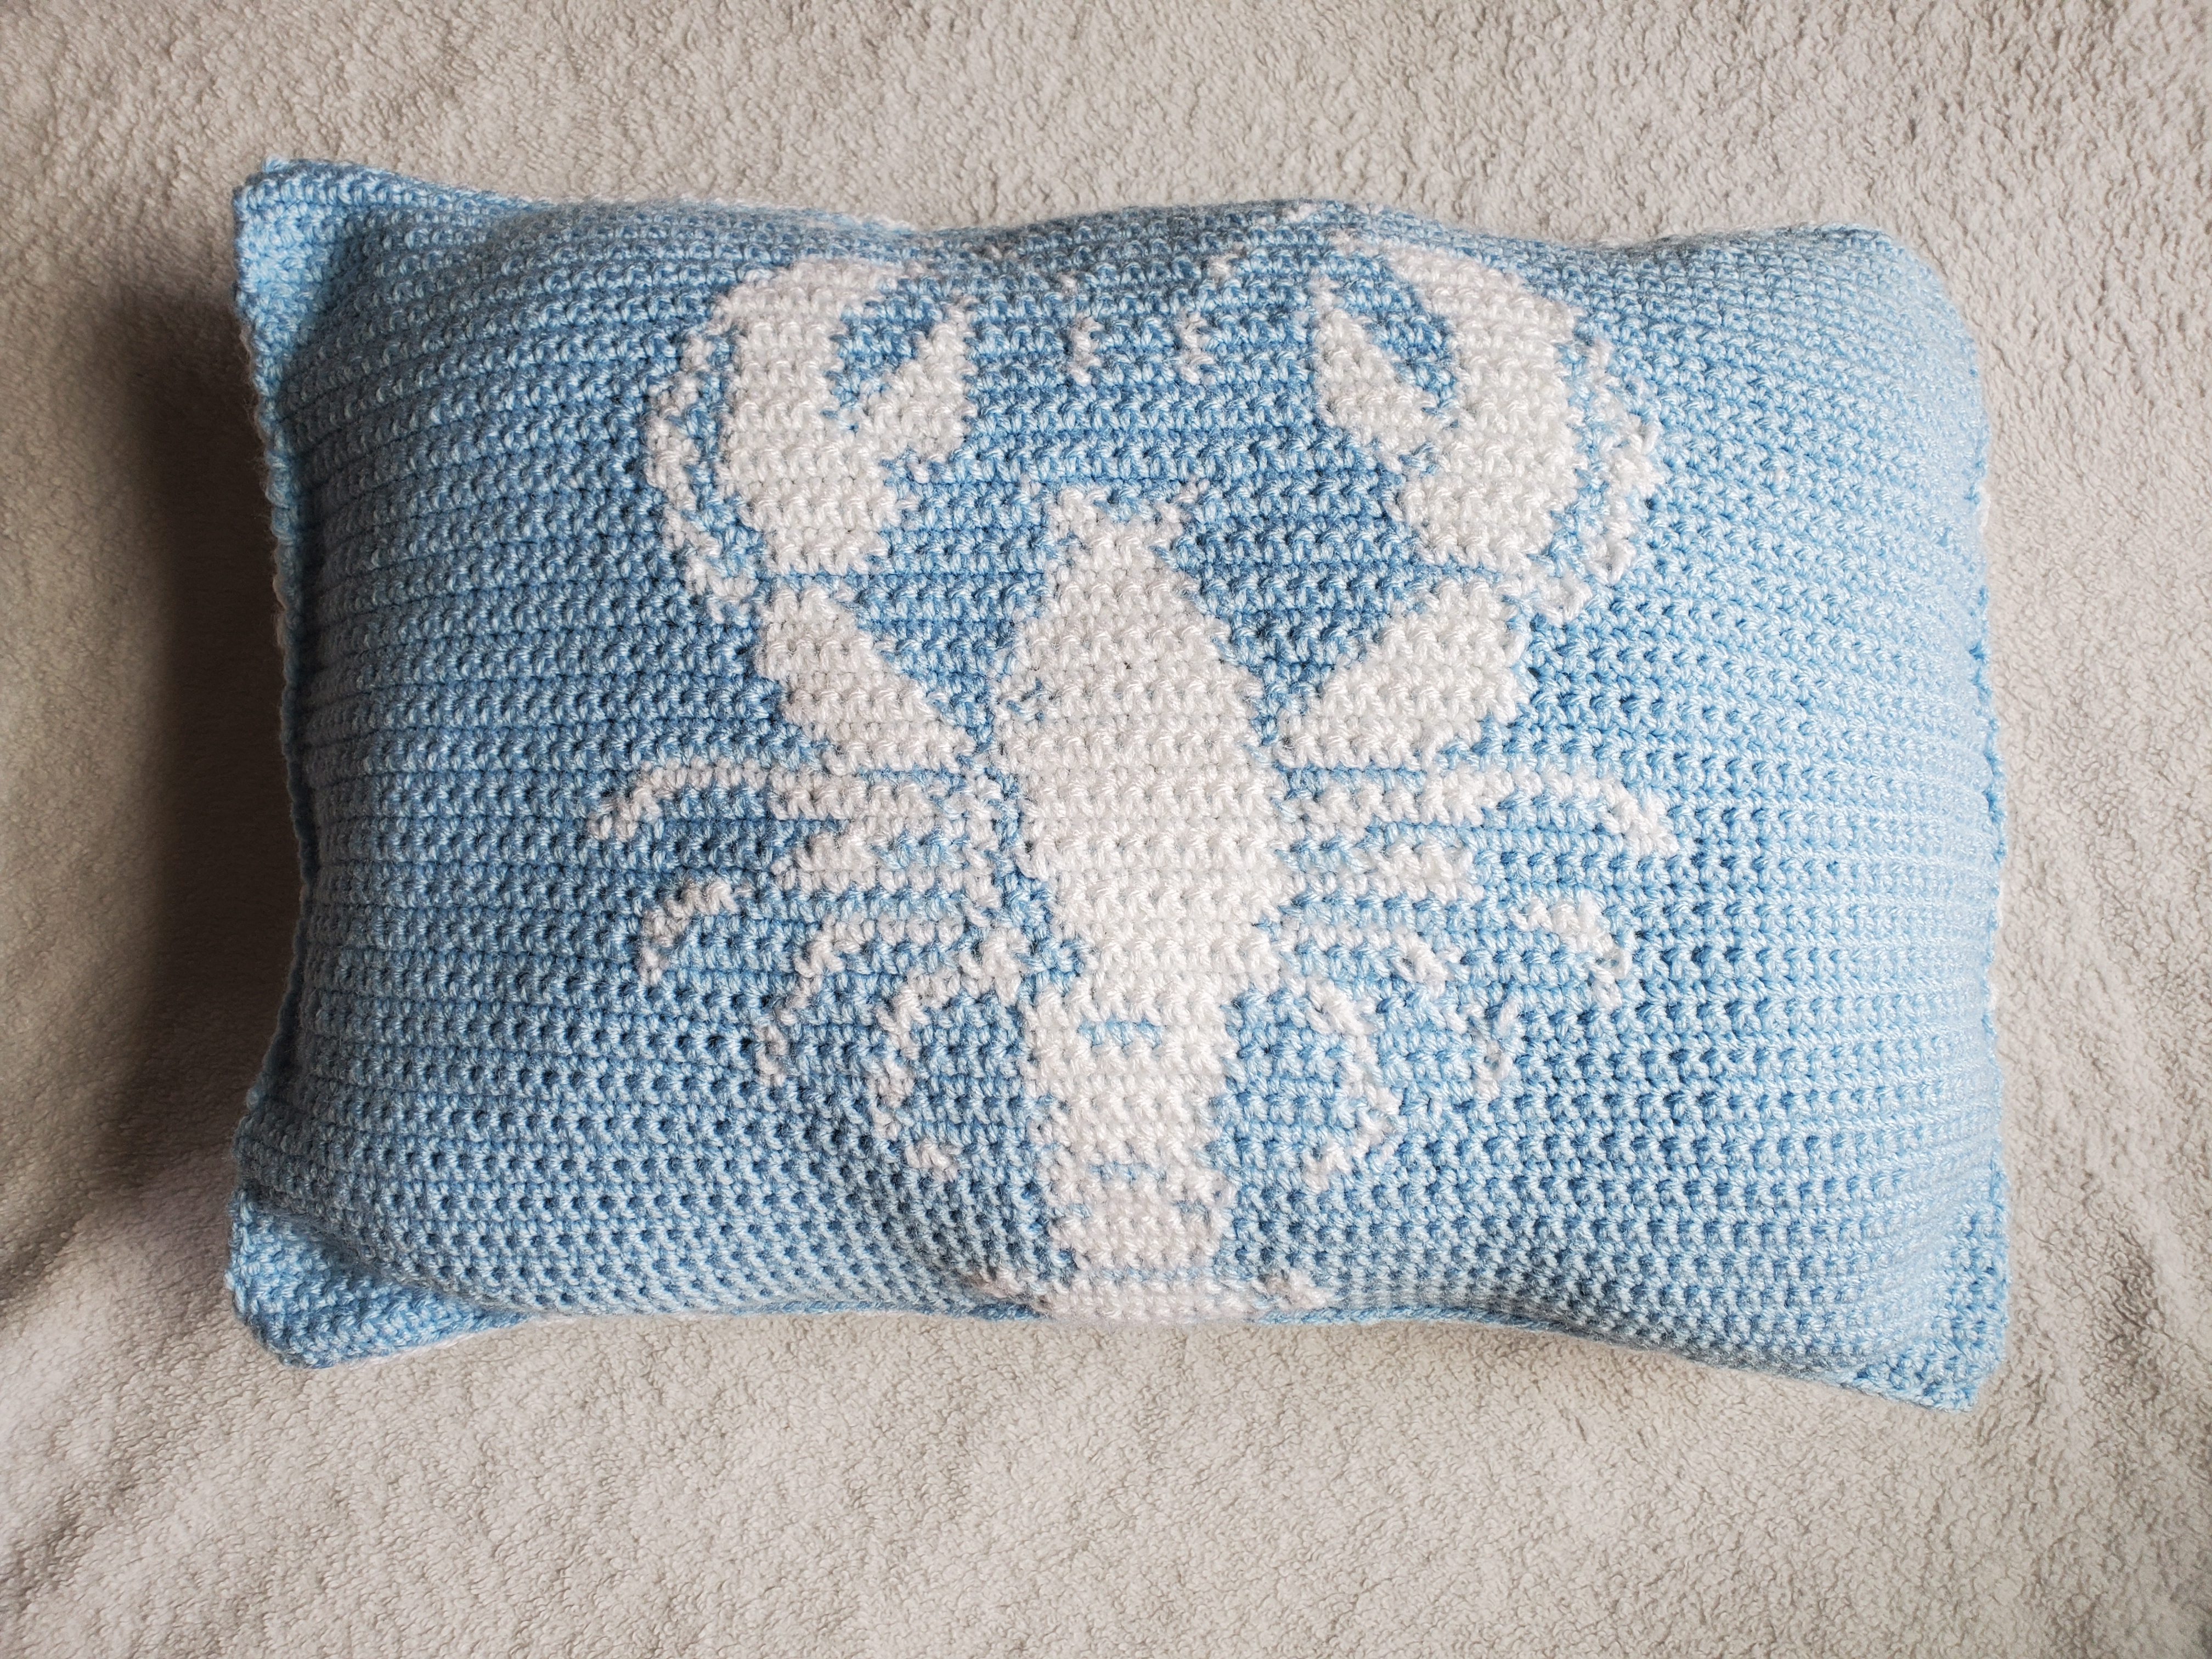
Lobster Crochet Pillow

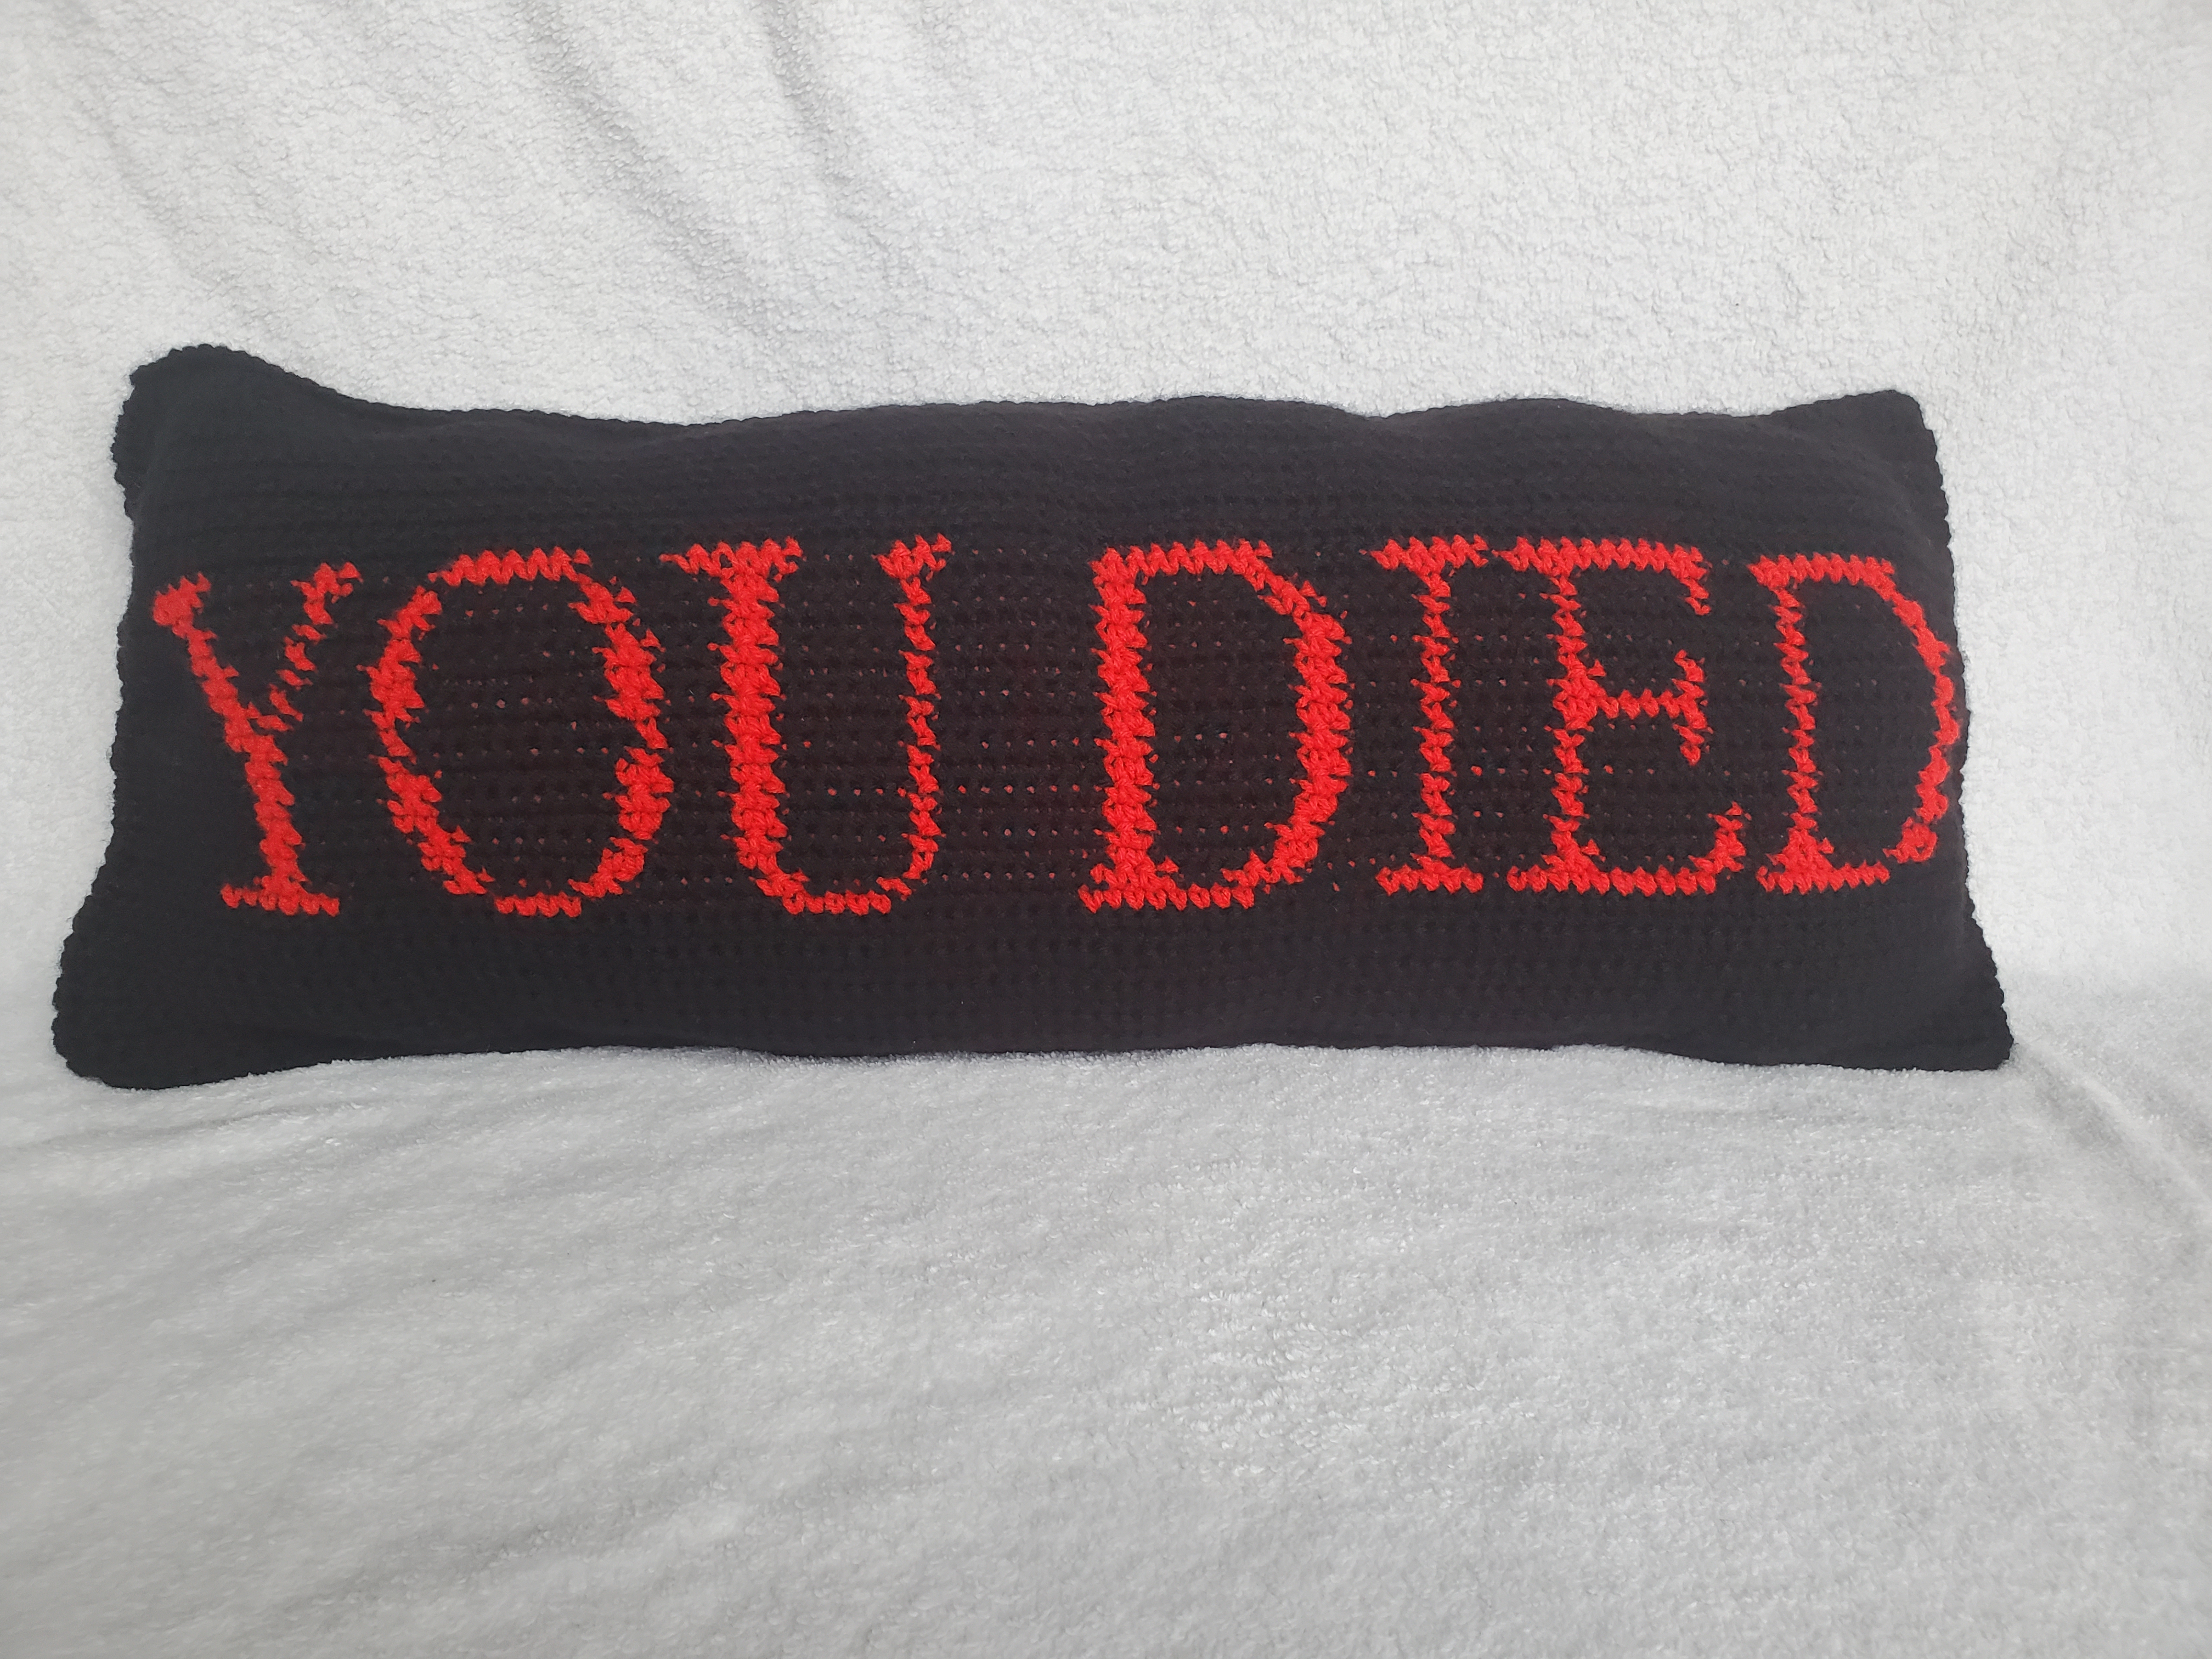
Free Dark Souls Crochet Pillow – You Died Accent Pillow

***This post may contain affiliate links, which means I may receive a commission if you make a purchase through these links. As a Yarnspirations affiliate, I earn through qualifying purchases.***

Hello everyone! Today I bring you a Dark Souls inspired crochet accent pillow! If you’ve ever played a game in the Dark Souls series…you’re probably familiar with this phrase; YOU DIED. 

My husband enjoys playing this game in his spare time. I played Dark Souls 2 when it first came out, and I was horrible at it to say the least. I really didn’t know what I was getting myself into, and I though it was just like any other RPG at the time. Boy was I wrong!

Despite the difficulty of it, it’s a beautiful game. It’s been five years since the release of Dark Souls 3 and we both decided to revisit it in 2021. 

It’s still amazing. The atmosphere. The music. The game play. 

So I was inspired by the game to graph out the infamous in-game notification: You Died. 

It was fairly easy, just a little time consuming. It took me about a week to totally finish this project, but that was between work and kids, so you’ll probably finish it quicker than I did!  

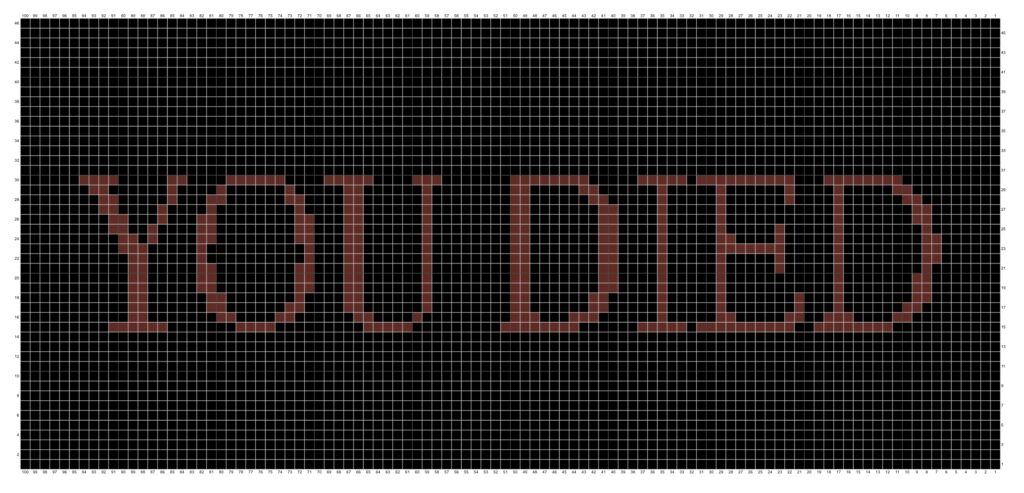
I also have a chart that you can reference to if you’re more of a visual learner. I created this graph through Stitch Fiddle, which is absolutely amazing for making tapestries via crochet (plus it’s totally free!)

Each block represents 1 single crochet stitch. When crocheting off of a graph, start from the left or right (doesn’t matter) and then continue back when you reach the end of the row. That is, if you start from left to right on the graph, work right to left after you turn your work.

I would also recommend to print this post out and mark off the instructions as you go. This can help prevent you from losing your spot.

You Died Dark Souls Graph

Materials Needed:

Abbreviations Used:

  • ch – chain
  • st(s) – stitch(es)
  • sl st – slip stitch
  • sc – single crochet
  • CTB – change to black
  • CTR – change to red

Special Instructions:

We’ll be making two sides and then sewing them together to make the accent pillow.

You’ll also need to be comfortable with changing colors on your hook. Do this by attaching the new color in the stitch BEFORE the needed color change.

So in the stitch BEFORE the color change, single crochet as normal, but do not complete it. Leave two loops on your hook, attach the new color and then finish the stitch.

This takes a bit of practice at first, but it really isn’t too bad once you get the swing of it. 

You can also carry the other color yarn with you as you crochet. Or you can cut and tie it off. 

I carried my yarn with me (you can tell by the red yarn somewhat poking through in the picture). If you don’t like how that looks, I would cut and tie it off.  One thing I don’t like about that method, is that it takes a REALLY LONG time to do. However, since we’ll be making a front and a back side to the pillow, the tied off ends will be hidden inside. So that’s a bonus. 

You Died Accent Pillow Pattern:

1 of 2 Sides:

With black yarn and 4 mm crochet hook

  • Ch 101
  • Row 1: From second ch from hook, single crochet in each ch across, turn (100 sts)
  • Row 2-14: Ch 1, sc in each st across, turn (100)
  • Row 15: (starting from left to right on graph) Ch 1, sc in next 9 sts, CTR, sc in next 6 sts, CTB, sc in next 7 sts, CTR, sc in next 4 sts, CTB, sc in next 9 sts, CTR, sc in next 5 sts, CTB, sc in next 9 sts, CTR, sc in next 8 sts, CTB, sc in next 6 sts, CTR, sc in next 5 sts, CTB, sc in next st, CTR, sc in next 10 sts, CTB, sc in next 2 sts, CTR, sc in next 8 sts, CTB, sc in next 11 sts, turn (100 sts)
  • Row 16: Ch 1, sc in next 9 sts, CTR, sc in next 2 sts, CTB, sc in next 4 sts, CTR, sc in next 3 sts, CTB, sc in next 2 sts, CTR, sc in next 2 sts, CTB, sc in next 5 sts, CTR, sc in next 2 sts, CTB, sc in next 5 sts, CTR, sc in next st, CTB, sc in next 6 sts, CTR, sc in next 3 sts, CTB, sc in next 3 sts, CTR, sc in next 3 sts, CTB, sc in next 9 sts, CTR, sc in next st, CTB, sc in next 4 sts, CTR, sc in next 2 sts, CTB, sc in next 6 sts, CTR, sc in next 2 sts, CTB, sc in next 4 sts, CTR, sc in next 2 sts, CTB, sc in next 7 sts, CTR, sc in next 2 sts, CTB, sc in next 11 sts, turn (100 sts)
  • Row 17: Ch 1, sc in next 11 sts, CTR, sc in next 2 sts, CTB, sc in next 6 sts, CTR, sc in next 2 sts, CTB, sc in next 6 sts, CTR, sc in next 2 sts, CTB, sc in next 4 sts, CTR, sc in next 2 sts, CTB, sc in next 6 sts, CTR, sc in next st, CTB, sc in next 8 sts, CTR, sc in next 2 sts, CTB, sc in next 6 sts, CTR, sc in next 2 sts, CTB, sc in next 5 sts, CTR, sc in next st, CTB, sc in next 5 sts, CTR, sc in next st, CTB, sc in next 7 sts, CTR, sc in next st, CTB, sc in next 3 sts, CTR, sc in next st, CTB, sc in next 6 sts, CTR, sc in next 2 sts, CTB, sc in next 8 sts, turn (100 sts)
  • Row 18: Ch 1, sc in next 7 sts, CTR, sc in next 2 sts, CTB, sc in next 7 sts, CTR, sc in next st, CTB, sc in next 3 sts, CTR, sc in next st, CTB, sc in next 7 sts, CTR, sc in next st, CTB, sc in next 5 sts, CTR, sc in next st, CTB, sc in next 5 sts, CTR, sc in next 2 sts, CTB, sc in next 6 sts, CTR, sc in next 2 sts, CTB, sc in next 8 sts, CTR, sc in next st, CTB, sc in next 6 sts, CTR, sc in next 2 sts, CTB, sc in next 4 sts, CTR, sc in next st, CTB, sc in next 7 sts, CTR, sc in next 2 sts, CTB, sc in next 6 sts, CTR, sc in next 2 sts, CTB. sc in next 11 sts, turn (100 sts)
  • Row 19: Ch 1, sc in next 11 sts, CTR, sc in next 2 sts, CTB, sc in next 5 sts, CTR, sc in next 2 sts, CTB, sc in next 8 sts, CTR, sc in next 2 sts, CTB, sc in next 3 sts, CTR, sc in next 2 sts, CTB, sc in next 6 sts, CTR, sc in next st, CTB, sc in next 8 sts, CTR, sc in next 2 sts, CTB, sc in next 7 sts, CTR, sc in next 2 sts, CTB, sc in next 4 sts, CTR, sc in next st, CTB, sc in next 5 sts, CTR, sc in next st, CTB, sc in next 11 sts, CTR, sc in next st, CTB, sc in next 7 sts, CTR, sc in next 2 sts, CTB, sc in next 7 sts, turn (100 sts)
  • Row 20: Ch 1, sc in next 7 sts, CTR, sc in next 2 sts, CTB, sc in next 7 sts, CTR, sc in next st, CTB, sc in next 11 sts, CTR, sc in next st, CTB, sc in next 5 sts, CTR, sc in next st, CTB, sc in next 4 sts, CTR, sc in next 2 sts, CTB, sc in next 7 sts, CTR, sc in next 2 sts, CTB, sc in next 8 sts, CTR, sc in next st, CTB, sc in next 6 sts, CTR, sc in next 2 sts, CTB, sc in next 3 sts, CTR, sc in next 2 sts, CTB, sc in next 8 sts, CTR, sc in next 2 sts, CTB, sc in next 5 sts, CTR, sc in next 2 sts, CTB, sc in next 11 sts, turn, (100 sts)
  • Row 21: Ch 1, sc in next 11 sts, CTR, sc in next 2 sts, CTB, sc in next 5 sts, CTR, sc in next 2 sts, CTB, sc in next 8 sts, CTR, sc in next 2 sts, CTB, sc in next 3 sts, CTR, sc in next 2 sts, CTB, sc in next 6 sts, CTR, sc in next st, CTB, sc in next 8 sts, CTR, sc in next 2 sts, CTB, sc in next 7 sts, CTR, sc in next 2 sts, CTB, sc in next 4 sts, CTR, sc in next st, CTB, sc in next 5 sts, CTR, sc in next st, CTB, sc in next 5 sts, CTR, sc in next st, CTB, sc in next 5 sts, CTR, sc in next st, CTB, sc in next 8 sts, CTR, sc in next st, CTB sc in next 7 sts, turn (100 sts)
  • Row 22: Ch 1, sc in next 6 sts, CTR, sc in next sc in next 2 sts, CTB, sc in next 8 sts, CTR, sc in next st, CTB, sc in next 5 sts, CTR, sc in next st, CTB, sc in next 5 sts, CTR, sc in next st, CTB, sc in next 5 sts, CTR, sc in next st, CTB, sc in next 4 sts, CTR, sc in next 2 sts, CTB, sc in next 7 sts, CTR, sc in next 2 sts, CTB, sc in next 8 sts, CTR, sc in next st, CTB, sc in next 6 sts, CTR, sc in next 2 sts, CTB, sc in next 3 sts, CTR, sc in next st, CTB, sc in next 10 sts, CTR, sc in next st, CTB, sc in next 5 sts, CTR, sc in next 2 sts, CTB, sc in next 11 sts, turn (100 sts)
  • Row 23: Ch 1, sc in next 10 sts, CTR, sc in next 3 sts, CTB, sc in next 5 sts, CTR, sc in next st, CTB, sc in next 10 sts, CTR, sc in next st, CTB, sc in next 3 sts, CTR, sc in next 2 sts, CTB, sc in next 6 sts, CTR, sc in next st, CTB, sc in next 8 sts, CTR, sc in next 2 sts, CTB, sc in next 7 sts, CTR, sc in next 2 sts, CTB, sc in next 4 sts, CTR, sc in next st, CTB, sc in next 5 sts, CTR, sc in next 7 sts, CTB, sc in next 5 sts, CTR, sc in next st, CTB, sc in next 8 sts, CTR, sc in next 2 sts, CTB, sc in next 6 sts, turn (100 sts)
  • Row 24: Ch 1, sc in next 6 sts, CTR, sc in next 2 sts, CTB, sc in next 8 sts, CTR, sc in next st, CTB, 5 sts, CTR, sc in next st, CTB, sc in next 4 sts, CTR, sc in next 2 sts, CTB, sc in next 5 sts, CTR, sc in next st, CTB, sc in next 4 sts, CTR, sc in next 2 sts, CTB, sc in next 7 sts, CTR, sc in next 2 sts, CTB, sc in next 8 sts, CTR, sc in next st, CTB, sc in next 6 sts, CTR, sc in next 2, CTB, sc in next 3 sts, CTR, sc in next 2 sts, CTB, sc in next 8 sts, CTR, sc in next 2 sts, CTB, sc in next 4 sts, CTR, sc in next st, CTB, sc in next st, CTR, sc in next 2 sts, CTB, sc in next 10 sts, turn (100 sts)
  • Row 25: Ch 1, sc in next 9 sts, CTR, sc in next 2 sts, CTB, sc in next 2 sts, CTR, sc in next st, CTB, sc in next 4 sts, CTR, sc in next 2 sts, CTB, sc in next 8 sts, CTR, sc in next 2 sts, CTB, sc in next 3 sts, CTR, sc in next 2 sts, CTB, sc in next 6 sts, CTR, sc in next st, CTB, sc in next 8 sts, CTR, sc in next 2 sts, CTB, sc in next 7 sts, CTR, sc in next 2 sts, CTB, sc in next 4 sts, CTR, sc in next st, CTB, sc in next 5 sts, CTR, sc in next st, CTB, sc in next 5 sts, CTR, sc in next st, CTB, sc in next 5 sts, CTR, sc in next st, CTB, sc in next 8 sts, CTR, sc in next st, CTB, sc in next 7 sts, turn (100 sts)
  • Row 26: Ch 1, sc in next 7 sts, CTR, sc in next 2 sts, CTB, sc in next 7 sts, CTR, sc in next st, CTB, sc in next 11 sts, CTR, sc in next st, CTB, sc in next 5 sts, CTR, sc in next st, CTB, sc in next 4 sts, CTR, sc in next 2 sts, CTB, sc in next 7 sts, CTR, sc in next 2 sts, CTB, sc in next 8 sts, CTR, sc in next st, CTB, sc in next 6 sts, CTR, sc in next 2 sts, CTB, sc in next 3 sts, CTR, sc in next 2 sts, CTB, sc in next 8 sts, CTR, sc in next 2 sts, CTB, sc in next 3 sts, CTR, sc in next st, CTB, sc in next 3 sts, CTR, sc in next 2 sts, CTB, sc in next 9 sts, turn (100 sts)
  • Row 27: Ch 1, sc in next 8 sts, CTR, sc in next 2 sts, CTB, sc in next 4 sts, CTR, sc in next st, CTB, sc in next 4 sts, CTR, sc in next st, CTB, sc in next 8 sts, CTR, sc in next st, CTB, sc in next 4 sts, CTR, sc in next 2 sts, CTB, sc in next 6 sts, CTR, sc in next st, CTB, sc in next 8 sts, CTR, sc in next 2 sts, CTB, sc in next 7 sts, CTR, sc in next 2 sts, CTB, sc in next 4 sts, CTR, sc in next st, CTB, sc in next 5 sts, CTR, sc in next st, CTB, sc in next 11 sts, CTR, sc in next st, CTB, sc in next 7 sts, CTR, sc in next 2 sts, CTB, sc in next 7 sts, turn (100 sts)
  • Row 28: Ch 1, sc in next 8 sts, CTR, sc in next 2 sts, CTB, sc in next 6 sts, CTR, sc in next st, CTB, sc in next 4 sts, CTR, sc in next st, CTB, sc in next 6 sts, CTR, sc in next st, CTB, sc in next 5 sts, CTR, sc in next st, CTB, sc in next 5 sts, CTR, sc in next 2 sts, CTB, sc in next 6 sts, CTR, sc in next 2 sts, CTB, sc in next 8 sts, CTR, sc in next st, CTB, sc in next 6 sts, CTR, sc in next 2 sts, CTB, sc in next 4 sts, CTR, sc in next 2 sts, CTB, sc in next 6 sts, CTR, sc in next 2 sts, CTB, sc in next 3 sts, CTR, sc in next st, CTB, sc in next 5 sts, CTR, sc in next 2 sts, CTB, sc in next 8 sts, turn (100 sts)
  • Row 29: Ch 1, sc in next 7 sts, CTR, sc in next 2 sts, CTB, sc in next 6 sts, CTR, sc in next st, CTB, sc in next 4 sts, CTR, sc in next st, CTB, sc in next 6 sts, CTR, sc in next st, CTB, sc in next 5 sts, CTR, sc in next 2 sts, CTB, sc in next 6 sts, CTR, sc in next st, CTB, sc in next 8 sts, CTR, sc in next 2 sts, CTB, sc in next 5 sts, CTR, sc in next 2 sts, CTB,sc in next 6 sts, CTR, sc in next st, CTB, sc in next 5 sts, CTR, sc in next st, CTB, sc in next 6 sts, CTR, sc in next st, CTB, sc in next 4 sts, CTR, sc in next st, CTB, sc in next 5 sts, CTR, sc in next 2 sts, CTB, sc in next 9 sts, turn (100 sts)
  • Row 30: Ch 1, sc in next 10 sts, CTR, sc in next 8 sts, CTB, sc in next 3 sts, CTR, sc in next 10 sts, CTB, sc in next st, CTR, sc in next 5 sts, CTB, sc in next 5 sts, CTR, sc in next 8 sts, CTB, sc in next 7 sts, CTR, sc in next 3 sts, CTB, sc in next 4 sts, CTR, sc in next 5 sts, CTB, sc in next 4 sts, CTR, sc in next 6 sts, CTB, sc in next 4 sts, CTR, sc in next 2 sts, CTB, sc in next 5 sts, CTR, sc in next 4 sts, CTB, sc in next 6 sts, turn (100 sts)
  • Row 31-46: Ch 1, sc in each st across,

Cut yarn with scissors and pull through, weave in end with tapestry needle.

Now we will make the back side of the pillow. This part is much easier!

Dark Souls Pillow!

2 of 2 Sides:

With 4mm crochet hook and black yarn

Ch 101

  • Row 1: From second ch from hook, sc in each ch across, turn (100 sts)
  • Row 2-46: Ch 1, sc in each st across (100 sts)

Don’t cut your yarn yet.

We’ll be sewing both sides together using the crochet hook and attached yarn.


Assembly:

Line up both sides of the pillow together evenly. Insert your crochet hook through both sides of the pillow and slip stitch in both stitches across.

Before slip stitching the 3rd side of the pillow, start stuffing firmly with poly-fil and continue stuffing as you go.

Slip stitch in the last stitches, cut yarn with scissors and pull through. Weave in end with tapestry needle (or tie off). Cut off any excess yarn.

Thank you for trying out this pattern! I hope you like this Dark Souls accent pillow!

As always, happy crocheting!

How to Crochet Star Ornaments for your Christmas Tree

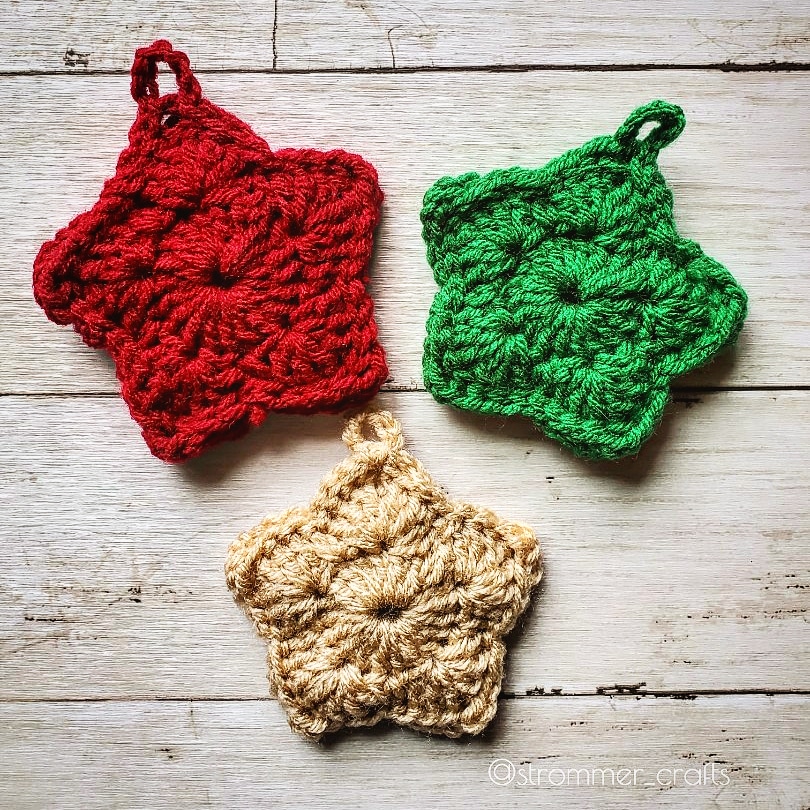
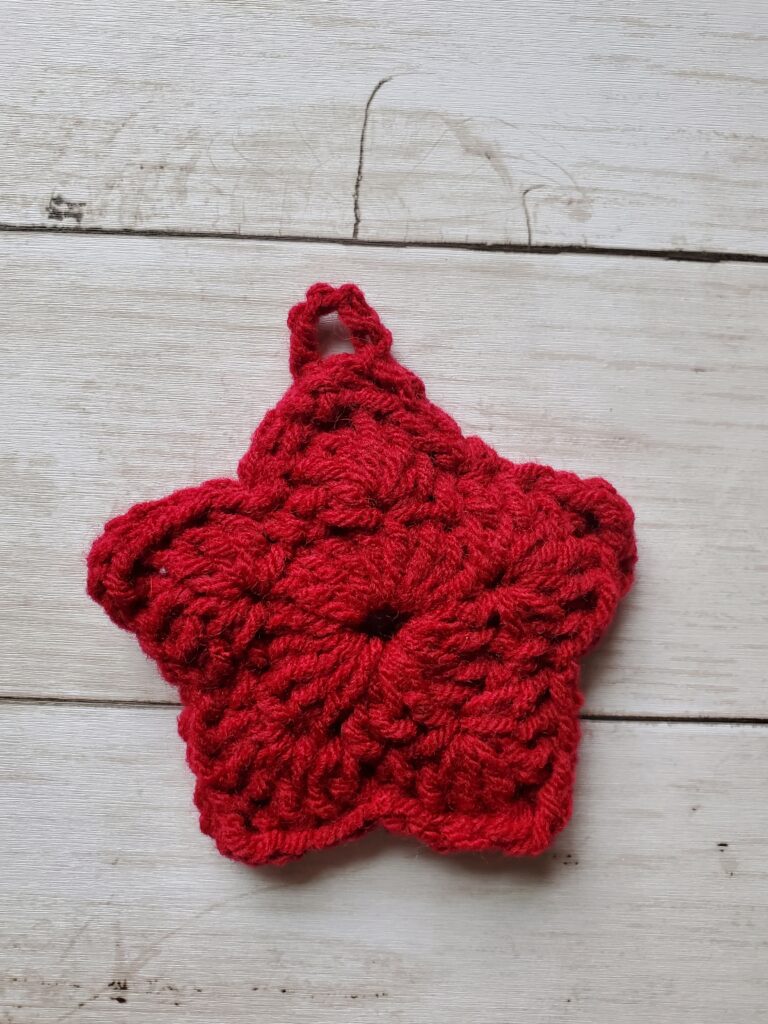
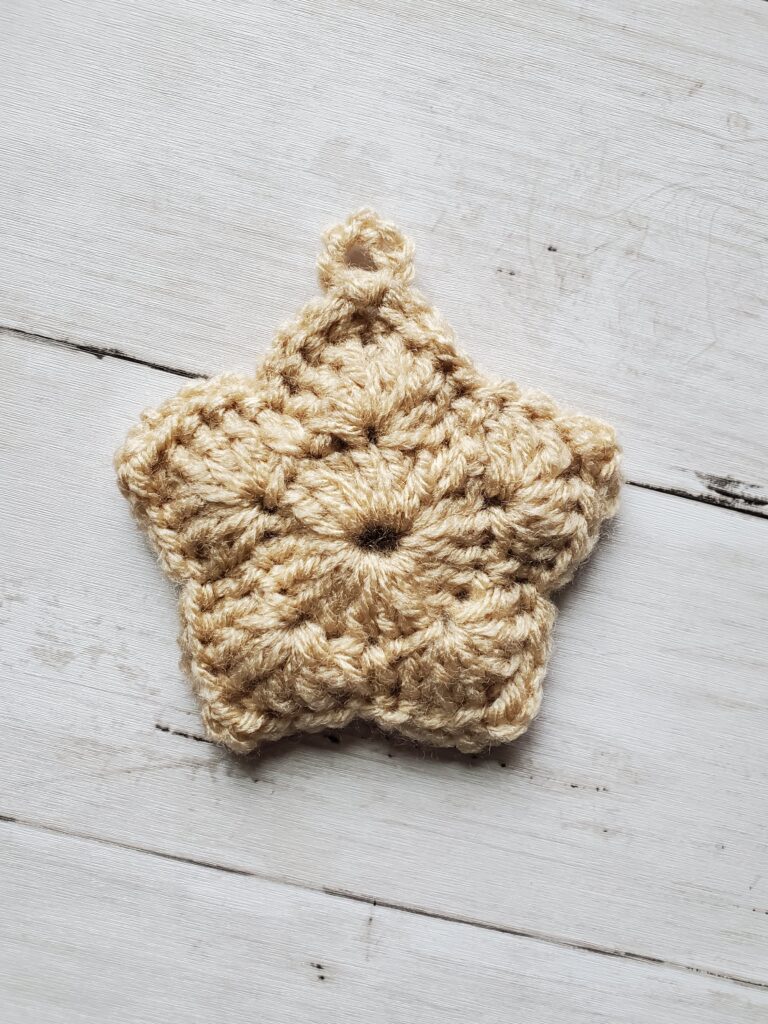
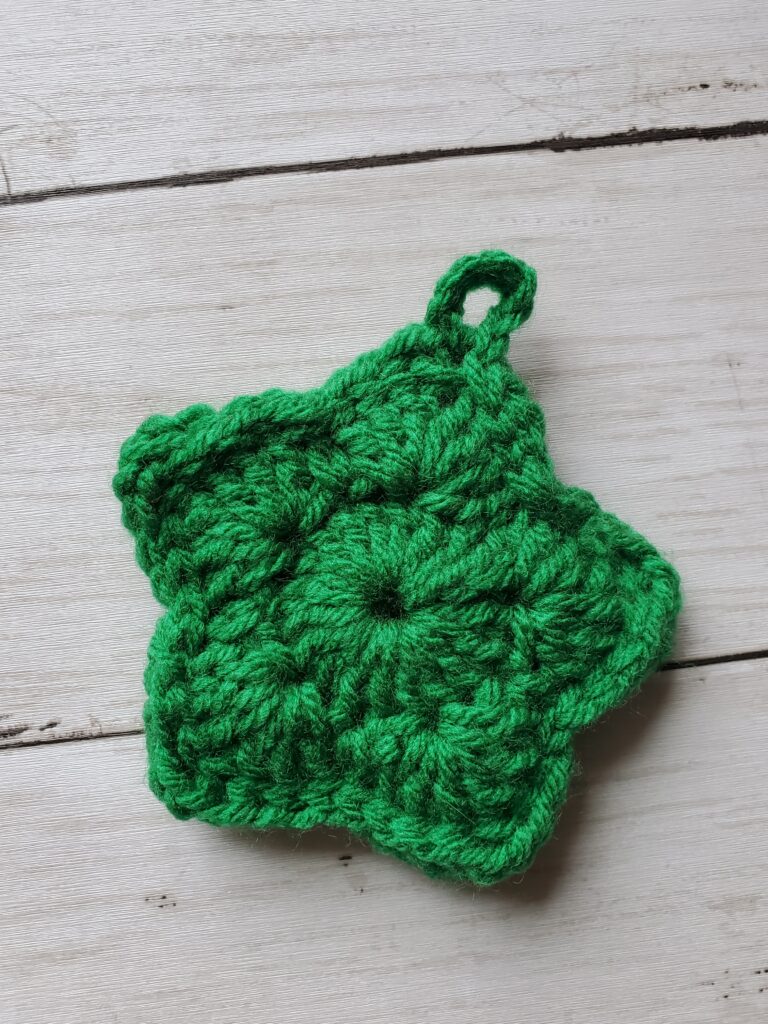
Three crochet christmas tree star ornaments in red, green, and tan

This is a post on how to crochet a Christmas tree ornament in a star shape. Keep scrolling to see the pattern!

Are you looking for a quick and easy way to decorate your Christmas tree this year? Or maybe you’re looking for a gift or stocking stuffer idea for the holidays? How about impressing your family or friends with your crochet skills?

If so, then this crochet Christmas tree ornament could be JUST the pattern you’re looking for! These little stars are so cute, yet so simple. Plus, your kids can’t break them if they decide to pluck them off the tree. So definitely a bonus in my book!

These work up so quickly and you can customize it by using any color and yarn you like. Try green, red, and white for traditional holiday colors. Or use neutral colored yarn, like brown and grey, to give your tree a rustic or farmhouse vibe! 

I’m fairly certain that my two year old was more excited than I was, when I finished a few of these. She hung them on her fingers while she ran around the house, saying, “my twinkle stars! My twinkle stars!” It was too cute, and I’m glad she got a kick out of them. 

Here’s the supplies you’ll need with the pattern listed below:

Supplies needed:

  • Appropriately sized crochet hook for your yarn (I used a 5mm and 4mm for my stars)
  • Yarn (I used Mainstays Green and Red Heart Super Saver in Burgundy and Aran)
  • Tapestry needle
  • Scissors

Special Instructions:

You’ll need to know how to make a magic circle in order to start this pattern. If you’ve never made a magic circle, or need help, you can go to my step-by-step guide here

Terms Used:

  • mc – magic circle
  • ch – chain
  • sc – single crochet
  • dc – double crochet
  • sl st – slip stitch

Pattern: 

Round 1) Make a magic circle. Ch 3, make 19 dc, sl st to top of ch 3. (20sts)

Round 2) *Sc in next st, skip a st, 3 dc in next st, ch3, 3 dc in same st, skip a st* Repeat from *to* around. Sl st into beginning sc. 

If you want to make your star bigger:

Round 3) Sl st into next 2 sts, ch 3, dc into next st, 3 dc in ch space, ch3, 3 dc in same space, dc in next 2 sts, skip the next 3 sts (should be a dc, sc, and dc).

*dc in next 2 sts, 3 dc in ch space, ch3, 3 dc in same ch space, dc in next 2 sts, skip next 3 sts* Repeat *to* around. Sl st to top of starting ch 3

Round 4) Sl st into next st, ch 3, dc in next 3 sts, 3 dc in ch space, ch 3, 3 dc in same ch space, dc in next 4 sts, skip 2 sts.

*dc in next 4 sts, 3 dc in ch space, ch 3, 3 more dc in ch space, dc in next 4 sts, skip next 2 sts* Repeat *to* around. Sl st to top of starting ch 3.

By this point your star will be fairly large. However, if you wish to keep growing your star, you can repeat round 4 essentially, but the dcs will increase down the sides. 

Starting your next round you’ll: sl st into the next st, ch 3, dc until you get to the ch space, 3 dc in ch space, ch 3, and 3 more dc in ch space, dc down the side of the star and remember to skip 2 sts for the inside corner. 

Cut yarn and pull through. 

Repeat pattern so when you’re finished, you have two separate stars with the same amount of rounds. Do not cut your yarn when you finish the 2nd star.

Assembly

Line up both stars evenly (Make sure the correct sides are facing out). Insert your hook through the corresponding sts of each star, sl st into each and every st, even the ch 3 spaces. 

Make sure to continue slip stitching to “sew” the two stars together and end your slip stitches into one of the ch 3 spaces. Ch 6 and sl st into the same ch3 space to create a loop for hanging your ornament.

Cut yarn and pull through. Weave in yarn end.

Crochet star ornament in red
Crochet Christmas Tree star ornament in aran
Crochet Star Ornament in Green

And that’s all! You can make them as big or as small as you would like, and in any color or type of yarn. Try traditional Christmas colors like red, green, or white, or choose colors that fit your tree theme! 

Thanks for reading, happy crocheting and happy holidays!