Crochet Pikachu Table Runner Part 4/4

Hey there everyone, today I have Part 4 of the Crochet Pikachu Table Runner for you today, plus the border!

At this point, Part 1, Part 2, and Part 3 should be completed. 

We are still using the 3DC method of filet crocheting in this pattern, and I will continue to describe how many open and closed squares you should have in a row. 

Remember: an open square consists of a DC, CH1, skip a st, and DC, and a closed square is 3DC in a row. 

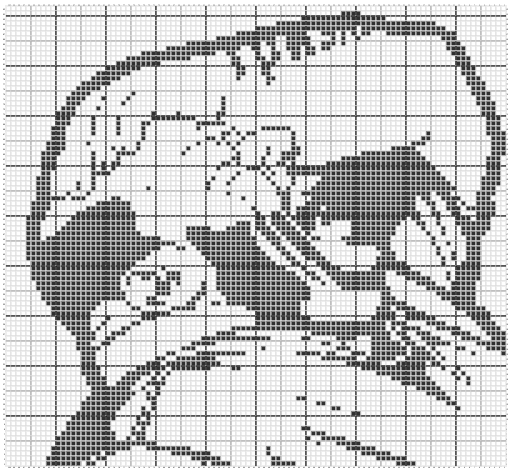
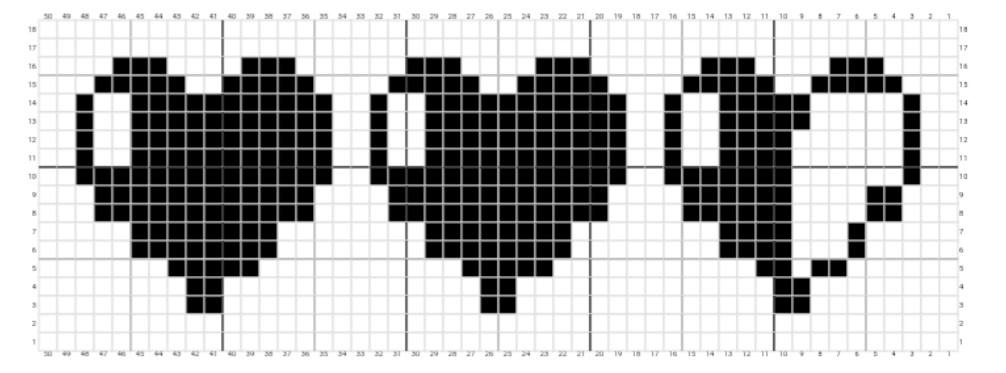
As always, the PDF chart of the Crochet Pikachu Table Runner is available below, I highly encourage looking at the chart to help visualize the open and closed square placements. The black squares = closed squares and the white squares = open squares.
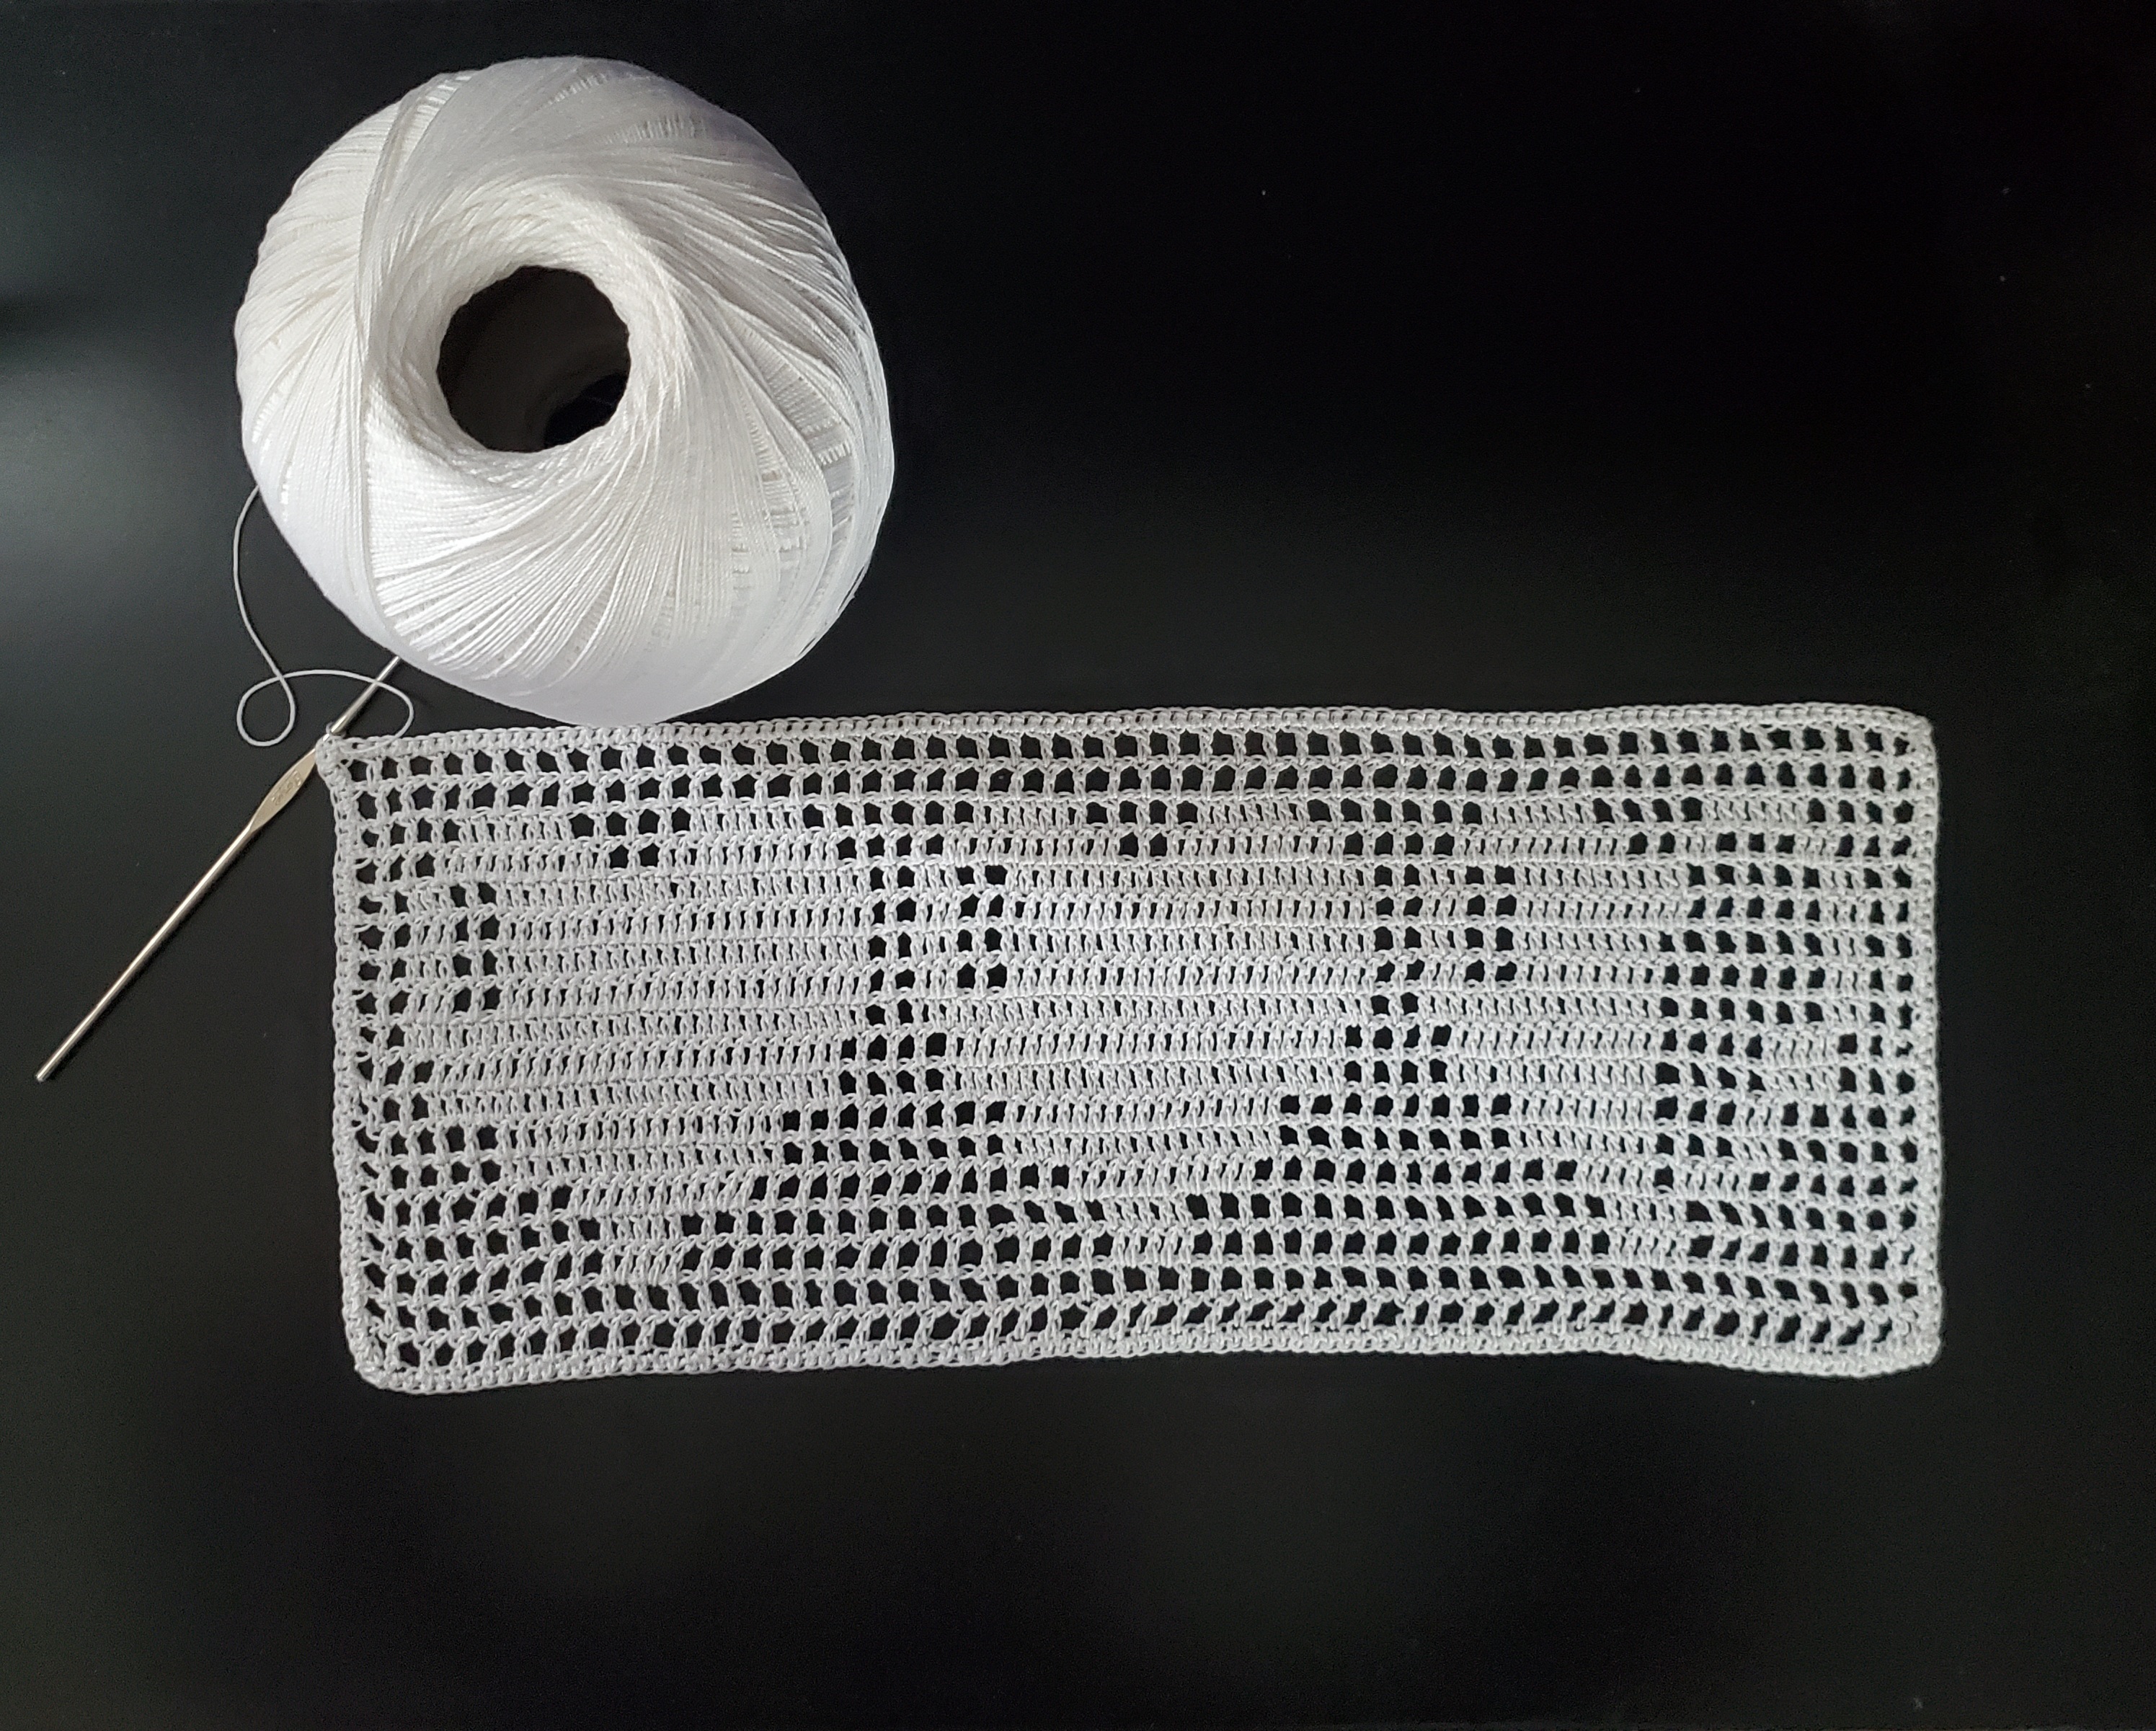
Materials:

  • White Crochet Thread from Red Heart Super Saver Size 10, 1000 yards x 1
  • 1.65 mm crochet hook 
  • Scissors
  • Tapestry Needle
  • Stitch Marker (optional)

Size:

10.5 in x 58 in 

Please note that your size may differ depending on your tension

Abbreviations:

Please note that these are in US terms not UK

  • ST(s) – stitch(es)
  • SL ST – slip stitch
  • CH – chain
  • SC – single crochet
  • DC – double crochet
  • CH3 PICOT – chain 3 stitches, slip stitch in last stitch made

Crochet Pikachu Table Runner Pattern Part 4/4

  • Row 133: going down, turn, CH4 (counts as DC, CH1 from here on out), make 2 open squares, make 5 closed squares, make open squares until end of row. (33 open squares, 5 closed squares).
  • Row 134: going up, turn, CH4, make open squares until 1 open square before first closed square from previous row, make 6 closed squares, make 2 open squares. (32 open squares, 6 closed squares).
  • Row 135: going down, turn, CH4, make 2 open squares, make 7 closed squares, make open squares until end of row. (31 open squares, 7 closed squares).
  • Row 136: going up, turn, CH4, make open squares until first closed square from previous row, make 7 closed squares, make 2 open squares. (31 open squares, 7 closed squares).
  • Row 137: going down, turn, CH4, make 2 open squares, make 7 closed squares, make open squares until end of row. (31, open squares, 7 closed squares).
  • Row 138: going up, turn, CH4, make open squares until first closed square from previous row, make 7 closed squares, make 2 open squares. (31 open squares, 7 closed squares).
  • Row 139: going down, turn, CH4, make 2 open squares, make 7 closed squares, make open squares until end of row. (31, open squares, 7 closed squares).
  • Row 140: going up, turn, CH4, make open squares until 2 open squares before first closed square from previous row, make 8 closed squares, make 3 open squares. (30 open squares, 8 closed squares).
  • Row 141: going down, turn, CH4, make 3 open squares, make 9 closed squares, make open squares until end of row. (29 open squares, 9 closed squares).
  • Row 142: going up, turn, CH4, make open squares until first closed square from previous row, make 9 closed squares, make 3 open squares. (29 open squares, 9 closed squares).
  • Row 143: going down, turn, CH4, make 4 open squares, make 9 closed squares, make open squares until end of row. (29 open squares, 9 closed squares).
  • Row 144: going up, turn, CH4, make 8 open squares, make 7 closed squares, make 10 open squares, make 1 closed square, make 1 open square, make 3 closed squares, make open squares until end of row. (27 open squares, 11 closed squares).
  • Row 145: going down, turn, CH4, make open squares until first closed square from previous row, make 4 closed squares, make 1 open square, make 1 closed square, make 6 open squares, make 11 closed squares, make open squares until end of row. (22 open squares, 16 closed squares).
  • Row 146: going up, turn, CH4, make 8 open squares, make 12 closed squares, make 2 open squares, make 2 closed squares, make 2 open squares, make 1 closed square, make open squares until end of row. (23 open squares, 15 closed squares). 
  • Row 147: going down, turn, CH4, make open squares until first closed square from previous row, make 3 closed squares, make 1 open square, make 13 closed squares, make open squares until end of row. (22 open squares, 16 closed squares).
  • Row 148: going up, turn, CH4, make open squares until first closed square from previous row, make 15 closed squares, make open squares until end of row. (23 open squares, 15 closed squares).
  • Row 149: going down, turn, CH4, make open squares until first closed square from previous row, make 1 more open square, make 14 closed squares, make open squares until end of row. (24 open squares, 14 closed squares).
  • Row 150: going up, turn, CH4, make open squares until first closed square from previous row, make 14 closed squares, make open squares until end of row. (24 open squares, 14 closed squares).
  • Row 151: going down, turn, CH4, make open squares until 1 open square before first closed square from previous row, make 12 closed squares, make 1 open square, make 1 closed square, make open squares until end of row. (25 open squares, 13 closed squares). 
  • Row 152: going up, turn, CH4, make open squares until first closed square from previous row, make 10 closed squares, make 1 open square, make 3 closed squares, make open squares until end of row. (25 open squares, 13 closed squares).
  • Row 153: going down, turn, CH4, make open squares until first closed square from previous row, make 1 closed square, make 4 open squares, make 10 closed squares, make open squares until end of row. (27 open squares, 11 closed squares).
  • Row 154: going up, turn, CH4, make open squares until first closed square from previous row, make 11 closed squares, make 3 open squares, make 1 closed square, make open squares until end of row. (26 open squares, 12 closed squares).
  • Row 155: going down, turn, CH4, make open squares until first closed square from previous row, make 15 closed squares, make open squares until end of row. (23 open squares, 15 closed squares).
  • Row 156: going up, turn, CH4, make open squares until first closed square from previous row, make 15 closed squares, make open squares until end of row. (23 open squares, 15 closed squares).
  • Row 157: going down, turn, CH4, make open squares until first closed square from previous row, make 1 closed square, make 2 open squares, make 13 closed squares, make open squares until end of row. (24 open squares, 14 closed squares).
  • Row 158: going up, turn, CH4, make open squares until first closed square from previous row, make 11 closed squares, make 4 open squares, make 1 closed square, make 1 open square, make 1 closed square, make open squares until end of row. (25 open squares, 13 closed squares).
  • Row 159: going down, turn, CH4, make open squares until first closed square from previous row, make 3 closed squares, make 5 open squares, make 11 closed squares, make open squares until end of row. (24 open squares, 14 closed squares).
  • Row 160: going up, turn, CH4, make 7 open squares, make 14 closed squares, make 2 open squares, make 1 closed square, make 2 open squares, make 1 closed square, make open squares until end of row. (22 open squares, 16 closed squares).
  • Row 161: going down, turn, CH4, make open squares until first closed square from previous row, make 1 more open square, make 1 closed square, make 1 open square, make 3 closed squares, make 1 open square, make 15 closed squares, make open squares until end of row. (19 open squares, 19 closed squares).
  • Row 162: going up, turn, CH4, make 4 open squares, make 16 closed squares, make 1 open square, make 2 closed squares, make 1 open square, make 2 closed squares, make open squares until end of row. (18 open squares, 20 closed squares).
  • Row 163: going down, turn, CH4, make open squares until first closed square from previous row, make 2 closed squares, make 1 open square, make 2 closed squares, make 1 open square, make 18 closed squares, make 2 open squares. (16 open squares, 22 closed squares).
  • Row 164: going up, turn, CH4, make 2 open squares, make 7 closed squares, make 1 open square, make 12 closed squares, make 1 open square, make 2 closed squares, make open squares until end of row. (17 open squares, 21 closed squares).
  • Row 165: going down, turn, CH4, make open squares until first closed square from previous row, make 2 closed squares, make 1 open square, make 12 closed squares, make 2 open squares, make 1 closed square, make 3 open squares, make 2 closed squares, make 2 open squares. (21 open squares, 17 closed squares).
  • Row 166: going up, turn, CH4, make 2 open squares, make 6 closed squares, make 3 open squares, make 10 closed squares, make 1 open square, make 2 closed squares, make open squares until end of row. (20 open squares, 18 closed squares).
  • Row 167: going down, turn, CH4, make open squares until first closed square from previous row, make 1 more open square, make 8 closed squares, make 2 open squares, make 10 closed squares, make 3 open squares. (20 open squares, 18 closed squares).
  • Row 168: going up, turn, CH4, make 3 open squares, make 3 closed squares, make 3 open squares, make 3 closed squares, make 4 open squares, make 7 closed squares, make open squares until end of row. (25 open squares, 13 closed squares).
  • Row 169: going down, turn, CH4, make open squares until first closed square from previous row, make 1 more open square, make 7 closed squares, make 2 open squares, make 4 closed squares, make open squares until end of row. (27 open squares, 11 closed squares).
  • Row 170: going up, turn, CH4, make open squares until first closed square from previous row, make 13 closed squares, make open squares until end of row. (25 open squares, 13 closed squares).
  • Row 171: going down, turn, CH4, make open squares until first closed square from previous row, make 1 more open square, make 3 closed squares, make 3 open squares, make 6 closed squares, make open squares until end of row. (29 open squares, 9 closed squares).
  • Row 172: going up, turn, CH4, make open squares until first closed square from previous row, make 1 more open square, make 11 closed squares, make open squares until end of row. (27 open squares, 11 closed squares).
  • Row 173: going down, turn, CH4, make open squares until first closed square from previous row, make 2 more open squares, make 8 closed squares, make open squares until end of row. (30 open squares, 8 closed squares).
  • Row 174: going up, turn, CH4, make open squares until first closed square from previous row, make 1 more open square, make 3 closed squares, make open squares until end of row. (35 open squares, 3 closed squares).
  • Row 175-176: going up, then down, turn, CH4, make open squares until end of row. (38 open squares). 

DON’T CUT YOUR YARN.

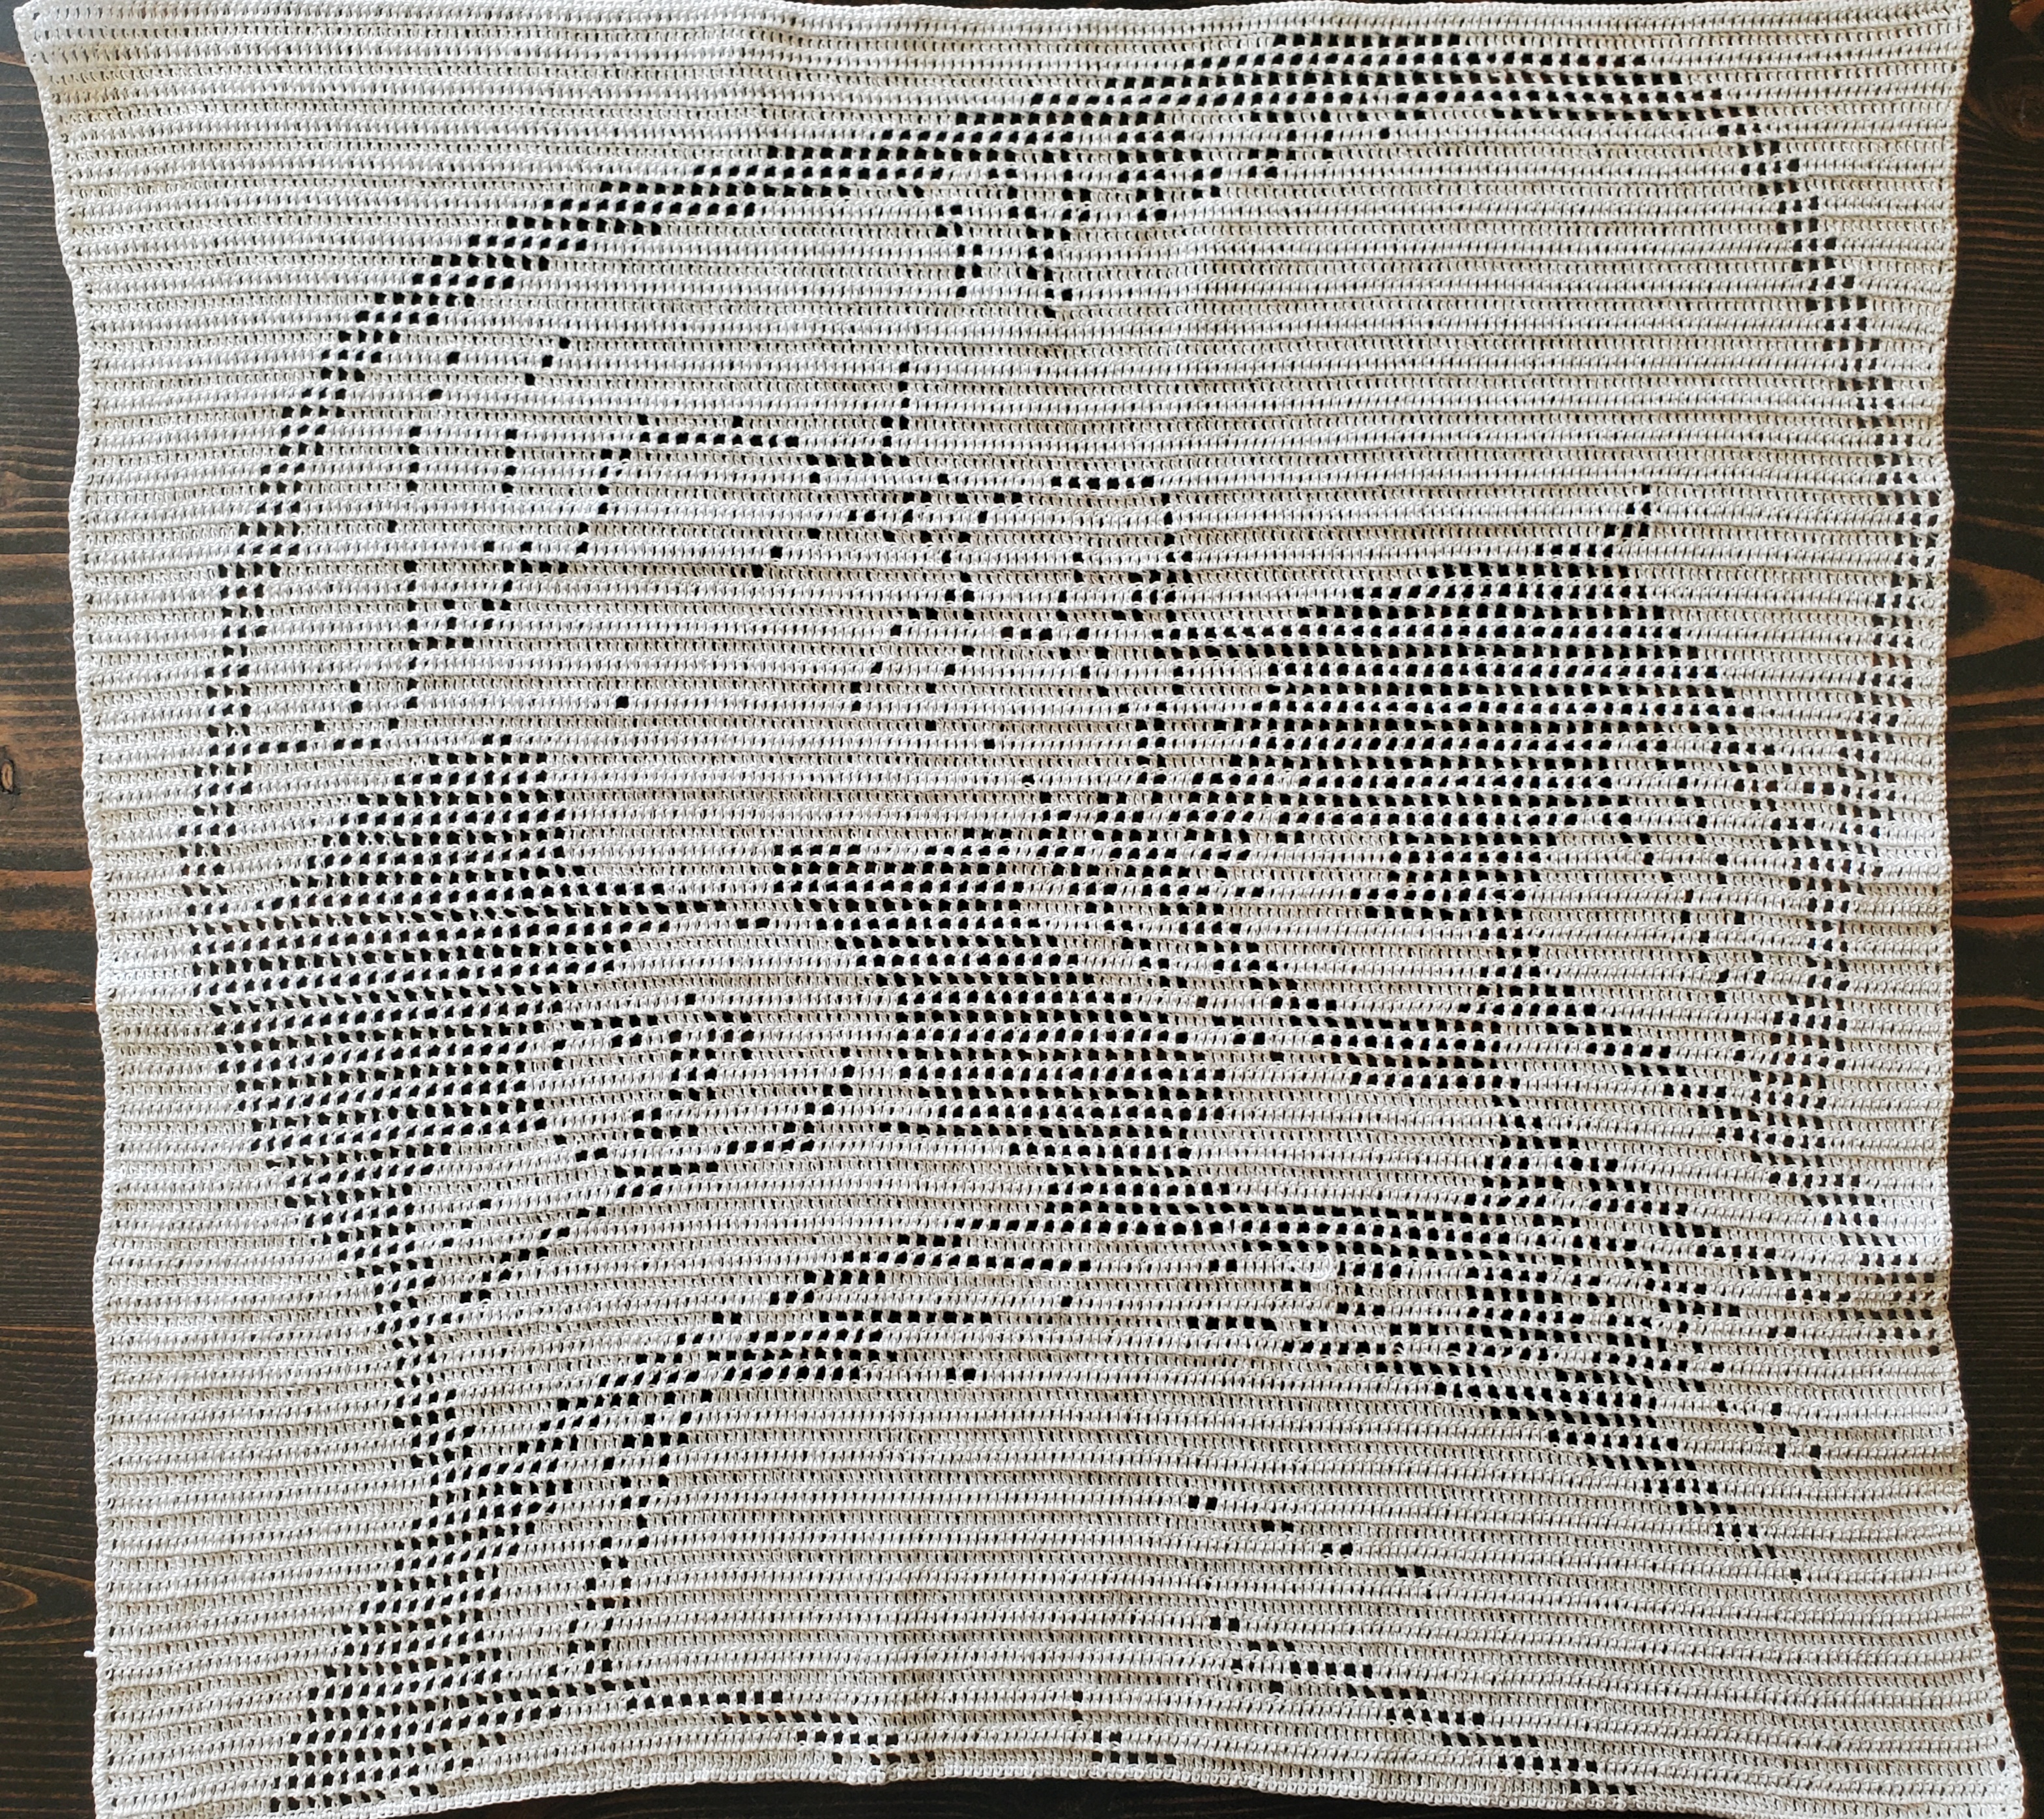
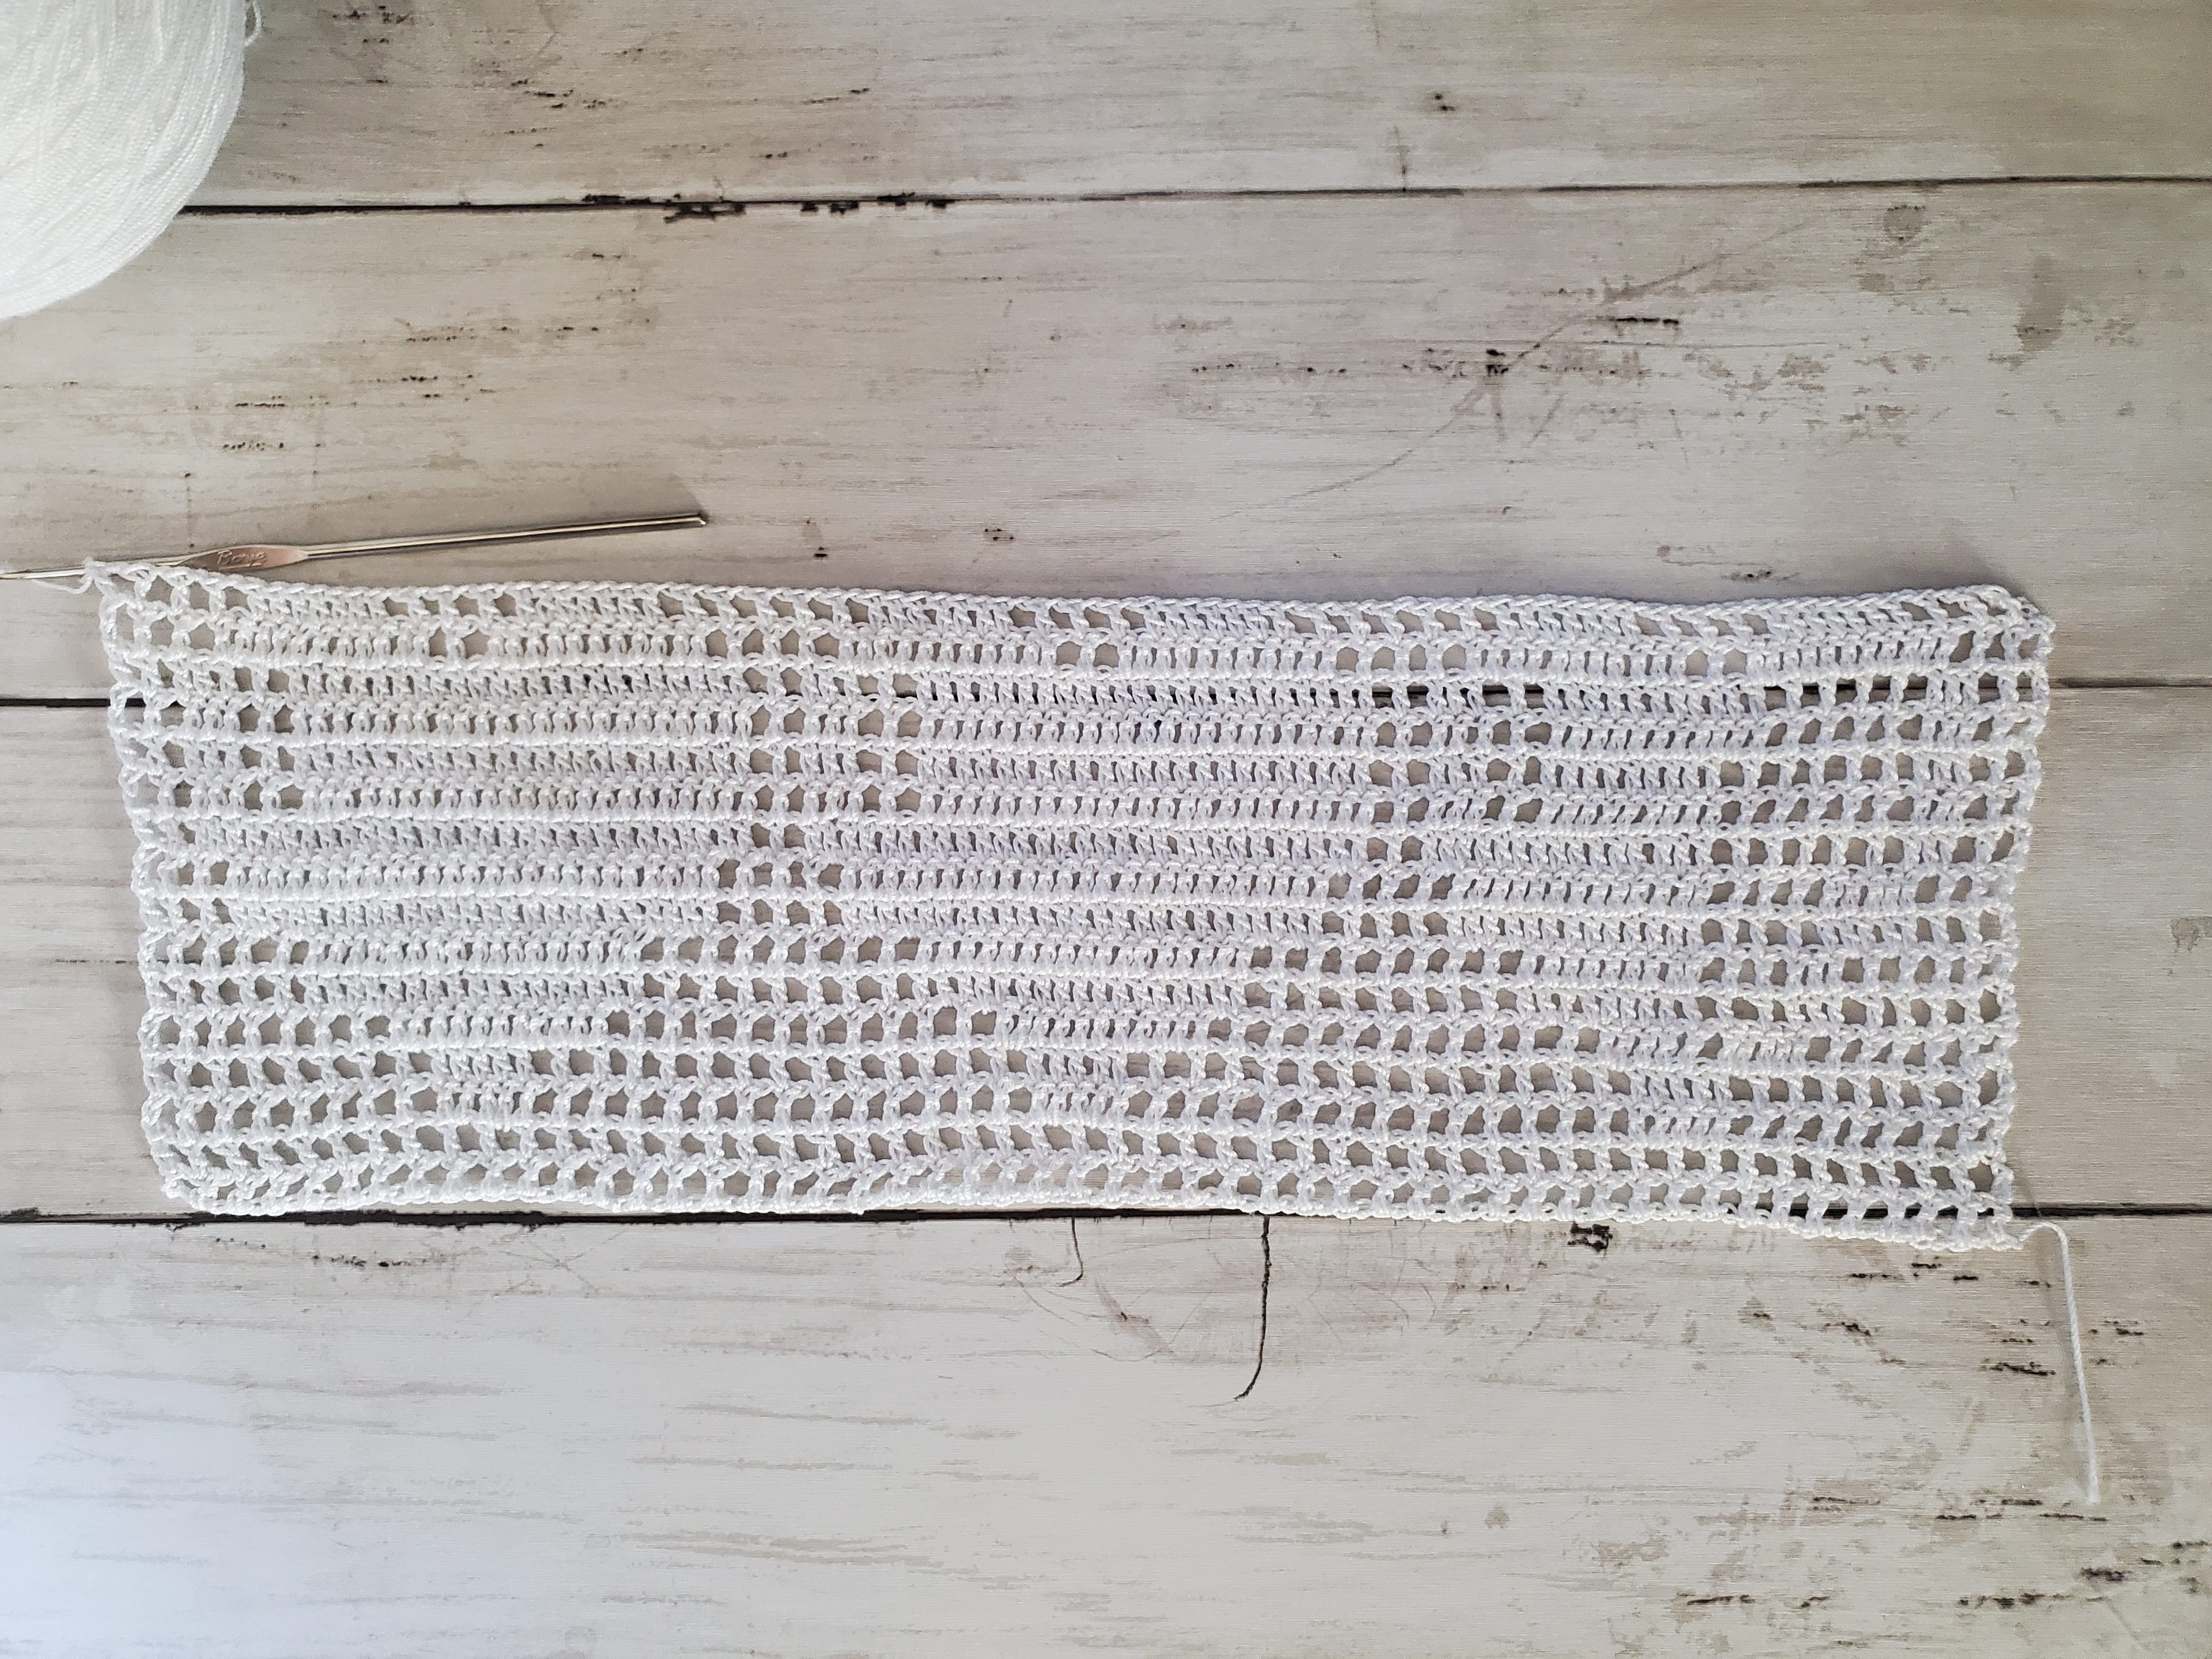
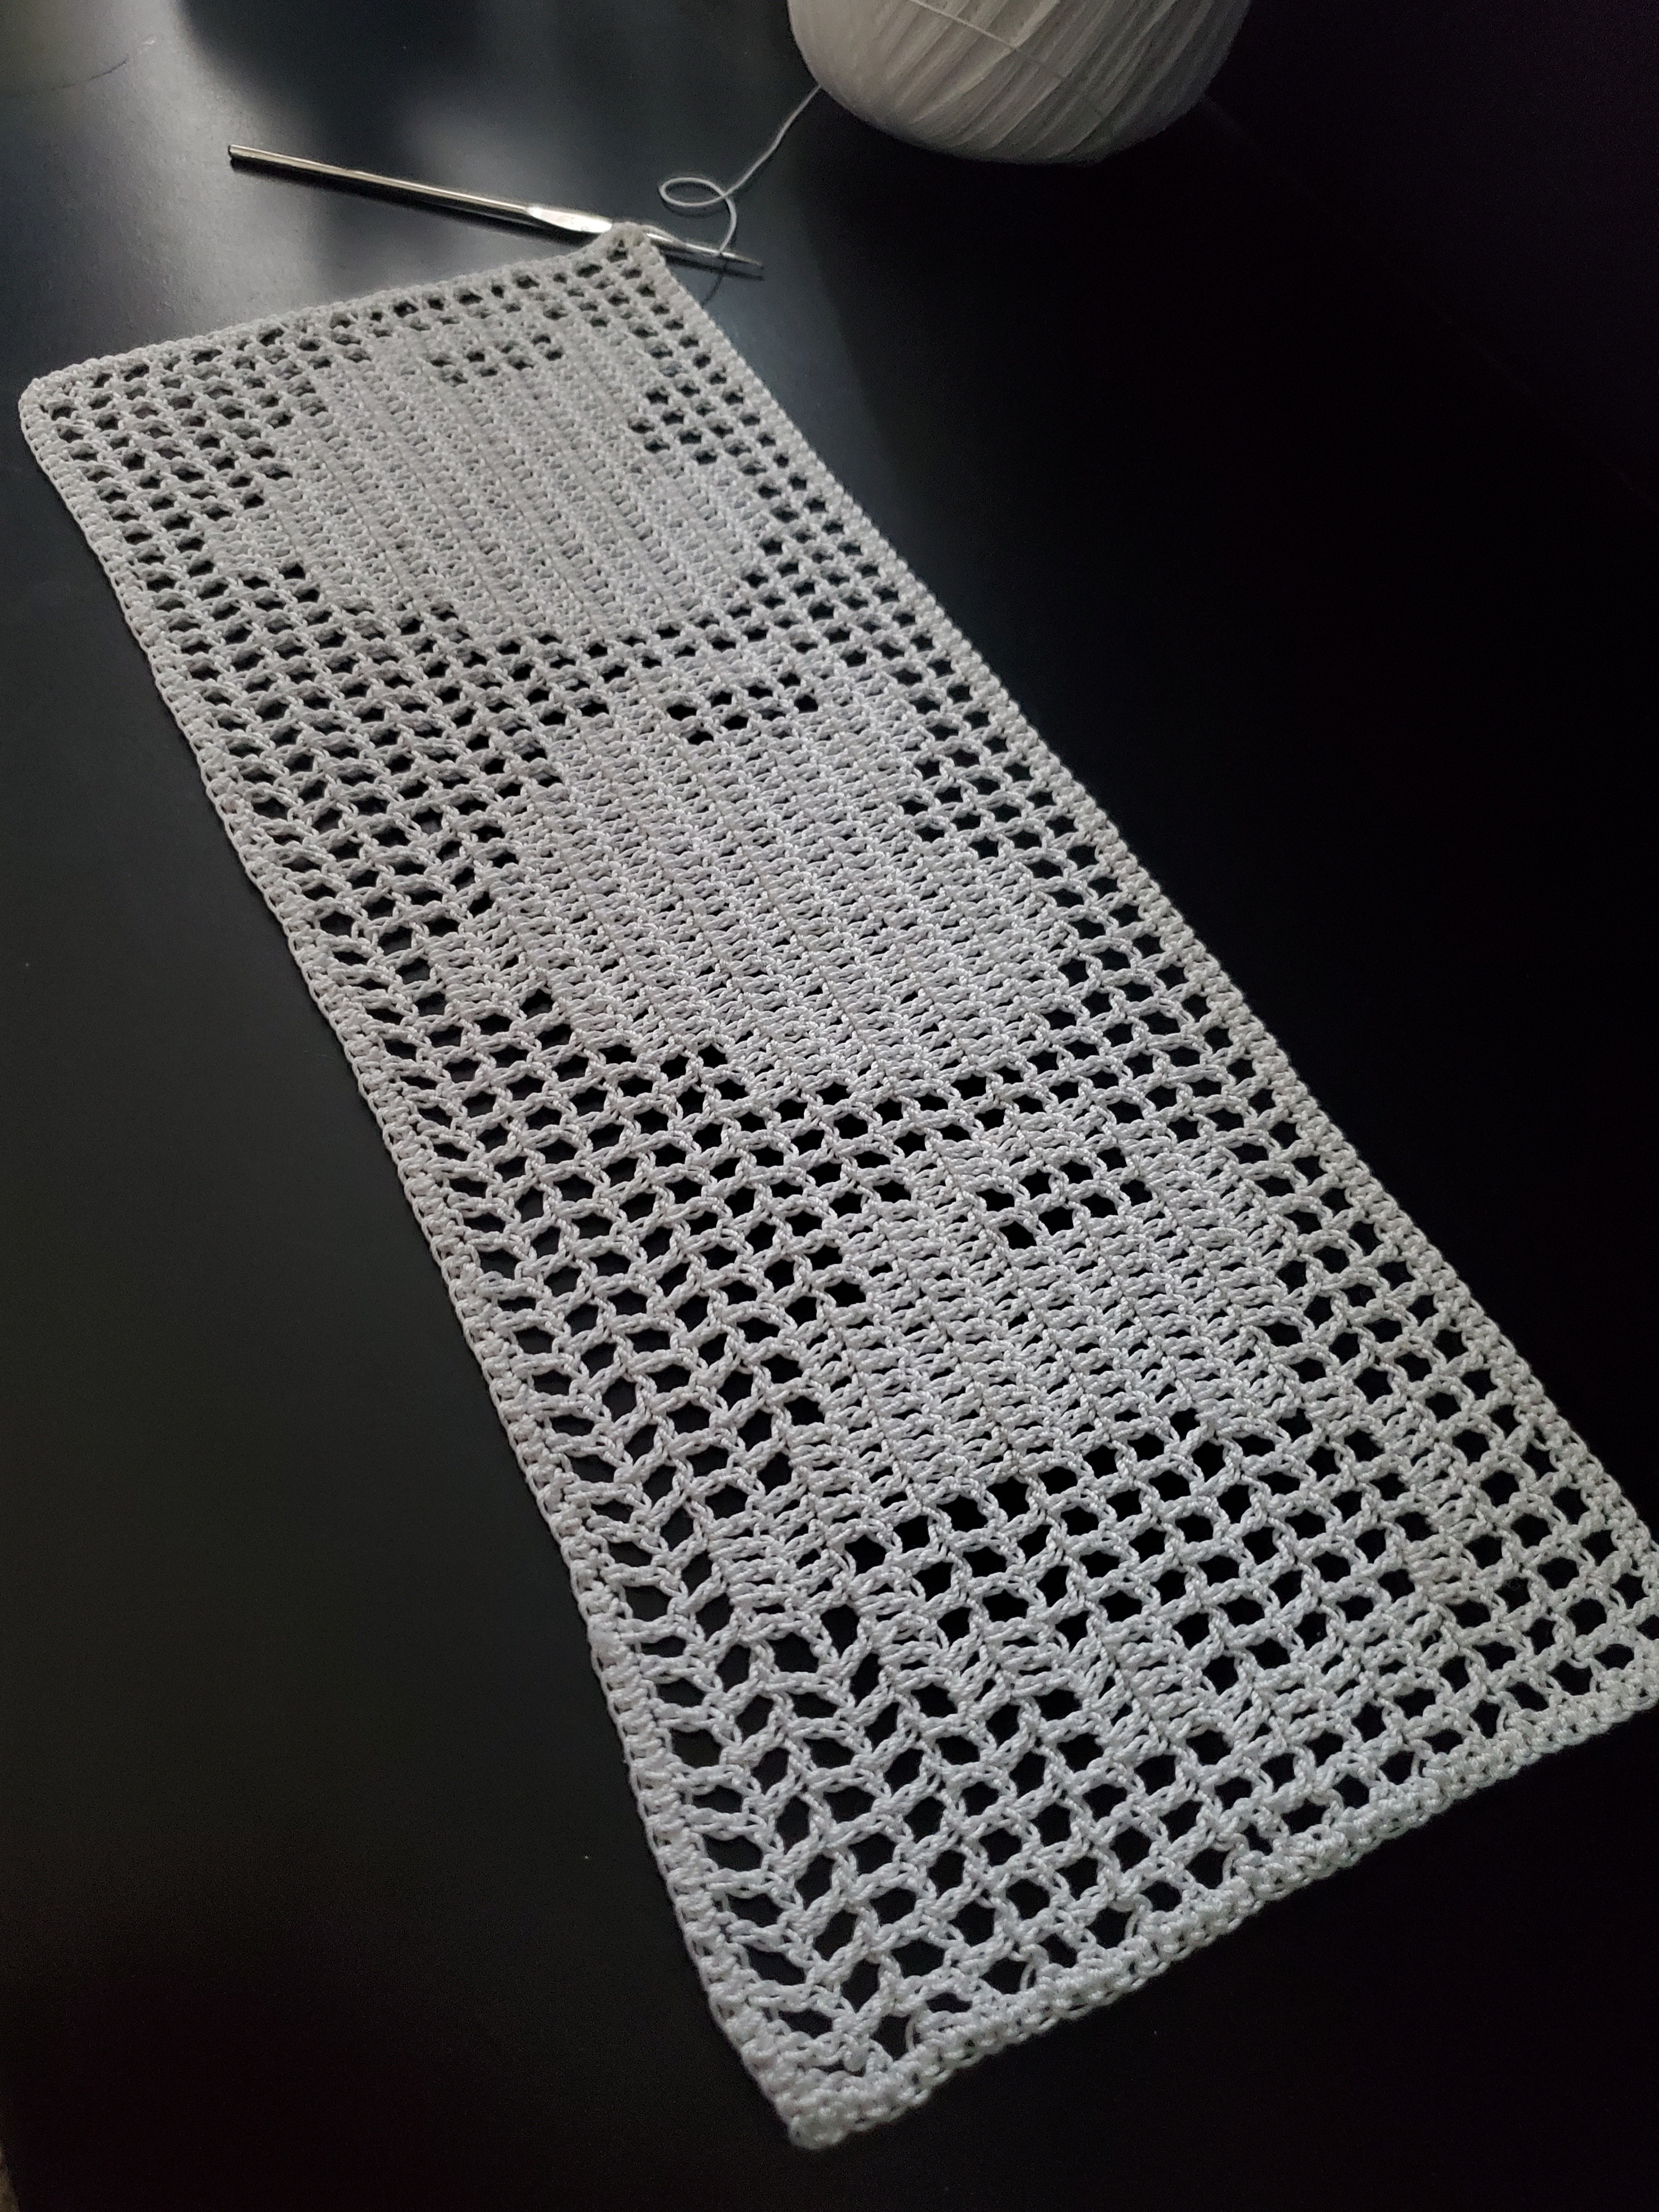
You now have the main part of the crochet Pikachu Table Runner completed.

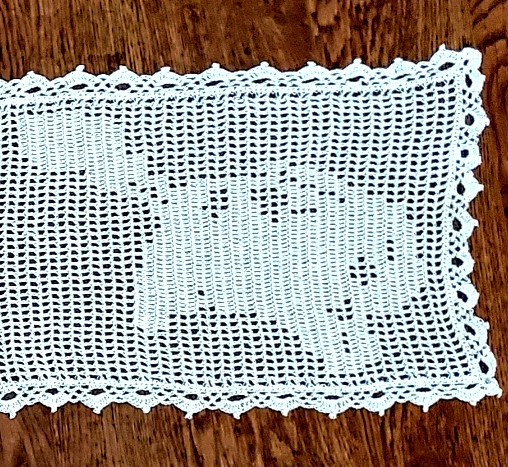
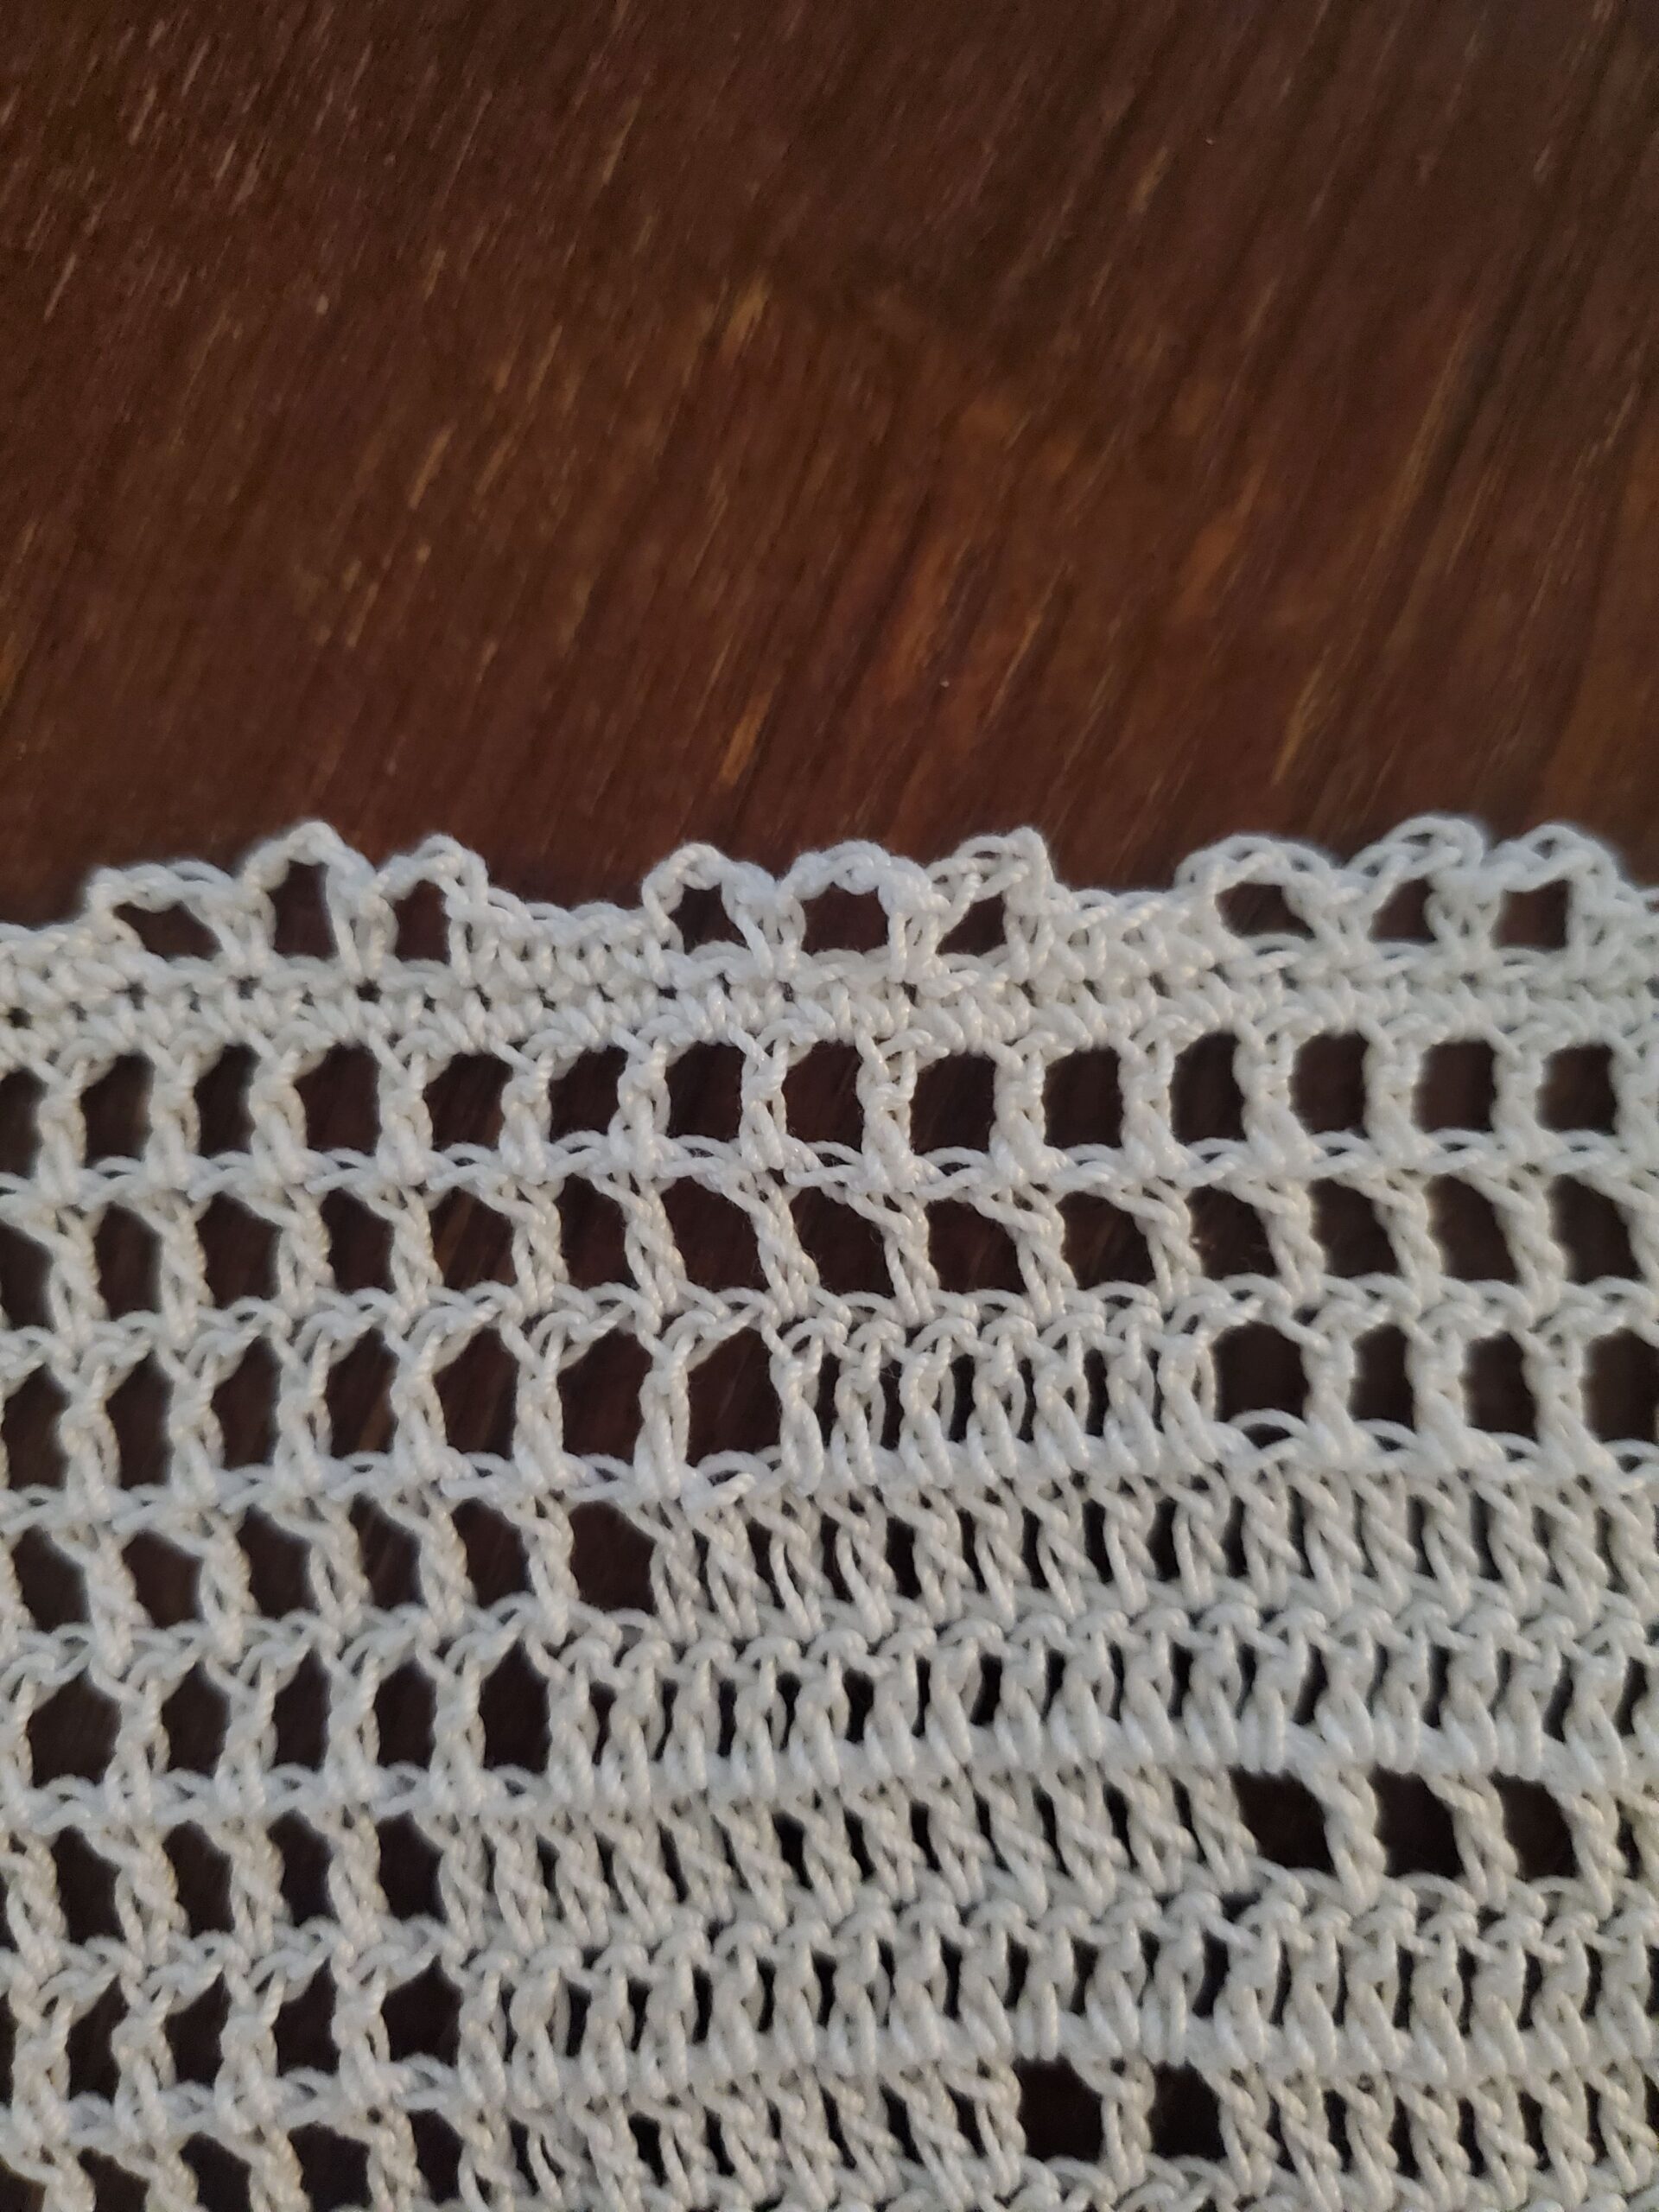
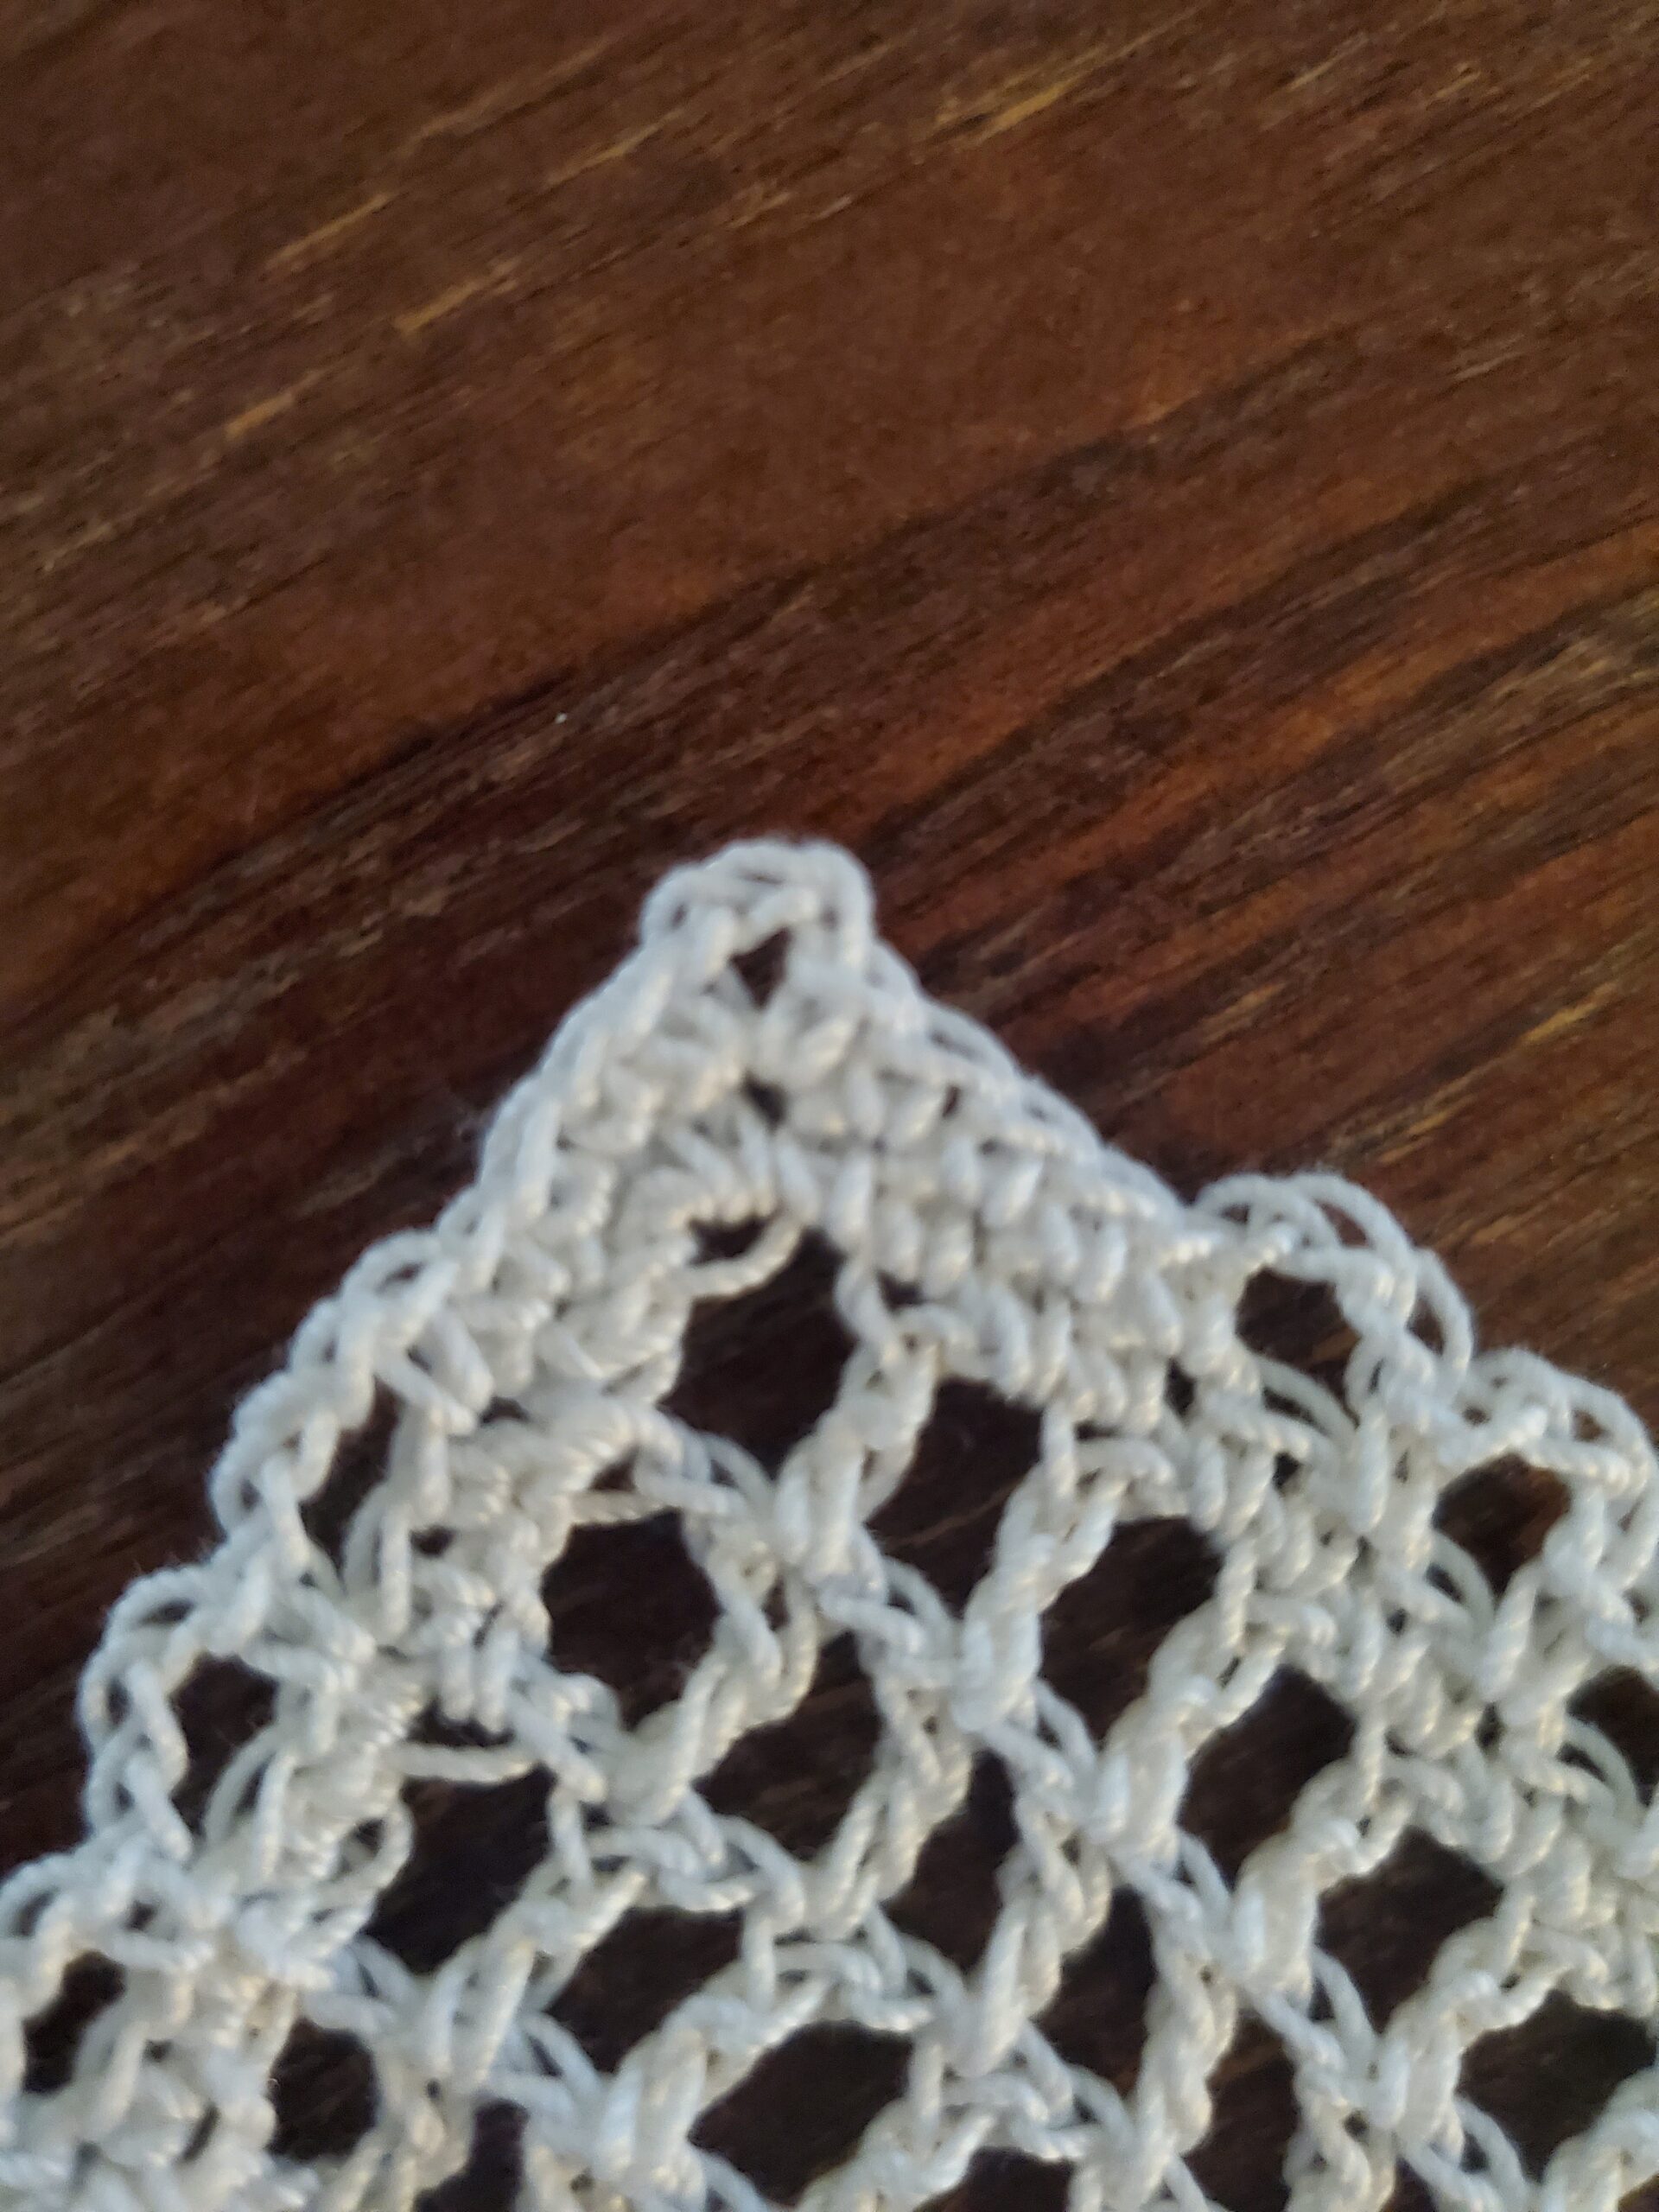
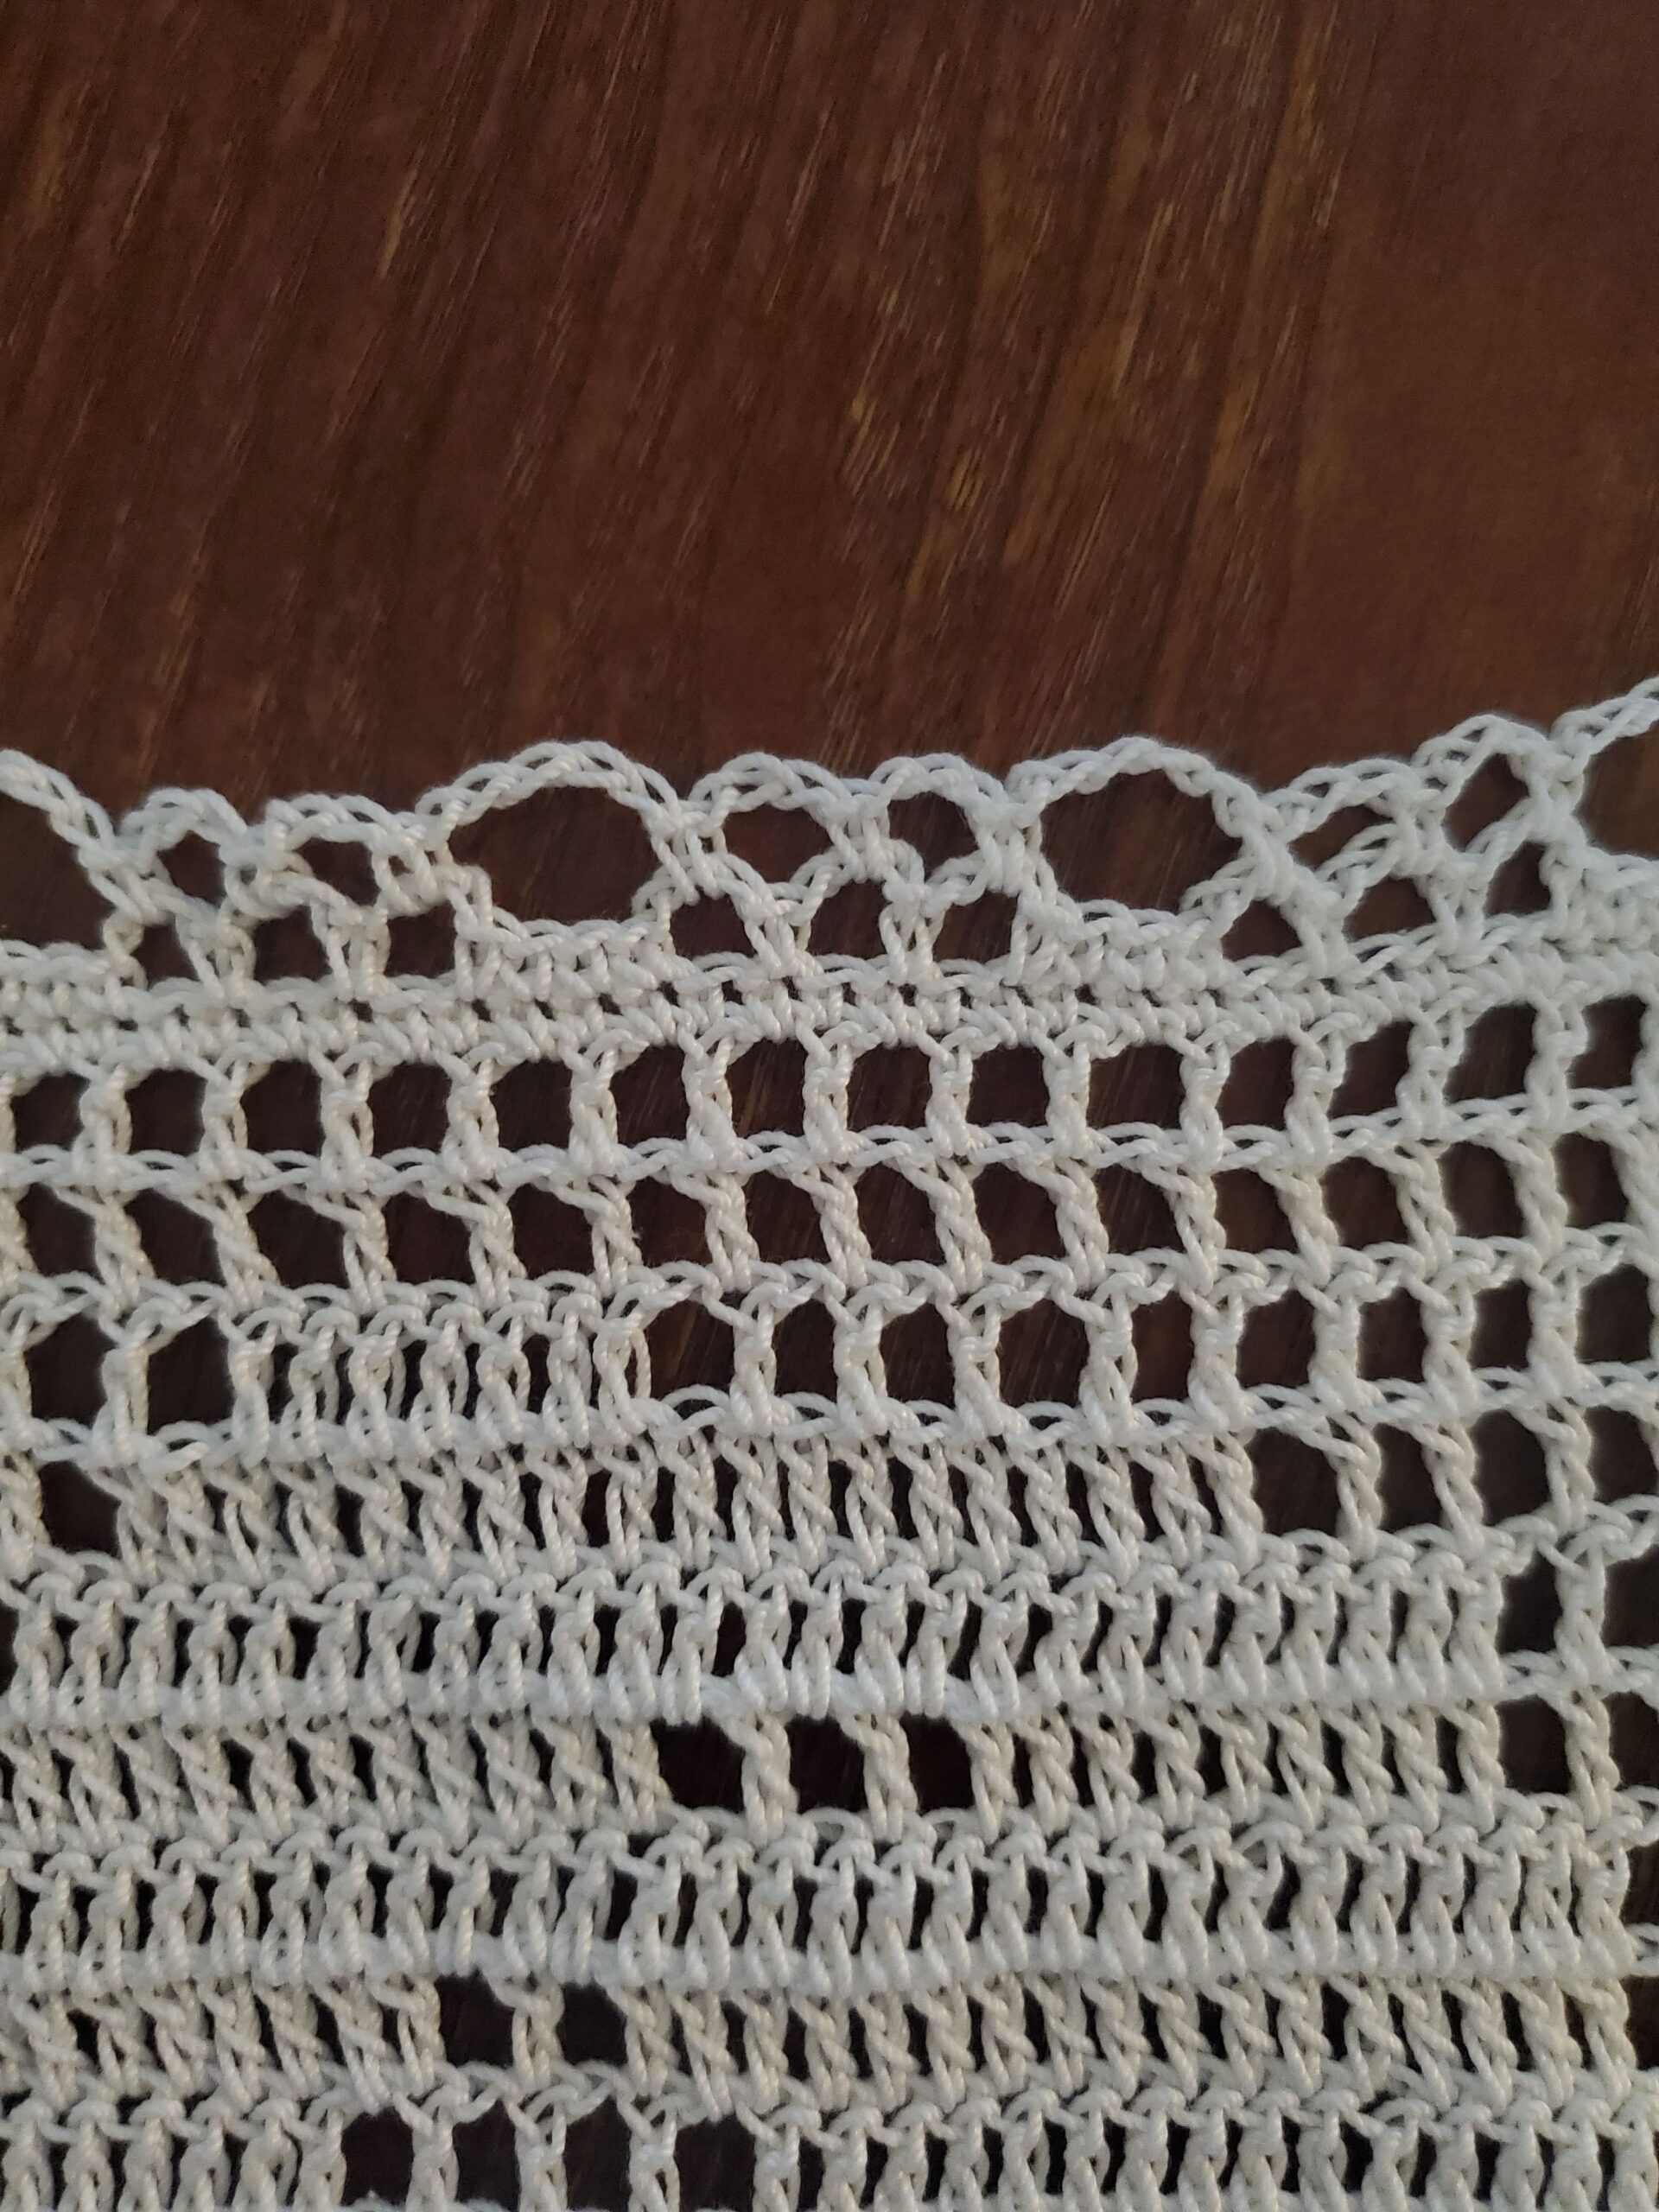
I highly suggest crocheting the border on the table runner, as it gives it a polished look and a nice vintage vibe. 

***Please note that the stitches on the long side before the corner will not line up evenly like on the short side***. This makes the border slightly off on those sides. I’ve made adjustments to the pattern to make it less noticeable, and when you’re finished it will be difficult to tell.

Here is a diagram of the pattern for the border I used.
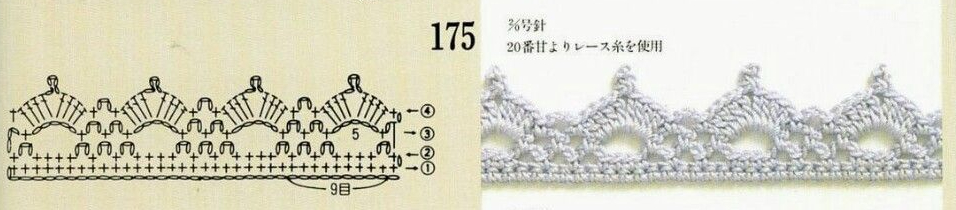
Border:

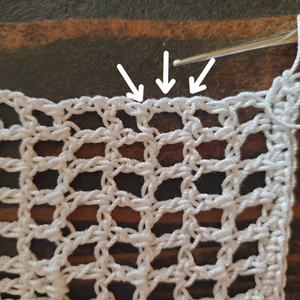
Row 1: Turn, ch 1, (sc, ch 1, sc) in same st, sc in each st and ch 1 space across, (sc, ch 1, sc) in the corner spaces. Repeat on all sides. When crocheting down the sides of the table runner, sc in top of dc or ch 3 and in the middle of the “leg” of the dc or in one of the chs in the ch 3. Sl st to the first sc.

Pikachu Table Runner Row 1
Row 1
Pikachu Pattern Table Runner Border Row 1 Corner
Row 1 Corner

Row 2: Sl st into ch 1 space of corner (sc, ch 3, sc), sc in next 4 sts, *(ch 3, skip a st, sc in next st x3 times), sc in next 3 sts.* Repeat from *to* until you’ve reached the corner, sc in next st, (sc, ch 3, sc) in ch 1 corner space. Continue down the next side, after the very last (sc, ch 3, sc), sc in next 6 sts. Create the next (sc, ch 3, sc )corner in the ch 1 space. Continue until the last corner, after last (sc, ch 3, sc), sc in next 4 sts, sl st into first sc made.

Crochet Pikachu Pattern Table Runner Border Row 2
Row 2
Pikachu Table Runner Border Row 2 Corner
Row 2 Corner

Row 3: Ch 1, sc in same st, sc in next st, (sc, ch 5, sc) in ch 3 corner space. Sc in next st, *ch 5, skip 4 sts and sc into next ch 3 space, ch 3, sc into next ch 3 space, ch 3 and sc into last ch 3 space.* Repeat from *to,* until next corner. Ch 5, skip 4 sts, sc into next st, (sc, ch 5, sc) into next ch 3 corner space. Sc into next st and repeat from *to* again down the next side. At the next corner, ch 5, skip 7 sts, sc into next st. Continue until last corner, sl st into first sc made.


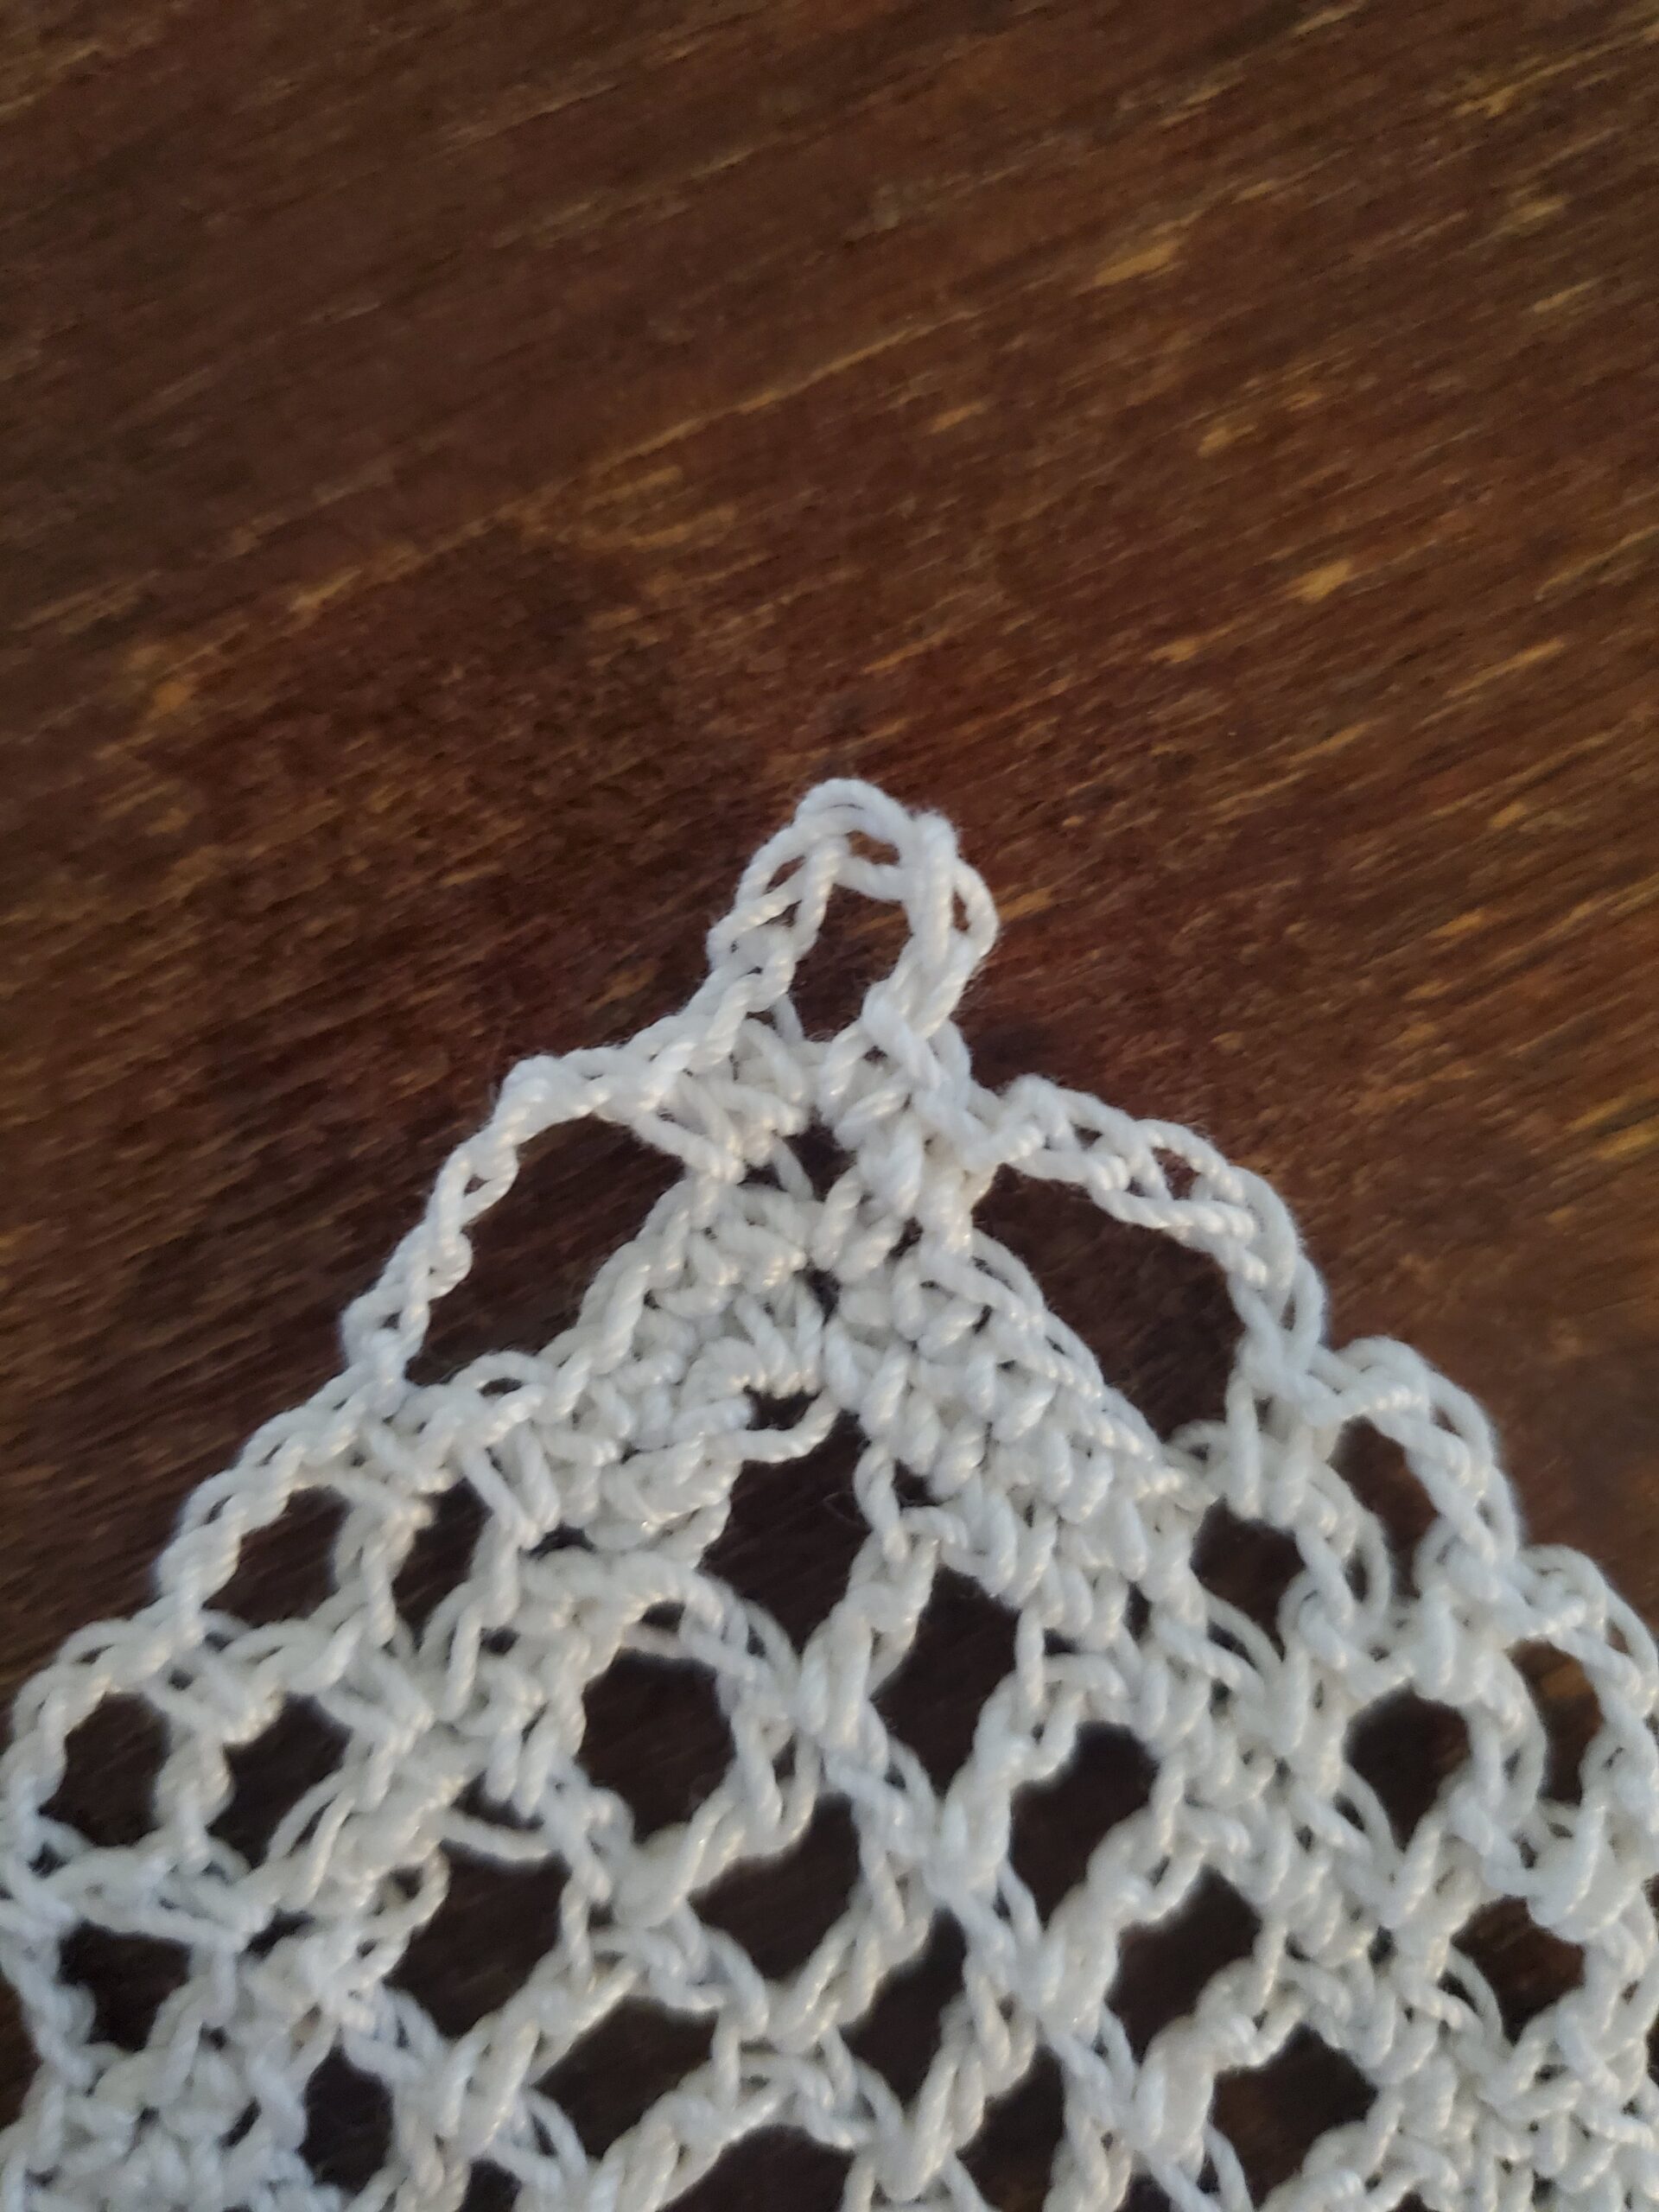
Row 4: Ch 1, sc in same st, sl st into ch 5 corner space, ch 3 (counts as dc), make 4 dc in same space, make ch 3 picot, make 4 more dc in same space, sc in next st. *4 dc in next ch 5 space, ch 3 picot, 4 more dc in ch 5 space, sc in next ch 3 space, ch 3, sc in next ch 3 space.* Repeat from *to* until next corner. Continue all the way around, make sure to sc in st prior to and after corner spaces, sl st into first sc made.

Cut yarn with scissors, weave in end with tapestry needle. 

Pat yourself on the back for making it all the way to the end!

Thank you for reading my pattern, until next time!

Kyriakos Grizzly Crochet Pattern

If you don’t know who Kyriakos Grizzly is, he’s a huge guy from Greece who posts videos on YouTube of himself working out and weightlifting in unconventional ways.

He’s become a meme in the fitness community and has been named the Bloat Lord due to his massiveness and ability to move an incredible amount of weight.

I was inspired to crochet this image of Kyriakos Grizzly after watching one of his most famous workout videos on YouTube, which can be found here.

In this workout video, he shrugs like 7 plates worth of weight on each side of the bar and then screams loudly when he’s done.

For those of you who aren’t familiar with weight lifting, a plate is 25 lbs. So if my math is correct, he’s shrugging something crazy, like 350 lbs. 

I can barely bench the bar, let alone hold that much weight. I think I’d probably collapse and die! 

However, even if I can’t lift much weight, I’m still incredibly impressed. This is why I wanted to crochet the image of him screaming in that moment. That, and also my husband loves the meme, so I made it for him too!

If you’re interested in crocheting Kyriakos Grizzly screaming, keep reading!

Method Used

I used a method of crocheting called filet crochet to make this image. If you’re not familiar with how to filet crochet, I learned how to do it here

I also used 3DC, so 3 double crochet in a row = 1 block filled OR 1 double crochet, a ch 1, and then another double crochet = 1 open block.

How Long Will This Take?

This piece took me around a month of working 1-2 hours a day to complete. This is due to using a tiny crochet hook and thread to get all the details in his face.

I also made a few mistakes and had to frog a couple of rows. So if you’re careful and pay attention (unlike me lol!), your timeline might look different.

Materials Used:

  • 1.65 mm crochet hook
  • Red Heart Classic Crochet Thread Size 10 in White (1000 yards) x 2
  • Tapestry Needle
  • Scissors

Helpful Tips: 

  • Below I have a link to the chart I used to make Kyriakos Grizzly’s face. You might have to create an account on Stitch Fiddle in order to view it, but I’m not entirely sure, but it’s totally free to do so.
  • On the chart; black squares = open blocks and white squares = closed blocks.
  • When you get to the end of a row, ch 3 and turn. This counts as a stitch.
  • If for some reason, the link is not working, I have a picture of the chart, although it may be difficult to see the squares.
  • I highly recommend finding a way to mark off squares as you go. I edited the chart on Stitch Fiddle and used different colored squares to show where I left off. You may also try to print out the chart and mark off as you go. Even writing down what row you’re on will be helpful.
  • You can also use a stitch marker or a scrap piece of thread/yarn to mark one side of the chart, so you don’t get turned around. I placed a stitch marker on the right side of my work so I could determine right from left (very helpful in the very beginning).

Kyriakos Grizzly Crochet Chart:

Link to Stitch Fiddle Chart of Kyriakos Grizzly: https://www.stitchfiddle.com/c/skcao8-jgdgil

Picture of Kyriakos Grizzly Crochet Chart

Starting Chain: Chain 204, double crochet into 5th chain from hook. Follow the chart starting from the bottom from left to right, placing 3 double crochet per white block (remember that 1 double crochet will be shared with the next block when you are counting. To make it easier multiply the number of needed blocks by 2 and add 1 double crochet). For the black blocks, chain 1, skip a chain, and then double crochet in the next chain. 

Continue until the end of the row, turn and ch 3 (counts as a double crochet) for row 2. 

Follow the chart reading from right to left now for the second row. At the end of this row, place a double crochet in the top of the ch 3 from the previous row.

Keep crocheting each based on the chart, I recommend counting your open blocks and making sure they line up correctly, especially on Kyriakos Grizzly’s t-shirt. 

Once the last row is completed, do not cut your thread!

Border: Chain 1, place a (single crochet, chain 1, single crochet) in the corner, single crochet down the side of the piece. Place another (single crochet, chain 1, single crochet) in the next corner stitch. 

Continue single crocheting in each stitch across all sides and placing in the corners a (single crochet, chain 1, single crochet). Slip stitch to the initial chain 1, cut thread of scissors and pull through.

Weave in end with tapestry needle.

Pinterest Pin of Kyriakos Grizzly Crochet

Blocking and Framing:

This is actually something I intend to do with this project, but just *haven’t* been able to do yet. 

I like to block my projects using cardboard and pins, but I am currently out of cardboard large enough to do this with. So once I get my hands on a piece large enough, I will be blocking this to get framed. 

As for framing, I plan on sewing the blocked piece with clear/invisible thread onto a dark place mat (I’ve heard using suede can be good, but sewing into it can be difficult). Once that’s completed, I will get this framed according to the blocked dimensions.

We have a framing business in our town that I plan on checking prices out on, however, I need to block and sew onto a place mat before doing this. 

Once I complete those steps I will try to update this post with pictures of the framed piece! 

Thank you as always and happy crocheting! 

Crochet Legend of Zelda Pattern – Hearts

Hello everyone today I have another free, Zelda themed pattern; a Crochet Legend of Zelda Heart Pattern! I’ve recently been interested in a crochet technique called filet crochet. Have you ever heard of it? It creates a vintage vibe, and all you need is a super tiny hook and thread!

I think The Legend of Zelda series will always have a special place in my heart, it was one of the first video games that I ever played. The series of three hearts represents the amount of life you have when you start most Zelda games. As you play and get hurt by monsters, fall damage, etc., you lose parts or whole hearts until you collapse or replenish them.

Related Posts:

The filet crochet Legend of Zelda Hearts would look great if framed with a dark background and hung on the wall, or you can leave it as is and use it as a cute, nerdy place mat or table decoration. 

Alright, so before we get started there are a few basics about filet crochet we need to cover (it’s not too crazy, I promise).

Filet Crochet Basics:

In filet crochet, you can create your very own image using open or closed squares/gaps/holes. In order to create an open square, two sides of the square will be a dc and two sides will be a ch 1. A closed square will be comprised of 3 dc in a row. 

If you would like to add more columns to the sides, the correct math for the starting ch is x2 number of squares needed + 4 more chs, then dc in the 6th ch from your hook. So for this heart pattern, I have 50 squares across, so this gets me my 100 chs, plus 4 (the extra 4 make up a dc and a ch 1 for 1 side and the top of an open square). 

Clear as mud? Don’t worry, you’ll get the hang of it after a few rows!

Please note that some of these links are affiliate links. That means that if you click on these links and make a purchase, I may receive a commission at no extra cost to you. You can find more information about our disclosure policy here. Thank you for your support.

Materials Needed:

Abbreviations (US Terms):

  • ch – chain
  • sl st – slip stitch
  • sc – single crochet
  • dc – double crochet

Pattern Chart:

The image below is a helpful chart if you’re more of a visual learner.

Tips for this Pattern:

  • For this filet pattern, we use 3 dc to make a closed square and dc, ch1, dc for an open square.
  • The turning chain counts as a dc, ch 1 throughout the whole pattern.
  • The ch 1 spaces count as a stitch.
  • You can place a stitch marker on the left or right side to help you keep track of where you are, however once you start making the 3rd half heart, it’s not difficult to determine.
  • Repeat instructions enclosed in () by the number indicated at the end. Example: (ch 1, skip ch 1 space, dc in next dc x3 times). 

Crochet Legend of Zelda Hearts Pattern

Ch 104

Foundation Chain for LOZ Heart Pattern
Ch 104

Row 1: Dc in 6th ch from hook, *ch 1, skip a ch, dc in next ch.* Repeat from *to.* End with a dc in the last ch (100 sts/50 open squares).

Dc in 6th ch from hook
Row 1 Completed
Row 1

Row 2: Turn, ch 4, skip ch 1 space, dc in next dc, *ch1, skip ch1 space, dc in next dc* Repeat from *to* (50 open squares).

Turn, ch 4, dc in next dc for Row 2
Beginning of Row 2: Turn, ch 4, dc in next dc

Row 3: Turn, ch 4, skip ch 1 space, dc in next dc, (ch 1, skip ch 1 space, dc in next dc x 7 times), (dc in ch 1 space, dc in next dc x 2). At this point you should have 8 open squares and 2 closed squares. *(Ch 1, skip ch 1 space, dc in next dc x 14), (dc in ch 1 space, dc in next dc x 2 times).* Repeat *to* once more. (Ch 1, skip ch 1 space, dc in next dc x 8 times). (44 open squares, 6 closed squares).

Row 3
Row 3

Row 4: Repeat row 3.

Row 5: Turn, ch 4, skip ch 1 space, dc in next dc, (ch 1, skip ch 1 space, dc in next dc x 6  times), *dc in next ch 1 space, dc in next 5 sts, (dc in ch 1 space, dc in next dc x2 times). (Ch 1, skip ch 1 space, dc in next dc x11 times).* Repeat from *to* once more. Start of 3rd half heart. Dc in next ch 1 space, dc in next 3 sts, ch 1 skip a st, dc in next dc, (dc in next ch 1 space, dc in next dc x2 times), (ch 1 skip ch 1 space , dc in next dc x6 times). (14 closed squares, 36 open squares).

Row 5
Row 5

Row 6: Turn, ch 4, skip ch 1 space, dc in next dc, (ch 1, skip ch 1 space, dc in next dc x 4 times). Dc in ch 1 space, dc in next dc, (ch 1, skip next st, dc in next st x2), ch 1, skip ch 1 space, dc in next 5 dc, (dc in ch 1 space, dc in next dc x2 times) (Ch 1, skip ch 1 space, dc in next dc x8 times), *dc in next ch 1 space, dc in next 11 sts, (dc in next ch 1 space, dc in next dc x2 times)* (ch 1, skip ch 1 space, dc in next dc x8 times). Repeat from *to* once more, (ch 1, skip ch 1 space, dc in next dc x5 times). (21 closed squares, 29 open squares).

Row 7: Turn, ch 4, skip ch 1 space, dc in next dc, (ch 1, skip ch 1 space, dc in next dc x 4 times), *dc in next 16 sts, (ch 1, skip ch 1 space, dc in next dc x8 times).* Repeat from to *to* once more. Dc in next 8 dc, (ch 1, skip ch 1 space, dc in next dc x3 times), dc in next 2 sts, (ch 1 skip ch 1 space, dc in next dc x5 times). (21 closed squares, 29 open squares).

Row 7
Row 7

Row 8: Turn, ch 4, skip ch 1 space, dc in next dc (ch 1, skip ch 1 space, dc in next dc x2 times), (dc in next ch 1 space, dc in next dc x2 times), ch 1, skip next st, dc in next st, (ch 1, skip ch 1 space, dc in next dc x3 times), dc in next 8 sts, (dc in next ch 1 space, dc in next dc x2 times), *(ch 1, skip ch 1 space, dc in next dc x 4 times), (dc in next ch 1 space, dc in next dc x2 times), dc in next 16 sts, (dc in next ch 1 space, dc in next dc x2 times).* Repeat from *to* once more. (Ch 1, skip ch 1 space, dc in next dc x3 times). (18 open squares, 32 closed squares).

Row 8 of LOZ Hearts
Row 8

Row 9: Turn, ch 4, skip ch 1 space ,dc in next dc (ch 1, skip ch 1 space, dc in next dc x2 times), *dc in next 24 sts, (ch 1, skip ch 1 space, dc in next dc x4 times.* Repeat from *to* once more. Dc in next 12 sts, (ch 1, skip ch 1 space, dc in next dc x4 times), dc in next 4 sts, (ch 1, skip ch 1 space, dc in next dc x3 times). (18 open squares, 32 closed squares).

Row 10: Turn, ch 4, skip ch 1 space, dc in next dc, ch 1, skip ch 1 space, dc in next dc, dc in ch 1 space, dc in next st (ch 1 skip ch 1 space, dc in next dc x6 times), dc in next 12 sts, *dc in ch 1 space, dc in next st, (ch 1 skip ch 1 space, dc in next dc x 2), dc in next ch 1 space, dc in next 25 sts.* Repeat from *to,* one more time, dc in ch 1 space, dc in next dc, (ch 1 skip ch 1 space, dc in next dc x2 times). (14 open squares, 36 closed squares).

Row 10 of filet crochet LOZ Hearts
Row 10

Row 11: Turn, ch 4, skip ch 1 space, dc in next dc, ch 1, skip ch 1 space, dc in next 3 sts (ch 1 skip ch 1 space, dc in next dc x2 times), dc in next 22 sts, (ch 1, skip ch 1 space, dc in next dc x2 times), dc in next 2 sts, (ch 1, skip ch 1 space, dc in next dc x2 times), dc in next 22 sts, (ch 1, skip ch 1 space, dc in next dc x2 times), dc in next 2 sts, (ch 1, skip ch 1 space, dc in next dc x2 times), dc in next 8 sts, (ch 1, skip ch 1 space, dc in next dc x6 times), dc in next 2 sts, (ch 1, skip ch 1 space, dc in next dc x2 times). (18 open squares, 32 closed squares).

Row 12: Turn, ch 4, skip ch 1 space, dc in next dc, ch 1, skip ch 1 space, dc in next dc, dc in next 2 sts, (ch 1, skip ch 1 space, dc in next dc x6 times), dc in next 8 sts, *(ch 1, skip ch 1 space, dc in next dc x2 times), dc in next 2 sts, (ch 1, skip ch 1 space, dc in next dc x2 times), dc in next 22 sts.* Repeat from *to* once more, (ch 1, skip ch 1 space, dc in next dc x2 times), dc in next 2 sts, (ch 1, skip ch 1 space, dc in next dc x2 times). (18 open squares, 32 closed squares).

Row 12 of filet crochet LOZ Hearts
Row 12

Row 13: Turn, ch 4, skip ch 1 space, dc in next dc, ch 1, skip ch 1 space, dc in next 3 dc, *(ch 1, skip ch 1 space, dc in next dc x2 times), dc in next 22 sts, (ch 1, skip ch 1 space, dc in next dc x2 times), dc in next 2 sts.* Repeat from *to* once more. (Ch 1, skip ch 1 space, dc in next dc x2 times), dc in next 8 sts, dc in ch 1 space, dc in next st, (ch 1, skip ch 1 space, dc in next dc x5 times), dc in next 2 sts, (ch 1, skip ch 1 space, dc in next dc x2 times). (19 open squares, 31 closed squares).

Row 13
Row 13

Row 14: Turn, ch 4, skip ch 1 space, dc in next dc, ch 1, skip ch 1 space, dc in next 3 sts, (ch 1, skip ch 1 space, dc in next dc x5 times), dc in next 10 sts, *(ch 1, skip, ch 1 space, dc in next dc x2 times), dc in next 2 sts, (ch 1, skip ch 1 space, dc in next dc x2 times), dc in next 22 sts.* Repeat from *to* once more. (Ch 1, skip ch 1 space, dc in next dc x2 times), dc in next 2 sts, (ch 1, skip ch 1 space, dc in next dc x2 times). (19 open squares, 31 closed squares).

Row 15: Turn, ch 4, skip ch 1 space, dc in next dc, ch 1, skip ch 1 space, dc in next dc, ch 1, skip a st, dc in next st, *(dc in next ch 1 space, dc in next dc x2 times), dc in next 6 sts, (ch 1, skip a st, dc in next st x2 times), dc in next 10 sts, ch 1, skip a st, dc in next st, (ch 1, skip ch 1 space, dc in next dc x2 times), ch 1, skip a st, dc in next st.* Repeat from *to* once more. (Dc in ch 1 space, dc in next st x2 times), dc in next 6 sts, (ch 1, skip a st, dc in next st x2 times), (dc in ch 1 space, dc in next dc x5 times), (ch 1, skip ch 1 space, dc in next dc x3 times). (20 open squares, 30 closed squares).

Row 16: Turn, ch 4, skip ch 1 space, dc in next dc, (ch 1, skip ch 1 space, dc in next dc x2 times), ch 1, skip a st, dc in next 7 sts, ch 1, skip a st, dc in next dc, (ch 1, skip ch 1 space, dc in next dc x2 times), ch 1, skip a st, dc in next st, dc in next 6 sts, *ch 1, skip a st, dc in next st, (ch 1, skip ch 1 space, dc in next dc x4 times), ch 1, skip a st, dc in next 7 sts, ch 1, skip a st, dc in next st, (ch 1, skip ch 1 space, dc in next dc x2 times), ch 1, skip a st, dc in next 7 sts.* Repeat from *to* once more. Ch 1, skip a st, dc in next st, (ch 1, skip ch 1 space, dc in next dc x2 times). (32 open squares, 18 closed squares).

Row 16
Row 16

Row 17-18: Turn, ch 4, dc in next dc, *ch 1, skip ch 1 space/next st, dc in next dc.* Repeat from *to.* (50 open squares).

Border:

Turn, ch 1 (ch 1 does not count as a st), sc in each st across (sc inside the ch 1, not under), when you get to the end of the first row, (sc, ch 2, sc) for your corner stitch. Continue down the short side. See picture below for sc placement. Try to place a sc in the top and middle of the dcs. 

arrows pointing to where to sc on short side

The right most arrow points to the “top” of a dc, the middle arrow to the “middle” and the left arrow to the next “top.”

Place a (sc, ch 2, sc) in the next 3 corner spaces.

Continue until you finish the last corner, then sl st into first sc.

Cut thread with scissors and pull through. Weave in ends with tapestry needle.

Dc in 6th ch from hook

Optional: Blocking

If you want a super straight, and clean looking finished product, I would suggest blocking your work. This step is optional, and you don’t have to do this if you like the way your project looks.

There are many different ways to do this, however, my favorite is to soak the project in some water, place it on a towel and gently pat/soak of the excess water. I use a scrap cardboard box to to lay it on and place pins around the project into the cardboard to “stretch” it out. Let it air dry (usually 24 hours+) and take the pins out. 

Your crochet project should be much straighter! 

And there it is! I hope you all enjoyed this Crochet Legend of Zelda Heart Pattern! Let me know what you think on Instagram by tagging me @strommercrafts with your finished project :). 

Happy crocheting! Until next time xoxo.