Wonderfully Festive Crochet Christmas Doily
Hello, everyone, today I have a new crochet doily pattern for you, the Crochet Christmas Doily!
With the Holidays coming up, I’ve been trying to come up with a few crochet Christmas gift ideas to give to family members and friends.
I enjoy crocheting with thread the most, so trying to think of gift ideas using that was kinda hard.
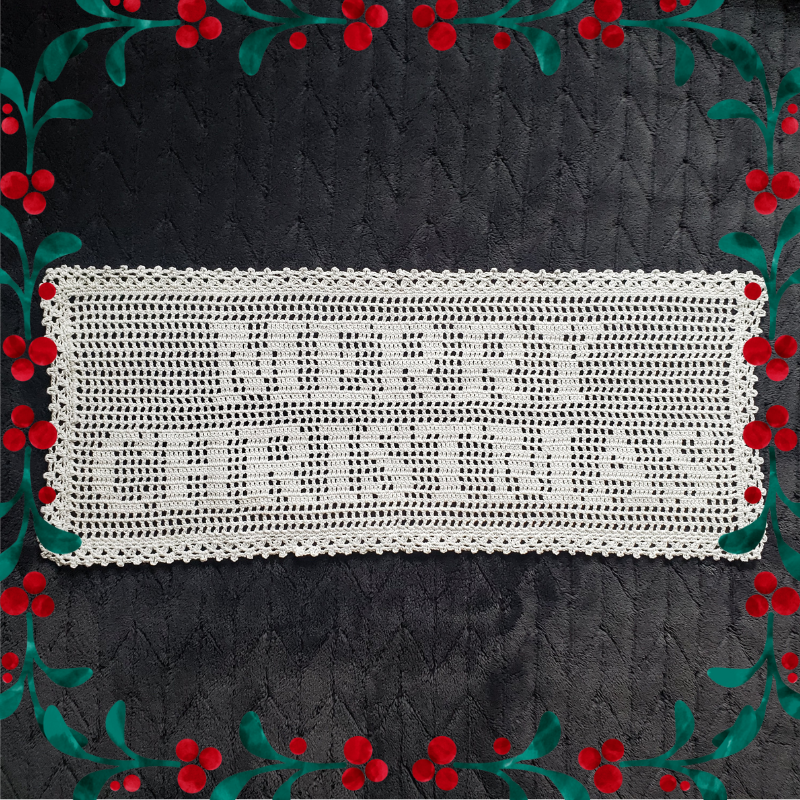
However, since I’ve been on a filet crochet doily kick, I thought how fun it would be to make a doily that simply says; Merry Christmas.
With doilies like this, the main function of it is to decorate tables, but I’ve seen people take it an extra step and frame this on a dark background, and then hang it on a wall.
Doilies don’t go with every interior decorating styles, but my own mom has a log cabin style home and they have a few of my doilies displayed that look absolutely fire 🔥.
Related Posts:
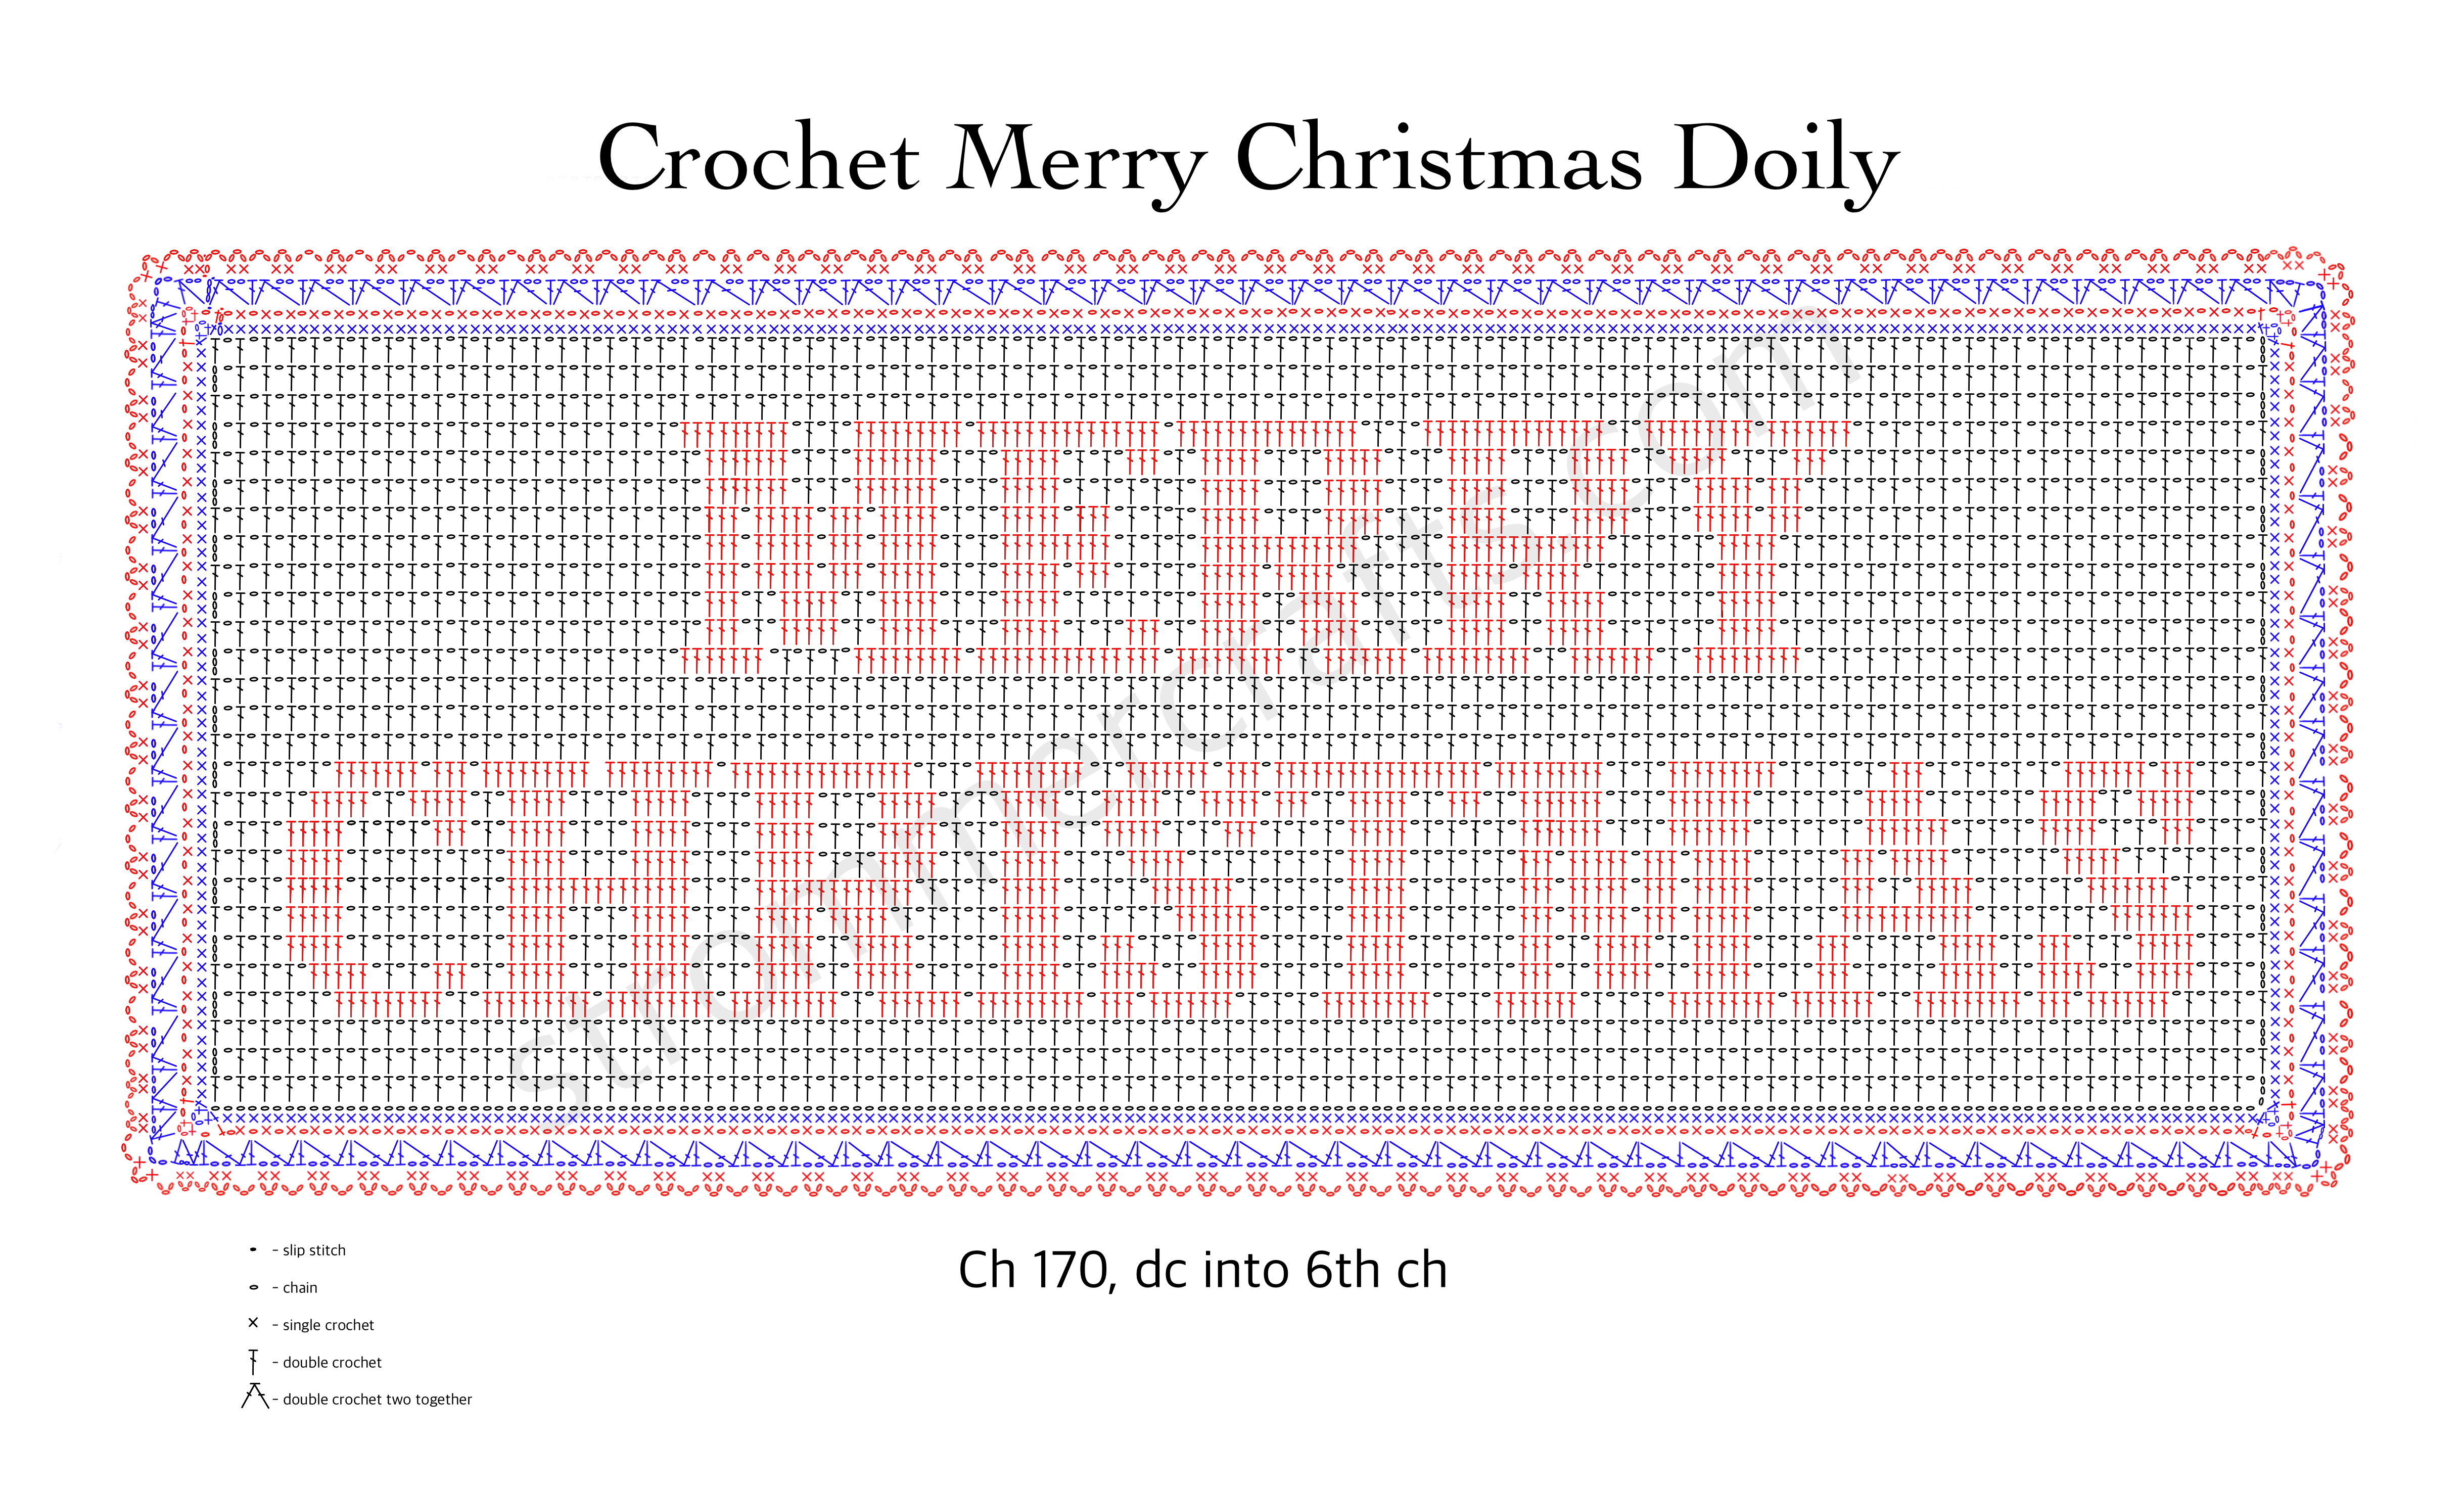
I’ve decided to use a chart instead of writing out instructions for every row. With filet crochet, it’s a lot easier to just view a chart. I constantly get lost trying to read written instructions, so if you’re anything like me, you’ll like this way better.
In the chart, I’ve made the letters in a red color so they’re more visible, however, I’m crocheting with one color of thread today, but feel free to actually make the letters whatever color you wish(it’ll help them stand out more!)
I’ve made the border for the Crochet Christmas Doily in red and blue colors so you can see where the border starts more easily.
As with some of my other filet crochet doilies, you will start by chaining the length of the doily, and working back and forth in rows. Once the border is reached, you go around the outside of your rectangle, instead of back and forth.
Please note that some of these links may be affiliate links. That means that if you click on a link and make a purchase, I may receive a commission at no extra cost to you. You can find more information about our disclosure policy here. Thank you for your support.
How Do I Make This Doily Lay Flat? It’s All Crinkled!
With most crochet thread projects, you need to block them to force them to lay nice and flat. This is an essential step, especially if you plan on your Merry Christmas Doily being displayed where others will see it.
To block a crochet doily, I simply soak it in water and pin it on a blocking board as symmetrically as possible to dry.
If you want it flat and crispy, you’ll need to use a starch solution to spray or soak it in.
Materials Needed:
- 1.65mm Crochet Hook
- Red Heart Classic Crochet Thread in White Size 10
- Tapestry Needle
- Scissors
- Blocking Board (or cardboard box)
- Pins
Crochet Christmas Doily Pattern:
Please consult the chart below, but you will start by chaining 170, turning and making a dc into the 6th chain away from the hook.
Once finished, cut thread with scissors, weave in any ends with tapestry needle to hide and secure them.
Blocking the Doily:
Grab your blocking board or a long enough piece of cardboard, pins, a bowl of water, and a towel.
Soak the doily in water (I use cool water but I don’t think it matters too much). Fully submerge it for 2-3 minutes, you may have to hold it down with her hand so it doesn’t float to the surface.
Pull it out and let it drip excess water back into your bowl. Place it on your towel and gently pat it dry. Do not wring the doily out.
Place the doily on your blocking board and pin it as evenly as possible on all sides.
This is where having a blocking board is king. The blocking board has grids so you can measure and pin on all sides evenly.
That’s all for this Crochet Merry Christmas Doily pattern. I hope the chart was helpful to you and that your doily brings you a little Christmas cheer this year.
Until next time.
Other Posts You May Like:
- 37 Crochet Lace Square Patterns
- 21 Stunning Crochet Lace Stitches
- Breathtakingly Nostalgic Crochet Pokeball Doily