
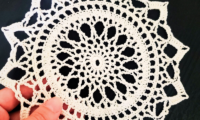
Incredibly Gorgeous Crochet Animal Crossing Doily
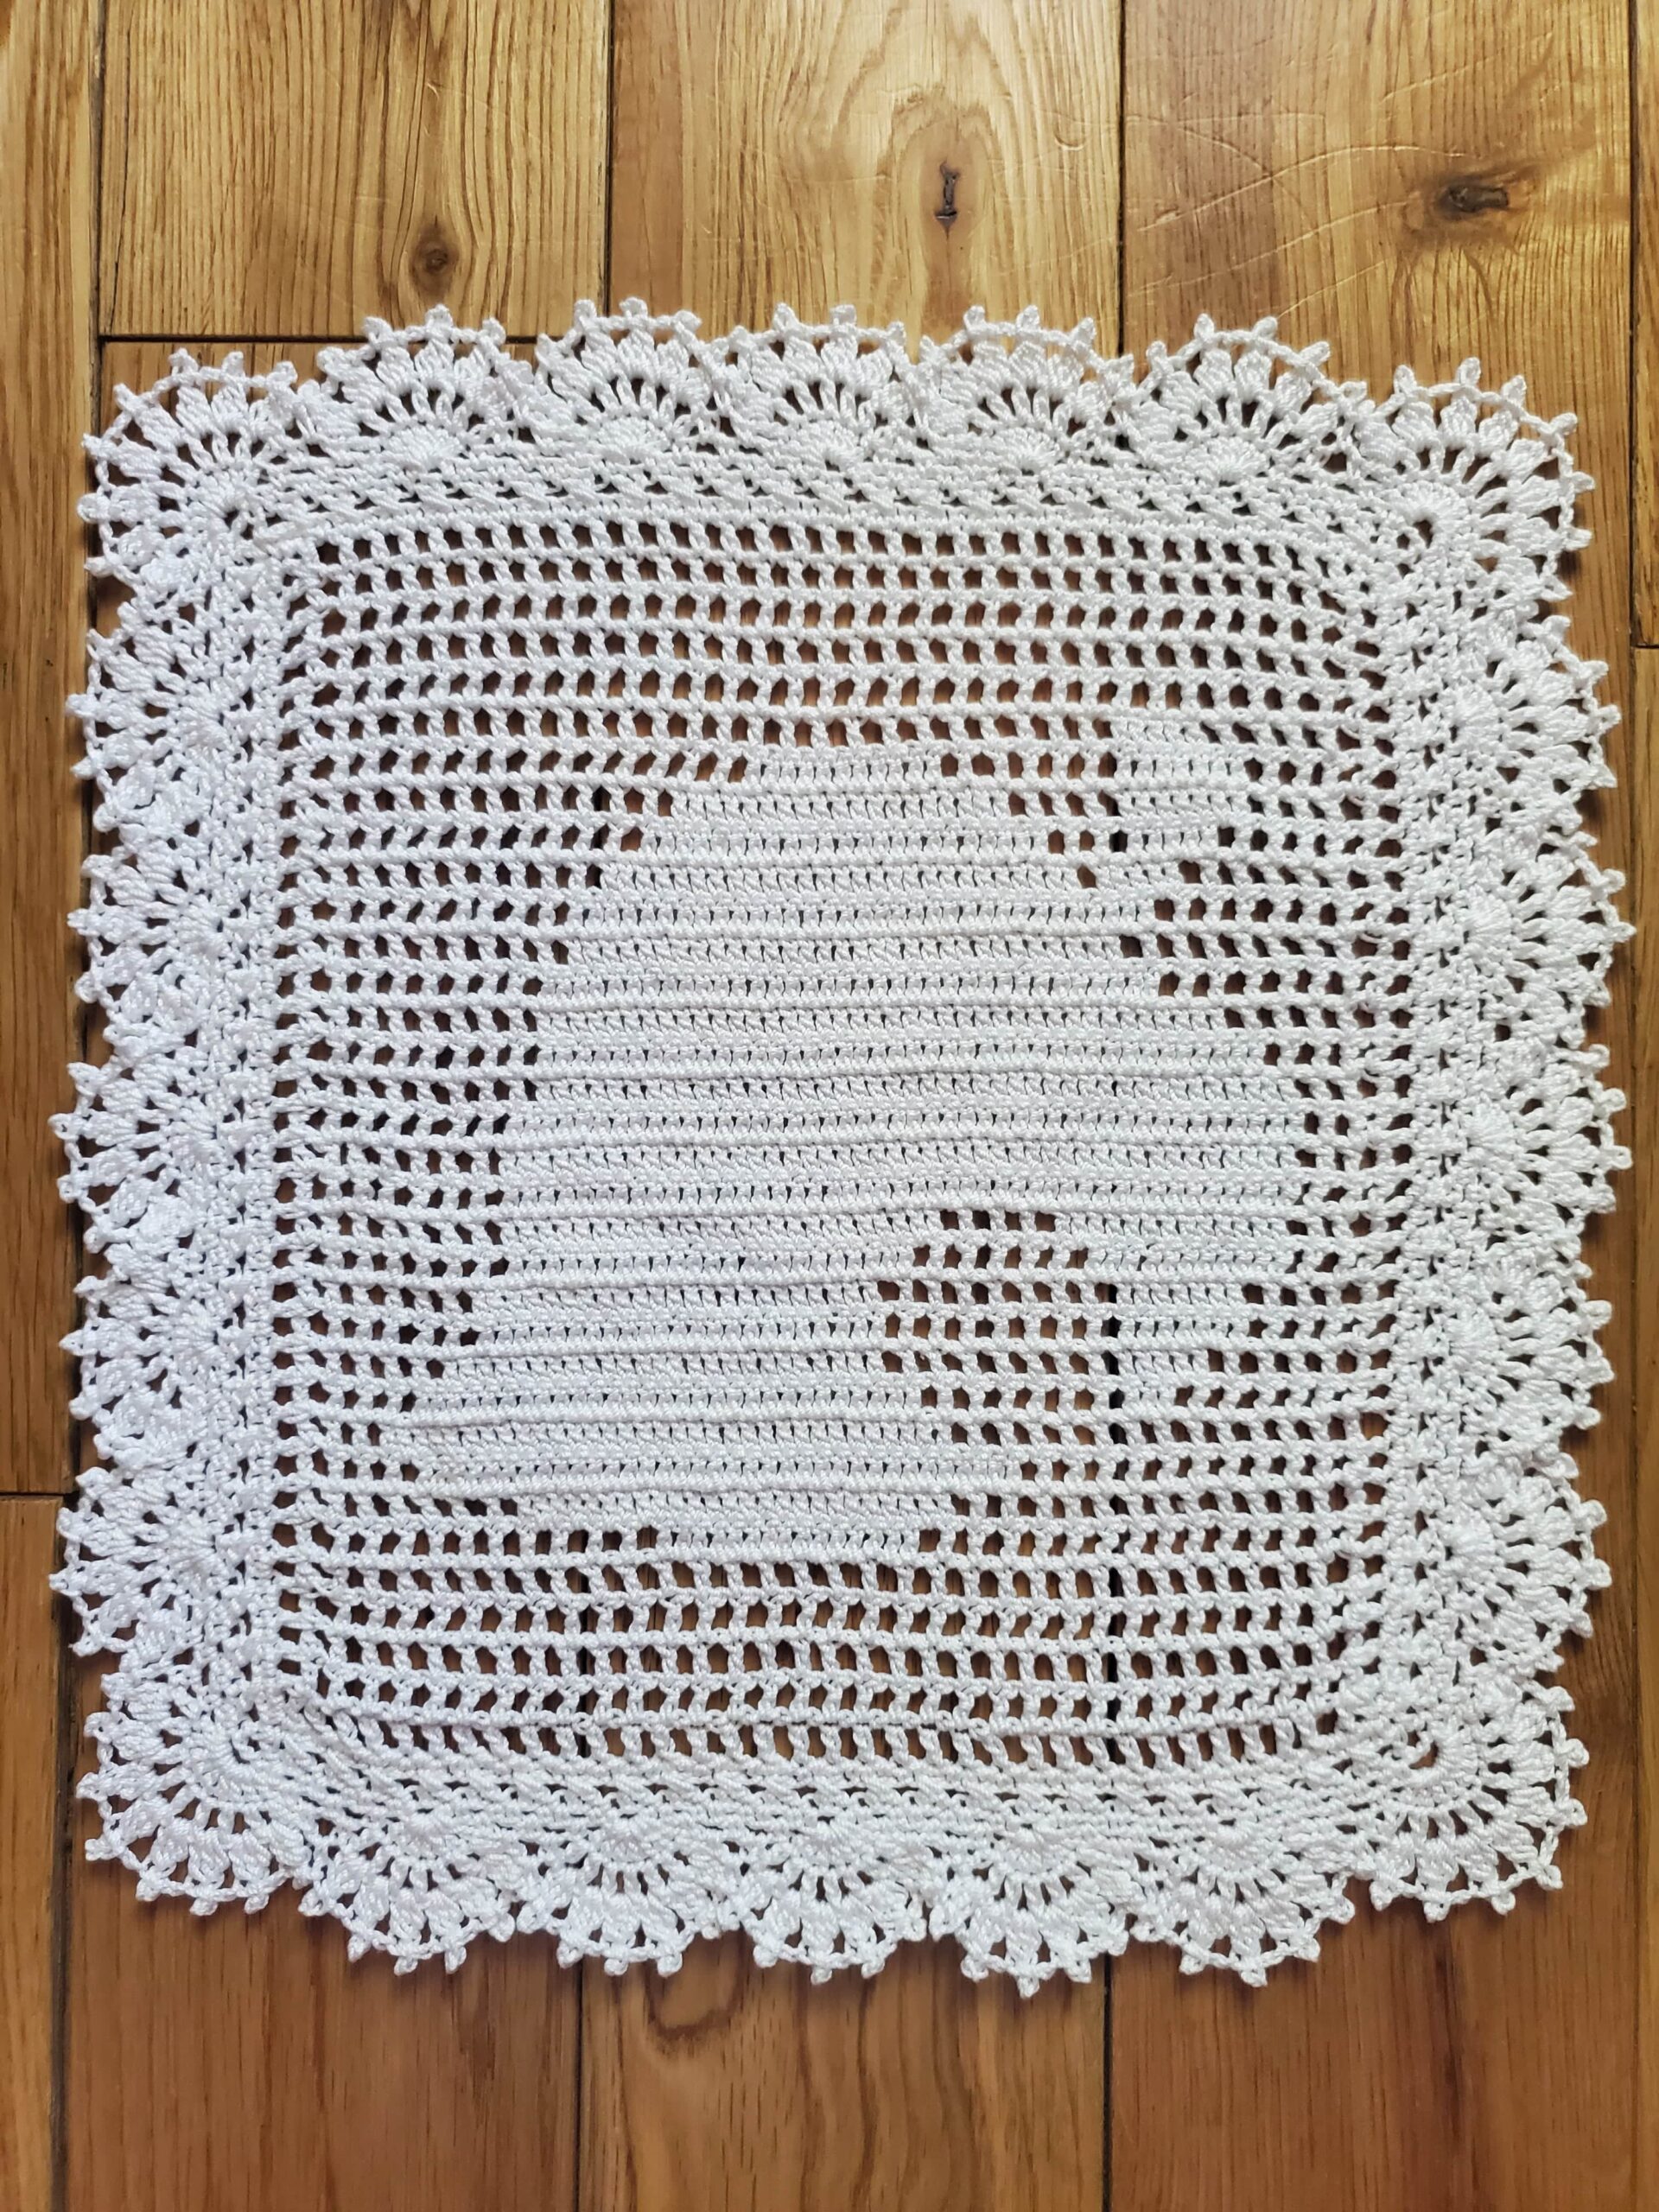
Hi everyone, today we will be learning how to crochet this beautiful Crochet Animal Crossing Doily!
Who can forget the iconic leaf logo from Animal Crossing? Not me!
I have loved Animal Crossing for a long time. My first game was actually Animal Crossing Wild World on the DS back in the day, but I quickly fell in love and grabbed the original game on the GameCube too.
Since I’ve enjoyed Animal Crossing so much, I thought I’d give it a fun little tribute and make a doily from the leaf that appears when you grab items.
I’m making this doily in a very similar way as my Crochet Legend of Zelda Doily as well, so you should totally check it out!
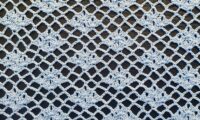
The center piece of the doily is actually just filet crochet, and then I’ve added a cute little border around it.
If you don’t know what filet crochet is, boy you are missing out! You can make almost any image you want doing this technique, it just takes a little time to get the dimensions right.
If you know how to read a crochet chart, I have one provided below.
It’s honestly super tedious to write out patterns for filet crochet and it’s a lot easier just to look at a chart. However, I am writing how to get you started on the doily and how to do the border.
I have also learned that making crochet charts/diagrams is still super hard, this time I tried my best to free hand the pattern in Procreate, but sheesh it was still hard! So I apologize in advance, my double crochets sort of run together, but I think you can get the gist of it!
Please note that some of these links in this post may be affiliate links. That means that if you click on these links and make a purchase, I may receive a commission at no extra cost to you. You can find more information about our disclosure policy here. Thank you for your support.
Blocking
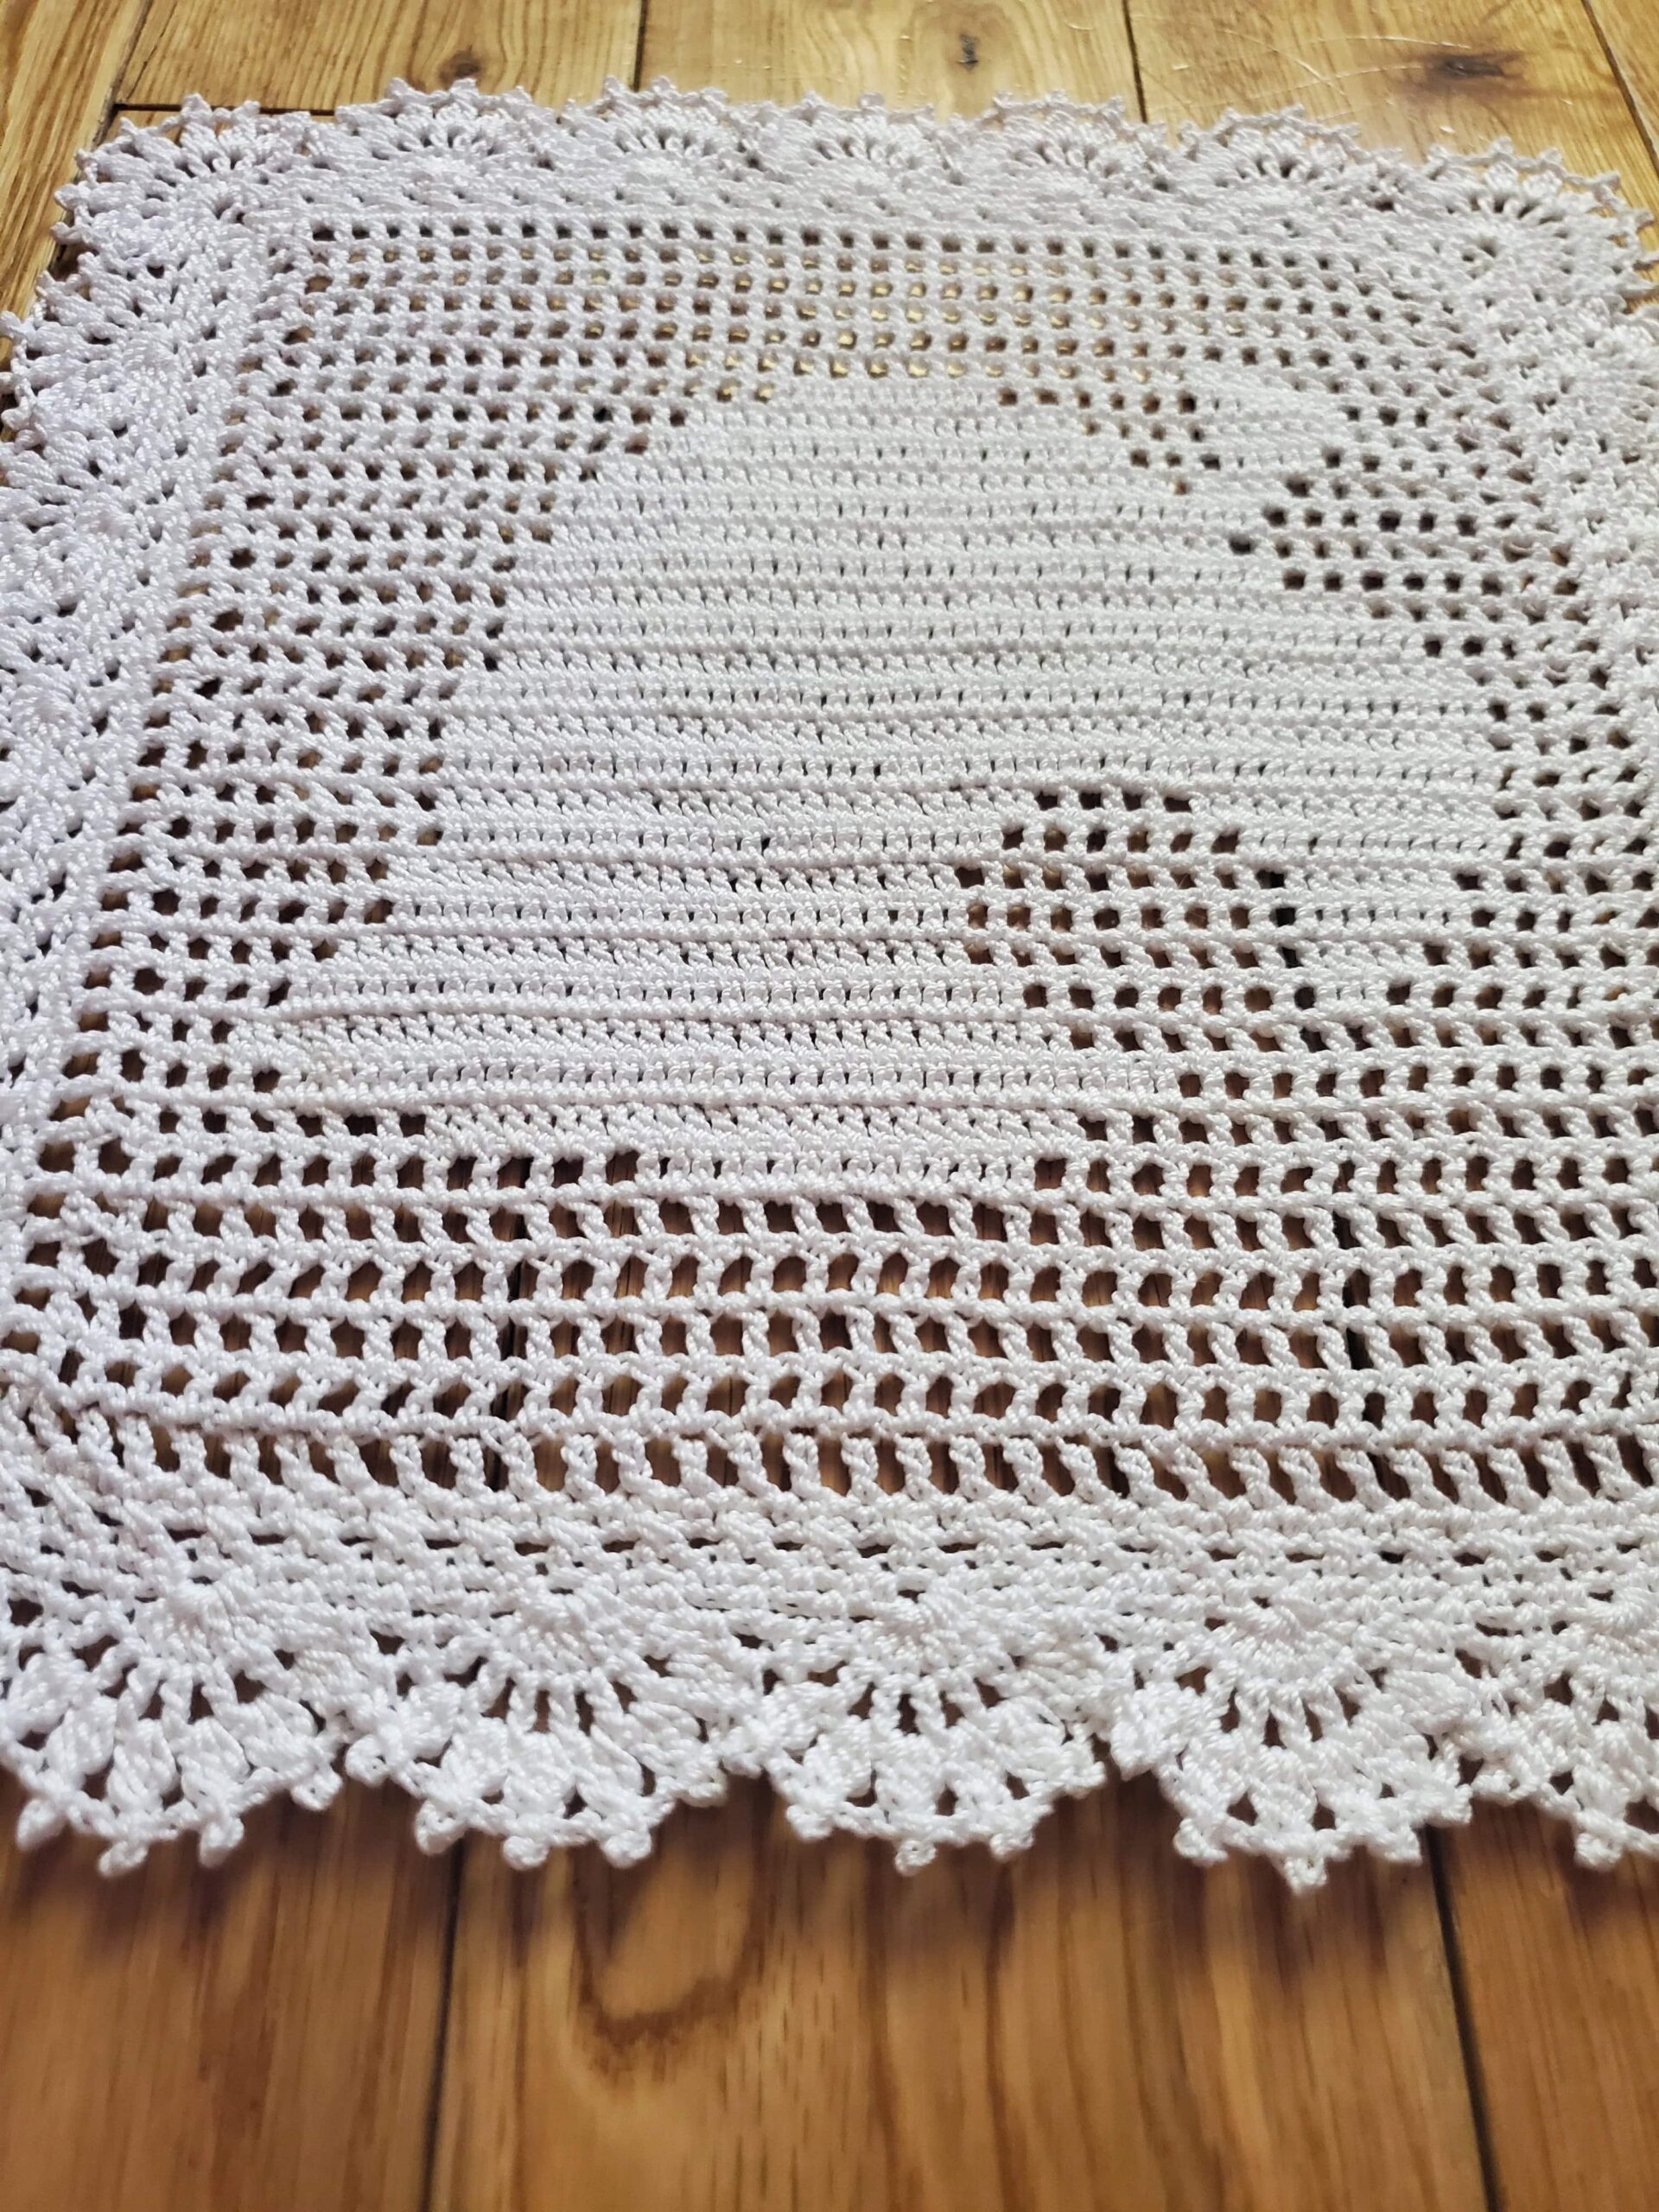
I definitely recommend blocking this doily and literally all doilies you ever crochet. They tend to look scrunched up and don’t sit very flat after you’re done making them.
If you’re going to make these beauties, I strongly suggest soaking them in water, patting them gently with a towel, stretching it on a blocking board and anchoring it down with pins.
Okay let’s go ahead and get started! 👇
Related Posts:
Materials Needed:
- 1.65mm Crochet Hook
- Red Heart Classic Crochet Thread in White Size 10
- Scissors
- Tapestry Needle
- Blocking Board and Pins (optional but recommended)
Abbreviations Used:
- Ch – chain
- Sl st – slip stitch
- Sc – single crochet
- Dc – double crochet
Special Stitches:
- 3dc Cluster – (YO (yarn over), insert hook into st, pull up a loop, YO, pull through 2 loops x3 times), should have 4 loops left on hook, YO, pull through all 4 loops.
- X Stitch – skip 2 sts, dc into next st, going behind the st just made, skip a st, dc into the next
- Ch 3 Picot – ch 3, sl st into the top of last st made
Special Instructions:
- The starting ch 4s all count as a dc and ch 1 for the leaf pattern in the center.
- I will be referring to open squares and closed squares throughout this pattern. An open square consists of a block of: (dc, ch 1, dc) and a closed squares consists of a block of (3dc). These are filet crochet terms that make it easier to count rather than counting each individual stitch.
Crochet Animal Crossing Doily Pattern
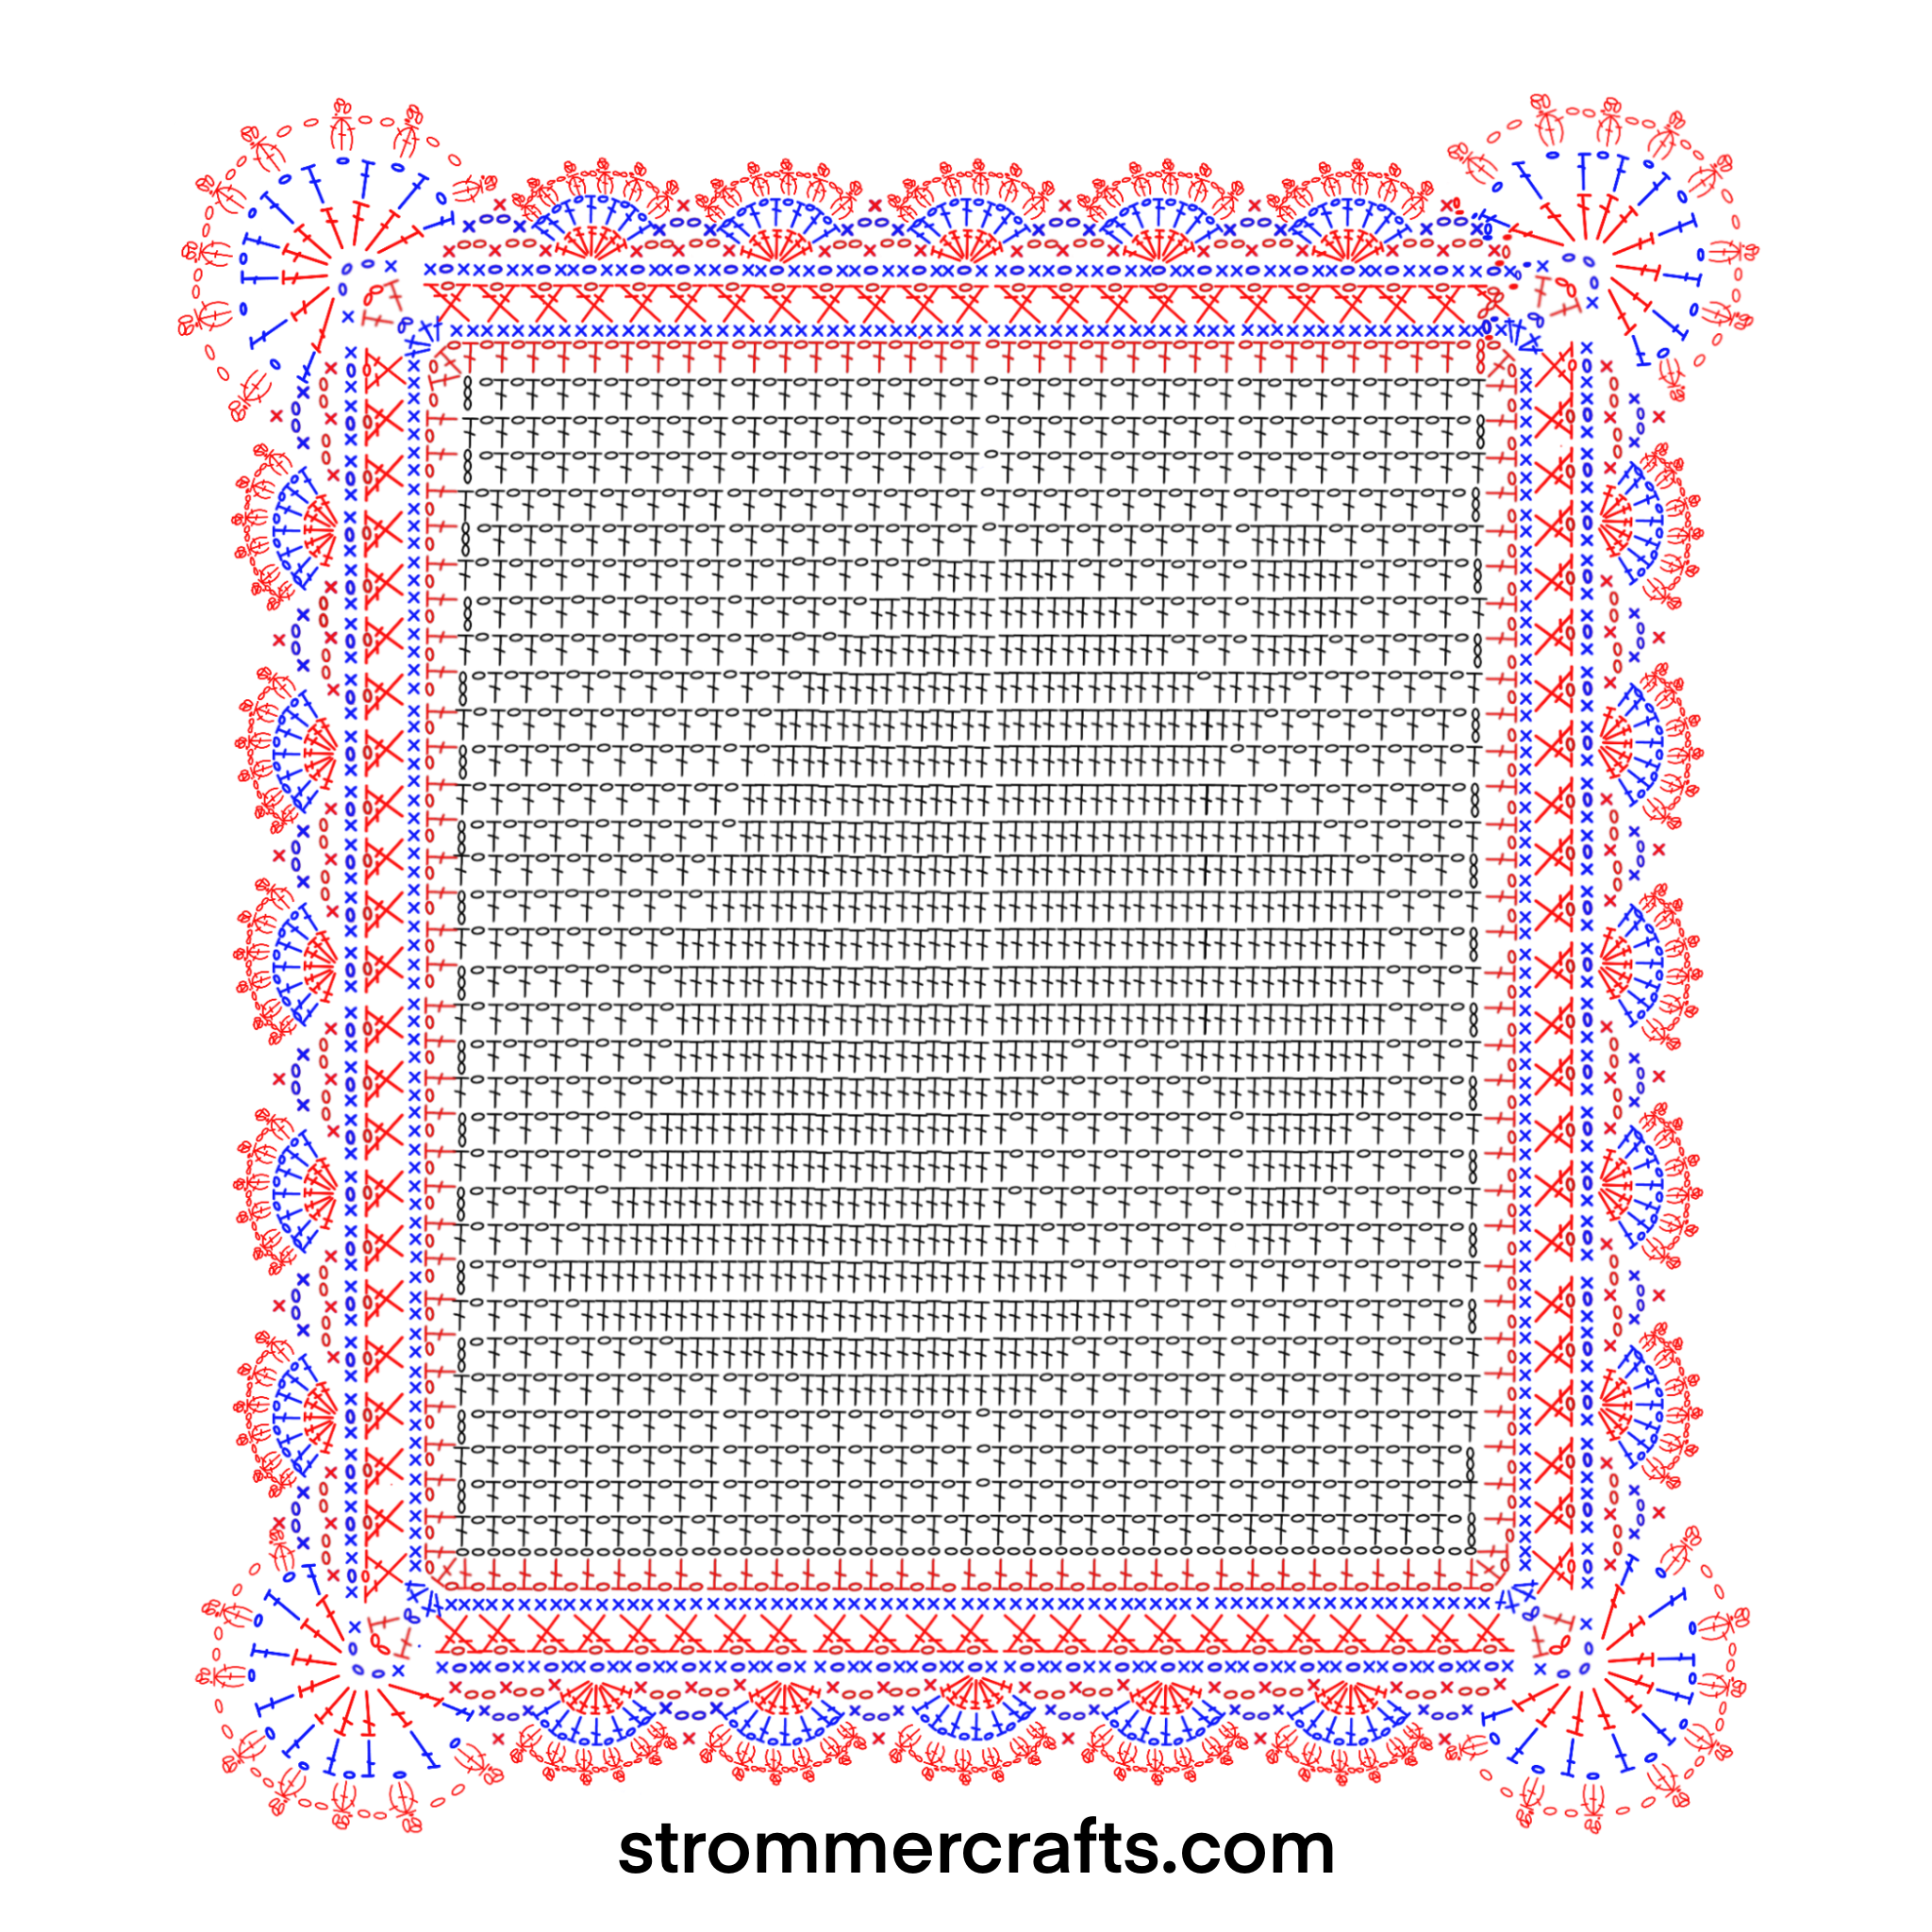
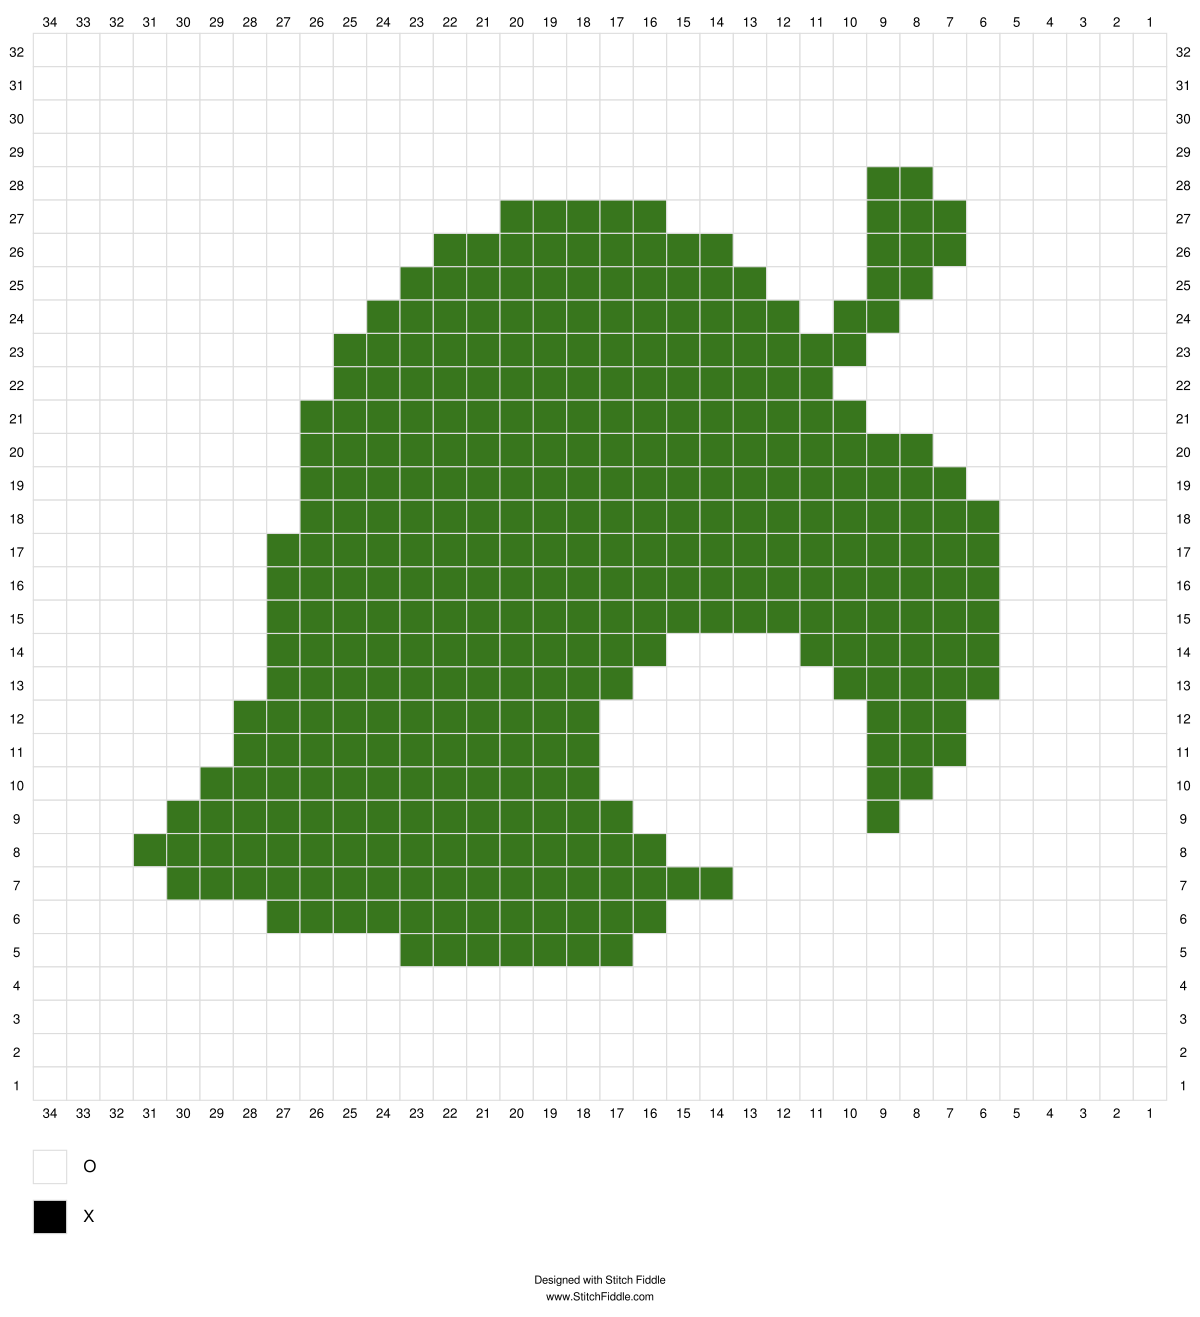
I have two charts to look at as a reference. The first one has the border included and the second one is just the leaf in a simple grid chart.
I thought maybe the top chart with the border might be hard to read in the middle, so I wanted to provided a second option.
For the green leaf chart, each white square is an open square and each green square is a closed square.
Row 1: Start by making 69 chains.
Dc into 7th ch from hook, *ch 1, skip a ch, dc into next ch.* Repeat from *to* until end. You should have 32 “open” squares in this row.
Row 2-4: Ch 4, dc into next dc, ch 1, skip a ch and dc into next dc all the way across. 32 open squares.
Row 5: We will start to make the bottom of the leaf in this row. I am starting by reading the chart from the right side to the left, you can do either way, but make sure the leaf is facing the correct way when you get to the border.
Ch 4, dc into next dc, ch 1, skip a ch, dc into next dc…do this for a total of 14 squares. Dc into next ch 1 space, dc into next dc (this is one closed square made) make 6 more closed squares for a total of 7 closed squares in this row. Make 11 more open squares for the remainder of row.
Row 6-32: Follow the chart(s) until you reach the border.
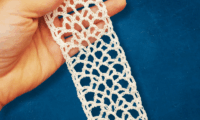
Border:
Round 1: Ch 4, make open squares until first corner (you should have a dc in the top of the 3rd ch from previous row here). (Ch 1, dc, ch 1, dc) in the same ch. This makes a corner of 3 dc separated by ch 1s. Turn down the side of the doily, ch 1, skip length of ch 3, dc in dc from row 31, ch 1, skip length of dc, dc into top of ch 3. Continue making open squares down the side. The second corner should be in the last ch of row 1. (Dc, ch 1, dc, ch 1, dc) in this ch. Refer to chart for details. Sl st to top of starting ch 1. (34 open squares on each side)
Round 2: Ch 1, sc in same ch, sc into each dc and ch 1 space across. When you get to the center dc of the first corner (2 sc, ch 2, 2 sc) in center dc. Continue this way around. Sl st to starting sc. (71 sc on each side with ch 2 space in corners)
Round 3: Ch 4 (counts as dc and ch 1), instead of going forward, go behind and dc into the sc st away from starting ch. Going forward, skip 2 sts, dc into next st, ch 1, turn behind, skip a st, dc into next st. This is an X stitch. Continue X stitches across, (dc, ch 2, dc) into ch 2 corner space. Sl st into 3rd ch of starting ch 4. (23 X stitches on each side with (dc, ch 2, dc) corners)
Round 4: Ch 1, sc into same ch. Ch 1, *skip ch 1 space, sc into next 2 dc.* Repeat from *to.* in corners make ch 3 over ch 2 space. Sl st into first sc.
Round 5: Sl st again into ch 1 space. Ch 1, sc into ch 1 space. *(Ch 2, skip 2 sc, sc into next ch 1 space x2 times). Skip 2 sc, in next ch 1 space make 7 dc (first shell made). Skip 2 sc, sc in next ch 1 space.* Repeat from *to* until corner. Make 9 dc in ch 3 corner space. Skip 2 sc, sc into next ch 1 space. Continue this way around. Sl st into starting sc. (5 7dc shells on each side with 9dc shells in corner).
Round 6: Sl st again into ch 2 space. Ch 2, sc into next ch 2 space. *In shell from previous row, make dc in first dc, ch 1, dc into next dc (make total of 7dc and 6 ch 1s). Sc into next ch 2 space, ch 2, sc into next ch 2 space.* Repeat from *to.* until corner. Make corner in similar fashion to other shells (8 dc and 8 ch 1s). Continue around. Sl st into starting sc.
Round 7: Ch 1, sl st again into ch 2 space. In first ch 1 space of next shell make 3 dc cluster. Ch 3, sl st into top of 3 dc cluster (ch 3 picot made). (Ch 2, 3dc cluster, ch 3 picot in top of cluster in each ch 1 space of shell, should have 6 3dc clusters with 6 ch 3 picots separated by ch 2s). Sc into next ch 2 space. Continue across make corners in similar fashion to previous shells. Sl st to starting sc.
Cut thread with scissors, pull through. Weave in any ends with tapestry needle.
Blocking, Optional But Recommended:
I suggest blocking your Crochet Animal Crossing Doily. I used just water, but if you want it stiff, use a starch solution.
You will need a bowl of water, a towel, pins, and something to block it on. I use this blocking board, but you can use a pizza box or a cardboard box that is large enough.
Soak the doily in the bowl of water for a minute. Gently press it down to get all the air out of the thread.
Pick the doily up out of the water and pat it gently with the towel. Do not wring the water out.
Place the doily on your blocking board or Cardboard box and pin as evenly as possible. Allow to dry for 1-2 days.
That’s it for the Crochet Animal Crossing Doily! I hope that you enjoyed this pattern and that the chars were helpful.
Until next time.
Absolutely Lovely Crochet Lace Edging -
[…] pattern is very similar to the border I used for my Crochet Animal Crossing Doily, but I’ve tweaked it just a little to make it slightly better I […]