Crochet Sweater for Child – Free Pattern
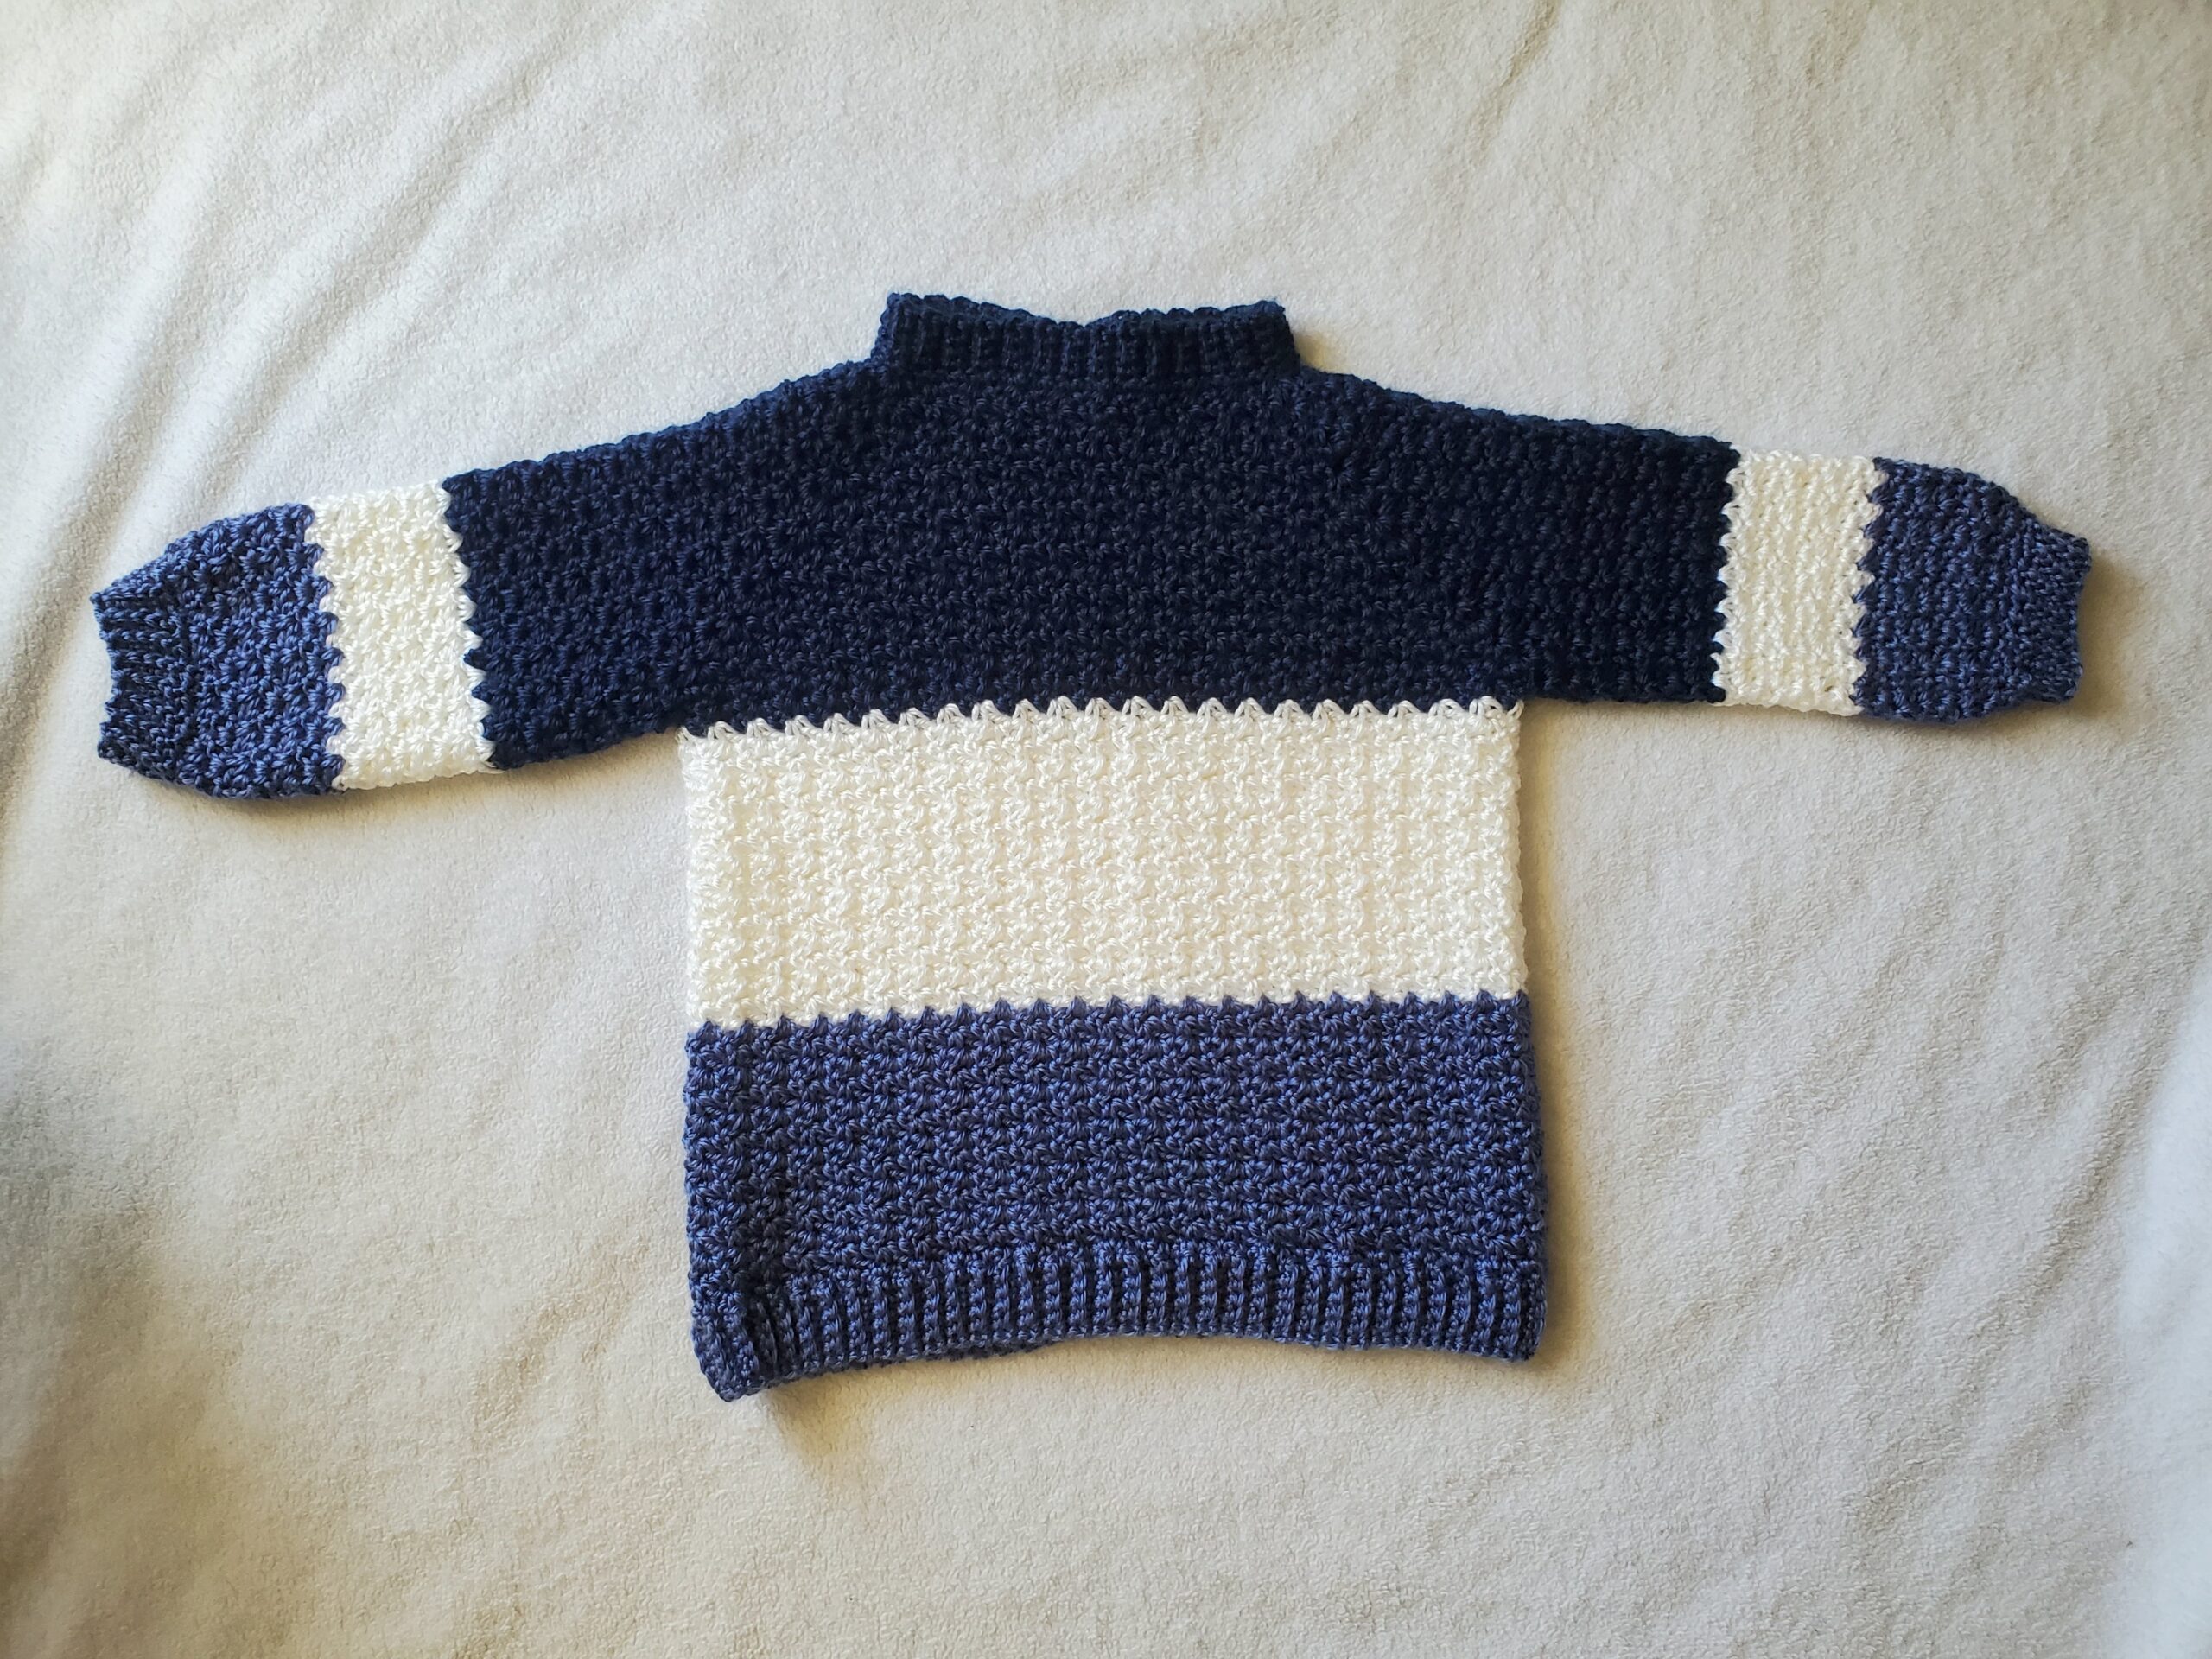
Hello everyone, I hope you have all enjoyed the holidays and have had a happy new year’s! Today I have a crochet sweater for a child pattern for you.
I’ve made a few sweaters in the past for my girls, but now that they’re a little bigger, they no longer fit. I decided to see if I could crochet a bigger one with yarn from Yarn Bee’s Soft Secret line.
I’m really enjoying working with this kind of yarn. It’s acrylic (so not as expensive as other yarn types), but incredibly soft and stretchy. The soft, stretchiness of the yarn is perfect for a nice, drapey sweater.
Yarn Bee claims that this yarn is a 4 medium weight, but to be perfectly honest, after using this yarn for a few projects, I think it’s a little lighter/smaller than that. So keep that in mind if you’re using a different type of yarn.
Caron Simply Soft yarn would be my second go to for this crochet sweater pattern. It also claims to be a 4 medium weight, but seems to be a little lighter in my opinion. It’s also an incredibly soft acrylic yarn.
One thing that I love about this sweater, is that it’s worked from the top, down.
This was nice because I had my little models close by and I could just slip the sweater over them and make adjustments as needed. Other sweater patterns might have you make a bunch of different panels and sew them together (which is fine, but the less sewing, the better imo).
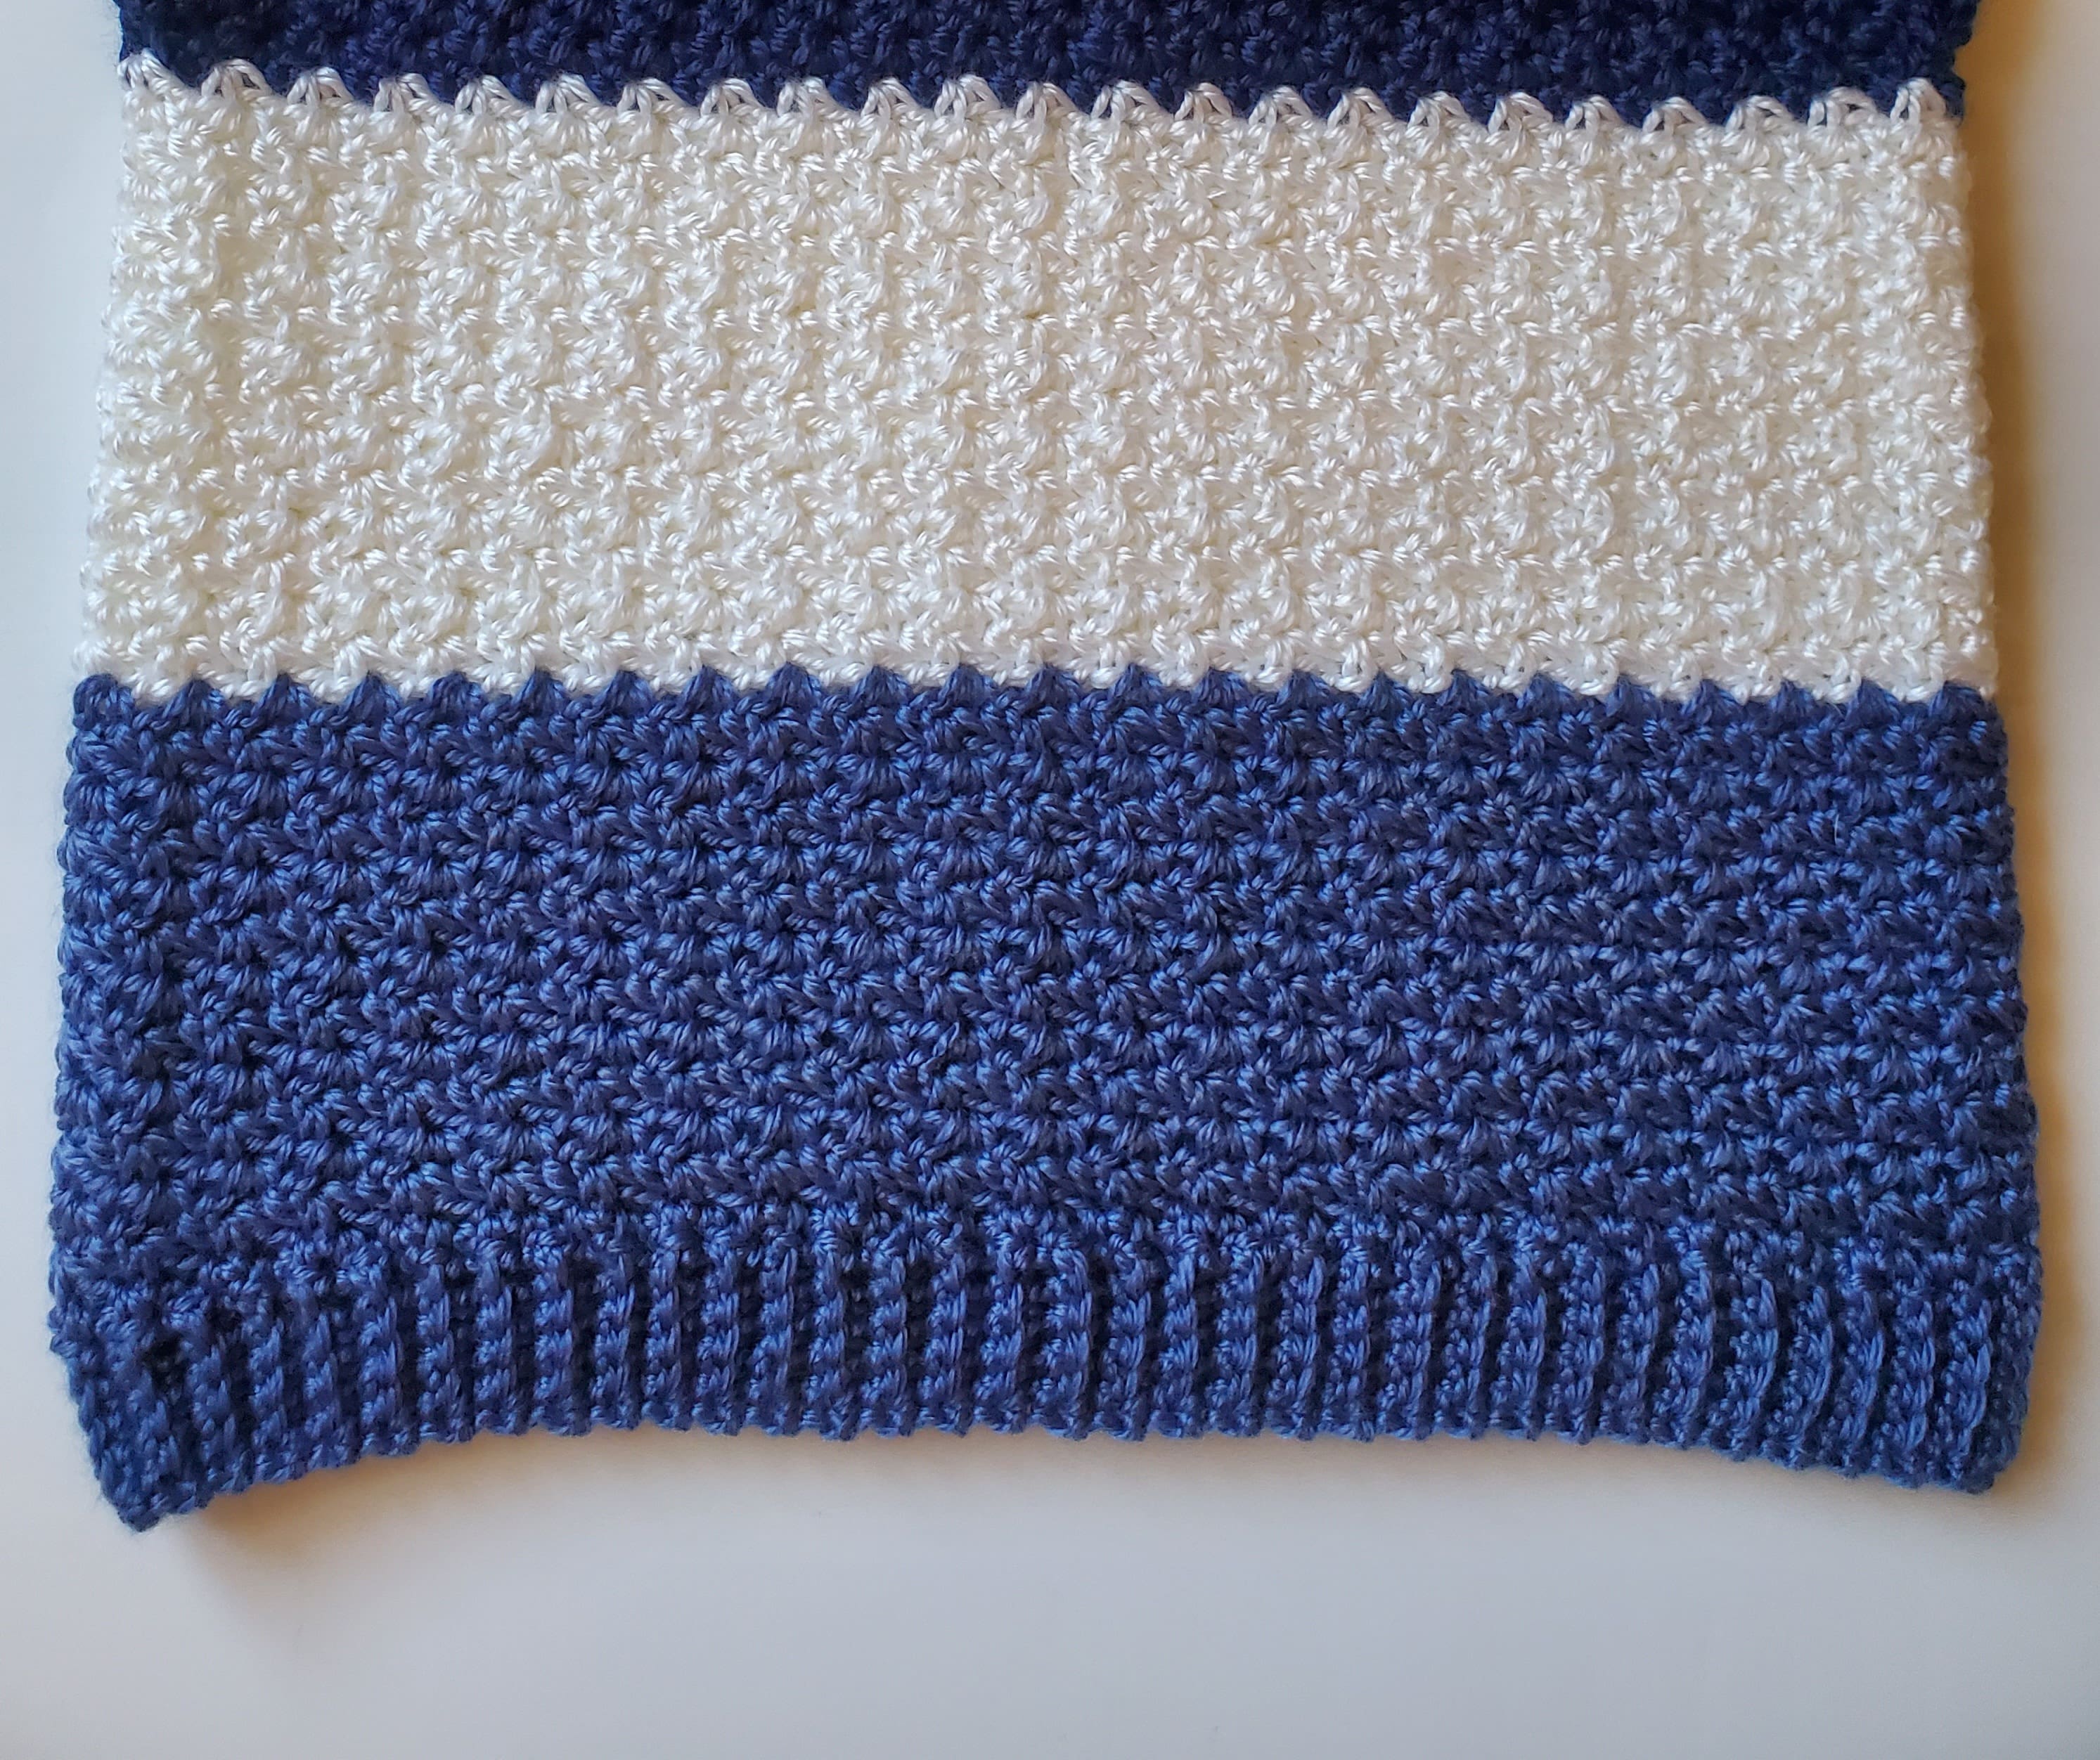
Another thing I love about the sweater is that it has a wonderful texture to it! It’s created with one of my favorite types of stitches: the wattle stitch! This stitch is simple and creates a lovely texture that isn’t boring.
To wattle stitch you; (sc, ch 1, dc) all in the same stitch, skip two stitches and repeat. Then when you wattle stitch in the next round, you (sc, ch 1, dc) in the ch 1 spaces from the previous wattle stitch.
Related Posts:
This sweater will fit a preschooler to a small child, but you can make this sweater a bigger or smaller size.
Here are the general steps to create this sweater in a different size:
- Measure the head circumference of whoever this sweater is for, take note of that number.
- Make the neck ribbing long enough so that it will stretch to that head circumference number (if you make the ribbing the exact same size as the head circumference, the sweater might end up being too baggy).
- Find the corners for the shoulders. This is done by counting the stitches after the single crochet row (round 61) of the neck ribbing, dividing it by 4 and rounding up or down. The number you get after dividing by 4, will tell you how many stitches from the beginning and end of your sweater, you should place your stitch markers.
- Continue crocheting around the neck ribbing and make increases where you placed the stitch markers.
- At some point you should be able to fold the sweater in half and determine if you have enough space for the arms, if not keep making increases. Once you’re happy with the arm hole size, you’ll join them together by crocheting the corner increases together.
- Continue crocheting until you reach the sweater length that you desire.
- Create the bottom ribbing.
- Make the arm sleeves by crocheting in the arm hole you created earlier until desired length and then make your sleeve cuffs.
Easy peasy, right? No worries, it will all make sense as we go along.
Please note that some of these links are affiliate links. That means that if you click on these links and make a purchase, I may receive a commission at no extra cost to you. You can find more information about our disclosure policy here. Thank you for your support.
Materials Needed:
- 5 mm crochet hook
- Yarn Bee’s Soft Secret in Navy Blue x 1 skein (300 yards)
- Yarn Bee’s Soft Secret in White x 1 skein (300 yards)
- Yarn Bee’s Soft Secret in Denim x 1 skein (300 yards)
- Stitch Markers
- Scissors
- Tapestry Needle
Abbreviations Used:
Please note these are in US terms, not UK.
- Ch – chain
- St(s) – stitch(es)
- Sl st – slip stitch
- Sc – single crochet
- Dc – double crochet
- Sc2tog – single crochet two stitches together
- Wattle stitch – series of (sc, ch 1, dc) in same st/space.
Crochet Sweater for Child Pattern:
Neck Ribbing:
With Navy Blue yarn;
- Round 1: Ch 5, insert hook into 2nd ch from hook and sc across (4 sts)
- Round 2-60: Ch 1, turn, sc in first st, sc in back loop of next 2 sts, sc in last st (4 sts)
Fold together and make 4 slip sts in the top to sew into a band.
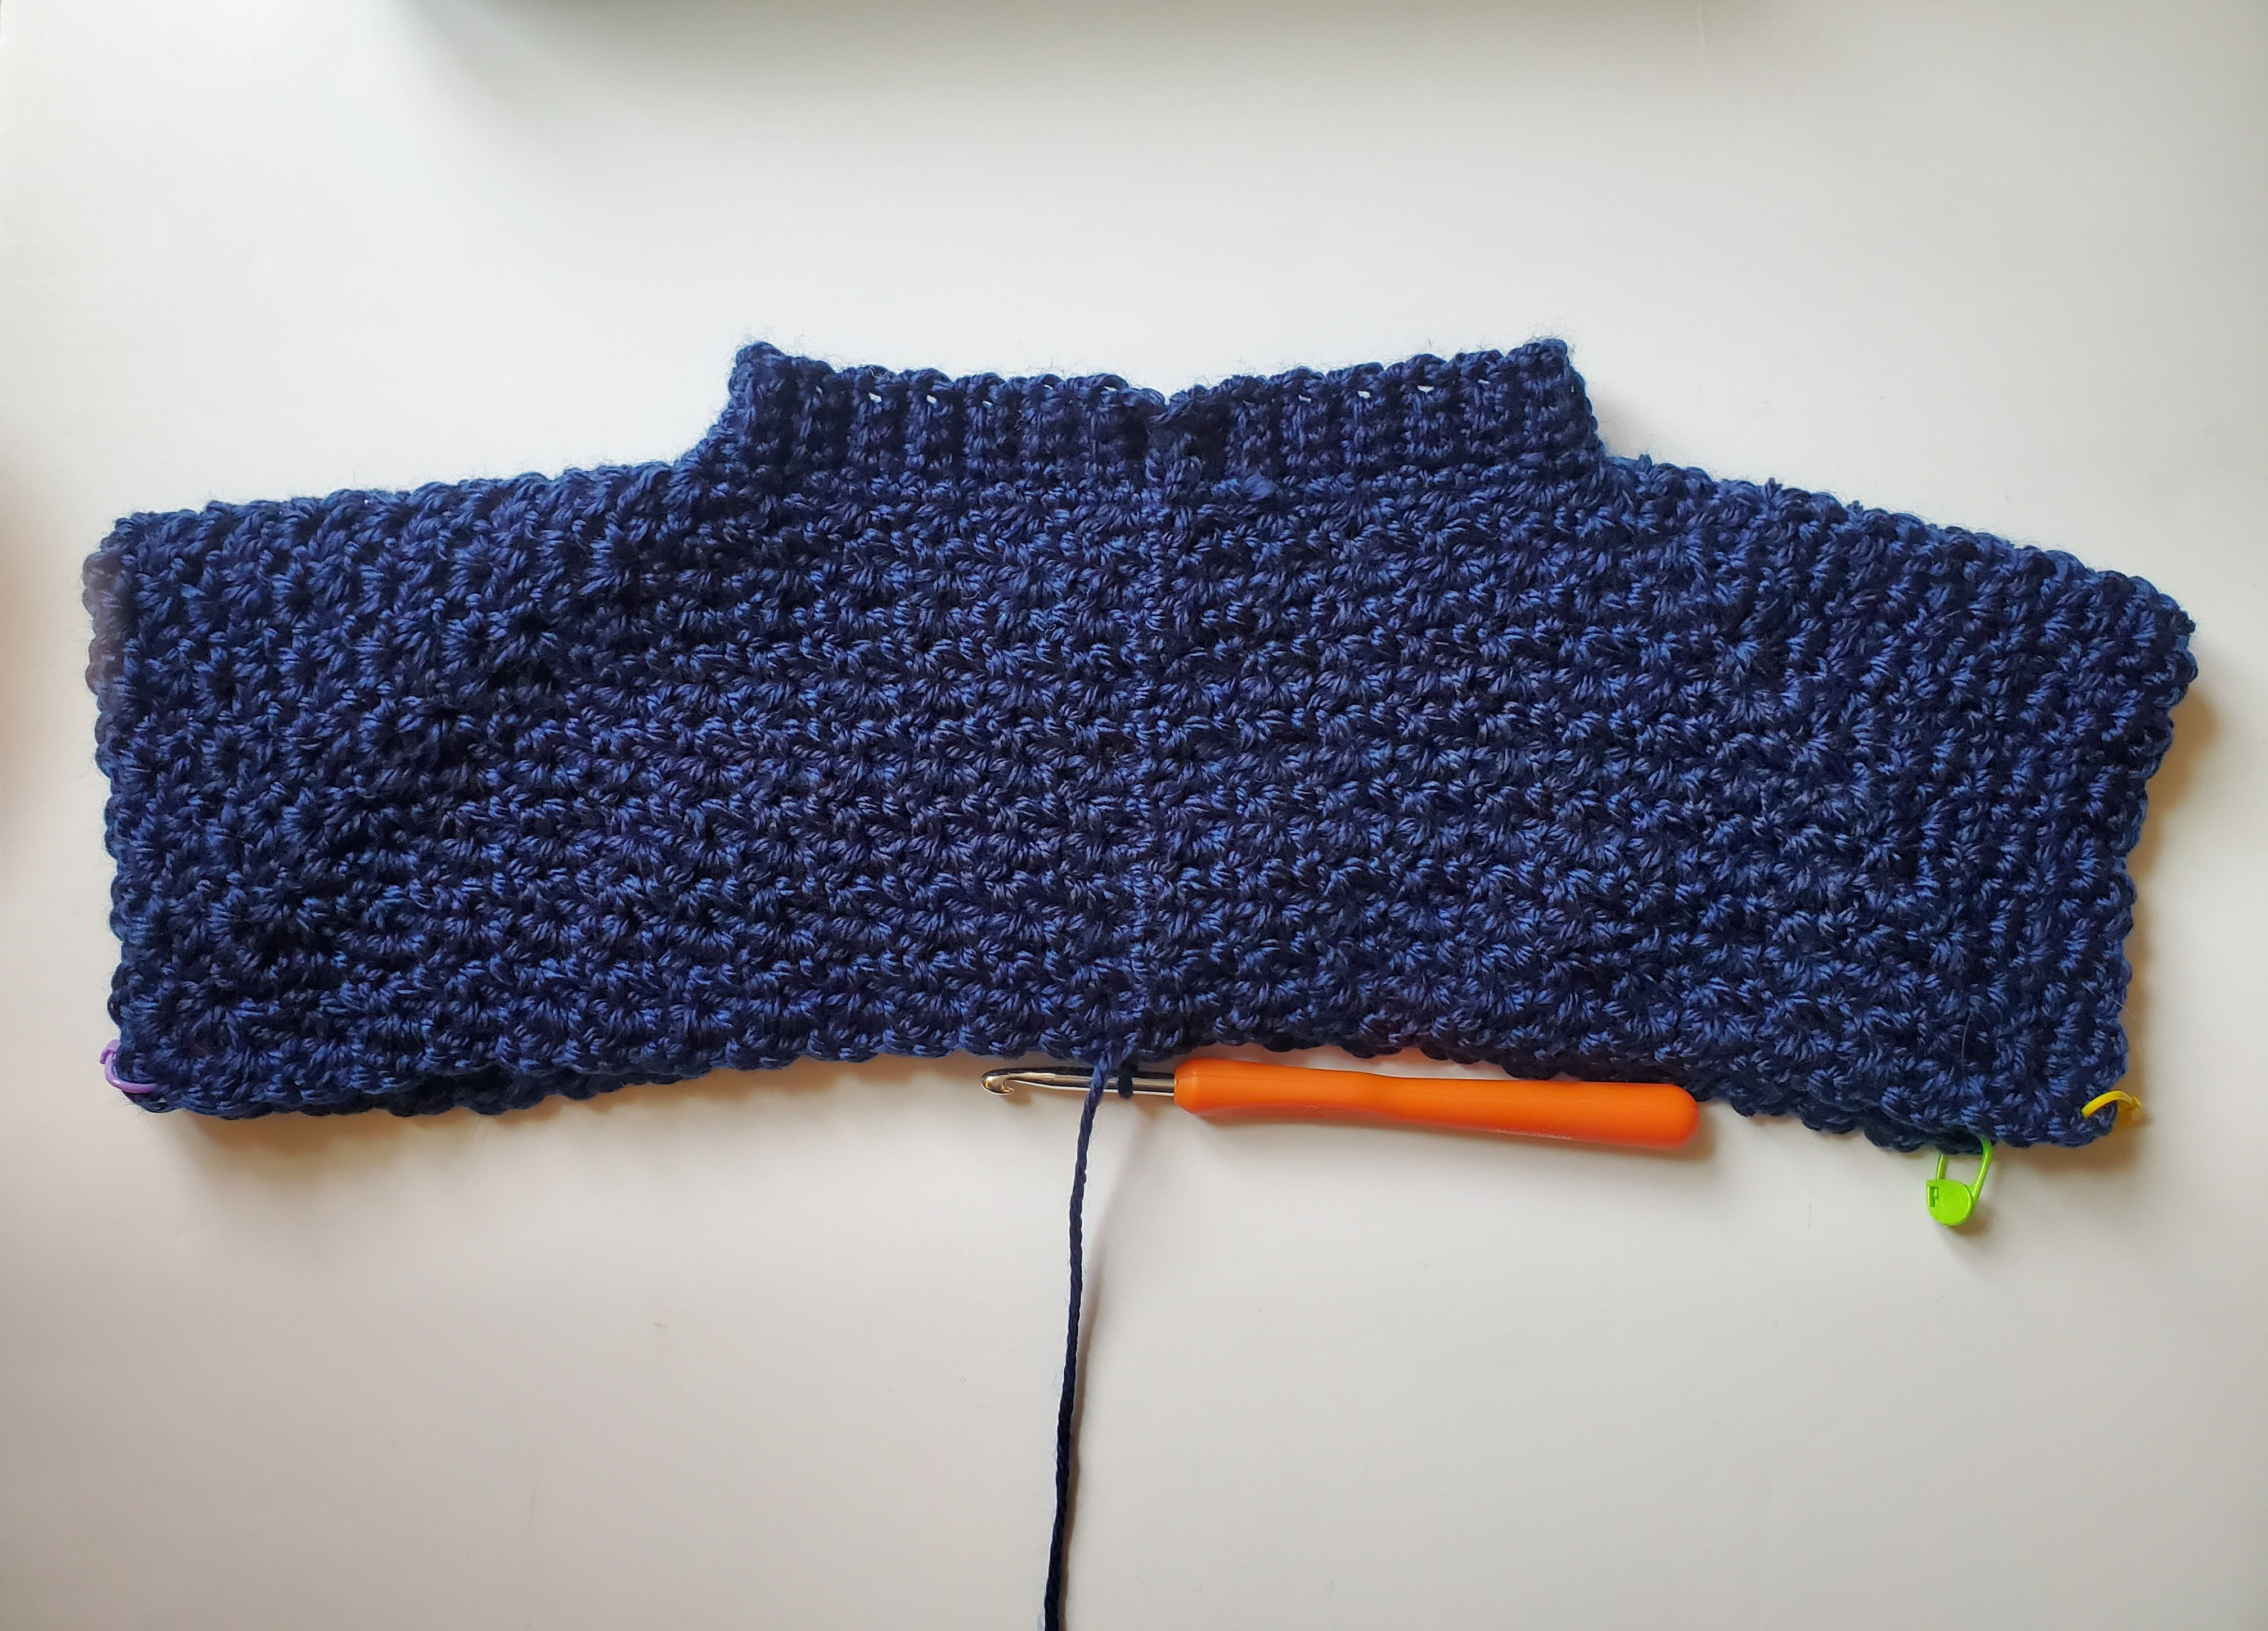
Round 61: Sl st into the edge of your band, ch 1, sc in same space, mark this stitch with a stitch marker. We will be making 1 sc into every “valley” and “ridge” of the band. Mark the last stitch with a stitch marker. Join with a sl st to first st (60 sts). Remember, whatever your stitch count is, if making a different size, make this a multiple of 3.
We will now mark corner stitches in the neck ribbing to start our increases for the shoulders. Mark the 15th st, 18th st, 43rd st, and 46th st with stitch markers if following this pattern.
Instructions for different sizes: To find the corner stitches for the shoulders, I’m essentially taking the total sc stitch count I have, and dividing it by 4, placing a stitch marker in that number away from the first stitch and placing another stitch 3 stitches away from that one. Then I do the same on the other side by counting from the last stitch and going the opposite way.
For example: I had 60 sts, 60/4 = 15.25. I round down and place a stitch marker in the 15th stitch away from the first and last stitch. I then count 3 stitches more and place another stitch marker.
Neck and Shoulders:
- Round 1: Ch 1 and turn your work. *(sc, ch 1, dc) (this is called the wattle stitch) in next st (your first st marked with the marker), skip 2 sts*, repeat from *to,* you should have 1 st left before the first corner st marker, skip 1 st, (sc, ch 1, dc, ch 2, sc, ch 1, dc) in the first corner stitch marked. Move your stitch marker into the ch 2 space. Skip 2 sts and (sc, ch 1, dc, ch 2, sc, ch 1, dc) in the next corner stitch marked. Move your st marker into ch 2 space as well.
- Skip 1 st, **(sc, ch 1, dc) in next st, skip 2 sts,** repeat from **to** until you have 1 st before the next marked corner st. Skip 1 st, (sc, ch 1, dc, ch 2, sc, ch 1, dc) in the first corner stitch marked. Move your stitch marker into the ch 2 space. Skip 2 sts and (sc, ch 1, dc, ch 2, sc, ch 1, dc) in the next corner stitch marked. Move next corner st marker into the ch 2 space. Skip 1 st, repeat from **to** again. You should have a (sc, ch 1, dc) in the last st of the round, sl st to first st.
- Round 2: Ch 1, turn, *(sc, ch 1, dc) in next ch 1 space of previous round, skip sc and dc of previous row and (sc, ch 1, dc) again,* repeat from *to* until you reach the marked ch 2 space of previous round’s corner stitch. **(sc, ch 2, dc) in ch 2 space. Place stitch marker in ch 2 space. (sc, ch 1, dc) in next ch 1 space, (sc, ch 1, dc) in next ch 1 space again. (sc, ch 2, dc) in next ch 2 corner space**. Repeat from *to* until next corner spaces. Repeat **to**. Repeat *to* once more. Sl st to first sc of round.
- Round 3: Ch 1, turn, *(sc, ch 1, dc) in next ch 1 space, skip sc and dc* repeat from *to* until next ch 2 corner space. **(sc, ch 1, dc, ch 2, sc, ch 1, dc) in ch 2 space. (sc, ch 1, dc) in next ch 1 space, skip sc and dc until next corner. (sc, ch 1, dc, ch 2, ch 1, dc) in next ch 2 corner space.** Repeat from *to* until next set of corner spaces. Repeat from **to** in next set of corner spaces. Repeat from *to* once more. Sl st to first sc of round.
- Round 4: Ch 1, turn, repeat round 2.
- Round 5: repeat round 3.
- Round 6: repeat round 2.
- Round 7: repeat round 3.
- Round 8: repeat round 2.
- Round 9: repeat round 3.
- Round 10: repeat round 2.
- Round 11: repeat round 3.
- Round 12: repeat round 2.
- Round 13: repeat round 3
- Round 14: repeat round 2
Length from bottom of neckline to bottom of chest at this point is about 4.5 inches. End on a repeat from round 2 if crocheting a different size.
Armholes:
Round 15: Ch 1, turn, *(sc, ch 1, dc) in next ch 1 space, skip sc and dc* repeat from *to* until first ch 2 corner space. Fold so both ch 2 corner spaces are touching, inserting your hook into both ch 2 spaces, (sc, ch 1, dc). You might have to turn your work a little to get the dc into ch 2 space correctly. This creates one of the arm holes. Continue wattle stitching across (don’t wattle stitch around the sleeves) until the next set of ch 2 spaces. Fold together and wattle stitch into both the ch 2 spaces. Wattle stitch until end of row. Sl st into first st.
Cut yarn and switch to White. Sl st into first st.
- Round 16-31: Ch 1, turn, wattle stitch around, sl st to first st.
Cut yarn and switch to Denim. Sl st into first st.
Round 32-43: Ch 1, turn, wattle stitch around, sl st to first st.
Bottom Ribbing:
- Round 44: Ch 6, insert hook into 2nd ch from hook and sc across ch and sc into the same space as sl st join from round 40. (5 sts)
- Round 45: Sc into ch 1 space from wattle stitch from round 40, turn, skip first st, sc into back loop of next 4 sts, sc into last st (5 sts)
- Round 46: turn, (do not ch 1), sc into first st, sc into back loop of next 4 sts, sc into dc of wattle stitch from round 40, sc into sc of next wattle stitch
- Round 47: turn, skip first two sts, sc into back loop of next 4 sts, sc into last st
- Round 48: turn (do not ch 1), sc into first st, sc into back loop of next 4 sts, sc into ch 1 space, sc into dc of wattle stitches from round 40.
- Round 49: repeat round 47.
- Round 50: turn (do not ch 1), sc into first st, sc into back loop of next 4 sts, sc into sc of wattle stitch, sc into ch 1 space of wattle stitch.
Continue making the ribbing this way and attaching to the body of the sweater by sc into the sc, ch 1 space, and dc of the wattle stitches from round 40.
Once you reach the beginning of the bottom ribbing, fold together and sew together into each st with a sl st.
Cut yarn, pull through, weave in end with tapestry needle.
Sleeves x2:
Change to Navy Blue
- Round 1: Insert hook into the armpit of the sleeve and attach with a sl st. Ch 1, wattle stitch around, sl st to first sc (make sure you are crocheting in the opposite way of the previous round of the arm hole, you should be looking at your wattle stitches with a dc first and then ch 1 and sc. This keeps the texture of the sweater consistent throughout the sleeves).
Round 2-7: Ch 1, turn, wattle stitch around, sl st to first st.
Cut yarn, pull through
Change to White, attach with a sl st in same space as previous sl st from round 7.
- Round 8-14: Ch 1, turn, wattle stitch around, sl st to first st.
Cut yarn and pull through
Change to Denim, attach with a sl st in same space as previous sl st from round 14.
- Round 15-21: Ch 1, turn, wattle stitch around, sl st to first st
- Round 22: Ch 1, turn, wattle stitch in the first ch 1 space, *sc into the next ch 1 space, wattle stitch in the next ch 1 space,* repeat from *to* around, ending with a sc in the last ch 1 space.
Sleeve Cuff x2:
Make sure that the same side of the sleeve cuff is facing out on both sides for consistency. You’ll notice that the texture on the front is different than the back. If the second cuff isn’t quite matching your first cuff’s texture, try turning and going the opposite way when you start your ch 6.
- Round 23: Ch 6, turn, sc into 2nd ch from hook and next 3 chs, sc2tog in last ch and in same st as sl st. (5 sts)
- Round 24: sl st into next st on the sleeve, turn, (going up the ch 6), skip sl st just made, sl st loosely into back loop of next 5 sts.
- Round 25: Ch 1, turn, sc in back loop of next 4 sts (these may be a little tight to get into as they are slip stitches, that’s why we are sl sting loosely in round 24), sc2tog in the last st and in the next st along the edge of the sleeve.
- Round 26: sl st into next st on the sleeve, turn, skip sl st just made, sl st loosely into back loop of next 5 sts.
Repeat rounds 25-26 until you’ve reached the beginning of round 23.
Line both ends of the cuff together and sl st to sew into each st. Cut yarn with scissors, pull through, weave in end with tapestry needle.
There you go! I hope your sweater turned out just as lovely as mine! If you have any questions, don’t hesitate to ask below.
Until next time!
Other Posts You May Like:


