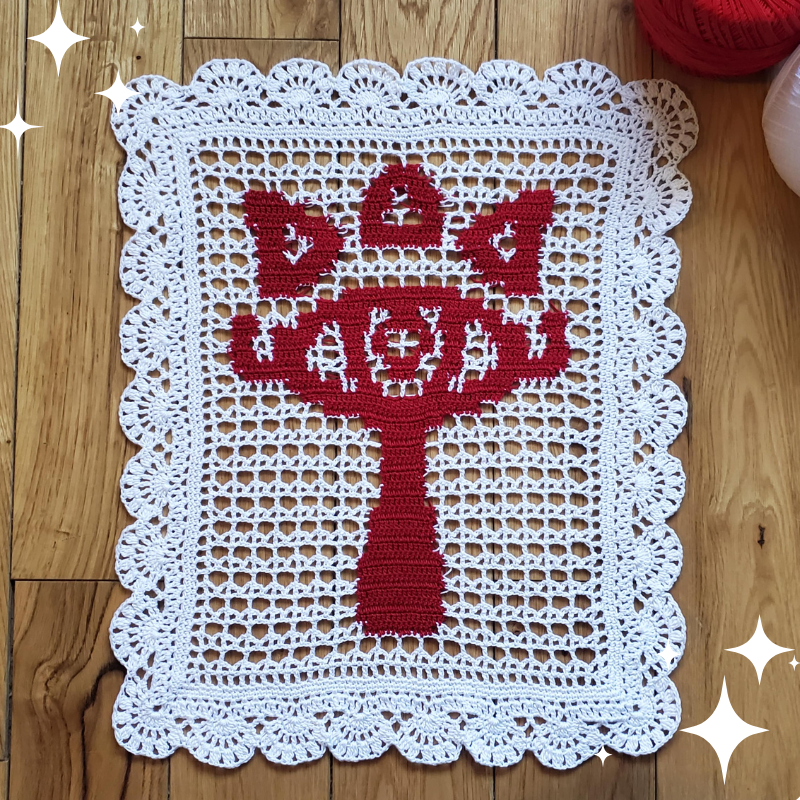
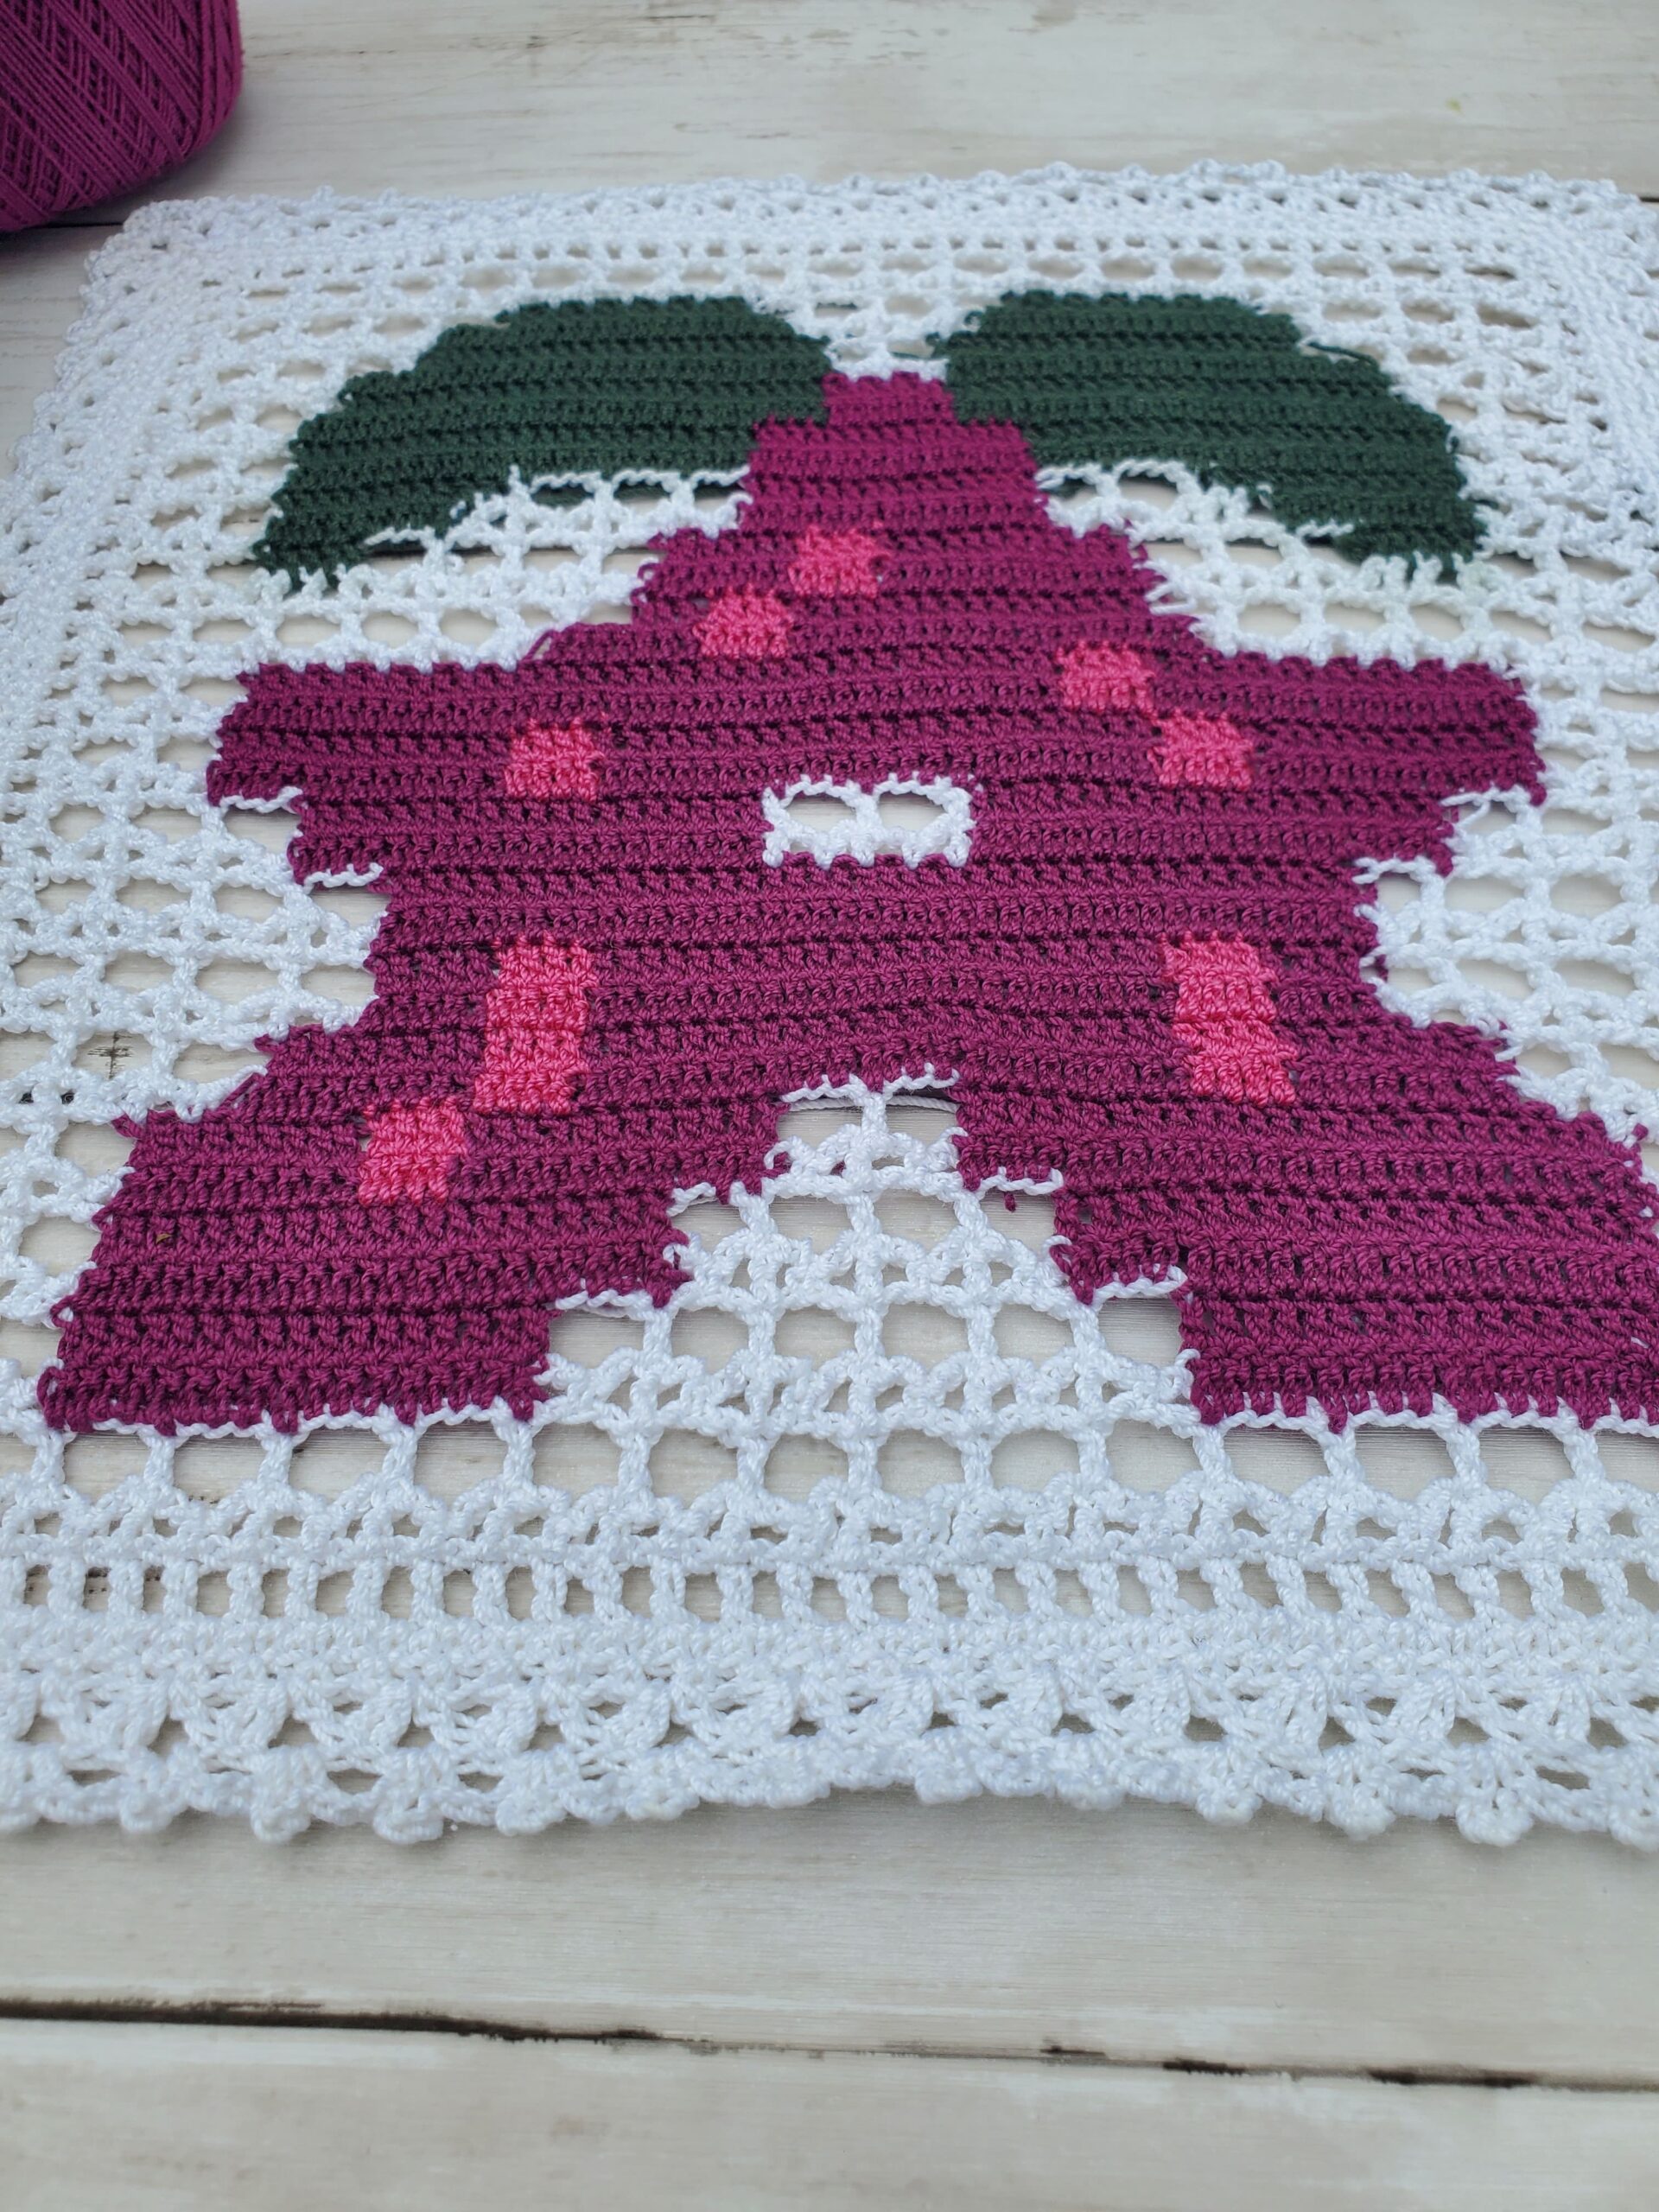
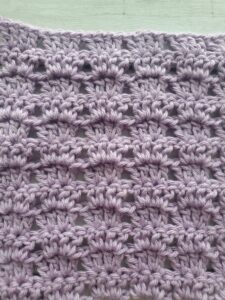
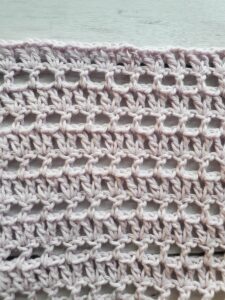
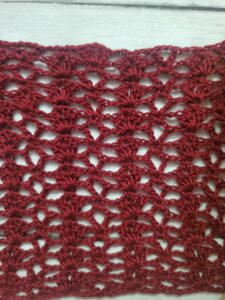
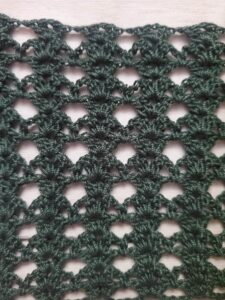
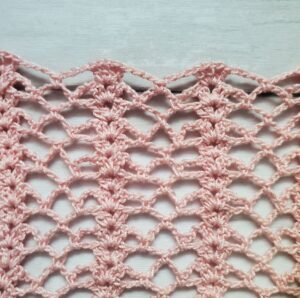
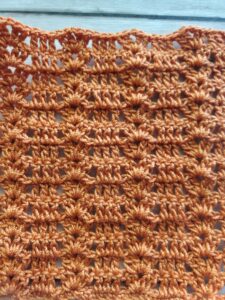
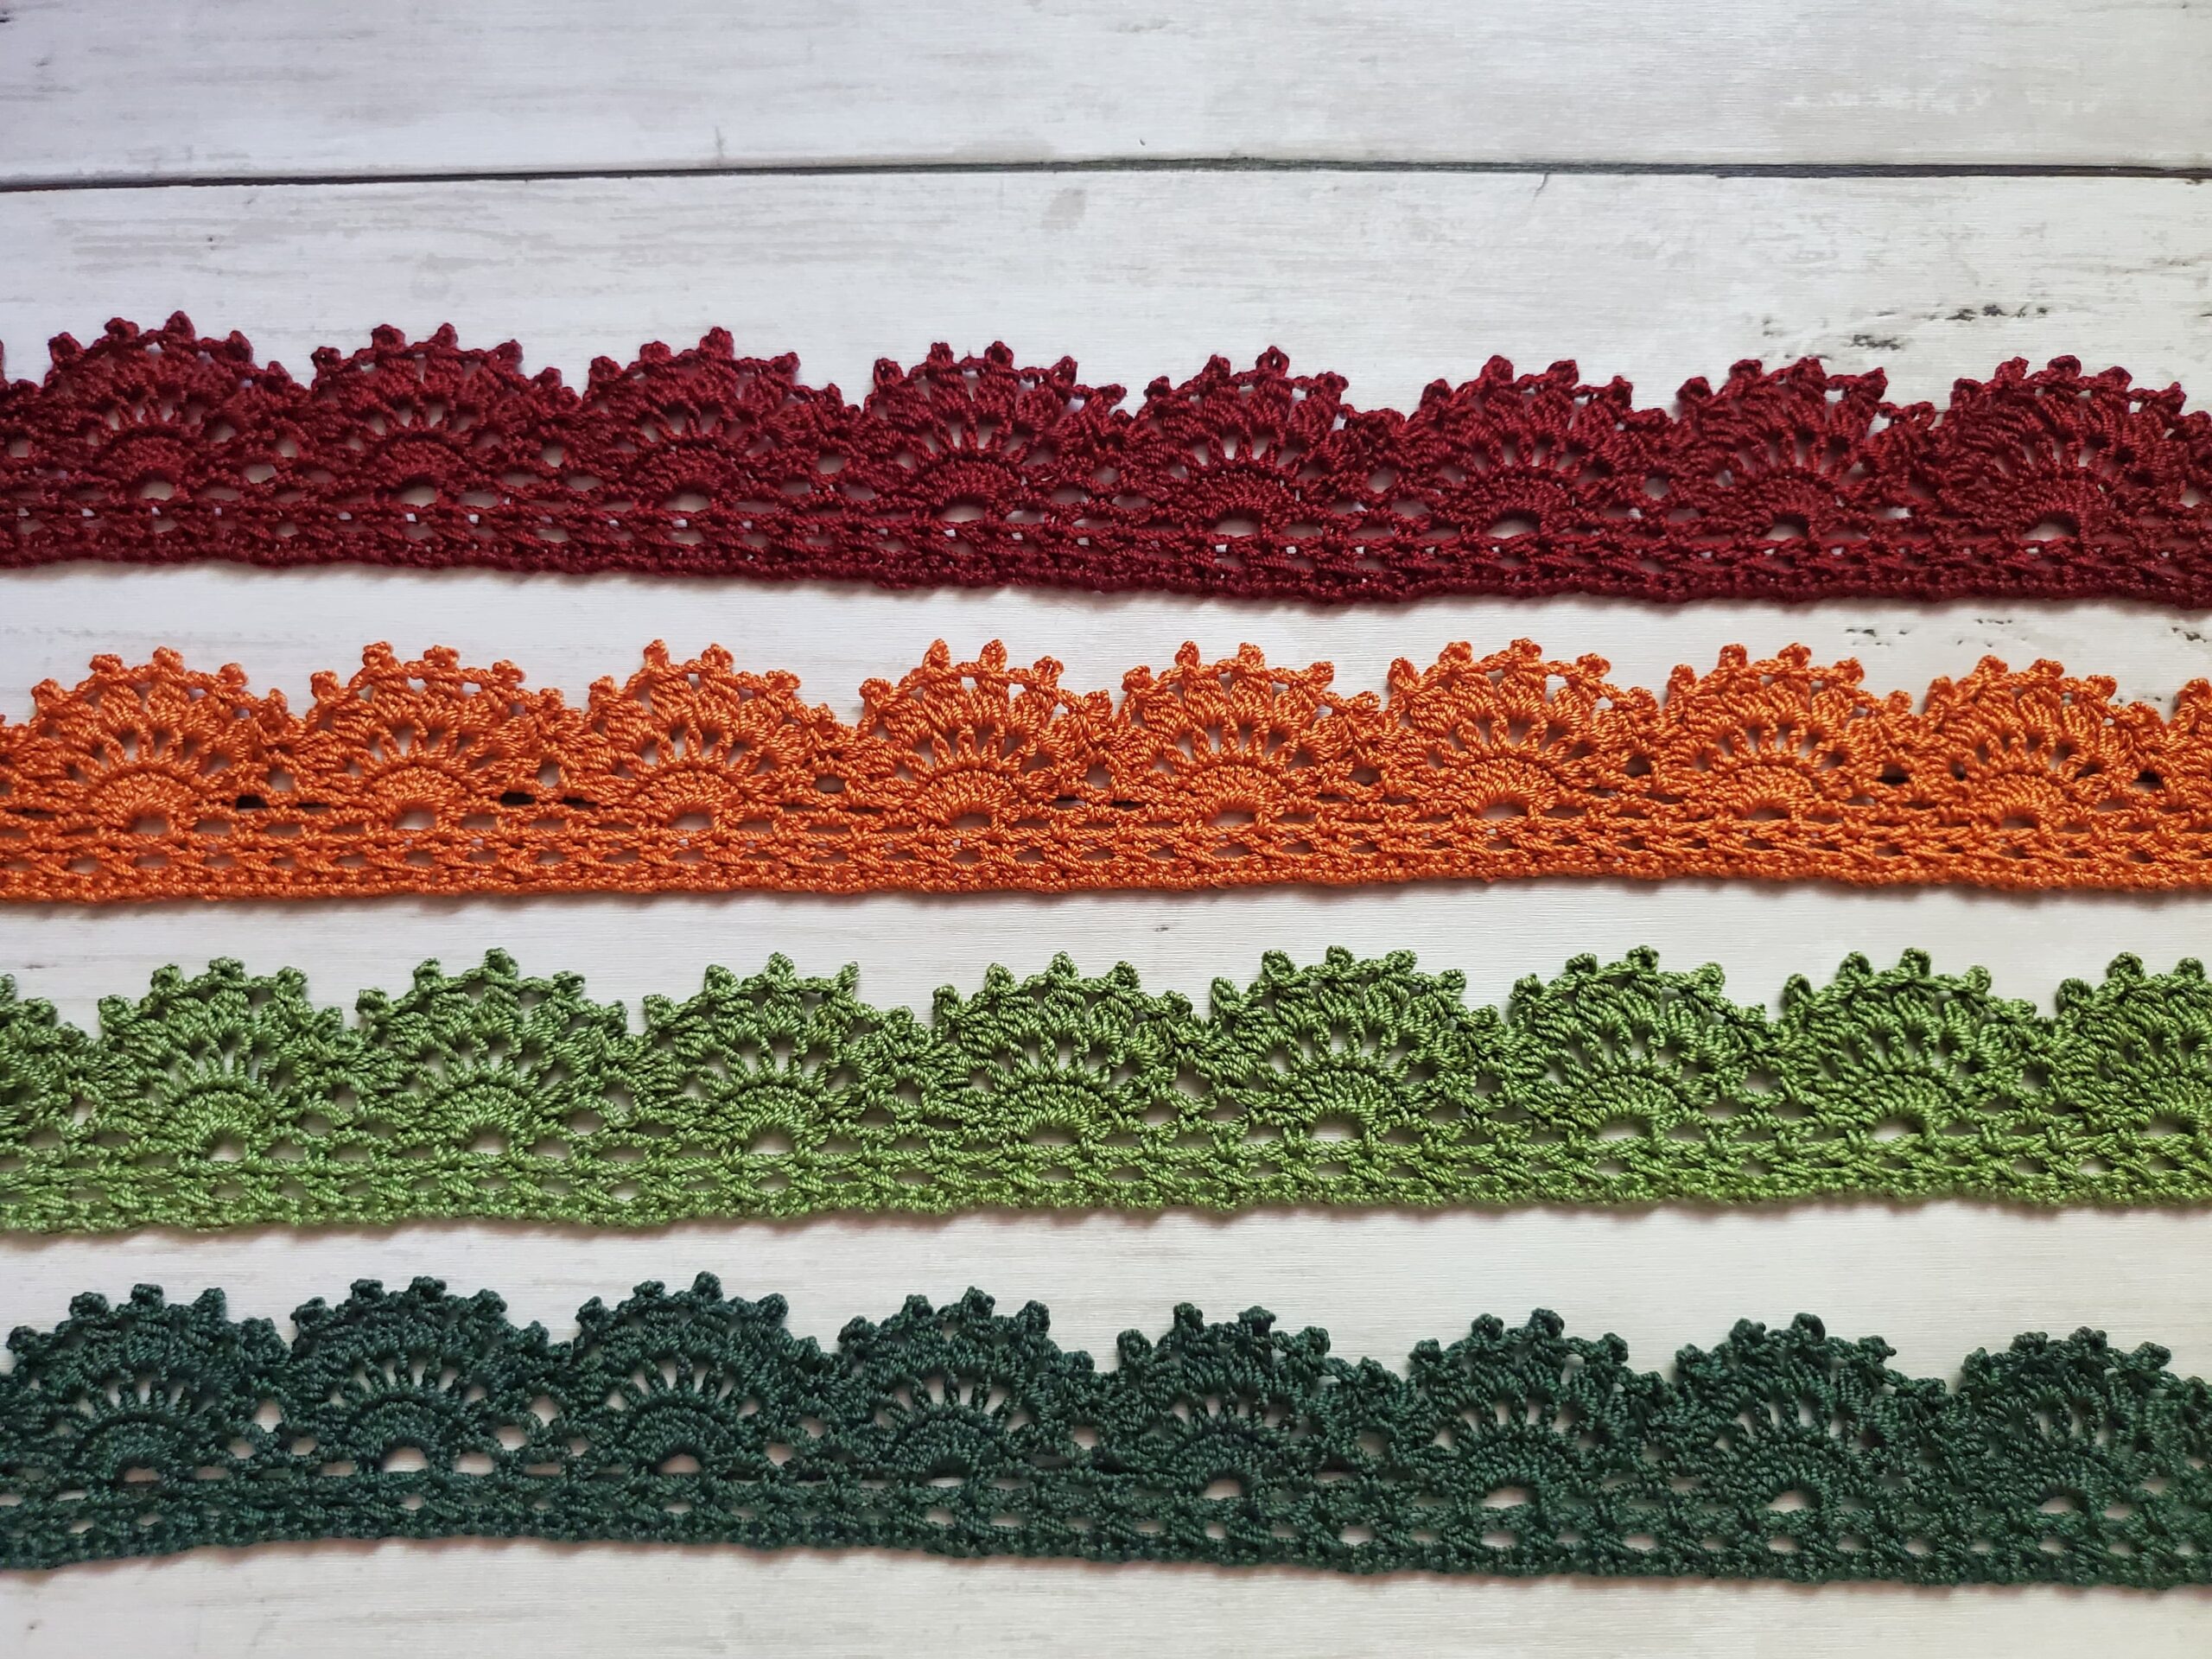
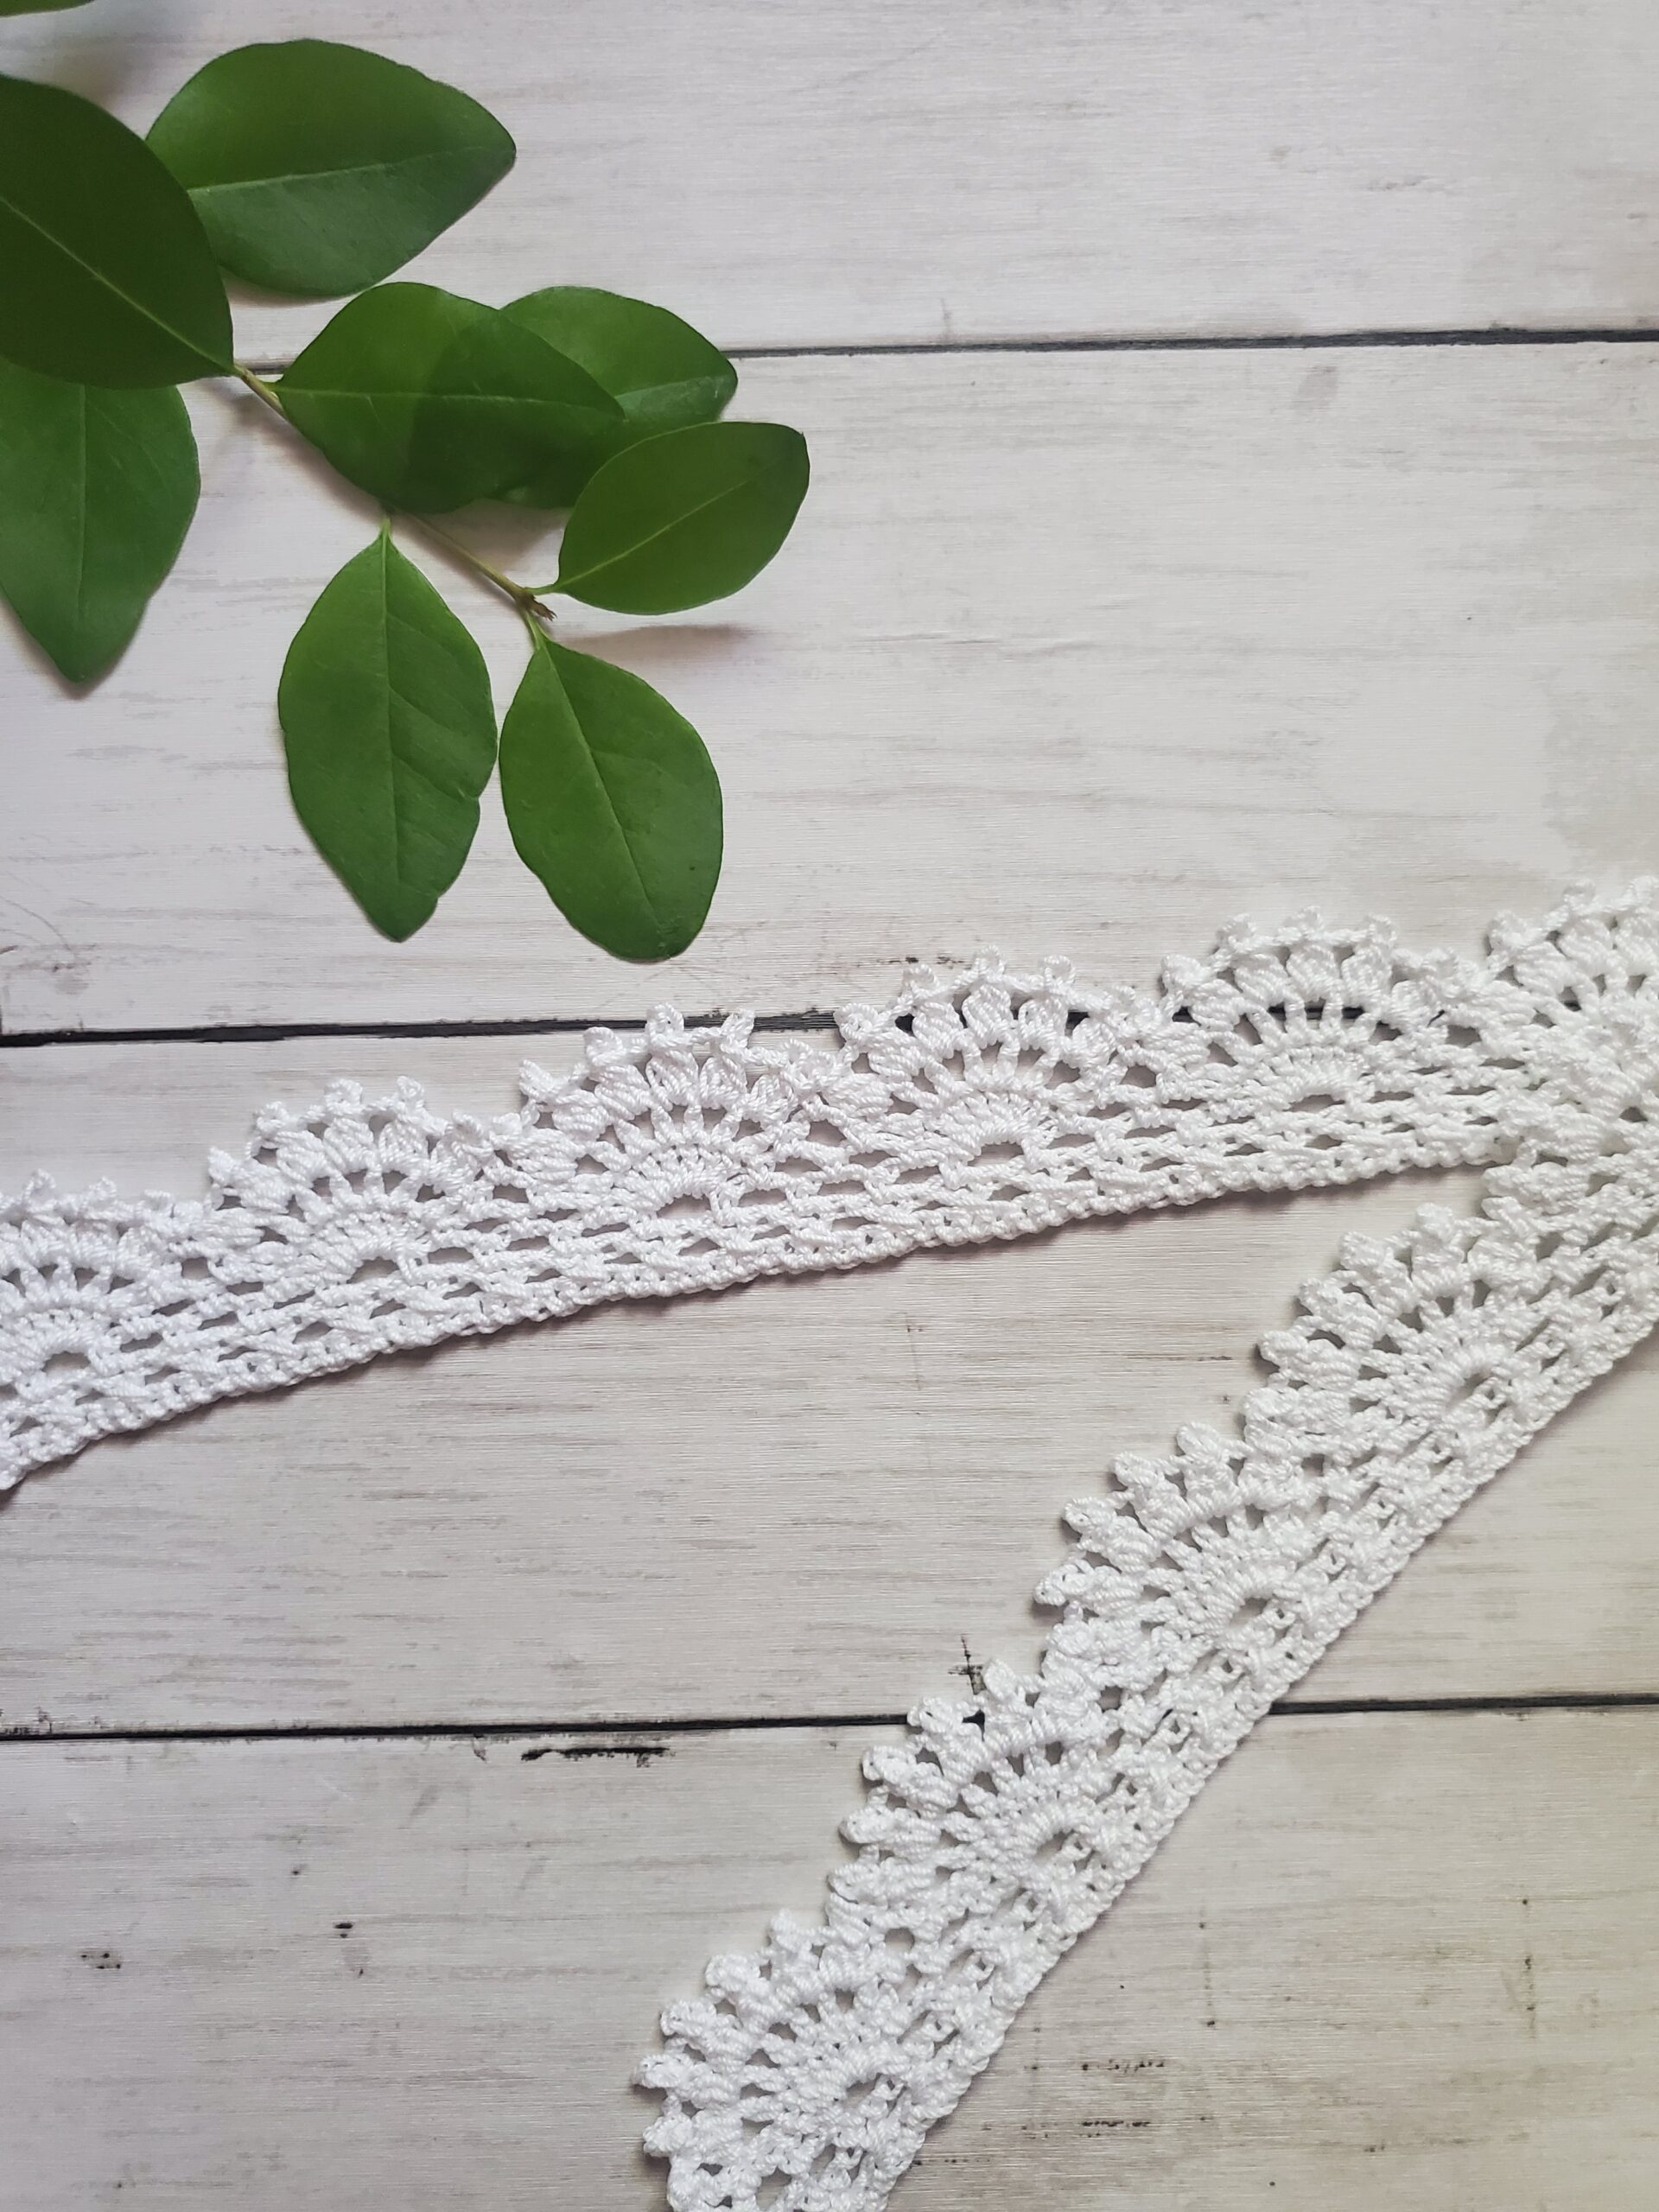
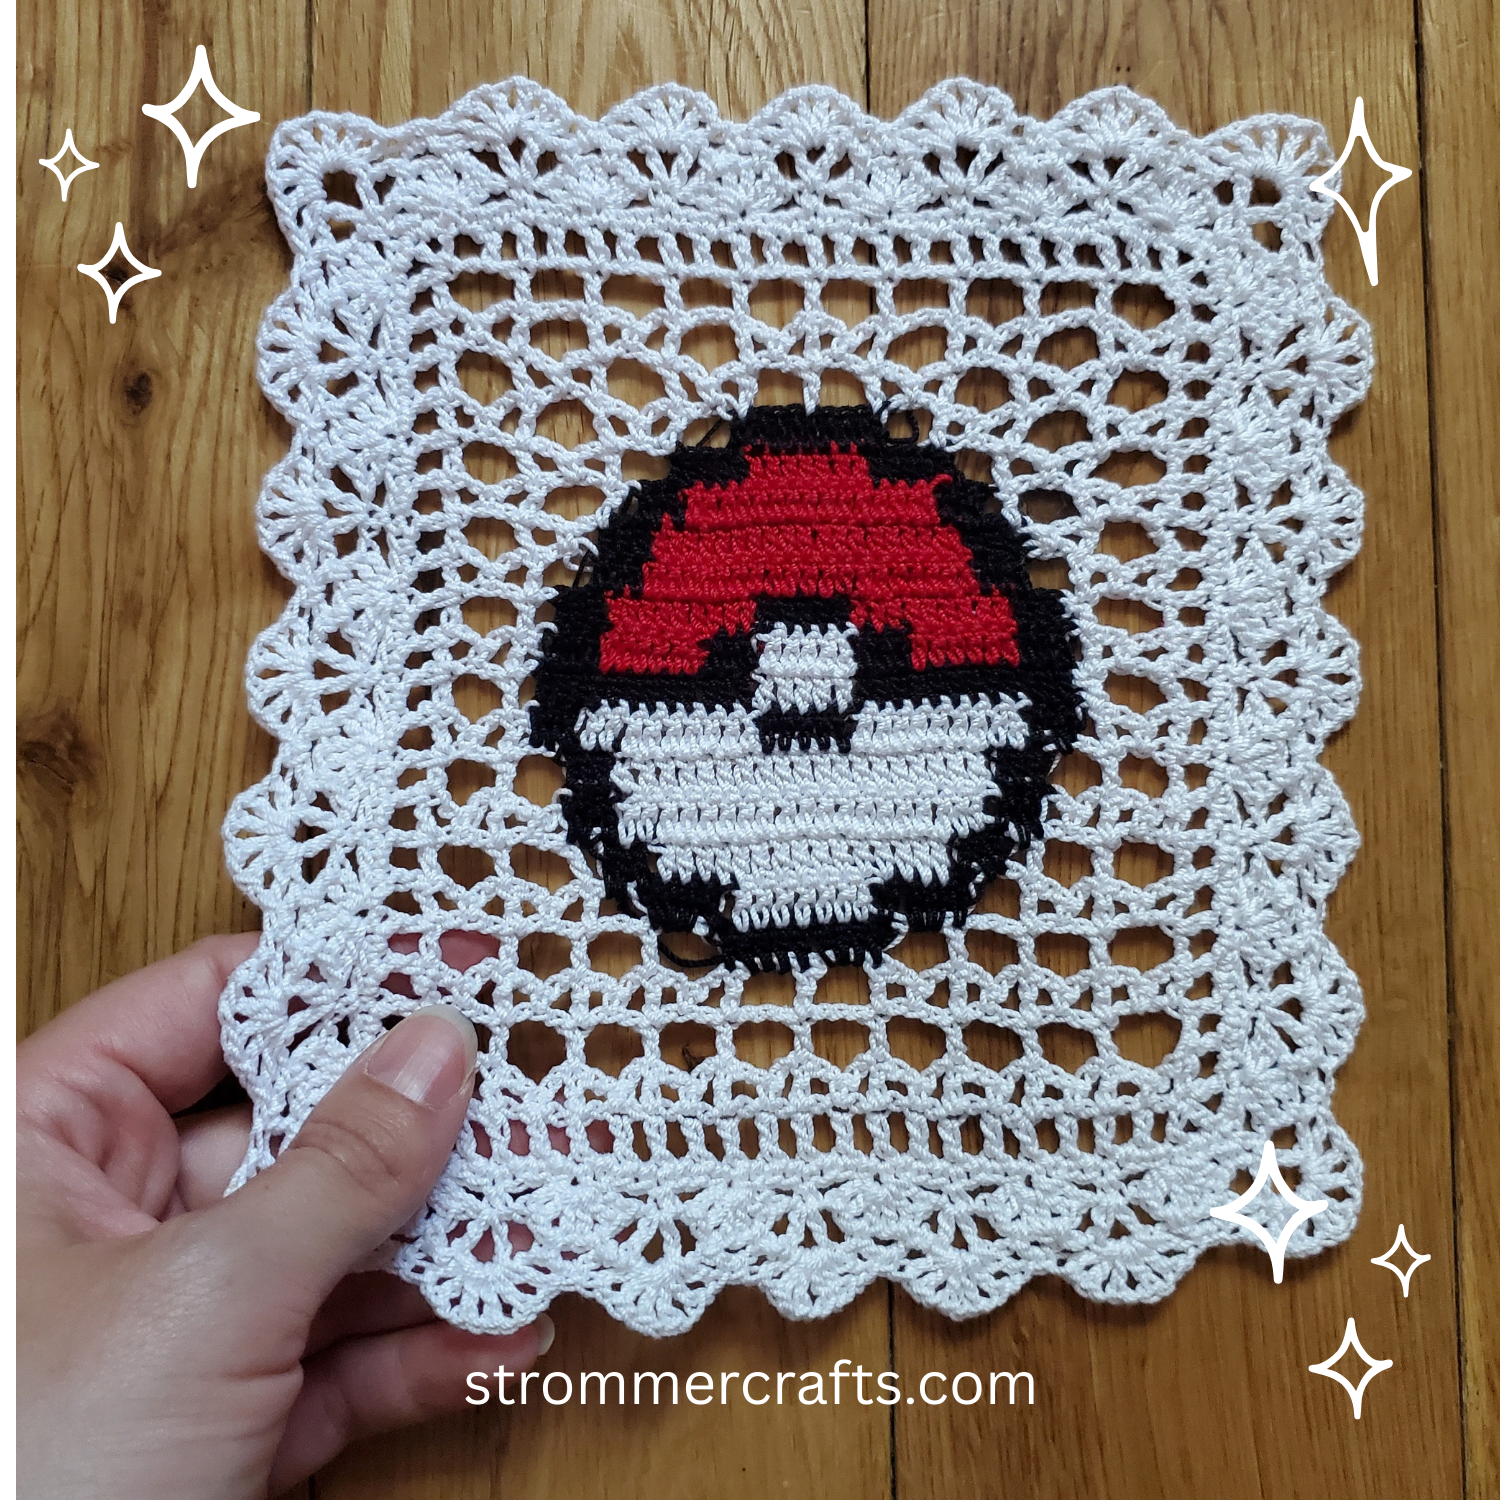
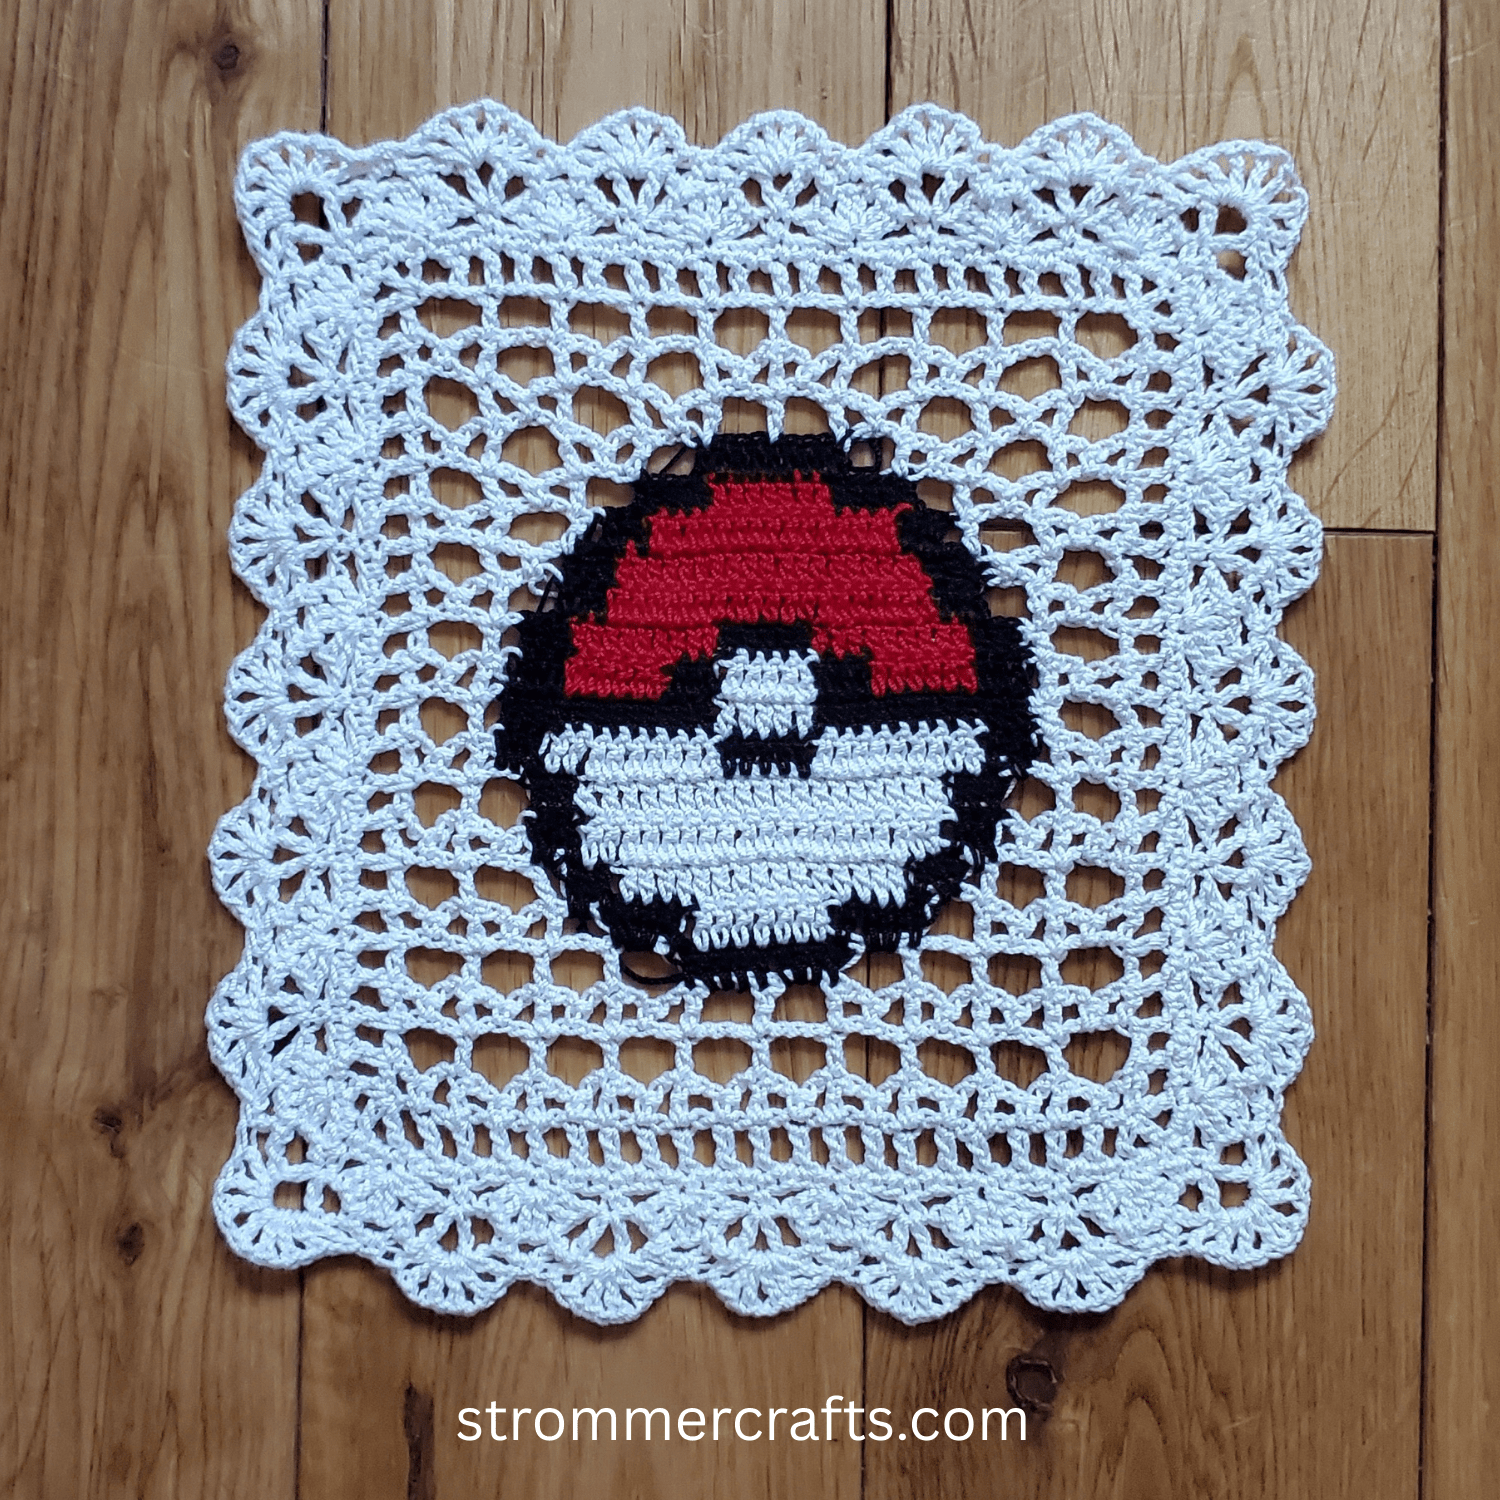
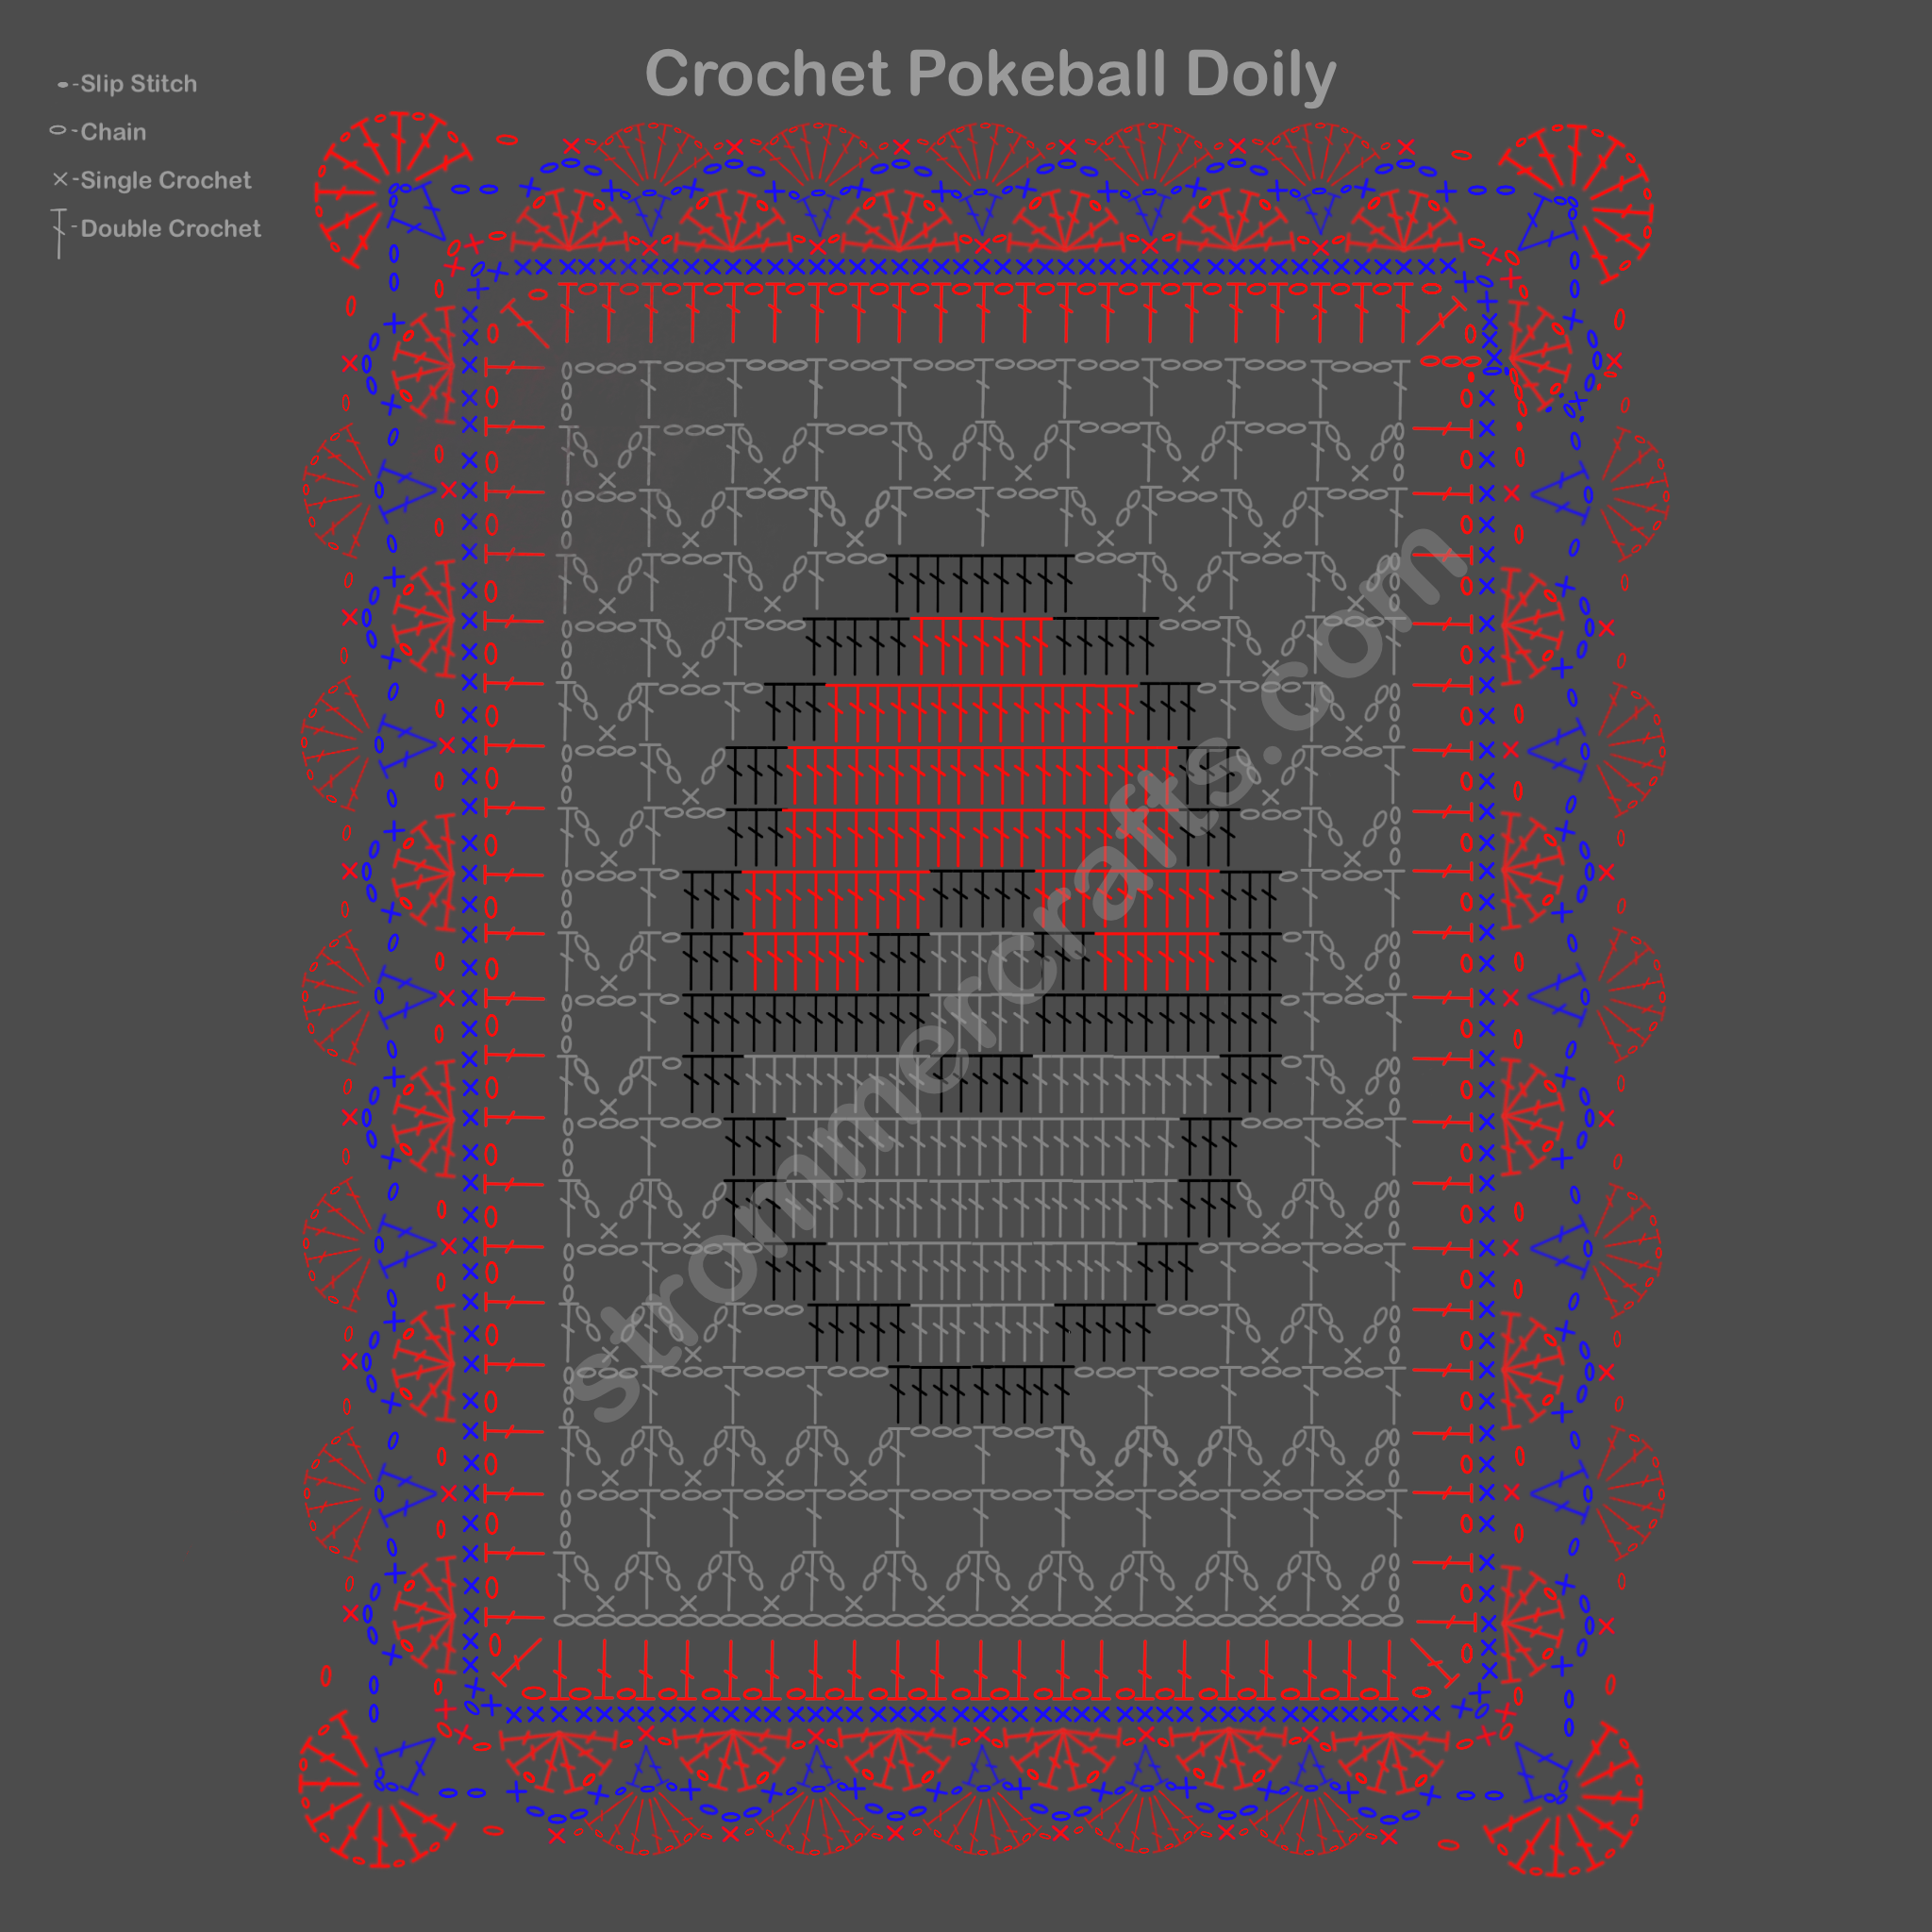
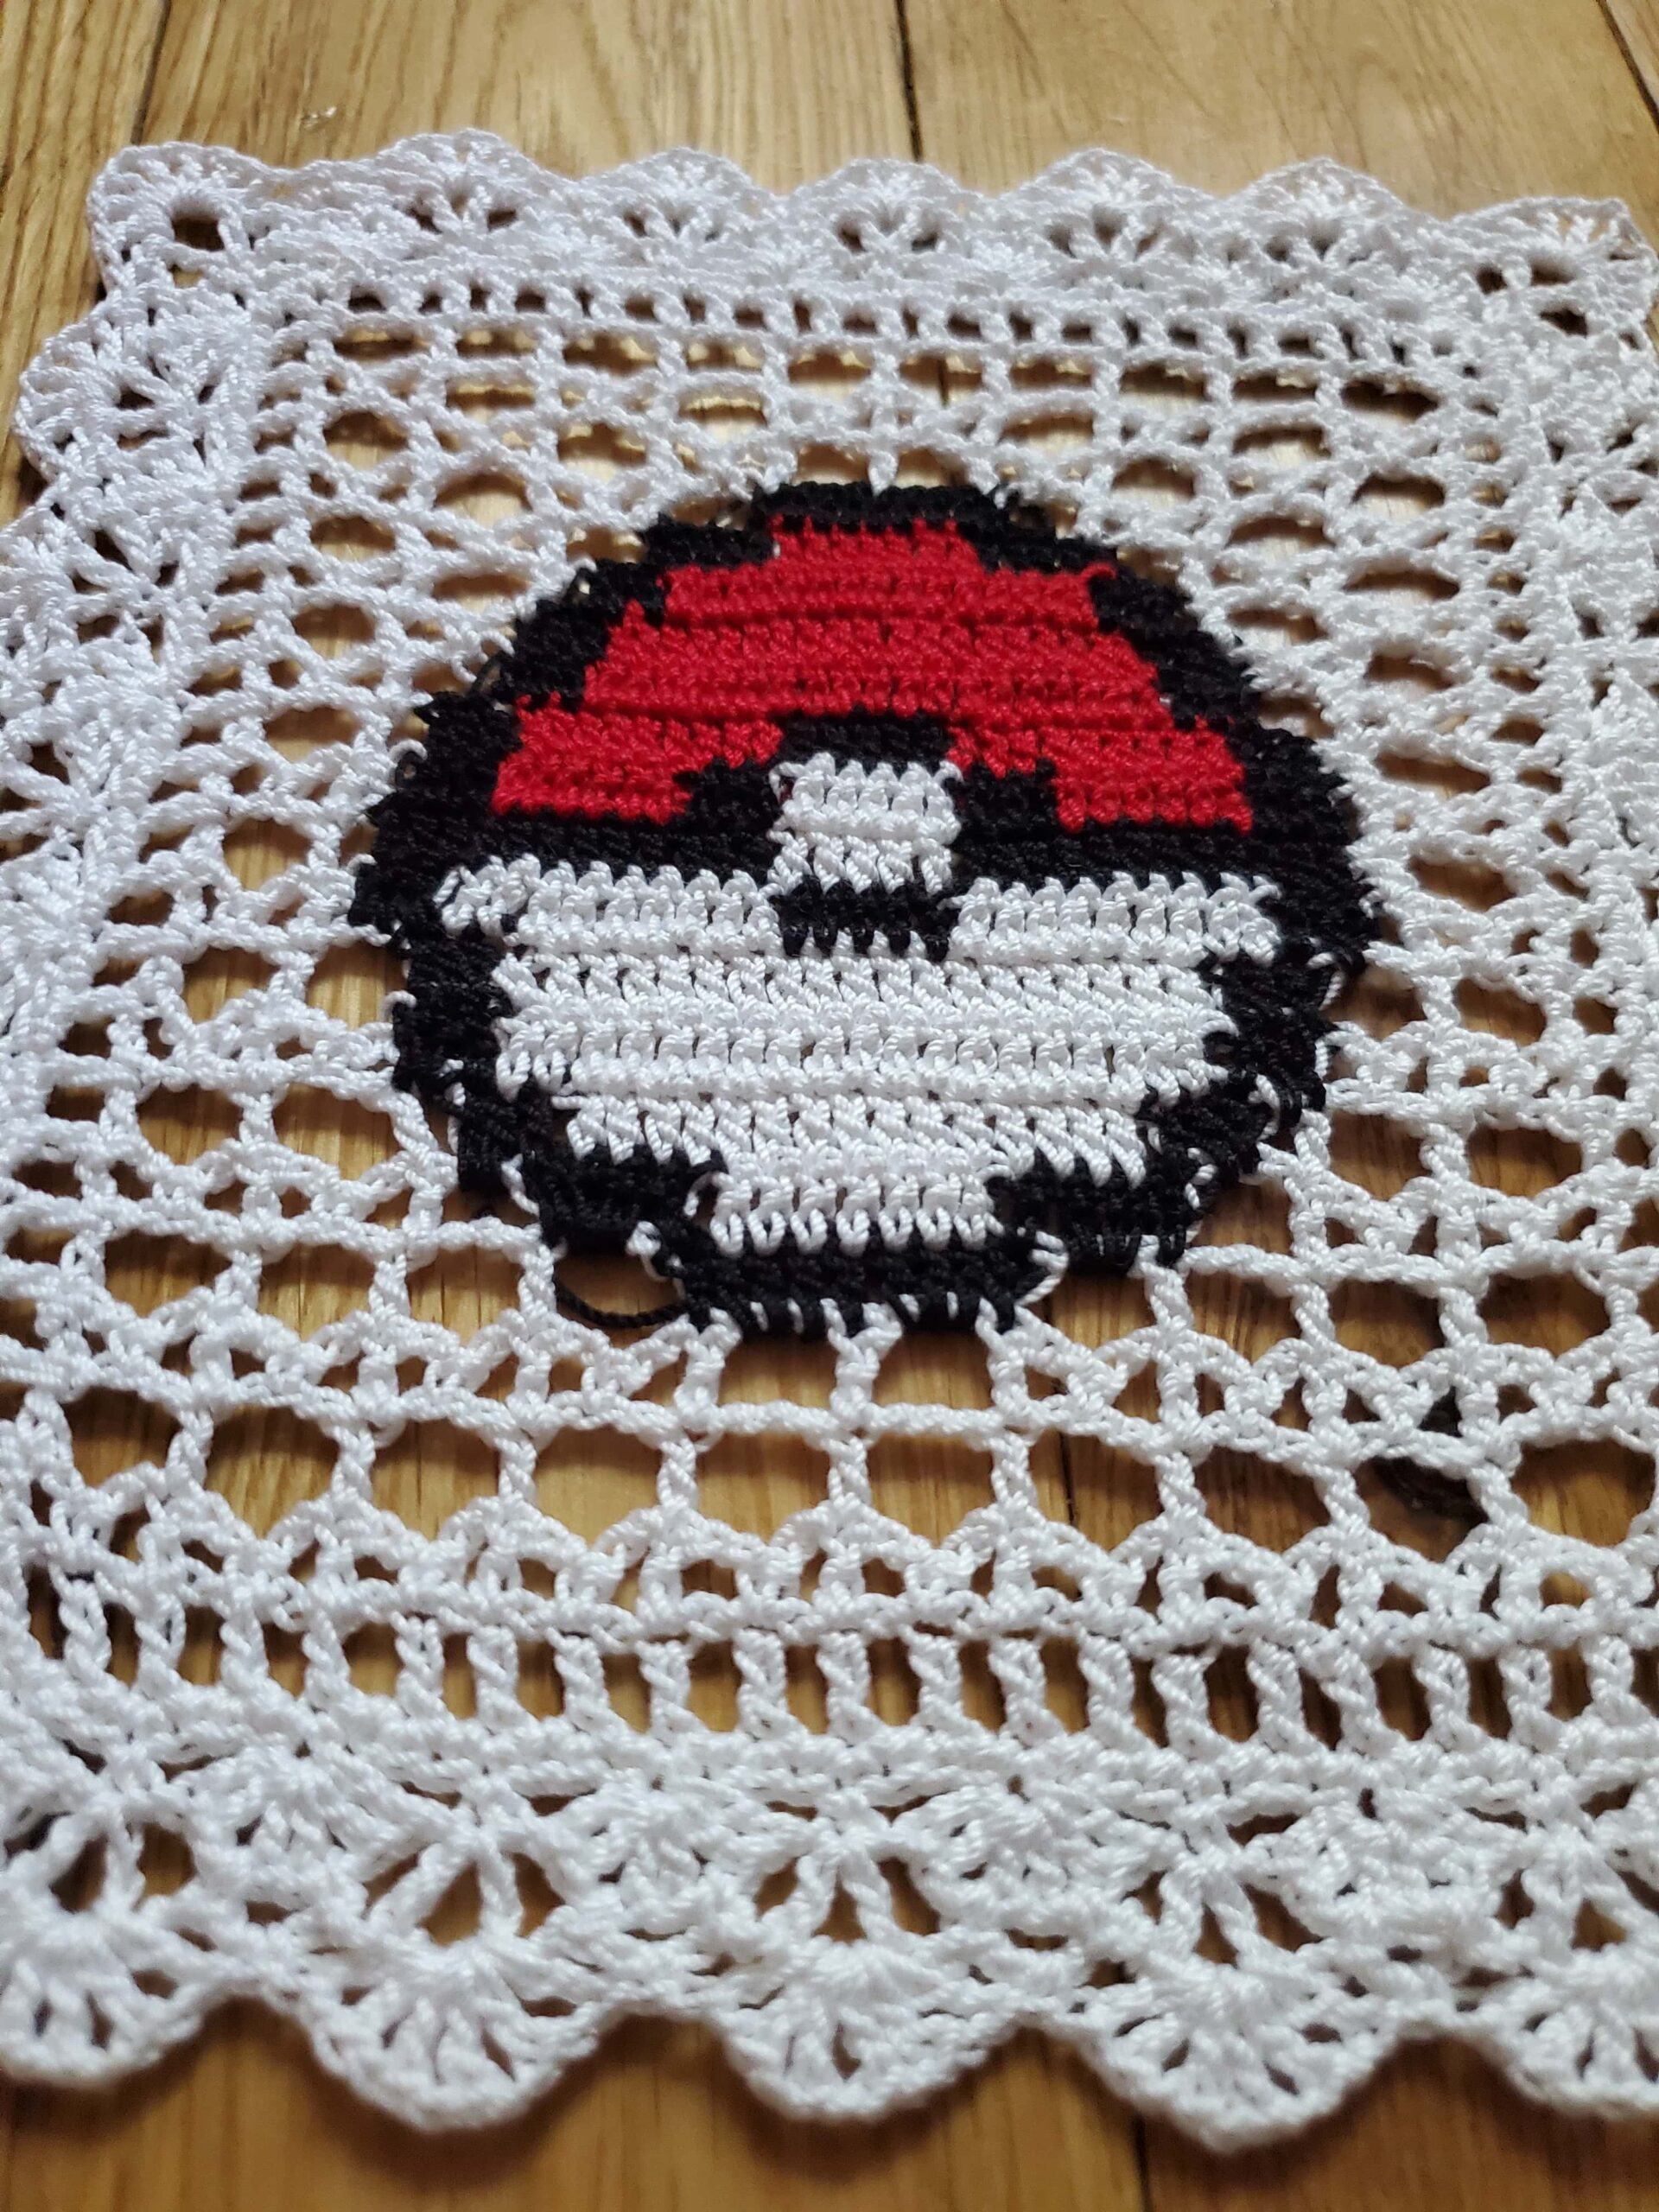
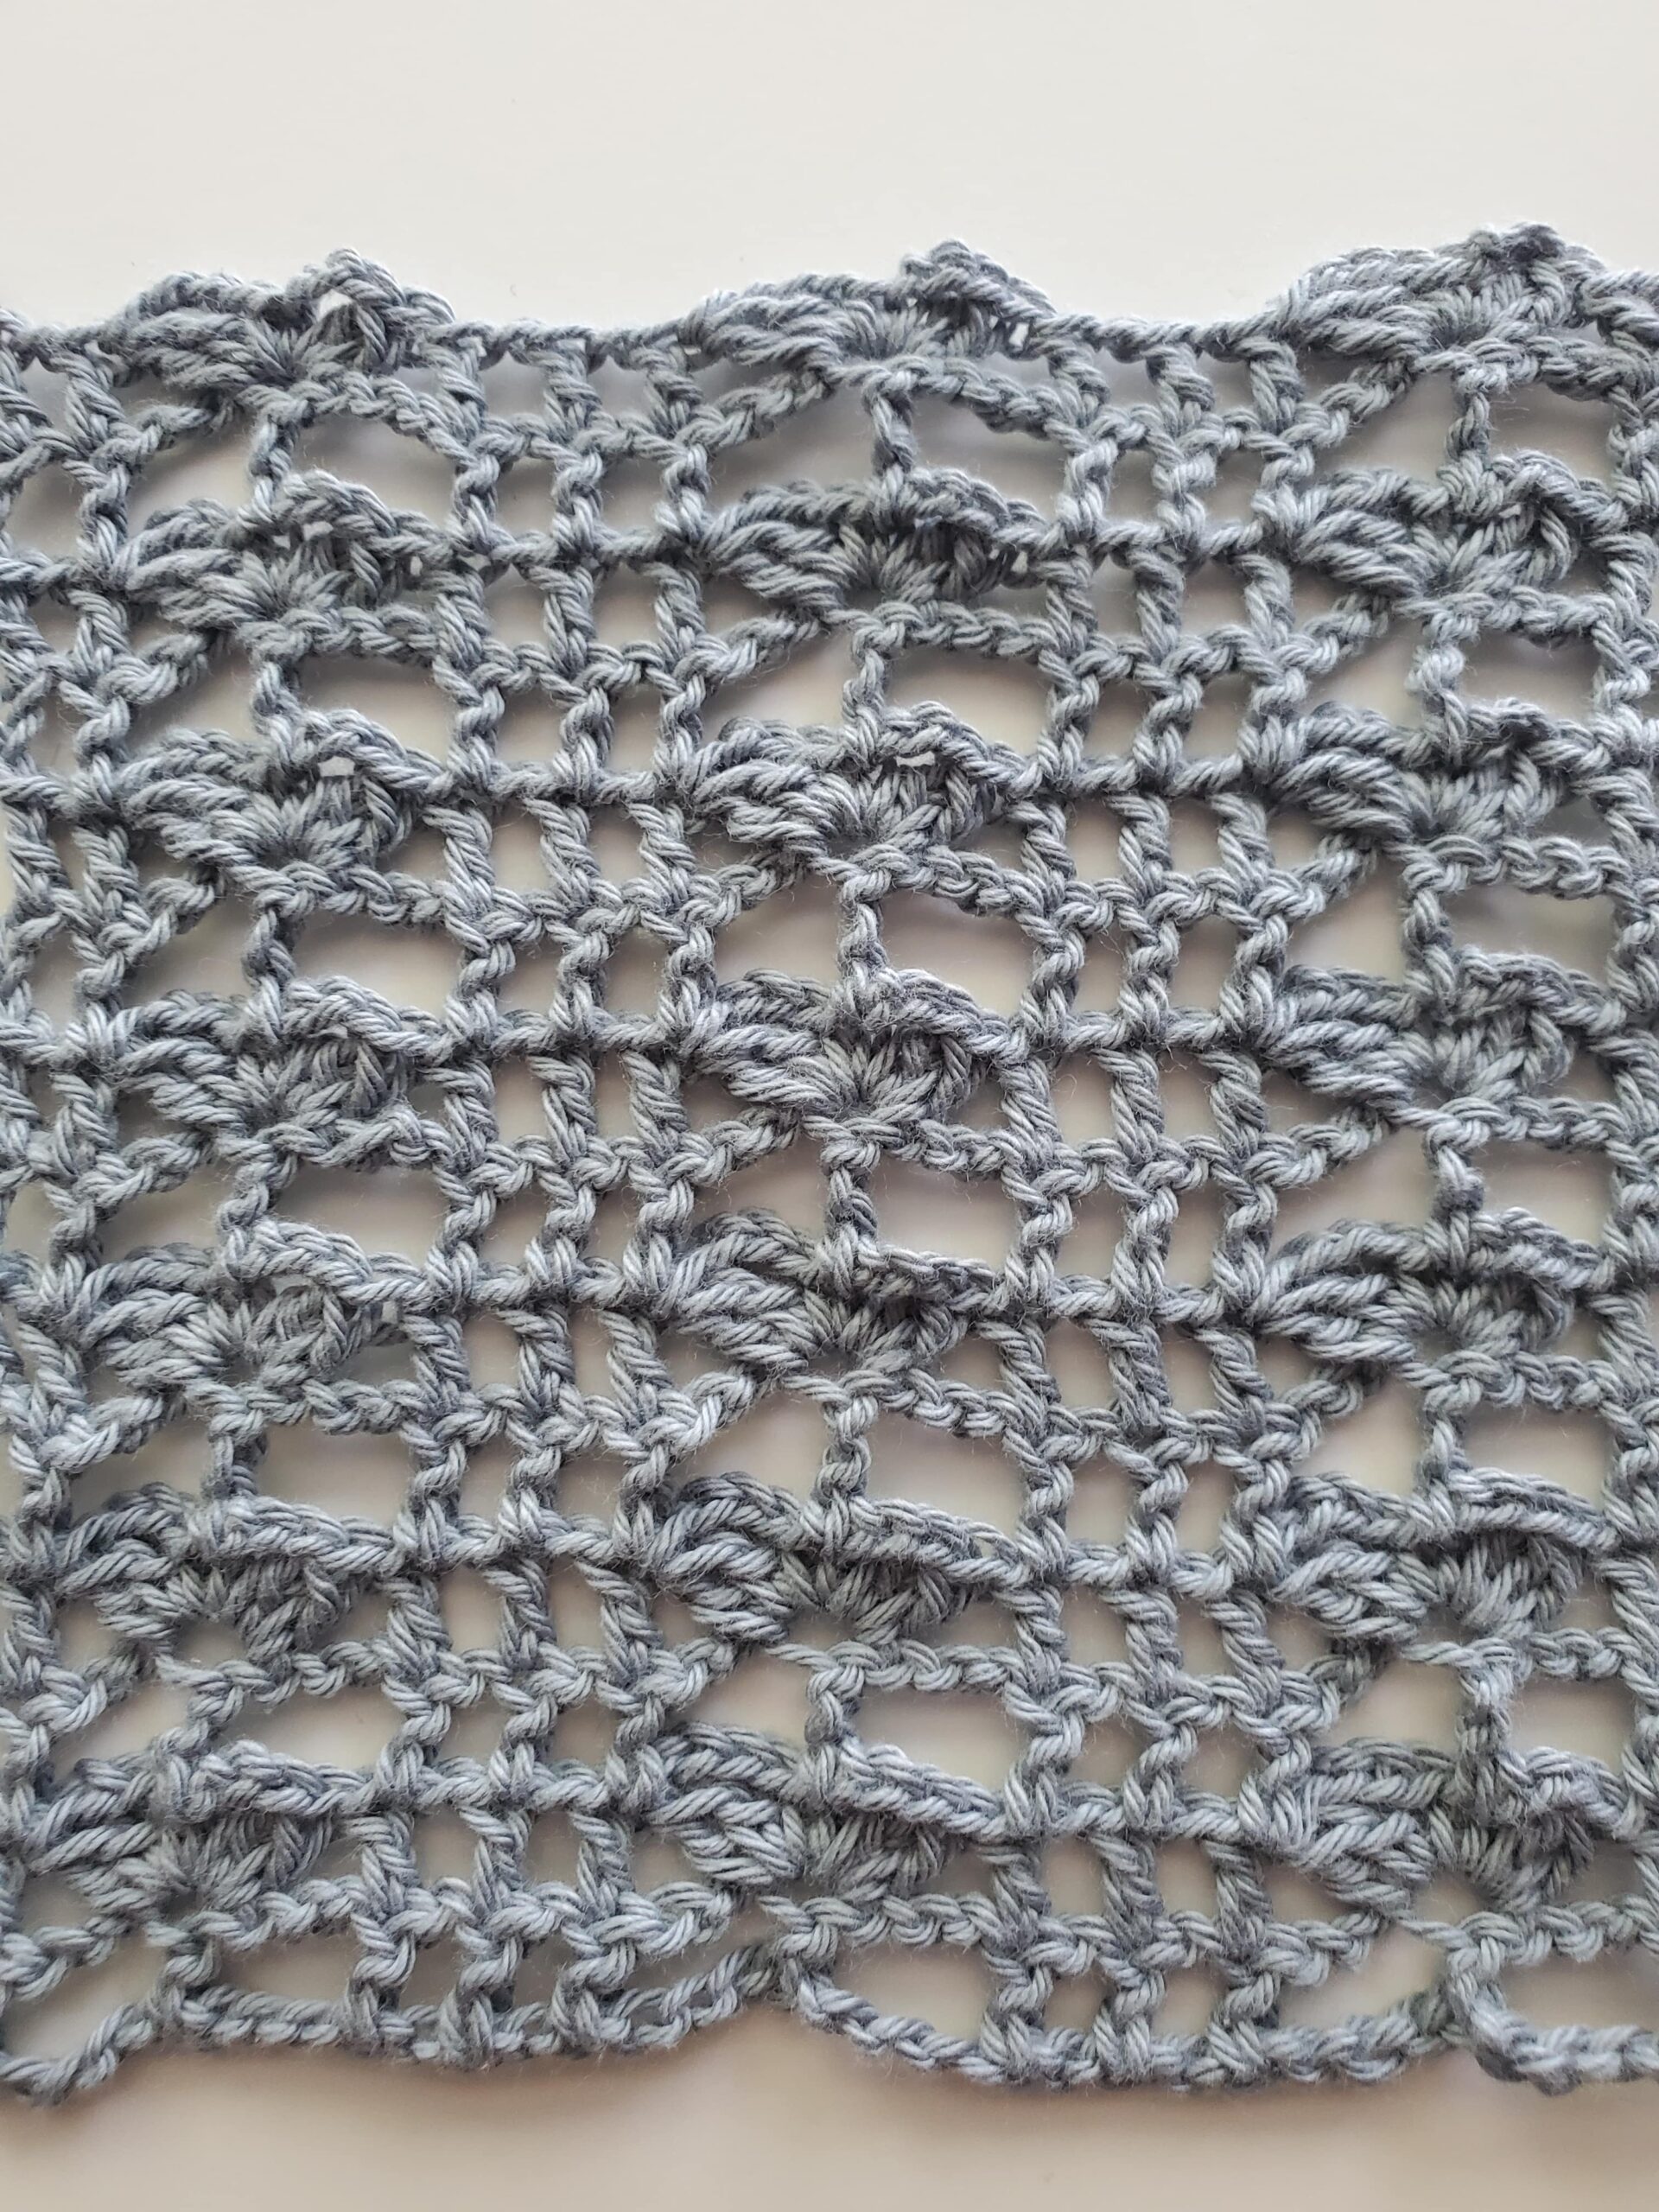
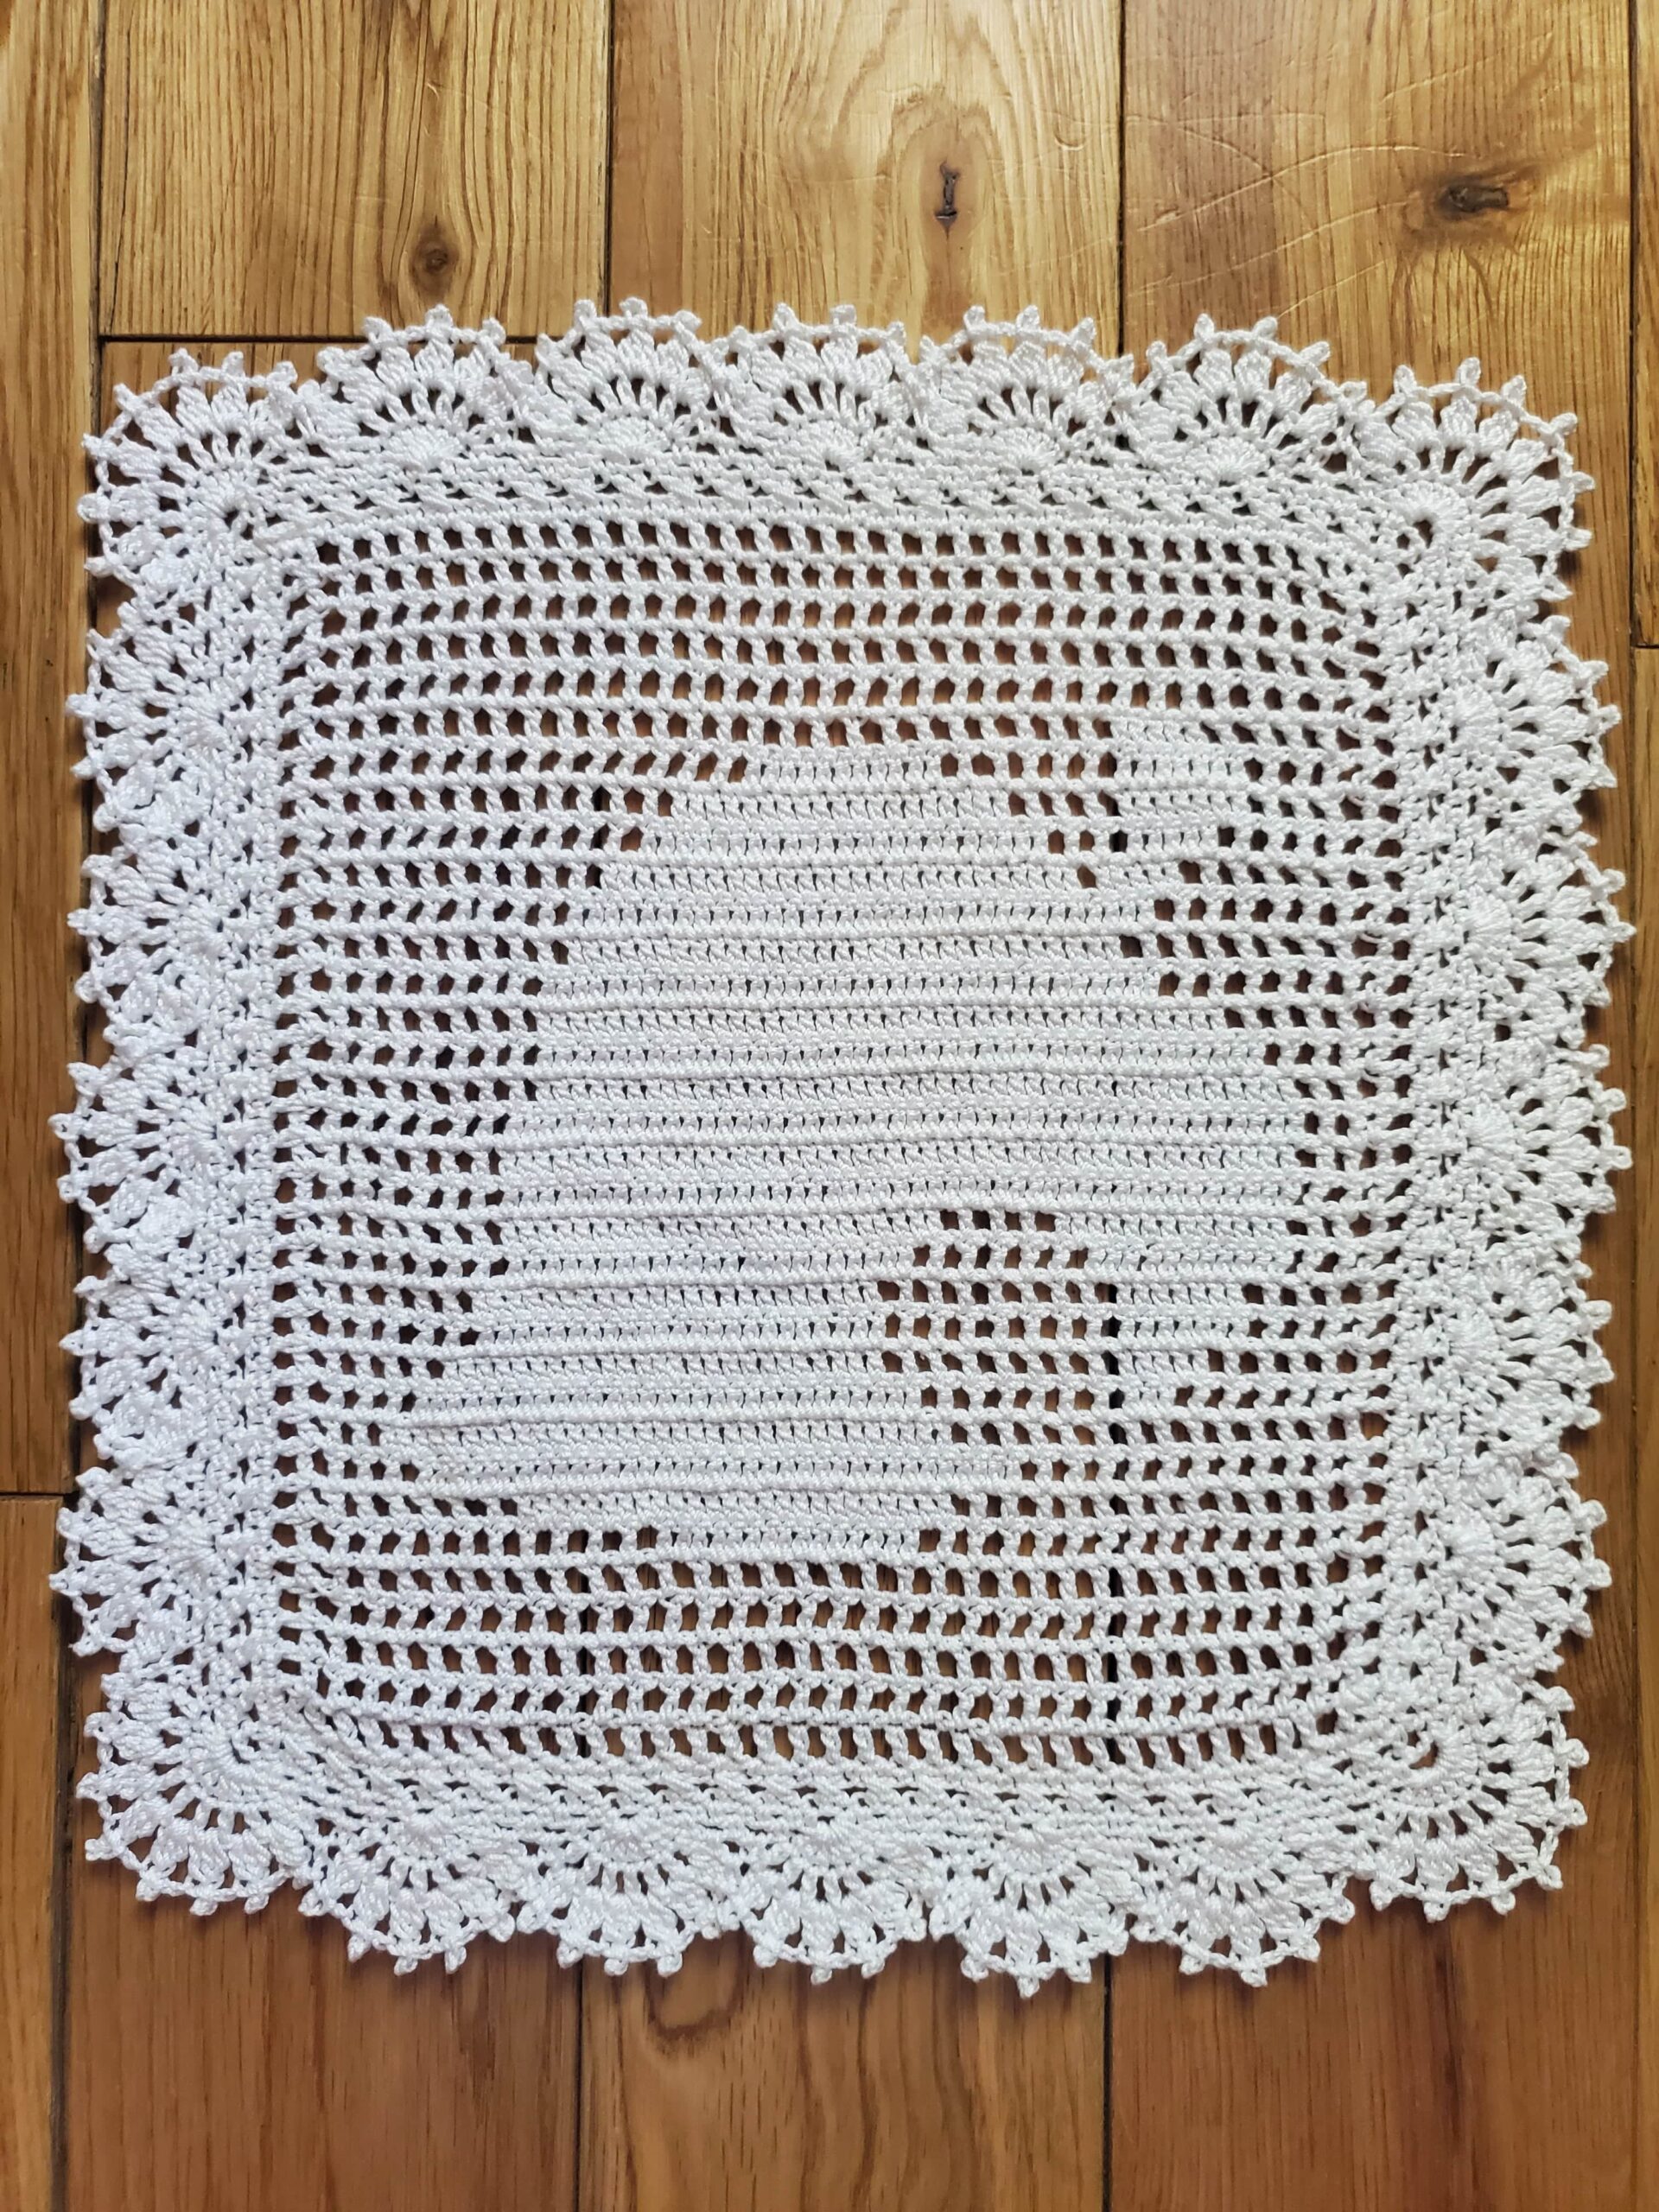
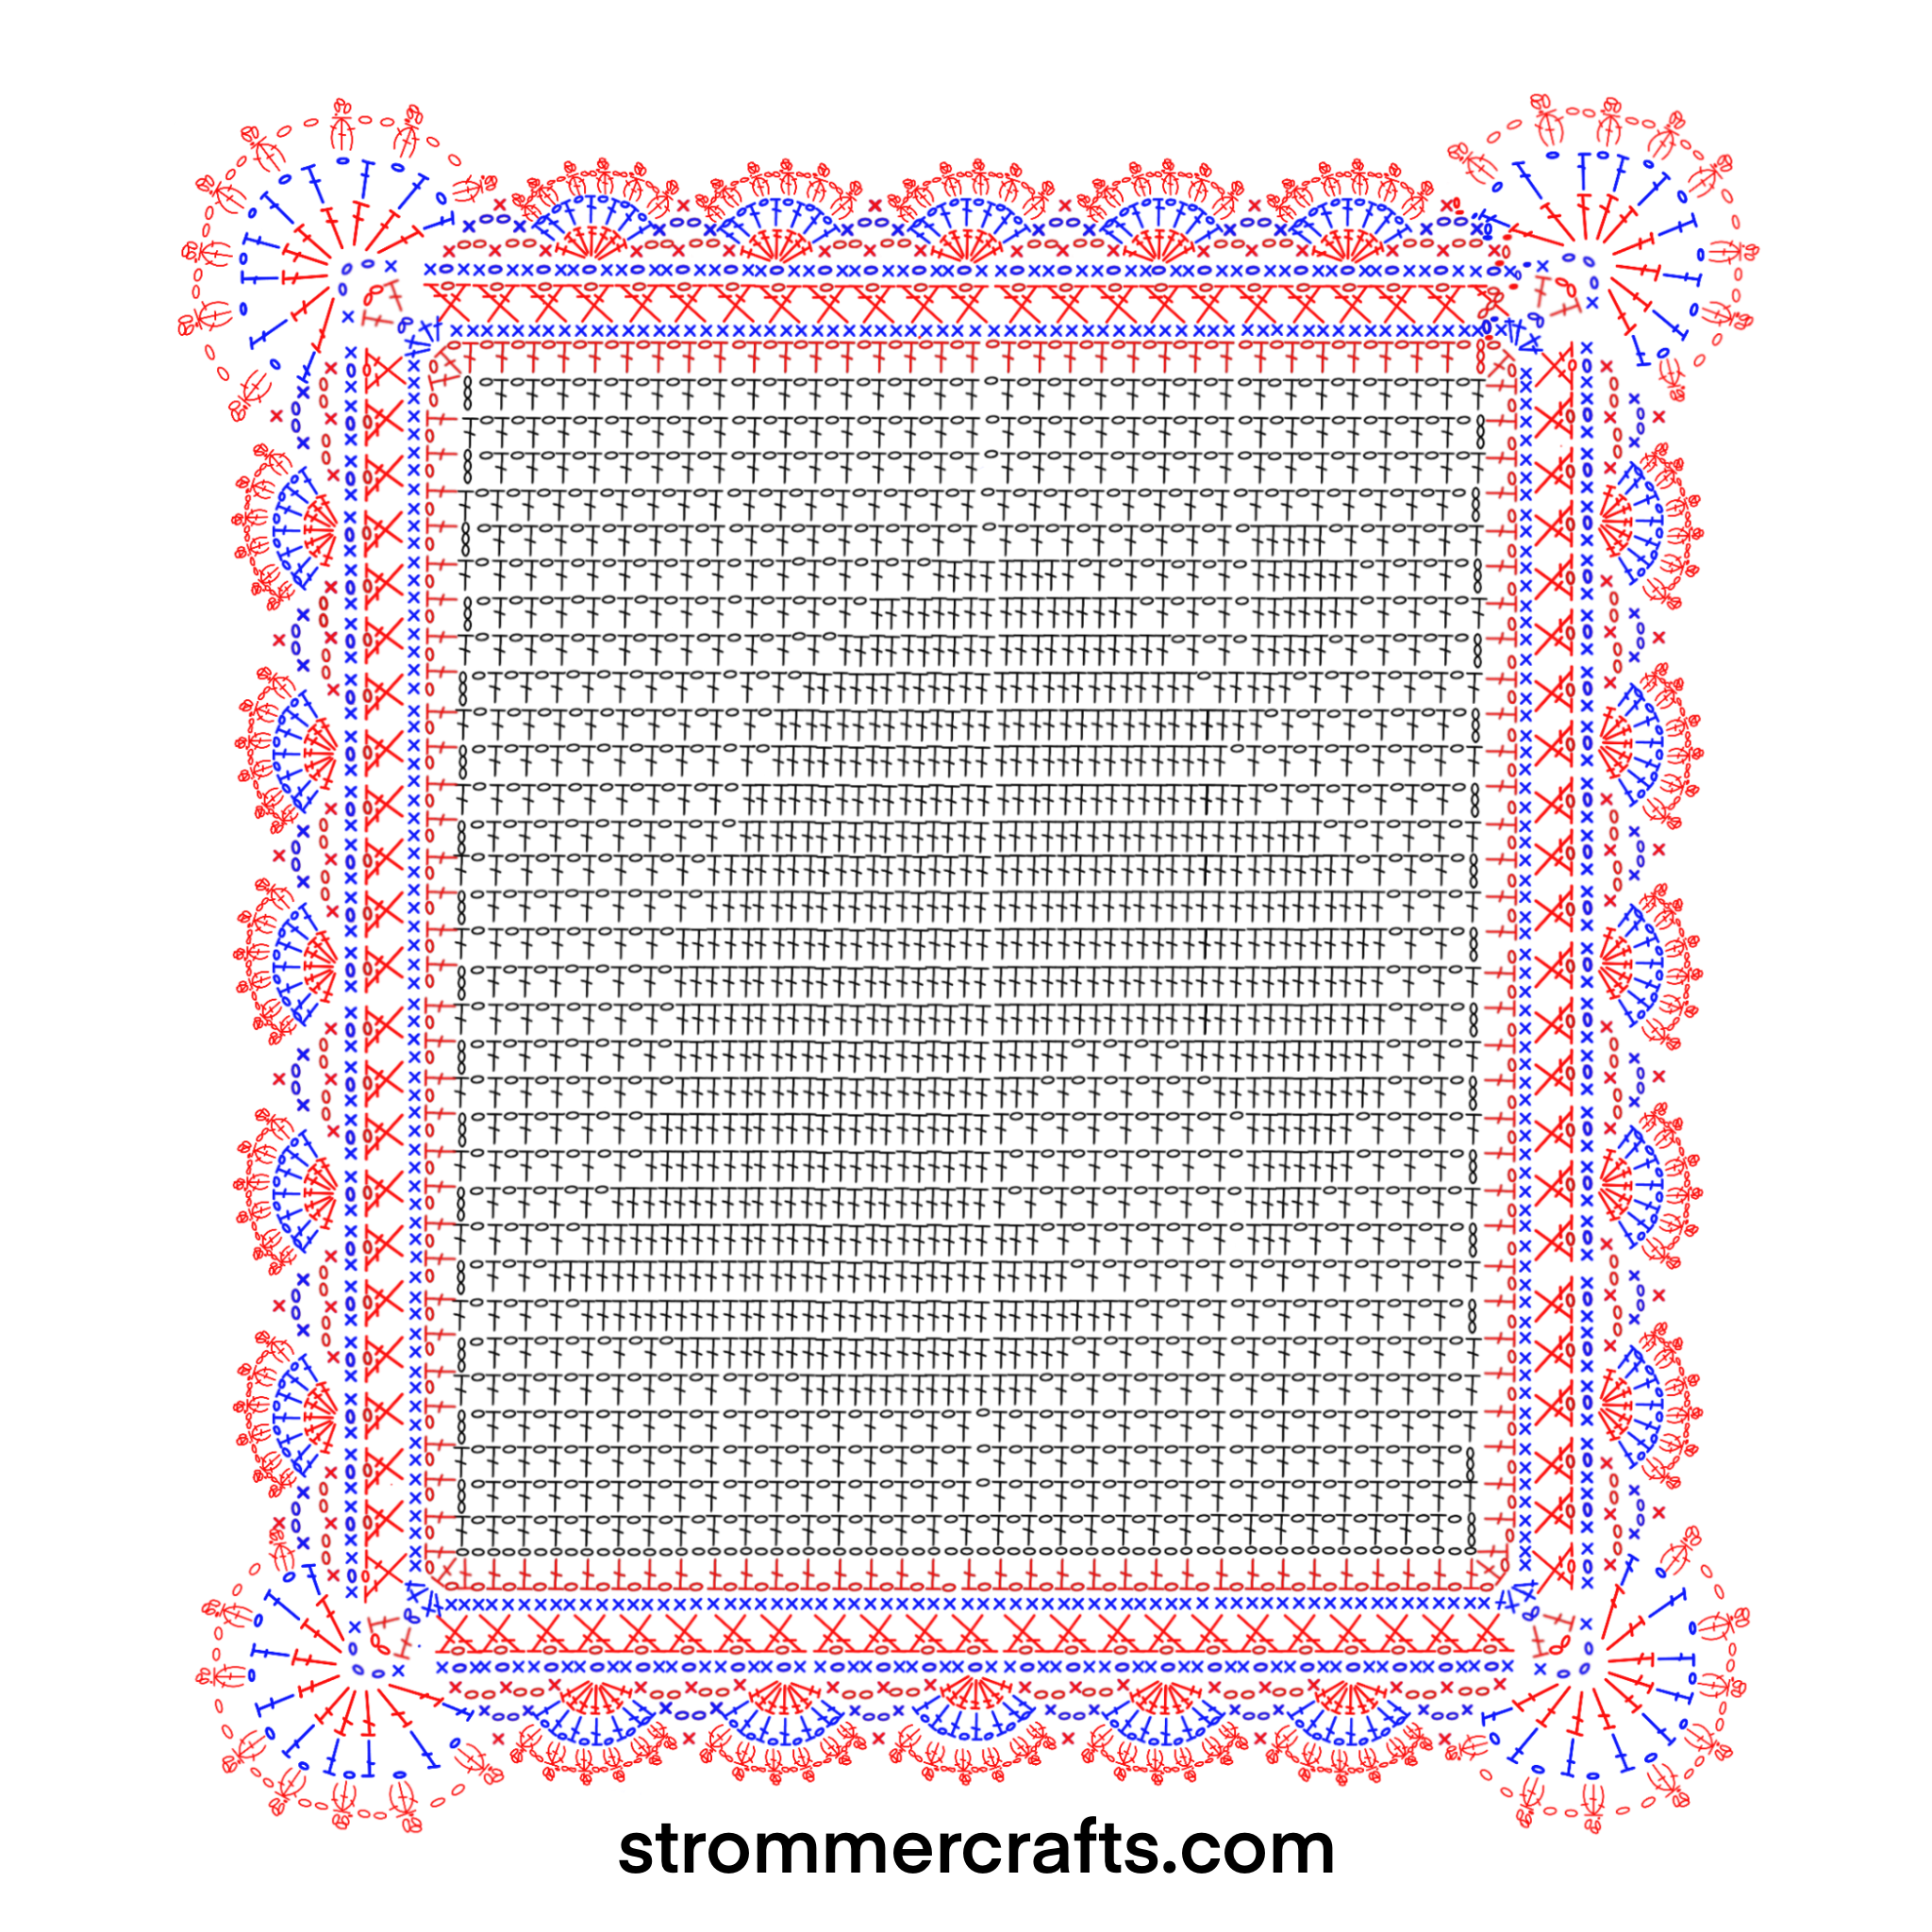
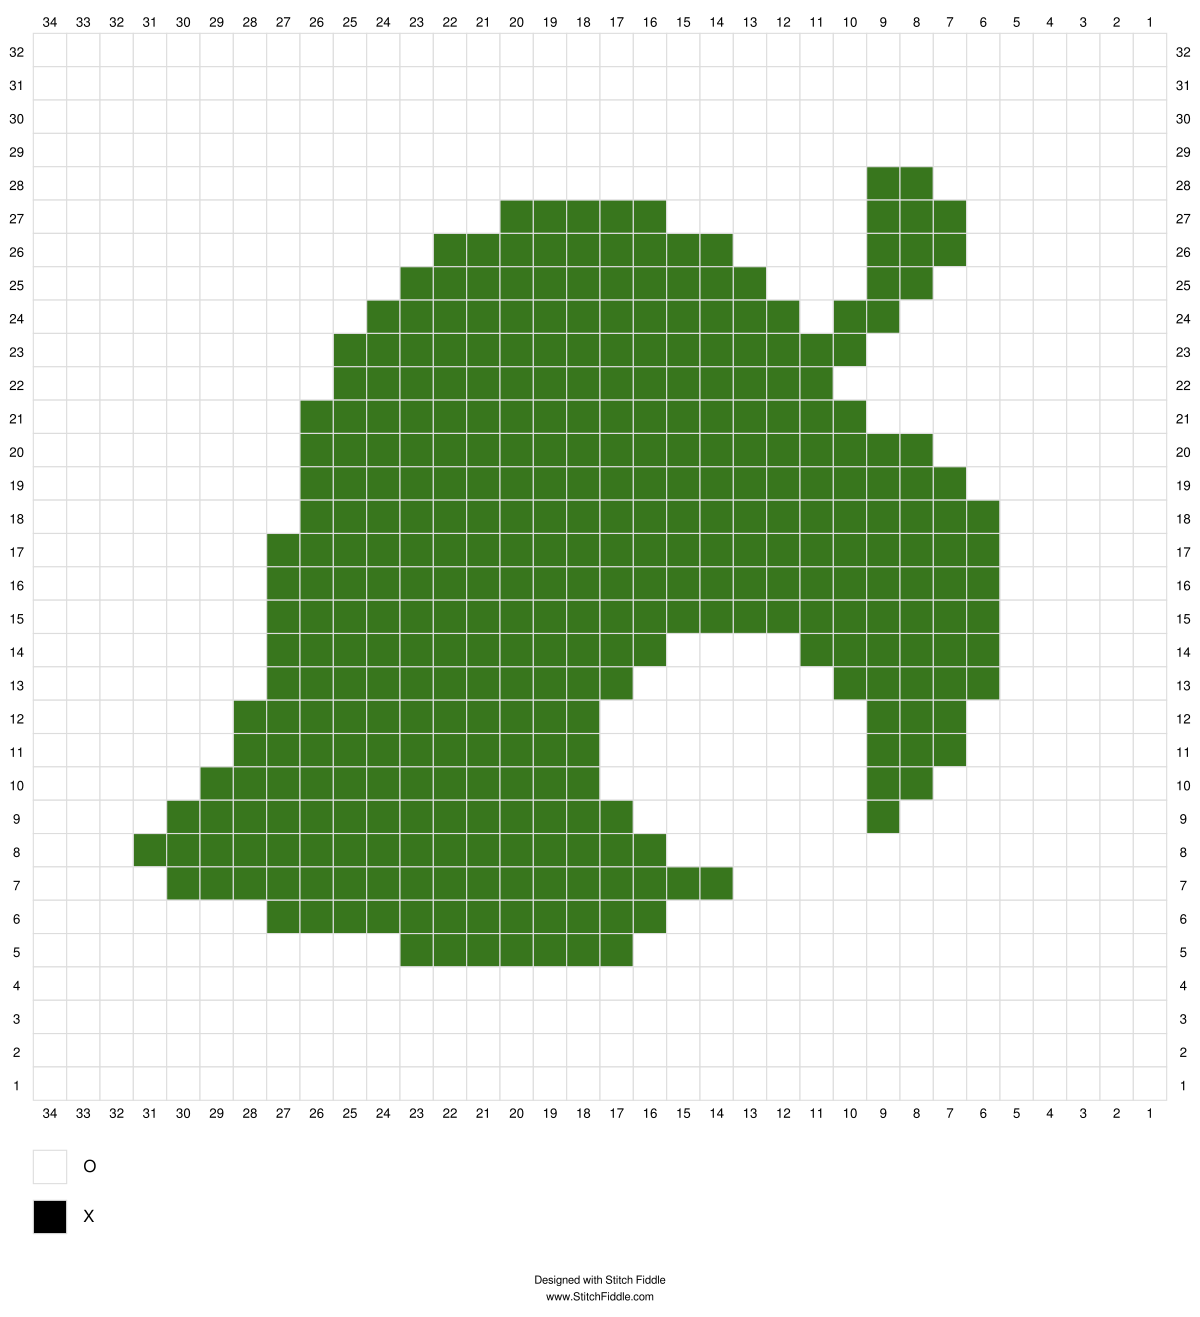
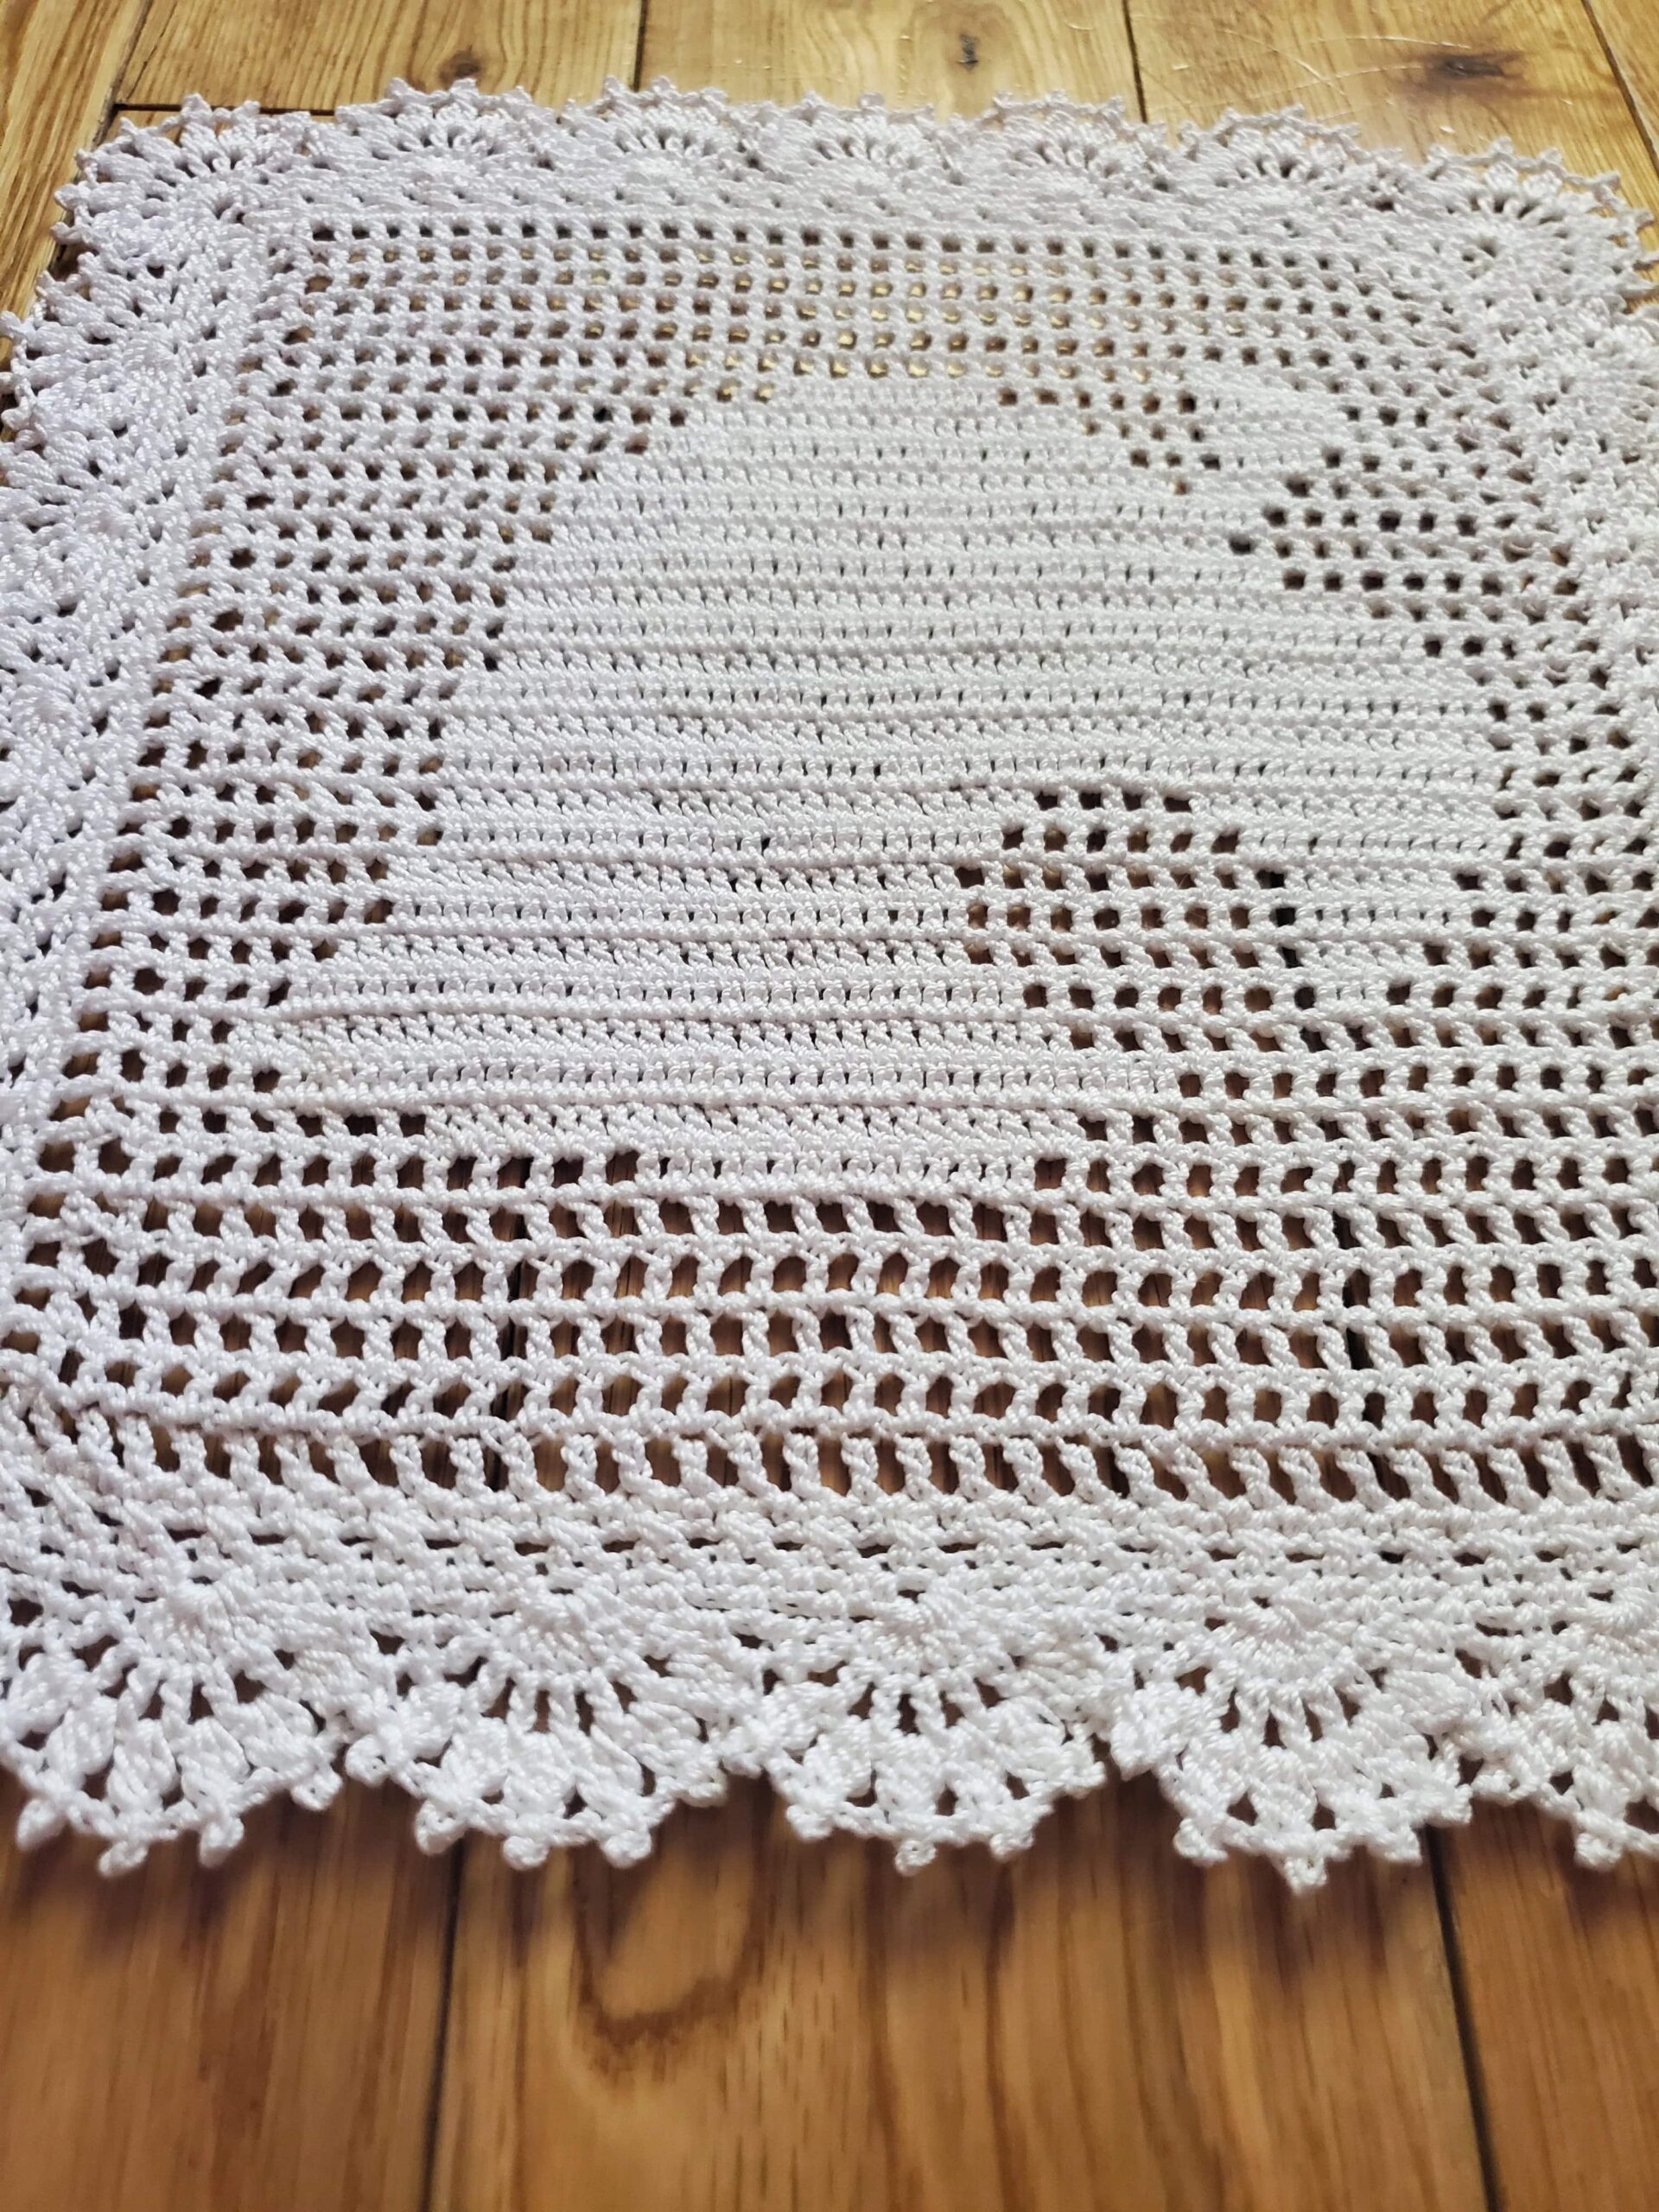
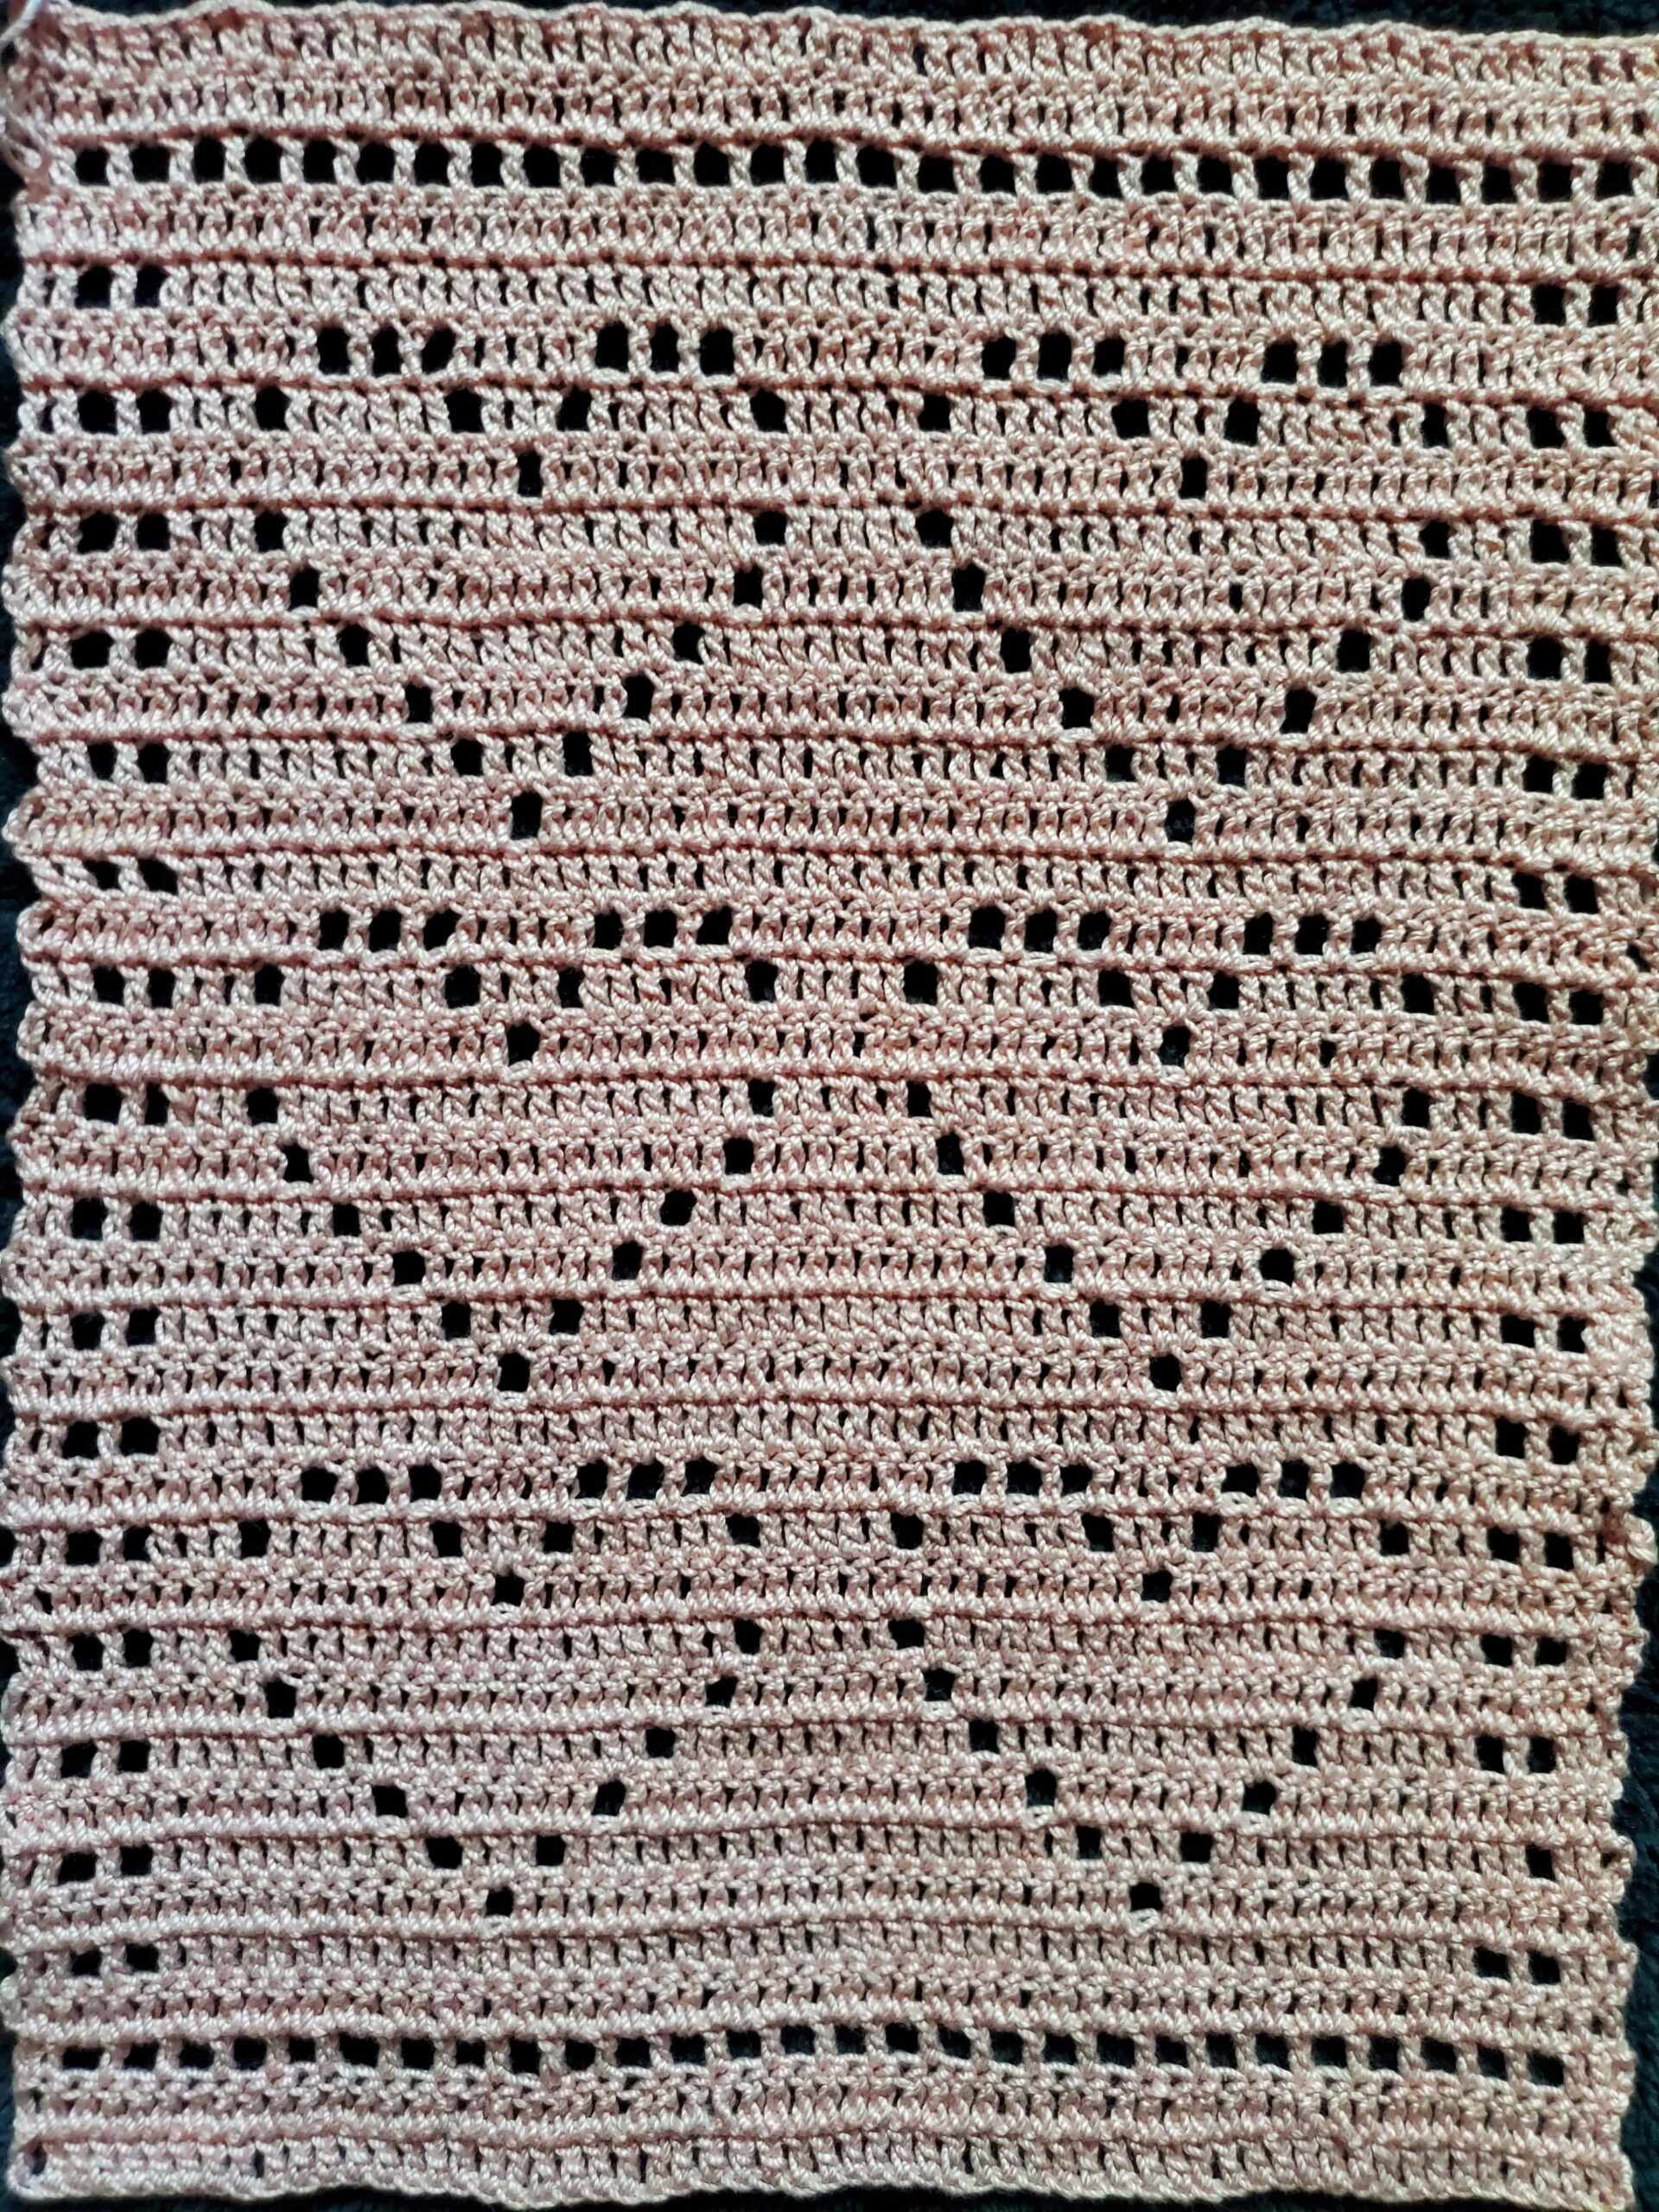
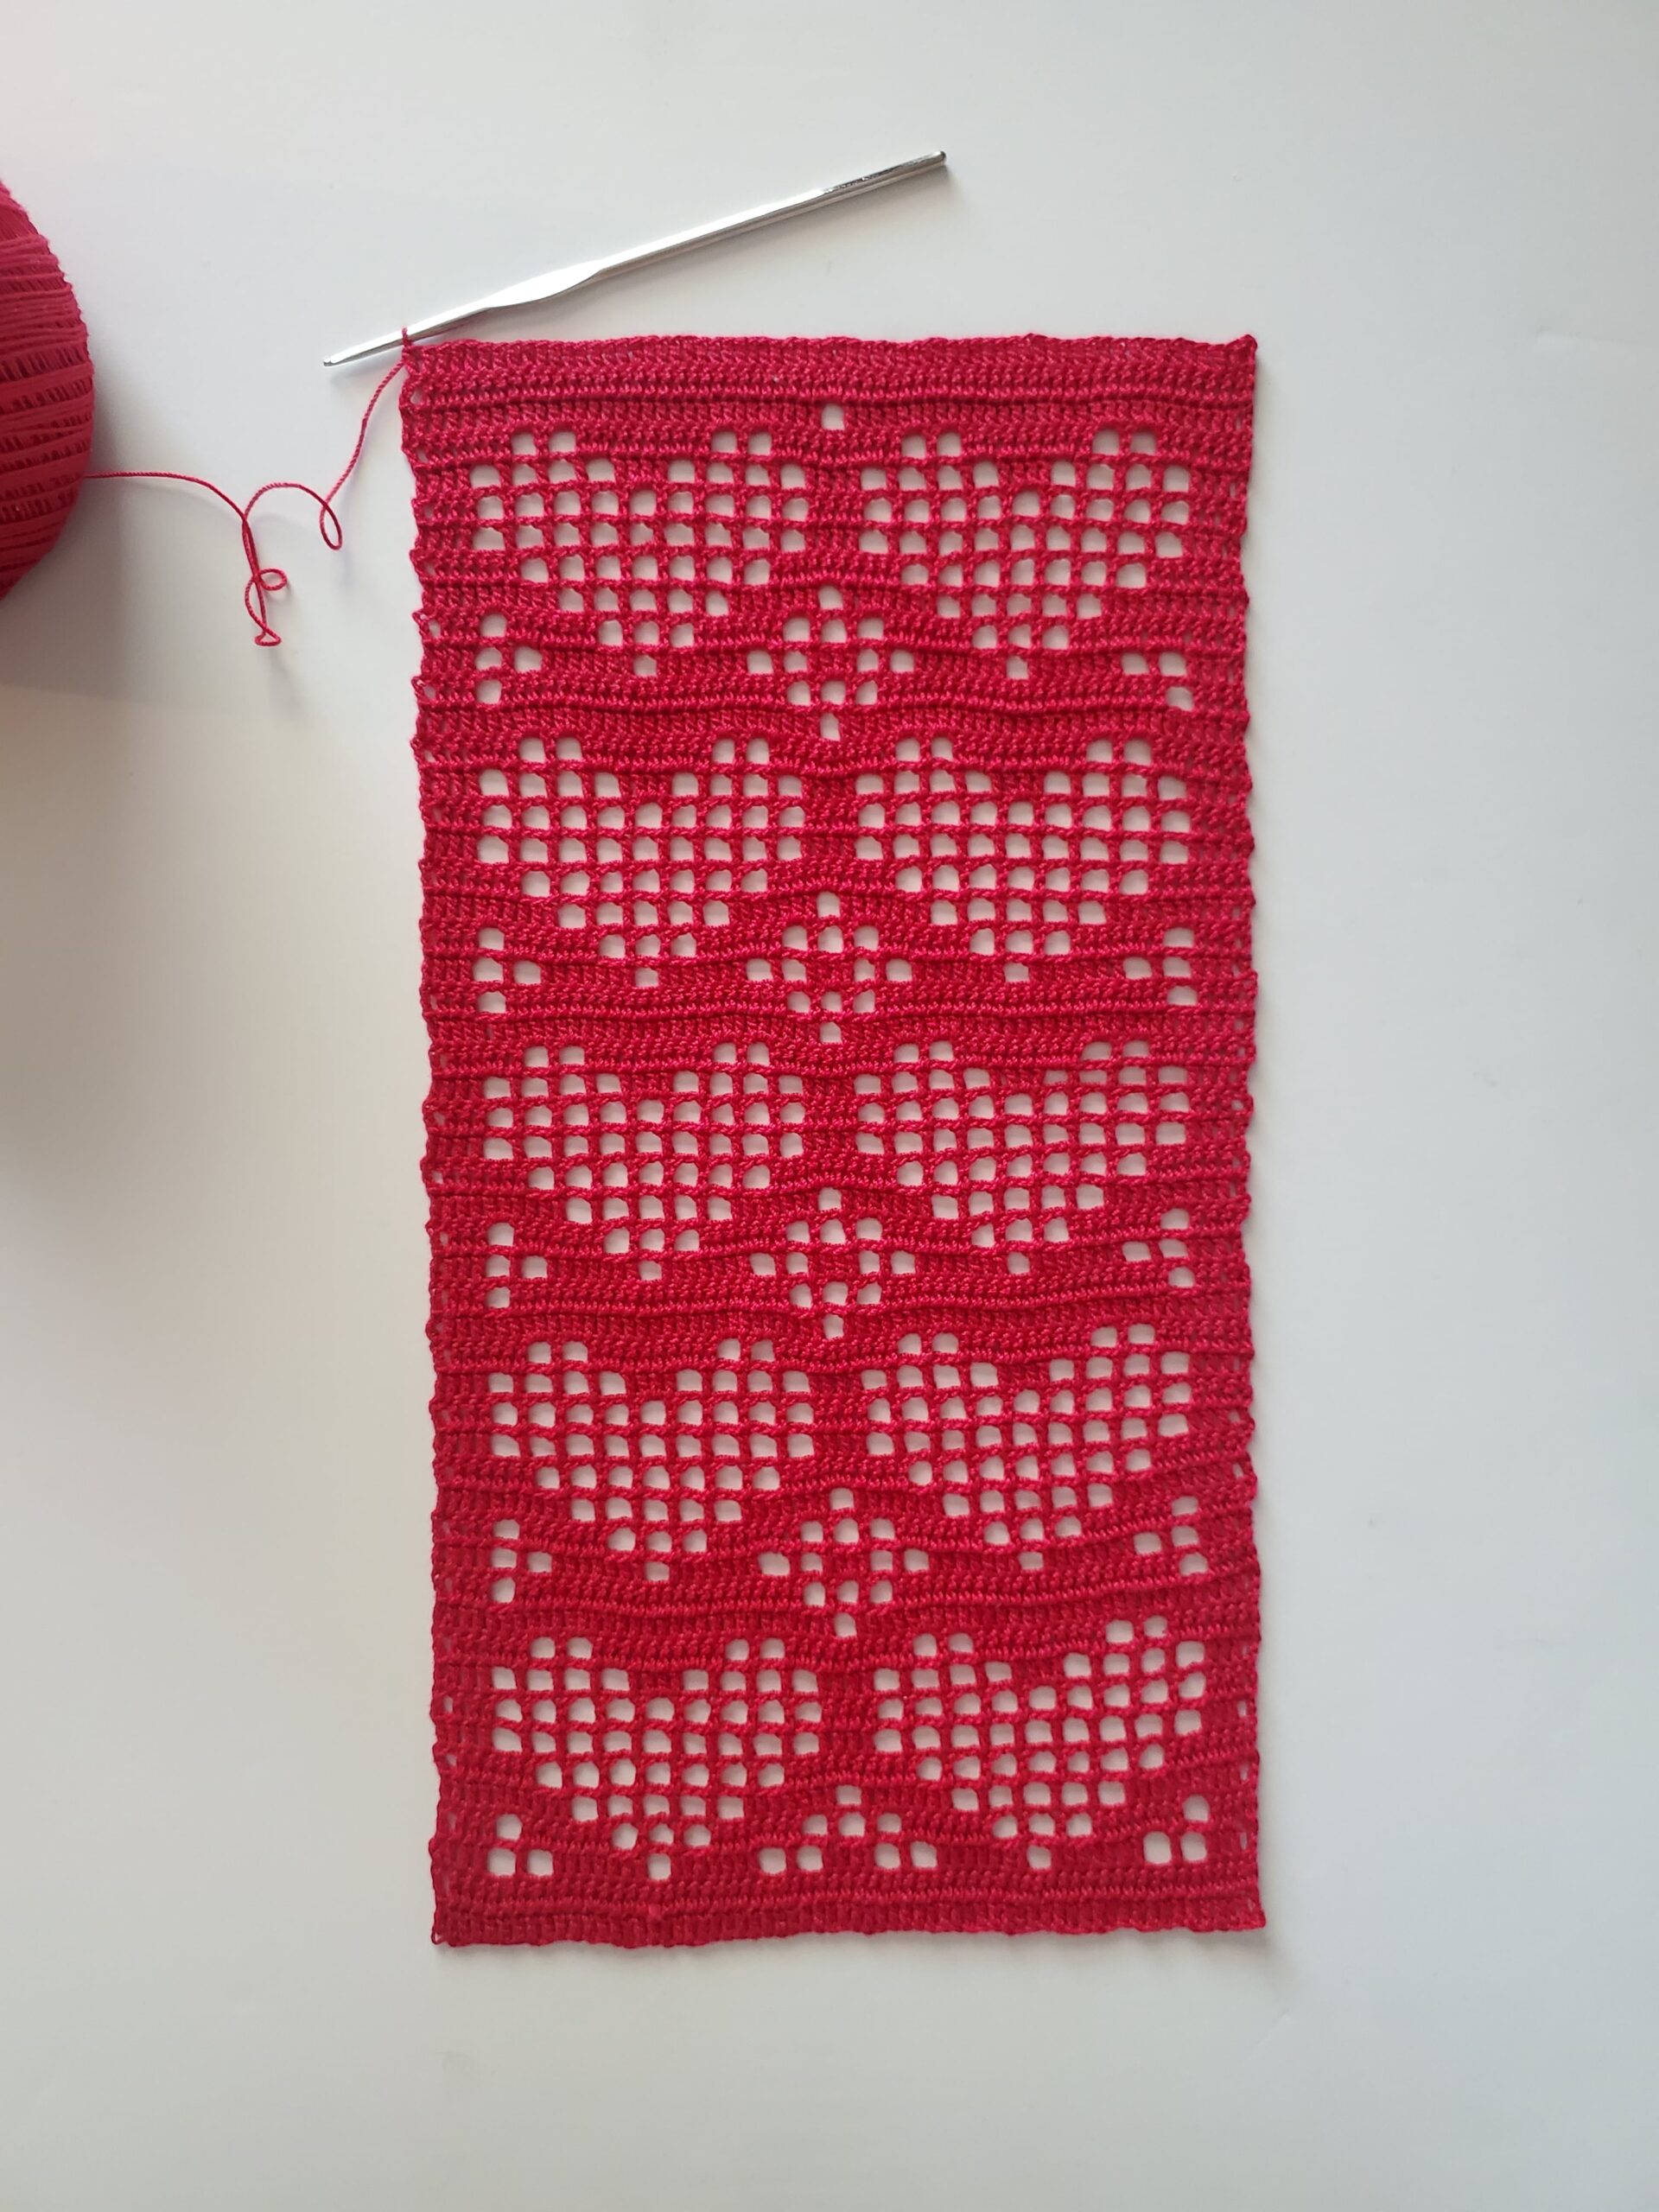
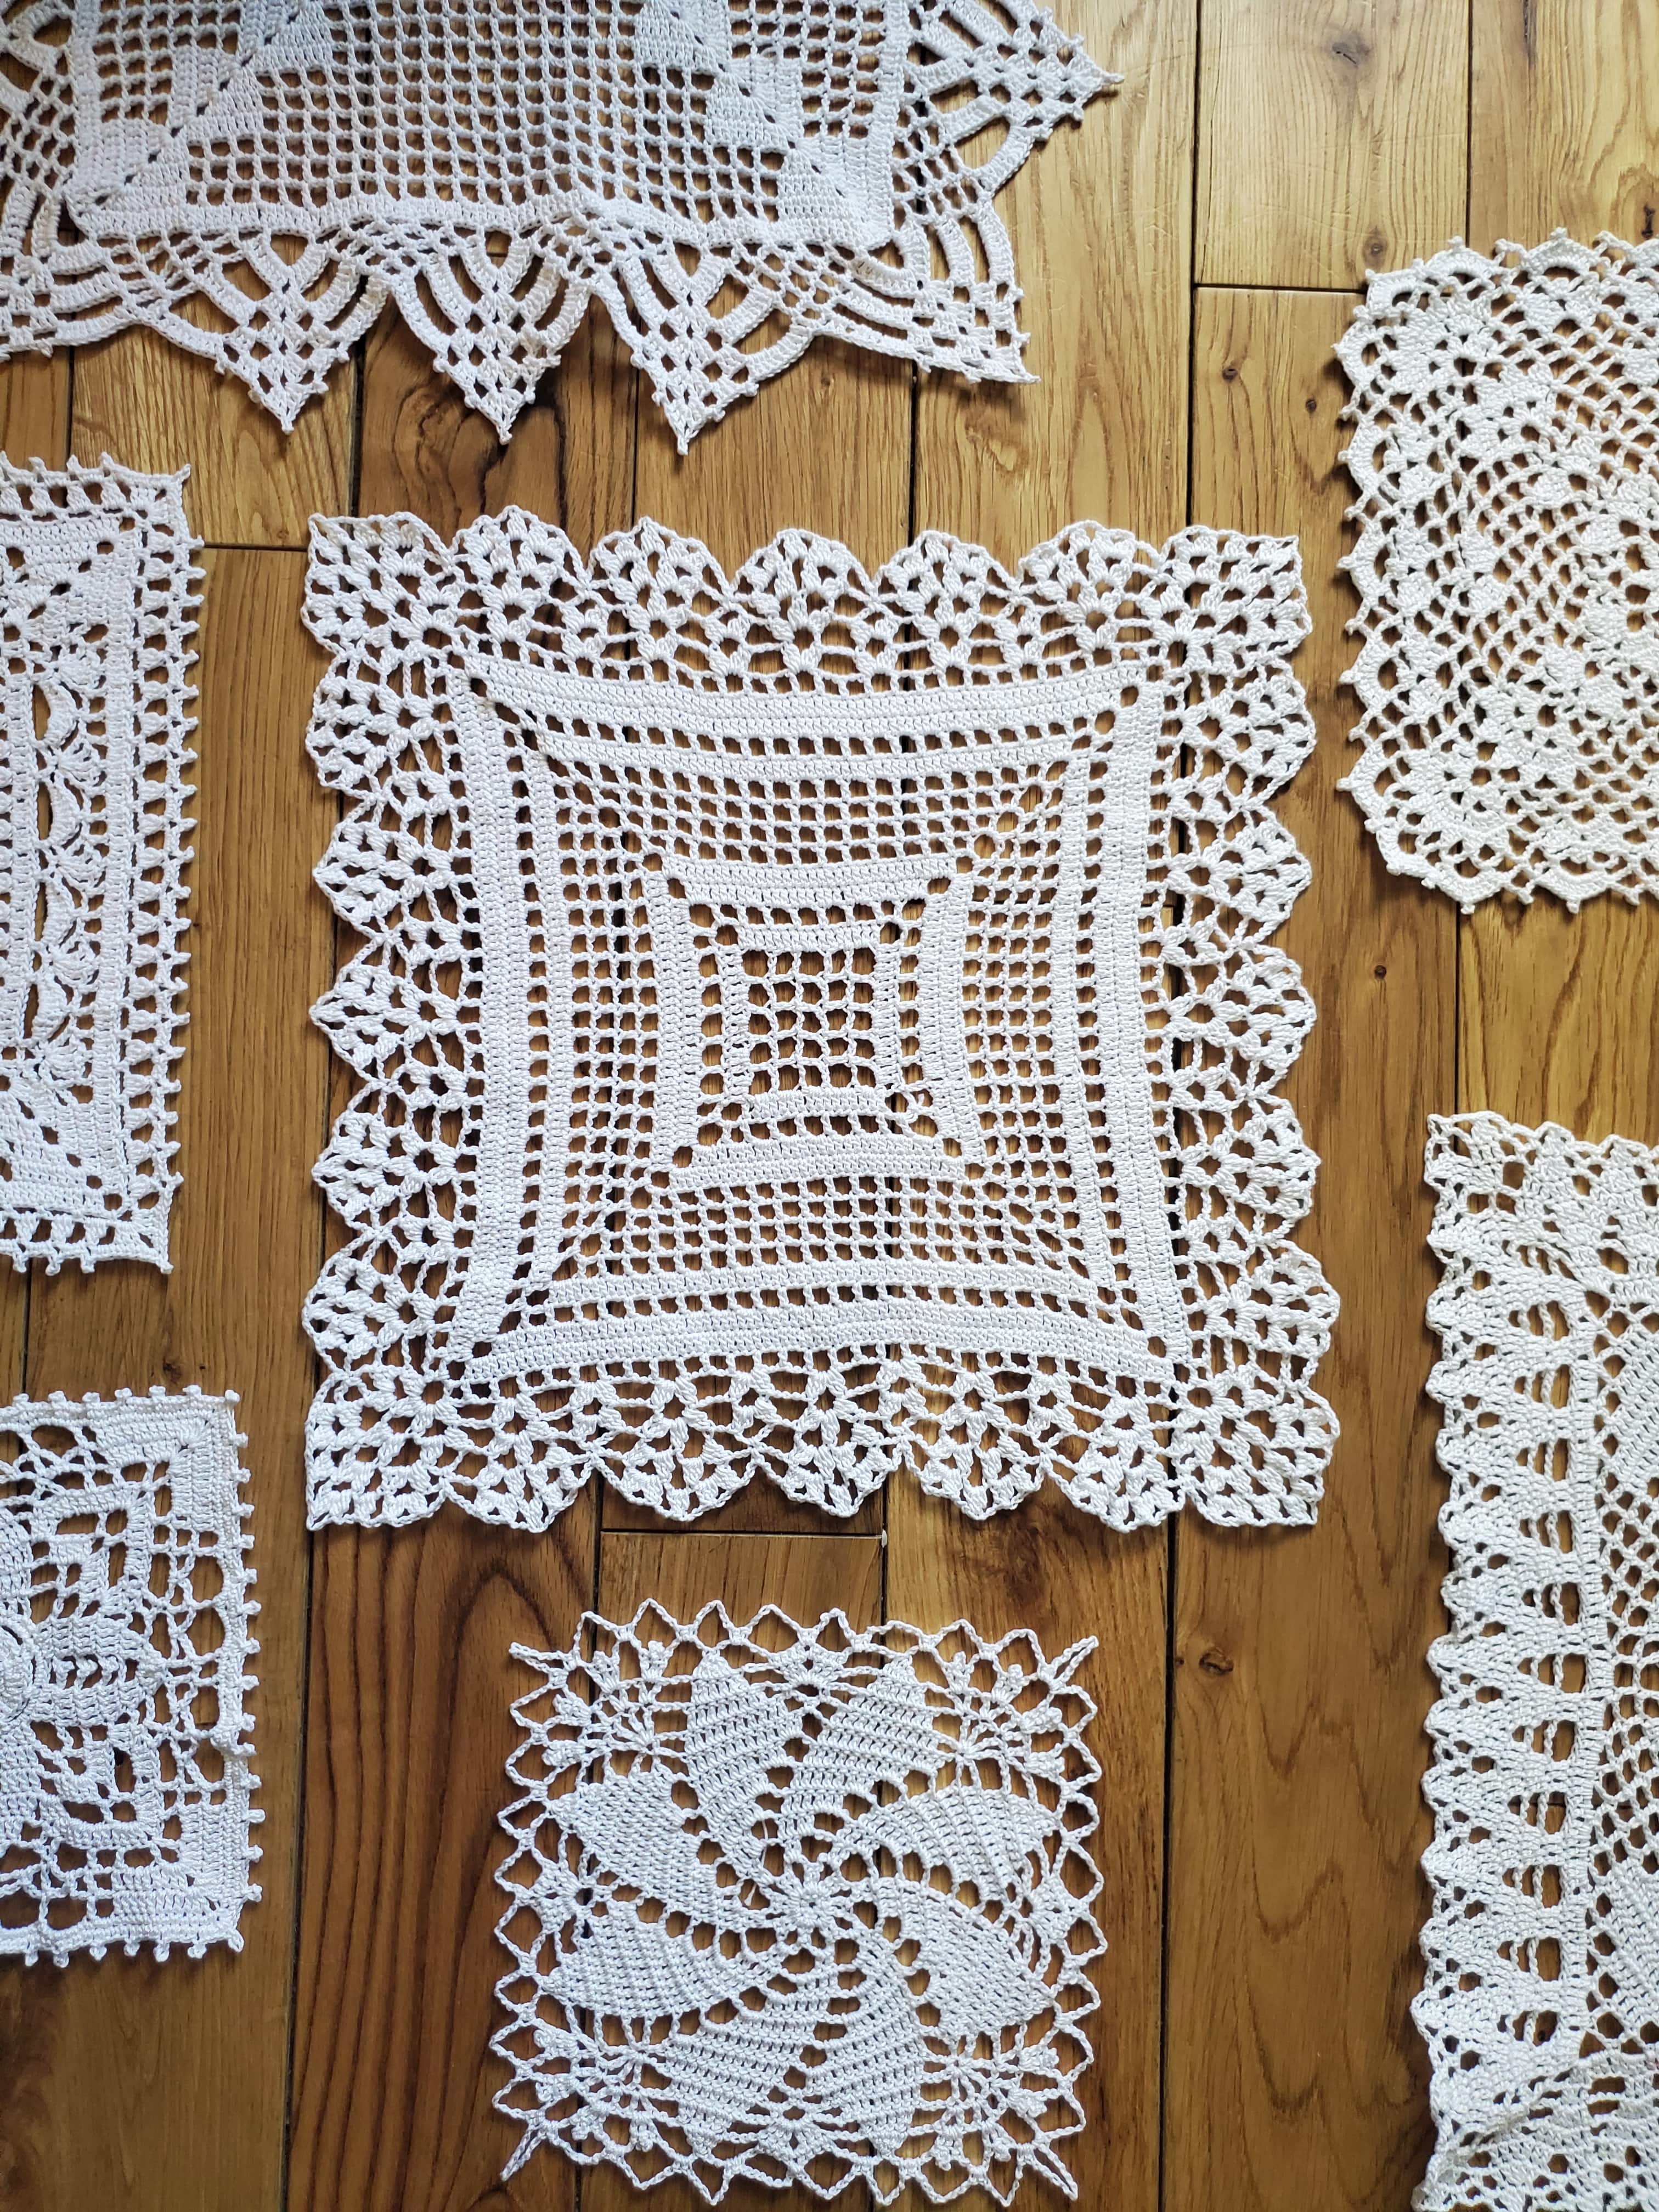
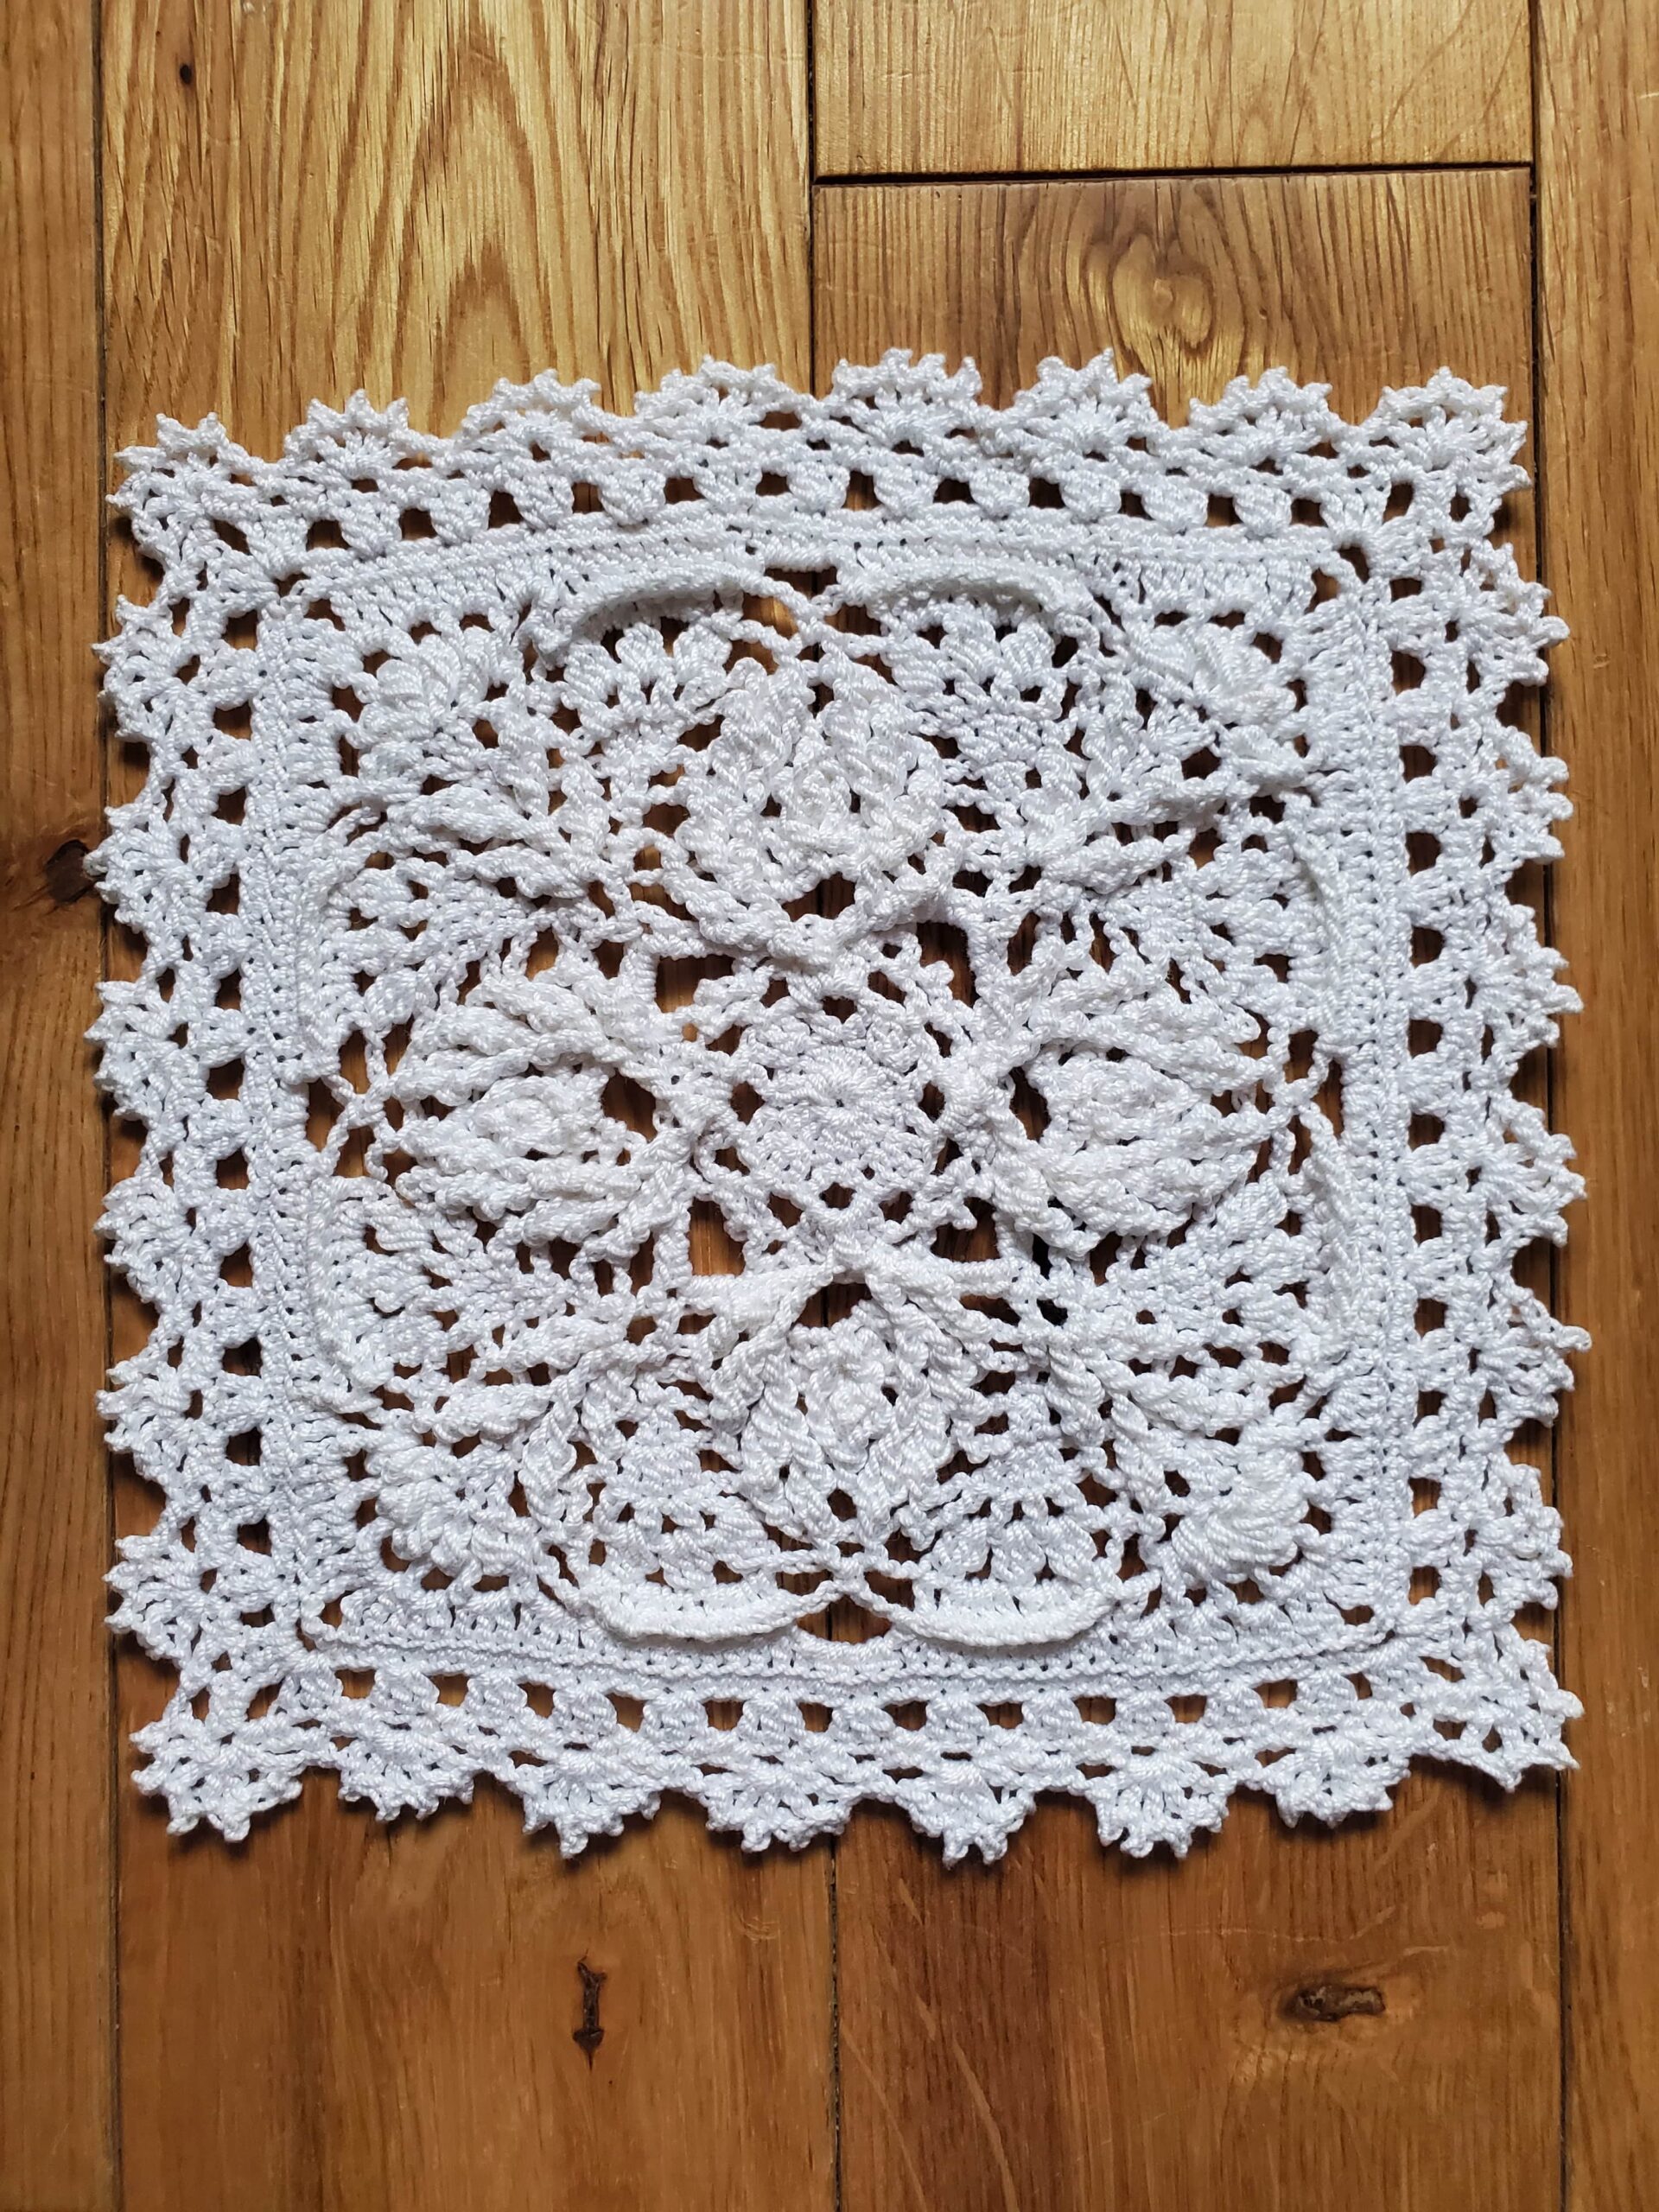
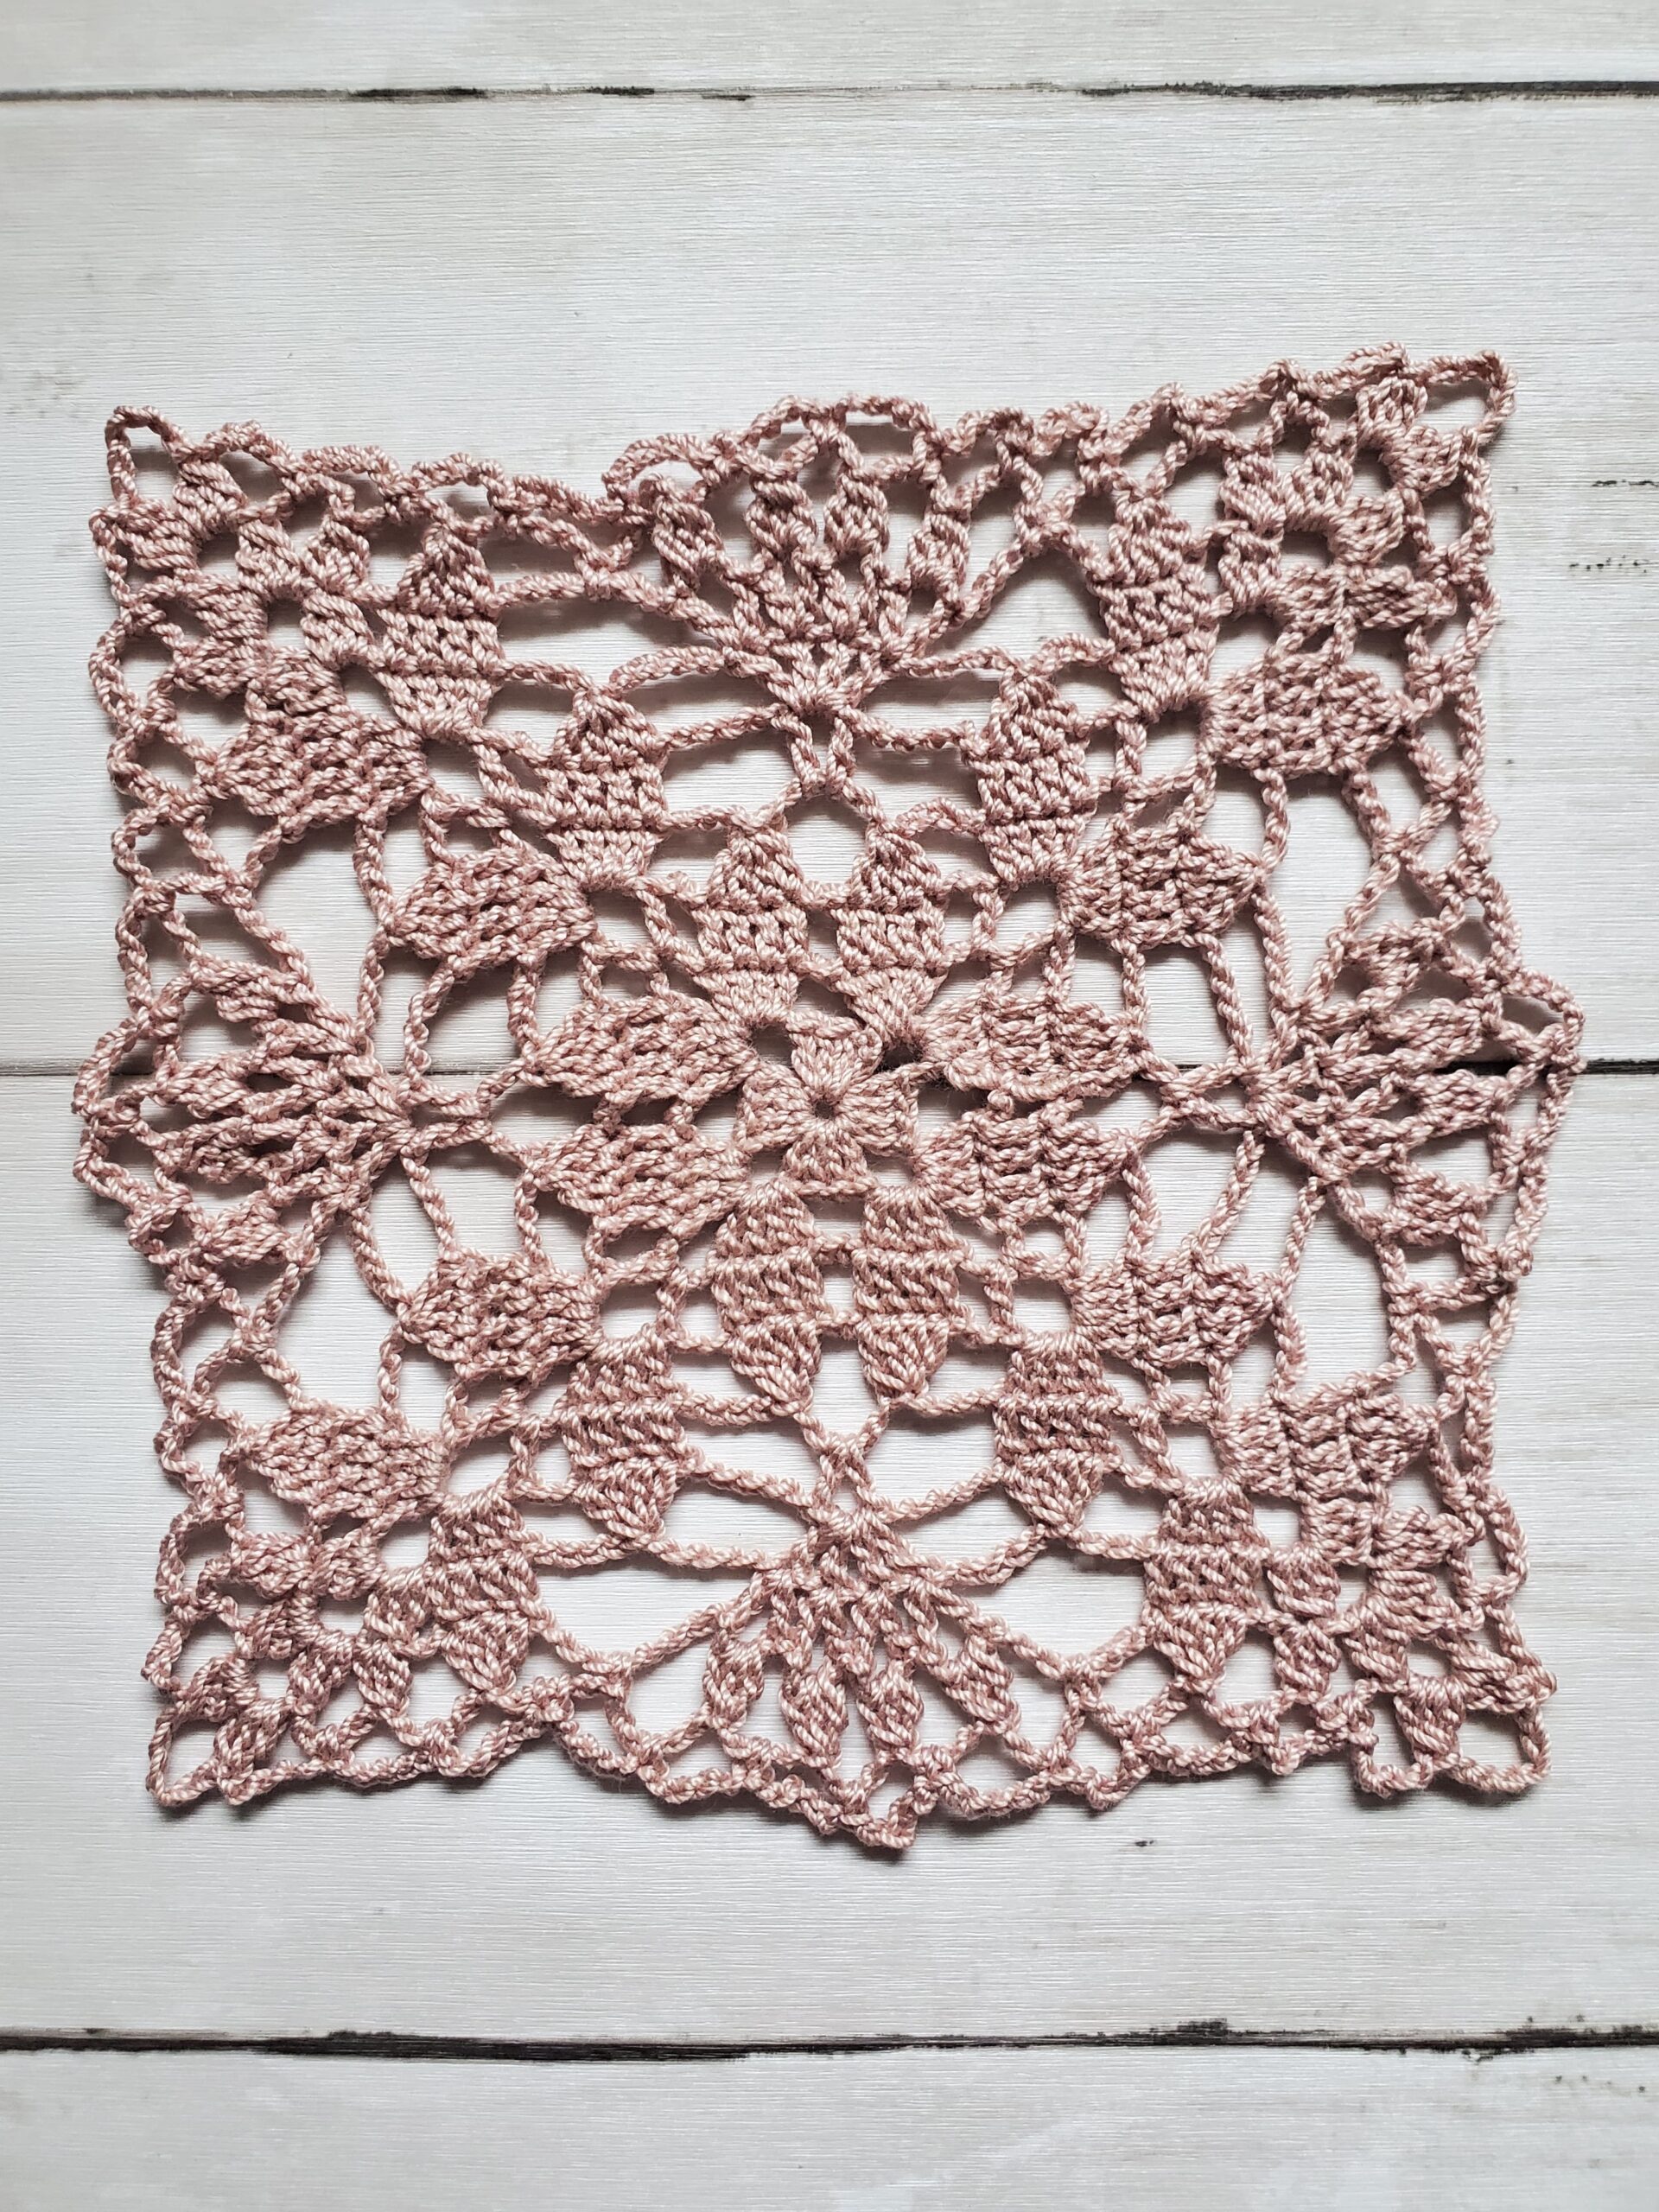
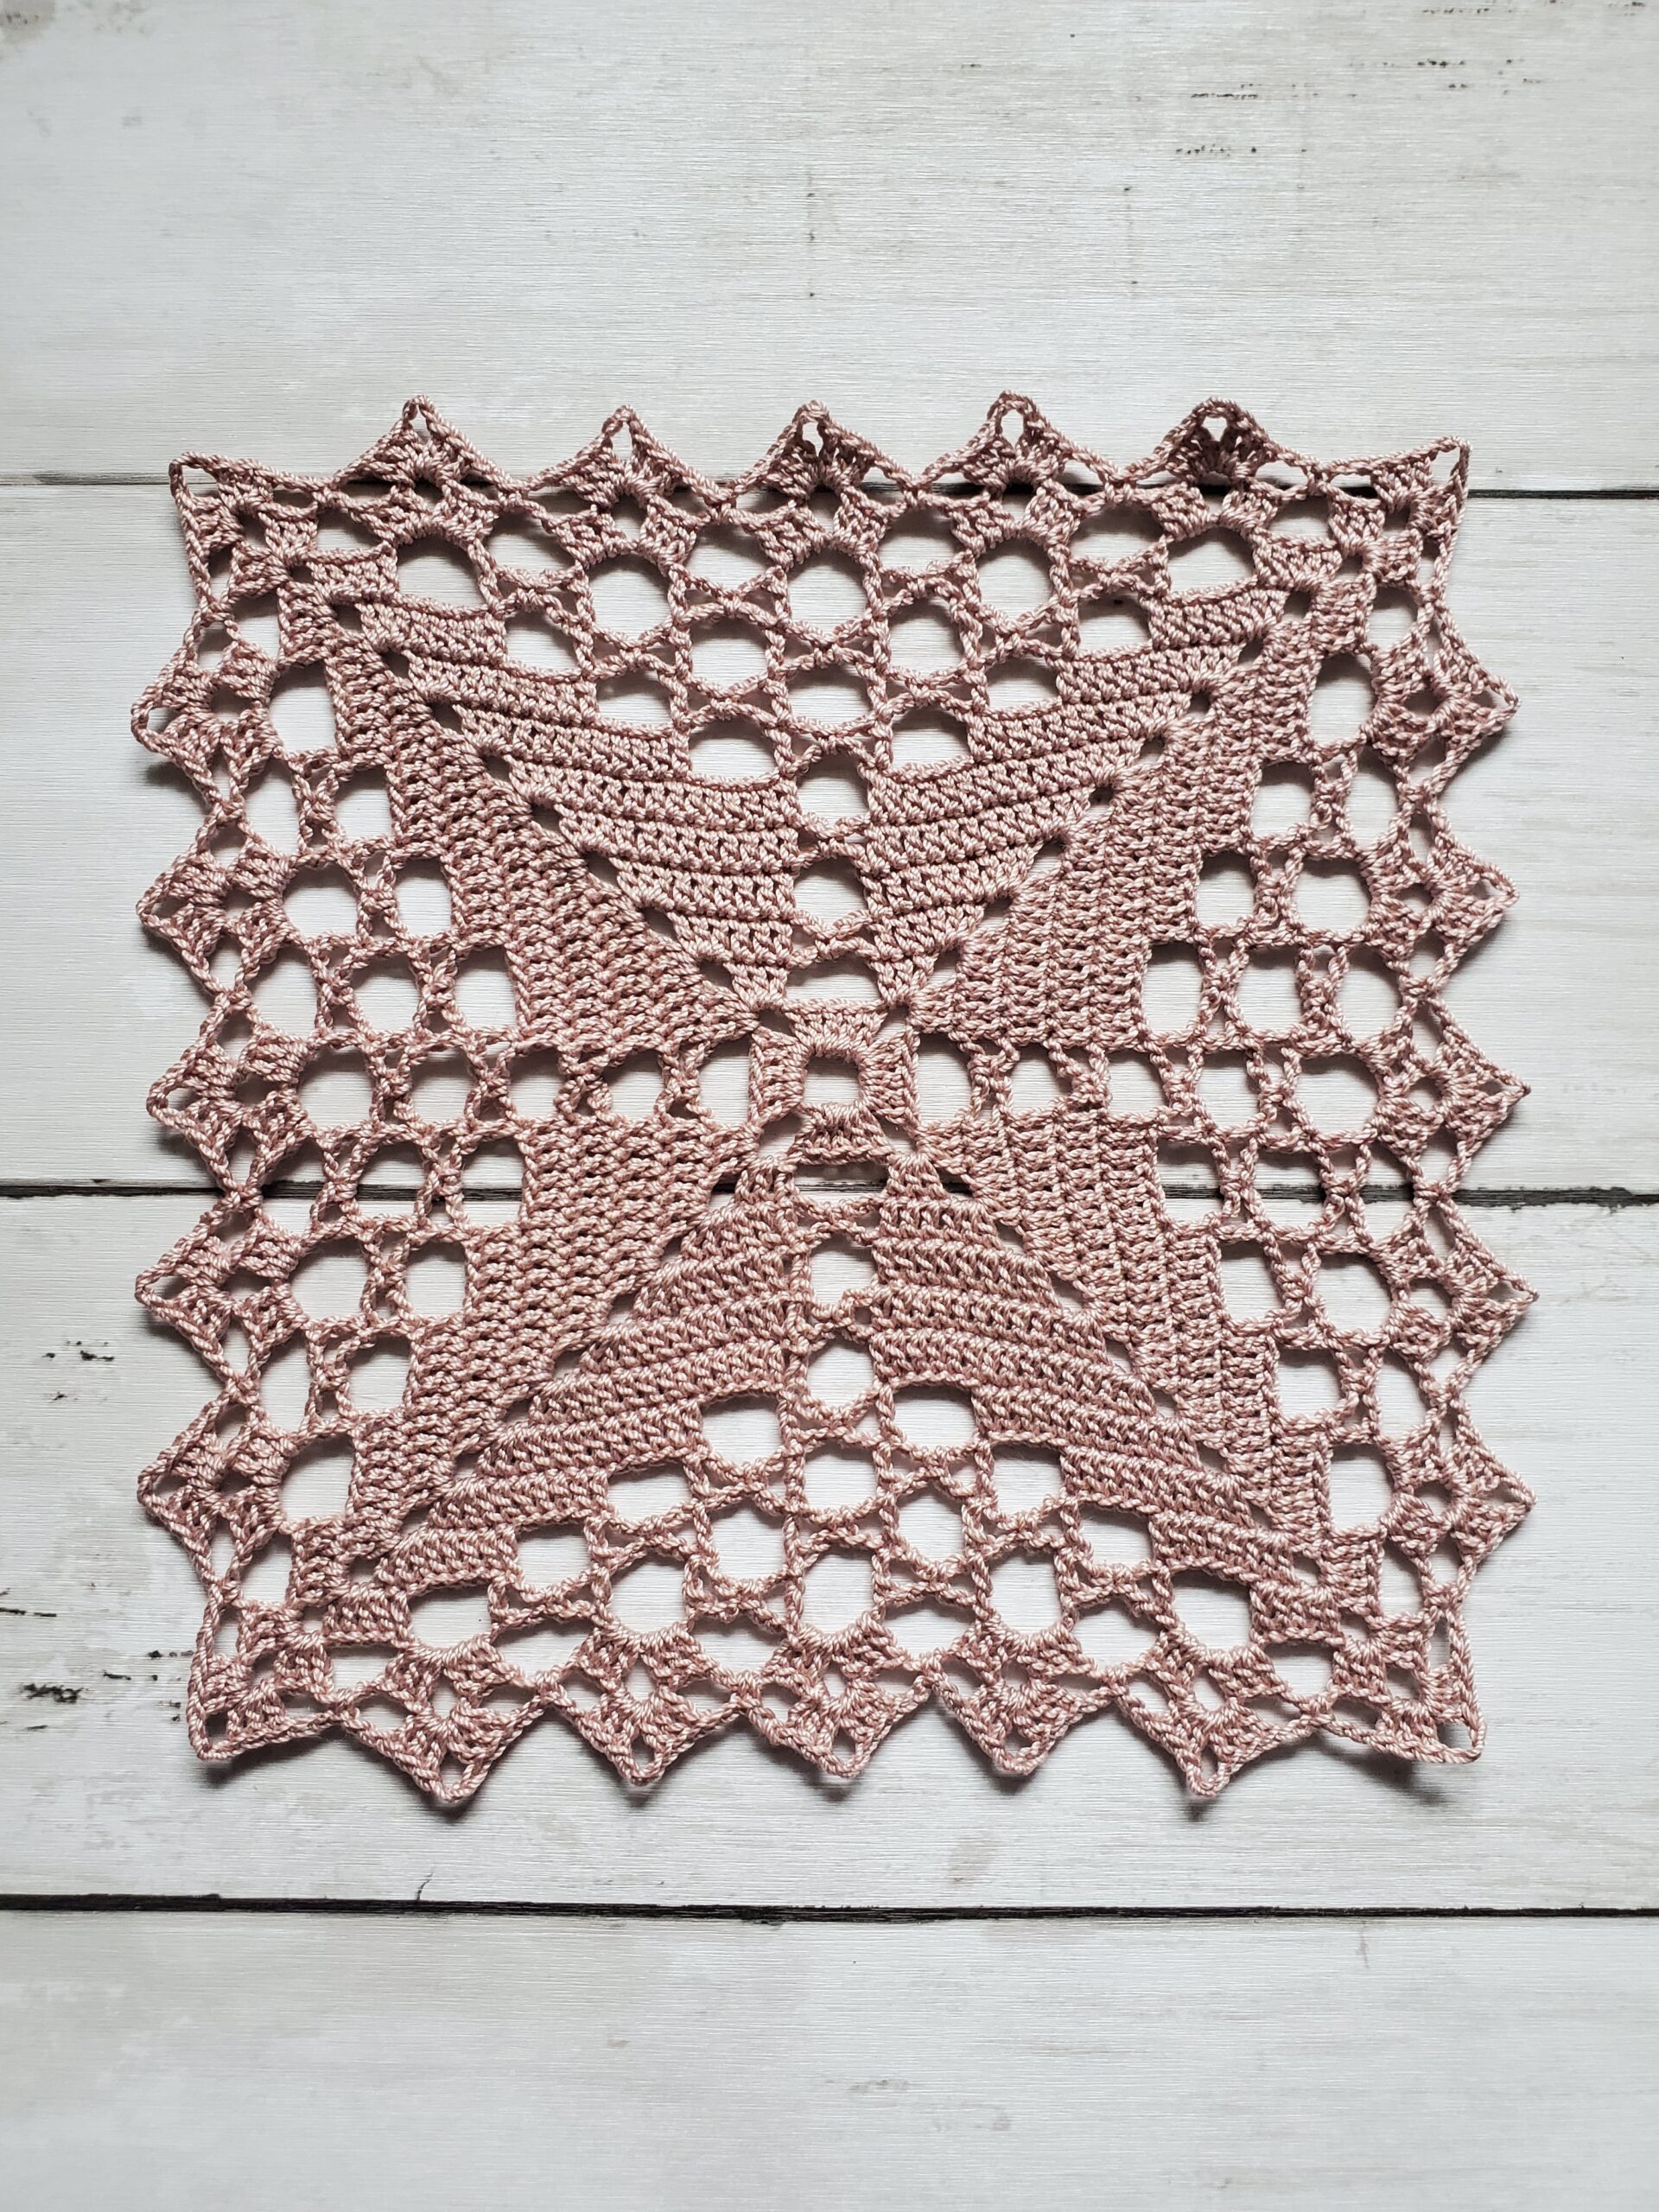
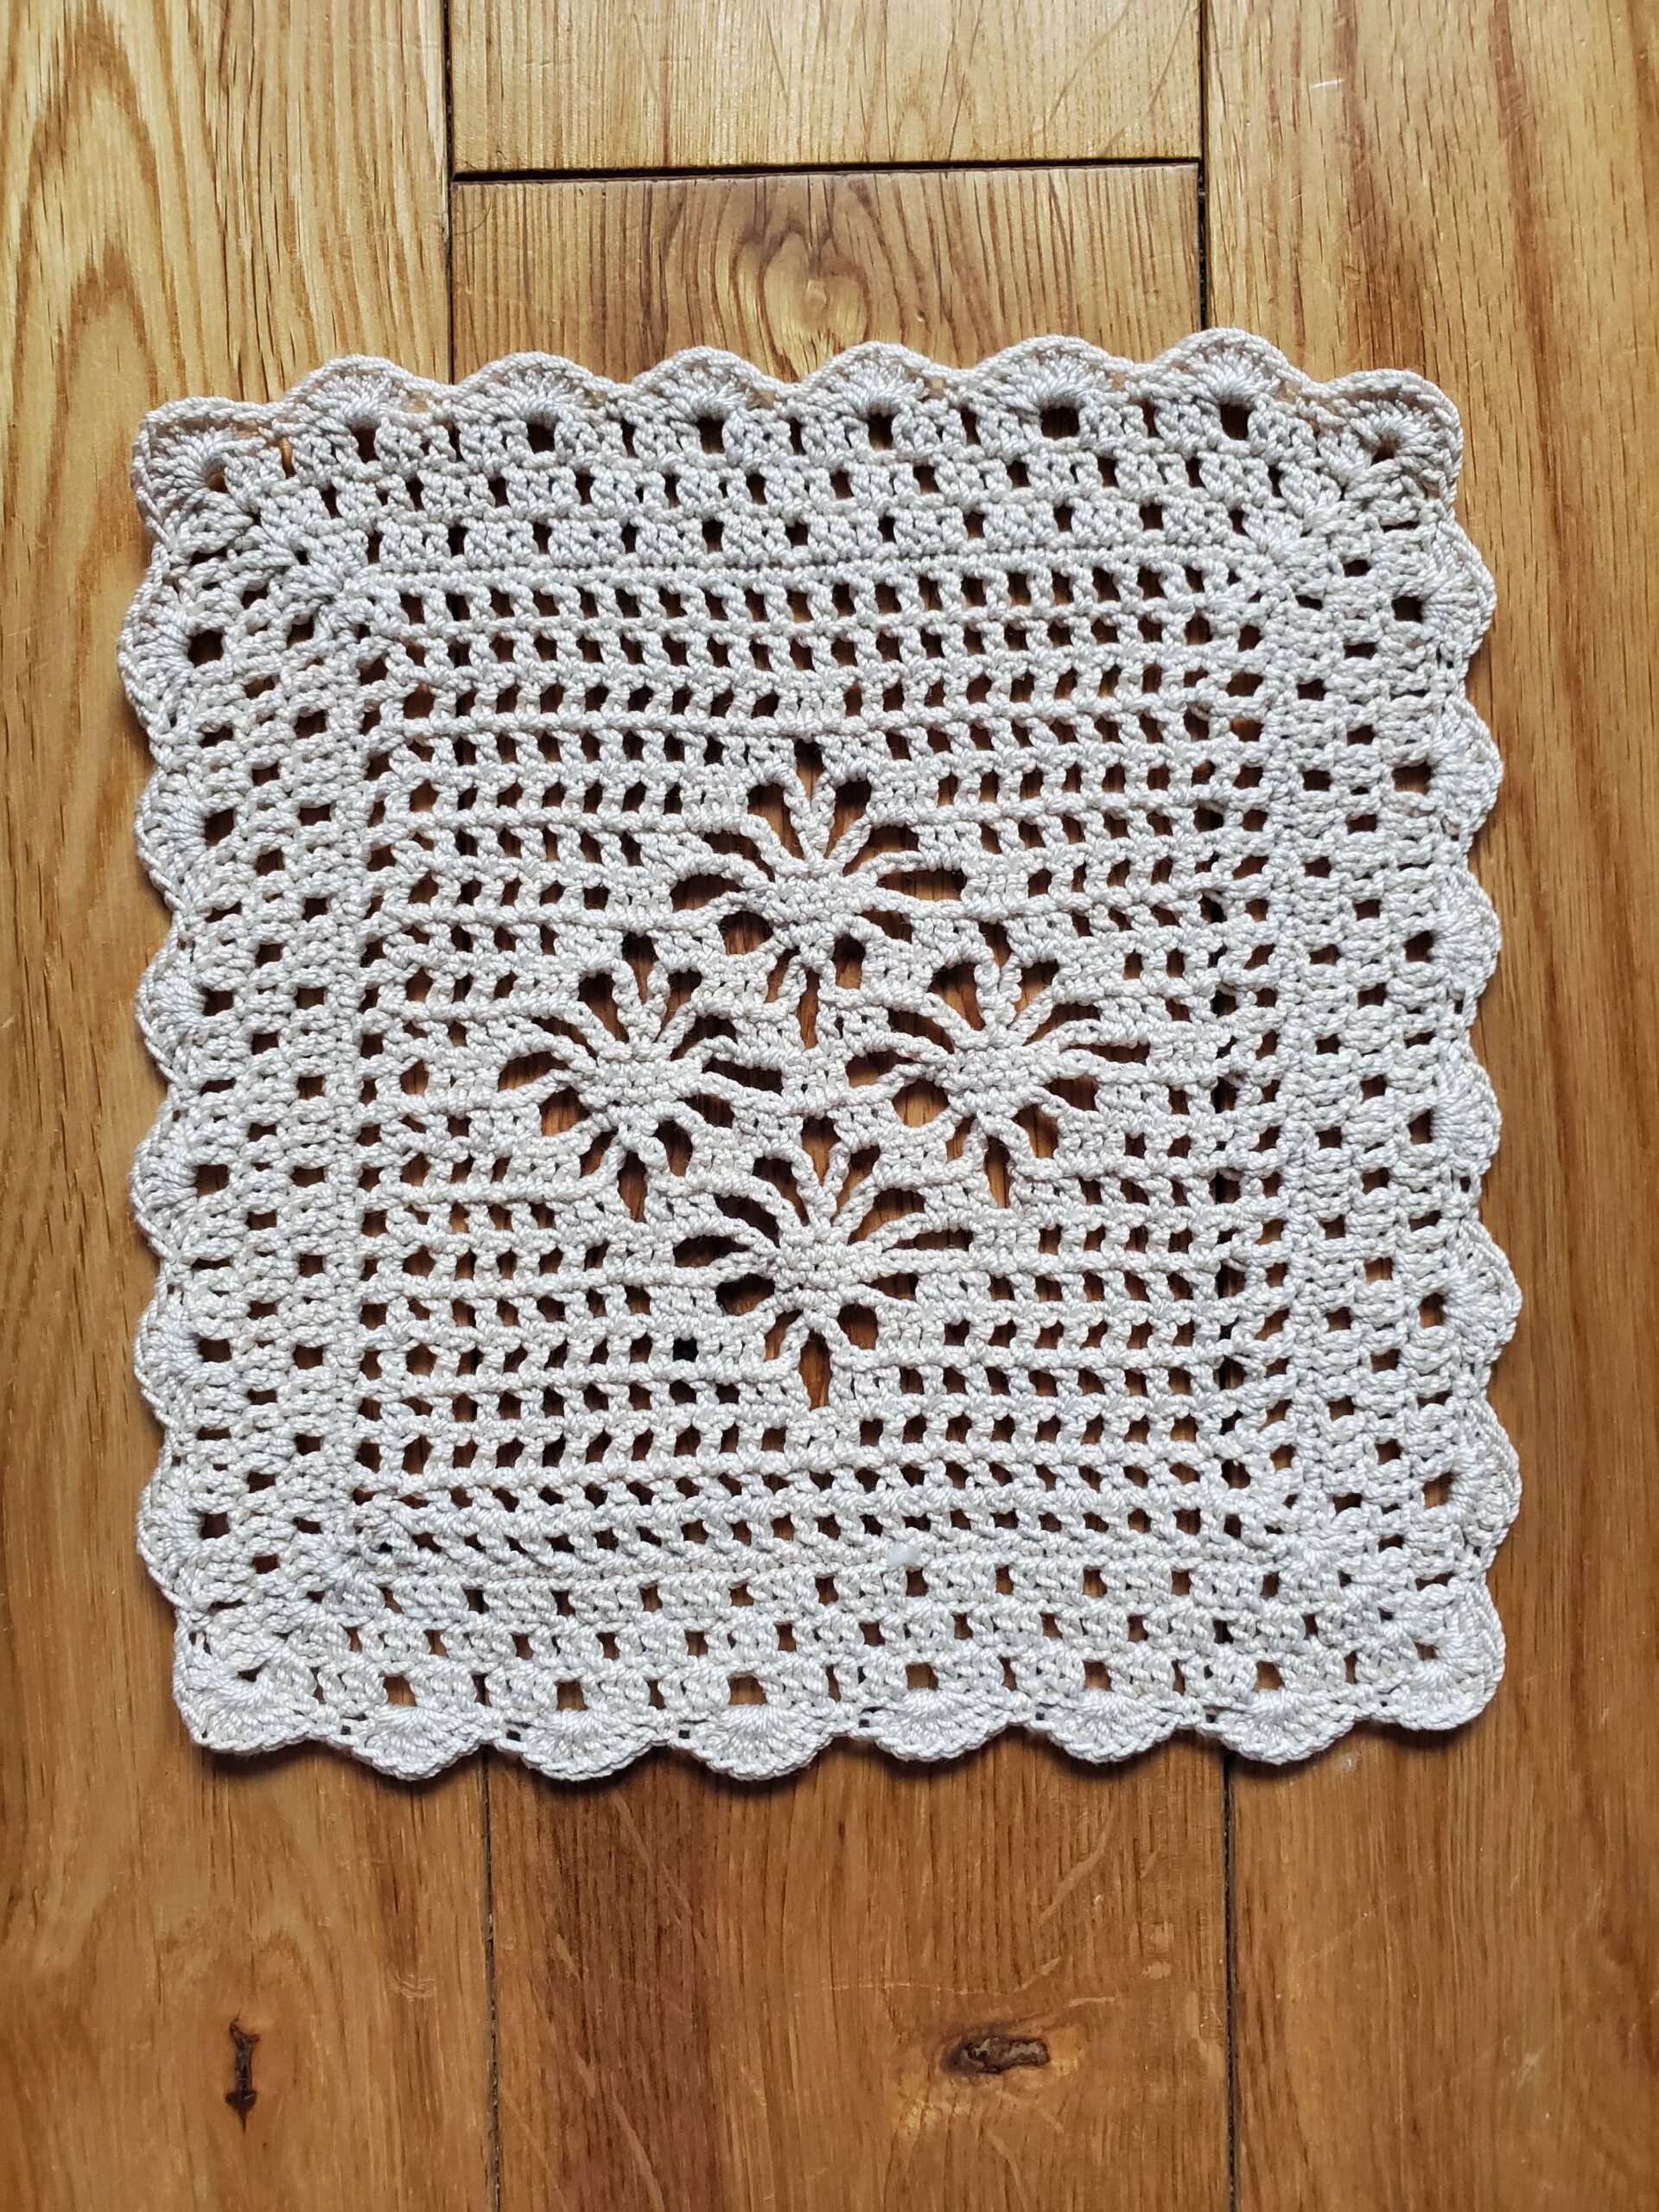
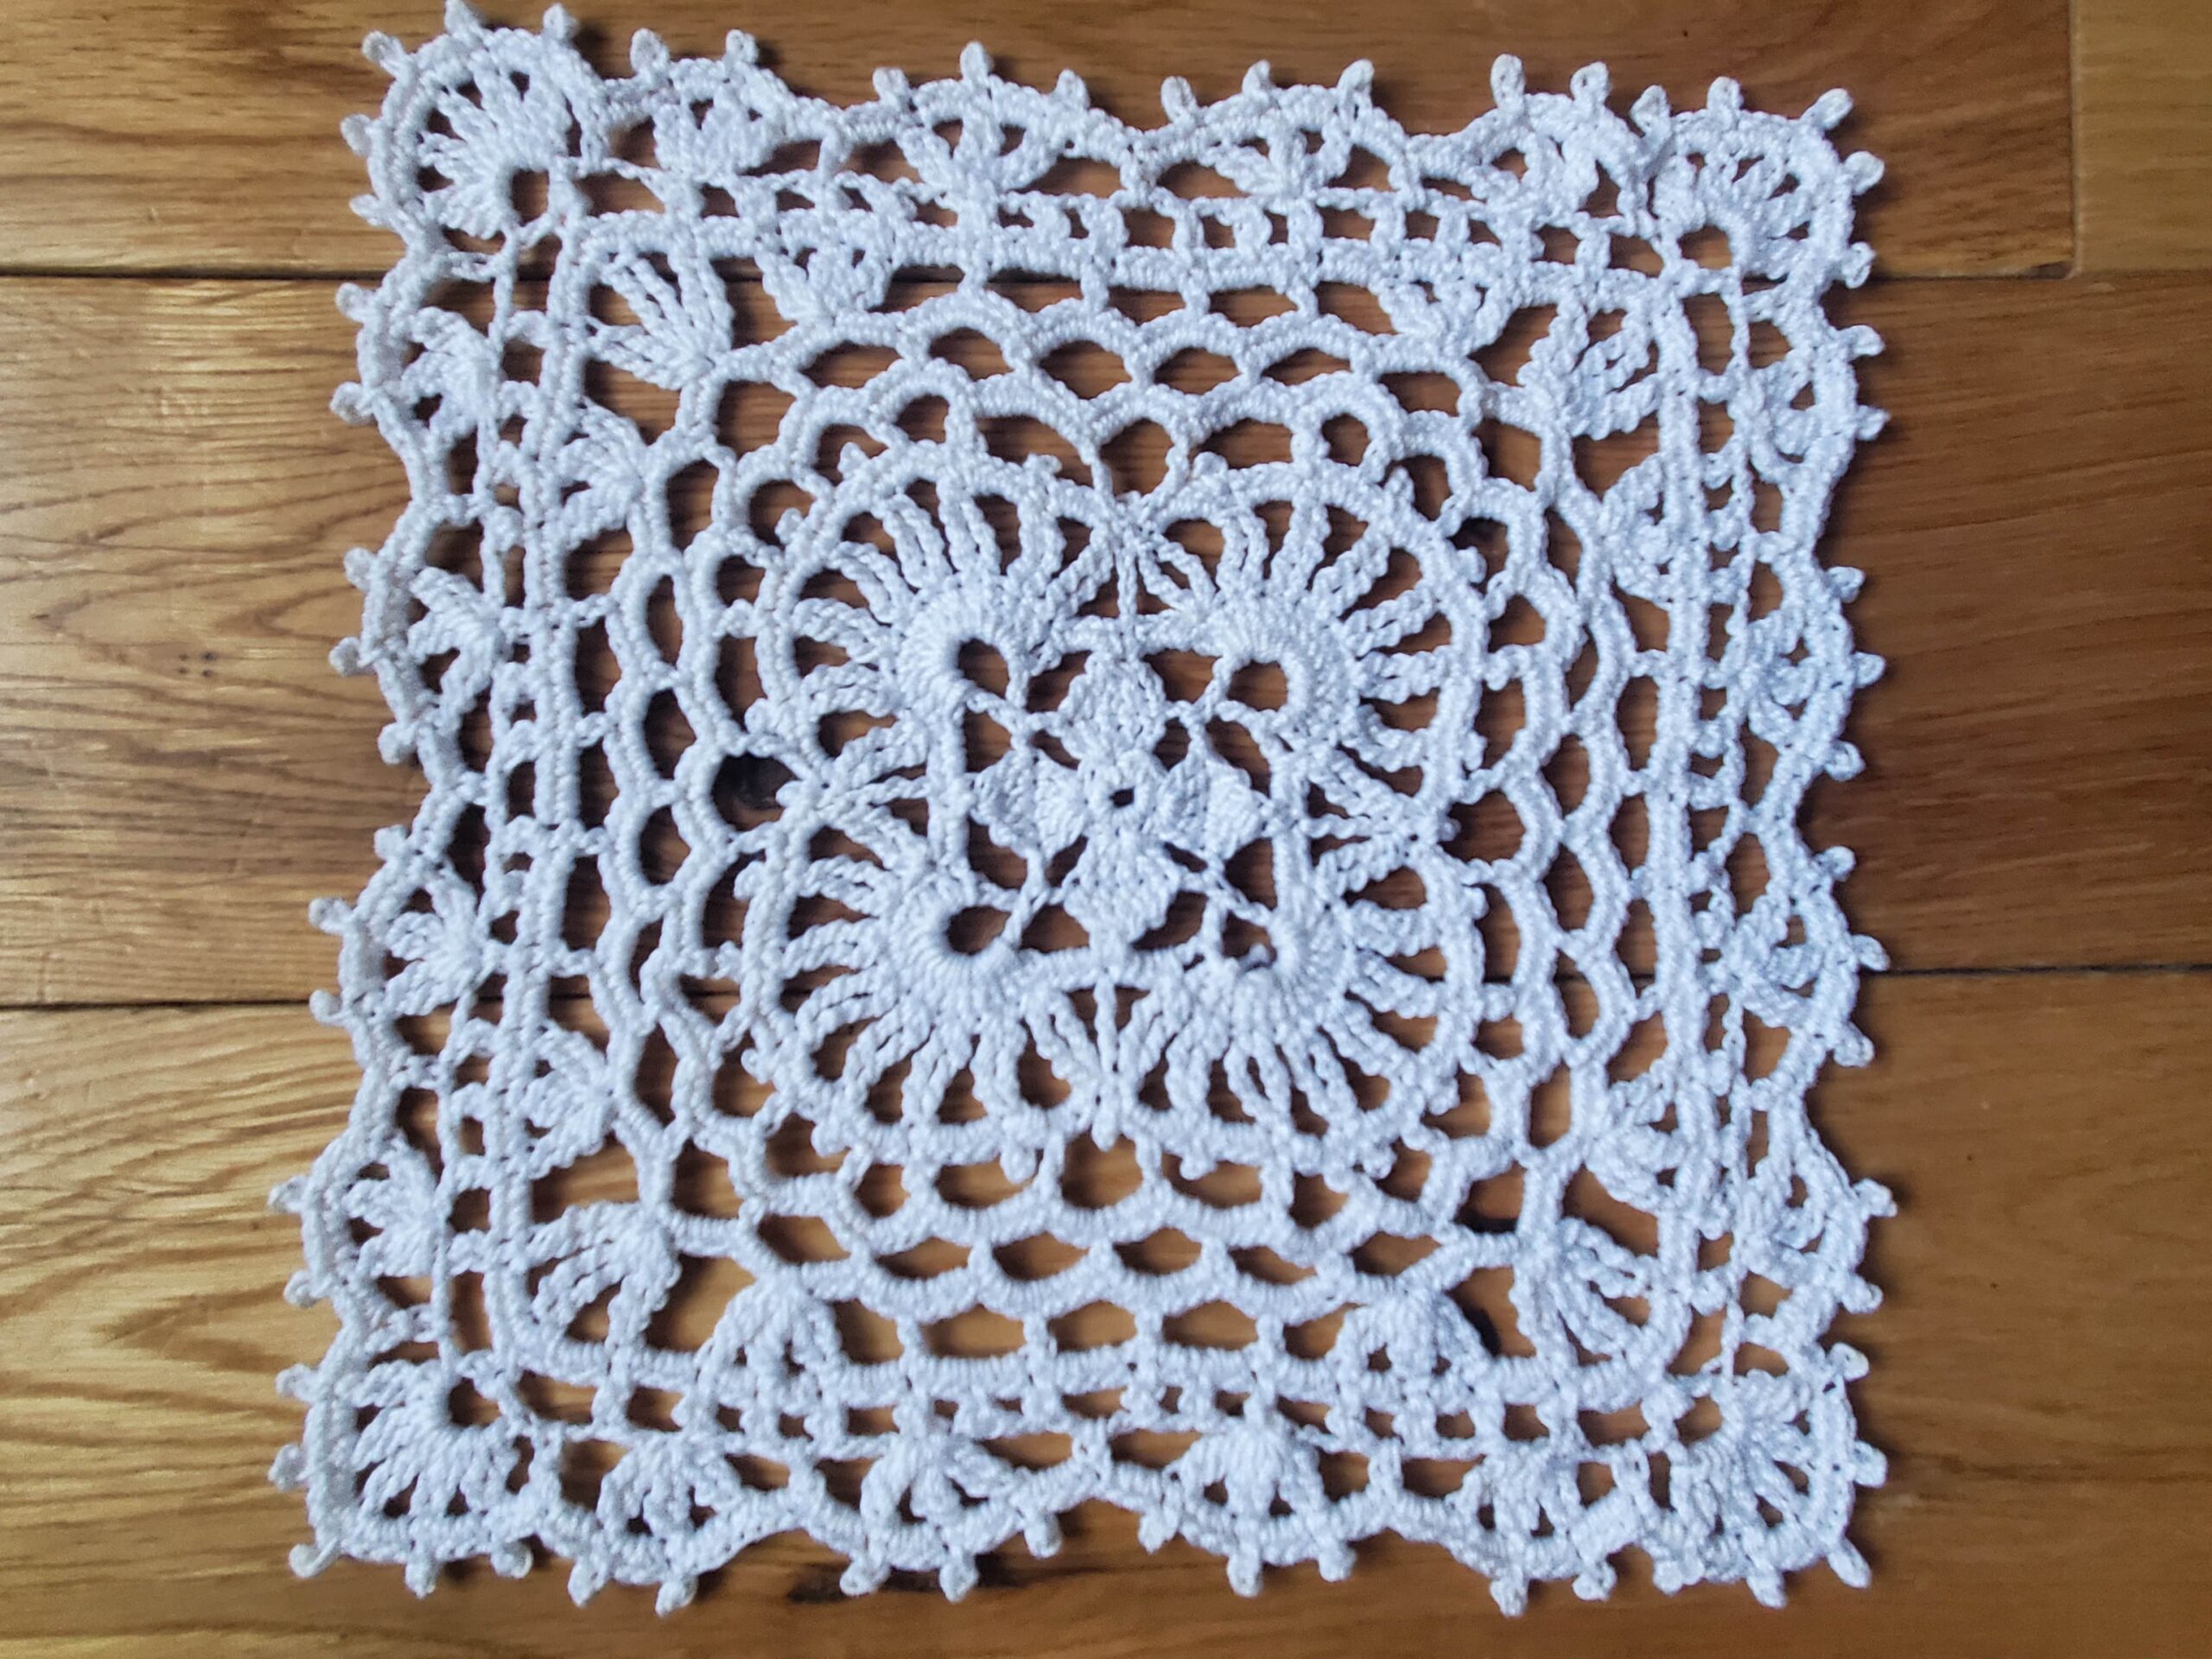
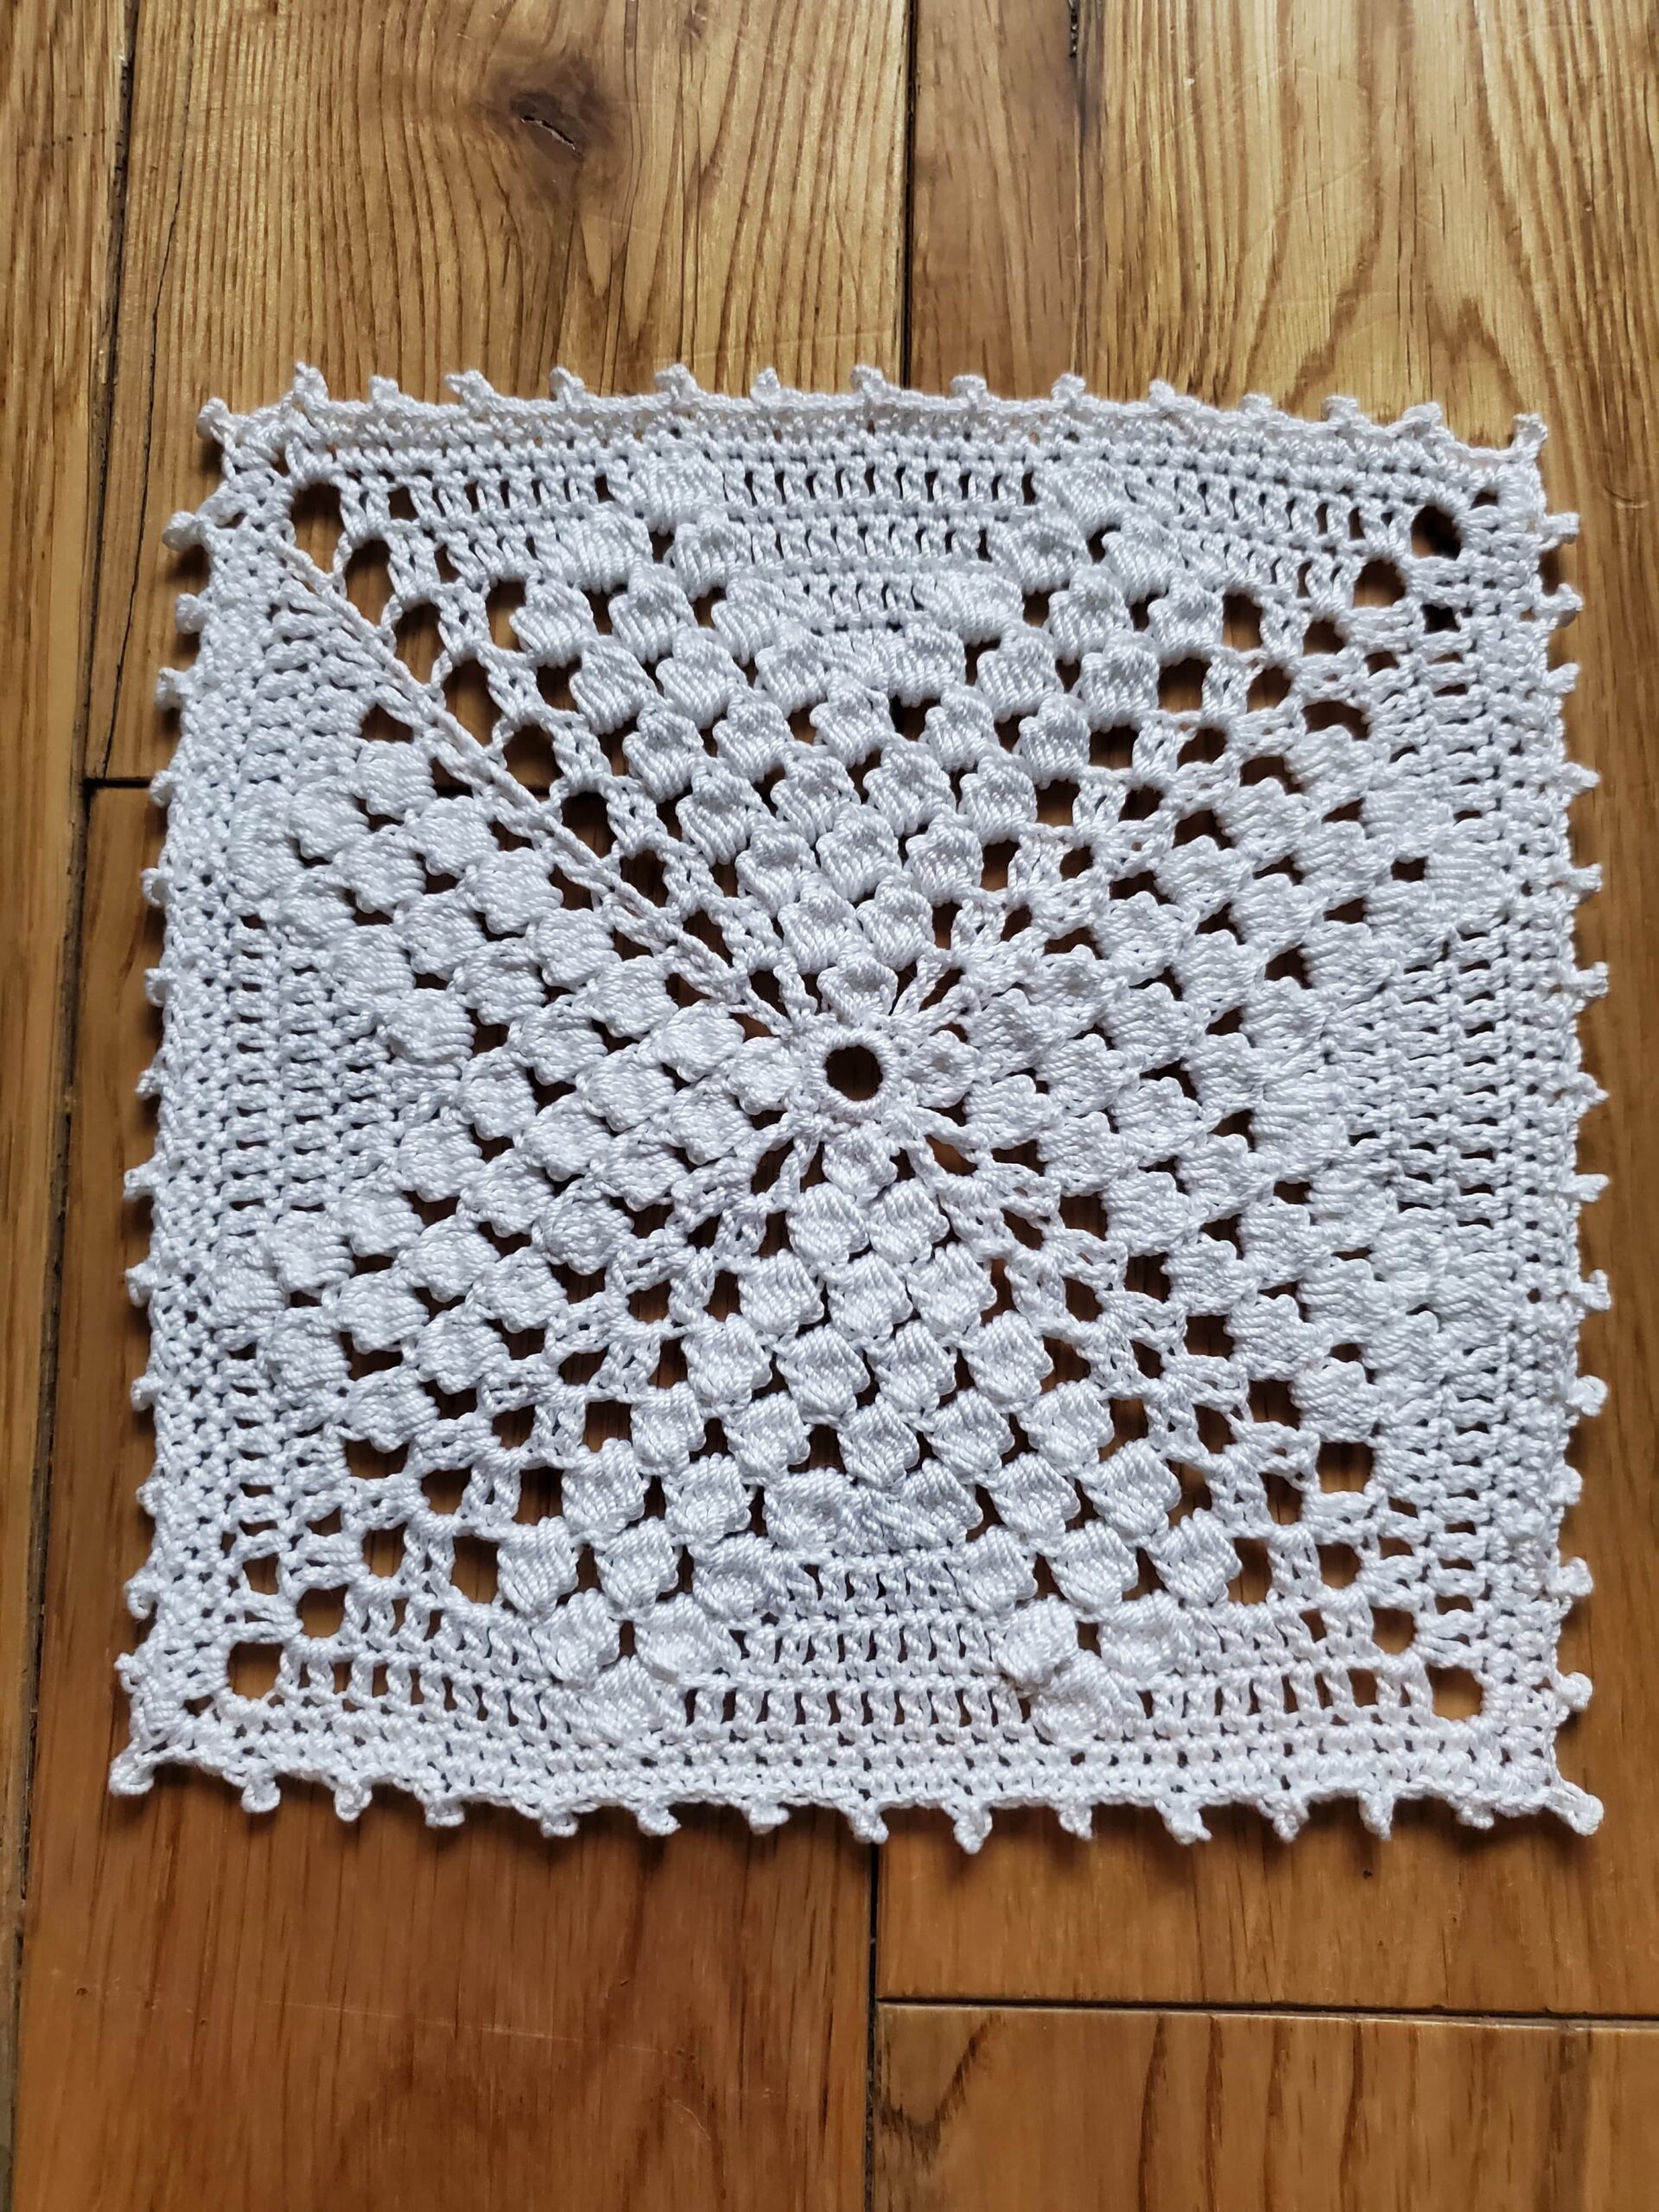
Crochet Pokeball Doily Pattern:
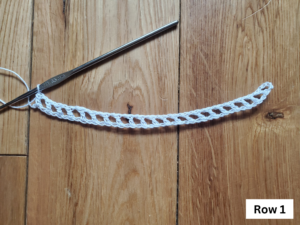
Ch 46
Row 1: sc into 8th ch away from hook (counts as dc and ch 2), ch 2, skip a ch, dc into next ch, *ch 2, skip a ch, sc into next ch, ch 2, skip a ch, dc into next ch.* Repeat from *to* (10 sc, 11 dc, 20 ch 2s)
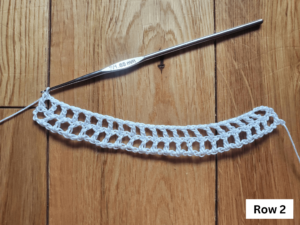
Row 2: ch 6 (counts as dc and ch 3), turn, skip ch 2, skip sc, and skip next ch 2, dc into next dc, *ch 3, skip ch 2, skip dc, and skip next ch 2, dc into next dc.* Repeat from *to* (11 dc, 10 ch 3s)
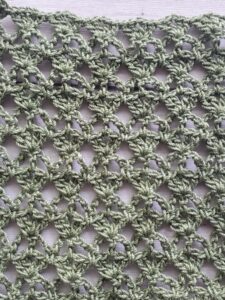
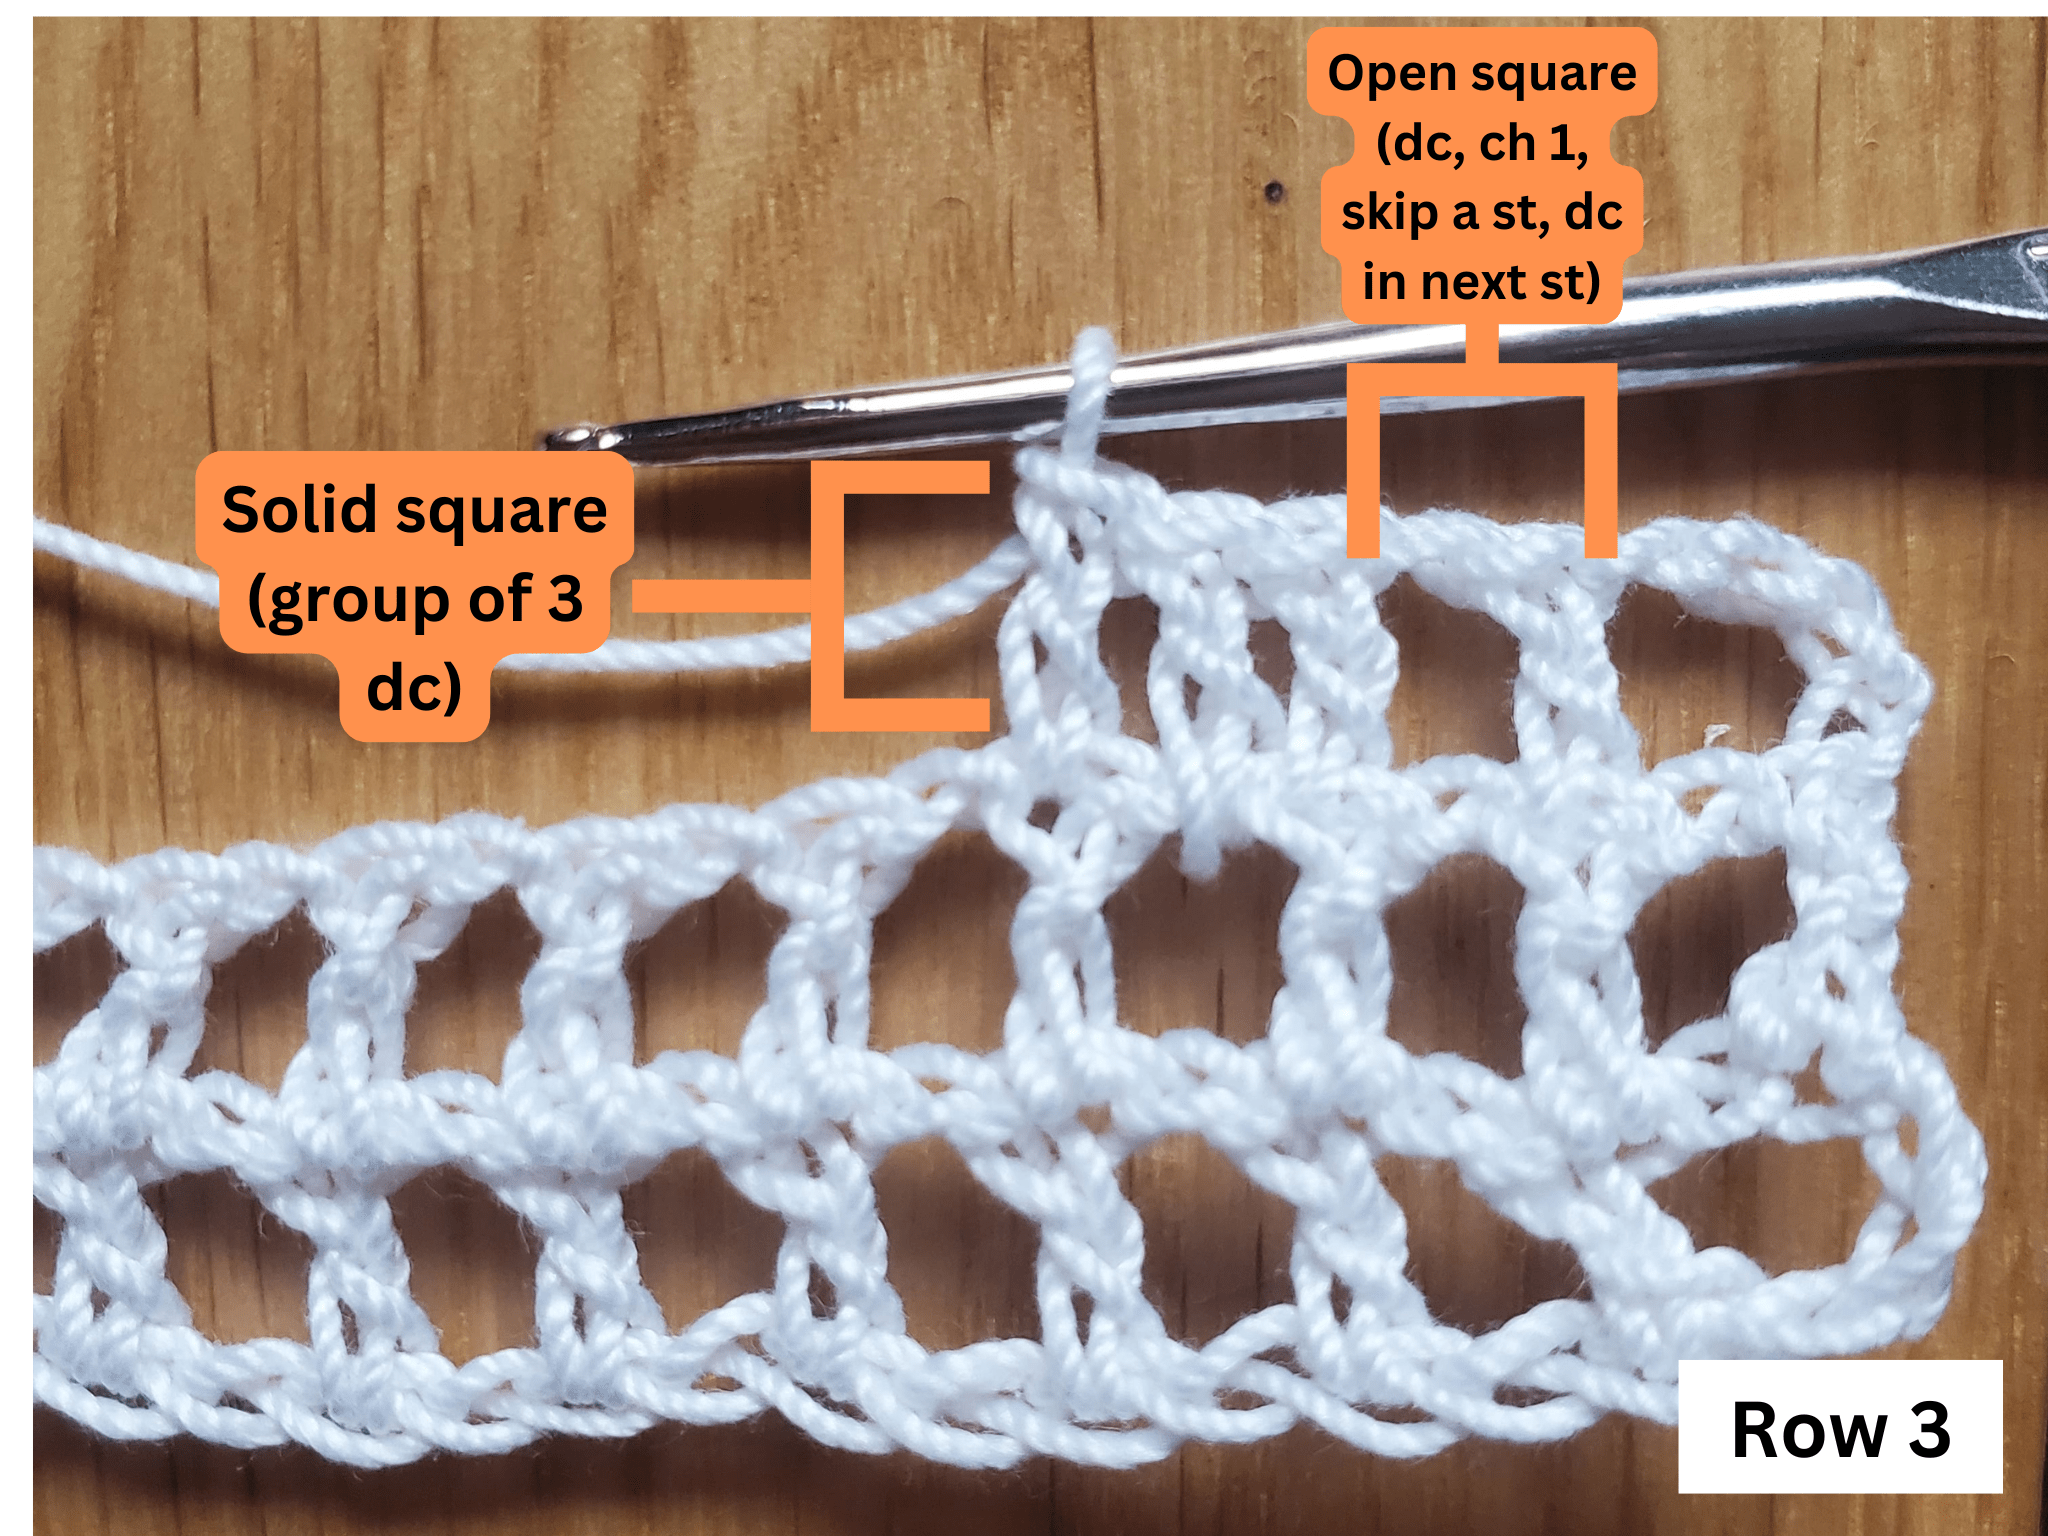
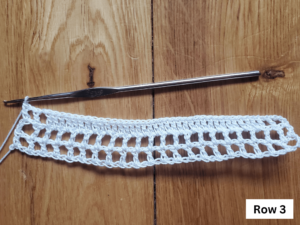
Row 3: ch 5 (counts as dc and ch 2), turn sc into middle ch of previous row’s ch 3, ch 2, dc into next dc, *ch 2, sc into middle ch of previous row’s ch 3, ch 2, dc into next dc* Repeat from *to* twice more. Ch 3, skip ch 3 space, dc into next dc, ch 3, skip ch 3 space, dc into next dc (these two open squares should be aligned right in the middle of the fabric). Repeat from *to* 4 more times. (11 dc, 8 sc, 16 ch 2s, 2 ch 3s)
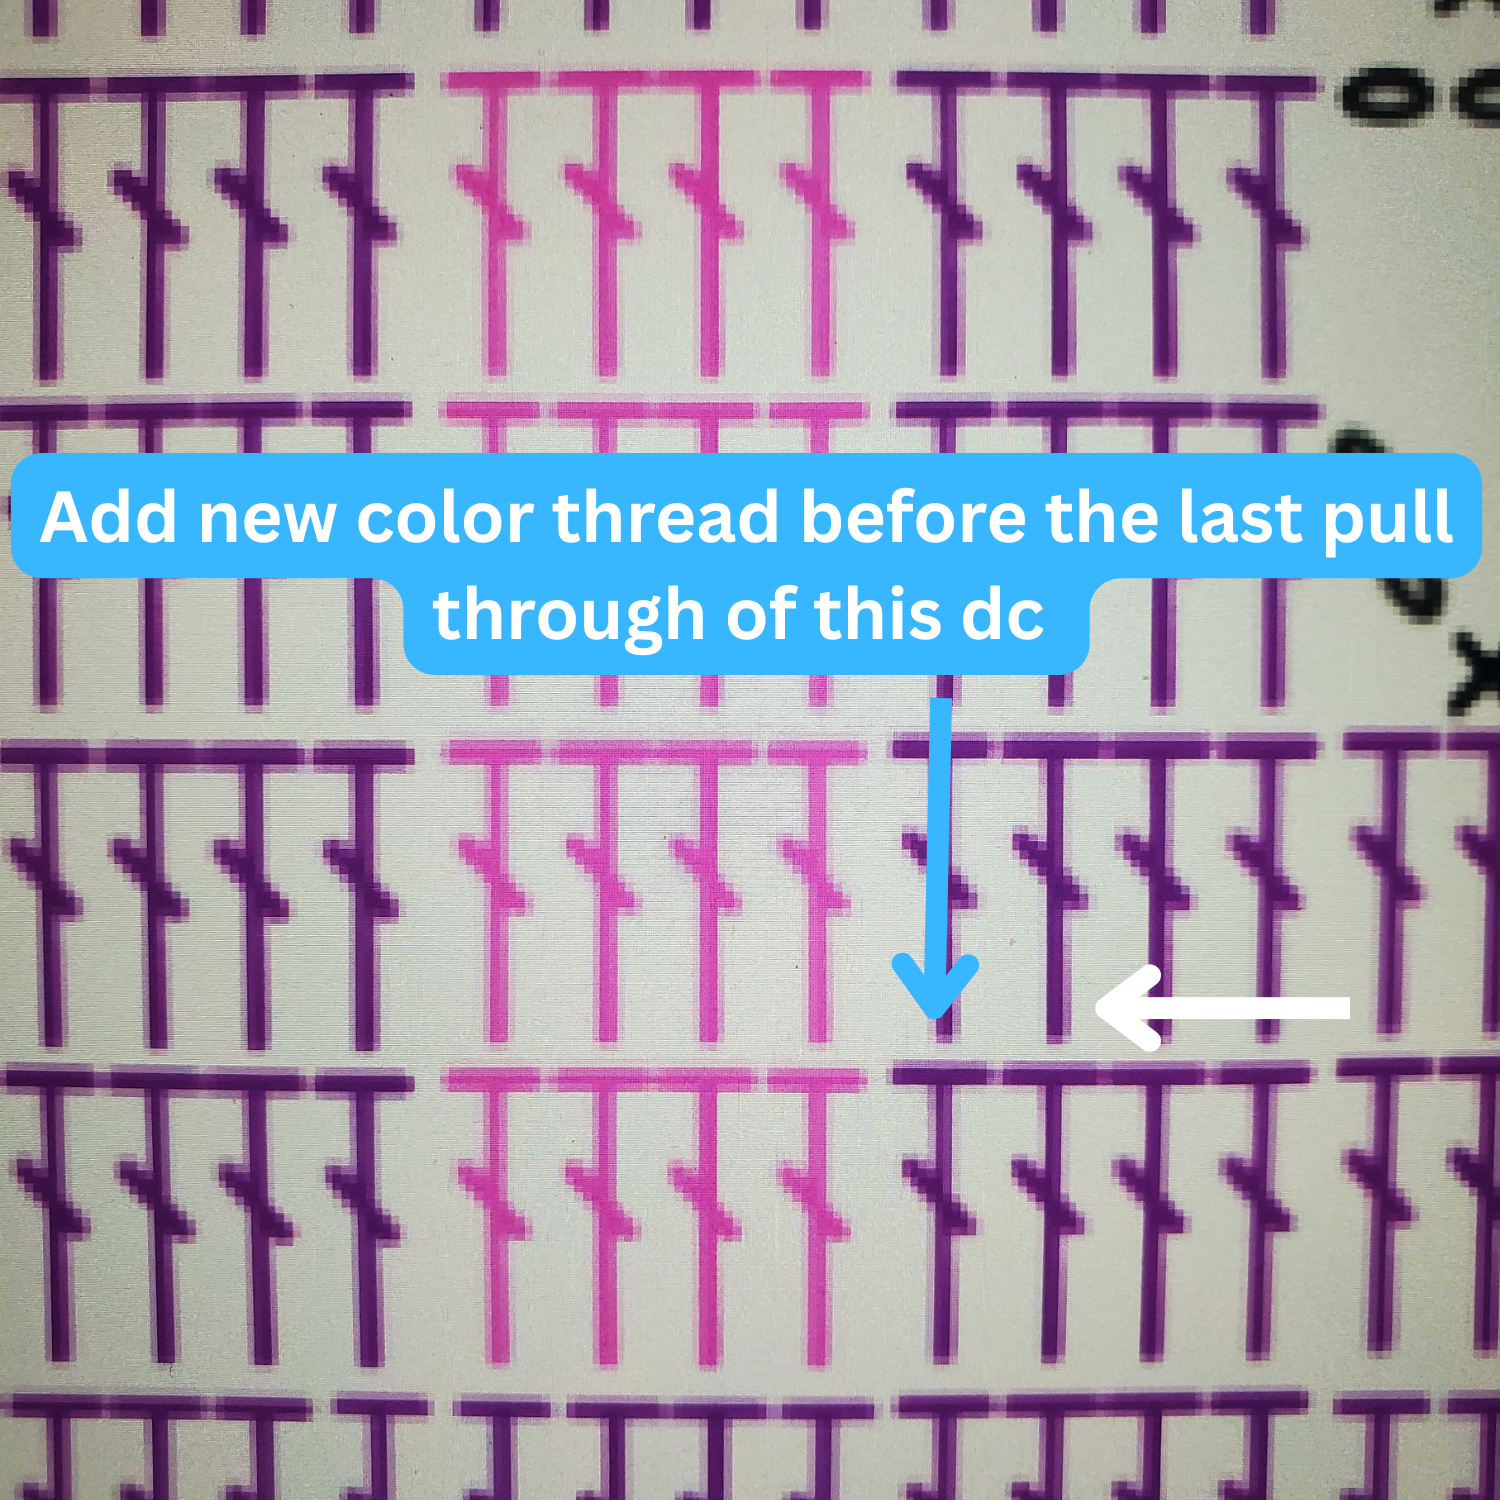
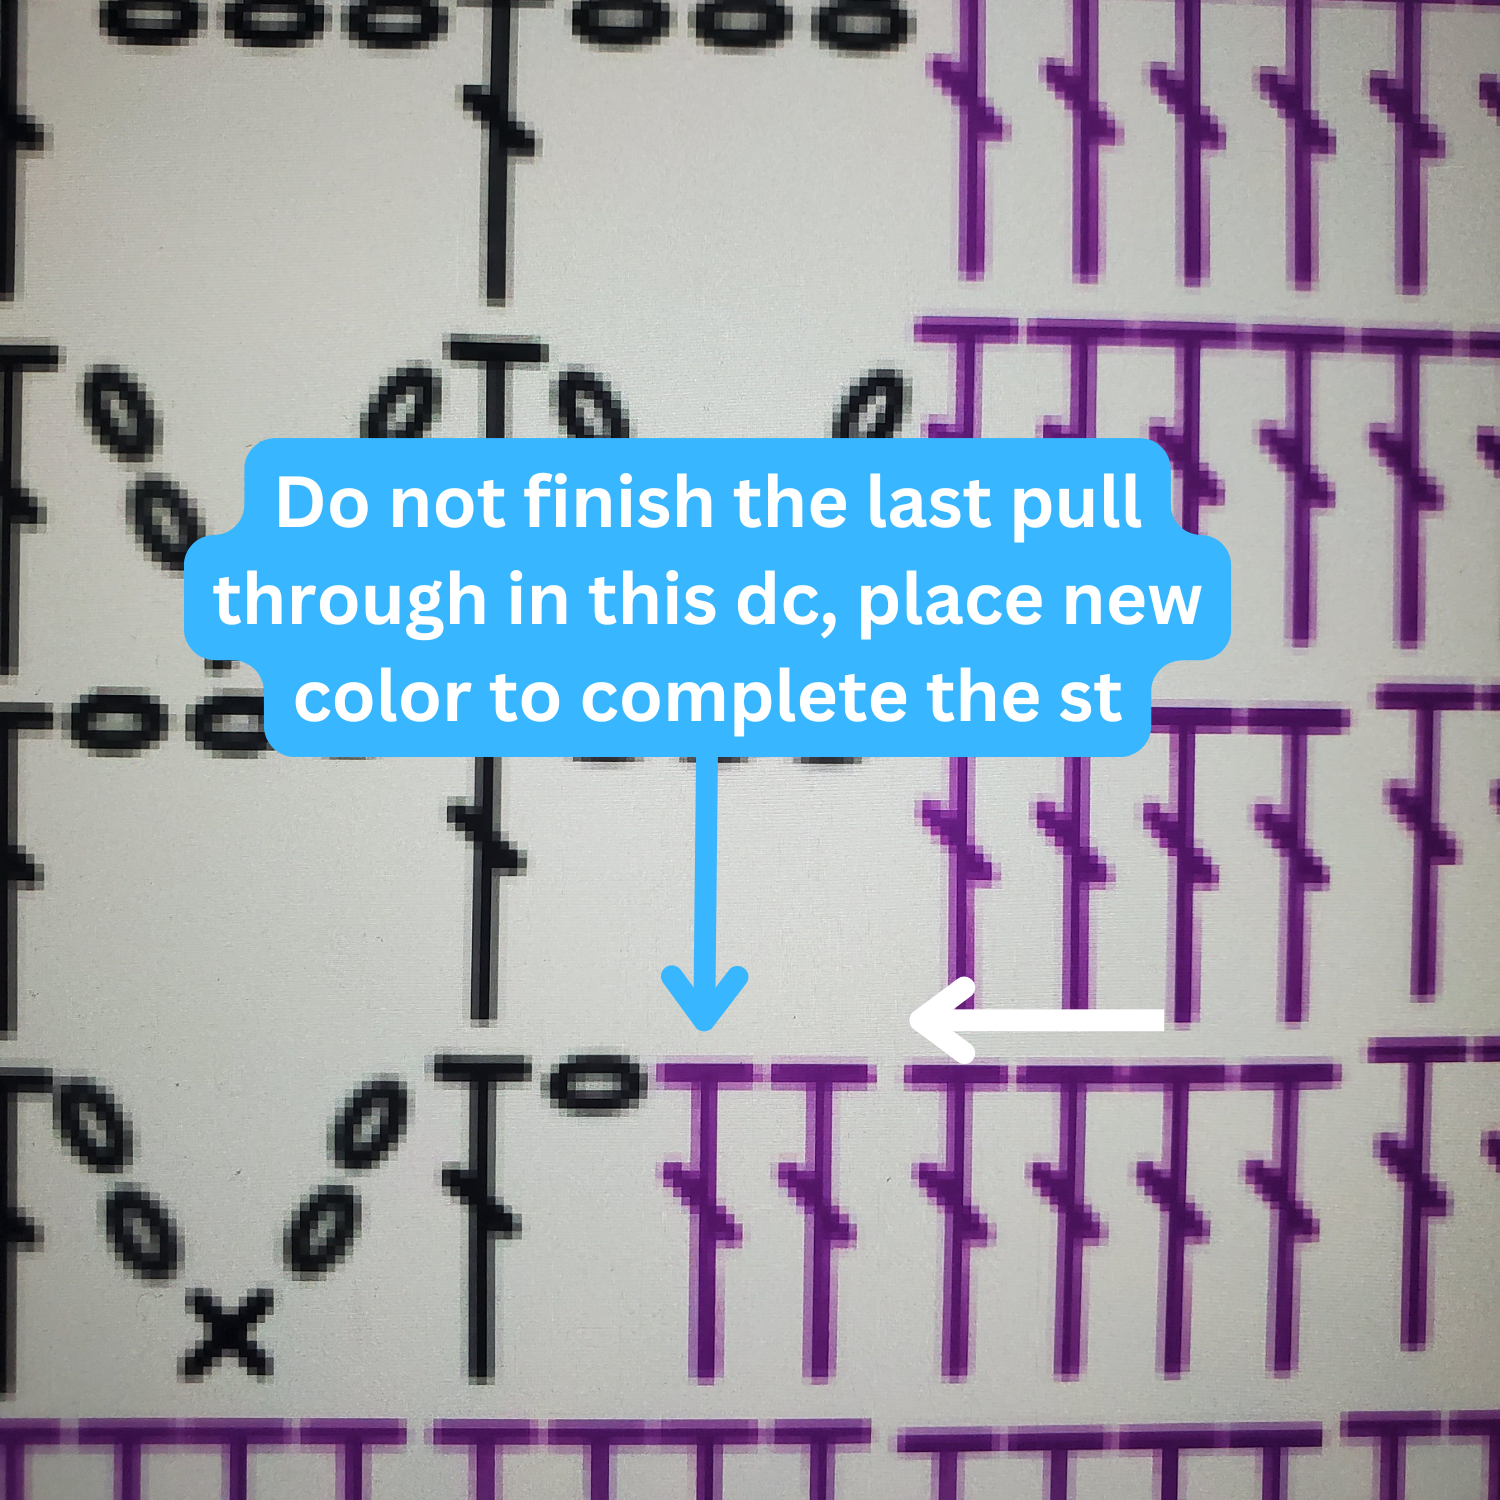
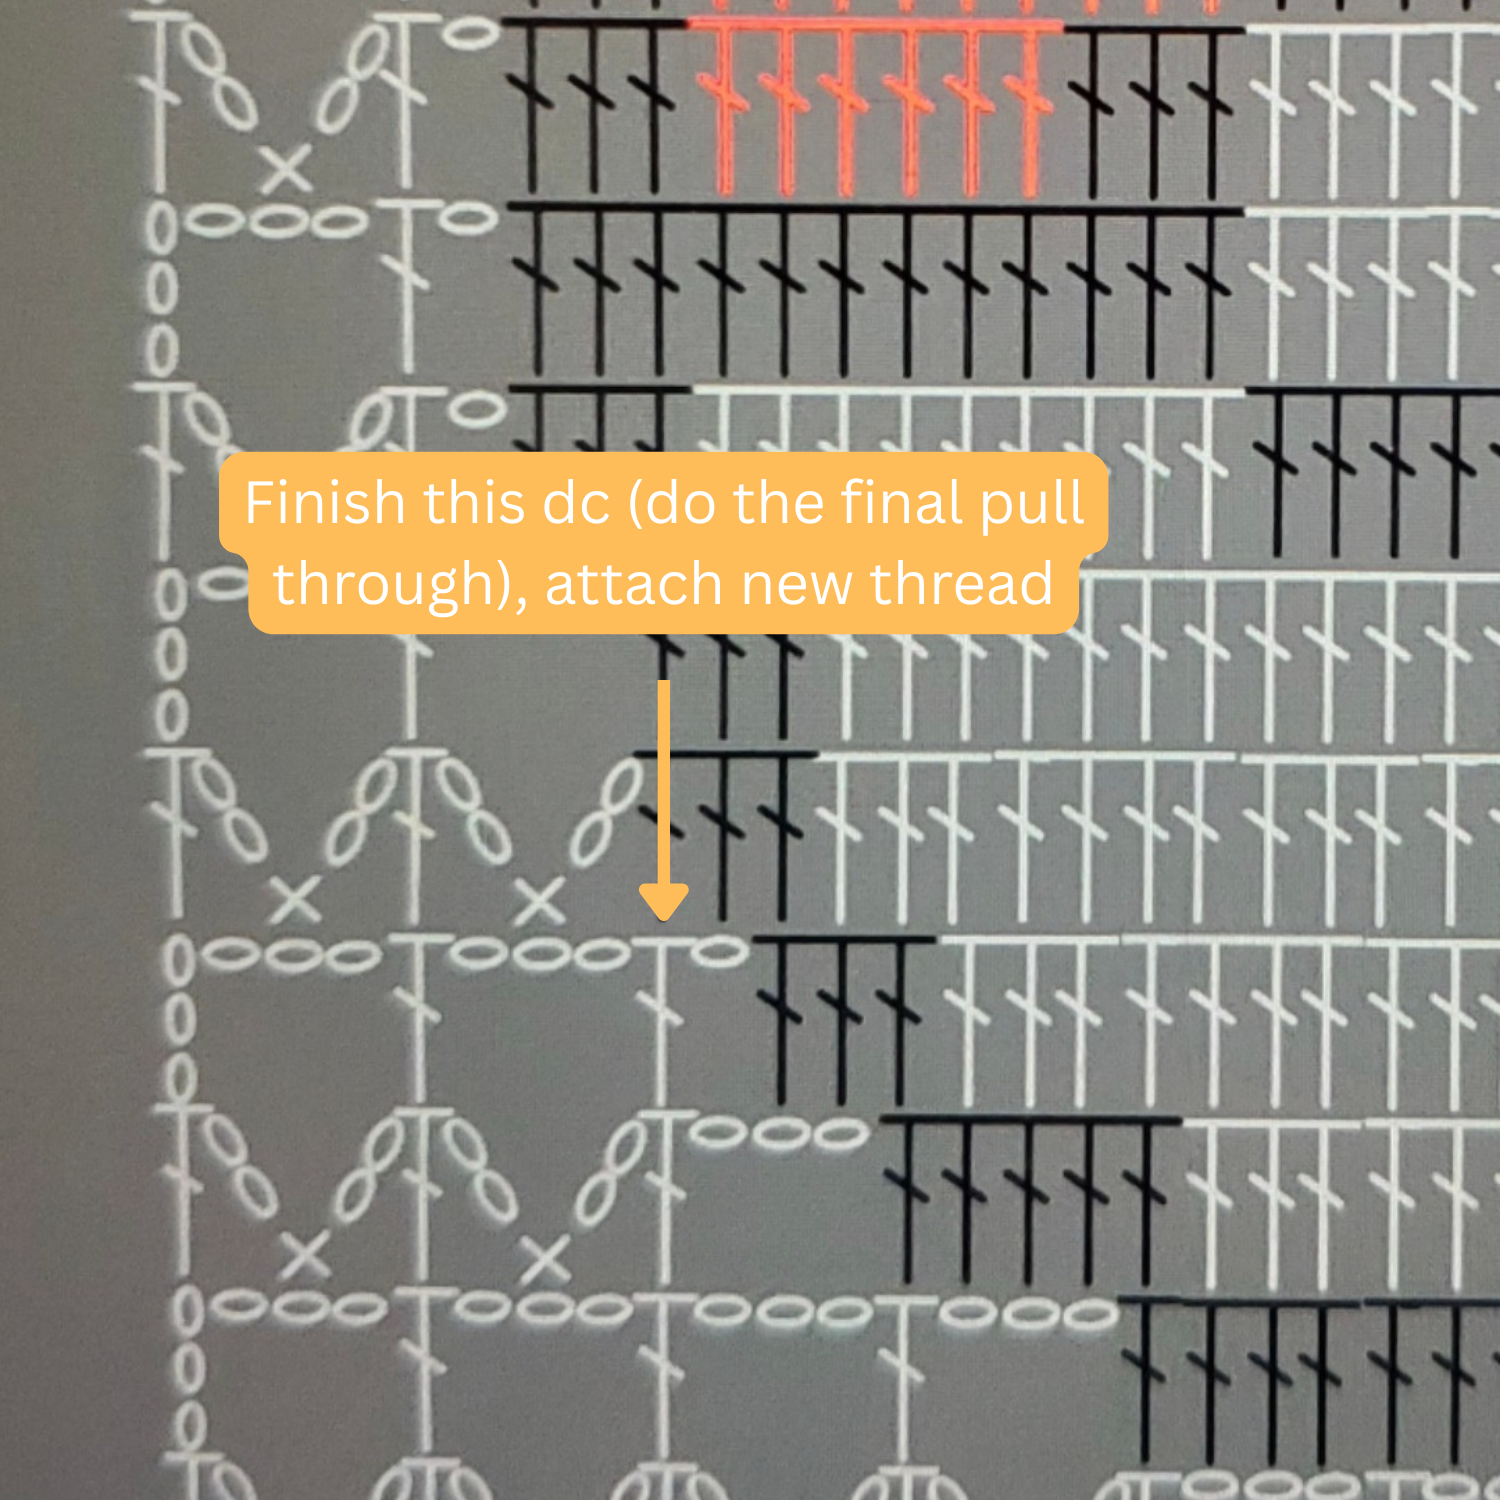
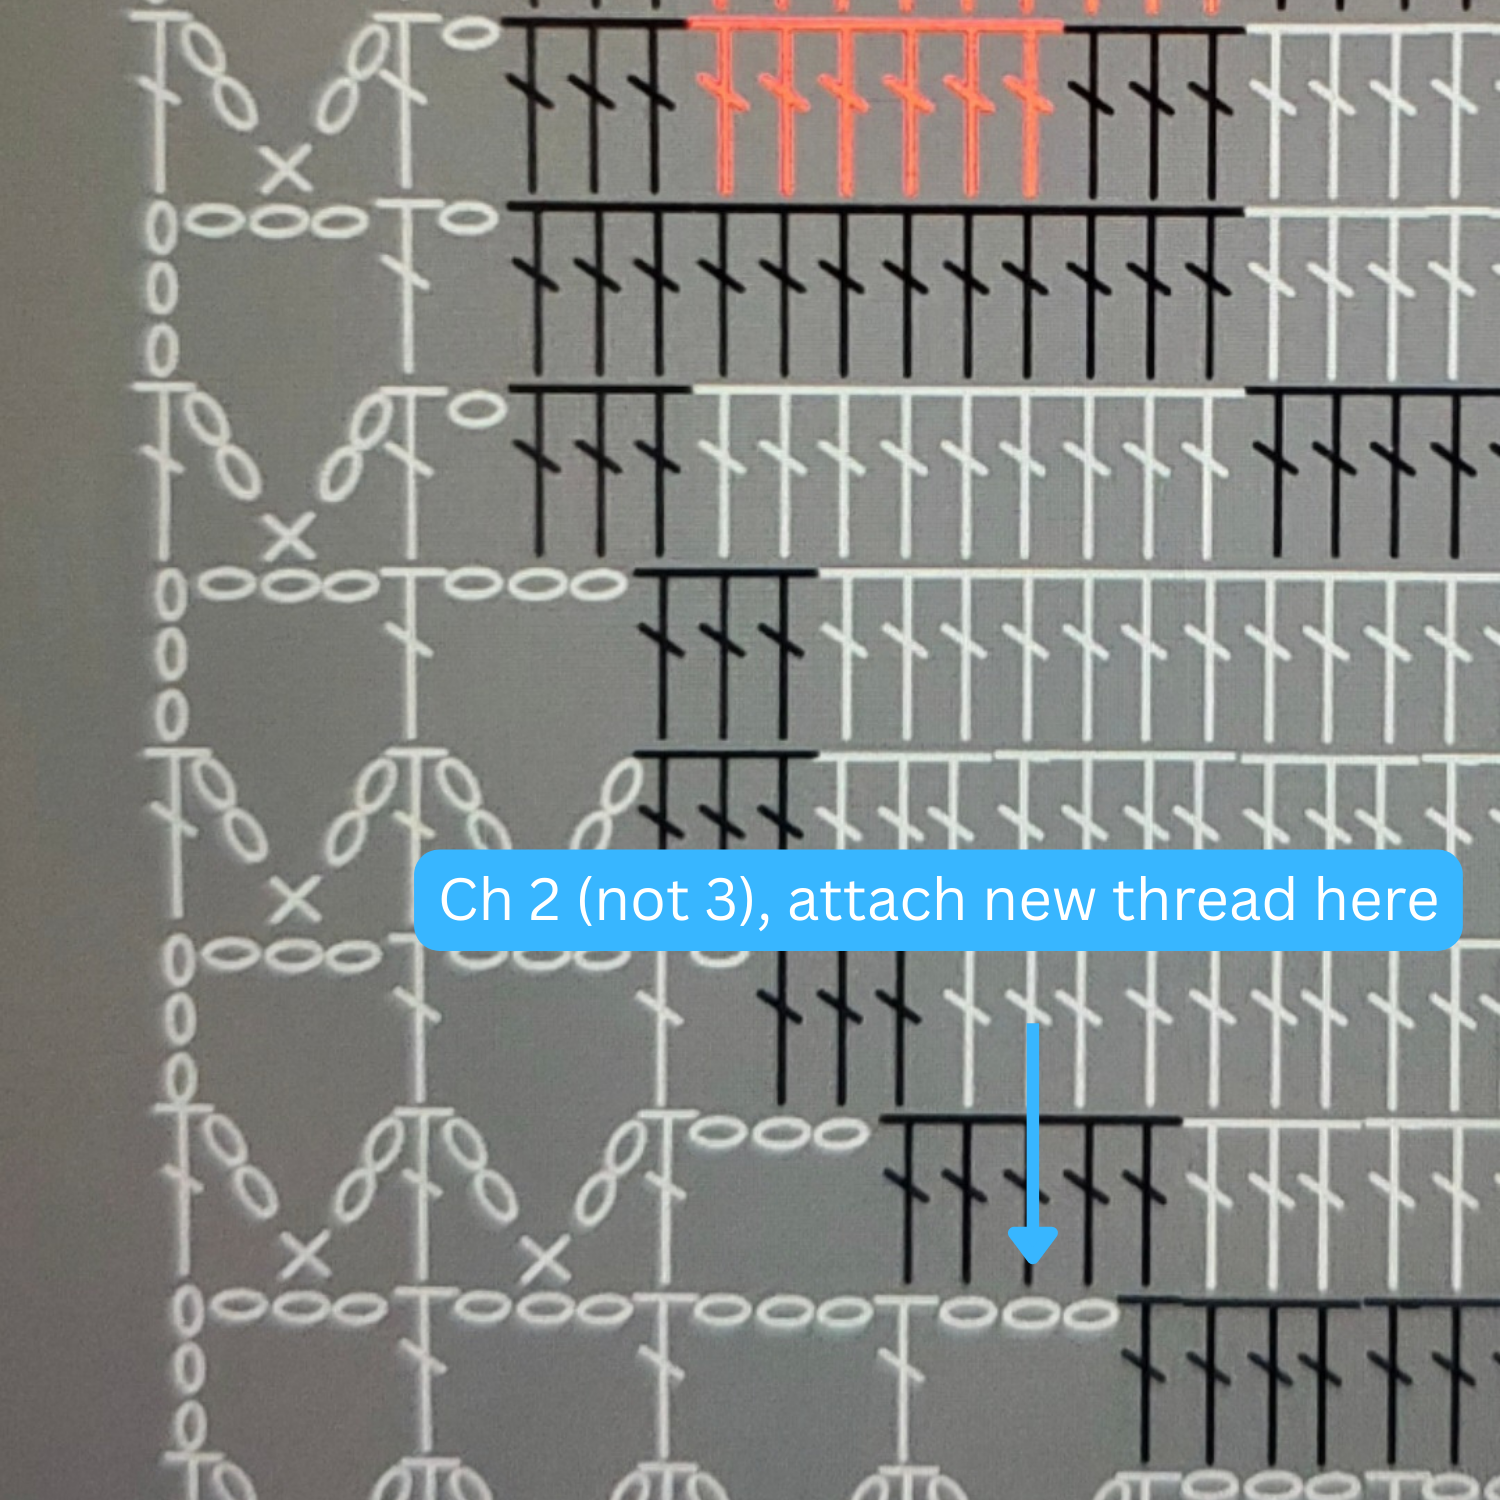
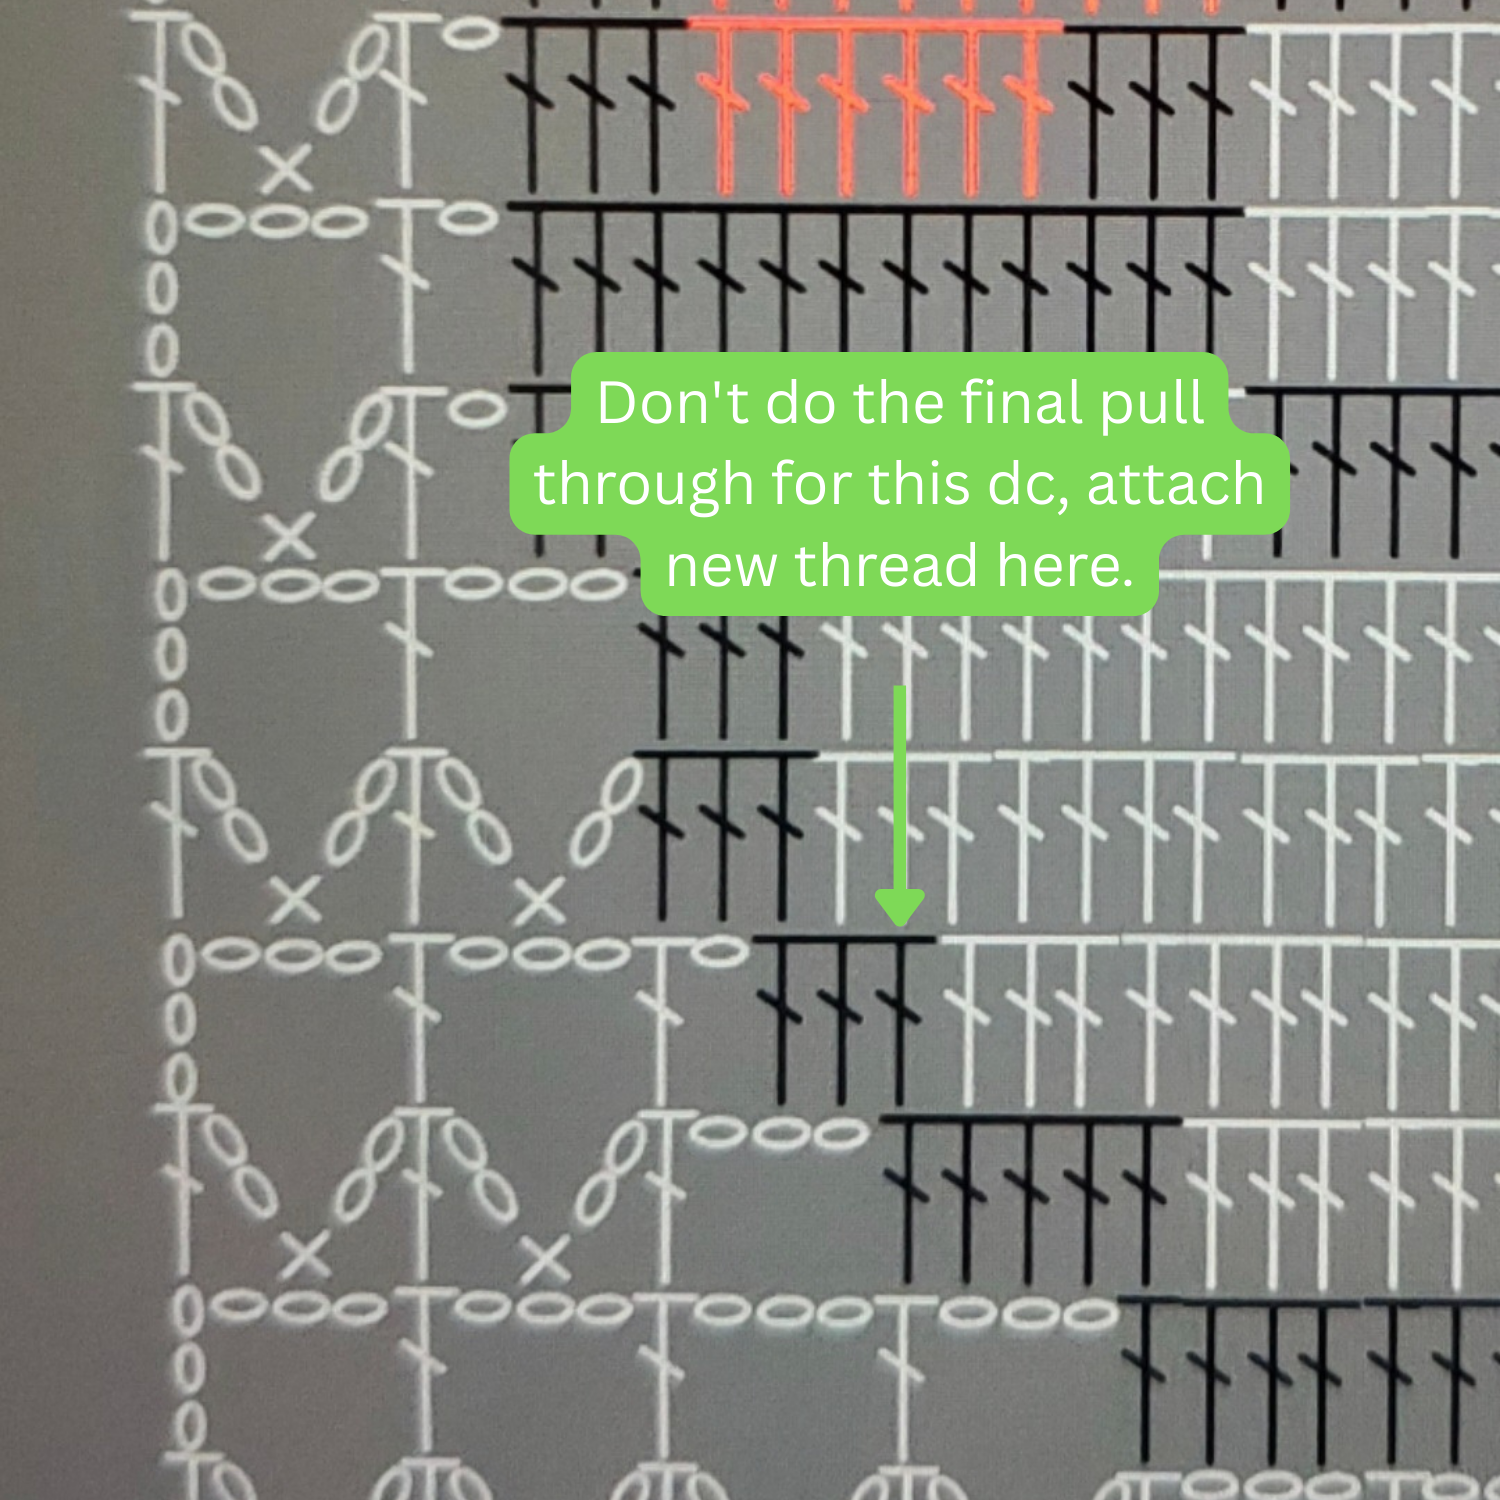
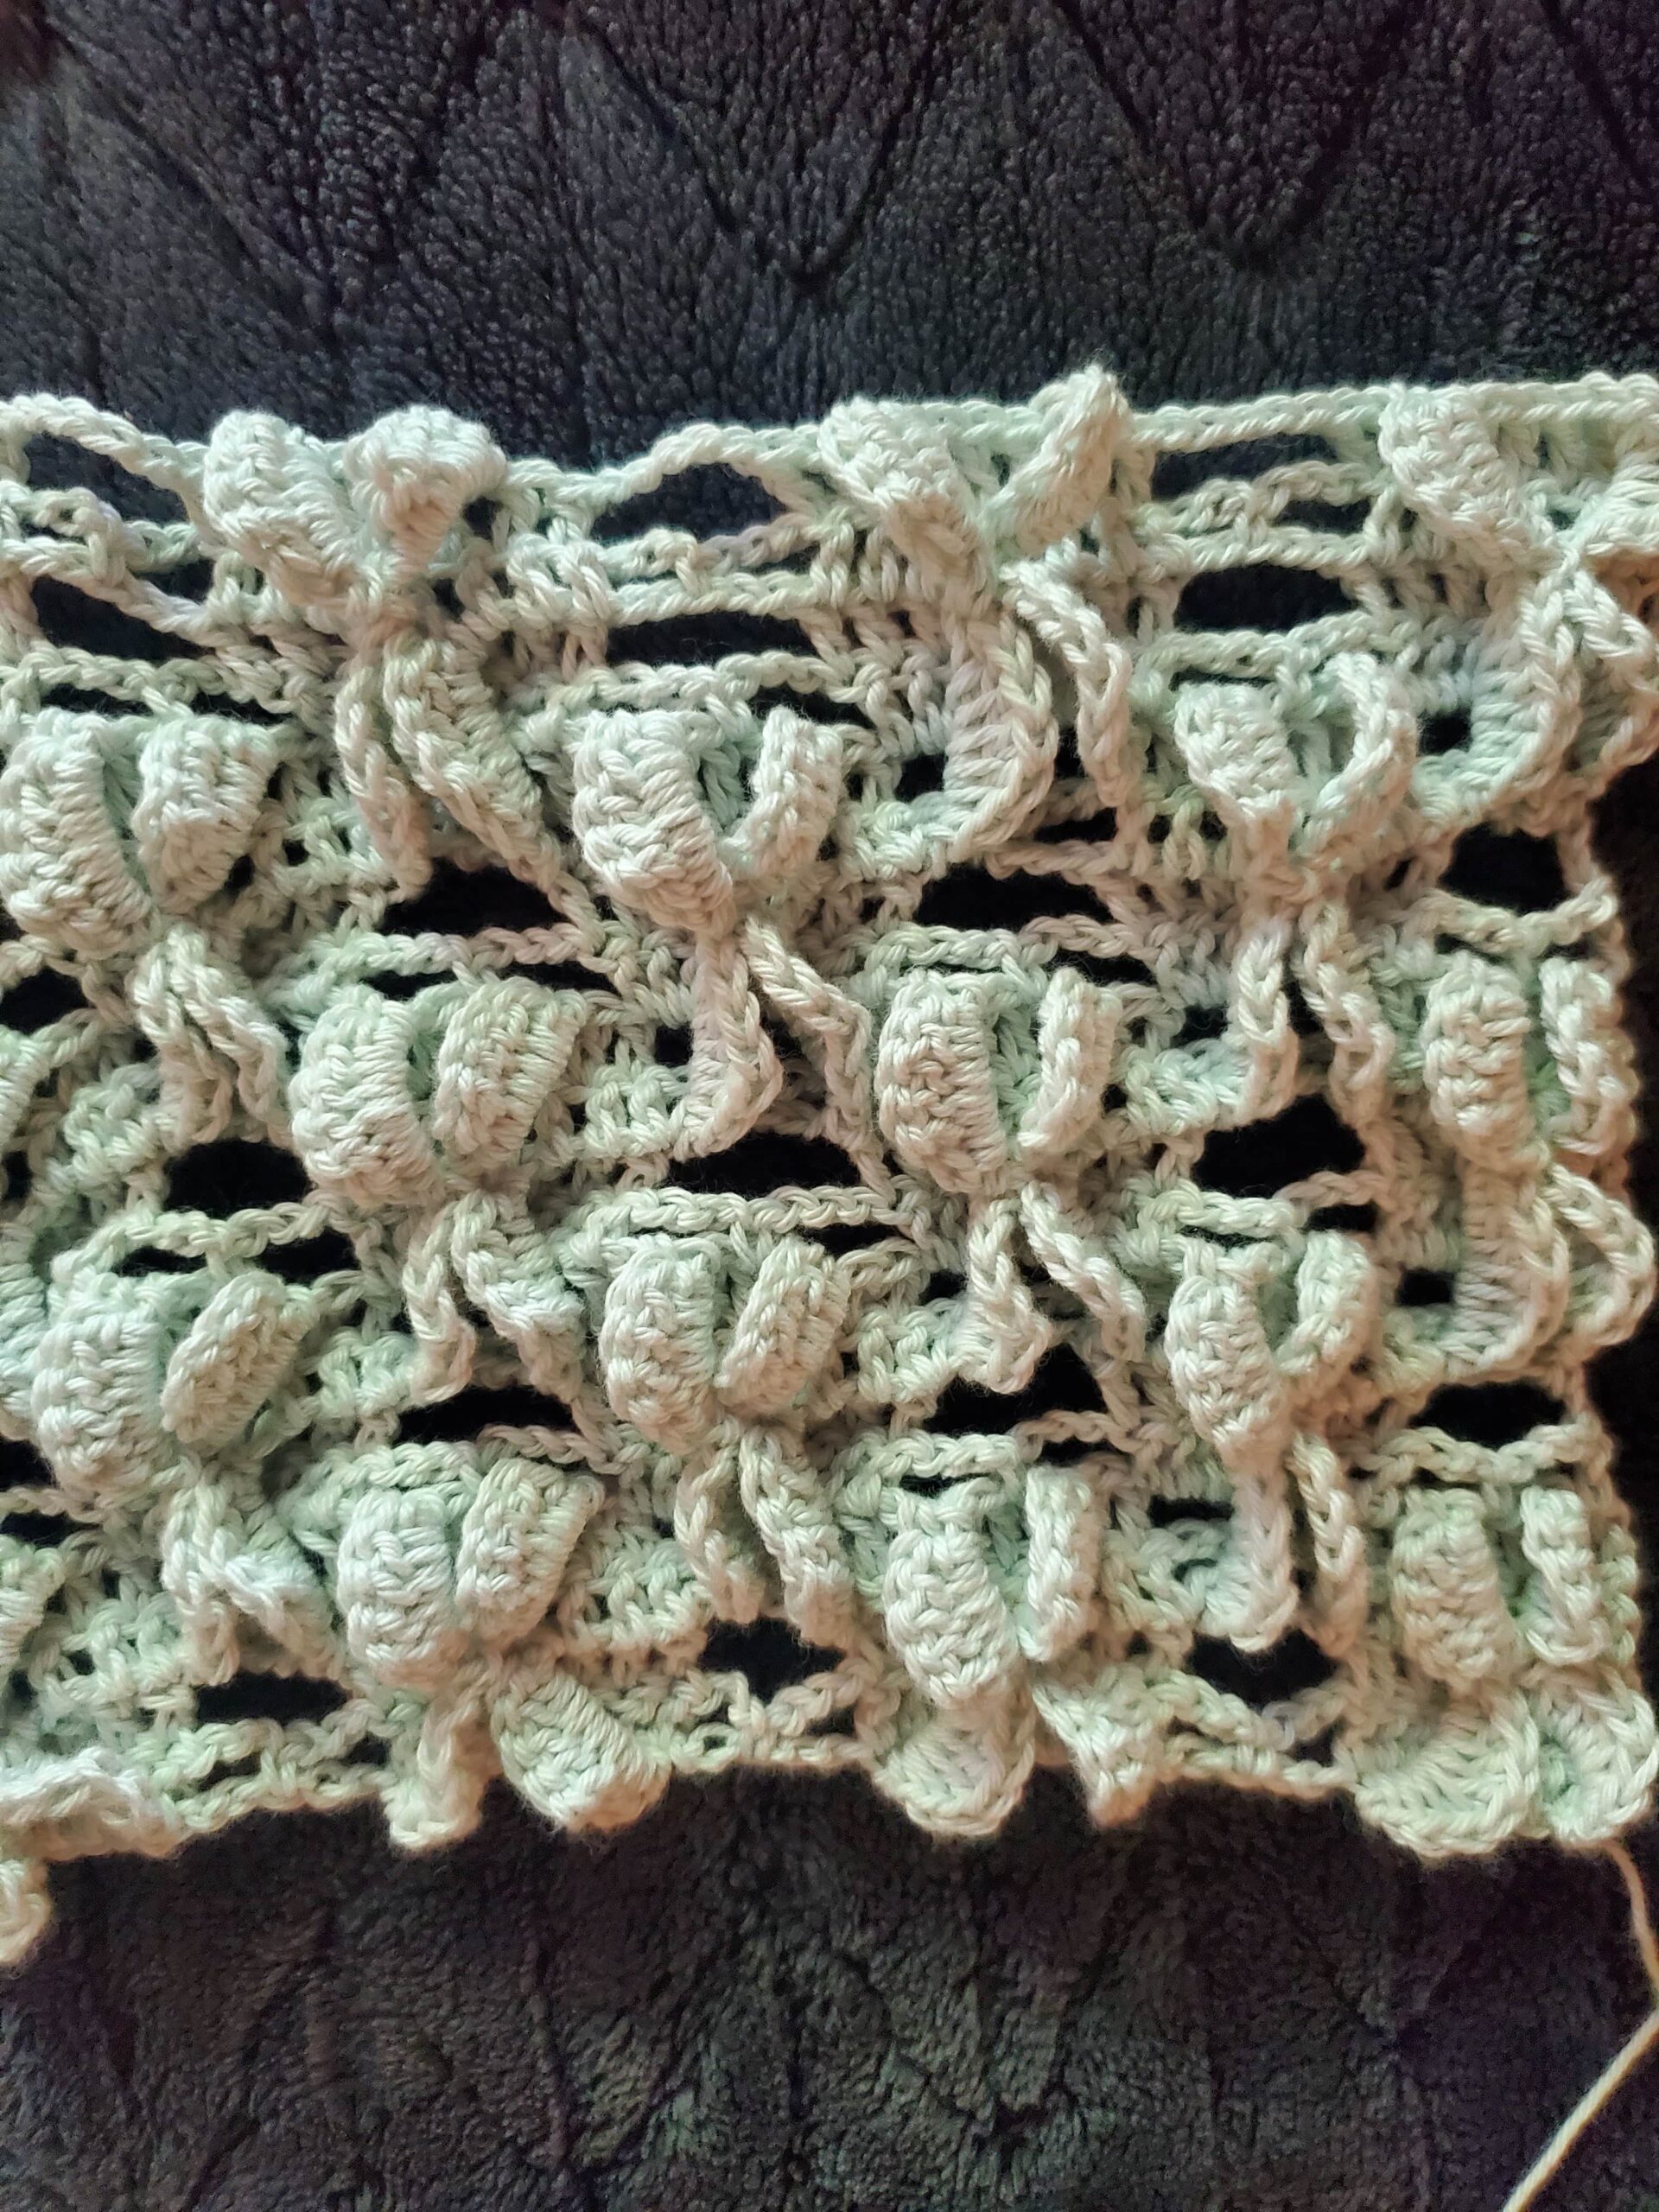
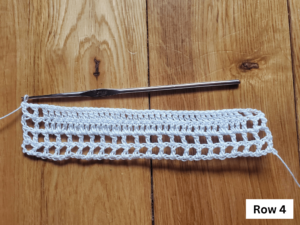
Row 4: ch 6 (counts as dc and ch 3), turn, skip ch 2, skip sc, skip ch 2, dc into next dc, *ch 3, skip ch 2, skip sc, skip ch 2, dc into next dc.* Repeat from *to* once more. Ch 2, S2B, dc into next dc (if done correctly, the white thread will have the appearance of a ch 3 not a ch 2). 3 dc into ch 3 space, dc in dc, 3 dc into ch 3 space, dc into next dc (don’t finish the final pull through, S2W). Repeat from *to* 4 more times (17 dc, 8 ch 3s)
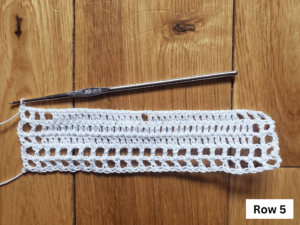
Row 5: ch 5 (counts as dc and ch 2), turn, sc into middle ch of ch 3 space, *ch 2, dc into next dc, ch 2, dc into middle ch of ch 3 space, ch 2, dc into next dc,* ch 2, S2B dc in next dc, 3 dc in ch 3 space, dc in next dc (don’t finish last pull through and S2W), dc in next 7 dc S2B, dc in next dc, 3 dc in ch 3 space, dc in next dc S2W ch 3, dc in next dc. Repeat from *to* twice more. (23 dc, 4 sc, 8 ch 2s, 2 ch 3s)
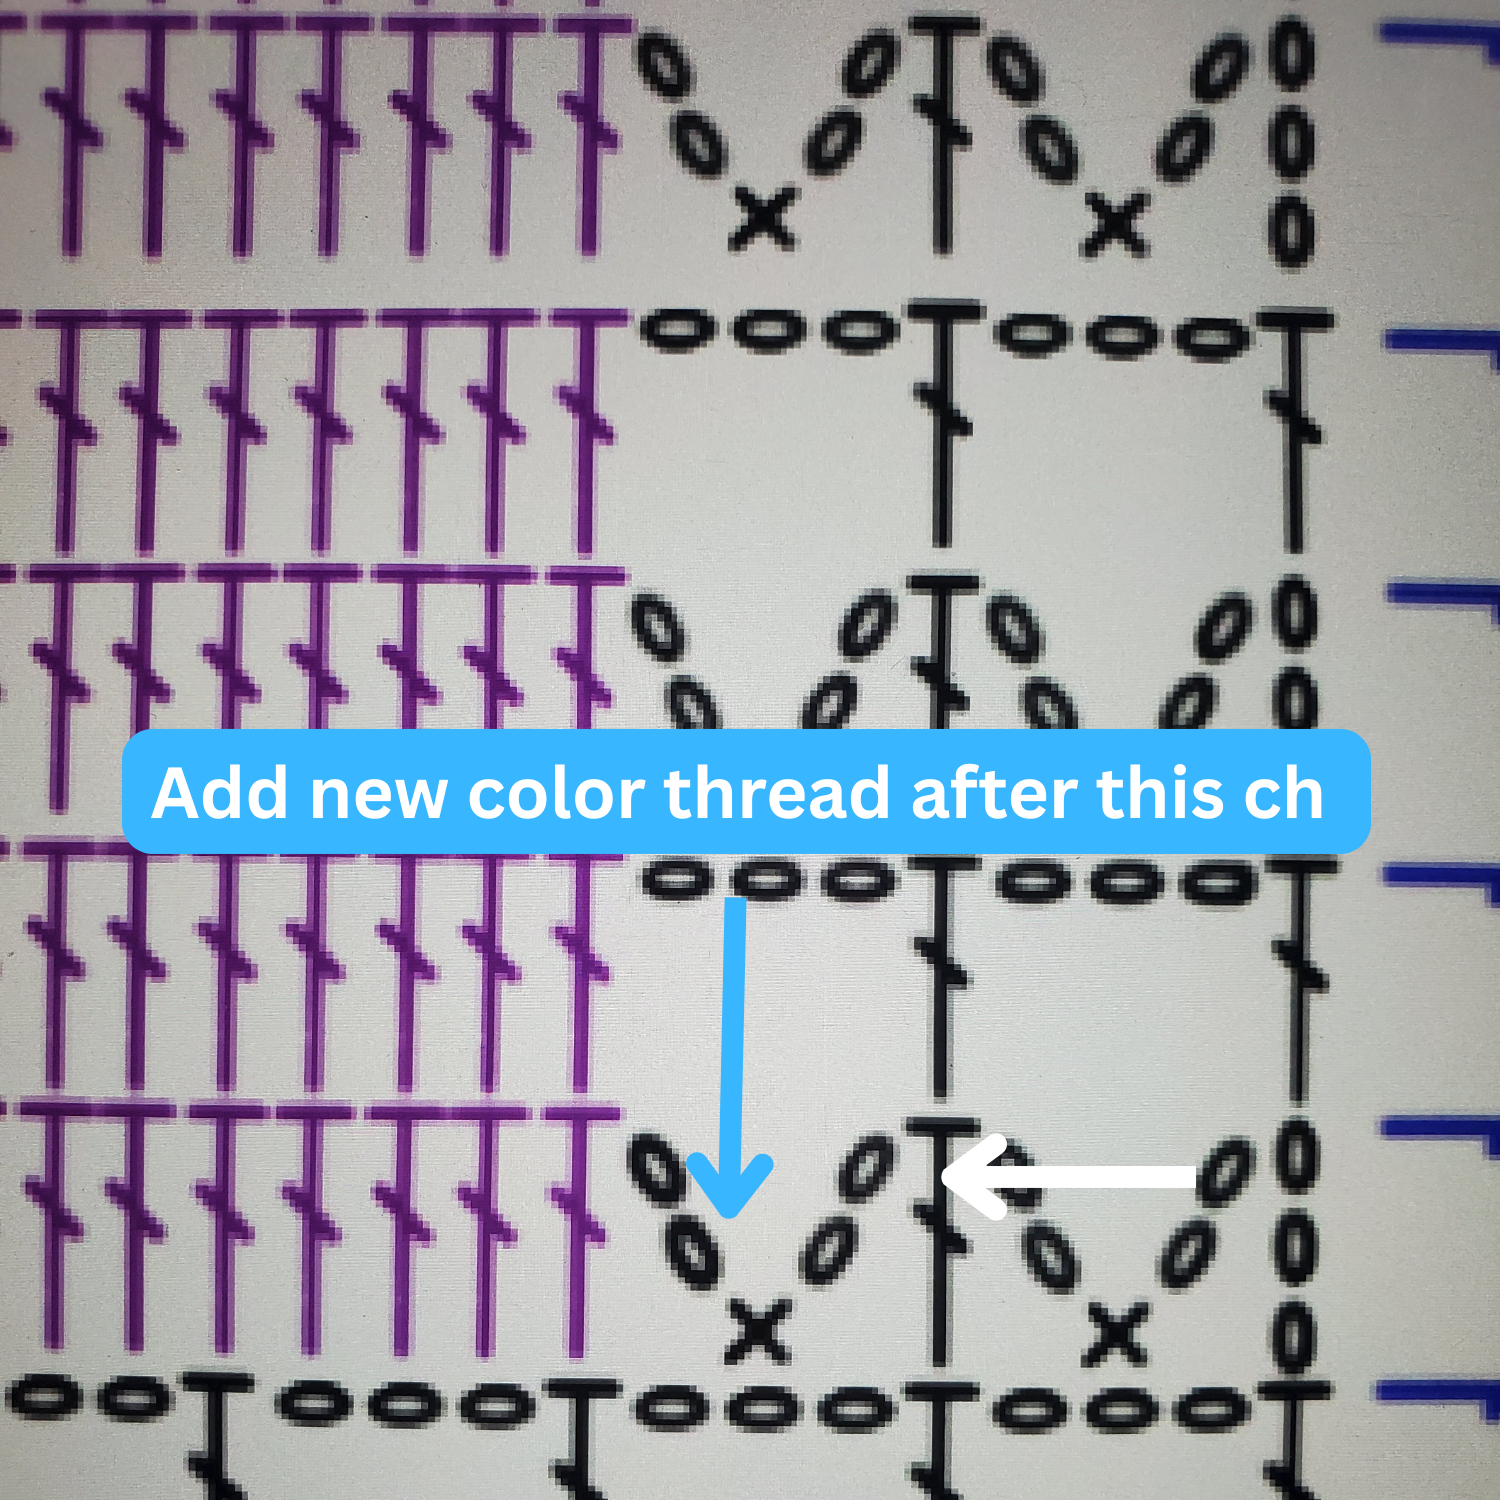
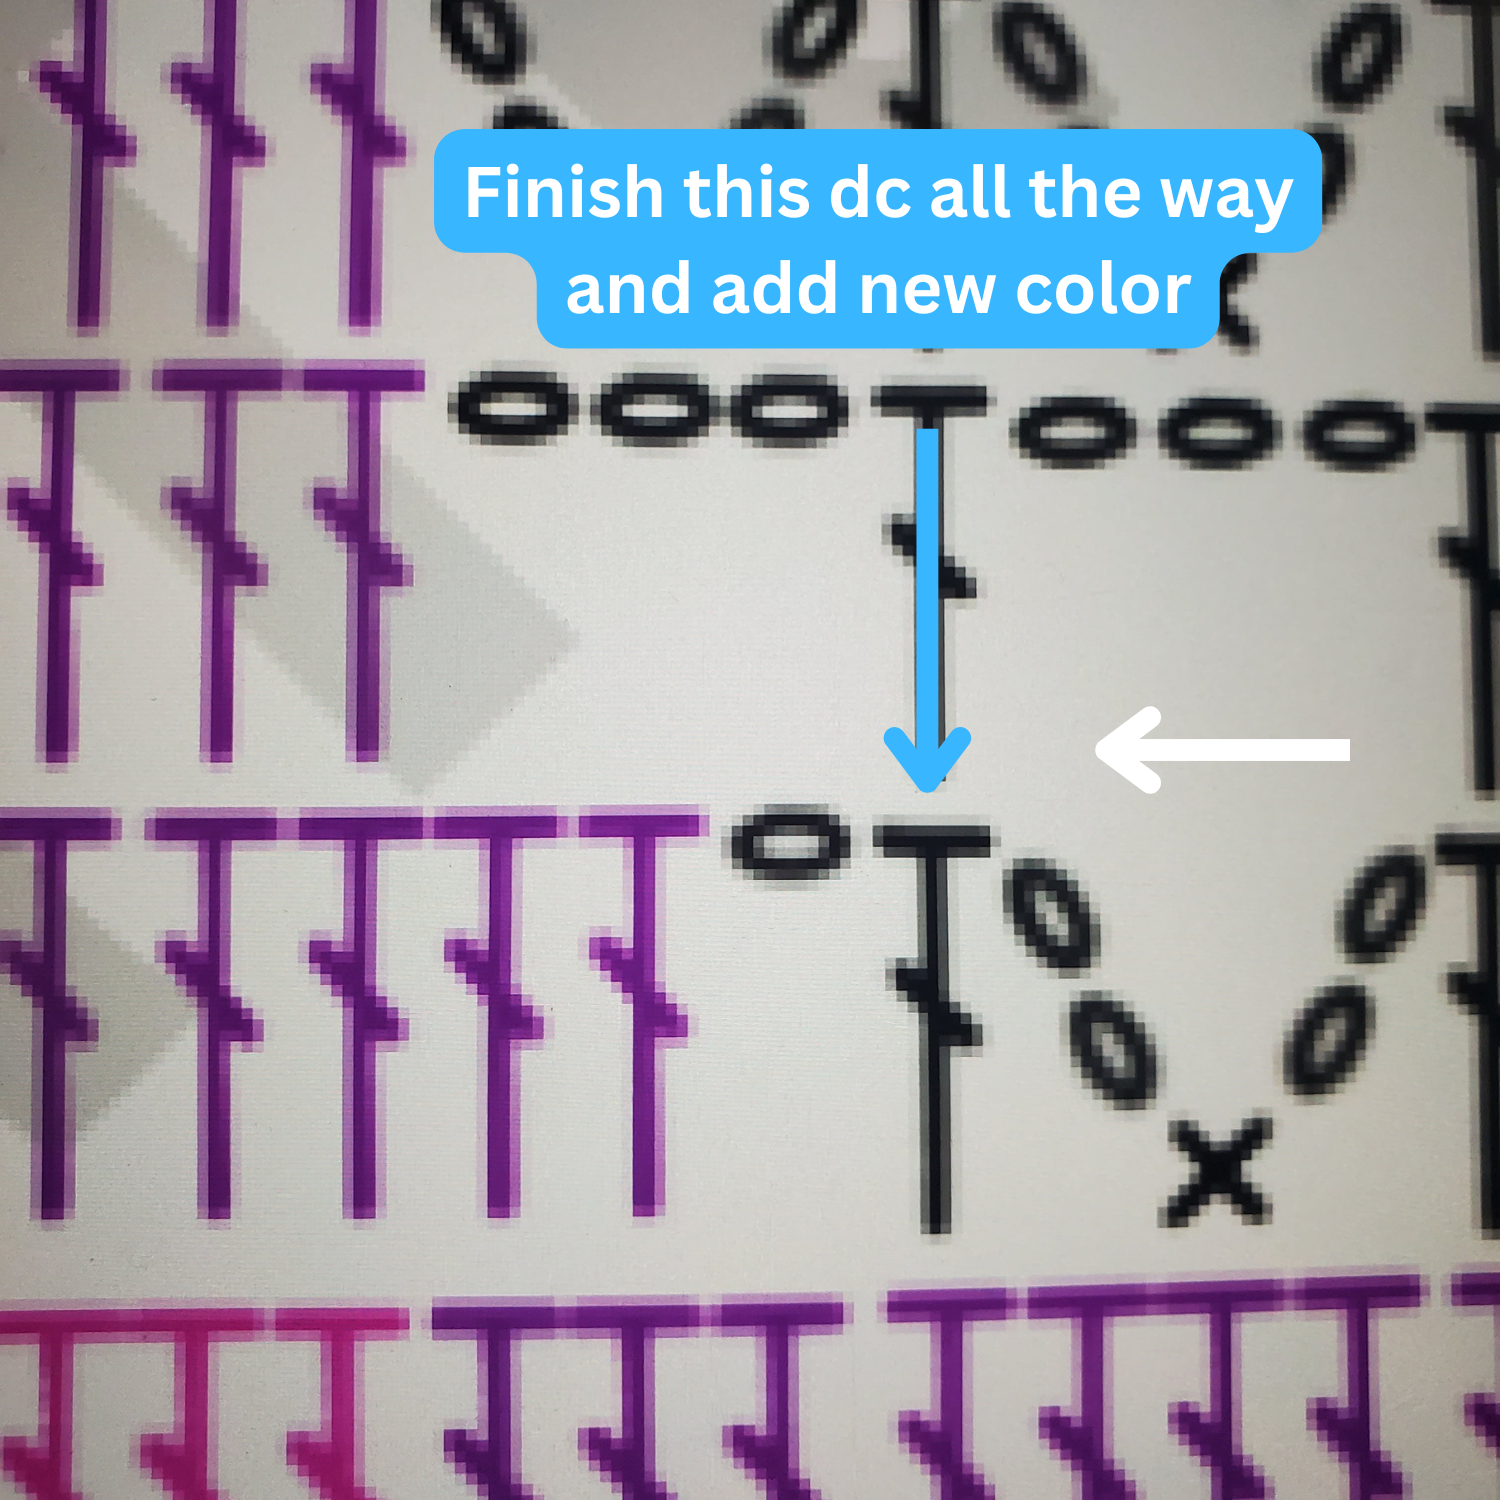
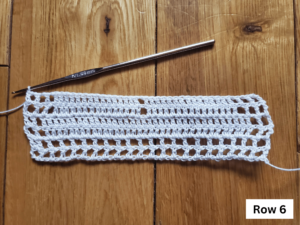
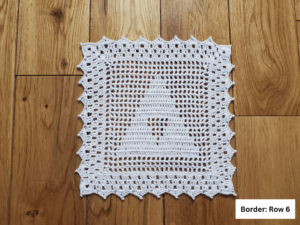
Row 6: ch 6 (counts as dc and ch 3), turn, skip and dc into next dc, ch 3, skip and dc into next dc, (finish this last dc all the way and S2B, skip a ch, dc in 2nd and 3rd ch of ch 3 space, dc into next dc S2W, dc into next 15 dc, S2B, dc into next dc, dc into next ch and middle ch of ch 3 space (don’t finish dc all the way and S2W, ch 1, dc into next dc, ch 3, skip and dc into next dc, ch 3, skip and dc into next dc (27 dc, 4 ch 3s, 2 ch 1s)
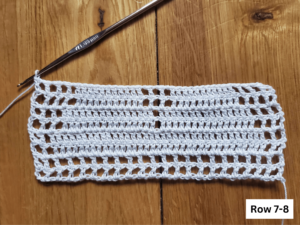
Row 7: ch 5 (counts as dc and ch 2), turn, sc into middle ch of ch 3, ch 2, dc into next dc, ch 2, sc into middle ch, ch 1, S2B, dc into next dc, dc into ch 1 space, dc into next dc S2W dc into next 19 dc, S2B dc in next dc, dc in ch 1 space, dc into next dc S2W, ch 2, sc into middle ch of ch 3, ch 2, dc into next dc, ch 2, sc in middle ch of ch 3, ch 2, dc into next dc (29 dc, 4 sc, 8 ch 2s)
Row 8: ch 6 (counts as dc and ch 3), turn, skip and dc into next dc, ch 2 S2B, skip and dc into next 3 dc, S2W, dc in next 19 dc, S2B dc in next 3 dc, S2W, ch 3, skip and dc into next dc, ch 3, skip and dc into next dc (29 dc, 4 ch 3s)
Row 9: ch 5 (counts as dc and ch 2), turn, sc in middle ch, ch 2, dc in next dc S2B, dc in middle and last ch of ch 3, dc in next dc, S2W, dc in next 9 dc, S2B, dc in next 5 dc, S2W, dc in next 9 dc, S2B, dc in next dc, dc in first ch of ch 3, dc in middle ch of ch 3, S2W, ch 1, dc in next dc, ch 2, sc in middle ch of ch 3, ch 2, dc in next dc (29 dc, 2 sc, 4 ch 2s, 2 ch 1s)
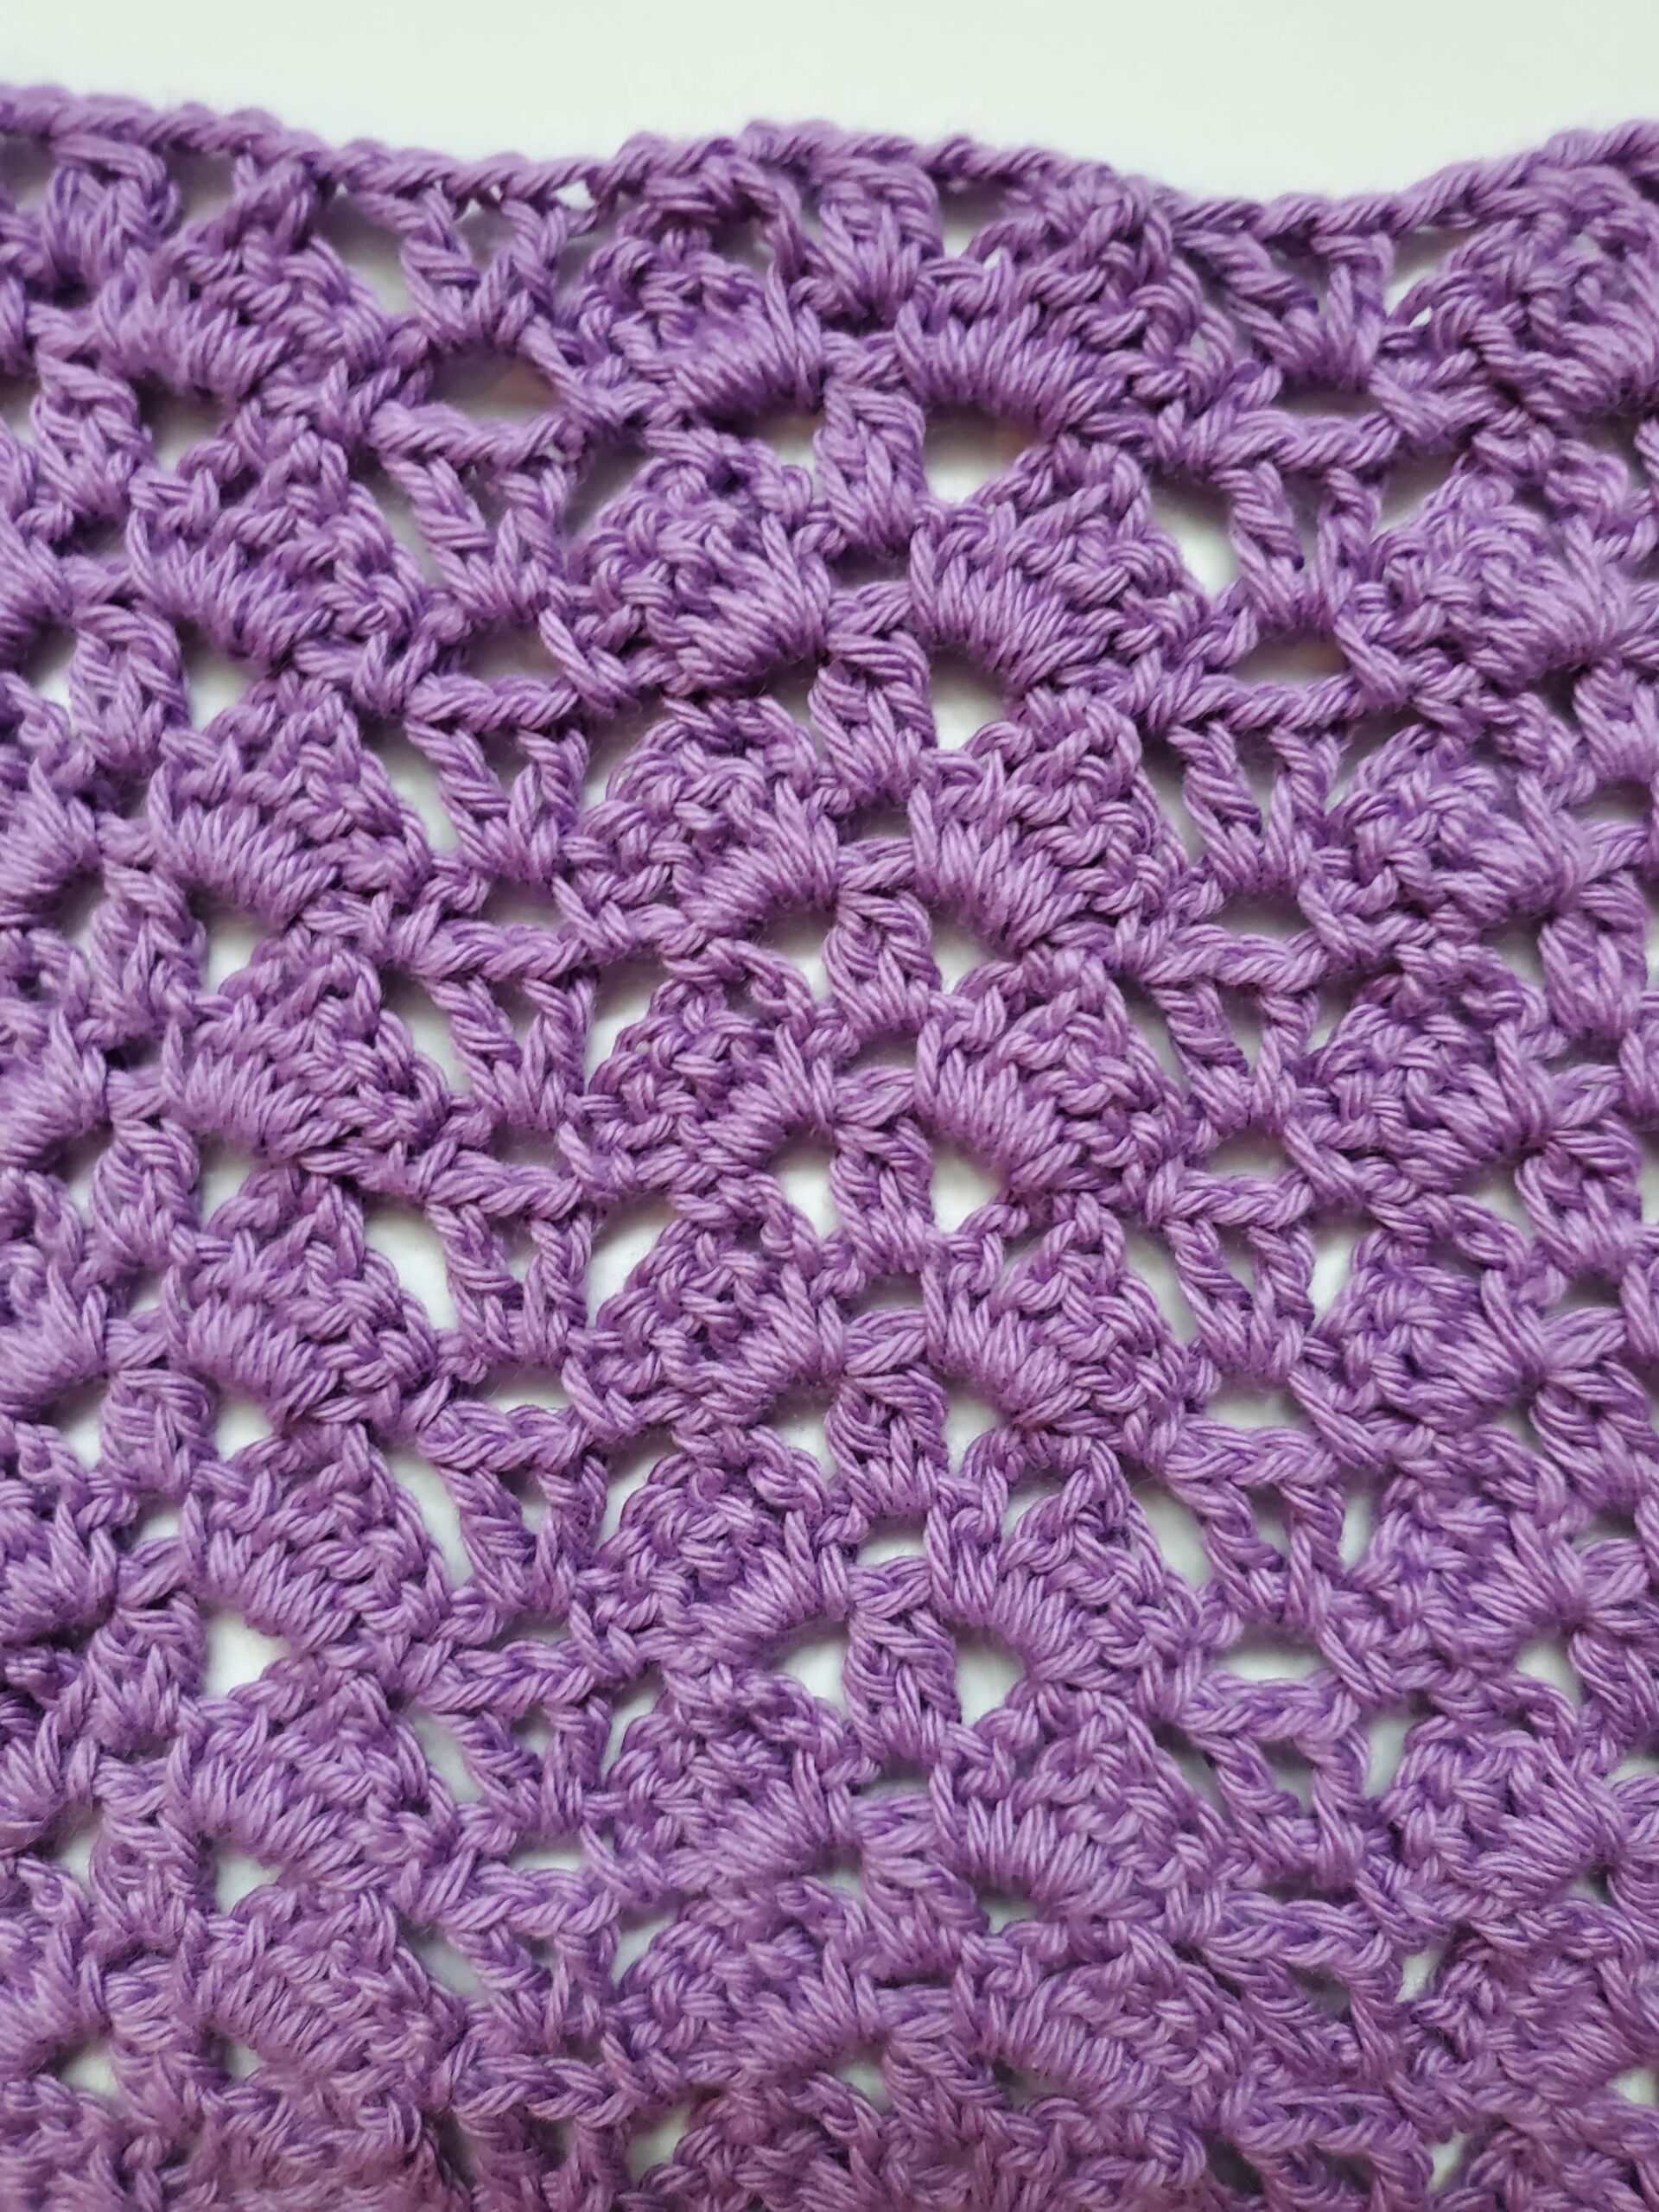
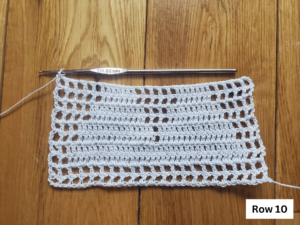
Row 10: ch 6 (counts as dc and ch 3), turn, dc into next dc S2B, dc in next 12 dc, S2W, dc in next 5 dc, S2B, dc in next 12 dc, S2W, ch 1, dc in next dc, ch 3 dc in next dc (33 dc, 2 ch 3s, w ch 1s)
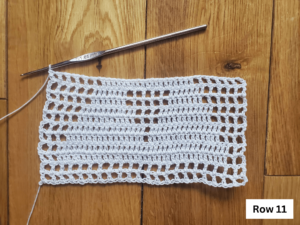
Row 11: ch 5 (counts as dc and ch 2), turn, sc in middle ch of ch 3, ch 2, dc in next dc, S2B, dc in next 3 dc, S2R, dc in next 6 dc, S2B, dc in next 3 dc, S2W, dc in next 5 dc, S2B, dc in next 3 dc, S2R, dc in next 5 dc, S2B, dc in next 3 dc, S2W, ch 1, dc in next dc, ch 2, sc in middle ch of ch 3, ch 2, dc in next dc (28 dc, 2 sc, 4 ch 2s, 2 ch 1s)
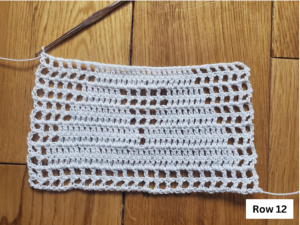
Row 12: ch 6 (counts as dc and ch 3), dc in next dc, S2B, dc in next 3 dc, S2R, dc in next 9 dc, S2B dc in next 5 dc, S2R, dc in next 9 dc, S2B, dc in next 3 dc, S2W, ch 1, dc in next dc, ch 3, dc in next dc (28 dc, 2 sc, 2 ch 1s)
Row 13: ch 5 (counts as dc and ch 2), turn, sc in middle ch of ch 3, ch 2, dc in next dc, ch 2 S2B, skip 2 dc, dc in next 3 dc, S2R, dc in next 19 dc, S2B, dc in next 3 dc, S2W, ch 3, skip 2 dc, skip ch 1, dc in next dc, ch 2, sc in middle ch of ch 3, ch 2, dc in next dc (29 dc, 2 sc, 4 ch 2s, 2 ch 3s)
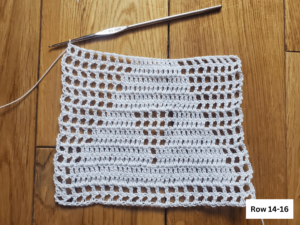
Row 14: ch 6 (counts as dc and ch 3), turn, dc in next dc, ch 2, sc in middle ch of ch 3, ch 1 S2B, dc in next 3 dc, S2R, dc in next 19 dc, S2B, dc in next 3 dc, S2W, ch 2, sc in middle ch of ch 3, dc in next dc, ch 3, dc in next dc (29 dc, 2 sc, 4 ch 2s, 2 ch 3s)
Row 15: ch 5, (counts as dc and ch 2), turn, sc in middle ch of ch 3, ch 2, dc in next dc, ch 3 dc in next dc, ch 1 S2B, skip a dc, dc in next 3 dc, S2R, dc in next 15 dc, S2B, dc in next 3 dc, S2W ch 1, skip a dc, dc in next dc, ch 3 dc in next dc, ch 2, sc in middle ch of ch 3, ch 2, dc in next dc (27 dc, 2 sc, 4 ch 2s, 2 ch 3s, 2 ch 1s)
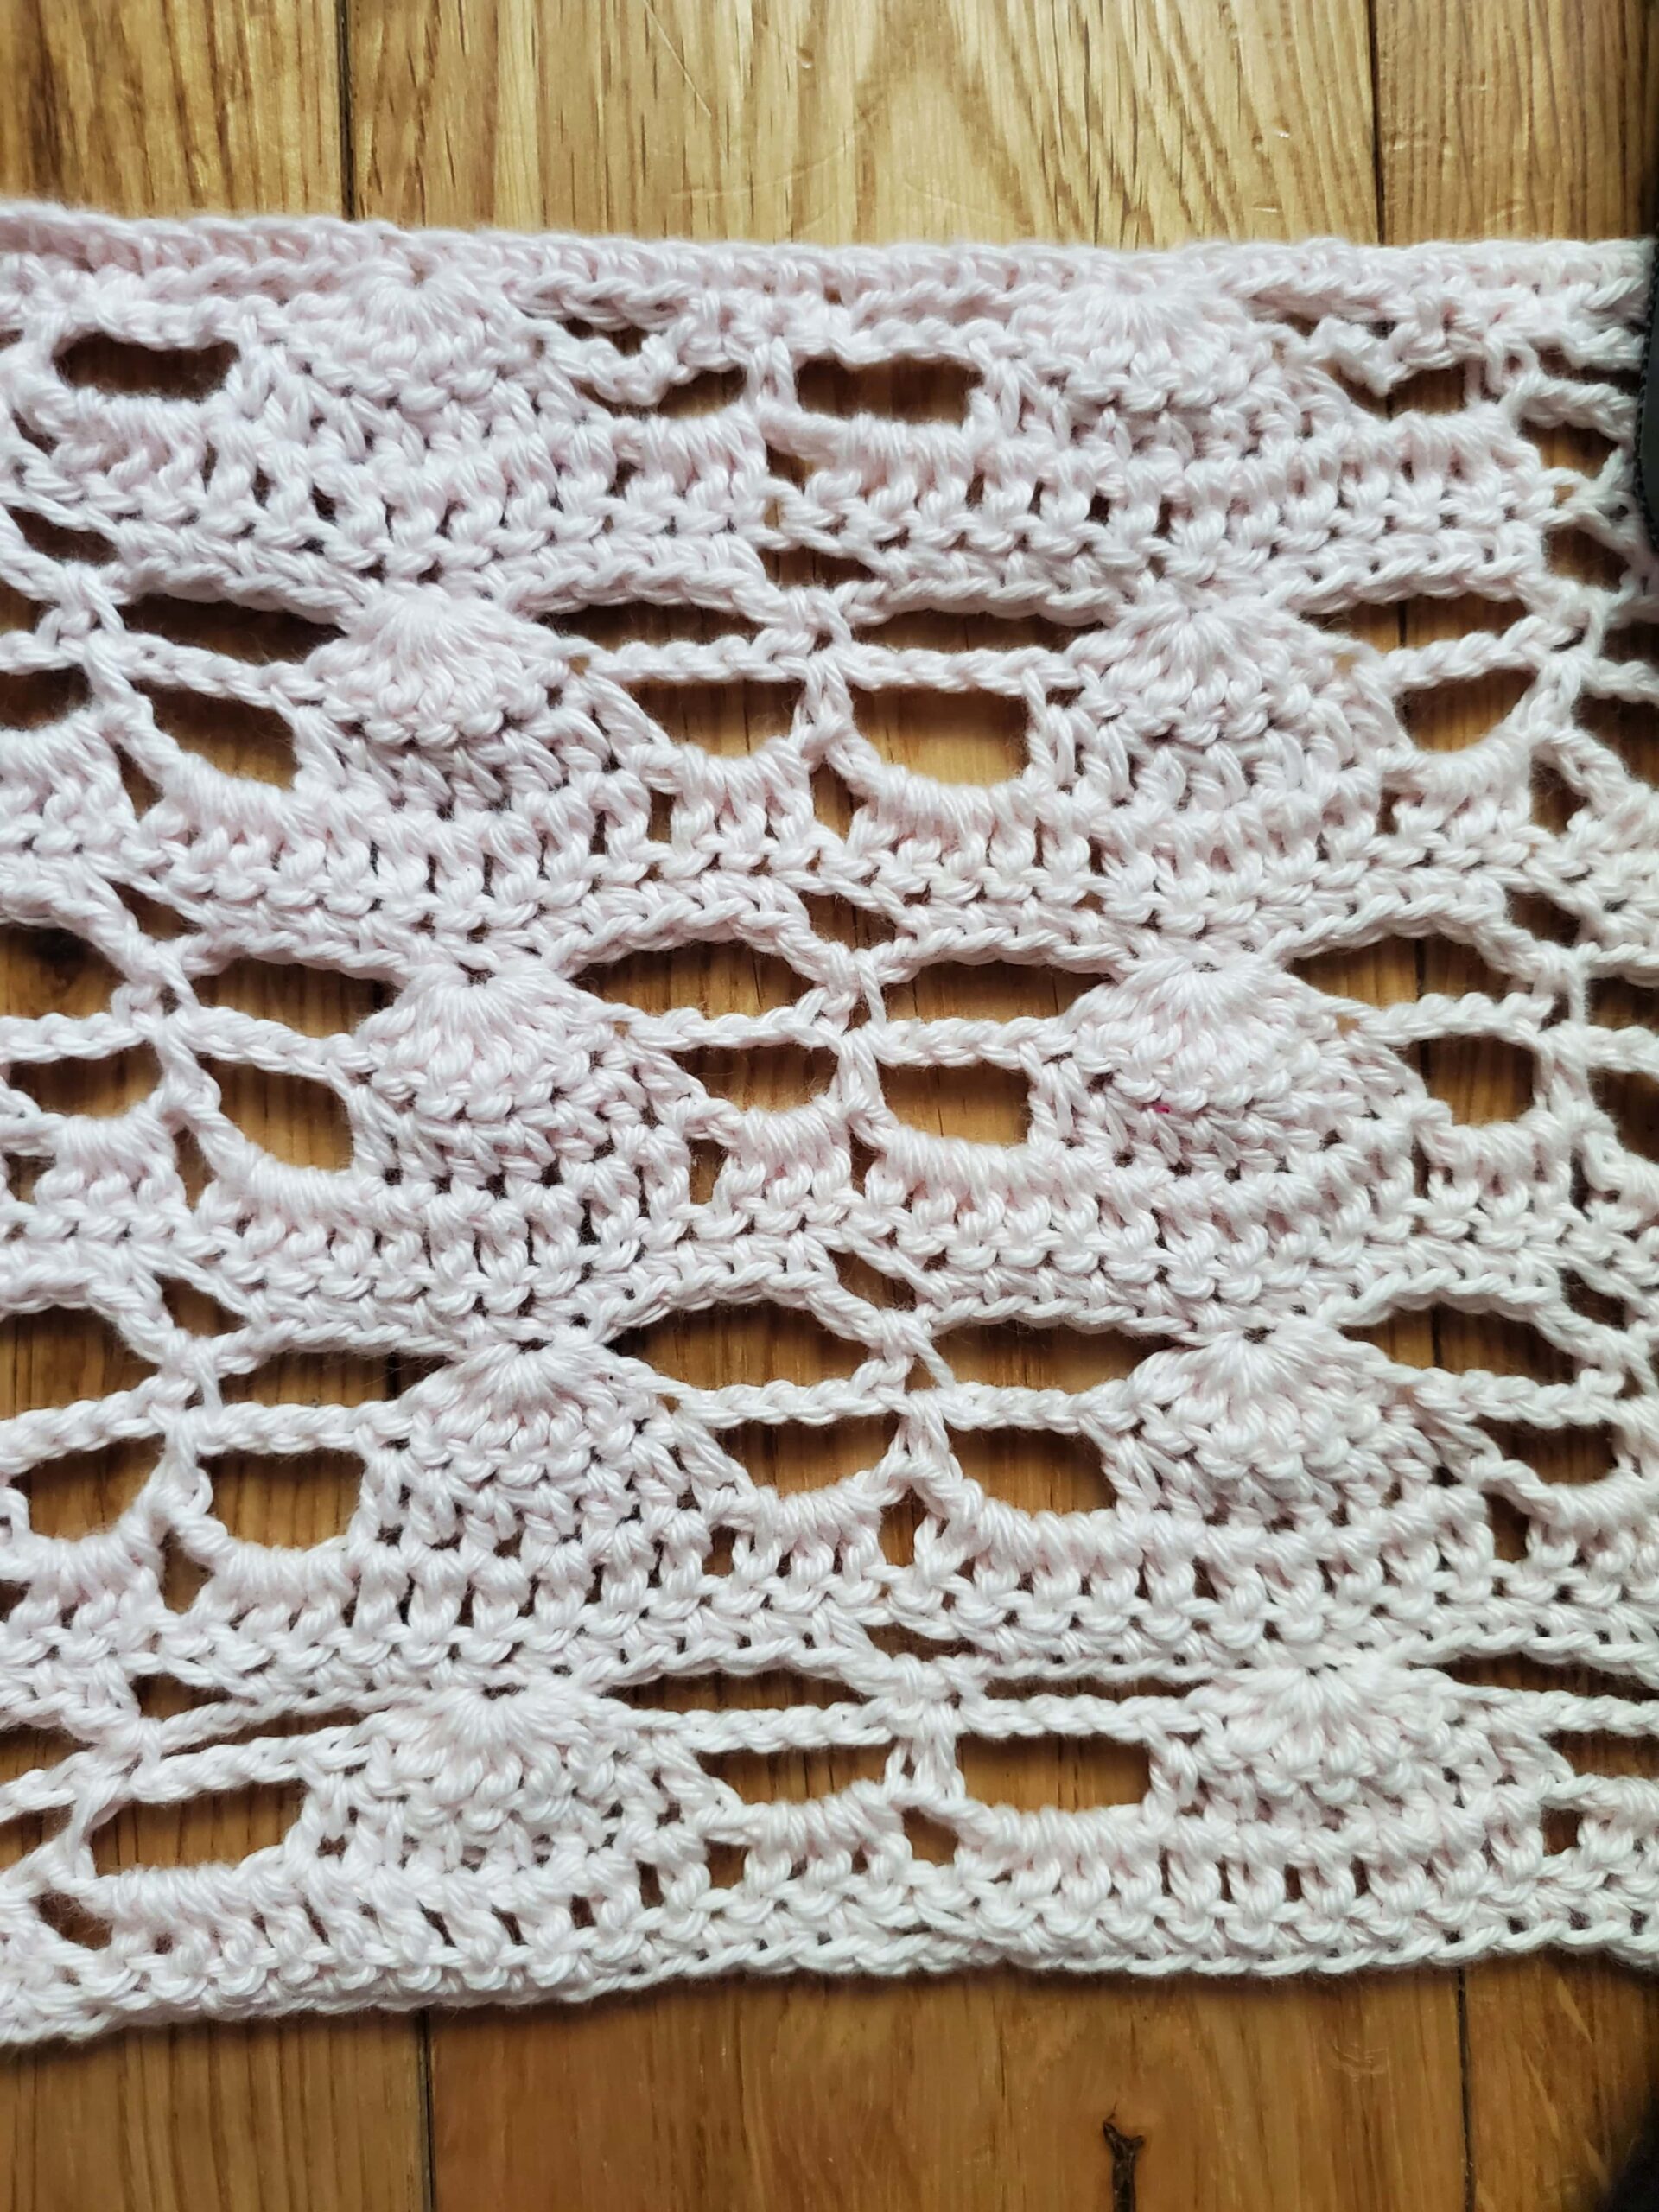
Row 16: ch 6, (counts as dc and ch 3), turn, dc in next dc, ch 2, sc in middle ch of ch 3, ch 2, dc in next dc, ch 3, S2B, skip 2 dc, dc in next 5 dc, S2R, dc in next 7 dc, S2B, dc in next 5 dc, S2W, ch 3, skip 2 dc, skip ch 1, dc in next dc, ch 2, sc in middle ch of ch 3, ch 2, dc in next dc, ch 3, dc in next dc (23 dc, 2 sc, 4 ch 2s, 4 ch 3s)
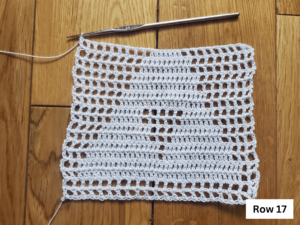
Row 17: ch 5 (counts as dc and ch 2), turn, sc in middle ch of ch 3, ch 2, dc in next dc, ch 3, dc in next dc, ch 2, sc in middle ch of ch 3, ch 2, dc in next dc, ch 3, S2B, skip 3 dc, dc in next 9 dc, S2W, ch 3, skip 3 dc, dc in next dc, ch 2, sc in middle ch of ch 3, ch 2, dc in next dc, ch 3, dc in next dc, ch 2, sc in middle ch of ch 3, ch 2, dc in next dc (17 dc, 4 sc, 8 ch 2s, 4 ch 3s)
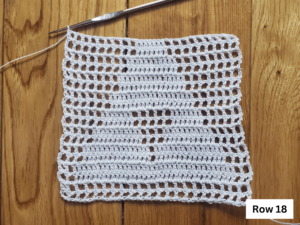
Row 18: ch 6 (counts as dc and ch), turn, dc in next dc, ch 2, sc in middle ch of ch 3, ch 2, dc in next dc, ch 3, dc in next dc, ch 2, sc in middle ch of ch 3, ch 2, dc in next dc, ch 3, skip 3 dc, dc in next dc, ch 3, skip 3 dc, dc in next dc, ch 2, sc in middle ch of ch 3, ch 2, sc in middle ch of ch 3, dc in next dc, ch 3, dc in next dc, ch 2, sc in middle ch of ch 3, dc in next dc, ch 3, dc in next dc (11 dc, 4 sc, 8 ch 2s, 6 ch 3s)
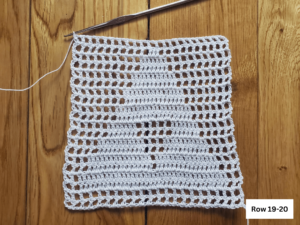
Row 19: ch 5 (counts as dc and ch 2), turn, sc in middle ch of ch 3, ch 2, dc in next dc, ch 3, dc in next dc, ch 2, sc in middle ch of ch 3, ch 2, dc in next dc, ch 3, dc in next dc, ch 2, sc in middle ch of ch 3, ch 2, dc in next dc, ch 2, sc in next ch of ch 3, ch 2, dc in next dc, ch 3, dc in next dc, ch 2, sc in middle ch of ch 3, ch 2, dc in next dc, ch 3, dc in next dc, ch 2, sc in middle ch of ch 3, dc in next dc (11 dc, 6 sc, 12 ch 2s, 4 ch 3s)
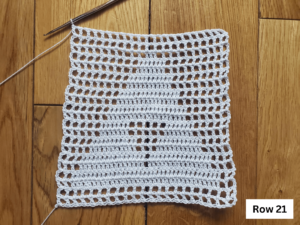
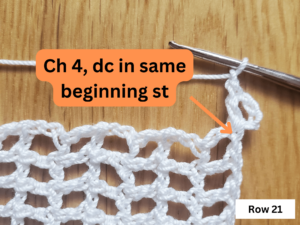
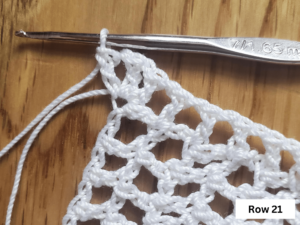
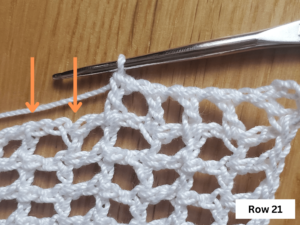
Row 20 ch 6 (counts as dc and ch 3), turn, dc in next dc, *ch 3, dc in next dc.* Repeat from *to* (11 dc, 10 ch 3s)


