17 Thick Crochet Stitches to Try for Your Next Project

Hello everyone! Today, I’ve compiled a list of 17 Thick Crochet Stitches that will add warmth and coziness to your next project! 

As November brings colder weather, I’ve been thinking of ways to create denser, chunkier fabrics in my crochet work. While using thicker yarn is an obvious choice, sometimes we want to use what we already have on hand or avoid buying new yarn.

So, I’ve put together a collection of thick crochet stitches that can help you achieve a warmer hat, blanket, scarf, or whatever your heart desires! 

Many of these stitches use layering effects, multiple yarn overs in the same stitch, or crocheting around stitches a row or two below.  

Enjoy the warmth and texture these stitches can bring to your crochet creations!

Related Posts:

Please note that some of these links are affiliate links. That means that if you click on these links and make a purchase, I may receive a commission at no extra cost to you. You can find more information about our disclosure policy here. Thank you for your support.

#1 Puff Stitch

Learn how to crochet the Puff Stitch here.

Yarn Pictured: Mainstays 100% Cotton Yarn in Daylily Pink

The puff stitch is one way to help thicken up your crochet project. The puff stitch creates a raised, textured, “puff,” and is often added for extra interest or dimension. The technique involves yarning over and inserting the hook into the next stitch (usually 3, 4 or more times), and pulling through all the loops at once.

#2 Popcorn Stitch

Learn how to crochet the Popcorn Stitch here.

Yarn Pictured: Red Heart Super Saver 4 Medium Acrylic in Dusty Gray

The popcorn stitch is a fun way to add density by creating little round balls that look sort of like popcorn kernels. These little “popcorns” are great for making the cutest blankets and baby items. To crochet a popcorn stitch, begin by executing a set number of double crochets, usually five or more. After the final double crochet, remove your hook from the loop, insert it into the first double crochet, retrieve the loop from the last double crochet, and pull it through.

#3 Bullion Stitch

Learn how to crochet the Bullion Stitch here.

Yarn Pictured: Yarn Bee Soft Secret in Navy

The bullion stitch, also known as the roll stitch, creates cute, little ‘coils’ into your crochet projects. I’ve personally crocheted a few bookmarks using this stitch, and its unique texture adds an elegant touch to the work.

To do the bullion stitch, wrap the yarn around your hook (typically at least 5 times, although some patterns may vary), insert it into the next stitch, yarn over, and then pull through all the loops.

While the first two loops are usually straightforward, the following ones can be a bit challenging. To ease the process, pulling the loops away from the hook as you draw through can be quite helpful.

#4 Bobble Stitch

Learn how to crochet the Bobble Stitch here.

Yarn Pictured: Peaches and Creme Solid 4 Medium Cotton Yarn in White

The bobble stitch is a cluster of stitches (usually double crochets) that makes a ball texture similar to the popcorn stitch. However, the technique for creating the bobble stitch differs. Typically these stitches are created by double crocheting 4-5 times in the same stitch, but you hold back the last pull through for each double crochet. After the last double crochet is made, you pull through all of the double crochets to create the bobble.

#5 Jasmine Stitch

Learn how to crochet the Jasmine Stitch here.

Yarn Pictured: Lion Brand Feels Like Butta Yarn in Pale Grey

The jasmine stitch is a super thick, super dense crochet stitch. It’s also one of (in my opinion) the hardest crochet stitches to make. The technique results in beautiful flower shapes and each petal is created by an alternative puff stitch technique. If you’re looking to add warmth to your project or maybe just use up a bunch of yarn fast, the jasmine stitch is the perfect choice.

#6 Crocodile Stitch

Learn how to crochet the Crocodile Stitch here.

Yarn Pictured: Yarn Bee Soft Secret in Tobacco

The crocodile stitch stands out as a distinctive crochet technique, creating layers of fabric that resemble reptile or fish scales (or feathers in some patterns), providing an interesting 3D effect to your projects.

While it’s an enjoyable stitch to create, it can pose a bit of a challenge initially. The process involves crocheting a row of ‘ladders’ and then double crocheting around the rungs of the ladder row in a circular fashion.

#7 Thermal Stitch

Learn how to crochet the Thermal Stitch here.

Yarn Pictured: Peaches and Creme Ombre 4 Medium Cotton Yarn in Oasis

The thermal stitch earns its name from how warm it will keep you during those cold months! It’s a crochet stitch that is double layered, making it dense and sturdy. It’s the perfect stitch for crochet projects that are going to be subject to any sort of wear and tear (potholders, dishcloths, bags, rugs, etc.). This stitch requires you to crochet in the back loops of the current row and then into the loop of the row directly below.

#8 Waffle Stitch 

Learn how to crochet the Waffle Stitch here.

Yarn Pictured: Yarn Bee Soft Secret in Cocoa

The waffle stitch is so enticing; you might find yourself tempted to take a bite out of your work (just kidding!). But in all seriousness, the waffle stitch not only resembles a delicious waffle but also promises to keep you warm throughout the winter.

Created by a combination of front post double crochets and regular double crochets, this cozy crochet stitch adds both texture and visual appeal to your projects.


#9 Basket Weave Stitch 

Learn how to crochet the Basket Weave Stitch here.

Yarn Pictured: Yarn Bee Soft Secret in White

The basket weave stitch is a layered technique that showcases a woven texture similar to a handmade basket. To achieve this stitch, you repeat a sequence of front post and back post double crochets for a few rows, and then switch the two stitches. The result is a visually appealing pattern that adds depth and interest to your crochet projects.

#10 Alpine Stitch

Learn how to crochet the Alpine the Stitch here.

Yarn Pictured: Hobbi Yarn Rainbow Cotton 8/4 in Natural White

The alpine stitch is a distinctive technique that makes a solid, warm fabric, reminding me of the imagery of trees seen from an aerial view on a mountainside. To make this stitch, you alternate between rows of single crochets and rows of front post double crochets worked into stitches two rows below. The result is a textured pattern that looks like a mountainous landscape, providing both visual interest and coziness to your crochet projects.


#11 Bean Stitch

Learn how to crochet the Bean Stitch here.

Yarn Pictured: Peaches and Creme Stripey 4 Medium Cotton Yarn in Linen

The bean stitch is a wonderfully cozy stitch. It’s a simple pattern that creates a fabric that looks like little beans in a zig-zag fashion. This is made by making puff stitches and single crochets, it’s that easy! Plus, who doesn’t love beans!? 


#12 Rice Stitch 

Learn how to crochet the Rice Stitch here.

Yarn Pictured: Hobbi Yarn Rainbow Cotton 8/4 in Beige

The rice stitch is a dense crochet pattern, similar to the basket weave stitch, but with a twist. In this stitch, the alternation between front post double crochets and back post double crochets occurs more rapidly, resulting in a fabric that resembles small grains of rice. 


#13 Bead Stitch

Learn how to crochet the Bead Stitch here.

Yarn Pictured: Red Heart Super Saver 4 Medium Acrylic in Real Teal

The bead stitch is a gorgeous and thick stitch that literally looks like beads. This yarn-eating stitch is simply made by making a double crochet and then basically puff stitching around that same double crochet. 


#14 Waistcoat Stitch 

Learn how to crochet the Waistcoat Stitch here.

Yarn Pictured: Hobbi Yarn Rainbow Cotton 8/4 in Brown

The waistcoat stitch is a dense crochet stitch that consists solely of single crochets, a surprising choice for creating thickness. The technique behind this stitch involves, instead of entering the top of the next stitch in the traditional manner, inserting the hook directly into the ‘legs’ of the next stitch. 

While mastering this stitch can be somewhat challenging, especially without adjusting the hook size or maintaining a loose tension, the result is a fabric that not only appears thick but also looks like knitting. When worked in the round, the little knitted V’s align more evenly, adding a neat finish to the project.


#15 Thick Marguerite Stitch 

Learn the Thick Marguerite Stitch here

Yarn Pictured: Hobbi Yarn Rainbow Cotton 8/4 in Petunia Pink

The thick marguerite stitch is such a cute stitch that resembles little stars (and it’s a variation of the star stitch). It creates a thicker fabric than the normal version by yarning over an extra time and helping to bulk up the stitch. It reminds me of the jasmine stitch, only much easier.


#16 Feather Stitch

Learn how to crochet the Feather Stitch here.

Yarn Pictured: Hobbi Yarn Rainbow Cotton 8/4 in Green

The feather stitch is a fun and layered crochet technique that, after a couple of rows, mimics the appearance of feathers on a folded bird wing. The method of creating the feather stitch is similar to the puff stitch, but with a twist—your hook is inserted into different positions in both the current row and the row below. This approach results in a textured pattern that resembles the beauty of feathers.


#17 Celtic Weave Stitch 

Learn how to crochet the Celtic Weave Stitch here.

Yarn Pictured: Hobbi Yarn Rainbow Cotton 8/4 in Yellow

The celtic weave stitch is a thick crochet stitch that looks like a diagonal woven basket. Achieved by crisscrossing front post treble crochets in one row and then executing back post treble crochets in the next, this stitch creates a textured fabric similar to traditional Celtic patterns.

Other Posts You May Like:

I hope that you enjoyed this list of 17 Thick Crochet Stitches! Whether you’re working on a cozy blanket, a stylish scarf, or a snug hat, these stitches are sure to bring warmth to you and your loved ones during the colder months!

Until next time!

Gothic Crochet Table Runner Pattern

Hello everyone, today I’m excited to present my latest crochet pattern, the “Gothic Crochet Table Runner.” 

If you’re looking to add a bit of gothic decor to your home, you’ll absolutely love this pattern! The black yarn and the lacy design will transform your dining or coffee table into a statement piece, plus you can tell all your guests you made it yourself! Talk about impressive.

The center of the table runner was inspired by the Gothic Crochet Stitch by astra.lebedeva2019 on Instagram. I loved the way these diamonds are created in that pattern, however for the tiny crochet thread we will be using, I wanted to make the diamonds look more lacy and a little thicker. 

This is a beautiful crochet table runner pattern, created with black crochet thread, however, it is another crochet pattern that takes time to complete and it is designed with crocheter’s who have an intermediate to advanced skill set. 

I didn’t time myself, and I’m a busy mom of little kids, so you’ll probably get it finished faster than me! If I had to guess, this probably took me a month to finish, of inconsistently crocheting 1-2 hours every day. Your time may vary obviously!

Related Posts:

I’ve adjusted the pattern instructions to allow you to make your table runner as long as you want. I don’t recommend making the short side longer than what I’ve described below, I think it makes the table runner look too wide on that side.

But seriously, look at how pretty this thing is! 

Now as a reminder, I try my best to make pattern instructions accurate, but I AM just a mom who likes to crochet, so please let me know if you see any errors by commenting below. 

With all that, let’s get started on this Gothic Crochet Table Runner Pattern!

Please note that some of these links are affiliate links. That means that if you click on these links and make a purchase, I may receive a commission at no extra cost to you. You can find more information about our disclosure policy here. Thank you for your support.

Materials Needed:

Abbreviations Used:

  • St(s) – stitch(es)
  • Ch(s) – chain(s)
  • Sl st – slip stitch
  • Sc – single crochet
  • Dc – double crochet
  • Fpdc – front post double crochet
  • Trc – treble crochet

Special Stitches:

Puff Stitch – YO (yarn over), insert hook into designated st/space, pull up a loop x 5 times (11 loops on your hook), YO, pull through all but the last loop (2 loops on your hook), YO, pull through last 2 loops.

Triangle Increase/Decrease – I will discuss these two stitches in detail below. Essentially, this is a group of trcs/dcs that create the top or bottom part of our diamonds.

Special Instructions:

  • I do not have st counts at the end of the rows. This is to allow you freedom to make your table runner as long or short as you’d like.
  • Instructions in () are grouped this way to make it easier to read and is usually written this way to indicate a series of sts made in the same st.
  • There is a bit of math we will have to do later, but don’t worry, I will walk you through it as we get to those spots in the pattern.

Gothic Crochet Table Runner Pattern

Ch 53

Row 1: *YO twice, insert into 8th ch from hook, pull up a loop, YO and pull through 2 loops (3 loops on your hook), skip a ch.

YO insert your hook into next ch, pull up a loop, YO and pull through 2 loops (4 loops on your hook), skip a ch.

YO insert your hook into next ch, pull up a loop, YO and pull through 2 loops (5 loops on your hook), skip a ch.

YO insert your hook into next ch, pull up a loop, YO and pull through 2 loops (6 loops on your hook).

YO, pull through 4 loops, YO and pull through 2 loops, YO and pull through 2 loops again. This is your triangle decrease stitch.

Ch 2, skip 2 chs, trc into next ch, ch 1, dc into the first two “loops” in the leg of the trc you just crocheted (see pic below), ch 1, dc into same space, ch 1, dc into same space again. This is your triangle increase stitch

Ch 2, skip 2 chs*, repeat from *to* trc into the last ch (4 triangle decreases and 3 triangle increases)

triangle increase dc placement
First two "loops" of the trc in Row 1
GCTR Row 1
Row 1

Row 2: Ch 6 (counts as a trc and ch 2), turn, for this row, we will be making triangle decrease stitches on top of the previous row’s triangle increase stitches and vice versa. 

The last stitch from row 1 should have been a triangle decrease stitch, so for row 2, we will begin with a triangle increase stitch.

Skip the next ch 2 space, make a trc, but place it under the next stitch (not into it as you normally would). I find it helpful to think of this space as the “neck” of the last row’s triangle decrease stitch. Just find a space to insert your hook into the neck and trc there. If you trc into the stitch normally, the diamonds we are trying to create will look off-center. See pic below for a visual on the placement.

Triangle increase stitch as you did in row 1. Ch 2, now we will make a triangle decrease into the next triangle increase. Make a triangle decrease stitch as we did in row 1, using only the dcs and trc sts and skipping the ch 1 spaces between. 

If crocheted correctly, this will give us our first diamond shape. 

Ch 2 and repeat these two stitches with a ch 2 between each triangle increase and decrease After the last ch 2, finish your row by skipping 2 chs and trc into the next ch.

Row 3: Ch 6, turn, the first st below should be a triangle increase stitch, so we will begin with a triangle decrease stitch. ch 2, and triangle increase into the next triangle decrease like we did in row 2. There is no difference in this row compared to row 2, other than starting with a different triangle stitch. 

Repeat Rows 2-3 until you reach 62 rows or increase the length with a repeat of 12 rows, do not cut yarn.

Border:

Now we will be creating the border around our length of lacy diamonds. We need to do a few simple rows of sc around to create a nice, thick line, a few rows of mesh squares, and then we’ll finish with an intricate pattern consisting of a variety of stitches.

***Important note on length adjustments***

The last row of our scs border needs to follow a repeat of 27+24 sc (do not count the corner sts). We will be doing 3 rows total of sc. For each row, the sc will increase by two. 

So, for example, on the short side of our rectangle, we need to have a total of 47 sc on the first row. This will increase to 49 sc on the next row, and then to 51 sc on the last row. 27+24 = 51 sc.

This is where stitch markers come in handy on the long side to help you count. Just make a series of 27 sc and make sure that you can fit 24 more on the very last row of sc (row 3).

It seems like a lot, but this is the only way your beautiful border is going to fit. Avoid the headache later by getting the math right early, because we both know that we don’t have the time or patience to frog everything :).

Row 1: Ch 1 (does not count as a st), sc into the same st, ch 1 (place a stitch marker here to help identify the corners later, otherwise just pray you can find it later lol), sc again into the same st. Now turning down the side, we will be placing a series of 3 sc into the sides of either the turning chs or the trcs from the previous rows.

The last sc you made counts as part of that series of 3, so place 2 more sc into the side of the trc. See pic for a better visual below.

You will have to skip a ch when you reach the starting chs, and that is ok.

sc border placement

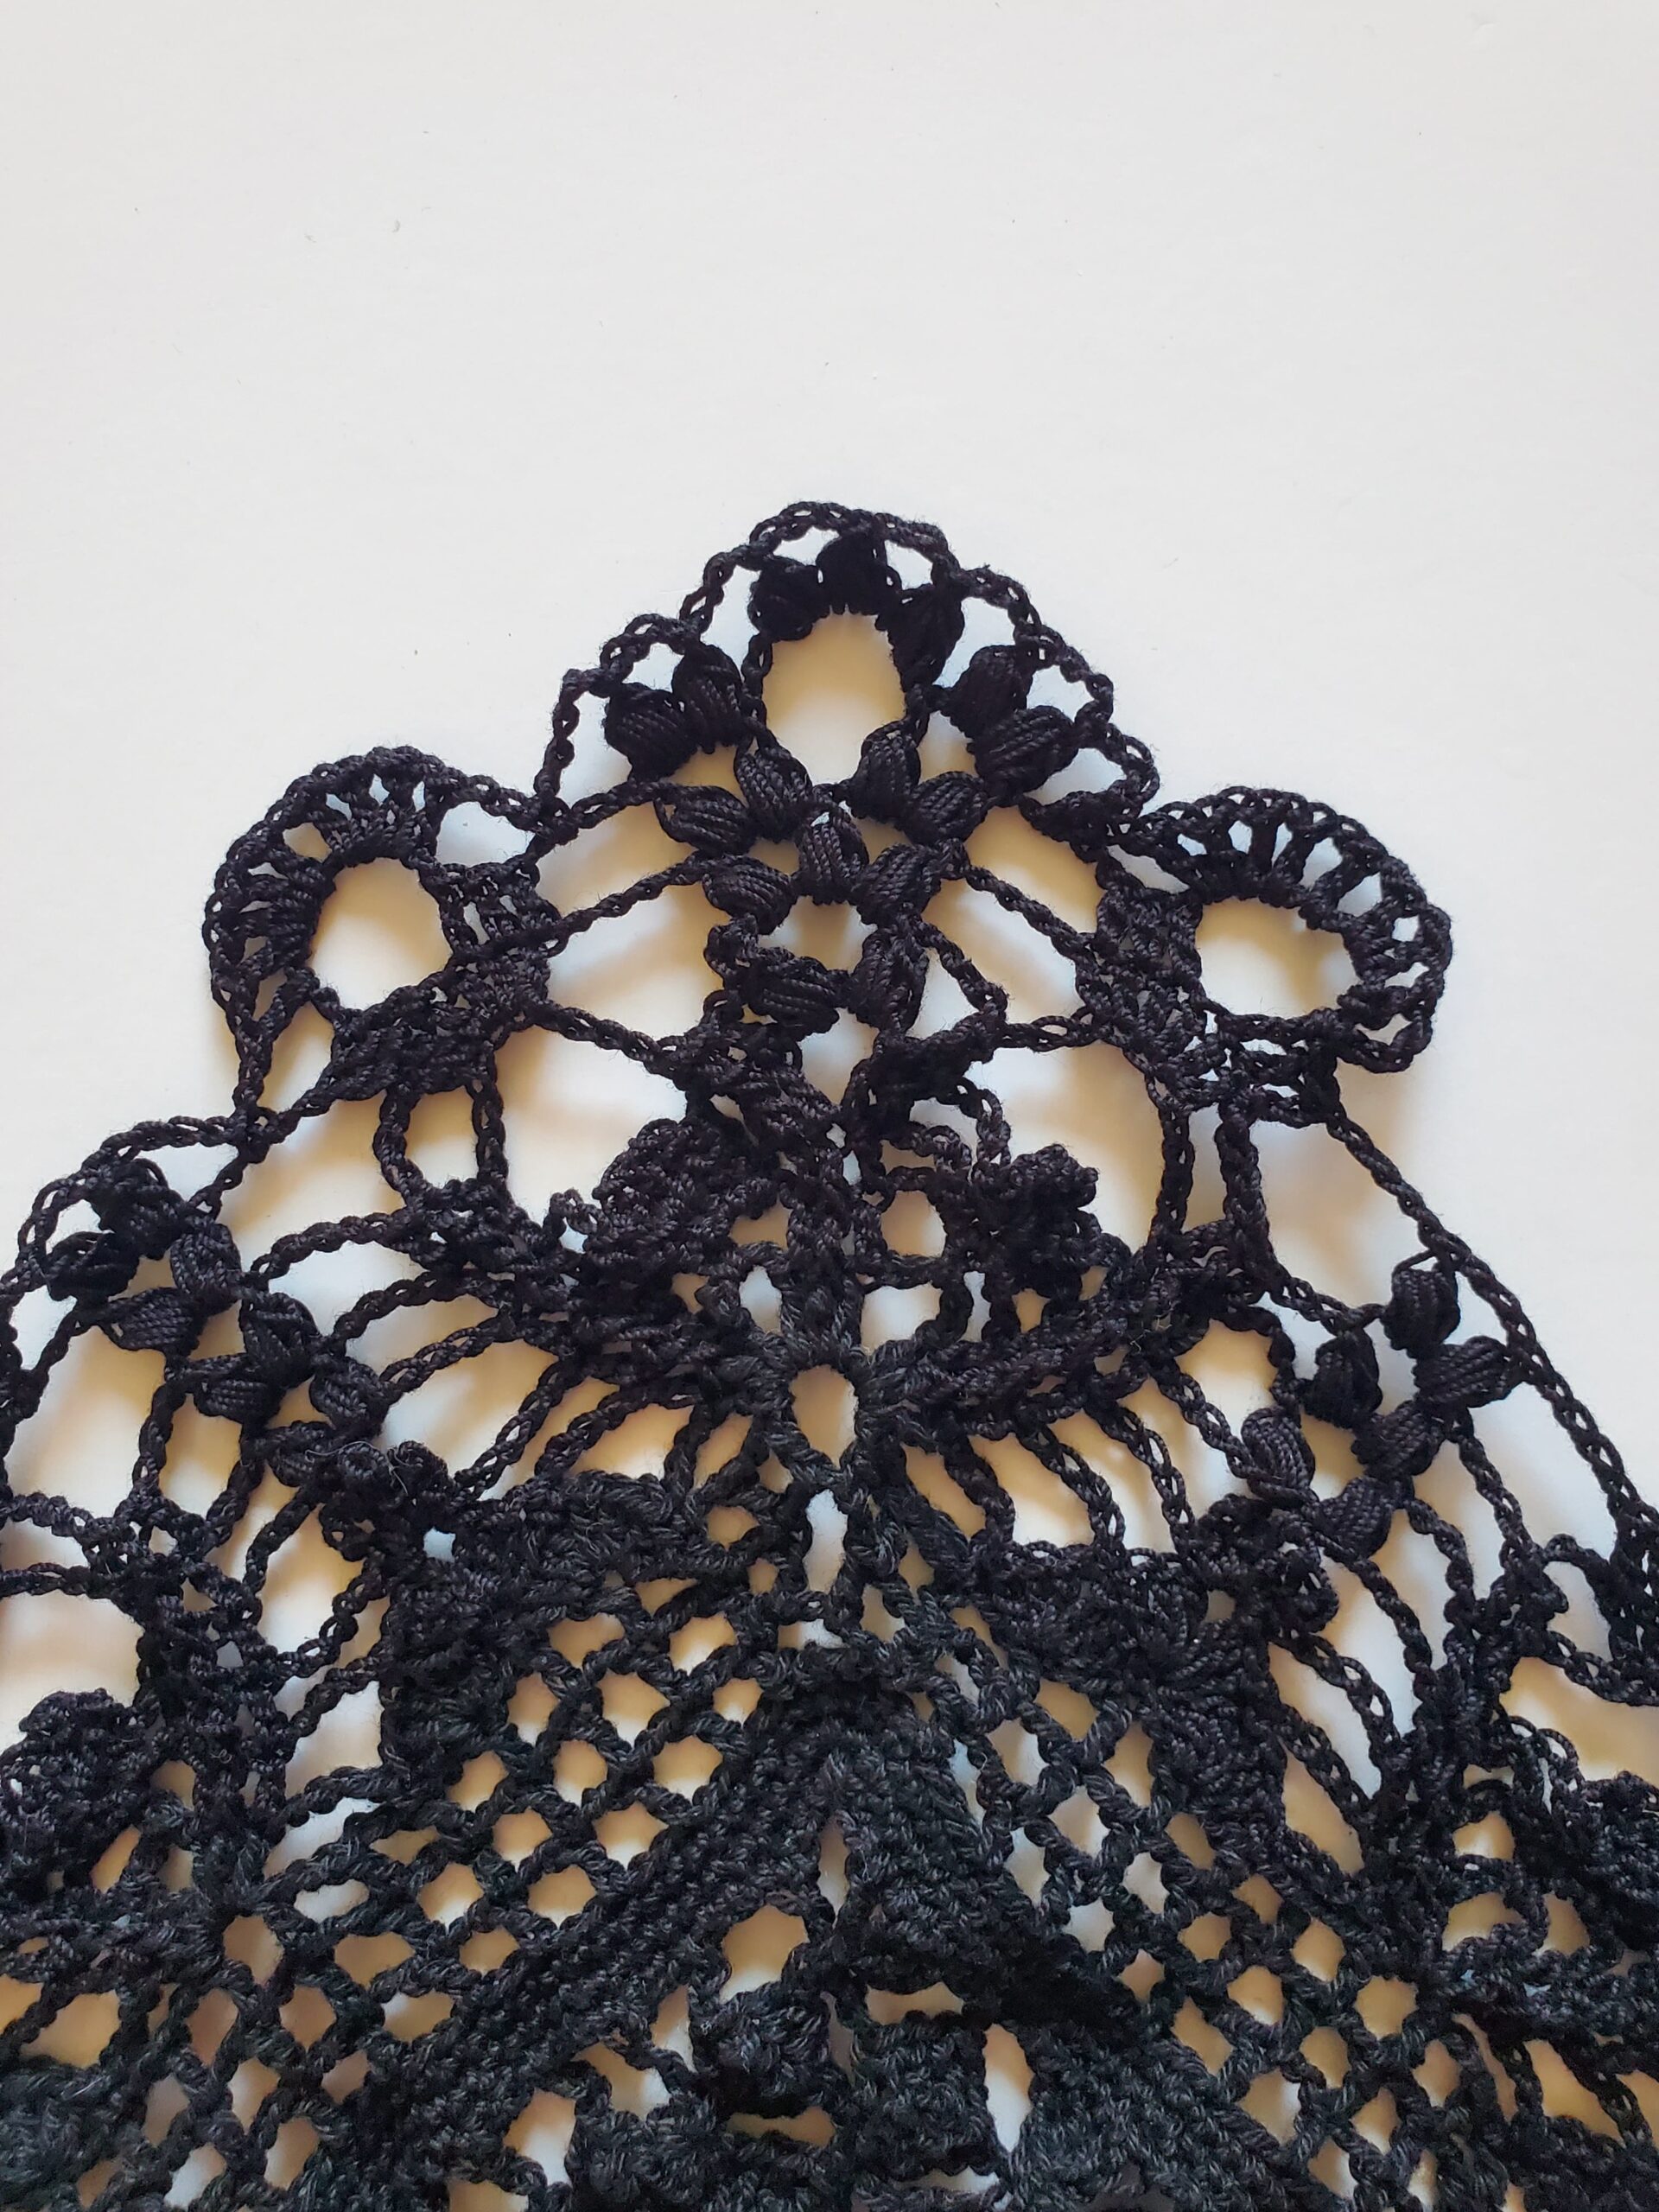
When you get close to the next corner, I found it easier to count 2 chs away from the triangle increase/decrease from the starting row and placing my corner st of (sc, ch 1, place a stitch marker, sc) into the next ch away. 

Now going down the next side (this should be the underside of our starting ch), place 1 sc into each ch 2 space, 1 sc into each of the bottoms of the 4 trc that make up the triangle decrease, 1 sc into each ch 2 space, and then 1 sc into the bottom of the triangle increase. Continue this way until you reach the next corner (the 3rd ch after you make 2 sc in the last ch 2 space) and (sc, ch 1, place a stitch marker, sc) in the same ch. 

***Make sure you have the same number of sts on each side***

Continue making sc around the next side and creating another corner st of (sc, ch 1, sc). 

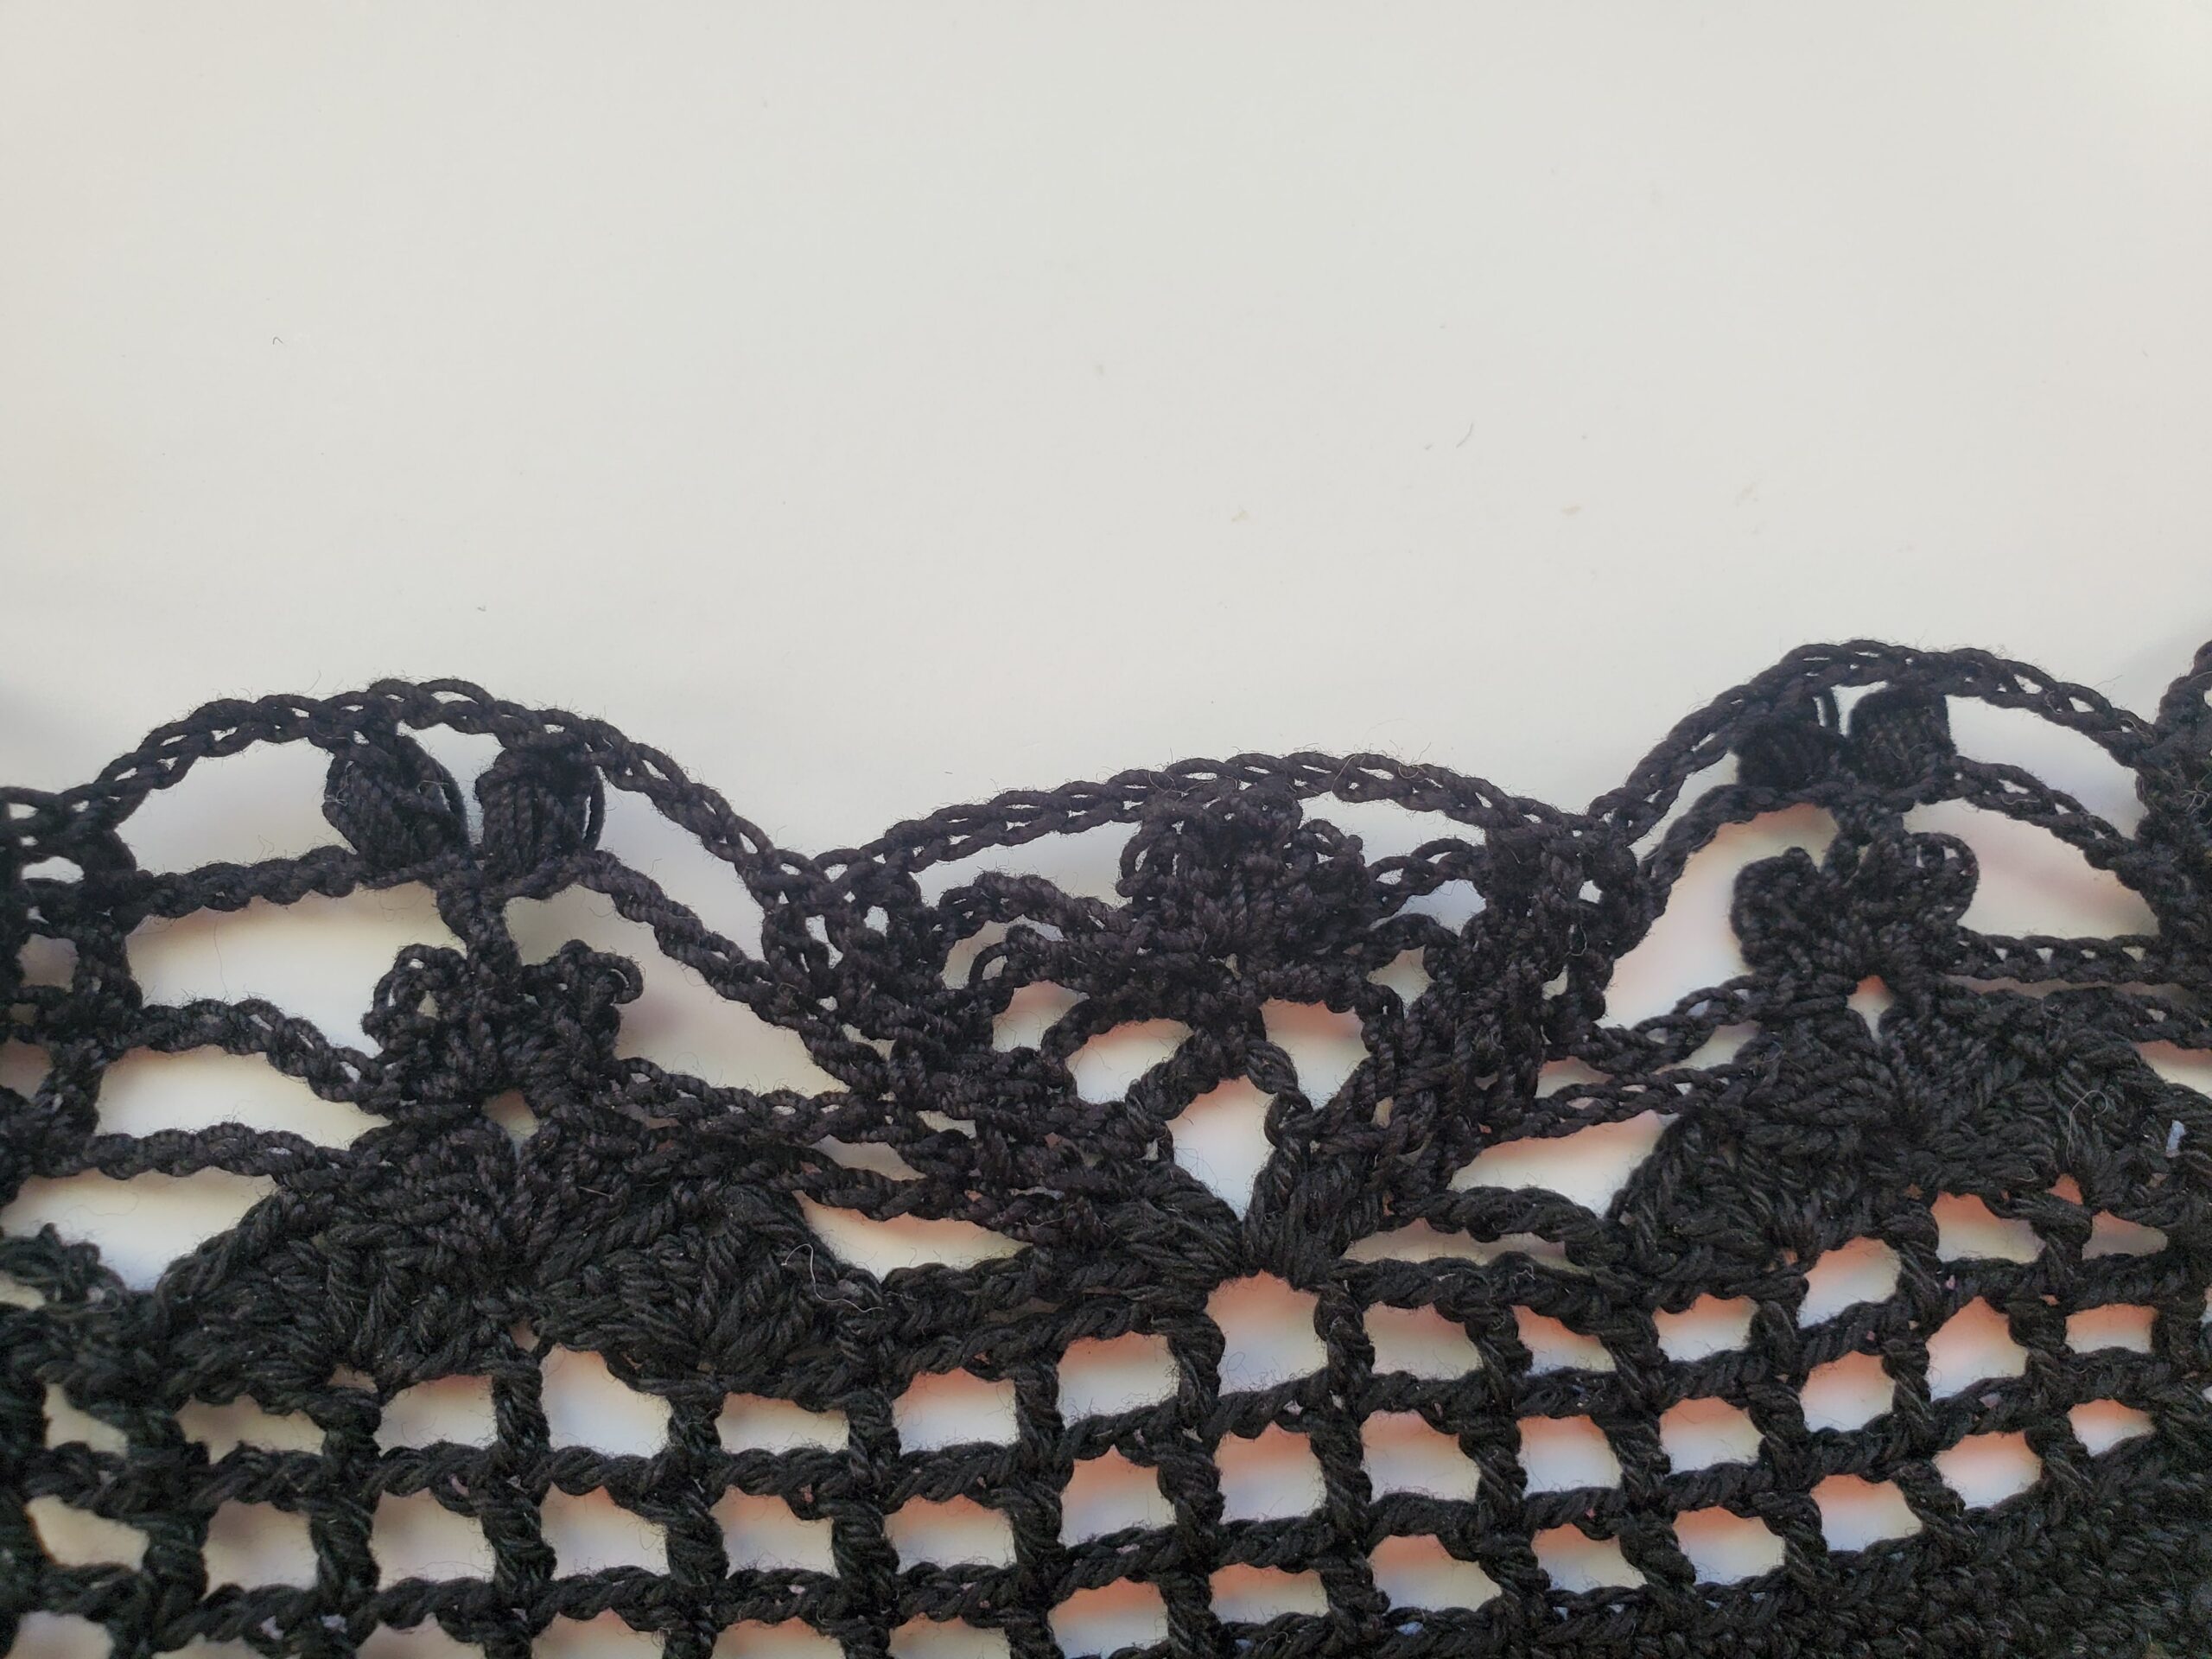
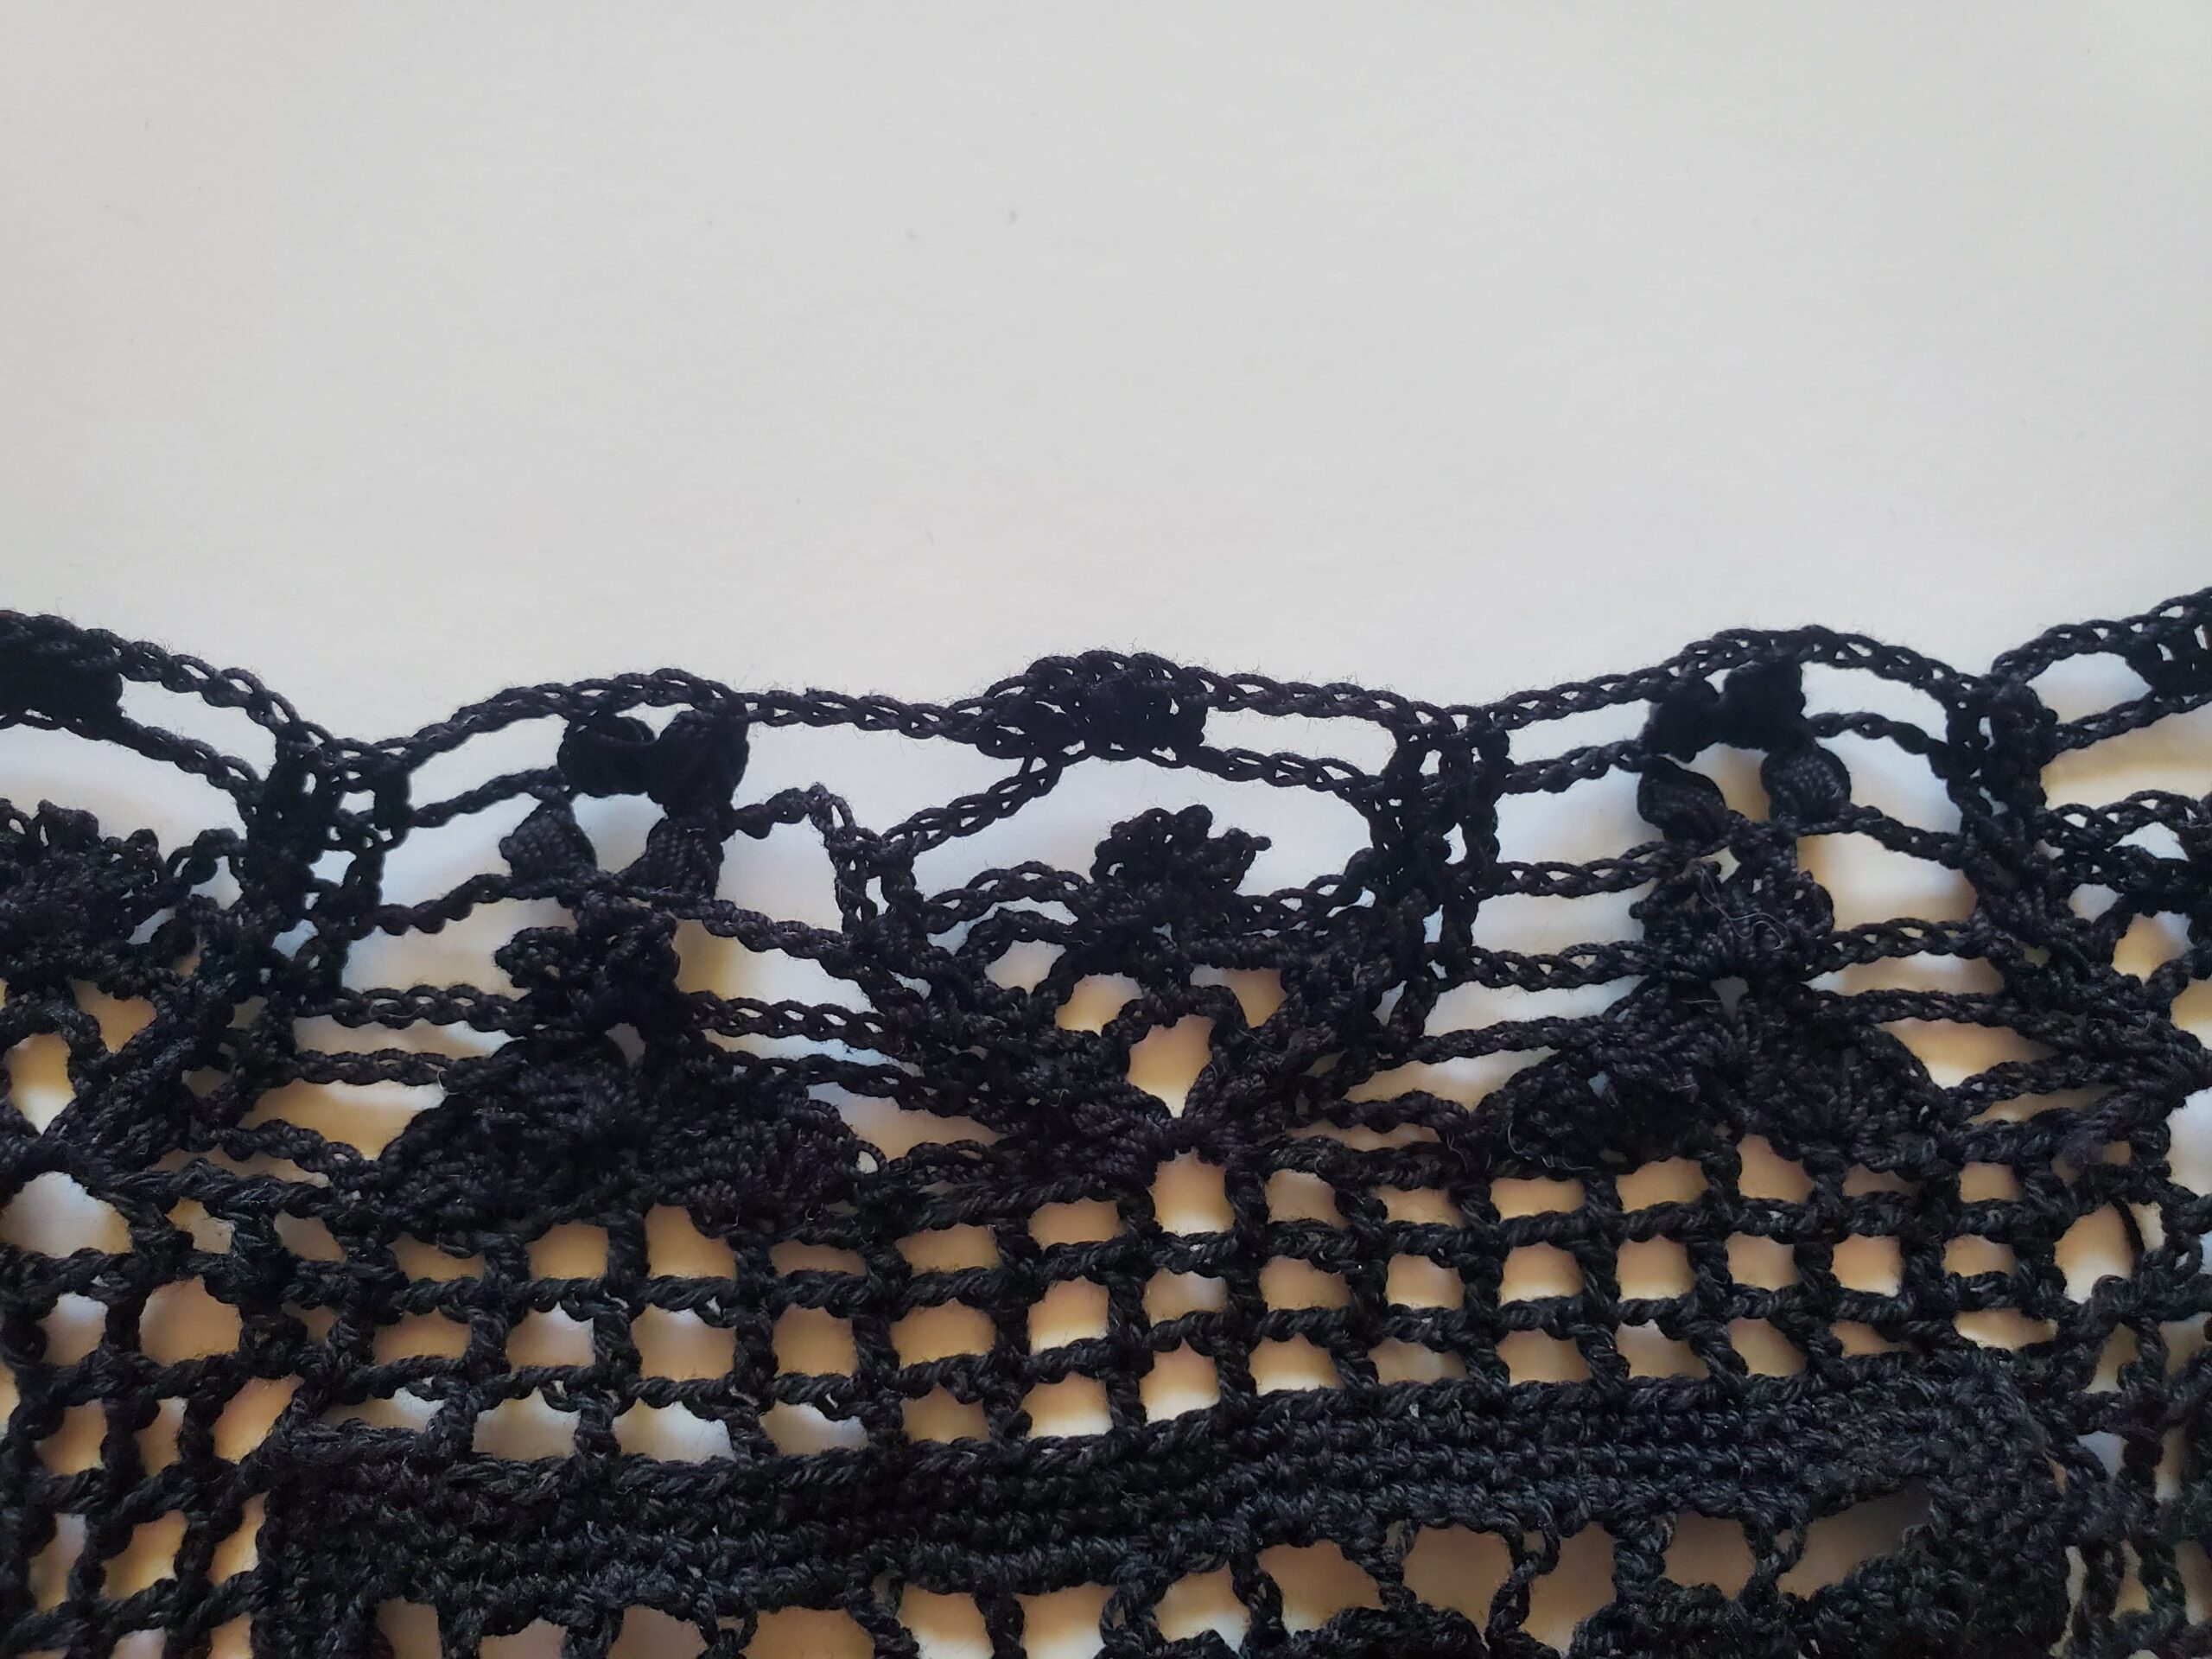
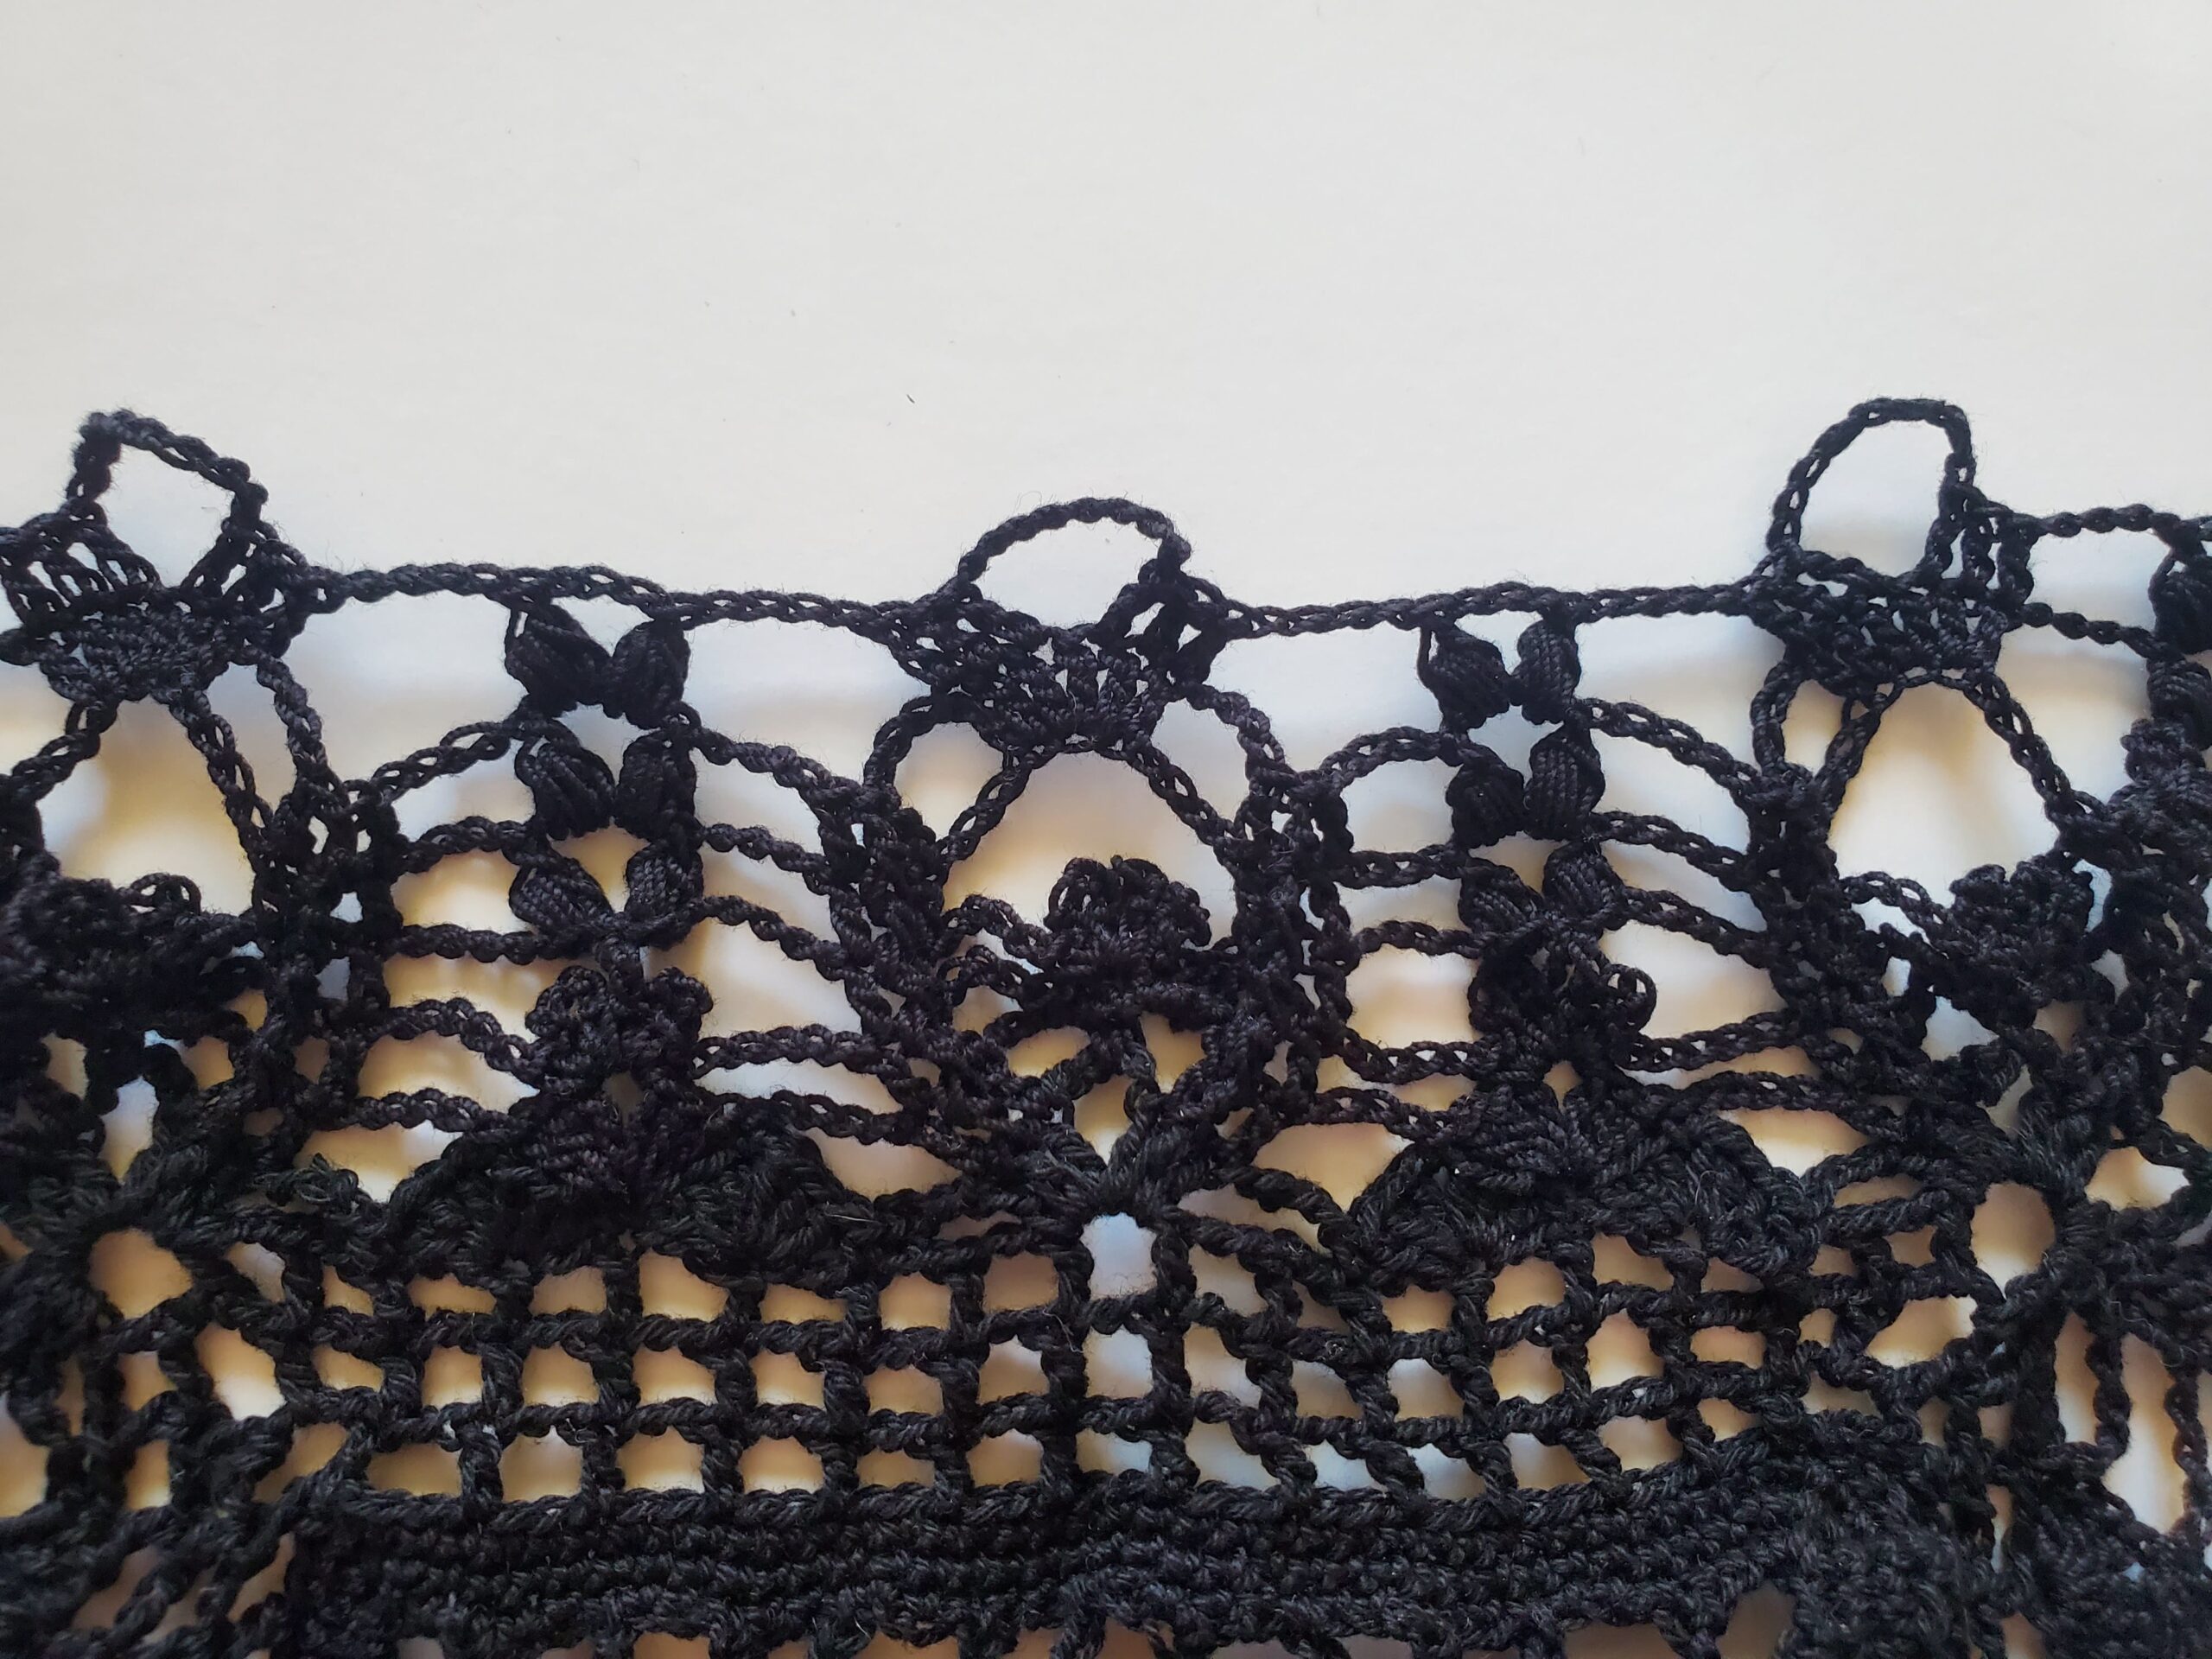
Once you get back to the top of your work, sc into each st, but skip the ch 1s in the triangle increase stitches (it looks too wavy if you do).

Sl st to first sc.

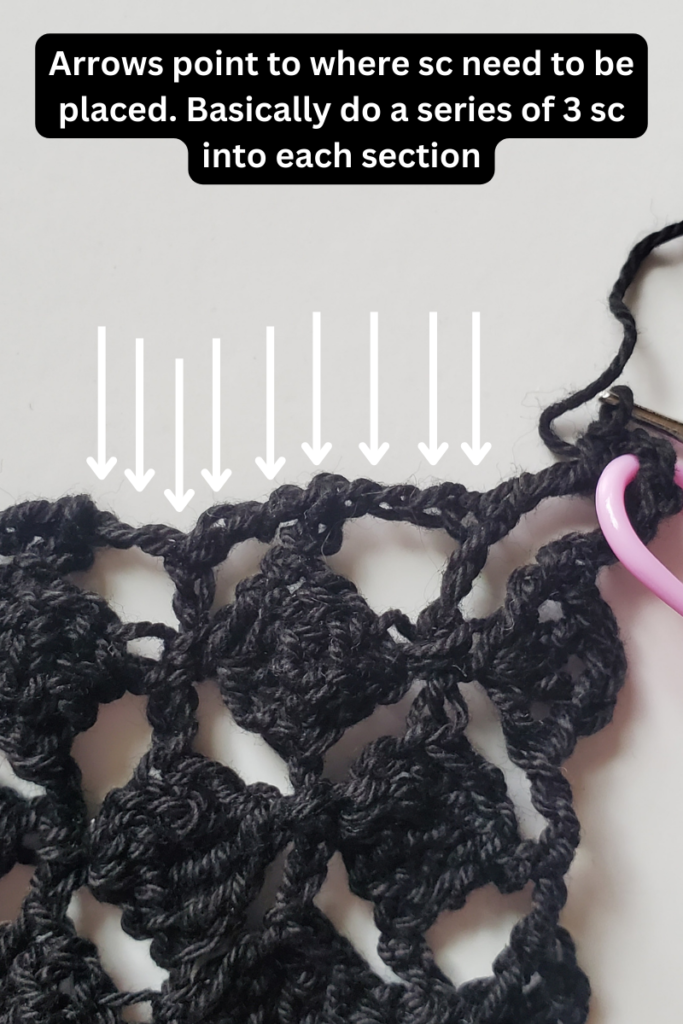
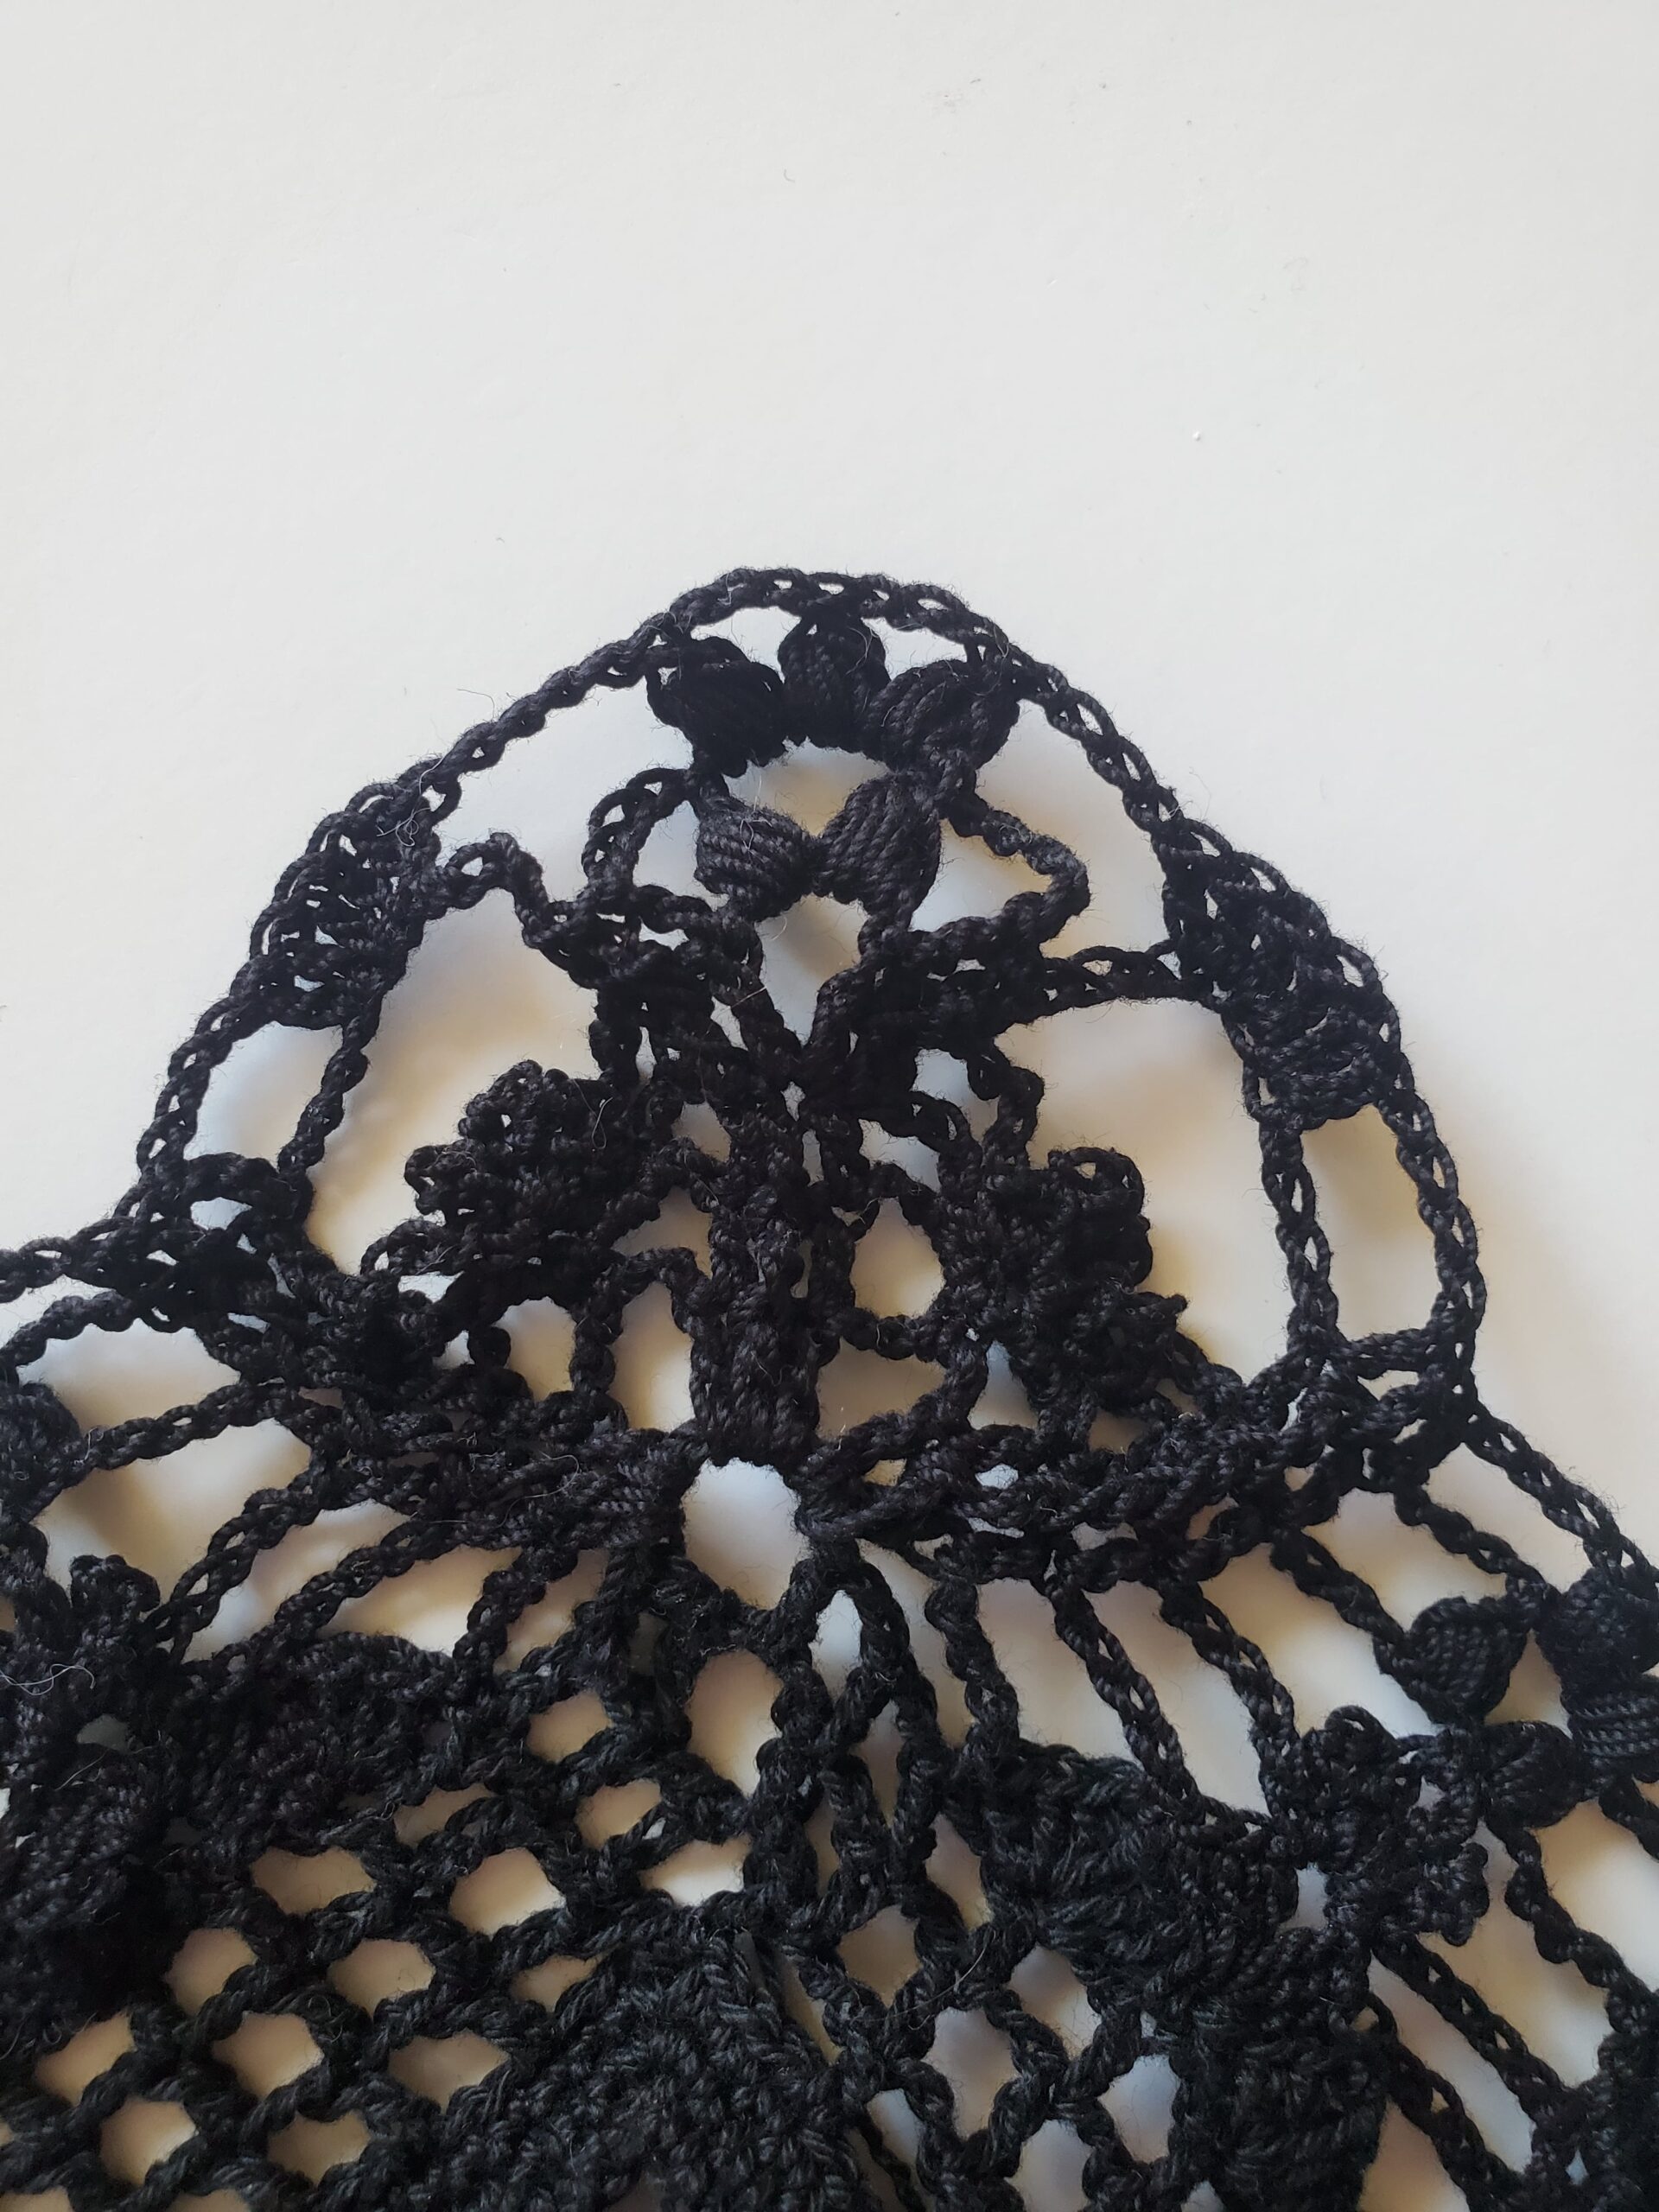
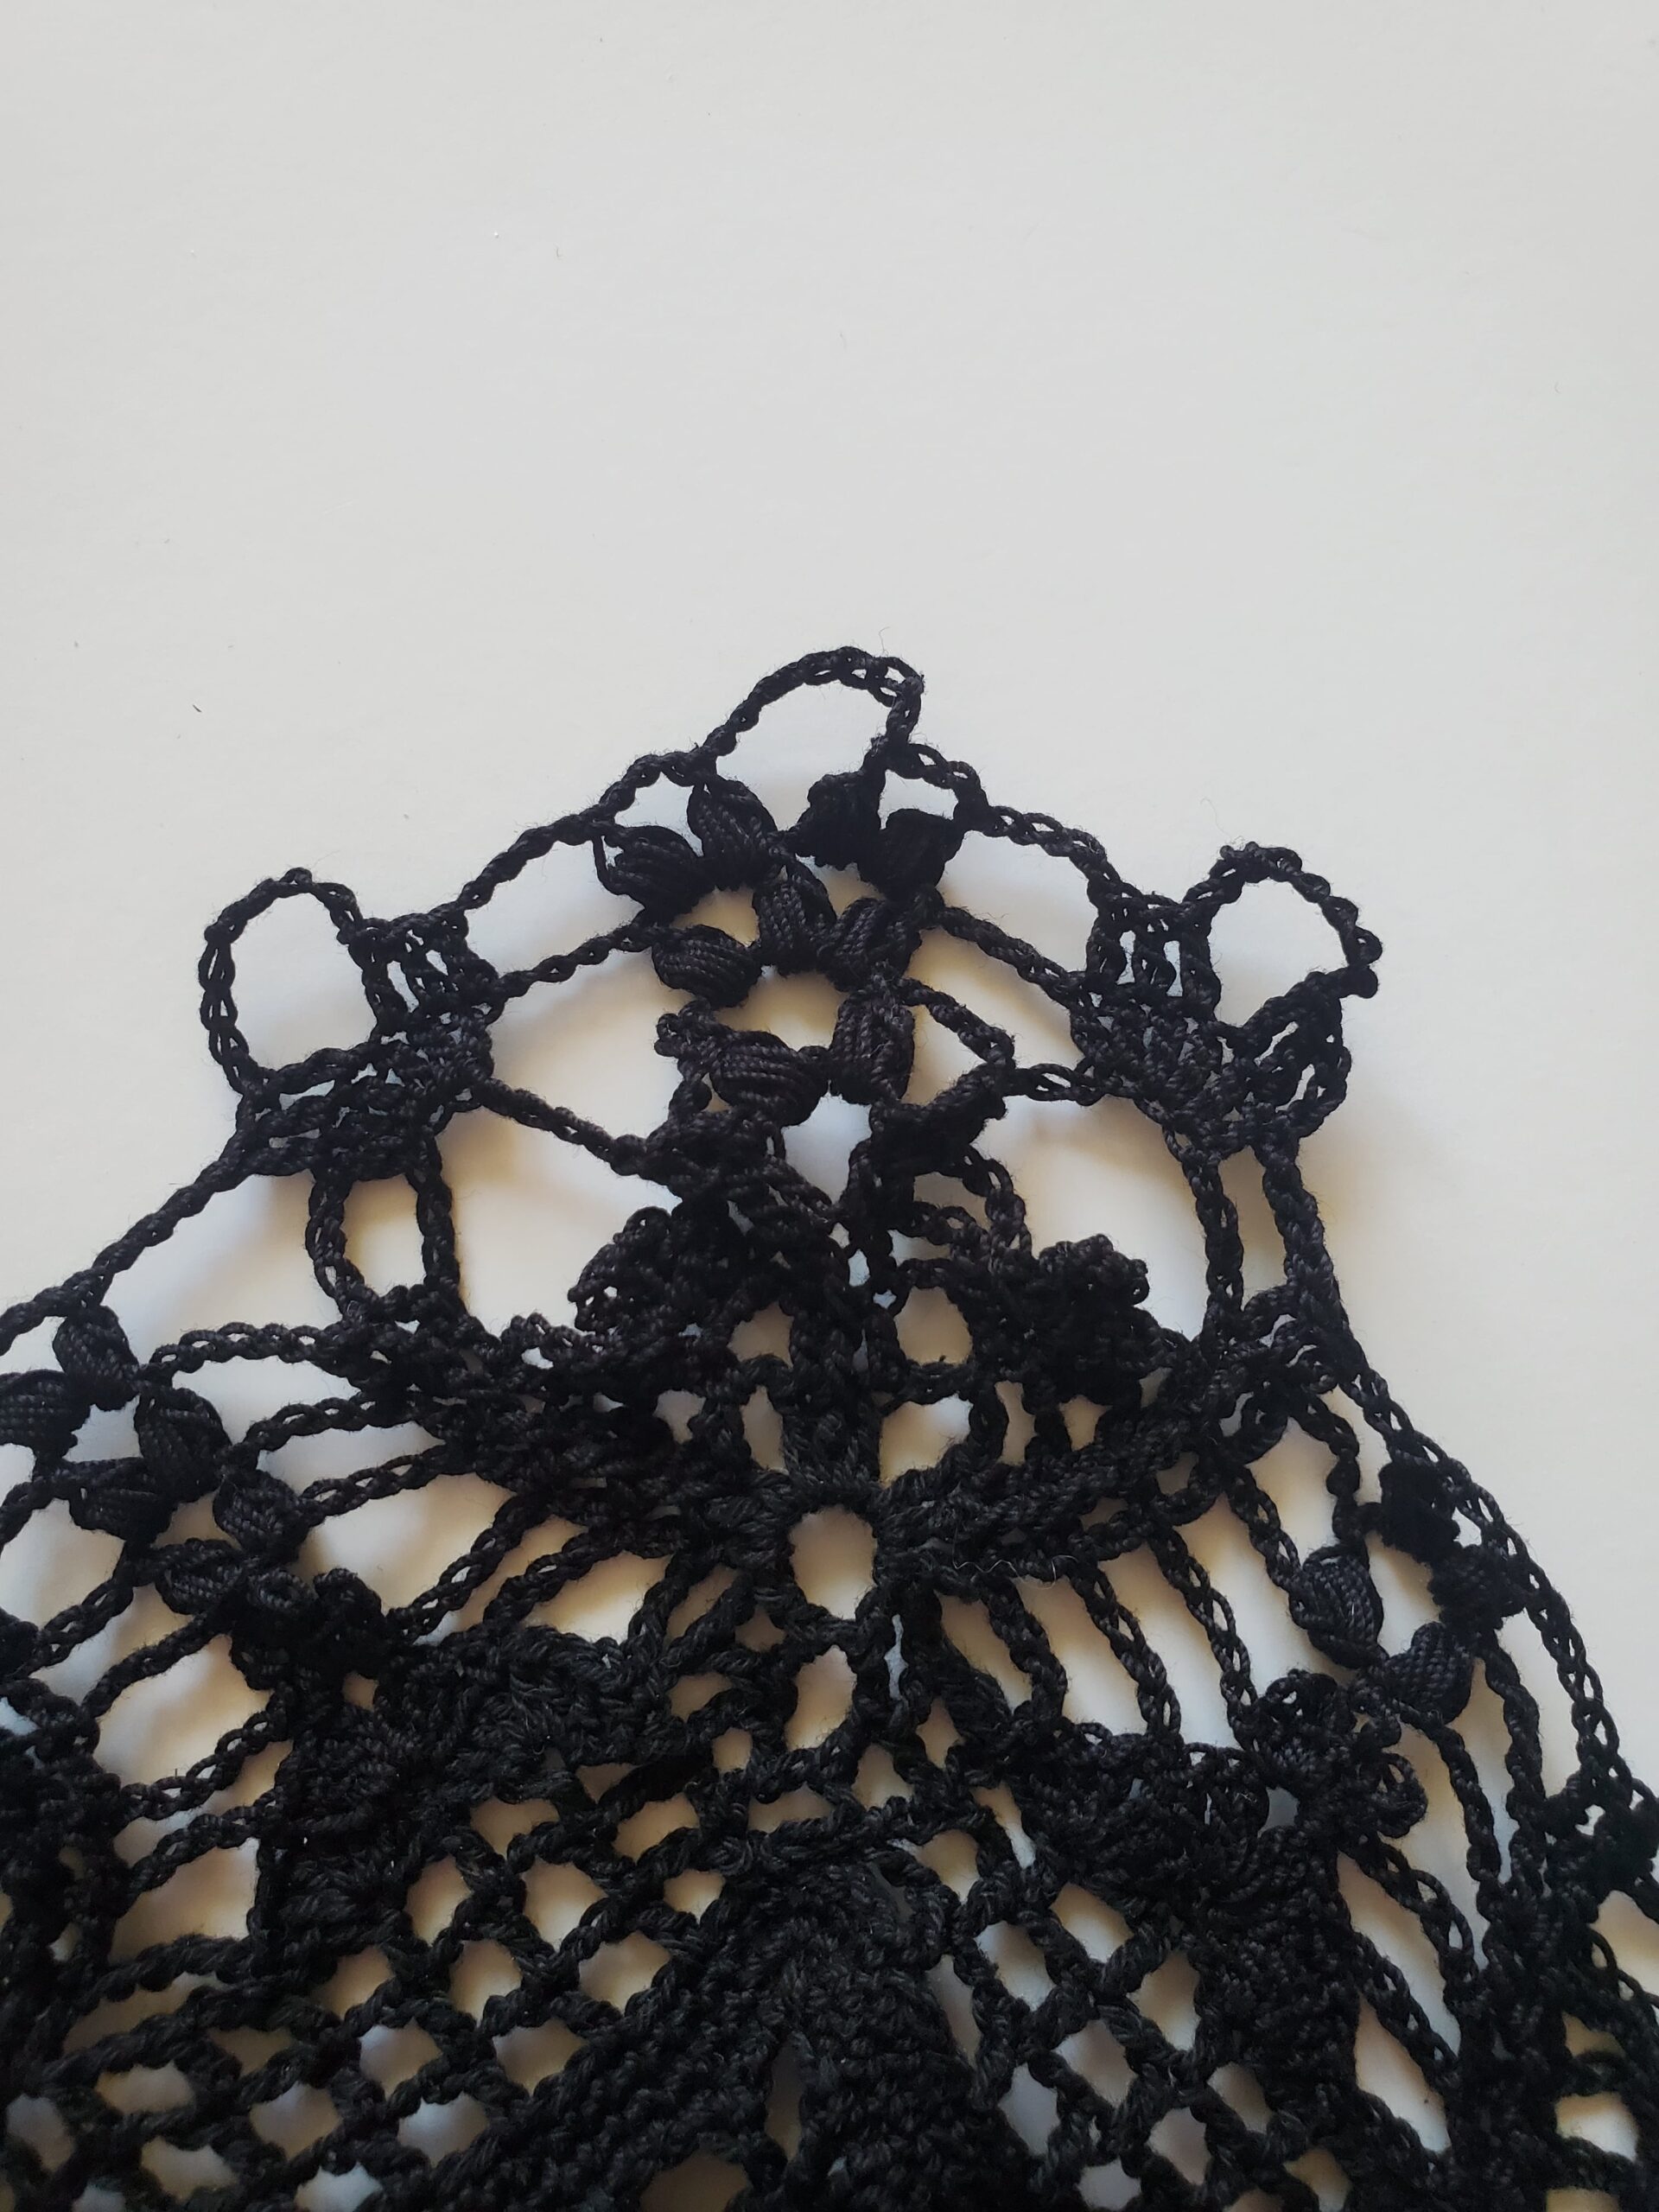
Row 2: Ch 1 (does not count as a st), sc in same st, (sc, ch 1, place st marker, sc) into next ch 1 space, then make 1 sc in each st across (try not to skip the st right after you finish your corner st, sometimes it gets a little hidden). Continue making sc and your corners in this fashion. Sl st to first sc.

Row 3: Ch 1 (does not count as a st), sc in same st, sc in next st, make a corner st in the next ch 1 space (sc, ch 1, sc). Continue making sc and corner sts as you did in row 2. Sl st to first sc. 

***Take the time here to double check your st counts , remember, your last row needs to have a repeat of 27+24 not including the ch 1 corners. If you need to, it’s ok to add or skip scs to achieve the repeat formula.***

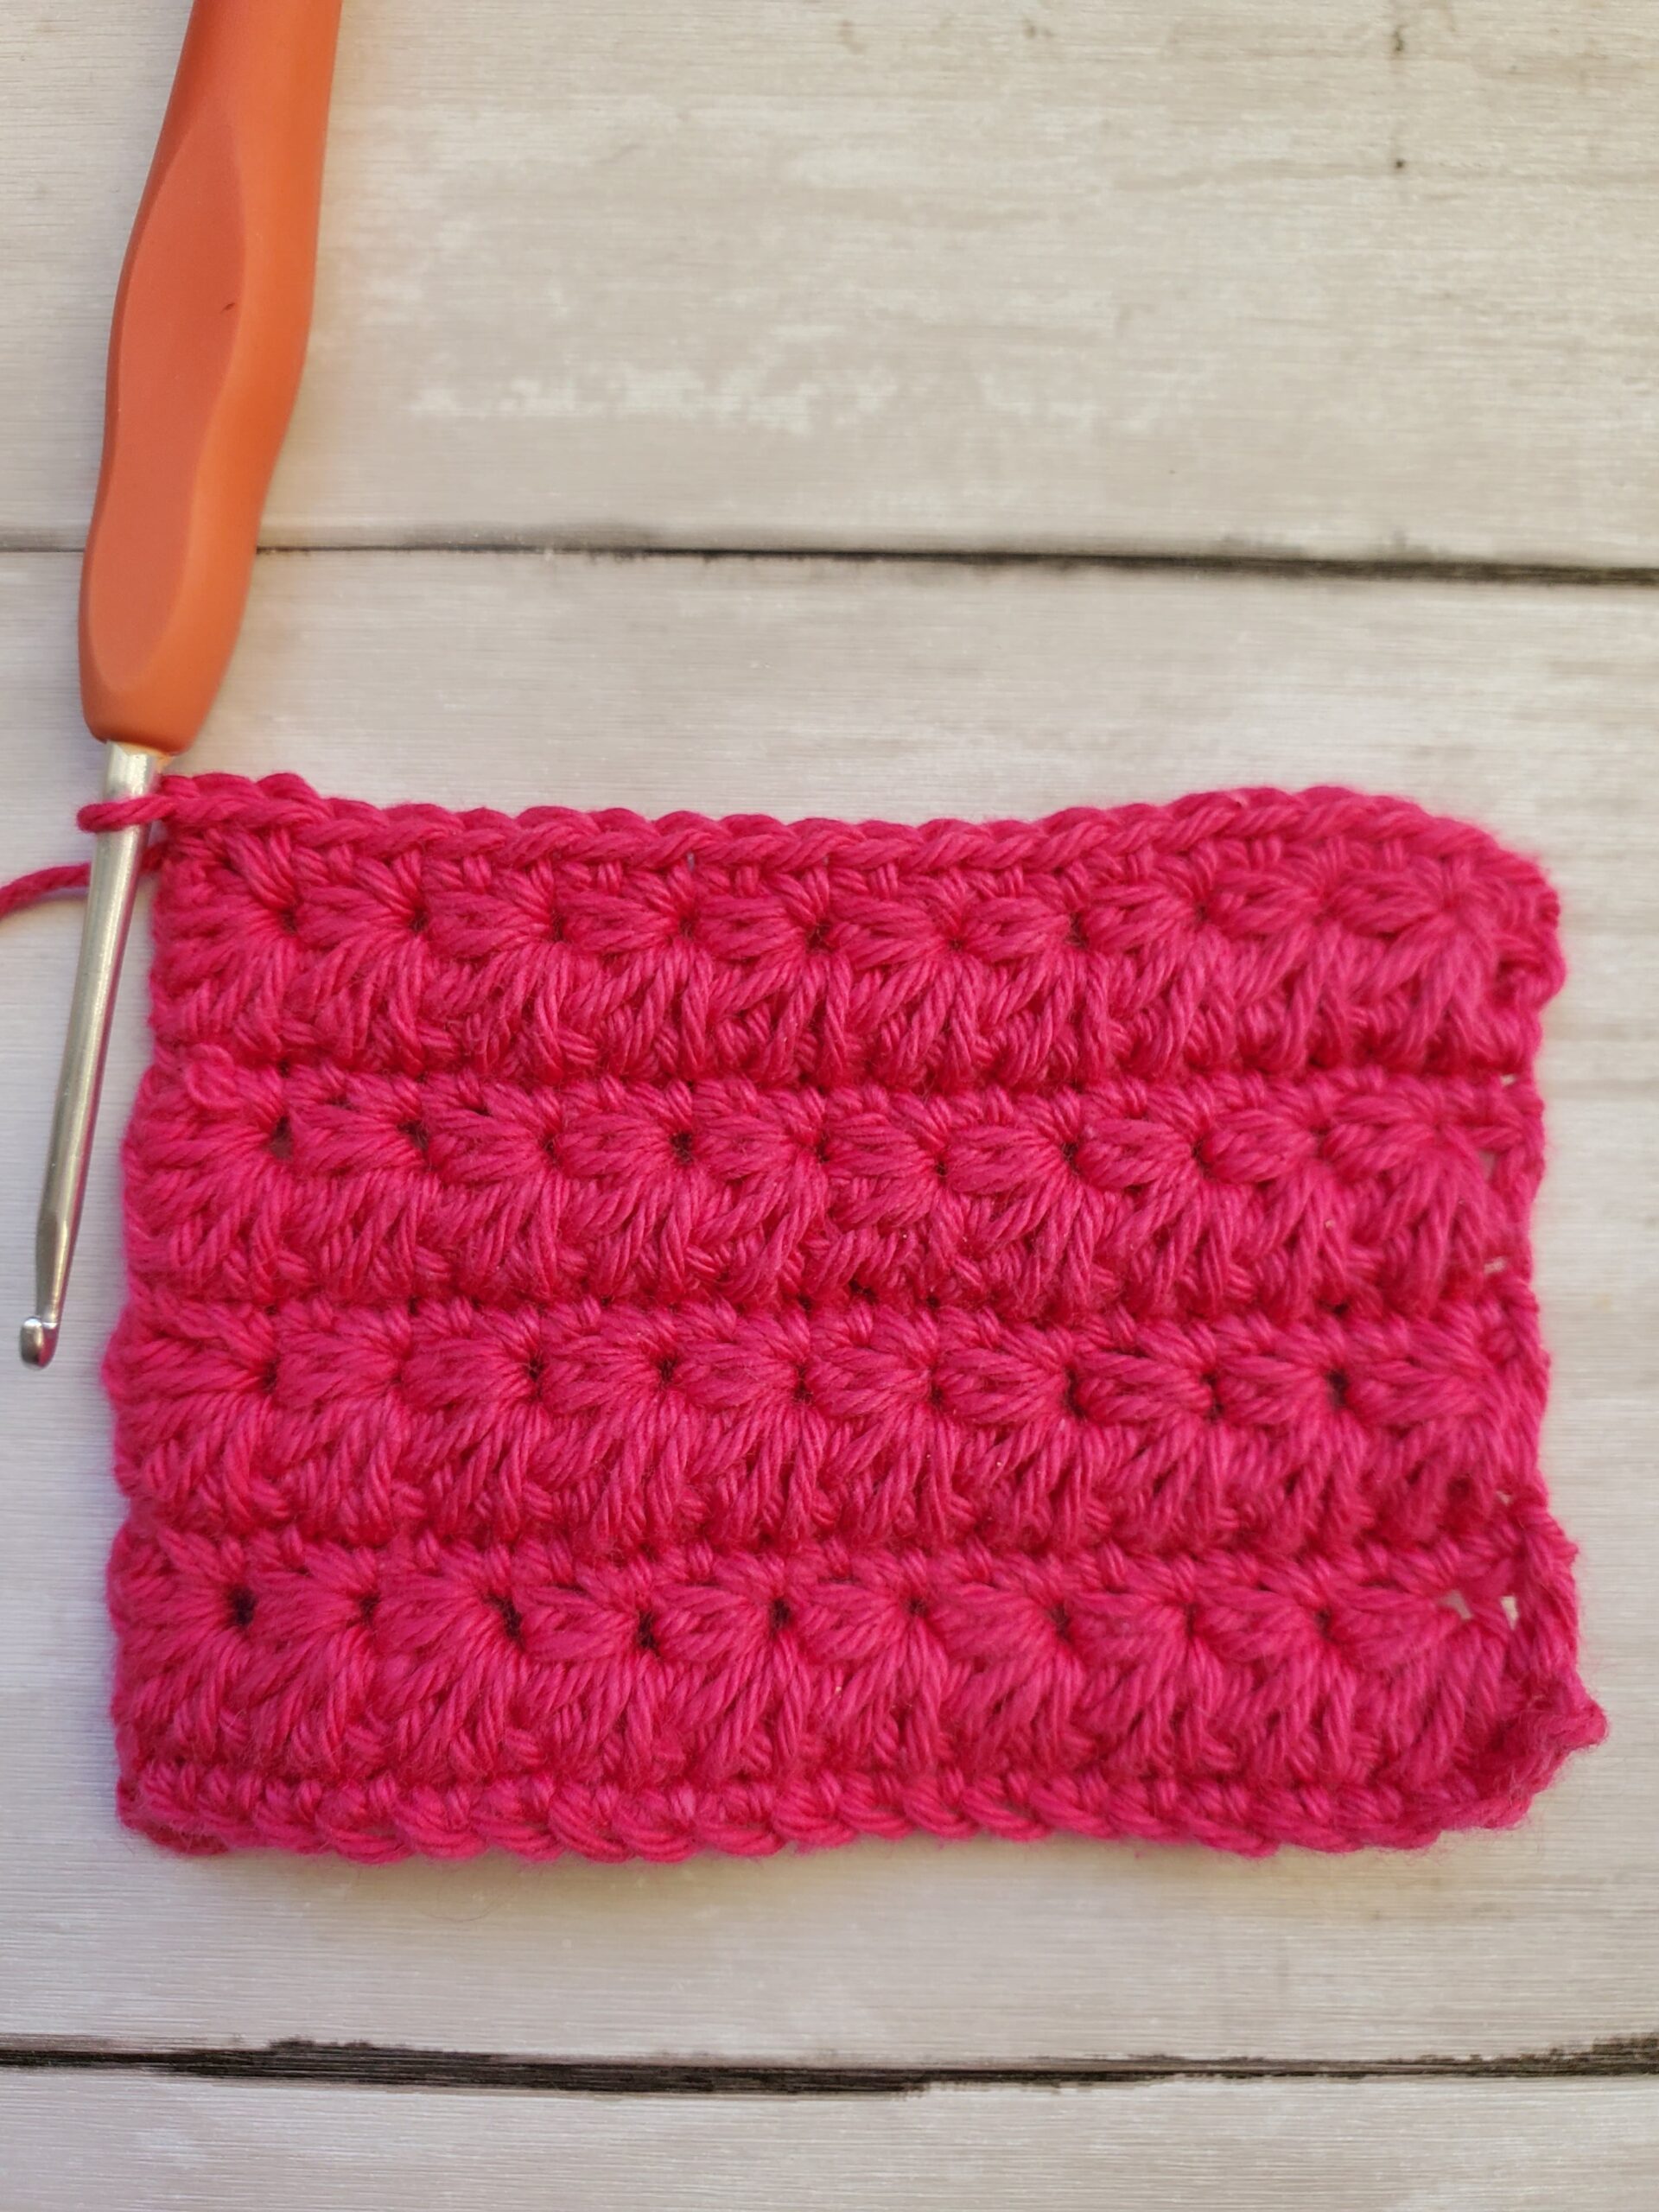
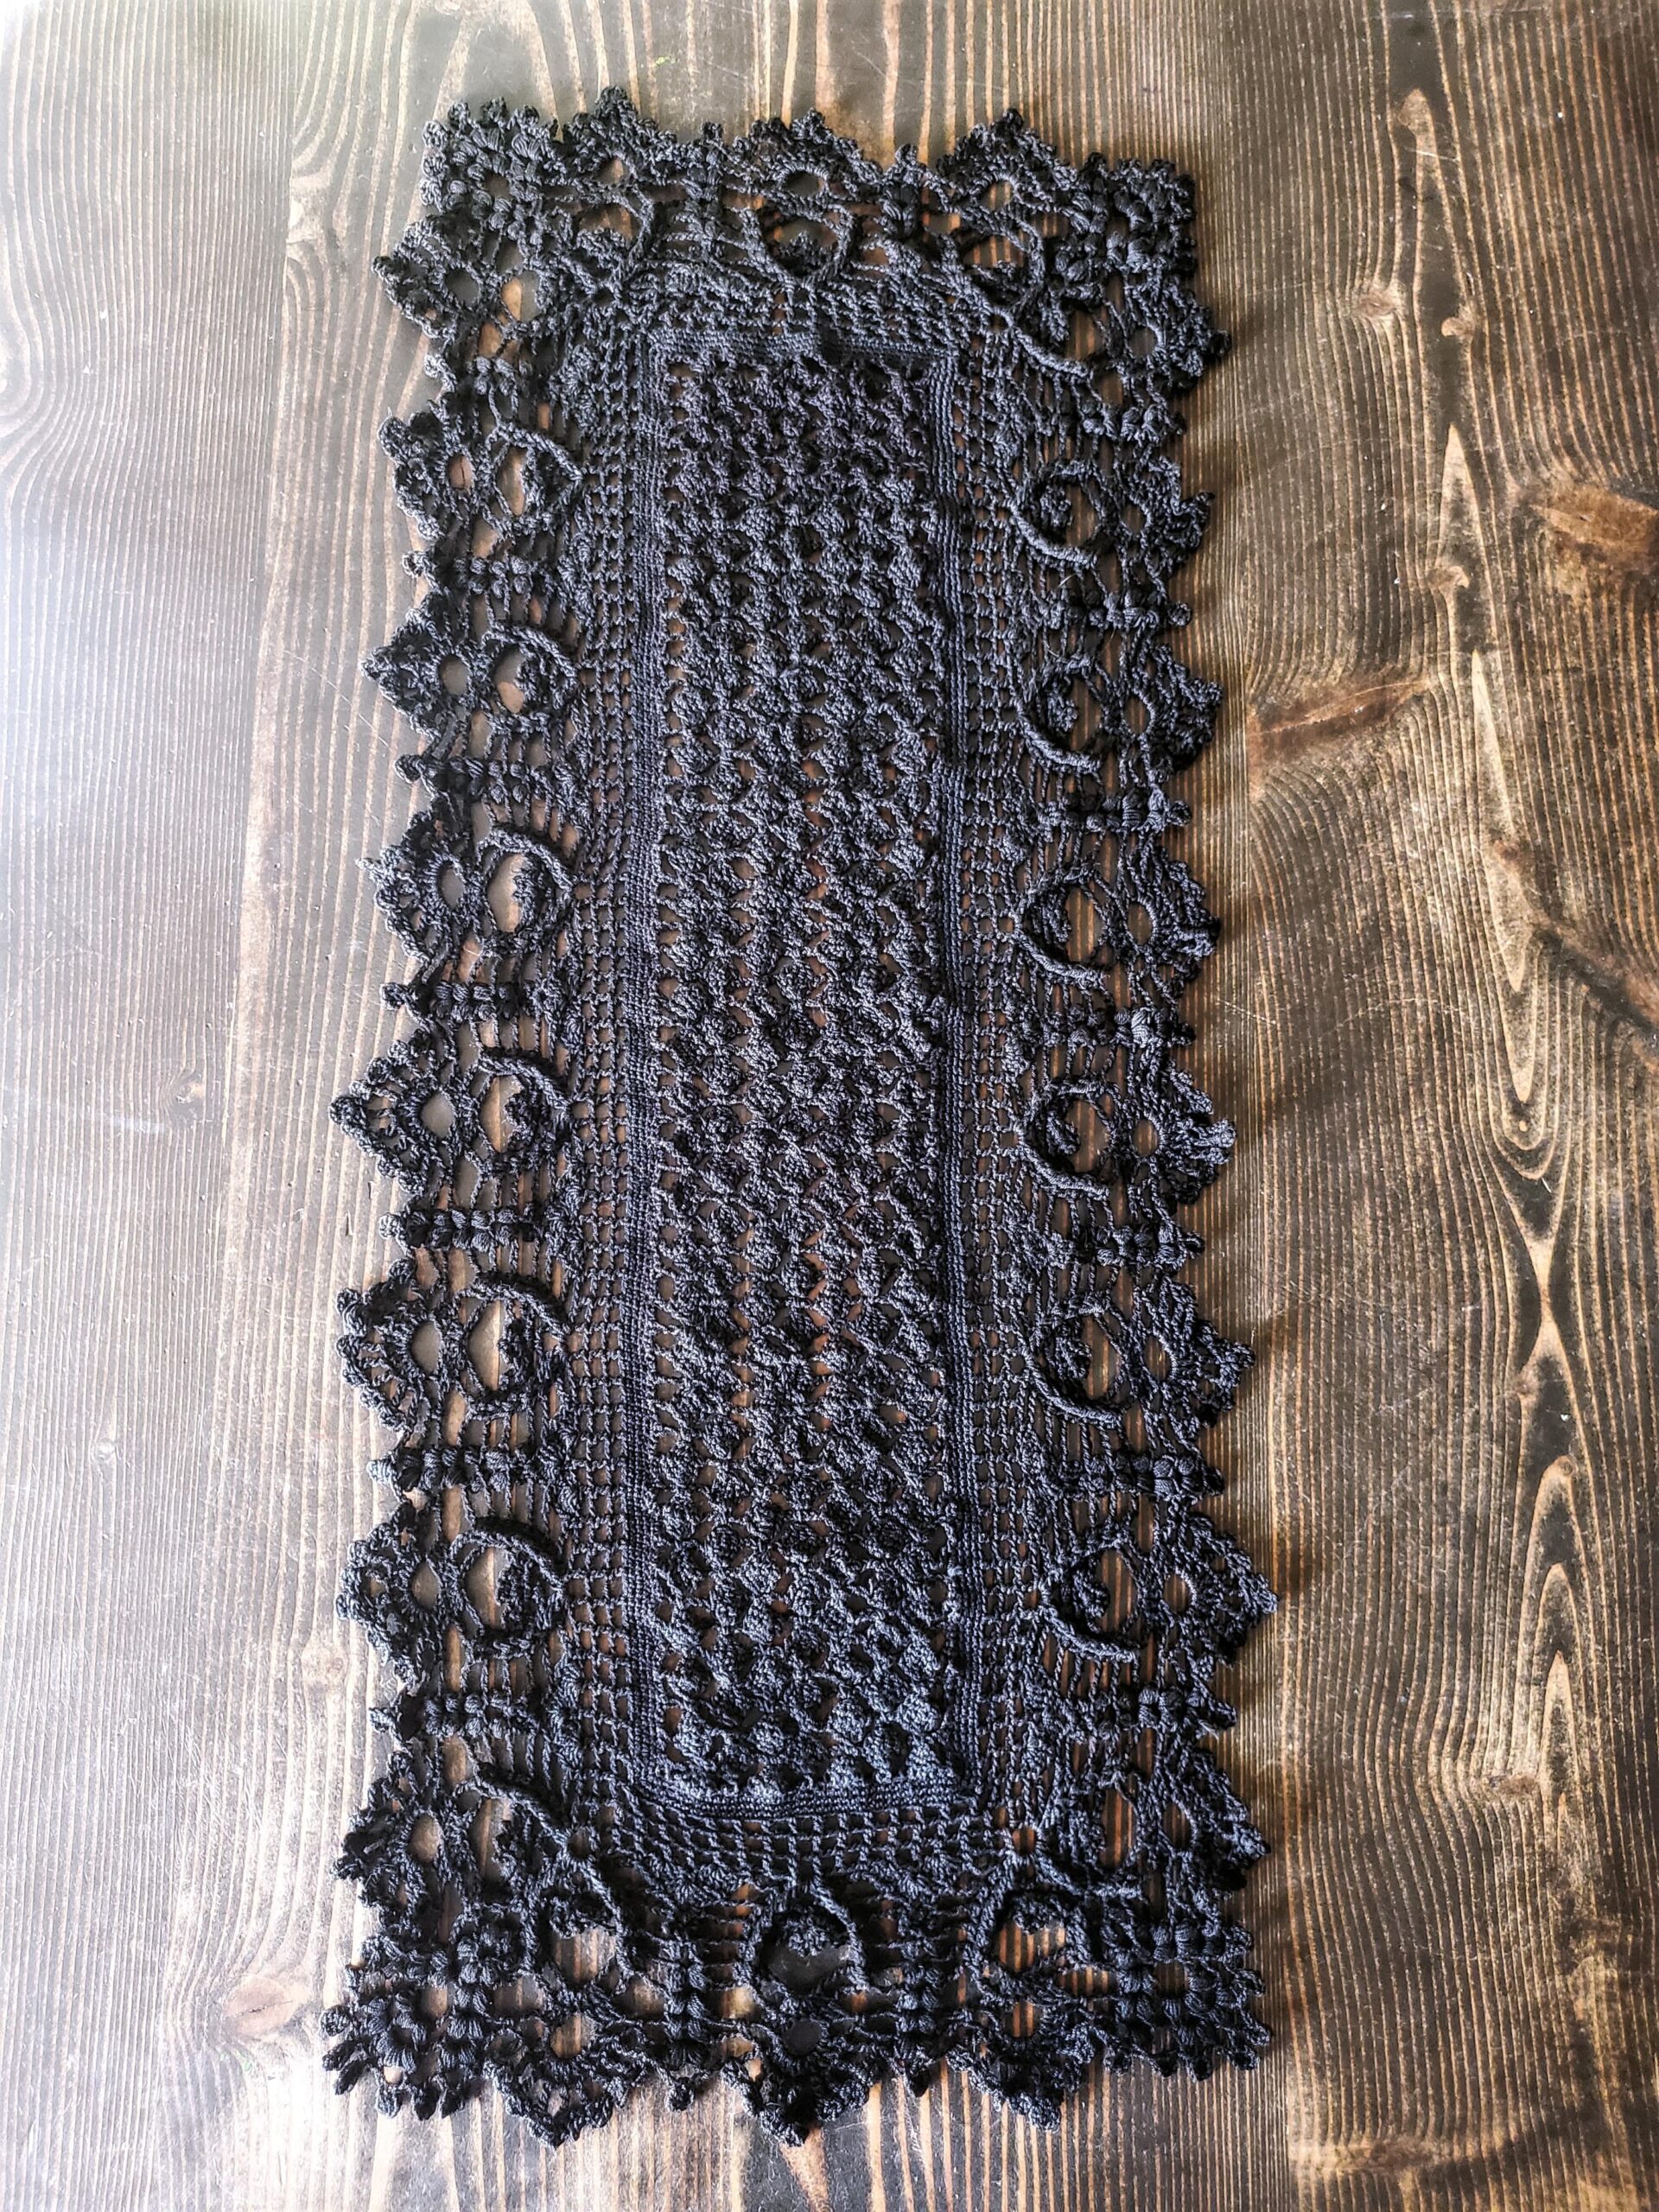
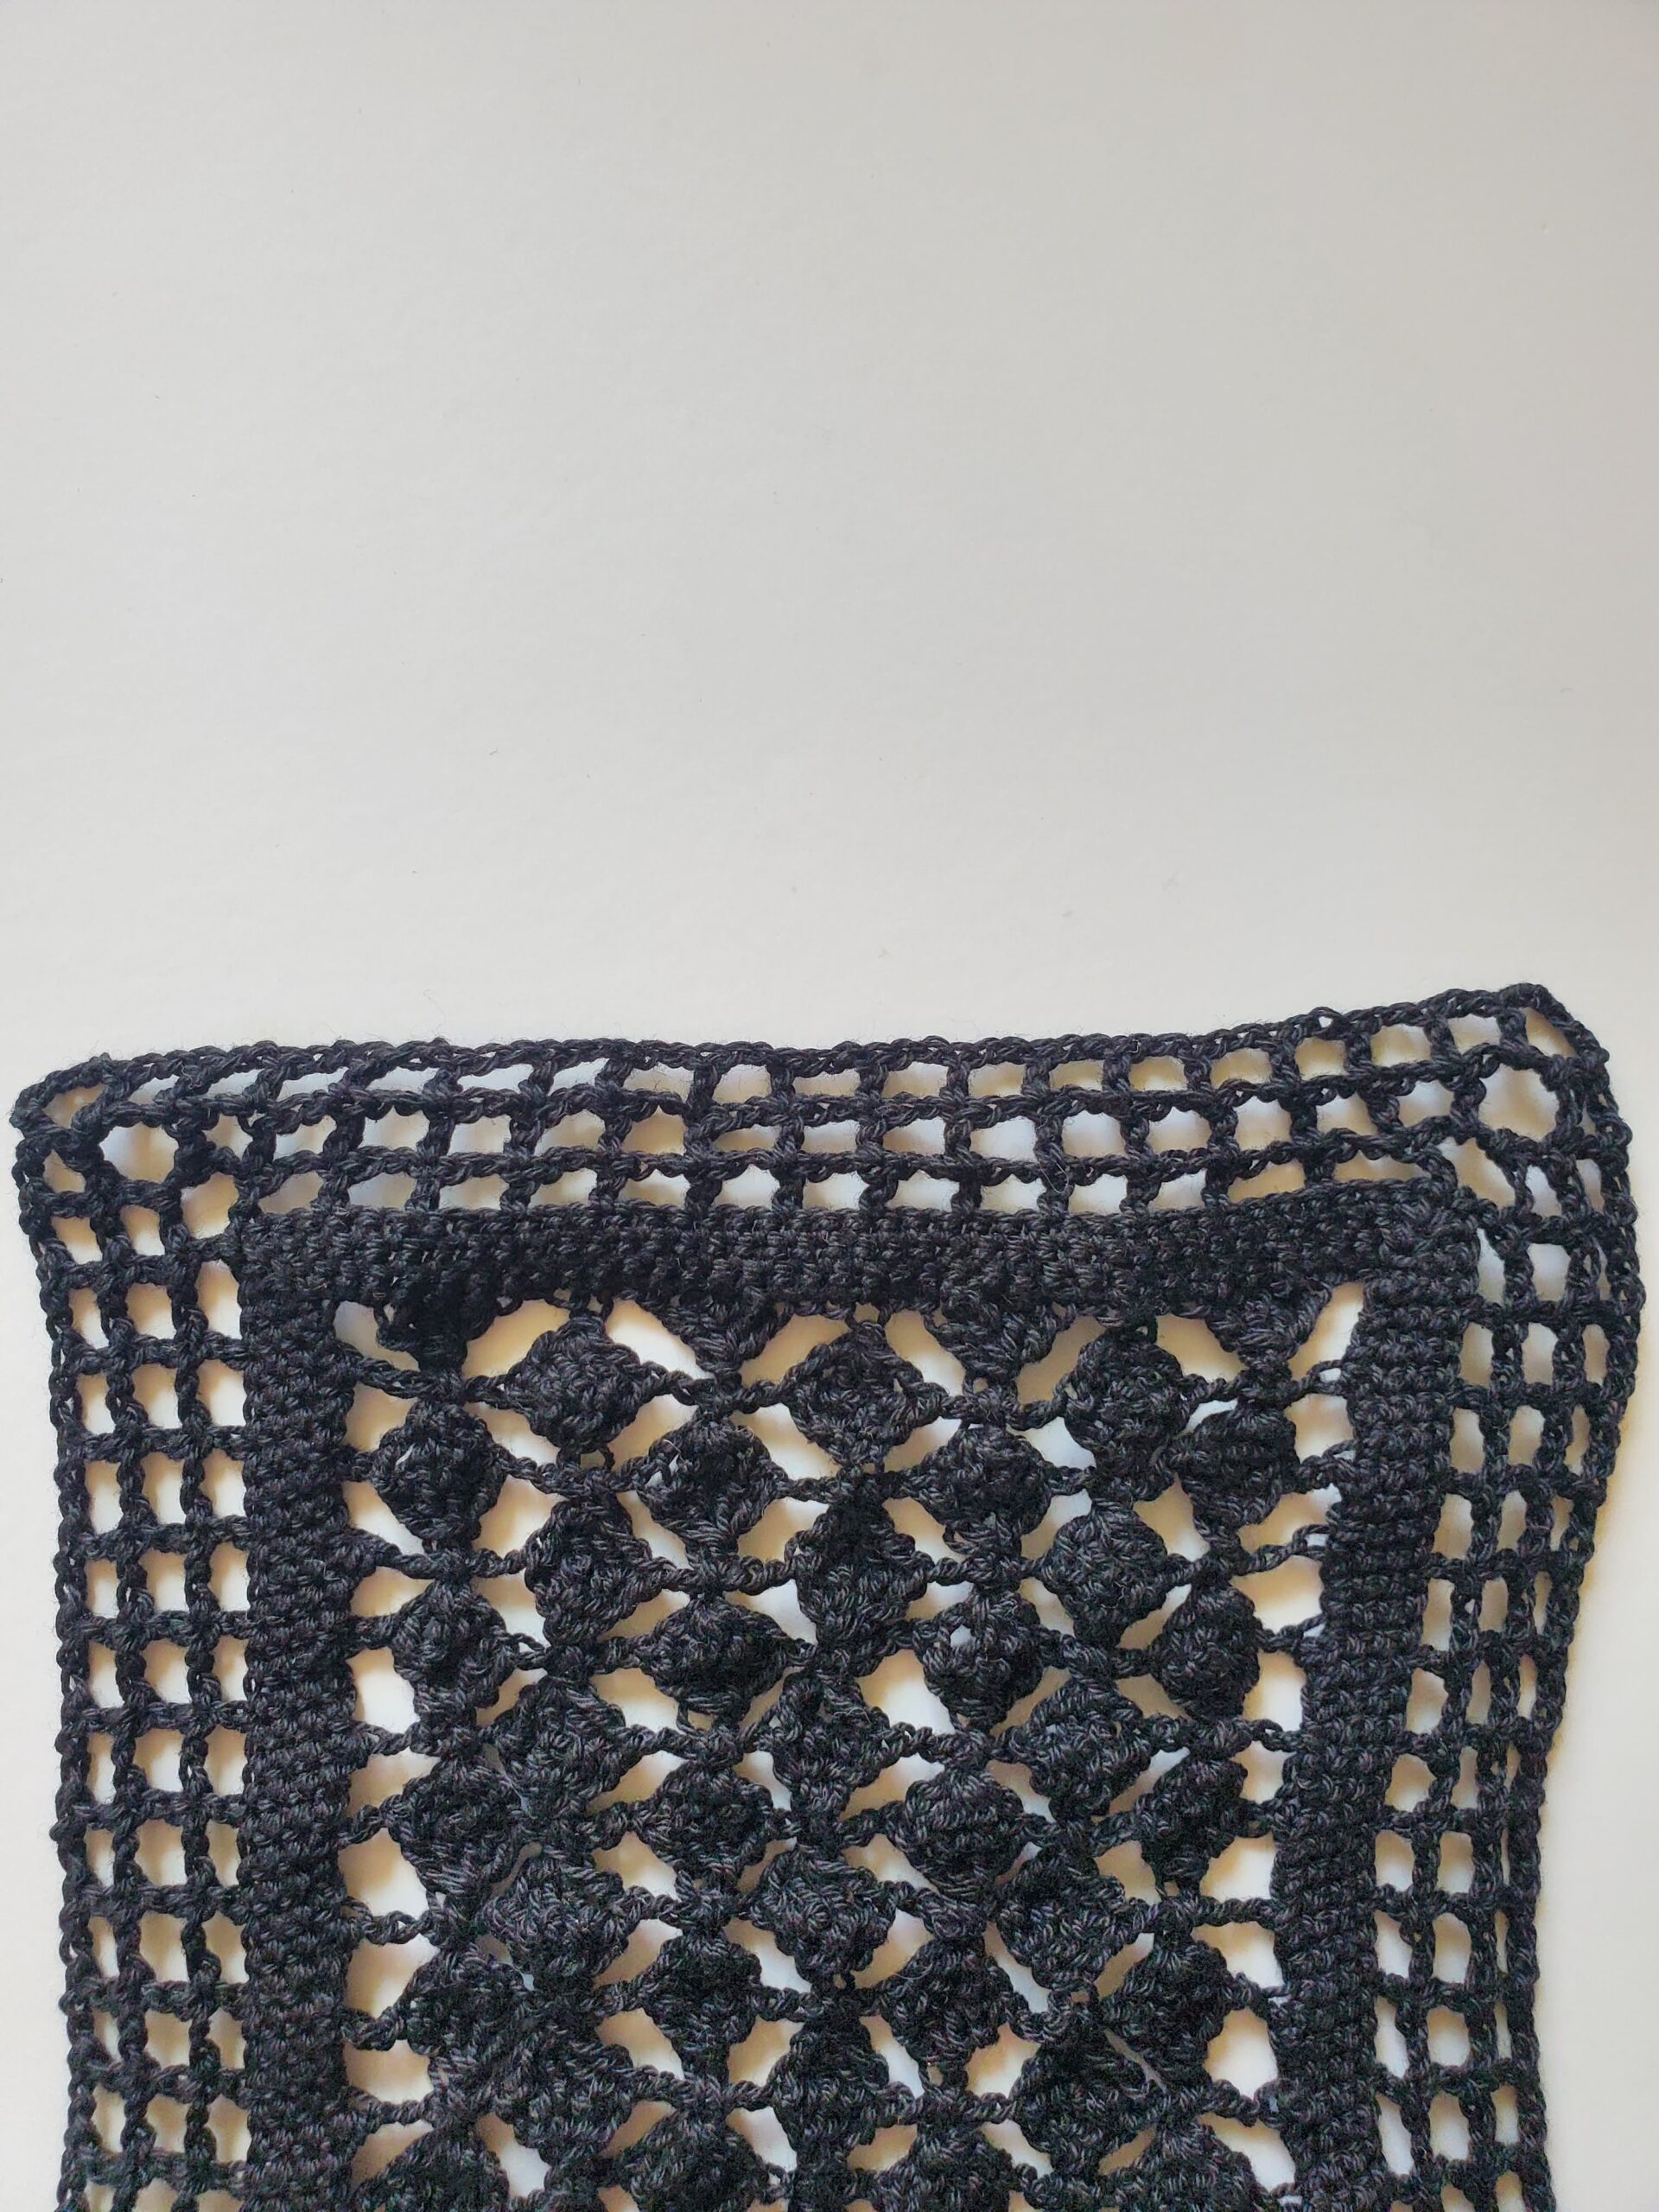
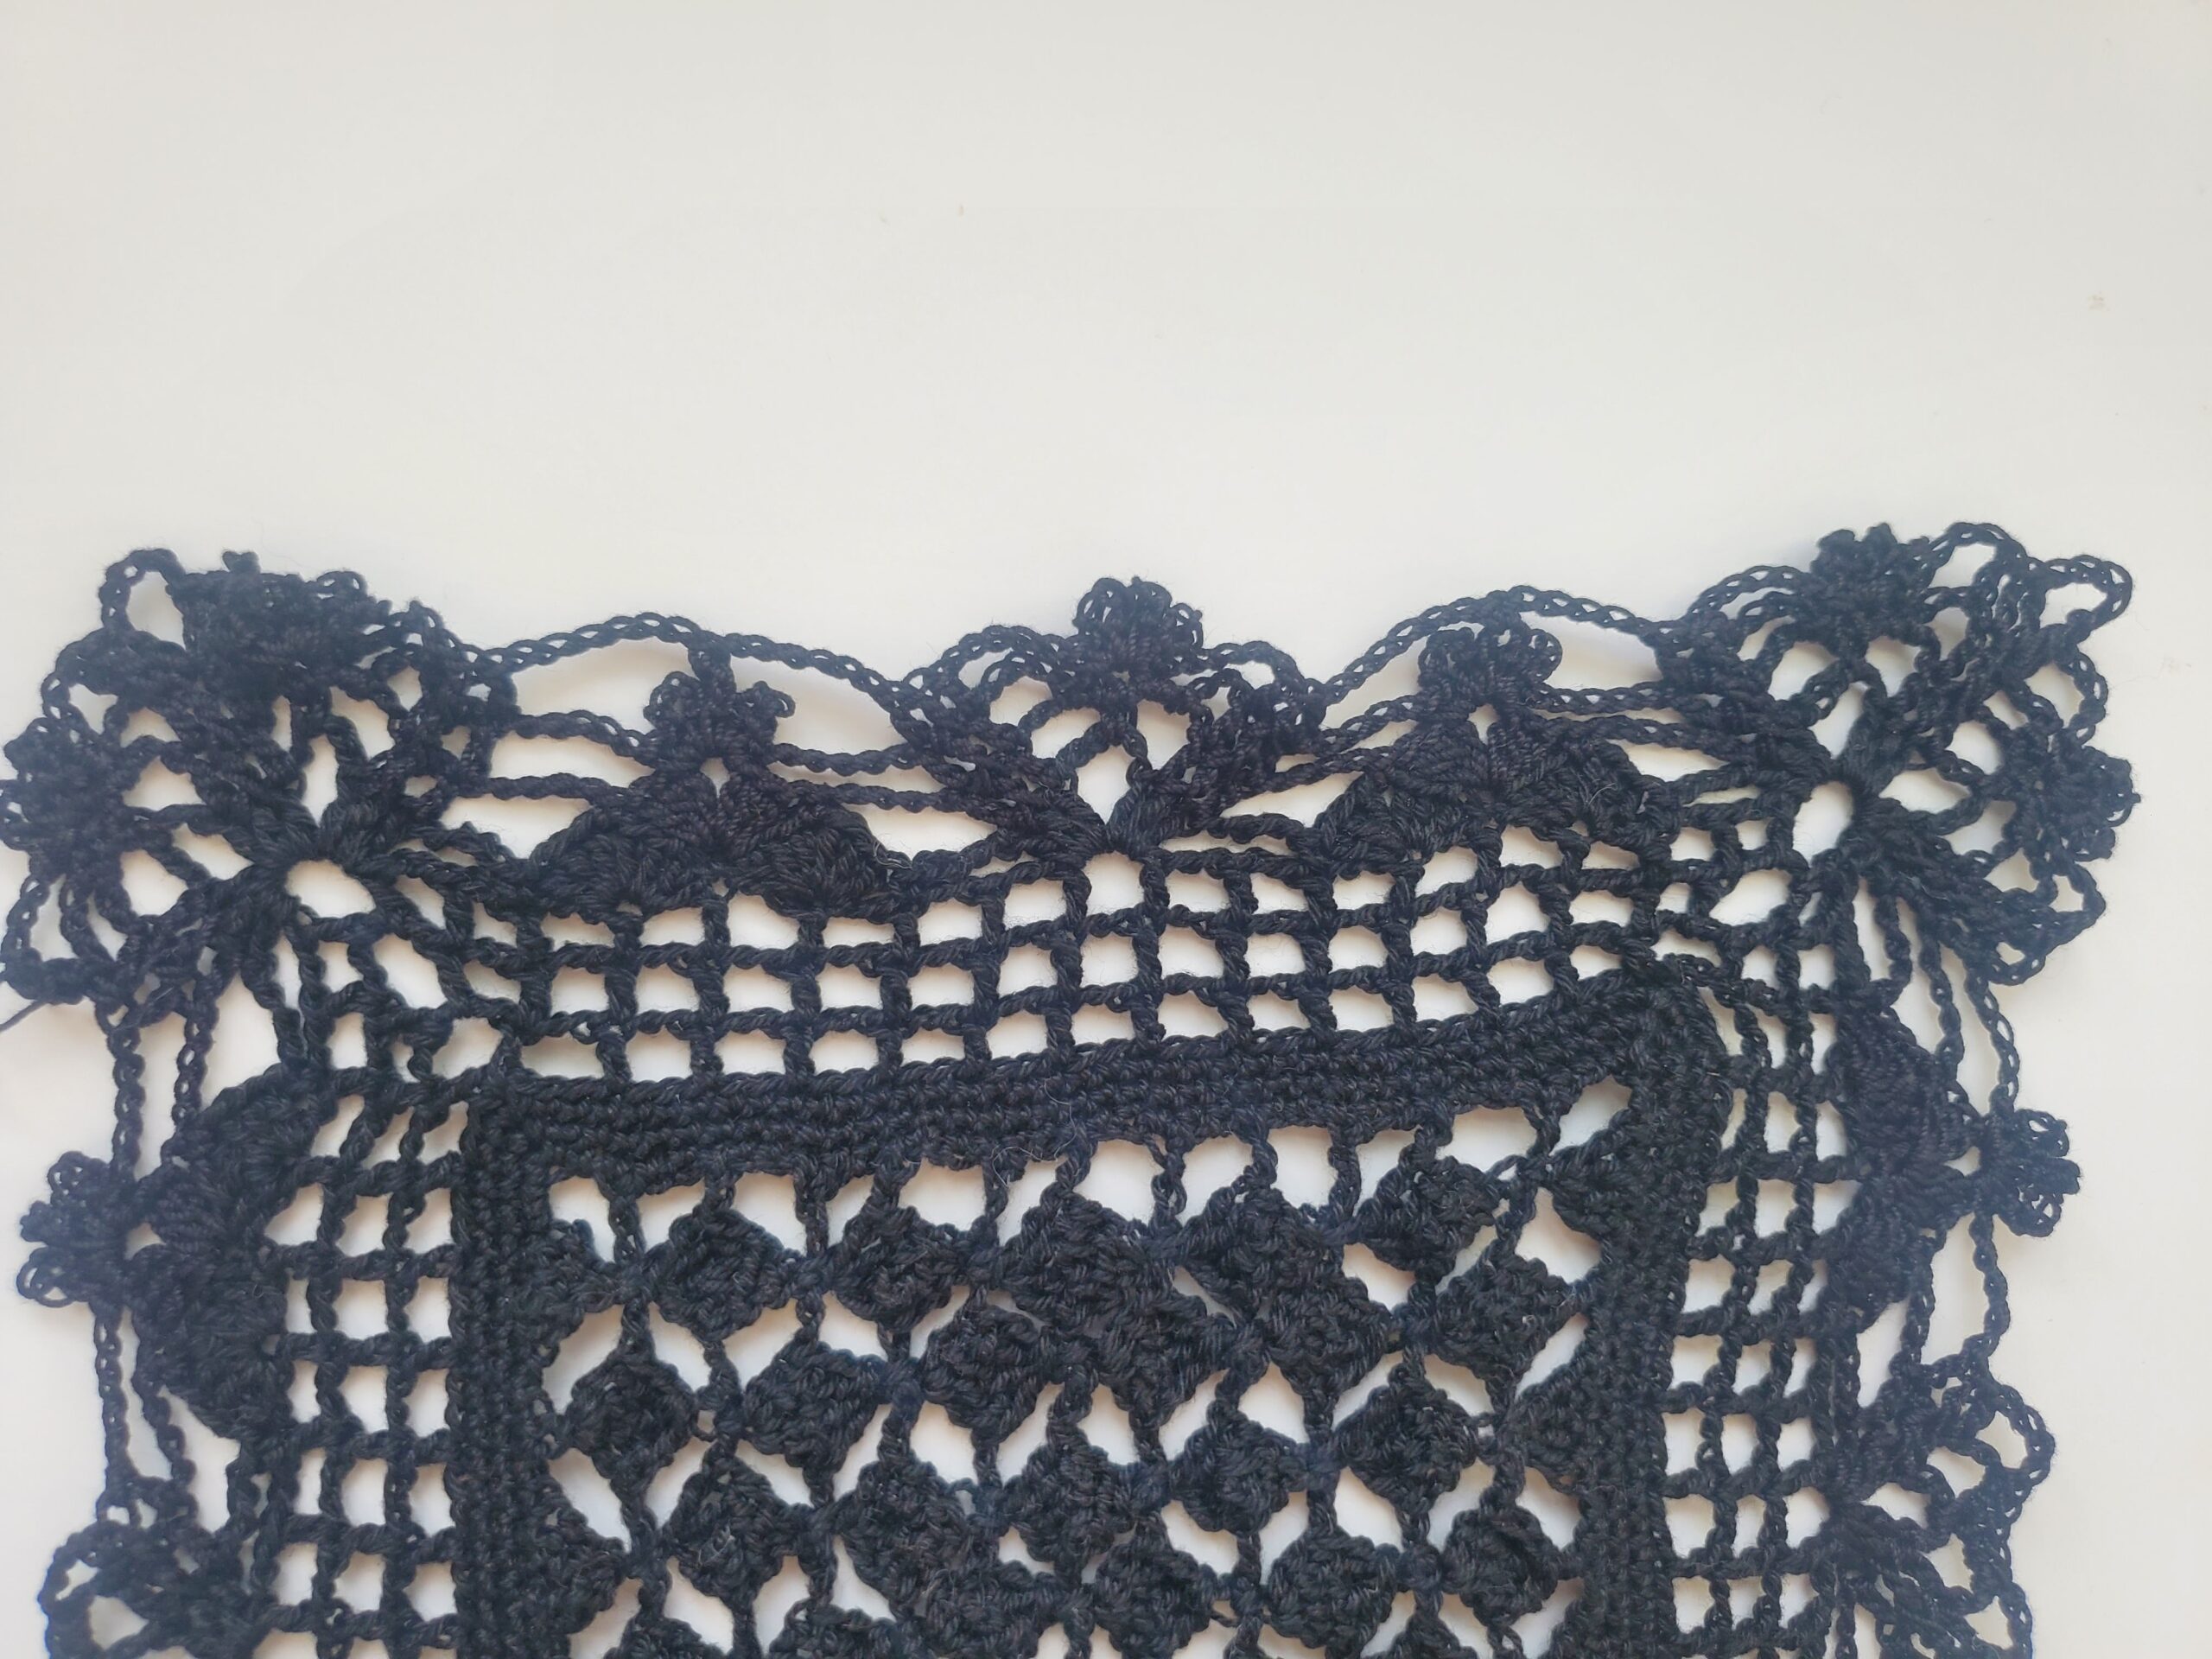
Now we will be making our mesh square rows.

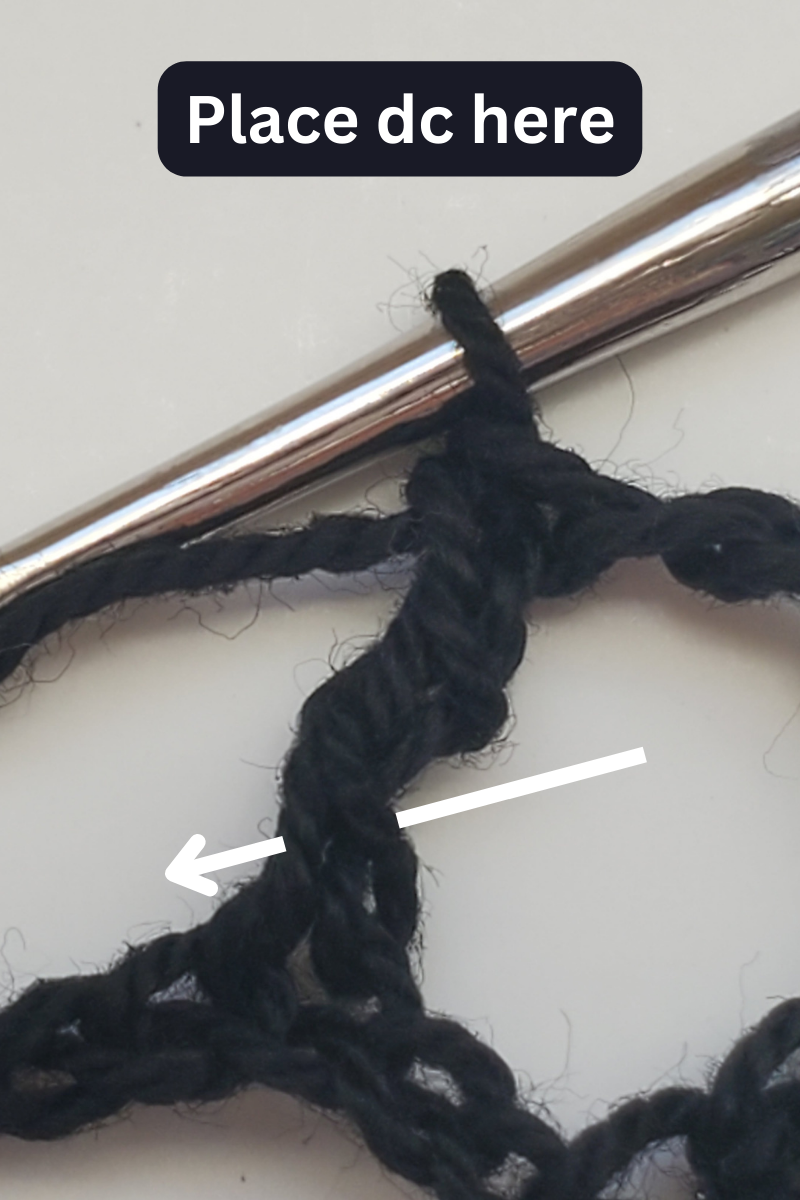
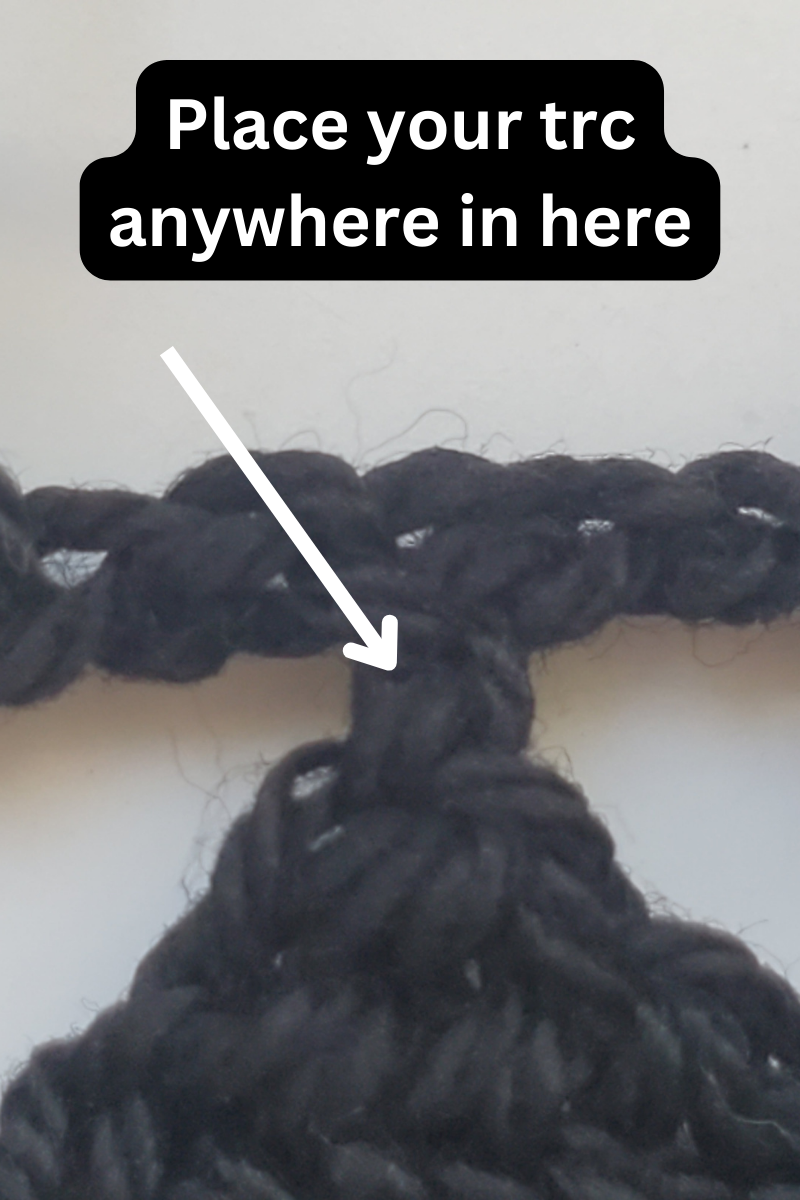
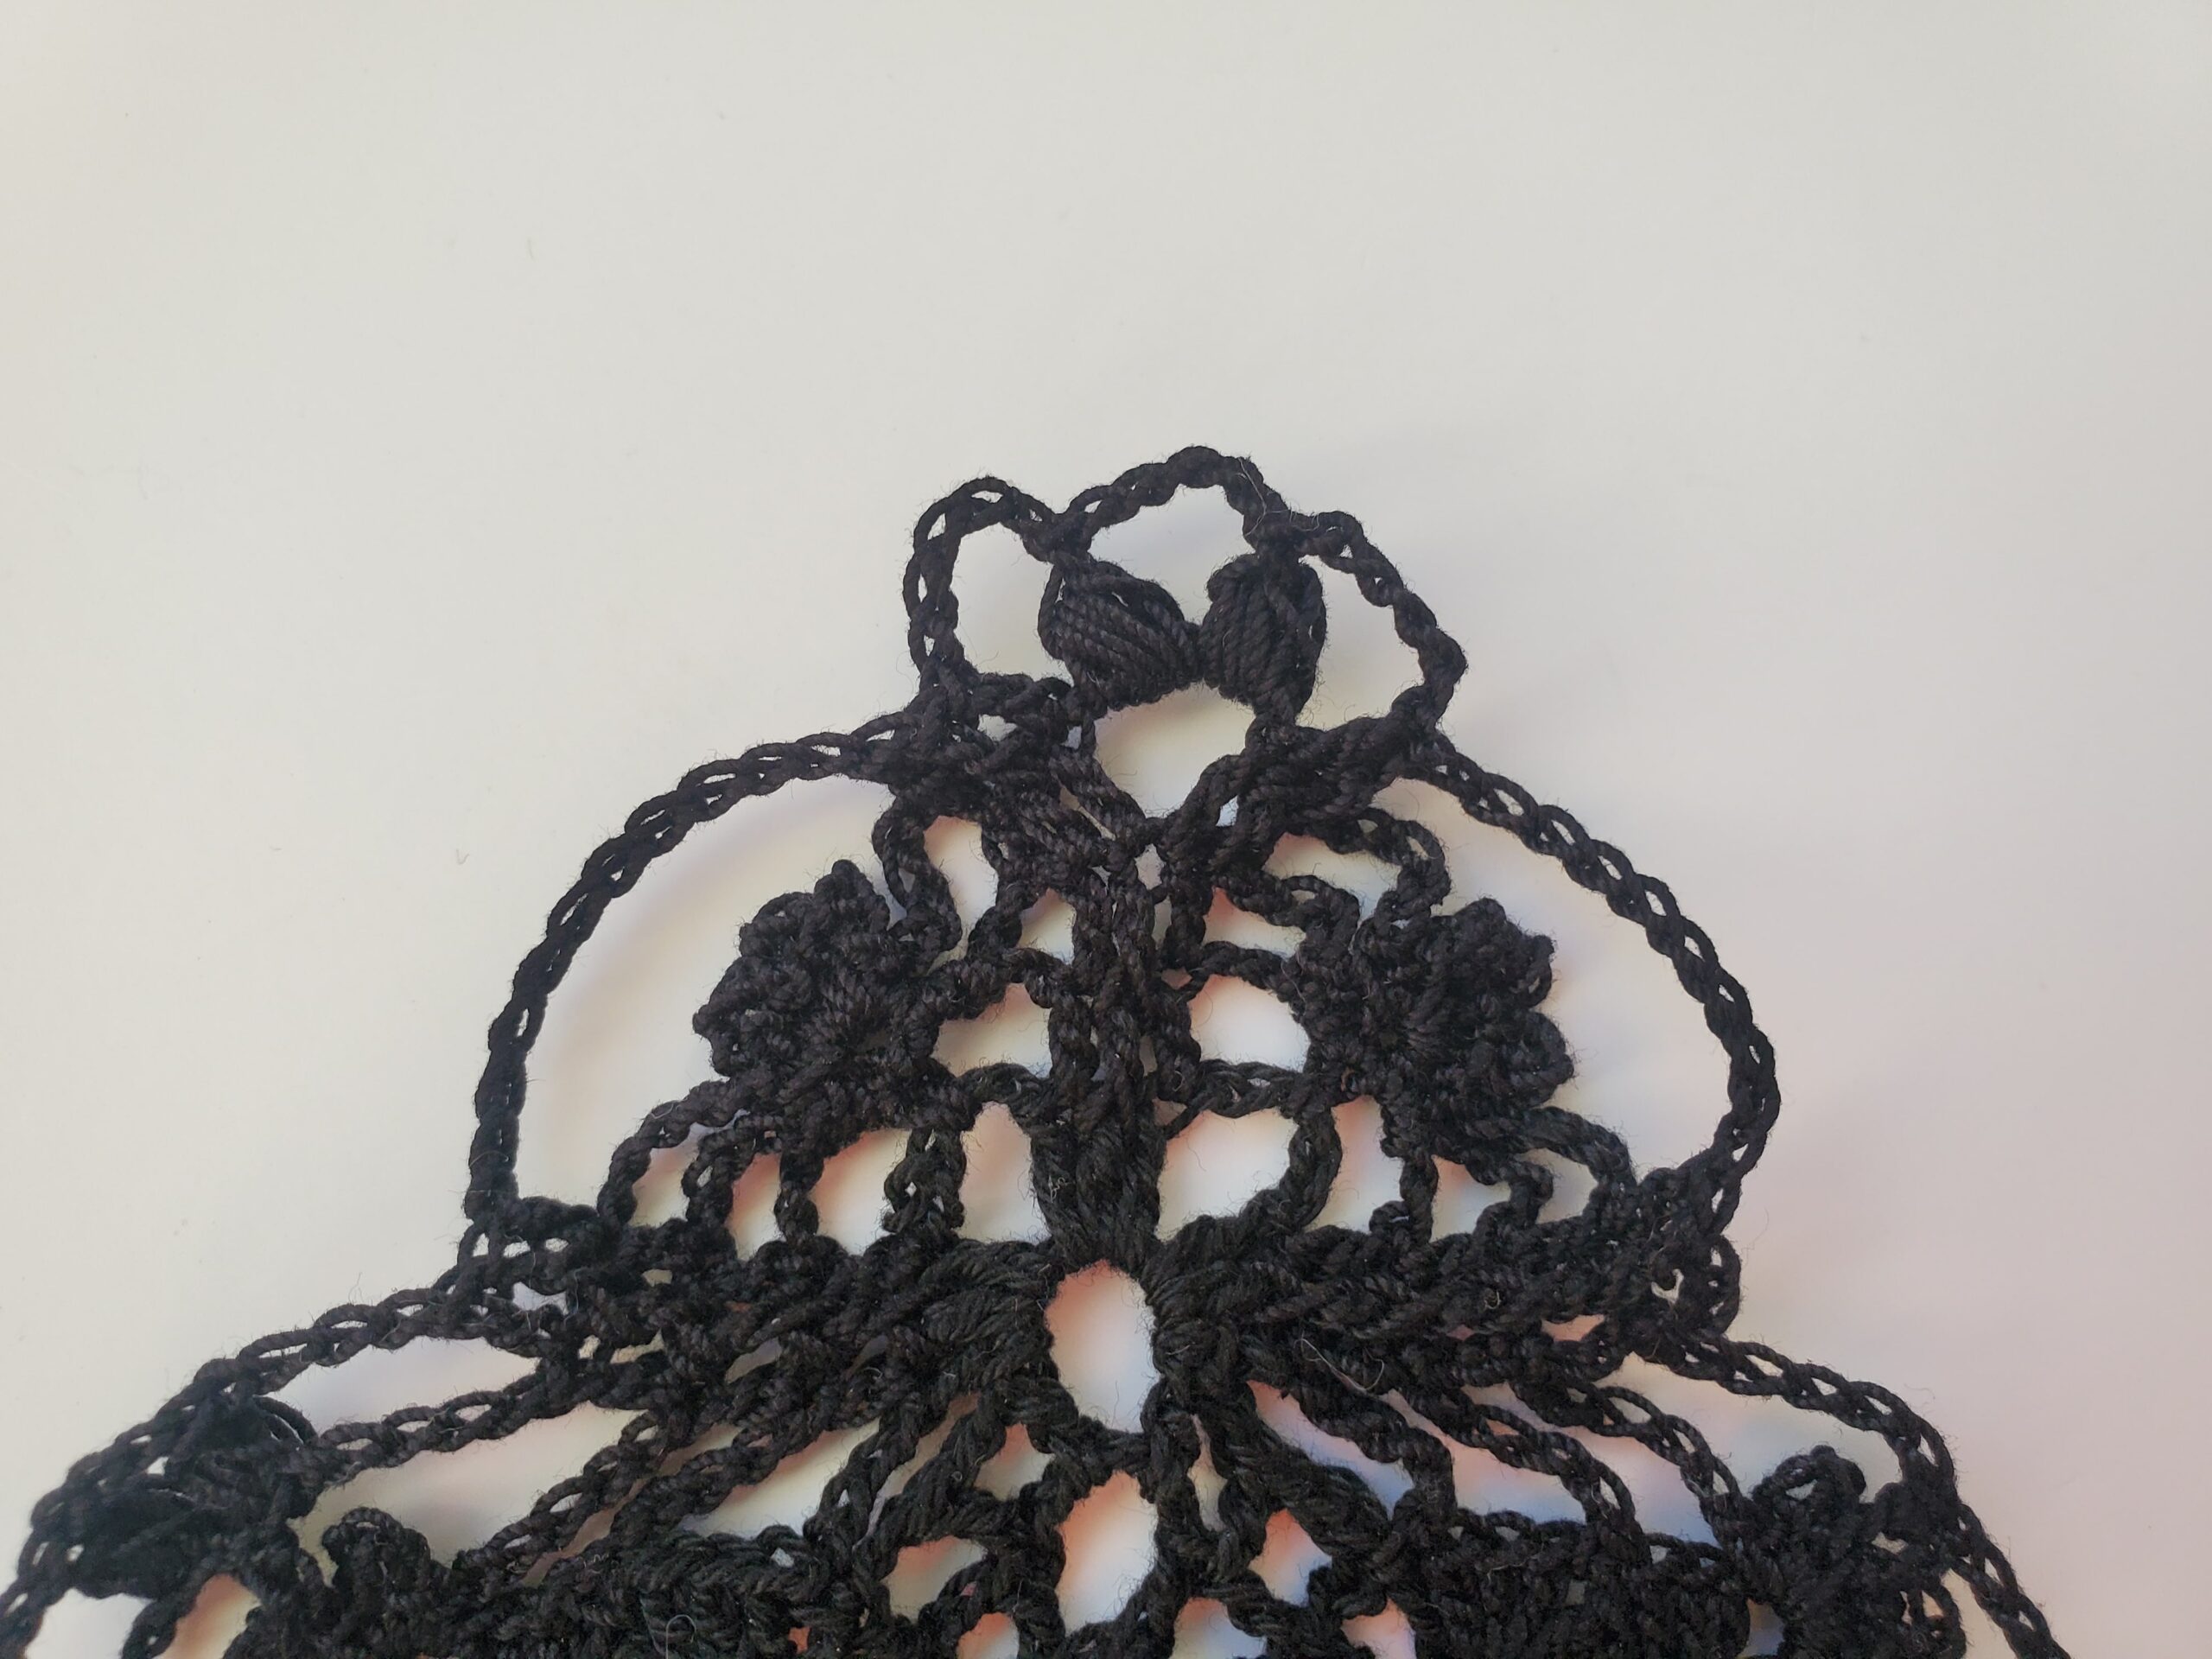
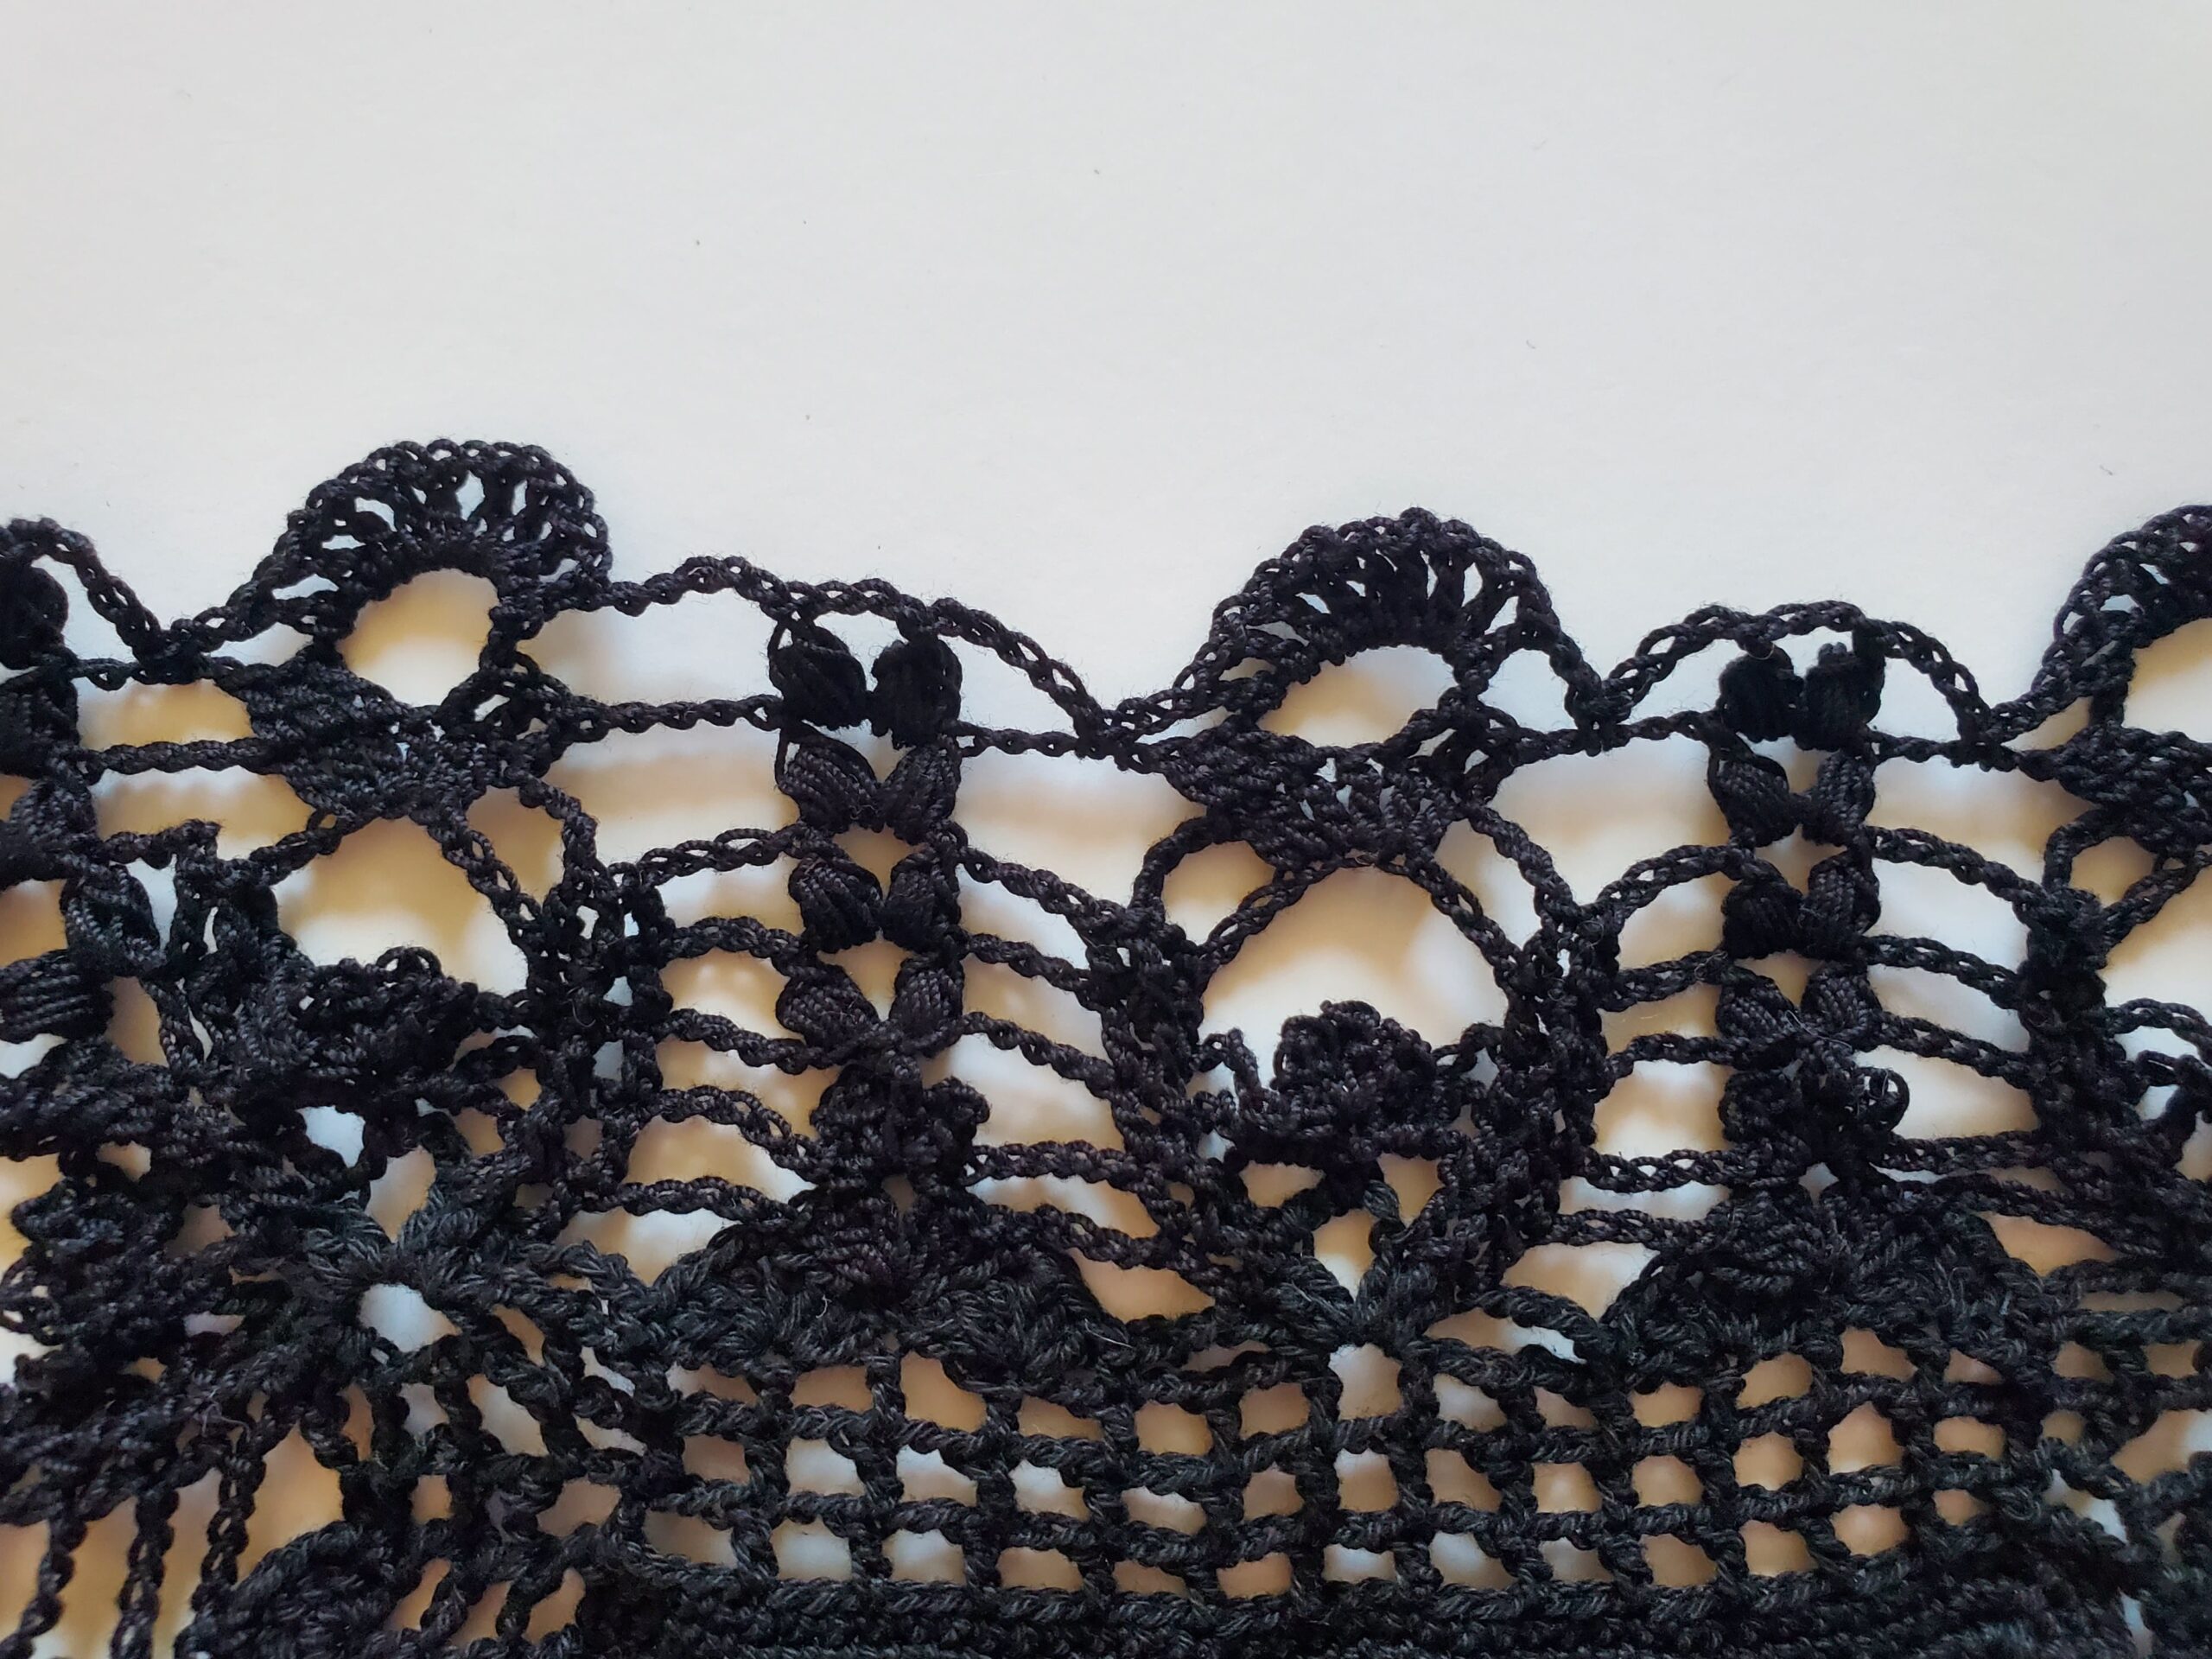
Row 4: Sl st into next few sts until you reach the corner ch 1 space, sl st into the ch 1 space, ch 8 (counts as dc and ch 5), dc in same space, *ch 2, skip 2 sts, dc in next st* repeat from *to* all the way around. (dc, ch 5, dc) in the next ch 1 corner spaces. Sl st to top of 3rd ch of our starting ch 8.

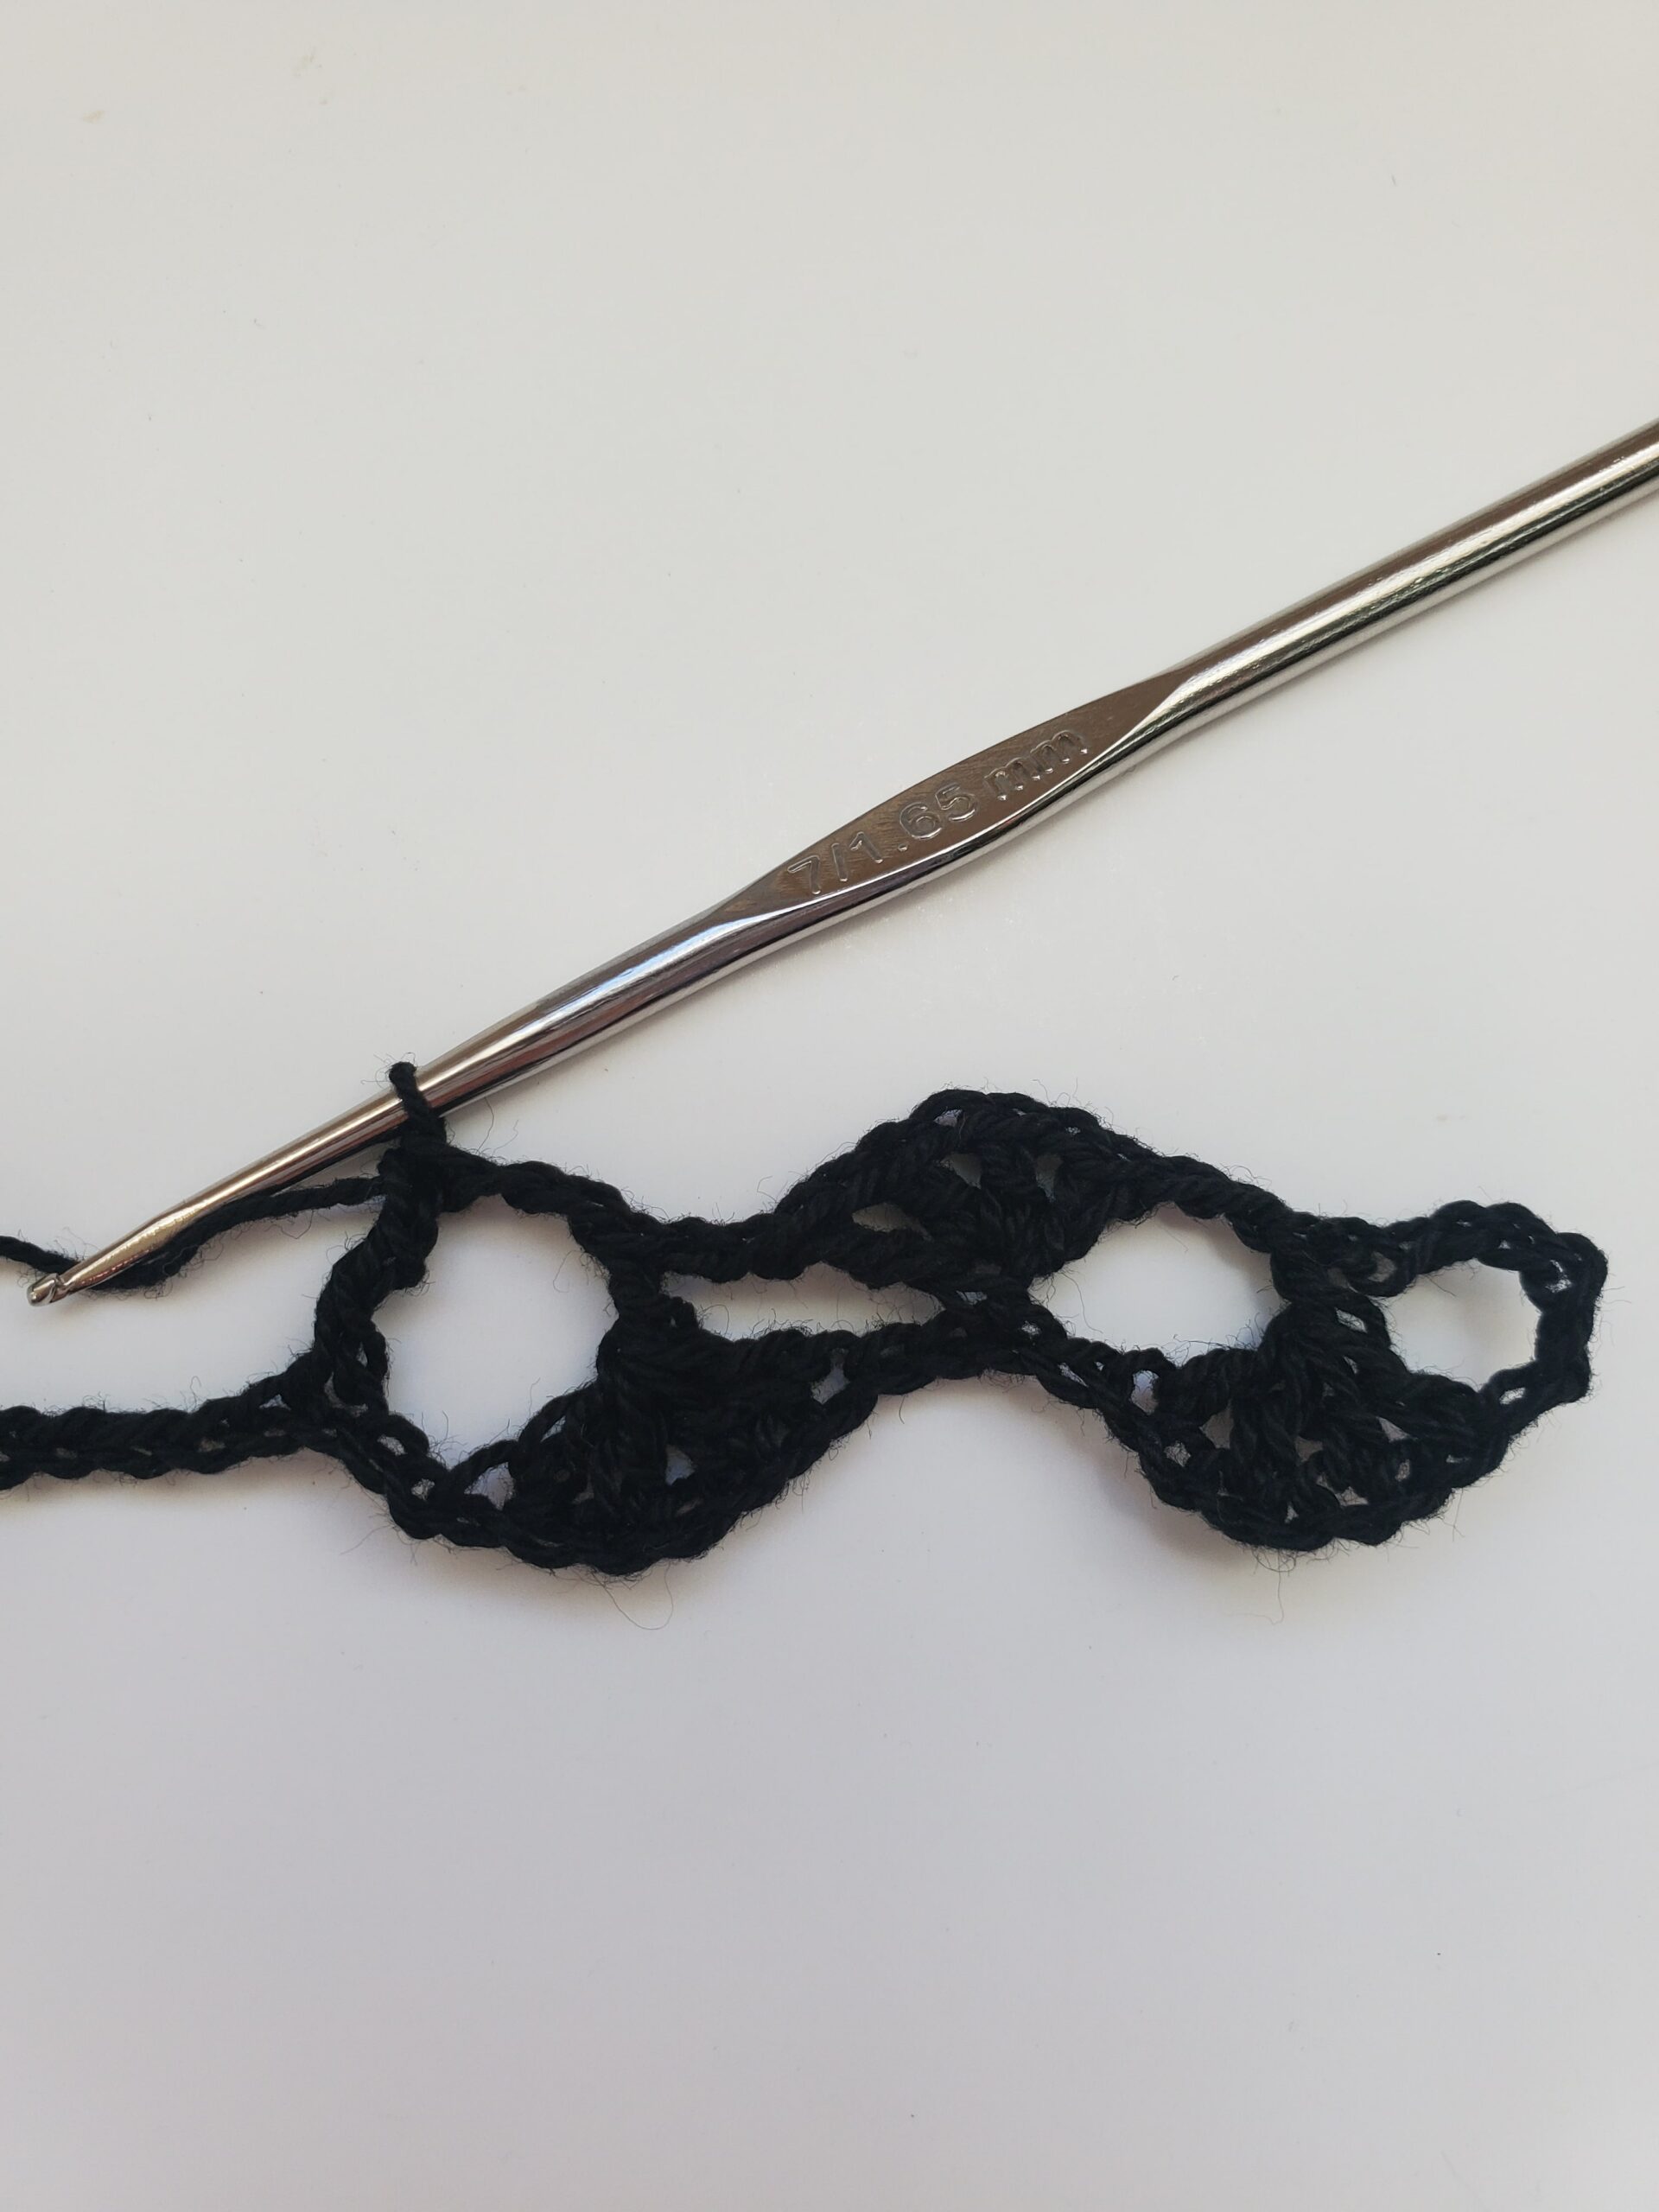
***For my short side, I have 13 mesh squares and on my long side I have 58 mesh squares (not including the ch 5 corners) Your long side number may be different if you increased or decreased the length.***

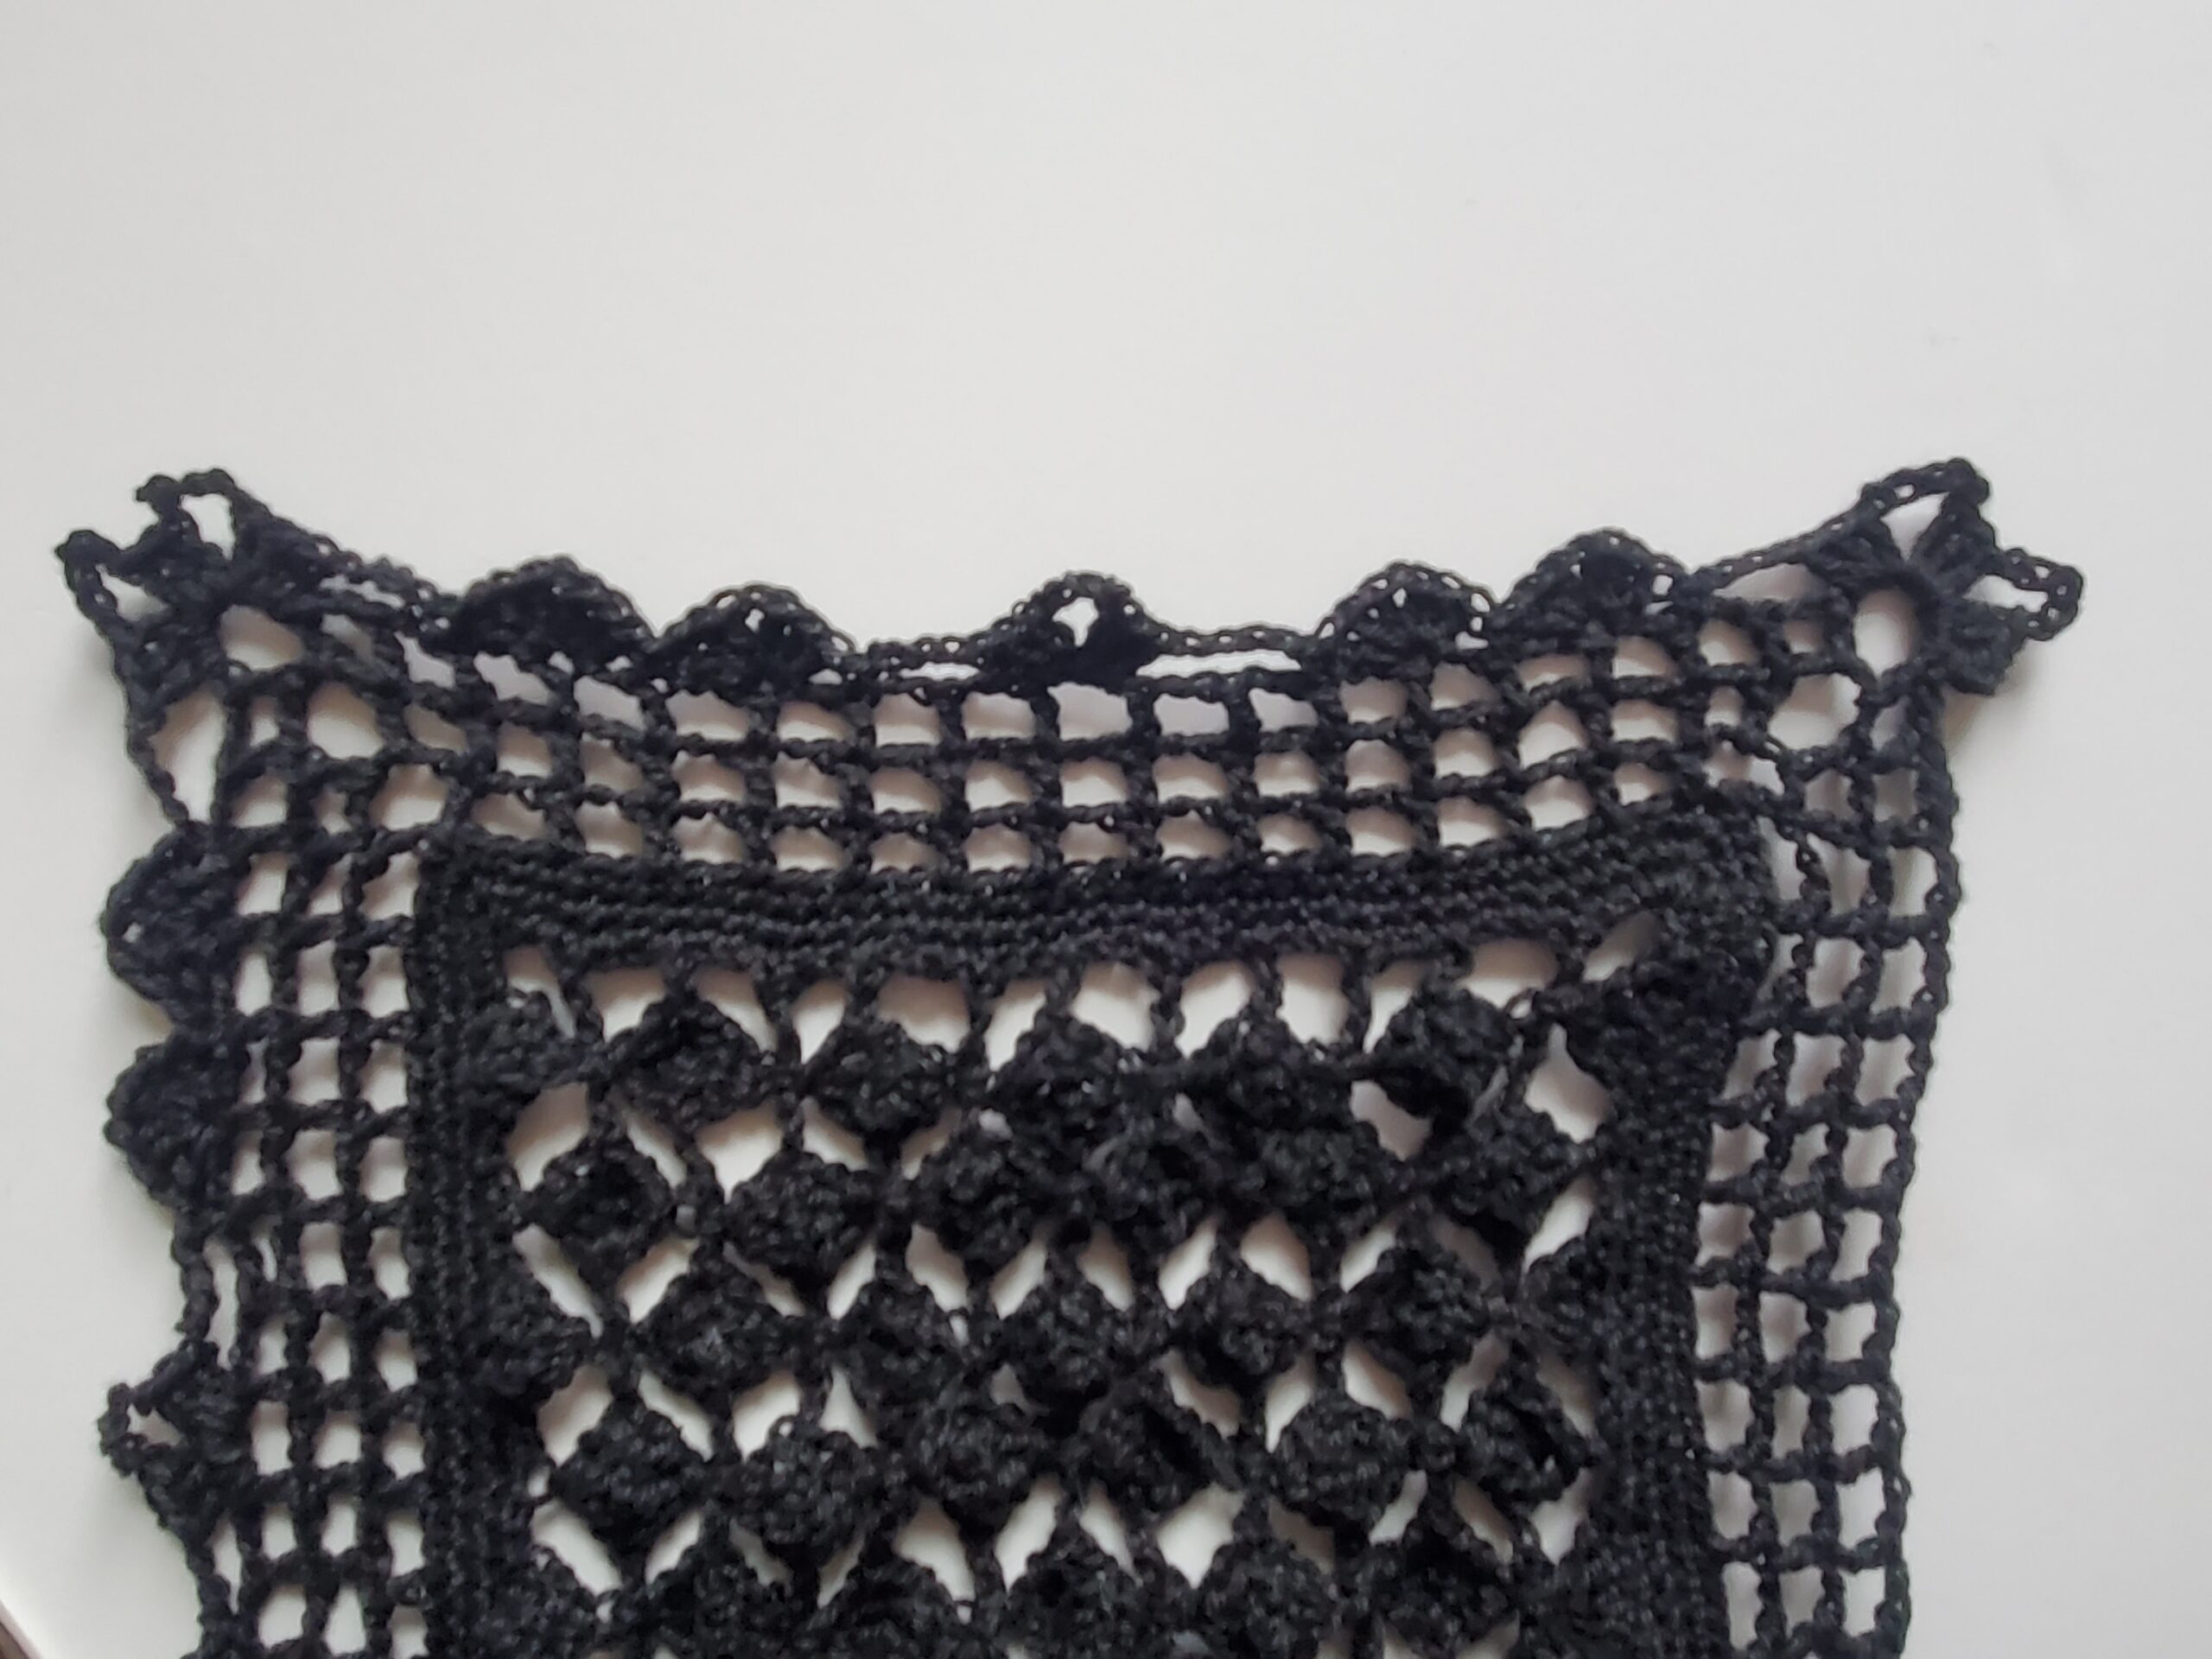
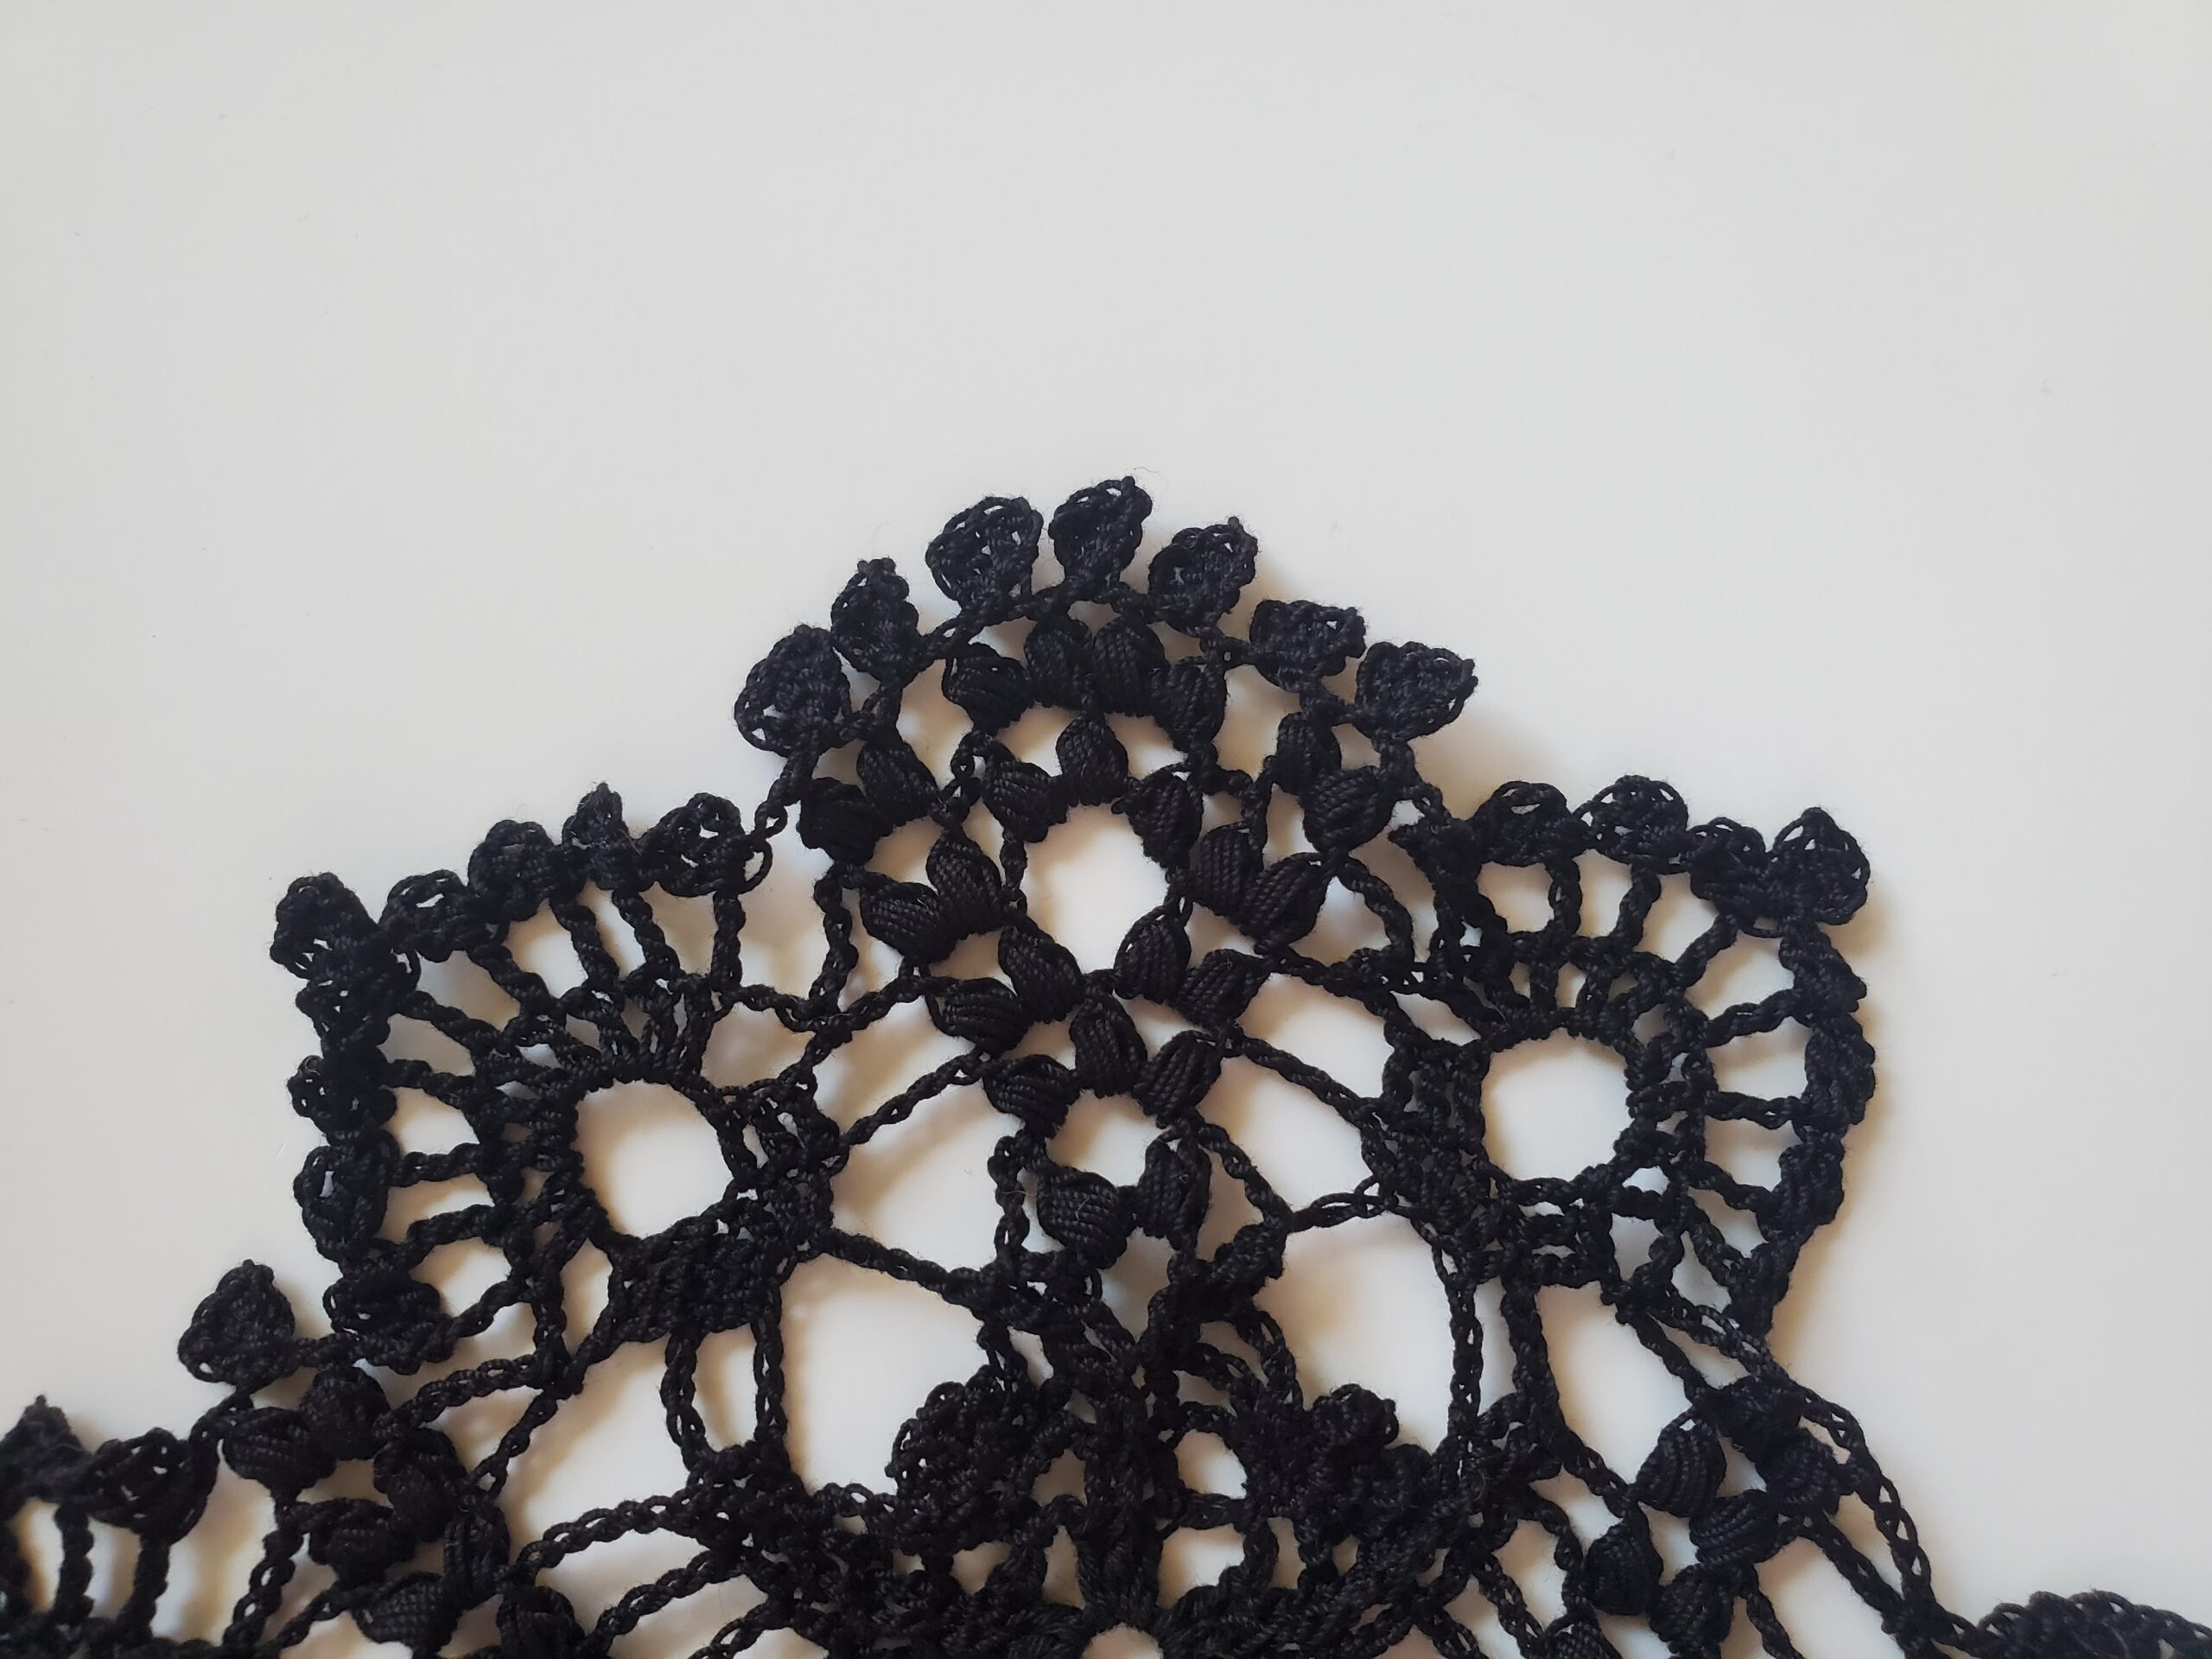
Row 5: Ch 5, (counts as dc and ch 2), (dc, ch 5, dc) in next ch 5 corner space. *Ch 2, dc in next dc.* Repeat from *to* around, making (dc, ch 5, dc) in the ch 5 corner spaces. Sl st to 3rd st of starting ch 5.

Row 6: Ch 5, dc in next dc, ch 2, (dc, ch 5, dc), *ch 2, dc in next dc.* Repeat from *to* around, making (dc, ch 5, dc) in the ch 5 corner spaces. Sl st to 3rd st of starting ch 5.

***Go ahead and stop again, let’s count our mesh squares. Our last row of mesh squares needs to follow a repeat formula of 9+8 squares, not including the corners. I have 17 squares on my short side and 62 squares on my long side. Your border will not fit if we don’t follow this formula.***

GCTR Mesh Squares
Row 6

Row 7: Sl st in each ch and st until you reach the first corner and sl st into the ch 5 space.

(Ch 3, 2 dc, ch 5, 3 dc, ch 5, 3 dc) in same ch 5 space. Ch 4, *skip over next dc and ch 2, skip over next dc and ch 2 again, sc into next dc (should be the 3rd dc away from the corner space), [skip ch 2 space, (3 dc, ch 1, 3 dc) in next dc, skip ch 2 space, sc in next dc] x 2 times, ch 4, skip the next 2 mesh squares, in the next square, (3 dc, ch 5, 3 dc), ch 4.*

Repeat from *to* until you reach the next corner space, skip over last two mesh squares, (3 dc, ch 5, 3 dc, ch 5, 3dc) in the same ch 5 corner space. Continue this way until you reach the beginning ch, sl st into top of starting ch 3.

GCTR Row 7
Row 7

Row 8: Ch 3, (fpdc around next dc, dc in next dc, ch 4, sc in ch 5 space, ch 4, dc in next dc, fpdc around next dc, dc in next dc, ch 4, sc in ch 5 space, ch 4, dc in next dc, fpdc around next dc, dc in next dc), ch 4, skip ch 4 and next 3 dc,

*sc in ch 1 space, skip 3 dc, and place (3 dc, ch 2, 3 dc) in the next sc (between the two shells), skip 3 dc and sc in ch 1 space, ch 4, skip 3 dc and ch 4, (dc in first dc, fpdc in next dc, dc in last dc, ch 4, sc in ch 5 space, ch 4, dc in next dc, fpdc around middle dc, and dc around last dc), ch 4.*

Repeat from *to* until next corner space and (dc, fpdc around next dc, dc in next dc, ch 4, sc in ch 5 space, ch 4, dc in next dc, fpdc around next dc, dc in next dc, ch 4, sc in ch 5 space, ch 4, dc in next dc, fpdc around next dc, dc in next dc) in the corner. Continue this way until you reach the beginning ch, sl st into top of starting ch 3.

GCTR Row 8
Row 8

Row 9: Ch 3 (fpdc around fpdc, dc in next dc, ch 4, 2 sc in ch 4, sc in next sc, 2 sc in ch 4 space, ch 4, dc in next dc, fpdc around fpdc, dc in next dc, ch 4, sc in next sc, 2 sc in ch 4 space, ch 4, dc in next dc, fpdc around fpdc, dc in next dc), ch 5,

*skip to ch 2 space, (2 sc, ch 4, sc, ch 4, sc, ch 4, 2 sc) in ch 2 space, ch 5, skip 3 dc, skip sc and skip ch 4, dc in next dc, fpdc around fpdc, dc in next dc, ch 4, 2 sc in ch 4 space, sc in next sc, 2 sc in next ch 4 space, ch 4, dc in next dc, fpdc around fpdc, dc in next dc, ch 5.*

Repeat from *to* until you reach the corners, (dc in next dc, fpdc around fpdc, dc in next dc, ch 4, 2 sc in ch 4, sc in next sc, 2 sc in ch 4 space, ch 4, dc in next dc, fpdc around fpdc, dc in next dc, ch 4, sc in next sc, 2 sc in ch 4 space, ch 4, dc in next dc, fpdc around fpdc, dc in next dc), ch 5, skip to ch 2 space, (2 sc, ch 4, sc, ch 4, sc, ch 4, 2 sc) in corner spaces.

Continue this way until you reach beginning ch 3. Sl st to top of ch 3.

GCTR Row 9
Row 9

Row 10: Ch 3, (fpdc around fpdc, dc in next dc, *ch 5, skip ch 4, skip 2 sc, [2 sc, ch 4, sc, ch 4, sc, ch 4, 2 sc] in next sc, ch 5*, dc in the 4th ch away in next ch 4, dc in next dc, dc in fpdc, ch 5, dc in same st, dc in next fpdc, dc in 1st ch in next 4 ch.

Repeat from *to,* dc in next dc, fpdc in fpdc, dc in next dc), ch 6,

**skip ch 5, skip first ch 4 “loop,” sc in middle ch 4 “loop,” ch 6, dc in next dc, fpdc around fpdc, dc in next dc, ch 5, skip ch 4, skip 2 sc, [2 sc, ch 4, sc, ch 4, sc, ch 4, 2 sc] in next sc, ch 5, fpdc around fpdc, dc in next dc, ch 6.**

Repeat from **to** until corner spaces, (dc in next dc, fpdc around fpdc, dc in next dc, *ch 5, skip ch 4, skip 2 sc, [2 sc, ch 4, sc, ch 4, sc, ch 4, 2 sc] in next sc, ch 5*, dc in the 4th ch away in next ch 4, dc in next dc, dc in fpdc, ch 5, dc in same st, dc in next fpdc, dc in 1st ch in next 4 ch.

Repeat from *to,* dc in next dc, fpdc in fpdc, dc in next dc) in corner spaces. Continue this way until you reach the beginning, sl st to top of starting ch 3.

GCTR Row 10
Row 10

Row 11: Ch 3, (fpdc around fpdc, dc in next dc, *ch 11, skip over ch 5, skip the set of ch 4 loops, skip next ch 5, and dc in next dc, fpdc around next dc, dc in next dc*, ch 5, puff st in next ch 5 space, ch 5, puff st in same space, ch 5, dc in next dc, fpdc around next dc, dc in next dc. Repeat from *to* once more.)

**Ch 4, puff st in 6th ch in next ch 6, ch 3, skip next sc, puff st in 1st ch of next ch 6, ch 4, dc in next dc, fpdc around fpdc, dc in next dc**, repeat from *to* once more, repeat from **to.**

Continue this way until next corner space, ch 4, dc in next dc and repeat instructions in () for the next corner. Sl st to top of beginning ch 3.

GCTR Row 11 Corner
Row 11 Corner
GCTR Row 11
Row 11

Row 12: Ch 3, (fpdc around fpdc, dc in next dc, ch 4, 2 dc in 5th ch away, 2 dc in next ch, 2 dc in next ch, ch 4, skip next 3 dc, skip 1st ch 5 space, puff st in next ch 5 space, ch 3, puff st in same space, ch 3, puff st in same space again, ch 4, skip next ch 5, skip next 3 dc, 2 dc in 5th ch, 2 dc in next ch, 2 dc in next ch, ch 4, dc in next dc, fpdc around fpdc, dc in next dc),

*ch 4, puff st in ch 3 space, ch 3, puff st in same st, ch 4, dc in next dc, fpdc around fpdc, dc in next dc, ch 4, 2 dc in 5th ch away, 2 dc in next ch, 2 dc in next ch, ch 4, dc in next dc, fpdc around fpdc, dc in next dc.*

Repeat from *to* until next corner space, dc in next dc, repeat instructions in () for corners. Continue this way until beginning and sl st into top of starting ch 3.

GCTR Row 12 Corner
Row 12 Corner
GCTR Row 12
Row 12

Row 13: Sl st into next 2 dc, sl st into next 4 chs, sl st into dc, [ch 3, dc in next 2 dc, ch 9, dc in next 3 dc, ch 4, skip ch 4, puff st into next ch 3 space, ch 3, puff st in same space, ch 9, (puff st, ch 3, puff st) in next ch 3 space, ch 4, dc in next 3 dc, ch 9, dc in next 3 dc],

ch 4, *skip ch 4, skip next 3 dc, (puff st, ch 3, puff st) in ch 3 space, ch 4, skip ch 4, skip 3 dc, dc in next 3 dc, ch 9, dc in next 3 dc, ch 4.*

Repeat from *to* until corner spaces, (puff st, ch 3, puff st), in ch 3 space, ch 4, dc in next dc, repeat instructions in [ ] for corners. Continue this way until beginning and sl st into starting ch 3.

GCTR Row 13 Corner
Row 13 Corner
GCTR Row 13
Row 13

Row 14: Sl st into next 2 dc, sl st into ch 9 space, ch 3, **(ch 1, dc x 8 times [you should have 9 dc]), ch 2, skip 3 dc and sc into ch 4 space, ch 5, (puff st, ch 3, puff st) into next ch 3 space, (ch 3, puff st x 3 times [3 puff sts total]) in ch 9 space,  ch 3, (puff st, ch 3, puff st) in ch 3 space, ch 5,**

*sc into ch 4 space, ch 2, skip 3 dc, (dc, ch 1 x 8 times) in ch 9 space, 1 more dc into same ch 9 space, ch 2, skip 3 dc, sc into ch 4 space, ch 5 (puff st, ch 3, puff st) into ch 3 space, ch 5.*

Repeat from *to* until the next corner, skip 3 dc, dc into ch 9 space, repeat from **to** for corners. Sl st into 3rd ch of starting ch 4.

GCTR Row 14 Corner
Row 14 Corner
GCTR Row 14
Row 14

Row 15: Ch 7 (counts as trc and ch 3), 2 dc into 4th ch away from hook, **(trc into next dc, ch 3, 2 dc into trc just made x3 times), trc into next dc, ch 3, 2 dc into trc just made, ch 3, sl st into same trc, ch 3, 2 dc into same trc again, (trc into next dc, ch 3, 2 dc into trc just made x 3 times), trc in last dc, (you should have 9 trc and 9 “tags”) ch 2**

Skip ch 2, skip ch 5, *(puff st, ch 5, 2 dc into 4th ch away from hook, ch 3, sl st into same ch, ch 1, puff st) into next ch 3 space, (ch 5, 2 dc into 4th ch away from hook, ch 3, sl st into same ch, ch 1)*

Skip next ch 3 space, repeat from *to* twice more, skip next ch 3 space (puff st, ch 5, 2 dc into 4th ch away from hook, ch 3, sl st into same ch, ch 1, puff st) in next ch 3 space. (You should have a total of 8 puff sts and 7 “tags” between the puff sts), ch 2, skip ch 5 space skip ch 2 space, trc into first dc, ch 3, 2 dc into trc just made,

Repeat from **to,** skip ch 2, skip ch 5, (puff st, ch 5, 2 dc into 4th ch away from hook, ch 3, sl st into same ch, ch 1, puff st) in next ch 3 space, ch 2, skip ch 5, skip ch 2, trc in first dc, repeat from **to** again.

Continue this way around until next corner, ch 2, trc into first dc and repeat from beginning for the corners. Sl st to 4th ch in starting ch 7.

GCTR Row 15 Corner
Row 15 Corner
GCTR Row 15
Row 15

Cut yarn with scissors, weave in any ends with tapestry needle.

CONGRATULATIONS!! You made it!!

Blocking:

To block your gothic crochet table runner, soak it in a large bowl of water for 1-2 minutes. Gently squeeze out the excess water.

Now, you can be fancy and use puzzle blocking boards to help you pin your table runner in place. These are great because you can make them as long and wide as you want (great for long crochet projects).

Or you can place it on a large towel/layer a few towels together, then pin it through the towels. 

Leave it to dry for at least 24 hours.

Thank you for checking out the Gothic Crochet Table Runner Pattern. I hope that yours turned out beautifully! If you have questions or if you find a mistake, please let me know in the comments below.

Until next time!

Other Posts You May Like: