
Animal Crossing Crochet Tabletop Pattern – Free Pattern
Hello and welcome back to another free crochet pattern, created by yours truly! Today I have for you an Animal Crossing Crochet Tabletop Pattern! Now that summer is here, I always tend to crochet more decorative items, because let’s be real…wearing acrylic crochet is not much fun in the heat.
Animal Crossing is another video game that is near and dear to my heart. I’ve been feeling a little nostalgic recently and I have fond memories of playing Animal Crossing during my childhood. It’s such a relaxing game with lots of open ended play.
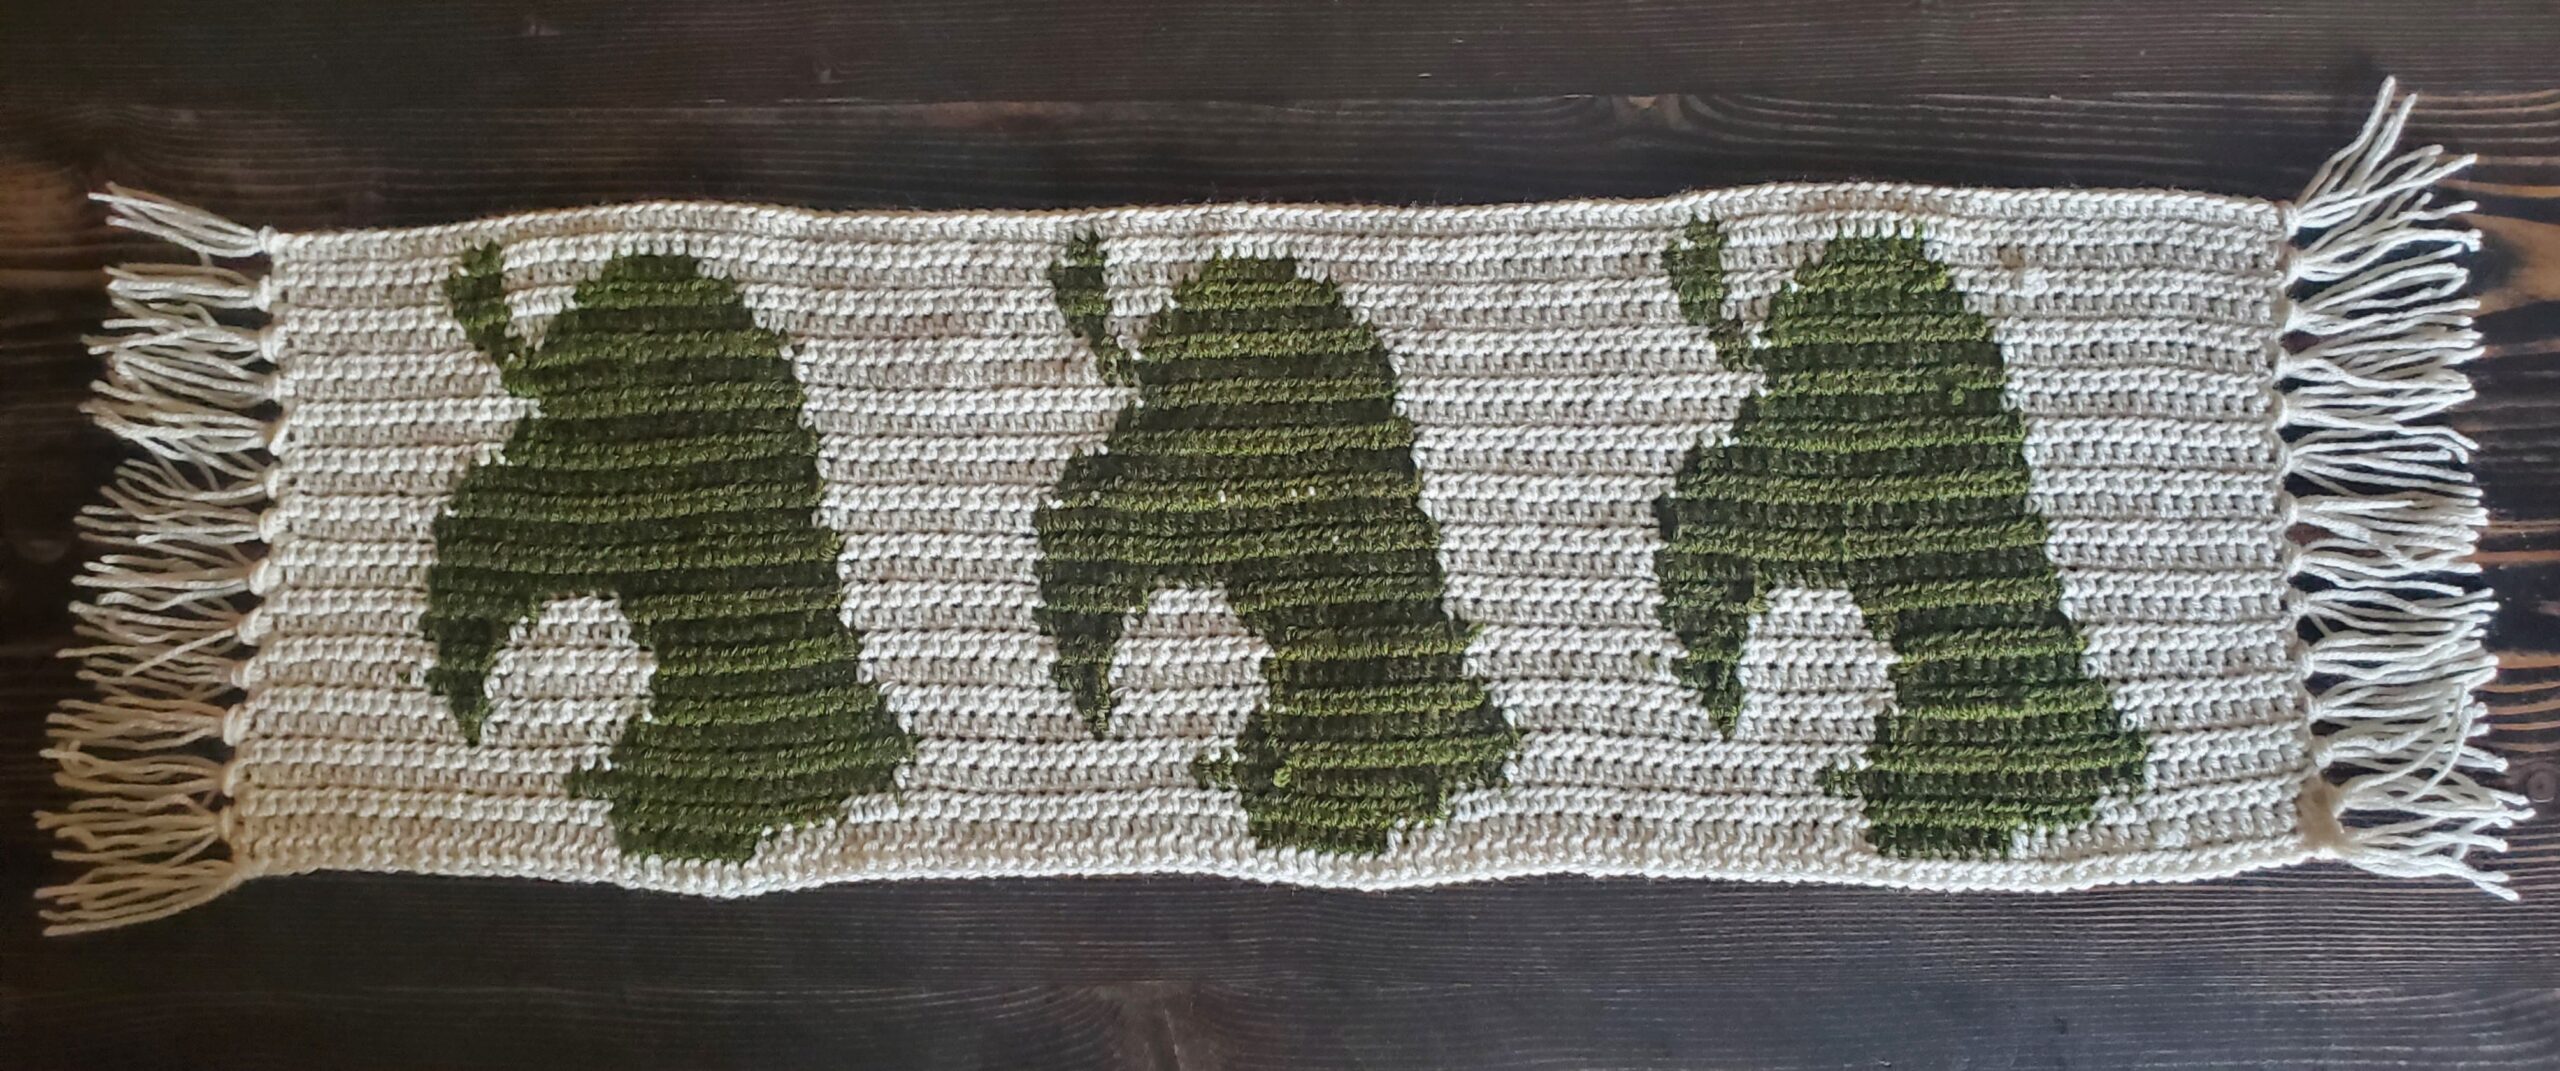
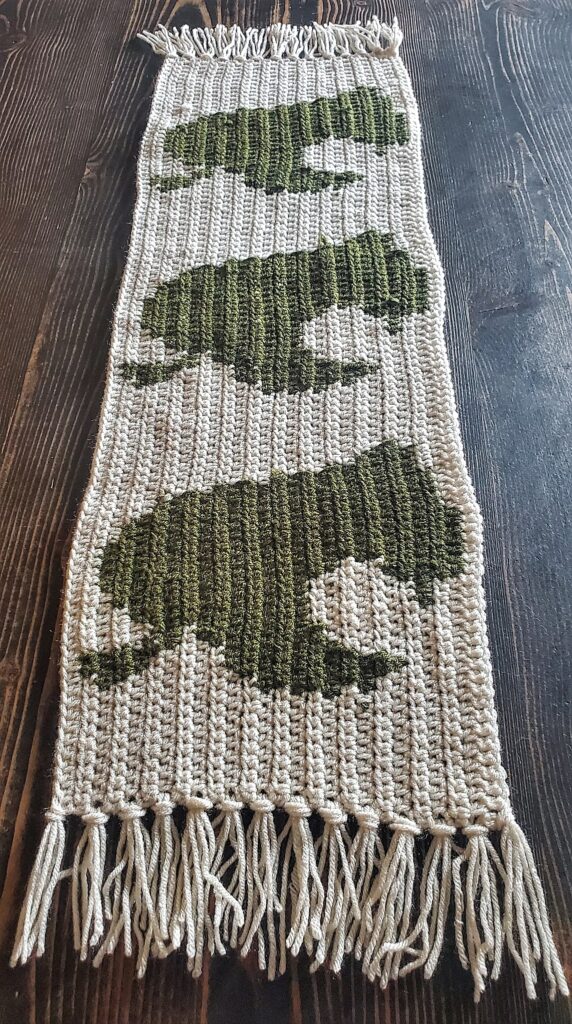
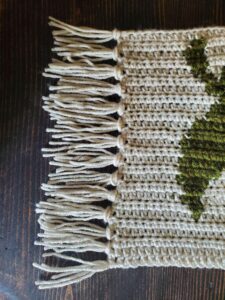
I would use this as a centerpiece for your table or coffee table. It’s a little too tall (thick? lol!) to be a runner for an end table in my opinion. When completed (and prior to blocking), my piece measured roughly 31″ x 9.5″ before adding fringe.
The Animal Crossing Crochet Tabletop Pattern has the iconic leaf logo from the game in a repeat of three.
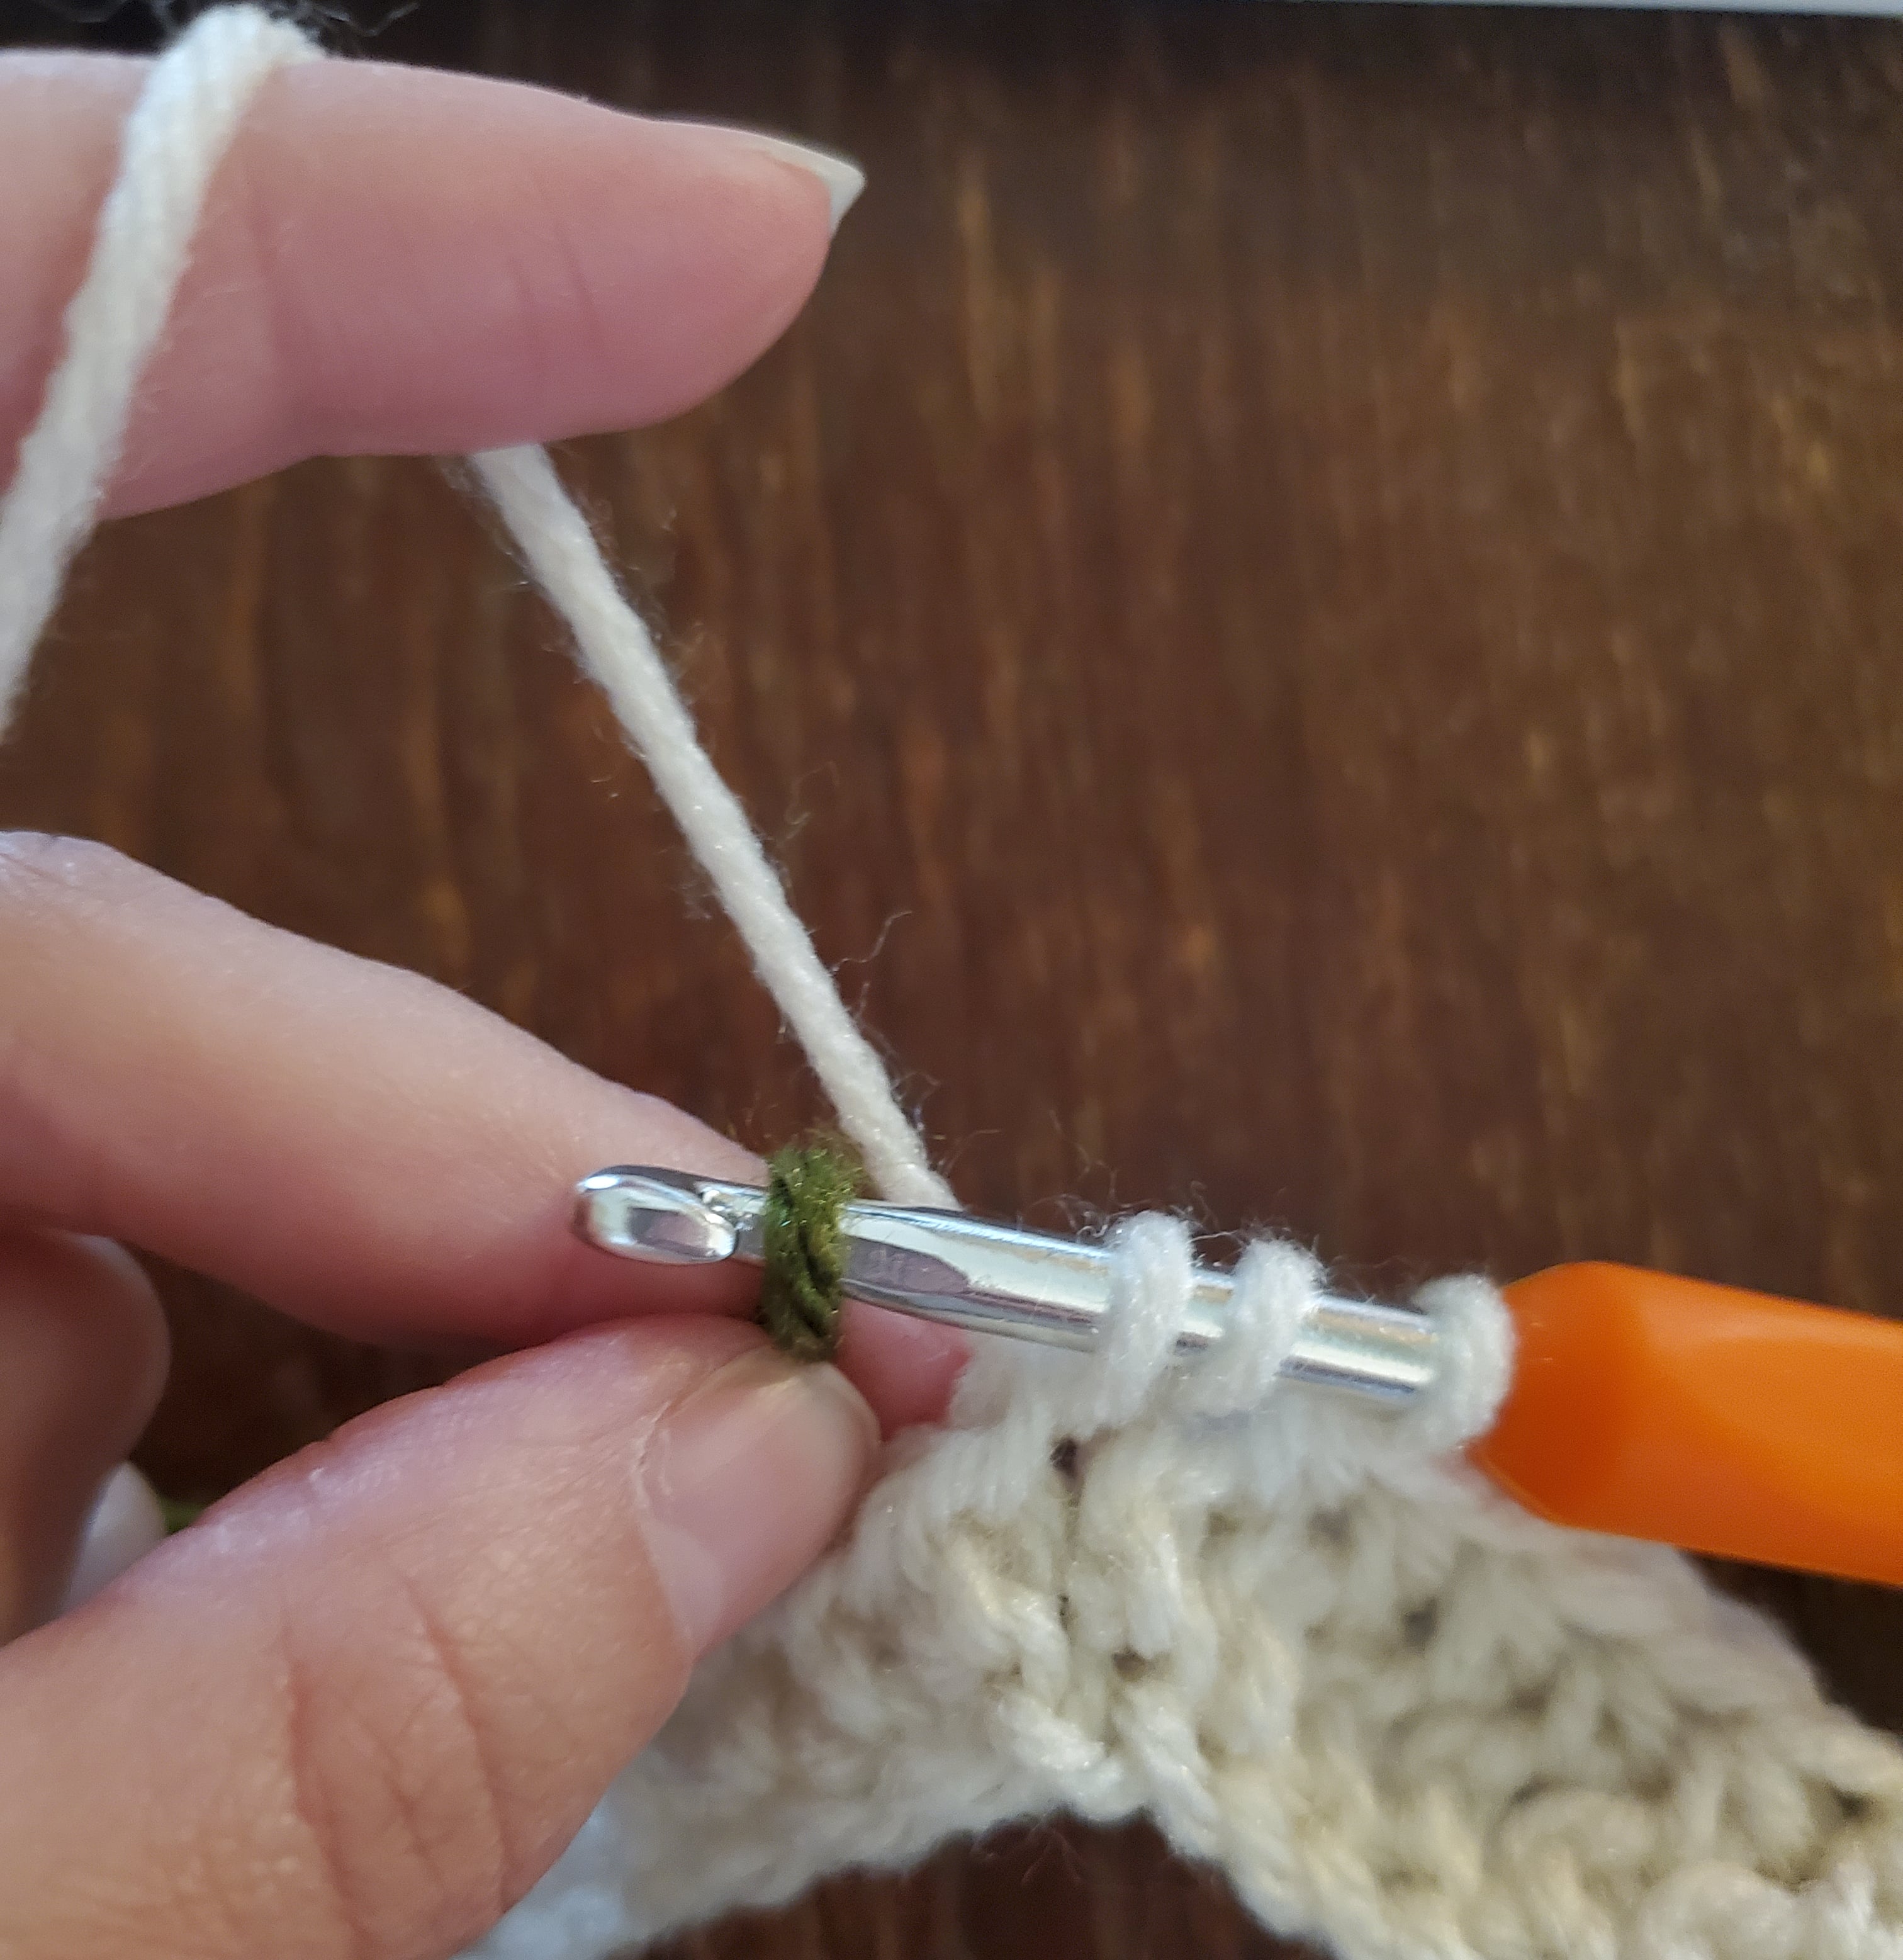
You’ll have to change between two colors throughout the pattern. I will explain my process below, however, feel free to use whatever method of color changing you prefer. If you need more help, you can check out my previous post on How to Color Change in Crochet the Right Way.
Tag me on Instagram with your finished projects @strommercrafts!
Thank you and I hope you enjoy this pattern! 🙂
Check out these other FREE Crochet Patterns!
Materials Needed:
- 5 mm crochet hook
- 1 skein of Red Heart Super Saver Worsted Weight Size 4 in Aran color
- 1 skein of Red Heart Super Saver Worsted Weight Size 4 in Thyme color
- Tapestry Needle
- Scissors
- Stitch marker (optional)
Abbreviations Used:
- ch – chain
- st(s) – stitch(es)
- hdc – half double crochet
- CTA – change to aran
- CTT – change to thyme
Useful Tips:
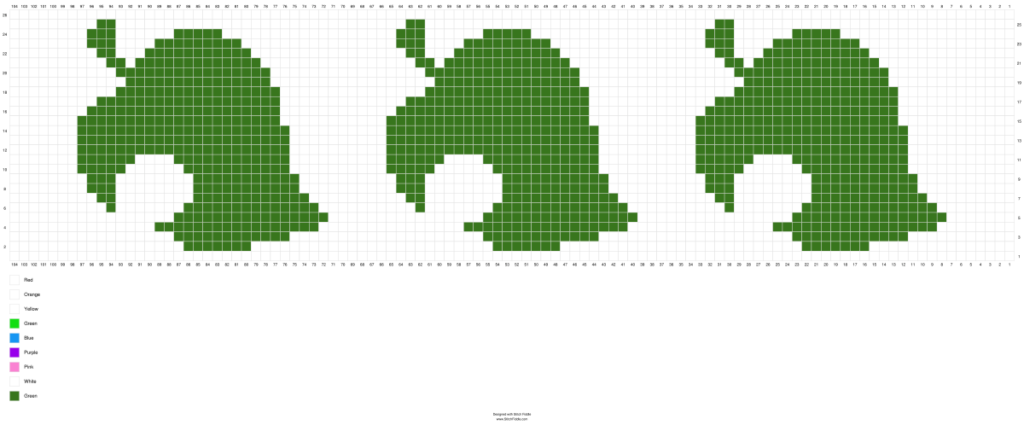
- I have written out all the color changes below, but I have a picture and PDF of the chart if you’re more of a visual person. If using the chart, each square = 1 hdc.
- Read the chart left to right for row 1, right to left for row 2 and so on.
- Use the stitch marker on one side to help you determine left from right.
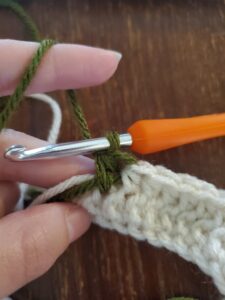
- When changing colors, you’ll always stop 1 st before the needed color change. Do not finish your hdc all the way (you’ll have 3 strands of yarn on your hook), put your new color on the hook and pull through.
- For example: I have aran on my hook and need to switch to thyme on the 10th st (or square if using the chart). On the 9th stitch I will color change as described above.
- I tend to crochet the ends of my yarn along the way when I can. You can weave the ends in if you’d rather. If you weave in too many ends, you tend to get a little wave/bulge going in your work.
- I chose to carry the aran color throughout the pattern, even when working on the leaves, but I dropped the thyme color only in the spaces between the leaves. (Due to the light aran color, you can really see the thyme color between stitches, which is fine, it’s just not my preference).
Animal Crossing Crochet Tabletop Pattern:
- Row 1 – With Aran color, Ch 105, hdc in second chain from hook, 1 hdc in each ch until end of row. (104 sts)
- Row 2 – Turn, ch 1, 1 hdc in next 15 sts (don’t finish the 15th stitch all the way, with 3 strands of yarn on your hook, switch to green yarn and pull through. Do this for switching between colors throughout the pattern), *with green yarn, 1 hdc in next 7 sts, CTA, 1 hdc in next 25 sts*. Repeat from *to* once more. CTT, 1 hdc in next 7 sts, CTA, 1 hdc in next 18 sts (104 sts)
- Row 3 – Turn, ch 1, 1 hdc in next 17 sts, *CTT, 1 hdc in next 12 sts, CTA, 1 hdc in next 20 sts*. Repeat from *to* once more. CTT, 1 hdc in next 12 sts, CTA, 1 hdc in next 11 sts (104 sts)
- Row 4 – Turn, ch 1, 1 hdc in next 8 sts, *CTT, 1 hdc in next 17 sts, CTA, 1 hdc in next 15 sts*. Repeat from *to* two more times. (104 sts)
- Row 5 – Turn, ch 1, 1 hdc in next 17 sts, *CTT, 1 hdc in next 16 sts, CTA, 1 hdc in next 16 sts*. Repeat from *to* once more. CTT, 1 hdc in next 16 sts, CTA, 1 hdc in next 7 sts (104 sts)
- Row 6 – Turn, ch1, 1 hdc in next 8 sts, *CTT, 1 hdc in next 14 sts, CTA, 1 hdc in next 7 sts, CTT, 1 hdc in next st, CTA, 1 hdc in next 10 sts*. Repeat from *to* two more times. (104 sts)
- Row 7 – Turn, ch 1, 1 hdc in next 9 sts, *CTT, 1 hdc in next 2 sts, CTA, 1 hdc in next 8 sts, CTT, 1 hdc in next 12 sts, CTA, 1 hdc in next 10 sts*. Repeat from *to* once more. CTT, 1 hdc in next 2 sts, CTA, 1 hdc in next 8 sts, CTT, 1 hdc in next 12 sts, CTA, 1 hdc in next 9 sts. (104 sts)
- Row 8 – Turn, ch 1, 1 hdc in next 10 sts, *CTT, 1 hdc in next 11 sts, CTA, 1 hdc in next 8 sts, CTT, 1 hdc in next 3 sts, CTA, 1 hdc in next 10 sts*. Repeat from *to* once more. CTT, 1 hdc in next 11 sts, CTA, 1 hdc in next 8 sts, CTT, 1 hdc in next 3 sts, CTA, 1 hdc in next 8 sts. (104 sts)
- Row 9 – Turn, ch 1, 1 hdc in next 8 sts, *CTT, 1 hdc in next 3 sts, CTA, 1 hdc in next 8 sts, CTT, 1 hdc in next 11 sts, CTA, 1 hdc in next 10 sts*. Repeat from *to* once more. CTT, 1 hdc in next 3 sts, CTA, 1 hdc in next 8 sts, CTT, 1 hdc in next 11 sts, CTA, 1 hdc in next 10 sts. (104 sts)
- Row 10 – Turn, ch 1, 1 hdc in next 11 sts, *CTT, 1 hdc in next 11 sts, CTA, 1 hdc in next 6 sts, CTT, 1 hdc in next 5 sts, CTA, 1 hdc in next 10 sts*. Repeat from *to* once more. CTT, 1 hdc in next 11 sts, CTA, 1 hdc in next 6 sts, CTT, 1 hdc in next 5 sts, CTA, 1 hdc in next 7 sts. (104 sts)
- Row 11 – Turn, ch 1, 1 hdc in next 7 sts, *CTT, 1 hdc in next 6 sts, CTA, 1 hdc in next 4 sts, CTT, 1 hdc in next 12 sts, CTA in next 10 sts*. Repeat from *to* once more. CTT, 1 hdc in next 6 sts, CTA, 1 hdc in next 4 sts, CTT, 1 hdc in next 12 sts, CTA in next 11 sts. (104 sts)
- Row 12 – Turn, ch 1, 1 hdc in next 11 sts, *CTT, 1 hdc in next 22 sts, CTA, 1 hdc in next 10 sts*. Repeat from *to* once more. CTT, 1 hdc in next 22 sts, CTA, 1 hdc in next 7 sts. (104 sts).
- Row 13 – Turn, ch 1, 1 hdc in next 7 sts, *CTT, 1 hdc in next 22 sts, CTA, 1 hdc in next 10 sts*. Repeat from *to* once more. CTT, 1 hdc in next 22 sts, CTA, 1 hdc in next 11 sts. (104 sts)
- Row 14 – Turn, ch 1, 1 hdc in next 11 sts, * CTT, 1 hdc in next 22 sts, CTA, 1 hdc in next 10 sts*. Repeat from *to* once more. CTT, 1 hdc in next 22 sts, CTA, 1 hdc in next 7 sts. (104 sts)
- Row 15 – Turn, ch 1, 1 hdc in next 7 sts, *CTT, 1 hdc in next 21 sts, CTA, 1 hdc in next 11 sts*. Repeat from *to* once more. CTT, 1 hdc in next 21 sts, CTA, 1 hdc in next 12 sts. (104 sts)
- Row 16 – Turn, ch 1, 1 hdc in next 12 sts, *CTT, 1 hdc in next 20 sts, CTA, 1 hdc in next 12 sts*. Repeat from *to* once more. CTT, 1 hdc in next 20 sts, CTA, 1 hdc in next 8 sts. (104 sts)
- Row 17 – Turn, ch 1, 1 hdc in next 9 sts, *CTT, 1 hdc in next 19 sts, CTA, 1 hdc in next 13 sts*. Repeat from *to* once more. CTT, 1 hdc in next 19 sts, CTA, 1 hdc in next 12 sts. (104 sts)
- Row 18 – Turn, ch 1, 1 hdc in next 12 sts, *CTT, 1 hdc in next 17 sts, CTA, 1 hdc in next 15 sts*. Repeat from *to* once more. CTT, 1 hdc in next 17 sts, CTA, 1 hdc in next 11 sts. (104 sts)
- Row 19 – Turn, ch 1, 1 hdc in next 12 sts, *CTT, 1 hdc in next 15 sts, CTA, 1 hdc in next 17 sts*. Repeat from *to* once more. CTT, 1 hdc in next 15 sts, CTA, 1 hdc in next 13 sts. (104 sts)
- Row 20 – Turn, ch 1, 1 hdc in next 13 sts, *CTT, 1 hdc in next 16 sts, CTA, 1 hdc in next 16 sts*. Repeat from *to* once more. CTT, 1 hdc in next 16 sts, CTA, 1 hdc in next 11 sts. (104 sts)
- Row 21 – Turn, ch 1, 1 hdc in next 10 sts, *CTT, 1 hdc in next 2 sts, CTA, 1 hdc in next st, CTT, 1 hdc in next 13 sts, CTA, 1 hdc in next 16 sts*. Repeat from *to* once more. CTT, 1 hdc in next 2 sts, CTA, 1 hdc in next st, CTT, 1 hdc in next 13 sts, CTA, 1 hdc in next 14 sts (104 sts)
- Row 22 – Turn, ch 1, 1 hdc in next 15 sts, *CTT, 1 hdc in next 11 sts, CTA, 1 hdc in next 3 sts, CTT, 1 hdc in next 2 sts, CTA, 1 hdc in next 16 sts*. Repeat from *to* once more. CTT, 1 hdc in next 11 sts, CTA, 1 hdc in next 3 sts, CTT, 1 hdc in next 2 sts, CTA, 1 hdc in next 9 sts (104 sts)
- Row 23 – Turn, ch 1, 1 hdc in next 8 sts, *CTT, 1 hdc in next 3 sts, CTA, 1 hdc in next 4 sts, CTT, 1 hdc in next 9 sts, CTA, 1 hdc in next 16 sts*. Repeat from *to* two more times. (104 sts)
- Row 24 – Turn, ch 1, 1 hdc in next 18 sts, *CTT, 1 hdc in next 5 sts, CTA, 1 hdc in next 6 sts, CTT, 1 hdc in next 3 sts, CTA, 1 hdc in next 18 sts*. Repeat from *to* once more. CTT, 1 hdc in next 5 sts, CTA, 1 hdc in next 6 sts, CTT, 1 hdc in next 3 sts, CTA, 1 hdc in next 8 sts. (104 sts)
- Row 25 – Turn, ch 1, 1 hdc in next 9 sts, *CTT, 1 hdc in next 2 sts, CTA, 1 hdc in next 30 sts*. Repeat from *to* once more. CTT, 1 hdc in next 2 sts, CTA, 1 hdc in next 29 sts. (104 sts)
- Row 26 – Turn, ch 1, 1 hdc in each st across (104 sts). Cut yarn and pull through. Weave in ned with tapestry needle.
Fringe:
- Cut 3 strands of aran yarn about 8″ long
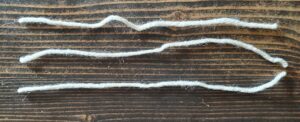
- Line up strands and make a loop. Make sure the ends are lined up evenly.
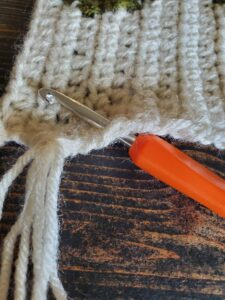
- Insert 5 mm hook from bottom to top in end of row 26.
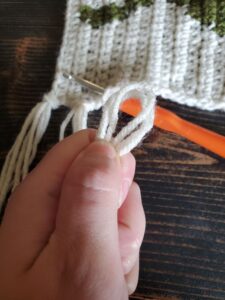
- Put your looped strands on the hook and pull through, but not all the way!
- Pull the end of the strands through the loop, either with your hands or your hook.
- Pull the strands snug.
- Repeat steps in every other row all the way down both edges.
- You’ll have to put the last two fringes next to each other.
- Trim up any long strands with scissors.
And that is it! I hope this pattern was easy enough to follow! I would love to see your finished projects below…tag me on IG @strommercrafts!
Until next time! 🙂