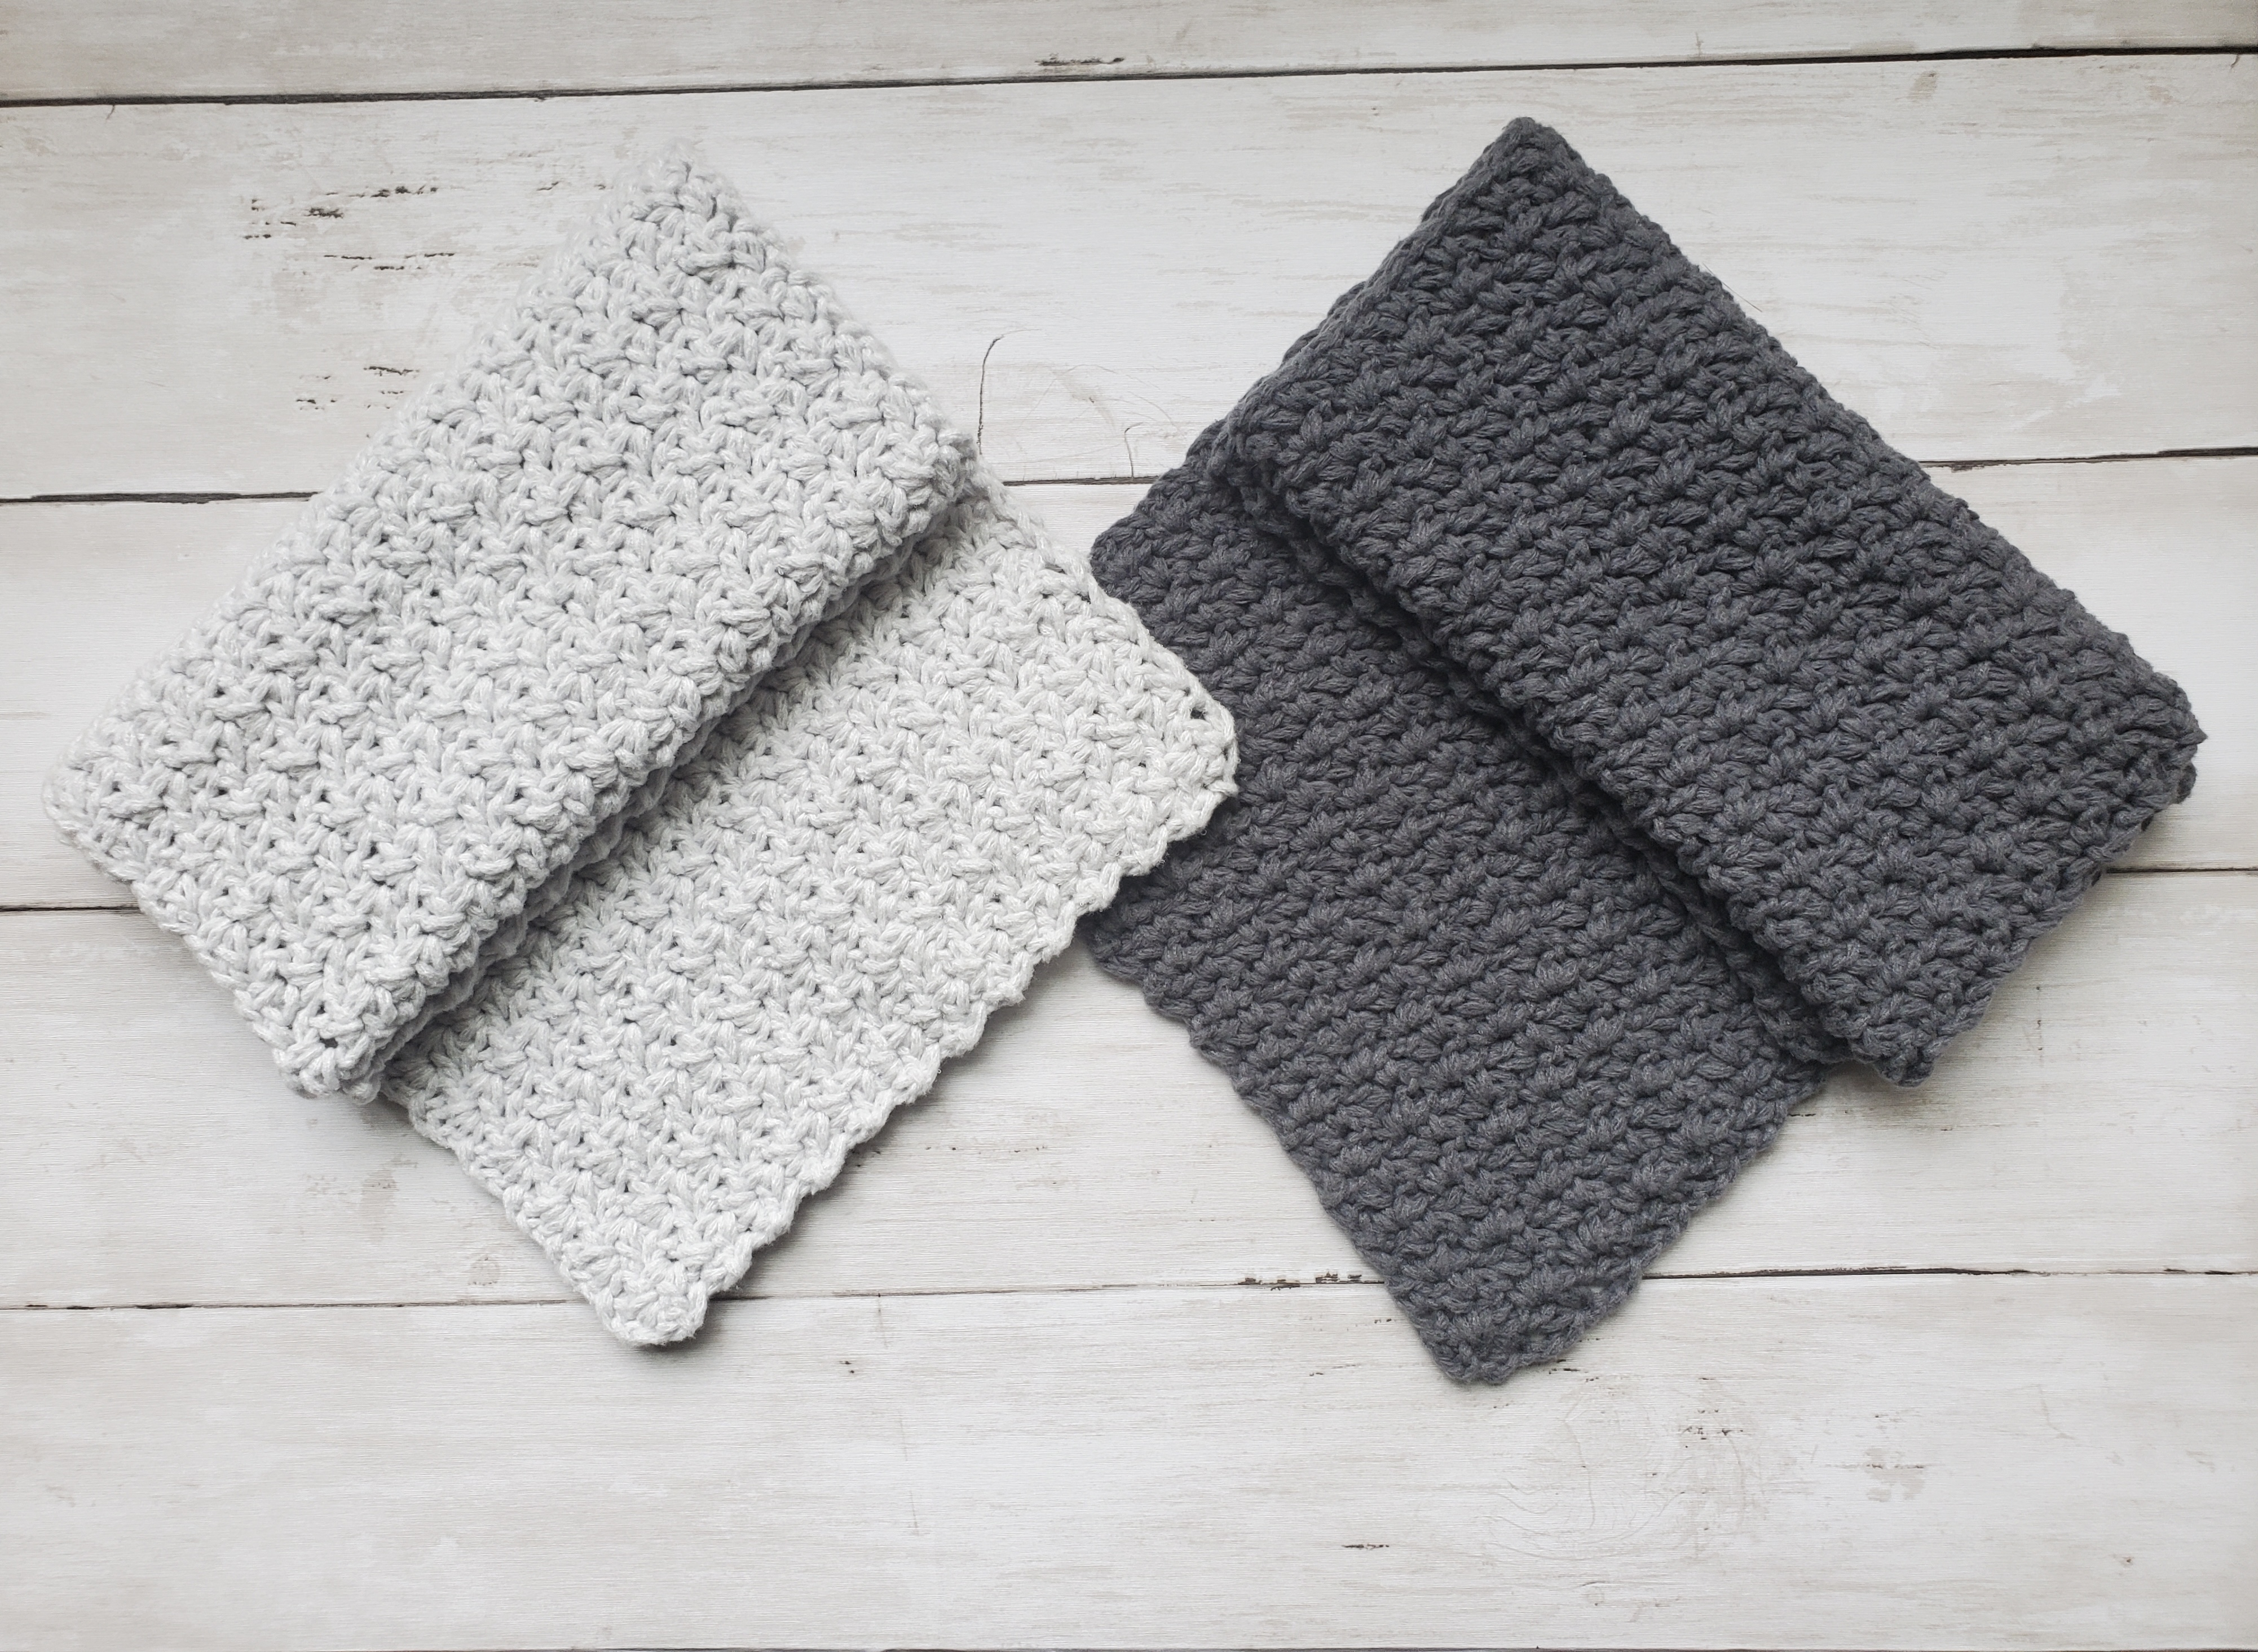
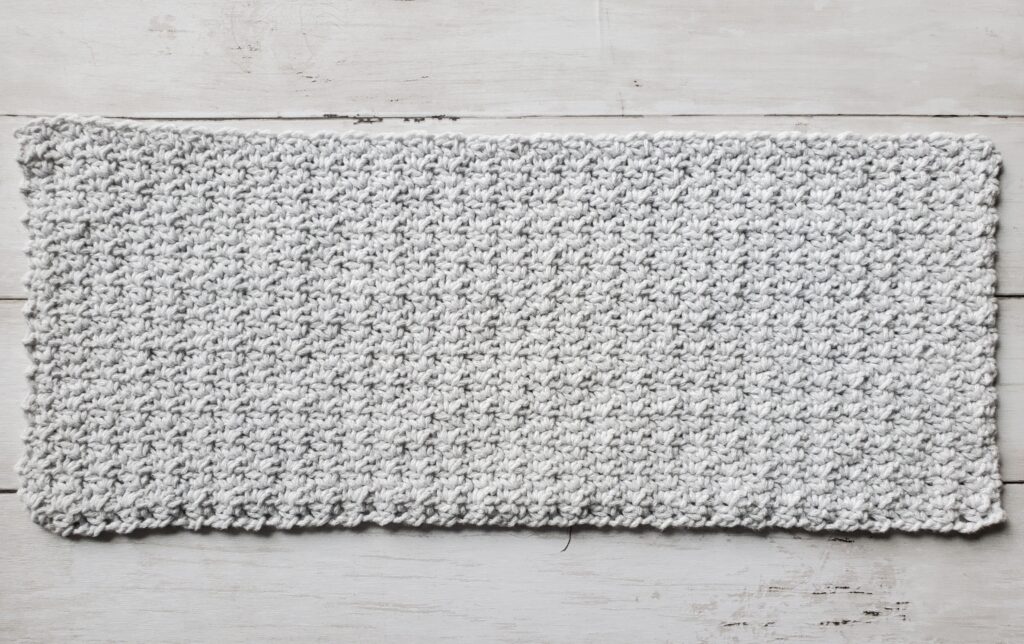
Free Peaches and Creme Crochet Burp Cloth Pattern

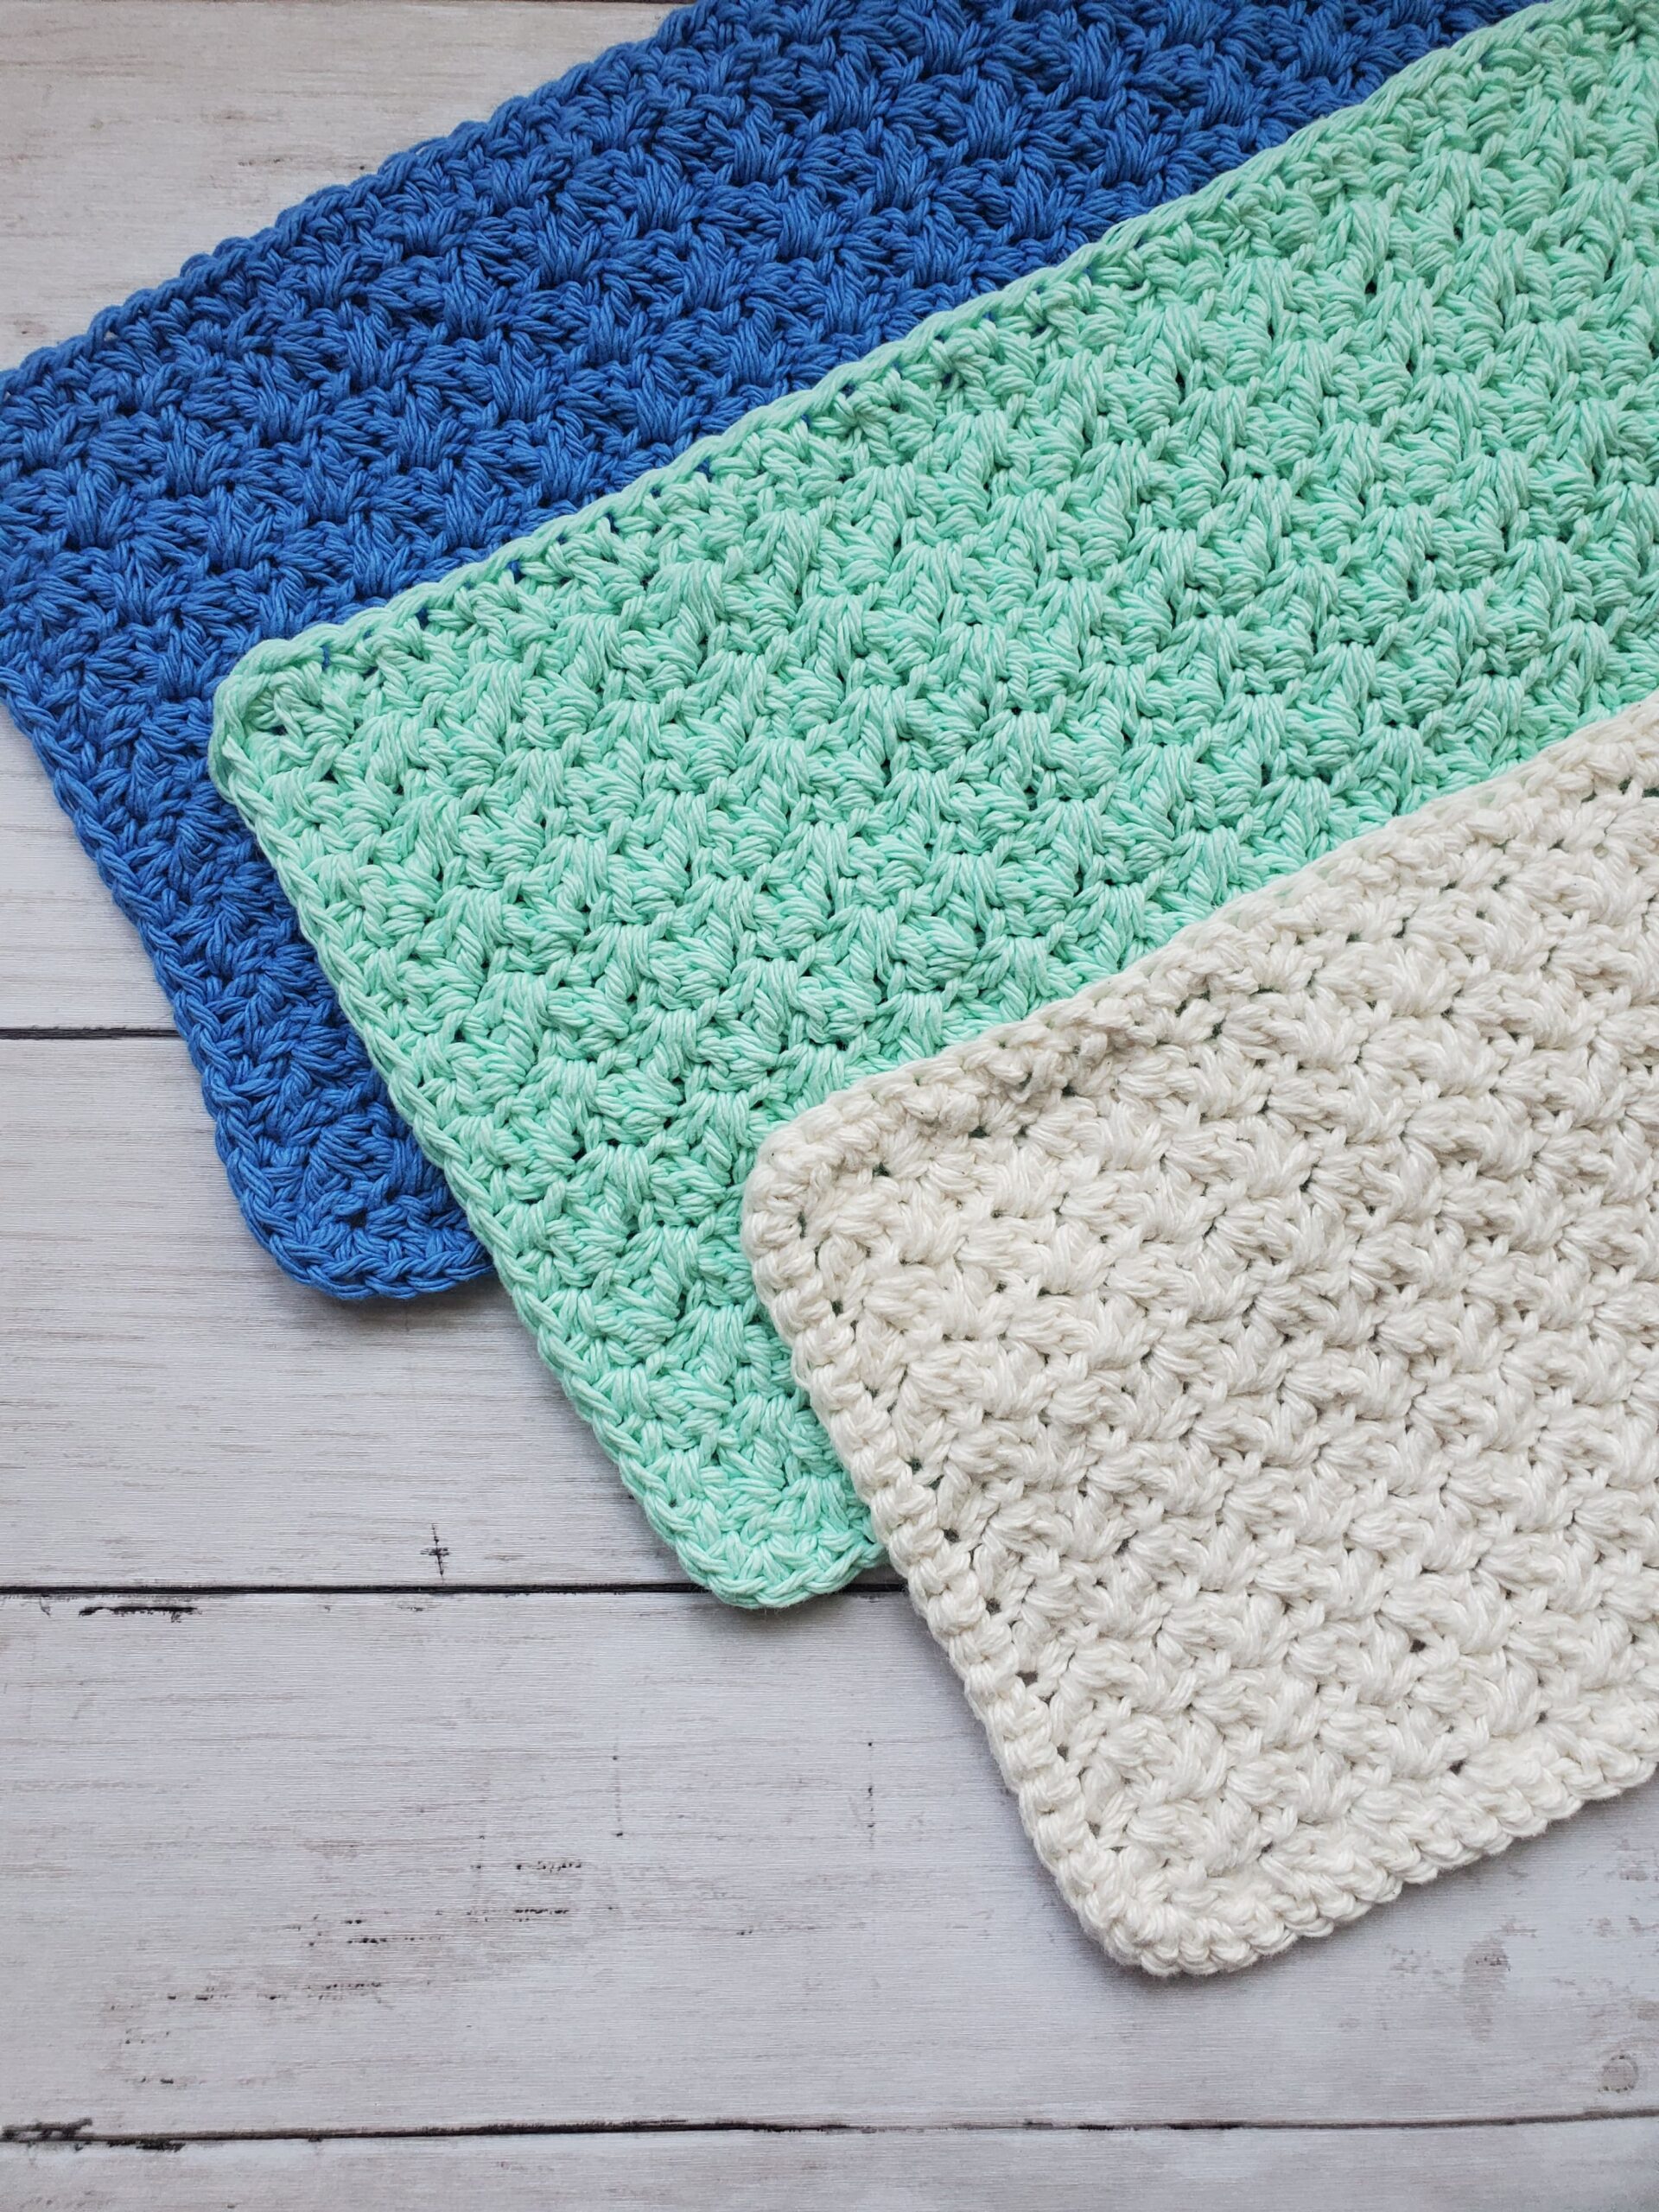
Hello everyone! Today I have a lovely crochet burp cloth pattern available for you! These burp cloths are made with the ever-popular Peaches and Creme cotton yarn. I honestly think they look so bright and clean!

Make These For A Wonderful Handmade Gift!

Aside from making these for yourself, this can be a thoughtful gift that can be given to a variety of individuals or institutions. Here are some ideas of who would appreciate receiving these crochet burp cloths as a gift:

  • Expectant or New Parents – Gifting crochet burp cloths to expectant or new parents can be a wonderful gesture. They’re a practical item for newborns and the fact that it’s handmade adds a personal and heartfelt element to the gift (I’ve almost cried over handmade gifts given for my babies because they were so thoughtful…darn hormones!).
  • Baby Showers and Gift Exchanges – If you’re invited to a baby shower or participating in a gift exchange, and have the crochet skills, these burp cloths can be an excellent choice. Your handmade gift will be unique, as no one can find one in stores, and hopefully new parents will appreciate the practicality and charm of it!
  • Churches, Charitable Organizations or Hospitals – If you enjoy crocheting for a cause, consider donating your handmade crochet burp cloths to a church, charitable organizations or local hospitals. Many organizations support families in need and your beautiful gift can provide comfort and absorbency to babies from these families. I worked at a hospital that accepted crochet donations (blankets, hats, and bereavement items for stillborns). 

Why Cotton Yarn is a Good Choice for a Burp Cloth:

Feel free to use any yarn you’d like, as long as it’s #4 worsted weight (medium) yarn. If you use a different weight, your burp cloth may become too big or small! I also like using cotton yarn instead of acrylic yarn . 

You can use acrylic, but it’s not very absorbent, and you should try to soften it up before using it on a baby’s delicate skin. 

Here are a few reasons why cotton yarn is a good choice for this crochet project:

  • Softness against baby’s skin – Cotton is renowned for its exceptional softness, making it a great choice for crocheted baby items. You want material that is gentle and non-irritating during use.
  • Absorbency – One of the primary uses for a burp cloth is to absorb spit-ups, drool, and other small spills. Cotton yarn excels in this aspect as it has excellent absorbent properties. The natural fibers in cotton can hold up to 27 times its own weight, making it readily able to soak up spills to keep you, and baby, dry and clean.
  • Breathability – Cotton is a breathable material, allowing air to circulate freely through the fabric. This can help prevent your baby from overheating. The breathability of cotton ensures that the moisture absorbed by the burp cloth evaporates quickly, reducing the chances of discomfort or rashes from trapped moisture.
  • Easy to clean – Babies are notorious for creating messes, and burp cloths are no exception. Choosing a material that is easy to clean is essential. Cotton yarn is machine washable, making it a convenient choice for busy parents. Simply toss the burp cloths into a washing machine, and they will come out fresh and clean, ready to be used again.
  • Durability – Burp cloths undergo frequent washing and heavy use, so durability is an important factor to consider. Cotton yarn is known for its strength and longevity, the natural fibers make it highly resilient and able to withstand repeated washing and drying.

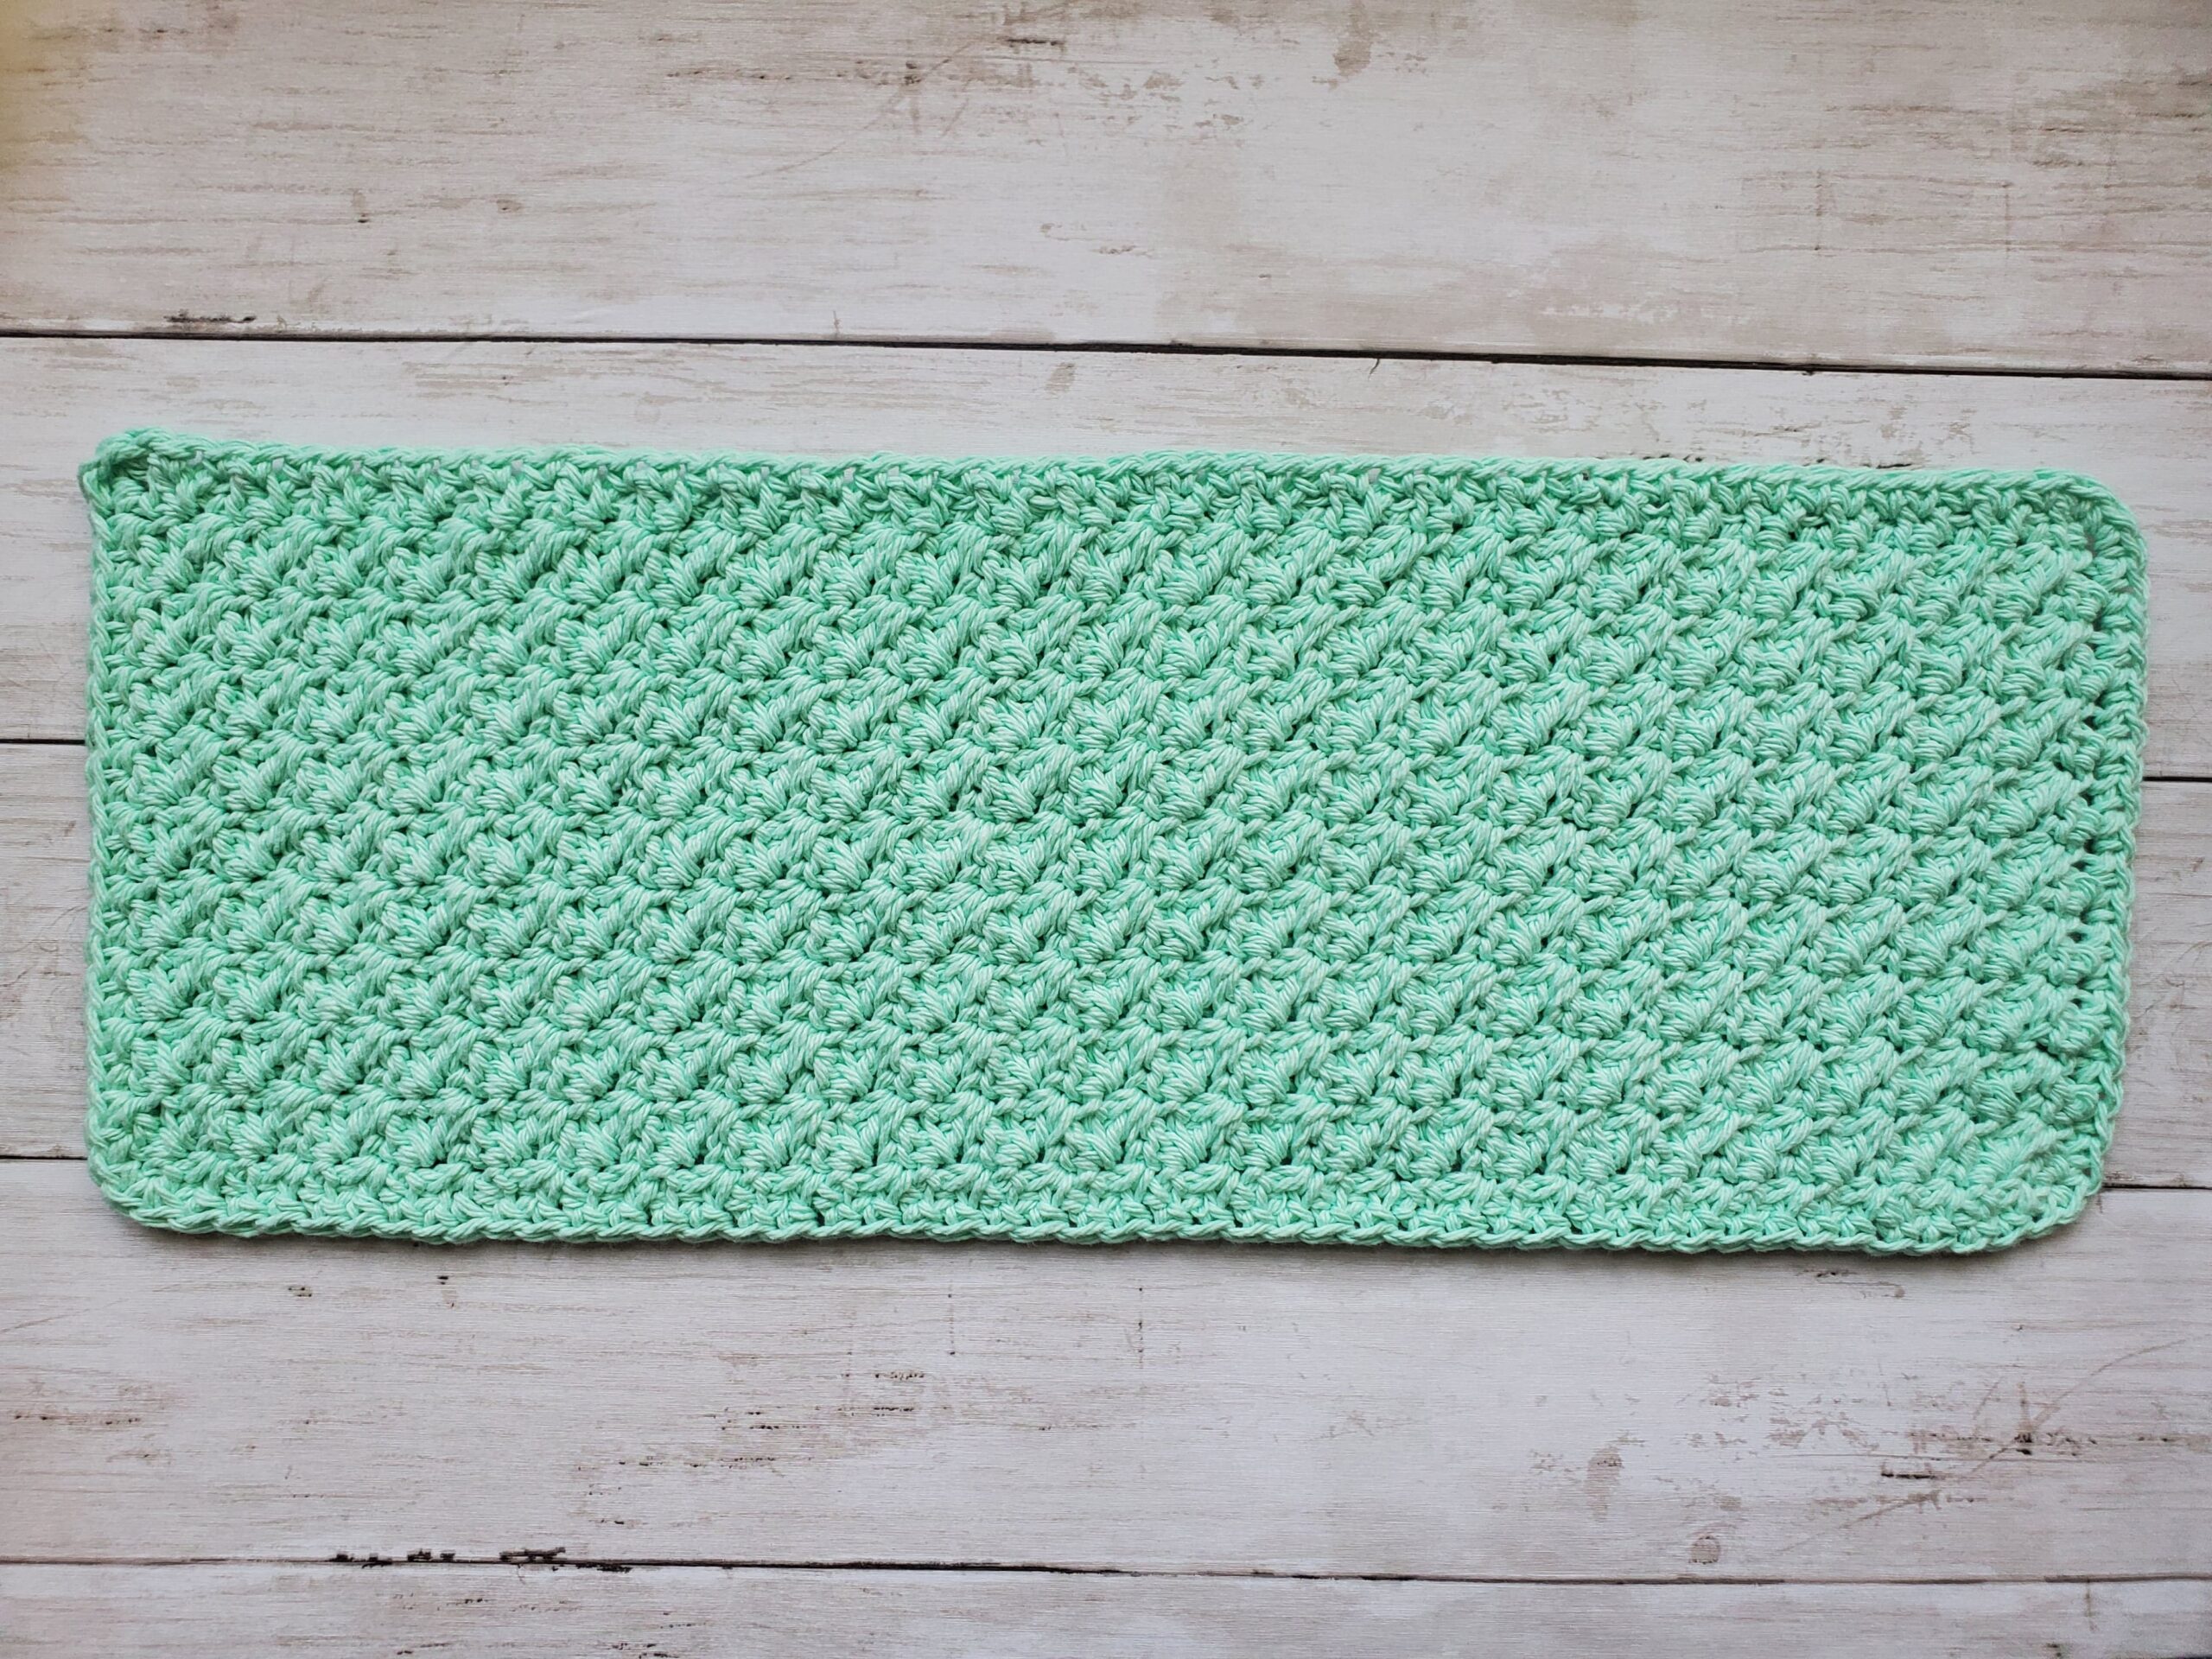
This Peaches and Creme Crochet Burp Cloth is designed to be beginner-friendly, making it accessible to both seasoned crocheters and those that are new. With just a few basic stitches, you’ll be able to whip up these beautiful burp cloths in no time! 

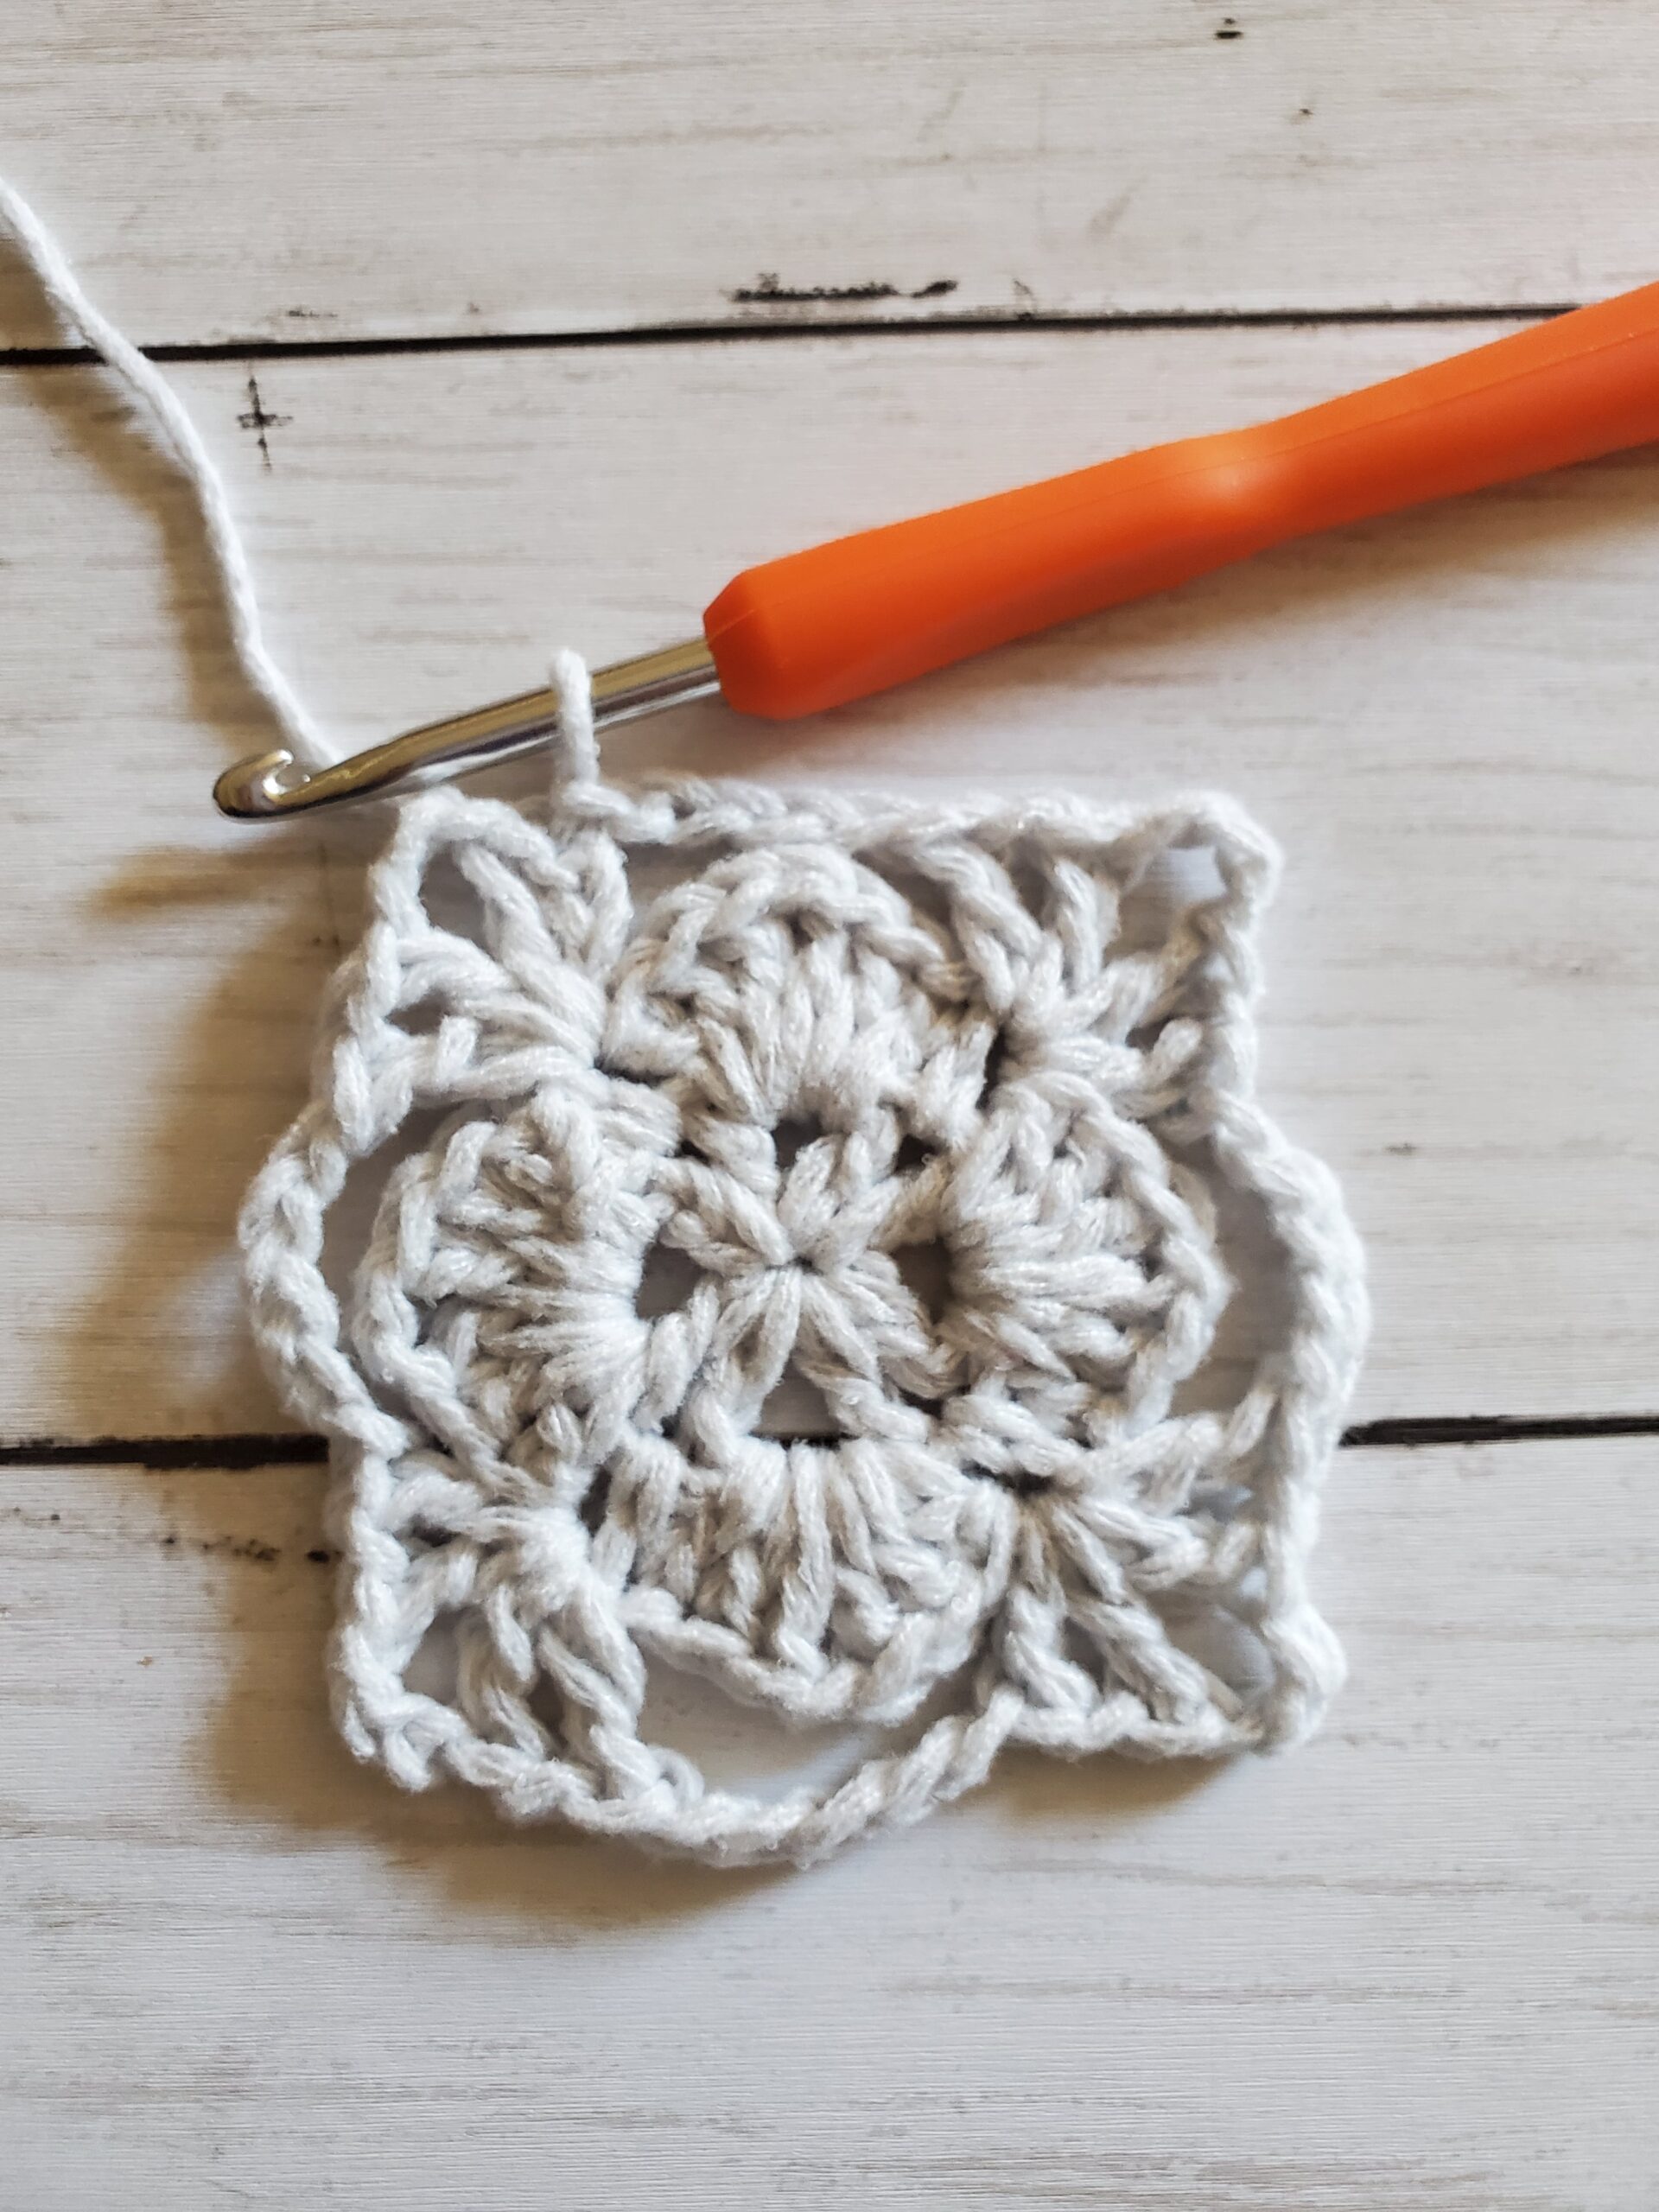
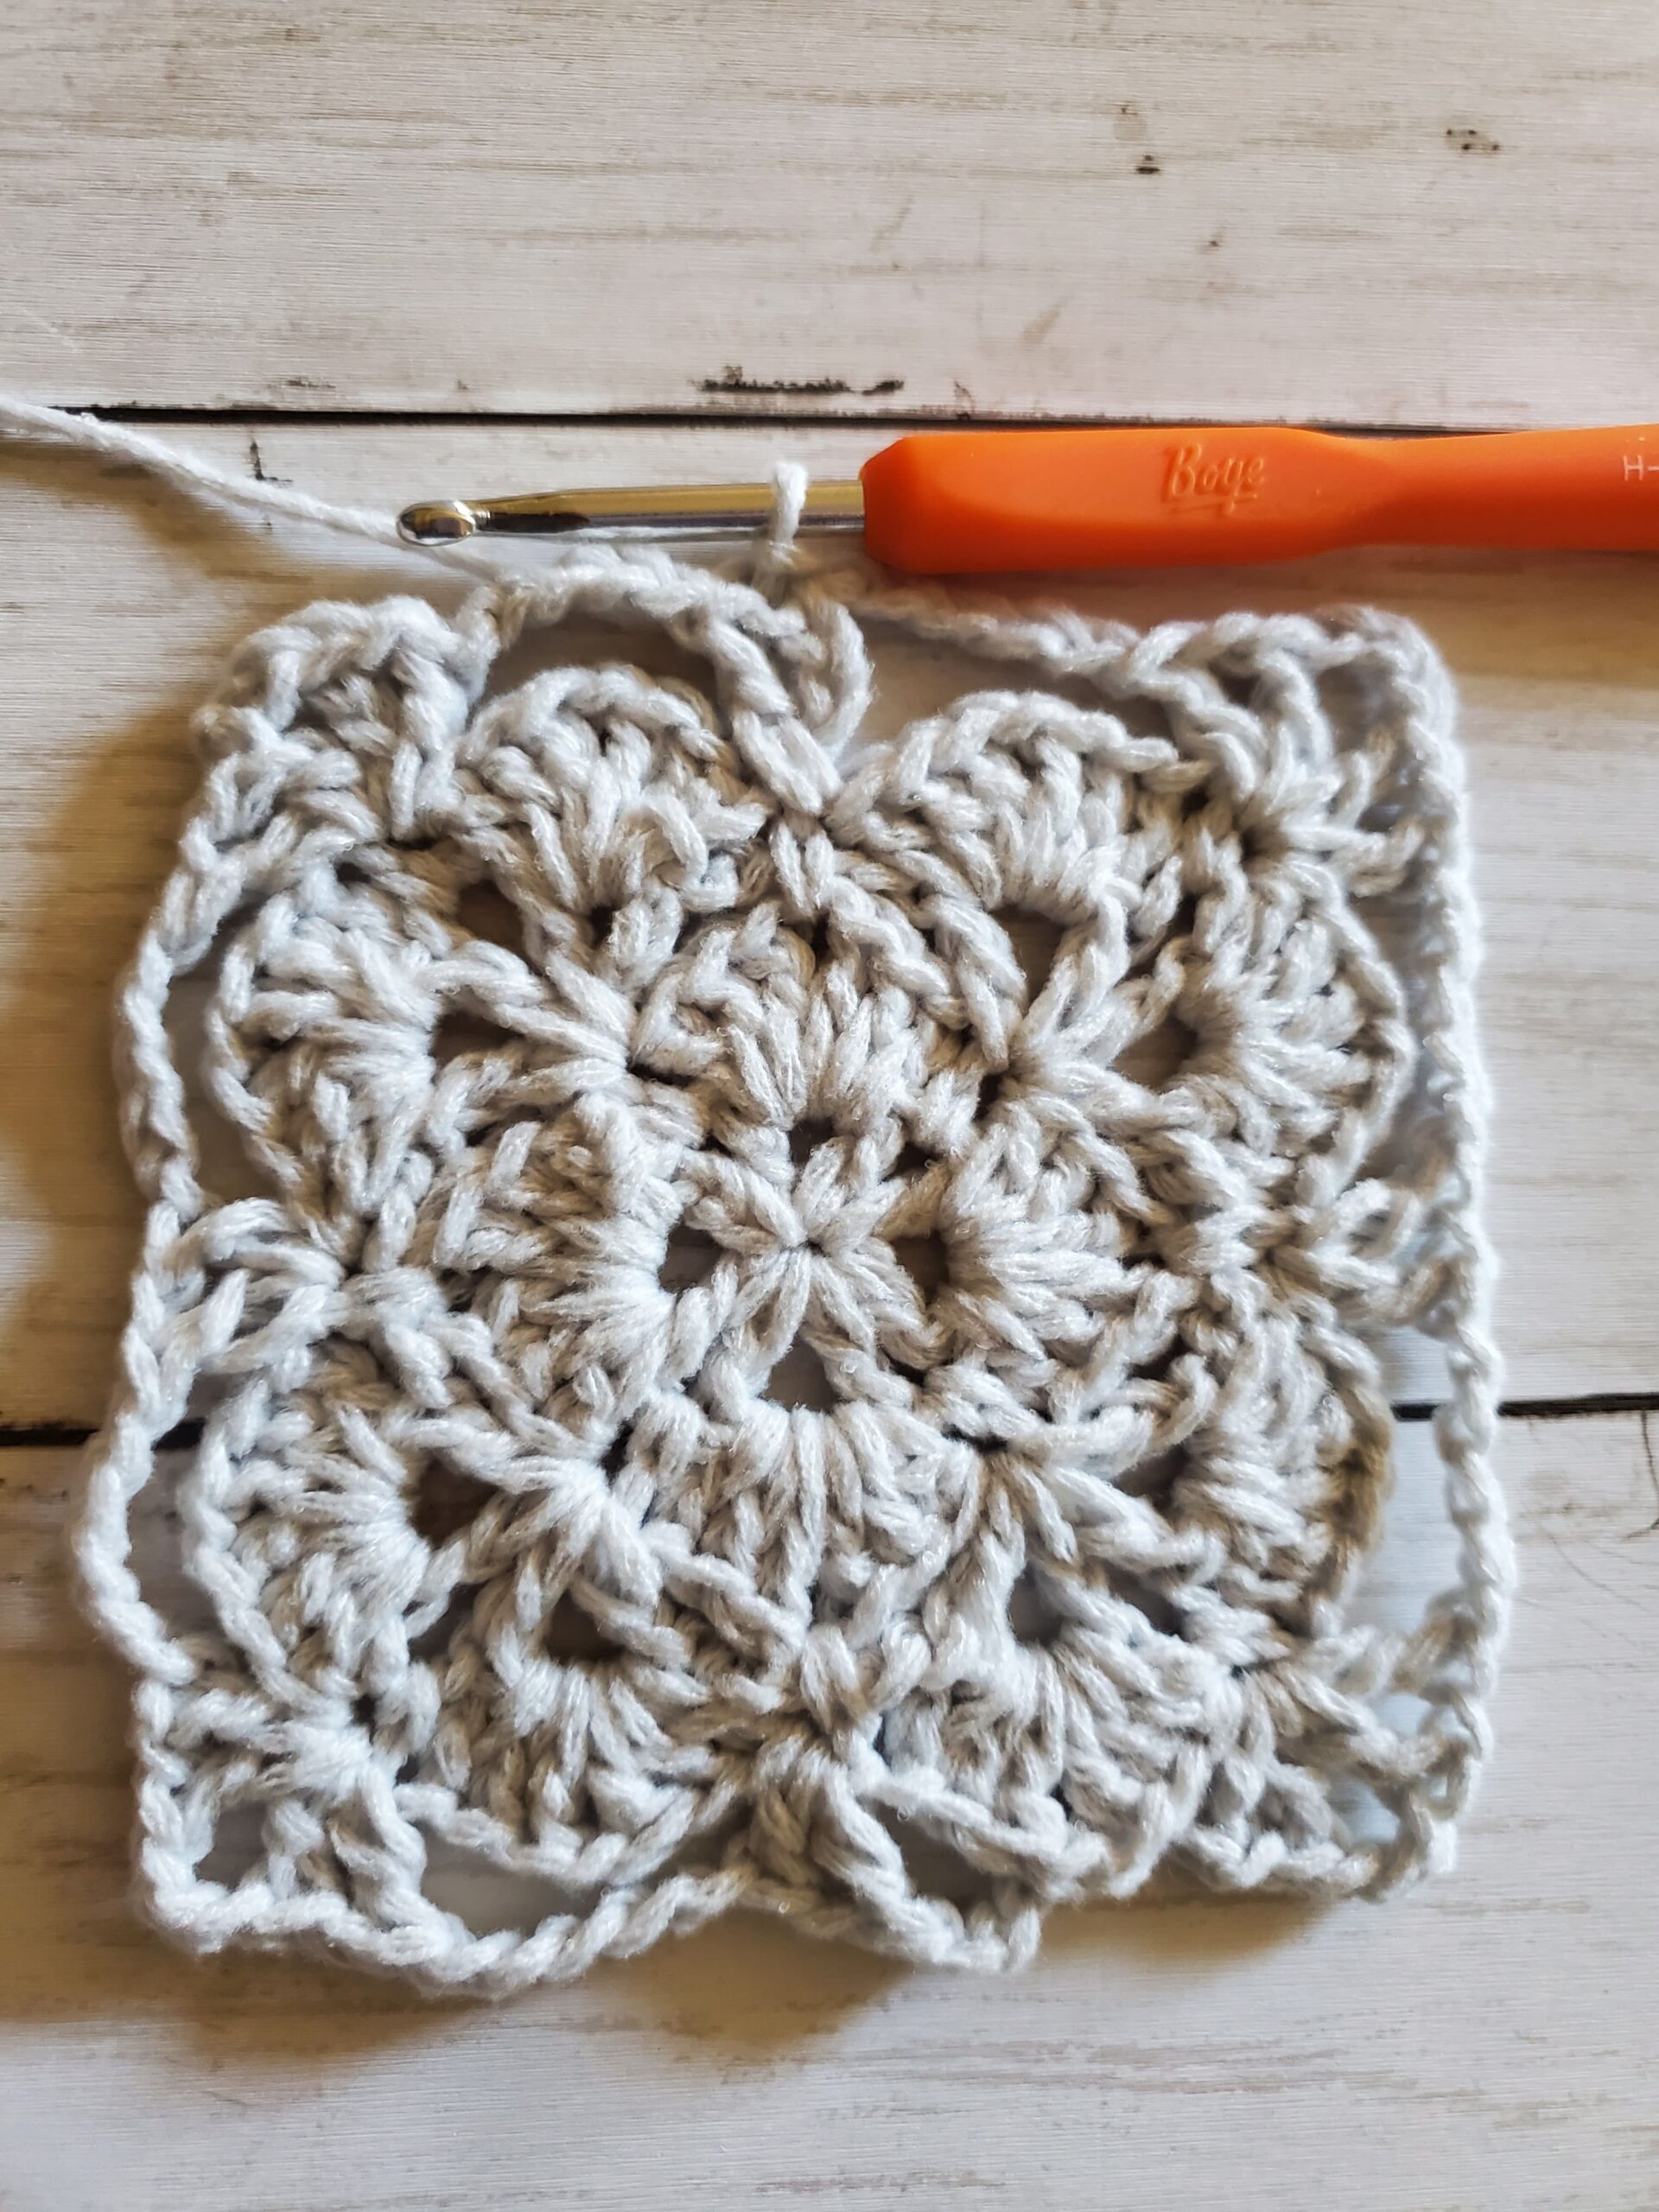
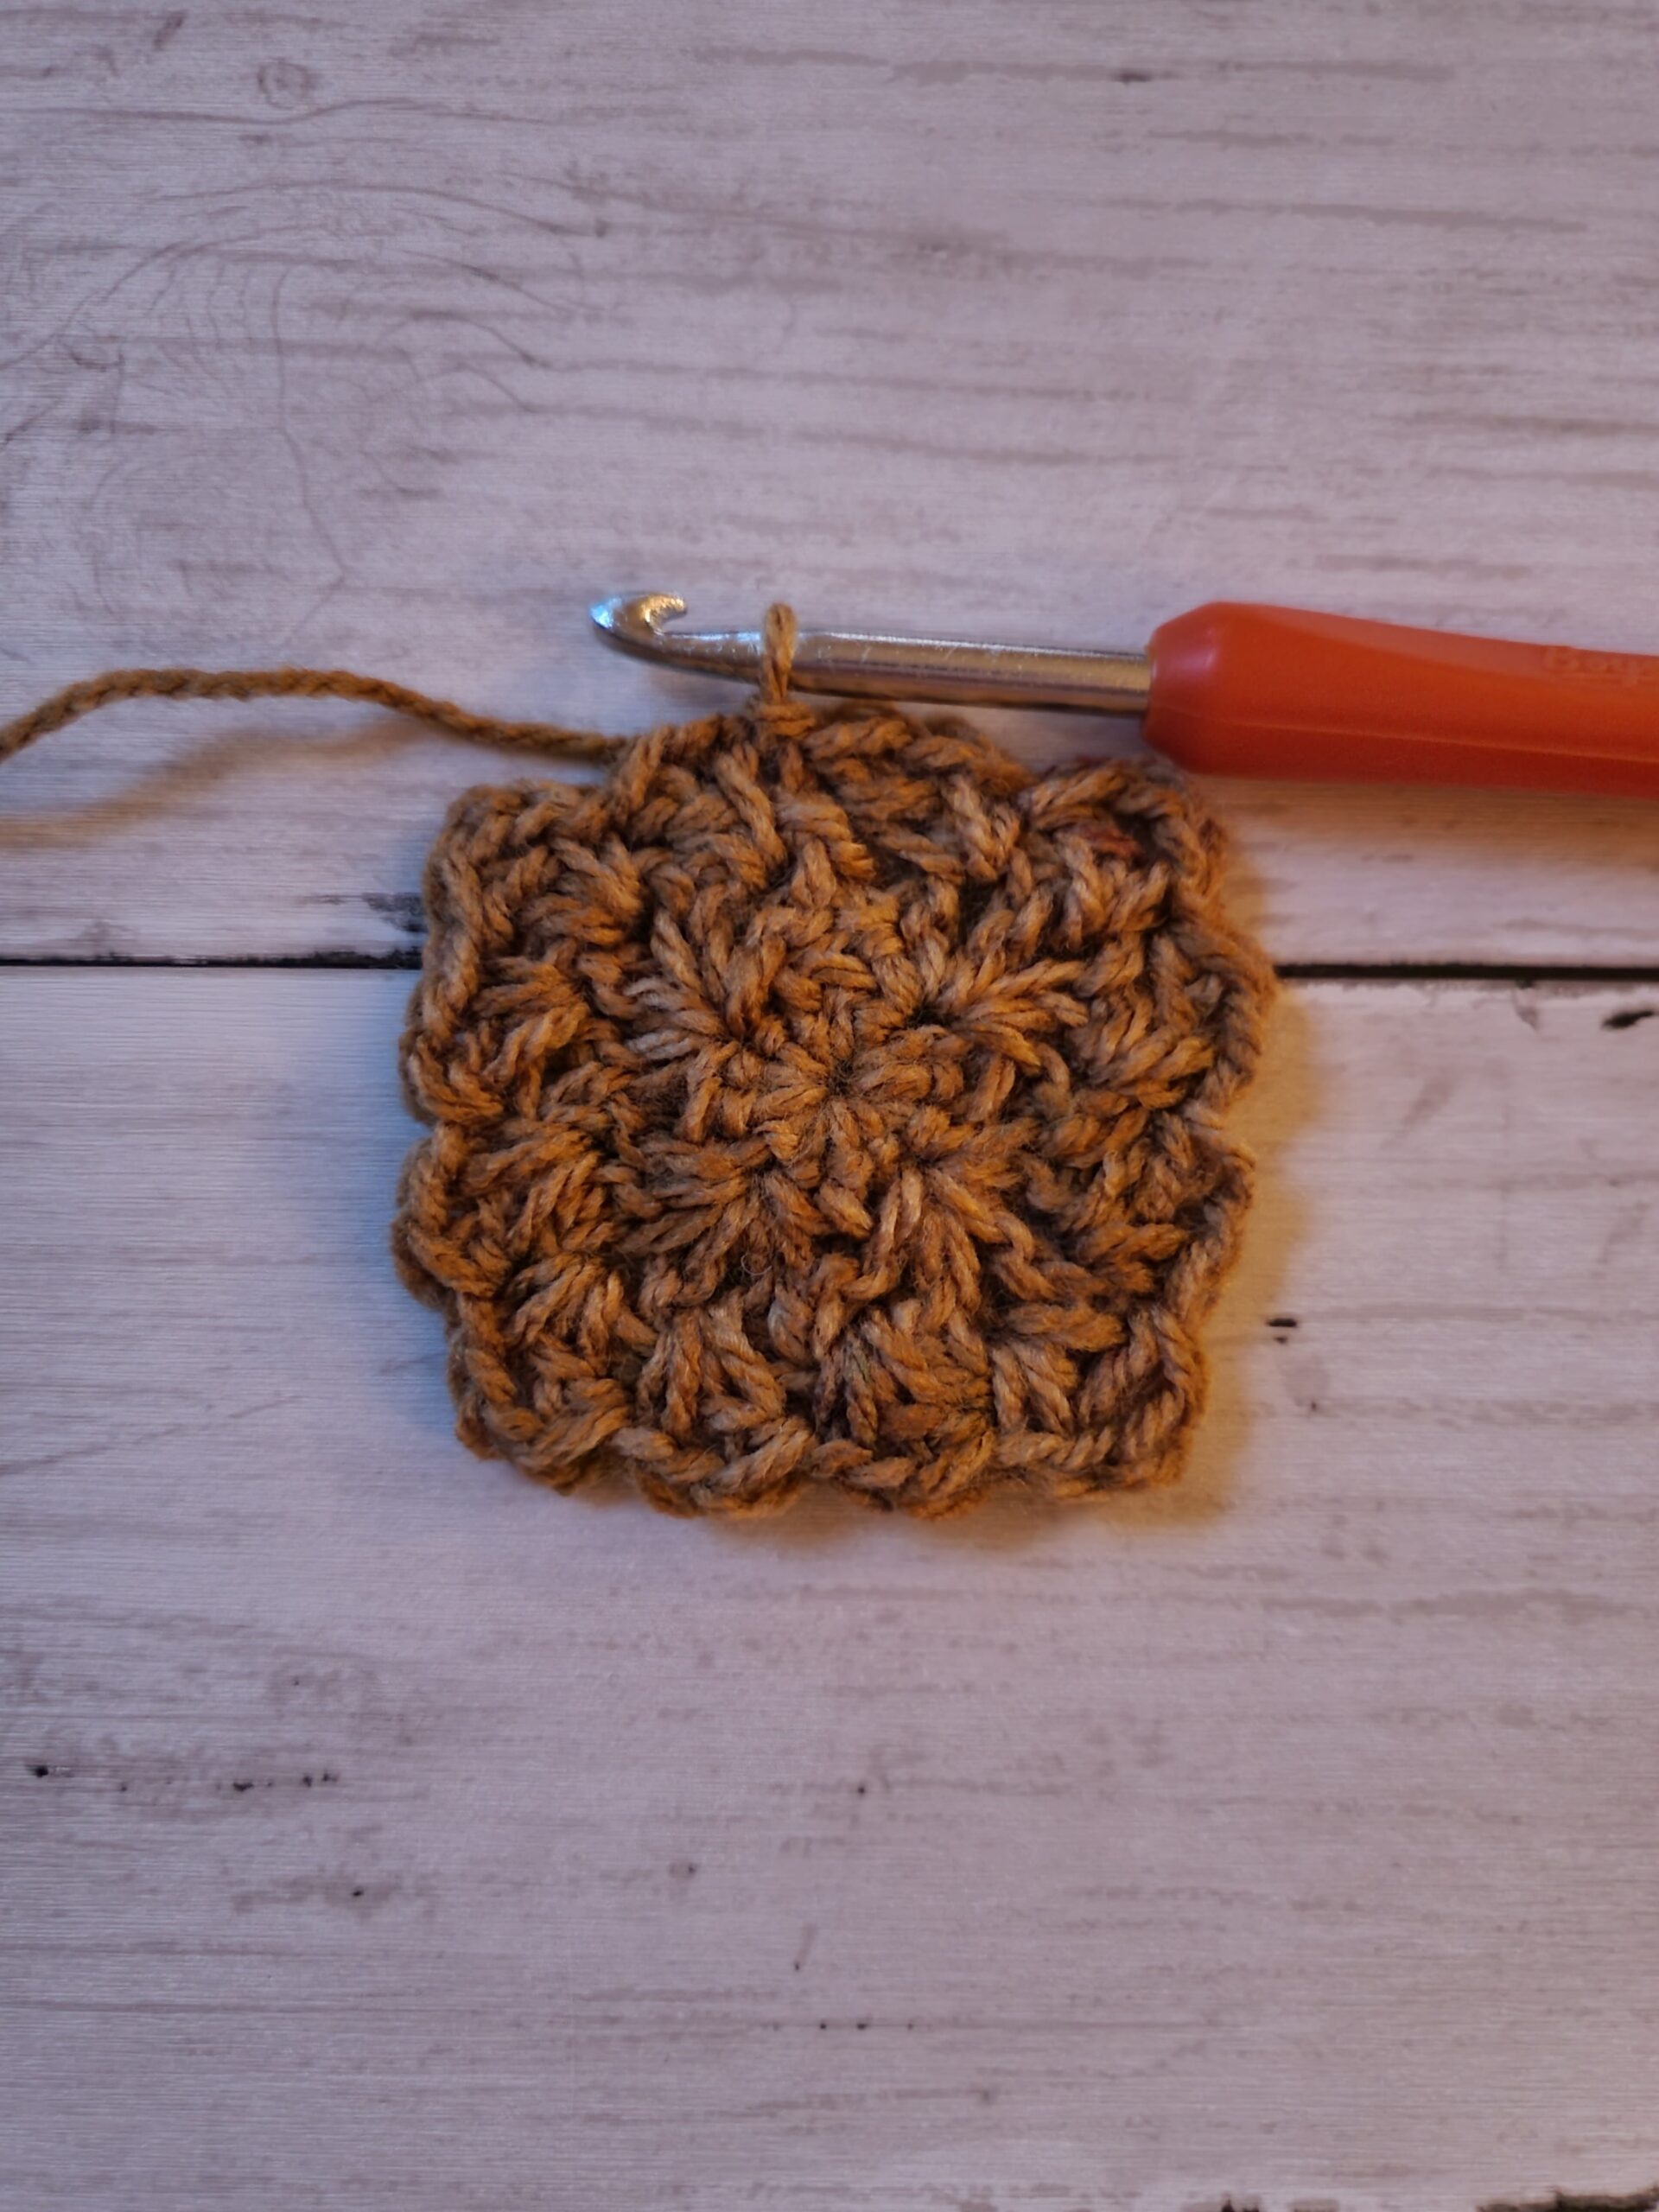
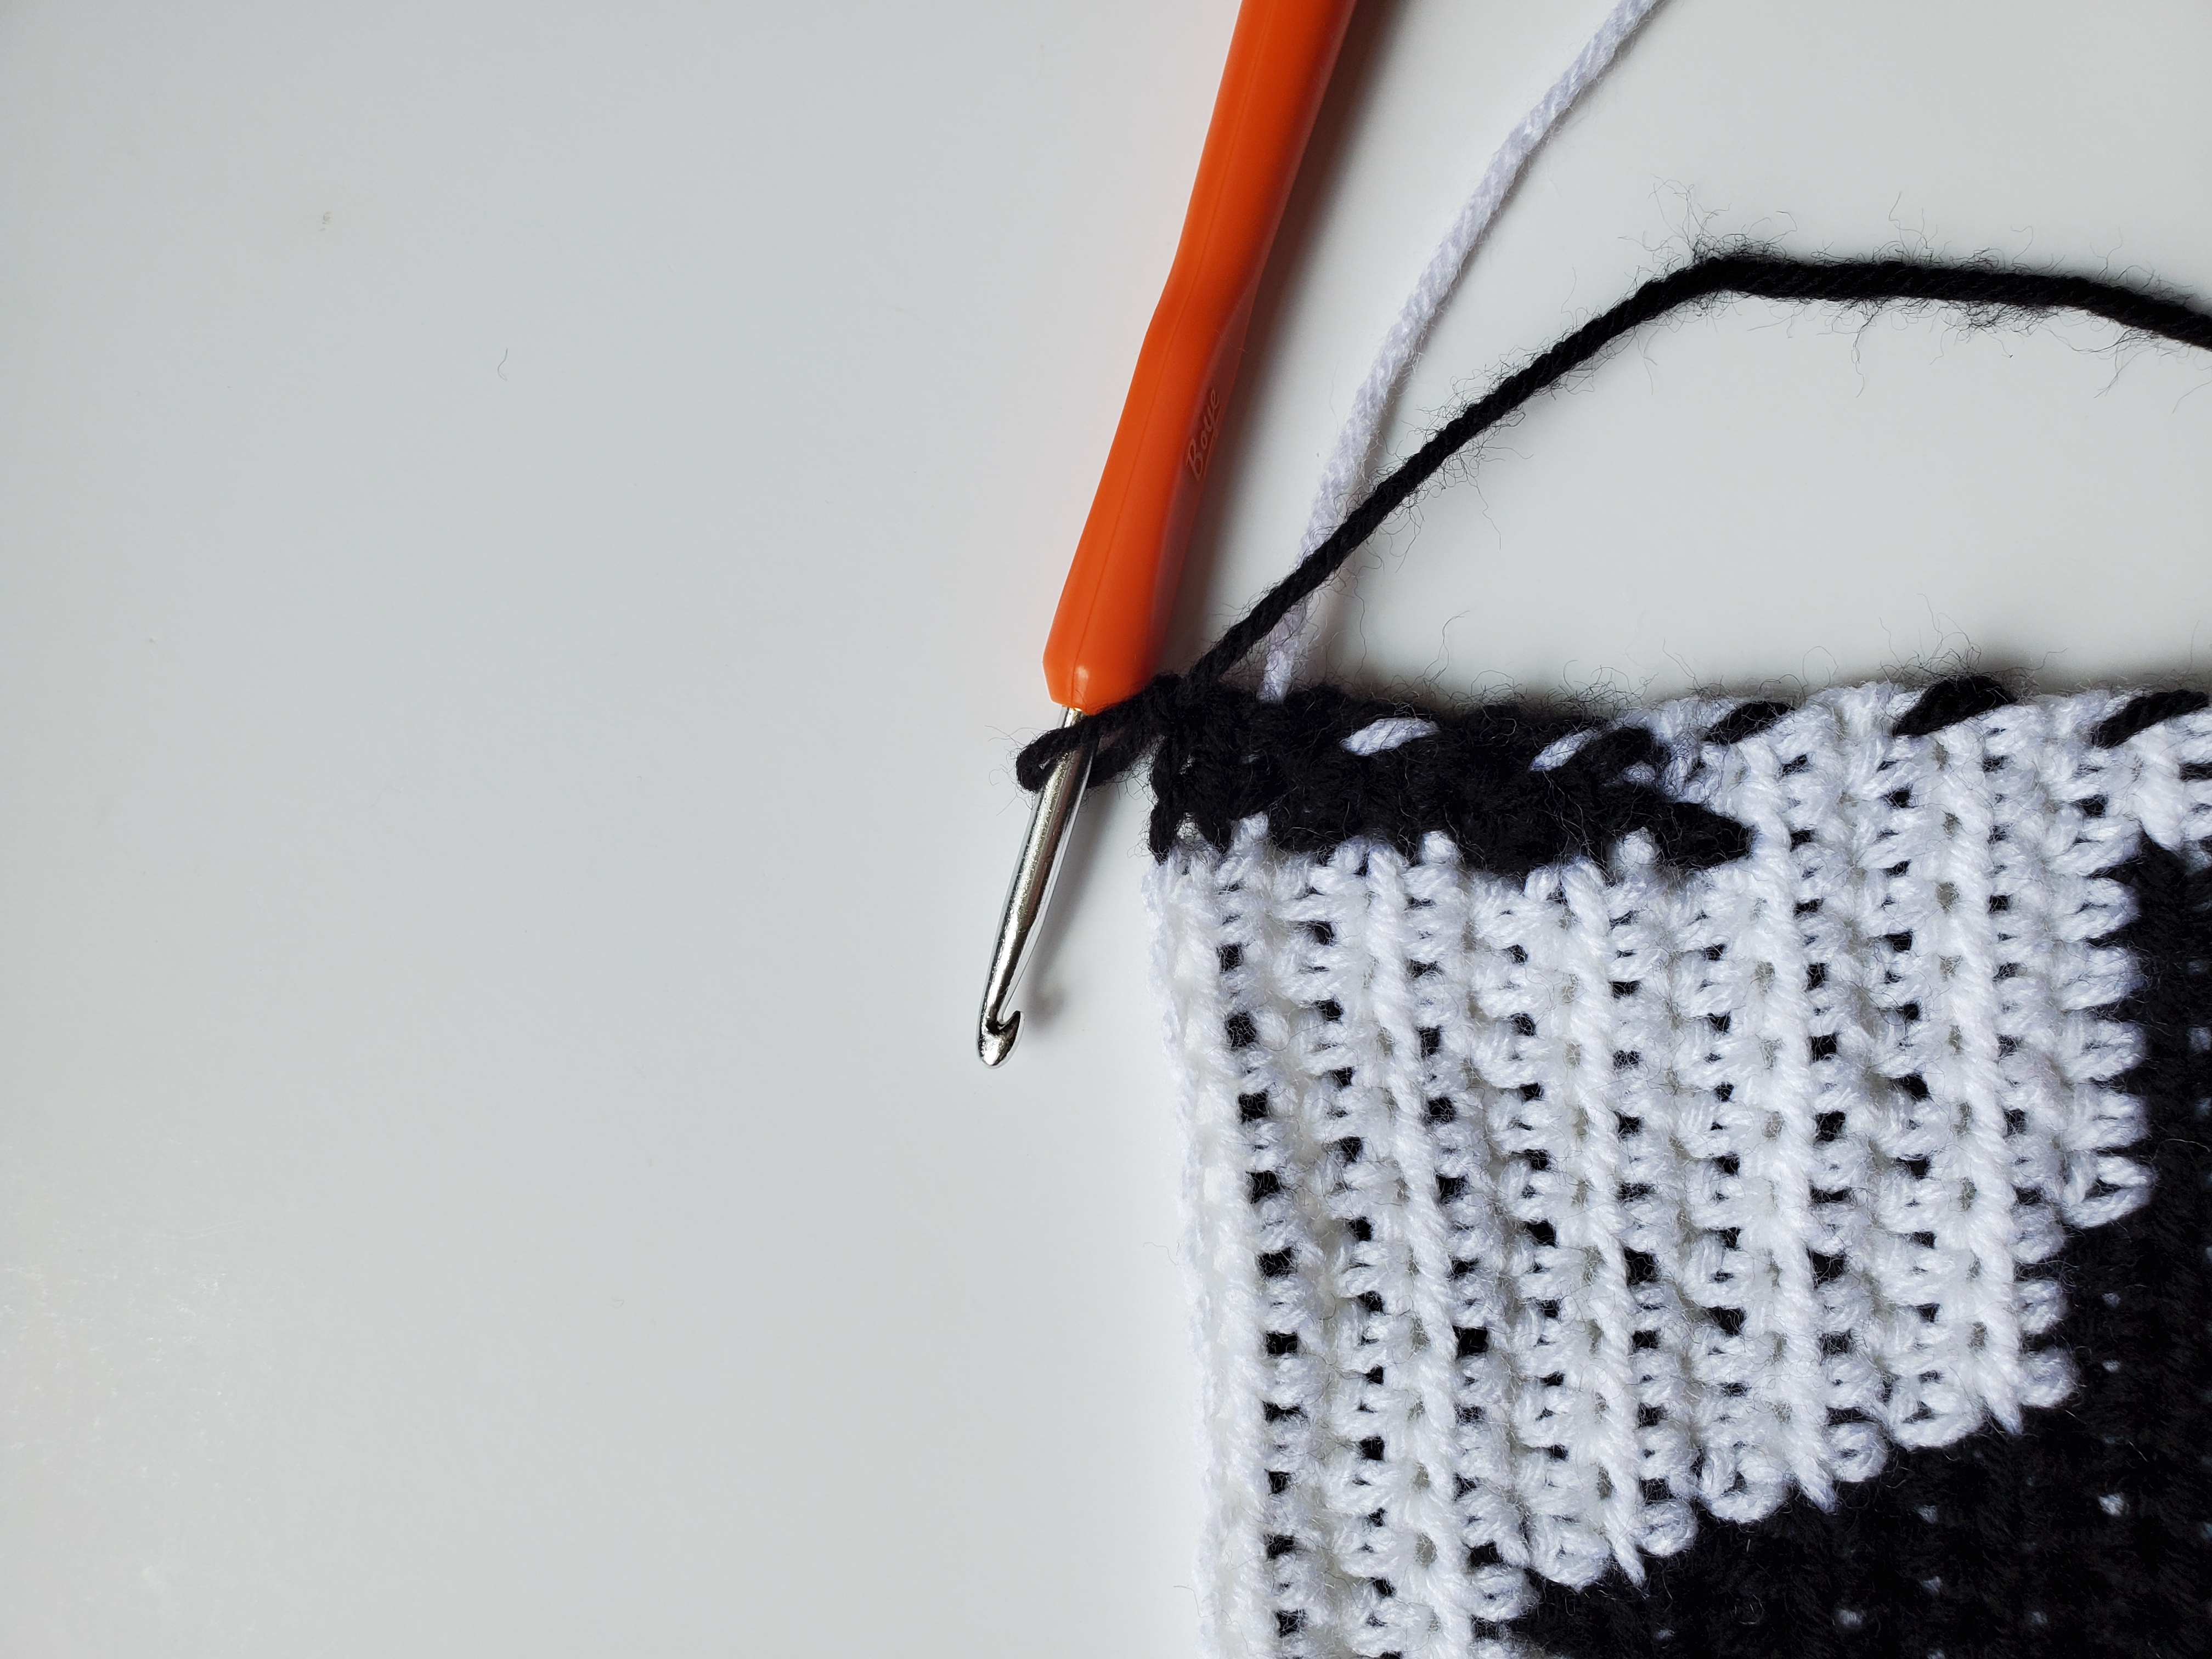
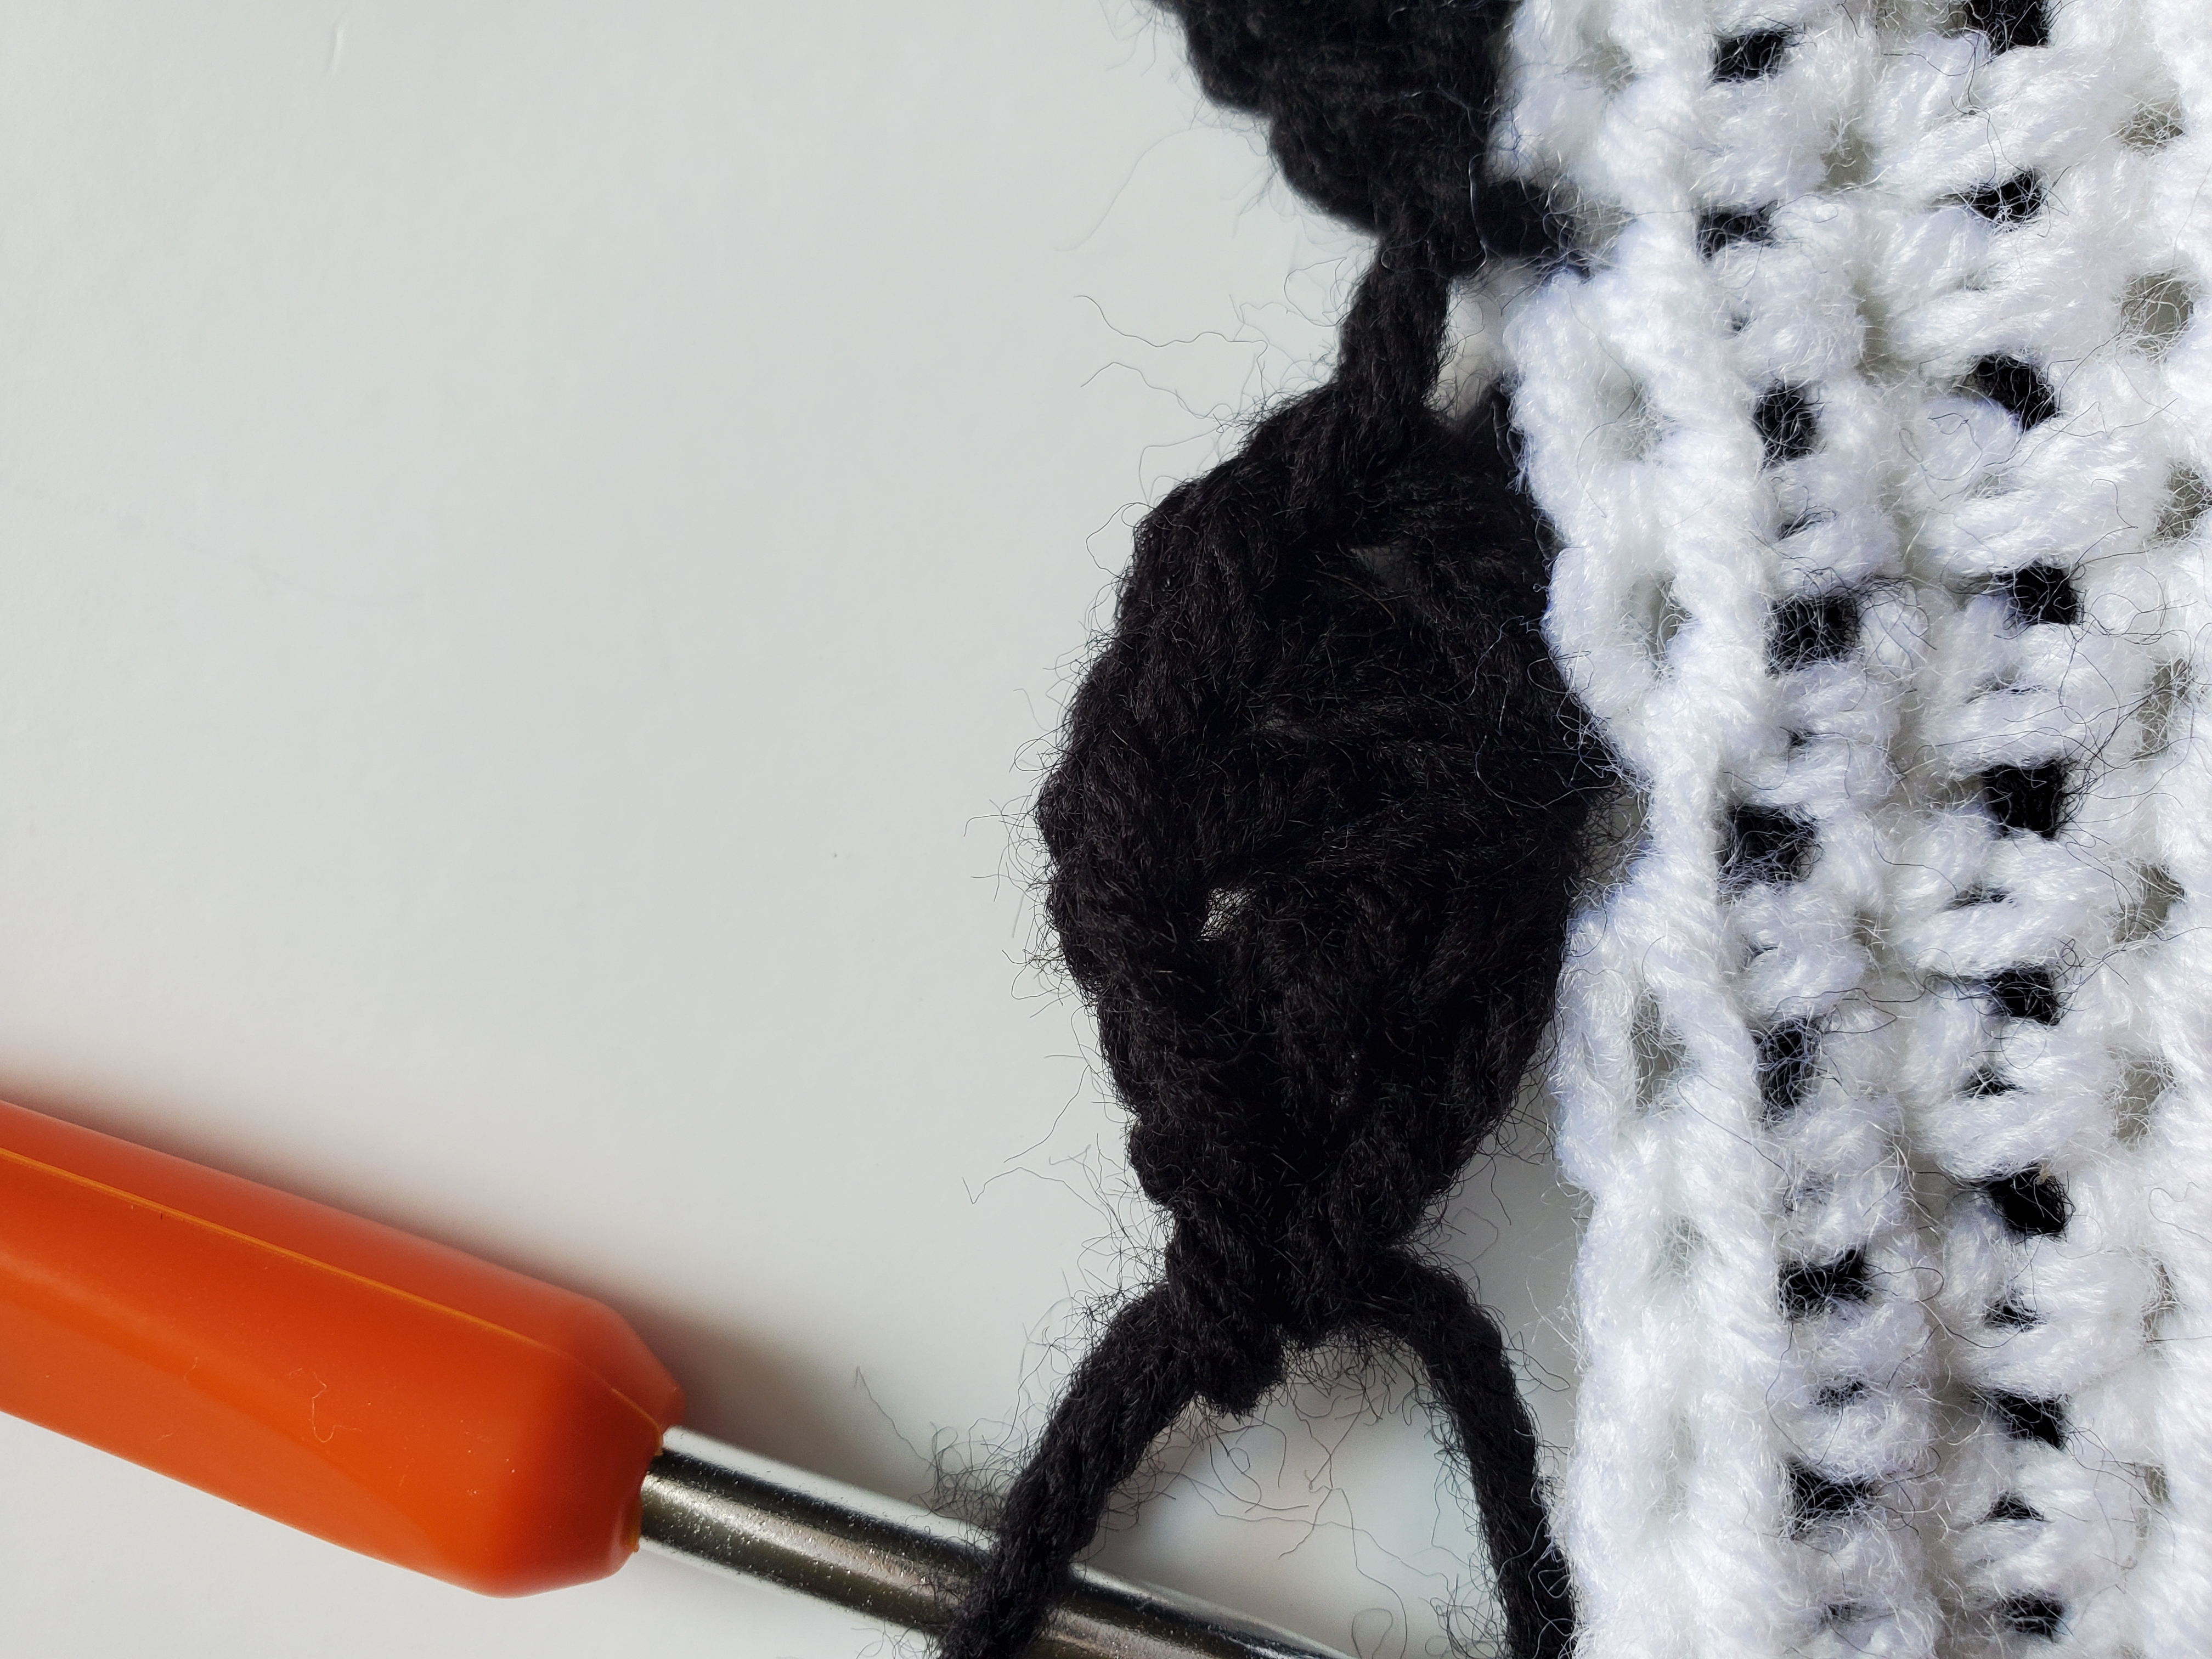
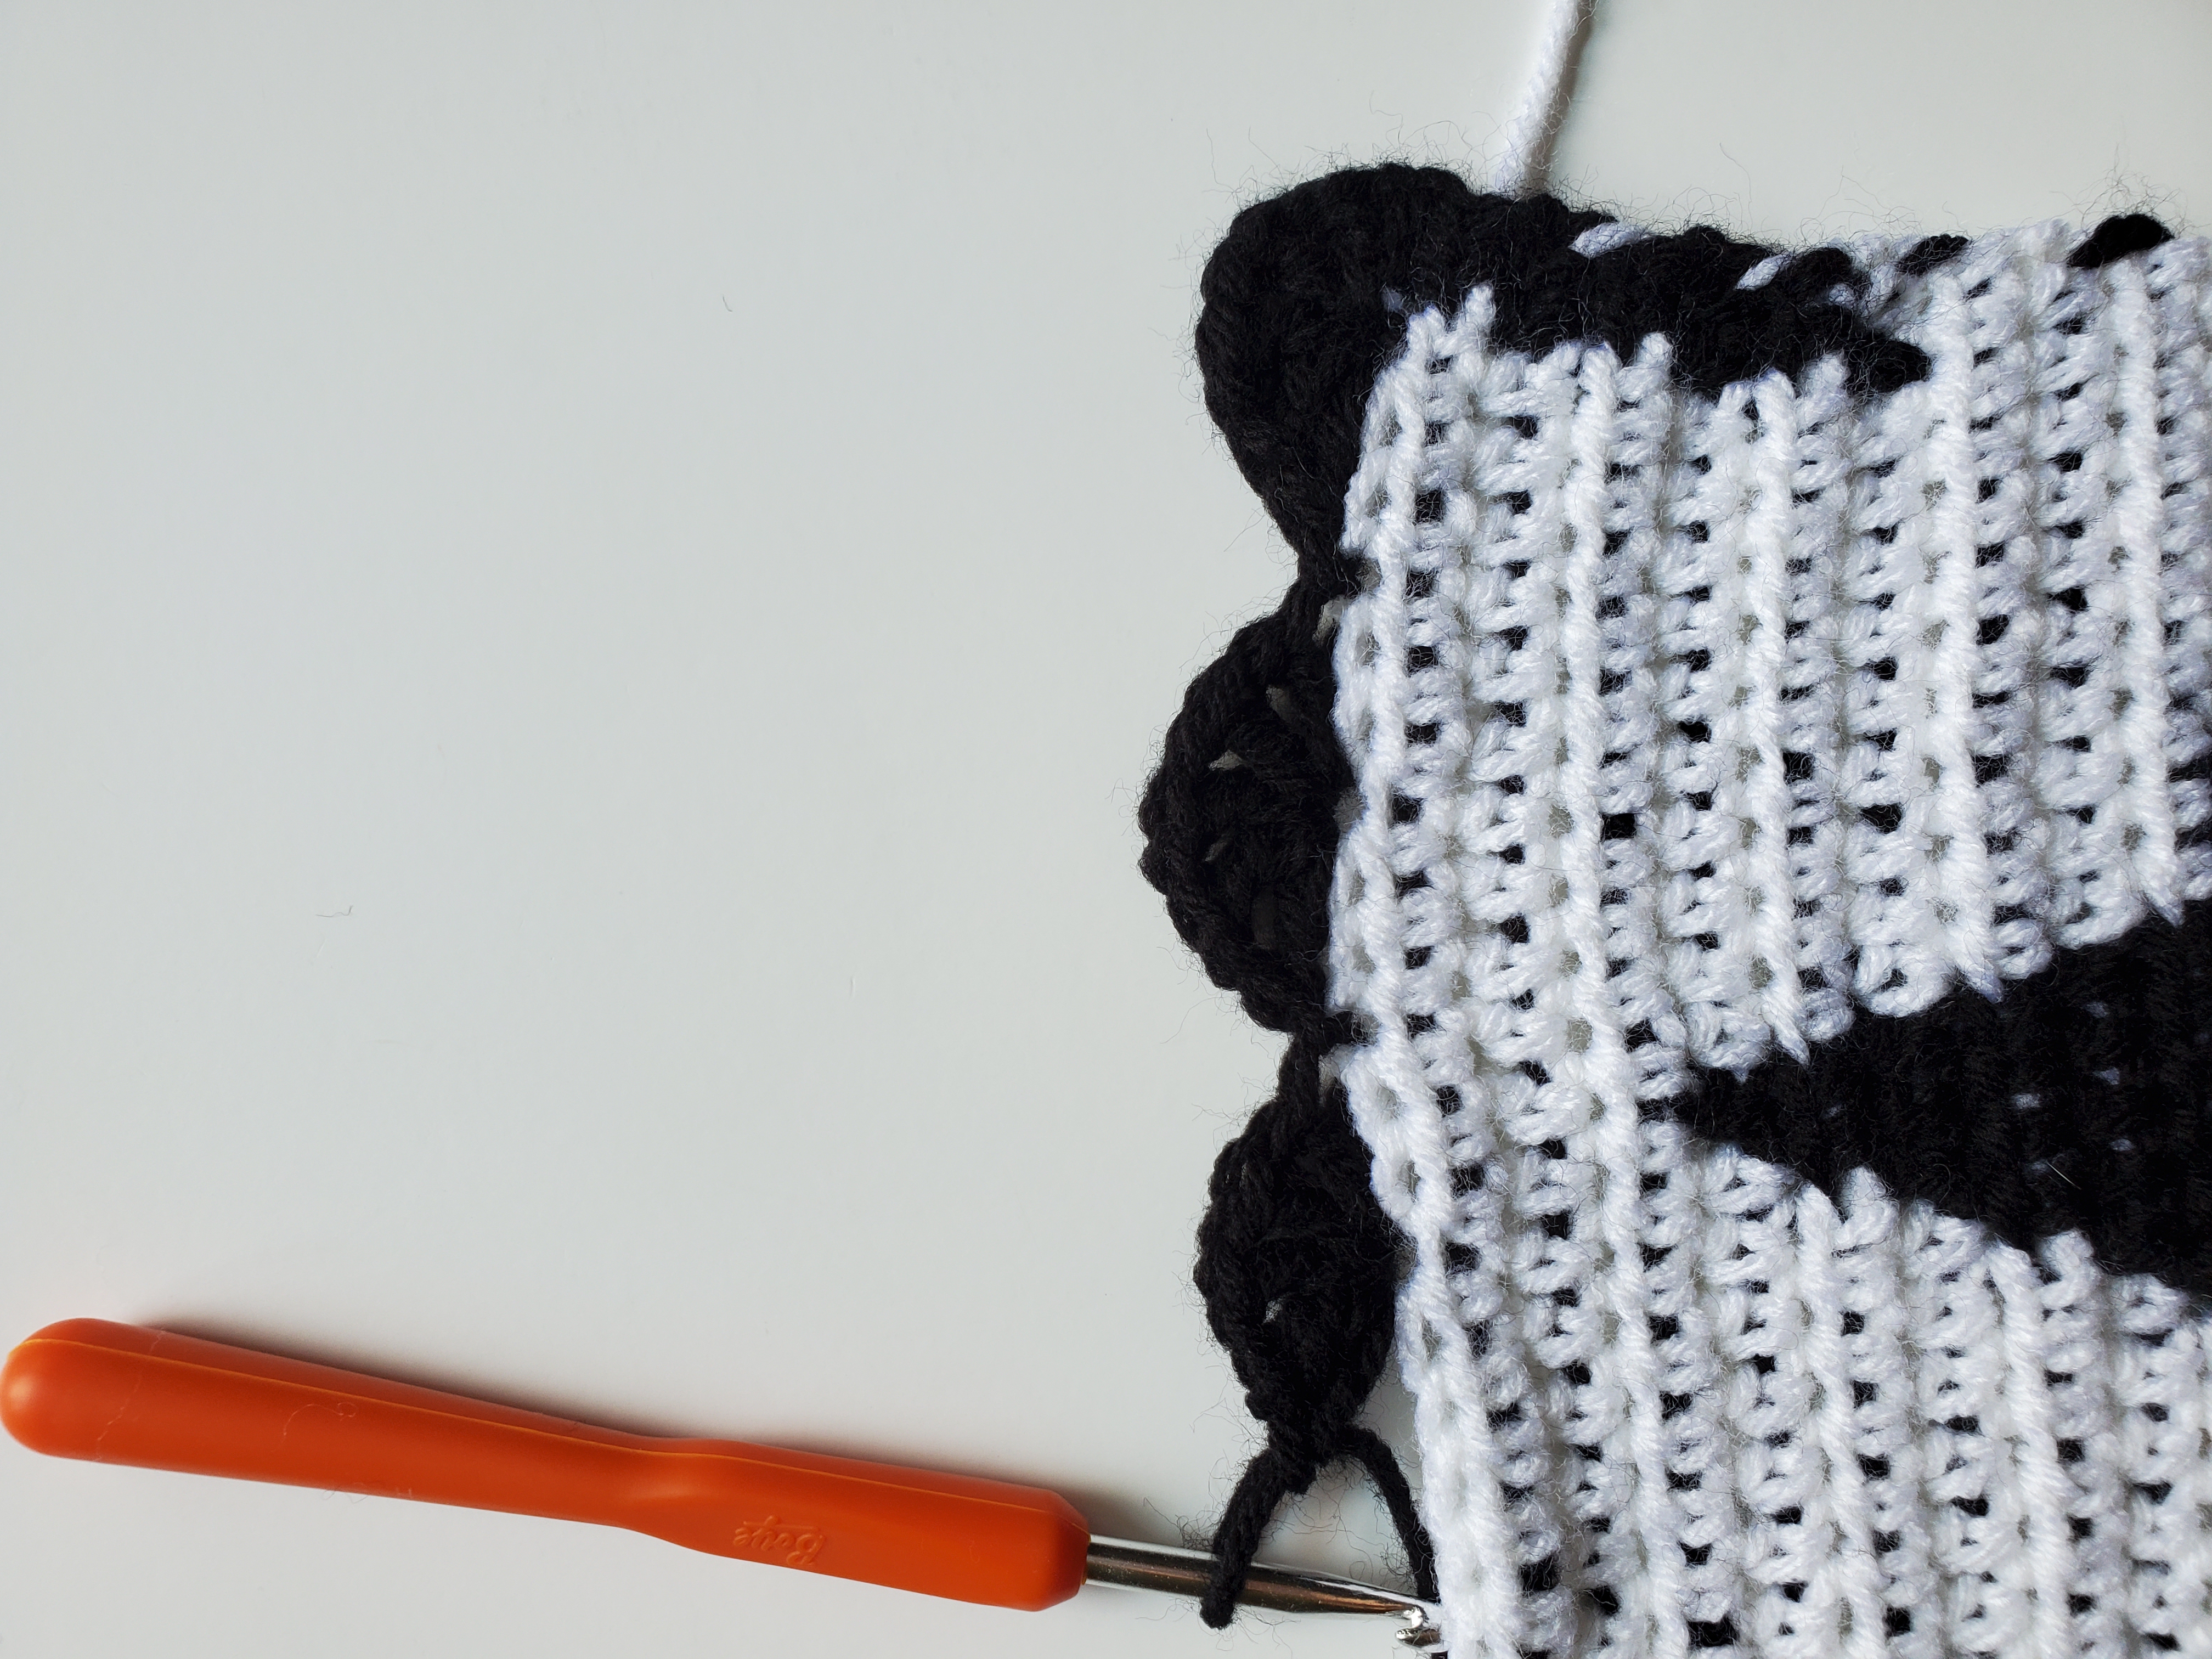
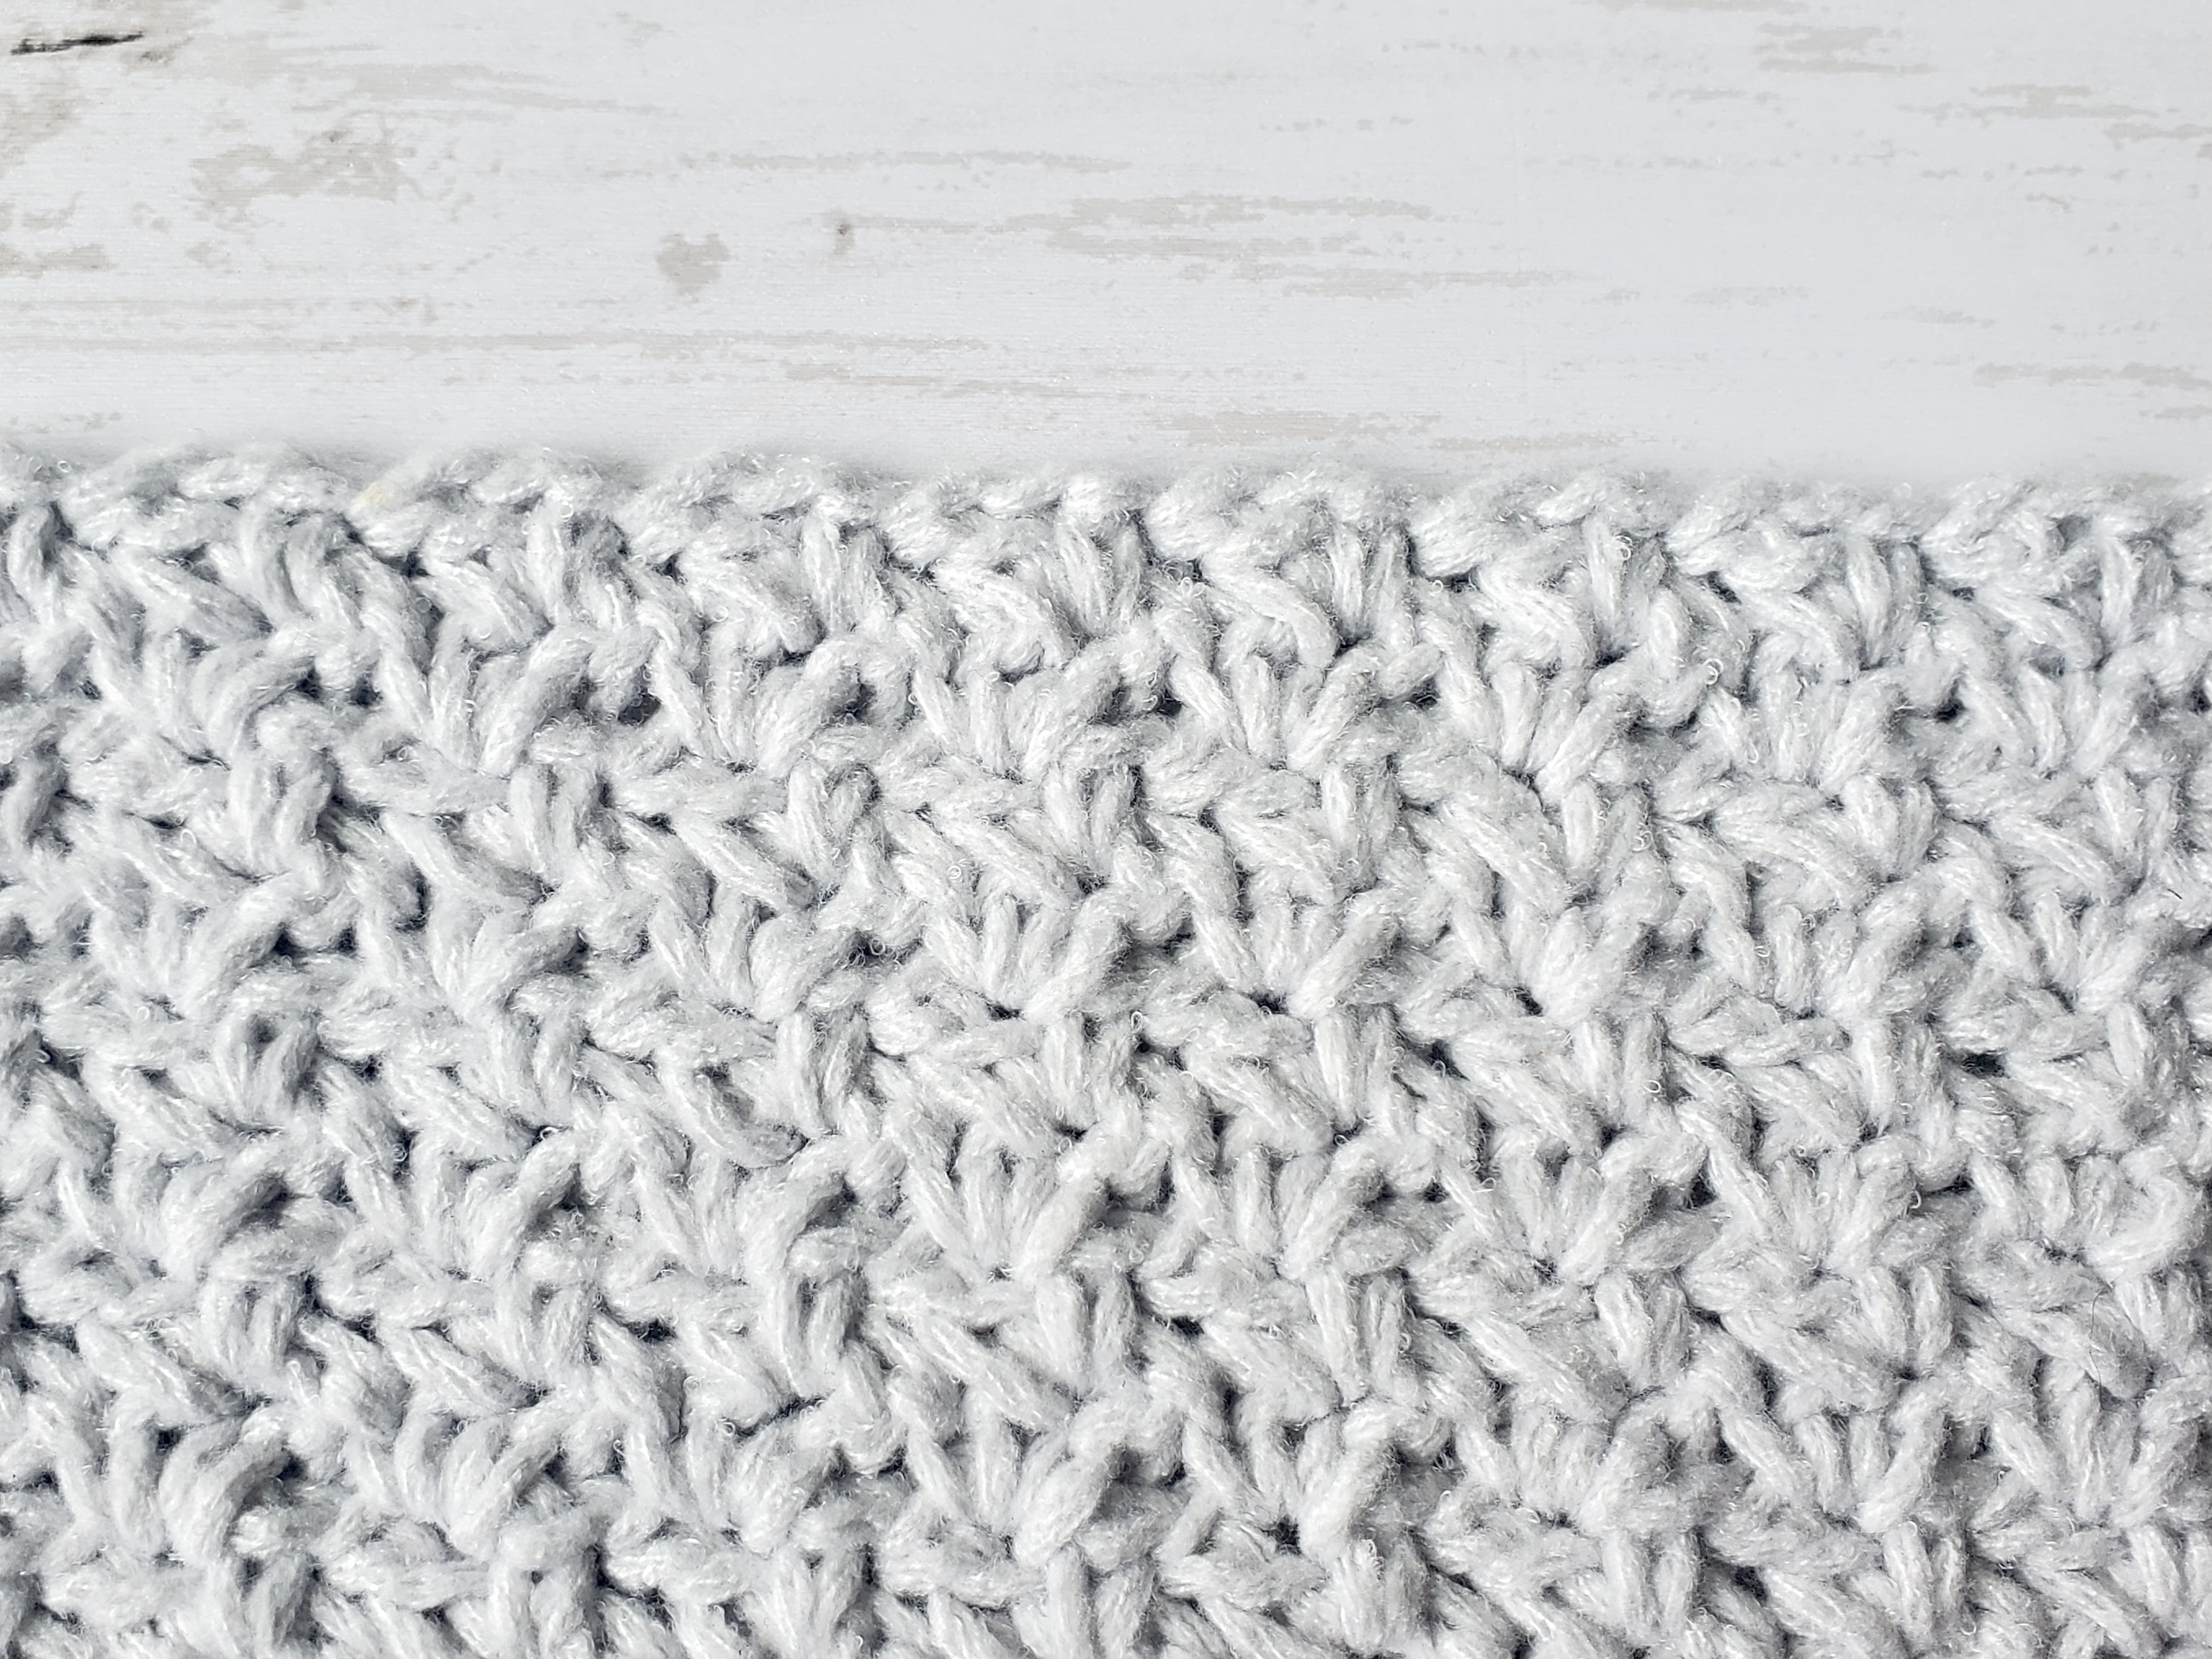
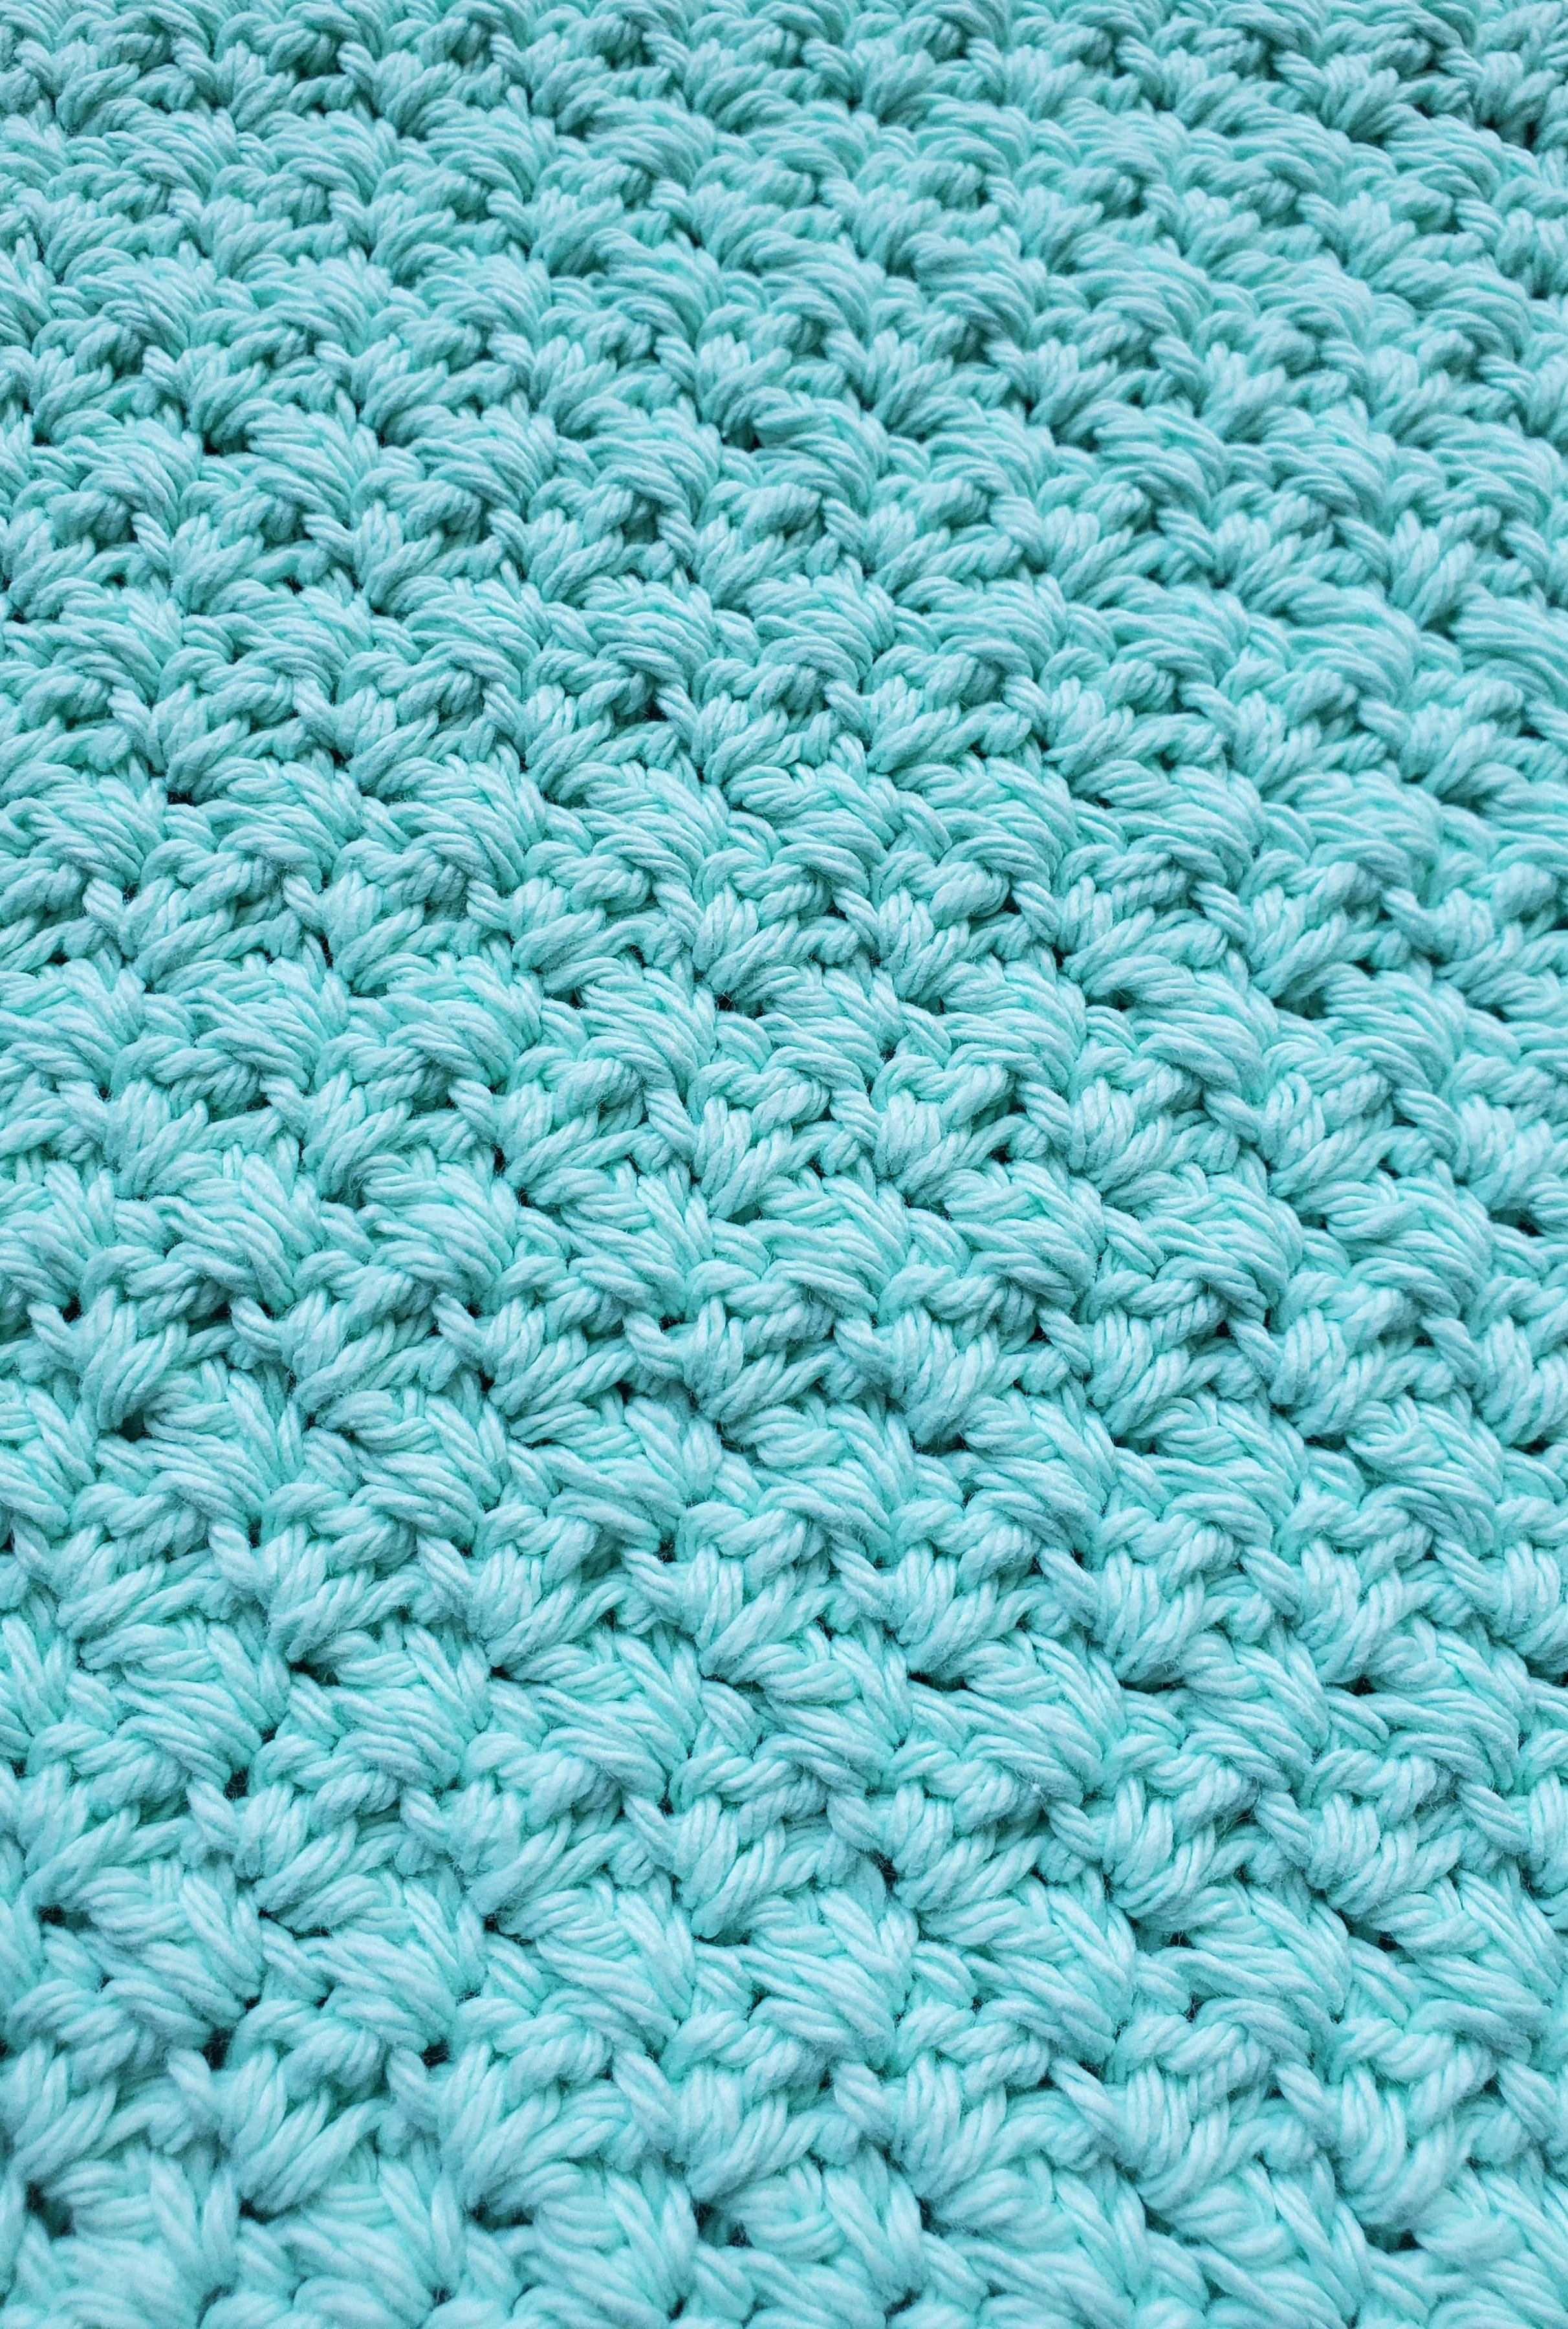
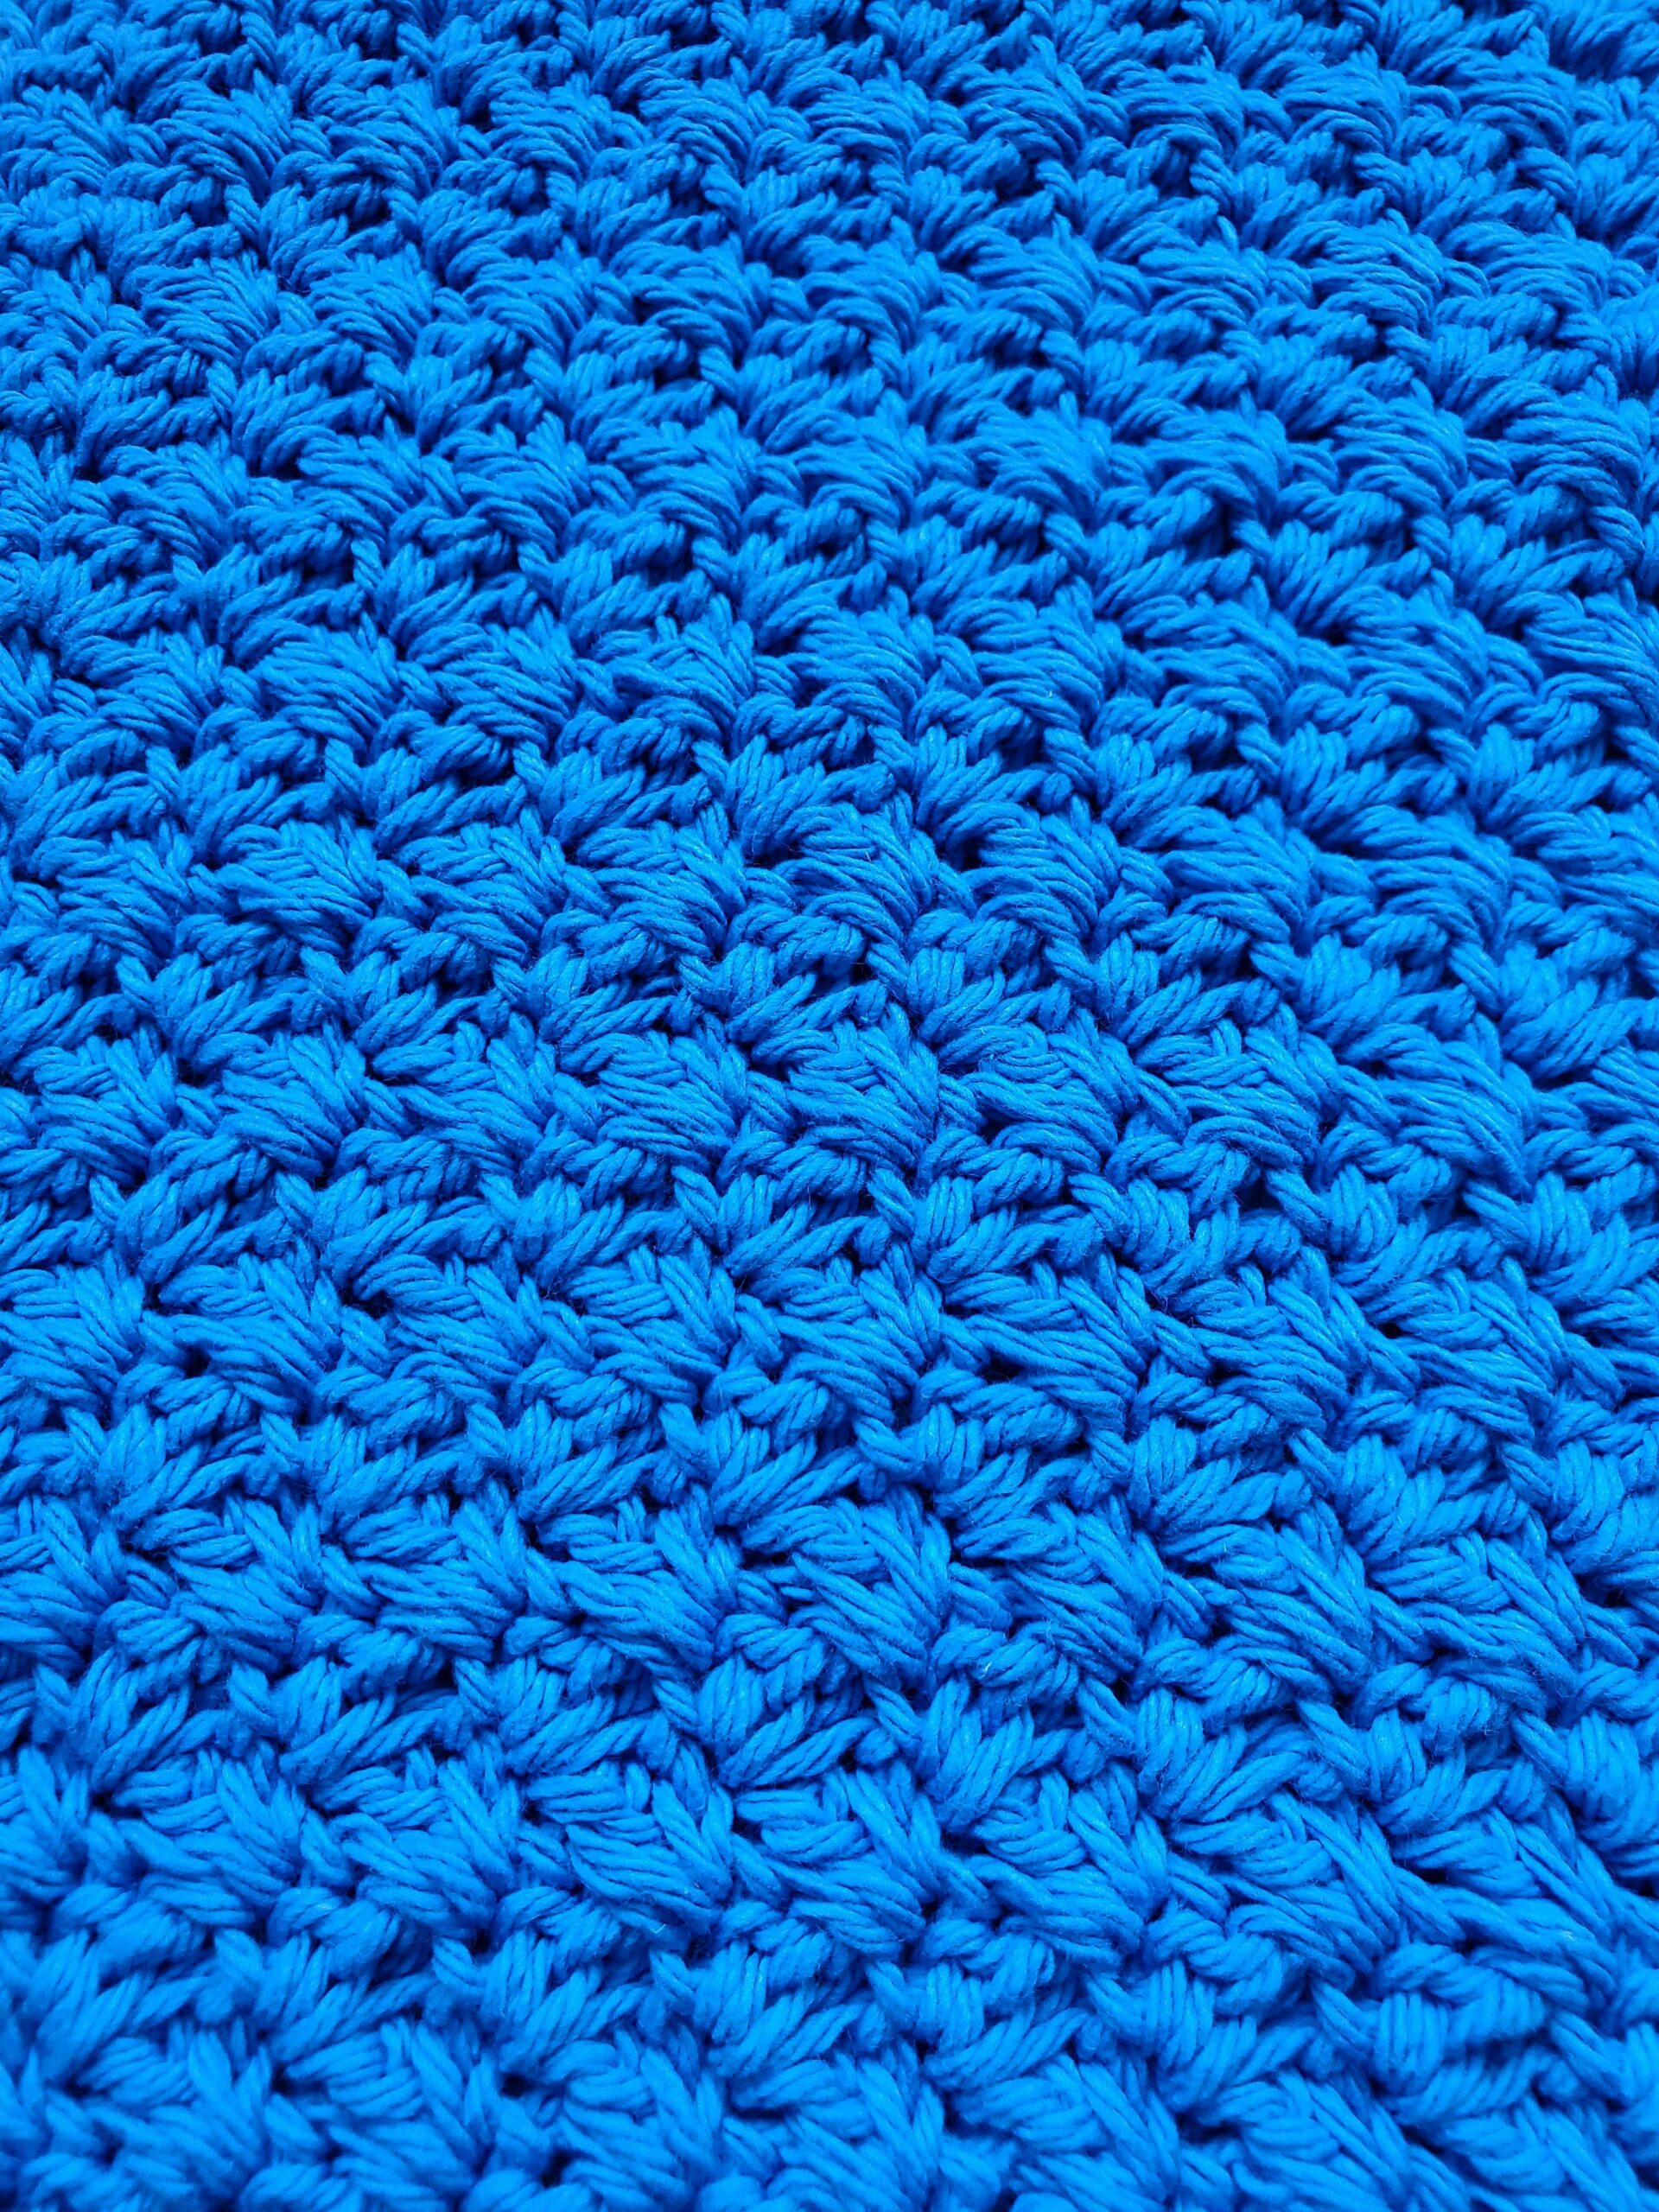
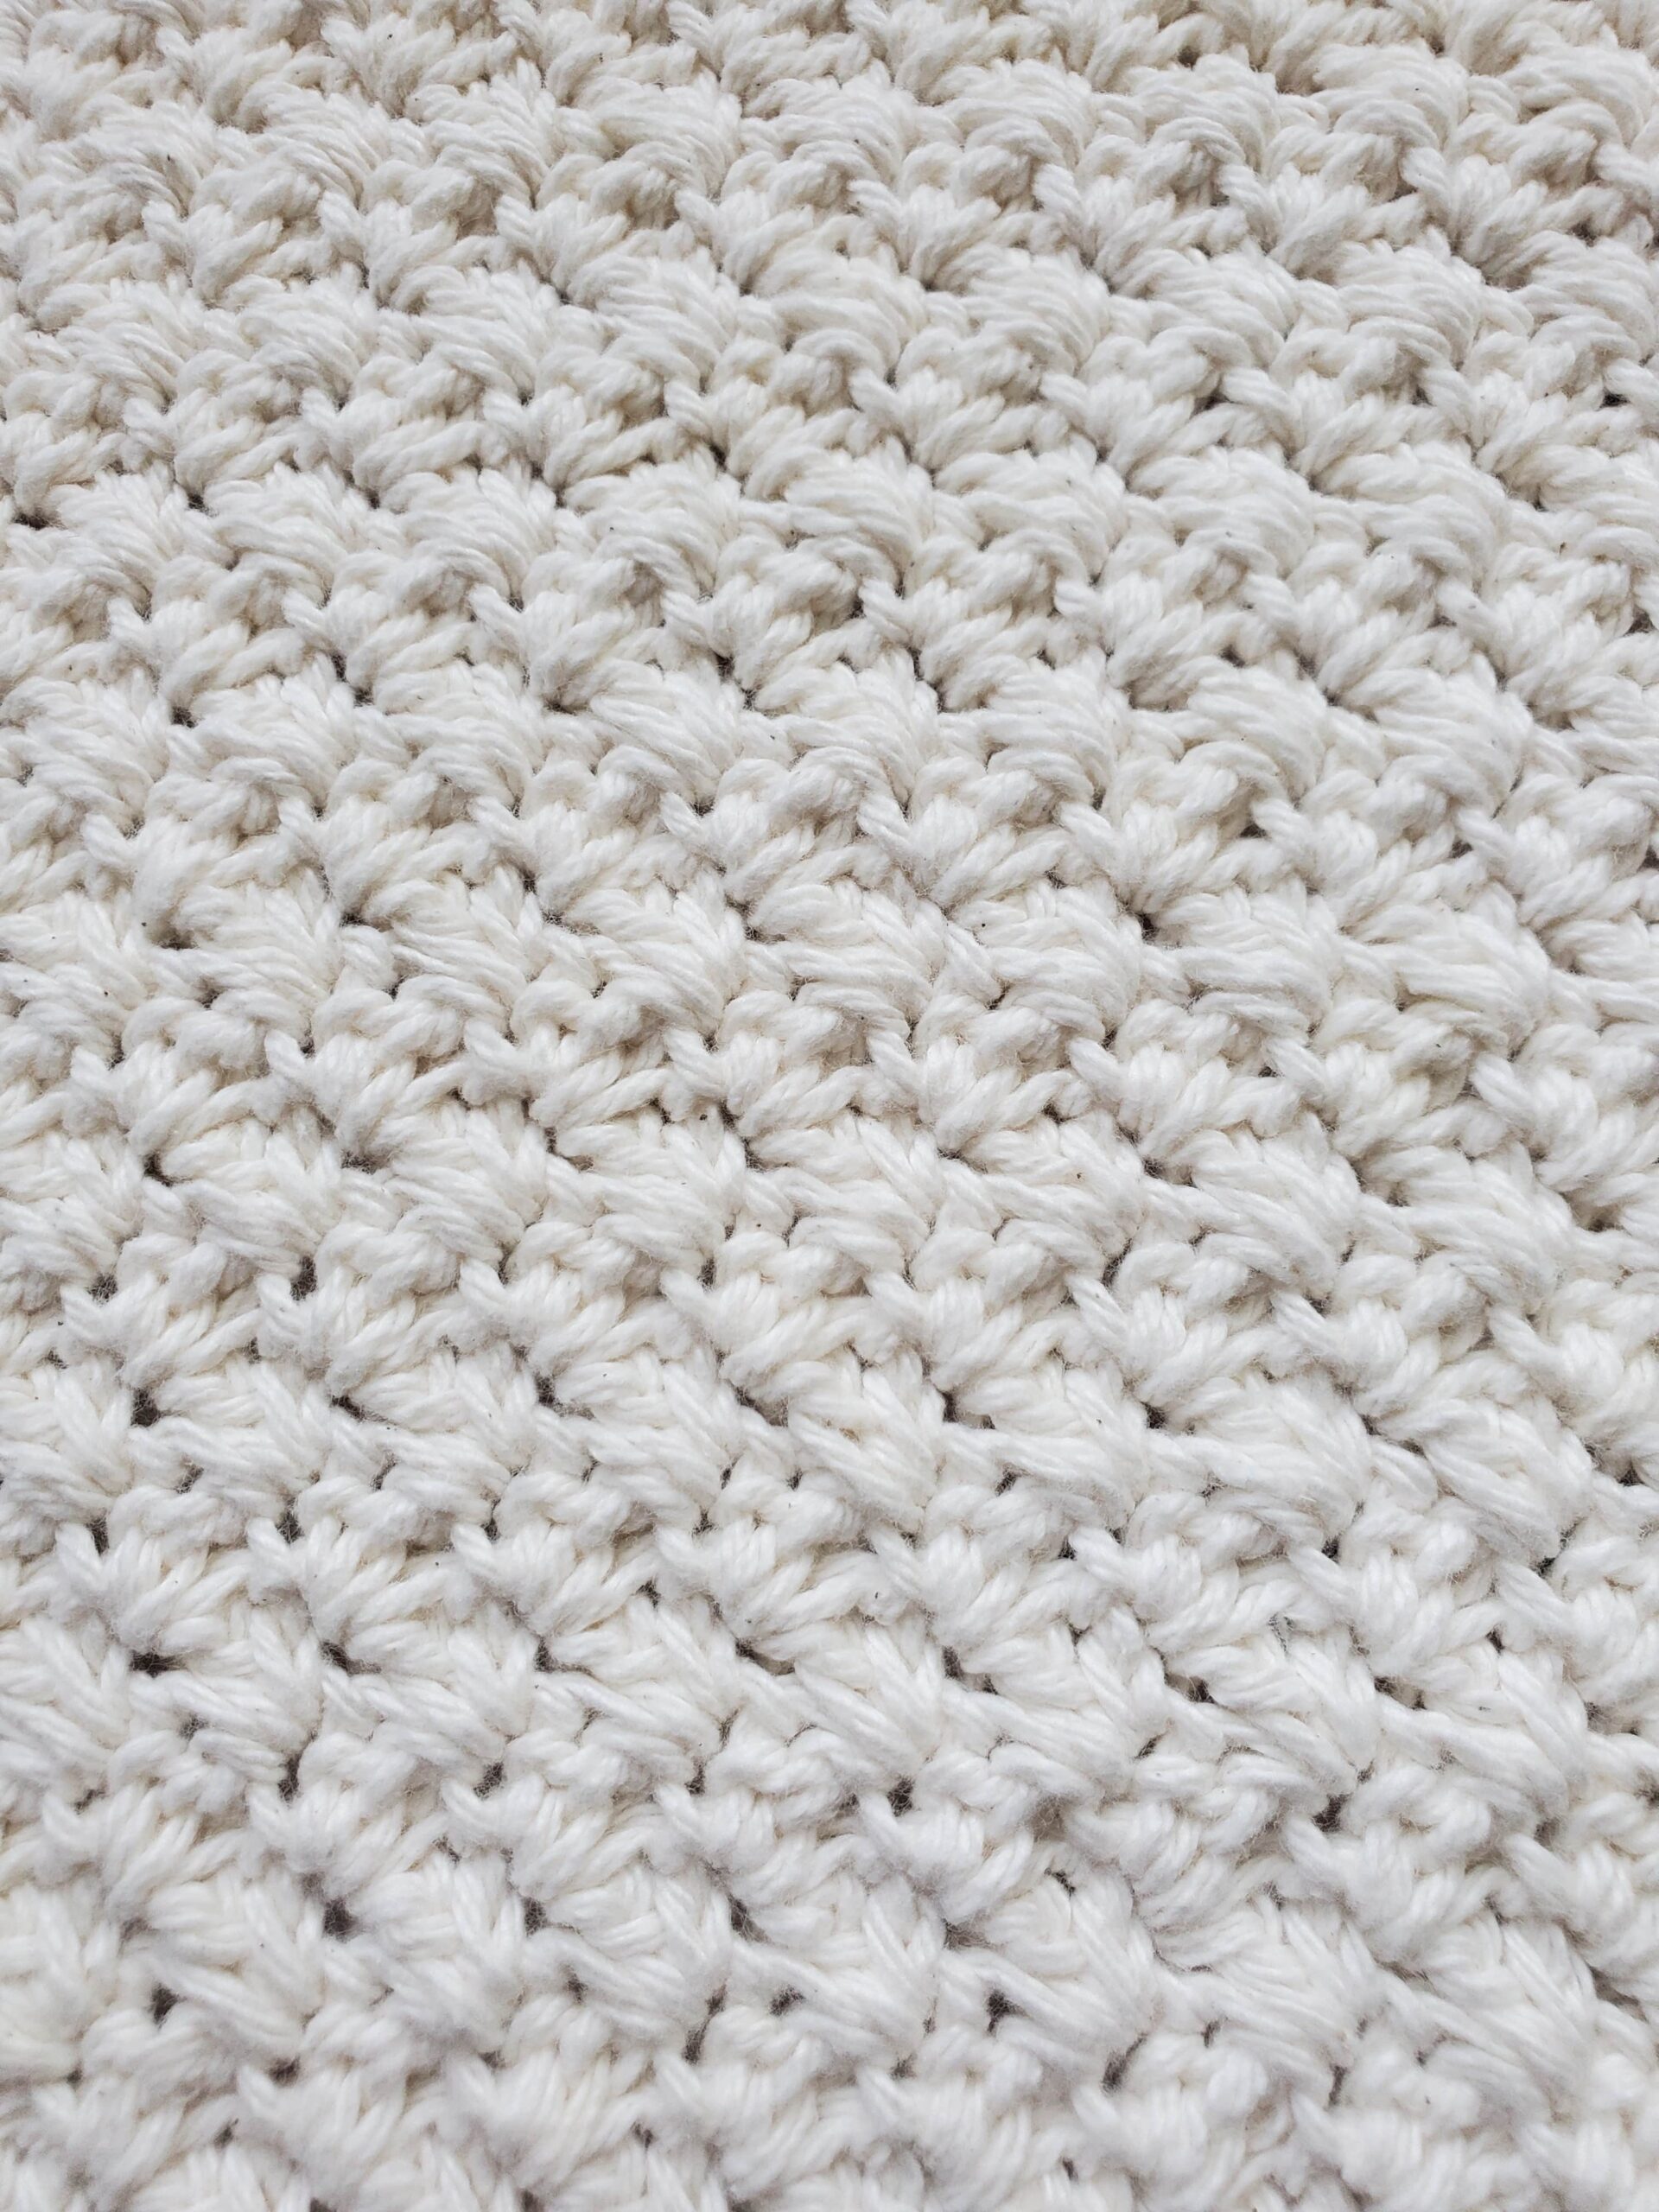
We’ll be using a stitch pattern called the Suzette Stitch today. The suzette stitch combines single and double crochet stitches in a simple, but unique way to achieve its distinct texture. The alternating single and double crochets create a balanced pattern that is visually appealing and functional, and the subtle texture provides a gentle surface that can help catch and absorb liquids. 

Here’s a close up of the texture we’ll be making in each color:

Texture in Mint
Mint
Burp Cloth Texture in Royal
Royal
Texture in Ecru
Ecru

Alright, let’s grab our hooks and our favorite colored Peaches and Creme colors and dive on in!

Related Posts:

Please note that some of these links are affiliate links. That means that if you click on these links and make a purchase, I may receive a commission at no extra cost to you. You can find more information about our disclosure policy here. Thank you for your support.

Materials Needed:

Abbreviations Used:

Please note these are in US terms, not UK.

  • Ch – chain
  • St(s) – stitch(es)
  • Sl st – slip stitch
  • Sc – single crochet
  • Dc – double crochet

Size:

  • 7 in x 17 in (this will vary depending on your tension)

Peaches and Creme Crochet Burp Cloth Pattern:

Ch 21

  • Row 1: Make 1 sc into second ch from hook, 1 dc into the same ch, *skip 1 ch, (1 sc and 1 dc) into next ch* repeat from *to.* Your last ch should end up with a (1 sc and 1 dc) worked into it. (20 sts)
  • Row 2: Ch 1 (does not count as a st), turn, *skip 1 st and work (1 sc and 1 dc) into the next st (this should be the sc from the previous row)*. Repeat from *to* (20 sts)

Row 3-46: Repeat Row 2.

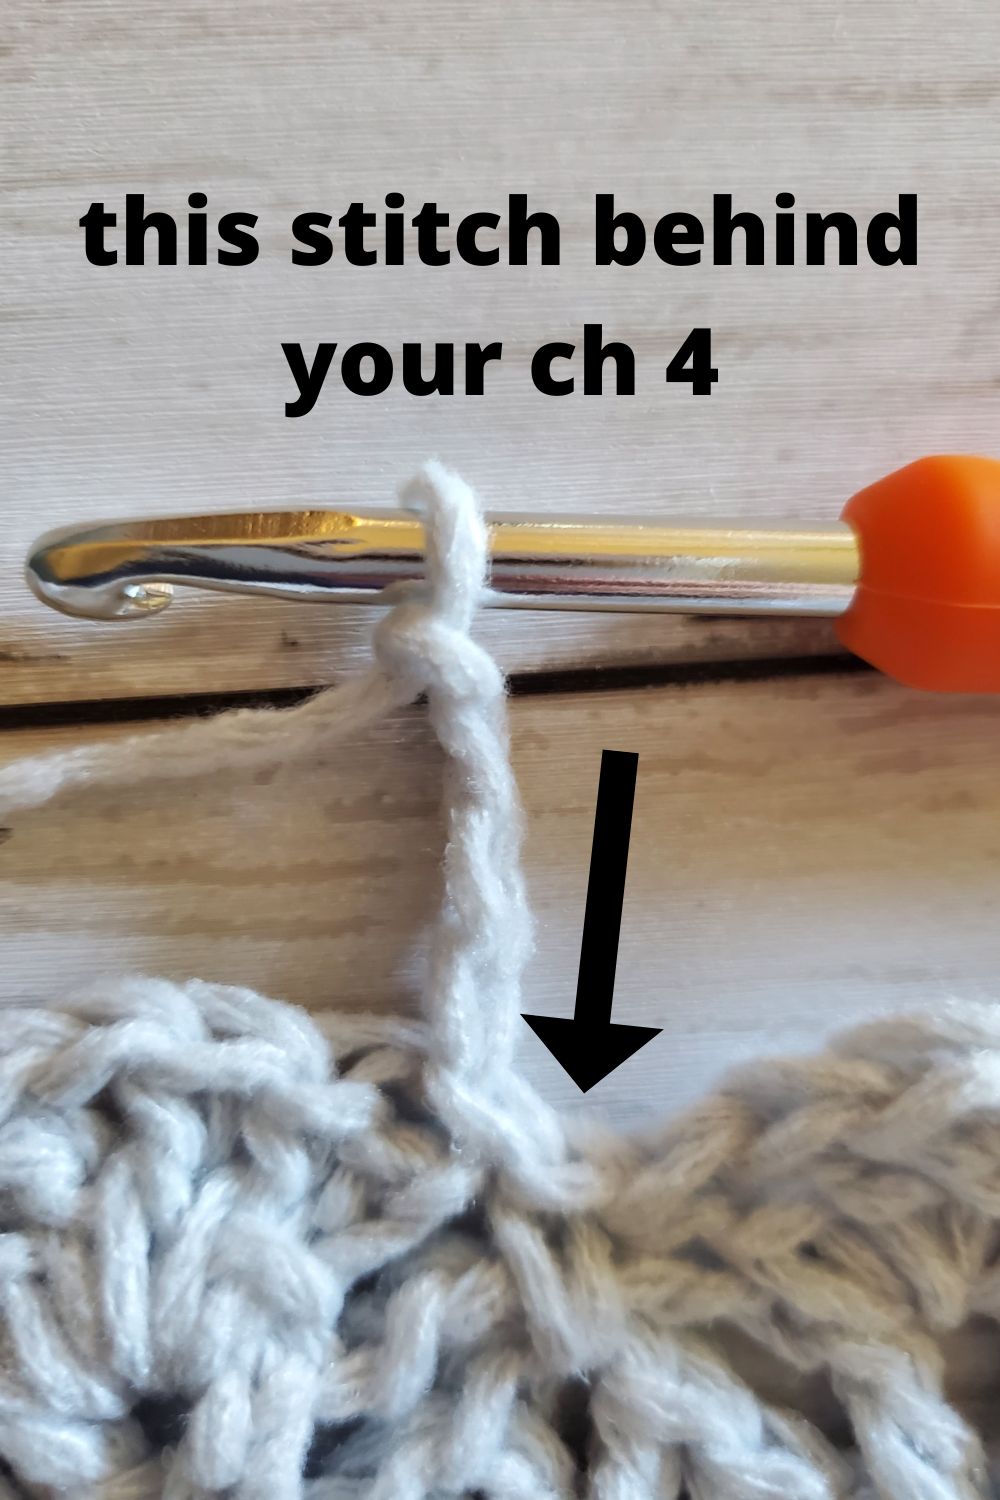
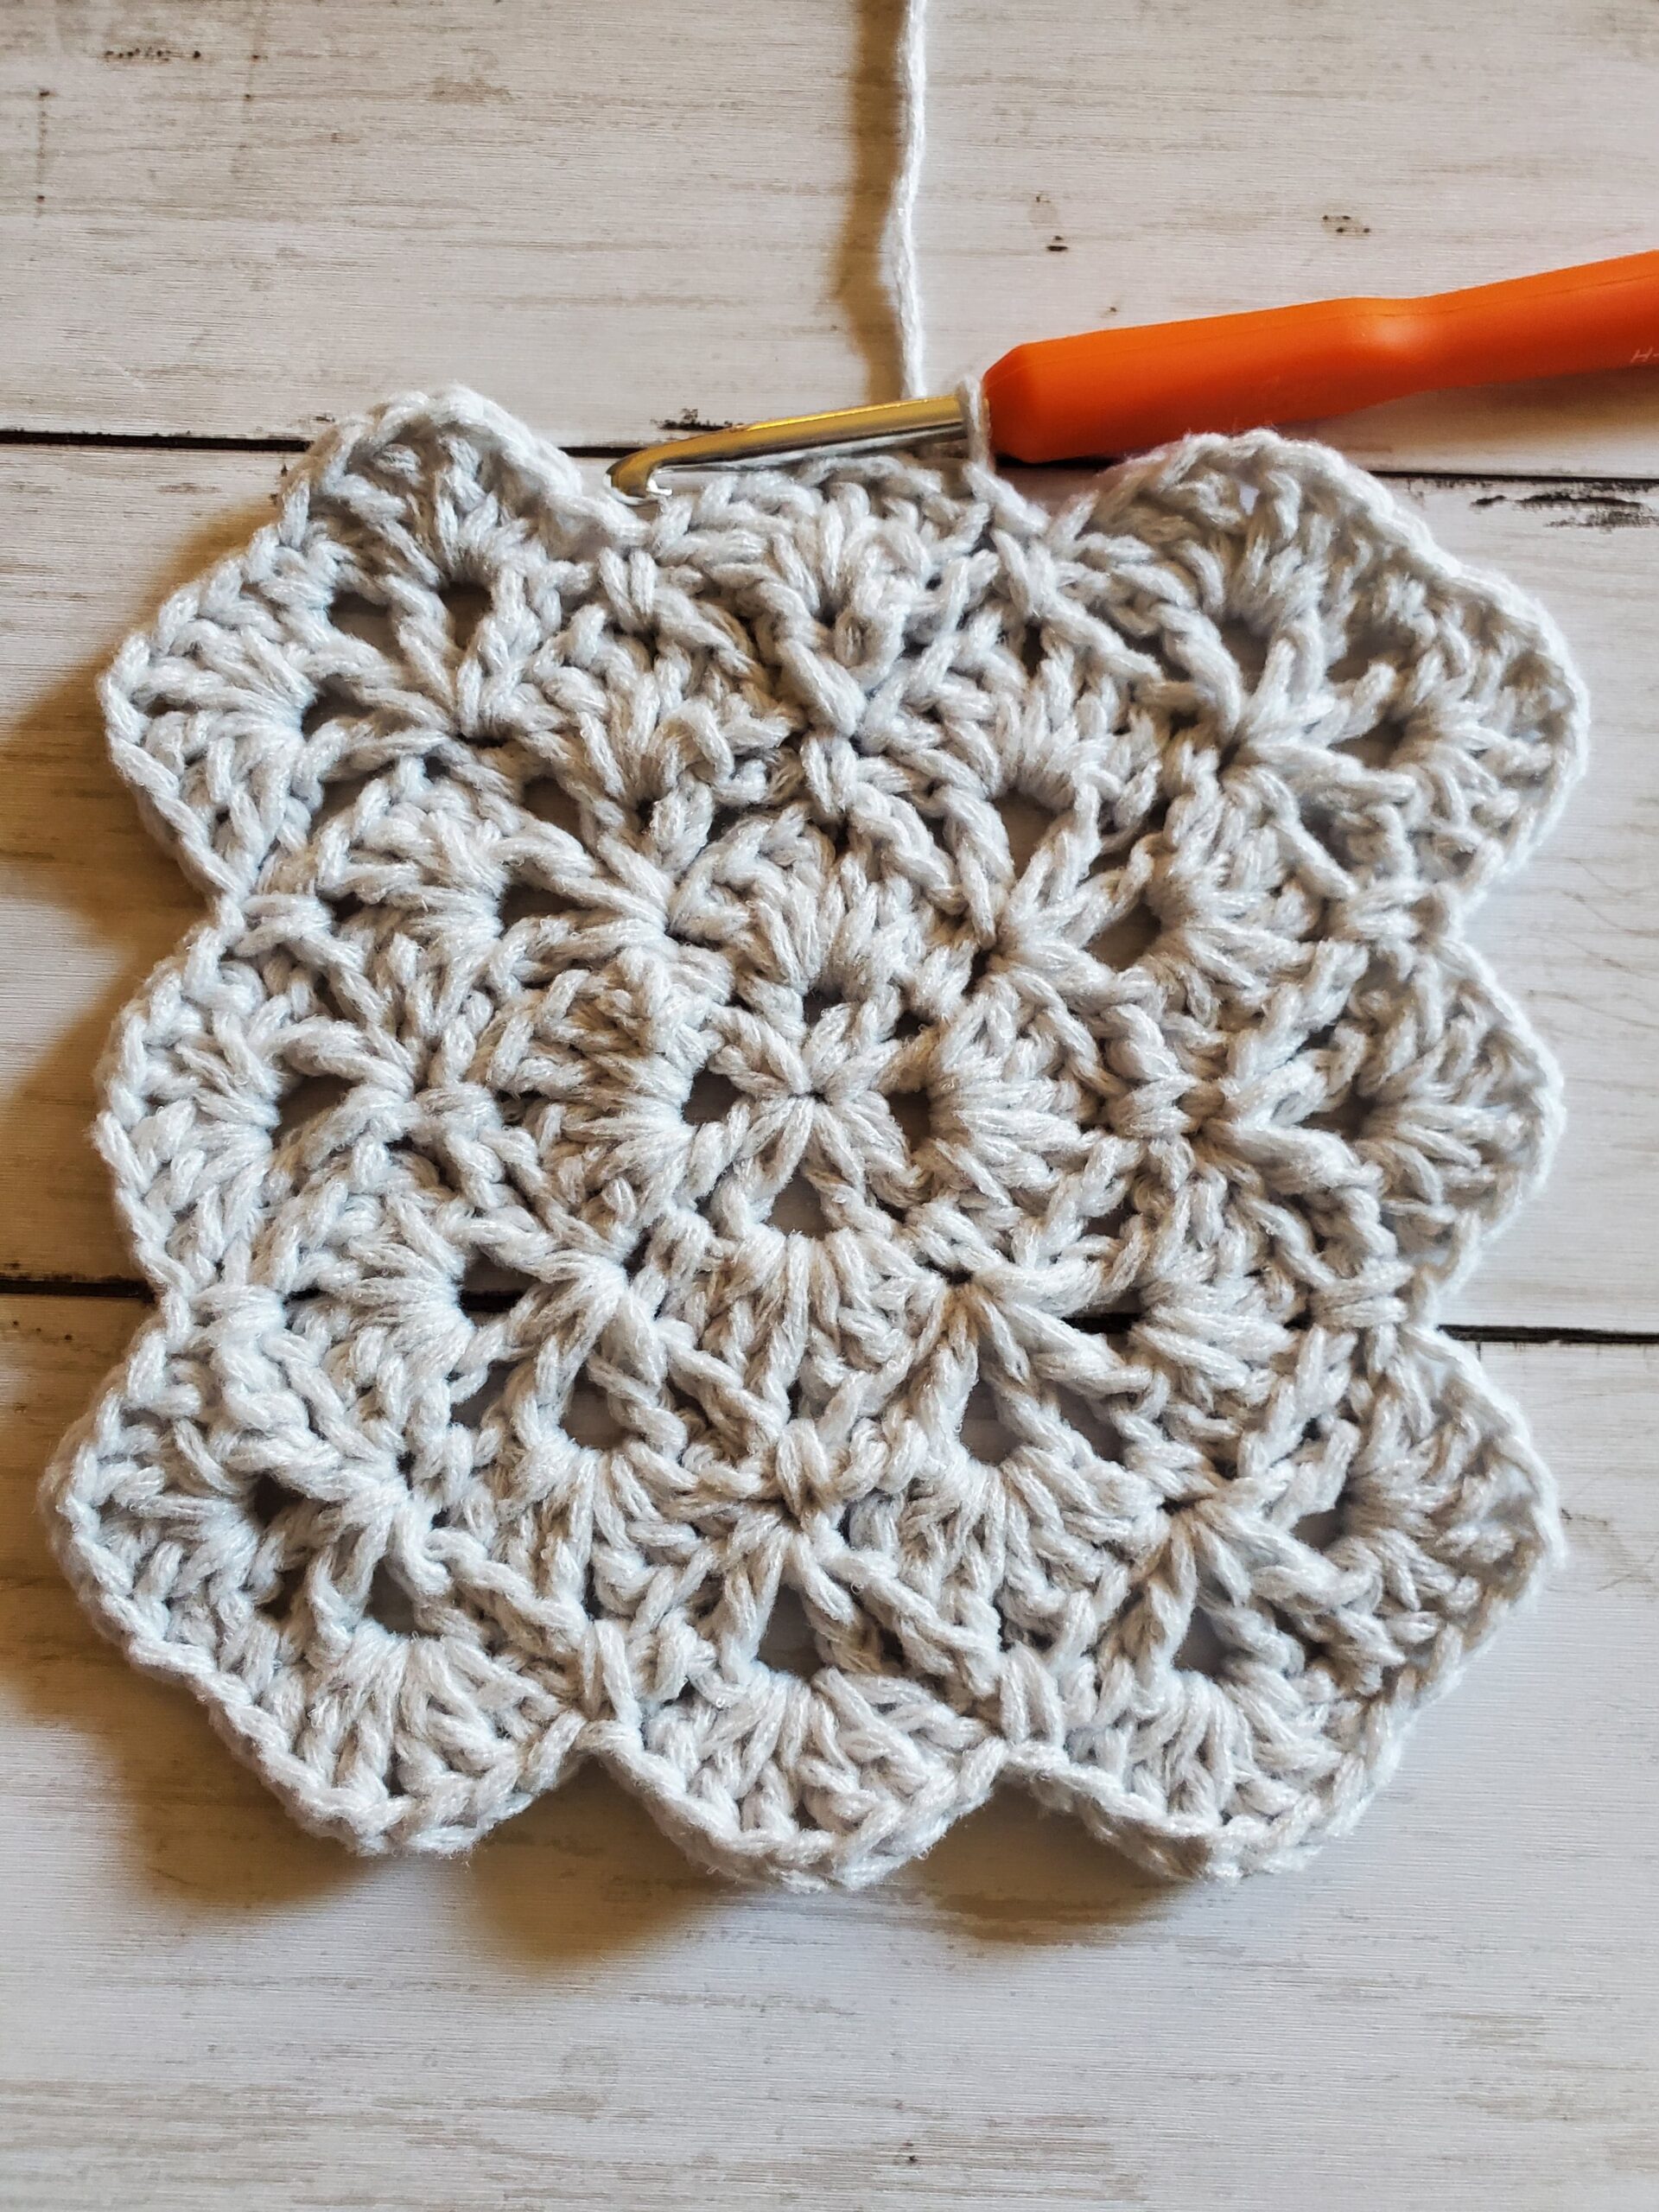
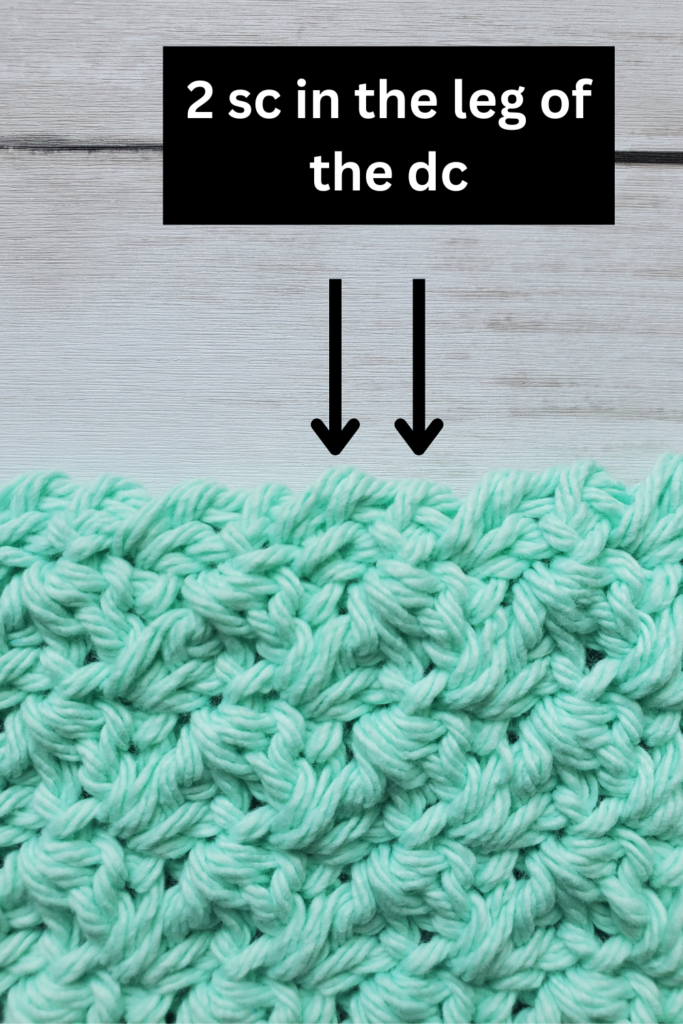
Border: Ch 1, turn, 2 sc in first st, 1 sc in each st across, 2 sc in last st (the corner), turning down the long side of the burp cloth, sc all the way to the next corner. I found that placing 2 sc into each leg or “bump” of the dc, then skipping the ch 1’s gave the cleanest edge. 2 sc in next corner st. Continue until last st, sl st into first st.

Cut yarn with scissors, weave in ends with tapestry needle.

Sc placement for border
Try to sc here.

That’s all! Thank you for checking out this Peaches and Creme Crochet Burp Cloth pattern! I hope that you love these as much as I do!

Until next time!

Other Posts You May Like:

Crochet Shell Baby Blanket – Free Pattern

Hello everyone, today I have a crochet shell baby blanket pattern for you. 

This crochet blanket is made up of a series of stitches that creates a beautiful shells. This pattern is ideal for baby blankets, especially newborn girls, as the shells give the blanket feminine features.

For the blanket pictured, I only used 1 skein of Lion Brand’s Feels like Butta Yarn in Pale Grey. With just 1 skein you can make a good sized stroller or carseat blanket, but you wouldn’t be able to wrap a newborn in it. 

For a typical newborn blanket (which is usually about 36 in x 36 in), you’ll need two skeins of Lion Brand’s Feels like Butta Yarn in Pale Grey.

I’ve used this specific yarn before to make burp cloths and winter hats, and I have to say, this is probably the softest acrylic yarn that I’ve worked with. Many acrylic yarns have a scratchy feeling that makes it less than ideal for crochet baby items (washing can soften it up, but it just isn’t the same!).

Lion Brand’s Feels like Butta Yarn is incredibly soft and gives the blanket a nice “squishy” feel. I absolutely love the colors that come from this yarn line. Obviously you don’t have to use the Pale Grey color, but the other colors available are of a softer palette and are great for making baby blankets.

The crochet shell baby blanket is  made with one color of yarn and from the center out. If you’ve never made a blanket like this before, don’t worry! It’s not too complicated, and if you don’t like using a magic circle to start, you can always chain 2 and insert your hook into the first chain.

I like making many baby blanket from the center out because no matter when you run out of yarn, you’ll always have a fairly even square! 

Related Posts:

Size:

  • With 1 skein of Feels like Butta Yarn, the size will be about 26 in x 26 in.
  • With 2 skeins, you can crochet a normal sized baby blanket, about 36 in x 36 in.

Materials Needed:

Abbreviations Used:

  • St – stitch
  • Sl st – slip stitch
  • Mc – magic circle 
  • Ch – chain
  • Sc – single crochet
  • Dc- double crochet
  • Shell – 3 dc, ch 1, 3 dc all in the same st
Pretty Crochet Blanket Pattern

Crochet Shell Baby Blanket

  • Round 1: Mc (alternatively you can ch 2 and work in the 1st ch), ch 3 (counts as a dc and ch 1), *dc, ch 1 in mc* repeat from *to* 7 times, sl st to 2nd ch of first ch 3 (you will have 8 dcs and 8 ch 1s).
Crochet Shell Blanket Round 1
Round 1
  • Round 2: Sl st into next ch 1 space, ch 3 (counts as dc), 2 dc in same ch 1 space, ch 1, 3 dc in same ch 1 space (first shell complete), *sc in next ch 1 space, (3 dc, ch 1, 3 dc) in next ch 1 space* repeat from *to* until last shell completed, sc in last ch 1 space, sl st to top of ch 3.
Crochet Shell Baby Blanket Round 2
Round 2
  • Round 3: Ch 4 (counts as a dc and ch 1), dc in the sc behind the ch 4 (the last sc of the previous round), ch 3, (dc, ch 1, dc) in same sc. *Ch 5, skip the next shell, (dc, ch 1, dc, ch 3, dc, ch 1, dc) in next sc* repeat from *to* until the last corner completed, ch 5, sl st to top of ch 3.
Crochet Shell Blanket Round 3
Round 3
  • Round 4: Sl st into next ch 1 space, ch 3 (counts as a dc), 2 dc in same ch 1 space, ch 1, 3 dc in same space. Sc in ch 3 space, (3 dc, ch 1, 3 dc) in next ch 1 space (first corner complete). *Grab the ch 5 from previous row by sc into next ch 1 space of the shell while crocheting over the ch 5 at the same time, (3 dc, ch 1, 3 dc) in next ch 1 space, sc in ch 3 space, (3 dc, ch 1, 3 dc) in next ch 1 space* repeat from *to* until last corner made, grab the ch 5, sc in next ch 1 space, sl st to top of ch 3.
Crochet Shell Baby Blanket Girl Round 4
Round 4
  • Round 5: Ch 4 (counts as a dc and ch 1), dc in the sc behind the ch 4 (the last sc of the previous round), *ch 5, skip the next shell, (dc, ch 1, dc, ch 3, dc, ch 1, dc) in next sc (first corner complete), ch 5, skip the next shell, (dc, ch 1, dc) in next sc* repeat from *to* until last corner made, ch 5, sl st to top of ch 3.
Crochet Shell Blanket Free Pattern Round 5
Round 5
  • Round 6: Sl st into next ch 1 space, ch 3 (counts as a dc), 2 dc in same ch 1 space, ch 1, 3 dc in same space, grab the ch 5 from previous row by sc into next ch 1 space of shell while crocheting over the ch 5, (3 dc, ch 1, 3 dc) in next ch 1 space, sc in ch 3 space, (3 dc, ch 1, 3 dc) in next ch 1 space (first corner complete). *Grab the ch 5 from previous row by sc into next ch 1 space of shell while crocheting over the ch 5, (3 dc, ch 1, 3 dc) in next ch 1 space, grab the ch 5 from previous row by sc into next ch 1 space of shell while crocheting over the ch 5 again, (3 dc, ch 1, 3 dc) in next ch 1 space, sc in ch 3 space, (3 dc, ch 1, 3 dc) in next ch 1 space* repeat from *to* until after last corner made, grab the ch 5, sc in next ch 1 space, sl st to top of ch 3.
Crochet Baby Blanket Girl Round 6
Round 6

Continue growing your blanket in this fashion, by repeating Rounds 5 and 6, but growing the sides between the corners longer. 

Remember to place (dc, ch 1, dc) in the scs on the long side, ch 5 and (dc, ch 1, dc, ch 3, dc, ch 1, dc) in the corners of Round 5.

Stop at desired size on a Round 6 repeat, cut yarn with scissors and weave in end with tapestry needle.

That’s it! Please let me know in the comments below if you enjoyed this pattern or have any questions! 

Thank you for reading this post on how to make a Crochet Shell Baby Blanket.   

Crochet Baby Blanket Pattern – The Magic Mirror

Hello everyone, today I have a free crochet baby blanket pattern for you. This is the Magic Mirror blanket, made with self striping yarn from Lion Brand! The line is called Mandala in the Warlock color. 

This is my first time using a self striping yarn (also known as a cake), and I’m pleasantly surprised with how the stripes lined up! I had to name this blanket something magical…the yarn is called Warlock of course! I think that the way the squares around the center are made reminded me of a colorful mirror.

It’s also really nice that you don’t have to cut your yarn and add new colors every couple of rows with self striping yarn. 

I’m using one ball of Lion Brand’s Mandala in Warlock for this pattern. It’s a little bit smaller than a typical crochet baby blanket, but it’s great for using as a blanket for your baby in a car seat or stroller, or even for those little preemie babies (if the nurses will let you bring it in the NICU). 

I’ve created this blanket from the center out. I prefer center out crochet when I’m not sure how big my blanket will be, this helps me keep a nice, even square shape no matter what round I need to stop. I’m using a magic circle (magic ring) to start, but you can easily ch 2 and crochet into the first ch instead.

I’m using a stitch called the Wattle Stitch. The stitch is simple once you get started, it is composed of a (sc, ch 1, dc) in the same stitch, then skipping 2 sts or skipping to reach the next chain space.

Okay, let’s get started!

Related Posts:

Size

25 in x 25 in, depending on your tension

Time to Complete

This crochet baby blanket took me about 2-3 days of inconsistent crocheting to complete.

Please note that some of these links may be affiliate links. That means that if you click on these links and make a purchase, I may receive a commission at no extra cost to you. You can find more information about our disclosure policy here. Thank you for your support.

Materials Needed:

Abbreviations Used:

Please note that these are in US terms, not UK.

  • Mc – magic circle
  • Ch(s) – chain(s)
  • St – stitch
  • Sl st – slip stitch
  • Sc – single crochet
  • Dc – double crochet

Helpful Tips:

  • The starting ch 1’s in each row do not count as a stitch.
  • We will be turning after finishing each row, this gives the wattle stitch a great looking texture.
  • How the corners are crocheted will alternate rounds. So round 2, 4, 6, 8 etc. will have the same type of corner and rounds 3, 5, 7, 9, etc. will have the same type or corner. I found that using wattle stitches to increase in the corners every round made it wave too much. I suspect it is from having too many stitches in the corners, so alternating made the blanket lay flat.
Mandala Cake Crochet Pattern

Magic Mirror Crochet Baby Blanket

  • Round 1: 12 sc in mc (alternatively you can ch 2 and sc in first ch), sl st to first sc
  • Round 2: ch 1 (does not count as st), *(sc, ch 1, dc, ch 2, sc, ch 1, dc) in same st, skip 2 sts* repeat from *to* around, sl st to first sc. As a helpful reminder, the series of (sc, ch 1, dc) is the Wattle Stitch.
  • Round 3: turn, sl st into next st, sl st again into ch 1 space, ch 1, (sc, ch 1, dc) in same ch 1 space, *skip next st, (sc, ch 2, dc) in ch 2 space, skip next st, (sc, ch 1, dc) in next ch 1 space, skip next 2 sts, (sc, ch 1, dc) in next ch 1 space* repeat from *to* around until last ch 2 space, (sc, ch 2, dc) in ch 2 space, skip a st, (sc, ch 1, dc) in last ch 1 space, sl st to first sc.
  • Round 4: turn, sl st into next st, sl st again into ch 1 space, ch 1, *(sc, ch 1, dc) in ch 1 space, skip next 2 sts, (sc, ch 1, dc, ch 2, sc, ch 1, dc) in same ch 2 space, skip next 2 sts (sc, ch 1, dc) in next ch 1 space, skip next 2 sts* repeat from *to* around until last ch 2 space, (sc, ch 1, dc, ch 2, sc, ch 1, dc) in ch 2 space, skip 2 sts, (sc, ch 1, dc) in last ch 1 space, sl st to first sc.
  • Round 5: turn, sl st into next st, sl st again into ch 1 space, ch 1, (sc, ch 1, dc) in same ch 1 space, skip 2 sts, (sc, ch 1, dc) in next ch 1 space, *skip next st, (sc, ch 2, dc) in ch 2 space, skip next st, [(sc, ch 1, dc) in next ch 1 space, skip 2 sts x3 times], skip 2 sts, (sc, ch 1, dc) in next ch 1 space* repeat from *to* until last ch 2 space, (sc, ch 2, dc) in ch 2 space, skip a st, (sc, ch 1, dc) in next ch 1 space, skip 2 sts, (sc, ch 1, dc) in last ch 1 space, sl st to first sc.
  • Round 6: turn, sl st into next st, sl st again into ch 1 space, ch 1, (sc, ch 1, dc) in same ch 1 space, skip 2 sts, *(sc, ch 1, dc, ch 2, sc, ch 1, dc) in next ch 2 space, skip 2 sts, [(sc, ch 1, dc) in next ch 1 space, skip 2 sts x4 times]* repeat from *to* until last ch 2 space, (sc, ch 1, dc, ch 2, sc, ch 1, dc) in ch 2 space, [skip 2 sts, (sc, ch 1, dc) in next ch 1 space x2 times], sl st to first sc.

At this point, hopefully you have the hang of how we are increasing our square with the wattle stitch, I’m going to refine how I describe the following rounds.

  • Round 7: turn, sl st into next st, sl st again into ch 1 space, ch 1, [(sc, ch 1, dc) in same ch 1 space, skip 2 sts until next ch 2 space], *(sc, ch 2, dc) in ch 2 space, [skip st(s) until next ch 1 space, (sc, ch 1, dc) in ch 1 space until next ch 2 space]* repeat from *to* around until last ch 2 space, (sc, ch 2, dc) in ch 2 space, (sc, ch 1, dc) in ch 1 space until last ch 1 space, sl st to first sc
  • Round 8: turn, sl st into next st, sl st again into ch 1 space, ch 1, wattle stitch, aka (sc, ch 1, dc) until the first ch 2 space, (sc, ch 1, dc, ch 2, sc, ch 1, dc) in ch 2 space, wattle stitch around, make the (sc, ch 1, dc, ch 2, sc, ch 1, dc) for your ch 2 corners, sl st to first sc.
  • Round 9: turn, sl st into next st, sl st again into ch 1 space, ch 1, wattle stitch until the first ch 2 space, (sc, ch 2, dc) in ch 2 corner space, wattle stitch around, make the (sc, ch 2, dc) for your ch 2 corners, sl st to first sc
  • Round 10: repeat round 8
  • Round 11: repeat round 9

Continuing like this, make your wattle stitches in the ch 1 spaces, increase in the corners by alternating rounds between the (sc, ch 1, dc, ch 2, sc, ch 1, dc) and the (sc, ch 2, dc). Sl st to the beginning of the round and turn.

After completing the last round, sl st to first st, cut yarn with scissors, pull through and weave in  your end.

And there’s your Magic Mirror Crochet Baby Blanket! I hope you found this free crochet pattern useful. I really love the jewel tones in this blanket and the way the stripes lined up. 

Did you make this pattern? Let me know on Instagram @strommercrafts! 

This post was all about how to make the Magic Mirror Crochet Baby Blanket Pattern.

Crochet Baby Blanket Mandala Yarn

Black and White Star Crochet Baby Blanket

Hey there and welcome to StrommerCrafts, today I am presenting to you my first completed baby blanket pattern! A Black and White Star Crochet Baby Blanket! 

***Please note that this post may contain affiliate links. This means that I may receive a commission if you purchase something through these links (at no cost to you!). Thank you for your support!***

I used a 5 mm crochet hook and 1 jumbo skein of white yarn from Red Heart Super Saver and 1 jumbo skein of black yarn from Red Heart Super Saver. 

When finished, this blanket is about 33” x 27” depending on your gauge. 

The stars are actually not a perfectly repeating pattern…I found an image of stars that I liked and used my favorite crochet graph generator, Stitch Fiddle, to create it.

Since the stars are not all the same, you can adjust the black stitches to be the exact same as the first whole star if the variations among the stars bothers you. I’m just lazy, so I left it as is ;).

You’ll also need to change colors correctly when following this pattern. When you switch between the two colored yarns, you’ll find that your skeins will start to get twisted. That is ok! That just tends to happen when you switch, just make sure that you unravel them occasionally so they don’t get knotted. 

Each square on the graph represents 1 half double crochet. I had originally used single crochets, but found that it took way too long to complete a baby blanket this way. Plus it was pretty stiff. The half double crochets worked perfectly, as the stars didn’t get stretched out too much (double crochets would distort the image and make it too tall…if that makes sense!).

Here is the graph I used to make the blanket:

Black and White Star Crochet Graph from Stitch Fiddle
Black and White Star Blanket Graph

Here is a link to a PDF of the pattern, which may be easier to see.

I suggest either printing the graph out to mark where you are in the Black and White Star Baby Blanket pattern or head over to Stitch Fiddle and mark where you are by using your own colored square (this is how I did it). You can also write down on a piece of paper or on your phone which row you last completed or are on.

It’s easy to get lost if you don’t have a way of marking which row you’re on, especially since this is a longer crochet project!

I also polished up the blanket by adding a shell stitch border around it. The shell border makes it look a little more feminine in my opinion, but you can add any border you like (or none at all!).

Corner shot of black and white star baby blanket with shell border
Check out that Shell Border!

Okay, let’s get started on our Black and White Star Crochet Baby Blanket!

Abbreviations Used:

  • Ch(s) – chain(s)
  • St – stitch
  • Sl st – slip stitch
  • Hdc – half double crochet
  • Dc – double crochet

Special Instructions:

  • Each square on the graph is equal to 1 half double crochet.
  • I carry the yarn color I’m not using with me. This prevents having a thousand ends that have to be weaved back into the project, however, you will be able to see the black yarn between the white. 
  • Make sure that you change yarn colors correctly. This prevents your colors from “straying” away.
  • Remember to untwist your skeins occasionally to prevent future knots and entanglement.

Black and White Star Baby Blanket Pattern:

With black yarn and 5 mm crochet hook:

  • Ch 103, in second ch from your hook, make 1 hdc in each ch across (102 sts)
  • Rows 1-62: Turn, ch 1 and follow the squares on the graph. The white squares indicate that 1 white hdc should be placed and the same with the black. I started Row 1 by reading the graph, left to right. Please see image above or high quality PDF below.
  • Click here for PDF version of the pattern.
  • If you want to make the shell border, don’t cut your yarn yet. When I ended the last row, I had black yarn on my hook already, so I went ahead and cut the white yarn off.

Shell Border (optional)

With 5 mm crochet hook and black yarn:

  • If you haven’t already, turn and ch 1. Skip 2 sts, in the third st make a total of 5 dcs, all separted by a ch 1 (do not ch 1 after the 5th dc).
  • In other words, in the same st: dc and ch 1, dc and ch1, dc and ch1, dc and ch1, and dc.
  • Skip 2 sts and make a sl st in the next st.
  • Repeat all the way to the end of the row. 
Start of the shell border
Turn and ch 1
Close up of shell stitch
Dc and ch 1 x4, dc
3 shell stitches for border
3 shells
  • You should end with a sl st in the last st (if not it’s ok if a shell is there, just keep repeating the pattern around).
  • If you end with a sl st in the last st, ch 1 to adjust for the corner and sl st into the same st.
  • Continue to skip 2 sts (or rows now that we’re down the side) make the shell, sl st, skip 2, all the way around the blanket.
  • The sides of the blanket can be difficult to see where you need to skip two and put your stitches. Try you’re best to stay consistent on both sides. I would count the shells to make sure they match.

And you’re done! I think this black and white star baby blanket turned out great! It took some time, but we always stitch with love, don’t we? 

As always, thank you for checking out my crochet patterns! Until next time!

Easy Textured Burp Cloth – Free Crochet Pattern

***Check out the listing for these burp cloths on my Etsy shop here!***

These textured baby burp cloths are so beautiful and easy to make! I have been thinking of ways to add a little more texture to my crochet projects and this stitch is not only simple, but relaxing to make.

So what is this amazingly textured stitch?

It’s called the Wattle Stitch!

It creates a beautiful texture that’s not totally busy or crazy, which is perfect for those baby crochet projects. It also has a minimalist/modern feel to it, which I absolutely love.

I like to think of the wattle stitch as a wonky V stitch. It’s just a single crochet, chain one, and double crochet in the same space throughout the pattern. Easy Peasy! 

I would say the ONLY difficult thing about this pattern, is if you have a hard time finding turning chains. You’ll have to make a single crochet in it to complete rows 3 and beyond. If you’re a new crocheter and can’t tell what is what (I remember those days!), you can use a stitch marker or a scrap piece of yarn after you make it to find it. 

The yarn used for these burp cloths is the ‘Feels like Butta’ from Lion Brand, and to be honest, I think this my new favorite yarn. It’s polyester, but it’s incredibly soft. The name is totally makes sense, I mean, it really does feel like butter! 

With the ‘Feels like Butta’ yarn and the combined wattle stitch, it gives the burp cloth a nice, squishy kind of feel. It’s soft and that texture is great for wiping away those little spit up messes babies tend to make. 

Of course, not ALL babies are super spitty (is that a word?), but they sure are nice to have around just in case!

Close up of wattle stitch

Just look at that gorgeous texture! Beautiful, right?

It’s so funny, I never thought I’d ever be geeking out about yarn and the ways you can make it look so cool, but here I am haha.

I used the Pale Grey and the Charcoal colored yarn for the burp cloths. I think I’m drawn more to neutral and natural colored yarns for my “serious” projects. Maybe I’m just boring, but it just looks so much cleaner and nicer to my eyes. Plus I really like that minimalist aesthetic that’s popular right now, and I think these two colors reflect it pretty well.

The finished burp cloths are about 7.5 inches x 18.5 inches. The final length will depend on how tight or loose your tension is, but feel free to add length and rows as needed.

Okay, enough talking, let’s get cracking and make that baby something to barf on!

Crochet burp cloth laid flat

Materials:

  • 3.75 mm crochet hook
  • 1 skein of 4 medium weight yarn (Lion Brand’s Feels like Butta Yarn in Pale Grey or Charcoal)
  • Scissors
  • Tapestry Needle

 Abbreviations Used:

  • Ch – chain
  • Sc – single crochet
  • Dc – double crochet

Textured Burp Cloth Pattern:

  • Row 1: Ch 93 or a multiple of 3
  • Row 2: From the 3rd ch from your hook make (1 sc, ch 1, and 1 dc) all in the same ch. Skip 2 chs and make (1 sc, ch 1, and 1 dc) in next ch. Repeat all the way to the end of the ch. Turn and ch 1. 
  • Row 3: Find the first ch 1 space from the previous row (it should be a nice little hole). Make ( 1 sc, ch 1, and 1 dc) in that space. Continue making 1 sc, ch 1, and 1 dc in each ch 1 space. At the end of the row, make a sc in the turning ch . Turn and ch 1.
  • Row 4-26: Repeat row 3
Crochet Burp cloth tied with ribbon

And that’s it! 

The stitches put together are simple, but they make such a wonderfully textured burp cloth perfect for your little one (or someone else’s!) 

I think these would make a nice baby shower or meet the baby gift (plus if it’s handmade, it’s even more special, right?). Fold them up Marie-Kondo style and tie a pretty bow around them!

Thank you for reading and happy crocheting!

Crochet Pikachu Hat for Newborn (Free Pattern)

If you like crochet and Pokemon, try making this cute crochet Pikachu hat! 

To be honest, I really like the Pokemon series. I always enjoyed playing the video games as a kid, and I still play some today, but now that I have my own kids, there’s not much time for gaming! 

HOWEVER! I can still enjoy one of my favorite video game genres with this Pikachu hat pattern.

You can complete this pattern in an afternoon if you’re an efficient crocheter. The hat itself works up fairly quickly since it’s all half double crochets.  

This Pikachu crochet hat fits an average newborn, so a head circumference of about 12.5″-13.”

You can make your hat bigger if you need to, but the ears may be a little small depending on the size. I have a tutorial and a chart here on how to crochet a beanie/hat in any size.  

Supplies needed:

  • Worsted weight 4 yarn in:
    • Yellow
    • Black
  • 5mm crochet hook
  • 4mm crochet hook
  • Stitch marker (optional)
  • Poly-fil for stuffing
  • Tapestry needle
  • Pins (optional)
  • Scissors

Terms used:

  • sl st – slip stitch
  • sc – single crochet
  • hdc – half double crochet
  • ch – chain
  • mc – magic circle
  • inc – crochet 2 stitches in the same stitch
  • dec – crochet 2 stitches together
  • (x) – x indicates the number of stitches you should have at the end of your round

Special Instructions:

For the hat, the beginning chain of each round does not count as a stitch. The first stitch of each round will be started in the same stitch as the beginning chain. Slip stitch to the first stitch (not the beginning chain) when you’re at the end of the round. This makes the “seam” when crocheting the hat appear less visible.

Use a stitch marker to mark the beginning of your stitches when crocheting the ears. When crocheting amigurumi, it’s better to crochet continuously in the round for a cleaner looking final product. Do not join with a sl st to the first stitch. You can technically do this, but you’ll be able to see a seam, which we don’t want.

Hat:

With yellow yarn and 5mm hook

Round 1) 8 hdc in mc, sl st to first stitch. (8)

Round 2) Ch 1, hdc inc in each stitch around, sl st to first stitch. (16)

Round 3) Ch1, 1 hdc, in next stitch hdc inc. Repeat around, sl st to first stitch. (24)

Round 4) Ch1, 2 hdc, then hdc inc. Repeat around, sl st to first stitch. (32)

Round 5) Ch 1, 3 hdc, then hdc inc. Repeat around, sl st to first stitch. (40)

Round 6) Ch1 9 hdc, then hdc inc. Repeat around, sl st to first stitch. (44)

Crown measurement of crochet pikachu hat

Round 7-13) Ch1, hdc in each stitch around. (44)

Pull your yarn through and weave the end in with your tapestry needle.

Crochet Pikachu Hat without Ears

Ears, make 2:

With 4mm hook

Start with black yarn.

Round 1) 3 sc in mc. (3)

Round 2) sc inc in each stitch around. (6)

Round 3) 1 sc, then sc inc in next stitch. Repeat around. (9)

Round 4) 2 sc, then sc inc. Repeat around (12)

Round 5-7) sc in each stitch around. (12)

Change to yellow.

Round 8) 3 sc, then inc. Repeat around. (16)

Round 9-14) sc in each stitch around (16)

Round 15) 3 sc, then dec. Repeat around (12)

At this point you should start stuffing the ear with poly-fil. Stuff lightly.

Round 16) 2 sc, then dec. Repeat around (9)

Finished Crochet pikachu ear

Assembly

Looking at the top of the hat, line the ears up evenly on each side from the center. You can use your pins to keep them in place. With your tapestry needle, sew the ears on, like in the in the picture below.

Crochet Pikachu Hat for Newborn

Make sure to weave the ends of your yarn tails into the hat to prevent it from unraveling.

Congratulations! You’ve made a super cute and awesome newborn crochet Pikachu hat!

How to Crochet a Snorlax Lovey (Free Pattern)

Snorlax used Rest!

And hopefully your kiddo will too! This crochet Snorlax lovey pattern was inspired by Courtney M. at Studio Crafti. She made an awesome (and free) Snorlax pattern that I tweaked and turn into a snugly lovey.

Her pattern for the Snorlax can be found here.

I used her pattern for Snorlax’s head and ears, so if you want to crochet this pattern, you’ll need to go to the link above to get started. 

I felt that for my lovey, the arms were just a little too short in Courtney’s pattern, so I created my own.

For the head and arms, I continued to crochet in the round. This means when I get to the end of my round, instead of slip stitching and chaining one, I continued the pattern into the beginning stitch of the previous round. You can still slip stitch and chain one if you want to, however with amigurumi-like projects, it looks a lot cleaner if you continue in the round.

You’ll also want something to mark the beginning of your rounds so you can count your stitches accurately. I use stitch markers, but you can use a scrap piece of yarn if you don’t have any.

Okay are we ready? Let’s get started!

You will need:

  • Medium worsted weight yarn 4 in these colors:
    • Navy blue
    • Cream 
    • Black
    • White
  • 3.5mm crochet hook (for Snorlax)
  • 6mm crochet hook (for blanket)
  • Tapestry needle
  • Poly-fil for stuffing
  • Stitch marker (optional)
  • Scissors

Terms used in this pattern:

  • mc – magic circle
  • sc – single crochet
  • dc – double crochet
  • st – stitch
  • ch -chain
  • sl st – slip stitch
  • inc – increase (this means to crochet two single crochets in one stitch)
  • dec – decrease (crochet two stitches together)
  • (x) – the number at the end of the row indicates how many stitches you should have

Follow Courtney’s steps for the head and ears using the 3.5mm crochet hook. Once you’re finished, pull your yarn through and leave a long tail so you have enough yarn to sew the head onto the blanket.

Eyes and mouth

Take your tapestry needle and sew with black yarn for the eyes and mouth (shown below). It’s best to tie both ends together from the inside of the head so that it doesn’t unravel.

Sew the teeth by making triangle shapes above the mouth (shown below).crc

Crochet Snorlax Lovey Head

Arms, make 2

Round 1) 6 sc in mc (6)

Round 2) inc in each st around (12)

Round 3) 1 sc, inc *repeat around (18)

Round 4-6) sc in each st around (18)

Round 7) sc 2, inc *repeat around (24)

Round 8-13) sc in each st around (24)

Round 14) dec, 1 sc *repeat around (16)

Start stuffing with poly-fil

Round 15) dec around (8)

Take your hook and pull your yarn through. Leave a long tail to sew later and cut with scissors.

Use your tapestry needle to sew the claws at the end of the arms with the white yarn. To hide your white yarn when finished, pull it through the poly-fil towards the top of the arm. I recommend tying both ends of the white yarn together, so the claws are secured and less likely to get pulled out.

Fold the opening of the arm in half so the stitches line up evenly. Take your tapestry needle and sew the opening together.

Blanket

It can be difficult to see stitches with dark colored yarn. The pictures presented below are crocheted with a lighter color yarn so you can see what’s happening in the pattern.

With Navy Blue Yarn

Round 1) mc

Round 2) ch 3, (this counts as a dc in this and the next rounds) 19 dc in mc (20)

Crochet star blanket round 1

Sl st into the top of ch 3

Round 3) ch 1, sc into same st, skip 1 st, 3 dc into next st, ch3, 3 dc into the same st (this is one point of the star shape)

*skip 1 st, sc into next st, 3 dc into next st, ch3, 3 dc into same st* repeat *to* until you reach beginning sc. Join with a sl st.

Crochet star blanket round 2

Round 4) sl st into the next 2 st, ch 3, dc into next st, 3 dc in chain space, ch 3, 3 dc into same space, dc into next 2 st, skip next 3 sts (dc, sc, dc).

*dc into next 2 sts, 3 dc in chain space, ch 3, 3 dc into same space, dc into next 2 sts, skip next 3 sts*. Repeat *to*, sl st into top of ch 3 from beginning

Crochet star blanket round 3

Round 5) Sl st into next st, ch 3, dc into next 3 sts, 3 dc in chain space, ch 3, 3 dc into same space, dc into next 4 sts, skip next 2 sts.

*dc into next 4 sts, 3 dc in chain space, ch 3, 3 dc into same space, skip next 2 sts*. Repeat *to*, sl st into top of ch 3 from beginning.

Crochet star blanket round 4

Continue in this fashion, essentially growing the star by increasing dcs up and down the sides, growing the corners by doing 3dc, ch 3, and 3 more dc in the same spot. Remember to sk 2 sts at the bottom of the corners.

Grow your star until you have completed a total of 12 rounds with the navy blue yarn, switch to cream yarn and complete 2 more rounds.

To complete, sew the head and arms of Snorlax into the middle of your star blanket with your tapestry needle. Thread your needle into each and every stitch of Snorlax’s head to make sure it stays secure. 

Congratulations! You have your very own crochet Snorlax lovey!